Tag Archives: Digital Making Framework

Our Code Editor is open source

Post Syndicated from Phil Howell original https://www.raspberrypi.org/blog/code-editor-open-source/

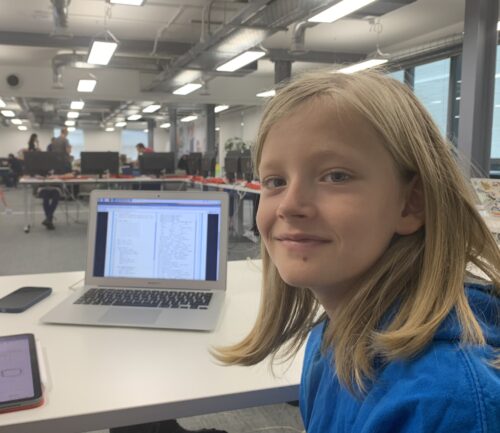
A couple of months ago we announced that you can test the online text-based Code Editor we’re building to help young people aged 7 and older learn to write code. Now we’ve made the code for the Editor open source so people can repurpose and contribute to it.

The interface of the beta version of the Raspberry Pi Foundation's Code Editor.

How can you use the Code Editor?

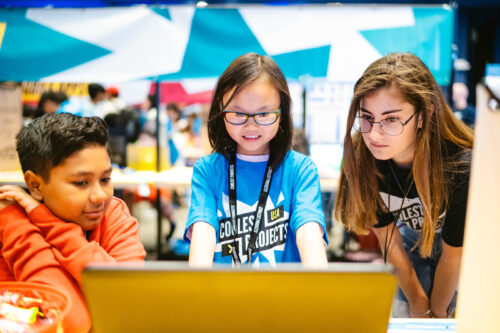
You and your learners can try out the Code Editor in the first two projects of our ‘Intro to Python’ path. We’ve included a feedback form for you to let us know what you think about the Editor.

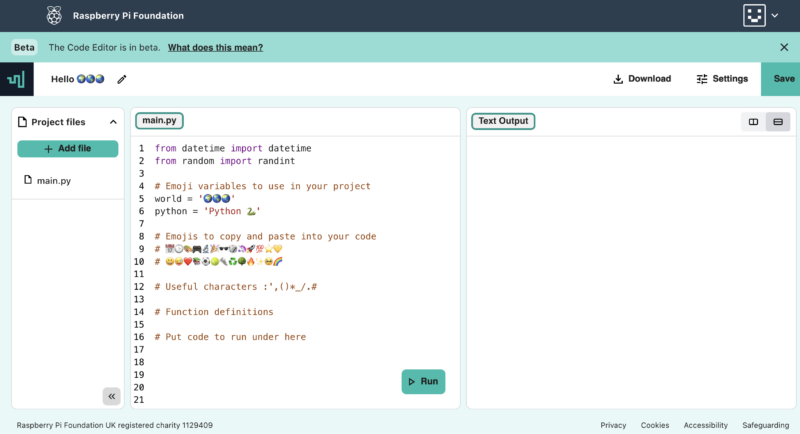
  • The Editor lets you run code straight in the browser, with no setup required.
  • It makes getting started with text-based coding easier thanks to its simple and intuitive interface.
  • If you’re logged into your Raspberry Pi Foundation account, your code in the Editor is automatically saved.
  • If you’re not logged in, your code changes persist for the session, so you can refresh or close the tab without losing your work.
  • You can download your code to your computer too.

Since the Editor lets learners save their code using their Raspberry Pi Foundation account, it’s easy for them to build on projects they’ve started in the classroom or at home, or bring a project they’ve started at home to their coding club.

Three learners working at laptops.

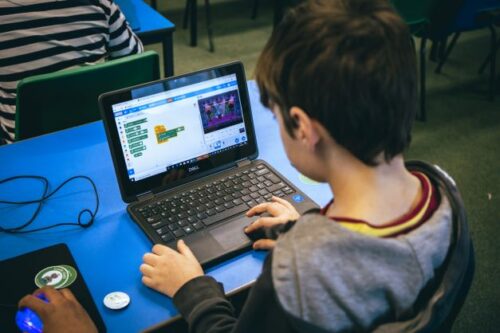
Python is the first programming language our Code Editor supports because it’s popular in schools, CoderDojos, and Code Clubs, as well as in industry. We’ll soon be adding support for web development languages (HTML/CSS).

A text output in the beta version of the Raspberry Pi Foundation's Code Editor.

Putting ease of use and accessibility front and centre

We know that starting out with new programming tools can be tricky and add to the cognitive load of learning new subject matter itself. That’s why our Editor has a simple and accessible user interface and design:

  • You can easily find key functions, such as how to write and run code, how to save or download your code, and how to check your code.
  • You can switch between dark and light mode.
  • You can enlarge or reduce the text size in input and output, which is especially useful for people with visual impairments and for educators and volunteers who want to demonstrate something to a group of learners.

We’ll expand the Editor’s functionalities as we go. For example, at the moment we’re looking at how to improve the Editor’s user interface (UI) for better mobile support.

If there’s a feature you think would help the Editor become more accessible and more suitable for young learners, or make it better for your classroom or club, please let us know via the feedback form.

The open-source code for the Code Editor

Our vision is that every young person develops the knowledge, skills, and confidence to use digital technologies effectively, and to be able to critically evaluate these technologies and confidently engage with technological change. We’re part of a global community that shares that vision, so we’ve made the Editor available as an open-source project. That means other projects and organisations focussed on helping people learn about coding and digital technologies can benefit from the work.

How did we build the Editor? An overview

To support the widest possible range of learners, we’ve designed the Code Editor application to work well on constrained devices and low-bandwidth connections. Safeguarding, accessibility, and data privacy are also key considerations when we build digital products at the Foundation. That’s why we decided to design the front end of the Editor to work in a standalone capacity, with Python executed through Skulpt, an entirely in-browser implementation of Python, and code changes persisted in local storage by default. Learners have the option of using a Raspberry Pi Foundation account to save their work, with changes then persisted via calls to a back end application programming interface (API).

As safeguarding is always at the core of what we do, we only make features available that comply with our safeguarding policies as well as the ICO’s age-appropriate design code. We considered supporting functionality such as image uploads and code sharing, but at the time of writing have decided to not add these features given that, without proper moderation, they present risks to safeguarding.

There’s an amazing community developing a wealth of open-source libraries. We chose to build our text-editor interface using CodeMirror, which has out-of-the-box mobile and tablet support and includes various useful features such as syntax highlighting and keyboard shortcuts. This has enabled us to focus on building the best experience for learners, rather than reinventing the wheel.

Diving a bit more into the technical details:

  • The UI front end is built in React and deployed using Cloudflare Pages
  • The API back end is built in Ruby on Rails
  • The text-editor panel uses CodeMirror, which has best-in-class accessibility through mobile device and screen-reader support, and includes functionality such as syntax highlighting, keyboard shortcuts, and autocompletion
  • Python functionality is built using Skulpt to enable in-browser execution of code, with custom extensions built to support our learning content
  • Project code is persisted through calls to our back end API using a mix of REST and GraphQL endpoints
  • Data is stored in PostgreSQL, which is hosted on Heroku along with our back end API

Accessing the open-source code

You can find out more about our Editor’s code for both the UI front end and API back end in our GitHub readme and contributions documentation. These kick-starter docs will help you get up and running faster:

The Editor’s front end is licensed as permissively as possible under the Apache Licence 2.0, and we’ve chosen to license the back end under the copyleft AGPL V3 licence. Copyleft licences mean derived works must be licensed under the same terms, including making any derived projects also available to the community.

We’d greatly appreciate your support with developing the Editor further, which you can give by:

  • Providing feedback on our code or raising a bug as a GitHub Issue in the relevant repository.
  • Submitting contributions by raising a pull request against the relevant repository.
    • On the back end repository we’ll ask you to allow the Raspberry Pi Foundation to reserve the right to re-use your contribution.
    • You’ll retain the copyright for any contributions on either repository.
  • Sharing feedback on using the Editor itself through the feedback form.

Our work to develop and publish the Code Editor as an open-source project has been funded by Endless. We thank them for their generous support.

If you are interested in partnering with us to fund this key work, or you are part of an organisation that would like to make use of the Code Editor, please reach out to us via email.

The post Our Code Editor is open source appeared first on Raspberry Pi Foundation.

Test our new Code Editor for young people

Post Syndicated from Phil Howell original https://www.raspberrypi.org/blog/code-editor-beta-testing/

We are building a new online text-based Code Editor to help young people aged 7 and older learn to write code. It’s free and designed for young people who attend Code Clubs and CoderDojos, students in schools, and learners at home.

The interface of the beta version of the Raspberry Pi Foundation's Code Editor.
The Code Editor interface

At this stage of development, the Code Editor enables learners to:

  • Write and run Python code right in their browser, with no setup required. The interface is simple and intuitive, which makes getting started with text-based coding easier.
  • Save their code using their Raspberry Pi Foundation account. We want learners to easily build on projects they start in the classroom at home, or bring a project they’ve started at home to their coding club.
A young person at a CoderDojo uses the Raspberry Pi Foundation's Code Editor.

We’ve chosen Python as the first programming language our Code Editor supports because it is popular in schools, CoderDojos, and Code Clubs. Many educators and young people like Python because they see it as similar to the English language. It is often the text-based language young people learn when they take their first steps away from a block-based programming environment, such as Scratch

Python is also widely used by professional programmers and usually tops at least one of the industry-standard indexes that ranks programming languages.

We will be adding support for web development languages (HTML/CSS/JavaScript) to the Editor in the near future.

We’re also planning to add features such as project sharing and collaboration, which we know young people will love. We want the Editor to be safe, accessible, and age-appropriate. As safeguarding is always at the core of what we do, we’ll only make new features available once we’ve ensured they comply with the ICO’s age-appropriate design code and our safeguarding policies.

Test the Code Editor and tell us what you think

We are inviting you to test the Code Editor as part of what we call the beta phase of development. As the Editor is still in development, some things might not look or work as well as we’d like — and this is why we need your help. 

A text output in the beta version of the Raspberry Pi Foundation's Code Editor.
Text output in the Code Editor

We’d love you to try the Editor out and let us know what worked well for you, what didn’t work well, and what you’d like to see next.

You can now try out the Code Editor in the first two projects of our ‘Intro to Python’ path. We’ve included a feedback form for you to let us know which project you tried, and what you think of the Editor. We’d love to hear from you.

Your feedback helps us decide what to do next. Based on what learners, educators, volunteers, teachers, and parents tell us, we will make the improvements to the Editor that matter most to the young people we aim to support.

Where next for the Code Editor?

One of our long-term goals is to engage millions of young people in learning about computing and how to create with digital technologies. We’re developing the Code Editor with three main aims in mind.

1. Supporting young people’s learning journeys

We aim to build the Code Editor so it:

  • Suits beginners and also supports them as their confidence and independence grows, so they can take on their own coding projects in a familiar environment
  • Helps learners to transition from block-based to text-based, informed by our deep understanding of pedagogy and computing education
  • Brings together projects instructions and code editing into a single interface so that young people do not have to switch screens, which makes coding easier

2. Removing barriers to accessing computing education

Our work on the Code Editor will:

  • Ensure it works well on mobile and tablet devices, and low-cost computers including the Raspberry Pi 4 2GB
  • Support localisation and translation, so we can tailor the Editor for the needs of young people all over the world

3. Making learning to program engaging for more young people

We want to offer a Code Editor that:

  • Enables young people to build a vast variety of projects because it supports graphic user interface output and supplies images and sprites for use in multimedia projects

We’re also planning on making the Editor available as an open source project so that other projects and organisations focussed on helping people learn to code can benefit. More on this soon.

Our work on the Code Editor has been generously funded by the Algorand Foundation and Endless, and we thank them for their generous support. If you are interested in partnering with us to fund this key work, please reach out to us via email.

The post Test our new Code Editor for young people appeared first on Raspberry Pi Foundation.

Introduce young people to coding with our updated projects

Post Syndicated from Liz Smart original https://www.raspberrypi.org/blog/introduction-to-scratch/

A year ago we launched our Introduction to Scratch path of six new coding projects. This was the first path to use our new 3…2…1…Make! approach for prioritising fun and engagement whilst enabling creators to make the things that matter to them. Creators learn how to add code, costumes, and sounds to sprites as they make animations, a game, an app, and a book.

Young person using Scratch.

As the first birthday of the Introduction to Scratch path approached, we decided to review and refresh each project. We used input from the community, looked at remixes of the projects, and analysed visitor data to guide us in our review.

We would like to say a massive thank you to everyone who engaged in focus groups, provided input via social channels, or clicked the project feedback buttons. We really appreciate you taking the time to reach out and we hope you will be pleased with the changes. 

An illustration of the 3-2-1 structure of the new Raspberry Pi Foundation coding project paths.
Our project paths have a 3-2-1 structure (click the image to enlarge)

The updates are split into two parts, those we made specifically to the Introduction to Scratch path, and changes made across all of the 3…2…1…Make! projects.

3…2…1…Make! projects

The first thing you might notice is the revamp of our Introduction step, now called ‘You will make’. This simplified step focuses on setting the scene and encourages creators to play with a completed project example.

Young person using a computer.
Picture Conor McCabe Photography

Also changed is the Reflection step, replaced by ‘Quick quiz’ — a much neater page that guides creators through three questions before awarding a project badge. 

Introduction to Scratch

Here is an overview of the Scratch path to tell you more about the projects and the changes we’ve made to the content.

Creators can start using the updated Scratch projects right away!

Three Explore projects

Our first three projects in the path introduce creators to a set of skills and provide step-by-step instructions to help them develop initial confidence.

Explore 1: Space talk 

In this project, creators design a space scene with characters that emote to share their thoughts or feelings. We received some amazing feedback from a member of the Deaf community to enhance the Nano uses sign language task and include a great new boxout to prompt discussion amongst our creators.

We also heard from a couple of club leaders that the Text to Speech extension in Scratch was a great addition to this project so we added an optional Text to Speech information card to the Upgrade your project step.  

Three alien characters stood still on a planet. One alien has a speech bubble that says, "Hello!". Another has a thinking bubble that reads, "Hmm...".

Explore 2: Catch the bus

The bus in the Catch the bus project is a tour bus, but we originally used the school backdrop as a departure point. We liked how the backdrop looked but now recognise that doing a project about a school bus whilst in a club was probably not the most popular choice. Please forgive us! The project now uses a nighttime city scene.

We also removed the use of the ‘Timer hat block’ from this project — it isn’t needed for the rest of the path and has behaviour that complicates things. The ‘timer hat block’ has been replaced by a ‘wait block’.

A bus drives along a cityscape at night. Scratch cat is faced towards the bus. A hippo with wings flies alongside the bus and towards Scratch cat.


Explore 3: Find the bug

We have loved engaging with the community submissions of this project and really enjoyed seeing how quickly we can find the small bugs on each level of the games that have been created. With replicating that enthusiasm in mind, our changes to this project focused on young creators sharing their project and playing projects created by others.

Our new Share and play step has a number of options, including sharing in a club, submitting your project to a shared studio, and experiencing remixes as a user. We have also embedded some community projects into the step to provide upgrade ideas and inspiration.

An insect is on a blackboard. Next to the insect is a speech bubble that contains "13.10". A parrot is below the blackboard.

Two Design projects

The next two projects in the path encourage creators to practise the skills they learned in the previous ‘Explore’ projects, and to express themselves creatively while they grow in independence.

The revamped Get ideas task on the first step of each Design project now has a featured community project that will be regularly updated. You may also notice that the inspirational examples have been reordered or changed using analysis from interactions with them.

Additional community submissions can be found in the Share and play steps to provide upgrade ideas and creators are encouraged to look at remixes of the starter project for even more inspiration. 

Design 1: Silly eyes

Interacting with remixes of the Silly eyes project is one of our favourite things to do! The project involves creating a character whose eyes follow the mouse pointer. We love seeing how design decisions have shaped each project and how various upgrades have been used.

For this project, we decided to remove the ‘Add stage effects’ step as it was largely a repeat of the earlier ‘Add sprite effects’ step. Stage effects is now an optional upgrade which means creators can get through to the ‘Share and play’ step to look at the design decisions made by others, then use those to choose which ideas to include in their project. 

A sea creature with large eyes.

Design 2: Surprise animation

This project consists of creating an animation of a story. We looked at the remixes so far and realised the main steps of the surprise animations were:  

  1. Create your scene
  2. Show curiosity
  3. Add a surprise

Sometimes projects had a reaction in them but others relied on creating a reaction in the user watching the animation. With this in mind we moved the Reaction step and added it as an optional upgrade. We also added graphics to each step to explain the step position in the animation timeline.

A new option to remix one of the example projects was added to this project as a starting point if creators were short of time, needed help with ideas, or had perhaps already thought of an extension to the example animations. 

A filmstrip that contains three images.

One Invent project

Our final project in the path is where creators use their skills to meet a project brief for a particular audience.

The project brief has been revamped to make it more concise with the Reflection step becoming a checklist to keep track of how the project is meeting the brief. 

Invent: I made you a book

This project consists of creating a book with multiple pages to tell a story or share facts. The major change to this project is a reorganisation of the steps. The original planning step has now split in two — the first step to decide the high-level purpose and audience for the book and the second step to plan the book in more detail using either the starter Scratch project or our new planning sheet

A storyboard with images that have been drawn by hand.
Creators can use the new planning sheet to sketch their ideas on paper

The build and test step has also been restructured to break up the skills into categories and make the tasks clearer. At the end of the step, creators are encouraged to ask for feedback then repeat the process to work on their book until it is ready to share.  

What next?

We will start refreshing another path soon but in the meantime, we hope you and your creators enjoy using the revamped Introduction to Scratch path. We would love to hear your feedback on any of our projects via the feedback button on the bottom of each project page. 

Two learners working together at a computer.

We look forward to seeing what your creators make. 

The post Introduce young people to coding with our updated projects appeared first on Raspberry Pi.

Get kids creating webpages with HTML and CSS

Post Syndicated from Rik Cross original https://www.raspberrypi.org/blog/learning-html-and-css/

With our new free ‘Introduction to web development’ path, young people are able to learn HTML and create their own webpages on topics that matter to them. The path is made up of six projects that show children and teenagers how to structure pages using HTML, and style them using CSS. 

At Coolest Projects, a young person explores a coding project.

With all the website tools available today, why learn HTML? 

Webpage creation has come a long way since the 1990s, but HTML is still the markup language that is used to display almost every page on the World Wide Web. By knowing how it works, you can deepen your understanding of the technology you use every day.

If you want to build your own website today, there are many tools to get you quickly up and running. These tools often involve dragging and dropping predefined elements and choosing from a wide collection of themed looks. Learning HTML and CSS skills is important for web designers, developers, and content creators who want to build unique webpage designs that make their content stand out.

Six webpages, each with a unique design and based on a topic important to the creator.
The path helps young people express themselves through their own webpages

With our new ‘Introduction to web development’ path, we want creators (the young people who use our projects) to be able to quickly make fantastic-looking websites that follow modern best practices, while they also learn how HTML and CSS work together to create a webpage. Creators write their own HTML to develop the content and structure of their webpages. And they customise our pre-built CSS style sheets to get their webpages to look like they imagine.

This really is a fun and unique approach to learning HTML and building a webpage, and we think young people will quickly engage with it. They start by finding out how to structure pages using HTML before applying CSS styles that bring their pages to life. Through the six projects, they build all the skills and independence they need to make webpages that matter to them. 

Accessibility first

We believe that young people should find out about website accessibility right from the start of their learning journey. That’s why the path for learning HTML shows creators how they can make their websites accessible to all their users regardless of the users’ needs or digital devices.

That’s why our new path uses semantic HTML. Older HTML tutorials might show you how to structure a webpage using tags like <div> and <span>. In contrast, the meaning and purpose of tags in semantic HTML is very clear. For example:

  • <main> is used to tag the main content for the webpage
  • <footer> is used for content to be displayed in the footer
  • <blockquote> contains a quote and typically the author of the quote
  • <section> contains a portion of content that usually sits within the main part of the webpage

Semantic HTML supports accessibility because it allows people who use a screen reader to more easily navigate a webpage and read it in a logical way. 

Another element of accessible design that the path introduces is the colour combinations used on webpages. It is really important that contrasting colours are used for the background and the text. High contrast makes the text more readable, which means the webpage is more suitable for visually impaired users. 

Good and bad examples of colour contrasting on webpages.
It’s very important to use contrasting colours on a webpage

The path also shows creators the importance of adding meaningful alternative text for images. Good alternative text helps visually impaired users, and users who have a very low bandwidth and therefore turn images off in their web browser. 

With the path, young people will learn how to design webpages that respond to the device of the user

Finally, our path for learning HTML introduces creators to the concept of responsive web design. Responsive design is helpful because websites can be viewed on thousands of different devices. Some people view pages on large, high-resolution monitors, and others view them on a mobile phone screen. We show learners how they can use HTML and CSS to make their pages responsive so they display in the way that works best for the specific screen on which a user is viewing them.

Key questions answered

Who is the ‘Intro to web development’ path for?

We have written the projects in this path with young people of around the age from 9 to 17 in mind. 

HTML and CSS are text-based markup languages. This means a young person who wants to start learning HTML needs to be familiar with typing on a keyboard. It would also be helpful to have experience of using the copy and paste function, which is useful when changing the layout of a page or copying similar pieces of code. 

Young people attending a Dojo.

If a young person is unsure whether they have the right skills to get started with the path, they can first try out a short ‘Discover’ project. With this Discover project, young people can choose between the themes ‘space’, ‘sunsets’, ‘forests’, or ‘animals’ to see how they can create their first webpage in just five steps. (We’re still working on the ‘Discover’ project type, so if you have any feedback about it, let us know.)

An example step from the Discover project, forest theme.
Young people can experiment with our Discover project to build their own webpage in just a few steps

What will young people learn with the path?

Creators will learn how to use HTML and CSS to build webpages that have:

  • Images
  • Lists
  • Quotes 
  • Links 
  • Animations
  • Imported fonts

They will also learn about how to make their webpages accessible to all through use of:

  • Semantic HTML
  • Alternative text for images
  • Colour contrast checking
  • Responsive design (means the webpage adapts to the device on which it is viewed)

How long does the path take to complete?

We’ve designed the path so young people can complete it in six one-hour sessions, with one hour for each project. Since the project instructions encourage creators to upgrade their projects, they may wish to go further and spend a little more time getting their projects exactly as they imagine them. 

A CoderDojo coding session for young people.

What software is needed to create the projects in the path?

Young people only need a standard web browser to follow the project instructions and use an online code editor to create their webpages. 

What can young people do next?

Explore our other projects for learning HTML

There are 28 other step-by-step projects for creators to choose from on our website. They can browse through these to see what cool things they’d like to make and what new skills they want to learn.

Build a webpage for Coolest Projects 

If your kid is proud of the webpage they create with the final ‘Invent’ project in the path, they can share it with a worldwide community of young creators in our free Coolest Projects tech showcase. Project registration will open again in spring 2023. You can sign up to hear news about the showcase on the Coolest Projects homepage.

Two teenage girls participating in Coolest Projects shows off their tech project.
Details about the projects in ‘Intro to web development’

The ‘Intro to web development’ path is structured according to our Digital Making Framework, with three Explore projects, two Design projects, and a final Invent project. You can also check out our learning graph to to see the progression of young people’s skills and knowledge throughout the path.

Explore project 1: Anime expressions


In the ‘Anime expressions’ project, creators build and style a webpage for an anime drawing tutorial. They learn how to use HTML tags to structure a webpage; use CSS to apply layout, colours, and fonts; and add images and text content to their page.  

Explore project 2: Top 5 emojis


With the ‘Top 5 emojis’ project, young people create a webpage displaying their top 5 list of emojis. They learn how to add emojis, create a list, use a block quote, and animate elements of the page. 

Explore project 3: Flip treat webcards


With the ‘Flip treat webcards’ project, creators make a webpage showing a flip card with a treat from around the world. They use CSS to make the card flip over when a user interacts with it. Creators also learn how to apply gradients and import fonts from Google Fonts

Design project 1: Mood board


This Design project gives creators the chance to develop the skills that they have learned in the three ‘Explore’ projects. With the ‘Mood board’ project, young people create a webpage to display a mood board for a real or imaginary project. The mood board could, for example, show ideas for a party, a fashion item, a redesign of their bedroom, or a website; or it could show reminders of all the things that make them happy. 

Design project 2: Sell me something


The ‘Sell me something’ project is another chance for creators to practise the skills that they have gained in the ‘Explore’ projects. They create a webpage to ‘sell something’ to the webpages visitors. It could be anything they like, from an object they love, to a game they like to play. 

Invent project: Build a webpage


The ‘Build a webpage’ project is the final project in the path and allows young people to independently build a webpage on any topic they’re interested in. This Invent project offers info cards to remind creators of the key skills they’ve learned with the path, and a light structure to support them through the process of making their webpage. Young people are encouraged to showcase their final webpages in the path gallery to inspire other creators. 

The post Get kids creating webpages with HTML and CSS appeared first on Raspberry Pi.

Get kids coding and learning electronics with Raspberry Pi Pico

Post Syndicated from Rebecca Franks original https://www.raspberrypi.org/blog/kids-coding-electronics-raspberry-pi-pico-free-learning-resource/

Since the release of the Raspberry Pi Pico microcontroller in 2021, we have seen people all over the world come up with creative Pico-based inventions.

Raspberry Pi Pico with its inbuilt LED blinking.
The Raspberry Pi Pico microcontroller.

Now, thanks to our brand-new and free ‘Introduction to Raspberry Pi Pico’ learning path, young coders can easily join in and make their own cool Pico projects! This free learning path has six guided projects to help kids to independently develop their coding skills, and their skills in physical computing and electronics.

A girl creates a physical computing project.
Physical computing is a great way to help young people get creative with coding.

In this post, I’ll tell you about Raspberry Pi Pico, what kids can make by following our free ‘Intro to Pico’ path, and what skills they will be learning.

Meet Raspberry Pi Pico

Raspberry Pi Pico is a physical computing device that is low-cost and easy to use. It’s much smaller than any Raspberry Pi computer, and it needs much less power. That’s because it’s not a full computer but instead a microcontroller. That means Pico is a device that you program by writing code on any computer, and then sending that code to Pico via a USB cable.

Raspberry Pi Pico has GPIO pins (like Raspberry Pi computers do). These pins mean it can interact with different types of physical computing components, such as buttons, buzzers, and LEDs.

In the ‘Intro to Raspberry Pi Pico’ path, we’ve designed new digital making projects specifically using Pico. By following the projects in the path, young people learn to make things with different electronic components. They’ll bring to life their own LED fireflies; they’ll make music with a sound machine and dial (a potentiometer); they’ll look after themselves and people around them by making a mood indicator and a heart rate visualiser. To find out more, visit the path, or scroll to the bottom of this post and click on ‘Details about the projects’.

The specially designed structure of our learning paths helps kids become confident and independent coders and digital makers. Through this project path, we want to show young people what is possible with Raspberry Pi Pico and inspire them to continue their digital making journey beyond the six projects. Seeing tech creations from our amazing community is super special to us, and we would love to hear about what your young coders have made with Pico. Kids can share their projects in the path gallery, or you can tag us on social media if you post photos!   

alt=""

Learning skills and independence with our project paths 

While young people make all these Raspberry Pi Pico projects, they will learn the skills and independence to make and code their very own, unique creations with a Pico. We have designed our new project paths to help kids become independent digital makers. As they progress through a path, kids gain new skills, practise what they have learnt, and finally write and follow their own project brief. 

Our learning paths help kids develop many of the skills that are important to all coders and digital makers, no matter how much experience they have: 

  • How to turn an idea on paper into a tech creation
  • How to debug a project
  • How to combine new information with what they already know about digital making 

The learning paths also encourage kids to make projects about the things that matter to them.  

Key questions answered

Who is this path for?

We have written the projects in this path with young people around the age of 9 to 13 in mind. 

Programs for Raspberry Pi Pico are written in a text-based language called MicroPython. That means a young person who wants to start the ‘Intro to Pico’ path needs to be familiar with typing on a keyboard.

A young person codes at a Raspberry Pi computer.

If your kid has never coded in a text-based language before, they could complete our free ‘Introduction to Python‘ project path first, but this is not a prerequisite.

What will young people learn?

To help with the programming aspects of the projects, the instructions in the path tell young people about:  

  • Displaying output
  • Arithmetic expressions
  • Importing from a library
  • While loops
  • Nested if statements
  • Defining and calling functions
  • Events
Raspberry Pi Pico attached with jumper wires to a purple LED.
We still get excited by a flashing LED.

One of the great things about this project path is that it helps young people explore physical computing and electronics. In the ‘Intro to Pico’ path, they’ll use:

  • Single-colour LEDs
  • Multi-colour LEDs (so-called RGB LEDs)
  • Buzzers
  • Switches (including switches the kids will make out of craft materials!)
  • Buttons
  • Potentiometers (dials)

How much time is needed to complete the path?

We’ve designed the path to be completed in around six one-hour sessions, with one hour per project. However, the project instructions encourage kids to upgrade their projects and go further if they wish. This means that they might want to spend a little more time getting their projects exactly as they imagine. 

What software is needed for the projects?

Young people need a web browser so they can follow the project instructions. The first two projects in the path provide detailed instructions for how to install the free software needed for the projects. 

alt=""
The projects in the path show you how to program Raspberry Pi Pico using MicroPython in the Thonny software.

What hardware is needed for these projects?

The first step of each project lists what components are needed to create the project. You can purchase a kit from Kitronik or from Pimoroni that includes all of the components used in the path:

‘Intro to Raspberry Pi Pico’ kit list (click here)

  • 1 × soldered Raspberry Pi Pico
  • 1 × USB cable
  • 1 × red LED
  • 1 × blue LED
  • 2 × yellow LEDs
  • 6 × single-colour LEDs (random)
  • 3 × RGB LEDs
  • 15 × 75 ohm resistors (max 220 ohm)
  • 2 × potentiometers
  • 8 × push buttons (optional, these can be made from crafting materials)
  • 15 × pin–socket jumper wires
  • 38 × socket–socket jumper wires
  • 4 × pin–pin jumper wires

What can young people do next?

Explore Python coding with us 

If your young coders enjoy MicroPython, they’ll also love our Python learning paths: ‘Introduction to Python‘ and More Python‘. Both are structured in the same way as our Pico path, and will help young people learn Python while creating their own visual designs.

A girl points happily at a project on the Raspberry Pi Foundation's projects site.
Details about the projects in ‘Intro to Raspberry Pi Pico’

The ‘Intro to Raspberry Pi Pico’ path is structured according to our Digital Making Framework, with three Explore projects, two Design projects, and a final Invent project. You can also check out our learning graph to see the progression of skills and knowledge throughout the path.

Explore project 1: LED firefly


The ‘LED firefly’ project introduces creators to Raspberry Pi Pico while they make their first project with a blinking LED. They program the LED with a blink pattern that is common to fireflies in the wild. To upgrade their projects, creators can place their LED firefly into a glass jar to create a twinkling effect.  

Explore project 2: Party popper


‘Party popper’ introduces creators to the RGB LED and a buzzer. To form the popper, they craft a pull switch out of kitchen foil and cardboard. When the popper is activated, the RGB LED flashes in their chosen colour, and a ‘tada’ sound plays on the buzzer. 

Explore project 3: Beating heart


‘Beating heart’ uses a potentiometer (dial) to control the pulsing speed of an LED. Creators craft their own hearts using red paper and origami before placing the pulsing LED inside. In this way, they create a model of a heart they can use to learn about medicine or to bring to life a favourite toy. 

Design project 1: Mood indicator


In the ‘Mood indicator’ project, kids use switches and an RGB LED to create a device that can communicate a need or a mood to another person. This Design project gives young creators lots of opportunities to use their new skills to create something personal to them.

Design project 2: Sound machine


‘Sound machine’ is a project for kids to work with the different tones that a buzzer can make. They can use the buzzer to create sound effects, or to recreate their favourite songs. Once they have decided on their sounds, they can think about how a user of their project might choose to play them. 

Invent project: Sensory gadget


This project gives creators that chance to pick their favourite elements of the path to create something totally unique to them. They could make all sorts of sensory gadgets, from a Picosaber to a candle that can be blown out. Creators are encouraged to showcase their creations in the path gallery to give other young makers inspiration. 

The post Get kids coding and learning electronics with Raspberry Pi Pico appeared first on Raspberry Pi.

Python coding for kids: Moving beyond the basics

Post Syndicated from Rebecca Franks original https://www.raspberrypi.org/blog/python-coding-for-kids-beyond-the-basics/

We are excited to announce our second new Python learning path, ‘More Python’, which shows young coders how to add real data to their programs while creating projects from a chart of Olympic medals to an interactive world map. The six guided Python projects in this free learning path are designed to enable young people to independently create their own Python projects about the topics that matter to them.

A girl points excitedly at a project on the Raspberry Pi Foundation's projects site.
Two kids are at a laptop with one of our coding projects.

In this post, we’ll show you how kids use the projects in the ‘More Python’ path, what they can make by following the path, and how the path structure helps them become confident and independent digital makers.

Python coding for kids: Our learning paths

Our ‘Introduction to Python’ learning path is the perfect place to start learning how to use Python, a text-based programming language. When we launched the Intro path in February, we explained why Python is such a popular, useful, and accessible programming language for young people.

Because Python has so much to offer, we have created a second Python path for young people who have learned the basics in the first path. In this new set of six projects, learners will discover new concepts and see how to add different types of real data to their programs.

Illustration of different graph types
By following the ‘More Python’ path, young people learn the skills to independently create a data visualisation for a topic they are passionate about in the final project.

Key questions answered

Who is this path for?

We have written the projects in this path with young people around the age of 10 to 13 in mind. To code in a text-based language, a young person needs to be familiar with using a keyboard, due to the typing involved. Learners should have already completed the ‘Introduction to Python’ project path, as they will build on the learning from that path.

Three young tech creators show off their tech project at Coolest Projects.

How do young people learn with the projects? 

Young people need access to a web browser to complete our project paths. Each project contains step-by-step instructions for learners to follow, and tick boxes to mark when they complete each step. On top of that, the projects have steps for learners to:

  • Reflect on what they have covered in the project
  • Share their projects with others
  • See suggestions to upgrade their projects

Young people also have the option to sign up for an account with us so they can save their progress at any time and collect badges.

A young person codes at a Raspberry Pi computer.

While learners follow the project instructions in this project path, they write their code into Trinket, a free web-based coding platform accessible in a browser. Each project contains a link to a starter Trinket, which includes everything to get started writing Python code — no need to install any additional software.

Screenshot of Python code in the online IDE Trinket.
This is what Python code on Trinket looks like.

If they prefer, however, young people also have the option of instead writing their code in a desktop-based programming environment, such as Thonny, as they work through the projects.

What will young people learn?  

To use data in their Python programs, the project instructions show learners how to:

  • Create and use lists
  • Create and use dictionaries
  • Read data from a data file

The projects support learners as they explore new concepts of digital visual media and: 

  • Create charts using the Python library Pygal
  • Plot pins on a map
  • Create randomised artwork

In each project, learners reflect and answer questions about their work, which is important for connecting the project’s content to their pre-existing knowledge.

In a computing classroom, a girl laughs at what she sees on the screen.

As they work through the projects, learners see different ways to present data and then decide how they want to present their data in the final project in the path. You’ll find out what the projects are on the path page, or at the bottom of this blog post.

The project path helps learners become independent coders and digital makers, as each project contains slightly less support than the one before. You can read about how our project paths are designed to increase young people’s independence, and explore our other free learning paths for young coders

How long will the path take to complete?

We’ve designed the path to be completed in around six one-hour sessions, with one hour per project, at home, in school, or at a coding club. The project instructions encourage learners to add code to upgrade their projects and go further if they wish. This means that young people might want to spend a little more time getting their projects exactly as they imagine them.

In a classroom, a teacher and a student look at a computer screen while the student types on the keyboard.

What can young people do next?

Use Unity to create a 3D world

Unity is a free development environment for creating 3D virtual environments, including games, visual novels, and animations, all with the text-based programming language C#. Our ‘Introduction to Unity’ project path for keen coders shows how to make 3D worlds and games with collectibles, timers, and non-player characters.

Take part in Coolest Projects Global

At the end of the ‘More Python’ path, learners are encouraged to register a project they’ve made using their new coding skills for Coolest Projects Global, our free and world-leading online technology showcase for young tech creators. The project they register will become part of the online gallery, where members of the Coolest Projects community can celebrate each other’s creations.

A young coder shows off her tech project for Coolest Projects to two other young tech creators.

We welcome projects from all young people, whether they are beginners or experienced coders and digital makers. Coolest Projects Global is a unique opportunity for young people to share their ingenuity with the world and with other young people who love coding and creating with digital technology.

Details about the projects in ‘More Python’

The ‘More Python’ path is structured according to our Digital Making Framework, with three Explore project, two Design projects, and a final Invent project.

Explore project 1: Charting champions

Illustration of a fast-moving, smiling robot wearing a champion's rosette.

In this Explore project, learners discover the power of lists in Python by creating an interactive chart of Olympic medals. They learn how to read data from a text file and then present that data as a bar chart.

Explore project 2: Solar system

Illustration of our solar system.

In this Explore project, learners create a simulation of the solar system. They revisit the drawing and animation skills that they learned in the ‘Introduction to Python’ project path to produce animated planets orbiting the sun. The animation is based on real data taken from a data file to simulate the speed that the planets move at as they orbit. The simulation is also interactive, using dictionaries to display data about the planets that have been selected.

Explore project 3: Codebreaker

Illustration of a person thinking about codebreaking.

The final Explore project gets learners to build on their knowledge of lists and dictionaries by creating a program that encodes and decodes a message using an Atbash cipher. The Atbash cipher was originally developed in the Hebrew language. It takes the alphabet and matches it to its reverse order to create a secret message. They also create a script that checks how many times certain letters have been used in an encoded message, so that they can discover patterns.

Design project 1: Encoded art

Illustration of a robot painting a portrait of another robot.

The first Design project allows learners to create fun pieces of artwork by encoding the letters of their name into images, patterns, or drawings. Learners can choose the images that will be produced for each letter, and whether these appear at random or in a geometric pattern.

Learners are encouraged to share their encoded artwork in the community library, where there are lots of fun projects to discover already. In this project, learners apply all of the coding skills and knowledge covered in the Explore projects, including working with dictionaries and lists.

Design project 2: Mapping data

Illustration of a map and a hand of someone marking it with a large pin.

In the next Design project, learners access data from a data file and use it to create location pins on a world map. They have six datasets to choose from, so they can use one that interests them. They can also choose from a variety of maps and design their own pin to truly personalise their projects.

Invent project: Persuasive data presentation

Illustration of different graph types

This project is designed to use all of the skills and knowledge covered in this path, and most of the skills from the ‘Introduction to Python’ path. Learners can choose from eight datasets to create data visualisations. They are also given instructions on how to access and prepare other datasets if they want to visualise data about a different topic.

Once learners have chosen their dataset, they can decide how they want it to be displayed. This could be a chart, a map with pins, or a unique data visualisation. There are lots of example projects to provide inspiration for learners. One of our favourites is the ISS Expedition project, which places flags on the ISS depending on the expedition number you enter.

The post Python coding for kids: Moving beyond the basics appeared first on Raspberry Pi.