All posts by Rob Sutter

Build applications of any size on Cloudflare with the Queues open beta

Post Syndicated from Rob Sutter original https://blog.cloudflare.com/cloudflare-queues-open-beta/

Build applications of any size on Cloudflare with the Queues open beta

Build applications of any size on Cloudflare with the Queues open beta

Message queues are a fundamental building block of cloud applications—and today the Cloudflare Queues open beta brings queues to every developer building for Region: Earth. Cloudflare Queues follows Cloudflare Workers and Cloudflare R2 in a long line of innovative services built for the Workers Developer Platform, enabling developers to build more complex applications without configuring networks, choosing regions, or estimating capacity. Best of all, like many other Cloudflare services, there are no egregious egress charges!

Build applications of any size on Cloudflare with the Queues open beta

If you’ve ever purchased something online and seen a message like “you will receive confirmation of your order shortly,” you’ve interacted with a queue. When you completed your order, your shopping cart and information were stored and the order was placed into a queue. At some later point, the order fulfillment service picks and packs your items and hands it off to the shipping service—again, via a queue. Your order may sit for only a minute, or much longer if an item is out of stock or a warehouse is busy, and queues enable all of this functionality.

Message queues are great at decoupling components of applications, like the checkout and order fulfillment services for an ecommerce site. Decoupled services are easier to reason about, deploy, and implement, allowing you to ship features that delight your customers without worrying about synchronizing complex deployments.

Queues also allow you to batch and buffer calls to downstream services and APIs. This post shows you how to enroll in the open beta, walks you through a practical example of using Queues to build a log sink, and tells you how we built Queues using other Cloudflare services. You’ll also learn a bit about the roadmap for the open beta.

Getting started

Enrolling in the open beta

Open the Cloudflare dashboard and navigate to the Workers section. Select Queues from the Workers navigation menu and choose Enable Queues Beta.

Review your order and choose Proceed to Payment Details.

Note: If you are not already subscribed to a Workers Paid Plan, one will be added to your order automatically.

Enter your payment details and choose Complete Purchase. That’s it – you’re enrolled in the open beta! Choose Return to Queues on the confirmation page to return to the Cloudflare Queues home page.

Creating your first queue

After enabling the open beta, open the Queues home page and choose Create Queue. Name your queue `my-first-queue` and choose Create queue. That’s all there is to it!

The dash displays a confirmation message along with a list of all the queues in your account.

Build applications of any size on Cloudflare with the Queues open beta

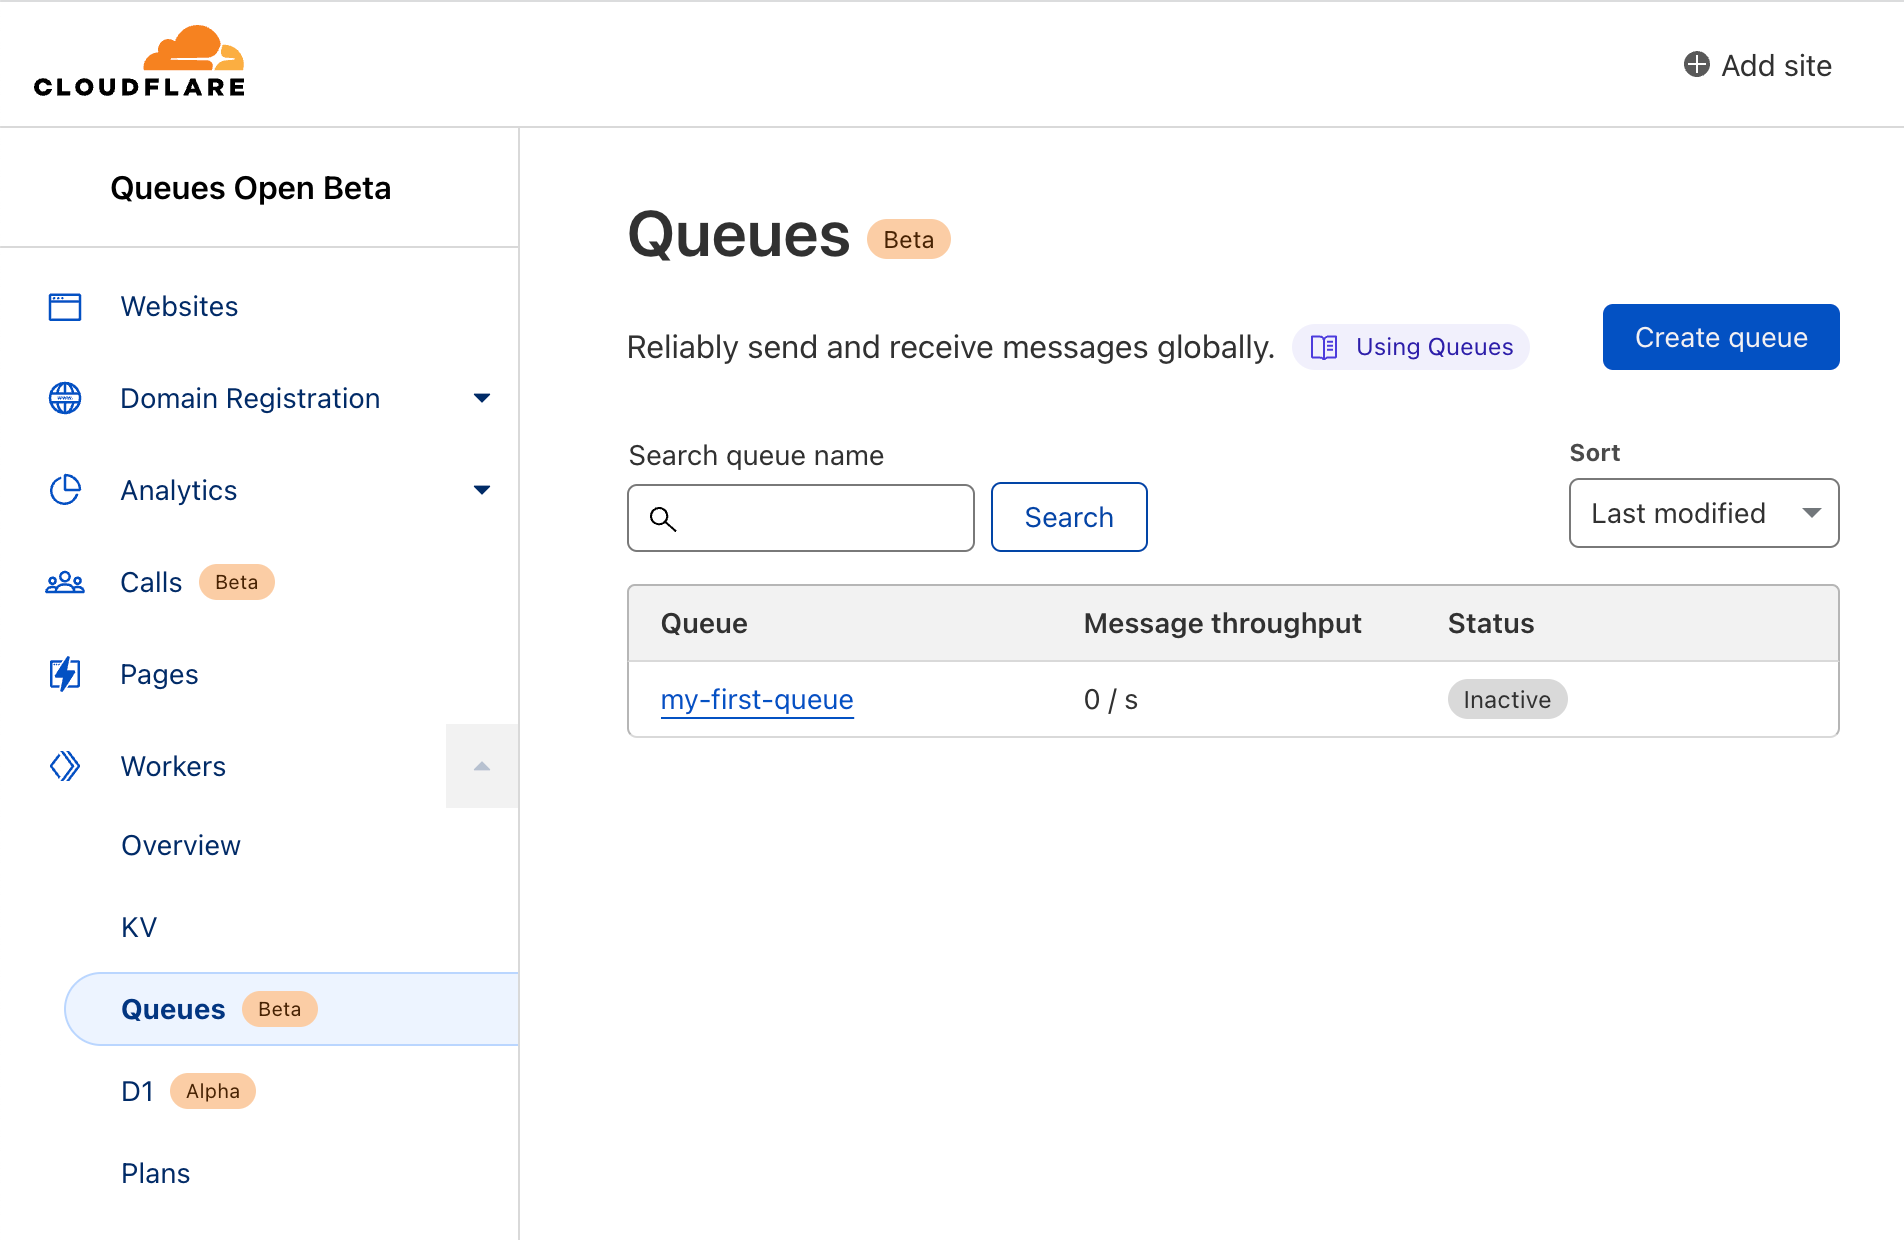
Note: As of the writing of this blog post each account is limited to ten queues. We intend to raise this limit as we build towards general availability.

Managing your queues with Wrangler

You can also manage your queues from the command line using Wrangler, the CLI for Cloudflare Workers. In this section, you build a simple but complete application implementing a log aggregator or sink to learn how to integrate Workers, Queues, and R2.

Setting up resources
To create this application, you need access to a Cloudflare Workers account with a subscription plan, access to the Queues open beta, and an R2 plan.

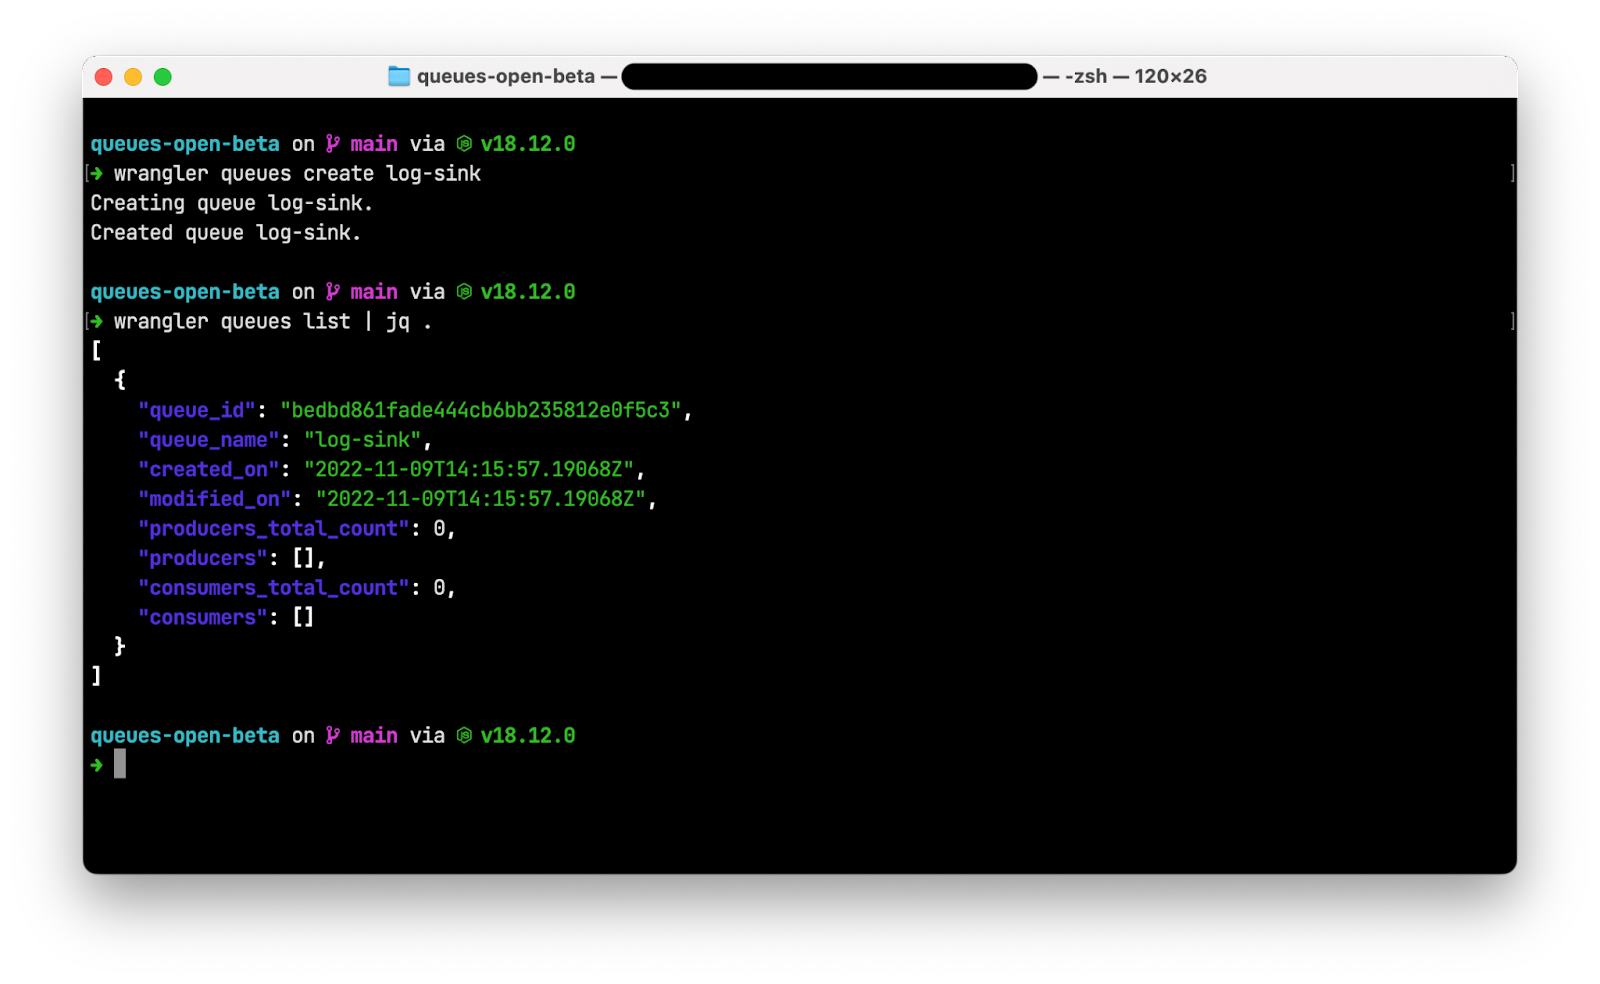
Install and authenticate Wrangler then run wrangler queues create log-sink from the command line to create a queue for your application.

Run wrangler queues list and note that Wrangler displays your new queue.

Note: The following screenshots use the jq utility to format the JSON output of wrangler commands. You do not need to install jq to complete this application.

Build applications of any size on Cloudflare with the Queues open beta

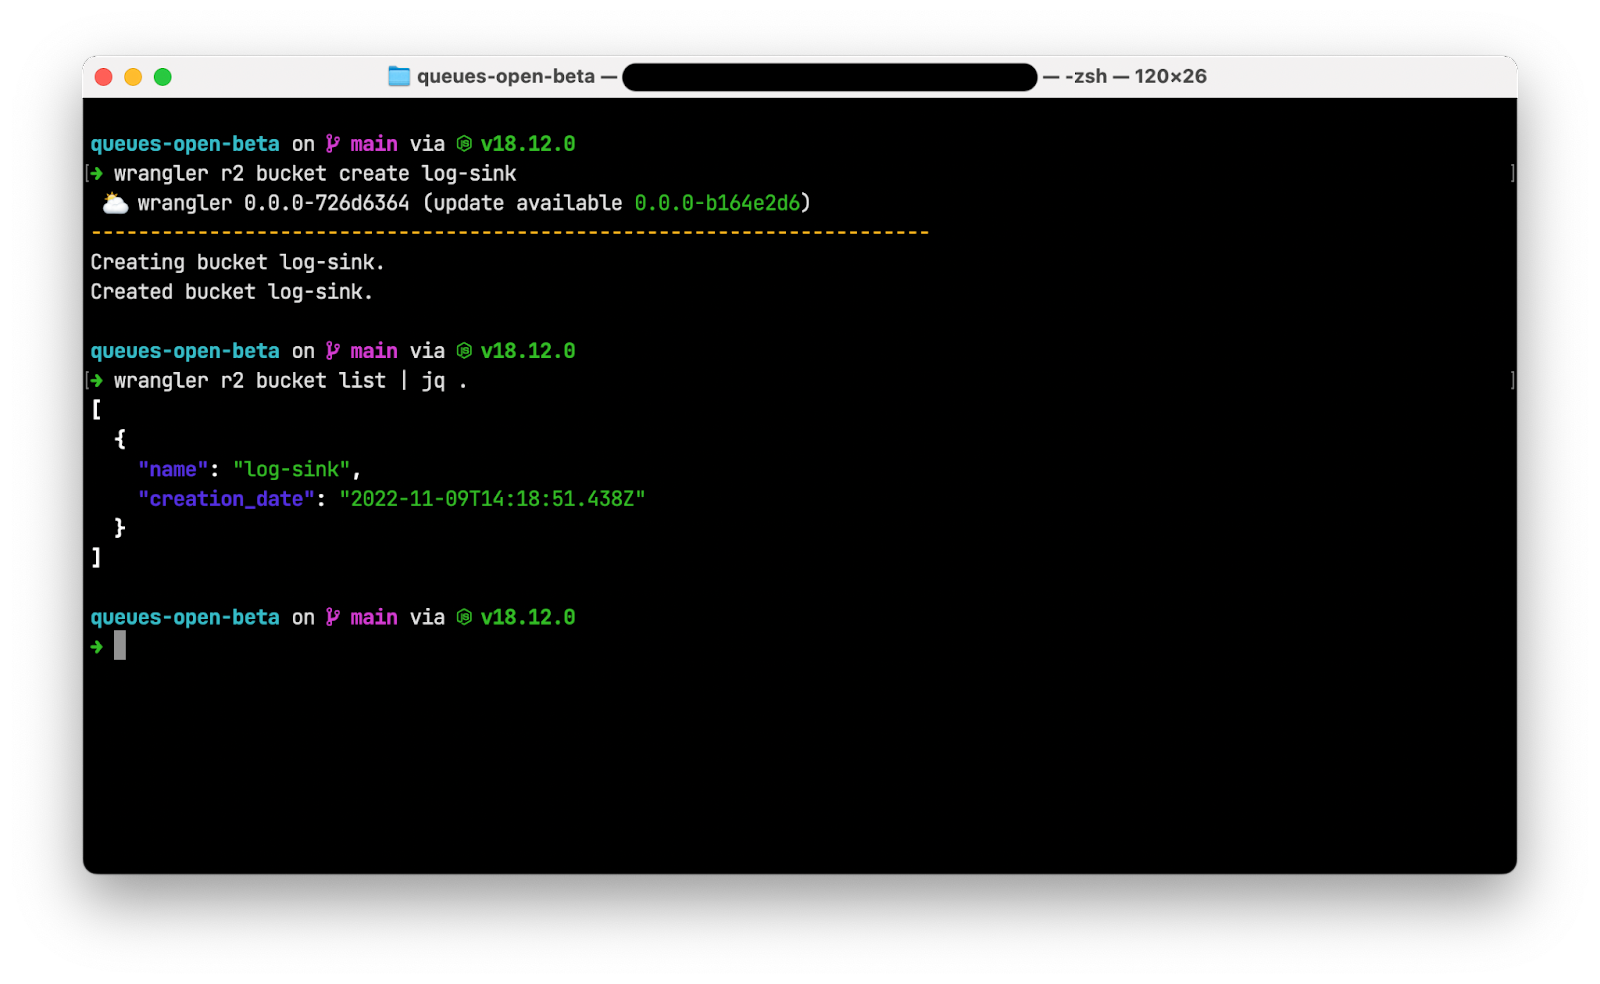
Finally, run wrangler r2 bucket create log-sink to create an R2 bucket to store your aggregated logs. After the bucket is created, run wrangler r2 bucket list to see your new bucket.

Build applications of any size on Cloudflare with the Queues open beta

Creating your Worker
Next, create a Workers application with two handlers: a fetch() handler to receive individual incoming log lines and a queue() handler to aggregate a batch of logs and write the batch to R2.

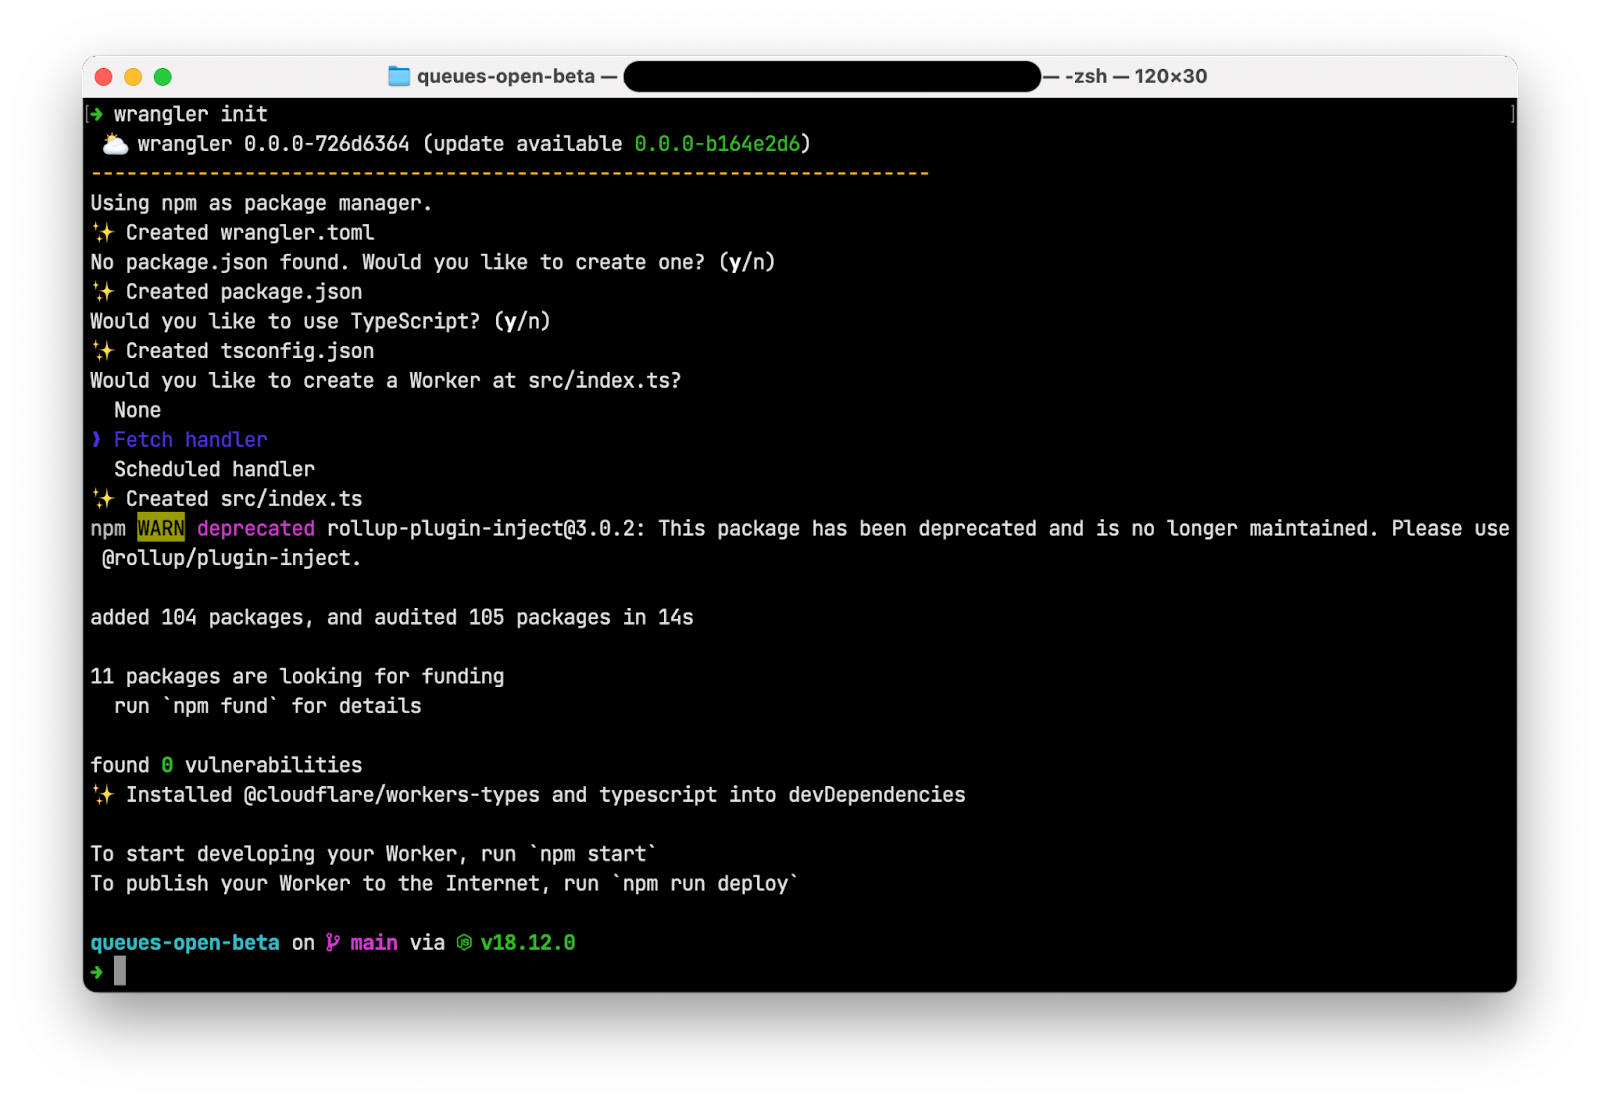
In an empty directory, run wrangler init to create a new Cloudflare Workers application. When prompted:

  • Choose “y” to create a new package.json
  • Choose “y” to use TypeScript
  • Choose “Fetch handler” to create a new Worker at src/index.ts
Build applications of any size on Cloudflare with the Queues open beta

Open wrangler.toml and replace the contents with the following:

wrangler.toml

name = "queues-open-beta"
main = "src/index.ts"
compatibility_date = "2022-11-03"
 
 
[[queues.producers]]
 queue = "log-sink"
 binding = "BUFFER"
 
[[queues.consumers]]
 queue = "log-sink"
 max_batch_size = 100
 max_batch_timeout = 30
 
[[r2_buckets]]
 bucket_name = "log-sink"
 binding = "LOG_BUCKET"

The [[queues.producers]] section creates a producer binding for the Worker at src/index.ts called BUFFER that refers to the log-sink queue. This Worker can place messages onto the log-sink queue by calling await env.BUFFER.send(log);

The [[queues.consumers]] section creates a consumer binding for the log-sink queue for your Worker. Once the log-sink queue has a batch ready to be processed (or consumed), the Workers runtime will look for the queue() event handler in src/index.ts and invoke it, passing the batch as an argument. The queue() function signature looks as follows:

async queue(batch: MessageBatch<Error>, env: Environment): Promise<void> {

The final binding in your wrangler.toml creates a binding for the log-sink R2 bucket that makes the bucket available to your Worker via env.LOG_BUCKET.

src/index.ts

Open src/index.ts and replace the contents with the following code:

export interface Env {
 BUFFER: Queue;
 LOG_BUCKET: R2Bucket;
}
 
export default {
 async fetch(request: Request, env: Environment): Promise<Response> {
   let log = await request.json();
   await env.BUFFER.send(log);
   return new Response("Success!");
 },
 async queue(batch: MessageBatch<Error>, env: Environment): Promise<void> {
   const logBatch = await JSON.stringify(batch.messages);
   await env.LOG_BUCKET.put(`logs/${Date.now()}.log.json`, logBatch);
 },
};

The export interface Env section exposes the two bindings you defined in wrangler.toml: a queue named BUFFER and an R2 bucket named LOG_BUCKET.

The fetch() handler transforms the request body into JSON, adds the body to the BUFFER queue, then returns an HTTP 200 response with the message Success!

The `queue()` handler receives a batch of messages that each contain log entries, iterates through concatenating each log into a string buffer, then writes that buffer to the LOG_BUCKET R2 bucket using the current timestamp as the filename.

Publishing and running your application
To publish your log sink application, run wrangler publish. Wrangler packages your application and its dependencies and deploys it to Cloudflare’s global network.

Build applications of any size on Cloudflare with the Queues open beta

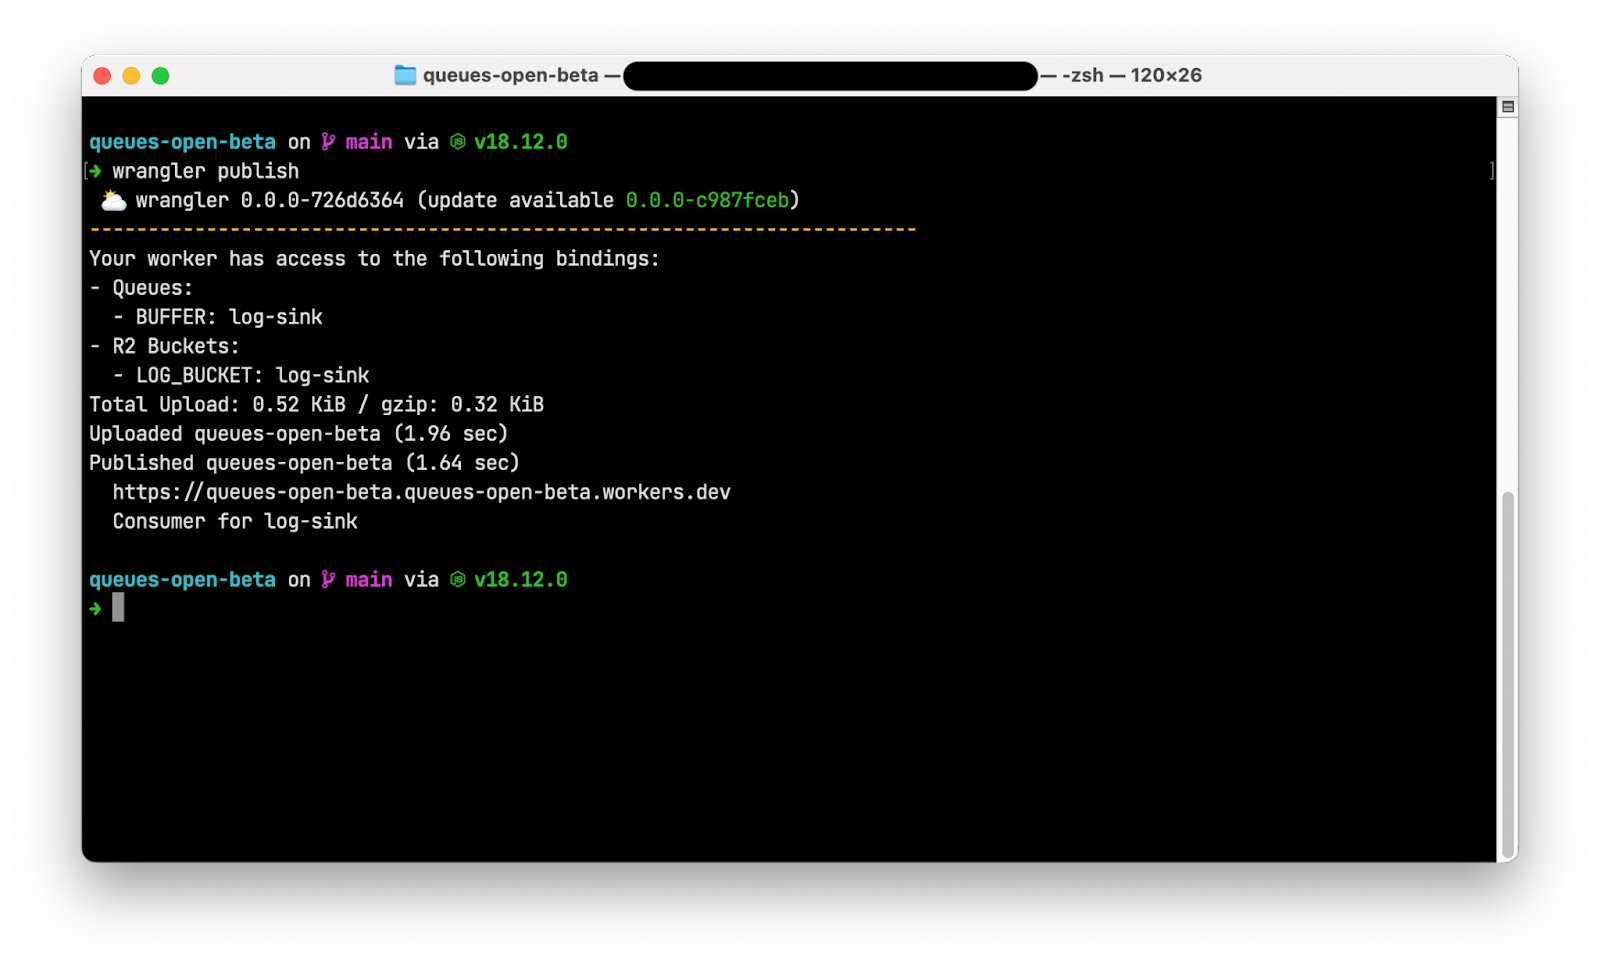
Note that the output of wrangler publish includes the BUFFER queue binding, indicating that this Worker is a producer and can place messages onto the queue. The final line of output also indicates that this Worker is a consumer for the log-sink queue and can read and remove messages from the queue.

Use your favorite API client, like curl, httpie, or Postman, to send JSON log entries to the published URL for your Worker via HTTP POST requests. Navigate to your log-sink R2 bucket in the Cloudflare dashboard and note that the logs prefix is now populated with aggregated logs from your request.

Build applications of any size on Cloudflare with the Queues open beta

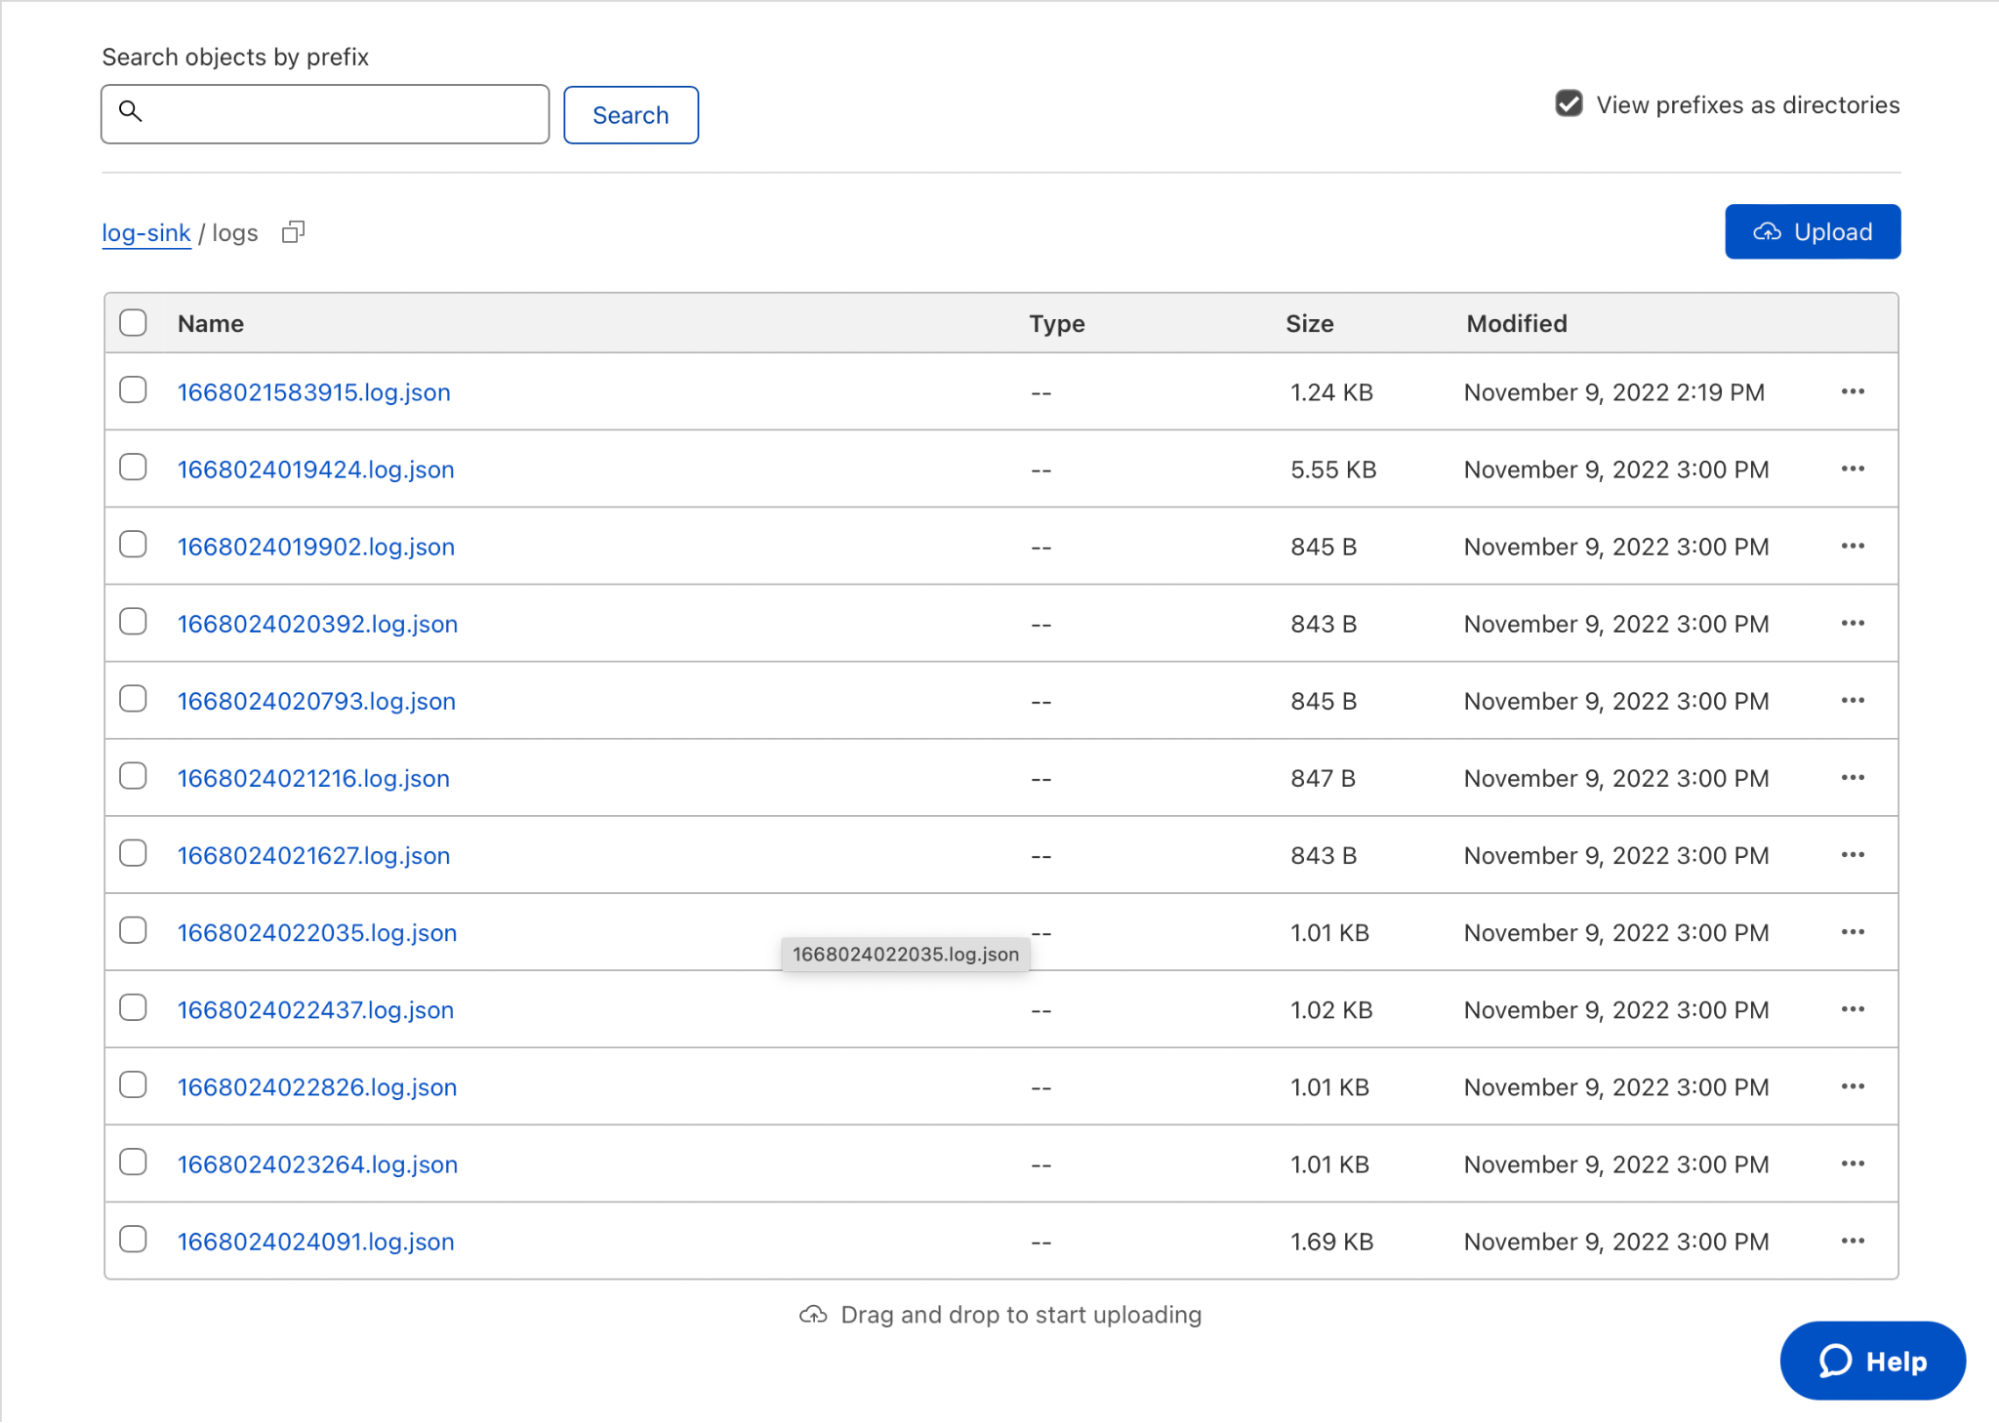
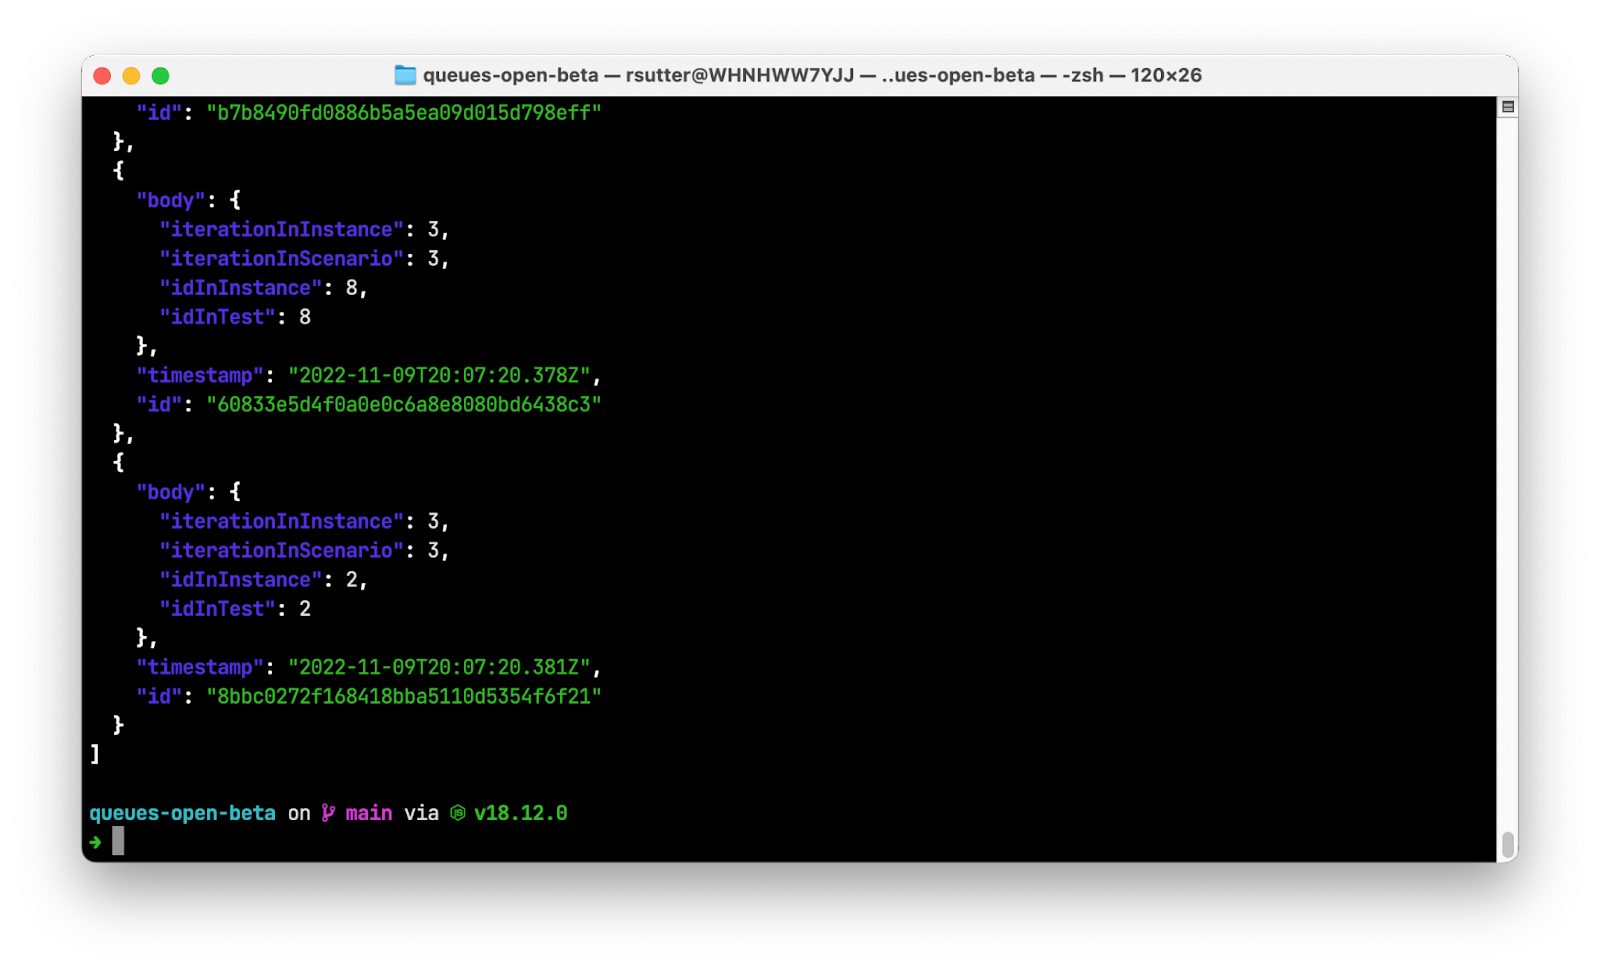
Download and open one of the logfiles to view the JSON array inside. That’s it – with fewer than 45 lines of code and config, you’ve built a log aggregator to ingest and store data in R2!

Build applications of any size on Cloudflare with the Queues open beta

Buffering R2 writes with Queues in the real world

In the previous example, you create a simple Workers application that buffers data into batches before writing the batches to R2. This reduces the number of calls to the downstream service, reducing load on the service and saving you money.

UUID.rocks, the fastest UUIDv4-as-a-service, wanted to confirm whether their API truly generates unique IDs on every request. With 80,000 requests per day, it wasn’t trivial to find out. They decided to write every generated UUID to R2 to compare IDs across the entire population. However, writing directly to R2 at the rate UUIDs are generated is inefficient and expensive.

To reduce writes and costs, UUID.rocks introduced Cloudflare Queues into their UUID generation workflow. Each time a UUID is requested, a Worker places the value of the UUID into a queue. Once enough messages have been received, the buffered batch of JSON objects is written to R2. This avoids invoking an R2 write on every API call, saving costs and making the data easier to process later.

The uuid-queue application consists of a single Worker with three event handlers:

  1. A fetch handler that receives a JSON object representing the generated UUID and writes it to a Cloudflare Queue.
  2. A queue handler that writes batches of JSON objects to R2 in CSV format.
  3. A scheduled handler that combines batches from the previous hour into a single file for future processing.

To view the source or deploy this application into your own account, visit the repository on GitHub.

How we built Cloudflare Queues

Like many of the Cloudflare services you use and love, we built Queues by composing other Cloudflare services like Workers and Durable Objects. This enabled us to rapidly solve two difficult challenges: securely invoking your Worker from our own service and maintaining a strongly consistent state at scale. Several recent Cloudflare innovations helped us overcome these challenges.

Securely invoking your Worker

In the Before Times (early 2022), invoking one Worker from another Worker meant a fresh HTTP call from inside your script. This was a brittle experience, requiring you to know your downstream endpoint at deployment time. Nested invocations ran as HTTP calls, passing all the way through the Cloudflare network a second time and adding latency to your request. It also meant security was on you – if you wanted to control how that second Worker was invoked, you had to create and implement your own authentication and authorization scheme.

Worker to Worker requests
During Platform Week in May 2022, Service Worker Bindings entered general availability. With Service Worker Bindings, your Worker code has a binding to another Worker in your account that you invoke directly, avoiding the network penalty of a nested HTTP call. This removes the performance and security barriers discussed previously, but it still requires that you hard-code your nested Worker at compile time. You can think of this setup as “static dispatch,” where your Worker has a static reference to another Worker where it can dispatch events.

Dynamic dispatch
As Service Worker Bindings entered general availability, we also launched a closed beta of Workers for Platforms, our tool suite to help make any product programmable. With Workers for Platforms, software as a service (SaaS) and platform providers can allow users to upload their own scripts and run them safely via Cloudflare Workers. User scripts are not known at compile time, but are dynamically dispatched at runtime.

Workers for Platforms entered general availability during GA week in September 2022, and is available for all customers to build with today.

With dynamic dispatch generally available, we now have the ability to discover and invoke Workers at runtime without the performance penalty of HTTP traffic over the network. We use dynamic dispatch to invoke your queue’s consumer Worker whenever a message or batch of messages is ready to be processed.

Consistent stateful data with Durable Objects

Another challenge we faced was storing messages durably without sacrificing performance. We took the design goal of ensuring that all messages were persisted to disk in multiple locations before we confirmed receipt of the message to the user. Again, we turned to an existing Cloudflare product—Durable Objects—which entered general availability nearly one year ago today.

Durable Objects are named instances of JavaScript classes that are guaranteed to be unique across Cloudflare’s entire network. Durable Objects process messages in-order and on a single-thread, allowing for coordination across messages and provide a strongly consistent storage API for key-value pairs. Offloading the hard problem of storing data durably in a distributed environment to Distributed Objects allowed us to reduce the time to build Queues and prepare it for open beta.

Open beta roadmap

Our open beta process empowers you to influence feature prioritization and delivery. We’ve set ambitious goals for ourselves on the path to general availability, most notably supporting unlimited throughput while maintaining 100% durability. We also have many other great features planned, like first-in first-out (FIFO) message processing and API compatibility layers to ease migrations, but we need your feedback to build what you need most, first.

Conclusion

Cloudflare Queues is a global message queue for the Workers developer. Building with Queues makes your applications more performant, resilient, and cost-effective—but we’re not done yet. Join the Open Beta today and share your feedback to help shape the Queues roadmap as we deliver application integration services for the next generation cloud.

Optimizing Lambda functions packaged as container images

Post Syndicated from Rob Sutter original https://aws.amazon.com/blogs/compute/optimizing-lambda-functions-packaged-as-container-images/

AWS Lambda launched support for packaging and deploying functions as container images at re:Invent 2020. In this post you learn how to build container images that reduce image size as well as build, deployment, and update time. Lambda container images have unique characteristics to consider for optimization. This means that the techniques you use to optimize container images for Lambda functions are slightly different from those you use for other environments.

To understand how to optimize container images, it helps to understand how container images are packaged, as well as how the Lambda service retrieves, caches, deploys, and retires container images.

Pre-requisites and assumptions

This post assumes you have access to an IAM user or role in an AWS account and a version of the tar utility on your machine. You must also install Docker and the AWS SAM CLI and start Docker.

Lambda container image packaging

Lambda container images are packaged according to the Open Container Initiative (OCI) Image Format specification. The specification defines how programs build and package individual layers into a single container image. To explore an example of the OCI Image Format, open a terminal and perform the following steps:

  1. Create an AWS SAM application.
    sam init –name container-images
  2. Choose 1 to select an AWS quick start template, then choose 2 to select container image as the packaging format, and finally choose 9 to use the amazon-go1.x-base image.
    Image showing the suggested choices for a sam init command
  3. After the AWS SAM CLI generates the application, enter the following commands to change into the new directory and build the Lambda container image
    cd container-images
    sam build
  4. AWS SAM builds your function and packages it as helloworldfunction:go1.x-v1. Export this container image to a tar archive and extract the filesystem into a new directory to explore the image format.
    docker save helloworldfunction:go1.x-v1 &gt; oci-image.tar
    mkdir -p image
    tar xf oci-image.tar -C image

The image directory contains several subdirectories, a container metadata JSON file, a manifest JSON file, and a repositories JSON file. Each subdirectory represents a single layer, and contains a version file, its own metadata JSON file, and a tar archive of the files that make up the layer.

Image of the result of running the tree command in a terminal window

The manifest.json file contains a single JSON object with the name of the container metadata file, a list of repository tags, and a list of included layers. The list of included layers is ordered according to the build order in your Dockerfile. The metadata JSON file in each subfolder also contains a mapping from each layer to its parent layer or final container.

Your function should have layers similar to the following. A separate layer is created any time files are added to the container image. This includes FROM, RUN, ADD, and COPY statements in your Dockerfile and base image Dockerfiles. Note that the specific layer IDs, layer sizes, number, and composition of layers may change over time.

ID Size Description Your function’s Dockerfile step
5fc256be… 641 MB Amazon Linux
c73e7f67… 320 KB Third-party licenses
de5f5100… 12 KB Lambda entrypoint script
2bd3c722… 7.8 MB AWS Lambda RIE
5d9d381b… 10.0 MB AWS Lambda runtime
cb832ffc… 12 KB Bootstrap link
1fcc74e8… 560 KB Lambda runtime library FROM public.ecr.aws/lambda/go:1
acb8dall… 9.6 MB Function code COPY –from=build-image /go/bin/ /var/task/

Runtimes generate a filesystem image by destructively overlaying each image layer over its parent. This means that any changes to one layer require all child layers to be recreated. In the following example, if you change the layer cb832ffc... then the layers 1fcc74e8… and acb8da111… are also considered “dirty” and must be recreated from the new parent image. This results in a new container image with eight layers, the first five the same as the original image, and the last three newly built, each with new IDs and parents.

Representation of a container image with eight layers, one of which is updated requiring two additional child layers to be updated also.

The layered structure of container images informs several decisions you make when optimizing your container images.

Strategies for optimizing container images

There are four main strategies for optimizing your container images. First, wherever possible, use the AWS-provided base images as a starting point for your container images. Second, use multi-stage builds to avoid adding unnecessary layers and files to your final image. Third, order the operations in your Dockerfile from most stable to most frequently changing. Fourth, if your application uses one or more large layers across all of your functions, store all of your functions in a single repository.

Use AWS-provided base images

If you have experience packaging traditional applications for container runtimes, using AWS-provided base images may seem counterintuitive. The AWS-provided base images are typically larger than other minimal container base images. For example, the AWS-provided base image for the Go runtime public.ecr.aws/lambda/go:1 is 670 MB, while alpine:latest, a popular starting point for building minimal container images, is only 5.58 MB. However, using the AWS-provided base images offers three advantages.

First, the AWS-provided base images are cached pro-actively by the Lambda service. This means that the base image is either nearby in another upstream cache or already in the worker instance cache. Despite being much larger, the deployment time may still be shorter when compared to third-party base images, which may not be cached. For additional details on how the Lambda service caches container images, see the re:Invent 2021 talk Deep dive into AWS Lambda security: Function isolation.

Second, the AWS-provided base images are stable. As the base image is at the bottom layer of the container image, any changes require every other layer to be rebuilt and redeployed. Fewer changes to your base image mean fewer rebuilds and redeployments, which can reduce build cost.

Finally, the AWS-provided base images are built on Amazon Linux and Amazon Linux 2. Depending on your chosen runtime, they may already contain a number of utilities and libraries that your functions may need. This means that you do not need to add them in later, saving you from creating additional layers that can cause more build steps leading to increased costs.

Use multi-stage builds

Multi-stage builds allow you to build your code in larger preliminary images, copy only the artifacts you need into your final container image, and discard the preliminary build steps. This means you can run any arbitrarily large number of commands and add or copy files into the intermediate image, but still only create one additional layer in your container image for the artifact. This reduces both the final size and the attack surface of your container image by excluding build-time dependencies from your runtime image.

AWS SAM CLI generates Dockerfiles that use multi-stage builds.

FROM golang:1.14 as build-image
WORKDIR /go/src
COPY go.mod main.go ./
RUN go build -o ../bin

FROM public.ecr.aws/lambda/go:1
COPY --from=build-image /go/bin/ /var/task/

# Command can be overwritten by providing a different command in the template directly.
CMD ["hello-world"]

This Dockerfile defines a two-stage build. First, it pulls the golang:1.14 container image and names it build-image. Naming intermediate stages is optional, but it makes it easier to refer to previous stages when packaging your final container image. Note that the golang:1.14 image is 810 MB, is not likely to be cached by the Lambda service, and contains a number of build tools that you should not include in your production images. The build-image stage then builds your function and saves it in /go/bin.

The second and final stage begins from the public.ecr.aws/lambda/go:1 base image. This image is 670 MB, but because it is an AWS-provided image, it is more likely to be cached on worker instances. The COPY command copies the contents of /go/bin from the build-image stage into /var/task in the container image, and discards the intermediate stage.

Build from stable to frequently changing

Any time a layer in an image changes, all layers that follow must be rebuilt, repackaged, redeployed, and recached by the Lambda service. In practice, this means that you should make your most frequently occurring changes as late in your Dockerfile as possible.

For example, if you have a stable Lambda function that uses a frequently updated machine learning model to make predictions, add your function to the container image before adding the machine learning model. However, if you have a function that changes frequently but relies on a stable Lambda extension, copy the extension into the image first.

If you put the frequently changing component early in your Dockerfile, all the build steps that follow must be re-run every time that component changes. If one of those actions is costly, for example, compiling a large library or running a complex simulation, these repetitions add unnecessary time and cost to your deployment pipeline.

Use a single repository for functions with large layers

When you create an application with multiple Lambda functions, you either store the container images in a single Amazon ECR repository or in multiple repositories, one for each function. If your application uses one or more large layers across all of your functions, store all of your functions in a single repository.

ECR repositories compare each layer of a container image when it is pushed to avoid uploading and storing duplicates. If each function in your application uses the same large layer, such as a custom runtime or machine learning model, that layer is stored exactly once in a shared repository. If you use a separate repository for each function, that layer is duplicated across repositories and must be uploaded separately to each one. This costs you time and network bandwidth.

Conclusion

Packaging your Lambda functions as container images enables you to use familiar tooling and take advantage of larger deployment limits. In this post you learn how to build container images that reduce image size as well as build, deployment, and update time. You learn some of the unique characteristics of Lambda container images that impact optimization. Finally, you learn how to think differently about image optimization for Lambda functions when compared to packaging traditional applications for container runtimes.

For more information on how to build serverless applications, including source code, blogs, videos, and more, visit the Serverless Land website.

Introducing larger state payloads for AWS Step Functions

Post Syndicated from Rob Sutter original https://aws.amazon.com/blogs/compute/introducing-larger-state-payloads-for-aws-step-functions/

AWS Step Functions allows you to create serverless workflows that orchestrate your business processes. Step Functions stores data from workflow invocations as application state. Today we are increasing the size limit of application state from 32,768 characters to 256 kilobytes of data per workflow invocation. The new limit matches payload limits for other commonly used serverless services such as Amazon SNS, Amazon SQS, and Amazon EventBridge. This means you no longer need to manage Step Functions payload limitations as a special case in your serverless applications.

Faster, cheaper, simpler state management

Previously, customers worked around limits on payload size by storing references to data, such as a primary key, in their application state. An AWS Lambda function then loaded the data via an SDK call at runtime when the data was needed. With larger payloads, you now can store complete objects directly in your workflow state. This removes the need to persist and load data from data stores such as Amazon DynamoDB and Amazon S3. You do not pay for payload size, so storing data directly in your workflow may reduce both cost and execution time of your workflows and Lambda functions. Storing data in your workflow state also reduces the amount of code you need to write and maintain.

AWS Management Console and workflow history improvements

Larger state payloads mean more data to visualize and search. To help you understand that data, we are also introducing changes to the AWS Management Console for Step Functions. We have improved load time for the Execution History page to help you get the information you need more quickly. We have also made backwards-compatible changes to the GetExecutionHistory API call. Now if you set includeExecutionData to false, GetExecutionHistory excludes payload data and returns only metadata. This allows you to debug your workflows more quickly.

Doing more with dynamic parallelism

A larger payload also allows your workflows to process more information. Step Functions workflows can process an arbitrary number of tasks concurrently using dynamic parallelism via the Map State. Dynamic parallelism enables you to iterate over a collection of related items applying the same process to each item. This is an implementation of the map procedure in the MapReduce programming model.

When to choose dynamic parallelism

Choose dynamic parallelism when performing operations on a small collection of items generated in a preliminary step. You define an Iterator, which operates on these items individually. Optionally, you can reduce the results to an aggregate item. Unlike with parallel invocations, each item in the collection is related to the other items. This means that an error in processing one item typically impacts the outcome of the entire workflow.

Example use case

Ecommerce and line of business applications offer many examples where dynamic parallelism is the right approach. Consider an order fulfillment system that receives an order and attempts to authorize payment. Once payment is authorized, it attempts to lock each item in the order for shipment. The available items are processed and their total is taken from the payment authorization. The unavailable items are marked as pending for later processing.

The following Amazon States Language (ASL) defines a Map State with a simplified Iterator that implements the order fulfillment steps described previously.


    "Map": {
      "Type": "Map",
      "ItemsPath": "$.orderItems",
      "ResultPath": "$.packedItems",
      "MaxConcurrency": 40,
      "Next": "Print Label",
      "Iterator": {
        "StartAt": "Lock Item",
        "States": {
          "Lock Item": {
            "Type": "Pass",
            "Result": "Item locked!",
            "Next": "Pull Item"
          },
          "Pull Item": {
            "Type": "Pass",
            "Result": "Item pulled!",
            "Next": "Pack Item"
          },
          "Pack Item": {
            "Type": "Pass",
            "Result": "Item packed!",
            "End": true
          }
        }
      }
    }

The following image provides a visualization of this workflow. A preliminary state retrieves the collection of items from a data store and loads it into the state under the orderItems key. The triple dashed lines represent the Map State which attempts to lock, pull, and pack each item individually. The result of processing each individual item impacts the next state, Print Label. As more items are pulled and packed, the total weight increases. If an item is out of stock, the total weight will decrease.

A visualization of a portion of an AWS Step Functions workflow that implements dynamic parallelism

Dynamic parallelism or the “Map State”

Larger state payload improvements

Without larger state payloads, each item in the $.orderItems object in the workflow state would be a primary key to a specific item in a DynamoDB table. Each step in the “Lock, Pull, Pack” workflow would need to read data from DynamoDB for every item in the order to access detailed item properties.

With larger state payloads, each item in the $.orderItems object can be a complete object containing the required fields for the relevant items. Not only is this faster, resulting in a better user experience, but it also makes debugging workflows easier.

Pricing and availability

Larger state payloads are available now in all commercial and AWS GovCloud (US) Regions where Step Functions is available. No changes to your workflows are required to use larger payloads, and your existing workflows will continue to run as before. The larger state is available however you invoke your Step Functions workflows, including the AWS CLI, the AWS SDKs, the AWS Step Functions Data Science SDK, and Step Functions Local.

Larger state payloads are included in existing Step Functions pricing for Standard Workflows. Because Express Workflows are priced by runtime and memory, you may see more cost on individual workflows with larger payloads. However, this increase may also be offset by the reduced cost of Lambda, DynamoDB, S3, or other AWS services.

Conclusion

Larger Step Functions payloads simplify and increase the efficiency of your workflows by eliminating function calls to persist and retrieve data. Larger payloads also allow your workflows to process more data concurrently using dynamic parallelism.

With larger payloads, you can minimize the amount of custom code you write and focus on the business logic of your workflows. Get started building serverless workflows today!