Post Syndicated from Fei Lang original https://aws.amazon.com/blogs/big-data/orchestrating-analytics-jobs-on-amazon-emr-notebooks-using-amazon-mwaa/
In a previous post, we introduced the Amazon EMR notebook APIs, which allow you to programmatically run a notebook on both Amazon EMR Notebooks and Amazon EMR Studio (preview) without accessing the AWS web console. With the APIs, you can schedule running EMR notebooks with cron scripts, chain multiple EMR notebooks, and use orchestration services such as AWS Step Functions triggered by AWS CloudWatch Events.
In this post, we show how to use Amazon Managed Workflows for Apache Airflow (Amazon MWAA) to orchestrate analytics jobs on EMR Notebooks. We will start by walking you through the process of using AWS CloudFormation to set up an Amazon MWAA environment, which allows you to programmatically author, schedule, and monitor different sorts of workflows on Amazon EMR. We will then use this environment to run an EMR notebook example which does data analysis with Hive.
The data source for the example in this post is from the public Amazon Customer Reviews Dataset. We use the Parquet formatted dataset as the input dataset for our EMR notebook.
Apache Airflow and Amazon MWAA
Apache Airflow is an open-source platform for authoring, scheduling, and monitoring workflows. With Apache Airflow, we can define direct acyclic graphs (DAGs). DAGs describe how to run a workflow and are written in Python. For additional details on Apache Airflow, see Concepts. Many organizations build, manage, and maintain Apache Airflow on AWS using services such as Amazon Elastic Compute Cloud (Amazon EC2) or Amazon Elastic Kubernetes Service (Amazon EKS). Amazon MWAA is a fully managed service that makes it easy to run open-source versions of Apache Airflow on AWS, and to build workflows to run your extract, transform, and load (ETL) jobs and data pipelines.
Prerequisites
Before getting started, you must have the following prerequisites:
- An AWS account that provides access to AWS services.
- AWS Command Line Interface (AWS CLI) version 1.18.128 or later installed on your workstation.
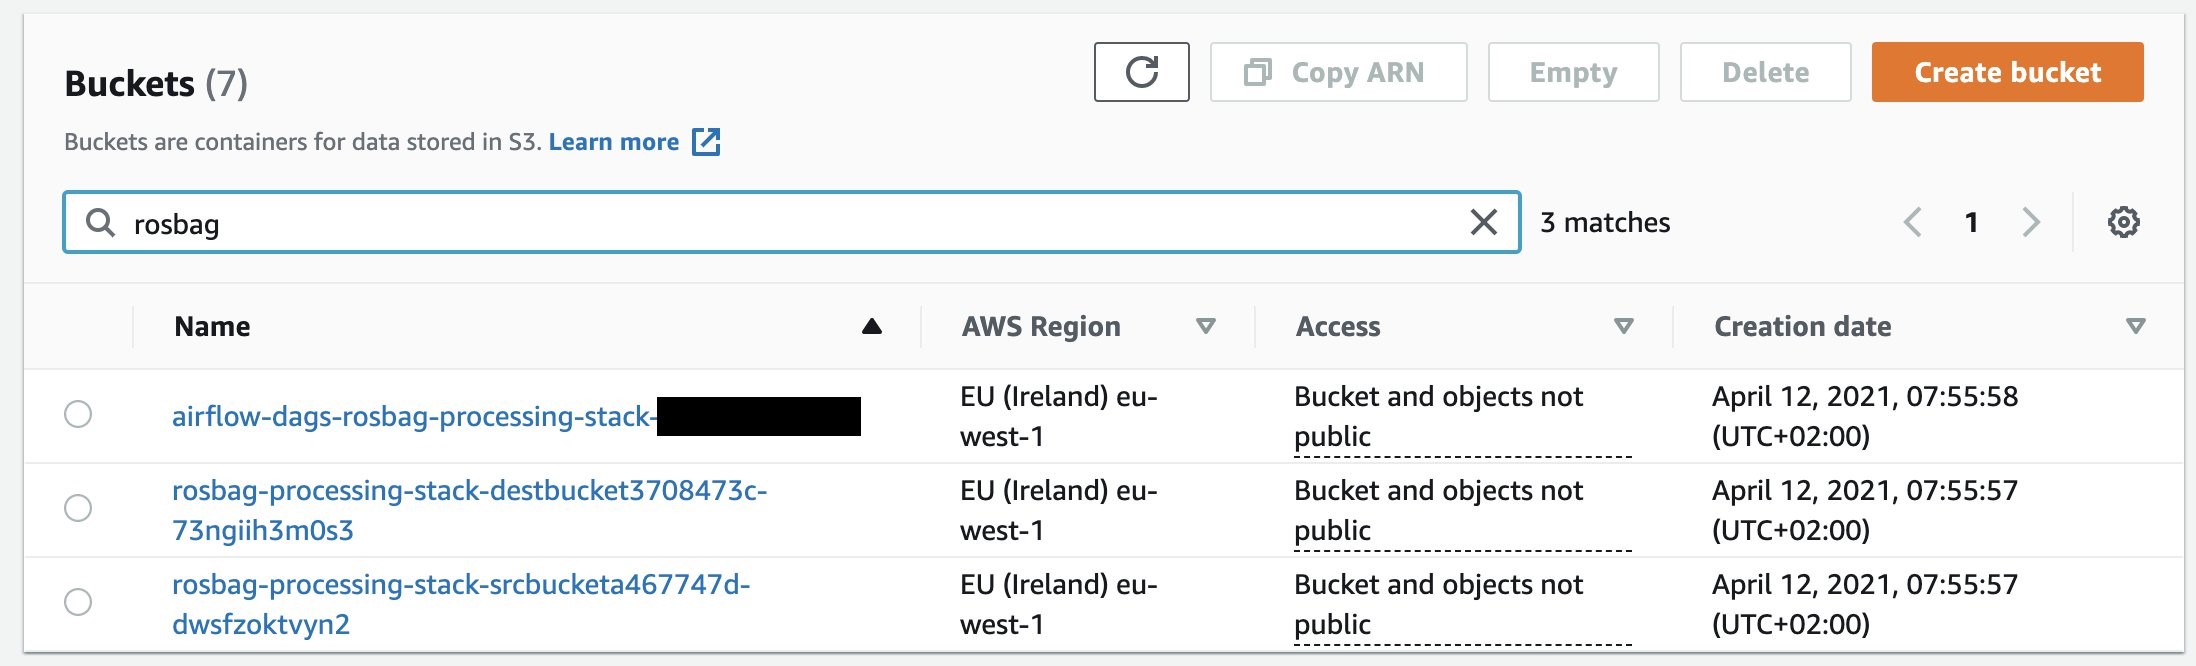
- An Amazon Simple Storage Service (Amazon S3) bucket that meets the following Amazon MWAA requirements:
- The bucket must be in the same AWS Region where you create the MWAA environment.
- The bucket name must start with
airflow- and should be globally unique.
- Bucket versioning is enabled.
- A folder named
dags must be created in the same bucket to store DAGs and associated support files.
- An AWS Identity and Access Management (IAM) user with an access key and secret access key to configure the AWS CLI.
- The IAM user has permissions to create an IAM role and policies, launch an EMR cluster, create an Amazon MWAA environment, and create stacks in AWS CloudFormation.
- A possible limit increase for your account. (Usually a limit increase isn’t necessary. See AWS service quotas if you encounter a limit error while building the solution.)
- An EMR notebook created through the Amazon EMR console, using the notebook file find_best_sellers.ipynb. See Creating a Notebook for instructions on creating an EMR notebook. Record the ID of the EMR notebook (for example, <e-*************************>); you will use this later in this post.
Architecture overview
At a high level, this solution uses Amazon MWAA with Amazon EMR to build pipelines for ETL workflow orchestration. The following diagram illustrates the solution architecture.

We use the following services and configurations in this solution:
- Amazon S3
- VPC network configurations
- VPC endpoints
Amazon S3
Amazon MWAA uses an S3 bucket to store DAGs and associated support files. You must create an S3 bucket before you can create the environment, with requirements as mentioned in the Prerequisites section. To use a bucket with an Amazon MWAA environment, you must create the bucket in the same Region where you create the environment. Refer to Create an Amazon S3 bucket for Amazon MWAA for further details.
VPC network configurations
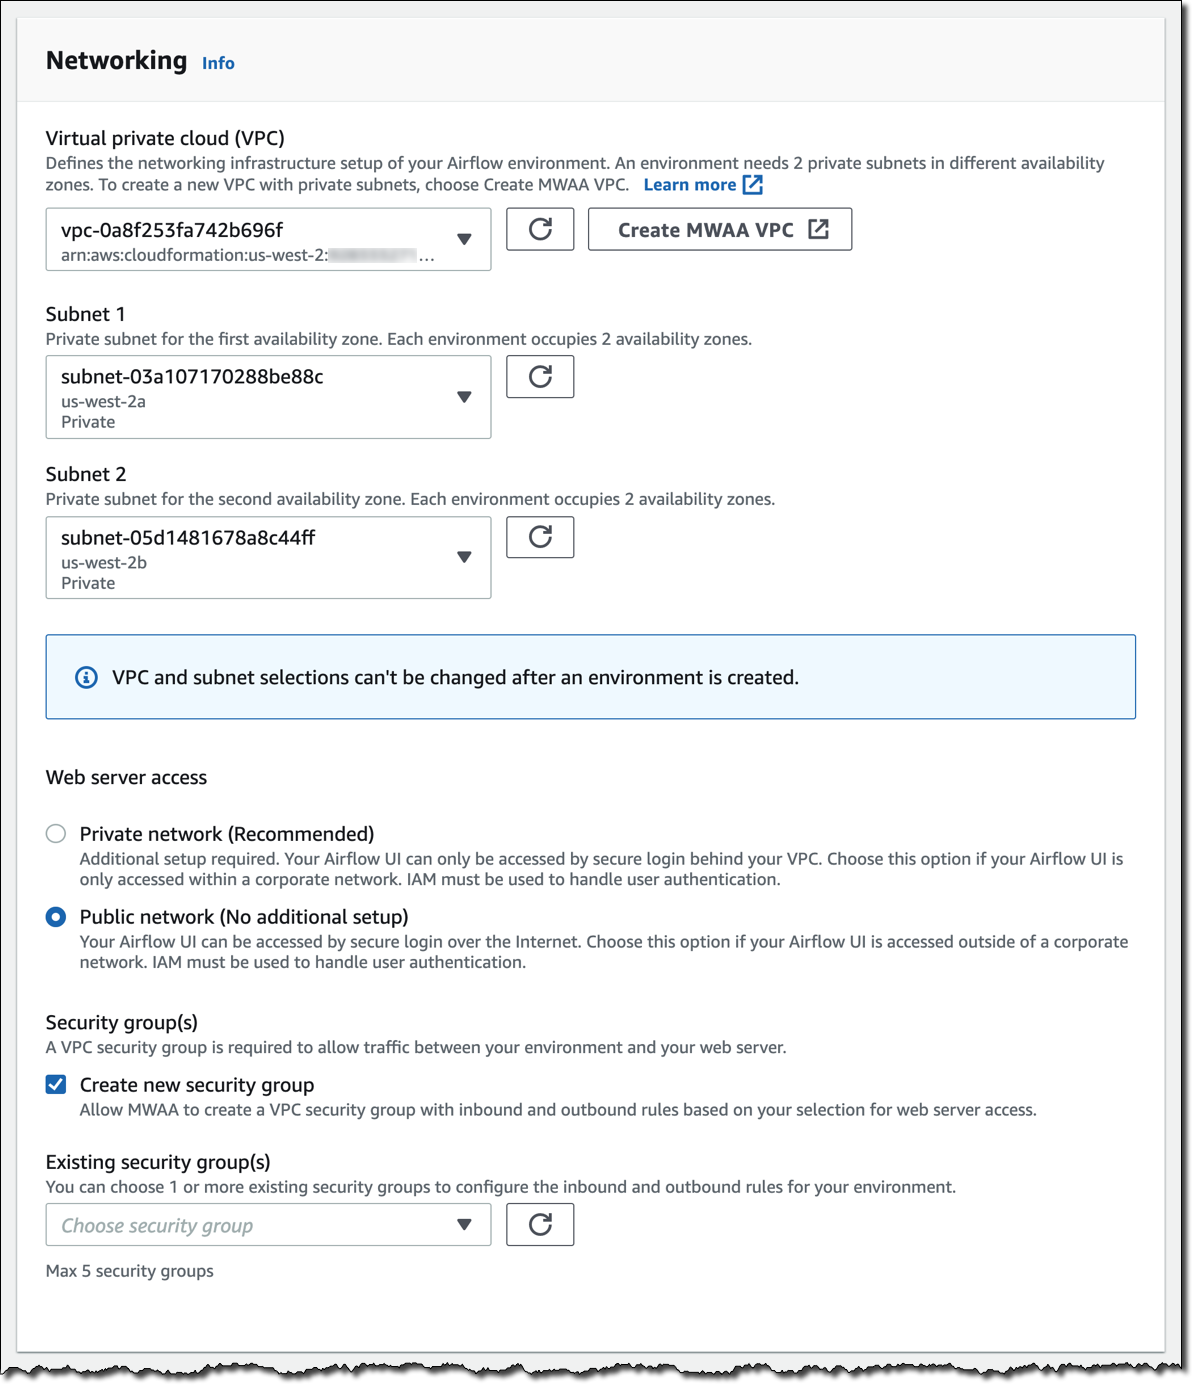
Amazon MWAA requires a VPC network that meets the following requirements:
- Includes two private subnets that are in two different Availability Zones within the same Region
- Includes public subnets that are configured to route the private subnet data to the internet (via NAT gateways)
For more information, see Create the VPC network using a AWS CloudFormation template.
The Airflow UI in the Amazon MWAA environment is accessible over the internet by users granted access in the IAM policy. Amazon MWAA attaches an Application Load Balancer with an HTTPS endpoint for your web server as part of the Amazon MWAA managed service. For more information, see How it works.
VPC endpoints
VPC endpoints are highly available VPC components that enable private connections between your VPC and supported AWS services. Traffic between your VPC and the other services remains in your AWS network. For our example, we use the following VPC endpoints to ensure extra security, availability, and Amazon S3 data transfer performance:
- An Amazon S3 gateway VPC endpoint to establish a private connection between the Amazon MWAA VPC and Amazon S3
- An EMR interface VPC endpoint to securely route traffic directly to Amazon EMR from Amazon MWAA, instead of connecting over the internet
Setting up an Amazon MWAA environment
To make it easier to get started, we created a CloudFormation template that automatically configures and deploys the Amazon MWAA environment. The template takes care of the following tasks for you:
- Create an Amazon MWAA execution IAM role.
- Set up the VPC network for the Amazon MWAA environment, deploying the following resources:
- A VPC with a pair of public and private subnets spread across two Availability Zones.
- An internet gateway, with a default route on the public subnets.
- A pair of NAT gateways (one in each Availability Zone), and default routes for them in the private subnets.
- Amazon S3 gateway VPC endpoints and EMR interface VPC endpoints in the private subnets in two Availability Zones.
- A security group to be used by the Amazon MWAA environment that only allows local inbound traffic and all outbound traffic.
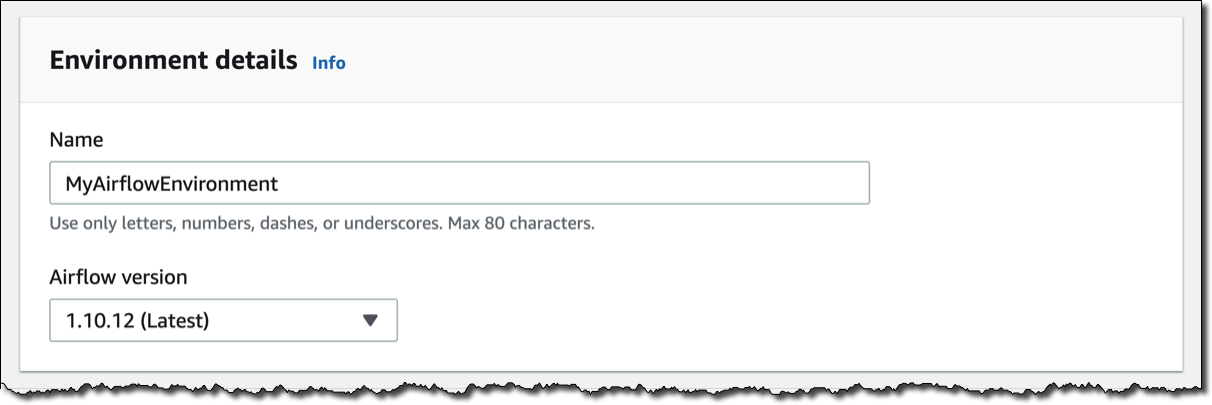
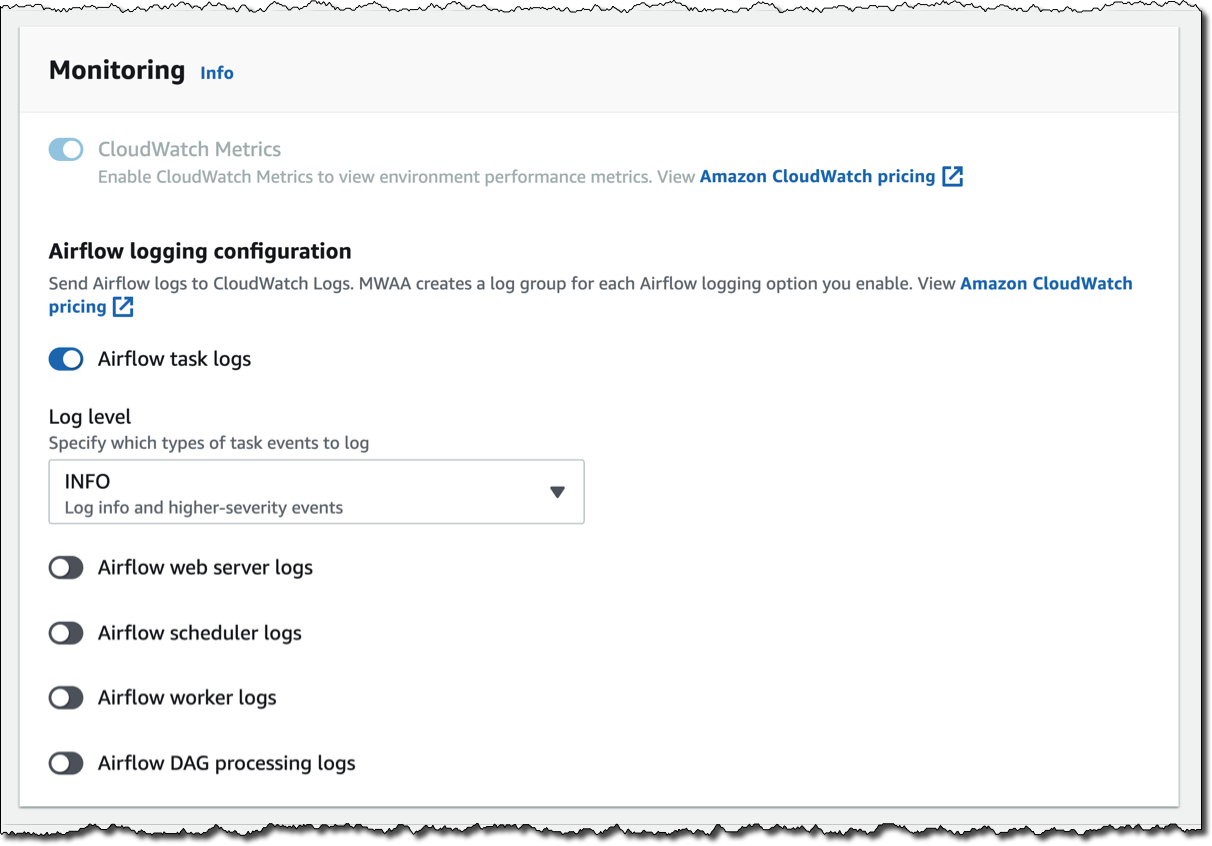
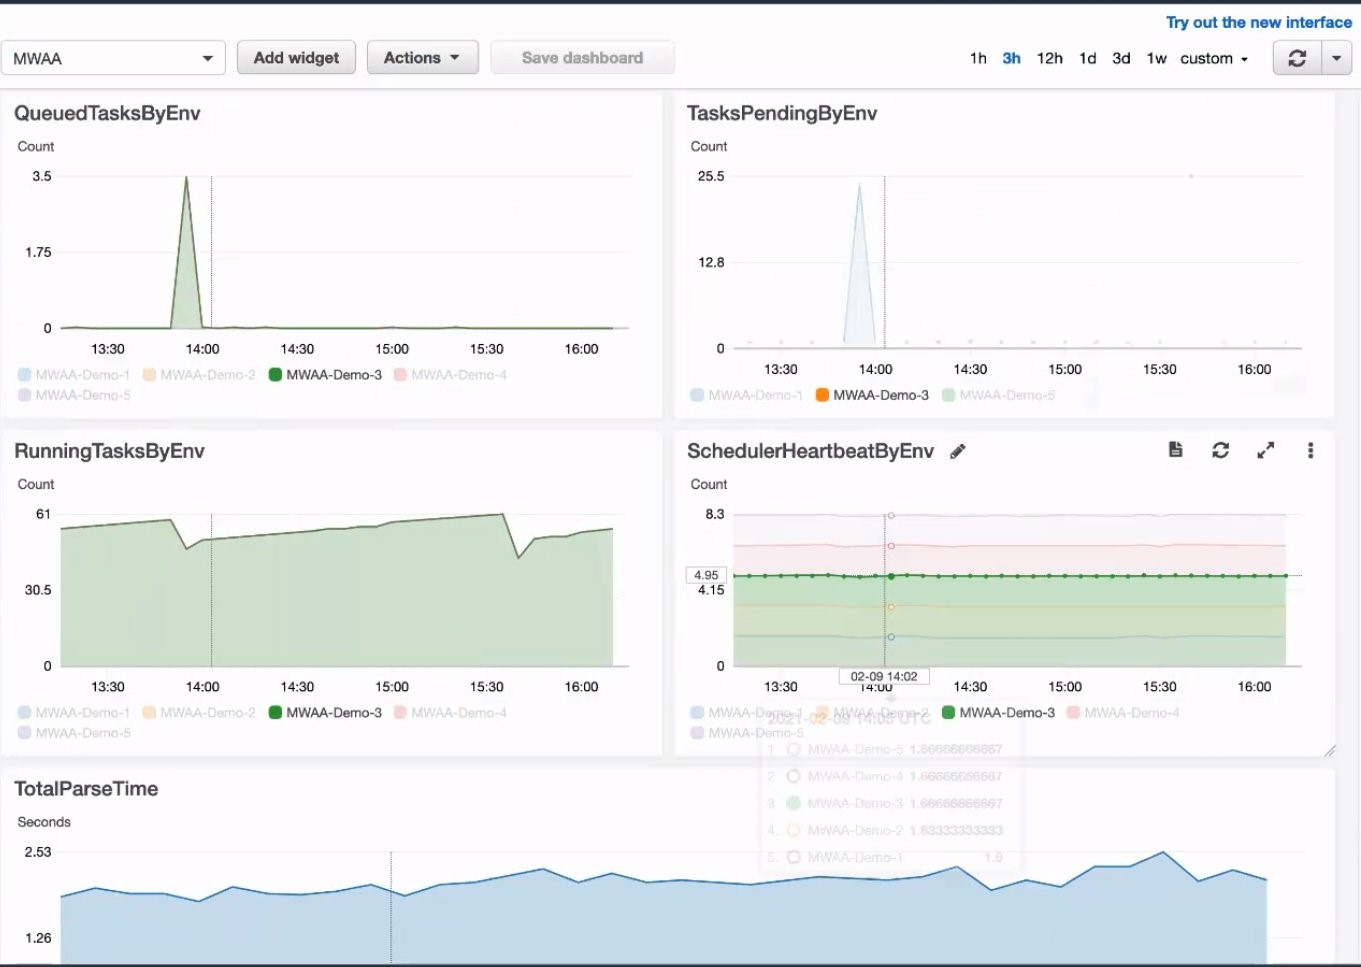
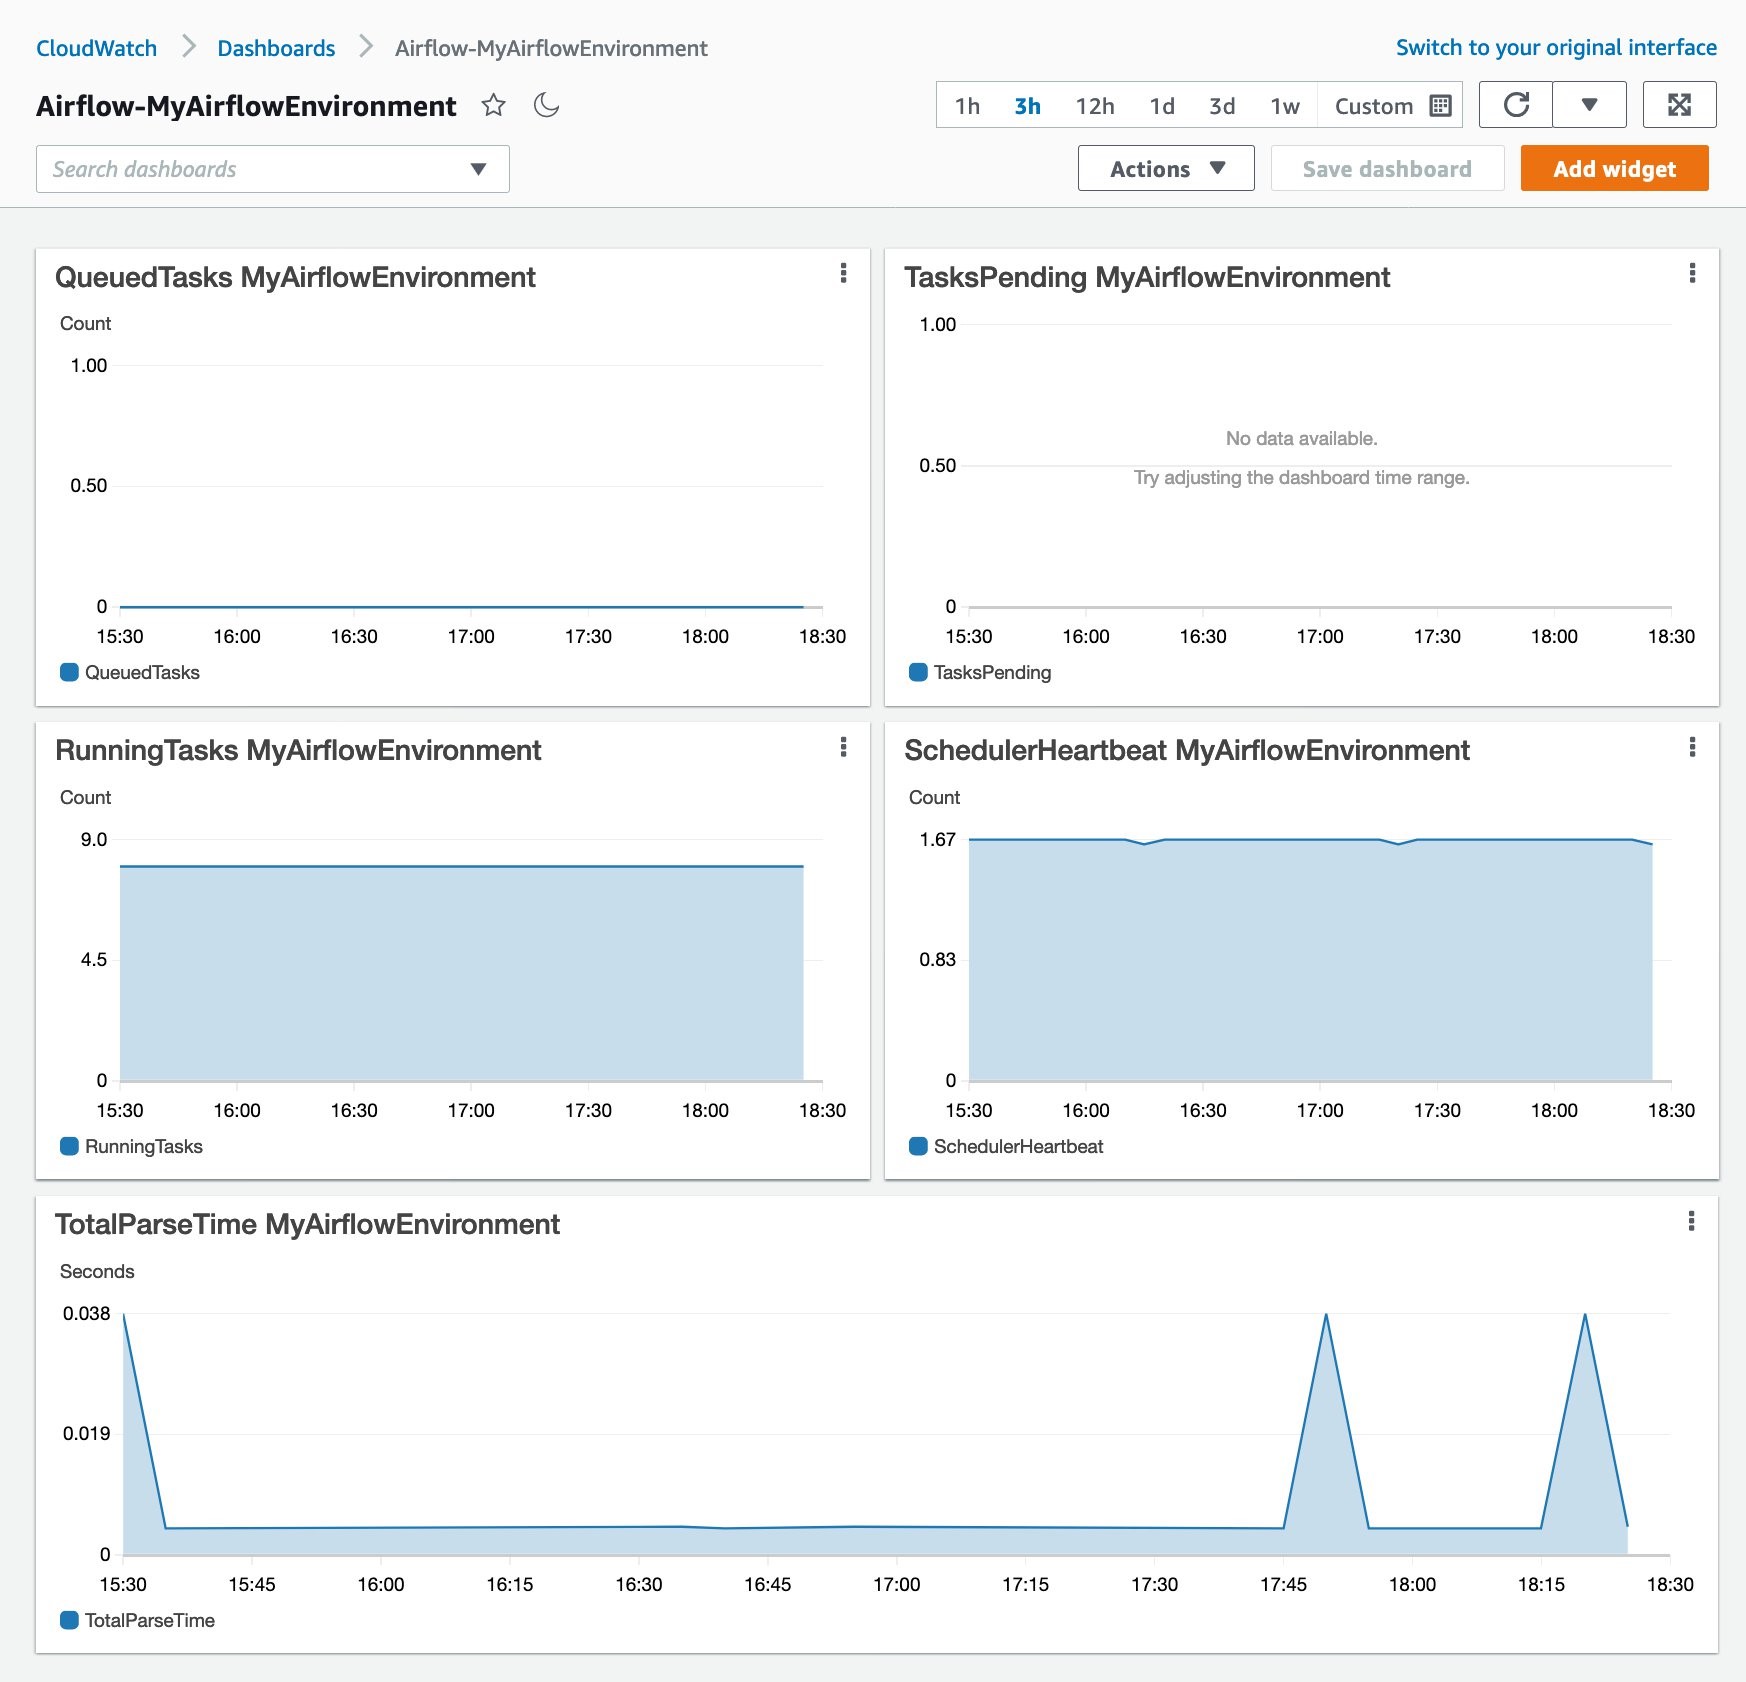
- Create an Amazon MWAA environment. For this post, we select mw1.small for the environment class and choose maximum worker count as 1. For monitoring, we choose to publish environment performance to CloudWatch Metrics. For Airflow logging configuration, we choose to send only the task logs and use log level
INFO.
If you want to manually create, configure, and deploy the Amazon MWAA environment without using AWS CloudFormation, see Get started with Amazon Managed Workflows for Apache Airflow (MWAA).
Launching the CloudFormation template
To launch your stack and provision your resources, complete the following steps:
- Choose Launch Stack:

This automatically launches AWS CloudFormation in your AWS account with a template. It prompts you to sign in as needed. You can view the template on the AWS CloudFormation console as required. The Amazon MWAA environment is created in the same Region as you launched the CloudFormation stack. Make sure that you create the stack in your intended Region.
The CloudFormation stack requires a few parameters, as shown in the following screenshot.

The following table describes the parameters.
| Parameter |
Description |
Default Value |
| Stack name |
Enter a meaningful name for the stack. We use MWAAEmrNBDemo for this example. Replace it with your own value. |
None |
| AirflowBucketName |
Name of the S3 bucket to store DAGs and support files. The S3 bucket must be in the same Region where you create the environment. The name must start with airflow-. Enter the S3 bucket created as a prerequisite. We use the S3 bucket airflow-emr-demo-us-west-2 for this post. You must replace it with your own value for this field. |
None |
| EnvironmentName |
An MWAA environment name that is prefixed to resource names. All the resources created by this templated are named after the value saved for this field. We name our environment mwaa-emr-blog-demo for this post. Replace it with your own value for this field. |
mwaa- |
| PrivateSubnet1CIDR |
The IP range (CIDR notation) for the private subnet in the first Availability Zone. For more information, see AWS CloudFormation VPC stack specifications. |
10.192.20.0/24 |
| PrivateSubnet2CIDR |
The IP range (CIDR notation) for the private subnet in the second Availability Zone. For more information, see AWS CloudFormation VPC stack specifications.. |
10.192.21.0/24 |
| PublicSubnet1CIDR |
The IP range (CIDR notation) for the public subnet in the first Availability Zone. For more information, see AWS CloudFormation VPC stack specifications. |
10.192.10.0/24 |
| PublicSubnet2CIDR |
The IP range (CIDR notation) for the public subnet in the second Availability Zone. For more information, see AWS CloudFormation VPC stack specifications. |
10.192.11.0/24 |
| VpcCIDR |
The IP range (CIDR notation) for this VPC being created. For more information, see AWS CloudFormation VPC stack specifications. |
10.192.0.0/16 |
The default values for the IP range (CIDR notation) fields refer to the AWS CloudFormation VPC stack specifications. You can make changes based on the requirements of your own network settings.
- Enter the parameter values from the preceding table.
- Review the details on the Capabilities section and select the check boxes confirming AWS CloudFormation might create IAM resources with custom names.
- Choose Create Stack.
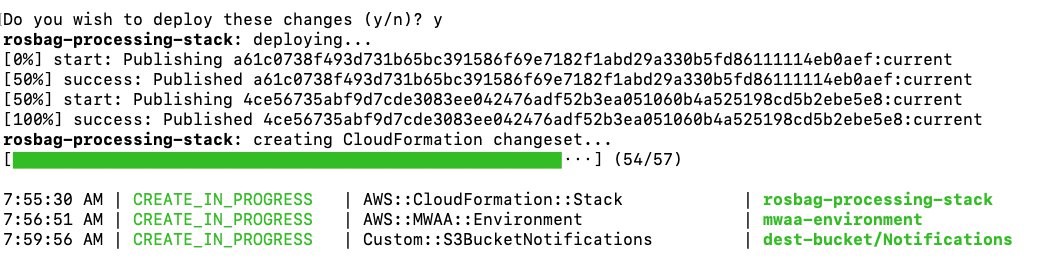
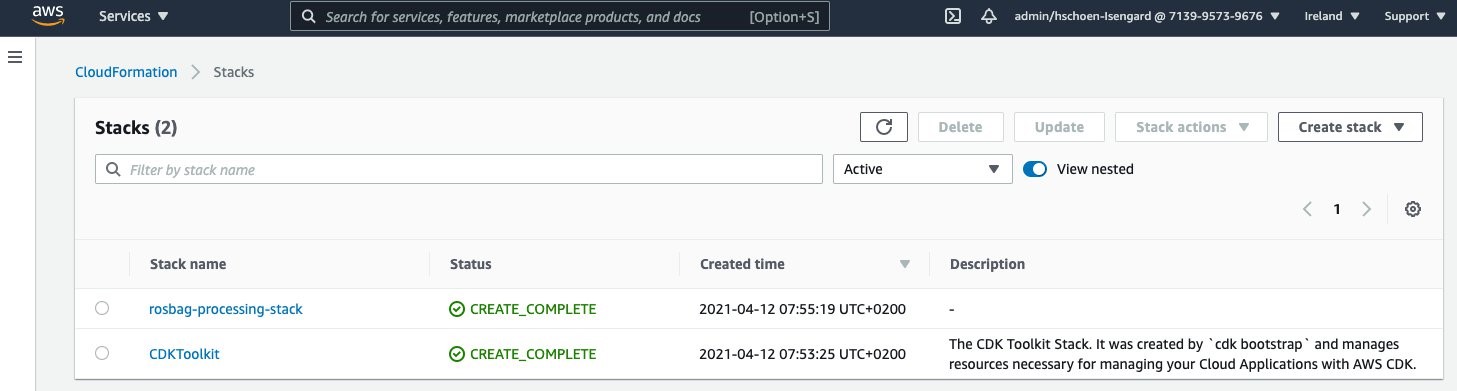
Stack creation takes a few minutes. After the CloudFormation stack is complete, on the Resources tab, you can find the resources being created in this CloudFormation stack. Now, we’re ready to run our example.
Orchestrating Hive analytics jobs on EMR Notebooks using Apache Airflow
The following diagram illustrates the workflow: As a user, you first need to create the DAG file that describes how to run the analytics jobs and upload it to the dags folder under the S3 bucket specified. The DAG can be triggered in Apache Airflow UI to orchestrate the job workflow, which includes creating an EMR cluster, waiting for the cluster to be ready, running Hive analytics jobs on EMR notebooks, uploading the results to Amazon S3, and cleaning up the cluster after the job is complete.

Input notebook file
Let’s take a look at the following input notebook file find_best_sellers.ipynb, which we use for our example.

find_best_sellers.ipynb is a Python script that does analysis on the public Amazon Customer Reviews Dataset. It generates the top 20 best sellers in a given list of categories over a given period of time and saves the results to the given S3 output location. For demonstration purpose only, we rank the seller simply by the sum of review star ratings from verified purchases.
The explanations of the default parameters in the first cell and each code block are included in the notebook itself.
The last line in the first cell, we have OUTPUT_LOCATION = "s3://airflow-emr-demo-us-west-2/query_output/” as a default value for the input parameter. Replace it with your own value for the output location. You can also supply a different value for this for this parameter in the Airflow Variables later.
DAG file
The DAG file test_dag.py is used to orchestrate our job flow via Apache Airflow. It performs the following tasks:
- Create an EMR cluster with one m5.xlarge primary and two m5.xlarge core nodes on release version 6.2.0 with Spark, Hive, Livy and JupyterEnterpriseGateway installed as applications.
- Wait until the cluster is up and ready.
- Run the notebook
find_best_sellers.ipynb on the EMR cluster created in Step 1.
- Wait until the notebook run is complete.
- Clean up the EMR cluster.
Here is the full source code of the DAG:
# Copyright Amazon.com, Inc. or its affiliates. All Rights Reserved.
# SPDX-License-Identifier: MIT-0
from airflow import DAG
from airflow.operators.python_operator import PythonOperator
from time import sleep
from datetime import datetime
import boto3, time
from builtins import range
from pprint import pprint
from airflow.operators.sensors import BaseSensorOperator
from airflow.contrib.operators.emr_create_job_flow_operator import EmrCreateJobFlowOperator
from airflow.contrib.operators.emr_terminate_job_flow_operator import EmrTerminateJobFlowOperator
from airflow.contrib.sensors.emr_job_flow_sensor import EmrJobFlowSensor
from airflow.contrib.sensors.emr_step_sensor import EmrStepSensor
from airflow.contrib.hooks.emr_hook import EmrHook
from airflow.contrib.sensors.emr_base_sensor import EmrBaseSensor
from airflow.models import Variable
from airflow.utils import apply_defaults
from airflow.utils.dates import days_ago

# Available categories:
#
# Apparel,Automotive,Baby,Beauty,Books,Camera,Digital_Ebook_Purchase,Digital_Music_Purchase,
# Digital_Software,Digital_Video_Download,Digital_Video_Games,Electronics,Furniture,Gift_Card,
# Grocery,Health_&_Personal_Care,Home,Home_Entertainment,Home_Improvement,Jewelry,Kitchen,
# Lawn_and_Garden,Luggage,Major_Appliances,Mobile_Apps,Mobile_Electronics,Music,Musical_Instruments,
# Office_Products,Outdoors,PC,Personal_Care_Appliances,Pet_Products,Shoes,Software,Sports,Tools,
# Toys,Video,Video_DVD,Video_Games,Watches,Wireless

# =============== VARIABLES ===============
NOTEBOOK_ID = Variable.get('NOTEBOOK_ID')
NOTEBOOK_FILE_NAME = Variable.get('NOTEBOOK_FILE_NAME')
CATEGORIES_CSV = Variable.get('CATEGORIES_CSV')
REGION = Variable.get('REGION')
SUBNET_ID = Variable.get('SUBNET_ID')
EMR_LOG_URI = Variable.get('EMR_LOG_URI')
OUTPUT_LOCATION = Variable.get('OUTPUT_LOCATION')
FROM_DATE = Variable.get('FROM_DATE')
TO_DATE = Variable.get('TO_DATE')
# =========================================

JOB_FLOW_OVERRIDES = {
    'Name': 'Test-Cluster',
    'ReleaseLabel': 'emr-6.2.0',
    'Applications': [{'Name':'Spark'}, {'Name':'Hive'}, {'Name':'Livy'}, {'Name':'JupyterEnterpriseGateway'}],
    'Configurations': [
          {
            "Classification": "hive-site",
            "Properties": {
                "hive.execution.engine": "spark"
            }
        }
    ],
    'Instances': {
        'Ec2SubnetId': SUBNET_ID,
        'InstanceGroups': [
            {
                'Name': 'Master node',
                'Market': 'ON_DEMAND',
                'InstanceRole': 'MASTER',
                'InstanceType': 'm5.xlarge',
                'InstanceCount': 1,
            },
            {
                'Name': 'Core node',
                'Market': 'ON_DEMAND',
                'InstanceRole': 'CORE',
                'InstanceType': 'm5.xlarge',
                'InstanceCount': 2,
            }
        ],
        'KeepJobFlowAliveWhenNoSteps': True,
        'TerminationProtected': False,
    },
    'JobFlowRole': 'EMR_EC2_DefaultRole',
    'ServiceRole': 'EMR_DefaultRole',
    'LogUri': EMR_LOG_URI
}


class CustomEmrJobFlowSensor(EmrJobFlowSensor):
    NON_TERMINAL_STATES = ['STARTING', 'BOOTSTRAPPING', 'TERMINATING']

class NotebookExecutionSensor(EmrBaseSensor):
    NON_TERMINAL_STATES = ['START_PENDING', 'STARTING', 'RUNNING', 'FINISHING', 'STOP_PENDING', 'STOPPING']
    FAILED_STATE = ['FAILING', 'FAILED']
    template_fields = ['notebook_execution_id']
    template_ext = ()
    @apply_defaults
    def __init__(self, notebook_execution_id, *args, **kwargs):
        super(NotebookExecutionSensor, self).__init__(*args, **kwargs)
        self.notebook_execution_id = notebook_execution_id
    def get_emr_response(self):
        emr = EmrHook(aws_conn_id=self.aws_conn_id).get_conn()
        self.log.info('Poking notebook execution %s', self.notebook_execution_id)
        return emr.describe_notebook_execution(NotebookExecutionId=self.notebook_execution_id)
    @staticmethod
    def state_from_response(response):
        return response['NotebookExecution']['Status']
    @staticmethod
    def failure_message_from_response(response):
        state_change_reason = response['NotebookExecution']['LastStateChangeReason']
        if state_change_reason:
            return 'Execution failed with reason: ' + state_change_reason
        return None

def start_execution(**context):
    ti = context['task_instance']
    cluster_id = ti.xcom_pull(key='return_value', task_ids='create_cluster_task')
    print("Starting an execution using cluster: " + cluster_id)
    # generate a JSON key-pair of <String : String Array>, e.g.
    # "\"CATEGORIES\": [\"Apparel\", \"Automotive\", \"Baby\", \"Books\"]"
    categories_escaped_quotes = ""
    for category in CATEGORIES_CSV.split(','):
        categories_escaped_quotes = categories_escaped_quotes + "\"" + category + "\","
    categories_escaped_quotes = categories_escaped_quotes[:-1]
    categories_parameter = "\"CATEGORIES\" : [" + categories_escaped_quotes + "]"

    output_location_parameter = "\"OUTPUT_LOCATION\": \"" + OUTPUT_LOCATION + "\""
    from_date_parameter = "\"FROM_DATE\": \"" + FROM_DATE + "\""
    to_date_parameter = "\"TO_DATE\": \"" + TO_DATE + "\""
    parameters = f"{{ {categories_parameter}, {output_location_parameter}, {from_date_parameter}, {to_date_parameter} }}"
    emr = boto3.client('emr', region_name=REGION)
    start_resp = emr.start_notebook_execution(
        EditorId=NOTEBOOK_ID,
        RelativePath=NOTEBOOK_FILE_NAME,
        ExecutionEngine={'Id': cluster_id, 'Type': 'EMR'},
        NotebookParams=parameters,
        ServiceRole='EMR_Notebooks_DefaultRole'
    )
    execution_id = start_resp['NotebookExecutionId']
    print("Started an execution: " + execution_id)
    return execution_id


with DAG('test_dag', description='test dag', schedule_interval='0 * * * *', start_date=datetime(2020,3,30), catchup=False) as dag:
    create_cluster = EmrCreateJobFlowOperator(
        task_id='create_cluster_task',
        job_flow_overrides=JOB_FLOW_OVERRIDES,
        aws_conn_id='aws_default',
        emr_conn_id='emr_default',
    )
    cluster_sensor = CustomEmrJobFlowSensor(
        task_id='check_cluster_task',
        job_flow_id="{{ task_instance.xcom_pull(task_ids='create_cluster_task', key='return_value') }}",
        aws_conn_id='aws_default',
    )
    start_execution = PythonOperator(
        task_id='start_execution_task',
        python_callable=start_execution,
        provide_context=True
    )
    execution_sensor = NotebookExecutionSensor(
        task_id='check_execution_task',
        notebook_execution_id="{{ task_instance.xcom_pull(task_ids='start_execution_task', key='return_value') }}",
        aws_conn_id='aws_default',
    )

    cluster_remover = EmrTerminateJobFlowOperator(
        task_id='terminate_cluster',
        job_flow_id="{{ task_instance.xcom_pull(task_ids='create_cluster_task', key='return_value') }}",
        aws_conn_id='aws_default',
    )

    create_cluster >> cluster_sensor >> start_execution >> execution_sensor >> cluster_remover
The very last line of the DAG code explains how the tasks are linked in the orchestration workflow. It’s overloading the right shift >> operator to create a dependency, meaning that the task on the left should be run first, and the output passed to the task on the right.
Instead of hard-coding the variables in the DAG code, we choose to supply these variables by importing a JSON file in the Airflow UI before actually running the DAG. This way, we can also update the variables without having to update the DAG code, which requires updating the DAG file in Amazon S3. We walk you through how to do so in the later steps. You can see the lines for VARIABLES that we repeated:
# =============== VARIABLES ===============
NOTEBOOK_ID = Variable.get('NOTEBOOK_ID')
NOTEBOOK_FILE_NAME = Variable.get('NOTEBOOK_FILE_NAME')
CATEGORIES_CSV = Variable.get('CATEGORIES_CSV')
REGION = Variable.get('REGION')
SUBNET_ID = Variable.get('SUBNET_ID')
EMR_LOG_URI = Variable.get('EMR_LOG_URI')
OUTPUT_LOCATION = Variable.get('OUTPUT_LOCATION')
FROM_DATE = Variable.get('FROM_DATE')
TO_DATE = Variable.get('TO_DATE')
We create a JSON formatted file named variables.json for our example. See the following code:
{
    "REGION": "us-west-2",
    "SUBNET_ID": "<subnet-********>",
    "EMR_LOG_URI": "s3://<S3 path for EMR logs>/",
    "NOTEBOOK_ID": "<e-*************************>",
    "NOTEBOOK_FILE_NAME": "find_best_sellers.ipynb",
    "CATEGORIES_CSV": "Apparel,Automotive,Baby,Beauty,Books",
    "FROM_DATE": "2015-08-25",
    "TO_DATE": "2015-08-31",
    "OUTPUT_LOCATION": "s3://<S3 path for query output>/"
}
To use this JSON code, you need to replace all the variable values (subnet and S3 paths) with the actual values.
Accessing Apache Airflow UI and running the workflow
To run the workflow, complete the following steps:
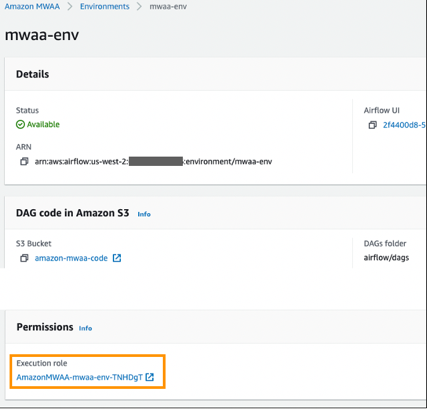
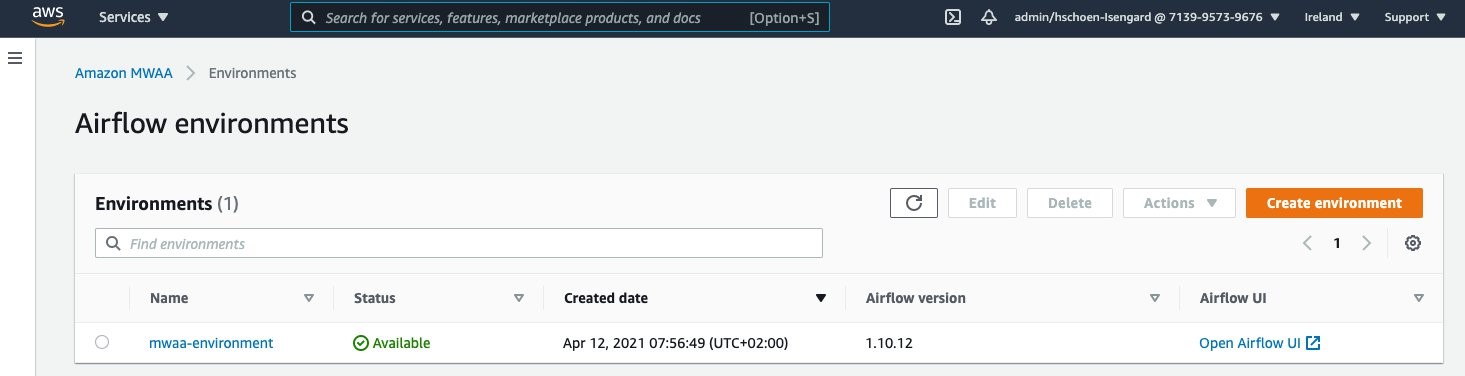
- On the Amazon MWAA console, find the new environment
mwaa-emr-blog-demo we created earlier with the CloudFormation template.

- Choose Open Airflow UI.
- Log in as an authenticated user.

Next, we import the JSON file for the variables into Airflow UI.
As we mentioned earlier, we want to supply the variable values for our DAG definition later upon triggering the DAG in Airflow UI instead of hard-coding the values.
- On the Admin menu, choose Variables.
- Choose Browse.
- Choose json.
- Choose Import Variables.

For more information about importing variables, see Variables.
- Run the following command in the same directory as where file
test_dag.py is to upload the DAG file to the dags folder under the S3 bucket specified for the Airflow environment. Replace <your_airflow_bucket_name> with the S3 bucket name that you created as a prerequisite:
aws s3 cp test_dag.py s3://<your_airflow_bucket_name>/dags/
test_dag.py should automatically appear in the Airflow UI.
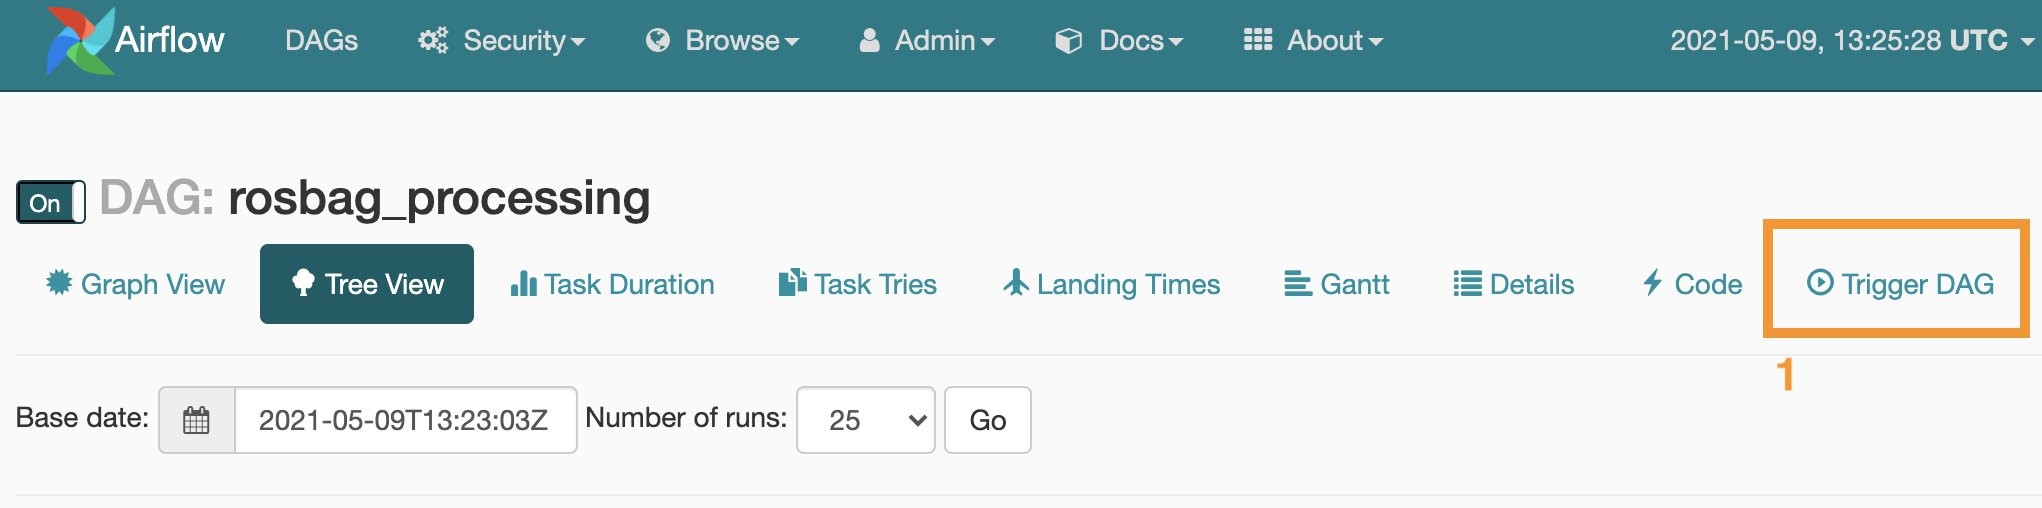
- Trigger the DAG by turning it to On

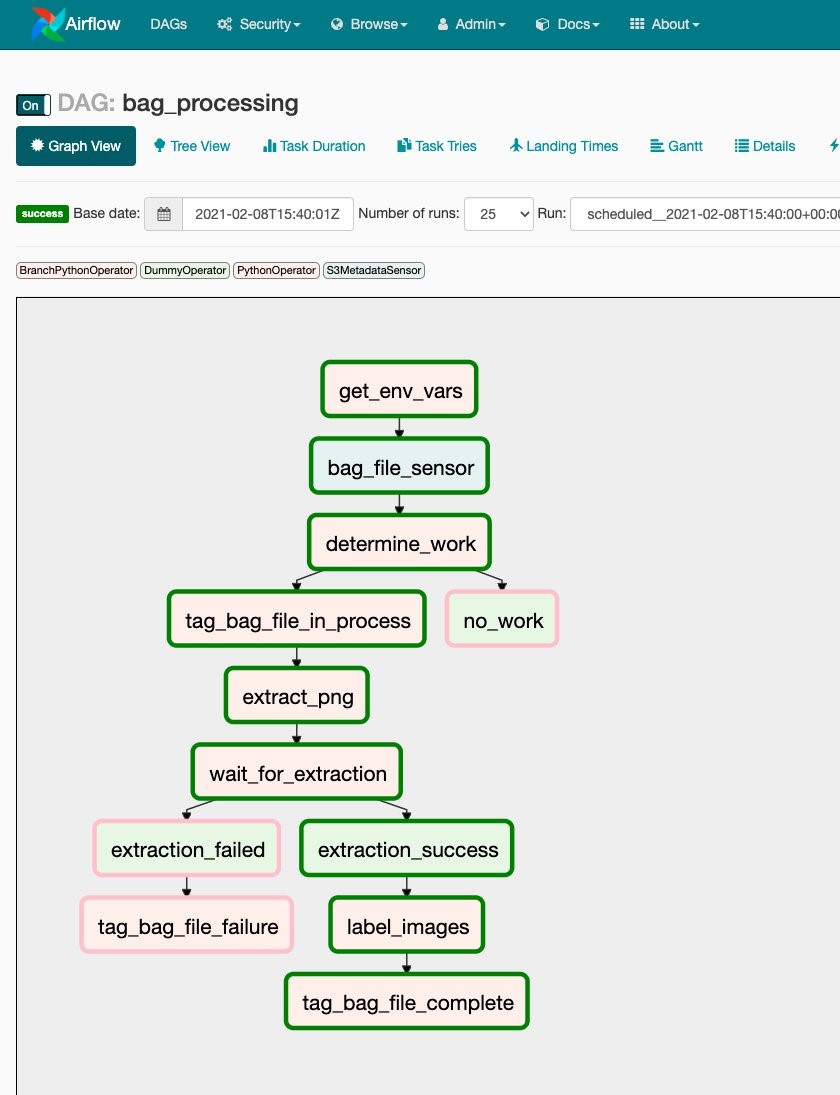
- Choose test_dag to go to the detail page for the DAG.
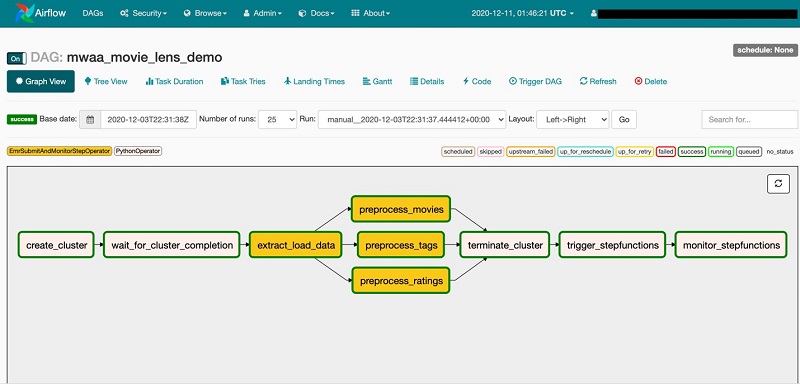
On the Graph View tab, we can see the whole workflow of our pipeline and each individual task as defined in our DAG code.

- Optionally, to trigger the DAG, choose Trigger DAG and add the following JSON formatted configuration before activate the DAG.

You now get an email when failure happens on any of the tasks. You can also configure to get email notification when retry happens as well.
- On the Amazon EMR console, find the EMR cluster created by the
create_cluster_task definition.

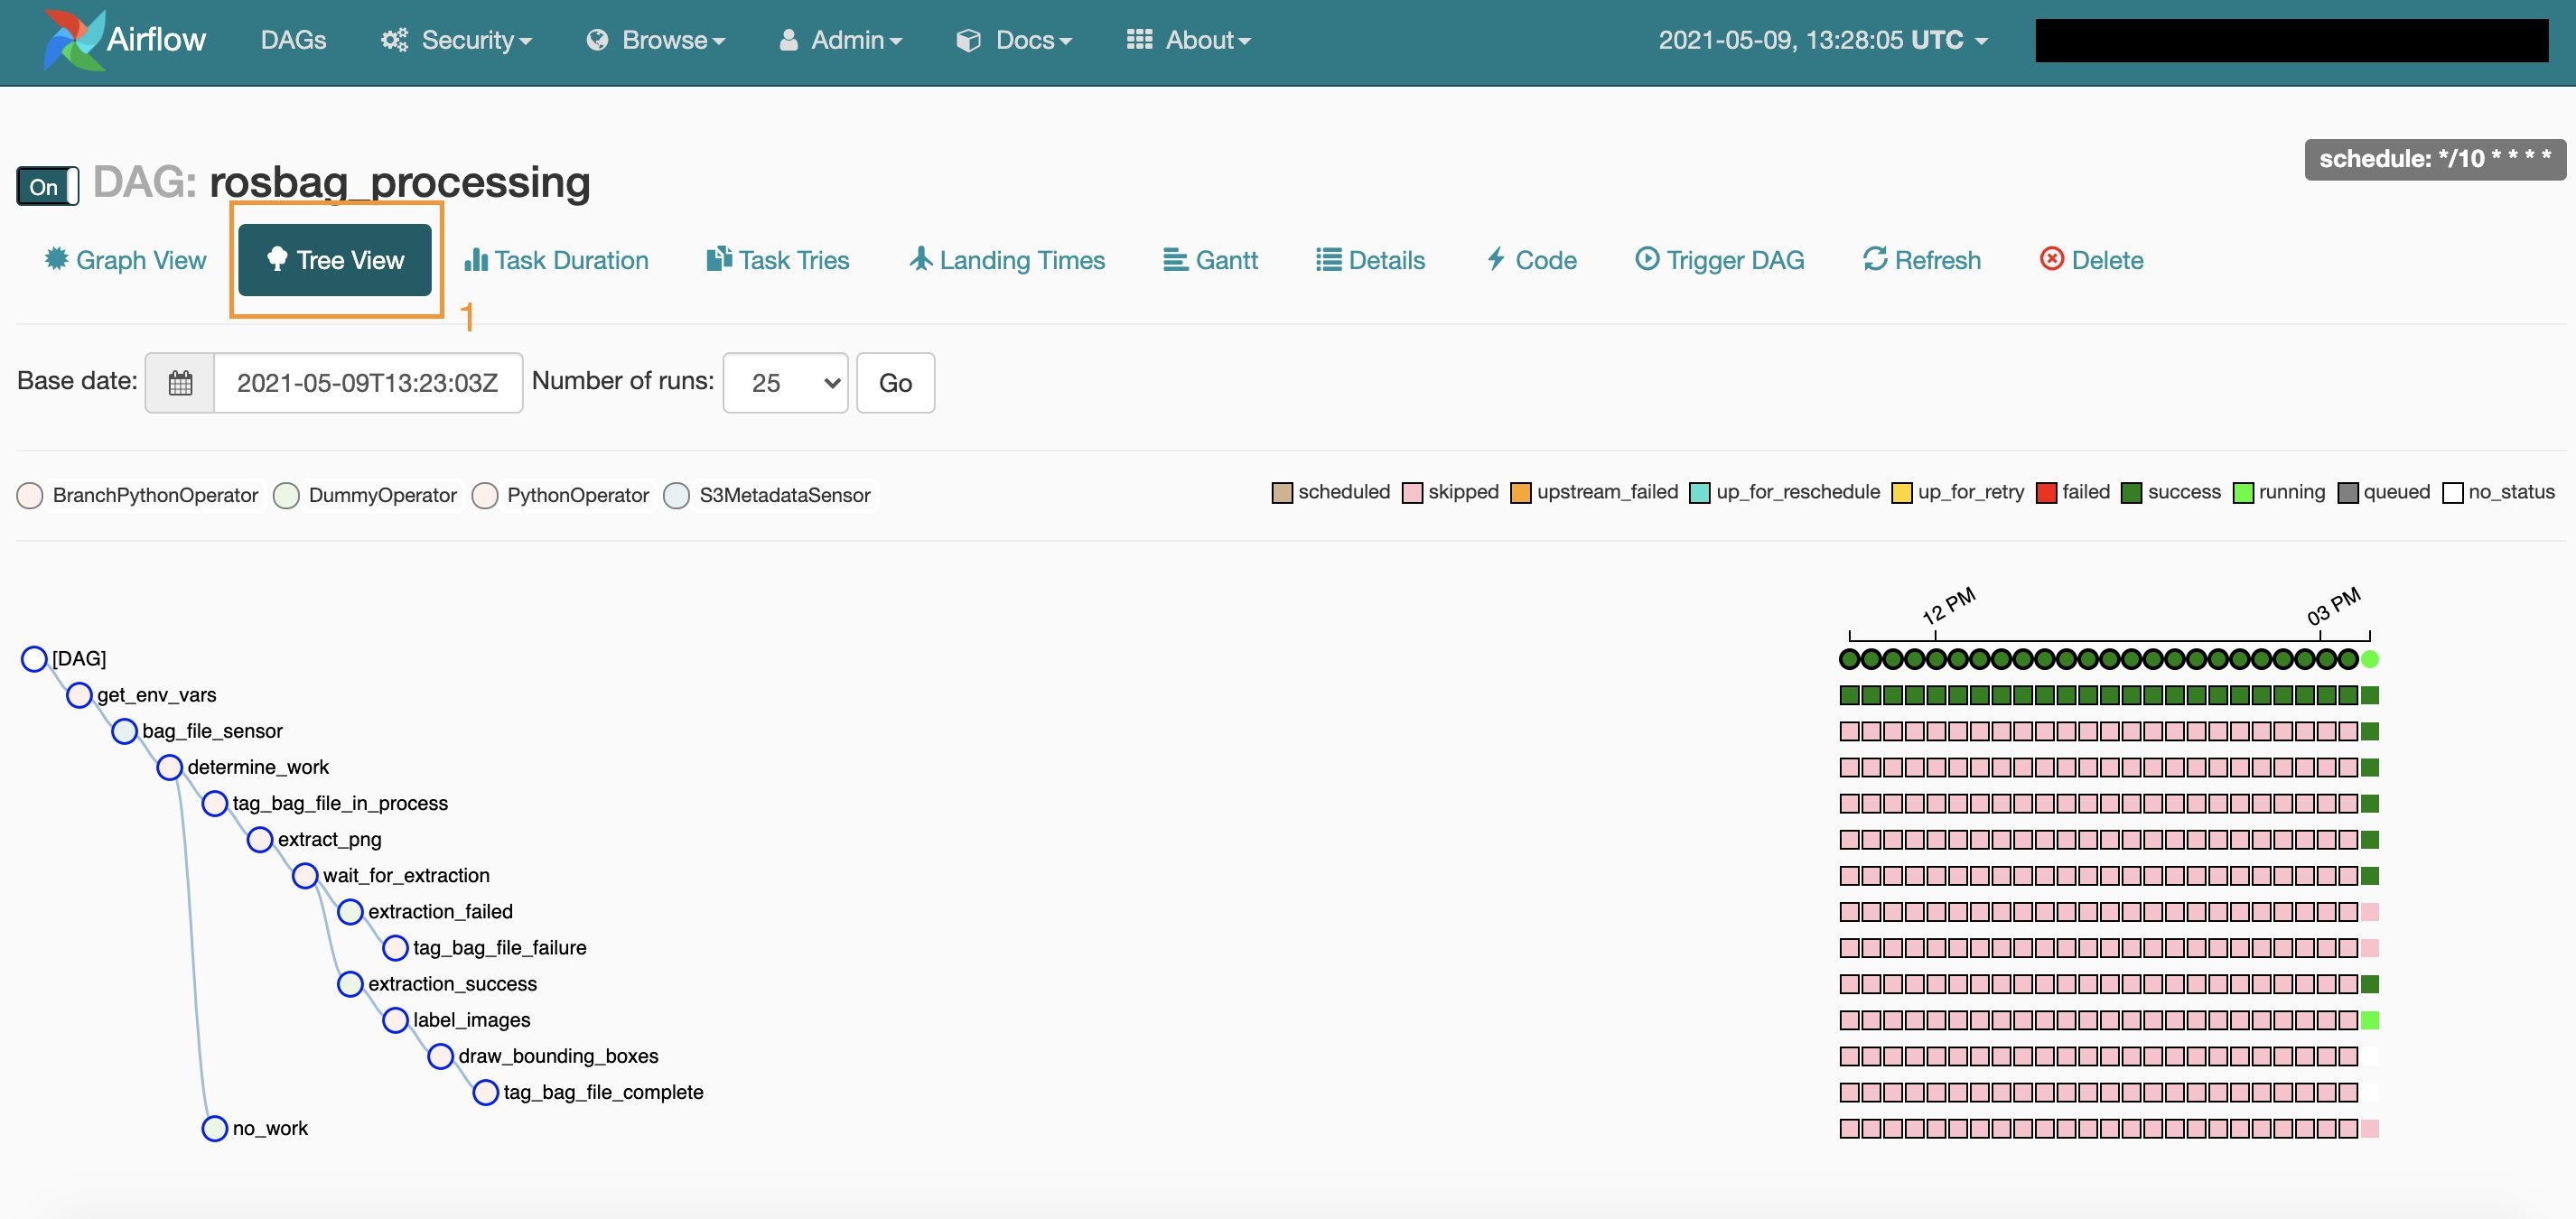
- On the Airflow UI, you can switch tabs to check the status of the workflow tasks.
After a few minutes, we can see on the Tree View tab that the workflow is complete and all the tasks are successful.

On the Gantt tab, we can see the time distribution of all the tasks of our workflow.

As specified in our DAG definition, the EMR cluster is stopped when the workflow is complete.
Because we use the cron expression 0 * * * * as the scheduled running interval for our workflow, if the triggered status of the DAG is ON, it runs every hour. You need to switch the status to OFF if you don’t want it to run again.
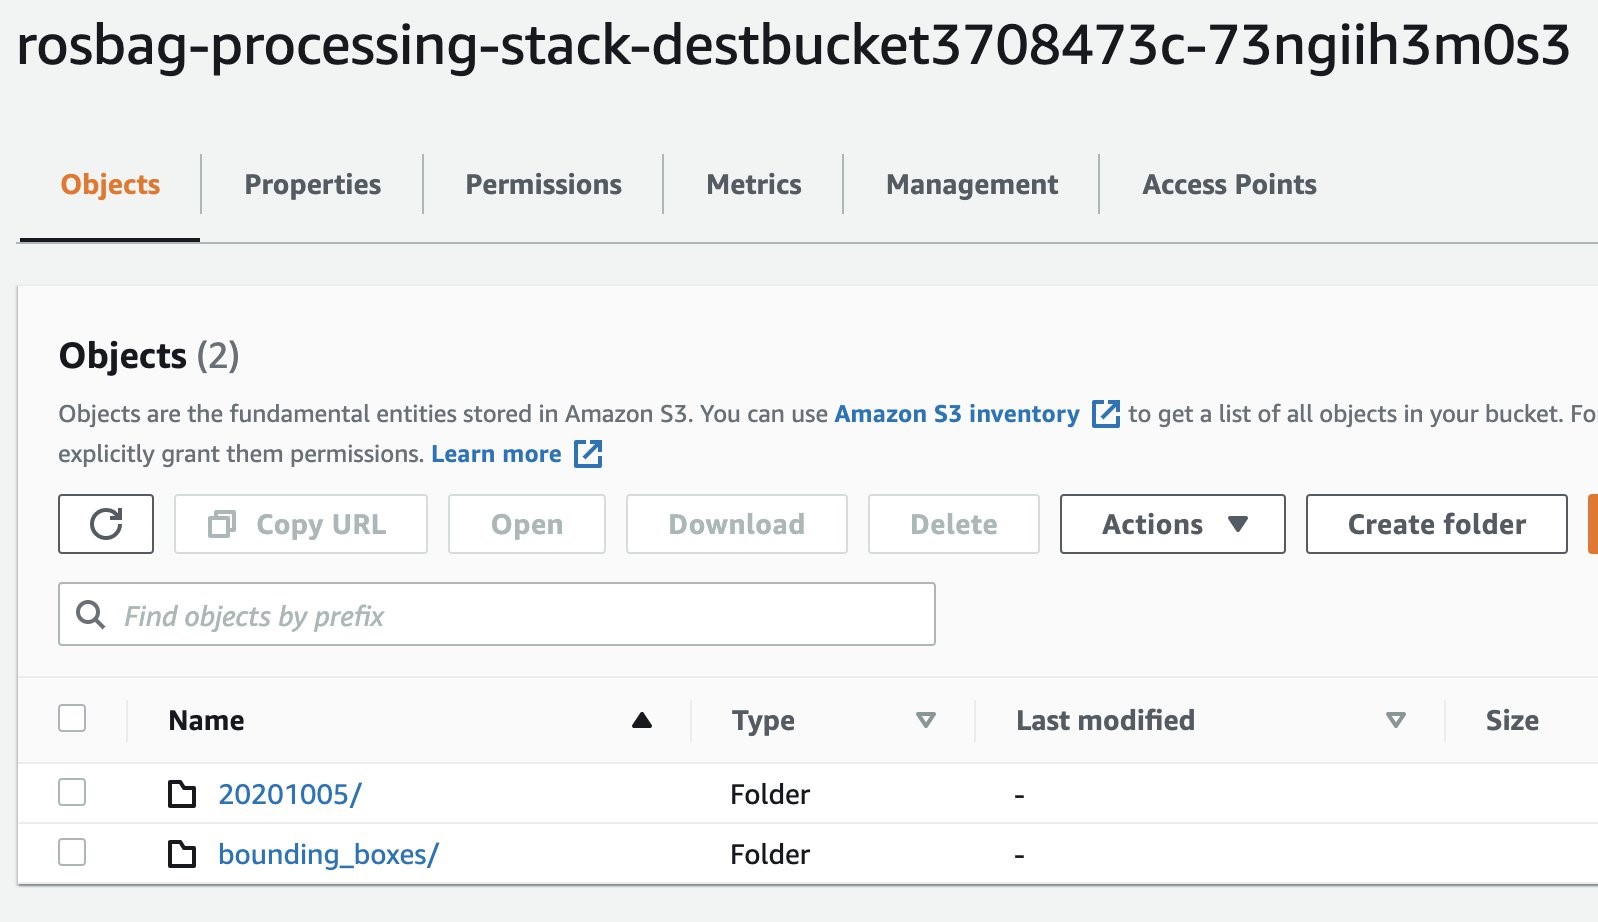
- On the Amazon S3 console, view the result of our notebook job in the S3 folder.

For example, the following screenshot is the output for the Books category that we provided as a value in the CATEGORIES parameter. As we can see, Go Set a Watchman: A Novel is the best Books seller from the week of 8-25-2015 to 8-31-2015.

Cleaning up
To avoid ongoing charges, delete the CloudFormation stack and any files in Amazon S3 that were created by running the examples in this post.
Conclusion
This post showed how to use the Amazon EMR Notebooks API and use orchestration services such as Amazon MWAA to build ETL pipelines. It demonstrated how set up a secured Amazon MWAA environment using a CloudFormation template and run a sample workflow with Apache Airflow.
If you want to learn how to run Amazon EMR applications such as PySpark with Amazon MWAA, see Running Spark Jobs on Amazon EMR with Apache Airflow.
About the Authors
 Fei Lang is a senior big data architect at Amazon Web Services. She is passionate about building the right big data solution for customers. In her spare time, she enjoys the scenery of the Pacific Northwest, going for a swim, and spending time with her family.
 Ray Liu is a software development engineer at AWS. Besides work, he enjoys traveling and spending time with family.


 Kishan Desai is a Data Engineer at Amazon Studios building a data platform to support the content creation process. He is passionate about building flexible and modular systems on AWS using serverless paradigms. Outside of work, Kishan enjoys learning new technologies, watching sports, experiencing SoCal’s great food, and spending quality time with friends and family.
 Virendhar (Viru) Sivaraman is a strategic Big Data & Analytics Architect with Amazon Web Services. He is passionate about building scalable big data and analytics solutions in the cloud. Besides work, he enjoys spending time with family, hiking & mountain biking.
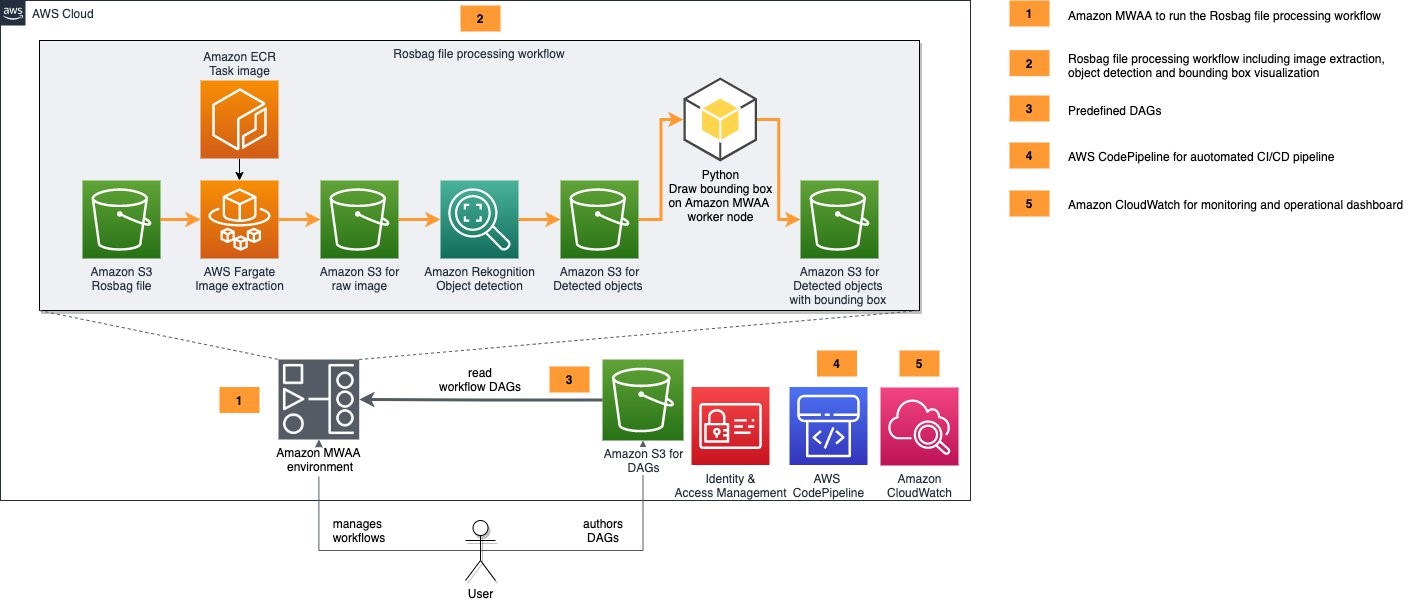


 Fei Lang is a senior big data architect at Amazon Web Services. She is passionate about building the right big data solution for customers. In her spare time, she enjoys the scenery of the Pacific Northwest, going for a swim, and spending time with her family.
 Ray Liu is a software development engineer at AWS. Besides work, he enjoys traveling and spending time with family.


 Dipankar Ghosal is a Sr Data Architect at Amazon Web Services and is based out of Minneapolis, MN. He has a focus in analytics and enjoys helping customers solve their unique use cases. When he’s not working, he loves going hiking with his wife and daughter.