Tag Archives: Backing Up

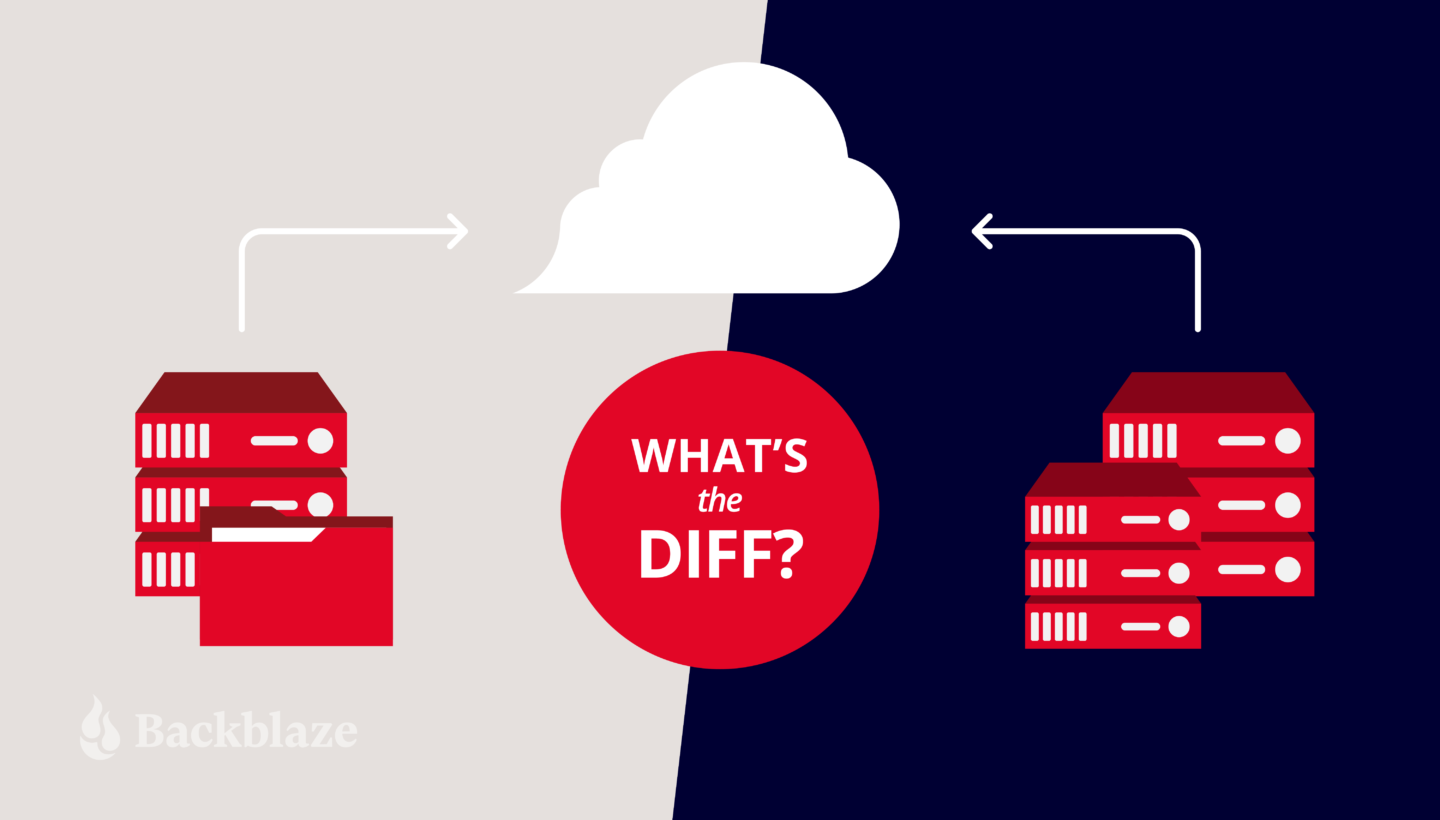
What’s the Diff: Image-Based Backup vs. File-Based Backup

Post Syndicated from Kari Rivas original https://www.backblaze.com/blog/whats-the-diff-image-based-backup-vs-file-based-backup/

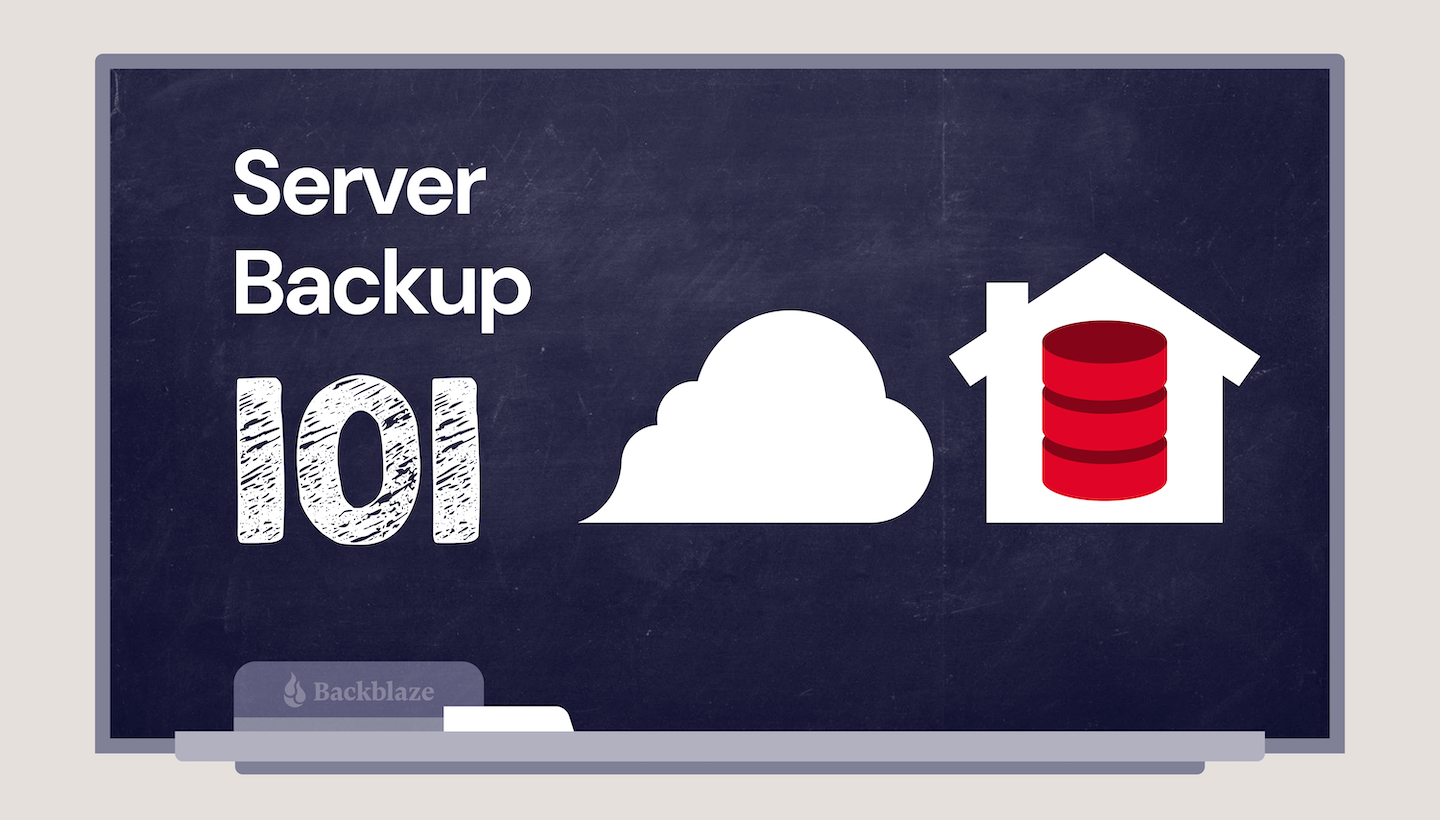
When you’re planning your backup strategy, one important decision to make is whether to use image-based or file-based backups. Both methods have pros and cons and both are useful in different situations. Think of it like packing for a trip: Sometimes you need to take everything plus the kitchen sink (image-based), and sometimes you only need the essentials (file-based). It’s not a perfect metaphor, but it will make more sense once you understand the differences between these two backup types. Let’s dig in.

The TLDR: What’s the Difference Between Image-Based and File-Based Backups?

The short answer is this: An image-based backup (also known as a bare metal backup, which is a deeply cool name) is a backup of an entire machine or server, including the operating system (OS) and applications as well as all of the files. A file-based backup only includes the files. We’ll dig deeper into the implications of each below, but that should give you a good base of knowledge to start.

First, Some Basic Backup Best Practices

In addition to understanding the difference between file-based and image-based backups and when to use them, there are a few key elements of a backup strategy you should have in your playbook:

Want a Deeper Dive?

Check out “Server Backup: A Comprehensive Guide to Protecting The Data on Your Servers” for an in-depth look at creating a bulletproof backup strategy.

➔ Download the Guide

Why Is Your Backup Configuration Important?

Properly configuring your backups, including when to use file-based versus image-based backups, is important for a couple reasons. First, it enables you to optimize your cloud storage usage and costs. Image-based backups are typically larger than file-based backups, so they’ll cost more to store. File-based backups are smaller and cost less to store, but they’re also not as robust. Finding the right mix is important as you’re planning your cloud storage strategy.

It’s also important to properly configure your backups so that you can recover more effectively in the case of a disaster. Restoring from an image-based backup will allow you to bring your entire operation back online. Understanding how each type of backup works will help you decide which to use when (and when you should use both).

What Is a File-Based Backup?

A file-based backup, sometimes called a file backup or a file-level backup, is a backup of a single file, multiple files, or even all the files on your system. The biggest distinction from an image-based backup is that it does not include a backup of the OS.

When configuring a file-based backup, you can choose which files you want to back up. For instance, you might choose to back up only certain file types, like Word documents or databases. Or you might choose to back up a particular set of files for one department, such as accounting files.

To understand when to use a file-based backup, it helps to know the pros and cons. We’ll dig into those next.

Advantages of File-Based Backup

File-based backups are simple and straightforward—you just need to back up files versus the entire system. Advantages of this type of backup include:

  • More control over what gets backed up. You can choose specific files or folders that get backed up or sent to cloud storage.
  • More control over what you recover. You can be more granular when it comes to choosing which files you need to restore should you need to.
  • Less storage utilization and faster backups. Since file-based backups are typically smaller in size than image-based, they take up less storage space and can be faster to run.
  • Ability to customize. Some backup applications allow you to set customized backup cadences for different types of files. For example, you could back up accounting files daily, but other project files weekly. Or, you could back up all files on a specific schedule.

Disadvantages of File-Based Backup

There are two main disadvantages of file-based backups:

  • The files are saved, but not the applications that created them. If you need to restore files to a different machine, you need to make sure that machine has all of the appropriate applications to read and use the files.
  • File-based backups are very limited in a disaster recovery scenario. If you need to restore an entire environment after a natural disaster or a ransomware attack, you would need to recover all of your files, then spend additional time reconstructing your OS, reinstalling all of your applications, reconfiguring them, etc.

What Is an Image-Based Backup?

An image-based backup, also known as a bare metal backup, disk backup, disk image backup, or mirror backup, allows you to back up all of the volumes on your server, creating a copy of your whole system.

As opposed to a file-based backup, an image-based backup backs up your entire OS, including settings, applications, configurations, and executable programs.

An image-based backup is more robust, which makes it larger. That comes with some advantages and disadvantages as well.

Advantages of Image-Based Backup

Image-based backups are comprehensive. Going back to our packing metaphor, this is the kitchen sink method. Advantages of this type of backup include:

  • The ability to restore a server in its entirety. This is great when you need to protect your entire server, including the OS.
  • The flexibility to restore individual files or the entire system. With an image-based backup, you get the same restore capabilities as a file-based backup, but with the added option to restore the entire disk if needed.
  • Faster recoveries. If you need to meet specific recovery time objectives (RTOs), image-based backups can save you time. You don’t need to reinstall and patch the OS.

Disadvantages of Image-Based Backup

There are a few disadvantages of image-based backups, including:

  • More time-consuming and bandwidth-hogging during backup. Since you’re backing up everything, image-based backups are going to take longer and use more internet bandwidth when you’re saving them to cloud storage. Backing up after work hours is typically recommended.
  • More expensive to store. Image-based backups take up more cloud storage space and hence cost more to store.
  • Could be overkill for day-to-day recovery needs. When you only need to recover a file that’s accidentally been deleted or corrupted, you don’t need a full image-based backup.

Image-Based vs. File-Based: How to Choose?

Now that you know the difference between image-based and file-based backups, how do you know when to use each type? Here are a few basic guidelines.

Choose a file-based backup for the following scenarios:

  1. If you have a virtualized environment. When you can reimage a new OS quickly in a virtualized environment, you may not want or need to back up the full OS.
  2. To back up employee workstations. Employees will most often need to restore individual files, and a file-based backup will cover this use case. If you ever needed to do a full restore, chances are good that you can just reinstall the OS easily.

Choose an image-based backup for the following scenarios:

  1. For servers with mission-critical data. If you can’t function without it, you should do a full image-based backup.
  2. For anything that would take a long time to configure. In a recovery situation, you don’t want to be spending time reconfiguring settings and reinstalling applications.

Why Not Use Both? Optimizing for Cost and Utility

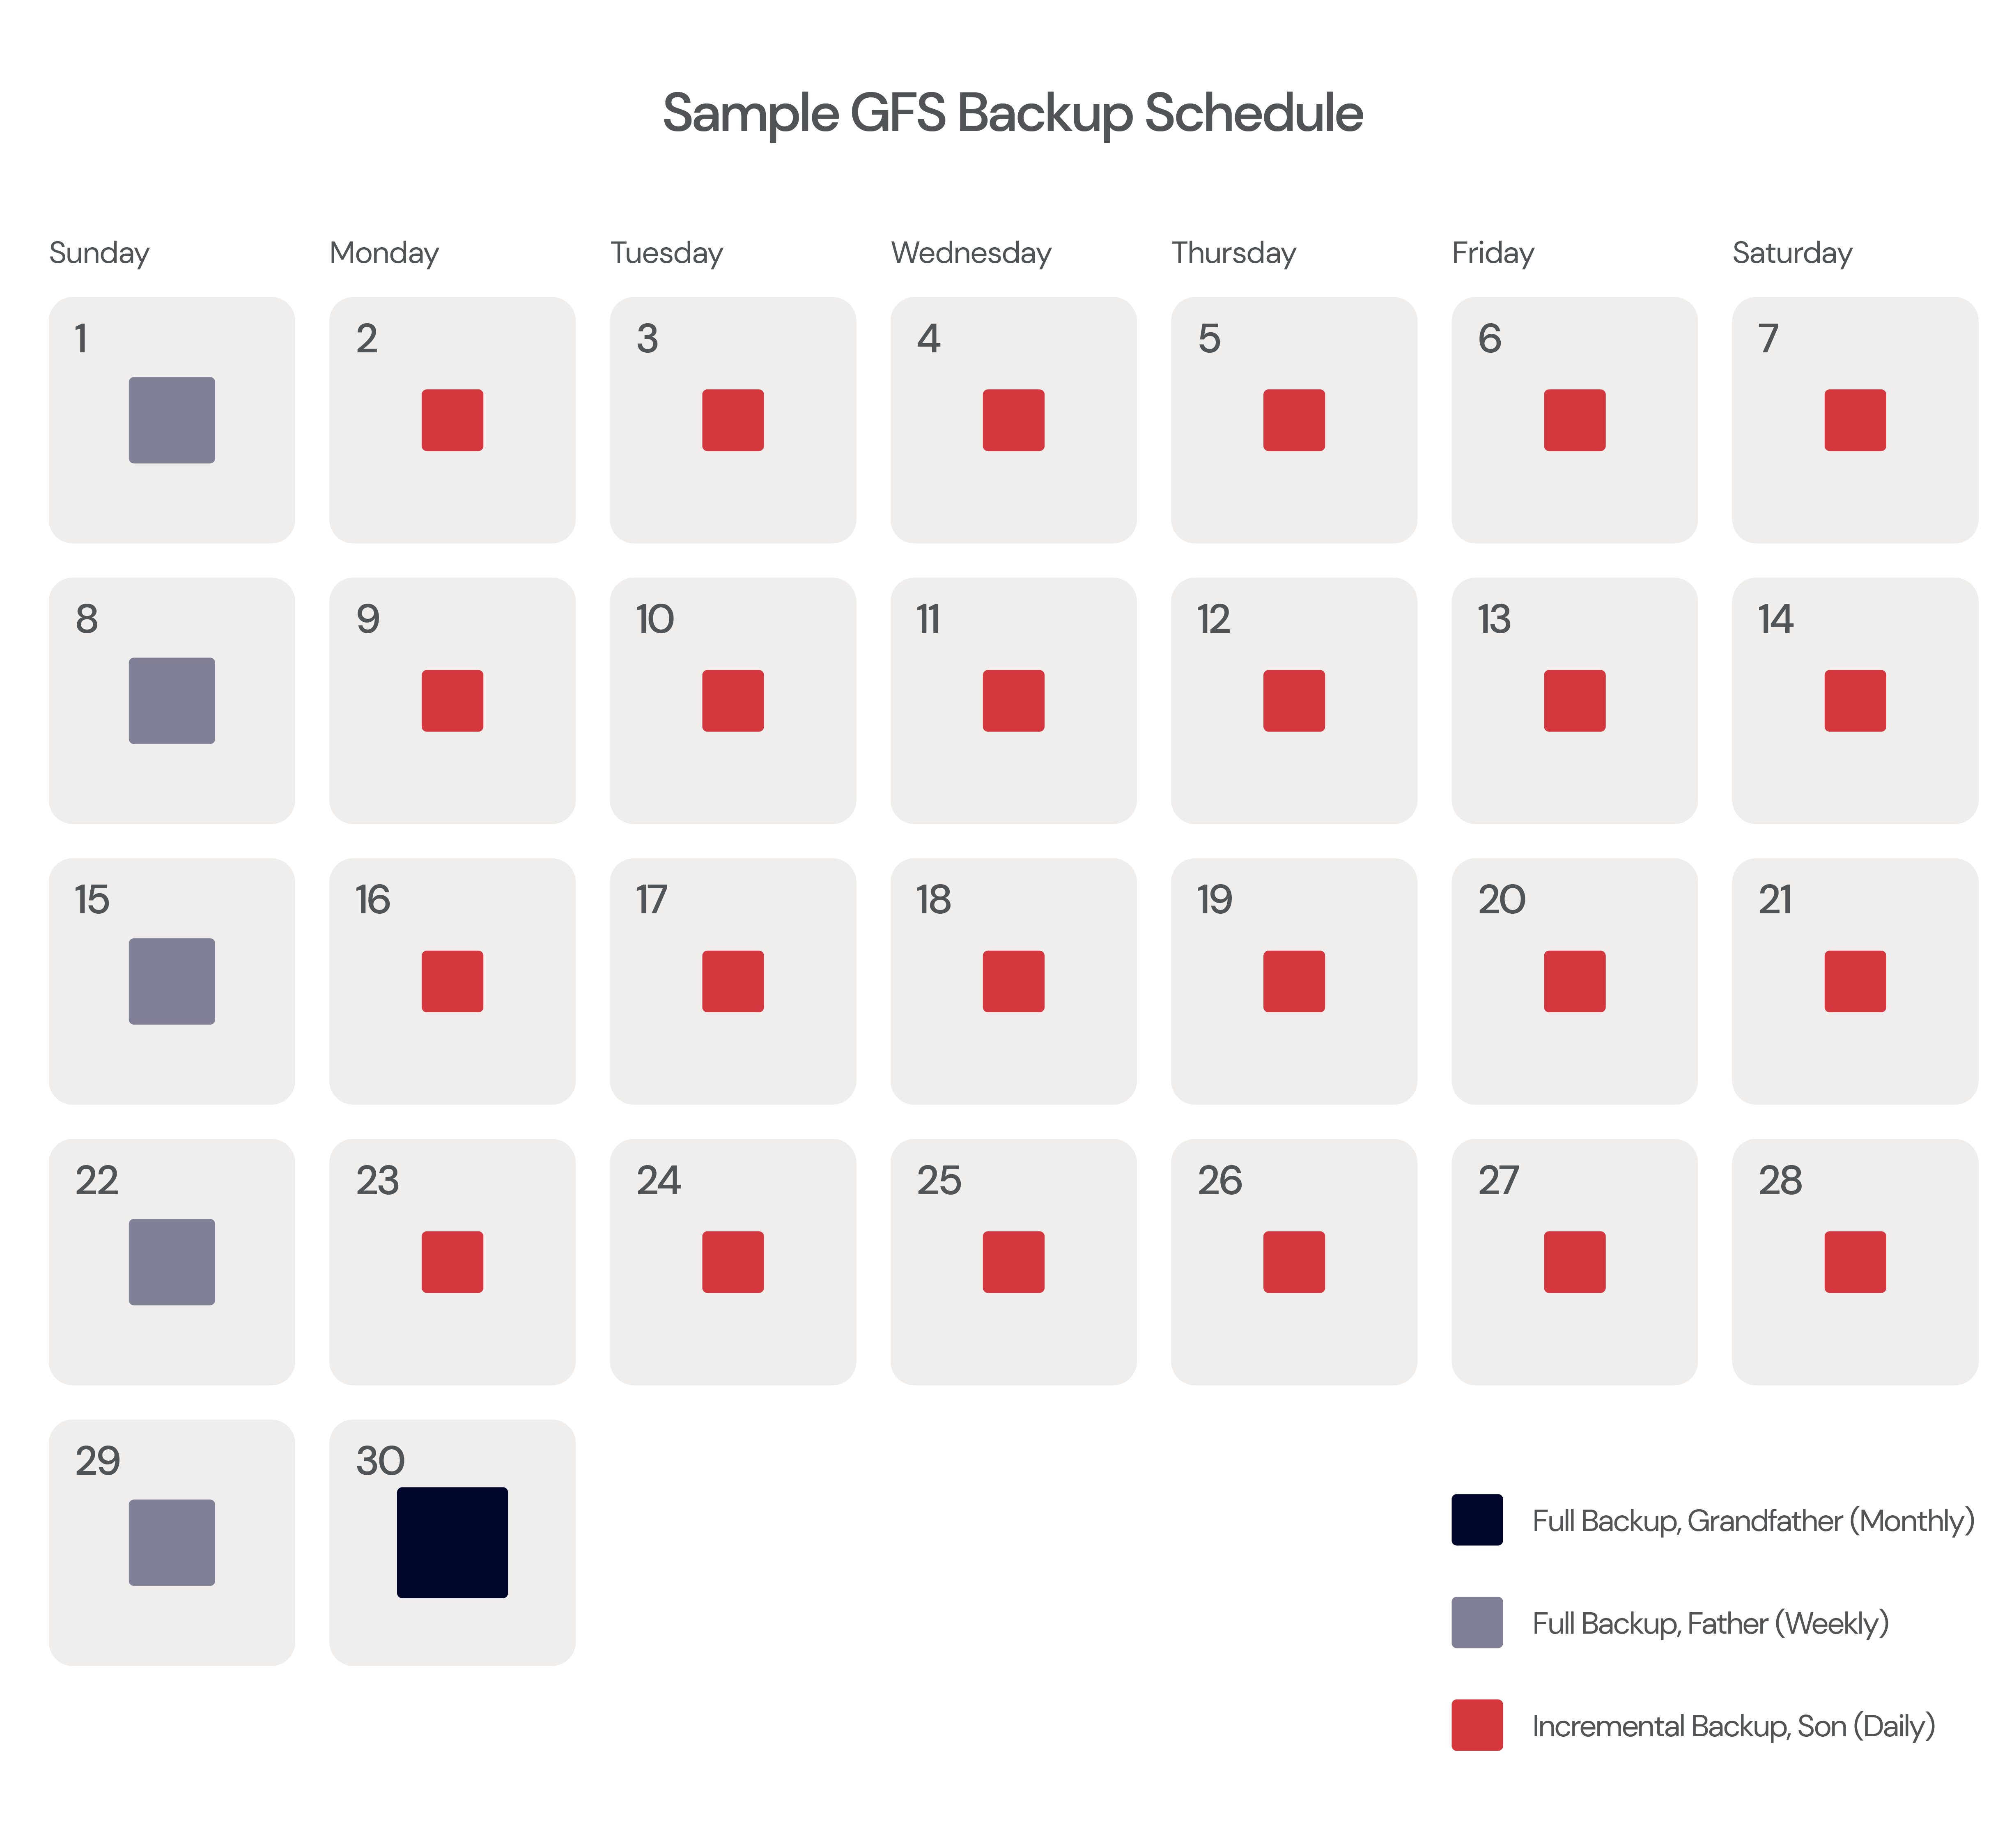
Rather than choosing between file-based or image-based, you could design a backup strategy that employs both. This allows you to manage your storage usage and costs while maximizing your ability to recover quickly. For example, you could consider doing an image-based backup monthly and file-based backups more frequently. Or you could do an image-based backup of your mission critical servers and file-based backups of employee workstations. The right combination will help you to keep your costs low while maintaining the fidelity of your environment in a disaster scenario.

Storing Backups in the Cloud

Whether you choose image-based or file-based backups, you need somewhere safe to store them. According to the 3-2-1 backup strategy, one of those copies should live off-site in a geographically distant location, and cloud storage is a great fit. Check out server backup solutions from Backblaze B2 to learn more about storing your image-based and file-based backups in the cloud.

The post What’s the Diff: Image-Based Backup vs. File-Based Backup appeared first on Backblaze Blog | Cloud Storage & Cloud Backup.

The Beginner’s Guide to Computer Backup with Backblaze

Post Syndicated from Stephanie Doyle original https://www.backblaze.com/blog/beginner-guide-to-computer-backup/

Wouldn’t it be great if computers never crashed? If laptops never got lost? If that cup of coffee never spilled across your keyboard? As much as we’d like to believe that our computers will always work and the data on them will always be safe and accessible, accidents happen. Regardless of how you’re using your computer, you’re storing data that needs to be backed up.

Whether you’ve accidentally deleted a synced file, have a social media presence that’s just too valuable to lose, are going back to school, or you want to make sure you’re protected from cyberattacks, having your data backed up means that your important information isn’t lost forever. So, let’s talk about how to get the most out of your Backblaze account.

1. Set Yourself Up for Success

Backblaze backs up all the files on your computer, including documents, photos, music, movies, and more. When you’re creating your account for the first time, that can take some time—longer than you might think depending on how much data you have and how fast your internet connection is. (If you think it will take a really long time, you should probably be considering Backblaze B2 and our Universal Data Migration solutions). It’s important that your computer is on and awake during that time period, so we suggest that you turn off your computer’s sleep mode during your initial backup.

2. Keep Your Account Secure

We’ve talked before about how to keep your passwords safe, but we just want to make sure it’s clear how important that is for your backups. When backups are your last line of defense—your only option for recovery—then it’s imperative that you use unique passwords and practice a 3-2-1 backup strategy.

Like Librarians, We Work Quietly

Backblaze works quietly in the background while you go about your normal computer life. Note that we’ll only backup a document that’s not actively open. So, make sure to close out your projects when you’re done for the night (or day).

3. Bring Your Drive to the Table

If you have external drives, it’s essential that you connect them to your computer to be backed up to your Backblaze account. In order to give us enough time to scan the whole drive, make sure that it’s plugged into your primary computer for at least four hours in a row, once every two weeks. Here’s some more information on using external hard drives with Backblaze.

4. Check In

Once a week, it’s a great idea to check that your backups are working properly. If they’re not, make sure that you have the most recent version of Backblaze, or you can always contact our Support Team to make sure everything is running smoothly.

And, once a month, it’s a good idea to try to restore files from your online account. This is especially important if you have external devices. It’s always good practice to double check that things are running well, but it also gives you an opportunity to make sure you’ve backed up your external drive successfully.

5. On Restoration: The Sooner, The Better

When you’ve lost data, make sure you restore your data ASAP. If you’re ever worried you may need data continuity, remember that you can easily enable Extended Version History for $2/month. That will give you the ability to restore any version of a file for one year—or forever—depending on what you need.

Remember that Backblaze offers lots of file restoration options. Of course, you can use our website, but you can also restore from your mobile device or even order a USB. (We know; old school.)

Backup and Beyond

We are big advocates of backing up, of course. Hey, it’s for good reason. We want our tech to be accessible to all types of users. We love when you tell your friends about us, or you can use us to help your family and friends. If we’re missing any good tips or you have questions for us, feel free to comment below, say hi on socials, or contact Support.

The post The Beginner’s Guide to Computer Backup with Backblaze appeared first on Backblaze Blog | Cloud Storage & Cloud Backup.
Let’s Not Go Phishing Today: Tips for Home Computer Users

Post Syndicated from original https://www.backblaze.com/blog/lets-not-go-phishing-today-tips-for-home-computer-users/

Every so often, a family member or friend will ask me if an email they received is a phishing email. That’s part of my job as the unofficial family tech person. Email phishing and its cousins vishing (voice phishing) and smishing (text phishing), are still a serious problem for the average home computer user. While businesses are slowly implementing phishing detection tools—and, more importantly, user training—to help tackle the problem, home computer users are, for the most part, left to fend for themselves.

Our goal in this post is to provide a few tips and tricks for those oft-forgotten home computer users—your old-school neighbor, your unassuming grandma, or your friend who’s just not that tech savvy—in their effort to use their computer without losing their life savings by clicking on the wrong link.

You can scroll past the first few sections to the phishing tips we’ve prepared so that you can use to better understand and identify a phishing email. Or, continue reading to learn more about the phishing problem, why it matters, and then finish up with the phishing tips.

Why It Matters

Phishing is the use of social engineering techniques—tactics that use psychological manipulation like impersonating someone you know—to get you to take an action that can lead to your downloading a virus or malware, having your account credentials stolen, becoming an extortion victim, or some other malicious action.

While detection and blocking technology has advanced over the years, Dark Reading, a cyber security news site, estimates that up to one percent of all emails that make it to the end user’s mailbox are phishing emails. For home users, who typically have to rely on their internet service provider (referred to as an ISP) or their browser (like Chrome or Safari) to keep them safe, the number is probably higher. Still, 1% doesn’t sound like much—until you consider that to get to that point, these phishing emails are the best of the best. Suddenly, it starts to make sense as to why up to 70% of phishing emails are opened by the recipient.

Who Owns the Phishing Problem?

My friends and family are not creators or purveyors of technology; they are primarily users. Asking them to identify phishing emails by deciphering the email raw source or header is not in their wheelhouse, nor should it be. We take planes, trains, and automobiles without knowing much about how they work. It should be possible to safely receive and interact with an email without having to understand sender authentication or bone up on RFC 5322.

You as the family IT manager.

Back in 2005, when most of us first heard of phishing, we had a pretty good idea which businesses and people would contact us and how they would reach us. Today, nearly every company or organization we interact with has a website, an email subscription, an app, social media, and maybe a phone number or two. The daily number of messages we receive via email, phone, text, and so on has easily increased 10-fold (100-fold?) over that time. Do you really have any idea how many accounts you’ve created in your lifetime, and if so, how each of them reaches and interacts with you?

Making matters worse is the proliferation of data collection services—legitimate, shady, and illegal—which will sell personal information to nearly anyone with a purchase order, credit card, or better yet, the latest cryptocurrency. Personal data such as your name, address, last four digits of a credit card, and much more are readily available. As a result, a phishing email can use your name and provide additional personal details along the way in an effort to make you believe it is valid ← that’s social engineering at work.

What Can You Do?

For home computer users, the phishing problem may not be of your making, but you cannot rely on technology if you want to safely function in today’s highly connected world. Phishing uses some really crafty tactics (i.e. social engineering) to get you to believe that when you receive a message from the bad guys, it is okay to do what they are asking you to do. That means you have to be at your best when the incoming message chime rings.

To that end, below we’ve provided you with a little social engineering education in the form of some easy to remember tips you can use to ferret out a phish. We’ll use email in our examples, but the techniques can apply to most inbound communications you’ll receive. In addition, you don’t have to have any special technical superpowers, just some common sense and the ability to lower your FOMO (fear of missing out) threshold.

You can read the tips below, but we’ve also prepared a 20-minute Let’s Not Go Phishing Today webinar which provides a little more depth for each of these tips. You can read the tips below, watch the webinar, or both. The webinar is available on the Backblaze channel on BrightTALK. Keep in mind that you will need to register to watch.

Tip 1: No trust and not useful.

Situation You receive an email from a business, organization, or person. You are certain you do not know or trust the sender and you were not expecting to receive the email.
Example You receive an email to lower your mortgage interest rate from a bank you do not use. Oh, and you rent.
Considerations There are zero reasons to open this email. There is no upside here at all for you. Even if this is not phishing, it is most likely spam.
Disposition Delete the email while crooning, “But there ain’t no Coupe de Ville hiding at the bottom of a Cracker Jack box,” in the style of Meat Loaf (“Two Out of Three Ain’t Bad,” Bat Out of Hell, 1977).

Your on-stage moment is at 2:27.

Tip 2: No trust, but you’re not sure.

Okay, tip one was pretty simple. They get a little harder now.

Situation You receive an email from a business, organization, or person. You might know the sender, but you really weren’t expecting an email.
Example You receive an email and the sender name sounds familiar, but that’s it. Maybe you stopped by a store and provided your email to the clerk, maybe you bought a shirt from them two years ago, or maybe it’s just some advertisement you saw, but nothing is ringing a bell.
Considerations
  • Don’t open the email right away, let it sit in your inbox for a day or two to see if there is a follow up message or perhaps you remember something.
  • Often phishers will use time to pressure you into acting. Surely you would have remembered something so important, so don’t let time pressure you into doing something you shouldn’t. Trust yourself.
  • If you do open the email do not click on any of the links and do not call any phone numbers you may find in the email. Just read the email to see if anything jogs your memory.
Disposition
  • After a day or two, if nothing rings a bell, delete the email. If it was important, they’ll resend. Click delete.
  • If you think the email could be legit—Okay, really, just lower your FOMO threshold and click delete. I am sure that a bank in Ireland is not waiting to give you a million dollars if you call them.

Fun fact: $1 million in $1 bills weighs 1.1 tons. Say that three times fast!

Tip 3: Trust, but verify.

Situation You receive an email from a business, organization, or person. You know the sender, but you weren’t really expecting an email from them.
Example You receive a promotional email from a business. You are a customer of this business and even have an online account with them. You were not expecting the email, but the email makes you an offer that is interesting to you.
Considerations
  • You can receive promotional emails anytime, but they are more prevalent around holidays and marketing events like Cyber Monday. Phishers know this and will use this to their advantage to avoid detection.
  • A phisher can send out millions of emails in an attack spoofing a given business. If you have a relationship with that business, you are prime pickings. Do not assume that just because you are a customer, the email is legitimate.
  • A phisher can also send out very targeted emails using personal information they have collected from data breaches and other sources, both public and private. Just because an email has your name and other personal details, it does not mean it is legitimate.
  • If you decide to open the email do not click on any of the links and do not call any phone numbers you may find in the email. Read the email and see what they are asking you to do.
Disposition
  • If you think the promotional offer is legitimate, then open a new browser window and type in the URL to go to the website, or open the app on your phone/tablet for that business. You may have to sign in to your account, but the promotion should be available in one of those places. If the promotion is only available via the email, contact customer service for the business and ask. Remember to use the website or app to contact customer service, not any of the contact information provided in the email.
  • Sometimes, an offer is only available by clicking on a link in the email. In my opinion this is lazy marketing and puts you at risk. Let the business know this is not acceptable.

Spam or Phish?

The email described above could be just a spam email. Whether an email is spam or phishing can be confusing, but in general spam messages are just trying to sell you something and phishing emails have some harmful intent. That said, the same tips we are using for identifying a phishing email can be used to identify spam messages as well.

Tip 4: Trust, but still verify.

Situation You receive an email from a business, organization, or person. You know the sender and you were expecting the email.
Example You receive an email on the 10th of the month from your credit card company saying your statement is ready. They always send you this email on the 10th of the month. The email says you can click on the link to sign in to your account and view the statement.
Considerations
  • It is highly likely this is a legitimate email, but given this email concerns your financial affairs, being extra careful is imperative. Opening up a web browser and typing in the URL to go to the bank’s website to sign in there is safer. This also enforces the good behavior of not clicking on links in emails.
  • Many financial companies and health care providers are starting to maintain a list of messages they send you via email and/or text. You can log into your account to view the list to make sure that any message you received was actually sent by the provider—before you interact with the message. This is an excellent best practice and such businesses should be commended for thinking about their customer’s online safety and security.
Disposition Even if you think the email is legitimate, use a web browser to access your online account, or use their app to take the requested action.

Downloading Email Attachments?

Only download an attachment that you were expecting to receive, preferably after you were notified via another email—or better yet another method such as a text message. For example, you or whomever you’re interacting with may say, “Hey Monique, I’m going to email those pictures in a minute.” Downloading unsolicited or unexpected attachments is not recommended.

Think of email, text messaging, and voicemail as read-only services, especially when it comes to your financial and health information. This is sometimes really hard with text messages that encourage you to “click this link to…” and voicemail messages saying “call us back at a specific number.” Such messages offer convenience and help move things forward—and sometimes, they are the only way to get things done. At that point, you have to trust the vendor and your instincts.

What to Do When You’re Forced to Click

There are two common situations where you are forced to click a link in an email or message in order to move forward: email newsletters and two factor (2FA) or multifactor (MFA) authentication.

We’re this happy about 2FA security too.

Newsletters

Newsletters can deliver valuable information and often link to other content for additional details. The trouble is, those links are often obscured by tracking redirects used to count how many clicks the link gets—It’s a marketing thing. The average user has little hope of figuring out where the link is actually going, so they are faced with ignoring the information or clicking to the unknown. Let’s break down an example.

Situation You receive a newsletter from a company you do business with and have received newsletters from them before.
Example Backblaze sends you a customer newsletter. There’s an article on a new feature and you want to learn more. To do so you have to click on a link, but when you rollover the link (don’t click) it reads something like:
“https://hub.backblaze.com/xxt/XXt/R+000/xx-h-99/V88XHdW7_bXrN4b0ml7W7xsyK94Tmm-9N2x86z13q3phV1-WJV7CgHCJW7swZm-8j6kXwW6cD…” plus 50-60 more characters that are not displayed.
Considerations
  • It may seem it goes to the Backblaze website (backblaze.com), but without seeing the entire URL you can’t be sure. It could end with “.../bad-guys-website.com“, which would not take you to Backblaze.
  • Were you expecting this newsletter or at least have you gotten a newsletter from Backblaze before? If it is the first time, did you just sign up?
  • What is the intent of the newsletter? Providing information or asking for something? If the newsletter is asking you to sign in to your account for example, it is easy enough to open a new web browser window and sign in from there.
Disposition
  • This one is all about trust, timing, and clicks. Let’s assume you trust Backblaze as a good sender, the newsletter looks very Backblaze-y, and this is something you would expect. If you do click on the newsletter links, there are two primary things to consider.
    • First, if the link takes you to a sign up or sign in page, stop. Always open a new browser window, enter the URL to go to the site, and sign in from there.
    • Second, make sure the click takes you where you expected to go. If you get pop-ups for downloading a toolbar or extension, land on an unexpected webpage, or other unusual browser behavior (e.g. an automatic download), close the browser window and everything else on your system. Then, run a full antivirus scan immediately.
  • If you are not inclined to click on any links in newsletters, we understand. In our case most of the links on a Backblaze newsletter will go to our blog or our website. You can open a new browser window and find the content on the Backblaze website. This works for the many different newsletters you may get daily. That is: You can usually find the content directly versus clicking on the link.

Tell Us More…

The problem with not clicking on the links in newsletters and other similar communications is that marketing folks lose information about what is important to the recipients, but your peace of mind is more important. So, a healthy alternative is that you could send an email or post something on social media about what you like and what you don’t. Even visiting the pages and interacting with the articles the newsletter highlighted will help. Marketers get feedback, you give your opinion on good content, and you’re a little safer from phishing attacks.

2FA or MFA

More and more websites are requiring the use of two factor or multifactor authentication. Here are a couple of scenarios to help you deal with the messages you might receive.

Scenario 1

Situation Your bank’s website uses text message-based two factor authentication to confirm access to your accounts.
Example Using a browser, you log in to your bank’s website. A couple of seconds later, you receive the text on your phone with a code that you need to enter on the website.
Disposition By asking to log in to your bank, you expect to get the text which provides the authentication code. You’re good.

Scenario 2

Situation Your bank’s website uses two factor authentication to confirm access to your accounts. You believe it is text message-based authentication.
Example Using a browser, you log in to your bank’s website. A couple of seconds later, you receive an email asking to click a link to allow the log in to your account.
Considerations
  • This is one of those cases where you need to know how the bank will contact you for the second factor. It could be a text message with the code (like the first example above). It could also be by clicking the link in a test message, or through an authentication app on your phone, or by email message, or even by phone.
  • Given the timing of the events in this example, it is highly likely that you had set up email as your second factor. But, sometimes it is not that easy to tell, especially if there are several minutes before you get the authentication message—or worse, if you don’t get the message at all.
  • One way to make this easier on you is to try to use the same authentication method for each website. The trouble is that different companies support different methods and not others. In some cases, you may be able to find information on the bank’s website to determine the authentication method they use.
Disposition If you’re not sure of the authentication method that was set up, you can abandon the sign-in, then open a new browser window and start again. If you get the same authentication method, you can be reasonably confident you’re doing the right thing.

Moving Forward

Over the past couple of years, vendors involved with providing email, text, and voicemail services have gotten better at detecting and eliminating phishing, spam, and malware before it reaches you. That’s great. But the bad guys haven’t given up, and many would say they’ve gotten better.

These tips are a good starting point for improving your ability to stay safe using the internet, email, and your phone. There are many websites and resources where you can learn more and stay informed about phishing and other forms of malware. We listed a few below. You can click on the links, but (if you are a little paranoid at this point), you can search for “consumer phishing resources” or just “phishing resources” using your favorite search engine. Good luck, and stay safe.

Select Phishing Resources

  1. Knowbe4: The world’s first and largest new-school security awareness training and simulated phishing platform.
  2. Phishing.org: A project from KnowBe4 that is a resource for IT professionals to keep you up to date on the latest phishing threats. The Resources page has some free tools to help improve your phishing knowledge.
  3. Phishing info from the Federal Trade Commission.
  4. A phishing primer from the National Cybersecurity Alliance.

The post Let’s Not Go Phishing Today: Tips for Home Computer Users appeared first on Backblaze Blog | Cloud Storage & Cloud Backup.
How to Download and Back Up Your Twitter Account

Post Syndicated from Barry Kaufman original https://www.backblaze.com/blog/how-to-download-and-back-up-your-twitter-account/

If you’ve been following the news lately, you might be thinking now is a good time to start downloading and backing up your Twitter history.

It’s officially the Elon Age of Twitter, and subsequently, there have been a few people rumbling about leaving the platform following Musk’s firing of top executives and an alarming rise in hate speech. Needless to say, we’re sticking around—you might have stumbled upon this article from Twitter itself. We just can’t quit the little blue bird quite yet. But there is one thing we can do, and that’s help you download and back up your Twitter archive—most likely for free.

Whether you’re anti-Elon or you’re just worried that the folks who are good at building electric cars or spaceships might not know how to manage a social media algorithm, you can take a few easy steps to protect your treasured Twitter memories. Here’s how.

Downloading Your Twitter Data

The first step is to log in to your Twitter account on a web browser. Once logged in, click on the “More” section in the navigation bar. From there, a new navigation bar will appear. You should select the “Settings and Support” dropdown, followed by the “Settings and Privacy” tab to progress.

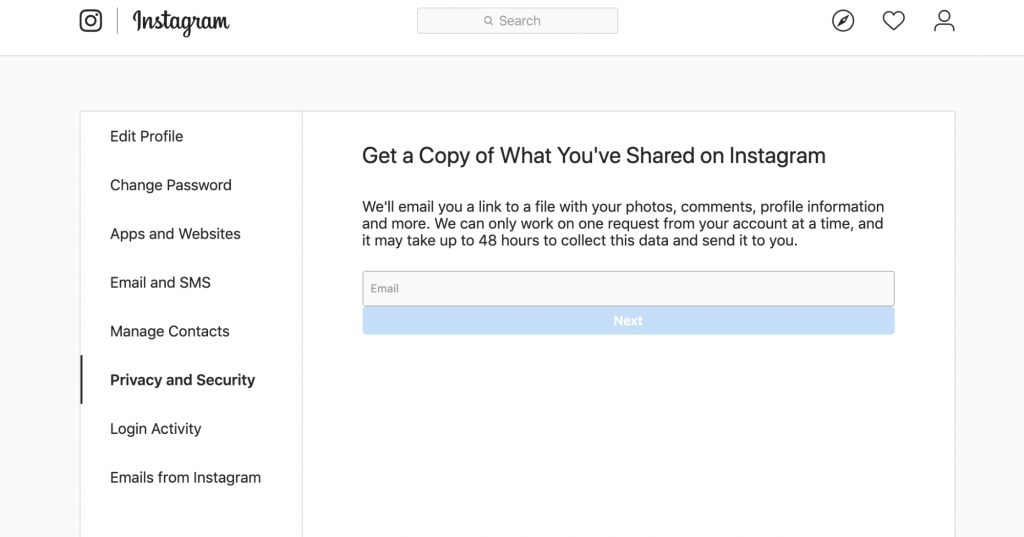
Under the “Your Account” section, you will find an area labeled “Download an archive of your data.” The function of this is pretty self-explanatory, but does lead to a further menu that allows you to request an archive of your Twitter data or Periscope data.

After requesting your archive you will receive a notification with a link when your archive is ready for download. This archive will consist of a ZIP file with data that Twitter has deemed most relevant or useful to you, including DMs, moments, profile media and any media you may have used in your Tweets such as gifs, photos, and videos.

Archive Your Twitter Data for Free

Once you download your Twitter data, you can then save a full archive copy in the cloud on Backblaze B2—for free if it’s under 10GB.

Click here to get started with Backblaze B2 Storage Cloud today.

Back Up Your Twitter Data (Not Free, But Super Easy)

In addition to an archive copy, it’s important to use a secure backup strategy so all of those Tweets and memories will be preserved and kept safe from accidental deletion, equipment failure, or disasters (whether they’re natural or Musk-made). This is where a 3-2-1 backup strategy comes in handy. Using a 3-2-1 approach means keeping one copy of your data locally, one copy on a different type of media like an external hard drive, and one off-site (the cloud is a great place to keep it!).

You’ll need to manually download your Twitter data periodically, but once you have it on your machine, you can ensure it’s backed up with Backblaze Computer Backup—it automatically backs up all of your files, including documents, photos, music, movies, and, yes, all of that Twitter data you downloaded.

Click here to sign up for a 15-day trial of Backblaze Computer Backup, and save those Tweets.

While You’re At It…

We’ve gathered a handful of guides to help you protect social content across many different platforms. We’re working on developing this list—please comment below if you’d like to see another platform covered.

The post How to Download and Back Up Your Twitter Account appeared first on Backblaze Blog | Cloud Storage & Cloud Backup.
How to Download and Back Up OneDrive Data

Post Syndicated from Lora Maslenitsyna original https://www.backblaze.com/blog/how-to-download-and-back-up-onedrive-data/

On the Backblaze blog, we’ve been sharing tips for backing up and doing more with your data, especially when it comes to data digitally scattered across social media platforms. We asked what you, our readers, wanted to know about protecting your data online and you responded with this question: How do you download and back up data on Microsoft OneDrive?

OneDrive is an online file hosting service that many users take advantage of to sync the data on their computer. Although it offers 5GB of storage space for free, users pay a fee to store data that exceeds tiers of 100GB, 1TB, and 6TB. OneDrive even notes on their website that to free up space on your OneDrive account, you should download that file or folder to a location outside of your OneDrive folders, and then delete the OneDrive copy of the file or folder to reduce your storage amount. Of course, this means that the document is no longer syncing. And by doing so, you’re forced to constantly juggle the amount of data saved in OneDrive to stay under the free limit. Worse yet, the data you remove from OneDrive is no longer protected using the 3-2-1 backup method.

This guide walks you through ensuring your data on OneDrive is safely backed up and how to keep your data safe using the 3-2-1 backup strategy. So, read on to learn how to save your OneDrive data, including:

  • A step-by-step guide to accessing and downloading your data.
  • What to do with your downloaded OneDrive data to ensure it stays protected.

Back Up Everything But the Kitchen Sync

If you’re reading this blog post, you probably already know that saving your data to a sync service is not the same as backing it up. Sync and backup services are complimentary, but only a backup will save a copy of your data and keep it safe against accidental deletion, updates, a ransomware attack, and more.

To help you save your synced computer data, we’re developing a series of guides to downloading and backing up your data across different sync services. Below is a list of our other guides, and comment below to let us know what other sync services you’d like to see us cover.

How to Download Data From Microsoft OneDrive

    1. Open your OneDrive account and select the files or folders you want to download. You can select individual items by clicking the circle check box next to each item. You can also select several files at once by clicking on one file, scrolling down the list, then left-clicking while holding down the Shift key on the last item in the list you want to select. To select all of the files in a folder, click the circle to the left of the top row, or simply press CTRL + A (or COMMAND + A on a Mac).
    2. In the top menu, select Download. You can also right-click an individual file and select Download. If you choose multiple files or folders and then select Download, your browser will download a ZIP file containing all the data you selected. If you’re in a folder and you select Download without selecting any files or folders, your browser will download everything saved in that folder.
    3. Save your OneDrive data on your computer. Your browser will download your files to the Downloads folder of your computer. Select the files and save them to a permanent location. For some users, your browser may prompt you to choose the location where you want to save the download.

    Now that you’ve downloaded your OneDrive data, keep reading to find out how to ensure that data is safely backed up.

    The 3-2-1 Method in a Nutshell

    Back up your data based on these principles:

    1. Redundancy. Have several copies of your data.
    2. Geographic Distance. Have those copies in different locations.
    3. Access. Have different types of access to your backup data. A good example here: you don’t want all of your data to be connected to the internet to reduce the risk of cyberattacks. You also don’t want all copies of your data stored in your home in case of disaster or theft.

    How to Back Up OneDrive Data

    Once you have all of your OneDrive data downloaded on your computer, you’ve fulfilled the first step of the 3-2-1 backup strategy by storing your data on your local device. Next, you should make sure to follow the next steps and save your data on a secondary, external device and in a third, off-site location. Cloud storage is the one of the best options for easily securing your data off-site.

    If you’re using Backblaze Personal Backup to protect all of the data on your computer and external drives, you’re all set! Backblaze automatically and continuously backs up a copy of all of your data to the cloud.

    Another option to consider when you want to securely store your data and offload some of it from your local device is to upload your data to Backblaze B2 Cloud Storage directly. As long as you are still keeping a copy of that data on other local drives or devices, you’re still fulfilling the 3-2-1 backup method. You can learn more about the difference between using Personal Backup and B2 Cloud Storage and how to save and organize your data in cloud storage by reading this blog post.

    Read On to Get the Most Out of Backblaze and OneDrive

    Our help section is filled with useful guides on maximizing the integration of Backblaze and OneDrive. Check out our guides for Windows or Mac to learn more.

    Don’t Rely on Sync Services to Secure Your Data

    Chances are, the data you have saved in your OneDrive folders is data you want to keep. Don’t wait until you accidentally get locked out of your account or a software update wreaks havoc on your synced data. Back up your data today, and comment below to let us know what else you’d like to know about to help you keep your data safe.

The post How to Download and Back Up OneDrive Data appeared first on Backblaze Blog | Cloud Storage & Cloud Backup.

Announcing: Backblaze Computer Backup v8.5

Post Syndicated from original https://www.backblaze.com/blog/announcing-backblaze-computer-backup-v8-5/

Announcing Backblaze Computer Backup 8.5! Our latest release builds on version 8.0’s speed boosts and brings with it not only a redesigned application for Mac and PC, but an improvement to our Safety Freeze feature, which prevents your backups from becoming corrupted. Here’s a brief overview of what’s new for this release:

macOS and Windows:

  • Safety Freeze enhancements: improved efficiency and reduced false-positives.
  • Visual refresh: We’ve completely refreshed both of our client apps.
  • Minor text, bug, and performance improvements: We’ve cleaned up some of the language to make things easier to understand and have tightened up some of the code.

macOS:

  • SwiftUI redesign: the macOS app has been completely redesigned from the ground up using SwiftUI.

In More Detail

Safety Freeze Enhancements

Our Safety Freeze feature is designed to protect your backups and prevent them from being corrupted if something goes wrong on your computer. Over the years we’ve updated the feature based on feedback and tried to make it more transparent to the end user. With the updates in version 8.5, we’ve added a self-healing component which attempts to fix some of the false positives that caused an erroneous Safety Freeze to occur, especially when a user is moving from one computer to another.

Visual Refresh

With the Swift redesign on macOS, we felt now would be the perfect time to also change some of the visuals in our apps. We’ve updated both of our client apps to make them better looking, simpler to use, less cluttered, and easier to understand.

SwiftUI Redesign

In preparation for macOS Ventura, we’ve rewritten the macOS app in SwiftUI. There’s nothing but good news here. This refresh helps future-proof our macOS app and also keeps the same system efficiency you know and love from Backblaze-built applications.

General Performance Improvements

Everyone’s favorite: “general bug fixes and performance improvements.” We’ve also updated and simplified a lot of our client text to go along with the visual refresh and deliver a better, easier-to-understand overall app.

Backblaze v8.5 Is Available Today: September 15, 2022

We hope you love this new release! We will be slowly auto-updating all users in the coming weeks, but if you can’t wait and want to update now on your Mac or PC:

  1. Right click on the Backblaze icon in your menu or taskbar.
  2. Select Check for Updates.
  3. Download v8.5 from the Backblaze Updates page.

Also, this version is now the default download on www.backblaze.com. Please reach out to support if you have any questions or if you want to give feedback—we always like to know how things are going.

The post Announcing: Backblaze Computer Backup v8.5 appeared first on Backblaze Blog | Cloud Storage & Cloud Backup.
Packing Up and Backing Up: It’s Time for School

Post Syndicated from Josephine Quock original https://www.backblaze.com/blog/packing-up-and-backing-up-its-time-for-school/

Note from the Editor: When students head off to college, they take their data and computers with them. We wanted to dig into what students and other young tech users are doing to save and protect their data, so we invited our intern, Josephine, to develop some resources for you before she heads off to college.

Apart from discovering the outside world and learning more about who you are as a person, the university experience is, at its core, about the pursuit of knowledge. In years past, students would store that knowledge in spiral-bound notebooks or scattered sheets of loose leaf, but today it’s all digital. While there’s no doubt that computers have changed everything from how we research to how assignments are turned in, technology comes with its own set of challenges. I wondered: how much are students taught about how to keep their data safe? My experience at Backblaze has taught me a lot about the importance of backing up your data, and I want to share that with other college students.

Lesson One: Syncing is Not Backing Up

If students do think about how to preserve their data, most are content to let services like iCloud or OneDrive handle it. What they may not realize (and I didn’t) is that these sync services are completely different from a true backup. Before interning at Backblaze, I didn’t even think about backing up, let alone understand the importance of it or the best strategies to back up my data. I couldn’t tell you the difference between backup and sync services. Because my photos and contacts were synced on my iPhone, iPad, and even my MacBook, I assumed all this data was saved and in good hands. However, working at Backblaze taught me the importance of backing up to prevent losing my data.

For example, if I were to delete a photo on my iPhone, syncing means that it would also delete on my other devices. Backing up gives you an additional copy of the data that doesn’t follow the same rules as your syncing services. If I accidentally delete something or get a virus, a backup with version history means that I could restore an earlier version of my files or library. This is why ensuring the safety of your data is proactive, as backing up can provide security in the event of hardware failure, cyber attack, natural disaster, or even a careless mistake.

Lesson Two: You Might Need Your Old Data

Let me provide an example that we college students have experienced at least once throughout our time in university: the frustration and annoyance of endlessly searching through the deepest corners of our devices to find an important document, only to not find it in the end.

A few months ago, I was given the option to select a prompt for an essay of my choosing from a couple of short stories. “The Tell-Tale Heart” by Edgar Allen Poe immediately caught my eye because I had read it and written a paper on it in high school. I enjoyed the story in high school and liked the idea of comparing my new paper with my old to see how much I’d grown as a writer. I browsed and inspected every possible drive on multiple email accounts—no luck.

Looking back, I wished that I had saved all the files and emails from middle and high school. But since I didn’t, I wasn’t able to review what I had written and couldn’t see the progress and improvement in my writing. Had I backed up all the data of my high school years, I could have read my essay on “The Tell-Tale Heart” and expanded on my original ideas. I was warned many times that all my documents from my account would be deleted. I knew this information and yet I still didn’t do anything about it.

Lesson Three: There Are Easy Answers

As a college student, I need a backup service that’s easy to use and affordable. Since Backblaze first started offering consumer backup, they’ve prioritized both of those things. According to an internal Backblaze’s Customer Survey in 2022, users love using the service because of the price, unlimited data backup, and most importantly ease of use. Backups are automatic, and 45% of Backblaze users spend less than $100 per year on all their backup services (including Backblaze).

Now that I will be going into my fourth year in college, I will have other important documents beyond my school work since I am going to be applying for more internships and jobs when I graduate. My resume, job applications, school projects, and essays are all things that I can’t risk losing. Additionally, lots of my photos are saved to social media accounts, and I want to save them somewhere besides my phone or on those platforms.

Lesson Learned!

After college, I plan on purchasing a new computer and will need to back everything up on my current computer to transfer over to my new laptop. Not only will that make sure that I don’t lose data when I change devices, but (rather than buying an external drive that I need to keep track of) I can use my Backblaze account. I will be using multiple devices to access my single Backblaze account. Once I have my new laptop, I just have to log in from my new device and restore all my files. I won’t have to worry about losing an external hard drive or making sure the files on a hard drive are updated.

With school back in session and the end of my university experience approaching, my social media, school work, and job search exist on all my devices. I can’t imagine losing any of it. After interning at Backblaze and hearing so many disaster stories, I will definitely be backing up my data, and I recommend that other students do too. That’s why services like Backblaze are really helpful.

The post Packing Up and Backing Up: It’s Time for School appeared first on Backblaze Blog | Cloud Storage & Cloud Backup.

How to Back Up Veeam to the Cloud

Post Syndicated from Kari Rivas original https://www.backblaze.com/blog/how-to-back-up-veeam-to-the-cloud/

Backups are your best defense against ransomware and other types of data loss. Thankfully it is quick and easy to back up all your Veeam data to Backblaze B2 Cloud Storage within minutes—and we have the videos to prove it!

What is Veeam?

Veeam is well-respected backup and disaster recovery software that works across many platforms and hardware/software configurations. Founded in 2006, Veeam Software is a U.S.-based company that operates in over 180 countries and has 400,000 customers—many of them Fortune 500 companies.

The Veeam and Backblaze B2 Cloud Storage Integration

Backblaze has partnered with Veeam to deliver the most reliable, affordable, and secure data protection and cloud storage target for your data. Veeam Backup & Replication provides modern data protection for your cloud, virtual, and physical workloads to solve your challenges around backup, recovery, archive, disaster recovery, and ransomware.

With a transparent pricing model that is a fraction of the competitors’ cost, Backblaze B2 Cloud Storage helps you plan your budget effectively and store more than four times the restore points you could otherwise. With Backblaze B2 as your cloud tier storage destination in Veeam, you can store your data for $5/TB per month with no minimum retention requirement, tiers, or hidden fees.

Additionally, Backblaze is certified as Veeam Ready—Object and Veeam Ready—Object with Immutability. Immutability is an important part of protecting backups from threats such as ransomware or stolen credentials because it allows you to protect objects from being changed, deleted, manipulated, copied, or encrypted for a specified, user-defined time period. Even better, Backblaze does not charge an extra fee for the use of the object lock feature.

How Does Veeam Work with Backblaze B2 Cloud Storage?

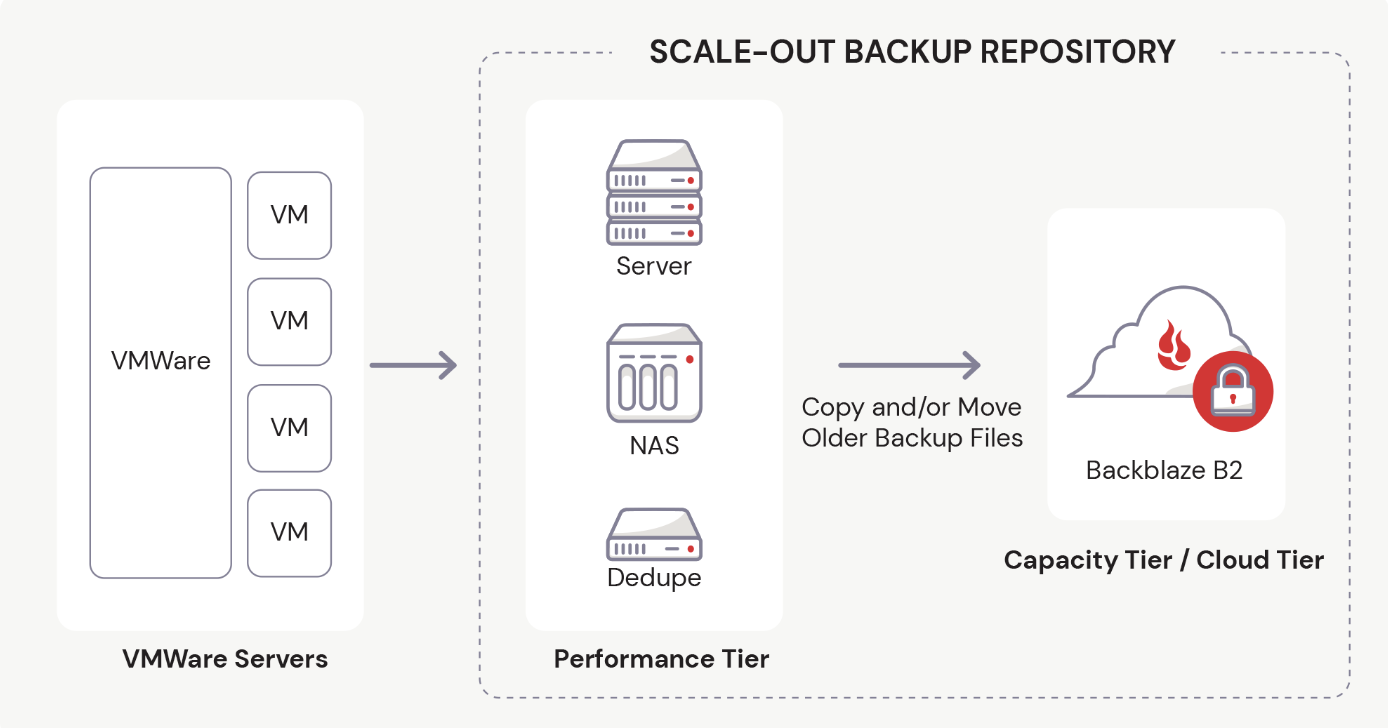
Backblaze is a proud partner of Veeam and is fully compatible with Veeam Cloud Tier. Using Backblaze B2’s S3-compatible API, you can set B2 Cloud Storage as your Cloud Tier in Veeam’s Scale-Out Backup Repository.

In Veeam v11 and earlier versions, you must first establish the Performance Tier, or Local Repository, before you can set up the Cloud Tier.

If you’ve been using Veeam, you probably already know how to add a local storage repository to Veeam. However, if you are one of our B2 users who are exploring this partnership for the first time, we have a video to guide you through the process. Watch as Greg Hamer, Senior Developer Evangelist, demonstrates how to set up the Local Repository in just a few minutes. If your Local Repository is already configured, then you’re ready to proceed to cloud backup!

Steps to Back Up Your Data with Veeam and Cloud Storage

To make things easy, we have created a video about How to Back Up Veeam to the Cloud. In the video, Greg demonstrates how you can securely store your Veeam data in just 20 minutes.

If you’re not a visual learner, you can easily back up all of your Veeam data to Backblaze’s B2 Cloud Storage using the five easy steps below.

Step 1: Create a Backblaze Account

First, you need to set up a Backblaze account. If you already have a Backblaze account, you’re all set and can move on to step two. Otherwise, visit Backblaze’s Veeam page and click the Start Now button to create one.

The Start Now button will take you to a simple sign-up form where you only have to enter your email address and a password. Don’t worry about setting up billing just yet. You have 10GB of free space to test drive B2 Cloud Storage before you have to set up any billing information.

Once you successfully create a new account, you will create a bucket to store your data in, then collect and save some information from your Backblaze dashboard to use later.

Step 2: Create a Backblaze B2 Bucket and Set Up an Application Key

A “bucket” is a container that holds your files uploaded by your Veeam software to Backblaze B2 Cloud Storage. When configuring your bucket, you will give it a unique name, choose whether it’s private or public (most customers choose private buckets), and turn on Object Lock to secure your files and make them immutable. (This is an important security step you won’t want to miss.)

Each bucket is associated with a name and an S3 Endpoint. You should jot down this Endpoint to use later in Veeam to connect with Backblaze.

Before you exit the Backblaze console, you will set up an Application Key that allows Veeam to connect to and access your storage bucket securely. You give the Application Key a name and make some additional choices to finish setting it up. Finally, you will jot down some details for the Application Key, such as keyID, keyName, and applicationKey, which is essentially a passcode for the key. Be sure to write these down immediately after creating the key, or you won’t be able to access it in plaintext again.

Step 3: Add Backblaze B2 Cloud Storage as a Cloud Tier Repository in Veeam

Switching over to the Veeam console, you will log into your software and create a Cloud Tier repository to interface with Backblaze B2 Cloud Storage.

Before you do that, however, you need to have a local repository created. The tutorial assumes that you have one already and have been using Veeam to backup locally.

To set up your cloud tier, you will follow a few simple steps:

  1. Choose your object storage type.
  2. Give it a name.
  3. Enter your Backblaze S3 Endpoint value.

You will also be prompted to enter your credentials, which is the Application Key information you’ve already set up when you created your Backblaze B2 Bucket. Before exiting that area, Veeam will test the connection to ensure it can reach your Bucket. The final stage in this step allows you to turn on Object Lock to keep your backup files safe.

Step 4: Create the Scale-Out Backup Repository in Veeam

Still working within the Veeam console, you will also set up a scale-out repository to handle backup data load. During this step, you will name your Veeam Scale-Out repository, choose a few options, select the Cloud Tier repository you just created in step three, and ensure that your files are backed up immediately.

Step 5: Create a Backup Job in Veeam

The final stage of our backup tutorial walks you through the process of setting up a backup job. You will continue working in Veeam to create a new backup job using cloud storage. In the video we show you a Virtual Machine backup, but you can create several other types of backup jobs as needed. You can then name your backup job, add the files you want to backup, and choose where you want to save them (in this case, the Scale-Out repository we just created).

You also have options to optimize storage and schedule your backup job to run as often as you like. Then, you can test it immediately to see how it goes.

We hope this video guide and brief explanation were useful in helping you get the most out of both Veeam and Backblaze. If you have thoughts for topics on future videos, sound off in the comments. And be sure to subscribe to our YouTube channel for more great content!

The post How to Back Up Veeam to the Cloud appeared first on Backblaze Blog | Cloud Storage & Cloud Backup.
Keeping Passwords Secret and Your Data Safe

Post Syndicated from Laura Debney original https://www.backblaze.com/blog/keeping-passwords-secret-and-your-data-safe/


Even if you’ve heard about the 3.27 billion email and password combinations made public on an English language hacker forum in 2020, you may not have heard the worst of it.

Anyone could buy the list for $2 a download.

You’d think that was the scariest part of what became known as the Compilation of Many Breaches (COMB) leak–but it’s not.

The scariest and most preventable part of this breach is that people reuse their passwords and cybercriminals know it.

You may have read Backblaze’s post about credential stuffing attacks. Briefly, it’s a brute force attack using credentials from a list like COMB to unlock an account, most likely with a weak and common password like 123456 or “passwort” (if you’re German).

Is there a better reason than COMB to stop reusing passwords for multiple devices, apps and websites? That alone should do it, but if you need more reasons, they are legion.

There’s no denying how hard it can be to remember 12 to 15 pieces of information in length. After all, our telephone numbers are only seven digits long by design–which happens to be the length of any sequence of numbers we humans can easily recall.

While we each have responsibility for implementing password best practices, the COMB attacks show us that personal password protection isn’t enough. Cloud service providers (CSP) are also responsible for protecting the data entrusted to them. Backblaze uses a sophisticated security approach to protect access.

Regardless, user verification is just more effective with strong passwords, so here are a few tips on keeping your password secret and your data safe.

What Is a Password?

First and foremost, a password is a secret authenticator, according to the National Institute of Standards and Technology (NIST). They have a lot to say about the strength of passwords by complexity, length, and manner of creation. We’ll get into details a little later.

The string of letters, numbers, and symbols used in a password can’t be easy to guess or forget. This is tougher to achieve than it sounds, and typically users choose short, memorable passwords for convenience.

If you want to eliminate the possibility of being the next victim of credential stuffing, here are some things you shouldn’t do:

  1. Use the same password for more than one online account or website.
  2. Recycle or rotate passwords.
  3. Store passwords where anyone can access them (e.g. on a piece of paper or as an autofill setting in your browser).

The reality is that hackers can (and have) released accurate email and password combinations, and the best way to render that old information utterly useless is never to use those passwords again. (Also, stop adding a “2” at the end of “Password1.” You’re not fooling anyone.)

How Does a Strong Password Help Keep Your Data Safe?

You should know that verifying a digital identity with an email and a password isn’t as straightforward as presenting your photo ID at the airport. And, password authentication isn’t as safe as it once was, thanks to cybercrimes resulting in lists like COMB. In light of the security risks hackers pose, new authentication guidelines were created to help CSPs ensure the authenticity of a user.

The Three Authenticators

There are three types of authenticators.

    1. Something you know (e.g. password).
    2. Something you have (e.g. a cellphone).
    3. Something you are (e.g. biometric data).

CSPs or verifiers can employ different combinations of authenticators to achieve different levels of assurance that will ultimately help to reduce successful cybersecurity attacks. The different combinations of authenticators create an authentication assurance level (AAL). For example, when you log in, a CSP might use a combination of your password and a code generated by an authenticator app.

A strong password is essential to each authentication level. Each AAL meets the recommended privacy controls and relies on something that only you know and is difficult to estimate. Cyber criminals only need to guess one reused email and password combination to make a costly mess of things for you or your business.

Strong Passwords Defined

This may sound too simplistic, but the NIST (SP 800-63-3 Appendix A) qualifies a password’s strength by its length. In the case of brute force attacks, shorter passwords are too easy to uncover before rate limitings results in a lockout. Passwords of sufficient length reduce the success of credential stuffing or denial-of-service attacks. The NIST recommends that CSPs allow passwords or password phrases of almost any length so long as it doesn’t demand excessive time to disguise with a salting of random letters, numbers, and hashing algorithm.

The next thing to consider when creating a strong password is complexity. That said, the NIST recommends that password complexity not impede memorability, which would defeat the purpose of using a password to authenticate something you know. Too complex of a password leads people to writing down passwords or storing them in unsafe places rather than forgetting them. This vulnerability has to be addressed when CSPs provide instructions for creating passwords for users.

Unfortunately, analysis of breached data reveals that combining complexity and length isn’t a foolproof deterrent. However, a sufficiently long password is harder to guess, and an adequately complex one will improve the masking efforts like salting and hashing.

One more way to ensure you’re using a strong password is to use a tool to randomly generate one based on a set of standards, like length, type of character, readability, etc.. Randomly produced passwords are harder to brute force attack or guess. While there are a few different places you can find a random password generator, we love password managers like BitWarden, 1Password, and LastPass, which generate, organize, and secure passwords.

Remember that breached data can provide insights into what an old password might be for the same account or similar type because cybercriminals know that we are creatures of habit. Not only that, but some facts are immutable. A great example is when you always select the same challenge question. If that data has been breached, it’s likely known to cybercriminals; also, your mother’s maiden name is not going to change. As another layer, you can use randomly generated answers to security questions the same way you use randomly generated passwords, meaning those answers won’t be able to be reused (or easily gleaned from dumb Facebook quizzes).

Next, let’s get into how you can keep hackers from guessing your strong passwords.

How to Create a Strong Password

To review, strong passwords are long, complex, and secret. These days you can take advantage of a password generator and save it to your password manager. However, there are times you need to come up with a strong password.

Consider these two steps for making a password strong:

Step one: Use a memorable phrase that’s 12 to 15 characters long (e.g. she sells seashells).

Step two: Lightly salt your version with some random characters (e.g. sHe sellz seasHells).

A few ideas for memorable phrases are to use a song lyric, a poetic verse or a line from a movie.

Pro Tip: When you lightly salt your memorable phrase, try not to use @ for the letter ‘a’ or the number zero for the letter ‘o’.

Avoid being predictable. Also, avoid the temptation to use sensitive information like your child’s birthdate or your first and last name or 12345678. Trust me, using this type of information is uber common worldwide.

Another way to check that you’re using a unique password is by culling breached data records. According to Troy Hunt’s pwned.com site, the password Qwerty was used 71,219 times before I typed it into Have I Been Pwned Password API. As Hunt points out, the NIST recommends that CSPs compare user-generated passwords with unacceptable ones. A blocklist should have passwords from previous breaches and predictable options that include the service name, like using the password ‘G000gle’ for your Gmail account.

What Else Can You Do to Protect Against Credential Stuffing Attacks?

In the battle against brute force attacks from hackers that can compute ridiculous numbers of hashes without rate limiting, users play a critical role in protecting your data with strong passwords.

Here are a few other ways to keep your data safer:

The good news is that even as cybercriminals get more ingenious, new and innovative tools have been created to make personal data security easier than ever. And, as data nerds ourselves, Backblaze takes your cybersecurity seriously. Check out some of the ways we secure your data here.

The post Keeping Passwords Secret and Your Data Safe appeared first on Backblaze Blog | Cloud Storage & Cloud Backup.
The 3-2-1 Backup Strategy

Post Syndicated from original https://backblaze.com/blog/the-3-2-1-backup-strategy/

A lot has changed since the 3-2-1 backup rule was first introduced in the late aughts. At the time, the iPad was just a glimmer in Apple’s eye. Facebook had a quaint 500 million users. Taylor Swift had only released two albums. Blockbuster Video still existed, and Netflix shipped DVDs to your door. 

Unlike most things in technology, the rule has held up over the years. It’s still the de facto standard for keeping your data safe. But some of the particular best practices have evolved as data storage has changed. Today, I’ll explain the 3-2-1 rule, what’s changed, and how you can easily achieve a 3-2-1 backup to keep your data safe and protected.

What Is the 3-2-1 Backup Rule?

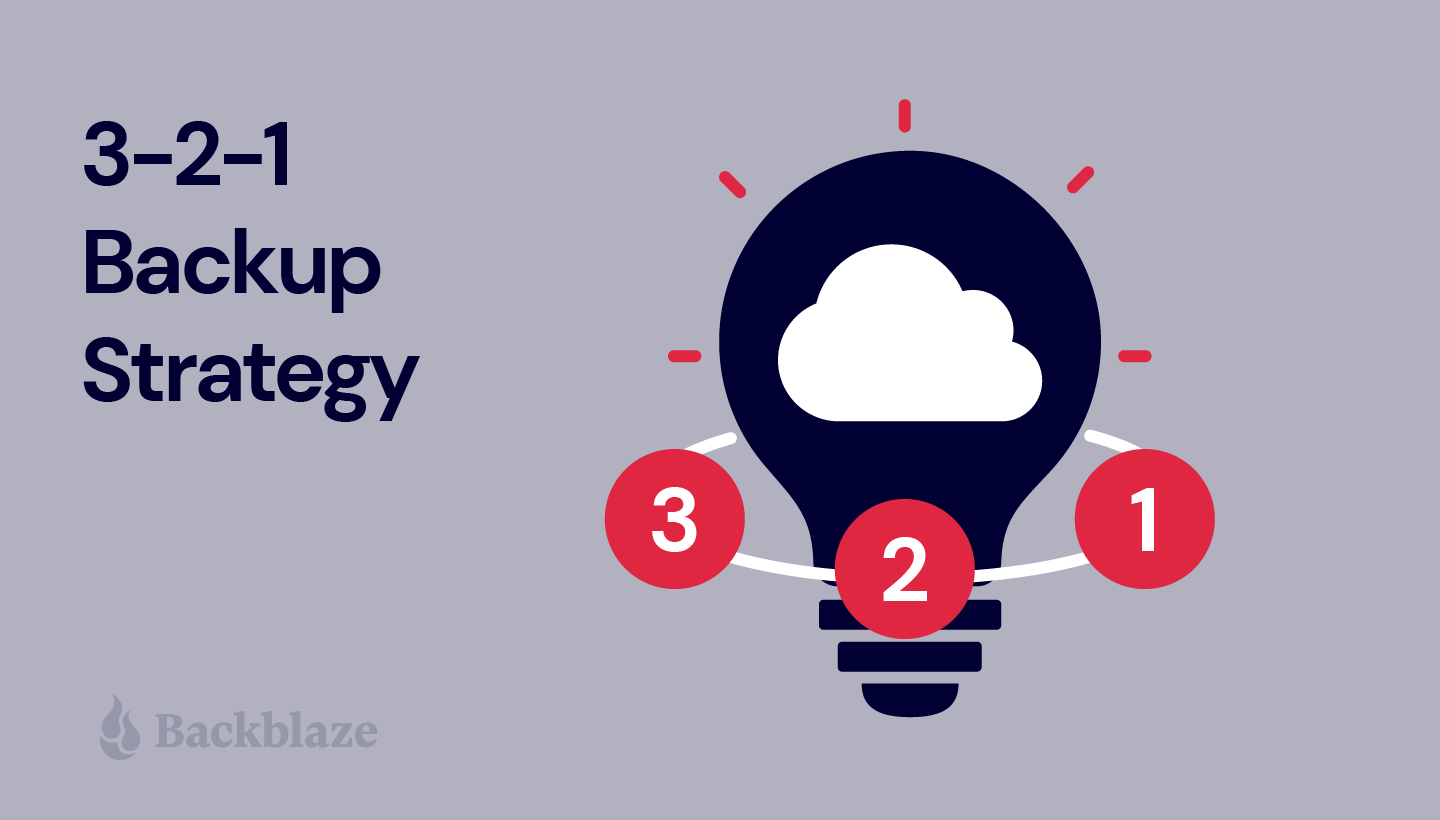
The 3-2-1 backup rule is a simple, effective strategy for keeping your data safe. It advises that you keep three copies of your data on two different media with one copy off-site. Let’s break that down:

  • Three copies of your data: Your three copies include your original or production data plus two more copies.
  • On two different media: You should store your data on two different forms of media. This means something different today than it did in the late 2000s. I’ll talk a little more about this in a bit.
  • One copy off-site: You should keep one copy of your data off-site in a remote location, ideally more than a few miles away from your other two copies.

If you want to protect your personal information, photos, work files, or other important data, the 3-2-1 backup strategy is the way to go. It helps you avoid having a single point of failure that’s vulnerable to human error, hard drive crashes, theft, natural disasters, or ransomware.

How Does the 3-2-1 Backup Rule Work?

Let’s say you took a picture of your social security card for your tax accountant years ago—that file is called “socialsecurity.jpg” and it lives on your computer at home. That’s the first “copy” of your data.

You also have an external hard drive at home, used to back up your go-to Mac or gaming PC.  That external hard drive will back up socialsecurity.jpg as part of its backup process. That’s a second copy on a different device or medium.

In addition to that external hard drive, you also have an online backup solution (we recommend Backblaze; go figure!). The online backup continuously scans your computer and uploads your data to the cloud (which, in layman’s terms, is an off-site data center). Socialsecurity.jpg is included in this upload, becoming the third copy of your data.

Oh! And, your paper social security card is hopefully stored in a fire-proof safe (not your wallet) as a bonus. 

What’s Changed About the 3-2-1 Backup Strategy?

When the 3-2-1 rule was first introduced, there were a lot more types of media to choose from when storing your data—the humble floppy disk, CDs, Blu-ray discs, USB sticks, external hard disk drives (HDD), solid state drives (SSD), network attached storage (NAS), tape libraries, etc. Some of those have fallen out of favor (CDs and DVDs, I’m looking at you).

Some types of media are not practical or affordable for a typical home computer user looking to back up their data (tape libraries, for example). Some of the technologies were prohibitively expensive back then, but are much more affordable now (SSDs). And one big one wasn’t mainstream yet: The Cloud™ (you might have heard it referred to as “other people’s computers”). So, what does this mean for the 3-2-1 backup strategy? Do you still need to keep your data on two different media?

Two Different Media, Really?

The short answer is: yes, but no. Today, you don’t need to keep your data on two different types of media, but you do need to keep your data on two different devices. 

The long answer is a bit more complicated. There are a couple reasons folks recommended keeping your data on two different types of media in the first place. One, it protects you from one of those forms of media becoming obsolete in the face of new storage technology (still looking at you, CDs) and your data becoming unreadable. And two, it’s wise to keep your backup copy on a separate device so that a hardware failure doesn’t take out both local copies. For example, if your computer all of the sudden doesn’t want to hold a charge, you can still recover data from your hard drive.

While obsolescence is always a concern, the advent of cloud storage for backups all but eliminates it. The cloud service provider is responsible for maintaining the physical storage devices and keeping your data accessible at all times. So, if you use a cloud backup service, you only need to worry about keeping your data on two devices, not two separate kinds of media. What does that look like? 

The Easiest 3-2-1 Backup

If you back up your home computer to an external hard drive and back both of those devices up to the cloud using something like Backblaze Computer Backup, congratulations: You have achieved a 3-2-1 backup. 

  • You have three copies of your data: One on your computer, one on your hard drive, and one in the cloud.
  • You store your data on two different devices: Your computer and your external hard drive. (Technically, three devices, since your data is also stored in the cloud).
  • One of those copies is off-site: The cloud copy.

Is the 3-2-1 Strategy Still the Standard?

If you aren’t backing up at all, achieving a 3-2-1 backup strategy is still the best thing you can do to protect your data. But, the 3-2-1 rule is becoming more of a starting point rather than the finish line in today’s world. 

The rise in ransomware attacks calls for strengthening the basic principles of the 3-2-1 strategy—redundancy, geographic distance, and access—with added protections. Cybercrimes targeting networked machines and capturing all data, including backups, is a growing problem.

New versions of the tried-and-true backup strategy have emerged, such as the 3-2-1-1-0 or 4-3-2 backups. Sounds like overkill? It isn’t. The good news is that companies like Backblaze exist to make at least the off-site component less stressful—we do the work and keep up with security best practices for you.

Why Do I Need Both an On-Site and an Off-Site Backup?

Whether you are interested in backing up a Mac or a PC, an on-site backup is a simple way to access your data quickly should anything happen to your computer. If your laptop or desktop’s hard drive crashes, and you have an up-to-date external hard drive available, you can quickly get most of your data back or use the external drive on another computer while yours gets fixed or replaced. If you remember to keep that external hard drive fairly up to date, the exposure for data loss is negligible, as you might only lose the uncopied files on your laptop. Most external hard drives even come with software to ensure they’re readily updated.

Having an on-site backup is a great start, but having an off-site backup is a key component in having a complete backup strategy, including cloud storage. The newer backup strategies build on the cloud’s strengths:

  • Convenience: Backing up large volumes of data in the cloud is fast.
  • Durability and reliability: Your data is protected against fires, natural disasters, and more.
  • Collaboration: Sharing with permissions is intuitive and effortless in the cloud.

Is the 3-2-1 Backup Rule Perfect?

There is no such thing as a perfect backup system, but the 3-2-1 approach is a great start for most people and businesses. Even the United States government recommends this approach. In a 2012 paper for the United States Computer Emergency Readiness Team (US-CERT), Carnegie Mellon recommended the 3-2-1 method in their publication: Data Backup Options.

Backing Up Is the Best Insurance

The 3-2-1 plan is great for getting your files backed up. If you view the strategy like an insurance policy, you want one that provides the coverage needed should the unthinkable happen. Service also matters; having a local, off-site, and offline backup gives you more options for backup recovery.

Backblaze Backup in 3-2-1…

While Backblaze can’t help with power outages, computer encryption, or anti-theft technologies (though we can locate a computer), we can help make backing up your files a no-brainer. And (at least to our most recent survey) with only 11% of respondents who own a computer backing up daily, folks need the help!

Getting started with Computer Backup for your personal or business computers helps take care of that crucial “1” in your complete 3-2-1 backup strategy. And, with our included one year Version History feature (or Forever Version History if you want to upgrade), you have additional layers of protection should anything happen to your physical devices.

The post The 3-2-1 Backup Strategy appeared first on Backblaze Blog | Cloud Storage & Cloud Backup

What Is Extended Version History?

Post Syndicated from original https://www.backblaze.com/blog/what-is-extended-version-history/

Our recent Backup Awareness Survey showed that 61% of Americans who own a computer and back it up are not very confident that all of their data is being backed up. That just goes to show how complicated some backup solutions are.

And what good is a backup service if it’s hard to get your data back when you need it?

The Backblaze Computer Backup client is designed to stay out of the way and back up your data, while making restoring that data a walk in the park. One of the popular ways of enhancing our backup service is a feature called Extended Version History. But, we’ve found that some people still don’t quite understand what it does. With that in mind, I wanted to write an overview of the feature, how it works, and why it’s useful for anyone that uses our Computer Backup service, whether it’s for personal use or for their company or family group.

Extended Version History Explained

First, we need to define two key terms, “retention” and “version,” to help explain Extended Version History.

What Is Retention?

In simple terms, retention is how long something in your backup is kept backed up.

What Is a Version?

It seems simple enough, but it’s worth explaining what we mean by a “version.” Without getting in the weeds, whenever a file is added or created on your computer, that is a version. Whenever you change a file on your computer, whether you add more lines to a spreadsheet or edit your recent vacation photos, those changes also create another version of the file.

When you understand what retention is and what a version is, it’s easy to understand Extended Version History. It’s a feature that allows you to set a retention timeframe that specifies how long all the older versions—the version history—of your files should be kept as part of your backup.

How Long Is Backblaze’s Retention?

The standard Backblaze Computer Backup service comes with 30 days of Version History for the files that are backed up. This means that you can go back in time (using our roll back time feature) and access older versions of files for 30 days from the date they were last changed or deleted. After that 30-day mark, the version of the file that’s 30 days old will leave your backup, but any newer files will remain.

Note: If you last changed or added a file more than 30 days ago, but have not made any changes to it, it will remain in your backup as long as it remains on your computer (or is unchanged). If it gets removed or changed, that’s when the 30-day retention period starts.

What Does Extended Version History Do?

With Extended Version History, you can increase that 30-day period to one year or even forever. This essentially increases the duration for which you can roll back time when going to access your data.

A Very Simple Example (With Babies!)

As a new uncle, I have babies on the brain. Let’s say that a baby was born on July 1st and our family creates a spreadsheet to chart the growth of the baby. Every single day, we add a row to the spreadsheet to add in the baby’s weight, height, and maybe a cute note. The previous rows don’t get deleted, and so the spreadsheet grows by one row every single day.
On July 30th, our spreadsheet will have 30 rows (one per day). If that spreadsheet was being backed up by Backblaze, I could go back in time to July 1st and get a copy of that spreadsheet from the very first day, with just a single row of baby information. However, if I tried to do that on July 31, that original version would be gone, but I could go back and get a copy from July 2nd, the version with the first two rows of baby data. If I tried to go back on, say, August 30th, I could get a copy from August 1, which would have all of July’s rows of baby data.

To illustrate the point, here’s me as a Soviet baby.

With Extended Version History, using that same example, I have more time (a year or forever) to go back and retrieve that original copy of the spreadsheet created on July 1 with just the first row.

Why would you want the spreadsheet with just one row? Who knows, it’s an example!

Why Extended Version History? Because Mistakes Happen!

Our Backup Awareness Month survey found that 67% of respondents have reported accidentally deleting a file. 44% reported losing data, or access to data, because a shared or synced drive or folder was deleted. Having Extended Version History turned on for your Backblaze backup helps avoid data loss because of accidental deletions.

You may not always realize right away (or within 30 days) that you deleted a file accidentally. Or you may not regularly check that shared drive until it’s too late and your older versions are gone. With Extended Version History, you can go back in time up to a year later or forever later and get those files back.

How to Get Extended Version History?

I encourage everyone I know to enable Extended Version History as soon as they install Backblaze on their computer.
Step 1: Click “Upgrade.”

Step 2: Select how long you want to keep files—one year or forever.

One thing to keep in mind is that simply turning on Extended Version History won’t automatically extend the “life” of your files retroactively. For example, if you open your account on July 1 and enable Extended Version History on July 28, only the versions from July 28 onward will have Extended Version History, not the versions created between July 1 and July 28. Once enabled, any new or changed files will have their retention rate increased, which is why doing so when you first install Backblaze is the best policy.

Consider Extended Version History as getting additional “mistake insurance” for your data. If something happens, or you lose access to shared files and that goes unnoticed, we’ll have your back!

The post What Is Extended Version History? appeared first on Backblaze Blog | Cloud Storage & Cloud Backup.

Server Backup 101: Disaster Recovery Planning

Post Syndicated from Kari Rivas original https://www.backblaze.com/blog/server-backup-101-disaster-recovery-planning/

In any business, time is money. What may shock you is how much money that time is actually worth. According to Gartner, the average cost of one hour of downtime for a business is roughly $300,000. That’s $5,600 a minute. Multiply that out by the amount of time it takes to recover from data theft, sabotage, or a natural disaster, and you could easily be looking at millions of dollars in lost revenue. That is, unless you’ve planned ahead with an effective disaster recovery plan.

Even one hour of lost time due to a cyberattack or natural disaster could adversely affect your business operations. Read on to learn how to develop an effective disaster recovery plan so you can quickly rebound no matter what happens, including:

  • Knowing what a disaster recovery plan is and why you need it.
  • Developing an effective strategy.
  • Identifying key roles.
  • Prioritizing business operations and objectives.
  • Deploying backups.

What Is a Disaster Recovery Plan?

A disaster recovery plan is made up of resources and processes that a business can use to restore apps, data, digital assets, equipment, and network operations in the event of any unplanned disruption.

Events such as natural disasters (floods, fires, earthquakes, etc.), theft, and cybercrime often interrupt business operations or restrict access to data. The goal of a disaster recovery plan is to get back up and running as quickly and smoothly as possible.

Some companies will choose to write their own disaster recovery plans, while others may contract with a managed service provider (MSP) specializing in disaster recovery as a service (DRaaS). Either way, crafting a disaster recovery plan that covers you for any contingency is crucial.

Why Do You Need a Disaster Recovery Plan?

A disaster recovery plan is not just a good idea, it is an essential component of your business. Cybercrime is on the rise, targeting small and medium-sized businesses just as often as large corporations. According to Cybersecurity Magazine, 43% of recent data breaches affected small and medium-sized businesses. Additionally, you could be cut off from your data by power outages, hardware failure, data corruption, and natural occurrences that restrict IT workflows. So, why do you need a disaster recovery plan? A few key benefits rise to the top:

  • Your disaster recovery plan will ensure business continuity in the case of a disaster. Imagine the confidence of knowing that no matter what happens, your business is prepared and can continue operations seamlessly.
  • An effective disaster recovery plan will help you get back up and running faster and more efficiently.
  • The plan also helps to communicate to your entire team, from top to bottom, what to do in the event of an emergency.

Writing a Disaster Recovery Plan: What Should Your Disaster Recovery Plan Include?

A solid disaster recovery plan should include five main elements, which we’ll detail below:

  1. An effective strategy.
  2. Key team members who can carry out the plan.
  3. Clear objectives and priorities.
  4. Solid backups.
  5. Testing protocols.

An Effective Strategy

One of the most critical aspects of your disaster recovery plan should be your strategy. Typically, the details of a disaster recovery plan include steps for prevention, preparation, mitigation, and recovery. Think about both the big picture and fine details when putting together the pieces.

Disaster Recovery Planning Case Study: Santa Cruz Skateboards

Santa Cruz Skateboards safeguarded decades worth of data with a disaster recovery plan and backups to prevent loss from the threat of tsunamis on the California coast. Read more about how they did it.

Some tips for creating an effective strategy include:

  • Identify possible disasters. Consider the types of disasters your business may encounter and design your plan around those. Every business is susceptible to cybercrime, which should be a significant component of your plan. If your business is located in a disaster prone location, let that dictate your plan objectives.
  • Plan for “minor” disasters. A “major” disaster like an earthquake could take out the entire office and on-premises infrastructure, but “minor” disasters can also be disruptive. Good employees make mistakes and delete things, and bad employees sometimes make worse mistakes. A disaster recovery plan protects you from those “minor” disasters as well.
  • Create multiple disaster recovery plans. You may need to create different versions of your disaster recovery plan based on specific scenarios and the severity of the disaster. For example, you may need a plan that responds to a cyberattack and restores data quickly, while another plan may deal with hardware destruction and replacement rather than data restoration.
  • Plan from your recovery backward. Think about what you need to accomplish with your disaster recovery and plan your backup routine to support it. Then, after your plan is written, go back and ensure that your backup routine follows the plan initiatives and accomplishes the goals in an acceptable time frame.
  • Develop KPIs. Include critical key performance indicators (KPIs) in the plan, such as a recovery time objective (RTO) and recovery point objective (RPO). RTO refers to how quickly you intend to restore your systems after a disaster, and RPO is the maximum amount of data loss you can safely incur.

Establish the Key Team Members and Their Roles and Hierarchy

Another crucial component of your disaster recovery plan is identifying key team members to carry out the instructions. You must clearly define roles and hierarchy for effectiveness. Consider the following when building your disaster recovery team:

  • Communicate roles and hierarchy. Ensure that each team member knows their role in the plan and understands where they land in the hierarchy. Build in redundancy if a major player is unavailable.
  • Develop a master contact list. Create a master list with updated contact information for each team member and update it regularly as things change. Be sure the list includes everyone’s cell phone and landline numbers (if applicable) and emergency contacts for each person. Don’t assume you will have working internet and consider alternative ways to reach critical team members in the middle of the night.
  • Plan on how to manage your team. Think about how you will stay organized and manage your team to function 24/7 until you resolve the disaster.

Prioritize Business Operations and Objectives

Another important aspect of your disaster recovery plan is prioritizing business operations and objectives and crafting your plan around those.

Identify the most critical aspects of the business that need to be restored first. Then, focus on those and leave the less essential things until later. Understand that it is not feasible to restore everything at once. Instead, you must prioritize the most critical business areas and get those up and running and then, other, less crucial parts of the system. Detail these priorities in your plan so that no one wastes time on nonessential operations.

Know How to Deploy Your Backups

Backups should be a routine function for your organization, and you should know them inside and out. Be sure to familiarize yourself with every aspect of the backup process, including where data is stored, how recent it is, and how to restore it at a moment’s notice.

Having a reliable backup plan could save your business. You don’t want to waste precious time figuring out where the latest backup is, where it’s stored (whether that’s locally or on the cloud), or how to access it. Off-site cloud storage is a safe, reliable way to store and retrieve your data, especially in the event of a disaster.

Practice restoring your backups regularly to test their viability. Document the process for restoring in case you are unavailable and someone else has to take over. Data restoration should be a central part of your disaster recovery plan. Remember, backups are not your entire disaster recovery plan but only a piece of the overall system.

Foolproof Your Plan With Disaster Recovery Testing

The best-laid plans don’t always work out. Therefore, it’s essential that you foolproof your disaster recovery plan by testing it regularly (once a year, or every six months, whatever works for you). You don’t have to experience a real catastrophe; you can simulate what a disaster would look like and run through the entire process to ensure everything works as expected. Some disaster recovery testing best practices include:

  • Planning for the worst-case scenario. Think about things like access to a car, how you will get to the office, and how you will access your backups if they are stored online and you don’t have internet? Prepare by having multiple alternate plans (A, B, C, etc.). Remember, disasters come in all shapes and sizes so, be prepared to think outside the box. When the COVID-19 pandemic started, businesses had to scramble to adjust. Prepare for anything, even minor disruptions or cut-offs from resources you rely on.
  • Securing resources in advance. If you need resources to make it work, such as budgetary funds, software, hardware, or services, get those approved now so you’re not stuck provisioning necessary resources in the middle of a disaster.
  • Regularly reviewing and updating your disaster recovery plan as things change. Team members come and go, so schedule routine updates every three to six months to ensure that everything is up to date and viable.
  • Distributing copies of your disaster recovery plan. All staff members, including executives, should have a copy of your plan, and you should clearly communicate how it works and what everyone’s responsibility is.
  • Conducting post mortems after training and simulations (or a real disaster) to determine what works and what doesn’t. Make changes to your plan accordingly.

Don’t wait until a disaster occurs before writing your disaster recovery plan. A disaster recovery plan is an ever-evolving process you must maintain as the business changes and grows so you can face anything that the future brings.

Disaster Recovery, Done.

Ready to check disaster recovery off your list? Check out our Instant Recovery in Any Cloud solution that you can use as part of your disaster recovery plan. You can run a single command to instantly see your servers, data, firewalls, and network storage. Get back up and running as soon as possible with minimal disruption and expense to your business.

The post Server Backup 101: Disaster Recovery Planning appeared first on Backblaze Blog | Cloud Storage & Cloud Backup.

Server Backup 101: Developing a Server Backup Strategy

Post Syndicated from Kari Rivas original https://www.backblaze.com/blog/server-backup-101-developing-a-server-backup-strategy/

In business, data loss is unavoidable unless you have good server backups. Files get deleted accidentally, servers crash, computers fail, and employees make mistakes.

However, those aren’t the only dangers. You could also lose your company data in a natural disaster or cybersecurity attack. Ransomware is a serious concern for small to medium-sized businesses as well as large enterprises. Smart companies plan ahead to avoid data loss.

This post will discuss server backup basics, the different types of server backup, why it’s critical to keep your data backed up, and how to create a solid backup strategy for your company. Read on to learn everything you ever wanted to know about server backups.

First Things First: What Is a Server?

A server is a virtual or physical device that performs a function to support other computers and users. Sometimes servers are dedicated machines used for a single purpose, and sometimes they serve multiple functions. Other computers or devices that connect to the server are called “clients.” Typically, clients use special software to communicate with the server and reply to requests. This communication is referred to as the server/client model. Some common uses for this setup include:

  • Web Server: Hosts web pages and online applications.
  • Email Server: Manages email for a company.
  • Database Server: Hosts various databases and controls access.
  • Application Server: Allows users to share applications.
  • File Server: Used to host files shared on a network.
  • DNS Server: Used to decode web addresses and deliver the user to the correct address.
  • FTP Server: Used specifically for hosting files for shared use.
  • Proxy Server: Adds a layer of security between client and server.

Servers run on many operating systems (OS) such as Windows, Linux, Mac, Apache, Unix, NetWare, and FreeBSD. The OS handles access control, user connections, memory allocation, and network functions. Each OS offers varying degrees of control, security, flexibility, and scalability.

Why It’s Important to Back Up Your Server

Did you know that roughly 40% of small and medium-sized businesses (SMBs) will be attacked by cybercriminals within a year, and 61% of all SMBs have already been attacked? Additionally, statistics show that 93% of companies that lost data for more than 10 days were forced into bankruptcy within a year. More than half of them filed immediately, and most shut down.

Company data is vulnerable to fire, theft, natural disasters, hardware failure, and cybercrime. Backups are an essential prevention tool.

Types of Servers

Within the realm of servers, there are many different types for virtually any purpose and environment. However, the primary function of most servers is data storage and processing. Some examples of servers include:

  • Physical Servers: These are hardware devices (usually computers) that connect users, share resources, and control access.
  • Virtual Servers: Using special software (called a hypervisor), you can set up multiple virtual servers on one physical machine. Each server acts like a physical server while the hypervisor manages memory and allocates other system resources as needed.
  • Hybrid Servers: Hybrids are servers combining physical servers and virtual servers. They offer the speed and efficiency of a physical server combined with the flexibility of cloud-hosted resources.
  • NAS Devices: Network-attached storage (NAS) devices store data and are accessed directly through the network without first connecting to a computer. These hardware devices contain a storage drive, processor, and OS, and can be accessed remotely.
  • SAN Server: Although not technically a server, a storage area network (SAN) connects multiple storage devices to multiple servers expanding the network and controlling connections.
  • Cloud Servers: Cloud servers exist in a virtual online environment, and you can access them through web portals, applications, and specialized software.

Regardless of how you save your data and where, backups are essential to protecting yourself from loss.

How to Back Up a Server

You have options for backing up data, and the methods vary. First, let’s talk about terminology.

Backup vs. Archive

Backing up is copying your data, whereas an archive is a historical copy that you keep for retention purposes, often for long periods. Archives are typically used to save old, inactive data for compliance reasons.

Here are two examples that illustrate backups vs. an archives. An example of a backup is when your mobile phone backs up to the cloud, and if you factory reset the phone, you can restore all your applications, settings, and data from the backup copy. An example of an archive is a tape backup of old HR files that have long since been deleted from the server.

Backup vs. Sync

Sometimes people confuse the word backup with sync. They are not the same thing. A backup is a copy of your data you can use to restore lost files. Syncing is the automatic updating and merging of two file sources. Cloud computing often uses syncing to keep files in one location identical to files in another.

To prevent data loss, backups are the process to use. Syncing overwrites files with the latest version; a backup can restore back to a single point in time, so you don’t lose anything valuable.

Backup Destinations

When selecting a backup destination, you have many mediums to choose from. There are pros and cons for each type. Some popular backup destinations and their pros and cons are as follows:

Destination Pros Cons
External Media (USB, CD, Removable Hard Drives, Flash Drives, etc.) Quick, easy, affordable. Fragile if dropped, crushed, or exposed to magnets; very small capacity.
NAS Always available on the network, small size, and great for SMBs. Vulnerable to on-premises threats and non-scalable due to limits.
Network or SAN Storage High speed, view connected drives as local, good security, failover protection, excellent disk utilization, and high-end disaster recovery options. Can be expensive, doesn’t work with all types of servers, and is vulnerable to attacks on the network.
Tape Dependable (robust, not fragile), can be kept for years, low cost, and simple to replicate. High initial setup costs, limited scalability, potential media corruption over time, and time consuming to manage.
FTP Excellent for large files, copy multiple files at once, can resume if the connection is lost, schedule backups and recover lost data. No security, vendors vary widely, not all solutions include encryption, and vulnerable to attacks.
File-sharing Services (Dropbox, OneDrive, iCloud, etc.) Quick and easy to use; inexpensive. Great for collaborating and sharing data. Most file-sharing services use file syncing rather than a true cloud backup.

Cloud backups are an altogether different type of backup; typically, you have two options available: all-in-one tools or integrated solutions.

All-in-one Tools

All-in-one tools like Carbonite Safe, Carbonite Server, Acronis, IDrive, CrashPlan, and SpiderOak combine both the backup software and the backend cloud storage in one offering. They have the ability to back up entire operating systems, files, images, videos, and sometimes even mobile device data. Depending on the tool you choose, you may be able to back up an unlimited number of devices, or you may have limits. However, most of these all-in-one solutions are expensive and can be complex to use. All those bells and whistles often come at a price—a steep learning curve.

Integrated Solutions (Backup Software Paired With Cloud Storage)

Pairing software and cloud storage is another option that combines the best of both worlds. It allows users to choose the software they want with the features they need and fast, reliable cloud storage. Cloud storage is scalable, so you will never run out of space as your business grows. Using your chosen software, it’s fast and easy to restore your files. Although it may seem counterintuitive, it’s often more affordable to use two integrated solutions versus an all-in-one tool. Another big bonus of using cloud storage is that it integrates with many popular software options. For example, Backblaze works seamlessly with:

An important factor to consider when choosing the right backup software and cloud storage is compatibility. Research which platforms your software will back up and what types of backups it offers (file, image, system, etc.). You also need to think about the restore process and your options (e.g., file, folder, bare metal/image, virtual, etc.). User-friendliness is important when deciding. Some programs like rClone require a working knowledge of command line. Choose a software program that is best for you.

Think about scalability and how much storage it can handle now and in the future as your business grows. A few other things to consider are pricing, security, and support. Your backup files are no good if they are vulnerable to attack. Compare prices and check out the support options before making your final decision.

Creating a Solid Backup Strategy

A solid backup strategy is the best way to protect your company against data loss. Again, you have options. The 3-2-1 strategy is the gold standard, but some companies are choosing options like a 3-2-1-1-0 option or even a 4-3-2 scheme. Learn more about how each plan works.

Before determining your strategy, you must consider what data you need to back up. For example, will you be backing up just servers or also workstations and dedicated servers, such as email servers or SaaS data devices?

Another concern is how you will get your data into the cloud. You need to figure out which method will work best for you. You have the option of direct transfer over internet bandwidth or using a rapid ingest device (e.g., the Backblaze Fireball rapid ingest device).

Universal Data Migration

Migrating your data can seem like an insurmountable task. We launched our Universal Data Migration service to make migrating to Backblaze just as easy as it is to use Backblaze. You can migrate from virtually any source to Backblaze B2 Cloud Storage, and it’s free to new customers who have 10TB of data or more to migrate with a one-year commitment.

How Often Should You Back Up Your Data?

Should you run full backups regularly? Or rely on incremental backups? The answer is that both have their place.

To fully protect yourself, performing regular full backups and keeping them safe is essential. Full backups can be scheduled for slow times or performed overnight when no one is using the data. Remember that full backups take the longest to complete and are the costliest but the easiest to restore.

A full backup backs up the entire server. An incremental backup only backs up files that have changed or been added since the last backup, saving storage space. The cadence of full versus incremental backups might look different for each organization. Learn more about full vs. incremental, differential, and full synthetic backups.

How Long Should You Keep Your Previous Backups?

You also must consider how long you want to keep your previous backups. Will you keep them for a specific amount of time and overwrite older backups?

By overwriting the files, you can save space, but you may not have an old enough backup when you need it. Also, keep in mind that many cloud storage vendors have minimum retention policies for deleted files. While “retention” sounds like a good thing, in this case it’s not. They might be charging you for data storage for 30, 60, or even 90 days even if you deleted it after storing it for just one day. That may also factor into your decision about how long you should keep your previous backup files. Some experts recommend three months, but that may not be enough in some situations.

You need to keep full backups for as long as you might need to recover from various issues. If, for example, you are infiltrated by a cybercriminal and don’t discover it for two months, will your oldest backup be enough to restore your system back to a clean state?

Another question to think about is if you’ll keep an archive. As a refresher, an archive is a backup of historical data that you keep long-term even if the files have already been deleted from the server. Most sources say you should plan to keep archives forever unless you have no use for the data in the future, but your company might have a different appetite for retention timeframes. Forever probably seems like…well, a long time, but keep in mind that the security of having those files available may be worth it.

How Will You Monitor Your Backup?

It’s not enough to just schedule your backups and walk away. You need to monitor them to ensure they are occurring on schedule. You should also test your ability to restore and fully understand the options you have for restoring your data. A backup is only as good as its ability to restore. You must test this out periodically to ensure you have a solid disaster recovery plan in place.

Special Considerations for Backing Up

When backing up servers with different operating systems, you need to consider the constraints of that system. For example, SQL servers can handle differential backups, whereas other servers cannot. Some backup software like Veeam integrates easily with all the major operating systems and therefore supports backups of multiple servers using different platforms.

If you are backing up a single server, things are easy. You have only one OS to worry about. However, if you are backing up multiple servers with different platforms and applications running on them, things could get more complex. Be sure to research all your options and use a vendor that can easily handle groups management and SaaS-managed backup services so that you can view all your data through a single pane of glass. You want consolidation and easy delineation if you need to pinpoint a single system to restore. You can use groups to easily manage different servers with similar operating systems to keep things organized and streamline your backup strategy.

As you can see, there are many facets to server backups, and you have options. If you have questions or want to learn more about Backblaze backup solutions, contact us today. Or, click here if you’re ready to get started backing up your server.

The post Server Backup 101: Developing a Server Backup Strategy appeared first on Backblaze Blog | Cloud Storage & Cloud Backup.

Level Up Your Backup Game With Backblaze and Veritas

Post Syndicated from Jennifer Newman original https://www.backblaze.com/blog/level-up-your-backup-game-with-backblaze-and-veritas/

If you’re using Veritas’ Backup Exec, you’re already ahead of the game when it comes to your data backup and recovery approach. Now, you can power up your backup strength by adding Backblaze B2 Cloud Storage as a destination for your Backup Exec data.

The joint solution offers easy, affordable, S3-compatible object storage to customers who use Backup Exec to streamline their data backup and recovery approach. Read on to learn more about this partnership and how it can benefit your business.

Backblaze and Veritas: In Person at VMware Explore 2022

Want to learn more? Stop by booth 1501 at VMware Explore 2022, August 29–September 1. You can visit with our technical experts, see demos, and learn more about how Backblaze B2 Cloud Storage seamlessly integrates with Veritas Backup Exec. Or, schedule a meeting using this link to talk about solutions tailored to your business needs.

What Is Veritas Backup Exec?

The Veritas Backup Exec service helps businesses protect almost any data on any storage device—tape, servers, or in the cloud. By unifying backup management in one panel, it creates a simple, customizable approach to managing backups and orchestrating recovery that can benefit everyone from the local bakery, to a regional school district, to large government units.

How Does Backblaze Integrate With Backup Exec?

Customers have regularly asked for Backblaze to be accepted into the Veritas Technology Partner Program. Being able to seamlessly integrate Veritas with Backblaze B2 is a big win for these customers who’ve long been looking for an easy, affordable solution that helps them manage infrastructure costs.

Beginning today, any business or institution using Backup Exec can configure their data to back up to B2 Cloud Storage. IT teams can rest easy, knowing that remote offices, Linux and Unix workloads, virtual or Microsoft workloads, and more, are protected and immediately available if they need them—all configurable in a few clicks and at one-fifth the price of traditional storage vendors, with no data retention minimums or other lock-in fees.

“The Backup Exec service empowers small and medium-sized businesses to do more with less, and to minimize their daily lift around data management and protection. This aligns perfectly with our mission to make storing and using data astonishingly easy—especially for IT teams that already have a ton on their plate.”
—Nilay Patel, VP of Sales & Partnerships, Backblaze

How Does This Partnership Benefit Joint Customers?

The partnership delivers in three key value areas:

  • Simplification: Backup Exec provides a simple, unified user interface that removes complexity from data protection. Backblaze B2 is configurable in a few easy steps.
  • Hybrid-cloud adoption: The capital and personnel expense of purchasing and managing on-prem data storage can be challenging. Veritas and Backblaze put cloud adoption within reach—for backups, workloads, infrastructure, recovery, or everything together.
  • Cost reduction: Backup Exec makes configuring backups easy, which means that businesses can fine-tune their storage bill in line with their budgets. With B2 Cloud Storage priced at one-fifth of traditional cloud vendors—the combination offers a powerful tool to businesses that want to optimize their spend.

“Our goal with Backup Exec is to provide a simple, powerful solution that frees business owners from concerns about data loss. Backblaze is a natural partner in this effort and we’re excited to work with them to bring the value of cloud backup to a larger group of businesses and institutions.”
—Jason Von Eberstein, Senior Principal Product Manager of Veritas

Bonus Points: Veritas + Carahsoft + Backblaze = Public Sector Success

Backblaze recently announced a partnership with Carahsoft to help public sector CIOs optimize their cloud spend. Carahsoft is the Master Government Aggregator™ for the IT industry. The partnership—which was enabled by our recent launch of a capacity-based pricing bundle, Backblaze B2 Reserve—solves both the budgeting and procurement challenges public sector CIOs are facing. And Carahsoft is a strategic distributor for Veritas, so public sector customers can take advantage of the joint solution as well.

About Veritas

Veritas enables organizations to harness the power of their information, with solutions designed to serve the world’s largest and most complex heterogeneous environments. Veritas’s industry-leading solutions cover all platforms with backup and recovery, business continuity, software-defined storage, and information governance.

Getting Started With Backblaze B2 and Veritas

Ready to take your backup game to the next level? Click here to get started today and check out our Knowledge Base article for detailed instructions.

The post Level Up Your Backup Game With Backblaze and Veritas appeared first on Backblaze Blog | Cloud Storage & Cloud Backup.

Server Backup 101: On-premises vs. Cloud-only vs. Hybrid Backup Strategies

Post Syndicated from Kari Rivas original https://www.backblaze.com/blog/server-backup-101-on-premises-vs-cloud-only-vs-hybrid-backup-strategies/

As an IT leader or business owner, establishing a solid, working backup strategy is one of the most important tasks on your plate. Server backups are an essential part of a good security and disaster recovery stance. One decision you’re faced with as part of setting up that strategy is where and how you’ll store server backups: on-premises, in the cloud, or in some mix of the two.

As the cloud has become more secure, affordable, and accessible, more organizations are using a hybrid cloud strategy for their cloud computing needs, and server backups are particularly well suited to this strategy. It allows you to maintain existing on-premises infrastructure while taking advantage of the scalability, affordability, and geographic separation offered by the cloud.

If you’re confused about how to set up a hybrid cloud strategy for backups, you’re not alone. There are as many ways to approach it as there are companies backing up to the cloud. Today, we’re discussing different server backup approaches to help you architect a hybrid server backup strategy that fits your business.

Server Backup Destinations

Learning about different backup destinations can help administrators craft better backup policies and procedures to ensure the safety of your data for the long term. When structuring your server backup strategy, you essentially have three choices for where to store data: on-premises, in the cloud, or in a hybrid environment that uses both. First, though, let’s explain what a hybrid environment truly is.

Refresher: What Is Hybrid Cloud?

Hybrid cloud refers to a cloud environment made up of both private cloud resources (typically on-premises, although they don’t have to be) and public cloud resources with some kind of orchestration between them. Let’s define private and public clouds:

  • A public cloud essentially lives in a data center that’s used by many different tenants and maintained by a third-party company. Tenants share the same physical hardware, and their data is virtually separated so one tenant can’t access another tenant’s data.
  • A private cloud is dedicated to a single tenant. Private clouds are traditionally thought of as on-premises. Your company provisions and maintains the infrastructure needed to run the cloud at your office. Now, though, you can rent rackspace or even private, dedicated servers in a data center, so a private cloud can be off-premises, but it’s still dedicated only to your company.

Hybrid clouds are defined by a combined management approach, which means they have some type of orchestration between the public and private cloud that allows data to move between them as demands, needs, and costs change, giving businesses greater flexibility and more options for data deployment and use.

Here are some examples of different server backup destinations according to where your data is located:

  • Local backup destinations.
  • Cloud-only backups.
  • Hybrid cloud backups.

Local Backup Destinations

On-premises backup, also known as a local backup, is the process of backing up your system, applications, and other data to a local device. Tape and network-attached storage (NAS) are examples of common local backup solutions.

  • Tape: With tape backup, data is copied from its primary storage location to a tape cartridge using a tape drive. Tape creates a physical air gap, meaning there’s a literal gap of air between the data on the tape and the network—they are not connected in any way. This makes tape a highly secure option, but it comes at a cost. Tape requires physical storage space some businesses may not have. Tape maintenance and management can be very time consuming. And tapes can degrade, resulting in data loss.
  • NAS: NAS is a type of storage device that is connected to a network to allow data processing and storage through a secure, centralized location. With NAS, authorized users can access stored data from anywhere with a browser and a LAN connection. NAS is flexible, relatively easy to scale, and cost-effective.

Cloud-only Backups

Cloud-only backup strategies are becoming more commonplace as startups take a cloud-native approach and existing companies undergo digital transformations. A cloud-only backup strategy involves eliminating local, on-premises backups and sending files and databases to the cloud vendor for storage. It’s still a great idea to keep a local copy of your backup so you comply with a 3-2-1 backup strategy (more on that below). You could also utilize multiple cloud vendors or multiple regions with the same vendor to ensure redundancy. In the event of an outage, your data is stored safely in a separate cloud or a different cloud region and can easily be restored.

With services like Cloud Replication, companies can easily achieve a solid cloud-only server backup solution within the same cloud vendor’s infrastructure. It’s also possible to orchestrate redundancy between two different cloud vendors in a multi-cloud strategy.

Hybrid Cloud Backups

When you hear the term “hybrid” when it comes to servers, you might initially think about a combination of on-premises and cloud data. That’s typically what people think of when they imagine a hybrid cloud, but as we mentioned earlier, a hybrid cloud is a combination of a public cloud and a private cloud. Today, private clouds can live off-premises, but for our purposes, we’ll consider private clouds as being on-premises. A hybrid server backup strategy is an easy way to accomplish a 3-2-1 backup strategy, generally considered the gold standard when it comes to backups.

Refresher: What Is the 3-2-1 Backup Strategy?

The 3-2-1 backup strategy is a tried and tested way to keep your data accessible, yet safe. It includes:

  • 3: Keep three copies of any important file—one primary and two backups.
  • 2: Keep the files on two different media types to protect against different types of hazards.
  • 1: Store one copy off-site.

A hybrid server backup strategy can be helpful for fulfilling this sage backup advice as it provides two backup locations, one in the private cloud and one in the public cloud.

Choosing a Backup Strategy

Choosing a backup strategy that is right for you involves carefully evaluating your existing systems and your future goals. Can you get there with your current backup strategy? What if a ransomware or distributed denial of service (DDoS) attack affected your organization tomorrow? Decide what gaps need to be filled and take into consideration a few more crucial points:

  • Evaluate your vulnerabilities. Is your location susceptible to a local data disaster? How often do you think you might need to access your backups? How quickly would you need them?
  • Price. Various backup strategies will incur costs for hardware, service, expansions, and more. Carefully evaluate your organization’s finances to decide on a budget. And keep in mind that monthly fees and service charges may go up over time as you add more storage or use enhanced backup tools.
  • Storage capacity. How much storage capacity do you have on-site? How much data does your business generate over a given period of time? Do you have IT personnel to manage on-premises systems?
  • Access to hardware. Provisioning a private cloud on-premises involves purchasing hardware. Increasing supply chain issues can slow down factories, so be mindful of shortages and increased delivery times.
  • Scalability. As your organization grows, it’s likely that your data backup needs will grow, too. If you’re projecting growth, choose a data backup strategy that can keep up with rapidly expanding backup needs.

Backup Strategy Pros and Cons

Local Backup Strategy

  • Pros: A major benefit to using a local backup strategy is that organizations have fast access to data backups in case of emergencies. Backing up to NAS can also be faster locally depending on the size of your data set.
  • Cons: Maintaining on-premises hardware can be costly, but more important, your data is at a higher risk of loss from local disasters like floods, fires, or theft.

Cloud Backup Strategy

  • Pros: With a cloud-only backup strategy, there is no need for on-site hardware, and backup and recovery can be initiated from any location. Cloud resources are inherently scalable, so the stress of budgeting for and provisioning hardware is gone.
  • Cons: A cloud-only strategy is susceptible to outages if your data is consolidated with one vendor, however this risk can be mitigated by diversifying vendors and regions within the same vendor. Similarly, if your network goes down, then you won’t have access to your data.

Hybrid Cloud Backup Strategy

  • Pros: Hybrid cloud server backup strategies combine the best features of public and private clouds: You have fast access to your data locally while protecting your data from disaster by adding an off-site location to your backup strategy.
  • Cons: Setting up and running a private cloud server can be very costly. Businesses also need to plan their backup strategy a bit more thoughtfully because they must decide what to keep in a public cloud versus a private cloud or on local storage.

Hybrid Server Backup Considerations

Once you’ve decided a hybrid server backup strategy is right for you, there are many ways you can structure it. Here are just a few examples:

  • Keep backups of active working files on-premises and move all archives to the cloud.
  • Choose a cutover date if your business is ready to move mostly to the cloud going forward. All backups and archives prior to the cutover date could remain on-premises and everything after the cutover date gets stored in cloud storage.
  • Store all incremental backups in cloud storage and keep all full backups and archives stored locally. Or, following the Grandfather-Father-Son (GFS) approach, put the father and son backups in the cloud and grandfather backups in local storage. (Or vice versa.)

As you’re structuring your server backup strategy, consider any GDPR, HIPAA, or cybersecurity requirements. Does it call for off-site, air-gapped backups? If so, you may want to move that data (like customer or patient records) to the cloud and keep other, non-regulated data local. Some industries, particularly government and heavily regulated industries, may require you to keep some data in a private cloud.

Ready to get started? Back up your server using our joint solution with MSP360 or get started with Veeam or any one of our many other integrations.

The post Server Backup 101: On-premises vs. Cloud-only vs. Hybrid Backup Strategies appeared first on Backblaze Blog | Cloud Storage & Cloud Backup.
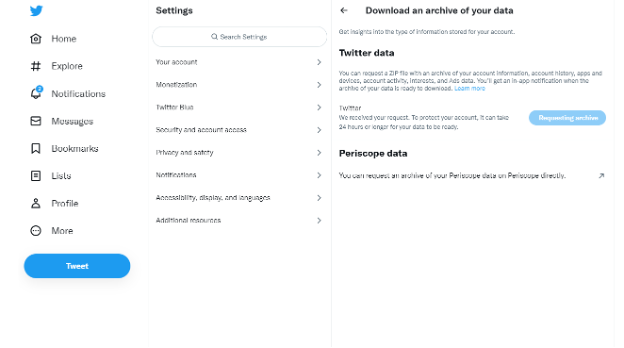
Server Backup 101: Choosing a Server Backup Solution

Post Syndicated from Kari Rivas original https://www.backblaze.com/blog/server-backup-101-choosing-a-server-backup-solution/

If you’re in charge of backups for your company, you know backing up your server is a critical task to protect important business data from data disasters like fires, floods, and ransomware attacks. You also likely know that digital transformation is pushing innovation forward with server backup solutions that live in the cloud.

Whether you operate in the cloud, on-premises, or with a hybrid environment, finding a server backup solution that meets your needs helps you keep your data and your business safe and secure.

This guide explains the various server backup solutions available both on-premises and in the cloud, and how to choose the right backup solution for you. Read on to learn more about choosing the right server backup solution for your needs.

On-premises Solutions for Server Backup

On-premises solutions store data on servers in an in-house data center managed and maintained internally. Although there has been a dramatic shift from on-premises to cloud server solutions, many organizations choose to operate their legacy systems on-premises alone or in conjunction with the cloud in a hybrid environment.

LTO/Tape

Linear tape-open (LTO) backup is the process of copying data from primary storage to a tape cartridge. If the hard disk crashes, the tapes will still hold a copy of the data.

Pros:

  • High capacity.
  • Tapes can last a long time.
  • Provides a physical air gap between backups and the network to protect against threats like ransomware.

Cons:

  • Up-front CapEx expense.
  • Tape drives must be monitored and maintained to ensure they are functioning properly.
  • Tapes take up lots of physical space.
  • Tape is susceptible to degradation over time.
  • The process of backing up to tape can be time consuming for high volumes of data.

NAS

Network-attached storage (NAS) enables multiple users and devices to store and back up data through a secure server. Anyone connected to a LAN can access the storage through a browser-based utility. It’s essentially an extra network strictly for storing data that users can access via its attached network device.

Pros:

  • Faster to restore files and access backups than tape backups.
  • More digitally intuitive and straightforward to navigate.
  • Comes with built-in backup and sync features.
  • Can connect and back up multiple computers and endpoints via the network.

Cons:

  • Requires physical maintenance and periodic drive replacement.
  • Each appliance has a limited storage capacity.
  • Because it’s connected to your network, it is also vulnerable to network attacks.

Local Server Backup

Putting your backup files on the same server or a storage server is not recommended for business applications. Still, many people choose to organize their backup storage on the same server the data runs on.

Pros:

  • Highly local.
  • Quick and easy to access.

Cons:

  • Generally less secure.
  • Capacity-limited.
  • Susceptible to malware, ransomware, and viruses.

Including these specific backup destinations, there are some pros to using on-premises backup solutions in general. For example, you might still be able to access backup files without an internet connection using on-premises solutions. And you can expect a fast restore if you have large amounts of data to recover.

However, all on-premises backup storage solutions are vulnerable to natural disasters, fires, and water damage despite your best efforts. While some methods like tape are naturally air-gapped, solutions like NAS are not. Even with a layered approach to data protection, NAS leaves a business susceptible to attacks.

Backing Up to Cloud Storage

Many organizations choose a cloud-based server for backup storage instead of or in addition to an on-premises solution (more on using both on-premises and cloud solutions together later) as they continue to integrate modern digital tools. While an on-premises system refers to data hardware and physical storage solutions, cloud storage lives “in the cloud.”

A cloud server is a virtual server that is hosted in a cloud provider’s data center. “The cloud” refers to the virtual servers users access through web browsers, APIs, CLIs, and SaaS applications and the databases that run on the servers themselves.

Because cloud providers manage the server’s physical location and hardware, organizations aren’t responsible for managing costly data centers. Even small businesses that can’t afford internal infrastructure can outsource data management, backup, and cloud storage from providers.

Pros

  • Highly scalable since companies can add as much storage as needed without ever running out of space.
  • Typically far less expensive than on-premises backup solutions because there’s no need to pay for dedicated IT staff, hardware upgrades or repair, or the space and electricity needed to run an on-premises system.
  • Builds resilience from natural disasters with off-site storage.
  • Virtual air-gapped protection may be available.
  • Fast recovery times in most cases.

Cons

  • Cloud storage fees can add up depending on the amount of storage your organization requires and the company you choose. Things like egress fees, minimum retention policies, and complicated pricing tiers can cause headaches later, so much so that there are companies dedicated to helping you decipher your AWS bill, for example.
  • Can require high bandwidth for initial deployment, however solutions like Universal Data Migration are making deployment and migrations easier.
  • Since backups can be accessed via API, they can be vulnerable to attacks without a feature like Object Lock.

It can be tough to choose between cloud storage vs. on-premises storage for backing up critical data. Many companies choose a hybrid cloud backup solution that involves both on-premises and cloud storage backup processes. Cloud backup providers often work with companies that want to build a hybrid cloud environment to run business applications and store data backups in case of a cyber attack, natural disaster, or hardware failure.

If you’re stuck between choosing an on-premises or cloud storage backup solution, a hybrid cloud option might be a good fit.

A hybrid cloud strategy combines a private, typically on-premises, cloud with a public cloud.

All-in-one vs. Integrated Solutions

When it comes to cloud backup solutions, there are two main types: all-in-one and integrated solutions.

Let’s talk about the differences between the two:

All-in-one Tools

All-in-one tools are cloud backup solutions that include both the backup application software and the cloud storage where backups will be stored. Instead of purchasing multiple products and deploying them separately, all-in-one tools allow users to deploy cloud storage with backup features together.

Pros:

  • No need for additional software.
  • Simple, out-of-the-box deployment.
  • Creates a seamless native environment.

Cons:

  • Some all-in-one tools sacrifice granularity for convenience, meaning they may not fit every use case.
  • They can be more costly than pairing cloud storage with backup software.

Integrated Solutions

Integrated solutions are pure cloud storage providers that offer cloud storage infrastructure without built-in backup software. An integrated solution means that organizations have to bring their own backup application that integrates with their chosen cloud provider.

Pros:

  • Mix and match your cloud storage and backup vendors to create a tailored server backup solution.
  • More control over your environment.
  • More control over your spending.

Cons:

  • Requires identifying and contracting with more than one provider.
  • Can require more technical expertise than with an all-in-one solution, but many cloud storage providers and backup software providers have existing integrations to make onboarding seamless.

How to Choose a Cloud Storage Solution

Choosing the best cloud storage solution for your organization involves careful consideration. There are several types of solutions available, each with unique capabilities. You don’t need the most expensive solution with bells and whistles. All you need to do is find the solution that fits your business model and future goals.

However, there are five main features that every organization seeking object storage in the cloud should look out for:

Cost

Cost is always a top concern for adopting new processes and tools in any business setting. Before choosing a cloud storage solution, take note of any fees or file size requirements for retention, egress, and data retrieval. Costs can vary significantly between storage providers, so be sure to check pricing details.

Ease-of-use and Onboarding Support

Adopting a new digital tool may also require a bit of a learning curve. Choosing a solution that supports your OS and is easy to use can help speed up the adoption rate. Check to see if there are data transfer options or services that can help you migrate more effectively. Not only should cloud storage be simple to use, but easy to deploy as well.

Security and Recovery Capabilities

Most object storage cloud solutions come with security and recovery capabilities. For example, you may be looking for a provider with Object Lock capabilities to protect data from ransomware or a simple way to implement disaster recovery protocols with a single command. Otherwise, you should check if the security specs meet your needs.

Integrations

All organizations seeking cloud storage solutions need to make sure that they choose a compatible solution with their existing systems and software. For example, if your applications speak the S3 API language, your storage systems must also speak the same language.

Many organizations use software-based backup tools to get things done. To take advantage of the benefits of cloud storage, these digital tools should also integrate with your storage solution. Popular backup solutions such as MSP360 and Veeam are built with native integrations for ease of use.

Support Models

The level of support you want and need should factor into your decision-making when choosing a cloud provider. If you know your team needs fast access to support personnel, make sure the cloud provider you choose offers a support SLA or the opportunity to purchase elevated levels of support.

Questions to Ask Before Deciding on a Cloud Storage Solution

Of course, there are other considerations to take into account. For example, managed service providers will likely need a cloud storage solution to manage multiple servers. Small business owners may only need a set amount of storage for now but with the ability to easily scale with pay-as-you-go pricing as the business grows. IT professionals might be looking for a simplified interface and centralized management to make monitoring and reporting more efficient.

When comparing different cloud solutions for object storage, there are a few more questions to ask before making a purchase:

  • Is there a web-based admin console? A web-based admin console makes it easy to view backups from multiple servers. You can manage all your storage from one single location and download or recover files from anywhere in the world with a network connection.
  • Are there multiple ways to interact with the storage? Does the provider offer different ways to access your data, for example, via a web console, APIs, CLI, etc.? If your infrastructure is configured to work with the S3 API, does the provider offer S3 compatibility?
  • Can you set retention? Some industries are more highly regulated than others. Consider whether your company needs a certain retention policy and ensure that your cloud storage provider doesn’t unnecessarily charge minimum file retention fees.
  • Is there native application support? A native environment can be helpful to back up an Exchange and SQL Server appropriately, especially for team members who are less experienced in cloud storage.
  • What types of restores does it offer? Another crucial factor to consider is how you can recover your data from cloud storage, if necessary.

Making a Buying Decision: The Intangibles

Lastly, don’t just consider the individual software and cloud storage solutions you’re buying. You should also consider the company you’re buying from. It’s worth doing your due diligence when vetting a cloud storage provider. Here are some areas to consider:

Stability

When it comes to crucial business data, you need to choose a company with a long-standing reputation for stability.

Data loss can happen if a not-so-well-known cloud provider suddenly goes down for good. And some lesser-known providers may not offer the same quality of uptime, storage, and other security and customer support options.

Find out how long the company has been providing cloud storage services, and do a little research to find out how popular its cloud services are.

Customers

Next, take a look at the organizations that use their cloud storage backup solutions. Do they work with companies similar to yours? Are there industry-specific features that can boost your business?

Choosing a cloud storage company that can provide the specs that your business requires plays an important role in the overall success of your organization. By looking at the other customers that a cloud storage company works with, you can better understand whether or not the solution will meet your needs.

Reviews

Online reviews are a great way to see how users respond to a cloud storage product’s features and benefits before trying it out yourself.

Many software review websites such as G2, Gartner Peer Insights, and Capterra offer a comprehensive overview of different cloud storage products and reviews from real customers. You can also take a look at the company’s website for case studies with companies like yours.

Values

Another area to investigate when choosing a cloud storage provider is the company values.

Organizations typically work with other companies that mirror their values and enhance their ability to put them into action. Choosing a cloud storage provider with the correct values can help you reach new clients. But choosing a provider with values that don’t align with your organization can turn customers away.

Many tech companies are proud of their values, so it’s easy to get a feel for what they stand for by checking out their social media feeds, about pages, and reviews from people who work there.

Continuous Improvement

An organization’s ability to improve over time shows resiliency, an eye for innovation, and the ability to deliver high-quality products to users like you. You can find out if a cloud storage provider has a good track record for improving and innovating their products by performing a search query for new products and features, new offerings, additional options, and industry recognition.

Keep each of the above factors in mind when choosing a server backup solution for your needs.

How Cloud Storage Can Protect Servers and Critical Business Data

Businesses have already made huge progress in moving to the cloud to enable digital transformations. Cloud-based solutions can help businesses modernize server backup solutions or adopt hybrid cloud strategies. To summarize, here are a few things to remember when considering a cloud storage solution for your server backup needs:

  • Understand the pros and cons of on-premises backup solutions and consider a hybrid cloud approach to storing backups.
  • Evaluate a provider’s cost, security offerings, integrations, and support structure.
  • Consider intangible factors like reputation, reviews, and values.

Have more questions about cloud storage or how to implement cloud backups for your server? Let us know in the comments. Ready to get started? Your first 10GB are free.

The post Server Backup 101: Choosing a Server Backup Solution appeared first on Backblaze Blog | Cloud Storage & Cloud Backup.
How to Back Up and Restore WhatsApp Messages and Files

Post Syndicated from Barry Kaufman original https://www.backblaze.com/blog/how-to-back-up-and-restore-whatsapp-messages-and-files/

June is Backup Awareness Month and we’re kicking it off with the next installment in our series of guides to help you protect social content across many different platforms. We’re working on developing this list—please comment below if you’d like to see another platform covered.

Some of your most valuable digital assets are memories, scattered across the digital ether. For a lot of us, these mementoes of our meta life are tied up in one of Meta’s most popular apps, WhatsApp. The last group chat you had with old college friends. An inspiring note from a loved one. A funny meme that proves your weird uncle does, in fact, have a sense of humor. They’re all out there, drifting through the cloud.

These are treasured memories, and worth preserving, especially in the always uncertain world online. You might find yourself gravitating towards a new messaging app as the technology changes. You might get locked out of your account. It might even be that your country winds up banning the app. (So far, it’s only happened in places like Cuba and Uganda, and while those were temporary, the app was “temporarily” blocked in China in 2017 and is still blocked. The point being, you never know which way the wind is going to blow).

So obviously, it’s worth it to make sure you have some kind of backup for these treasured memories. Now it’s just a matter of creating those backups, and finding somewhere (or, more accurately, several somewheres) to securely store them.

How to Create Backups of Your WhatsApp Data

Back Up Individual Messages and Group Chats

By default, WhatsApp automatically archives your chats every day onto your device, with the option to back them up to Google Drive. As you’ll see, this is not quite sufficient if you really want to preserve those memories. To create a backup that you can preserve elsewhere, use the following steps:

  1. Tap the three vertical dots within an individual message or group chat.
  2. Tap More, and then Export Chat.
  3. You can then choose whether to export with or without media, with the most recent media being added as attachments.
  4. From here, you can choose how to share the attachments, which will consist of a .txt file as well as individual attachments for each piece of media in the chat.
Here we see it as a step-by-step guide, which also helpfully demonstrates the idiotic conversations the author has with his friends on WhatsApp.

Choose Your Backup Destination

We suggest downloading your backup to your device at this point. This step creates a local backup on your phone. From here, you can either download the attachment onto your computer from that same email, or connect your phone and make a copy from local storage onto your desktop. This will create two copies, but we’re just getting started.

Initiating Backup in 3…2…1…

As with anything you back up, the best strategy to employ is the classic 3-2-1 backup strategy. In essence, this is creating a trio of redundant copies, giving your backups their own backups in case anything should go wrong. Typically, you’ll want two copies stored on two different local devices and a third in the cloud.

Is this a little bit of overkill? Absolutely, and we mean that in the best possible way. You’ll thank us when a spilled cup of coffee doesn’t wipe out some of your favorite WhatsApp chats.

Backup #1: Local Storage (i.e., PC)

If you’ve followed the directions so far, you’ll now have a copy of your chats on your phone as well as on your desktop. This constitutes your first local copy.

Backup #2: Options

For your second local copy, you have a few options:

  1. Flash drive: Your computer is prone to any number of breakdowns, outages, or viruses that a flash drive simply isn’t, providing a safe, secondary, local place to store those all-important chats. As anyone who has ever accidentally sat on, stepped on, lost, or otherwise accidentally mutilated a flash drive can tell you, it’s not the end-all-be-all solution. However, having this redundant safety measure could be the thing that saves you from losing your data forever.
  2. External hard drive: An external hard drive is another good option to house a second copy of your data, and we know a little bit about them—we monitor 203,168 hard drives used to store data in our data centers. If you’re new to using an external hard drive, check out this handy guide.
  3. SSD: Like flash and hard drives, external SSDs are another form of external storage you can use to keep backup copies of your data. If you really want to get into the weeds on external storage, check out our guide on the difference between SSD vs. NVMe vs. M.2 drives.

Backup #3: Cloud Storage

We’ll admit to being a bit biased here, but for true peace of mind that your backups will survive any number of disasters and mishaps, you have to incorporate cloud storage into your 3-2-1 solution. (If for no other reason than without it, you have a 2-1 situation which doesn’t quite have the same ring to it. But believe us, there are plenty of other reasons, mainly so you don’t lose your data when your computer suddenly dies or you drop your flash drive down the sewer.)

If you are one of the millions of extraordinarily clever people who use Backblaze Personal Backup, this might just be the easiest step in the process because it’s all done automatically. Simply by having your WhatsApp backups on your computer, you’ll rest easy knowing that the software is one step ahead of you, storing your chats and online memories safely in the cloud.

If space is limited locally, and you don’t necessarily need the WhatsApp files on your own computer, Backblaze B2 Cloud Storage gives you plenty of space in the cloud to stash them until they’re needed. Paired with local copies elsewhere, you could also use this method to achieve a 3-2-1 strategy without taking up a huge amount of space locally on your machine.

Bonus Pro Tips: Transferring Your WhatsApp Data to a New Phone

While it’s all well and good to have your data securely tucked away using the 3-2-1 strategy, what happens when you get a new phone and want to have easy access through the app to all of your old chats? When that happens, you’re going to be glad you squirreled it away, and thrilled that we’ve outlined step-by-step how to get your new phone up and running with all of your old memories intact.

How to Restore Your Backup to an Android Phone

Restoring your WhatsApp backup to an Android phone takes a few steps. In these steps, we will assume you have reinstalled WhatsApp on your new phone.

  1. Install a file manager app on your Android phone.
  2. Copy the backup file to your Android phone.
  3. Open the file manager app.
  4. Copy the backup file to WhatsApp > Databases.
  5. Remember to restore the most recently created backup file to the device’s Databases folder.
  6. Restore your WhatsApp backup from local storage.

How to Restore Your Backup to an iPhone

The restore process for WhatsApp on an iPhone is similar. We will assume you do not have WhatsApp installed with the Android steps.

  1. Connect your iPhone to your computer.
  2. Open iTunes.
  3. Back up your iPhone using iTunes. This step will create a WhatsApp backup (along with your other phone data) to your computer.
  4. Back up your iTunes backup to the cloud. Backing up your iTunes data to a cloud storage service is advisable because your PC’s local storage might fail. For detailed guidance, see our post: “A Quick Guide to iCloud and iTunes Backups for Your iPhone and iPad.”
  5. Restore data to your iPhone using iTunes. Restoring your WhatsApp data to your iPhone is simple. Connect your iPhone to the computer where you ran the backup. Open iTunes and use the “restore a backup” feature.

Keep Your WhatsApp Archive Safe

When it comes to your digital assets, backups matter. Even the most mundane conversations you engage in on WhatsApp now might end up being a treasured memory of old friends later on. Preserving them is important, and if you’ve followed these steps and backed up your memories to your computer and to the cloud, you’ll have those memories available at a moment’s notice wherever you are.

The post How to Back Up and Restore WhatsApp Messages and Files appeared first on Backblaze Blog | Cloud Storage & Cloud Backup.
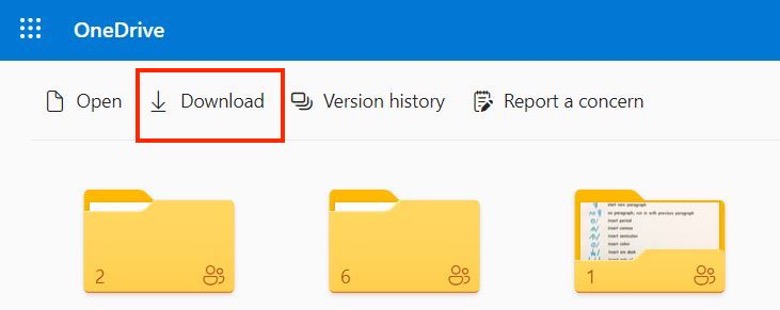
Better Backup Practices: What Is the Grandfather-Father-Son Approach?

Post Syndicated from Kari Rivas original https://www.backblaze.com/blog/better-backup-practices-what-is-the-grandfather-father-son-approach/

What Is the Grandfather-Father-Son Backup Strategy

They say the older you get, the more you become your parents. It’s so true, Progressive Insurance built an entire marketing campaign around it. (Forcing food on your family? Guilty.) But when it comes to backups, generational copies are a good thing. In fact, there’s a widely-used backup approach based on the idea—grandfather-father-son (GFS) backups.

In this post, we’ll explain what GFS is and how GFS works, we’ll share an example GFS backup plan, and we’ll show you how you can use GFS to organize your backup approach.

What Are Grandfather-Father-Son Backups?

Whether you’re setting up your first cloud backup or researching how to enhance your data security practices, chances are you’ve already got the basics figured out, like using at least a 3-2-1 backup strategy, if not a 3-2-1-1-0 or a 4-3-2. You’ve realized you need at least three total copies of your data, two of which are local but on different media, and one copy stored off-site. The next part of your strategy is to consider how often to perform full backups, with the assumption that you’ll fill the gap between full backups with incremental (or differential) backups.

One way to simplify your decision-making around backup strategy, including when to perform full vs. incremental backups, is to follow the GFS backup scheme. GFS provides recommended, but flexible, rotation cycles for full and incremental backups and has the added benefit of providing layers of data protection in a manageable framework.

Refresher: Full vs. Incremental vs. Differential vs. Synthetic Backups

There are four different types of backups: full, incremental, synthetic full, and differential. And choosing the right mix of types helps you maximize efficiency versus simply performing full backups all the time and monopolizing bandwidth and storage space. Here’s a quick refresher on each type:

  • Full backups: A complete copy of your data.
  • Incremental backups: A copy of data that has changed or has been added since your last full backup or since the last incremental backup.
  • Synthetic full backups: A synthesized “full” backup copy created from the full backup you have stored in the cloud plus your subsequent incremental backups. Synthetic full backups are much faster than full backups.
  • Differential backups: A specialized type of backups popular for database applications like Microsoft SQL but not used frequently otherwise. Differential backups copy all changes since the last full backup every time (versus incrementals which only contain changes or additions since the last incremental). As you make changes to your data set, your differential backup grows.

Check out our complete guide on the difference between full, incremental, synthetic full, and differential backups here.

How Do GFS Backups Work?

In the traditional GFS approach, a full backup is completed on the same day of each month (for example, the last day of each month or the fourth Friday of each month—however you want to define it). This is the “grandfather” cycle. It’s best practice to store this backup off-site or in the cloud. This also helps satisfy the off-site requirement of a 3-2-1 strategy.

Next, another full backup is set to run on a more frequent basis, like weekly. Again, you can define when exactly this full backup should take place, keeping in mind your business’s bandwidth requirements. (Because full backups will most definitely tie up your network for a while!) This is the “father” cycle, and, ideally, your backup should be stored locally and/or in hot cloud storage, like Backblaze B2 Cloud Storage, where it can be quickly and easily accessed if needed.

Last, plan to cover your bases with daily incremental backups. These are the “son” backups, and they should be stored in the same location as your “father” backups.

GFS Backups: An Example

In the example month shown below, the grandfather backup is completed on the last day of each month. Father full backups run every Sunday, and incremental son backups run Monday through Saturday.

What Is the Grandfather-Father-Son Backup Strategy Diagram

It’s important to note that the daily-weekly-monthly cadence is a common approach, but you could perform your incremental son backups even more often than daily (Like hourly!) or you could set your grandfather backups to run yearly instead of monthly. Some choose to run grandfather backups monthly and “great-grandfather” backups yearly. Essentially, you just want to create three regular backup cycles (one full backup to off-site storage; one full backup to local or hot storage; and incremental backups to fill the gaps) with your grandfather full backup cycle being performed less often than your father full backup cycle.

How Long Should You Retain GFS Backups?

Last, it’s important to also consider your retention policy for each backup cycle. In other words, how long do you want to keep your monthly grandfather backups, in case you need to restore data from one? How long do you want to keep your father and son backups? Are you in an industry that has strict data retention requirements?

You’ll want to think about how to balance regulatory requirements with storage costs. By the way, you might find us a little biased towards Backblaze B2 Cloud Storage because, at $5/TB/month, you can afford to keep your backups in quickly accessible hot storage and keep them archived for as long as you need without worrying about an excessive cloud storage bill.

Ultimately, you’ll find that grandfather-father-son is an organized approach to creating and retaining full and incremental backups. It takes some planning to set up but is fairly straightforward to follow once you have a system in place. You have multiple fallback options in case your business is impacted by ransomware or a natural disaster, and you still have the flexibility to set backup cycles that meet your business needs and storage requirements.

Ready to Get Started With GFS Backups and Backblaze B2?

Check out our Business Backup solutions and safeguard your GFS backups in the industry’s leading independent storage cloud.

The post Better Backup Practices: What Is the Grandfather-Father-Son Approach? appeared first on Backblaze Blog | Cloud Storage & Cloud Backup.
What’s the Diff: File-level vs. Block-level Incremental Backups

Post Syndicated from Kari Rivas original https://www.backblaze.com/blog/whats-the-diff-file-level-vs-block-level-incremental-backups/

If you’ve stumbled upon this blog, chances are you already know that you need to be backing up your data to protect your home or business. Maybe you’re a hobbyist with over 1,000 digital movies in your collection and you lie awake at night, worrying about what would happen if your toddler spills juice on your NAS (let’s face it, toddlers are data disasters waiting to happen). Or you’re a media and entertainment professional worried about keeping archives of your past projects on an on-premises device. Or maybe that tornado that hit your area last week caused you to think twice about keeping all of your data on-premises.

Whether you have a background in IT or not, the many different configuration options for your backup software and cloud storage can be confusing. Today, we’re hoping to clear up one common question when it comes to backup strategies—understanding the difference between file-level and block-level incremental backups.

Refresher: Full vs. Incremental Backups

First things first, let’s define what we’re dealing with: the difference between full and incremental backups. The first step in any backup plan is to perform a full backup of your data. Plan to do this on a slow day because it can take a long time and hog a lot of bandwidth. Of course, if you’re a Backblaze customer, you can also use the Backblaze Fireball to get your data into Backblaze B2 Cloud Storage without taking up precious internet resources.

You should plan on regularly performing full backups because it’s always a good idea to have a fresh, full copy of your entire data set. Some people perform full backups weekly, some might do them monthly or even less often; it’s up to you as you plan your backup strategy.

Then, typically, incremental backups are performed in between your full backups. Want to know more about the difference between full and incremental backups and the considerations for each? Check out our recent blog post on the different types of backups.

What’s the Diff: File-level vs. Block-level Incremental Backups

Let’s take it to the next level. Incremental backups back up what has been changed or added since your last full backup. Within the category of incremental backups, there are two standard options: file-level and block-level incremental backups. Many backup tools and devices, like network attached storage (NAS) devices, offer these options in the configuration settings, so it’s important to understand the difference. After you decide which type of incremental backup is best for you, check your backup software or device’s support articles to see if you can configure this setting for yourself.

File-level Incremental Backups

When a file-level incremental backup is performed and a file has been modified, the entire file is copied to your backup repository. This takes longer than performing a block-level backup because your backup software will scan all your files to see which ones have changed since the last full backup and will then back up the entire modified file again.

Imagine that you have a really big file and you make one small change to that file; with file-level backups, the whole file is re-uploaded. This likely sounds pretty inefficient, but there are some advantages to a file-level backup:

  • It’s simple and straightforward.
  • It allows you to pick and choose the files you want backed up.
  • You can include or exclude certain file types or easily back up specific directories.

File-level backups might be the right choice for you if you’re a home techie who wants to back up their movie collection, knowing that those files are not likely to change. Or it could be a good fit for a small business with a small amount of data that isn’t frequently modified.

The diagram below illustrates this concept. This person performs their full backup on Sundays and Wednesdays. (To be clear, we’re not recommending this cadence—it’s just for demonstration purposes.) This results in a 100% copy of their data to a backup repository like Backblaze B2 Cloud Storage. On Monday, part of a file is changed (the black triangle) and a new file is added (the red square). The file-level incremental backup uploads the new file (the red square) and the entire file that has changed (the grey square with the black triangle). On Tuesday, another file is changed (the purple triangle). When the file-level incremental backup is performed, it adds the entire file (the grey square with the purple triangle) to the backup repository. On Wednesday, a new full backup is run, which creates a complete copy of the source data (including all your previously changed and added data) and stores that in the cloud. This starts the cycle of full backups to incremental backups over again.

Click to expand.

Block-level Incremental Backups

Block-level incremental backups do not copy the entire file if only a portion of it has changed. With this option, only the changed part of the file is sent to the backup repository. Because of this, block-level backups are faster and require less storage space. If you’re backing up to cloud storage, obviously this will help you save on storage costs.

Let’s return to our scenario where full backups are performed on Sundays and Wednesdays, but this time, block-level incrementals are being run in between. When the first block-level incremental backup is run on Monday, the backup software copies just the changed piece of data in the file (the black triangle) and the new data (the red square). In the Tuesday backup, the additional modified data in another file (the purple triangle) is also added to the backup repository. On Wednesday, the new full backup results in a fresh copy of the full data set to the cloud.

Click to expand.

Block-level incremental backups take a snapshot of the running volume and data is read from the snapshot. This allows files to be copied even if they’re currently in use in a running software program, and it also reduces the impact on your machine’s performance while the backup is running.

This backup type works better than file-level incremental backups when you have a large number of files or files that often change. If you don’t need to pick and choose which files to specifically include or exclude in your backup, it’s generally best to use block-level incremental backups, as they’re more efficient.

The only drawbacks to block-level incremental backups are that recovery may take longer, since your backup software will need to recover each piece of modified data and rebuild the file. And, because this style of incremental backup uploads modified data in pieces and parts, if one of those pieces becomes corrupted or is unable to be recovered, it could affect your ability to recover the whole file. For this reason (and plenty of other good reasons), it’s important to regularly include full backups in your backup strategy and not just count on incremental backups perpetually.

Ready to Get Started?

No matter which method of incremental backup you decide is right for you, you can take advantage of Backblaze’s extremely affordable B2 Cloud Storage at just $5/TB/month. Back up your servers or your NAS in a matter of minutes and enjoy the peace of mind that comes with knowing you’re protected from a data disaster.

The post What’s the Diff: File-level vs. Block-level Incremental Backups appeared first on Backblaze Blog | Cloud Storage & Cloud Backup.
How a National Nonprofit Protects Field Staff Workstations

Post Syndicated from Molly Clancy original https://www.backblaze.com/blog/how-a-national-nonprofit-protects-field-staff-workstations/

Image credits below: Mason Cummings, The Wilderness Society.

Saving the environment is one of the most noble tasks anyone can undertake, but the thing about the environment is that it’s notoriously rough on laptops.

For the staff of The Wilderness Society, saving wild places means trekking out into said wild with boots firmly on the ground. Whether that means shutting down copper mines that would have otherwise devastated nearby waterways or helping create public transportation routes out to public lands, The Wilderness Society is a group constantly on the move. That doesn’t leave a lot of time for dealing with backups, particularly in the geographically far-flung areas in which The Wilderness Society researchers find themselves.

Data saved on staff laptops was regularly at risk, and The Wilderness Society needed a way to protect that data from threats both natural and otherwise. Director of Information Technology, Kristin Iden, shared how she:

  • Protected essential workstation data with cloud backups.
  • Achieved a security stance that aligns with cyber insurance policies.
  • Eased the administrative burden on an IT team of two that serves more than 160 staff around the country.
Otero Mesa, New Mexico.
The Wilderness Society: A Force for Change

Since 1935, The Wilderness Society has led the effort to permanently protect 109 million acres of wilderness in 44 states. They have been at the forefront of nearly every major public lands victory. Initiatives include climate change solutions, land and water conservation, and community-led conservation.

How Workstation Backups Protect Data From Disasters

The urgency to put a solid workstation backup plan in place hit home for Kristin when her laptop was destroyed by a lightning strike. And yes, she’s aware of the irony. The IT director, one of the few who isn’t dragging their laptop across creation, is the one who lost data to natural disaster.

The Wilderness Society’s researchers find themselves all over the world as part of their mission to protect the environment. There are 14 offices from coast to coast, from Hallowell, Maine to Anchorage, Alaska. According to Kristin, “drop and destroy” events are not uncommon out in the field, whether it’s a laptop taking an accidental trip down a mountainside or into the waters of the Arctic Circle.

Add to that, as a nonprofit organization, The Wilderness Society always has to look at the bottom line. Their funding comes entirely from donors and sponsors, gifted with a purpose, and as much of it should go toward the mission as possible. In fact, Kristin had originally sought out a backup solution solely for executives as a way to save budget, but Backblaze’s affordability made it a no-brainer to extend backups out into the field.

“If somebody in the Arctic Circle drops and breaks their laptop, now I can get them back up and running within a couple of days. ”
—Kristin Iden, Director of Information Technology, The Wilderness Society

Arctic National Wildlife Refuge, Alaska.

How to Back Up Field Staff Workstations

Kristin started with a beta test group of around 10% of the users, making sure to include a mix of field researchers, administrative workers, and executives. One important group to include in this mix was the handful of workers in truly remote regions of the country that have metered bandwidth. This obviously made regular backups difficult, but Kristin found a workaround by having them run the backup during weekly office visits.

The two members of the IT department are the sole administrators on the roughly 160 machines throughout the organization, an 80/20 mix of PC and Mac users. As such, they were able to roll out installation of Backblaze through Microsoft Intune, a mass deployment tool. The initial beta test went off without a hitch, and they took a phased approach to the remaining rollout—Backblaze was installed across the entire organization in groups of 30.

Pisgah National Forest, North Carolina.

Lightweight Backup Client Provides Peace of Mind

Kristin knew there was simply no way to prevent the inevitable destruction of user laptops out in the field. By focusing her efforts on finding the right backup solution, she was able to easily roll out to the entire organization a solution that protected their data from the rigors of nature.

Of paramount importance was simplifying the entire process for the users. They are, after all, doing the truly critical work of protecting the environment. Whether that means surveying wildlife in their native environment or working with lawmakers to craft bills that preserve nature, Kristin wanted their focus on the mission and not on their machine. With a lightweight client that doesn’t bog down machines and reliable backups she can use to provision new machines and recover data, Backblaze gave her that turnkey solution, and the peace of mind that followed.

“Admin tasks like backups are a time suck when you’re a two-person team minding 160 people running around the country trying to make sure the forests stay up. I don’t have time to babysit something constantly. With Backblaze, it just does its thing, and it lets me know when something’s not working. That’s exactly what I want out of every tool I use—just work, tell me when it isn’t, and make it easy to fix it. Backblaze just works everywhere we need it to.”
—Kristin Iden, Director of Information Technology, The Wilderness Society

Looking for a backup solution for your nonprofit organization or dispersed field staff? Learn more about Backblaze Business Backup for workstations.

The post How a National Nonprofit Protects Field Staff Workstations appeared first on Backblaze Blog | Cloud Storage & Cloud Backup.