Tag Archives: Graviton

Announcing AWS Graviton2 Support for AWS Fargate – Get up to 40% Better Price-Performance for Your Serverless Containers

Post Syndicated from Channy Yun original https://aws.amazon.com/blogs/aws/announcing-aws-graviton2-support-for-aws-fargate-get-up-to-40-better-price-performance-for-your-serverless-containers/

AWS Graviton2 processors are custom-built by AWS using 64-bit Arm Neoverse cores to deliver the best price-performance for your cloud workloads running in Amazon Elastic Compute Cloud (Amazon EC2). They provide up to 40 percent better price-performance over comparable x86-based instances for a wide variety of workloads. Many of our customers such as Intuit, SmugMug, Snap, Formula One, and Honeycomb.io use Graviton2-based instances to run their workloads for better price-performance in Amazon EC2 for their workloads and enjoy better price-performance.

Many fully-managed services including Amazon Relational Database Service (Amazon RDS), Amazon Aurora, Amazon ElastiCache, Amazon OpenSearch Service (successor of Amazon Elasticsearch Service), and Amazon EMR have extended the benefits of Graviton2 to their customers. Recently, we also extended the benefits of Graviton2 to our serverless computing customers using AWS Lambda. AWS Lambda functions powered by AWS Graviton2 offer up to 19 percent better performance at 20 percent lower cost compared to running them on x86-based instances.

Today, I am happy to announce AWS Graviton2 support for AWS Fargate with Amazon Elastic Container Service (Amazon ECS). AWS Fargate is the serverless compute engine for containers on AWS that removes the need to provision, scale, and manage servers. AWS Fargate powered by AWS Graviton2 processors delivers up to 40 percent better price-performance at 20 percent lower cost over comparable Intel x86-based Fargate for containerized applications.

With Graviton2 support for Fargate, you get the serverless benefits of Fargate, the price-performance advantages of Graviton2, and the flexibility to use a container compute processor of your choice. You can upload multi-architecture images or images that have ARM64 in your image manifest with your container registry, such as Amazon Elastic Container Registry (Amazon ECR). When orchestrated via Amazon ECS, Fargate will run these applications on Graviton2-powered compute.

Multi-architecture container images consist of two main parts: layers and a manifest. Each container image has one or more layers of file system content. The manifest specifies the groups of layers that make up the image as well as its runtime characteristics, either ARM64 and X86_64.

This allows you to have the same repository that supports multiple architectures, and the container runtime does the work of selecting which image layers to pull based on the system architecture, including ARM64. To learn more, visit Introducing multi-architecture container images for Amazon ECR.

Getting Started With Fargate powered by Graviton2 processors
To enable Graviton2 support for Fargate, you opt in to Arm compatibility in your ECS cluster. In the ECS console, when creating a new task definition, you can simply select Linux/ARM64 in the Operating system/Architecture dropdown list.

The following is an example of a task definition containing a simple container using the Fargate launch type with an optional parameter cpuArchitecture to ARM64. (The default value is X86_64).

{
 "family": "bb-arm64",
 "networkMode": "awsvpc",
 "containerDefinitions": [
    {
        "name": "sleep",
        "image": "arm64v8/busybox",
        "cpu": 100,
        "memory": 100,
        "essential": true,
        "command": [ "echo hello" ],
        "entryPoint": [ "sh", "-c" ]
    }
 ],
 "requiresCompatibilities": [ "FARGATE" ],
 "cpu": "1 vCpu",
 "memory": "3 GB",
 "runtimePlatform": { "cpuArchitecture": "ARM64" },
 "executionRoleArn": "arn:aws:iam::1234567890:role/ecsTaskExecutionRole"
}

When you run your tasks with the Graviton-based compute, you can see the value of Linux/ARM64 for Operating system/Architecture in each task detail page of the ECS console.

With AWS Command-line Interface (AWS CLI), you simply find which architecture is used in your ECS cluster.

$ aws ecs describe-tasks \
    --cluster MyCluster \
    --tasks arn:aws:ecs:us-west-2:123456789012:task/MyCluster/1234567890123456789

Here is an output of CPU architecture in the response of DescribeTasks or will have it as a filter to ListTasks.

{ 
    "tasks": [
    {
        "family": "...",
        "attributes": [
            {
                "name": "ecs.cpu-architecture",
                "value": "arm64"
            }
        ]
    }]
}

Migration to Gaviton2-based Fargate Containers
You get all the same Fargate features you’re used to for your containerized applications with Intel x86-based offering. With logging, monitoring, tracing, extensible ephemeral storage by Amazon Elastic File System (Amazon EFS) file systems, and more, you can easily migrate your applications to Graviton2-based Fargate containers. You get out-of-the-box logging via Amazon CloudWatch logs and metrics via Container Insights and AWS Distro for Open Telemetry agent as a sidecar to enable traces via ServiceLens.

With Amazon ECS, you can use Amazon ECS Exec for break-glass or developer debugging scenarios. With ECS Exec, you can directly interact with containers without needing to first interact with the host container operating system, open inbound ports, or manage SSH keys. You can use ECS Exec to run commands in or get a shell to a container running on an Amazon EC2 instance or on AWS Fargate.  To learn more, see Using Amazon ECS Exec for debugging in the AWS documentation.

Once your development teams test and validate that applications are ARM64 compatible, in addition to using AWS CodeBuild that has supported Graviton for a long time, you can now run Jenkins or Gitlab runners. This will give you an end-to-end serverless experience, right from testing to building containers to running them on Fargate.

To get more support with the monitoring and logging, security, and continuous delivery on AWS Fargate, see the list of AWS Fargate Partners such as Aqua Security, Datadog, New Relic, Splunk, and Sumo Logic that have extended Fargate’s capabilities.

Available Now
AWS Graviton2 support on AWS Fargate is available in all AWS Regions where Fargate is available except Bahrain, Cape Town, China, and GovCloud regions. This feature is supported on Fargate Platform Version (PV) 1.4.0 or later. If you are not already using PV 1.4.0, see the AWS Fargate platform versions section in the AWS documentation to learn how to migrate.

You can get up to 40 percent better price-performance for Arm-compatible container-based applications. You can further reduce your costs by getting up to a 52 percent discount off on-demand pricing in exchange for a commitment of a one- or three-year term with Compute Savings Plans. For more information, see the AWS Fargate pricing page.

Give it a try, and please send us feedback either on the public AWS containers roadmap in the AWS forum for Amazon ECS, or through your usual AWS support contacts.

Channy

Target cross-platform Go builds with AWS CodeBuild Batch builds

Post Syndicated from Russell Sayers original https://aws.amazon.com/blogs/devops/target-cross-platform-go-builds-with-aws-codebuild-batch-builds/

Many different operating systems and architectures could end up as the destination for our applications. By using a AWS CodeBuild batch build, we can run builds for a Go application targeted at multiple platforms concurrently.

Cross-compiling Go binaries for different platforms is as simple as setting two environment variables $GOOS and $GOARCH, regardless of the build’s host platform. For this post we will build all of the binaries on Linux/x86 containers. You can run the command go tool dist list to see the Go list of supported platforms. We will build binaries for six platforms: Windows+ARM, Windows+AMD64, Linux+ARM64, Linux+AMD64, MacOS+ARM64, and Mac+AMD64. Note that AMD64 is a 64-bit architecture based on the Intel x86 instruction set utilized on both AMD and Intel hardware.

This post demonstrates how to create a single AWS CodeBuild project by using a batch build and a single build spec to create concurrent builds for the six targeted platforms. Learn more about batch builds in AWS CodeBuild in the documentation: Batch builds in AWS CodeBuild

Solution Overview

AWS CodeBuild is a fully managed continuous integration service that compiles source code, runs tests, and produces ready-to-deploy software packages. A batch build is utilized to run concurrent and coordinated builds. Let’s summarize the 3 different batch builds:

  • Build graph: defines dependencies between builds. CodeBuild utilizes the dependencies graph to run builds in an order that satisfies the dependencies.
  • Build list: utilizes a list of settings for concurrently run builds.
  • Build matrix: utilizes a matrix of settings to create a build for every combination.

The requirements for this project are simple – run multiple builds with a platform pair of $GOOS and $GOARCH environment variables. For this, a build list can be utilized. The buildspec for the project contains a batch/build-list setting containing every environment variable for the six builds.

batch:
  build-list:
    - identifier: build1
      env:
        variables:
          GOOS: darwin
          GOARCH: amd64
    - identifier: build2
      env:
        variables:
          GOOS: darwin
          GOARCH: arm64
    - ...

The batch build project will launch seven builds. See the build sequence in the diagram below.

  • Step 1 – A build downloads the source.
  • Step 2 – Six concurrent builds configured with six sets of environment variables from the batch/build-list setting.
  • Step 3 – Concurrent builds package a zip file and deliver to the artifacts Amazon Simple Storage Service (Amazon S3) bucket.

build sequence

The supplied buildspec file includes commands for the install and build phases. The install phase utilizes the phases/install/runtime-versions phase to set the version of Go is used in the build container.

The build phase contains commands to replace source code placeholders with environment variables set by CodeBuild. The entire list of environment variables is documented at Environment variables in build environments. This is followed by a simple go build to build the binaries. The application getting built is an AWS SDK for Go sample that will list the contents of an S3 bucket.

  build:
    commands:
      - mv listObjects.go listObjects.go.tmp
      - cat listObjects.go.tmp | envsubst | tee listObjects.go
      - go build listObjects.go

The artifacts sequence specifies the build outputs that we want packaged and delivered to the artifacts S3 bucket. The name setting creates a name for ZIP artifact. And the name combines the operating system, architecture environment variables, as well as the git commit hash. We use Shell command language to expand the environment variables, as well as command substitution to take the first seven characters of the git hash.

artifacts:
  files:
    - 'listObjects'
    - 'listObjects.exe'
    - 'README.md'
  name: listObjects_${GOOS}_${GOARCH}_$(echo $CODEBUILD_RESOLVED_SOURCE_VERSION | cut -c 1-7).zip 

Let’s walk through the CodeBuild project setup process. When the builds complete, we’ll see zip files containing the builds for each platform in an artifacts bucket.

Here is what we will create:

  • Create an S3 bucket to host the built artifacts.
  • Create the CodeBuild project, which needs to know:
    • Where the source is
    • The environment – a docker image and a service role
    • The location of the build spec
    • Batch configuration, a service role used to launch batch build groups
    • The artifact S3 bucket location

The code that is built is available on github here: https://github.com/aws-samples/cross-platform-go-builds-with-aws-codebuild. For an alternative to the manual walkthrough steps, a CloudFormation template that will build all of the resources is available in the git repository.

Prerequisites

For this walkthrough, you must have the following prerequisites:

Create the Artifacts S3 Bucket

An S3 bucket will be the destination of the build artifacts.

  • In the Amazon S3 console, create a bucket with a unique name. This will be the destination of your build artifacts.
    creating an s3 bucket

Create the AWS CodeBuild Project

  • In the AWS CodeBuild console, create a project named multi-arch-build.
    codebuild project name
  • For Source Provider, choose GitHub. Choose the Connect to GitHub button and follow the authorization screens. For repository, enter https://github.com/aws-samples/cross-platform-go-builds-with-aws-codebuild
    coldbuild select source
  • For Environment image, choose Managed Image. Choose the most recent Ubuntu image. This image contains every tool needed for the build. If you are interested in the contents of the image, then you can see the Dockerfile used to build the image in the GitHub repository here: https://github.com/aws/aws-codebuild-docker-images/tree/master/ubuntu
    Select environment
  • For Service Role, keep the suggested role name.
    Service role
  • For Build specifications, leave Buildspec name empty. This will use the default location buildspec.yml in the source root.
  • Under Batch configuration, enable Define batch configuration. For the Role Name, enter a name for the role: batch-multi-arch-build-service-role. There is an option here to combine artifacts. CodeBuild can combine the artifacts from batch builds into a single location. This isn’t needed for this build, as we want a zip to be created for each platform.
    Batch configuration
  • Under Artifacts, for Type, choose Amazon S3. For Bucket name, select the S3 bucket created earlier. This is where we want the build artifacts delivered. Choose the checkbox for Enable semantic versioning. This will tell CodeBuild to use the artifact name that was specified in the buildspec file.
    Artifacts
  • For Artifacts Packaging, choose Zip for CodeBuild to create a compressed zip from the build artifacts.
    Artifacts packaging
  • Create the build project, and start a build. You will see the DOWNLOAD_SOURCE build complete, followed by the six concurrent builds for each combination of OS and architecture.
    Builds in batch

Run the Artifacts

The builds have completed, and each packaged artifact has been delivered to the S3 bucket. Remember the name of the ZIP archive that was built using the buildspec file setting. This incorporated a combination of the operating system, architecture, and git commit hash.

Run the artifacts

Below, I have tested the artifact by downloading the zip for the operating system and architecture combination on three different platforms: MacOS/AMD64, an AWS Graviton2 instance, and a Microsoft Windows instance. Note the system information, unzipping the platform artifact, and the build specific information substituted into the Go source code.

Window1 Window2 Window3

Cleaning up

To avoid incurring future charges, delete the resources:

  • On the Amazon S3 console, choose the artifacts bucket created, and choose Empty. Confirm the deletion by typing ‘permanently delete’. Choose Empty.
  • Choose the artifacts bucket created, and Delete.
  • On the IAM console, choose Roles.
  • Search for batch-multi-arch-build-service-role and Delete. Search for codebuild-multi-arch-build-service-role and Delete.
  • Go to the CodeBuild console. From Build projects, choose multi-arch-build, and choose Delete build project.

Conclusion

This post utilized CodeBuild batch builds to build and package binaries for multiple platforms concurrently. The build phase used a small amount of scripting to replace placeholders in the code with build information CodeBuild makes available in environment variables. By overriding the artifact name using the buildspec setting, we created zip files built from information about the build. The zip artifacts were downloaded and tested on three platforms: Intel MacOS, a Graviton ARM based EC2 instance, and Microsoft Windows.

Features like this let you build on CodeBuild, a fully managed build service – and not have to worry about maintaining your own build servers.

Top 5: Featured Architecture Content for September

Post Syndicated from Elyse Lopez original https://aws.amazon.com/blogs/architecture/top-5-featured-architecture-content-for-september/

The AWS Architecture Center provides new and notable reference architecture diagrams, vetted architecture solutions, AWS Well-Architected best practices, whitepapers, and more. This blog post features some of our best picks from the new and newly updated content we released in the past month.

1. AWS Best Practices for DDoS Resiliency

Prioritizing the availability and responsiveness of your application helps you maintain customer trust. That’s why it’s crucial to protect your business from the impact of distributed denial of service (DDoS) and other cyberattacks. This whitepaper provides you prescriptive guidance to improve the resiliency of your applications and best practices for how to manage different attack types.

2. Predictive Modeling for Automotive Retail

Automotive retailers use data to better understand how their incentives are helping to sell cars. This new reference architecture diagram shows you how to design a modeling system that provides granular return on investment (ROI) predictions for automotive sales incentives.

3. AWS Graviton Performance Testing – Tips for Independent Software Vendors

If you’re deciding whether to phase in AWS Graviton processors for your workload, this whitepaper covers best practices and common pitfalls for defining test approaches to evaluate Amazon Elastic Compute Cloud (Amazon EC2) instance performance and how to set success factors and compare different test methods and their implementation.

4. Text Analysis with Amazon OpenSearch Service and Amazon Comprehend

This AWS Solutions Implementation was recently updated with new guidance related to Amazon OpenSearch Service, the successor to Amazon Elasticsearch Service. Learn how Amazon OpenSearch Service and Amazon Comprehend work together to deploy a cost-effective, end-to-end solution to extract meaningful insights from unstructured text-based data such as customer calls, support tickets, and online customer feedback.

5. Back to Basics: Hosting a Static Website on AWS

In this episode of Back to Basics, join SA Readiness Specialist Even Zhang as he breaks down the AWS services you can use to host and scale your static website without a single server. You’ll also learn how to use additional functionalities to enhance your observability and security posture or run A/B tests.

 CloudFront Edge Locations and Caches from Back to Basics video

Figure 1. CloudFront Edge Locations and Caches from Back to Basics video


ICYMI: Serverless Q3 2021

Post Syndicated from James Beswick original https://aws.amazon.com/blogs/compute/icymi-serverless-q3-2021/

Welcome to the 15th edition of the AWS Serverless ICYMI (in case you missed it) quarterly recap. Every quarter, we share all of the most recent product launches, feature enhancements, blog posts, webinars, Twitch live streams, and other interesting things that you might have missed!

Q3 calendar

In case you missed our last ICYMI, check out what happened last quarter here.

AWS Lambda

You can now choose next-generation AWS Graviton2 processors in your Lambda functions. This Arm-based processor architecture can provide up to 19% better performance at 20% lower cost. You can configure functions to use Graviton2 in the AWS Management Console, API, CloudFormation, and CDK. We recommend using the AWS Lambda Power Tuning tool to see how your function compare and determine the price improvement you may see.

All Lambda runtimes built on Amazon Linux 2 support Graviton2, with the exception of versions approaching end-of-support. The AWS Free Tier for Lambda includes functions powered by both x86 and Arm-based architectures.

Create Lambda function with new arm64 option

You can also use the Python 3.9 runtime to develop Lambda functions. You can choose this runtime version in the AWS Management Console, AWS CLI, or AWS Serverless Application Model (AWS SAM). Version 3.9 includes a range of new features and performance improvements.

Lambda now supports Amazon MQ for RabbitMQ as an event source. This makes it easier to develop serverless applications that are triggered by messages in a RabbitMQ queue. This integration does not require a consumer application to monitor queues for updates. The connectivity with the Amazon MQ message broker is managed by the Lambda service.

Lambda has added support for up to 10 GB of memory and 6 vCPU cores in AWS GovCloud (US) Regions and in the Middle East (Bahrain), Asia Pacific (Osaka), and Asia Pacific (Hong Kong) Regions.

AWS Step Functions

Step Functions now integrates with the AWS SDK, supporting over 200 AWS services and 9,000 API actions. You can call services directly from the Amazon States Language definition in the resource field of the task state. This allows you to work with services like DynamoDB, AWS Glue Jobs, or Amazon Textract directly from a Step Functions state machine. To learn more, see the SDK integration tutorial.

AWS Amplify

The Amplify Admin UI now supports importing existing Amazon Cognito user pools and identity pools. This allows you to configure multi-platform apps to use the same user pools with different client IDs.

Amplify CLI now enables command hooks, allowing you to run custom scripts in the lifecycle of CLI commands. You can create bash scripts that run before, during, or after CLI commands. Amplify CLI has also added support for storing environment variables and secrets used by Lambda functions.

Amplify Geo is in developer preview and helps developers provide location-aware features to their frontend web and mobile applications. This uses the Amazon Location Service to provide map UI components.

Amazon EventBridge

The EventBridge schema registry now supports discovery of cross-account events. When schema registry is enabled on a bus, it now generates schemes for events originating from another account. This helps organize and find events in multi-account applications.

Amazon DynamoDB

DynamoDB console

The new DynamoDB console experience is now the default for viewing and managing DynamoDB tables. This makes it easier to manage tables from the navigation pane and also provided a new dedicated Items page. There is also contextual guidance and step-by-step assistance to help you perform common tasks more quickly.

API Gateway

API Gateway can now authenticate clients using certificate-based mutual TLS. Previously, this feature only supported AWS Certificate Manager (ACM). Now, customers can use a server certificate issued by a third-party certificate authority or ACM Private CA. Read more about using mutual TLS authentication with API Gateway.

The Serverless Developer Advocacy team built the Amazon API Gateway CORS Configurator to help you configure cross origin resource scripting (CORS) for REST and HTTP APIs. Fill in the information specific to your API and the AWS SAM configuration is generated for you.

Serverless blog posts

July

August

September

Tech Talks & Events

We hold AWS Online Tech Talks covering serverless topics throughout the year. These are listed in the Serverless section of the AWS Online Tech Talks page. We also regularly deliver talks at conferences and events around the world, speak on podcasts, and record videos you can find to learn in bite-sized chunks.

Here are some from Q3:

Videos

Serverless Land

Serverless Office Hours – Tues 10 AM PT

Weekly live virtual office hours. In each session we talk about a specific topic or technology related to serverless and open it up to helping you with your real serverless challenges and issues. Ask us anything you want about serverless technologies and applications.

July

August

September

DynamoDB Office Hours

Are you an Amazon DynamoDB customer with a technical question you need answered? If so, join us for weekly Office Hours on the AWS Twitch channel led by Rick Houlihan, AWS principal technologist and Amazon DynamoDB expert. See upcoming and previous shows

Still looking for more?

The Serverless landing page has more information. The Lambda resources page contains case studies, webinars, whitepapers, customer stories, reference architectures, and even more Getting Started tutorials.

You can also follow the Serverless Developer Advocacy team on Twitter to see the latest news, follow conversations, and interact with the team.

AWS Lambda Functions Powered by AWS Graviton2 Processor – Run Your Functions on Arm and Get Up to 34% Better Price Performance

Post Syndicated from Danilo Poccia original https://aws.amazon.com/blogs/aws/aws-lambda-functions-powered-by-aws-graviton2-processor-run-your-functions-on-arm-and-get-up-to-34-better-price-performance/

Many of our customers (such as Formula One, Honeycomb, Intuit, SmugMug, and Snap Inc.) use the Arm-based AWS Graviton2 processor for their workloads and enjoy better price performance. Starting today, you can get the same benefits for your AWS Lambda functions. You can now configure new and existing functions to run on x86 or Arm/Graviton2 processors.

With this choice, you can save money in two ways. First, your functions run more efficiently due to the Graviton2 architecture. Second, you pay less for the time that they run. In fact, Lambda functions powered by Graviton2 are designed to deliver up to 19 percent better performance at 20 percent lower cost.

With Lambda, you are charged based on the number of requests for your functions and the duration (the time it takes for your code to execute) with millisecond granularity. For functions using the Arm/Graviton2 architecture, duration charges are 20 percent lower than the current pricing for x86. The same 20 percent reduction also applies to duration charges for functions using Provisioned Concurrency.

In addition to the price reduction, functions using the Arm architecture benefit from the performance and security built into the Graviton2 processor. Workloads using multithreading and multiprocessing, or performing many I/O operations, can experience lower execution time and, as a consequence, even lower costs. This is particularly useful now that you can use Lambda functions with up to 10 GB of memory and 6 vCPUs. For example, you can get better performance for web and mobile backends, microservices, and data processing systems.

If your functions don’t use architecture-specific binaries, including in their dependencies, you can switch from one architecture to the other. This is often the case for many functions using interpreted languages such as Node.js and Python or functions compiled to Java bytecode.

All Lambda runtimes built on top of Amazon Linux 2, including the custom runtime, are supported on Arm, with the exception of Node.js 10 that has reached end of support. If you have binaries in your function packages, you need to rebuild the function code for the architecture you want to use. Functions packaged as container images need to be built for the architecture (x86 or Arm) they are going to use.

To measure the difference between architectures, you can create two versions of a function, one for x86 and one for Arm. You can then send traffic to the function via an alias using weights to distribute traffic between the two versions. In Amazon CloudWatch, performance metrics are collected by function versions, and you can look at key indicators (such as duration) using statistics. You can then compare, for example, average and p99 duration between the two architectures.

You can also use function versions and weighted aliases to control the rollout in production. For example, you can deploy the new version to a small amount of invocations (such as 1 percent) and then increase up to 100 percent for a complete deployment. During rollout, you can lower the weight or set it to zero if your metrics show something suspicious (such as an increase in errors).

Let’s see how this new capability works in practice with a few examples.

Changing Architecture for Functions with No Binary Dependencies
When there are no binary dependencies, changing the architecture of a Lambda function is like flipping a switch. For example, some time ago, I built a quiz app with a Lambda function. With this app, you can ask and answer questions using a web API. I use an Amazon API Gateway HTTP API to trigger the function. Here’s the Node.js code including a few sample questions at the beginning:

const questions = [
  {
    question:
      "Are there more synapses (nerve connections) in your brain or stars in our galaxy?",
    answers: [
      "More stars in our galaxy.",
      "More synapses (nerve connections) in your brain.",
      "They are about the same.",
    ],
    correctAnswer: 1,
  },
  {
    question:
      "Did Cleopatra live closer in time to the launch of the iPhone or to the building of the Giza pyramids?",
    answers: [
      "To the launch of the iPhone.",
      "To the building of the Giza pyramids.",
      "Cleopatra lived right in between those events.",
    ],
    correctAnswer: 0,
  },
  {
    question:
      "Did mammoths still roam the earth while the pyramids were being built?",
    answers: [
      "No, they were all exctint long before.",
      "Mammooths exctinction is estimated right about that time.",
      "Yes, some still survived at the time.",
    ],
    correctAnswer: 2,
  },
];

exports.handler = async (event) => {
  console.log(event);

  const method = event.requestContext.http.method;
  const path = event.requestContext.http.path;
  const splitPath = path.replace(/^\/+|\/+$/g, "").split("/");

  console.log(method, path, splitPath);

  var response = {
    statusCode: 200,
    body: "",
  };

  if (splitPath[0] == "questions") {
    if (splitPath.length == 1) {
      console.log(Object.keys(questions));
      response.body = JSON.stringify(Object.keys(questions));
    } else {
      const questionId = splitPath[1];
      const question = questions[questionId];
      if (question === undefined) {
        response = {
          statusCode: 404,
          body: JSON.stringify({ message: "Question not found" }),
        };
      } else {
        if (splitPath.length == 2) {
          const publicQuestion = {
            question: question.question,
            answers: question.answers.slice(),
          };
          response.body = JSON.stringify(publicQuestion);
        } else {
          const answerId = splitPath[2];
          if (answerId == question.correctAnswer) {
            response.body = JSON.stringify({ correct: true });
          } else {
            response.body = JSON.stringify({ correct: false });
          }
        }
      }
    }
  }

  return response;
};

To start my quiz, I ask for the list of question IDs. To do so, I use curl with an HTTP GET on the /questions endpoint:

$ curl https://<api-id>.execute-api.us-east-1.amazonaws.com/questions
[
  "0",
  "1",
  "2"
]

Then, I ask more information on a question by adding the ID to the endpoint:

$ curl https://<api-id>.execute-api.us-east-1.amazonaws.com/questions/1
{
  "question": "Did Cleopatra live closer in time to the launch of the iPhone or to the building of the Giza pyramids?",
  "answers": [
    "To the launch of the iPhone.",
    "To the building of the Giza pyramids.",
    "Cleopatra lived right in between those events."
  ]
}

I plan to use this function in production. I expect many invocations and look for options to optimize my costs. In the Lambda console, I see that this function is using the x86_64 architecture.

Console screenshot.

Because this function is not using any binaries, I switch architecture to arm64 and benefit from the lower pricing.

Console screenshot.

The change in architecture doesn’t change the way the function is invoked or communicates its response back. This means that the integration with the API Gateway, as well as integrations with other applications or tools, are not affected by this change and continue to work as before.

I continue my quiz with no hint that the architecture used to run the code has changed in the backend. I answer back to the previous question by adding the number of the answer (starting from zero) to the question endpoint:

$ curl https://<api-id>.execute-api.us-east-1.amazonaws.com/questions/1/0
{
  "correct": true
}

That’s correct! Cleopatra lived closer in time to the launch of the iPhone than the building of the Giza pyramids. While I am digesting this piece of information, I realize that I completed the migration of the function to Arm and optimized my costs.

Changing Architecture for Functions Packaged Using Container Images
When we introduced the capability to package and deploy Lambda functions using container images, I did a demo with a Node.js function generating a PDF file with the PDFKit module. Let’s see how to migrate this function to Arm.

Each time it is invoked, the function creates a new PDF mail containing random data generated by the faker.js module. The output of the function is using the syntax of the Amazon API Gateway to return the PDF file using Base64 encoding. For convenience, I replicate the code (app.js) of the function here:

const PDFDocument = require('pdfkit');
const faker = require('faker');
const getStream = require('get-stream');

exports.lambdaHandler = async (event) => {

    const doc = new PDFDocument();

    const randomName = faker.name.findName();

    doc.text(randomName, { align: 'right' });
    doc.text(faker.address.streetAddress(), { align: 'right' });
    doc.text(faker.address.secondaryAddress(), { align: 'right' });
    doc.text(faker.address.zipCode() + ' ' + faker.address.city(), { align: 'right' });
    doc.moveDown();
    doc.text('Dear ' + randomName + ',');
    doc.moveDown();
    for(let i = 0; i < 3; i++) {
        doc.text(faker.lorem.paragraph());
        doc.moveDown();
    }
    doc.text(faker.name.findName(), { align: 'right' });
    doc.end();

    pdfBuffer = await getStream.buffer(doc);
    pdfBase64 = pdfBuffer.toString('base64');

    const response = {
        statusCode: 200,
        headers: {
            'Content-Length': Buffer.byteLength(pdfBase64),
            'Content-Type': 'application/pdf',
            'Content-disposition': 'attachment;filename=test.pdf'
        },
        isBase64Encoded: true,
        body: pdfBase64
    };
    return response;
};

To run this code, I need the pdfkit, faker, and get-stream npm modules. These packages and their versions are described in the package.json and package-lock.json files.

I update the FROM line in the Dockerfile to use an AWS base image for Lambda for the Arm architecture. Given the chance, I also update the image to use Node.js 14 (I was using Node.js 12 at the time). This is the only change I need to switch architecture.

FROM public.ecr.aws/lambda/nodejs:14-arm64
COPY app.js package*.json ./
RUN npm install
CMD [ "app.lambdaHandler" ]

For the next steps, I follow the post I mentioned previously. This time I use random-letter-arm for the name of the container image and for the name of the Lambda function. First, I build the image:

$ docker build -t random-letter-arm .

Then, I inspect the image to check that it is using the right architecture:

$ docker inspect random-letter-arm | grep Architecture

"Architecture": "arm64",

To be sure the function works with the new architecture, I run the container locally.

$ docker run -p 9000:8080 random-letter-arm:latest

Because the container image includes the Lambda Runtime Interface Emulator, I can test the function locally:

$ curl -XPOST "http://localhost:9000/2015-03-31/functions/function/invocations" -d '{}'

It works! The response is a JSON document containing a base64-encoded response for the API Gateway:

{
    "statusCode": 200,
    "headers": {
        "Content-Length": 2580,
        "Content-Type": "application/pdf",
        "Content-disposition": "attachment;filename=test.pdf"
    },
    "isBase64Encoded": true,
    "body": "..."
}

Confident that my Lambda function works with the arm64 architecture, I create a new Amazon Elastic Container Registry repository using the AWS Command Line Interface (CLI):

$ aws ecr create-repository --repository-name random-letter-arm --image-scanning-configuration scanOnPush=true

I tag the image and push it to the repo:

$ docker tag random-letter-arm:latest 123412341234.dkr.ecr.us-east-1.amazonaws.com/random-letter-arm:latest
$ aws ecr get-login-password | docker login --username AWS --password-stdin 123412341234.dkr.ecr.us-east-1.amazonaws.com
$ docker push 123412341234.dkr.ecr.us-east-1.amazonaws.com/random-letter-arm:latest

In the Lambda console, I create the random-letter-arm function and select the option to create the function from a container image.

Console screenshot.

I enter the function name, browse my ECR repositories to select the random-letter-arm container image, and choose the arm64 architecture.

Console screenshot.

I complete the creation of the function. Then, I add the API Gateway as a trigger. For simplicity, I leave the authentication of the API open.

Console screenshot.

Now, I click on the API endpoint a few times and download some PDF mails generated with random data:

Screenshot of some PDF files.

The migration of this Lambda function to Arm is complete. The process will differ if you have specific dependencies that do not support the target architecture. The ability to test your container image locally helps you find and fix issues early in the process.

Comparing Different Architectures with Function Versions and Aliases
To have a function that makes some meaningful use of the CPU, I use the following Python code. It computes all prime numbers up to a limit passed as a parameter. I am not using the best possible algorithm here, that would be the sieve of Eratosthenes, but it’s a good compromise for an efficient use of memory. To have more visibility, I add the architecture used by the function to the response of the function.

import json
import math
import platform
import timeit

def primes_up_to(n):
    primes = []
    for i in range(2, n+1):
        is_prime = True
        sqrt_i = math.isqrt(i)
        for p in primes:
            if p > sqrt_i:
                break
            if i % p == 0:
                is_prime = False
                break
        if is_prime:
            primes.append(i)
    return primes

def lambda_handler(event, context):
    start_time = timeit.default_timer()
    N = int(event['queryStringParameters']['max'])
    primes = primes_up_to(N)
    stop_time = timeit.default_timer()
    elapsed_time = stop_time - start_time

    response = {
        'machine': platform.machine(),
        'elapsed': elapsed_time,
        'message': 'There are {} prime numbers <= {}'.format(len(primes), N)
    }
    
    return {
        'statusCode': 200,
        'body': json.dumps(response)
    }

I create two function versions using different architectures.

Console screenshot.

I use a weighted alias with 50% weight on the x86 version and 50% weight on the Arm version to distribute invocations evenly. When invoking the function through this alias, the two versions running on the two different architectures are executed with the same probability.

Console screenshot.

I create an API Gateway trigger for the function alias and then generate some load using a few terminals on my laptop. Each invocation computes prime numbers up to one million. You can see in the output how two different architectures are used to run the function.

$ while True
  do
    curl https://<api-id>.execute-api.us-east-1.amazonaws.com/default/prime-numbers\?max\=1000000
  done

{"machine": "aarch64", "elapsed": 1.2595275060011772, "message": "There are 78498 prime numbers <= 1000000"}
{"machine": "aarch64", "elapsed": 1.2591725109996332, "message": "There are 78498 prime numbers <= 1000000"}
{"machine": "x86_64", "elapsed": 1.7200910530000328, "message": "There are 78498 prime numbers <= 1000000"}
{"machine": "x86_64", "elapsed": 1.6874686619994463, "message": "There are 78498 prime numbers <= 1000000"}
{"machine": "x86_64", "elapsed": 1.6865161940004327, "message": "There are 78498 prime numbers <= 1000000"}
{"machine": "aarch64", "elapsed": 1.2583248640003148, "message": "There are 78498 prime numbers <= 1000000"}
...

During these executions, Lambda sends metrics to CloudWatch and the function version (ExecutedVersion) is stored as one of the dimensions.

To better understand what is happening, I create a CloudWatch dashboard to monitor the p99 duration for the two architectures. In this way, I can compare the performance of the two environments for this function and make an informed decision on which architecture to use in production.

Console screenshot.

For this particular workload, functions are running much faster on the Graviton2 processor, providing a better user experience and much lower costs.

Comparing Different Architectures with Lambda Power Tuning
The AWS Lambda Power Tuning open-source project, created by my friend Alex Casalboni, runs your functions using different settings and suggests a configuration to minimize costs and/or maximize performance. The project has recently been updated to let you compare two results on the same chart. This comes in handy to compare two versions of the same function, one using x86 and the other Arm.

For example, this chart compares x86 and Arm/Graviton2 results for the function computing prime numbers I used earlier in the post:

Chart.

The function is using a single thread. In fact, the lowest duration for both architectures is reported when memory is configured with 1.8 GB. Above that, Lambda functions have access to more than 1 vCPU, but in this case, the function can’t use the additional power. For the same reason, costs are stable with memory up to 1.8 GB. With more memory, costs increase because there are no additional performance benefits for this workload.

I look at the chart and configure the function to use 1.8 GB of memory and the Arm architecture. The Graviton2 processor is clearly providing better performance and lower costs for this compute-intensive function.

Availability and Pricing
You can use Lambda Functions powered by Graviton2 processor today in US East (N. Virginia), US East (Ohio), US West (Oregon), Europe (Frankfurt), Europe (Ireland), EU (London), Asia Pacific (Mumbai), Asia Pacific (Singapore), Asia Pacific (Sydney), Asia Pacific (Tokyo).

The following runtimes running on top of Amazon Linux 2 are supported on Arm:

  • Node.js 12 and 14
  • Python 3.8 and 3.9
  • Java 8 (java8.al2) and 11
  • .NET Core 3.1
  • Ruby 2.7
  • Custom Runtime (provided.al2)

You can manage Lambda Functions powered by Graviton2 processor using AWS Serverless Application Model (SAM) and AWS Cloud Development Kit (AWS CDK). Support is also available through many AWS Lambda Partners such as AntStack, Check Point, Cloudwiry, Contino, Coralogix, Datadog, Lumigo, Pulumi, Slalom, Sumo Logic, Thundra, and Xerris.

Lambda functions using the Arm/Graviton2 architecture provide up to 34 percent price performance improvement. The 20 percent reduction in duration costs also applies when using Provisioned Concurrency. You can further reduce your costs by up to 17 percent with Compute Savings Plans. Lambda functions powered by Graviton2 are included in the AWS Free Tier up to the existing limits. For more information, see the AWS Lambda pricing page.

You can find help to optimize your workloads for the AWS Graviton2 processor in the Getting started with AWS Graviton repository.

Start running your Lambda functions on Arm today.

Danilo

Increase Amazon Elasticsearch Service performance by upgrading to Graviton2

Post Syndicated from Zachariah Elliott original https://aws.amazon.com/blogs/big-data/increase-amazon-elasticsearch-service-performance-by-upgrading-to-graviton2/

Amazon Elasticsearch Service (Amazon ES) supports multiple instance types based on your use case. In 2021, AWS announced general purpose (M6g), compute optimized (C6g), and memory optimized (R6g, R6gd) instance types for Amazon ES version 7.9 or later powered by AWS Graviton2 processors, which delivers a major leap in capabilities and better price/performance improvement over previous generation instances.

Graviton2 instances are built using custom silicon designed by Amazon. These instances are Amazon-designed hardware and software innovations that enable the delivery of efficient, flexible, and secure cloud services with isolated multi-tenancy, private networking, and fast local storage. You can launch Graviton2 instances via the Amazon ES console, the AWS Command Line Interface (AWS CLI), AWS API, AWS CloudFormation, or the AWS Cloud Development Kit (AWS CDK). You can change your existing Amazon ES instance types to Graviton2 using a blue/green deployment process, which minimizes downtime and maintains the original environment in the event of unsuccessful deployments.

In this post, we review prerequisites and considerations to upgrade your existing Amazon ES instances to Graviton2 with minimal downtime.

Why move to Graviton2?

The following are some of the reasons you should move to Graviton2:

  • You can enjoy up to 38% improvement in indexing throughput compared to the corresponding x86-based counterparts
  • The Graviton2 instance family provides up to 50% reduction in indexing latency, and up to 30% improvement in query performance when compared to the current generation (M5, C5, R5)
  • Amazon ES Graviton2 instances provide up to 44% price/performance improvement over previous generation instances
  • Graviton2 instances include support for all recently launched features like encryption at rest and in flight, role-based access control, cross-cluster search, Auto-Tune, Trace Analytics, Kibana Reporting, and UltraWarm

Solution overview

For this post, let’s consider a use case in which we have an Amazon ES cluster running version 7.4 with three data nodes and two primary nodes.

As a general best practice, we recommend testing the process in a non-production environment followed by validation tests to make sure everything is configured and operating as per your expectations before making changes to the production environment. We also recommend creating a snapshot of your cluster before performing upgrades or modifying the instance type to minimize the risk of data loss.

In this post, we walk you through the following steps:

  1. Upgrade the Amazon ES cluster (if needed):
    1. Determine if the current cluster version meets the minimum required version (7.9 or later) for moving to Graviton2.
    2. Upgrade the Amazon ES domain to the required minimum version.
  2. Modify the instance type of your cluster nodes.
  3. Confirm that your applications work correctly with the upgraded cluster.
  4. Roll back to the previous instance types if compatibility issues are discovered.

Upgrade Amazon ES versions

To take advantage of Graviton2-based Amazon ES instances, your cluster must be running Amazon ES version 7.9 and above and service software R20210331 or later (as of this post). For the latest updates of this information, see Supported instance types in Amazon Elasticsearch Service. For upgrade considerations, compatibilities, and instructions, see Upgrading Elasticsearch.

For our use case, our cluster is running version 7.4. We can confirm the version via the AWS CLI or Amazon ES console, as in the following screenshot.

To upgrade your domain, choose Upgrade domain on the Actions menu. You can then choose what version to upgrade to, or verify your cluster can be upgraded. The upgrade process takes some time depending on the size of your cluster.

If you prefer to use the AWS CLI, you can perform the same steps. To get a list of all valid upgrade targets for a current version using the AWS CLI, use the describe-elasticsearch-domain command.

The following describe-elasticsearch-domain example provides configuration details for a given domain:

aws es describe-elasticsearch-domain \
    --domain-name demo

If the cluster version is less than 7.9, use the upgrade-elasticsearch-domain command to upgrade your domain:

aws es upgrade-elasticsearch-domain \
--domain-name demo
--target-version 7.9

You can track the progress of the Amazon ES domain upgrade using API calls to Amazon ES. For more information, see Why is my Amazon Elasticsearch Service domain upgrade taking so long?

Modify instances

At the time of writing, you can’t mix x86 and Graviton2-based Amazon ES instances with the primary and data nodes. As such, both data nodes and primary nodes are modified at the same time. To modify your nodes, complete the following steps:

  1. On the Amazon ES console, go to the domain you want to upgrade.
  2. Choose Edit domain.

  1. In the Data nodes section, for Instance type, change your data nodes to Graviton 2 instance types. In our case, we upgrade from r5.large.elasticsearch to r6g.large.elasticsearch.

  1. In the Dedicated master nodes section, for Instance type, change your dedicated primary nodes to Graviton 2 instance types. In our case, we upgrade from r5.large.elasticsearch to r6g.large.elasticsearch.

  1. Choose Submit.

The cluster goes into a processing state. During this time, you can monitor the Cluster health tab to see your number of nodes increase. In our case, our cluster has two dedicated primary nodes and three data nodes (five total).

During deployment, Amazon ES performs a blue/green deployment. This ensures any errors encountered during modification can be rolled back. You can continue to use the cluster during this time, however there may be a brief service interruption when the cluster switches to the new dedicated primary nodes. During blue/green deployment, you’re charged for both instance types, and then only the new instance type going forward.

After the modification finishes successfully, you can verify both the primary and data nodes are using Graviton2 instances.

Validate and confirm the application works correctly

You can now validate Amazon ES is performing as expected with your application. You can check the Cluster health tab for metrics related to cluster performance and observe if you’re not seeing the expected performance.

Perform rollback

In the rare scenario in which issues are discovered with the Graviton2-based Amazon ES cluster, such as application compatibility or data issues, you can perform the same steps to change the cluster back to the original node type.

Summary

This post shared a step-by-step guide to migrate your Amazon ES cluster to Graviton2-based nodes, as well as some key considerations when modifying your cluster. We also talked about how to upgrade your cluster to the latest version of Amazon ES to take advantage of Graviton 2, as well as other features such as UltraWarm and cold storage. As always, make sure you fully test compatibility with your application and these newer versions of Amazon ES, and per best practices, always perform upgrades in a lower environment before making these changes in a production environment.

Additional resources

For more information, see the following:


About the Authors

Zachariah Elliott works as a Solutions Architect focusing on EdTech at AWS. He is passionate about helping customers build Well-Architected solutions on AWS. He is also part of the IoT Subject Matter Expert community at AWS and loves helping customers develop unique IoT-based solutions.


Pranusha Manchala is a Solutions Architect at AWS who works with education companies. She has worked with many EdTech customers and provided them with architectural guidance for building highly scalable and cost-optimized applications on AWS. She found her interests in machine learning and started to dive deep into this technology. She enjoys cooking, baking, and outdoor activities in her free time.

Migrate Your Workloads with the Graviton Challenge!

Post Syndicated from Steve Roberts original https://aws.amazon.com/blogs/aws/migrate-your-workloads-with-the-graviton-challenge/

Today, Dave Brown, VP of Amazon EC2 at AWS, announced the Graviton Challenge as part of his session on AWS silicon innovation at the Six Five Summit 2021. We invite you to take the Graviton Challenge and move your applications to run on AWS Graviton2. The challenge, intended for individual developers and small teams, is based on the experiences of customers who’ve already migrated. It provides a framework of eight, approximately four-hour chunks to prepare, port, optimize, and finally deploy your application onto Graviton2 instances. Getting your application running on Graviton2, and enjoying the improved price performance, aren’t the only rewards. There are prizes and swag for those who complete the challenge!

AWS Graviton2 is a custom-built processor from AWS that’s based on the Arm64 architecture. It’s supported by popular Linux operating systems including Amazon Linux 2, Red Hat Enterprise Linux, SUSE Linux Enterprise Server, and Ubuntu. Compared to fifth-generation x86-based Amazon Elastic Compute Cloud (Amazon EC2) instance types, Graviton2 instance types have a 20% lower cost. Overall, customers who have moved applications to Graviton2 typically see up to 40% better price performance for a broad range of workloads including application servers, container-based applications, microservices, caching fleets, data analytics, video encoding, electronic design automation, gaming, open-source databases, and more.

Before I dive in to talk more about the challenge, check out the fun introductory video below from Jeff Barr, Chief Evangelist, AWS and Dave Brown, Vice President, EC2. As Jeff mentions in the video: same exact workload, same or better performance, and up to 40% better price performance!

After you complete the challenge, we invite you to tell us about your adoption journey and enter the contest. If you post on social media with the hashtag #ITookTheGravitonChallenge, you’ll earn a t-shirt. To earn a hoodie, include a short video with your post.

To enter the competition, you’ll need to create a 5 to 10-minute video that describes your project and the application you migrated, any hurdles you needed to overcome, and the price performance benefits you realized.

All valid contest entries will each receive a $500 AWS credit (limited to 500 quantity). A panel of judges will evaluate the content entries and award additional prizes across six categories. All category winners will receive an AWS re:Invent 2021 conference pass, flight, and hotel for one company representative, and winners will be able to meet with senior members of the Graviton2 team at the conference. Here are additional category-specific prizes:

  • Best adoption – enterprise
    Based on the performance gains, total cost savings, number of instances the workload is running on, and time taken to migrate the workload (faster is better), for companies with over 1000 employees. The winner will also receive a chance to present at the conference.
  • Best adoption – small/medium business
    Based on the performance gains, total cost savings, number of instances the workload is running on, and time taken to migrate the workload (faster is better), for companies with 100-1000 employees. The winner will also receive a chance to present at the conference.
  • Best adoption – startup
    Based on the performance gains, total cost savings, number of instances the workload is running on, and time taken to migrate the workload (faster is better), for companies with fewer than 100 employees. The winner will also receive a chance to present at the conference.
  • Best new workload adoption
    Awarded to a workload that’s new to EC2 (migrated to Graviton2 from on-premises, or other cloud) based on the performance gains, total cost savings, number of instances the workload is running on, and time taken to migrate the workload (faster is better). The winner will also receive a chance to participate in a video or written case study.
  • Most impactful adoption
    Awarded to the workload with the biggest social impact based on details provided about what the workload/application does. Applications in this category are related to fields such as sustainability, healthcare and life sciences, conservation, learning/education, justice/equity. The winner will also receive a chance to participate in a video or written case study.
  • Most innovative adoption
    Applications in this category solve unique problems for their customers, address new use cases, or are groundbreaking. The award will be based on the workload description, price performance gains, and total cost savings. The winner will also receive a chance to participate in a video or written case study.

Competition submissions open on June 22 and close August 31. Winners will be announced on October 1 2021.

Identifying a workload to migrate
Now that you know what’s possible with Graviton2, you’re probably eager to get started and identify a workload to tackle as part of the challenge. The ideal workload is one that already runs on Linux and uses open-source components. This means you’ll have full access to the source code of every component and can easily make any required changes. If you don’t have an existing Linux workload that is entirely open-source based, you can, of course, move other workloads. A robust ecosystem of ISVs and AWS services already support Graviton2. However, if you are using software from a vendor that does not support Arm64/Graviton2, reach out to the Graviton Challenge Slack channel for support.

What’s involved in the challenge?
The challenge includes eight steps performed over four days (but you don’t have to do the challenge in four consecutive days). If you need assistance from Graviton2 experts, a dedicated Slack channel is available and you can sign up for emails containing helpful tips and guidance. In addition to support on Slack and supporting emails, you also get $25 AWS credit to cover the cost of the taking the challenge. Graviton2-based burstable T4g instances also have a free trial, available until December 31 2021, that can be used to qualify your workloads.

You can download the complete whitepaper can be downloaded from the Graviton Challenge page, but here is an outline of the process.

Day 1: Learn and explore
The first day you’ll learn about Graviton2 and then assess your selected workload. I recommend that you start by checking out the 2020 AWS re:Invent session, Deep dive on AWS Graviton2 processor-powered EC2 instances. The Getting Started with AWS Graviton GitHub repository will be a useful reference as you work through the challenge.

Assessment involves identifying the application’s dependencies and requirements. As with all preparatory work, the more thorough you are at this stage, the better positioned you are for success. So, don’t skimp on this task!

Day 2: Create a plan and start porting
On the second day, you’ll create a Graviton2 environment. You can use EC2 virtual machine instances with AWS-provided images or build your own custom images. Alternatively, you can go the container route, because both Amazon Elastic Container Service (Amazon ECS) and Amazon Elastic Kubernetes Service (EKS) support Graviton2-based instances.

After you have created your environment, you’ll bootstrap the application. The Getting Started Guide on GitHub contains language-specific getting started information. If your application uses Java, Python, Node.js, .NET, or other high-level languages, then it might run as-is or need minimal changes. Other languages like C, C++, or Go will need to be compiled for the 64-bit Arm architecture. For more information, see the guides on GitHub.

Day 3: Debug and optimize
Now that the application is running on a Graviton2 environment, it’s time to test and verify its functionality. When you have a fully functional application, you can test performance and compare it to x86-64 environments. If you don’t observe the expected performance, reach out to your account team, or get support on the Graviton Challenge Slack channel. We’re here to help analyze and resolve any potential performance gaps.

Day 4: Update infrastructure and start deployments
It’s shipping day! You’ll update your infrastructure to add Graviton2-based instances, and then start deploying. We recommend that you use canary or blue-green deployments so that a portion of your traffic is redirected to the new environments. When you’re comfortable, you can transition all traffic.

At this point, you can celebrate completing the challenge, publish a post on social media using the #ITookTheGravitonChallenge hashtag, let us know about your success, and consider entering the competition. Remember, entries for the competition are due by August 31, 2021.

Start the challenge today!
Now that you have some details about the challenge and rewards, it’s time to start your (migration) engines. Download the whitepaper from the Graviton Challenge landing page, familiarize yourself with the details, and off you go! And, if you do decide to enter the competition, good luck!

Footnote
In my role as a .NET Developer Advocate at AWS, I would be remiss if I failed to mention that this challenge is equally applicable to .NET applications using .NET Core or .NET 5 and later! In fact, .NET 5 includes ARM64-specific optimizations. For information about performance improvements my colleagues found for .NET applications running on AWS Graviton2, see the Powering .NET 5 with AWS Graviton2: Benchmarks blog post. There’s also a lab for .NET 5 on Graviton2. I invite you to check out the getting started material for .NET in the aws-graviton-getting-started GitHub repository and start migrating.

— Steve

Build and deploy .NET web applications to ARM-powered AWS Graviton 2 Amazon ECS Clusters using AWS CDK

Post Syndicated from Matt Laver original https://aws.amazon.com/blogs/devops/build-and-deploy-net-web-applications-to-arm-powered-aws-graviton-2-amazon-ecs-clusters-using-aws-cdk/

With .NET providing first-class support for ARM architecture, running .NET applications on an AWS Graviton processor provides you with more choices to help optimize performance and cost. We have already written about .NET 5 with Graviton benchmarks; in this post, we explore how C#/.NET developers can take advantages of Graviton processors and obtain this performance at scale with Amazon Elastic Container Service (Amazon ECS).

In addition, we take advantage of infrastructure as code (IaC) by using the AWS Cloud Development Kit (AWS CDK) to define the infrastructure .

The AWS CDK is an open-source development framework to define cloud applications in code. It includes constructs for Amazon ECS resources, which allows you to deploy fully containerized applications to AWS.

Architecture overview

Our target architecture for our .NET application running in AWS is a load balanced ECS cluster, as shown in the following diagram.

Show load balanced Amazon ECS Cluster running .NET application

Figure: Show load balanced Amazon ECS Cluster running .NET application

We need to provision many components in this architecture, but this is where the AWS CDK comes in. AWS CDK is an open source-software development framework to define cloud resources using familiar programming languages. You can use it for the following:

  • A multi-stage .NET application container build
  • Create an Amazon Elastic Container Registry (Amazon ECR) repository and push the Docker image to it
  • Use IaC written in .NET to provision the preceding architecture

The following diagram illustrates how we use these services.

Show pplication and Infrastructure code written in .NET

Figure: Show Application and Infrastructure code written in .NET

Setup the development environment

To deploy this solution on AWS, we use the AWS Cloud9 development environment.

  1. On the AWS Cloud9 console, choose Create environment.
  2. For Name, enter a name for the environment.
  3. Choose Next step.
  4. On the Environment settings page, keep the default settings:
    1. Environment type – Create a new EC2 instance for the environment (direct access)
    2. Instance type – t2.micro (1 Gib RAM + 1 vCPU)
    3. Platform – Amazon Linux 2(recommended)
    Show Cloud9 Environment settings

    Figure: Show Cloud9 Environment settings

  5. Choose Next step.
  6. Choose Create environment.

When the Cloud9 environment is ready, proceed to the next section.

Install the .NET SDK

The AWS development tools we require will already be setup in the Cloud9 environment, however the .NET SDK will not be available.

Install the .NET SDK with the following code from the Cloud9 terminal:

curl -sSL https://dot.net/v1/dotnet-install.sh | bash /dev/stdin -c 5.0
export PATH=$PATH:$HOME/.local/bin:$HOME/bin:$HOME/.dotnet

Verify the expected version has been installed:

dotnet --version
Show installed .NET SDK version

Figure: Show installed .NET SDK version

Clone and explore the example code

Clone the example repository:

git clone https://github.com/aws-samples/aws-cdk-dotnet-graviton-ecs-example.git

This repository contains two .NET projects, the web application, and the IaC application using the AWS CDK.

The unit of deployment in the AWS CDK is called a stack. All AWS resources defined within the scope of a stack, either directly or indirectly, are provisioned as a single unit.

The stack for this project is located within /cdk/src/Cdk/CdkStack.cs. When we read the C# code, we can see how it aligns with the architecture diagram at the beginning of this post.

First, we create a virtual private cloud (VPC) and assign a maximum of two Availability Zones:

var vpc = new Vpc(this, "DotNetGravitonVpc", new VpcProps { MaxAzs = 2 });

Next, we define the cluster and assign it to the VPC:

var cluster = new Cluster(this, "DotNetGravitonCluster", new ClusterProp { Vpc = vpc });

The Graviton instance type (c6g.4xlarge) is defined in the cluster capacity options:

cluster.AddCapacity("DefaultAutoScalingGroupCapacity",
    new AddCapacityOptions
    {
        InstanceType = new InstanceType("c6g.4xlarge"),
        MachineImage = EcsOptimizedImage.AmazonLinux2(AmiHardwareType.ARM)
    });

Finally, ApplicationLoadBalancedEC2Service is defined, along with a reference to the application source code:

new ApplicationLoadBalancedEc2Service(this, "Service",
    new ApplicationLoadBalancedEc2ServiceProps
    {
        Cluster = cluster,
        MemoryLimitMiB = 8192,
        DesiredCount = 2,
        TaskImageOptions = new ApplicationLoadBalancedTaskImageOptions
        {
            Image = ContainerImage.FromAsset(Path.Combine(Directory.GetCurrentDirectory(), @"../app")),                        
        }                             
    });

With about 30 lines of AWS CDK code written in C#, we achieve the following:

  • Build and package a .NET application within a Docker image
  • Push the Docker image to Amazon Elastic Container Registry (Amazon ECR)
  • Create a VPC with two Availability Zones
  • Create a cluster with a Graviton c6g.4xlarge instance type that pulls the Docker image from Amazon ECR

The AWS CDK has several useful helpers, such as the FromAsset function:

Image =  ContainerImage.FromAsset(Path.Combine(Directory.GetCurrentDirectory(), @"../app")),  

The ContainerImage.FromAsset function instructs the AWS CDK to build the Docker image from a Dockerfile, automatically create an Amazon ECR repository, and upload the image to the repository.

For more information about the ContainerImage class, see ContainerImage.

Build and deploy the project with the AWS CDK Toolkit

The AWS CDK Toolkit, the CLI command cdk, is the primary tool for interaction with AWS CDK apps. It runs the app, interrogates the application model you defined, and produces and deploys the AWS CloudFormation templates generated by the AWS CDK.

If an AWS CDK stack being deployed uses assets such as Docker images, the environment needs to be bootstrapped. Use the cdk bootstrap command from the /cdk directory:

cdk bootstrap

Now you can deploy the stack into the AWS account with the deploy command:

cdk deploy

The AWS CDK Toolkit synthesizes fresh CloudFormation templates locally before deploying anything. The first time this runs, it has a changeset that reflects all the infrastructure defined within the stack and prompts you for confirmation before running.

When the deployment is complete, the load balancer DNS is in the Outputs section.

Show stack outputs

Figure: Show stack outputs

You can navigate to the load balancer address via a browser.

Browser navigating to .NET application

Figure: Show browser navigating to .NET application

Tracking the drift

Typically drift is a change that happens outside of the Infrastructure as Code, for example, code updates to the .NET application.

To support changes, the AWS CDK Toolkit queries the AWS account for the last deployed CloudFormation template for the stack and compares it with the locally generated template. Preview the changes with the following code:

cdk diff

If a simple text change within the application’s home page HTML is made (app/webapp/Pages/Index.cshtml), a difference is detected within the assets, but not all the infrastructure as per the first deploy.

Show cdk diff output

Figure: Show cdk diff output

Running cdk deploy again now rebuilds the Docker image, uploads it to Amazon ECR, and refreshes the containers within the ECS cluster.

cdk deploy
Show browser navigating to updated .NET application

Figure: Show browser navigating to updated .NET application

Clean up

Remove the resources created in this post with the following code:

cdk destroy

Conclusion

Using the AWS CDK to provision infrastructure in .NET provides rigor, clarity, and reliability in a language familiar to .NET developers. For more information, see Infrastructure as Code.

This post demonstrates the low barrier to entry for .NET developers wanting to apply modern application development practices while taking advantage of the price performance of ARM-based processors such as Graviton.

To learn more about building and deploying .NET applications on AWS visit our .NET Developer Center.

About the author

Author Matt Laver


Matt Laver is a Solutions Architect at AWS working with SMB customers in the UK. He is passionate about DevOps and loves helping customers find simple solutions to difficult problems.


Building an ARM64 Rust development environment using AWS Graviton2 and AWS CDK

Post Syndicated from Alistair McLean original https://aws.amazon.com/blogs/devops/building-an-arm64-rust-development-environment-using-aws-graviton2-and-aws-cdk/

2020 was the year that ARM chips made the headlines by moving from largely mobile form factors into the cloud thanks to AWS Graviton2, allowing you to have up to 40% better price performance over comparable current generation x86 Amazon Elastic Compute Cloud (Amazon EC2) and Amazon Relational Database Service (Amazon RDS) instances.

We speak to customers daily about Graviton2. One recurring question we hear is “Graviton2 is great, but how can my team develop for ARM natively without the complexity of cross-compilation or having to buy custom hardware on premises?” This post seeks to answer that question by setting up the Visual Studio Code-based Code Server IDE, running on a Graviton2 EC2 instance that enables native development in a cost-effective and secure manner accessed via your browser.

The Rust programming language has gained a huge amount of popularity recently. This post aims to show that you can use this environment for Rust development as well as hundreds of other supported languages. AWS has committed to supporting the Rust community and using the language to deliver fast and robust services to customers at scale, and we want to enable our customers to do the same.

We also include instructions for building and installing the rust-analyzer and CodeLLDB debugger plugins to add additional language features.

Solution overview

The following diagram illustrates our solution architecture.

Architecture of the solution showing components and their linkages

The solution consists of an EC2 Graviton2 instance located in a private VPC subnet routed through an AWS Global Accelerator accelerator to provide routing optimization and keep packet loss, jitter, and latency lower by up to 60%. An internal facing Application Load Balancer containing the AWS Certificate Manager certificate decrypts and forwards traffic to this instance.

Code Server queries AWS Secrets Manager to initially set the login password on startup and allow for continued password-based authentication and easy password rotation. The EC2 instance has access to the internet through a NAT gateway and has no public IP address or key pair associated, and is accessible only through AWS Systems Manager Session Manager.

Prerequisites

For this walkthrough, the following are prerequisites:

AWS CDK stack

In order to deploy our architecture, I use the AWS CDK. As a developer, it’s more intuitive to me to define my infrastructure using a language and tooling with which I am familiar. I can also do things like environment variable injection and scripting as part of the stack creation to add stack parameters and customization points.

The AWS CDK application is comprised of five stacks. Each stack defines a separate part of the architecture:

  • Networking – Defines a VPC across two Availability Zones with the CIDR range of your choice. The routing and public/private subnet creation is done for us as part of the default configuration.
  • Certificate – This is the reason for the domain prerequisite. It’s a best practice to encrypt web applications using TLS, and for that we need a certificate and therefore a domain. This stack creates a certificate for the subdomain you specify as part of the stack creation and DNS validation in Route 53.
  • Amazon EC2 configuration – This defines both our AMI and the instance type and configuration. In this case, we’re using Amazon Linux 2 ARM64 edition. Here we also set the instance-managed roles that allow Session Manager connectivity and Secrets Manager access.
  • ALB configuration – Here we define the internal load balancer and specify the listener, certificate, and target configuration. I have injected the Amazon EC2 configuration as part of the class constructor so that I can reference it directly as a target.
  • Global accelerator configuration – Finally, the accelerator is defined here with two ports open, the ALB we defined in the ALB stack as a target, and most importantly adds in a CNAME DNS entry pointing to the DNS name of the accelerator.

Walkthrough overview

This walkthrough uses the AWS CDK command line tools to deploy the stack. Session Manager is enabled to allow access to the EC2 instance and configure the Code Server application and associated plugins.

The walkthrough specifically covers the following steps:

  1. Deploy the AWS CDK stacks via CloudShell to build out the application infrastructure and associated IAM roles.
  2. Launch Code Server via the official Docker container with the commands to get and set the password stored in Secrets Manager.
  3. Log in and build the rust-analyzer and CodeLLDB plugins from a terminal to allow for debugging within a “Hello World” application.

Start CloudShell and install the appropriate tooling

In this section, I use dummy values for the domain, the VPC CIDR, AWS Region, and the secret password. You need to submit real values as appropriate.

Sign in to CloudShell and enter the following commands:

sudo yum groupinstall -y "Development Tools"
sudo npm install aws-cdk -g
git clone https://github.com/aws-samples/cdk-graviton2-alb-aga-route53.git
cd cdk-graviton2-alb-aga-route53
python3 -m venv .
source bin/activate
python -m pip install -r requirements.txt
export VPC_CIDR=”10.0.0.1/16” #Substitute your CIDR here.
export CDK_DEPLOY_ACCOUNT=`aws sts get-caller-identity | jq -r '.Account'`
export CDK_DEPLOY_REGION=$AWS_REGION
export R53_DOMAIN=”code-server.example.com” #Substitute your domain here.
cdk bootstrap aws://$CDK_DEPLOY_ACCOUNT/$CDK_DEPLOY_REGION
cdk deploy --all

The deploy step takes around 10-15 mins to run and prompts a couple of times to add resources like security groups and IAM roles.

Log in to the new instance using Session Manager

Install the latest version of the Session Manager plugin for the AWS CLI:

cd ~
curl "https://s3.amazonaws.com/session-manager-downloads/plugin/latest/linux_64bit/session-manager-plugin.rpm" -o "session-manager-plugin.rpm"
sudo yum install -y session-manager-plugin.rpm

Now start a session, logging into the newly created EC2 instance and log in as ec2-user:

aws ssm start-session --target i-1234xyz7890abc #Substitute the instance id we just created here
#Once session is active:
sudo su - ec2-user

Add the password as a secret and start the container

Enter the following code to add the password as a secret in Secrets Manager and start the container:

aws secretsmanager create-secret --name CodeServerProd --secret-string Password123abc # Substitute the appropriate password here.
sudo docker run -d --name=code-server -e PUID=1000 -e PGID=1000 -e PASSWORD=`aws secretsmanager get-secret-value --secret-id CodeServerProd | jq -r '.SecretString'` -p 8080:8080 -v /home/ec2-user/.config:/config --restart unless-stopped codercom/code-server

Access and configure the web application for Rust development

So far, we have accomplished the following:

  • Created the infrastructure in the diagram via AWS CDK deployment
  • Configured the EC2 instance to run Docker and added this to the systemctl startup scripts
  • Created a secret in Secrets Manager to use as the application login password
  • Instantiated a Docker container running Code Server

Next, we access the running container via the web interface and install the required development tools.

Log in to the Code Server web application

To log in to the Code Server web application, complete the following steps:

  1. Browse to https://code-server.example.com, where example.com is the name of the domain you supplied in the AWS CDK step.
  2. Log in using the password you created in Secrets Manager.
  3. Create a new terminal by choosing the hamburger icon and, under Terminal, choosing New Terminal.
  4. Issue the following commands into the terminal to install the Rust programming language:
bash
sudo apt update && sudo apt upgrade -y
sudo apt install -y build-essential npm clang lldb
curl --proto '=https' --tlsv1.2 -sSf https://sh.rustup.rs | sh
source $HOME/.cargo/env

Install the rust-analyzer plugin

Open the extensions panel and enter Rust Analyzer in the search bar. Then install the plugin.

Install the debugger

Go back to the extensions panel in the Code Server application and enter CodeLLDB into the search bar. Then install this extension.

Create a sample application and open it in the Code Server window

To create and use our sample application, complete the following steps:

  • In the existing Code Server terminal, enter the following:
mkdir -p ~/src/
cd ~/src
cargo new helloworld --bin
  • Open the newly created folder in Code Server verifying that the helloworld directory was successfully created.

Open File or Folder dialog in Code Server

  • Rust-analyzer runs when you open up src/main.rs and index the file.
  • You can run the program by choosing Run in the editor.

Main Code Server editor window showing helloworld Rust program code.

  • Similarly, to launch the debugger, choose Debug in the editor.

Code Server Debugger view

Troubleshooting

If the CloudShell session times out, you need to reset your environment variables in order to re-deploy, modify, and delete the stack deployment.

Clean up

This stack incurs an estimated monthly cost of $143.00.

To delete the stack, log in to CloudShell and enter the following commands:

cd cdk-graviton2-alb-aga-route53
source bin/activate

# Re-set the environment variables again if required
export VPC_CIDR=”10.0.0.1/16” #Substitute your CIDR here.
export CDK_DEPLOY_ACCOUNT=`aws sts get-caller-identity | jq -r '.Account'`
export CDK_DEPLOY_REGION=$AWS_REGION
export R53_DOMAIN=”code-server.example.com” #Substitute your domain here.
cdk destroy --all

This destroys all the resources created in the first step. You can verify this by browsing to the AWS CloudFormation console and noting the deletion of all the stacks.

Conclusion

AWS is a place where builders can reinvent the future. The future of development means supporting different chipsets depending on different business requirements. This post is designed to enable development targeting the ARM64 microarchitecture by utilizing AWS Graviton2. Happy building!

Author bio

Author portrait

Alistair is a Principal Solutions Architect at AWS focused on EdTech customers. Originally from the west coast of Scotland, Alistair now lives in Fairfield, Connecticut, with his wife and two daughters and enjoys spending time with his family, skiing, golfing, cycling, and using his pellet smoker.

Supporting AWS Graviton2 and x86 instance types in the same Auto Scaling group

Post Syndicated from Emma White original https://aws.amazon.com/blogs/compute/supporting-aws-graviton2-and-x86-instance-types-in-the-same-auto-scaling-group/

This post is written by Tyler Lynch, Sr. Solutions Architect – EdTech, and Praneeth Tekula, Technical Account Manager.

As customers seek performance improvements and to cost optimize their workloads, they are evaluating and adopting AWS Graviton2 based instances. This post provides instructions on how to configure your Amazon EC2 Auto Scaling group (ASG) to use both Graviton2 and x86 based Amazon EC2 Instances in the same Auto Scaling group with different AMIs. This allows you to introduce Graviton2 based instances as part of a multiple instance type strategy.

For example, a customer may want to use the same Auto Scaling group definition across multiple Regions, but an instance type might not available in that region yet. Implementing instance and architecture diversity allow those Auto Scaling group definitions to be portable.

Solution Overview

The Amazon EC2 Auto Scaling console currently doesn’t support the selection of multiple launch templates, so I use the AWS Command Line Interface (AWS CLI) throughout this post. First, you create your launch templates that specify AMIs for use on x86 and arm64 based instances. Then you create your Auto Scaling group using a mixed instance policy with instance level overrides to specify the launch template to use for that instance.

Finally, you extend the launch templates to use architecture-specific EC2 user data to download architecture-specific binaries. Putting it all together, here are the high-level steps to follow:

  1. Create the launch templates:
    1. Launch template for x86– Creates a launch template for x86 instances, specifying the AMI but not the instance sizes.
    2. Launch template for arm64– Creates a launch template for arm64 instances, specifying the AMI but not the instance sizes.
  2. Create the Auto Scaling group that references the launch templates in a mixed instance policy override.
  3. Create a sample Node.js application.
  4. Create the architecture-specific user data scripts.
  5. Modify the launch templates to use architecture-specific user data scripts.

Prerequisites

The prerequisites for this solution are as follows:

  • The AWS CLI installed locally. I use AWS CLI version 2 for this post.
    • For AWS CLI v2, you must use 2.1.3+
    • For AWS CLI v1, you must use 1.18.182+
  • The correct AWS Identity and Access Management(IAM) role permissions for your account allowing for the creation and execution of the launch templates, Auto Scaling groups, and launching EC2 instances.
  • A source control service such as AWS CodeCommit or GitHub that your user data script can interact with to git clone the Hello World Node.js application.
  • The source code repository initialized and cloned locally.

Create the Launch Templates

You start with creating the launch template for x86 instances, and then the launch template for arm64 instances. These are simple launch templates where you only specify the AMI for Amazon Linux 2 in US-EAST-1 (architecture dependent). You use the AWS CLI cli-input-json feature to make things more readable and repeatable.

You first must add the lt-x86-cli-input.json file to your local working for reference by the AWS CLI.

  1. In your preferred text editor, add a new file, and copy paste the following JSON into the file.

{
    "LaunchTemplateName": "lt-x86",
    "VersionDescription": "LaunchTemplate for x86 instance types using Amazon Linux 2 x86 AMI in US-EAST-1",
    "LaunchTemplateData": {
        "ImageId": "ami-04bf6dcdc9ab498ca"
    }
}
  1. Save the file in your local working directory and name it lt-x86-cli-input.json.

Now, add the lt-arm64-cli-input.json file into your local working directory.

  1. In a text editor, add a new file, and copy paste the following JSON into the file.

{
    "LaunchTemplateName": "lt-arm64",
    "VersionDescription": "LaunchTemplate for Graviton2 instance types using Amazon Linux 2 Arm64 AMI in US-EAST-1",
    "LaunchTemplateData": {
        "ImageId": "ami-09e7aedfda734b173"
    }
}
  1. Save the file in your local working directory and name it lt-arm64-cli-input.json.

Now that your CLI input files are ready, create your launch templates using the CLI.

From your terminal, run the following commands:


aws ec2 create-launch-template \
            --cli-input-json file://./lt-x86-cli-input.json \
            --region us-east-1

aws ec2 create-launch-template \
            --cli-input-json file://./lt-arm64-cli-input.json \
            --region us-east-1

After you run each command, you should see the command output similar to this:


{
	"LaunchTemplate": {
		"LaunchTemplateId": "lt-07ab8c76f8e021b0c",
		"LaunchTemplateName": "lt-x86",
		"CreateTime": "2020-11-20T16:08:08+00:00",
		"CreatedBy": "arn:aws:sts::111111111111:assumed-role/Admin/myusername",
		"DefaultVersionNumber": 1,
		"LatestVersionNumber": 1
	}
}

{
	"LaunchTemplate": {
		"LaunchTemplateId": "lt-0c65656a2c75c0f76",
		"LaunchTemplateName": "lt-arm64",
		"CreateTime": "2020-11-20T16:08:37+00:00",
		"CreatedBy": "arn:aws:sts::111111111111:assumed-role/Admin/myusername",
		"DefaultVersionNumber": 1,
		"LatestVersionNumber": 1
	}
}

Create the Auto Scaling Group

Moving on to creating your Auto Scaling group, start with creating another JSON file to use the cli-input-json feature. Then, create the Auto Scaling group via the CLI.

I want to call special attention to the LaunchTemplateSpecification under the MixedInstancePolicy Overrides property. This Auto Scaling group is being created with a default launch template, the one you created for arm64 based instances. You override that at the instance level for x86 instances.

Now, add the asg-mixed-arch-cli-input.json file into your local working directory.

  1. In a text editor, add a new file, and copy paste the following JSON into the file.
  2. You need to change the subnet IDs specified in the VPCZoneIdentifier to your own subnet IDs.

{
    "AutoScalingGroupName": "asg-mixed-arch",
    "MixedInstancesPolicy": {
        "LaunchTemplate": {
            "LaunchTemplateSpecification": {
                "LaunchTemplateName": "lt-arm64",
                "Version": "$Default"
            },
            "Overrides": [
                {
                    "InstanceType": "t4g.micro"
                },
                {
                    "InstanceType": "t3.micro",
                    "LaunchTemplateSpecification": {
                        "LaunchTemplateName": "lt-x86",
                        "Version": "$Default"
                    }
                },
                {
                    "InstanceType": "t3a.micro",
                    "LaunchTemplateSpecification": {
                        "LaunchTemplateName": "lt-x86",
                        "Version": "$Default"
                    }
                }
            ]
        }
    },    
    "MinSize": 1,
    "MaxSize": 5,
    "DesiredCapacity": 3,
    "VPCZoneIdentifier": "subnet-e92485b6, subnet-07fe637b44fd23c31, subnet-828622e4, subnet-9bd6a2d6"
}
  1. Save the file in your local working directory and name it asg-mixed-arch-cli-input.json.

Now that your CLI input file is ready, create your Auto Scaling group using the CLI.

  1. From your terminal, run the following command:

aws autoscaling create-auto-scaling-group \
            --cli-input-json file://./asg-mixed-arch-cli-input.json \
            --region us-east-1

After you run the command, there isn’t any immediate output. Describe the Auto Scaling group to review the configuration.

  1. From your terminal, run the following command:

aws autoscaling describe-auto-scaling-groups \
            --auto-scaling-group-names asg-mixed-arch \
            --region us-east-1

Let’s evaluate the output. I removed some of the output for brevity. It shows that you have an Auto Scaling group with a mixed instance policy, which specifies a default launch template named lt-arm64. In the Overrides property, you can see the instances types that you specified and the values that define the lt-x86 launch template to be used for specific instance types (t3.micro, t3a.micro).


{
    "AutoScalingGroups": [
        {
            "AutoScalingGroupName": "asg-mixed-arch",
            "AutoScalingGroupARN": "arn:aws:autoscaling:us-east-1:111111111111:autoScalingGroup:a1a1a1a1-a1a1-a1a1-a1a1-a1a1a1a1a1a1:autoScalingGroupName/asg-mixed-arch",
            "MixedInstancesPolicy": {
                "LaunchTemplate": {
                    "LaunchTemplateSpecification": {
                        "LaunchTemplateId": "lt-0cc7dae79a397d663",
                        "LaunchTemplateName": "lt-arm64",
                        "Version": "$Default"
                    },
                    "Overrides": [
                        {
                            "InstanceType": "t4g.micro"
                        },
                        {
                            "InstanceType": "t3.micro",
                            "LaunchTemplateSpecification": {
                                "LaunchTemplateId": "lt-04b525bfbde0dcebb",
                                "LaunchTemplateName": "lt-x86",
                                "Version": "$Default"
                            }
                        },
                        {
                            "InstanceType": "t3a.micro",
                            "LaunchTemplateSpecification": {
                                "LaunchTemplateId": "lt-04b525bfbde0dcebb",
                                "LaunchTemplateName": "lt-x86",
                                "Version": "$Default"
                            }
                        }
                    ]
                },
                ...
            },
            ...
            "Instances": [
                {
                    "InstanceId": "i-00377a23630a5e107",
                    "InstanceType": "t4g.micro",
                    "AvailabilityZone": "us-east-1b",
                    "LifecycleState": "InService",
                    "HealthStatus": "Healthy",
                    "LaunchTemplate": {
                        "LaunchTemplateId": "lt-0cc7dae79a397d663",
                        "LaunchTemplateName": "lt-arm64",
                        "Version": "1"
                    },
                    "ProtectedFromScaleIn": false
                },
                {
                    "InstanceId": "i-07c2d4f875f1f457e",
                    "InstanceType": "t4g.micro",
                    "AvailabilityZone": "us-east-1a",
                    "LifecycleState": "InService",
                    "HealthStatus": "Healthy",
                    "LaunchTemplate": {
                        "LaunchTemplateId": "lt-0cc7dae79a397d663",
                        "LaunchTemplateName": "lt-arm64",
                        "Version": "1"
                    },
                    "ProtectedFromScaleIn": false
                },
                {
                    "InstanceId": "i-09e61e95cdf705ade",
                    "InstanceType": "t4g.micro",
                    "AvailabilityZone": "us-east-1c",
                    "LifecycleState": "InService",
                    "HealthStatus": "Healthy",
                    "LaunchTemplate": {
                        "LaunchTemplateId": "lt-0cc7dae79a397d663",
                        "LaunchTemplateName": "lt-arm64",
                        "Version": "1"
                    },
                    "ProtectedFromScaleIn": false
                }
            ],
            ...
        }
    ]
}

Create Hello World Node.js App

Now that you have created the launch templates and the Auto Scaling group you are ready to create the “hello world” application that self-reports the processor architecture. You work in the local directory that is cloned from your source repository as specified in the prerequisites. This doesn’t have to be the local working directory where you are creating architecture-specific files.

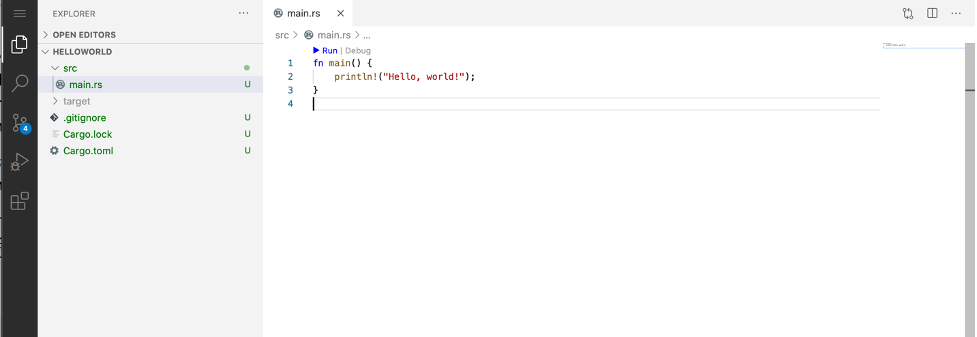
  1. In a text editor, add a new file with the following Node.js code:

// Hello World sample app.
const http = require('http');

const port = 3000;

const server = http.createServer((req, res) => {
  res.statusCode = 200;
  res.setHeader('Content-Type', 'text/plain');
  res.end(`Hello World. This processor architecture is ${process.arch}`);
});

server.listen(port, () => {
  console.log(`Server running on processor architecture ${process.arch}`);
});
  1. Save the file in the root of your source repository and name it app.js.
  2. Commit the changes to Git and push the changes to your source repository. See the following commands:

git add .
git commit -m "Adding Node.js sample application."
git push

Create user data scripts

Moving on to your creating architecture-specific user data scripts that will define the version of Node.js and the distribution that matches the processor architecture. It will download and extract the binary and add the binary path to the environment PATH. Then it will clone the Hello World app, and then run that app with the binary of Node.js that was installed.

Now, you must add the ud-x86-cli-input.txt file to your local working directory.

  1. In your text editor, add a new file, and copy paste the following text into the file.
  2. Update the git clone command to use the repo URL where you created the Hello World app previously.
  3. Update the cd command to use the repo name.

sudo yum update -y
sudo yum install git -y
VERSION=v14.15.3
DISTRO=linux-x64
wget https://nodejs.org/dist/$VERSION/node-$VERSION-$DISTRO.tar.xz
sudo mkdir -p /usr/local/lib/nodejs
sudo tar -xJvf node-$VERSION-$DISTRO.tar.xz -C /usr/local/lib/nodejs 
export PATH=/usr/local/lib/nodejs/node-$VERSION-$DISTRO/bin:$PATH
git clone https://github.com/<<githubuser>>/<<repo>>.git
cd <<repo>>
node app.js
  1. Save the file in your local working directory and name it ud-x86-cli-input.txt.

Now, add the ud-arm64-cli-input.txt file into your local working directory.

  1. In a text editor, add a new file, and copy paste the following text into the file.
  2. Update the git clone command to use the repo URL where you created the Hello World app previously.
  3. Update the cd command to use the repo name.

sudo yum update -y
sudo yum install git -y
VERSION=v14.15.3
DISTRO=linux-arm64
wget https://nodejs.org/dist/$VERSION/node-$VERSION-$DISTRO.tar.xz
sudo mkdir -p /usr/local/lib/nodejs
sudo tar -xJvf node-$VERSION-$DISTRO.tar.xz -C /usr/local/lib/nodejs 
export PATH=/usr/local/lib/nodejs/node-$VERSION-$DISTRO/bin:$PATH
git clone https://github.com/<<githubuser>>/<<repo>>.git
cd <<repo>>
node app.js
  1. Save the file in your local working directory and name it ud-arm64-cli-input.txt.

Now that your user data scripts are ready, you need to base64 encode them as the AWS CLI does not perform base64-encoding of the user data for you.

  • On a Linux computer, from your terminal use the base64 command to encode the user data scripts.

base64 ud-x86-cli-input.txt > ud-x86-cli-input-base64.txt
base64 ud-arm64-cli-input.txt > ud-arm64-cli-input-base64.txt
  • On a Windows computer, from your command line use the certutil command to encode the user data. Before you can use this file with the AWS CLI, you must remove the first (BEGIN CERTIFICATE) and last (END CERTIFICATE) lines.

certutil -encode ud-x86-cli-input.txt ud-x86-cli-input-base64.txt
certutil -encode ud-arm64-cli-input.txt ud-arm64-cli-input-base64.txt
notepad ud-x86-cli-input-base64.txt
notepad ud-arm64-cli-input-base64.txt

Modify the Launch Templates

Now, you modify the launch templates to use architecture-specific user data scripts.

Please note that the contents of your ud-x86-cli-input-base64.txt and ud-arm64-cli-input-base64.txt files are different from the samples here because you referenced your own GitHub repository. These base64 encoded user data scripts below will not work as is, they contain placeholder references for the git clone and cd commands.

Next, update the lt-x86-cli-input.json file to include your base64 encoded user data script for x86 based instances.

  1. In your preferred text editor, open the ud-x86-cli-input-base64.txt file.
  2. Open the lt-x86-cli-input.json file, and add in the text from the ud-x86-cli-input-base64.txt file into the UserData property of the LaunchTemplateData object. It should look similar to this:

{
    "LaunchTemplateName": "lt-x86",
    "VersionDescription": "LaunchTemplate for x86 instance types using Amazon Linux 2 x86 AMI in US-EAST-1",
    "LaunchTemplateData": {
        "ImageId": "ami-04bf6dcdc9ab498ca",
        "UserData": "IyEvYmluL2Jhc2gKeXVtIHVwZGF0ZSAteQoKVkVSU0lPTj12MTQuMTUuMwpESVNUUk89bGludXgteDY0CndnZXQgaHR0cHM6Ly9ub2RlanMub3JnL2Rpc3QvJFZFUlNJT04vbm9kZS0kVkVSU0lPTi0kRElTVFJPLnRhci54egpzdWRvIG1rZGlyIC1wIC91c3IvbG9jYWwvbGliL25vZGVqcwpzdWRvIHRhciAteEp2ZiBub2RlLSRWRVJTSU9OLSRESVNUUk8udGFyLnh6IC1DIC91c3IvbG9jYWwvbGliL25vZGVqcyAKZXhwb3J0IFBBVEg9L3Vzci9sb2NhbC9saWIvbm9kZWpzL25vZGUtJFZFUlNJT04tJERJU1RSTy9iaW46JFBBVEgKZ2l0IGNsb25lIGh0dHBzOi8vZ2l0aHViLmNvbS88PGdpdGh1YnVzZXI+Pi88PHJlcG8+Pi5naXQKY2QgPDxyZXBvPj4Kbm9kZSBhcHAuanMK"
    }
}
  1. Save the file.

Next, update the lt-arm64-cli-input.json file to include your base64 encoded user data script for arm64 based instances.

  1. In your text editor, open the ud-arm64-cli-input-base64.txt file.
  2. Open the lt-arm64-cli-input.json file, and add in the text from the ud-arm64-cli-input-base64.txt file into the UserData property of the LaunchTemplateData It should look similar to this:

{
    "LaunchTemplateName": "lt-arm64",
    "VersionDescription": "LaunchTemplate for Graviton2 instance types using Amazon Linux 2 Arm64 AMI in US-EAST-1",
    "LaunchTemplateData": {
        "ImageId": "ami-09e7aedfda734b173",
        "UserData": "IyEvYmluL2Jhc2gKeXVtIHVwZGF0ZSAteQoKVkVSU0lPTj12MTQuMTUuMwpESVNUUk89bGludXgtYXJtNjQKd2dldCBodHRwczovL25vZGVqcy5vcmcvZGlzdC8kVkVSU0lPTi9ub2RlLSRWRVJTSU9OLSRESVNUUk8udGFyLnh6CnN1ZG8gbWtkaXIgLXAgL3Vzci9sb2NhbC9saWIvbm9kZWpzCnN1ZG8gdGFyIC14SnZmIG5vZGUtJFZFUlNJT04tJERJU1RSTy50YXIueHogLUMgL3Vzci9sb2NhbC9saWIvbm9kZWpzIApleHBvcnQgUEFUSD0vdXNyL2xvY2FsL2xpYi9ub2RlanMvbm9kZS0kVkVSU0lPTi0kRElTVFJPL2JpbjokUEFUSApnaXQgY2xvbmUgaHR0cHM6Ly9naXRodWIuY29tLzw8Z2l0aHVidXNlcj4+Lzw8cmVwbz4+LmdpdApjZCA8PHJlcG8+Pgpub2RlIGFwcC5qcwoKCg=="
    }
}
  1. Save the file.

Now, your CLI input files are ready. Next, create a new version of your launch templates and then set the newest version as the default.

From your terminal, run the following commands:


aws ec2 create-launch-template-version \
            --cli-input-json file://./lt-x86-cli-input.json \
            --region us-east-1

aws ec2 create-launch-template-version \
            --cli-input-json file://./lt-arm64-cli-input.json \
            --region us-east-1

aws ec2 modify-launch-template \
            --launch-template-name lt-x86 \
            --default-version 2
			
aws ec2 modify-launch-template \
            --launch-template-name lt-arm64 \
            --default-version 2

After you run each command, you should see the command output similar to this:


{
    "LaunchTemplate": {
        "LaunchTemplateId": "lt-08ff3d03d4cf0038d",
        "LaunchTemplateName": "lt-x86",
        "CreateTime": "1970-01-01T00:00:00+00:00",
        "CreatedBy": "arn:aws:sts::111111111111:assumed-role/Admin/myusername",
        "DefaultVersionNumber": 2,
        "LatestVersionNumber": 2
    }
}

{
    "LaunchTemplate": {
        "LaunchTemplateId": "lt-0c5e1eb862a02f8e0",
        "LaunchTemplateName": "lt-arm64",
        "CreateTime": "1970-01-01T00:00:00+00:00",
        "CreatedBy": "arn:aws:sts::111111111111:assumed-role/Admin/myusername",
        "DefaultVersionNumber": 2,
        "LatestVersionNumber": 2
    }
}

Now, refresh the instances in the Auto Scaling group so that the newest version of the launch template is used.

From your terminal, run the following command:


aws autoscaling start-instance-refresh \
            --auto-scaling-group-name asg-mixed-arch

Verify Instances

The sample Node.js application self reports the process architecture in two ways: when the application is started, and when the application receives a HTTP request on port 3000. Retrieve the last five lines of the instance console output via the AWS CLI.

First, you need to get an instance ID from the autoscaling group.

  1. From your terminal, run the following commands:

aws autoscaling describe-auto-scaling-groups \
            --auto-scaling-group-name asg-mixed-arch \
            --region us-east-1
  1. Evaluate the output. I removed some of the output for brevity. You need to use the InstanceID from the output.

{
    "AutoScalingGroups": [
        {
            "AutoScalingGroupName": "asg-mixed-arch",
            "AutoScalingGroupARN": "arn:aws:autoscaling:us-east-1:111111111111:autoScalingGroup:a1a1a1a1-a1a1-a1a1-a1a1-a1a1a1a1a1a1:autoScalingGroupName/asg-mixed-arch",
            "MixedInstancesPolicy": {
                ...
            },
            ...
            "Instances": [
                {
                    "InstanceId": "i-0eeadb140405cc09b",
                    "InstanceType": "t4g.micro",
                    "AvailabilityZone": "us-east-1a",
                    "LifecycleState": "InService",
                    "HealthStatus": "Healthy",
                    "LaunchTemplate": {
                        "LaunchTemplateId": "lt-0c5e1eb862a02f8e0",
                        "LaunchTemplateName": "lt-arm64",
                        "Version": "2"
                    },
                    "ProtectedFromScaleIn": false
                }
            ],
          ....
        }
    ]
}

Now, retrieve the last five lines of console output from the instance.

From your terminal, run the following command:


aws ec2 get-console-output –instance-id d i-0eeadb140405cc09b \
            --output text | tail -n 5

Evaluate the output, you should see Server running on processor architecture arm64. This confirms that you have successfully utilized an architecture-specific user data script.


[  58.798184] cloud-init[1257]: node-v14.15.3-linux-arm64/share/systemtap/tapset/node.stp
[  58.798293] cloud-init[1257]: node-v14.15.3-linux-arm64/LICENSE
[  58.798402] cloud-init[1257]: Cloning into 'node-helloworld'...
[  58.798510] cloud-init[1257]: Server running on processor architecture arm64
2021-01-14T21:14:32+00:00

Cleaning Up

Delete the Auto Scaling group and use the force-delete option. The force-delete option specifies that the group is to be deleted along with all instances associated with the group, without waiting for all instances to be terminated.


aws autoscaling delete-auto-scaling-group \
            --auto-scaling-group-name asg-mixed-arch --force-delete \
            --region us-east-1

Now, delete your launch templates.


aws ec2 delete-launch-template --launch-template-name lt-x86
aws ec2 delete-launch-template --launch-template-name lt-arm64

Conclusion

You walked through creating and using architecture-specific user data scripts that were processor architecture-specific. This same method could be applied to fleets where you have different configurations needed for different instance types. Variability such as disk sizes, networking configurations, placement groups, and tagging can now be accomplished in the same Auto Scaling group.

Powering .NET 5 with AWS Graviton2: Benchmarks

Post Syndicated from Emma White original https://aws.amazon.com/blogs/compute/powering-net-5-with-aws-graviton2-benchmark-results/

This post was authored by Kirk Davis, Developer Advocate for App Modernization 

In 2019, AWS announced new Amazon EC2 instance types powered by the AWS Graviton2 processor. The AWS Graviton2 processor is based on the ARM64 architecture leveraging 64-bit ARM Neoverse N1 cores. Since 2019, AWS has launched many new EC2 instances built on Graviton2, including general-purpose (M6g), compute-optimized (C6g), memory-optimized (R6g), and general-purpose burstable (T4g) types. These Graviton2 based instances provide up to 40% better price performance over their comparable generation x86-64 instances. These instance types use the same naming convention as other types, but with a “g” appended to the family. For example, a t4g.large, or a c6g.2xlarge. Many customers are already running workloads on these Graviton2 instances, including .NET Core applications. Note that I refer to these 64-bit processors as “x86” for this blog post.

Organizations like AnandTech have done in-depth benchmarking of Graviton2 against x86-architecture EC2 instances and found that Graviton2 has a significant performance and cost advantage. Comparing similar instance families, the Graviton2 instances are about 20% less expensive per hour than Intel x86 instances with up to 40% better performance. With .NET 5 officially released in November, I thought it would be interesting to see what advantages Graviton2 has for .NET 5 web applications as a follow-up to the .NET 5 on AWS blog AWS published earlier. Follow along this blog to learn how I ran the benchmarking tests, the applications I chose to benchmark, and to see the results.

Overview

I decided to run some straight-forward .NET 5 benchmarks that tested ASP.NET Core under load for both x86-based and Graviton2 instances. ASP.NET Core runs application code in thread-pool threads, so it takes advantage of multiple cores to handle multiple requests concurrently. One thing to keep in mind is that x86-based EC2 instance types use simultaneous multi-threading, and a vCPU maps to a logical core. However, for Graviton2 instances a vCPU maps to a physical core. So, for these benchmarks, I used x86 and ARM64 instance types with 4 x vCPUs: m5.xlarge instance types, which have four logical (two physical) x86 cores, and m6g.xlarge instances, which have four physical ARM cores. I wanted to compare the latency and requests/second performance for different scenarios, and then compare the performance adjusted for the instances’ cost per hour. I used the per-hour pricing from the us-east-2 (Ohio) Region:

m5.xlarge m6g.xlarge
Cost $0.192 $0.154
vCPU 4 4
RAM 16 16

Benchmarks and testing framework

I used the open-source Crank software to run the benchmarks and gather results. Crank abstracts away many of the messy details in running benchmarks and delivers consistent results. From the GitHub page:

“Crank is the benchmarking infrastructure used by the .NET team to run benchmarks including (but not limited to) scenarios from the TechEmpower Web Framework Benchmarks.

Crank uses a controller (crank-controller), which communicates to one or more agents (crank-agent). The agents download, compile, and run the code, then report the results back to the controller. In this case, I used three agents: one each on the instances to be tested, and one on a test-runner instance (an m5.xlarge) that ran bombardier, a common load-testing tool that is already integrated into Crank. You can also choose wrk2, or other tools if you prefer (Crank’s readme files provide examples for both). I ran all the instances in the same Availability Zone (AZ) to minimize any other sources of latency. The setup looked like this:

benchmark environment setup

Note:    In order to use Crank’s agent with the .NET 5 release version, I made minor changes to its Startup.cs class. These changes forced Crank to pull down the correct .NET 5 SDK version, and fixed an issue where it wasn’t appending the correct build parameters for arm64 when compiling code on the m6g.xlarge instance. It’s possible the Microsoft.Crank.Agent project has been updated since I used it. I also updated all projects to .NET 5.

Benchmark tests

Since many of the .NET Core workloads customers are running in AWS are ASP.NET Core websites or APIs, I focused only these types of applications. I selected the Mvc project from the ASP.NET Benchmarks GitHub repository. The controller in this project defines an “Entry” class, and then creates and returns them as List<Entry> (which gets serialized to JSON by ASP.NET Core). For the source code for these methods, please refer to the preceding GitHub links. In the project, the Crank configuration YAML file defines three scenarios (note that I used these scenarios but swapped out wrk for bombardier).

  • MvcJsonNet2k: calls JsonController’s Json2k() method (returns eight Entries)
  • MvcJsonOutput60k: calls JsonController’s JsonNk() method for 60,000 bytes
  • MvcJsonOutput2M: calls JsonController’s JsonNk() method for 221 bytes

Additionally, I created another ASP.NET Core Web API application based on the boilerplate ASP.NET Web API project and added EF Core. I did this because many ASP.NET Core applications use Entity Framework Core (EF Core), and do more computationally expensive work than only serializing JSON. To isolate the performance of the two instances, I used the in-memory provider for EF Core, and populated a DbSet with weather summaries at startup. I modified the WeatherForecastController to encrypt each WeatherForecast’s Summary property using .NET’s RSACryptoServiceProvider class, and then added another controller that queries forecasts from the DbSet, and serializes them to strings. For that method, I added an asynchronous delay (using Task.Delay) to simulate querying a relational database. To run the tests, I created a Crank configuration YAML file that defines three scenarios:

  • AsyncParallelJson100: returns 100 forecasts from EF Core serialized to string using Text.Json
  • AsyncParallelJson500: returns 500 forecasts from EF Core serialized to string using Text.Json
  • ParallelEncryptWeather100: encrypts summaries for 100 forecasts and returns the forecasts as IEnumerable<WeatherForecast>

This application uses the 5.0.0 version of the Microsoft.EntityFrameworkCore and Microsoft.EntityFrameworkCore.InMemory NuGet packages. The following is the source code for the two methods I used in the tests:

JsonSerializeController’s Get method:

[HttpGet]
public async Task<IEnumerable<string>> Get(int count = 100)
{
    List<WeatherForecast> forecasts;
    List<string> jsons = new List<string>();

    using (var context = new WeatherContext())
    {
        forecasts = context.WeatherForecasts.Take(count).ToList();
    }
    await Task.Delay(5);
    Parallel.ForEach(forecasts, x => jsons.Add(JsonSerializer.Serialize(x)));

    return jsons;
}

WeatherForecastController’s Get method:

[HttpGet]
public IEnumerable<WeatherForecast> Get(int count = 100)
{
    List<WeatherForecast> forecasts;

    using (var context = new WeatherContext())
    {
        forecasts = context.WeatherForecasts.Take(count).ToList();
    }
    UnicodeEncoding ByteConverter = new UnicodeEncoding();

    using (RSACryptoServiceProvider RSA = new RSACryptoServiceProvider())
    {
        Parallel.ForEach(forecasts, x => x.EncryptedSummary = RSAEncrypt(ByteConverter.GetBytes(x.Summary), RSA.ExportParameters(false), false));
    }
    return forecasts;
}

Note:    The RSAEncrypt method was copied from the sample code in the RSACryptoServiceProvider’s docs.

Setting up the instances

For running the benchmarks, I selected the Amazon Machine Image (AMI) for Ubuntu Server 20.04 LTS, and chose “64-bit (x86)” for the m5.xlarge and “64-bit (Arm)” for the m6g.xlarge. I gave them both 20GB of Amazon Elastic Block Store (EBS) storage, and chose a security group with port 22 open to my home IP address, so that I could SSH into them. While it’s possible to install and use .NET 5 on Amazon Linux 2 (AL2), that’s not currently a supported Linux distribution for .NET 5 on ARM, and I wanted the same distribution for both x86 and ARM64. For details on launching Graviton2 instances from the AWS Management Console, please refer to the .NET 5 on AWS blog post from November 10, 2020.

Ubuntu 20.04 is a supported release for installing .NET 5 using apt-get, but ARM architectures are not yet supported. So instead – and to use the same method on both instances – I manually installed the .NET 5 SDK using the following commands, specifying the architecture-appropriate download link for the binaries*. Instructions for manually installing are also available at the prior “installing .NET 5” link.

curl -SL -o dotnet.tar.gz <link to architecture-specific binary file*>
sudo mkdir -p /usr/share/dotnet
sudo tar -zxf dotnet.tar.gz -C /usr/share/dotnet
sudo ln -s /usr/share/dotnet/dotnet /usr/bin/dotnet
echo "export DOTNET_SYSTEM_GLOBALIZATION_INVARIANT=true" >> ~/.bash_profile

Then, I used SCP to upload the source code for my benchmarking solution to the instances, and SSH’d onto both, using two tabs in the new Windows Terminal.

*At the time this blog was written, the binaries used were:
dotnet-sdk-5.0.100-linux-arm64.tar.gz
dotnet-sdk-5.0.100-linux-x64.tar.gz

Benchmark results

Benchmark runs and units

I used Crank to perform two runs of each of the six benchmarks on each of the two instances and took the average of the two runs for each. There was minimal variation between runs. For each test, I charted the latency in microseconds (μs), with the bars for MvcJsonOutput2M and ParallelEncryptWeather100 scaled by plotting μs/100, and bars for AsyncParallelJson100 and AsyncParallelJson500 scaled with μs/10. For latency, shorter bars are better.

I also charted the performance in requests/second, and the overall value as performance/dollar, where the performance is the requests/second, and dollars is the cost/hour of the given instance type. In order to have the bars legible on the same chart, some values were scaled as shown below the chart (the same scaling was applied to all values for a given benchmark). For both raw performance and performance/price, longer bars are better.

Note that I didn’t do any specific optimization for ARM64 or x86.

Summary of results

The Graviton2 instance had lower latency across the board for the tests I ran, with the m6g.xlarge (Graviton2) instance having up to 24.7% lower latency (for MvcJsonOutput2M) than the m5.xlarge (x86-64). It’s notable that in general, the more work the test method was doing, the bigger the advantage of Graviton2.

The results were broadly similar for requests/second, with Graviton2 delivering up to 31.6% better performance (for MvcJsonOutput2M). For the most computationally-expensive test – ParallelEncryptWeather100 – the Graviton2 instance churned out 16.6% more requests per second. And all of this is without considering the price difference. Also, not reflected in the charts is that the x86 instance had twice as many bad requests (average of 16) as the Graviton2 instance (average of 8) for the ParallelEncryptWeather100 test. ParallelEncryptWeather100 was the only test where there were any bad responses across all the tests.

When scaling the performance for the hourly price of each instance type, the differences are starker. The Graviton2 offers up to 64% more requests/second per hourly cost of the instance (for MvcJsonOutput2M). Even on the test with the least advantage (MvcJsonNet2k), the Graviton2 provided 30.8% better performance/cost, where performance is requests/second. These types of results can translate into significant savings for even modestly sized workloads.

Charts

chart showing mean latency for the benchmark

In the preceding chart, the mean latency is shown in micro-seconds (μs), with the values for some tests divided by either 10 or 100 in order to make all the bars visible in the chart. The Graviton2 instance had 24.7% lower latency for the MvcJsonOutput2M test, and had lower latency across all the tests.

chart showing raw performance for the benchmark

This second chart shows how the m6g.xlarge Graviton2 instance handled more requests for every test. The bars represent the raw requests/second for each test. For the MvcJsonOutput2M test, which serializes two megabytes to JSON, it handled 31.6% more requests per second, and was faster for every test I ran.

chart showing price/performance for benchmark test

This third chart uses the same performance values as the preceding one, but the m5.xlarge values are divided by its hourly cost ($0.192 in the Ohio Region), and the m6g.xlarge bars are divided by $0.154 (also for the Ohio Region). The Graviton2 instance handled 64% more requests per dollar for the MvcJsonOutput2M test, and provides much better performance per dollar across all the tests.

Conclusion

If you’re adopting .NET 5 for your applications, you have a variety of choices for deploying them in AWS. You can run them in containers in Amazon Elastic Container Service (ECS) or Amazon Elastic Kubernetes Service (EKS) with or without AWS Fargate, you can deploy them as serverless functions in AWS Lambda, or deploy them onto EC2 using either x86-based or Graviton2-based instances.

For running scalable web applications built on ASP.NET Core 5.0, the new Graviton2 instance families offer significant performance advantages, and even more compelling performance/price advantages of up to 64% over the equivalent Intel x86 instance families without making any code changes. Coupled with the ARM64 performance improvements in .NET 5, moving from .NET Core 3.1 on x86 to .NET 5 on Graviton2 promises significant cost savings. It also allows developers to code and locally test on their x86-based development machines (or even new ARM-based macOS laptops), and to use their existing deployment mechanisms. If your application is still based on .NET Framework, consider using the AWS Porting Assistant for .NET to begin porting to .NET Core.

Learn more about AWS Graviton2 based instances.


Coming Soon – EC2 C6gn Instances – 100 Gbps Networking with AWS Graviton2 Processors

Post Syndicated from Danilo Poccia original https://aws.amazon.com/blogs/aws/coming-soon-ec2-c6gn-instances-100-gbps-networking-with-aws-graviton2-processors/

Based on the amazing feedback from customers such as Snap, NextRoll, Intuit, SmugMug, and Honeycomb who are running their workloads on Amazon Elastic Compute Cloud (EC2) instances powered by AWS Graviton2, today we are announcing an addition to our broad Arm-based Graviton2 portfolio with C6gn instances that deliver up to 100 Gbps network bandwidth, up to 38 Gbps Amazon Elastic Block Store (EBS) bandwidth, up to 40% higher packet processing performance, and up to 40% better price/performance versus comparable current generation x86-based network optimized instances.

Compared to C6g instances, this new instance type provides 4x higher network bandwidth, 4x higher packet processing performance, and 2x higher EBS bandwidth. This means that customers with workloads that need high networking bandwidth such as high performance computing (HPC), network appliance, real-time video communications, and data analytics, will be able to bring their biggest and most challenging applications to Arm and take advantage of the performance and cost-optimization.

C6gn instances will be available in 8 sizes:

Name vCPUs Memory
(GiB)
Network Bandwidth
(Gbps)
EBS Throughput
(Gbps)
c6gn.medium 1 2 Up to 25 Up to 9.5
c6gn.large 2 4 Up to 25 Up to 9.5
c6gn.xlarge 4 8 Up to 25 Up to 9.5
c6gn.2xlarge 8 16 Up to 25 Up to 9.5
c6gn.4xlarge 16 32 25 9.5
c6gn.8xlarge 32 64 50 19
c6gn.12xlarge 48 96 75 28.5
c6gn.16xlarge 64 128 100 38

The new instances are built on the AWS Nitro System, a collection of AWS-designed hardware and software innovations that maximize resource efficiency. C6gn instances support Elastic Fabric Adapter (EFA) on the c6gn.16xlarge sizes for workloads that can take advantage of lower network latency (such as HPC and video processing) and use Message Passing Interface (MPI) for highly scalable clusters. These new instances also fully support network frameworks like Data Plane Development Kit (DPDK), making it easier to migrate network appliance workloads.

Coming Soon
EC2 C6gn instances will be available later this month and make it easier to optimize costs for HPC and workloads that require high network bandwidth and low latency. Let me know what you are going to build with them!

To get practice with the AWS Graviton2 architecture, you can try t4g.micro instances for free for up to 750 hours per month until March 31st, 2021.

Learn more about EC2 C6gn instances today.

Danilo

Creating multi-architecture Docker images to support Graviton2 using AWS CodeBuild and AWS CodePipeline

Post Syndicated from Tyler Lynch original https://aws.amazon.com/blogs/devops/creating-multi-architecture-docker-images-to-support-graviton2-using-aws-codebuild-and-aws-codepipeline/

This post provides a clear path for customers who are evaluating and adopting Graviton2 instance types for performance improvements and cost-optimization.

Graviton2 processors are custom designed by AWS using 64-bit Arm Neoverse N1 cores. They power the T4g*, M6g*, R6g*, and C6g* Amazon Elastic Compute Cloud (Amazon EC2) instance types and offer up to 40% better price performance over the current generation of x86-based instances in a variety of workloads, such as high-performance computing, application servers, media transcoding, in-memory caching, gaming, and more.

More and more customers want to make the move to Graviton2 to take advantage of these performance optimizations while saving money.

During the transition process, a great benefit AWS provides is the ability to perform native builds for each architecture, instead of attempting to cross-compile on homogenous hardware. This has the benefit of decreasing build time as well as reducing complexity and cost to set up.

To see this benefit in action, we look at how to build a CI/CD pipeline using AWS CodePipeline and AWS CodeBuild that can build multi-architecture Docker images in parallel to aid you in evaluating and migrating to Graviton2.

Solution overview

With CodePipeline and CodeBuild, we can automate the creation of architecture-specific Docker images, which can be pushed to Amazon Elastic Container Registry (Amazon ECR). The following diagram illustrates this architecture.

Solution overview architectural diagram

The steps in this process are as follows:

  1. Create a sample Node.js application and associated Dockerfile.
  2. Create the buildspec files that contain the commands that CodeBuild runs.
  3. Create three CodeBuild projects to automate each of the following steps:
    • CodeBuild for x86 – Creates a x86 Docker image and pushes to Amazon ECR.
    • CodeBuild for arm64 – Creates a Arm64 Docker image and pushes to Amazon ECR.
    • CodeBuild for manifest list – Creates a Docker manifest list, annotates the list, and pushes to Amazon ECR.
  4. Automate the orchestration of these projects with CodePipeline.

Prerequisites

The prerequisites for this solution are as follows:

  • The correct AWS Identity and Access Management (IAM) role permissions for your account allowing for the creation of the CodePipeline pipeline, CodeBuild projects, and Amazon ECR repositories
  • An Amazon ECR repository named multi-arch-test
  • A source control service such as AWS CodeCommit or GitHub that CodeBuild and CodePipeline can interact with
  • The source code repository initialized and cloned locally

Creating a sample Node.js application and associated Dockerfile

For this post, we create a sample “Hello World” application that self-reports the processor architecture. We work in the local folder that is cloned from our source repository as specified in the prerequisites.

  1. In your preferred text editor, add a new file with the following Node.js code:

# Hello World sample app.
const http = require('http');

const port = 3000;

const server = http.createServer((req, res) => {
  res.statusCode = 200;
  res.setHeader('Content-Type', 'text/plain');
  res.end(`Hello World. This processor architecture is ${process.arch}`);
});

server.listen(port, () => {
  console.log(`Server running on processor architecture ${process.arch}`);
});
  1. Save the file in the root of your source repository and name it app.js.
  2. Commit the changes to Git and push the changes to our source repository. See the following code:

git add .
git commit -m "Adding Node.js sample application."
git push

We also need to create a sample Dockerfile that instructs the docker build command how to build the Docker images. We use the default Node.js image tag for version 14.

  1. In a text editor, add a new file with the following code:

# Sample nodejs application
FROM node:14
WORKDIR /usr/src/app
COPY package*.json app.js ./
RUN npm install
EXPOSE 3000
CMD ["node", "app.js"]
  1. Save the file in the root of the source repository and name it Dockerfile. Make sure it is Dockerfile with no extension.
  2. Commit the changes to Git and push the changes to our source repository:

git add .
git commit -m "Adding Dockerfile to host the Node.js sample application."
git push

Creating a build specification file for your application

It’s time to create and add a buildspec file to our source repository. We want to use a single buildspec.yml file for building, tagging, and pushing the Docker images to Amazon ECR for both target native architectures, x86, and Arm64. We use CodeBuild to inject environment variables, some of which need to be changed for each architecture (such as image tag and image architecture).

A buildspec is a collection of build commands and related settings, in YAML format, that CodeBuild uses to run a build. For more information, see Build specification reference for CodeBuild.

The buildspec we add instructs CodeBuild to do the following:

  • install phase – Update the yum package manager
  • pre_build phase – Sign in to Amazon ECR using the IAM role assumed by CodeBuild
  • build phase – Build the Docker image using the Docker CLI and tag the newly created Docker image
  • post_build phase – Push the Docker image to our Amazon ECR repository

We first need to add the buildspec.yml file to our source repository.

  1. In a text editor, add a new file with the following build specification:

version: 0.2
phases:
    install:
        commands:
            - yum update -y
    pre_build:
        commands:
            - echo Logging in to Amazon ECR...
            - $(aws ecr get-login --no-include-email --region $AWS_DEFAULT_REGION)
    build:
        commands:
            - echo Build started on `date`
            - echo Building the Docker image...          
            - docker build -t $IMAGE_REPO_NAME:$IMAGE_TAG .
            - docker tag $IMAGE_REPO_NAME:$IMAGE_TAG $AWS_ACCOUNT_ID.dkr.ecr.$AWS_DEFAULT_REGION.amazonaws.com/$IMAGE_REPO_NAME:$IMAGE_TAG      
    post_build:
        commands:
            - echo Build completed on `date`
            - echo Pushing the Docker image...
            - docker push $AWS_ACCOUNT_ID.dkr.ecr.$AWS_DEFAULT_REGION.amazonaws.com/$IMAGE_REPO_NAME:$IMAGE_TAG
  1. Save the file in the root of the repository and name it buildspec.yml.

Because we specify environment variables in the CodeBuild project, we don’t need to hard code any values in the buildspec file.

  1. Commit the changes to Git and push the changes to our source repository:

git add .
git commit -m "Adding CodeBuild buildspec.yml file."
git push

Creating a build specification file for your manifest list creation

Next we create a buildspec file that instructs CodeBuild to create a Docker manifest list, and associate that manifest list with the Docker images that the buildspec file builds.

A manifest list is a list of image layers that is created by specifying one or more (ideally more than one) image names. You can then use it in the same way as an image name in docker pull and docker run commands, for example. For more information, see manifest create.

As of this writing, manifest creation is an experimental feature of the Docker command line interface (CLI).

Experimental features provide early access to future product functionality. These features are intended only for testing and feedback because they may change between releases without warning or be removed entirely from a future release. Experimental features must not be used in production environments. For more information, Experimental features.

When creating the CodeBuild project for manifest list creation, we specify a buildspec file name override as buildspec-manifest.yml. This buildspec instructs CodeBuild to do the following:

  • install phase – Update the yum package manager
  • pre_build phase – Sign in to Amazon ECR using the IAM role assumed by CodeBuild
  • build phase – Perform three actions:
    • Set environment variable to enable Docker experimental features for the CLI
    • Create the Docker manifest list using the Docker CLI
    • Annotate the manifest list to add the architecture-specific Docker image references
  • post_build phase – Push the Docker image to our Amazon ECR repository and use docker manifest inspect to echo out the contents of the manifest list from Amazon ECR

We first need to add the buildspec-manifest.yml file to our source repository.

  1. In a text editor, add a new file with the following build specification:

version: 0.2
# Based on the Docker documentation, must include the DOCKER_CLI_EXPERIMENTAL environment variable
# https://docs.docker.com/engine/reference/commandline/manifest/    

phases:
    install:
        commands:
            - yum update -y
    pre_build:
        commands:
            - echo Logging in to Amazon ECR...
            - $(aws ecr get-login --no-include-email --region $AWS_DEFAULT_REGION)
    build:
        commands:
            - echo Build started on `date`
            - echo Building the Docker manifest...   
            - export DOCKER_CLI_EXPERIMENTAL=enabled       
            - docker manifest create $AWS_ACCOUNT_ID.dkr.ecr.$AWS_DEFAULT_REGION.amazonaws.com/$IMAGE_REPO_NAME $AWS_ACCOUNT_ID.dkr.ecr.$AWS_DEFAULT_REGION.amazonaws.com/$IMAGE_REPO_NAME:latest-arm64v8 $AWS_ACCOUNT_ID.dkr.ecr.$AWS_DEFAULT_REGION.amazonaws.com/$IMAGE_REPO_NAME:latest-amd64    
            - docker manifest annotate --arch arm64 $AWS_ACCOUNT_ID.dkr.ecr.$AWS_DEFAULT_REGION.amazonaws.com/$IMAGE_REPO_NAME $AWS_ACCOUNT_ID.dkr.ecr.$AWS_DEFAULT_REGION.amazonaws.com/$IMAGE_REPO_NAME:latest-arm64v8
            - docker manifest annotate --arch amd64 $AWS_ACCOUNT_ID.dkr.ecr.$AWS_DEFAULT_REGION.amazonaws.com/$IMAGE_REPO_NAME $AWS_ACCOUNT_ID.dkr.ecr.$AWS_DEFAULT_REGION.amazonaws.com/$IMAGE_REPO_NAME:latest-amd64

    post_build:
        commands:
            - echo Build completed on `date`
            - echo Pushing the Docker image...
            - docker manifest push $AWS_ACCOUNT_ID.dkr.ecr.$AWS_DEFAULT_REGION.amazonaws.com/$IMAGE_REPO_NAME
            - docker manifest inspect $AWS_ACCOUNT_ID.dkr.ecr.$AWS_DEFAULT_REGION.amazonaws.com/$IMAGE_REPO_NAME
  1. Save the file in the root of the repository and name it buildspec-manifest.yml.
  2. Commit the changes to Git and push the changes to our source repository:

git add .
git commit -m "Adding CodeBuild buildspec-manifest.yml file."
git push

Setting up your CodeBuild projects

Now we have created a single buildspec.yml file for building, tagging, and pushing the Docker images to Amazon ECR for both target native architectures: x86 and Arm64. This file is shared by two of the three CodeBuild projects that we create. We use CodeBuild to inject environment variables, some of which need to be changed for each architecture (such as image tag and image architecture). We also want to use the single Docker file, regardless of the architecture. We also need to ensure any third-party libraries are present and compiled correctly for the target architecture.

For more information about third-party libraries and software versions that have been optimized for Arm, see the Getting started with AWS Graviton GitHub repo.

We use the same environment variable names for the CodeBuild projects, but each project has specific values, as detailed in the following table. You need to modify these values to your numeric AWS account ID, the AWS Region where your Amazon ECR registry endpoint is located, and your Amazon ECR repository name. The instructions for adding the environment variables in the CodeBuild projects are in the following sections.

Environment Variable x86 Project values Arm64 Project values manifest Project values
1 AWS_DEFAULT_REGION us-east-1 us-east-1 us-east-1
2 AWS_ACCOUNT_ID 111111111111 111111111111 111111111111
3 IMAGE_REPO_NAME multi-arch-test multi-arch-test multi-arch-test
4 IMAGE_TAG latest-amd64 latest-arm64v8 latest

The image we use in this post uses architecture-specific tags with the term latest. This is for demonstration purposes only; it’s best to tag the images with an explicit version or another meaningful reference.

CodeBuild for x86

We start with creating a new CodeBuild project for x86 on the CodeBuild console.

CodeBuild looks for a file named buildspec.yml by default, unless overridden. For these first two CodeBuild projects, we rely on that default and don’t specify the buildspec name.

  1. On the CodeBuild console, choose Create build project.
  2. For Project name, enter a unique project name for your build project, such as node-x86.
  3. To add tags, add them under Additional Configuration.
  4. Choose a Source provider (for this post, we choose GitHub).
  5. For Environment image, choose Managed image.
  6. Select Amazon Linux 2.
  7. For Runtime(s), choose Standard.
  8. For Image, choose aws/codebuild/amazonlinux2-x86_64-standard:3.0.

This is a x86 build image.

  1. Select Privileged.
  2. For Service role, choose New service role.
  3. Enter a name for the new role (one is created for you), such as CodeBuildServiceRole-nodeproject.

We reuse this same service role for the other CodeBuild projects associated with this project.

  1. Expand Additional configurations and move to the Environment variables
  2. Create the following Environment variables:
Name Value Type
1 AWS_DEFAULT_REGION us-east-1 Plaintext
2 AWS_ACCOUNT_ID 111111111111 Plaintext
3 IMAGE_REPO_NAME multi-arch-test Plaintext
4 IMAGE_TAG latest-amd64 Plaintext
  1. Choose Create build project.

Attaching the IAM policy

Now that we have created the CodeBuild project, we need to adjust the new service role that was just created and attach an IAM policy so that it can interact with the Amazon ECR API.

  1. On the CodeBuild console, choose the node-x86 project
  2. Choose the Build details
  3. Under Service role, choose the link that looks like arn:aws:iam::111111111111:role/service-role/CodeBuildServiceRole-nodeproject.

A new browser tab should open.

  1. Choose Attach policies.
  2. In the Search field, enter AmazonEC2ContainerRegistryPowerUser.
  3. Select AmazonEC2ContainerRegistryPowerUser.
  4. Choose Attach policy.

CodeBuild for arm64

Now we move on to creating a new (second) CodeBuild project for Arm64.

  1. On the CodeBuild console, choose Create build project.
  2. For Project name, enter a unique project name, such as node-arm64.
  3. If you want to add tags, add them under Additional Configuration.
  4. Choose a Source provider (for this post, choose GitHub).
  5. For Environment image, choose Managed image.
  6. Select Amazon Linux 2.
  7. For Runtime(s), choose Standard.
  8. For Image, choose aws/codebuild/amazonlinux2-aarch64-standard:2.0.

This is an Arm build image and is different from the image selected in the previous CodeBuild project.

  1. Select Privileged.
  2. For Service role, choose Existing service role.
  3. Choose CodeBuildServiceRole-nodeproject.
  4. Select Allow AWS CodeBuild to modify this service role so it can be used with this build project.
  5. Expand Additional configurations and move to the Environment variables
  6. Create the following Environment variables:
Name Value Type
1 AWS_DEFAULT_REGION us-east-1 Plaintext
2 AWS_ACCOUNT_ID 111111111111 Plaintext
3 IMAGE_REPO_NAME multi-arch-test Plaintext
4 IMAGE_TAG latest-arm64v8 Plaintext
  1. Choose Create build project.

CodeBuild for manifest list

For the last CodeBuild project, we create a Docker manifest list, associating that manifest list with the Docker images that the preceding projects create, and pushing the manifest list to ECR. This project uses the buildspec-manifest.yml file created earlier.

  1. On the CodeBuild console, choose Create build project.
  2. For Project name, enter a unique project name for your build project, such as node-manifest.
  3. If you want to add tags, add them under Additional Configuration.
  4. Choose a Source provider (for this post, choose GitHub).
  5. For Environment image, choose Managed image.
  6. Select Amazon Linux 2.
  7. For Runtime(s), choose Standard.
  8. For Image, choose aws/codebuild/amazonlinux2-x86_64-standard:3.0.

This is a x86 build image.

  1. Select Privileged.
  2. For Service role, choose Existing service role.
  3. Choose CodeBuildServiceRole-nodeproject.
  4. Select Allow AWS CodeBuild to modify this service role so it can be used with this build project.
  5. Expand Additional configurations and move to the Environment variables
  6. Create the following Environment variables:
Name Value Type
1 AWS_DEFAULT_REGION us-east-1 Plaintext
2 AWS_ACCOUNT_ID 111111111111 Plaintext
3 IMAGE_REPO_NAME multi-arch-test Plaintext
4 IMAGE_TAG latest Plaintext
  1. For Buildspec name – optional, enter buildspec-manifest.yml to override the default.
  2. Choose Create build project.

Setting up CodePipeline

Now we can move on to creating a pipeline to orchestrate the builds and manifest creation.

  1. On the CodePipeline console, choose Create pipeline.
  2. For Pipeline name, enter a unique name for your pipeline, such as node-multi-architecture.
  3. For Service role, choose New service role.
  4. Enter a name for the new role (one is created for you). For this post, we use the generated role name CodePipelineServiceRole-nodeproject.
  5. Select Allow AWS CodePipeline to create a service role so it can be used with this new pipeline.
  6. Choose Next.
  7. Choose a Source provider (for this post, choose GitHub).
  8. If you don’t have any existing Connections to GitHub, select Connect to GitHub and follow the wizard.
  9. Choose your Branch name (for this post, I choose main, but your branch might be different).
  10. For Output artifact format, choose CodePipeline default.
  11. Choose Next.

You should now be on the Add build stage page.

  1. For Build provider, choose AWS CodeBuild.
  2. Verify the Region is your Region of choice (for this post, I use US East (N. Virginia)).
  3. For Project name, choose node-x86.
  4. For Build type, select Single build.
  5. Choose Next.

You should now be on the Add deploy stage page.

  1. Choose Skip deploy stage.

A pop-up appears that reads Your pipeline will not include a deployment stage. Are you sure you want to skip this stage?

  1. Choose Skip.
  2. Choose Create pipeline.

CodePipeline immediately attempts to run a build. You can let it continue without worry if it fails. We are only part of the way done with the setup.

Adding an additional build step

We need to add the additional build step for the Arm CodeBuild project in the Build stage.

  1. On the CodePipeline console, choose node-multi-architecture pipeline
  2. Choose Edit to start editing the pipeline stages.

You should now be on the Editing: node-multi-architecture page.

  1. For the Build stage, choose Edit stage.
  2. Choose + Add action.

Editing node-multi-architecture

  1. For Action name, enter Build-arm64.
  2. For Action provider, choose AWS CodeBuild.
  3. Verify your Region is correct.
  4. For Input artifacts, select SourceArtifact.
  5. For Project name, choose node-arm64.
  6. For Build type, select Single build.
  7. Choose Done.
  8. Choose Save.

A pop-up appears that reads Saving your changes cannot be undone. If the pipeline is running when you save your changes, that execution will not complete.

  1. Choose Save.

Updating the first build action name

This step is optional. The CodePipeline wizard doesn’t allow you to enter your Build action name during creation, but you can update the Build stage’s first build action to have consistent naming.

  1. Choose Edit to start editing the pipeline stages.
  2. Choose the Edit icon.
  3. For Action name, enter Build-x86.
  4. Choose Done.
  5. Choose Save.

A pop-up appears that says Saving your changes cannot be undone. If the pipeline is running when you save your changes, that execution will not complete.

  1. Choose Save.

Adding the project

Now we add the CodeBuild project for manifest creation and publishing.

  1. On the CodePipeline console, choose node-multi-architecture pipeline.
  2. Choose Edit to start editing the pipeline stages.
  3. Choose +Add stage below the Build
  4. Set the Stage name to Manifest
  5. Choose +Add action group.
  6. For Action name, enter Create-manifest.
  7. For Action provider, choose AWS CodeBuild.
  8. Verify your Region is correct.
  9. For Input artifacts, select SourceArtifact.
  10. For Project name, choose node-manifest.
  11. For Build type, select Single build.
  12. Choose Done.
  13. Choose Save.

A pop-up appears that reads Saving your changes cannot be undone. If the pipeline is running when you save your changes, that execution will not complete.

  1. Choose Save.

Testing the pipeline

Now let’s verify everything works as planned.

  1. In the pipeline details page, choose Release change.

This runs the pipeline in stages. The process should take a few minutes to complete. The pipeline should show each stage as Succeeded.

Pipeline visualization

Now we want to inspect the output of the Create-manifest action that runs the CodeBuild project for manifest creation.

  1. Choose Details in the Create-manifest

This opens the CodeBuild pipeline.

  1. Under Build logs, we should see the output from the manifest inspect command we ran as the last step in the buildspec-manifest.yml See the following sample log:

[Container] 2020/10/07 16:47:39 Running command docker manifest inspect $AWS_ACCOUNT_ID.dkr.ecr.$AWS_DEFAULT_REGION.amazonaws.com/$IMAGE_REPO_NAME
{
   "schemaVersion": 2,
   "mediaType": "application/vnd.docker.distribution.manifest.list.v2+json",
   "manifests": [
      {
         "mediaType": "application/vnd.docker.distribution.manifest.v2+json",
         "size": 1369,
         "digest": "sha256:238c2762212ff5d7e0b5474f23d500f2f1a9c851cdd3e7ef0f662efac508cd04",
         "platform": {
            "architecture": "amd64",
            "os": "linux"
         }
      },
      {
         "mediaType": "application/vnd.docker.distribution.manifest.v2+json",
         "size": 1369,
         "digest": "sha256:0cc9e96921d5565bdf13274e0f356a139a31d10e95de9ad3d5774a31b8871b05",
         "platform": {
            "architecture": "arm64",
            "os": "linux"
         }
      }
   ]
}

Cleaning up

To avoid incurring future charges, clean up the resources created as part of this post.

  1. On the CodePipeline console, choose the pipeline node-multi-architecture.
  2. Choose Delete pipeline.
  3. When prompted, enter delete.
  4. Choose Delete.
  5. On the CodeBuild console, choose the Build project node-x86.
  6. Choose Delete build project.
  7. When prompted, enter delete.
  8. Choose Delete.
  9. Repeat the deletion process for Build projects node-arm64 and node-manifest.

Next we delete the Docker images we created and pushed to Amazon ECR. Be careful to not delete a repository that is being used for other images.

  1. On the Amazon ECR console, choose the repository multi-arch-test.

You should see a list of Docker images.

  1. Select latest, latest-arm64v8, and latest-amd64.
  2. Choose Delete.
  3. When prompted, enter delete.
  4. Choose Delete.

Finally, we remove the IAM roles that we created.

  1. On the IAM console, choose Roles.
  2. In the search box, enter CodePipelineServiceRole-nodeproject.
  3. Select the role and choose Delete role.
  4. When prompted, choose Yes, delete.
  5. Repeat these steps for the role CodeBuildServiceRole-nodeproject.

Conclusion

To summarize, we successfully created a pipeline to create multi-architecture Docker images for both x86 and arm64. We referenced them via annotation in a Docker manifest list and stored them in Amazon ECR. The Docker images were based on a single Docker file that uses environment variables as parameters to allow for Docker file reuse.

For more information about these services, see the following:

About the Authors


Tyler Lynch photo

Tyler Lynch
Tyler Lynch is a Sr. Solutions Architect focusing on EdTech at AWS.


Alistair McLean photo

Alistair McLean

Alistair is a Principal Solutions Architect focused on State and Local Government and K12 customers at AWS.