Tag Archives: Graviton

Simplifying Amazon EC2 instance type flexibility with new attribute-based instance type selection features

Post Syndicated from Sheila Busser original https://aws.amazon.com/blogs/compute/simplifying-amazon-ec2-instance-type-flexibility-with-new-attribute-based-instance-type-selection-features/

This blog is written by Rajesh Kesaraju, Sr. Solution Architect, EC2-Flexible Compute and Peter Manastyrny, Sr. Product Manager, EC2.

Today AWS is adding two new attributes for the attribute-based instance type selection (ABS) feature to make it even easier to create and manage instance type flexible configurations on Amazon EC2. The new network bandwidth attribute allows customers to request instances based on the network requirements of their workload. The new allowed instance types attribute is useful for workloads that have some instance type flexibility but still need more granular control over which instance types to run on.

The two new attributes are supported in EC2 Auto Scaling Groups (ASG), EC2 Fleet, Spot Fleet, and Spot Placement Score.

Before exploring the new attributes in detail, let us review the core ABS capability.

ABS refresher

ABS lets you express your instance type requirements as a set of attributes, such as vCPU, memory, and storage when provisioning EC2 instances with ASG, EC2 Fleet, or Spot Fleet. Your requirements are translated by ABS to all matching EC2 instance types, simplifying the creation and maintenance of instance type flexible configurations. ABS identifies the instance types based on attributes that you set in ASG, EC2 Fleet, or Spot Fleet configurations. When Amazon EC2 releases new instance types, ABS will automatically consider them for provisioning if they match the selected attributes, removing the need to update configurations to include new instance types.

ABS helps you to shift from an infrastructure-first to an application-first paradigm. ABS is ideal for workloads that need generic compute resources and do not necessarily require the hardware differentiation that the Amazon EC2 instance type portfolio delivers. By defining a set of compute attributes instead of specific instance types, you allow ABS to always consider the broadest and newest set of instance types that qualify for your workload. When you use EC2 Spot Instances to optimize your costs and save up to 90% compared to On-Demand prices, instance type diversification is the key to access the highest amount of Spot capacity. ABS provides an easy way to configure and maintain instance type flexible configurations to run fault-tolerant workloads on Spot Instances.

We recommend ABS as the default compute provisioning method for instance type flexible workloads including containerized apps, microservices, web applications, big data, and CI/CD.

Now, let us dive deep on the two new attributes: network bandwidth and allowed instance types.

How network bandwidth attribute for ABS works

Network bandwidth attribute allows customers with network-sensitive workloads to specify their network bandwidth requirements for compute infrastructure. Some of the workloads that depend on network bandwidth include video streaming, networking appliances (e.g., firewalls), and data processing workloads that require faster inter-node communication and high-volume data handling.

The network bandwidth attribute uses the same min/max format as other ABS attributes (e.g., vCPU count or memory) that assume a numeric value or range (e.g., min: ‘10’ or min: ‘15’; max: ‘40’). Note that setting the minimum network bandwidth does not guarantee that your instance will achieve that network bandwidth. ABS will identify instance types that support the specified minimum bandwidth, but the actual bandwidth of your instance might go below the specified minimum at times.

Two important things to remember when using the network bandwidth attribute are:

  • ABS will only take burst bandwidth values into account when evaluating maximum values. When evaluating minimum values, only the baseline bandwidth will be considered.
    • For example, if you specify the minimum bandwidth as 10 Gbps, instances that have burst bandwidth of “up to 10 Gbps” will not be considered, as their baseline bandwidth is lower than the minimum requested value (e.g., m5.4xlarge is burstable up to 10 Gbps with a baseline bandwidth of 5 Gbps).
    • Alternatively, c5n.2xlarge, which is burstable up to 25 Gbps with a baseline bandwidth of 10 Gbps will be considered because its baseline bandwidth meets the minimum requested value.
  • Our recommendation is to only set a value for maximum network bandwidth if you have specific requirements to restrict instances with higher bandwidth. That would help to ensure that ABS considers the broadest possible set of instance types to choose from.

Using the network bandwidth attribute in ASG

In this example, let us look at a high-performance computing (HPC) workload or similar network bandwidth sensitive workload that requires a high volume of inter-node communications. We use ABS to select instances that have at minimum 10 Gpbs of network bandwidth and at least 32 vCPUs and 64 GiB of memory.

To get started, you can create or update an ASG or EC2 Fleet set up with ABS configuration and specify the network bandwidth attribute.

The following example shows an ABS configuration with network bandwidth attribute set to a minimum of 10 Gbps. In this example, we do not set a maximum limit for network bandwidth. This is done to remain flexible and avoid restricting available instance type choices that meet our minimum network bandwidth requirement.

Create the following configuration file and name it: my_asg_network_bandwidth_configuration.json

{
    "AutoScalingGroupName": "network-bandwidth-based-instances-asg",
    "DesiredCapacityType": "units",
    "MixedInstancesPolicy": {
        "LaunchTemplate": {
            "LaunchTemplateSpecification": {
                "LaunchTemplateName": "LaunchTemplate-x86",
                "Version": "$Latest"
            },
            "Overrides": [
                {
                "InstanceRequirements": {
                    "VCpuCount": {"Min": 32},
                    "MemoryMiB": {"Min": 65536},
                    "NetworkBandwidthGbps": {"Min": 10} }
                 }
            ]
        },
        "InstancesDistribution": {
            "OnDemandPercentageAboveBaseCapacity": 30,
            "SpotAllocationStrategy": "capacity-optimized"
        }
    },
    "MinSize": 1,
    "MaxSize": 10,
    "DesiredCapacity":10,
    "VPCZoneIdentifier": "subnet-f76e208a, subnet-f76e208b, subnet-f76e208c"
}

Next, let us create an ASG using the following command:

my_asg_network_bandwidth_configuration.json file

aws autoscaling create-auto-scaling-group --cli-input-json file://my_asg_network_bandwidth_configuration.json

As a result, you have created an ASG that may include instance types m5.8xlarge, m5.12xlarge, m5.16xlarge, m5n.8xlarge, and c5.9xlarge, among others. The actual selection at the time of the request is made by capacity optimized Spot allocation strategy. If EC2 releases an instance type in the future that would satisfy the attributes provided in the request, that instance will also be automatically considered for provisioning.

Considered Instances (not an exhaustive list)


Instance Type        Network Bandwidth
m5.8xlarge             “10 Gbps”

m5.12xlarge           “12 Gbps”

m5.16xlarge           “20 Gbps”

m5n.8xlarge          “25 Gbps”

c5.9xlarge               “10 Gbps”

c5.12xlarge             “12 Gbps”

c5.18xlarge             “25 Gbps”

c5n.9xlarge            “50 Gbps”

c5n.18xlarge          “100 Gbps”

Now let us focus our attention on another new attribute – allowed instance types.

How allowed instance types attribute works in ABS

As discussed earlier, ABS lets us provision compute infrastructure based on our application requirements instead of selecting specific EC2 instance types. Although this infrastructure agnostic approach is suitable for many workloads, some workloads, while having some instance type flexibility, still need to limit the selection to specific instance families, and/or generations due to reasons like licensing or compliance requirements, application performance benchmarking, and others. Furthermore, customers have asked us to provide the ability to restrict the auto-consideration of newly released instances types in their ABS configurations to meet their specific hardware qualification requirements before considering them for their workload. To provide this functionality, we added a new allowed instance types attribute to ABS.

The allowed instance types attribute allows ABS customers to narrow down the list of instance types that ABS considers for selection to a specific list of instances, families, or generations. It takes a comma separated list of specific instance types, instance families, and wildcard (*) patterns. Please note, that it does not use the full regular expression syntax.

For example, consider container-based web application that can only run on any 5th generation instances from compute optimized (c), general purpose (m), or memory optimized (r) families. It can be specified as “AllowedInstanceTypes”: [“c5*”, “m5*”,”r5*”].

Another example could be to limit the ABS selection to only memory-optimized instances for big data Spark workloads. It can be specified as “AllowedInstanceTypes”: [“r6*”, “r5*”, “r4*”].

Note that you cannot use both the existing exclude instance types and the new allowed instance types attributes together, because it would lead to a validation error.

Using allowed instance types attribute in ASG

Let us look at the InstanceRequirements section of an ASG configuration file for a sample web application. The AllowedInstanceTypes attribute is configured as [“c5.*”, “m5.*”,”c4.*”, “m4.*”] which means that ABS will limit the instance type consideration set to any instance from 4th and 5th generation of c or m families. Additional attributes are defined to a minimum of 4 vCPUs and 16 GiB RAM and allow both Intel and AMD processors.

Create the following configuration file and name it: my_asg_allow_instance_types_configuration.json

{
    "AutoScalingGroupName": "allow-instance-types-based-instances-asg",
    "DesiredCapacityType": "units",
    "MixedInstancesPolicy": {
        "LaunchTemplate": {
            "LaunchTemplateSpecification": {
                "LaunchTemplateName": "LaunchTemplate-x86",
                "Version": "$Latest"
            },
            "Overrides": [
                {
                "InstanceRequirements": {
                    "VCpuCount": {"Min": 4},
                    "MemoryMiB": {"Min": 16384},
                    "CpuManufacturers": ["intel","amd"],
                    "AllowedInstanceTypes": ["c5.*", "m5.*","c4.*", "m4.*"] }
            }
            ]
        },
        "InstancesDistribution": {
            "OnDemandPercentageAboveBaseCapacity": 30,
            "SpotAllocationStrategy": "capacity-optimized"
        }
    },
    "MinSize": 1,
    "MaxSize": 10,
    "DesiredCapacity":10,
    "VPCZoneIdentifier": "subnet-f76e208a, subnet-f76e208b, subnet-f76e208c"
}

As a result, you have created an ASG that may include instance types like m5.xlarge, m5.2xlarge, c5.xlarge, and c5.2xlarge, among others. The actual selection at the time of the request is made by capacity optimized Spot allocation strategy. Please note that if EC2 will in the future release a new instance type which will satisfy the other attributes provided in the request, but will not be a member of 4th or 5th generation of m or c families specified in the allowed instance types attribute, the instance type will not be considered for provisioning.

Selected Instances (not an exhaustive list)

m5.xlarge

m5.2xlarge

m5.4xlarge

c5.xlarge

c5.2xlarge

m4.xlarge

m4.2xlarge

m4.4xlarge

c4.xlarge

c4.2xlarge

As you can see, ABS considers a broad set of instance types for provisioning, however they all meet the compute attributes that are required for your workload.

Cleanup

To delete both ASGs and terminate all the instances, execute the following commands:

aws autoscaling delete-auto-scaling-group --auto-scaling-group-name network-bandwidth-based-instances-asg --force-delete

aws autoscaling delete-auto-scaling-group --auto-scaling-group-name allow-instance-types-based-instances-asg --force-delete

Conclusion

In this post, we explored the two new ABS attributes – network bandwidth and allowed instance types. Customers can use these attributes to select instances based on network bandwidth and to limit the set of instances that ABS selects from. The two new attributes, as well as the existing set of ABS attributes enable you to save time on creating and maintaining instance type flexible configurations and make it even easier to express the compute requirements of your workload.

ABS represents the paradigm shift in the way that our customers interact with compute, making it easier than ever to request diversified compute resources at scale. We recommend ABS as a tool to help you identify and access the largest amount of EC2 compute capacity for your instance type flexible workloads.

Let’s Architect! Architecting with custom chips and accelerators

Post Syndicated from Luca Mezzalira original https://aws.amazon.com/blogs/architecture/lets-architect-custom-chips-and-accelerators/

It’s hard to imagine a world without computer chips. They are at the heart of the devices that we use to work and play every day. Currently, Amazon Web Services (AWS) is offering customers the next generation of computer chip, with lower cost, higher performance, and a reduced carbon footprint.

This edition of Let’s Architect! focuses on custom computer chips, accelerators, and technologies developed by AWS, such as AWS Nitro System, custom-designed Arm-based AWS Graviton processors that support data-intensive workloads, as well as AWS Trainium, and AWS Inferentia chips optimized for machine learning training and inference.

In this post, we discuss these new AWS technologies, their main characteristics, and how to take advantage of them in your architecture.

Deliver high performance ML inference with AWS Inferentia

As Deep Learning models become increasingly large and complex, the training cost for these models increases, as well as the inference time for serving.

With AWS Inferentia, machine learning practitioners can deploy complex neural-network models that are built and trained on popular frameworks, such as Tensorflow, PyTorch, and MXNet on AWS Inferentia-based Amazon EC2 Inf1 instances.

This video introduces you to the main concepts of AWS Inferentia, a service designed to reduce both cost and latency for inference. To speed up inference, AWS Inferentia: selects and shares a model across multiple chips, places pieces inside the on-chip cache, then streams the data via pipeline for low-latency predictions.

Presenters discuss through the structure of the chip, software considerations, as well as anecdotes from the Amazon Alexa team, who uses AWS Inferentia to serve predictions. If you want to learn more about high throughput coupled with low latency, explore Achieve 12x higher throughput and lowest latency for PyTorch Natural Language Processing applications out-of-the-box on AWS Inferentia on the AWS Machine Learning Blog.

AWS Inferentia shares a model across different chips to speed up inference

AWS Inferentia shares a model across different chips to speed up inference

AWS Lambda Functions Powered by AWS Graviton2 Processor – Run Your Functions on Arm and Get Up to 34% Better Price Performance

AWS Lambda is a serverless, event-driven compute service that enables code to run from virtually any type of application or backend service, without provisioning or managing servers. Lambda uses a high-availability compute infrastructure and performs all of the administration of the compute resources, including server- and operating-system maintenance, capacity-provisioning, and automatic scaling and logging.

AWS Graviton processors are designed to deliver the best price and performance for cloud workloads. AWS Graviton3 processors are the latest in the AWS Graviton processor family and provide up to: 25% increased compute performance, two-times higher floating-point performance, and two-times faster cryptographic workload performance compared with AWS Graviton2 processors. This means you can migrate AWS Lambda functions to Graviton in minutes, plus get as much as 19% improved performance at approximately 20% lower cost (compared with x86).

Comparison between x86 and Arm/Graviton2 results for the AWS Lambda function computing prime numbers

Comparison between x86 and Arm/Graviton2 results for the AWS Lambda function computing prime numbers (click to enlarge)

Powering next-gen Amazon EC2: Deep dive on the Nitro System

The AWS Nitro System is a collection of building-block technologies that includes AWS-built hardware offload and security components. It is powering the next generation of Amazon EC2 instances, with a broadening selection of compute, storage, memory, and networking options.

In this session, dive deep into the Nitro System, reviewing its design and architecture, exploring new innovations to the Nitro platform, and understanding how it allows for fasting innovation and increased security while reducing costs.

Traditionally, hypervisors protect the physical hardware and bios; virtualize the CPU, storage, networking; and provide a rich set of management capabilities. With the AWS Nitro System, AWS breaks apart those functions and offloads them to dedicated hardware and software.

AWS Nitro System separates functions and offloads them to dedicated hardware and software, in place of a traditional hypervisor

AWS Nitro System separates functions and offloads them to dedicated hardware and software, in place of a traditional hypervisor

How Amazon migrated a large ecommerce platform to AWS Graviton

In this re:Invent 2021 session, we learn about the benefits Amazon’s ecommerce Datapath platform has realized with AWS Graviton.

With a range of 25%-40% performance gains across 53,000 Amazon EC2 instances worldwide for Prime Day 2021, the Datapath team is lowering their internal costs with AWS Graviton’s improved price performance. Explore the software updates that were required to achieve this and the testing approach used to optimize and validate the deployments. Finally, learn about the Datapath team’s migration approach that was used for their production deployment.

AWS Graviton2: core components

AWS Graviton2: core components

See you next time!

Thanks for exploring custom computer chips, accelerators, and technologies developed by AWS. Join us in a couple of weeks when we talk more about architectures and the daily challenges faced while working with distributed systems.

Other posts in this series

Looking for more architecture content?

AWS Architecture Center provides reference architecture diagrams, vetted architecture solutions, Well-Architected best practices, patterns, icons, and more!

Graviton Fast Start – A New Program to Help Move Your Workloads to AWS Graviton

Post Syndicated from Danilo Poccia original https://aws.amazon.com/blogs/aws/graviton-fast-start-a-new-program-to-help-move-your-workloads-to-aws-graviton/

With the Graviton Challenge last year, we helped customers migrate to Graviton-based EC2 instances and get up to 40 percent price performance benefit in as little as 4 days. Tens of thousands of customers, including 48 of the top 50 Amazon Elastic Compute Cloud (Amazon EC2) customers, use AWS Graviton processors for their workloads. In addition to EC2, many AWS managed services can run their workloads on Graviton. For most customers, adoption is easy, requiring minimal code changes. However, the effort and time required to move workloads to Graviton depends on a few factors including your software development environment and the technology stack on which your application is built.

This year, we want to take it a step further and make it even easier for customers to adopt Graviton not only through EC2, but also through managed services. Today, we are launching AWS Graviton Fast Start, a new program that makes it even easier to move your workloads to AWS Graviton by providing step-by-step directions for EC2 and other managed services that support the Graviton platform:

  • Amazon Elastic Compute Cloud (Amazon EC2) – EC2 provides the most flexible environment for a migration and can support many kinds of workloads, such as web apps, custom databases, or analytics. You have full control over the interpreted or compiled code running in the EC2 instance. You can also use many open-source and commercial software products that support the Arm64 architecture.
  • AWS Lambda – Migrating your serverless functions can be really easy, especially if you use an interpreted runtime such as Node.js or Python. Most of the time, you only have to check the compatibility of your software dependencies. I have shown a few examples in this blog post.
  • AWS Fargate – Fargate works best if your applications are already running in containers or if you are planning to containerize them. By using multi-architecture container images or images that have Arm64 in their image manifest, you get the serverless benefits of Fargate and the price-performance advantages of Graviton.
  • Amazon Aurora – Relational databases are at the core of many applications. If you need a database compatible with PostgreSQL or MySQL, you can use Amazon Aurora to have a highly performant and globally available database powered by Graviton.
  • Amazon Relational Database Service (RDS) – Similarly to Aurora, Amazon RDS engines such as PostgreSQL, MySQL, and MariaDB can provide a fully managed relational database service using Graviton-based instances.
  • Amazon ElastiCache – When your workload requires ultra-low latency and high throughput, you can speed up your applications with ElastiCache and have a fully managed in-memory cache running on Graviton and compatible with Redis or Memcached.
  • Amazon EMR – With Amazon EMR, you can run large-scale distributed data processing jobs, interactive SQL queries, and machine learning applications on Graviton using open-source analytics frameworks such as Apache SparkApache Hive, and Presto.

Here’s some feedback we got from customers running their workloads on Graviton:

  • Formula 1 racing told us that Graviton2-based C6gn instances provided the best price performance benefits for some of their computational fluid dynamics (CFD) workloads. More recently, they found that Graviton3 C7g instances are 40 percent faster for the same simulations and expect Graviton3-based instances to become the optimal choice to run all of their CFD workloads.
  • Honeycomb has 100 percent of their production workloads running on Graviton using EC2 and Lambda. They have tested the high-throughput telemetry ingestion workload they use for their observability platform against early preview instances of Graviton3 and have seen a 35 percent performance increase for their workload over Graviton2. They were able to run 30 percent fewer instances of C7g than C6g serving the same workload and with 30 percent reduced latency. With these instances in production, they expect over 50 percent price performance improvement over x86 instances.
  • Twitter is working on a multi-year project to leverage Graviton-based EC2 instances to deliver Twitter timelines. As part of their ongoing effort to drive further efficiencies, they tested the new Graviton3-based C7g instances. Across a number of benchmarks representative of their workloads, they found Graviton3-based C7g instances deliver 20-80 percent higher performance compared to Graviton2-based C6g instances, while also reducing tail latencies by as much as 35 percent. They are excited to utilize Graviton3-based instances in the future to realize significant price performance benefits.

With all these options, getting the benefits of running all or part of your workload on AWS Graviton can be easier than you expect. To help you get started, there’s also a free trial on the Graviton-based T4g instances for up to 750 hours per month through December 31st, 2022.

Visit AWS Graviton Fast Start to get step-by-step directions on how to move your workloads to AWS Graviton.

Danilo

New – Amazon EC2 C7g Instances, Powered by AWS Graviton3 Processors

Post Syndicated from Sébastien Stormacq original https://aws.amazon.com/blogs/aws/new-amazon-ec2-c7g-instances-powered-by-aws-graviton3-processors/

I am excited to announce that Amazon Elastic Compute Cloud (Amazon EC2) C7g instances powered by the latest AWS Graviton3 processors that have been available in preview since re:Invent last year are now available for all.

Let’s decompose the name C7g: the “C” instance family is designed for compute-intensive workloads. This is the 7th generation of this instance family. And the “g” means it is based on AWS Graviton, the silicon designed by AWS. These instances are the first instances to be powered by the latest generation of AWS Graviton, the Graviton3 processors.

As you bring more diverse workloads to the cloud, and as your compute, storage, and networking demands increase at a rapid pace, you are asking us to push the price performance boundary even further so that you can accelerate your migration to the cloud and optimize your costs. Additionally, you are looking for more energy-efficient compute options to help you reduce your carbon footprint and achieve your sustainability goals. We do this by working back from your requests, and innovating at a rapid pace across all levels of the AWS infrastructure. Our Graviton chips offer better performance at lower cost along with enhanced capabilities. For example, AWS Graviton3 processors offer you enhanced security with always-on memory encryption, dedicated caches for every vCPU, and support for pointer authentication.

Let’s illustrate this with numbers. When we launched Graviton2-based instances, they provided up to 40 percent better price/performance for a wide variety of workloads over comparable fifth-generation x86-based instances. We now have 12 instance families (M6g, M6gd, C6g, C6gd, C6gn, R6g, R6gd, T4g, X2gd, Im4gn, Is4gen, and G5g) that are powered by AWS Graviton2 processors that provide significant price performance benefits for a wide range of workloads. In 2021, we saw tens of thousands of AWS customers take advantage of this innovation by using Graviton2-based EC2 instances.

Our next generation, Graviton3 processors, deliver up to 25 percent higher performance, up to 2x higher floating-point performance, and 50 percent faster memory access based on leading-edge DDR5 memory technology compared with Graviton2 processors.

Graviton3 also uses up to 60 percent less energy for the same performance as comparable EC2 instances, which helps you reduce your carbon footprint.

Snap Inc, known for its popular social media services such as Snapchat and Bitmoji, adopted AWS Graviton2-based instances to optimize their price performance on Amazon EC2. Aaron Sheldon, software engineer at Snap, told us: “We trialed the new AWS Graviton3-based Amazon EC2 C7g instances and found that they provide significant performance improvements on real workloads compared to previous generation C6g instances. We are excited to migrate our Graviton2-based workloads to Graviton3, including messaging, storage, and friend graph workloads.”

The C7g instances are available in eight sizes with 1, 2, 4, 8, 16, 32, 48, and 64 vCPUs. C7g instances support configurations up to 128 GiB of memory, 30 Gbps of network performance, and 20 Gbps of Amazon Elastic Block Store (EBS) performance. These instances are powered by the AWS Nitro System, a combination of dedicated hardware and a lightweight hypervisor.

The following table summarizes the key characteristics of each instance type in this family.

Instance Name vCPUs
Memory
Network Bandwidth
EBS Bandwidth
c7g.medium 1 2 GiB up to 12.5 Gbps up to 10 Gbps
c7g.large 2 4 GiB up to 12.5 Gbps up to 10 Gbps
c7g.xlarge 4 8 GiB up to 12.5 Gbps up to 10 Gbps
c7g.2xlarge 8 16 GiB up to 15 Gbps up to 10 Gbps
c7g.4xlarge 16 32 GiB up to 15 Gbps up to 10 Gbps
c7g.8xlarge 32 64 GiB 15 Gbps 10 Gbps
c7g.12xlarge 48 96 GiB 22.5 Gbps 15 Gbps
c7g.16xlarge 64 128 GiB 30 Gbps 20 Gbps

C7g instances are initially available in US East (N. Virginia) and US West (Oregon) AWS Regions; other Regions will be added shortly after launch.

As usual, you can purchase C7g capacity on demand, as Reserved Instances, or as Spot instances, and use your Saving Plans. The pricing details are available on the EC2 pricing page.

I have the chance to talk with AWS customers on a daily basis, and many of my discussions are around price performance and the sustainability of their workloads. With more than 500 instance types to choose from, one question I often receive is: what are the workloads that would benefit from C7g?

You will find that C7g instances provide the best price performance within their instance families for a broad spectrum of compute-intensive workloads, including application servers, micro services, high-performance computing, electronic design automation, gaming, media encoding, or CPU-based ML inference. These instances are ideal for all Linux-based workloads, including containerized and micro service-based applications built using Amazon Elastic Kubernetes Service (EKS), Amazon Elastic Container Service (Amazon ECS), Amazon Elastic Container Registry, Kubernetes, and Docker, and written in popular programming languages such as C/C++, Rust, Go, Java, Python, .NET Core, Node.js, Ruby, and PHP.

The next question I receive is: given that Graviton instances are based on Arm architecture, how difficult is it to migrate from x86?

Graviton3 instances are supported by a broad choice of operating systems, independent software vendors, container services, agents, and developer tools, enabling you to migrate your workloads with minimal effort.

Applications and scripts written in high-level programming languages such as Python, Node.js, Ruby, Java, or PHP will typically just require a redeployment. Applications written in lower-level programming languages such as C/C++, Rust, or Go will require a re-compilation.

But you don’t always need to migrate your applications. Several managed services are based on Graviton already, such as Amazon ElastiCache, Amazon EKS, Amazon ECS, Amazon Relational Database Service (RDS), Amazon EMR, Amazon Aurora, and Amazon OpenSearch Service, and your application can benefit from Graviton with minimal efforts. A French customer told me recently they migrated a significant portion of their Amazon EMR clusters to Graviton by doing just one line change in their Terraform scripts; all the rest worked as-is.

For those of you building with serverless, we have also released Graviton support for AWS Fargate and AWS Lambda, extending the price, efficiency, and performance benefits of Graviton to serverless workloads. Lambda functions using Graviton2 can see up to 34 percent better price/performance.

Reducing the carbon footprint of your organization is also of paramount importance. Reducing the carbon footprint of cloud-based workloads is a shared responsibility between you and us. We do our part by innovating at all levels: from the materials used to build our facilities, the usage of water for cooling, and the production of renewable energy, down to inventing new silicons that are more energy efficient. To help you meet your own sustainability goals, we added a sustainability pillar to the AWS Well-Architected framework, and we released the Customer Carbon Footprint tool. Graviton3 fits into that context. It uses up to 60 percent less energy for the same performance as comparable EC2 instances.

We do our part in this shared responsibility model, and now, it is your turn. You can use our innovations and tools to help you optimize your workloads and only use the resources you need. Take the occasion to write clever code that uses fewer CPU cycles, less storage, or less network bandwidth. And be sure to select energy-efficient options, such as Graviton3-based instance types or managed services, when deploying your code.

To help you to get started migrating your applications to Graviton instance types today, we curated this list of technical resources. Have a look at it. To learn more about Graviton-based instances, visit the Graviton page or the C7g page and check out this video:

If you’d like to get started with Graviton-based instances for free, we also just reintroduced the free trial on T4g.small instances for up to 750 hours/month until the end of this year (December 31, 2022).

And now, go build 😉

— seb

Improved performance with AWS Graviton2 instances on Amazon OpenSearch Service

Post Syndicated from Rohin Bhargava original https://aws.amazon.com/blogs/big-data/improved-performance-with-aws-graviton2-instances-on-amazon-opensearch-service/

Amazon OpenSearch Service (successor to Amazon Elasticsearch Service) is a fully managed service at AWS for OpenSearch. It’s an open-source search and analytics suite used for a broad set of use cases, like real-time application monitoring, log analytics, and website search.

While running an OpenSearch Service domain, you can choose from a variety of instances for your primary nodes and data nodes suitable for your workload: general purpose, compute optimized, memory optimized, or storage optimized. With the release of each new generation, Amazon OpenSearch Service has brought even better price performance.

Amazon OpenSearch Service now supports AWS Graviton2 instances: general purpose (M6g), compute optimized (C6g), memory optimized (R6g), and memory optimized with attached disk (R6gd). These instances offer up to a 38% improvement in indexing throughput, 50% reduction in indexing latency, and 40% improvement in query performance depending upon the instance family and size compared to the corresponding intel-based instances from the current generation (M5, C5, R5).

The AWS Graviton2 instance family includes several new performance optimizations, such as larger caches per core, higher Amazon Elastic Block Store (Amazon EBS) throughput than comparable x86 instances, fully encrypted RAM, and many others. You can benefit from these optimizations with minimal effort by provisioning or migrating your OpenSearch Service instances today.

Performance analysis compared to fifth-generation intel-based instances

We conducted tests using the AWS Graviton2 instances against the fifth-generation intel-based instances and measured performance improvements. Our setup included two six-node domains with three dedicated primary nodes and three data nodes and running Elasticsearch 7.10. For the intel-based setup, we used c5.xlarge for the primary nodes and r5.xlarge for the data nodes. Similarly on the AWS Graviton2-based setup, we used c6g.xlarge for the primary nodes and r6g.xlarge for the data nodes. Both domains were three Availability Zone enabled and VPC enabled, with advanced security and 512 GB of EBS volume attached to each node. Each index had six shards with a single replica.

The dataset contained 2,000 documents with a flat document structure. Each document had 20 fields: 1 date field, 16 text fields, 1 float field, and 2 long fields. Documents were generated on the fly using random samples so that the corpus was infinite.

For ingestion, we used a load generation host where each bulk request had a 4 MB payload (approximately 2,048 documents per request) and nine clients.

We used one query generation host with one client. We ran a mix of low-latency queries (approximately 10 milliseconds), medium-latency queries (100 milliseconds) , and high-latency queries (1,000 milliseconds):

  • Low-latency queries – These were match-all queries.
  • Medium-latency queries – These were multi-match queries or queries with filters based on one randomly selected keyword. The results where aggregated in a date histogram and sorted by the descending ingest timestamp.
  • High-latency queries – These were multi-match queries or queries with filters based on five randomly selected keywords. The results were aggregated using two aggregations: aggregated in a date histogram with a 3-hour interval based on the ingest timestamp, and a date histogram with a 1-minute interval based on the ingest timestamp.

We ran 60 minutes of burn-in time followed by 3 hours of 90/10 ingest to query workloads with a mix of 20% low-latency, 50% medium-latency, and 30% high-latency queries. The amount of load sent to the clusters was identical.

Graphs and results

When ingesting documents at the same throughput, the AWS Graviton2 domain shows a much lower latency than the intel-based domain, as shown in the following graph. Even at p99 latency, the AWS Graviton2 domain is consistently lower than the p50 latency of the intel-based domains. In addition, AWS Graviton2 latencies are more consistent than intel-based instances, providing for a more predictable user experience.

When querying documents at the same throughput, the AWS Graviton2 domain outperforms the intel-based instances. The p50 latency of AWS Graviton2 is better than the p50 latency of intel-based.

Similarly, the p99 latency of AWS Graviton2 is better than that of the intel-based instances. Note in the following graph that the increase in latency over time is due to the growing corpus size.

Conclusion

As demonstrated in our performance analysis, the new AWS Graviton2-based instances consistently yield better performance compared to the fifth-generation intel-based instances. Try these new instances out and let us know how they perform for you!

As usual, let us know your feedback.


About the Authors

Rohin Bhargava is a Sr. Product Manager with the Amazon OpenSearch Service team. His passion at AWS is to help customers find the correct mix of AWS services to achieve success for their business goals.

Chase Engelbrecht is a Software Engineer working with the Amazon OpenSearch Service team. He is interested in performance tuning and optimization of OpenSearch running on Amazon OpenSearch Service.

Migrating AWS Lambda functions to Arm-based AWS Graviton2 processors

Post Syndicated from Julian Wood original https://aws.amazon.com/blogs/compute/migrating-aws-lambda-functions-to-arm-based-aws-graviton2-processors/

AWS Lambda now allows you to configure new and existing functions to run on Arm-based AWS Graviton2 processors in addition to x86-based functions. Using this processor architecture option allows you to get up to 34% better price performance. This blog post highlights some considerations when moving from x86 to arm64 as the migration process is code and workload dependent.

Functions using the Arm architecture benefit from the performance and security built into the Graviton2 processor, which is designed to deliver up to 19% better performance for compute-intensive workloads. Workloads using multithreading and multiprocessing, or performing many I/O operations, can experience lower invocation time, which reduces costs.

Duration charges, billed with millisecond granularity, are 20 percent lower when compared to current x86 pricing. This also applies to duration charges when using Provisioned Concurrency. Compute Savings Plans supports Lambda functions powered by Graviton2.

The architecture change does not affect the way your functions are invoked or how they communicate their responses back. Integrations with APIs, services, applications, or tools are not affected by the new architecture and continue to work as before.

The following runtimes, which use Amazon Linux 2, are supported on Arm:

  • Node.js 12 and 14
  • Python 3.8 and 3.9
  • Java 8 (java8.al2) and 11
  • .NET Core 3.1
  • Ruby 2.7
  • Custom runtime (provided.al2)

Lambda@Edge does not support Arm as an architecture option.

You can create and manage Lambda functions powered by Graviton2 processor using the AWS Management Console, AWS Command Line Interface (AWS CLI), AWS CloudFormation, AWS Serverless Application Model (AWS SAM), and AWS Cloud Development Kit (AWS CDK). Support is also available through many AWS Lambda Partners.

Understanding Graviton2 processors

AWS Graviton processors are custom built by AWS. Generally, you don’t need to know about the specific Graviton processor architecture, unless your applications can benefit from specific features.

The Graviton2 processor uses the Neoverse-N1 core and supports Arm V8.2 (include CRC and crypto extensions) plus several other architectural extensions. In particular, Graviton2 supports the Large System Extensions (LSE), which improve locking and synchronization performance across large systems.

Migrating x86 Lambda functions to arm64

Many Lambda functions may only need a configuration change to take advantage of the price/performance of Graviton2. Other functions may require repackaging the Lambda function using Arm-specific dependencies, or rebuilding the function binary or container image.

You may not require an Arm processor on your development machine to create Arm-based functions. You can build, test, package, compile, and deploy Arm Lambda functions on x86 machines using AWS SAM and Docker Desktop. If you have an Arm-based system, such as an Apple M1 Mac, you can natively compile binaries.

Functions without architecture-specific dependencies or binaries

If your functions don’t use architecture-specific dependencies or binaries, you can switch from one architecture to the other with a single configuration change. Many functions using interpreted languages such as Node.js and Python, or functions compiled to Java bytecode, can switch without any changes. Ensure you check binaries in dependencies, Lambda layers, and Lambda extensions.

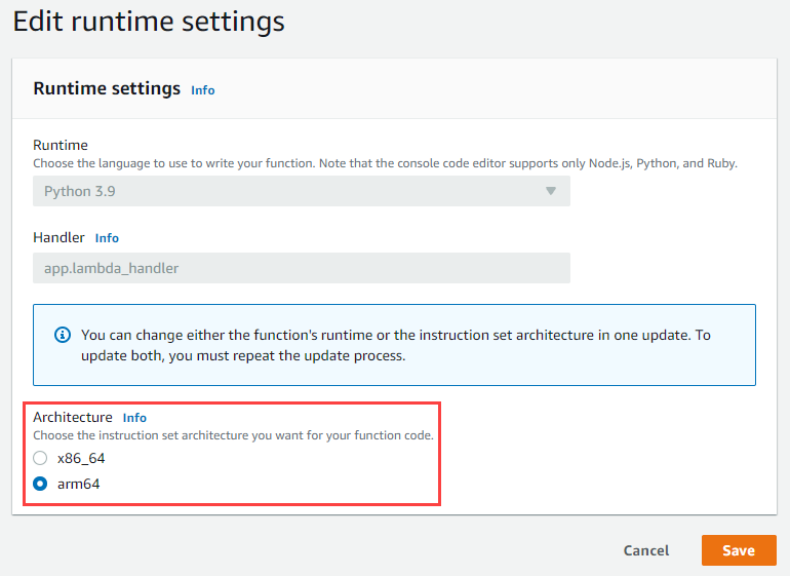
To switch functions from x86 to arm64, you can change the Architecture within the function runtime settings using the Lambda console.

Edit AWS Lambda function Architecture

Edit AWS Lambda function Architecture

If you want to display or log the processor architecture from within a Lambda function, you can use OS specific calls. For example, Node.js process.arch or Python platform.machine().

When using the AWS CLI to create a Lambda function, specify the --architectures option. If you do not specify the architecture, the default value is x86-64. For example, to create an arm64 function, specify --architectures arm64.

aws lambda create-function \
    --function-name MyArmFunction \
    --runtime nodejs14.x \
    --architectures arm64 \
    --memory-size 512 \
    --zip-file fileb://MyArmFunction.zip \
    --handler lambda.handler \
    --role arn:aws:iam::123456789012:role/service-role/MyArmFunction-role

When using AWS SAM or CloudFormation, add or amend the Architectures property within the function configuration.

MyArmFunction:
  Type: AWS::Lambda::Function
  Properties:
    Runtime: nodejs14.x
    Code: src/
    Architectures:
  	- arm64
    Handler: lambda.handler
    MemorySize: 512

When initiating an AWS SAM application, you can specify:

sam init --architecture arm64

When building Lambda layers, you can specify CompatibleArchitectures.

MyArmLayer:
  Type: AWS::Lambda::LayerVersion
  Properties:
    ContentUri: layersrc/
    CompatibleArchitectures:
      - arm64

Building function code for Graviton2

If you have dependencies or binaries in your function packages, you must rebuild the function code for the architecture you want to use. Many packages and dependencies have arm64 equivalent versions. Test your own workloads against arm64 packages to see if your workloads are good migration candidates. Not all workloads show improved performance due to the different processor architecture features.

For compiled languages like Rust and Go, you can use the provided.al2 custom runtime, which supports Arm. You provide a binary that communicates with the Lambda Runtime API.

When compiling for Go, set GOARCH to arm.

GOOS=linux GOARCH=arm go build

When compiling for Rust, set the target.

cargo build --release -- target-cpu=neoverse-n1

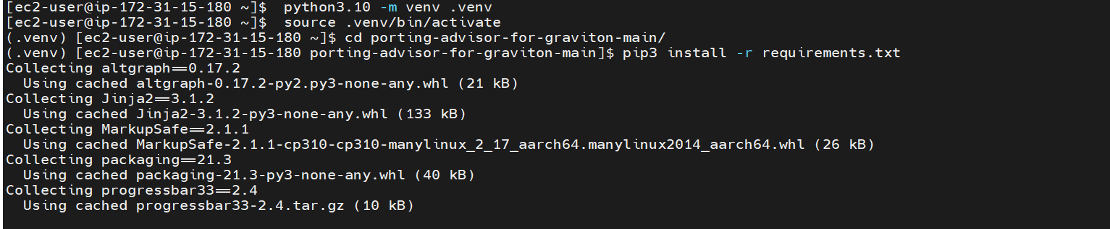
The default installation of Python pip on some Linux distributions is out of date (<19.3). To install binary wheel packages released for Graviton, upgrade the pip installation using:

sudo python3 -m pip install --upgrade pip

The Arm software ecosystem is continually improving. As a general rule, use later versions of compilers and language runtimes whenever possible. The AWS Graviton Getting Started GitHub repository includes known recent changes to popular packages that improve performance, including ffmpeg, PHP, .Net, PyTorch, and zlib.

You can use https://pkgs.org/ as a package repository search tool.

Sometimes code includes architecture specific optimizations. These can include code optimized in assembly using specific instructions for CRC, or enabling a feature that works well on particular architectures. One way to see if any optimizations are missing for arm64 is to search the code for __x86_64__ ifdefs and see if there is corresponding arm64 code included. If not, consider alternative solutions.

For additional language-specific considerations, see the links within the GitHub repository.

The Graviton performance runbook is a performance profiling reference by the Graviton to benchmark, debug, and optimize application code.

Building functions packages as container images

Functions packaged as container images must be built for the architecture (x86 or arm64) they are going to use. There are arm64 architecture versions of the AWS provided base images for Lambda. To specify a container image for arm64, use the arm64 specific image tag, for example, for Node.js 14:

  • public.ecr.aws/lambda/nodejs:14-arm64
  • public.ecr.aws/lambda/nodejs:latest-arm64
  • public.ecr.aws/lambda/nodejs:14.2021.10.01.16-arm64

Arm64 Images are also available from Docker Hub.

You can also use arbitrary Linux base images in addition to the AWS provided Amazon Linux 2 images. Images that support arm64 include Alpine Linux 3.12.7 or later, Debian 10 and 11, Ubuntu 18.04 and 20.04. For more information and details of other supported Linux versions, see Operating systems available for Graviton based instances.

Migrating a function

Here is an example of how to migrate a Lambda function from x86 to arm64 and take advantage of newer software versions to improve price and performance. You can follow a similar approach to test your own code.

I have an existing Lambda function as part of an AWS SAM template configured without an Architectures property, which defaults to x86_64.

  Imagex86Function:
    Type: AWS::Serverless::Function
    Properties:
      CodeUri: src/
      Handler: app.lambda_handler
      Runtime: python3.9

The Lambda function code performs some compute intensive image manipulation. The code uses a dependency configured with the following version:

{
  "dependencies": {
    "imagechange": "^1.1.1"
  }
}

I duplicate the Lambda function within the AWS SAM template using the same source code and specify arm64 as the Architectures.

  ImageArm64Function:
    Type: AWS::Serverless::Function
    Properties:
      CodeUri: src/
      Handler: app.lambda_handler
      Runtime: python3.9
      Architectures:
        - arm64

I use AWS SAM to build both Lambda functions. I specify the --use-container flag to build each function within its architecture-specific build container.

sam build –use-container

I can use sam local invoke to test the arm64 function locally even on an x86 system.

AWS SAM local invoke

AWS SAM local invoke

I then use sam deploy to deploy the functions to the AWS Cloud.

The AWS Lambda Power Tuning open-source project runs your functions using different settings to suggest a configuration to minimize costs and maximize performance. The tool allows you to compare two results on the same chart and incorporate arm64-based pricing. This is useful to compare two versions of the same function, one using x86 and the other arm64.

I compare the performance of the X86 and arm64 Lambda functions and see that the arm64 Lambda function is 12% cheaper to run:

Compare x86 and arm64 with dependency version 1.1.1

Compare x86 and arm64 with dependency version 1.1.1

I then upgrade the package dependency to use version 1.2.1, which has been optimized for arm64 processors.

{
  "dependencies": {
    "imagechange": "^1.2.1"
  }
}

I use sam build and sam deploy to redeploy the updated Lambda functions with the updated dependencies.

I compare the original x86 function with the updated arm64 function. Using arm64 with a newer dependency code version increases the performance by 30% and reduces the cost by 43%.

Compare x86 and arm64 with dependency version 1.2.1

Compare x86 and arm64 with dependency version 1.2.1

You can use Amazon CloudWatch,to view performance metrics such as duration, using statistics. You can then compare average and p99 duration between the two architectures. Due to the Graviton2 architecture, functions may be able to use less memory. This could allow you to right-size function memory configuration, which also reduces costs.

Deploying arm64 functions in production

Once you have confirmed your Lambda function performs successfully on arm64, you can migrate your workloads. You can use function versions and aliases with weighted aliases to control the rollout. Traffic gradually shifts to the arm64 version or rolls back automatically if any specified CloudWatch alarms trigger.

AWS SAM supports gradual Lambda deployments with a feature called Safe Lambda deployments using AWS CodeDeploy. You can compile package binaries for arm64 using a number of CI/CD systems. AWS CodeBuild supports building Arm based applications natively. CircleCI also has Arm compute resource classes for deployment. GitHub Actions allows you to use self-hosted runners. You can also use AWS SAM within GitHub Actions and other CI/CD pipelines to create arm64 artifacts.

Conclusion

Lambda functions using the Arm/Graviton2 architecture provide up to 34 percent price performance improvement. This blog discusses a number of considerations to help you migrate functions to arm64.

Many functions can migrate seamlessly with a configuration change, others need to be rebuilt to use arm64 packages. I show how to migrate a function and how updating software to newer versions may improve your function performance on arm64. You can test your own functions using the Lambda PowerTuning tool.

Start migrating your Lambda functions to Arm/Graviton2 today.

For more serverless learning resources, visit Serverless Land.

AWS Compute Optimizer supports AWS Graviton migration guidance

Post Syndicated from Pranaya Anshu original https://aws.amazon.com/blogs/compute/aws-compute-optimizer-supports-aws-graviton-migration-guidance/

This post is written by Letian Feng, Principal Product Manager for AWS Compute Optimizer, and Steve Cole, Senior EC2 Spot Specialist Solutions Architect.

Today, AWS Compute Optimizer is launching a new capability that makes it easier for you to optimize your EC2 instances by leveraging multiple CPU architectures, including x86-based and AWS Graviton-based instances. Compute Optimizer is an opt-in service that recommends optimal AWS resources for your workloads to reduce costs and improve performance by analyzing historical utilization metrics. AWS Graviton processors are custom-built by Amazon Web Services using 64-bit Arm cores to deliver the best price performance for your cloud workloads running in Amazon EC2, with the potential to realize up to 40% better price performance over comparable current generation x86-based instances. As a result, customers interested in Graviton have been asking for a scalable way to understand which EC2 instances they should prioritize in their Graviton migration journey. Starting today, you can use Compute Optimizer to find the workloads that will deliver the biggest return for the smallest migration effort.

How it works

Compute Optimizer helps you find the workloads with the biggest return for the smallest migration effort by providing a migration effort rating. The migration effort rating, ranging from very low to high, reflects the level of effort that might be required to migrate from the current instance type to the recommended instance type, based on the differences in instance architecture and whether the workloads are compatible with the recommended instance type.

Clues about the type of workload running are useful for estimating the migration effort to Graviton. For some workloads, transitioning to Graviton is as simple as updating the instance types and associated Amazon Machine Images (AMIs) directly or in various launch or CloudFormation templates. For other workloads, you might need to use different software versions or change source codes. The quickest and easiest workloads to transition are Linux-based open-source applications. Many open source projects already support Arm64, and by extension Graviton. Therefore, many customers start their Graviton migration journey by checking whether their workloads are among the list of Graviton-compatible applications. They then combine this information with estimated savings from Compute Optimizer to build a list of Graviton migration opportunities.

Because Compute Optimizer cannot see into an instance, it looks to instance attributes for clues about the workload type running on the EC2 instance. The clues Compute Optimizer uses are based on the instance attributes customers provide, such as instance tags, AWS Marketplace product names, AMI names, and CloudFormation templates names. For example, when an instance is tagged with “key:application-type” and “value:hadoop”, Compute Optimizer will identify the application –Apache Hadoop in this example. Then, because we know that major frameworks, such as Apache Hadoop, Apache Spark, and many others, run on Graviton, Compute Optimizer will indicate that there is low migration effort to Graviton, and point customers to documentation that outlines the required steps for migrating a Hadoop application to Graviton.

As another example, when Compute Optimizer sees an instance is using a Microsoft Windows SQL Server AMI, Compute Optimizer will infer that SQL Server is running. Then, because it takes a lot of effort to modernize and migrate a SQL Server workload to Arm, Compute Optimizer will indicate that there is a high migration effort to Graviton. The most effective way to give Compute Optimizer clues about what application is running is by putting an “application-type” tag onto each instance. If Compute Optimizer doesn’t have enough clues, it will indicate that it doesn’t have enough information to offer migration guidance.

The following shows the different levels of migration effort:

  • Very Low – The recommended instance type has the same CPU architecture as the current instance type. Often, customers can just modify instance types directly, or do a simple re-deployment onto the new instance type. So, this is just an optimization, not a migration.
  • Low – The recommended instance type has different CPU architecture from the current instance type, but there’s a low-effort migration path. For example, migrating Apache Hadoop or Redis from x86 to Graviton falls under this category as both Hadoop and Redis have Graviton-compatible versions.
  • Medium – The recommended instance type has different CPU architecture from the current instance type, but Compute Optimizer doesn’t have enough information to offer migration guidance.
  • High – The recommended instance type has different CPU architecture from the current instance type, and the workload has no known compatible version on the recommended CPU architecture. Therefore, customers may need to re-compile their applications or re-platform their workloads (like moving from SQL Server to MySQL).

More and more applications support Graviton every day. If you’re running an application that you know has low migration effort, but Compute Optimizer isn’t yet aware, please tell us! Shoot us an email at [email protected] with the application type, and we’ll update our migration guidance mappings as quickly as we can. You can also put an “application-type” tag on your instances so that Compute Optimizer can infer your application type with high confidence.

Customers who have already opted into Compute Optimizer recommendations will have immediate access to this new capability. Customers who haven’t can opt-in with a single console click or API, enabling all Compute Optimizer features.

Walk through

Now, let’s take a look at how to get started with Graviton recommendation on Compute Optimizer. When you open the Compute Optimizer console, you will see the dashboard page that provides you with a summary of all optimization opportunities in your account. Graviton recommendation is available for EC2 instances and Auto Scaling groups.

Screenshot of Compute Optimizer dashboard page, which shows the number of EC2 instance and Auto Scaling group recommendations by findings in your AWS account.

After you click on View recommendations for EC2 instances, you will come to the EC2 recommendation list view. Here is where you can see a list of your EC2 instances, their current instance type, our finding (over-provisioned, under-provisioned, or optimized), the recommended optimal instance type, and the estimated savings if there is a downsizing opportunity. By default, we will show you the best-fit instance type for the price regardless of CPU architecture. In many cases this means that Graviton will be recommended because EC2 offers a wide selection of Graviton instances with comparatively high price/performance ratio. If you’d like to only look at recommendations with your current architecture, you can use the CPU architecture preference dropdown to tell Compute Optimizer to show recommendations with only the current CPU architecture.

Compute Optimizer EC2 Recommendation List Page. Here you can select both current and Graviton as the preferred CPU architectures. The recommendation list contains two new columns -- migration effort, and inferred workload types.

Here you can see two new columns — Migration effort and Inferred workload types. The Inferred workload types field shows the type of workload Compute Optimizer has inferred your instance is running. The Migration effort field shows how much effort you might need to spend if you migrate from your current instance type to recommended instance type based on the inferred workload type. When there is no change in CPU architecture (i.e. moving from an x86-instance type to another x86-instance type, like in the third row), the migration effort will be Very low. For x86-instances that are running Graviton-compatible applications, such as Apache Hadoop, NGINX, Memcached, etc., when you migrate the instance to Graviton, the effort will be Low. If Compute Optimizer cannot identify the applications, the migration effort from x86 to Graviton will be Medium, and you can provide application type data by putting an application-type tag key onto the instance. You can click on each row to see more detailed recommendation. Let’s click on the first row.

Compute Optimizer EC2 Recommendation Detail Page. The current instance type is r5.large. Recommended option 1 is r6g.large, with low migration effort. Recommended option 2 is t4g.xlarge, with low migration effort. Recommended option 3 is m6g.xlarge, with low migration effort.

Compute Optimizer identifies this instance to be running Apache Hadoop workloads because there’s Amazon EMR system tag associated with it. It shows a banner that details why Compute Optimizer considers this as a low-effort Graviton migration candidate, and offers a migration guide when you click on Learn more.

Github screenshot of AWS Graviton migration guide. The migration guide details steps to transition workloads from x86-based instances to Graviton-based instances.

The same Graviton recommendation can also be retrieved through Compute Optimizer API or CLI. Here’s a sample CLI that retrieves the same recommendation as discussed above:

aws compute-optimizer get-ec2-instance-recommendations --instance-arns arn:aws:ec2:us-west-2:020796573343:instance/i-0b5ec1bb9daabf0f3 --recommendation-preferences "{\"cpuVendorArchitectures\": [\"CURRENT\" , \"AWS_ARM64\"]}"
{
    "instanceRecommendations": [
        {
            "instanceArn": "arn:aws:ec2:us-west-2:000000000000:instance/i-0b5ec1bb9daabf0f3",
            "accountId": "000000000000",
            "instanceName": "Compute Intensive",
            "currentInstanceType": "r5.large",
            "finding": "UNDER_PROVISIONED",
            "findingReasonCodes": [
                "CPUUnderprovisioned",
                "EBSIOPSOverprovisioned"
            ],
            "inferredWorkloadTypes": [
                "ApacheHadoop"
            ],
            "utilizationMetrics": [
                {
                    "name": "CPU",
                    "statistic": "MAXIMUM",
                    "value": 100.0
                },
                {
                    "name": "EBS_READ_OPS_PER_SECOND",
                    "statistic": "MAXIMUM",
                    "value": 0.0
                },
                {
                    "name": "EBS_WRITE_OPS_PER_SECOND",
                    "statistic": "MAXIMUM",
                    "value": 4.943333333333333
                },
                {
                    "name": "EBS_READ_BYTES_PER_SECOND",
                    "statistic": "MAXIMUM",
                    "value": 0.0
                },
                {
                    "name": "EBS_WRITE_BYTES_PER_SECOND",
                    "statistic": "MAXIMUM",
                    "value": 880541.9921875
                },
                {
                    "name": "NETWORK_IN_BYTES_PER_SECOND",
                    "statistic": "MAXIMUM",
                    "value": 18113.96638888889
                },
                {
                    "name": "NETWORK_OUT_BYTES_PER_SECOND",
                    "statistic": "MAXIMUM",
                    "value": 90.37638888888888
                },
                {
                    "name": "NETWORK_PACKETS_IN_PER_SECOND",
                    "statistic": "MAXIMUM",
                    "value": 2.484055555555556
                },
                {
                    "name": "NETWORK_PACKETS_OUT_PER_SECOND",
                    "statistic": "MAXIMUM",
                    "value": 0.3302777777777778
                }
            ],
            "lookBackPeriodInDays": 14.0,
            "recommendationOptions": [
                {
                    "instanceType": "r6g.large",
                    "projectedUtilizationMetrics": [
                        {
                            "name": "CPU",
                            "statistic": "MAXIMUM",
                            "value": 70.76923076923076
                        }
                    ],
                    "platformDifferences": [
                        "Architecture"
                    ],
                    "migrationEffort": "Low",
                    "performanceRisk": 1.0,
                    "rank": 1
                },
                {
                    "instanceType": "t4g.xlarge",
                    "projectedUtilizationMetrics": [
                        {
                            "name": "CPU",
                            "statistic": "MAXIMUM",
                            "value": 33.33333333333333
                        }
                    ],
                    "platformDifferences": [
                        "Hypervisor",
                        "Architecture"
                    ],
                    "migrationEffort": "Low",
                    "performanceRisk": 3.0,
                    "rank": 2
                },
                {
                    "instanceType": "m6g.xlarge",
                    "projectedUtilizationMetrics": [
                        {
                            "name": "CPU",
                            "statistic": "MAXIMUM",
                            "value": 33.33333333333333
                        }
                    ],
                    "platformDifferences": [
                        "Architecture"
                    ],
                    "migrationEffort": "Low",
                    "performanceRisk": 1.0,
                    "rank": 3
                }
            ],
            "recommendationSources": [
                {
                    "recommendationSourceArn": "arn:aws:ec2:us-west-2:000000000000:instance/i-0b5ec1bb9daabf0f3",
                    "recommendationSourceType": "Ec2Instance"
                }
            ],
            "lastRefreshTimestamp": "2021-12-28T11:00:03.576000-08:00",
            "currentPerformanceRisk": "High",
            "effectiveRecommendationPreferences": {
                "cpuVendorArchitectures": [
                    "CURRENT", 
                    "AWS_ARM64"
                ],
                "enhancedInfrastructureMetrics": "Inactive"
            }
        }
    ],
    "errors": []
}

Conclusion

Compute Optimizer Graviton recommendations are available in in US East (Ohio), US East (N. Virginia), US West (N. California), US West (Oregon), Asia Pacific (Mumbai), Asia Pacific (Seoul), Asia Pacific (Singapore), Asia Pacific (Sydney), Asia Pacific (Tokyo), Canada (Central), Europe (Frankfurt), Europe (Ireland), Europe (London), Europe (Paris), Europe (Stockholm), and South America (São Paulo) Regions at no additional charge. To get started with Compute Optimizer, visit the Compute Optimizer webpage.

New Storage-Optimized Amazon EC2 Instances (Im4gn and Is4gen) Powered by AWS Graviton2 Processors

Post Syndicated from Jeff Barr original https://aws.amazon.com/blogs/aws/new-storage-optimized-amazon-ec2-instances-im4gn-and-is4gen-powered-by-aws-graviton2-processors/

EC2 storage-optimized instances are designed to deliver high disk I/O performance, and plenty of storage. Our customers use them to host high-performance real-time databases, distributed file systems, data warehouses, key-value stores, and more. Over the years we have released multiple generations of storage-optimized instances including the HS1 (2012) , D2 (2015), I2 (2013) , I3 (2017), I3en (2019), and D3/D3en (2020).

As I look back on all of these launches, it is interesting to see how we continue to provide an ever-increasing set of options that make each successive generation an even better fit for the diverse (and also ever-increasing) needs of our customers. HS1 instances were available in just one size, D2 and I2 in four, I3 in six, and I3en in eight. These instances give our customers the freedom to choose the size that best meets their current needs while also giving them room to scale up or down if those needs happen to change.

Im4gn and Is4gen
Today I am happy to introduce the two newest families of storage-optimized instances, Im4gn and Is4gen, powered by Graviton2 processors. Both instances offer up to 30 TB of NVMe storage using AWS Nitro SSD devices that are custom-built by AWS. As part of our drive to innovate on behalf of our customers, we turned our attention to storage and designed devices that were optimized to support high-speed access to large amounts of data. The AWS Nitro SSDs reduce I/O latency by up to 60% and also reduce latency variability by up to 75% when compared to the third generation of storage-optimized instances. As a result you get faster and more predictable performance for your I/O-intensive EC2 workloads.

Im4gn instances are a great fit for applications that require large amounts of dense SSD storage and high compute performance, but are not especially memory intensive such as social games, session storage, chatbots, and search engines. Here are the specs:

Instance Name vCPUs
Memory Local NVMe Storage
(AWS Nitro SSD)
Read Throughput
(128 KB Blocks)
EBS-Optimized Bandwidth Network Bandwidth
im4gn.large 2 8 GiB 937 GB 250 MB/s Up to 9.5 Gbps Up to 25 Gbps
im4gn.xlarge 4 16 GiB 1.875 TB 500 MB/s Up to 9.5 Gbps Up to 25 Gbps
im4gn.2xlarge 8 32 GiB 3.75 TB 1 GB/s Up to 9.5 Gbps Up to 25 Gbps
im4gn.4xlarge 16 64 GiB 7.5 TB 2 GB/s 9.5 Gbps 25 Gbps
im4gn.8xlarge 32 128 GiB 15 TB
(2 x 7.5 TB)
4 GB/s 19 Gbps 50 Gbps
im4gn.16xlarge 64 256 GiB 30 TB
(4 x 7.5 TB)
8 GB/s 38 Gbps 100 Gbps

Im4gn instances provide up to 40% better price performance and up to 44% lower cost per TB of storage compared to I3 instances. The new instances are available in the AWS US West (Oregon), US East (Ohio), US East (N. Virginia), and Europe (Ireland) Regions as On-Demand, Spot, Savings Plan, and Reserved instances.

Is4gen instances are a great fit for applications that do large amounts of random I/O to large amounts of SSD storage. This includes shared file systems, stream processing, social media monitoring, and streaming platforms, all of which can use the increased storage density to retain more data locally. Here are the specs:

Instance Name vCPUs
Memory Local NVMe Storage
(AWS Nitro SSD)
Read Throughput
(128 KB Blocks)
EBS-Optimized Bandwidth Network Bandwidth
is4gen.medium 1 6 GiB 937 GB 250 MB/s Up to 9.5 Gbps Up to 25 Gbps
is4gen.large 2 12 GiB 1.875 TB 500 MB/s Up to 9.5 Gbps Up to 25 Gbps
is4gen.xlarge 4 24 GiB 3.75 TB 1 GB/s Up to 9.5 Gbps Up to 25 Gbps
is4gen.2xlarge 8 48 GiB 7.5 TB 2 GB /s Up to 9.5 Gbps Up to 25 Gbps
is4gen.4xlarge 16 96 GiB 15 TB
(2 x 7.5 TB)
4 GB/s 9.5 Gbps 25 Gbps
is4gen.8xlarge 32 192 GiB 30 TB
(4 x 7.5 TB)
8 GB/s 19 Gbps 50 Gbps

Is4gen instances provide 15% lower cost per TB of storage and up to 48% better compute performance compared to I3en instances. The new instances are available in the AWS US West (Oregon), US East (Ohio), US East (N. Virginia), and Europe (Ireland) Regions as On-Demand, Spot, Savings Plan, and Reserved instances.

Available Now
As I never get tired of saying, these new instances are available now and you can start using them today. You can use Amazon Linux 2, Ubuntu 18.04.05 (and newer), Red Hat Enterprise Linux 8.0, and SUSE Enterprise Server 15 (and newer) AMIs, along with the container-optimized ECS and EKS AMIs. Learn more about the Im4gn and Is4gen instances.

Jeff;

PS – As of this launch twelve EC2 instance types are now powered by Graviton2 processors! To learn more, visit the Graviton2 page.

Join the Preview – Amazon EC2 C7g Instances Powered by New AWS Graviton3 Processors

Post Syndicated from Jeff Barr original https://aws.amazon.com/blogs/aws/join-the-preview-amazon-ec2-c7g-instances-powered-by-new-aws-graviton3-processors/

We announced the first generation AWS-designed Graviton processor in late 2018, and followed it up with the second generation Graviton2 a year later. Today, AWS customers make use of twelve different Graviton2-powered instances including the new X2gd instances that are designed for memory-intensive workloads. All Graviton processors include dedicated cores & caches for each vCPU, along with additional security features courtesy of AWS Nitro System; the Graviton2 processors add support for always-on memory encryption.

C7g in the Works
I am thrilled to tell you about our upcoming C7g instances. Powered by new Graviton3 processors, these instances are going to be a great match for your compute-intensive workloads: HPC, batch processing, electronic design automation (EDA), media encoding, scientific modeling, ad serving, distributed analytics, and CPU-based machine learning inferencing.

While we are still optimizing these instances, it is clear that the Graviton3 is going to deliver amazing performance. In comparison to the Graviton2, the Graviton3 will deliver up to 25% more compute performance and up to twice as much floating point & cryptographic performance. On the machine learning side, Graviton3 includes support for bfloat16 data and will be able to deliver up to 3x better performance.

Graviton3 processors also include a new pointer authentication feature that is designed to improve security. Before return addresses are pushed on to the stack, they are first signed with a secret key and additional context information, including the current value of the stack pointer. When the signed addresses are popped off the stack, they are validated before being used. An exception is raised if the address is not valid, thereby blocking attacks that work by overwriting the stack contents with the address of harmful code. We are working with operating system and compiler developers to add additional support for this feature, so please get in touch if this is of interest to you.

C7g instances will be available in multiple sizes (including bare metal), and are the first in the cloud industry to be equipped with DDR5 memory. In addition to drawing less power, this memory delivers 50% higher bandwidth than the DDR4 memory used in the current generation of EC2 instances.

On the network side, C7g instances will offer up to 30 Gbps of network bandwidth and Elastic Fabric Adapter (EFA) support.

Join the Preview
We are now running a preview of the C7g instances so that you can be among the first to experience all of this power. Sign up now, take an instance for a spin, and let me know what you think!

Jeff;

New – Amazon EC2 G5g Instances Powered by AWS Graviton2 Processors and NVIDIA T4G Tensor Core GPUs

Post Syndicated from Channy Yun original https://aws.amazon.com/blogs/aws/new-amazon-ec2-g5g-instances-powered-by-aws-graviton2-processors-and-nvidia-t4g-tensor-core-gpus/

AWS Graviton2 processors are custom-designed by AWS to enable the best price performance in Amazon EC2. Thousands of customers are realizing significant price performance benefits for a wide variety of workloads with Graviton2-based instances.

Today, we are announcing the general availability of Amazon EC2 G5g instances that extend Graviton2 price-performance benefits to GPU-based workloads including graphics applications and machine learning inference. In addition to Graviton2 processors, G5g instances feature NVIDIA T4G Tensor Core GPUs to provide the best price performance for Android game streaming, with up to 25 Gbps of networking bandwidth and 19 Gbps of EBS bandwidth.

These instances provide up to 30 percent lower cost per stream per hour for Android game streaming than x86-based GPU instances. G5g instances are also ideal for machine learning developers who are looking for cost-effective inference, have ML models that are sensitive to CPU performance, and leverage NVIDIA’s AI libraries.

G5g instances are available in the six sizes as shown below.

Instance Name vCPUs Memory (GB) NVIDIA T4G Tensor Core GPU GPU Memory (GB) EBS Bandwidth (Gbps) Network Bandwidth (Gbps)
g5g.xlarge 4 8 1 16 Up to 3.5 Up to 10
g5g.2xlarge 8 16 1 16 Up to 3.5 Up to 10
g5g.4xlarge 16 32 1 16 Up to 3.5 Up to 10
g5g.8xlarge 32 64 1 16 9 12
g5g.16xlarge 64 128 2 32 19 25
g5g.metal 64 128 2 32 19 25

These instances are a great fit for many interesting types of workloads. Here are a few examples:

  • Streaming Android gaming—With G5g instances, Android game developers can build natively on Arm-based GPU instances without the need for cross-compilation or emulation on x86-based instances. They can encode the rendered graphics and stream the game over the network to a mobile device. This helps simplify development efforts and time and lowers the cost per stream per hour by up to 30 percent.
  • ML Inference —G5g instances are also ideal for machine learning developers who are looking for cost-effective inference, have ML models that are sensitive to CPU performance, and leverage NVIDIA’s AI If you don’t have any dependencies on NVIDIA software, you may use Inf1 instances, which deliver up to 70 percent lower cost-per-inference than G4dn instances.
  • Graphics rendering—G5g instances are the most cost-effective option for customers with rendering workloads and dependencies on NVIDIA libraries. These instances also support rendering applications and use cases that leverage industry-standard APIs such as OpenGL and Vulkan.
  • Autonomous Vehicle Simulations—Several of our customers are designing and simulating autonomous vehicles that include multiple real-time sensors. They can use ray tracing to simulate sensor input in real time.

The instances are compatible with a very long list of graphical and machine learning libraries on Linux, including NVENC, NVDEC, nvJPEG, OpenGL, Vulkan, CUDA, CuDNN, CuBLAS, and TensorRT.

Available Now
The new G5g instances are available now, and you can start using them today in the US East (N. Virginia), US West (Oregon), and Asia-Pacific (Seoul, Singapore and Tokyo) Regions in On-Demand, Spot, Savings Plan, and Reserved Instance form. To learn more, see the EC2 pricing page.

G5g instances are available now in AWS Deep Learning AMIs with NVIDIA drivers and popular ML frameworks, Amazon Elastic Container Service (Amazon ECS), or Amazon Elastic Kubernetes Service (Amazon EKS) clusters for containerized ML applications.

You can send feedback to the AWS forum for Amazon EC2 or through your usual AWS Support contacts.

Channy

Announcing AWS Graviton2 Support for AWS Fargate – Get up to 40% Better Price-Performance for Your Serverless Containers

Post Syndicated from Channy Yun original https://aws.amazon.com/blogs/aws/announcing-aws-graviton2-support-for-aws-fargate-get-up-to-40-better-price-performance-for-your-serverless-containers/

AWS Graviton2 processors are custom-built by AWS using 64-bit Arm Neoverse cores to deliver the best price-performance for your cloud workloads running in Amazon Elastic Compute Cloud (Amazon EC2). They provide up to 40 percent better price-performance over comparable x86-based instances for a wide variety of workloads. Many of our customers such as Intuit, SmugMug, Snap, Formula One, and Honeycomb.io use Graviton2-based instances to run their workloads for better price-performance in Amazon EC2 for their workloads and enjoy better price-performance.

Many fully-managed services including Amazon Relational Database Service (Amazon RDS), Amazon Aurora, Amazon ElastiCache, Amazon OpenSearch Service (successor of Amazon Elasticsearch Service), and Amazon EMR have extended the benefits of Graviton2 to their customers. Recently, we also extended the benefits of Graviton2 to our serverless computing customers using AWS Lambda. AWS Lambda functions powered by AWS Graviton2 offer up to 19 percent better performance at 20 percent lower cost compared to running them on x86-based instances.

Today, I am happy to announce AWS Graviton2 support for AWS Fargate with Amazon Elastic Container Service (Amazon ECS). AWS Fargate is the serverless compute engine for containers on AWS that removes the need to provision, scale, and manage servers. AWS Fargate powered by AWS Graviton2 processors delivers up to 40 percent better price-performance at 20 percent lower cost over comparable Intel x86-based Fargate for containerized applications.

With Graviton2 support for Fargate, you get the serverless benefits of Fargate, the price-performance advantages of Graviton2, and the flexibility to use a container compute processor of your choice. You can upload multi-architecture images or images that have ARM64 in your image manifest with your container registry, such as Amazon Elastic Container Registry (Amazon ECR). When orchestrated via Amazon ECS, Fargate will run these applications on Graviton2-powered compute.

Multi-architecture container images consist of two main parts: layers and a manifest. Each container image has one or more layers of file system content. The manifest specifies the groups of layers that make up the image as well as its runtime characteristics, either ARM64 and X86_64.

This allows you to have the same repository that supports multiple architectures, and the container runtime does the work of selecting which image layers to pull based on the system architecture, including ARM64. To learn more, visit Introducing multi-architecture container images for Amazon ECR.

Getting Started With Fargate powered by Graviton2 processors
To enable Graviton2 support for Fargate, you opt in to Arm compatibility in your ECS cluster. In the ECS console, when creating a new task definition, you can simply select Linux/ARM64 in the Operating system/Architecture dropdown list.

The following is an example of a task definition containing a simple container using the Fargate launch type with an optional parameter cpuArchitecture to ARM64. (The default value is X86_64).

{
 "family": "bb-arm64",
 "networkMode": "awsvpc",
 "containerDefinitions": [
    {
        "name": "sleep",
        "image": "arm64v8/busybox",
        "cpu": 100,
        "memory": 100,
        "essential": true,
        "command": [ "echo hello" ],
        "entryPoint": [ "sh", "-c" ]
    }
 ],
 "requiresCompatibilities": [ "FARGATE" ],
 "cpu": "1 vCpu",
 "memory": "3 GB",
 "runtimePlatform": { "cpuArchitecture": "ARM64" },
 "executionRoleArn": "arn:aws:iam::1234567890:role/ecsTaskExecutionRole"
}

When you run your tasks with the Graviton-based compute, you can see the value of Linux/ARM64 for Operating system/Architecture in each task detail page of the ECS console.

With AWS Command-line Interface (AWS CLI), you simply find which architecture is used in your ECS cluster.

$ aws ecs describe-tasks \
    --cluster MyCluster \
    --tasks arn:aws:ecs:us-west-2:123456789012:task/MyCluster/1234567890123456789

Here is an output of CPU architecture in the response of DescribeTasks or will have it as a filter to ListTasks.

{ 
    "tasks": [
    {
        "family": "...",
        "attributes": [
            {
                "name": "ecs.cpu-architecture",
                "value": "arm64"
            }
        ]
    }]
}

Migration to Gaviton2-based Fargate Containers
You get all the same Fargate features you’re used to for your containerized applications with Intel x86-based offering. With logging, monitoring, tracing, extensible ephemeral storage by Amazon Elastic File System (Amazon EFS) file systems, and more, you can easily migrate your applications to Graviton2-based Fargate containers. You get out-of-the-box logging via Amazon CloudWatch logs and metrics via Container Insights and AWS Distro for Open Telemetry agent as a sidecar to enable traces via ServiceLens.

With Amazon ECS, you can use Amazon ECS Exec for break-glass or developer debugging scenarios. With ECS Exec, you can directly interact with containers without needing to first interact with the host container operating system, open inbound ports, or manage SSH keys. You can use ECS Exec to run commands in or get a shell to a container running on an Amazon EC2 instance or on AWS Fargate.  To learn more, see Using Amazon ECS Exec for debugging in the AWS documentation.

Once your development teams test and validate that applications are ARM64 compatible, in addition to using AWS CodeBuild that has supported Graviton for a long time, you can now run Jenkins or Gitlab runners. This will give you an end-to-end serverless experience, right from testing to building containers to running them on Fargate.

To get more support with the monitoring and logging, security, and continuous delivery on AWS Fargate, see the list of AWS Fargate Partners such as Aqua Security, Datadog, New Relic, Splunk, and Sumo Logic that have extended Fargate’s capabilities.

Available Now
AWS Graviton2 support on AWS Fargate is available in all AWS Regions where Fargate is available except Bahrain, Cape Town, China, and GovCloud regions. This feature is supported on Fargate Platform Version (PV) 1.4.0 or later. If you are not already using PV 1.4.0, see the AWS Fargate platform versions section in the AWS documentation to learn how to migrate.

You can get up to 40 percent better price-performance for Arm-compatible container-based applications. You can further reduce your costs by getting up to a 52 percent discount off on-demand pricing in exchange for a commitment of a one- or three-year term with Compute Savings Plans. For more information, see the AWS Fargate pricing page.

Give it a try, and please send us feedback either on the public AWS containers roadmap in the AWS forum for Amazon ECS, or through your usual AWS support contacts.

Channy

Target cross-platform Go builds with AWS CodeBuild Batch builds

Post Syndicated from Russell Sayers original https://aws.amazon.com/blogs/devops/target-cross-platform-go-builds-with-aws-codebuild-batch-builds/

Many different operating systems and architectures could end up as the destination for our applications. By using a AWS CodeBuild batch build, we can run builds for a Go application targeted at multiple platforms concurrently.

Cross-compiling Go binaries for different platforms is as simple as setting two environment variables $GOOS and $GOARCH, regardless of the build’s host platform. For this post we will build all of the binaries on Linux/x86 containers. You can run the command go tool dist list to see the Go list of supported platforms. We will build binaries for six platforms: Windows+ARM, Windows+AMD64, Linux+ARM64, Linux+AMD64, MacOS+ARM64, and Mac+AMD64. Note that AMD64 is a 64-bit architecture based on the Intel x86 instruction set utilized on both AMD and Intel hardware.

This post demonstrates how to create a single AWS CodeBuild project by using a batch build and a single build spec to create concurrent builds for the six targeted platforms. Learn more about batch builds in AWS CodeBuild in the documentation: Batch builds in AWS CodeBuild

Solution Overview

AWS CodeBuild is a fully managed continuous integration service that compiles source code, runs tests, and produces ready-to-deploy software packages. A batch build is utilized to run concurrent and coordinated builds. Let’s summarize the 3 different batch builds:

  • Build graph: defines dependencies between builds. CodeBuild utilizes the dependencies graph to run builds in an order that satisfies the dependencies.
  • Build list: utilizes a list of settings for concurrently run builds.
  • Build matrix: utilizes a matrix of settings to create a build for every combination.

The requirements for this project are simple – run multiple builds with a platform pair of $GOOS and $GOARCH environment variables. For this, a build list can be utilized. The buildspec for the project contains a batch/build-list setting containing every environment variable for the six builds.

batch:
  build-list:
    - identifier: build1
      env:
        variables:
          GOOS: darwin
          GOARCH: amd64
    - identifier: build2
      env:
        variables:
          GOOS: darwin
          GOARCH: arm64
    - ...

The batch build project will launch seven builds. See the build sequence in the diagram below.

  • Step 1 – A build downloads the source.
  • Step 2 – Six concurrent builds configured with six sets of environment variables from the batch/build-list setting.
  • Step 3 – Concurrent builds package a zip file and deliver to the artifacts Amazon Simple Storage Service (Amazon S3) bucket.

build sequence

The supplied buildspec file includes commands for the install and build phases. The install phase utilizes the phases/install/runtime-versions phase to set the version of Go is used in the build container.

The build phase contains commands to replace source code placeholders with environment variables set by CodeBuild. The entire list of environment variables is documented at Environment variables in build environments. This is followed by a simple go build to build the binaries. The application getting built is an AWS SDK for Go sample that will list the contents of an S3 bucket.

  build:
    commands:
      - mv listObjects.go listObjects.go.tmp
      - cat listObjects.go.tmp | envsubst | tee listObjects.go
      - go build listObjects.go

The artifacts sequence specifies the build outputs that we want packaged and delivered to the artifacts S3 bucket. The name setting creates a name for ZIP artifact. And the name combines the operating system, architecture environment variables, as well as the git commit hash. We use Shell command language to expand the environment variables, as well as command substitution to take the first seven characters of the git hash.

artifacts:
  files:
    - 'listObjects'
    - 'listObjects.exe'
    - 'README.md'
  name: listObjects_${GOOS}_${GOARCH}_$(echo $CODEBUILD_RESOLVED_SOURCE_VERSION | cut -c 1-7).zip 

Let’s walk through the CodeBuild project setup process. When the builds complete, we’ll see zip files containing the builds for each platform in an artifacts bucket.

Here is what we will create:

  • Create an S3 bucket to host the built artifacts.
  • Create the CodeBuild project, which needs to know:
    • Where the source is
    • The environment – a docker image and a service role
    • The location of the build spec
    • Batch configuration, a service role used to launch batch build groups
    • The artifact S3 bucket location

The code that is built is available on github here: https://github.com/aws-samples/cross-platform-go-builds-with-aws-codebuild. For an alternative to the manual walkthrough steps, a CloudFormation template that will build all of the resources is available in the git repository.

Prerequisites

For this walkthrough, you must have the following prerequisites:

Create the Artifacts S3 Bucket

An S3 bucket will be the destination of the build artifacts.

  • In the Amazon S3 console, create a bucket with a unique name. This will be the destination of your build artifacts.
    creating an s3 bucket

Create the AWS CodeBuild Project

  • In the AWS CodeBuild console, create a project named multi-arch-build.
    codebuild project name
  • For Source Provider, choose GitHub. Choose the Connect to GitHub button and follow the authorization screens. For repository, enter https://github.com/aws-samples/cross-platform-go-builds-with-aws-codebuild
    coldbuild select source
  • For Environment image, choose Managed Image. Choose the most recent Ubuntu image. This image contains every tool needed for the build. If you are interested in the contents of the image, then you can see the Dockerfile used to build the image in the GitHub repository here: https://github.com/aws/aws-codebuild-docker-images/tree/master/ubuntu
    Select environment
  • For Service Role, keep the suggested role name.
    Service role
  • For Build specifications, leave Buildspec name empty. This will use the default location buildspec.yml in the source root.
  • Under Batch configuration, enable Define batch configuration. For the Role Name, enter a name for the role: batch-multi-arch-build-service-role. There is an option here to combine artifacts. CodeBuild can combine the artifacts from batch builds into a single location. This isn’t needed for this build, as we want a zip to be created for each platform.
    Batch configuration
  • Under Artifacts, for Type, choose Amazon S3. For Bucket name, select the S3 bucket created earlier. This is where we want the build artifacts delivered. Choose the checkbox for Enable semantic versioning. This will tell CodeBuild to use the artifact name that was specified in the buildspec file.
    Artifacts
  • For Artifacts Packaging, choose Zip for CodeBuild to create a compressed zip from the build artifacts.
    Artifacts packaging
  • Create the build project, and start a build. You will see the DOWNLOAD_SOURCE build complete, followed by the six concurrent builds for each combination of OS and architecture.
    Builds in batch

Run the Artifacts

The builds have completed, and each packaged artifact has been delivered to the S3 bucket. Remember the name of the ZIP archive that was built using the buildspec file setting. This incorporated a combination of the operating system, architecture, and git commit hash.

Run the artifacts

Below, I have tested the artifact by downloading the zip for the operating system and architecture combination on three different platforms: MacOS/AMD64, an AWS Graviton2 instance, and a Microsoft Windows instance. Note the system information, unzipping the platform artifact, and the build specific information substituted into the Go source code.

Window1 Window2 Window3

Cleaning up

To avoid incurring future charges, delete the resources:

  • On the Amazon S3 console, choose the artifacts bucket created, and choose Empty. Confirm the deletion by typing ‘permanently delete’. Choose Empty.
  • Choose the artifacts bucket created, and Delete.
  • On the IAM console, choose Roles.
  • Search for batch-multi-arch-build-service-role and Delete. Search for codebuild-multi-arch-build-service-role and Delete.
  • Go to the CodeBuild console. From Build projects, choose multi-arch-build, and choose Delete build project.

Conclusion

This post utilized CodeBuild batch builds to build and package binaries for multiple platforms concurrently. The build phase used a small amount of scripting to replace placeholders in the code with build information CodeBuild makes available in environment variables. By overriding the artifact name using the buildspec setting, we created zip files built from information about the build. The zip artifacts were downloaded and tested on three platforms: Intel MacOS, a Graviton ARM based EC2 instance, and Microsoft Windows.

Features like this let you build on CodeBuild, a fully managed build service – and not have to worry about maintaining your own build servers.

Top 5: Featured Architecture Content for September

Post Syndicated from Elyse Lopez original https://aws.amazon.com/blogs/architecture/top-5-featured-architecture-content-for-september/

The AWS Architecture Center provides new and notable reference architecture diagrams, vetted architecture solutions, AWS Well-Architected best practices, whitepapers, and more. This blog post features some of our best picks from the new and newly updated content we released in the past month.

1. AWS Best Practices for DDoS Resiliency

Prioritizing the availability and responsiveness of your application helps you maintain customer trust. That’s why it’s crucial to protect your business from the impact of distributed denial of service (DDoS) and other cyberattacks. This whitepaper provides you prescriptive guidance to improve the resiliency of your applications and best practices for how to manage different attack types.

2. Predictive Modeling for Automotive Retail

Automotive retailers use data to better understand how their incentives are helping to sell cars. This new reference architecture diagram shows you how to design a modeling system that provides granular return on investment (ROI) predictions for automotive sales incentives.

3. AWS Graviton Performance Testing – Tips for Independent Software Vendors

If you’re deciding whether to phase in AWS Graviton processors for your workload, this whitepaper covers best practices and common pitfalls for defining test approaches to evaluate Amazon Elastic Compute Cloud (Amazon EC2) instance performance and how to set success factors and compare different test methods and their implementation.

4. Text Analysis with Amazon OpenSearch Service and Amazon Comprehend

This AWS Solutions Implementation was recently updated with new guidance related to Amazon OpenSearch Service, the successor to Amazon Elasticsearch Service. Learn how Amazon OpenSearch Service and Amazon Comprehend work together to deploy a cost-effective, end-to-end solution to extract meaningful insights from unstructured text-based data such as customer calls, support tickets, and online customer feedback.

5. Back to Basics: Hosting a Static Website on AWS

In this episode of Back to Basics, join SA Readiness Specialist Even Zhang as he breaks down the AWS services you can use to host and scale your static website without a single server. You’ll also learn how to use additional functionalities to enhance your observability and security posture or run A/B tests.

 CloudFront Edge Locations and Caches from Back to Basics video

Figure 1. CloudFront Edge Locations and Caches from Back to Basics video


ICYMI: Serverless Q3 2021

Post Syndicated from James Beswick original https://aws.amazon.com/blogs/compute/icymi-serverless-q3-2021/

Welcome to the 15th edition of the AWS Serverless ICYMI (in case you missed it) quarterly recap. Every quarter, we share all of the most recent product launches, feature enhancements, blog posts, webinars, Twitch live streams, and other interesting things that you might have missed!

Q3 calendar

In case you missed our last ICYMI, check out what happened last quarter here.

AWS Lambda

You can now choose next-generation AWS Graviton2 processors in your Lambda functions. This Arm-based processor architecture can provide up to 19% better performance at 20% lower cost. You can configure functions to use Graviton2 in the AWS Management Console, API, CloudFormation, and CDK. We recommend using the AWS Lambda Power Tuning tool to see how your function compare and determine the price improvement you may see.

All Lambda runtimes built on Amazon Linux 2 support Graviton2, with the exception of versions approaching end-of-support. The AWS Free Tier for Lambda includes functions powered by both x86 and Arm-based architectures.

Create Lambda function with new arm64 option

You can also use the Python 3.9 runtime to develop Lambda functions. You can choose this runtime version in the AWS Management Console, AWS CLI, or AWS Serverless Application Model (AWS SAM). Version 3.9 includes a range of new features and performance improvements.

Lambda now supports Amazon MQ for RabbitMQ as an event source. This makes it easier to develop serverless applications that are triggered by messages in a RabbitMQ queue. This integration does not require a consumer application to monitor queues for updates. The connectivity with the Amazon MQ message broker is managed by the Lambda service.

Lambda has added support for up to 10 GB of memory and 6 vCPU cores in AWS GovCloud (US) Regions and in the Middle East (Bahrain), Asia Pacific (Osaka), and Asia Pacific (Hong Kong) Regions.

AWS Step Functions

Step Functions now integrates with the AWS SDK, supporting over 200 AWS services and 9,000 API actions. You can call services directly from the Amazon States Language definition in the resource field of the task state. This allows you to work with services like DynamoDB, AWS Glue Jobs, or Amazon Textract directly from a Step Functions state machine. To learn more, see the SDK integration tutorial.

AWS Amplify

The Amplify Admin UI now supports importing existing Amazon Cognito user pools and identity pools. This allows you to configure multi-platform apps to use the same user pools with different client IDs.

Amplify CLI now enables command hooks, allowing you to run custom scripts in the lifecycle of CLI commands. You can create bash scripts that run before, during, or after CLI commands. Amplify CLI has also added support for storing environment variables and secrets used by Lambda functions.

Amplify Geo is in developer preview and helps developers provide location-aware features to their frontend web and mobile applications. This uses the Amazon Location Service to provide map UI components.

Amazon EventBridge

The EventBridge schema registry now supports discovery of cross-account events. When schema registry is enabled on a bus, it now generates schemes for events originating from another account. This helps organize and find events in multi-account applications.

Amazon DynamoDB

DynamoDB console

The new DynamoDB console experience is now the default for viewing and managing DynamoDB tables. This makes it easier to manage tables from the navigation pane and also provided a new dedicated Items page. There is also contextual guidance and step-by-step assistance to help you perform common tasks more quickly.

API Gateway

API Gateway can now authenticate clients using certificate-based mutual TLS. Previously, this feature only supported AWS Certificate Manager (ACM). Now, customers can use a server certificate issued by a third-party certificate authority or ACM Private CA. Read more about using mutual TLS authentication with API Gateway.

The Serverless Developer Advocacy team built the Amazon API Gateway CORS Configurator to help you configure cross origin resource scripting (CORS) for REST and HTTP APIs. Fill in the information specific to your API and the AWS SAM configuration is generated for you.

Serverless blog posts

July

August

September

Tech Talks & Events

We hold AWS Online Tech Talks covering serverless topics throughout the year. These are listed in the Serverless section of the AWS Online Tech Talks page. We also regularly deliver talks at conferences and events around the world, speak on podcasts, and record videos you can find to learn in bite-sized chunks.

Here are some from Q3:

Videos

Serverless Land

Serverless Office Hours – Tues 10 AM PT

Weekly live virtual office hours. In each session we talk about a specific topic or technology related to serverless and open it up to helping you with your real serverless challenges and issues. Ask us anything you want about serverless technologies and applications.

July

August

September

DynamoDB Office Hours

Are you an Amazon DynamoDB customer with a technical question you need answered? If so, join us for weekly Office Hours on the AWS Twitch channel led by Rick Houlihan, AWS principal technologist and Amazon DynamoDB expert. See upcoming and previous shows

Still looking for more?

The Serverless landing page has more information. The Lambda resources page contains case studies, webinars, whitepapers, customer stories, reference architectures, and even more Getting Started tutorials.

You can also follow the Serverless Developer Advocacy team on Twitter to see the latest news, follow conversations, and interact with the team.

AWS Lambda Functions Powered by AWS Graviton2 Processor – Run Your Functions on Arm and Get Up to 34% Better Price Performance

Post Syndicated from Danilo Poccia original https://aws.amazon.com/blogs/aws/aws-lambda-functions-powered-by-aws-graviton2-processor-run-your-functions-on-arm-and-get-up-to-34-better-price-performance/

Many of our customers (such as Formula One, Honeycomb, Intuit, SmugMug, and Snap Inc.) use the Arm-based AWS Graviton2 processor for their workloads and enjoy better price performance. Starting today, you can get the same benefits for your AWS Lambda functions. You can now configure new and existing functions to run on x86 or Arm/Graviton2 processors.

With this choice, you can save money in two ways. First, your functions run more efficiently due to the Graviton2 architecture. Second, you pay less for the time that they run. In fact, Lambda functions powered by Graviton2 are designed to deliver up to 19 percent better performance at 20 percent lower cost.

With Lambda, you are charged based on the number of requests for your functions and the duration (the time it takes for your code to execute) with millisecond granularity. For functions using the Arm/Graviton2 architecture, duration charges are 20 percent lower than the current pricing for x86. The same 20 percent reduction also applies to duration charges for functions using Provisioned Concurrency.

In addition to the price reduction, functions using the Arm architecture benefit from the performance and security built into the Graviton2 processor. Workloads using multithreading and multiprocessing, or performing many I/O operations, can experience lower execution time and, as a consequence, even lower costs. This is particularly useful now that you can use Lambda functions with up to 10 GB of memory and 6 vCPUs. For example, you can get better performance for web and mobile backends, microservices, and data processing systems.

If your functions don’t use architecture-specific binaries, including in their dependencies, you can switch from one architecture to the other. This is often the case for many functions using interpreted languages such as Node.js and Python or functions compiled to Java bytecode.

All Lambda runtimes built on top of Amazon Linux 2, including the custom runtime, are supported on Arm, with the exception of Node.js 10 that has reached end of support. If you have binaries in your function packages, you need to rebuild the function code for the architecture you want to use. Functions packaged as container images need to be built for the architecture (x86 or Arm) they are going to use.

To measure the difference between architectures, you can create two versions of a function, one for x86 and one for Arm. You can then send traffic to the function via an alias using weights to distribute traffic between the two versions. In Amazon CloudWatch, performance metrics are collected by function versions, and you can look at key indicators (such as duration) using statistics. You can then compare, for example, average and p99 duration between the two architectures.

You can also use function versions and weighted aliases to control the rollout in production. For example, you can deploy the new version to a small amount of invocations (such as 1 percent) and then increase up to 100 percent for a complete deployment. During rollout, you can lower the weight or set it to zero if your metrics show something suspicious (such as an increase in errors).

Let’s see how this new capability works in practice with a few examples.

Changing Architecture for Functions with No Binary Dependencies
When there are no binary dependencies, changing the architecture of a Lambda function is like flipping a switch. For example, some time ago, I built a quiz app with a Lambda function. With this app, you can ask and answer questions using a web API. I use an Amazon API Gateway HTTP API to trigger the function. Here’s the Node.js code including a few sample questions at the beginning:

const questions = [
  {
    question:
      "Are there more synapses (nerve connections) in your brain or stars in our galaxy?",
    answers: [
      "More stars in our galaxy.",
      "More synapses (nerve connections) in your brain.",
      "They are about the same.",
    ],
    correctAnswer: 1,
  },
  {
    question:
      "Did Cleopatra live closer in time to the launch of the iPhone or to the building of the Giza pyramids?",
    answers: [
      "To the launch of the iPhone.",
      "To the building of the Giza pyramids.",
      "Cleopatra lived right in between those events.",
    ],
    correctAnswer: 0,
  },
  {
    question:
      "Did mammoths still roam the earth while the pyramids were being built?",
    answers: [
      "No, they were all exctint long before.",
      "Mammooths exctinction is estimated right about that time.",
      "Yes, some still survived at the time.",
    ],
    correctAnswer: 2,
  },
];

exports.handler = async (event) => {
  console.log(event);

  const method = event.requestContext.http.method;
  const path = event.requestContext.http.path;
  const splitPath = path.replace(/^\/+|\/+$/g, "").split("/");

  console.log(method, path, splitPath);

  var response = {
    statusCode: 200,
    body: "",
  };

  if (splitPath[0] == "questions") {
    if (splitPath.length == 1) {
      console.log(Object.keys(questions));
      response.body = JSON.stringify(Object.keys(questions));
    } else {
      const questionId = splitPath[1];
      const question = questions[questionId];
      if (question === undefined) {
        response = {
          statusCode: 404,
          body: JSON.stringify({ message: "Question not found" }),
        };
      } else {
        if (splitPath.length == 2) {
          const publicQuestion = {
            question: question.question,
            answers: question.answers.slice(),
          };
          response.body = JSON.stringify(publicQuestion);
        } else {
          const answerId = splitPath[2];
          if (answerId == question.correctAnswer) {
            response.body = JSON.stringify({ correct: true });
          } else {
            response.body = JSON.stringify({ correct: false });
          }
        }
      }
    }
  }

  return response;
};

To start my quiz, I ask for the list of question IDs. To do so, I use curl with an HTTP GET on the /questions endpoint:

$ curl https://<api-id>.execute-api.us-east-1.amazonaws.com/questions
[
  "0",
  "1",
  "2"
]

Then, I ask more information on a question by adding the ID to the endpoint:

$ curl https://<api-id>.execute-api.us-east-1.amazonaws.com/questions/1
{
  "question": "Did Cleopatra live closer in time to the launch of the iPhone or to the building of the Giza pyramids?",
  "answers": [
    "To the launch of the iPhone.",
    "To the building of the Giza pyramids.",
    "Cleopatra lived right in between those events."
  ]
}

I plan to use this function in production. I expect many invocations and look for options to optimize my costs. In the Lambda console, I see that this function is using the x86_64 architecture.

Console screenshot.

Because this function is not using any binaries, I switch architecture to arm64 and benefit from the lower pricing.

Console screenshot.

The change in architecture doesn’t change the way the function is invoked or communicates its response back. This means that the integration with the API Gateway, as well as integrations with other applications or tools, are not affected by this change and continue to work as before.

I continue my quiz with no hint that the architecture used to run the code has changed in the backend. I answer back to the previous question by adding the number of the answer (starting from zero) to the question endpoint:

$ curl https://<api-id>.execute-api.us-east-1.amazonaws.com/questions/1/0
{
  "correct": true
}

That’s correct! Cleopatra lived closer in time to the launch of the iPhone than the building of the Giza pyramids. While I am digesting this piece of information, I realize that I completed the migration of the function to Arm and optimized my costs.

Changing Architecture for Functions Packaged Using Container Images
When we introduced the capability to package and deploy Lambda functions using container images, I did a demo with a Node.js function generating a PDF file with the PDFKit module. Let’s see how to migrate this function to Arm.

Each time it is invoked, the function creates a new PDF mail containing random data generated by the faker.js module. The output of the function is using the syntax of the Amazon API Gateway to return the PDF file using Base64 encoding. For convenience, I replicate the code (app.js) of the function here:

const PDFDocument = require('pdfkit');
const faker = require('faker');
const getStream = require('get-stream');

exports.lambdaHandler = async (event) => {

    const doc = new PDFDocument();

    const randomName = faker.name.findName();

    doc.text(randomName, { align: 'right' });
    doc.text(faker.address.streetAddress(), { align: 'right' });
    doc.text(faker.address.secondaryAddress(), { align: 'right' });
    doc.text(faker.address.zipCode() + ' ' + faker.address.city(), { align: 'right' });
    doc.moveDown();
    doc.text('Dear ' + randomName + ',');
    doc.moveDown();
    for(let i = 0; i < 3; i++) {
        doc.text(faker.lorem.paragraph());
        doc.moveDown();
    }
    doc.text(faker.name.findName(), { align: 'right' });
    doc.end();

    pdfBuffer = await getStream.buffer(doc);
    pdfBase64 = pdfBuffer.toString('base64');

    const response = {
        statusCode: 200,
        headers: {
            'Content-Length': Buffer.byteLength(pdfBase64),
            'Content-Type': 'application/pdf',
            'Content-disposition': 'attachment;filename=test.pdf'
        },
        isBase64Encoded: true,
        body: pdfBase64
    };
    return response;
};

To run this code, I need the pdfkit, faker, and get-stream npm modules. These packages and their versions are described in the package.json and package-lock.json files.

I update the FROM line in the Dockerfile to use an AWS base image for Lambda for the Arm architecture. Given the chance, I also update the image to use Node.js 14 (I was using Node.js 12 at the time). This is the only change I need to switch architecture.

FROM public.ecr.aws/lambda/nodejs:14-arm64
COPY app.js package*.json ./
RUN npm install
CMD [ "app.lambdaHandler" ]

For the next steps, I follow the post I mentioned previously. This time I use random-letter-arm for the name of the container image and for the name of the Lambda function. First, I build the image:

$ docker build -t random-letter-arm .

Then, I inspect the image to check that it is using the right architecture:

$ docker inspect random-letter-arm | grep Architecture

"Architecture": "arm64",

To be sure the function works with the new architecture, I run the container locally.

$ docker run -p 9000:8080 random-letter-arm:latest

Because the container image includes the Lambda Runtime Interface Emulator, I can test the function locally:

$ curl -XPOST "http://localhost:9000/2015-03-31/functions/function/invocations" -d '{}'

It works! The response is a JSON document containing a base64-encoded response for the API Gateway:

{
    "statusCode": 200,
    "headers": {
        "Content-Length": 2580,
        "Content-Type": "application/pdf",
        "Content-disposition": "attachment;filename=test.pdf"
    },
    "isBase64Encoded": true,
    "body": "..."
}

Confident that my Lambda function works with the arm64 architecture, I create a new Amazon Elastic Container Registry repository using the AWS Command Line Interface (CLI):

$ aws ecr create-repository --repository-name random-letter-arm --image-scanning-configuration scanOnPush=true

I tag the image and push it to the repo:

$ docker tag random-letter-arm:latest 123412341234.dkr.ecr.us-east-1.amazonaws.com/random-letter-arm:latest
$ aws ecr get-login-password | docker login --username AWS --password-stdin 123412341234.dkr.ecr.us-east-1.amazonaws.com
$ docker push 123412341234.dkr.ecr.us-east-1.amazonaws.com/random-letter-arm:latest

In the Lambda console, I create the random-letter-arm function and select the option to create the function from a container image.

Console screenshot.

I enter the function name, browse my ECR repositories to select the random-letter-arm container image, and choose the arm64 architecture.

Console screenshot.

I complete the creation of the function. Then, I add the API Gateway as a trigger. For simplicity, I leave the authentication of the API open.

Console screenshot.

Now, I click on the API endpoint a few times and download some PDF mails generated with random data:

Screenshot of some PDF files.

The migration of this Lambda function to Arm is complete. The process will differ if you have specific dependencies that do not support the target architecture. The ability to test your container image locally helps you find and fix issues early in the process.

Comparing Different Architectures with Function Versions and Aliases
To have a function that makes some meaningful use of the CPU, I use the following Python code. It computes all prime numbers up to a limit passed as a parameter. I am not using the best possible algorithm here, that would be the sieve of Eratosthenes, but it’s a good compromise for an efficient use of memory. To have more visibility, I add the architecture used by the function to the response of the function.

import json
import math
import platform
import timeit

def primes_up_to(n):
    primes = []
    for i in range(2, n+1):
        is_prime = True
        sqrt_i = math.isqrt(i)
        for p in primes:
            if p > sqrt_i:
                break
            if i % p == 0:
                is_prime = False
                break
        if is_prime:
            primes.append(i)
    return primes

def lambda_handler(event, context):
    start_time = timeit.default_timer()
    N = int(event['queryStringParameters']['max'])
    primes = primes_up_to(N)
    stop_time = timeit.default_timer()
    elapsed_time = stop_time - start_time

    response = {
        'machine': platform.machine(),
        'elapsed': elapsed_time,
        'message': 'There are {} prime numbers <= {}'.format(len(primes), N)
    }
    
    return {
        'statusCode': 200,
        'body': json.dumps(response)
    }

I create two function versions using different architectures.

Console screenshot.

I use a weighted alias with 50% weight on the x86 version and 50% weight on the Arm version to distribute invocations evenly. When invoking the function through this alias, the two versions running on the two different architectures are executed with the same probability.

Console screenshot.

I create an API Gateway trigger for the function alias and then generate some load using a few terminals on my laptop. Each invocation computes prime numbers up to one million. You can see in the output how two different architectures are used to run the function.

$ while True
  do
    curl https://<api-id>.execute-api.us-east-1.amazonaws.com/default/prime-numbers\?max\=1000000
  done

{"machine": "aarch64", "elapsed": 1.2595275060011772, "message": "There are 78498 prime numbers <= 1000000"}
{"machine": "aarch64", "elapsed": 1.2591725109996332, "message": "There are 78498 prime numbers <= 1000000"}
{"machine": "x86_64", "elapsed": 1.7200910530000328, "message": "There are 78498 prime numbers <= 1000000"}
{"machine": "x86_64", "elapsed": 1.6874686619994463, "message": "There are 78498 prime numbers <= 1000000"}
{"machine": "x86_64", "elapsed": 1.6865161940004327, "message": "There are 78498 prime numbers <= 1000000"}
{"machine": "aarch64", "elapsed": 1.2583248640003148, "message": "There are 78498 prime numbers <= 1000000"}
...

During these executions, Lambda sends metrics to CloudWatch and the function version (ExecutedVersion) is stored as one of the dimensions.

To better understand what is happening, I create a CloudWatch dashboard to monitor the p99 duration for the two architectures. In this way, I can compare the performance of the two environments for this function and make an informed decision on which architecture to use in production.

Console screenshot.

For this particular workload, functions are running much faster on the Graviton2 processor, providing a better user experience and much lower costs.

Comparing Different Architectures with Lambda Power Tuning
The AWS Lambda Power Tuning open-source project, created by my friend Alex Casalboni, runs your functions using different settings and suggests a configuration to minimize costs and/or maximize performance. The project has recently been updated to let you compare two results on the same chart. This comes in handy to compare two versions of the same function, one using x86 and the other Arm.

For example, this chart compares x86 and Arm/Graviton2 results for the function computing prime numbers I used earlier in the post:

Chart.

The function is using a single thread. In fact, the lowest duration for both architectures is reported when memory is configured with 1.8 GB. Above that, Lambda functions have access to more than 1 vCPU, but in this case, the function can’t use the additional power. For the same reason, costs are stable with memory up to 1.8 GB. With more memory, costs increase because there are no additional performance benefits for this workload.

I look at the chart and configure the function to use 1.8 GB of memory and the Arm architecture. The Graviton2 processor is clearly providing better performance and lower costs for this compute-intensive function.

Availability and Pricing
You can use Lambda Functions powered by Graviton2 processor today in US East (N. Virginia), US East (Ohio), US West (Oregon), Europe (Frankfurt), Europe (Ireland), EU (London), Asia Pacific (Mumbai), Asia Pacific (Singapore), Asia Pacific (Sydney), Asia Pacific (Tokyo).

The following runtimes running on top of Amazon Linux 2 are supported on Arm:

  • Node.js 12 and 14
  • Python 3.8 and 3.9
  • Java 8 (java8.al2) and 11
  • .NET Core 3.1
  • Ruby 2.7
  • Custom Runtime (provided.al2)

You can manage Lambda Functions powered by Graviton2 processor using AWS Serverless Application Model (SAM) and AWS Cloud Development Kit (AWS CDK). Support is also available through many AWS Lambda Partners such as AntStack, Check Point, Cloudwiry, Contino, Coralogix, Datadog, Lumigo, Pulumi, Slalom, Sumo Logic, Thundra, and Xerris.

Lambda functions using the Arm/Graviton2 architecture provide up to 34 percent price performance improvement. The 20 percent reduction in duration costs also applies when using Provisioned Concurrency. You can further reduce your costs by up to 17 percent with Compute Savings Plans. Lambda functions powered by Graviton2 are included in the AWS Free Tier up to the existing limits. For more information, see the AWS Lambda pricing page.

You can find help to optimize your workloads for the AWS Graviton2 processor in the Getting started with AWS Graviton repository.

Start running your Lambda functions on Arm today.

Danilo

Increase Amazon Elasticsearch Service performance by upgrading to Graviton2

Post Syndicated from Zachariah Elliott original https://aws.amazon.com/blogs/big-data/increase-amazon-elasticsearch-service-performance-by-upgrading-to-graviton2/

Amazon Elasticsearch Service (Amazon ES) supports multiple instance types based on your use case. In 2021, AWS announced general purpose (M6g), compute optimized (C6g), and memory optimized (R6g, R6gd) instance types for Amazon ES version 7.9 or later powered by AWS Graviton2 processors, which delivers a major leap in capabilities and better price/performance improvement over previous generation instances.

Graviton2 instances are built using custom silicon designed by Amazon. These instances are Amazon-designed hardware and software innovations that enable the delivery of efficient, flexible, and secure cloud services with isolated multi-tenancy, private networking, and fast local storage. You can launch Graviton2 instances via the Amazon ES console, the AWS Command Line Interface (AWS CLI), AWS API, AWS CloudFormation, or the AWS Cloud Development Kit (AWS CDK). You can change your existing Amazon ES instance types to Graviton2 using a blue/green deployment process, which minimizes downtime and maintains the original environment in the event of unsuccessful deployments.

In this post, we review prerequisites and considerations to upgrade your existing Amazon ES instances to Graviton2 with minimal downtime.

Why move to Graviton2?

The following are some of the reasons you should move to Graviton2:

  • You can enjoy up to 38% improvement in indexing throughput compared to the corresponding x86-based counterparts
  • The Graviton2 instance family provides up to 50% reduction in indexing latency, and up to 30% improvement in query performance when compared to the current generation (M5, C5, R5)
  • Amazon ES Graviton2 instances provide up to 44% price/performance improvement over previous generation instances
  • Graviton2 instances include support for all recently launched features like encryption at rest and in flight, role-based access control, cross-cluster search, Auto-Tune, Trace Analytics, Kibana Reporting, and UltraWarm

Solution overview

For this post, let’s consider a use case in which we have an Amazon ES cluster running version 7.4 with three data nodes and two primary nodes.

As a general best practice, we recommend testing the process in a non-production environment followed by validation tests to make sure everything is configured and operating as per your expectations before making changes to the production environment. We also recommend creating a snapshot of your cluster before performing upgrades or modifying the instance type to minimize the risk of data loss.

In this post, we walk you through the following steps:

  1. Upgrade the Amazon ES cluster (if needed):
    1. Determine if the current cluster version meets the minimum required version (7.9 or later) for moving to Graviton2.
    2. Upgrade the Amazon ES domain to the required minimum version.
  2. Modify the instance type of your cluster nodes.
  3. Confirm that your applications work correctly with the upgraded cluster.
  4. Roll back to the previous instance types if compatibility issues are discovered.

Upgrade Amazon ES versions

To take advantage of Graviton2-based Amazon ES instances, your cluster must be running Amazon ES version 7.9 and above and service software R20210331 or later (as of this post). For the latest updates of this information, see Supported instance types in Amazon Elasticsearch Service. For upgrade considerations, compatibilities, and instructions, see Upgrading Elasticsearch.

For our use case, our cluster is running version 7.4. We can confirm the version via the AWS CLI or Amazon ES console, as in the following screenshot.

To upgrade your domain, choose Upgrade domain on the Actions menu. You can then choose what version to upgrade to, or verify your cluster can be upgraded. The upgrade process takes some time depending on the size of your cluster.

If you prefer to use the AWS CLI, you can perform the same steps. To get a list of all valid upgrade targets for a current version using the AWS CLI, use the describe-elasticsearch-domain command.

The following describe-elasticsearch-domain example provides configuration details for a given domain:

aws es describe-elasticsearch-domain \
    --domain-name demo

If the cluster version is less than 7.9, use the upgrade-elasticsearch-domain command to upgrade your domain:

aws es upgrade-elasticsearch-domain \
--domain-name demo
--target-version 7.9

You can track the progress of the Amazon ES domain upgrade using API calls to Amazon ES. For more information, see Why is my Amazon Elasticsearch Service domain upgrade taking so long?

Modify instances

At the time of writing, you can’t mix x86 and Graviton2-based Amazon ES instances with the primary and data nodes. As such, both data nodes and primary nodes are modified at the same time. To modify your nodes, complete the following steps:

  1. On the Amazon ES console, go to the domain you want to upgrade.
  2. Choose Edit domain.

  1. In the Data nodes section, for Instance type, change your data nodes to Graviton 2 instance types. In our case, we upgrade from r5.large.elasticsearch to r6g.large.elasticsearch.

  1. In the Dedicated master nodes section, for Instance type, change your dedicated primary nodes to Graviton 2 instance types. In our case, we upgrade from r5.large.elasticsearch to r6g.large.elasticsearch.

  1. Choose Submit.

The cluster goes into a processing state. During this time, you can monitor the Cluster health tab to see your number of nodes increase. In our case, our cluster has two dedicated primary nodes and three data nodes (five total).

During deployment, Amazon ES performs a blue/green deployment. This ensures any errors encountered during modification can be rolled back. You can continue to use the cluster during this time, however there may be a brief service interruption when the cluster switches to the new dedicated primary nodes. During blue/green deployment, you’re charged for both instance types, and then only the new instance type going forward.

After the modification finishes successfully, you can verify both the primary and data nodes are using Graviton2 instances.

Validate and confirm the application works correctly

You can now validate Amazon ES is performing as expected with your application. You can check the Cluster health tab for metrics related to cluster performance and observe if you’re not seeing the expected performance.

Perform rollback

In the rare scenario in which issues are discovered with the Graviton2-based Amazon ES cluster, such as application compatibility or data issues, you can perform the same steps to change the cluster back to the original node type.

Summary

This post shared a step-by-step guide to migrate your Amazon ES cluster to Graviton2-based nodes, as well as some key considerations when modifying your cluster. We also talked about how to upgrade your cluster to the latest version of Amazon ES to take advantage of Graviton 2, as well as other features such as UltraWarm and cold storage. As always, make sure you fully test compatibility with your application and these newer versions of Amazon ES, and per best practices, always perform upgrades in a lower environment before making these changes in a production environment.

Additional resources

For more information, see the following:


About the Authors

Zachariah Elliott works as a Solutions Architect focusing on EdTech at AWS. He is passionate about helping customers build Well-Architected solutions on AWS. He is also part of the IoT Subject Matter Expert community at AWS and loves helping customers develop unique IoT-based solutions.


Pranusha Manchala is a Solutions Architect at AWS who works with education companies. She has worked with many EdTech customers and provided them with architectural guidance for building highly scalable and cost-optimized applications on AWS. She found her interests in machine learning and started to dive deep into this technology. She enjoys cooking, baking, and outdoor activities in her free time.

Migrate Your Workloads with the Graviton Challenge!

Post Syndicated from Steve Roberts original https://aws.amazon.com/blogs/aws/migrate-your-workloads-with-the-graviton-challenge/

Today, Dave Brown, VP of Amazon EC2 at AWS, announced the Graviton Challenge as part of his session on AWS silicon innovation at the Six Five Summit 2021. We invite you to take the Graviton Challenge and move your applications to run on AWS Graviton2. The challenge, intended for individual developers and small teams, is based on the experiences of customers who’ve already migrated. It provides a framework of eight, approximately four-hour chunks to prepare, port, optimize, and finally deploy your application onto Graviton2 instances. Getting your application running on Graviton2, and enjoying the improved price performance, aren’t the only rewards. There are prizes and swag for those who complete the challenge!

AWS Graviton2 is a custom-built processor from AWS that’s based on the Arm64 architecture. It’s supported by popular Linux operating systems including Amazon Linux 2, Red Hat Enterprise Linux, SUSE Linux Enterprise Server, and Ubuntu. Compared to fifth-generation x86-based Amazon Elastic Compute Cloud (Amazon EC2) instance types, Graviton2 instance types have a 20% lower cost. Overall, customers who have moved applications to Graviton2 typically see up to 40% better price performance for a broad range of workloads including application servers, container-based applications, microservices, caching fleets, data analytics, video encoding, electronic design automation, gaming, open-source databases, and more.

Before I dive in to talk more about the challenge, check out the fun introductory video below from Jeff Barr, Chief Evangelist, AWS and Dave Brown, Vice President, EC2. As Jeff mentions in the video: same exact workload, same or better performance, and up to 40% better price performance!

After you complete the challenge, we invite you to tell us about your adoption journey and enter the contest. If you post on social media with the hashtag #ITookTheGravitonChallenge, you’ll earn a t-shirt. To earn a hoodie, include a short video with your post.

To enter the competition, you’ll need to create a 5 to 10-minute video that describes your project and the application you migrated, any hurdles you needed to overcome, and the price performance benefits you realized.

All valid contest entries will each receive a $500 AWS credit (limited to 500 quantity). A panel of judges will evaluate the content entries and award additional prizes across six categories. All category winners will receive an AWS re:Invent 2021 conference pass, flight, and hotel for one company representative, and winners will be able to meet with senior members of the Graviton2 team at the conference. Here are additional category-specific prizes:

  • Best adoption – enterprise
    Based on the performance gains, total cost savings, number of instances the workload is running on, and time taken to migrate the workload (faster is better), for companies with over 1000 employees. The winner will also receive a chance to present at the conference.
  • Best adoption – small/medium business
    Based on the performance gains, total cost savings, number of instances the workload is running on, and time taken to migrate the workload (faster is better), for companies with 100-1000 employees. The winner will also receive a chance to present at the conference.
  • Best adoption – startup
    Based on the performance gains, total cost savings, number of instances the workload is running on, and time taken to migrate the workload (faster is better), for companies with fewer than 100 employees. The winner will also receive a chance to present at the conference.
  • Best new workload adoption
    Awarded to a workload that’s new to EC2 (migrated to Graviton2 from on-premises, or other cloud) based on the performance gains, total cost savings, number of instances the workload is running on, and time taken to migrate the workload (faster is better). The winner will also receive a chance to participate in a video or written case study.
  • Most impactful adoption
    Awarded to the workload with the biggest social impact based on details provided about what the workload/application does. Applications in this category are related to fields such as sustainability, healthcare and life sciences, conservation, learning/education, justice/equity. The winner will also receive a chance to participate in a video or written case study.
  • Most innovative adoption
    Applications in this category solve unique problems for their customers, address new use cases, or are groundbreaking. The award will be based on the workload description, price performance gains, and total cost savings. The winner will also receive a chance to participate in a video or written case study.

Competition submissions open on June 22 and close August 31. Winners will be announced on October 1 2021.

Identifying a workload to migrate
Now that you know what’s possible with Graviton2, you’re probably eager to get started and identify a workload to tackle as part of the challenge. The ideal workload is one that already runs on Linux and uses open-source components. This means you’ll have full access to the source code of every component and can easily make any required changes. If you don’t have an existing Linux workload that is entirely open-source based, you can, of course, move other workloads. A robust ecosystem of ISVs and AWS services already support Graviton2. However, if you are using software from a vendor that does not support Arm64/Graviton2, reach out to the Graviton Challenge Slack channel for support.

What’s involved in the challenge?
The challenge includes eight steps performed over four days (but you don’t have to do the challenge in four consecutive days). If you need assistance from Graviton2 experts, a dedicated Slack channel is available and you can sign up for emails containing helpful tips and guidance. In addition to support on Slack and supporting emails, you also get $25 AWS credit to cover the cost of the taking the challenge. Graviton2-based burstable T4g instances also have a free trial, available until December 31 2021, that can be used to qualify your workloads.

You can download the complete whitepaper can be downloaded from the Graviton Challenge page, but here is an outline of the process.

Day 1: Learn and explore
The first day you’ll learn about Graviton2 and then assess your selected workload. I recommend that you start by checking out the 2020 AWS re:Invent session, Deep dive on AWS Graviton2 processor-powered EC2 instances. The Getting Started with AWS Graviton GitHub repository will be a useful reference as you work through the challenge.

Assessment involves identifying the application’s dependencies and requirements. As with all preparatory work, the more thorough you are at this stage, the better positioned you are for success. So, don’t skimp on this task!

Day 2: Create a plan and start porting
On the second day, you’ll create a Graviton2 environment. You can use EC2 virtual machine instances with AWS-provided images or build your own custom images. Alternatively, you can go the container route, because both Amazon Elastic Container Service (Amazon ECS) and Amazon Elastic Kubernetes Service (EKS) support Graviton2-based instances.

After you have created your environment, you’ll bootstrap the application. The Getting Started Guide on GitHub contains language-specific getting started information. If your application uses Java, Python, Node.js, .NET, or other high-level languages, then it might run as-is or need minimal changes. Other languages like C, C++, or Go will need to be compiled for the 64-bit Arm architecture. For more information, see the guides on GitHub.

Day 3: Debug and optimize
Now that the application is running on a Graviton2 environment, it’s time to test and verify its functionality. When you have a fully functional application, you can test performance and compare it to x86-64 environments. If you don’t observe the expected performance, reach out to your account team, or get support on the Graviton Challenge Slack channel. We’re here to help analyze and resolve any potential performance gaps.

Day 4: Update infrastructure and start deployments
It’s shipping day! You’ll update your infrastructure to add Graviton2-based instances, and then start deploying. We recommend that you use canary or blue-green deployments so that a portion of your traffic is redirected to the new environments. When you’re comfortable, you can transition all traffic.

At this point, you can celebrate completing the challenge, publish a post on social media using the #ITookTheGravitonChallenge hashtag, let us know about your success, and consider entering the competition. Remember, entries for the competition are due by August 31, 2021.

Start the challenge today!
Now that you have some details about the challenge and rewards, it’s time to start your (migration) engines. Download the whitepaper from the Graviton Challenge landing page, familiarize yourself with the details, and off you go! And, if you do decide to enter the competition, good luck!

Footnote
In my role as a .NET Developer Advocate at AWS, I would be remiss if I failed to mention that this challenge is equally applicable to .NET applications using .NET Core or .NET 5 and later! In fact, .NET 5 includes ARM64-specific optimizations. For information about performance improvements my colleagues found for .NET applications running on AWS Graviton2, see the Powering .NET 5 with AWS Graviton2: Benchmarks blog post. There’s also a lab for .NET 5 on Graviton2. I invite you to check out the getting started material for .NET in the aws-graviton-getting-started GitHub repository and start migrating.

— Steve

Build and deploy .NET web applications to ARM-powered AWS Graviton 2 Amazon ECS Clusters using AWS CDK

Post Syndicated from Matt Laver original https://aws.amazon.com/blogs/devops/build-and-deploy-net-web-applications-to-arm-powered-aws-graviton-2-amazon-ecs-clusters-using-aws-cdk/

With .NET providing first-class support for ARM architecture, running .NET applications on an AWS Graviton processor provides you with more choices to help optimize performance and cost. We have already written about .NET 5 with Graviton benchmarks; in this post, we explore how C#/.NET developers can take advantages of Graviton processors and obtain this performance at scale with Amazon Elastic Container Service (Amazon ECS).

In addition, we take advantage of infrastructure as code (IaC) by using the AWS Cloud Development Kit (AWS CDK) to define the infrastructure .

The AWS CDK is an open-source development framework to define cloud applications in code. It includes constructs for Amazon ECS resources, which allows you to deploy fully containerized applications to AWS.

Architecture overview

Our target architecture for our .NET application running in AWS is a load balanced ECS cluster, as shown in the following diagram.

Show load balanced Amazon ECS Cluster running .NET application

Figure: Show load balanced Amazon ECS Cluster running .NET application

We need to provision many components in this architecture, but this is where the AWS CDK comes in. AWS CDK is an open source-software development framework to define cloud resources using familiar programming languages. You can use it for the following:

  • A multi-stage .NET application container build
  • Create an Amazon Elastic Container Registry (Amazon ECR) repository and push the Docker image to it
  • Use IaC written in .NET to provision the preceding architecture

The following diagram illustrates how we use these services.

Show pplication and Infrastructure code written in .NET

Figure: Show Application and Infrastructure code written in .NET

Setup the development environment

To deploy this solution on AWS, we use the AWS Cloud9 development environment.

  1. On the AWS Cloud9 console, choose Create environment.
  2. For Name, enter a name for the environment.
  3. Choose Next step.
  4. On the Environment settings page, keep the default settings:
    1. Environment type – Create a new EC2 instance for the environment (direct access)
    2. Instance type – t2.micro (1 Gib RAM + 1 vCPU)
    3. Platform – Amazon Linux 2(recommended)
    Show Cloud9 Environment settings

    Figure: Show Cloud9 Environment settings

  5. Choose Next step.
  6. Choose Create environment.

When the Cloud9 environment is ready, proceed to the next section.

Install the .NET SDK

The AWS development tools we require will already be setup in the Cloud9 environment, however the .NET SDK will not be available.

Install the .NET SDK with the following code from the Cloud9 terminal:

curl -sSL https://dot.net/v1/dotnet-install.sh | bash /dev/stdin -c 5.0
export PATH=$PATH:$HOME/.local/bin:$HOME/bin:$HOME/.dotnet

Verify the expected version has been installed:

dotnet --version
Show installed .NET SDK version

Figure: Show installed .NET SDK version

Clone and explore the example code

Clone the example repository:

git clone https://github.com/aws-samples/aws-cdk-dotnet-graviton-ecs-example.git

This repository contains two .NET projects, the web application, and the IaC application using the AWS CDK.

The unit of deployment in the AWS CDK is called a stack. All AWS resources defined within the scope of a stack, either directly or indirectly, are provisioned as a single unit.

The stack for this project is located within /cdk/src/Cdk/CdkStack.cs. When we read the C# code, we can see how it aligns with the architecture diagram at the beginning of this post.

First, we create a virtual private cloud (VPC) and assign a maximum of two Availability Zones:

var vpc = new Vpc(this, "DotNetGravitonVpc", new VpcProps { MaxAzs = 2 });

Next, we define the cluster and assign it to the VPC:

var cluster = new Cluster(this, "DotNetGravitonCluster", new ClusterProp { Vpc = vpc });

The Graviton instance type (c6g.4xlarge) is defined in the cluster capacity options:

cluster.AddCapacity("DefaultAutoScalingGroupCapacity",
    new AddCapacityOptions
    {
        InstanceType = new InstanceType("c6g.4xlarge"),
        MachineImage = EcsOptimizedImage.AmazonLinux2(AmiHardwareType.ARM)
    });

Finally, ApplicationLoadBalancedEC2Service is defined, along with a reference to the application source code:

new ApplicationLoadBalancedEc2Service(this, "Service",
    new ApplicationLoadBalancedEc2ServiceProps
    {
        Cluster = cluster,
        MemoryLimitMiB = 8192,
        DesiredCount = 2,
        TaskImageOptions = new ApplicationLoadBalancedTaskImageOptions
        {
            Image = ContainerImage.FromAsset(Path.Combine(Directory.GetCurrentDirectory(), @"../app")),                        
        }                             
    });

With about 30 lines of AWS CDK code written in C#, we achieve the following:

  • Build and package a .NET application within a Docker image
  • Push the Docker image to Amazon Elastic Container Registry (Amazon ECR)
  • Create a VPC with two Availability Zones
  • Create a cluster with a Graviton c6g.4xlarge instance type that pulls the Docker image from Amazon ECR

The AWS CDK has several useful helpers, such as the FromAsset function:

Image =  ContainerImage.FromAsset(Path.Combine(Directory.GetCurrentDirectory(), @"../app")),  

The ContainerImage.FromAsset function instructs the AWS CDK to build the Docker image from a Dockerfile, automatically create an Amazon ECR repository, and upload the image to the repository.

For more information about the ContainerImage class, see ContainerImage.

Build and deploy the project with the AWS CDK Toolkit

The AWS CDK Toolkit, the CLI command cdk, is the primary tool for interaction with AWS CDK apps. It runs the app, interrogates the application model you defined, and produces and deploys the AWS CloudFormation templates generated by the AWS CDK.

If an AWS CDK stack being deployed uses assets such as Docker images, the environment needs to be bootstrapped. Use the cdk bootstrap command from the /cdk directory:

cdk bootstrap

Now you can deploy the stack into the AWS account with the deploy command:

cdk deploy

The AWS CDK Toolkit synthesizes fresh CloudFormation templates locally before deploying anything. The first time this runs, it has a changeset that reflects all the infrastructure defined within the stack and prompts you for confirmation before running.

When the deployment is complete, the load balancer DNS is in the Outputs section.

Show stack outputs

Figure: Show stack outputs

You can navigate to the load balancer address via a browser.

Browser navigating to .NET application

Figure: Show browser navigating to .NET application

Tracking the drift

Typically drift is a change that happens outside of the Infrastructure as Code, for example, code updates to the .NET application.

To support changes, the AWS CDK Toolkit queries the AWS account for the last deployed CloudFormation template for the stack and compares it with the locally generated template. Preview the changes with the following code:

cdk diff

If a simple text change within the application’s home page HTML is made (app/webapp/Pages/Index.cshtml), a difference is detected within the assets, but not all the infrastructure as per the first deploy.

Show cdk diff output

Figure: Show cdk diff output

Running cdk deploy again now rebuilds the Docker image, uploads it to Amazon ECR, and refreshes the containers within the ECS cluster.

cdk deploy
Show browser navigating to updated .NET application

Figure: Show browser navigating to updated .NET application

Clean up

Remove the resources created in this post with the following code:

cdk destroy

Conclusion

Using the AWS CDK to provision infrastructure in .NET provides rigor, clarity, and reliability in a language familiar to .NET developers. For more information, see Infrastructure as Code.

This post demonstrates the low barrier to entry for .NET developers wanting to apply modern application development practices while taking advantage of the price performance of ARM-based processors such as Graviton.

To learn more about building and deploying .NET applications on AWS visit our .NET Developer Center.

About the author

Author Matt Laver


Matt Laver is a Solutions Architect at AWS working with SMB customers in the UK. He is passionate about DevOps and loves helping customers find simple solutions to difficult problems.


Building an ARM64 Rust development environment using AWS Graviton2 and AWS CDK

Post Syndicated from Alistair McLean original https://aws.amazon.com/blogs/devops/building-an-arm64-rust-development-environment-using-aws-graviton2-and-aws-cdk/

2020 was the year that ARM chips made the headlines by moving from largely mobile form factors into the cloud thanks to AWS Graviton2, allowing you to have up to 40% better price performance over comparable current generation x86 Amazon Elastic Compute Cloud (Amazon EC2) and Amazon Relational Database Service (Amazon RDS) instances.

We speak to customers daily about Graviton2. One recurring question we hear is “Graviton2 is great, but how can my team develop for ARM natively without the complexity of cross-compilation or having to buy custom hardware on premises?” This post seeks to answer that question by setting up the Visual Studio Code-based Code Server IDE, running on a Graviton2 EC2 instance that enables native development in a cost-effective and secure manner accessed via your browser.

The Rust programming language has gained a huge amount of popularity recently. This post aims to show that you can use this environment for Rust development as well as hundreds of other supported languages. AWS has committed to supporting the Rust community and using the language to deliver fast and robust services to customers at scale, and we want to enable our customers to do the same.

We also include instructions for building and installing the rust-analyzer and CodeLLDB debugger plugins to add additional language features.

Solution overview

The following diagram illustrates our solution architecture.

Architecture of the solution showing components and their linkages

The solution consists of an EC2 Graviton2 instance located in a private VPC subnet routed through an AWS Global Accelerator accelerator to provide routing optimization and keep packet loss, jitter, and latency lower by up to 60%. An internal facing Application Load Balancer containing the AWS Certificate Manager certificate decrypts and forwards traffic to this instance.

Code Server queries AWS Secrets Manager to initially set the login password on startup and allow for continued password-based authentication and easy password rotation. The EC2 instance has access to the internet through a NAT gateway and has no public IP address or key pair associated, and is accessible only through AWS Systems Manager Session Manager.

Prerequisites

For this walkthrough, the following are prerequisites:

AWS CDK stack

In order to deploy our architecture, I use the AWS CDK. As a developer, it’s more intuitive to me to define my infrastructure using a language and tooling with which I am familiar. I can also do things like environment variable injection and scripting as part of the stack creation to add stack parameters and customization points.

The AWS CDK application is comprised of five stacks. Each stack defines a separate part of the architecture:

  • Networking – Defines a VPC across two Availability Zones with the CIDR range of your choice. The routing and public/private subnet creation is done for us as part of the default configuration.
  • Certificate – This is the reason for the domain prerequisite. It’s a best practice to encrypt web applications using TLS, and for that we need a certificate and therefore a domain. This stack creates a certificate for the subdomain you specify as part of the stack creation and DNS validation in Route 53.
  • Amazon EC2 configuration – This defines both our AMI and the instance type and configuration. In this case, we’re using Amazon Linux 2 ARM64 edition. Here we also set the instance-managed roles that allow Session Manager connectivity and Secrets Manager access.
  • ALB configuration – Here we define the internal load balancer and specify the listener, certificate, and target configuration. I have injected the Amazon EC2 configuration as part of the class constructor so that I can reference it directly as a target.
  • Global accelerator configuration – Finally, the accelerator is defined here with two ports open, the ALB we defined in the ALB stack as a target, and most importantly adds in a CNAME DNS entry pointing to the DNS name of the accelerator.

Walkthrough overview

This walkthrough uses the AWS CDK command line tools to deploy the stack. Session Manager is enabled to allow access to the EC2 instance and configure the Code Server application and associated plugins.

The walkthrough specifically covers the following steps:

  1. Deploy the AWS CDK stacks via CloudShell to build out the application infrastructure and associated IAM roles.
  2. Launch Code Server via the official Docker container with the commands to get and set the password stored in Secrets Manager.
  3. Log in and build the rust-analyzer and CodeLLDB plugins from a terminal to allow for debugging within a “Hello World” application.

Start CloudShell and install the appropriate tooling

In this section, I use dummy values for the domain, the VPC CIDR, AWS Region, and the secret password. You need to submit real values as appropriate.

Sign in to CloudShell and enter the following commands:

sudo yum groupinstall -y "Development Tools"
sudo npm install aws-cdk -g
git clone https://github.com/aws-samples/cdk-graviton2-alb-aga-route53.git
cd cdk-graviton2-alb-aga-route53
python3 -m venv .
source bin/activate
python -m pip install -r requirements.txt
export VPC_CIDR=”10.0.0.1/16” #Substitute your CIDR here.
export CDK_DEPLOY_ACCOUNT=`aws sts get-caller-identity | jq -r '.Account'`
export CDK_DEPLOY_REGION=$AWS_REGION
export R53_DOMAIN=”code-server.example.com” #Substitute your domain here.
cdk bootstrap aws://$CDK_DEPLOY_ACCOUNT/$CDK_DEPLOY_REGION
cdk deploy --all

The deploy step takes around 10-15 mins to run and prompts a couple of times to add resources like security groups and IAM roles.

Log in to the new instance using Session Manager

Install the latest version of the Session Manager plugin for the AWS CLI:

cd ~
curl "https://s3.amazonaws.com/session-manager-downloads/plugin/latest/linux_64bit/session-manager-plugin.rpm" -o "session-manager-plugin.rpm"
sudo yum install -y session-manager-plugin.rpm

Now start a session, logging into the newly created EC2 instance and log in as ec2-user:

aws ssm start-session --target i-1234xyz7890abc #Substitute the instance id we just created here
#Once session is active:
sudo su - ec2-user

Add the password as a secret and start the container

Enter the following code to add the password as a secret in Secrets Manager and start the container:

aws secretsmanager create-secret --name CodeServerProd --secret-string Password123abc # Substitute the appropriate password here.
sudo docker run -d --name=code-server -e PUID=1000 -e PGID=1000 -e PASSWORD=`aws secretsmanager get-secret-value --secret-id CodeServerProd | jq -r '.SecretString'` -p 8080:8080 -v /home/ec2-user/.config:/config --restart unless-stopped codercom/code-server

Access and configure the web application for Rust development

So far, we have accomplished the following:

  • Created the infrastructure in the diagram via AWS CDK deployment
  • Configured the EC2 instance to run Docker and added this to the systemctl startup scripts
  • Created a secret in Secrets Manager to use as the application login password
  • Instantiated a Docker container running Code Server

Next, we access the running container via the web interface and install the required development tools.

Log in to the Code Server web application

To log in to the Code Server web application, complete the following steps:

  1. Browse to https://code-server.example.com, where example.com is the name of the domain you supplied in the AWS CDK step.
  2. Log in using the password you created in Secrets Manager.
  3. Create a new terminal by choosing the hamburger icon and, under Terminal, choosing New Terminal.
  4. Issue the following commands into the terminal to install the Rust programming language:
bash
sudo apt update && sudo apt upgrade -y
sudo apt install -y build-essential npm clang lldb
curl --proto '=https' --tlsv1.2 -sSf https://sh.rustup.rs | sh
source $HOME/.cargo/env

Install the rust-analyzer plugin

Open the extensions panel and enter Rust Analyzer in the search bar. Then install the plugin.

Install the debugger

Go back to the extensions panel in the Code Server application and enter CodeLLDB into the search bar. Then install this extension.

Create a sample application and open it in the Code Server window

To create and use our sample application, complete the following steps:

  • In the existing Code Server terminal, enter the following:
mkdir -p ~/src/
cd ~/src
cargo new helloworld --bin
  • Open the newly created folder in Code Server verifying that the helloworld directory was successfully created.

Open File or Folder dialog in Code Server

  • Rust-analyzer runs when you open up src/main.rs and index the file.
  • You can run the program by choosing Run in the editor.

Main Code Server editor window showing helloworld Rust program code.

  • Similarly, to launch the debugger, choose Debug in the editor.

Code Server Debugger view

Troubleshooting

If the CloudShell session times out, you need to reset your environment variables in order to re-deploy, modify, and delete the stack deployment.

Clean up

This stack incurs an estimated monthly cost of $143.00.

To delete the stack, log in to CloudShell and enter the following commands:

cd cdk-graviton2-alb-aga-route53
source bin/activate

# Re-set the environment variables again if required
export VPC_CIDR=”10.0.0.1/16” #Substitute your CIDR here.
export CDK_DEPLOY_ACCOUNT=`aws sts get-caller-identity | jq -r '.Account'`
export CDK_DEPLOY_REGION=$AWS_REGION
export R53_DOMAIN=”code-server.example.com” #Substitute your domain here.
cdk destroy --all

This destroys all the resources created in the first step. You can verify this by browsing to the AWS CloudFormation console and noting the deletion of all the stacks.

Conclusion

AWS is a place where builders can reinvent the future. The future of development means supporting different chipsets depending on different business requirements. This post is designed to enable development targeting the ARM64 microarchitecture by utilizing AWS Graviton2. Happy building!

Author bio

Author portrait

Alistair is a Principal Solutions Architect at AWS focused on EdTech customers. Originally from the west coast of Scotland, Alistair now lives in Fairfield, Connecticut, with his wife and two daughters and enjoys spending time with his family, skiing, golfing, cycling, and using his pellet smoker.

Supporting AWS Graviton2 and x86 instance types in the same Auto Scaling group

Post Syndicated from Emma White original https://aws.amazon.com/blogs/compute/supporting-aws-graviton2-and-x86-instance-types-in-the-same-auto-scaling-group/

This post is written by Tyler Lynch, Sr. Solutions Architect – EdTech, and Praneeth Tekula, Technical Account Manager.

As customers seek performance improvements and to cost optimize their workloads, they are evaluating and adopting AWS Graviton2 based instances. This post provides instructions on how to configure your Amazon EC2 Auto Scaling group (ASG) to use both Graviton2 and x86 based Amazon EC2 Instances in the same Auto Scaling group with different AMIs. This allows you to introduce Graviton2 based instances as part of a multiple instance type strategy.

For example, a customer may want to use the same Auto Scaling group definition across multiple Regions, but an instance type might not available in that region yet. Implementing instance and architecture diversity allow those Auto Scaling group definitions to be portable.

Solution Overview

The Amazon EC2 Auto Scaling console currently doesn’t support the selection of multiple launch templates, so I use the AWS Command Line Interface (AWS CLI) throughout this post. First, you create your launch templates that specify AMIs for use on x86 and arm64 based instances. Then you create your Auto Scaling group using a mixed instance policy with instance level overrides to specify the launch template to use for that instance.

Finally, you extend the launch templates to use architecture-specific EC2 user data to download architecture-specific binaries. Putting it all together, here are the high-level steps to follow:

  1. Create the launch templates:
    1. Launch template for x86– Creates a launch template for x86 instances, specifying the AMI but not the instance sizes.
    2. Launch template for arm64– Creates a launch template for arm64 instances, specifying the AMI but not the instance sizes.
  2. Create the Auto Scaling group that references the launch templates in a mixed instance policy override.
  3. Create a sample Node.js application.
  4. Create the architecture-specific user data scripts.
  5. Modify the launch templates to use architecture-specific user data scripts.

Prerequisites

The prerequisites for this solution are as follows:

  • The AWS CLI installed locally. I use AWS CLI version 2 for this post.
    • For AWS CLI v2, you must use 2.1.3+
    • For AWS CLI v1, you must use 1.18.182+
  • The correct AWS Identity and Access Management(IAM) role permissions for your account allowing for the creation and execution of the launch templates, Auto Scaling groups, and launching EC2 instances.
  • A source control service such as AWS CodeCommit or GitHub that your user data script can interact with to git clone the Hello World Node.js application.
  • The source code repository initialized and cloned locally.

Create the Launch Templates

You start with creating the launch template for x86 instances, and then the launch template for arm64 instances. These are simple launch templates where you only specify the AMI for Amazon Linux 2 in US-EAST-1 (architecture dependent). You use the AWS CLI cli-input-json feature to make things more readable and repeatable.

You first must add the lt-x86-cli-input.json file to your local working for reference by the AWS CLI.

  1. In your preferred text editor, add a new file, and copy paste the following JSON into the file.

{
    "LaunchTemplateName": "lt-x86",
    "VersionDescription": "LaunchTemplate for x86 instance types using Amazon Linux 2 x86 AMI in US-EAST-1",
    "LaunchTemplateData": {
        "ImageId": "ami-04bf6dcdc9ab498ca"
    }
}
  1. Save the file in your local working directory and name it lt-x86-cli-input.json.

Now, add the lt-arm64-cli-input.json file into your local working directory.

  1. In a text editor, add a new file, and copy paste the following JSON into the file.

{
    "LaunchTemplateName": "lt-arm64",
    "VersionDescription": "LaunchTemplate for Graviton2 instance types using Amazon Linux 2 Arm64 AMI in US-EAST-1",
    "LaunchTemplateData": {
        "ImageId": "ami-09e7aedfda734b173"
    }
}
  1. Save the file in your local working directory and name it lt-arm64-cli-input.json.

Now that your CLI input files are ready, create your launch templates using the CLI.

From your terminal, run the following commands:


aws ec2 create-launch-template \
            --cli-input-json file://./lt-x86-cli-input.json \
            --region us-east-1

aws ec2 create-launch-template \
            --cli-input-json file://./lt-arm64-cli-input.json \
            --region us-east-1

After you run each command, you should see the command output similar to this:


{
	"LaunchTemplate": {
		"LaunchTemplateId": "lt-07ab8c76f8e021b0c",
		"LaunchTemplateName": "lt-x86",
		"CreateTime": "2020-11-20T16:08:08+00:00",
		"CreatedBy": "arn:aws:sts::111111111111:assumed-role/Admin/myusername",
		"DefaultVersionNumber": 1,
		"LatestVersionNumber": 1
	}
}

{
	"LaunchTemplate": {
		"LaunchTemplateId": "lt-0c65656a2c75c0f76",
		"LaunchTemplateName": "lt-arm64",
		"CreateTime": "2020-11-20T16:08:37+00:00",
		"CreatedBy": "arn:aws:sts::111111111111:assumed-role/Admin/myusername",
		"DefaultVersionNumber": 1,
		"LatestVersionNumber": 1
	}
}

Create the Auto Scaling Group

Moving on to creating your Auto Scaling group, start with creating another JSON file to use the cli-input-json feature. Then, create the Auto Scaling group via the CLI.

I want to call special attention to the LaunchTemplateSpecification under the MixedInstancePolicy Overrides property. This Auto Scaling group is being created with a default launch template, the one you created for arm64 based instances. You override that at the instance level for x86 instances.

Now, add the asg-mixed-arch-cli-input.json file into your local working directory.

  1. In a text editor, add a new file, and copy paste the following JSON into the file.
  2. You need to change the subnet IDs specified in the VPCZoneIdentifier to your own subnet IDs.

{
    "AutoScalingGroupName": "asg-mixed-arch",
    "MixedInstancesPolicy": {
        "LaunchTemplate": {
            "LaunchTemplateSpecification": {
                "LaunchTemplateName": "lt-arm64",
                "Version": "$Default"
            },
            "Overrides": [
                {
                    "InstanceType": "t4g.micro"
                },
                {
                    "InstanceType": "t3.micro",
                    "LaunchTemplateSpecification": {
                        "LaunchTemplateName": "lt-x86",
                        "Version": "$Default"
                    }
                },
                {
                    "InstanceType": "t3a.micro",
                    "LaunchTemplateSpecification": {
                        "LaunchTemplateName": "lt-x86",
                        "Version": "$Default"
                    }
                }
            ]
        }
    },    
    "MinSize": 1,
    "MaxSize": 5,
    "DesiredCapacity": 3,
    "VPCZoneIdentifier": "subnet-e92485b6, subnet-07fe637b44fd23c31, subnet-828622e4, subnet-9bd6a2d6"
}
  1. Save the file in your local working directory and name it asg-mixed-arch-cli-input.json.

Now that your CLI input file is ready, create your Auto Scaling group using the CLI.

  1. From your terminal, run the following command:

aws autoscaling create-auto-scaling-group \
            --cli-input-json file://./asg-mixed-arch-cli-input.json \
            --region us-east-1

After you run the command, there isn’t any immediate output. Describe the Auto Scaling group to review the configuration.

  1. From your terminal, run the following command:

aws autoscaling describe-auto-scaling-groups \
            --auto-scaling-group-names asg-mixed-arch \
            --region us-east-1

Let’s evaluate the output. I removed some of the output for brevity. It shows that you have an Auto Scaling group with a mixed instance policy, which specifies a default launch template named lt-arm64. In the Overrides property, you can see the instances types that you specified and the values that define the lt-x86 launch template to be used for specific instance types (t3.micro, t3a.micro).


{
    "AutoScalingGroups": [
        {
            "AutoScalingGroupName": "asg-mixed-arch",
            "AutoScalingGroupARN": "arn:aws:autoscaling:us-east-1:111111111111:autoScalingGroup:a1a1a1a1-a1a1-a1a1-a1a1-a1a1a1a1a1a1:autoScalingGroupName/asg-mixed-arch",
            "MixedInstancesPolicy": {
                "LaunchTemplate": {
                    "LaunchTemplateSpecification": {
                        "LaunchTemplateId": "lt-0cc7dae79a397d663",
                        "LaunchTemplateName": "lt-arm64",
                        "Version": "$Default"
                    },
                    "Overrides": [
                        {
                            "InstanceType": "t4g.micro"
                        },
                        {
                            "InstanceType": "t3.micro",
                            "LaunchTemplateSpecification": {
                                "LaunchTemplateId": "lt-04b525bfbde0dcebb",
                                "LaunchTemplateName": "lt-x86",
                                "Version": "$Default"
                            }
                        },
                        {
                            "InstanceType": "t3a.micro",
                            "LaunchTemplateSpecification": {
                                "LaunchTemplateId": "lt-04b525bfbde0dcebb",
                                "LaunchTemplateName": "lt-x86",
                                "Version": "$Default"
                            }
                        }
                    ]
                },
                ...
            },
            ...
            "Instances": [
                {
                    "InstanceId": "i-00377a23630a5e107",
                    "InstanceType": "t4g.micro",
                    "AvailabilityZone": "us-east-1b",
                    "LifecycleState": "InService",
                    "HealthStatus": "Healthy",
                    "LaunchTemplate": {
                        "LaunchTemplateId": "lt-0cc7dae79a397d663",
                        "LaunchTemplateName": "lt-arm64",
                        "Version": "1"
                    },
                    "ProtectedFromScaleIn": false
                },
                {
                    "InstanceId": "i-07c2d4f875f1f457e",
                    "InstanceType": "t4g.micro",
                    "AvailabilityZone": "us-east-1a",
                    "LifecycleState": "InService",
                    "HealthStatus": "Healthy",
                    "LaunchTemplate": {
                        "LaunchTemplateId": "lt-0cc7dae79a397d663",
                        "LaunchTemplateName": "lt-arm64",
                        "Version": "1"
                    },
                    "ProtectedFromScaleIn": false
                },
                {
                    "InstanceId": "i-09e61e95cdf705ade",
                    "InstanceType": "t4g.micro",
                    "AvailabilityZone": "us-east-1c",
                    "LifecycleState": "InService",
                    "HealthStatus": "Healthy",
                    "LaunchTemplate": {
                        "LaunchTemplateId": "lt-0cc7dae79a397d663",
                        "LaunchTemplateName": "lt-arm64",
                        "Version": "1"
                    },
                    "ProtectedFromScaleIn": false
                }
            ],
            ...
        }
    ]
}

Create Hello World Node.js App

Now that you have created the launch templates and the Auto Scaling group you are ready to create the “hello world” application that self-reports the processor architecture. You work in the local directory that is cloned from your source repository as specified in the prerequisites. This doesn’t have to be the local working directory where you are creating architecture-specific files.

  1. In a text editor, add a new file with the following Node.js code:

// Hello World sample app.
const http = require('http');

const port = 3000;

const server = http.createServer((req, res) => {
  res.statusCode = 200;
  res.setHeader('Content-Type', 'text/plain');
  res.end(`Hello World. This processor architecture is ${process.arch}`);
});

server.listen(port, () => {
  console.log(`Server running on processor architecture ${process.arch}`);
});
  1. Save the file in the root of your source repository and name it app.js.
  2. Commit the changes to Git and push the changes to your source repository. See the following commands:

git add .
git commit -m "Adding Node.js sample application."
git push

Create user data scripts

Moving on to your creating architecture-specific user data scripts that will define the version of Node.js and the distribution that matches the processor architecture. It will download and extract the binary and add the binary path to the environment PATH. Then it will clone the Hello World app, and then run that app with the binary of Node.js that was installed.

Now, you must add the ud-x86-cli-input.txt file to your local working directory.

  1. In your text editor, add a new file, and copy paste the following text into the file.
  2. Update the git clone command to use the repo URL where you created the Hello World app previously.
  3. Update the cd command to use the repo name.

sudo yum update -y
sudo yum install git -y
VERSION=v14.15.3
DISTRO=linux-x64
wget https://nodejs.org/dist/$VERSION/node-$VERSION-$DISTRO.tar.xz
sudo mkdir -p /usr/local/lib/nodejs
sudo tar -xJvf node-$VERSION-$DISTRO.tar.xz -C /usr/local/lib/nodejs 
export PATH=/usr/local/lib/nodejs/node-$VERSION-$DISTRO/bin:$PATH
git clone https://github.com/<<githubuser>>/<<repo>>.git
cd <<repo>>
node app.js
  1. Save the file in your local working directory and name it ud-x86-cli-input.txt.

Now, add the ud-arm64-cli-input.txt file into your local working directory.

  1. In a text editor, add a new file, and copy paste the following text into the file.
  2. Update the git clone command to use the repo URL where you created the Hello World app previously.
  3. Update the cd command to use the repo name.

sudo yum update -y
sudo yum install git -y
VERSION=v14.15.3
DISTRO=linux-arm64
wget https://nodejs.org/dist/$VERSION/node-$VERSION-$DISTRO.tar.xz
sudo mkdir -p /usr/local/lib/nodejs
sudo tar -xJvf node-$VERSION-$DISTRO.tar.xz -C /usr/local/lib/nodejs 
export PATH=/usr/local/lib/nodejs/node-$VERSION-$DISTRO/bin:$PATH
git clone https://github.com/<<githubuser>>/<<repo>>.git
cd <<repo>>
node app.js
  1. Save the file in your local working directory and name it ud-arm64-cli-input.txt.

Now that your user data scripts are ready, you need to base64 encode them as the AWS CLI does not perform base64-encoding of the user data for you.

  • On a Linux computer, from your terminal use the base64 command to encode the user data scripts.

base64 ud-x86-cli-input.txt > ud-x86-cli-input-base64.txt
base64 ud-arm64-cli-input.txt > ud-arm64-cli-input-base64.txt
  • On a Windows computer, from your command line use the certutil command to encode the user data. Before you can use this file with the AWS CLI, you must remove the first (BEGIN CERTIFICATE) and last (END CERTIFICATE) lines.

certutil -encode ud-x86-cli-input.txt ud-x86-cli-input-base64.txt
certutil -encode ud-arm64-cli-input.txt ud-arm64-cli-input-base64.txt
notepad ud-x86-cli-input-base64.txt
notepad ud-arm64-cli-input-base64.txt

Modify the Launch Templates

Now, you modify the launch templates to use architecture-specific user data scripts.

Please note that the contents of your ud-x86-cli-input-base64.txt and ud-arm64-cli-input-base64.txt files are different from the samples here because you referenced your own GitHub repository. These base64 encoded user data scripts below will not work as is, they contain placeholder references for the git clone and cd commands.

Next, update the lt-x86-cli-input.json file to include your base64 encoded user data script for x86 based instances.

  1. In your preferred text editor, open the ud-x86-cli-input-base64.txt file.
  2. Open the lt-x86-cli-input.json file, and add in the text from the ud-x86-cli-input-base64.txt file into the UserData property of the LaunchTemplateData object. It should look similar to this:

{
    "LaunchTemplateName": "lt-x86",
    "VersionDescription": "LaunchTemplate for x86 instance types using Amazon Linux 2 x86 AMI in US-EAST-1",
    "LaunchTemplateData": {
        "ImageId": "ami-04bf6dcdc9ab498ca",
        "UserData": "IyEvYmluL2Jhc2gKeXVtIHVwZGF0ZSAteQoKVkVSU0lPTj12MTQuMTUuMwpESVNUUk89bGludXgteDY0CndnZXQgaHR0cHM6Ly9ub2RlanMub3JnL2Rpc3QvJFZFUlNJT04vbm9kZS0kVkVSU0lPTi0kRElTVFJPLnRhci54egpzdWRvIG1rZGlyIC1wIC91c3IvbG9jYWwvbGliL25vZGVqcwpzdWRvIHRhciAteEp2ZiBub2RlLSRWRVJTSU9OLSRESVNUUk8udGFyLnh6IC1DIC91c3IvbG9jYWwvbGliL25vZGVqcyAKZXhwb3J0IFBBVEg9L3Vzci9sb2NhbC9saWIvbm9kZWpzL25vZGUtJFZFUlNJT04tJERJU1RSTy9iaW46JFBBVEgKZ2l0IGNsb25lIGh0dHBzOi8vZ2l0aHViLmNvbS88PGdpdGh1YnVzZXI+Pi88PHJlcG8+Pi5naXQKY2QgPDxyZXBvPj4Kbm9kZSBhcHAuanMK"
    }
}
  1. Save the file.

Next, update the lt-arm64-cli-input.json file to include your base64 encoded user data script for arm64 based instances.

  1. In your text editor, open the ud-arm64-cli-input-base64.txt file.
  2. Open the lt-arm64-cli-input.json file, and add in the text from the ud-arm64-cli-input-base64.txt file into the UserData property of the LaunchTemplateData It should look similar to this:

{
    "LaunchTemplateName": "lt-arm64",
    "VersionDescription": "LaunchTemplate for Graviton2 instance types using Amazon Linux 2 Arm64 AMI in US-EAST-1",
    "LaunchTemplateData": {
        "ImageId": "ami-09e7aedfda734b173",
        "UserData": "IyEvYmluL2Jhc2gKeXVtIHVwZGF0ZSAteQoKVkVSU0lPTj12MTQuMTUuMwpESVNUUk89bGludXgtYXJtNjQKd2dldCBodHRwczovL25vZGVqcy5vcmcvZGlzdC8kVkVSU0lPTi9ub2RlLSRWRVJTSU9OLSRESVNUUk8udGFyLnh6CnN1ZG8gbWtkaXIgLXAgL3Vzci9sb2NhbC9saWIvbm9kZWpzCnN1ZG8gdGFyIC14SnZmIG5vZGUtJFZFUlNJT04tJERJU1RSTy50YXIueHogLUMgL3Vzci9sb2NhbC9saWIvbm9kZWpzIApleHBvcnQgUEFUSD0vdXNyL2xvY2FsL2xpYi9ub2RlanMvbm9kZS0kVkVSU0lPTi0kRElTVFJPL2JpbjokUEFUSApnaXQgY2xvbmUgaHR0cHM6Ly9naXRodWIuY29tLzw8Z2l0aHVidXNlcj4+Lzw8cmVwbz4+LmdpdApjZCA8PHJlcG8+Pgpub2RlIGFwcC5qcwoKCg=="
    }
}
  1. Save the file.

Now, your CLI input files are ready. Next, create a new version of your launch templates and then set the newest version as the default.

From your terminal, run the following commands:


aws ec2 create-launch-template-version \
            --cli-input-json file://./lt-x86-cli-input.json \
            --region us-east-1

aws ec2 create-launch-template-version \
            --cli-input-json file://./lt-arm64-cli-input.json \
            --region us-east-1

aws ec2 modify-launch-template \
            --launch-template-name lt-x86 \
            --default-version 2
			
aws ec2 modify-launch-template \
            --launch-template-name lt-arm64 \
            --default-version 2

After you run each command, you should see the command output similar to this:


{
    "LaunchTemplate": {
        "LaunchTemplateId": "lt-08ff3d03d4cf0038d",
        "LaunchTemplateName": "lt-x86",
        "CreateTime": "1970-01-01T00:00:00+00:00",
        "CreatedBy": "arn:aws:sts::111111111111:assumed-role/Admin/myusername",
        "DefaultVersionNumber": 2,
        "LatestVersionNumber": 2
    }
}

{
    "LaunchTemplate": {
        "LaunchTemplateId": "lt-0c5e1eb862a02f8e0",
        "LaunchTemplateName": "lt-arm64",
        "CreateTime": "1970-01-01T00:00:00+00:00",
        "CreatedBy": "arn:aws:sts::111111111111:assumed-role/Admin/myusername",
        "DefaultVersionNumber": 2,
        "LatestVersionNumber": 2
    }
}

Now, refresh the instances in the Auto Scaling group so that the newest version of the launch template is used.

From your terminal, run the following command:


aws autoscaling start-instance-refresh \
            --auto-scaling-group-name asg-mixed-arch

Verify Instances

The sample Node.js application self reports the process architecture in two ways: when the application is started, and when the application receives a HTTP request on port 3000. Retrieve the last five lines of the instance console output via the AWS CLI.

First, you need to get an instance ID from the autoscaling group.

  1. From your terminal, run the following commands:

aws autoscaling describe-auto-scaling-groups \
            --auto-scaling-group-name asg-mixed-arch \
            --region us-east-1
  1. Evaluate the output. I removed some of the output for brevity. You need to use the InstanceID from the output.

{
    "AutoScalingGroups": [
        {
            "AutoScalingGroupName": "asg-mixed-arch",
            "AutoScalingGroupARN": "arn:aws:autoscaling:us-east-1:111111111111:autoScalingGroup:a1a1a1a1-a1a1-a1a1-a1a1-a1a1a1a1a1a1:autoScalingGroupName/asg-mixed-arch",
            "MixedInstancesPolicy": {
                ...
            },
            ...
            "Instances": [
                {
                    "InstanceId": "i-0eeadb140405cc09b",
                    "InstanceType": "t4g.micro",
                    "AvailabilityZone": "us-east-1a",
                    "LifecycleState": "InService",
                    "HealthStatus": "Healthy",
                    "LaunchTemplate": {
                        "LaunchTemplateId": "lt-0c5e1eb862a02f8e0",
                        "LaunchTemplateName": "lt-arm64",
                        "Version": "2"
                    },
                    "ProtectedFromScaleIn": false
                }
            ],
          ....
        }
    ]
}

Now, retrieve the last five lines of console output from the instance.

From your terminal, run the following command:


aws ec2 get-console-output –instance-id d i-0eeadb140405cc09b \
            --output text | tail -n 5

Evaluate the output, you should see Server running on processor architecture arm64. This confirms that you have successfully utilized an architecture-specific user data script.


[  58.798184] cloud-init[1257]: node-v14.15.3-linux-arm64/share/systemtap/tapset/node.stp
[  58.798293] cloud-init[1257]: node-v14.15.3-linux-arm64/LICENSE
[  58.798402] cloud-init[1257]: Cloning into 'node-helloworld'...
[  58.798510] cloud-init[1257]: Server running on processor architecture arm64
2021-01-14T21:14:32+00:00

Cleaning Up

Delete the Auto Scaling group and use the force-delete option. The force-delete option specifies that the group is to be deleted along with all instances associated with the group, without waiting for all instances to be terminated.


aws autoscaling delete-auto-scaling-group \
            --auto-scaling-group-name asg-mixed-arch --force-delete \
            --region us-east-1

Now, delete your launch templates.


aws ec2 delete-launch-template --launch-template-name lt-x86
aws ec2 delete-launch-template --launch-template-name lt-arm64

Conclusion

You walked through creating and using architecture-specific user data scripts that were processor architecture-specific. This same method could be applied to fleets where you have different configurations needed for different instance types. Variability such as disk sizes, networking configurations, placement groups, and tagging can now be accomplished in the same Auto Scaling group.