Tag Archives: Amazon EC2 Container Registry

Amazon EC2 DL1 instances Deep Dive

Post Syndicated from Sheila Busser original https://aws.amazon.com/blogs/compute/amazon-ec2-dl1-instances-deep-dive/

This post is written by Amr Ragab, Principal Solutions Architect, Amazon EC2.

AWS is excited to announce that the new Amazon Elastic Compute Cloud (Amazon EC2) DL1 instances are now generally available in US-East (N. Virginia) and US-West (Oregon). DL1 provides up to 40% better price performance for training deep learning models as compared to current generation GPU-based EC2 instances. The dl1.24xlarge instance type features eight Intel-Habana Gaudi accelerators, which are custom-built to train deep learning models. Each Gaudi accelerator has 32 GB of high bandwidth memory (HBM2) and a peer-to-peer bidirectional bandwidth of 100 Gbps RoCE, for a total bidirectional interconnect bandwidth of 700 Gbps per card. Further instance specifications are as follows:

Instance Size vCPU Instance Memory (GiB) Gaudi Accelerators Network Bandwidth (Gbps) Total Accelerator Interconnect (Gbs) Local Instance Storage EBS Bandwidth (Gbps)
d1.24xlarge 96 768 8 4×100 Gbps 700 4x1TB NVMe 19

Instance Architecture

System architecture of the amazon ec2 dl1 instances.

As the preceding instance architecture indicates, pairs of Gaudi accelerators (e.g., Gaudi0 and Gaudi1) are attached directly through a PCIe Gen3x16 link. Additionally, peer-to-peer networking via 100 Gbps RoCEv2 links – with seven active links per card – provides a torus configuration with a total of 700 Gbps of interconnect bandwidth per card. This topology is a separate interconnect outside of the two NUMA domains. Furthermore, the instance supports four EFA ENIs and 4x1TB of local NVMe SSD storage. We will provide a peer-direct driver over EFA, which will let you utilize high throughput, low latency peer-direct networking between accelerators across multiple instances to efficiently scale multi-node distributed training workloads.

Quick Start

Quickly get started with DL1 and SynapseAI SDK through with the following options:

1) Habana Deep Learning AMIs provided by AWS.

2) AWS Marketplace AMIs provided by Habana.

3) Using Packer to build a custom Amazon Machine Images (AMI) provided by this GitHub repo. This repo also provides build scripts to create Amazon Elastic Container Service (Amazon ECS) and Amazon Elastic Kubernetes Service (Amazon EKS) AMIs.

After selecting an AMI, launch a dl1.24xlarge instance in either us-east-1 or us-west-2. To help identify in which availability zone(s) dl1.24xlarge is available, run the following command:

aws ec2 describe-instance-type-offerings \
--location-type availability-zone \
--filters Name=instance-type,Values=dl1.24xlarge \
--region us-west-2 \
--output table

Once launched, you can connect to the instance over SSH (with the correct security group attached).

Habana Collectives Communication Library (HCL/HCCL)

As part of the Habana SynapseAI SDK, Habana Gaudi’s use the HCCL library for handling the collectives between HPUs. Get more information on HCCL here. On DL1 through the HCL-tests, we can confirm close to 700 Gbps (689 Gbps) per card for the collectives tested as follows.

You can confirm these tests by cloning the github repo here.

Habana DL1 HCCL tests.

Amazon EKS Quick Start

Support for DL1 on Amazon EKS is available today with Amazon EKS versions > 1.19. The following is a quick start to get up and running quickly with DL1.

The following dependencies will be needed:

eksctl – You need version 0.70.0+ of eksctl.
kubectl – You use Kubernetes version 1.20 in this post.

Create EKS cluster:

eksctl create cluster --region us-east-1 --without-nodegroup \
--vpc-public-subnets subnet-037d8e430963c2d3e,subnet-0abe898359a7d43e9

Nodegroup configuration – save the following codeblock to a file called dl1-managed-ng.yaml. Replace the AMI ID in the code block with the AMI created earlier.

apiVersion: eksctl.io/v1alpha5
kind: ClusterConfig

metadata:
  name: fabulous-rainbow-1635807811
  region: us-west-2

vpc:
  id: vpc-34f1894c
  subnets:
    public:
      endpoint-one:
        id: subnet-4532e73d
      endpoint-two:
        id: subnet-8f8b7dc5

managedNodeGroups:
  - name: dl1-ng-1d
    instanceType: dl1.24xlarge
    volumeSize: 200
    instancePrefix: dl1-ng-1d-worker
    ami: ami-072c632cbbc2255b3
    iam:
      withAddonPolicies:
        imageBuilder: true
        autoScaler: true
        ebs: true
        fsx: true
        cloudWatch: true
    ssh:
      allow: true
      publicKeyName: amrragab-aws
    subnets:
    - endpoint-one
    minSize: 1
    desiredCapacity: 1
    maxSize: 4
    overrideBootstrapCommand: |
      #!/bin/bash
      /etc/eks/bootstrap.sh fabulous-rainbow-1635807811

Create the managed nodegroup with the following command:

eksctl create nodegroup -f dl1-managed-ng.yaml

Once the nodegroup has been completed, you must apply the habana-k8s-device-plugin

kubectl create -f https://vault.habana.ai/artifactory/docker-k8s-device-plugin/habana-k8s-device-plugin.yaml

Once completed, you should see the Gaudi devices as an allocatable resource in your EKS
cluster, presenting 8 Gaudi accelerators per DL1 node in the cluster.

Allocatable:

attachable-volumes-aws-ebs: 39
cpu:                        95690m
ephemeral-storage:          192188443124
habana.ai/gaudi:            8
hugepages-1Gi:              0
hugepages-2Mi:              30000Mi
memory:                     753055132Ki
pods:                       15

Example Distributed Machine Learning (ML) Workloads

The following tables are examples of Mixed Precision/FP32 training results comparing DL1 to the common GPU instances used for ML training.

Model: ResNet50
Framework: TensorFlow 2
Dataset: Imagenet2012
GitHub: https://github.com/HabanaAI/Model-
References/tree/master/TensorFlow/computer_vision/Resnets/resnet_keras

Instance Type Batch Size
Mixed Precision Training Throughput (images/sec)
8x Gaudi – 32 GB (dl1.24xlarge) 256 13036
8x A100 – 40 GB (p4d.24xlarge) 256 17921
8x V100 – 32 GB (p3dn.24xlarge) 256 9685
8x V100 – 16GB (p3.16xlarge) 256 8945

Model: Bert Large – Pretraining
Framework: Pytorch 1.9
Dataset: Wikipedia/BooksCorpus
GitHub: https://github.com/HabanaAI/Model-References/tree/master/PyTorch/nlp/bert

Instance Type Batch Size
@128 Sequence
Length
Mixed Precision Training Throughput (seq/sec)
8x Gaudi – 32 GB (dl1.24xlarge) 256 1318
8x A100 – 40 GB (p4d.24xlarge) 8192 2979
8x V100 – 32 GB (p3dn.24xlarge) 8192 1458
8x V100 – 16GB (p3.16xlarge) 8192 1013

You can find a more comprehensive list of ML models supported with performance data here. Support for containers with TensorFlow and Pytorch are also available. Furthermore, you can stay up-to-date with the operator support for TensorFlow and Pytorch.

CONCLUSION

We are excited to innovate on behalf of our customers and provide a diverse choice in ML accelerators with DL1 instances. The DL1 instances powered by Gaudi accelerators can provide up to 40% better price performance for training deep learning models as compared to current generation GPU-based EC2 instances. DL1 instances use the Habana SynapseAI SDK with framework support in Pytorch and TensorFlow. Additional future support for EFA with peer direct HPUs across nodes will also be supported. Now it’s time to go power up your ML workloads with Amazon EC2 DL1 instances.

Modernizing deployments with container images in AWS Lambda

Post Syndicated from Eric Johnson original https://aws.amazon.com/blogs/compute/modernizing-deployments-with-container-images-in-aws-lambda/

This post is written by Joseph Keating, AWS Modernization Architect, and Virginia Chu, Sr. DevSecOps Architect.

Container image support for AWS Lambda enables developers to package function code and dependencies using familiar patterns and tools. With this pattern, developers use standard tools like Docker to package their functions as container images and deploy them to Lambda.

In a typical deployment process for image-based Lambda functions, the container and Lambda function are created or updated in the same process. However, some use cases require developers to create the image first, and then update one or more Lambda functions from that image. In these situations, organizations may mandate that infrastructure components such as Amazon S3 and Amazon Elastic Container Registry (ECR) are centralized and deployed separately from their application deployment pipelines.

This post demonstrates how to use AWS continuous integration and deployment (CI/CD) services and Docker to separate the container build process from the application deployment process.

Overview

There is a sample application that creates two pipelines to deploy a Java application. The first pipeline uses Docker to build and deploy the container image to the Amazon ECR. The second pipeline uses AWS Serverless Application Model (AWS SAM) to deploy a Lambda function based on the container from the first process.

This shows how to build, manage, and deploy Lambda container images automatically with infrastructure as code (IaC). It also covers automatically updating or creating Lambda functions based on a container image version.

Example architecture

Example architecture

The example application uses AWS CloudFormation to configure the AWS Lambda container pipelines. Both pipelines use AWS CodePipeline, AWS CodeBuild, and AWS CodeCommit. The lambda-container-image-deployment-pipeline builds and deploys a container image to ECR. The sam-deployment-pipeline updates or deploys a Lambda function based on the new container image.

The pipeline deploys the sample application:

  1. The developer pushes code to the main branch.
  2. An update to the main branch invokes the pipeline.
  3. The pipeline clones the CodeCommit repository.
  4. Docker builds the container image and assigns tags.
  5. Docker pushes the image to ECR.
  6. The lambda-container-image-pipeline completion triggers an Amazon EventBridge event.
  7. The pipeline clones the CodeCommit repository.
  8. AWS SAM builds the Lambda-based container image application.
  9. AWS SAM deploys the application to AWS Lambda.

Prerequisites

To provision the pipeline deployment, you must have the following prerequisites:

Infrastructure configuration

The pipeline relies on infrastructure elements like AWS Identity and Access Management roles, S3 buckets, and an ECR repository. Due to security and governance considerations, many organizations prefer to keep these infrastructure components separate from their application deployments.

To start, deploy the core infrastructure components using CloudFormation and the AWS CLI:

  1. Create a local directory called BlogDemoRepo and clone the source code repository found in the following location:
    mkdir -p $HOME/BlogDemoRepo
    cd $HOME/BlogDemoRepo
    git clone https://github.com/aws-samples/modernize-deployments-with-container-images-in-lambda
  2. Change directory into the cloned repository:
    cd modernize-deployments-with-container-images-in-lambda/
  3. Deploy the s3-iam-config CloudFormation template, keeping the following CloudFormation template names:
    aws cloudformation create-stack \
      --stack-name s3-iam-config \
      --template-body file://templates/s3-iam-config.yml \
      --parameters file://parameters/s3-iam-config-params.json \
      --capabilities CAPABILITY_NAMED_IAM

    The output should look like the following:

    Output example for stack creation

    Output example for stack creation

Application overview

The application uses Docker to build the container image and an ECR repository to store the container image. AWS SAM deploys the Lambda function based on the new container.

The example application in this post uses a Java-based container image using Amazon Corretto. Amazon Corretto is a no-cost, multi-platform, production-ready Open Java Development Kit (OpenJDK).

The Lambda container-image base includes the Amazon Linux operating system, and a set of base dependencies. The image also consists of the Lambda Runtime Interface Client (RIC) that allows your runtime to send and receive to the Lambda service. Take some time to review the Dockerfile and how it configures the Java application.

Configure the repository

The CodeCommit repository contains all of the configurations the pipelines use to deploy the application. To configure the CodeCommit repository:

  1. Get metadata about the CodeCommit repository created in a previous step. Run the following command from the BlogDemoRepo directory created in a previous step:
    aws codecommit get-repository \
      --repository-name DemoRepo \
      --query repositoryMetadata.cloneUrlHttp \
      --output text

    The output should look like the following:

    Output example for get repository

    Output example for get repository

  2. In your terminal, paste the Git URL from the previous step and clone the repository:
    git clone <insert_url_from_step_1_output>

    You receive a warning because the repository is empty.

    Empty repository warning

    Empty repository warning

  3. Create the main branch:
    cd DemoRepo
    git checkout -b main
  4. Copy all of the code from the cloned GitHub repository to the CodeCommit repository:
    cp -r ../modernize-deployments-with-container-images-in-lambda/* .
  5. Commit and push the changes:
    git add .
    git commit -m "Initial commit"
    git push -u origin main

Pipeline configuration

This example deploys two separate pipelines. The first is called the modernize-deployments-with-container-images-in-lambda, which consists of building and deploying a container-image to ECR using Docker and the AWS CLI. An EventBridge event starts the pipeline when the CodeCommit branch is updated.

The second pipeline, sam-deployment-pipeline, is where the container image built from lambda-container-image-deployment-pipeline is deployed to a Lambda function using AWS SAM. This pipeline is also triggered using an Amazon EventBridge event. Successful completion of the lambda-container-image-deployment-pipeline invokes this second pipeline through Amazon EventBridge.

Both pipelines consist of AWS CodeBuild jobs configured with a buildspec file. The buildspec file enables developers to run bash commands and scripts to build and deploy applications.

Deploy the pipeline

You now configure and deploy the pipelines and test the configured application in the AWS Management Console.

  1. Change directory back to modernize-serverless-deployments-leveraging-lambda-container-images directory and deploy the lambda-container-pipeline CloudFormation Template:
    cd $HOME/BlogDemoRepo/modernize-deployments-with-container-images-in-lambda/
    aws cloudformation create-stack \
      --stack-name lambda-container-pipeline \
      --template-body file://templates/lambda-container-pipeline.yml \
      --parameters file://parameters/lambda-container-params.json  \
      --capabilities CAPABILITY_IAM \
      --region us-east-1

    The output appears:

    Output example for stack creation

    Output example for stack creation

  2. Wait for the lambda-container-pipeline stack from the previous step to complete and deploy the sam-deployment-pipeline CloudFormation template:
    aws cloudformation create-stack \
      --stack-name sam-deployment-pipeline \
      --template-body file://templates/sam-deployment-pipeline.yml \
      --parameters file://parameters/sam-deployment-params.json  \
      --capabilities CAPABILITY_IAM \
      --region us-east-1

    The output appears:

    Output example of stack creation

    Output example of stack creation

  3. In the console, select CodePipelinepipelines:

  4. Wait for the status of both pipelines to show Succeeded:
  5. Navigate to the ECR console and choose demo-java. This shows that the pipeline is built and the image is deployed to ECR.
  6. Navigate to the Lambda console and choose the MyCustomLambdaContainer function.
  7. The Image configuration panel shows that the function is configured to use the image created earlier.
  8. To test the function, choose Test.
  9. Keep the default settings and choose Test.

This completes the walkthrough. To further test the workflow, modify the Java application and commit and push your changes to the main branch. You can then review the updated resources you have deployed.

Conclusion

This post shows how to use AWS services to automate the creation of Lambda container images. Using CodePipeline, you create a CI/CD pipeline for updates and deployments of Lambda container-images. You then test the Lambda container-image in the AWS Management Console.

For more serverless content visit Serverless Land.

Orchestrate Jenkins Workloads using Dynamic Pod Autoscaling with Amazon EKS

Post Syndicated from Vladimir Toussaint original https://aws.amazon.com/blogs/devops/orchestrate-jenkins-workloads-using-dynamic-pod-autoscaling-with-amazon-eks/

This blog post will demonstrate how to leverage Jenkins with Amazon Elastic Kubernetes Service (EKS) by running a Jenkins Manager within an EKS pod. In doing so, we can run Jenkins workloads by allowing Amazon EKS to spawn dynamic Jenkins Agent(s) in order to perform application and infrastructure deployment. Traditionally, customers will setup a Jenkins Manager-Agent architecture that contains a set of manually added nodes with no autoscaling capabilities. Implementing this strategy will ensure that a robust approach optimizes the performance with the right-sized compute capacity and work needed to successfully perform the build tasks.

In setting up our Amazon EKS cluster with Jenkins, we’ll utilize the eksctl simple CLI tool for creating clusters on EKS. Then, we’ll build both the Jenkins Manager and Jenkins Agent image. Afterward, we’ll run a container deployment on our cluster to access the Jenkins application and utilize the dynamic Jenkins Agent pods to run pipelines and jobs.

Solution Overview

The architecture below illustrates the execution steps.

Solution Architecture diagram
Figure 1. Solution overview diagram

Disclaimer(s): (Note: This Jenkins application is not configured with a persistent volume storage. Therefore, you must establish and configure this template to fit that requirement).

To accomplish this deployment workflow, we will do the following:

Centralized Shared Services account

  1. Deploy the Amazon EKS Cluster into a Centralized Shared Services Account.
  2. Create the Amazon ECR Repository for the Jenkins Manager and Jenkins Agent to store docker images.
  3. Deploy the kubernetes manifest file for the Jenkins Manager.

Target Account(s)

  1. Establish a set of AWS Identity and Access Management (IAM) roles with permissions for cross-across access from the Share Services account into the Target account(s).

Jenkins Application UI

  1. Jenkins Plugins – Install and configure the Kubernetes Plugin and CloudBees AWS Credentials Plugin from Manage Plugins (you will not have to manually install this since it will be packaged and installed as part of the Jenkins image build).
  2. Jenkins Pipeline Example—Fetch the Jenkinsfile to deploy an S3 Bucket with CloudFormation in the Target account using a Jenkins parameterized pipeline.

Prerequisites

The following is the minimum requirements for ensuring this solution will work.

Account Prerequisites

  • Shared Services Account: The location of the Amazon EKS Cluster.
  • Target Account: The destination of the CI/CD pipeline deployments.

Build Requirements

Clone the Git Repository

git clone https://github.com/aws-samples/jenkins-cloudformation-deployment-example.git

Security Considerations

This blog provides a high-level overview of the best practices for cross-account deployment and isolation maintenance between the applications. We evaluated the cross-account application deployment permissions and will describe the current state as well as what to avoid. As part of the security best practices, we will maintain isolation among multiple apps deployed in these environments, e.g., Pipeline 1 does not deploy to the Pipeline 2 infrastructure.

Requirement

A Jenkins manager is running as a container in an EC2 compute instance that resides within a Shared AWS account. This Jenkins application represents individual pipelines deploying unique microservices that build and deploy to multiple environments in separate AWS accounts. The cross-account deployment utilizes the target AWS account admin credentials in order to do the deployment.

This methodology means that it is not good practice to share the account credentials externally. Additionally, the deployment errors risk should be eliminated and application isolation should be maintained within the same account.

Note that the deployment steps are being run using AWS CLIs, thus our solution will be focused on AWS CLI usage.

The risk is much lower when utilizing CloudFormation / CDK to conduct deployments because the AWS CLIs executed from the build jobs will specify stack names as parametrized inputs and the very low probability of stack-name error. However, it remains inadvisable to utilize admin credentials of the target account.

Best Practice — Current Approach

We utilized cross-account roles that can restrict unauthorized access across build jobs. Behind this approach, we will utilize the assume-role concept that will enable the requesting role to obtain temporary credentials (from the STS service) of the target role and execute actions permitted by the target role. This is safer than utilizing hard-coded credentials. The requesting role could be either the inherited EC2 instance role OR specific user credentials. However, in our case, we are utilizing the inherited EC2 instance role.

For ease of understanding, we will refer the target-role as execution-role below.

Cross account roles for Jenkins build jobs
Figure 2. Current approach

  • As per the security best practice of assigning minimum privileges, we must first create execution role in IAM in the target account that has deployment permissions (either via CloudFormation OR via CLI’s), e.g., app-dev-role in Dev account and app-prod-role in Prod account.
  • For each of those roles, we configure a trust relationship with the parent account ID (Shared Services account). This enables any roles in the Shared Services account (with assume-role permission) to assume the execution-role and deploy it on respective hosting infrastructure, e.g., the app-dev-role in Dev account will be a common execution role that will deploy various apps across infrastructure.
  • Then, we create a local role in the Shared Services account and configure credentials within Jenkins to be utilized by the Build Jobs. Provide the job with the assume-role permissions and specify the list of ARNs across every account. Alternatively, the inherited EC2 instance role can also be utilized to assume the execution-role.

Create Cross-Account IAM Roles

Cross-account IAM roles allow users to securely access AWS resources in a target account while maintaining the observability of that AWS account. The cross-account IAM role includes a trust policy allowing AWS identities in another AWS account to assume the given role. This allows us to create a role in one AWS account that delegates specific permissions to another AWS account.

  • Create an IAM role with a common name in each target account. The role name we’ve created is AWSCloudFormationStackExecutionRole. The role must have permissions to perform CloudFormation actions and any actions regarding the resources that will be created. In our case, we will be creating an S3 Bucket utilizing CloudFormation.
  • This IAM role must also have an established trust relationship to the Shared Services account. In this case, the Jenkins Agent will be granted the ability to assume the role of the particular target account from the Shared Services account.
  • In our case, the IAM entity that will assume the AWSCloudFormationStackExecutionRole is the EKS Node Instance Role that associated with the EKS Cluster Nodes.
{
    "Version": "2012-10-17",
    "Statement": [
        {
            "Effect": "Allow",
            "Action": [
                "cloudformation:CreateUploadBucket",
                "cloudformation:ListStacks",
                "cloudformation:CancelUpdateStack",
                "cloudformation:ExecuteChangeSet",
                "cloudformation:ListChangeSets",
                "cloudformation:ListStackResources",
                "cloudformation:DescribeStackResources",
                "cloudformation:DescribeStackResource",
                "cloudformation:CreateChangeSet",
                "cloudformation:DeleteChangeSet",
                "cloudformation:DescribeStacks",
                "cloudformation:ContinueUpdateRollback",
                "cloudformation:DescribeStackEvents",
                "cloudformation:CreateStack",
                "cloudformation:DeleteStack",
                "cloudformation:UpdateStack",
                "cloudformation:DescribeChangeSet",
                "s3:PutBucketPublicAccessBlock",
                "s3:CreateBucket",
                "s3:DeleteBucketPolicy",
                "s3:PutEncryptionConfiguration",
                "s3:PutBucketPolicy",
                "s3:DeleteBucket"
            ],
            "Resource": "*"
        }
    ]
}

Build Docker Images

Build the custom docker images for the Jenkins Manager and the Jenkins Agent, and then push the images to AWS ECR Repository. Navigate to the docker/ directory, then execute the command according to the required parameters with the AWS account ID, repository name, region, and the build folder name jenkins-manager/ or jenkins-agent/ that resides in the current docker directory. The custom docker images will contain a set of starter package installations.

Deploy Jenkins Application

After building both images, navigate to the k8s/ directory, modify the manifest file for the Jenkins image, and then execute the Jenkins manifest.yaml template to setup the Jenkins application. (Note: This Jenkins application is not configured with a persistent volume storage. Therefore, you will need to establish and configure this template to fit that requirement).

# Fetch the Application URL or navigate to the AWS Console for the Load Balancer
kubectl get svc -n jenkins

# Verify that jenkins deployment/pods are up running
kubectl get pods -n jenkins

# Replace with jenkins manager pod name and fetch Jenkins login password
kubectl exec -it pod/<JENKINS-MANAGER-POD-NAME> -n jenkins -- cat /var/jenkins_home/secrets/initialAdminPassword
  • The Kubernetes Plugin and CloudBees AWS Credentials Plugin should be installed as part of the Jenkins image build from the Managed Plugins.
  • Navigate: Manage Jenkins → Configure Global Security
  • Set the Crumb Issuer to remove the error pages in order to prevent Cross Site Request Forgery exploits.

Screenshot of Crumb isssuer
Figure 3. Configure Global Security

Configure Jenkins Kubernetes Cloud

  • Navigate: Manage Jenkins → Manage Nodes and Clouds → Configure Clouds
  • Click: Add a new cloud → select Kubernetes from the drop menus

Screenshot to configure Cloud on Jenkins
Figure 4a. Jenkins Configure Nodes and Clouds

Note: Before proceeding, please ensure that you can access your Amazon EKS cluster information, whether it is through Console or CLI.

  • Enter a Name in the Kubernetes Cloud configuration field.
  • Enter the Kubernetes URL which can be found via AWS Console by navigating to the Amazon EKS service and locating the API server endpoint of the cluster, or run the command kubectl cluster-info.
  • Enter the namespace that will be utilized in the Kubernetes Namespace field. This will determine where the dynamic kubernetes pods will spawn. In our case, the name of the namespace is jenkins.
  • During the initial setup of Jenkins Manager on kubernetes, there is an environment variable JENKINS_URL that automatically utilizes the Load Balancer URL to resolve requests. However, we will resolve our requests locally to the cluster IP address.
    • The format is as follows: https://<service-name>.<namespace>.svc.cluster.local

Configuring Kubernetes cloud for Jenkins
Figure 4b. Configure Kubernetes Cloud

Set AWS Credentials

Security concerns are a key reason why we’re utilizing an IAM role instead of access keys. For any given approach involving IAM, it is the best practice to utilize temporary credentials.

  • You must have the AWS Credentials Binding Plugin installed before this step. Enter the unique ID name as shown in the example below.
  • Enter the IAM Role ARN you created earlier for both the ID and IAM Role to use in the field as shown below.

Setting up credentials on Jenkins
Figure 5. AWS Credentials Binding

Configuring Global credentials
Figure 6. Managed Credentials

Create a pipeline

  • Navigate to the Jenkins main menu and select new item
  • Create a Pipeline

Screenshot for Pipeline configuration
Figure 7. Create a pipeline

Configure Jenkins Agent

Setup a Kubernetes YAML template after you’ve built the agent image. In this example, we will be using the k8sPodTemplate.yaml file stored in the k8s/ folder.

CloudFormation Execution Scripts

This deploy-stack.sh file can accept four different parameters and conduct several types of CloudFormation stack executions such as deploy, create-changeset, and execute-changeset. This is also reflected in the stages of this Jenkinsfile pipeline. As for the delete-stack.sh file, two parameters are accepted, and, when executed, it will delete a CloudFormation stack based on the given stack name and region.

Jenkinsfile

In this Jenkinsfile, the individual pipeline build jobs will deploy individual microservices. The k8sPodTemplate.yaml is utilized to specify the kubernetes pod details and the inbound-agent that will be utilized to run the pipeline.

Jenkins Pipeline: Execute a pipeline

  • Click Build with Parameters and then select a build action.

Configuring stackname in Jenkins configuration
Figure 8a. Build with Parameters

  • Examine the pipeline stages even further for the choice you selected. Also, view more details of the stages below and verify in your AWS account that the CloudFormation stack was executed.

Jenkins pipeline dashboard
Figure 8b. Pipeline Stage View

  • The Final Step is to execute your pipeline and watch the pods spin up dynamically in your terminal. As is shown below, the Jenkins agent pod spawned and then terminated after the work completed. Watch this task on your own by executing the following command:
# Watch the pods spawn in the "jenkins" namespace
kubectl get pods -n jenkins -w

CLI output showing Jenkins POD status
Figure 9. Watch Jenkins Agent Pods Spawn

Code Repository

References

Cleanup

In order to avoid incurring future charges, delete the resources utilized in the walkthrough.

  • Delete the EKS cluster. You can utilize the eksctl to delete the cluster.
  • Delete any remaining AWS resources created by EKS such as AWS LoadBalancer, Target Groups, etc.
  • Delete any related IAM entities.

Conclusion

This post walked you through the process of building out Amazon EKS based infrastructure and integrating Jenkins to orchestrate workloads. We demonstrated how you can utilize this to deploy securely across multiple accounts with dynamic Jenkins agents and create alignment to your business with similar use cases. To learn more about Amazon EKS, see our documentation pages or explore our console.

About the Authors

Vladimir Toussaint Headshot1.png

Vladimir P. Toussaint

Vladimir is a DevOps Cloud Architect at Amazon Web Services. He works with GovCloud customers to build solutions and capabilities as they move to the cloud. Previous to Amazon Web Services, Vladimir has leveraged container orchestration tools such as Kubernetes to securely manage microservice applications for large enterprises.

Matt Noyce Headshot1.png

Matt Noyce

Matt is a Sr. Cloud Application Architect at Amazon Web Services. He works primarily with health care and life sciences customers to help them architect and build applications, data lakes, and DevOps pipelines that solve their business needs. In his spare time Matt likes to run and hike along with enjoying time with friends and family.

Nikunj Vaidya Headshot1.png

Nikunj Vaidya

Nikunj is a DevOps Tech Leader at Amazon Web Services. He offers technical guidance to the customers on AWS DevOps solutions and services that would streamline the application development process, accelerate application delivery, and enable maintaining a high bar of software quality. Prior to AWS, Nikunj has worked in software engineering roles, leading transformation projects, driving releases and improvements in the software quality and customer experience.

Building well-architected serverless applications: Optimizing application costs

Post Syndicated from Julian Wood original https://aws.amazon.com/blogs/compute/building-well-architected-serverless-applications-optimizing-application-costs/

This series of blog posts uses the AWS Well-Architected Tool with the Serverless Lens to help customers build and operate applications using best practices. In each post, I address the serverless-specific questions identified by the Serverless Lens along with the recommended best practices. See the introduction post for a table of contents and explanation of the example application.

COST 1. How do you optimize your serverless application costs?

Design, implement, and optimize your application to maximize value. Asynchronous design patterns and performance practices ensure efficient resource use and directly impact the value per business transaction. By optimizing your serverless application performance and its code patterns, you can directly impact the value it provides, while making more efficient use of resources.

Serverless architectures are easier to manage in terms of correct resource allocation compared to traditional architectures. Due to its pay-per-value pricing model and scale based on demand, a serverless approach effectively reduces the capacity planning effort. As covered in the operational excellence and performance pillars, optimizing your serverless application has a direct impact on the value it produces and its cost. For general serverless optimization guidance, see the AWS re:Invent talks, “Optimizing your Serverless applications” Part 1 and Part 2, and “Serverless architectural patterns and best practices”.

Required practice: Minimize external calls and function code initialization

AWS Lambda functions may call other managed services and third-party APIs. Functions may also use application dependencies that may not be suitable for ephemeral environments. Understanding and controlling what your function accesses while it runs can have a direct impact on value provided per invocation.

Review code initialization

I explain the Lambda initialization process with cold and warm starts in “Optimizing application performance – part 1”. Lambda reports the time it takes to initialize application code in Amazon CloudWatch Logs. As Lambda functions are billed by request and duration, you can use this to track costs and performance. Consider reviewing your application code and its dependencies to improve the overall execution time to maximize value.

You can take advantage of Lambda execution environment reuse to make external calls to resources and use the results for subsequent invocations. Use TTL mechanisms inside your function handler code. This ensures that you can prevent additional external calls that incur additional execution time, while preemptively fetching data that isn’t stale.

Review third-party application deployments and permissions

When using Lambda layers or applications provisioned by AWS Serverless Application Repository, be sure to understand any associated charges that these may incur. When deploying functions packaged as container images, understand the charges for storing images in Amazon Elastic Container Registry (ECR).

Ensure that your Lambda function only has access to what its application code needs. Regularly review that your function has a predicted usage pattern so you can factor in the cost of other services, such as Amazon S3 and Amazon DynamoDB.

Required practice: Optimize logging output and its retention

Considering reviewing your application logging level. Ensure that logging output and log retention are appropriately set to your operational needs to prevent unnecessary logging and data retention. This helps you have the minimum of log retention to investigate operational and performance inquiries when necessary.

Emit and capture only what is necessary to understand and operate your component as intended.

With Lambda, any standard output statements are sent to CloudWatch Logs. Capture and emit business and operational events that are necessary to help you understand your function, its integration, and its interactions. Use a logging framework and environment variables to dynamically set a logging level. When applicable, sample debugging logs for a percentage of invocations.

In the serverless airline example used in this series, the booking service Lambda functions use Lambda Powertools as a logging framework with output structured as JSON.

Lambda Powertools is added to the Lambda functions as a shared Lambda layer in the AWS Serverless Application Model (AWS SAM) template. The layer ARN is stored in Systems Manager Parameter Store.

Parameters:
  SharedLibsLayer:
    Type: AWS::SSM::Parameter::Value<String>
    Description: Project shared libraries Lambda Layer ARN
Resources:
    ConfirmBooking:
        Type: AWS::Serverless::Function
        Properties:
            FunctionName: !Sub ServerlessAirline-ConfirmBooking-${Stage}
            Handler: confirm.lambda_handler
            CodeUri: src/confirm-booking
            Layers:
                - !Ref SharedLibsLayer
            Runtime: python3.7
…

The LOG_LEVEL and other Powertools settings are configured in the Globals section as Lambda environment variable for all functions.

Globals:
    Function:
        Environment:
            Variables:
                POWERTOOLS_SERVICE_NAME: booking
                POWERTOOLS_METRICS_NAMESPACE: ServerlessAirline
                LOG_LEVEL: INFO 

For Amazon API Gateway, there are two types of logging in CloudWatch: execution logging and access logging. Execution logs contain information that you can use to identify and troubleshoot API errors. API Gateway manages the CloudWatch Logs, creating the log groups and log streams. Access logs contain details about who accessed your API and how they accessed it. You can create your own log group or choose an existing log group that could be managed by API Gateway.

Enable access logs, and selectively review the output format and request fields that might be necessary. For more information, see “Setting up CloudWatch logging for a REST API in API Gateway”.

API Gateway logging

API Gateway logging

Enable AWS AppSync logging which uses CloudWatch to monitor and debug requests. You can configure two types of logging: request-level and field-level. For more information, see “Monitoring and Logging”.

AWS AppSync logging

AWS AppSync logging

Define and set a log retention strategy

Define a log retention strategy to satisfy your operational and business needs. Set log expiration for each CloudWatch log group as they are kept indefinitely by default.

For example, in the booking service AWS SAM template, log groups are explicitly created for each Lambda function with a parameter specifying the retention period.

Parameters:
    LogRetentionInDays:
        Type: Number
        Default: 14
        Description: CloudWatch Logs retention period
Resources:
    ConfirmBookingLogGroup:
        Type: AWS::Logs::LogGroup
        Properties:
            LogGroupName: !Sub "/aws/lambda/${ConfirmBooking}"
            RetentionInDays: !Ref LogRetentionInDays

The Serverless Application Repository application, auto-set-log-group-retention can update the retention policy for new and existing CloudWatch log groups to the specified number of days.

For log archival, you can export CloudWatch Logs to S3 and store them in Amazon S3 Glacier for more cost-effective retention. You can use CloudWatch Log subscriptions for custom processing, analysis, or loading to other systems. Lambda extensions allows you to process, filter, and route logs directly from Lambda to a destination of your choice.

Good practice: Optimize function configuration to reduce cost

Benchmark your function using a different set of memory size

For Lambda functions, memory is the capacity unit for controlling the performance and cost of a function. You can configure the amount of memory allocated to a Lambda function, between 128 MB and 10,240 MB. The amount of memory also determines the amount of virtual CPU available to a function. Benchmark your AWS Lambda functions with differing amounts of memory allocated. Adding more memory and proportional CPU may lower the duration and reduce the cost of each invocation.

In “Optimizing application performance – part 2”, I cover using AWS Lambda Power Tuning to automate the memory testing process to balances performance and cost.

Best practice: Use cost-aware usage patterns in code

Reduce the time your function runs by reducing job-polling or task coordination. This avoids overpaying for unnecessary compute time.

Decide whether your application can fit an asynchronous pattern

Avoid scenarios where your Lambda functions wait for external activities to complete. I explain the difference between synchronous and asynchronous processing in “Optimizing application performance – part 1”. You can use asynchronous processing to aggregate queues, streams, or events for more efficient processing time per invocation. This reduces wait times and latency from requesting apps and functions.

Long polling or waiting increases the costs of Lambda functions and also reduces overall account concurrency. This can impact the ability of other functions to run.

Consider using other services such as AWS Step Functions to help reduce code and coordinate asynchronous workloads. You can build workflows using state machines with long-polling, and failure handling. Step Functions also supports direct service integrations, such as DynamoDB, without having to use Lambda functions.

In the serverless airline example used in this series, Step Functions is used to orchestrate the Booking microservice. The ProcessBooking state machine handles all the necessary steps to create bookings, including payment.

Booking service state machine

Booking service state machine

To reduce costs and improves performance with CloudWatch, create custom metrics asynchronously. You can use the Embedded Metrics Format to write logs, rather than the PutMetricsData API call. I cover using the embedded metrics format in “Understanding application health” – part 1 and part 2.

For example, once a booking is made, the logs are visible in the CloudWatch console. You can select a log stream and find the custom metric as part of the structured log entry.

Custom metric structured log entry

Custom metric structured log entry

CloudWatch automatically creates metrics from these structured logs. You can create graphs and alarms based on them. For example, here is a graph based on a BookingSuccessful custom metric.

CloudWatch metrics custom graph

CloudWatch metrics custom graph

Consider asynchronous invocations and review run away functions where applicable

Take advantage of Lambda’s event-based model. Lambda functions can be triggered based on events ingested into Amazon Simple Queue Service (SQS) queues, S3 buckets, and Amazon Kinesis Data Streams. AWS manages the polling infrastructure on your behalf with no additional cost. Avoid code that polls for third-party software as a service (SaaS) providers. Rather use Amazon EventBridge to integrate with SaaS instead when possible.

Carefully consider and review recursion, and establish timeouts to prevent run away functions.

Conclusion

Design, implement, and optimize your application to maximize value. Asynchronous design patterns and performance practices ensure efficient resource use and directly impact the value per business transaction. By optimizing your serverless application performance and its code patterns, you can reduce costs while making more efficient use of resources.

In this post, I cover minimizing external calls and function code initialization. I show how to optimize logging output with the embedded metrics format, and log retention. I recap optimizing function configuration to reduce cost and highlight the benefits of asynchronous event-driven patterns.

This post wraps up the series, building well-architected serverless applications, where I cover the AWS Well-Architected Tool with the Serverless Lens . See the introduction post for links to all the blog posts.

For more serverless learning resources, visit Serverless Land.


How to authenticate private container registries using AWS Batch

Post Syndicated from Ben Peven original https://aws.amazon.com/blogs/compute/how-to-authenticate-private-container-registries-using-aws-batch/

This post was contributed by Clayton Thomas, Solutions Architect, AWS WW Public Sector SLG Govtech.

Many AWS Batch users choose to store and consume their AWS Batch job container images on AWS using Amazon Elastic Container Registries (ECR). AWS Batch and Amazon Elastic Container Service (ECS) natively support pulling from Amazon ECR without any extra steps required. For those users that choose to store their container images on other container registries or Docker Hub, often times they are not publicly exposed and require authentication to pull these images. Third-party repositories may throttle the number of requests, which impedes the ability to run workloads and self-managed repositories require heavy tuning to offer the scale that Amazon ECS provides. This makes Amazon ECS the preferred solution to run workloads on AWS Batch.

While Amazon ECS allows you to configure repositoryCredentials in task definitions containing private registry credentials, AWS Batch does not expose this option in AWS Batch job definitions. AWS Batch does not provide the ability to use private registries by default but you can allow that by configuring the Amazon ECS agent in a few steps.

This post shows how to configure an AWS Batch EC2 compute environment and the Amazon ECS agent to pull your private container images from private container registries. This gives you the flexibility to use your own private and public container registries with AWS Batch.

Overview

The solution uses AWS Secrets Manager to securely store your private container registry credentials, which are retrieved on startup of the AWS Batch compute environment. This ensures that your credentials are securely managed and accessed using IAM roles and are not persisted or stored in AWS Batch job definitions or EC2 user data. The Amazon ECS agent is then configured upon startup to pull these credentials from AWS Secrets Manager. Note that this solution only supports Amazon EC2 based AWS Batch compute environments, thus AWS Fargate cannot use this solution.

High-level diagram showing event flow

Figure 1: High-level diagram showing event flow

  1. AWS Batch uses an Amazon EC2 Compute Environment powered by Amazon ECS. This compute environment uses a custom EC2 Launch Template to configure the Amazon ECS agent to include credentials for pulling images from private registries.
  2. An EC2 User Data script is run upon EC2 instance startup that retrieves registry credentials from AWS Secrets Manager. The EC2 instance authenticates with AWS Secrets Manager using its configured IAM instance profile, which grants temporary IAM credentials.
  3. AWS Batch jobs can be submitted using private images that require authentication with configured credentials.

Prerequisites

For this walkthrough, you should have the following prerequisites:

  1. An AWS account
  2. An Amazon Virtual Private Cloud with private and public subnets. If you do not have a VPC, this tutorial can be followed. The AWS Batch compute environment must have connectivity to the container registry.
  3. A container registry containing a private image. This example uses Docker Hub and assumes you have created a private repository
  4. Registry credentials and/or an access token to authenticate with the container registry or Docker Hub.
  5. A VPC Security Group allowing the AWS Batch compute environment egress connectivity to the container registry.

A CloudFormation template is provided to simplify setting up this example. The CloudFormation template and provided EC2 user data script can be viewed here on GitHub.

The CloudFormation template will create the following resources:

  1. Necessary IAM roles for AWS Batch
  2. AWS Secrets Manager secret containing container registry credentials
  3. AWS Batch managed compute environment and job queue
  4. EC2 Launch Configuration with user data script

Click the Launch Stack button to get started:

Launch Stack

Launch the CloudFormation stack

After clicking the Launch stack button above, click Next to be presented with the following screen:

Figure 2: CloudFormation stack parameters

Figure 2: CloudFormation stack parameters

Fill in the required parameters as follows:

  1. Stack Name: Give your stack a unique name.
  2. Password: Your container registry password or Docker Hub access token. Note that both user name and password are masked and will not appear in any CF logs or output. Additionally, they are securely stored in an AWS Secrets Manager secret created by CloudFormation.
  3. RegistryUrl: If not using Docker Hub, specify the URL of the private container registry.
  4. User name: Your container registry user name.
  5. SecurityGroupIDs: Select your previously created security group to assign to the example Batch compute environment.
  6. SubnetIDs: To assign to the example Batch compute environment, select one or more VPC subnet IDs.

After entering these parameters, you can click through next twice and create the stack, which will take a few minutes to complete. Note that you must acknowledge that the template creates IAM resources on the review page before submitting.

Finally, you will be presented with a list of created AWS resources once the stack deployment finishes as shown in Figure 3 if you would like to dig deeper.

Figure 3: CloudFormation created resources

Figure 3: CloudFormation created resources

User data script contained within launch template

AWS Batch allows you to customize the compute environment in a variety of ways such as specifying an EC2 key pair, custom AMI, or an EC2 user data script. This is done by specifying an EC2 launch template before creating the Batch compute environment. For more information on Batch launch template support, see here.

Let’s take a closer look at how the Amazon ECS agent is configured upon compute environment startup to use your registry credentials.

MIME-Version: 1.0
Content-Type: multipart/mixed; boundary="==MYBOUNDARY=="

--==MYBOUNDARY==
Content-Type: text/cloud-config; charset="us-ascii"

packages:
- jq
- aws-cli

runcmd:
- /usr/bin/aws configure set region $(curl http://169.254.169.254/latest/meta-data/placement/region)
- export SECRET_STRING=$(/usr/bin/aws secretsmanager get-secret-value --secret-id your_secrets_manager_secret_id | jq -r '.SecretString')
- export USERNAME=$(echo $SECRET_STRING | jq -r '.username')
- export PASSWORD=$(echo $SECRET_STRING | jq -r '.password')
- export REGISTRY_URL=$(echo $SECRET_STRING | jq -r '.registry_url')
- echo $PASSWORD | docker login --username $USERNAME --password-stdin $REGISTRY_URL
- export AUTH=$(cat ~/.docker/config.json | jq -c .auths)
- echo 'ECS_ENGINE_AUTH_TYPE=dockercfg' >> /etc/ecs/ecs.config
- echo "ECS_ENGINE_AUTH_DATA=$AUTH" >> /etc/ecs/ecs.config

--==MYBOUNDARY==--

This example script uses and installs a few tools including the AWS CLI and the open-source tool jq to retrieve and parse the previously created Secrets Manager secret. These packages are installed using the cloud-config user data type, which is part of the cloud-init packages functionality. If using the provided CloudFormation template, this script will be dynamically rendered to reference the created secret, but note that you must specify the correct Secrets Manager secret id if not using the template.

After performing a Docker login, the generated Auth JSON object is captured and passed to the Amazon ECS agent configuration to be used on AWS Batch jobs that require private images. For an explanation of Amazon ECS agent configuration options including available Amazon ECS engine Auth types, see here. This example script can be extended or customized to fit your needs but must adhere to requirements for Batch launch template user data scripts, including being in MIME multi-part archive format.

It’s worth noting that the AWS CLI automatically grabs temporary IAM credentials from the associated IAM instance profile the CloudFormation stack created in order to retrieve the Secret Manager secret values. This example assumes you created the AWS Secrets Manager secret with the default AWS managed KMS key for Secrets Manager. However, if you choose to encrypt your secret with a customer managed KMS key, make sure to specify kms:Decrypt IAM permissions for the Batch compute environment IAM role.

Submitting the AWS Batch job

Now let’s try an example Batch job that uses a private container image by creating a Batch job definition and submitting a Batch job:

  1. Open the AWS Batch console
  2. Navigate to the Job Definition page
  3. Click create
  4. Provide a unique Name for the job definition
  5. Select the EC2 platform
  6. Specify your private container image located in the Image field
  7. Click create

Figure 4: Batch job definition

Now you can submit an AWS Batch job that uses this job definition:

  1. Click on the Jobs page
  2. Click Submit New Job
  3. Provide a Name for the job
  4. Select the previously created job definition
  5. Select the Batch Job Queue created by the CloudFormation stack
  6. Click Submit
Submitting a new Batch job

Figure 5: Submitting a new Batch job

After submitting the AWS Batch job, it will take a few minutes for the AWS Batch Compute Environment to create resources for scheduling the job. Once that is done, you should see a SUCCEEDED status by viewing the job and filtering by AWS Batch job queue shown in Figure 6.

Figure 6: AWS Batch job succeeded

Figure 6: AWS Batch job succeeded

Cleaning up

To clean up the example resources, click delete for the created CloudFormation stack in the CloudFormation Console.

Conclusion

In this blog, you deployed a customized AWS Batch managed compute environment that was configured to allow pulling private container images in a secure manner. As I’ve shown, AWS Batch gives you the flexibility to use both private and public container registries. I encourage you to continue to explore the many options available natively on AWS for hosting and pulling container images. Amazon ECR or the recently launched Amazon ECR public repositories (for a deeper dive, see this blog announcement) both provide a seamless experience for container workloads running on AWS.

Choosing a Well-Architected CI/CD approach: Open Source on AWS

Post Syndicated from Mikhail Vasilyev original https://aws.amazon.com/blogs/devops/choosing-a-well-architected-ci-cd-approach-open-source-on-aws/

Introduction

When building a CI/CD platform, it is important to make an informed decision regarding every underlying tool. This post explores evaluating the criteria for selecting each tool focusing on a balance between meeting functional and non-functional requirements, and maximizing value.

Your first decision: source code management.

Source code is potentially your most valuable asset, and so we start by choosing a source code management tool. These tools normally have high non-functional requirements in order to protect your assets and to ensure they are available to the organization when needed. The requirements usually include demand for high durability, high availability (HA), consistently high throughput, and strong security with role-based access controls.

At the same time, source code management tools normally have many specific functional requirements as well. For example, the ability to provide collaborative code review in the UI, flexible and tunable merge policies including both automated and manual gates (code checks), and out-of-box UI-level integrations with numerous other tools. These kinds of integrations can include enabling monitoring, CI, chats, and agile project management.

Many teams also treat source code management tools as their portal into other CI/CD tools. They make them shareable between teams, and might prefer to stay within one single context and user interface throughout the entire DevOps cycle. Many source code management tools are actually a stack of services that support multiple steps of your CI/CD workflows from within a single UI. This makes them an excellent starting point for building your CI/CD platforms.

The first decision your need to make is whether to go with an open source solution for managing code or with AWS-managed solutions, such as AWS CodeCommit. Open source solutions include (but are not limited to) the following: Gerrit, Gitlab, Gogs, and Phabricator.

You decision will be influenced by the amount of benefit your team can gain from the flexibility provided through open source, and how well your team can support deploying and managing these solutions. You will also need to consider the infrastructure and management overhead cost.

Engineering teams that have the capacity to develop their own plugins for their CI/CD platforms, or whom even contribute directly to open source projects, will often prefer open source solutions for the flexibility they provide. This will be especially true if they are fluent in designing and supporting their own cloud infrastructure. If the team gets more value by trading the flexibility of open source for not having to worry about managing infrastructure (especially if High Availability, Scalability, Durability, and Security are more critical) an AWS-managed solution would be a better choice.

Source Code Management Solution

When the choice is made in favor of an open-source code management solution (such as Gitlab), the next decision will be how to architect the deployment. Will the team deploy to a single instance, or design for high availability, durability, and scalability? Teams that want to design Gitlab for HA can use the following guide to proceed: Installing GitLab on Amazon Web Services (AWS)

By adopting AWS services (such as Amazon RDS, Amazon ElastiCache for Redis, and Autoscaling Groups), you can lower the management burden of supporting the underlying infrastructure in this self-managed HA scenario.

High level overview of self-managed HA Gitlab deployment

Your second decision: Continuous Integration engine

Selecting your CI engine, you might be able to benefit from additional features of previously selected solutions. Gitlab provides both source control services, as well as built-in CI tools, called Gitlab CI. Gitlab Runners are responsible for running CI jobs, and the actual jobs are described as YML files stored in Gitlab’s git repository along with product code. For security and performance reasons, GitLab Runners should be on resources separate from your GitLab instance.

You could manage those resources or you could use one of the AWS services that can support deploying and managing Runners. The use of an on-demand service removes the expense of implementing and managing a capability that is undifferentiated heavy lifting for you. This provides cost optimization and enables operational excellence. You pay for what you use and the service team manages the underlying service.

Continuous Integration engine Solution

In an architecture example (below), Gitlab Runners are deployed in containers running on Amazon EKS. The team has less infrastructure to manage, can start focusing on development faster by not having to implement the capability, and can provision resources in an optimal way for their on-demand needs.

To further optimize costs, you can use EC2 Spot Instances for your EKS nodes. CI jobs are normally compute intensive and limited in run time. The runner jobs can easily be restarted on a different resource with little impact. This makes them tolerant of failure and the use of EC2 Spot instances very appealing. Amazon EKS and Spot Instances are supported out-of-box in Gitlab. As a result there is no integration to develop, only configuration is required.

To support infrastructure as code best practices, Runners are deployed with Helm and are stored and versioned as Helm charts. All of the infrastructure as code information used to implement the CI/CD platform itself is stored in templates such as Terraform.

High level overview of Infrastructure as Code on Gitlab and Gitlab CI

High level overview of Infrastructure as Code on Gitlab and Gitlab CI

Your third decision: Container Registry

You will be unable to deploy Runners if the container images are not available. As a result, the primary non-functional requirements for your production container registry are likely to include high availability, durability, transparent scalability, and security. At the same time, your functional requirements for a container registry might be lower. It might be sufficient to have a simple UI, and simple APIs supporting basic flows. Customers looking for a managed solution can use Amazon ECR, which is OCI compliant and supports Helm Charts.

Container Registry Solution

For this set of requirements, the flexibility and feature velocity of open source tools does not provide an advantage. Self-supporting high availability and strengthened security could be costly in implementation time and long-term management. Based on [Blog post 1 Diagram 1], an AWS-managed solution provides cost advantages and has no management overhead. In this case, an AWS-managed solution is a better choice for your container registry than an open-source solution hosted on AWS. In this example, Amazon ECR is selected. Customers who prefer to go with open-source container registries might consider solutions like Harbor.

High level overview of Gitlab CI with Amazon ECR

High level overview of Gitlab CI with Amazon ECR

Additional Considerations

Now that the main services for the CI/CD platform are selected, we will take a high level look at additional important considerations. You need to make sure you have observability into both infrastructure and applications, that backup tools and policies are in place, and that security needs are addressed.

There are many mechanisms to strengthen security including the use of security groups. Use IAM for granular permission control. Robust policies can limit the exposure of your resources and control the flow of traffic. Implement policies to prevent your assets leaving your CI environment inappropriately. To protect sensitive data, such as worker secrets, encrypt these assets while in transit and at rest. Select a key management solution to reduce your operational burden and to support these activities such as AWS Key Management Service (AWS KMS). To deliver secure and compliant application changes rapidly while running operations consistently with automation, implement DevSecOps.

Amazon S3 is durable, secure, and highly available by design making it the preferred choice to store EBS-level backups by many customers. Amazon S3 satisfies the non-functional requirements for a backup store. It also supports versioning and tiered storage classes, making it a cost-effective as well.

Your observability requirements may emphasize versatility and flexibility for application-level monitoring. Using Amazon CloudWatch to monitor your infrastructure and then extending your capabilities through an open-source solutions such as Prometheus may be advantageous. You can get many of the benefits of both open-source Prometheus and AWS services with Amazon Managed Service for Prometheus (AMP). For interactive visualization of metrics, many customers choose solutions such as open-source Grafana, available as an AWS service Amazon Managed Service for Grafana (AMG).

CI/CD Platform with Gitlab and AWS

CI/CD Platform with Gitlab and AWS

Conclusion

We have covered how making informed decisions can maximize value and synergy between open-source solutions on AWS, such as Gitlab, and AWS-managed services, such as Amazon EKS and Amazon ECR. You can find the right balance of open-source tools and AWS services that will meet your functional and non-functional requirements, and help maximizing the value you get from those resources.

Pete Goldberg, Director of Partnerships at GitLab: “When aligning your development process to AWS Well Architected Framework, GitLab allows customers to build and automate processes to achieve Operational Excellence. As a single tool designed to facilitate collaboration across the organization, GitLab simplifies the process to follow the Fully Separated Operating Model where Engineering and Operations come together via automated processes that remove the historical barriers between the groups. This gives organizations the ability to efficiently and rapidly deploy new features and applications that drive the business while providing the risk mitigation and compliance they require. By allowing operations teams to define infrastructure as code in the same tool that the engineering teams are storing application code, and allowing your automation bring those together for your CI/CD workflows companies can move faster while having compliance and controls built-in, providing the entire organization greater transparency. With GitLab’s integrations with different AWS compute options (EC2, Lambda, Fargate, ECS or EKS), customers can choose the best type of compute for the job without sacrificing the controls required to maintain Operational Excellence.”


Author bio

Mikhail is a Solutions Architect for RUS-CIS. Mikhail supports customers on their cloud journeys with Well-architected best practices and adoption of DevOps techniques on AWS. Mikhail is a fan of ChatOps, Open Source on AWS and Operational Excellence design principles.

Building well-architected serverless applications: Implementing application workload security – part 1

Post Syndicated from Julian Wood original https://aws.amazon.com/blogs/compute/building-well-architected-serverless-applications-implementing-application-workload-security-part-1/

This series of blog posts uses the AWS Well-Architected Tool with the Serverless Lens to help customers build and operate applications using best practices. In each post, I address the serverless-specific questions identified by the Serverless Lens along with the recommended best practices. See the introduction post for a table of contents and explanation of the example application.

Security question SEC3: How do you implement application security in your workload?

Review and automate security practices at the application code level, and enforce security code review as part of development workflow. By implementing security at the application code level, you can protect against emerging security threats and reduce the attack surface from malicious code, including third-party dependencies.

Required practice: Review security awareness documents frequently

Stay up to date with both AWS and industry security best practices to understand and evolve protection of your workloads. Having a clear understanding of common threats helps you to mitigate them when developing your workloads.

The AWS Security Blog provides security-specific AWS content. The Open Web Application Security Project (OWASP) Top 10 is a guide for security practitioners to understand the most common application attacks and risks. The OWASP Top 10 Serverless Interpretation provides information specific to serverless applications.

Review and subscribe to vulnerability and security bulletins

Regularly review news feeds from multiple sources that are relevant to the technologies used in your workload. Subscribe to notification services to be informed of critical threats in near-real time.

The Common Vulnerabilities and Exposures (CVE) program identifies, defines, and catalogs publicly disclosed cybersecurity vulnerabilities. You can search the CVE list directly, for example “Python”.

CVE Python search

CVE Python search

The US National Vulnerability Database (NVD) allows you to search by vulnerability type, severity, and impact. You can also perform advanced searching by vendor name, product name, and version numbers. GitHub also integrates with CVE, which allows for advanced searching within the CVEproject/cvelist repository.

AWS Security Bulletins are a notification system for security and privacy events related to AWS services. Subscribe to the security bulletin RSS feed to keep up to date with AWS security announcements.

The US Cybersecurity and Infrastructure Security Agency (CISA) provides alerts about current security issues, vulnerabilities, and exploits. You can receive email alerts or subscribe to the RSS feed.

AWS Partner Network (APN) member Palo Alto Networks provides the “Serverless architectures Security Top 10” list. This is a security awareness and education guide to use while designing, developing, and testing serverless applications to help minimize security risks.

Good practice: Automatically review a workload’s code dependencies/libraries

Regularly reviewing application and code dependencies is a good industry security practice. This helps detect and prevent non-certified application code, and ensure that third-party application dependencies operate as intended.

Implement security mechanisms to verify application code and dependencies before using them

Combine automated and manual security code reviews to examine application code and its dependencies to ensure they operate as intended. Automated tools can help identify overly complex application code, and common security vulnerability exposures that are already cataloged.

Manual security code reviews, in addition to automated tools, help ensure that application code works as intended. Manual reviews can include business contextual information and integrations that automated tools may not capture.

Before adding any code dependencies to your workload, take time to review and certify each dependency to ensure that you are adding secure code. Use third-party services to review your code dependencies on every commit automatically.

OWASP has a code review guide and dependency check tool that attempt to detect publicly disclosed vulnerabilities within a project’s dependencies. The tool has a command line interface, a Maven plugin, an Ant task, and a Jenkins plugin.

GitHub has a number of security features for hosted repositories to inspect and manage code dependencies.

The dependency graph allows you to explore the packages that your repository depends on. Dependabot alerts show information about dependencies that are known to contain security vulnerabilities. You can choose whether to have pull requests generated automatically to update these dependencies. Code scanning alerts automatically scan code files to detect security vulnerabilities and coding errors.

You can enable these features by navigating to the Settings tab, and selecting Security & analysis.

GitHub configure security and analysis features

GitHub configure security and analysis features

Once Dependabot analyzes the repository, you can view the dependencies graph from the Insights tab. In the serverless airline example used in this series, you can view the Loyalty service package.json dependencies.

Serverless airline loyalty dependencies

Serverless airline loyalty dependencies

Dependabot alerts for security vulnerabilities are visible in the Security tab. You can review alerts and see information about how to resolve them.

Dependabot alert

Dependabot alert

Once Dependabot alerts are enabled for a repository, you can also view the alerts when pushing code to the repository from the terminal.

Dependabot terminal alert

Dependabot terminal alert

If you enable security updates, Dependabot can automatically create pull requests to update dependencies.

Dependabot pull requests

Dependabot pull requests

AWS Partner Network (APN) member Snyk has an integration with AWS Lambda to manage the security of your function code. Snyk determines what code and dependencies are currently deployed for Node.js, Ruby, and Java projects. It tests dependencies against their vulnerability database.

If you build your functions using container images, you can use Amazon Elastic Container Registry’s (ECR) image scanning feature. You can manually scan your images, or scan them on each push to your repository.

Elastic Container Registry image scanning example results

Elastic Container Registry image scanning example results

Best practice: Validate inbound events

Sanitize inbound events and validate them against a predefined schema. This helps prevent errors and increases your workload’s security posture by catching malformed events or events intentionally crafted to be malicious. The OWASP Input validation cheat sheet includes guidance for providing input validation security functionality in your applications.

Validate incoming HTTP requests against a schema

Implicitly trusting data from clients could lead to malformed data being processed. Use data type validators or web application frameworks to ensure data correctness. These should include regular expressions, value range, data structure, and data normalization.

You can configure Amazon API Gateway to perform basic validation of an API request before proceeding with the integration request to add another layer of security. This ensures that the HTTP request matches the desired format. Any HTTP request that does not pass validation is rejected, returning a 400 error response to the caller.

The Serverless Security Workshop has a module on API Gateway input validation based on the fictional Wild Rydes unicorn raid hailing service. The example shows a REST API endpoint where partner companies of Wild Rydes can submit unicorn customizations, such as branded capes, to advertise their company. The API endpoint should ensure that the request body follows specific patterns. These include checking the ImageURL is a valid URL, and the ID for Cape is a numeric value.

In API Gateway, a model defines the data structure of a payload, using the JSON schema draft 4. The model ensures that you receive the parameters in the format you expect. You can check them against regular expressions. The CustomizationPost model specifies that the ImageURL and Cape schemas should contain the following valid patterns:

    "imageUrl": {
      "type": "string",
      "title": "The Imageurl Schema",
      "pattern": "^https?:\/\/[-a-zA-Z0-9@:%_+.~#?&//=]+$"
    },
    "sock": {
      "type": "string",
      "title": " The Cape Schema ",
      "pattern": "^[0-9]*$"
    },
    …

The model is applied to the /customizations/post method as part of the Method Request. The Request Validator is set to Validate body and the CustomizationPost model is set for the Request Body.

API Gateway request validator

API Gateway request validator

When testing the POST /customizations API with valid parameters using the following input:

{  
   "name":"Cherry-themed unicorn",
   "imageUrl":"https://en.wikipedia.org/wiki/Cherry#/media/File:Cherry_Stella444.jpg",
   "sock": "1",
   "horn": "2",
   "glasses": "3",
   "cape": "4"
}

The result is a valid response:

{"customUnicornId":<the-id-of-the-customization>}

Testing validation to the POST /customizations API using invalid parameters shows the input validation process.

The ImageUrl is not a valid URL:

 {  
    "name":"Cherry-themed unicorn",
    "imageUrl":"htt://en.wikipedia.org/wiki/Cherry#/media/File:Cherry_Stella444.jpg",
    "sock": "1" ,
    "horn": "2" ,
    "glasses": "3",
    "cape": "4"
 }

The Cape parameter is not a number, which shows a SQL injection attempt.

 {  
    "name":"Orange-themed unicorn",
    "imageUrl":"https://en.wikipedia.org/wiki/Orange_(fruit)#/media/File:Orange-Whole-%26-Split.jpg",
    "sock": "1",
    "horn": "2",
    "glasses": "3",
    "cape":"2); INSERT INTO Cape (NAME,PRICE) VALUES ('Bad color', 10000.00"
 }

These return a 400 Bad Request response from API Gateway before invoking the Lambda function:

{"message": "Invalid request body"}

To gain further protection, consider adding an AWS Web Application Firewall (AWS WAF) access control list to your API endpoint. The workshop includes an AWS WAF module to explore three AWS WAF rules:

  • Restrict the maximum size of request body
  • SQL injection condition as part of the request URI
  • Rate-based rule to prevent an overwhelming number of requests
AWS WAF ACL

AWS WAF ACL

AWS WAF also includes support for custom responses and request header insertion to improve the user experience and security posture of your applications.

For more API Gateway security information, see the security overview whitepaper.

Also add further input validation logic to your Lambda function code itself. For examples, see “Input Validation for Serverless”.

Conclusion

Implementing application security in your workload involves reviewing and automating security practices at the application code level. By implementing code security, you can protect against emerging security threats. You can improve the security posture by checking for malicious code, including third-party dependencies.

In this post, I cover reviewing security awareness documentation such as the CVE database. I show how to use GitHub security features to inspect and manage code dependencies. I then show how to validate inbound events using API Gateway request validation.

This well-architected question will be continued where I look at securely storing, auditing, and rotating secrets that are used in your application code.

For more serverless learning resources, visit Serverless Land.

How Banks Can Use AWS to Meet Compliance

Post Syndicated from Jiwan Panjiker original https://aws.amazon.com/blogs/architecture/how-banks-can-use-aws-to-meet-compliance/

Since the 2008 financial crisis, banking supervisory institutions such as the Basel Committee on Banking Supervision (BCBS) have strengthened regulations. There is now increased oversight over the financial services industry. For banks, making the necessary changes to comply with these rules is a challenging, multi-year effort.

Basel IV, a massive update to existing rules, is due for implementation in January 2023. Basel IV standardizes the approach to calculating credit risk, increases the impact of risk-weighted assets (RWAs) and emphasizes data transparency.

Given the complexity of data, modeling, and numerous assumptions that have to be made, compliance under Basel IV implementation will be challenging. Standardization omits nuances unique to your business, which can drive up costs, but violating guidelines will result in steep penalties.

This post will address these challenges by outlining a mechanism that facilitates a healthy, data-driven dialogue between banks and regulators to better achieve compliance objectives. The reference architecture will focus on enabling fast, iterative releases with the help of serverless AWS services.

There are four key actions to take in order to support this mechanism:

  1. Automate data management
  2. Establish a continuous integration/continuous delivery (CI/CD) pipeline
  3. Enable fast, point-in-time audit replays
  4. Set up proactive monitoring and notifications

Automate data management

Due to frequent merger activity, banks are typically comprised of a web of integrated systems and siloed business units, making it difficult to consolidate data. Under Basel IV guidelines, auditors want banks to provide detailed data in a presentable way.

You can tackle this first challenge by establishing a data pipeline as shown in Figure 1. Take inventory of each data source as it is incorporated into the pipeline. Identify the critical internal and external data sources that will be used to populate the initial landing area. Amazon Simple Storage Service (S3) is a great choice for this.

Figure 1. Data pipeline that cleans, processes, and segments data

Figure 1. Data pipeline that cleans, processes, and segments data

Amazon S3 is a highly available, durable service that is a popular data lake solution. S3 offers WORM storage capabilities like S3 Glacier Vault and S3 Object Lock to protect the integrity of your archived data in accordance with U.S. SEC and FINRA rules.

Basel IV regulations also require banks to use many attributes to develop accurate credit risk models. The attributes can be a mix of datasets such as financial statements, internal balanced scorecards, macro-economic data, and credit ratings. The risk models themselves can also be segmented by portfolio types, industry segments, asset types and much more.

You can split data into different domains and designate data owners with separate S3 buckets. Credit risk model developers, analyst, and data scientists can then use the structure of the S3 buckets to pull together relevant datasets. They can then store the outputs into S3 buckets.

To support fast, automated data retrieval, store object metadata in a highly scalable, and queryable database. You can set up Amazon S3 so that an event can initiate a function to populate Amazon DynamoDB. Developers can use AWS Lambda to write these functions using popular languages like Python.

With AWS Glue, you can automate Extract/Load/Transform (ETL) processes to clean and move data to the different S3 buckets. AWS Glue can also support data operations by automatically cataloging your various data sources.

Taking on a structured approach will simplify data governance and transparency as the business continues to grow and operate.

Establish a CI/CD pipeline

Adopt tools that machine learning teams can use to build a streamlined CI/CD solution as demonstrated in Figure 2.

Figure 2. An end-to-end machine learning development and deployment pipeline

Figure 2. An end-to-end machine learning development and deployment pipeline

Using tightly integrated AWS services, your teams can minimize time spent managing tools and deployment processes, and instead, focus on tuning the models and analyzing the results.

Amazon SageMaker brings together a powerful set of machine learning capabilities on the AWS Cloud. It helps data scientists and engineers build insightful models. Figure 2 depicts the high-level architecture and shows how Amazon SageMaker Pipelines helps teams orchestrate the automation and deployment processes.

The core of the pipeline uses a set of AWS deployment services so that your teams can collaborate and review effectively. With AWS CodeCommit, your teams can set up git-based repository to store and version models for data processing, training, and evaluation. The repository can also store code and configuration files using AWS CloudFormation for deployment. You can use AWS CodePipeline and AWS CodeBuild to create and update a model endpoint based on the approved/reviewed changes.

Any updates detected in the AWS CodeCommit repository initiate a deployment whenever a new model version is added to the Model Registry. Amazon S3 can be used to store generated model artifacts, historical data, and models.

Enable fast, point-in-time audit replays

Figure 3. Containers offer a lightweight, powerful solution to run audits using historical assets

Figure 3. Containers offer a lightweight, powerful solution to run audits using historical assets

One of the main themes of Basel IV is transparency. Figure 3 illustrates a solution to build trust with regulators by allowing them to verify and understand modeling activity.

A lightweight application is hosted in AWS Fargate and enables auditors to re-run Basel credit risk models under specified conditions. With AWS Fargate, you don’t need to manually manage instances or container orchestration. Configure the CPU or memory specifications at the task level and set guidelines around scalability for your service. Your tasks then scale up and down automatically, based on demand, and will optimize cost efficiency and availability.

Figure 3 shows the following:

  1. The application takes inputs such as date, release version, and model type.
  2. It then queries DynamoDB with this information.
  3. The query will return the data necessary to retrieve model artifacts from previous CI/CD deployments and relevant datasets from historical S3 buckets.
  4. Using this information, it can spin up as many containers as needed to run the model.
  5. It then stores the outputs in a separate S3 bucket.
  6. Auditors will have a detailed trace of all the attributes, assumptions, and data that went into the modeling effort. To streamline this process, the app can also compare the outputs of the historical runs to the recent replay and highlight any significant deviations.

Though internal models will be de-emphasized under Basel IV, banks will continue to run internal models as a benchmark against the broader standards. Schedule AWS Fargate tasks to run these models regularly to capitalize on highly performant compute services while minimizing costs.

Set up proactive monitoring and notifications

Figure 4. Scheduled jobs can send out notifications using Amazon SNS when certain thresholds are breached

Figure 4. Scheduled jobs can send out notifications using Amazon SNS when certain thresholds are breached

The last principle is based around establishing an early warning system, enabling banks to take on a more proactive role in maintaining compliance.

With automated monitoring and notifications, banks will be able to respond quickly to potential concerns. For instance, there can be a daily scheduled job that launches containers and runs the models against the latest data. If any thresholds are breached, alerts can be sent out via SMS or email. Operational teams can be subscribed to certain message topics using Amazon Simple Notification Service (SNS). They can then respond before actual compliance issues emerge.

Conclusion

With a Well-Architected approach, AWS helps you control your data, deploy new features, and embrace a serverless approach. This frees you to innovate quickly and address regulatory challenges.

You can iterate with new AWS services and bring machine learning to bear on various streams of data to identify high impact pools of value. You can get a clearer picture of the data to make it easier to identify areas where you can reduce RWAs. Using Amazon S3, you can turn on AWS analytics services such as Amazon QuickSight and Amazon Athena to visualize the data. You’ll be able to fulfill reporting requirements such as those found in regulatory studies like CCAR, DFAST, CECL, and IFRS9.

For more information about establishing a data pipeline, read Lake House Formation Architecture. It is a powerful pattern that combines a few concepts that will help bring your data together cohesively. To set up a robust CI/CD pipeline, explore the AWS Serverless CI/CD Reference Architecture.

Choosing a CI/CD approach: Open Source on AWS, an Iponweb story

Post Syndicated from Mikhail Vasilyev original https://aws.amazon.com/blogs/devops/choosing-a-ci-cd-approach-open-source-on-aws-an-iponweb-story/

Iponweb is a global leader in building programmatic and real-time advertising technology and infrastructure for some of the world’s biggest digital media buyers and sellers. The company develops client-facing products and internal development tools that must be platform agnostic to support spanning across multiple cloud services.

In this post, we explore how Iponweb applied key considerations when choosing a continuous integration, continuous deployment (CI/CD), what they determined to be the right CI/CD approach for them, and review some considerations that may apply to your own business needs. And in the next post, we will dive even deeper into these key considerations.

How did Iponweb decide what they needed?

The first and most important question in designing a Well-Architected approach is: “How do you determine your priorities?” AWS Well-Architected defines the first two best practices to do that as: ”evaluate external customer needs” (Iponweb’s clients) and “evaluate internal customer needs” (Iponweb’s team).

Iponweb started with these two considerations while selecting the strategic toolset. After evaluating their customers’ requirements, the next step was to look at the needs of the Iponweb team. Their priorities included the products and features required, the cost, and the ability to build multi-cloud solutions.

Iponweb is dedicated to operating securely with the reliability and performance to support their customers. Solutions had to satisfy their fundamental requirements in these areas to be considered in their evaluation.

Feature set

Iponweb evaluated available options for the CI tool chain and found that, for their needs, GitLab was the clear winner, differentiated by delivering the greatest number of required features at the best price while being platform agnostic.

AWS had the complete set of tools, services, and best practices to support Iponweb’s goal to establish an open-source, self-hosted CI environment using GitLab. Upon completing their thorough evaluation process, Iponweb selected AWS to implement its CI environment.

Cost

Iponweb understood the investment they would be making within their team to leverage and support all the desired features of GitLab. Iponweb evaluated the expertise of its internal teams and factored in ease of integration with supporting services.

They adopted several AWS services that satisfied their undifferentiated needs, which allowed them to remove the operational burden and cost of maintaining their own implementations of various capabilities and features.

Furthermore, the availability of Amazon Elastic Compute Cloud (Amazon EC2) Spot Instances provided the opportunity to further manage costs for their CI resource needs and usage patterns.

Security

Iponweb leveraged their existing security control implementations and integration with AWS to support adopting additional AWS services. AWS was responsible for the security of the cloud, including the underlying AWS services. Iponweb was able to focus on secure and effective configurations of those services and secure and effective configuration of their GitLab implementation. This ensured the security of their open-source, self-hosted CI environment.

When setting priorities for the design of a Well-Architected approach, it’s imperative to “manage benefits and risks,” which emphasizes making informed decisions when adopting open source or any tools. Iponweb achieved their best value solution by applying Well-Architected practices in Operational Excellence, Cost Optimization, and Security pillars by leveraging AWS products and services.

Overview of solution

Continuous integration consists of three key processes, each of which AWS supports:

  • Code stage – Iponweb built the centralized Git repository on the GitLab platform on EC2 servers, providing the UI and API to store and manage the code.
  • Test and build stage – They used GitLab as the application layer to manage build and test flows through GitLab Runners (compute workers for CI jobs). This layer is implanted via GitLab in containers, and is deployed and managed by Amazon Elastic Kubernetes Service (Amazon EKS).
  • Publish stageAmazon Elastic Container Registry (Amazon ECR) stores the infrastructure containers for the runners and product containers.

The following diagram illustrates this architecture:

At the core of Iponweb’s CI platform architecture is the open-source GitLab Community Edition.

Implementing the solution

CI jobs are either run regularly or triggered by events such as merge requests. The jobs are described as code in YAML files and are stored and versioned along with the product code itself. Runner versions are published into Amazon ECR and launched as Docker containers in Amazon EKS.

Runner code is stored as Helm charts that help Iponweb package up and manage their large-scale Kubernetes deployments. In addition, Amazon EKS has support for Helm and many other plugins for Kubernetes.

Iponweb developers innovate at a very fast pace, and customize Iponweb’s client solutions in rapid iterations. To address uncertain container registry requirements, Iponweb decided to use Amazon ECR. As a managed service, Amazon ECR eliminates concerns about scaling capacity and management. Integration of GitLab with Amazon EKS and Amazon ECR is provided out of the box through a UI and predefined scripts, with no additional overhead to develop and deploy code or plugins.

Iponweb was able to implement the Well-Architected design principle: “stop continuously estimating its capacity needs.” Enabling them to focus on more strategic development activities. They performed a thorough analysis of each component, looking at the total cost of ownership, including operations and management. In doing so, they implemented the best practice from the Cost Optimization pillar: “How do you evaluate cost when you select services?”

In the Cost Optimization pillar, a key question is “How do you use pricing models to reduce costs?” Iponweb deployed runners in Amazon EKS for precise, granular, and on-demand compute scaling for each CI job. These tasks have short-term capacity needs, so Iponweb benefited from configuring Amazon EKS on Spot Instances, achieving factor price reduction. The EC2 Spot pricing model is most appropriate for their CI resource needs and usage patterns.

To protect their data at rest, Iponweb followed a best practice from the Security pillar: “Implement secure key management.” They used AWS Key Management Service (AWS KMS) to manage secrets for the runners.

To protect the code and artifacts, and to ensure these valuable assets don’t leave the CI environment inappropriately, Iponweb followed best practices in Infrastructure Protection from the Security pillar question, “How do you protect your networks?” Iponweb scrupulously defined the network protection requirements, limiting their exposure by controlling traffic at all layers, and implementing security groups to prevent inappropriate access into and out of their VPC.

Michael Benuhis, CTO at Iponweb, says:

“Iponweb was able to get the best of open-source software and public cloud services by building the continuous integration platform on Amazon Web Services. Open-source tools provided Iponweb platform agnosticism for serving our diverse customer base, while managed Amazon EKS on EC2 Spot Instances eliminated the operational burden of managing our own Kubernetes infrastructure, and with greater cost efficiency.”

Conclusion

Iponweb has satisfied their current needs and aren’t looking for improvement in the short term. They will stay on the free version of GitLab, satisfied for the moment with what they have achieved. They have custom automations in place to synchronize with GitLab and integrate with their existing tools. They like the features provided by the paid version of GitLab, but there isn’t a business case to support an informed decision to upgrade at this time.

They have achieved their goal of using Amazon EKS and Spot under GitLab CI/CD integrated with their existing systems and satisfying their needs.

Using container image support for AWS Lambda with AWS SAM

Post Syndicated from Eric Johnson original https://aws.amazon.com/blogs/compute/using-container-image-support-for-aws-lambda-with-aws-sam/

At AWS re:Invent 2020, AWS Lambda released Container Image Support for Lambda functions. This new feature allows developers to package and deploy Lambda functions as container images of up to 10 GB in size. With this release, AWS SAM also added support to manage, build, and deploy Lambda functions using container images.

In this blog post, I walk through building a simple serverless application that uses Lambda functions packaged as container images with AWS SAM. I demonstrate creating a new application and highlight changes to the AWS SAM template specific to container image support. I then cover building the image locally for debugging in addition to eventual deployment. Finally, I show using AWS SAM to handle packaging and deploying Lambda functions from a developer’s machine or a CI/CD pipeline.

Push to invoke lifecycle

Push to invoke lifecycle

The process for creating a Lambda function packaged as a container requires only a few steps. A developer first creates the container image and tags that image with the appropriate label. The image is then uploaded to an Amazon Elastic Container Registry (ECR) repository using docker push.

During the Lambda create or update process, the Lambda service pulls the image from ECR, optimizes the image for use, and deploys the image to the Lambda service. Once this, and any other configuration processes are complete, the Lambda function is then in Active status and ready to be invoked. The AWS SAM CLI manages most of these steps for you.

Prerequisites

The following tools are required in this walkthrough:

Create the application

Use the terminal and follow these steps to create a serverless application:

  1. Enter sam init.
  2. For Template source, select option one for AWS Quick Start Templates.
  3. For Package type, choose option two for Image.
  4. For Base image, select option one for amazon/nodejs12.x-base.
  5. Name the application demo-app.
Demonstration of sam init

Demonstration of sam init

Exploring the application

Open the template.yaml file in the root of the project to see the new options available for container image support. The AWS SAM template has two new values that are required when working with container images. PackageType: Image tells AWS SAM that this function is using container images for packaging.

AWS SAM template

AWS SAM template

The second set of required data is in the Metadata section that helps AWS SAM manage the container images. When a container is created, a new tag is added to help identify that image. By default, Docker uses the tag, latest. However, AWS SAM passes an explicit tag name to help differentiate between functions. That tag name is a combination of the Lambda function resource name, and the DockerTag value found in the Metadata. Additionally, the DockerContext points to the folder containing the function code and Dockerfile identifies the name of the Dockerfile used in building the container image.

In addition to changes in the template.yaml file, AWS SAM also uses the Docker CLI to build container images. Each Lambda function has a Dockerfile that instructs Docker how to construct the container image for that function. The Dockerfile for the HelloWorldFunction is at hello-world/Dockerfile.

Local development of the application

AWS SAM provides local development support for zip-based and container-based Lambda functions. When using container-based images, as you modify your code, update the local container image using sam build. AWS SAM then calls docker build using the Dockerfile for instructions.

Dockerfile for Lambda function

Dockerfile for Lambda function

In the case of the HelloWorldFunction that uses Node.js, the Docker command:

  1. Pulls the latest container base image for nodejs12.x from the Amazon Elastic Container Registry Public.
  2. Copies the app.js code and package.json files to the container image.
  3. Installs the dependencies inside the container image.
  4. Sets the invocation handler.
  5. Creates and tags new version of the local container image.

To build your application locally on your machine, enter:

sam build

The results are:

Results for sam build

Results for sam build

Now test the code by locally invoking the HelloWorldFunction using the following command:

sam local invoke HelloWorldFunction

The results are:

Results for sam local invoke

Results for sam local invoke

You can also combine these commands and add flags for cached and parallel builds:

sam build --cached --parallel && sam local invoke HelloWorldFunction

Deploying the application

There are two ways to deploy container-based Lambda functions with AWS SAM. The first option is to deploy from AWS SAM using the sam deploy command. The deploy command tags the local container image, uploads it to ECR, and then creates or updates your Lambda function. The second method is the sam package command used in continuous integration and continuous delivery or deployment (CI/CD) pipelines, where the deployment process is separate from the artifact creation process.

AWS SAM package tags and uploads the container image to ECR but does not deploy the application. Instead, it creates a modified version of the template.yaml file with the newly created container image location. This modified template is later used to deploy the serverless application using AWS CloudFormation.

Deploying from AWS SAM with the guided flag

Before you can deploy the application, use the AWS CLI to create a new ECR repository to store the container image for the HelloWorldFunction.

Run the following command from a terminal:

aws ecr create-repository --repository-name demo-app-hello-world \
--image-tag-mutability IMMUTABLE --image-scanning-configuration scanOnPush=true

This command creates a new ECR repository called demo-app-hello-world. The –image-tag-mutability IMMUTABLE option prevents overwriting tags. The –image-scanning-configuration scanOnPush=true enables automated vulnerability scanning whenever a new image is pushed to the repository. The output is:

Amazon ECR creation output

Amazon ECR creation output

Make a note of the repositoryUri as you need it in the next step.

Before you can push your images to this new repository, ensure that you have logged in to the managed Docker service that ECR provides. Update the bracketed tokens with your information and run the following command in the terminal:

aws ecr get-login-password --region <region> | docker login --username AWS \
--password-stdin <account id>.dkr.ecr.<region>.amazonaws.com

You can also install the Amazon ECR credentials helper to help facilitate Docker authentication with Amazon ECR.

After building the application locally and creating a repository for the container image, you can deploy the application. The first time you deploy an application, use the guided version of the sam deploy command and follow these steps:

  1. Type sam deploy --guided, or sam deploy -g.
  2. For Stack Name, enter demo-app.
  3. Choose the same Region that you created the ECR repository in.
  4. Enter the Image Repository for the HelloWorldFunction (this is the repositoryUri of the ECR repository).
  5. For Confirm changes before deploy and Allow SAM CLI IAM role creation, keep the defaults.
  6. For HelloWorldFunction may not have authorization defined, Is this okay? Select Y.
  7. Keep the defaults for the remaining prompts.
Results of sam deploy --guided

Results of sam deploy –guided

AWS SAM uploads the container images to the ECR repo and deploys the application. During this process, you see a changeset along with the status of the deployment. When the deployment is complete, the stack outputs are then displayed. Use the HelloWorldApi endpoint to test your application in production.

Deploy outputs

Deploy outputs

When you use the guided version, AWS SAM saves the entered data to the samconfig.toml file. For subsequent deployments with the same parameters, use sam deploy. If you want to make a change, use the guided deployment again.

This example demonstrates deploying a serverless application with a single, container-based Lambda function in it. However, most serverless applications contain more than one Lambda function. To work with an application that has more than one Lambda function, follow these steps to add a second Lambda function to your application:

  1. Copy the hello-world directory using the terminal command cp -R hello-world hola-world
  2. Replace the contents of the template.yaml file with the following
    AWSTemplateFormatVersion: '2010-09-09'
    Transform: AWS::Serverless-2016-10-31
    Description: demo app
      
    Globals:
      Function:
        Timeout: 3
    
    Resources:
      HelloWorldFunction:
        Type: AWS::Serverless::Function
        Properties:
          PackageType: Image
          Events:
            HelloWorld:
              Type: Api
              Properties:
                Path: /hello
                Method: get
        Metadata:
          DockerTag: nodejs12.x-v1
          DockerContext: ./hello-world
          Dockerfile: Dockerfile
          
      HolaWorldFunction:
        Type: AWS::Serverless::Function
        Properties:
          PackageType: Image
          Events:
            HolaWorld:
              Type: Api
              Properties:
                Path: /hola
                Method: get
        Metadata:
          DockerTag: nodejs12.x-v1
          DockerContext: ./hola-world
          Dockerfile: Dockerfile
    
    Outputs:
      HelloWorldApi:
        Description: "API Gateway endpoint URL for Prod stage for Hello World function"
        Value: !Sub "https://${ServerlessRestApi}.execute-api.${AWS::Region}.amazonaws.com/Prod/hello/"
      HolaWorldApi:
        Description: "API Gateway endpoint URL for Prod stage for Hola World function"
        Value: !Sub "https://${ServerlessRestApi}.execute-api.${AWS::Region}.amazonaws.com/Prod/hola/"
  3. Replace the contents of hola-world/app.js with the following
    let response;
    exports.lambdaHandler = async(event, context) => {
        try {
            response = {
                'statusCode': 200,
                'body': JSON.stringify({
                    message: 'hola world',
                })
            }
        }
        catch (err) {
            console.log(err);
            return err;
        }
        return response
    };
  4. Create an ECR repository for the HolaWorldFunction
    aws ecr create-repository --repository-name demo-app-hola-world \
    --image-tag-mutability IMMUTABLE --image-scanning-configuration scanOnPush=true
  5. Run the guided deploy to add the second repository:
    sam deploy -g

The AWS SAM guided deploy process allows you to provide the information again but prepopulates the defaults with previous values. Update the following:

  1. Keep the same stack name, Region, and Image Repository for HelloWorldFunction.
  2. Use the new repository for HolaWorldFunction.
  3. For the remaining steps, use the same values from before. For Lambda functions not to have authorization defined, enter Y.
Results of sam deploy --guided

Results of sam deploy –guided

Deploying in a CI/CD pipeline

Companies use continuous integration and continuous delivery (CI/CD) pipelines to automate application deployment. Because the process is automated, using an interactive process like a guided AWS SAM deployment is not possible.

Developers can use the packaging process in AWS SAM to prepare the artifacts for deployment and produce a separate template usable by AWS CloudFormation. The package command is:

sam package --output-template-file packaged-template.yaml \
--image-repository 5555555555.dkr.ecr.us-west-2.amazonaws.com/demo-app

For multiple repositories:

sam package --output-template-file packaged-template.yaml \ 
--image-repositories HelloWorldFunction=5555555555.dkr.ecr.us-west-2.amazonaws.com/demo-app-hello-world \
--image-repositories HolaWorldFunction=5555555555.dkr.ecr.us-west-2.amazonaws.com/demo-app-hola-world

Both cases create a file called packaged-template.yaml. The Lambda functions in this template have an added tag called ImageUri that points to the ECR repository and a tag for the Lambda function.

Packaged template

Packaged template

Using sam package to generate a separate CloudFormation template enables developers to separate artifact creation from application deployment. The deployment process can then be placed in an isolated stage allowing for greater customization and observability of the pipeline.

Conclusion

Container image support for Lambda enables larger application artifacts and the ability to use container tooling to manage Lambda images. AWS SAM simplifies application management by bringing these tools into the serverless development workflow.

In this post, you create a container-based serverless application in using command lines in the terminal. You create ECR repositories and associate them with functions in the application. You deploy the application from your local machine and package the artifacts for separate deployment in a CI/CD pipeline.

To learn more about serverless and AWS SAM, visit the Sessions with SAM series at s12d.com/sws and find more resources at serverlessland.com.

#ServerlessForEveryone

Working with Lambda layers and extensions in container images

Post Syndicated from Julian Wood original https://aws.amazon.com/blogs/compute/working-with-lambda-layers-and-extensions-in-container-images/

In this post, I explain how to use AWS Lambda layers and extensions with Lambda functions packaged and deployed as container images.

Previously, Lambda functions were packaged only as .zip archives. This includes functions created in the AWS Management Console. You can now also package and deploy Lambda functions as container images.

You can use familiar container tooling such as the Docker CLI with a Dockerfile to build, test, and tag images locally. Lambda functions built using container images can be up to 10 GB in size. You push images to an Amazon Elastic Container Registry (ECR) repository, a managed AWS container image registry service. You create your Lambda function, specifying the source code as the ECR image URL from the registry.

Lambda container image support

Lambda container image support

Lambda functions packaged as container images do not support adding Lambda layers to the function configuration. However, there are a number of solutions to use the functionality of Lambda layers with container images. You take on the responsible for packaging your preferred runtimes and dependencies as a part of the container image during the build process.

Understanding how Lambda layers and extensions work as .zip archives

If you deploy function code using a .zip archive, you can use Lambda layers as a distribution mechanism for libraries, custom runtimes, and other function dependencies.

When you include one or more layers in a function, during initialization, the contents of each layer are extracted in order to the /opt directory in the function execution environment. Each runtime then looks for libraries in a different location under /opt, depending on the language. You can include up to five layers per function, which count towards the unzipped deployment package size limit of 250 MB. Layers are automatically set as private, but they can be shared with other AWS accounts, or shared publicly.

Lambda Extensions are a way to augment your Lambda functions and are deployed as Lambda layers. You can use Lambda Extensions to integrate functions with your preferred monitoring, observability, security, and governance tools. You can choose from a broad set of tools provided by AWS, AWS Lambda Ready Partners, and AWS Partners, or create your own Lambda Extensions. For more information, see “Introducing AWS Lambda Extensions – In preview.”

Extensions can run in either of two modes, internal and external. An external extension runs as an independent process in the execution environment. They can start before the runtime process, and can continue after the function invocation is fully processed. Internal extensions run as part of the runtime process, in-process with your code.

Lambda searches the /opt/extensions directory and starts initializing any extensions found. Extensions must be executable as binaries or scripts. As the function code directory is read-only, extensions cannot modify function code.

It helps to understand that Lambda layers and extensions are just files copied into specific file paths in the execution environment during the function initialization. The files are read-only in the execution environment.

Understanding container images with Lambda

A container image is a packaged template built from a Dockerfile. The image is assembled or built from commands in the Dockerfile, starting from a parent or base image, or from scratch. Each command then creates a new layer in the image, which is stacked in order on top of the previous layer. Once built from the packaged template, a container image is immutable and read-only.

For Lambda, a container image includes the base operating system, the runtime, any Lambda extensions, your application code, and its dependencies. Lambda provides a set of open-source base images that you can use to build your container image. Lambda uses the image to construct the execution environment during function initialization. You can use the AWS Serverless Application Model (AWS SAM) CLI or native container tools such as the Docker CLI to build and test container images locally.

Using Lambda layers in container images

Container layers are added to a container image, similar to how Lambda layers are added to a .zip archive function.

There are a number of ways to use container image layering to add the functionality of Lambda layers to your Lambda function container images.

Use a container image version of a Lambda layer

A Lambda layer publisher may have a container image format equivalent of a Lambda layer. To maintain the same file path as Lambda layers, the published container images must have the equivalent files located in the /opt directory. An image containing an extension must include the files in the /opt/extensions directory.

An example Lambda function, packaged as a .zip archive, is created with two layers. One layer contains shared libraries, and the other layer is a Lambda extension from an AWS Partner.

aws lambda create-function –region us-east-1 –function-name my-function \

aws lambda create-function --region us-east-1 --function-name my-function \  
    --role arn:aws:iam::123456789012:role/lambda-role \
    --layers \
        "arn:aws:lambda:us-east-1:123456789012:layer:shared-lib-layer:1" \
        "arn:aws:lambda:us-east-1:987654321987:extensions-layer:1" \
    …

The corresponding Dockerfile syntax for a function packaged as a container image includes the following lines. These pull the container image versions of the Lambda layers and copy them into the function image. The shared library image is pulled from ECR and the extension image is pulled from Docker Hub.

FROM public.ecr.aws/myrepo/shared-lib-layer:1 AS shared-lib-layer
# Layer code
WORKDIR /opt
COPY --from=shared-lib-layer /opt/ .

FROM aws-partner/extensions-layer:1 as extensions-layer
# Extension  code
WORKDIR /opt/extensions
COPY --from=extensions-layer /opt/extensions/ .

Copy the contents of a Lambda layer into a container image

You can use existing Lambda layers, and copy the contents of the layers into the function container image /opt directory during docker build.

You need to build a Dockerfile that includes the AWS Command Line Interface to copy the layer files from Amazon S3.

The Dockerfile to add two layers into a single image includes the following lines to copy the Lambda layer contents.

FROM alpine:latest

ARG AWS_DEFAULT_REGION=${AWS_DEFAULT_REGION:-"us-east-1"}
ARG AWS_ACCESS_KEY_ID=${AWS_ACCESS_KEY_ID:-""}
ARG AWS_SECRET_ACCESS_KEY=${AWS_SECRET_ACCESS_KEY:-""}
ENV AWS_DEFAULT_REGION=${AWS_DEFAULT_REGION}
ENV AWS_ACCESS_KEY_ID=${AWS_ACCESS_KEY_ID}
ENV AWS_SECRET_ACCESS_KEY=${AWS_SECRET_ACCESS_KEY}

RUN apk add aws-cli curl unzip

RUN mkdir -p /opt

RUN curl $(aws lambda get-layer-version-by-arn --arn arn:aws:lambda:us-east-1:1234567890123:layer:shared-lib-layer:1 --query 'Content.Location' --output text) --output layer.zip
RUN unzip layer.zip -d /opt
RUN rm layer.zip

RUN curl $(aws lambda get-layer-version-by-arn --arn arn:aws:lambda:us-east-1:987654321987:extensions-layer:1 --query 'Content.Location' --output text) --output layer.zip
RUN unzip layer.zip -d /opt
RUN rm layer.zip

To run the AWS CLI, specify your AWS_ACCESS_KEY, and AWS_SECRET_ACCESS_KEY, and include the required AWS_DEFAULT_REGION as command-line arguments.

docker build . -t layer-image1:latest \
--build-arg AWS_DEFAULT_REGION=us-east-1 \
--build-arg AWS_ACCESS_KEY_ID=AKIAIOSFODNN7EXAMPLE \
--build-arg AWS_SECRET_ACCESS_KEY=wJalrXUtnFEMI/K7MDENG/bPxRfiCYEXAMPLEKEY

This creates a container image containing the existing Lambda layer and extension files. This can be pushed to ECR and used in a function.

Build a container image from a Lambda layer

You can repackage and publish Lambda layer file content as container images. Creating separate container images for different layers allows you to add them to multiple functions, and share them in a similar way as Lambda layers.

You can create a separate container image containing the files from a single layer, or combine the files from multiple layers into a single image. If you create separate container images for layer files, you then add these images into your function image.

There are two ways to manage language code dependencies. You can pre-build the dependencies and copy the files into the container image, or build the dependencies during docker build.

In this example, I migrate an existing Python application. This comprises a Lambda function and extension, from a .zip archive to separate function and extension container images. The extension writes logs to S3.

You can choose how to store images in repositories. You can either push both images to the same ECR repository with different image tags, or push to different repositories. In this example, I use separate ECR repositories.

To set up the example, visit the GitHub repo and follow the instructions in the README.md file.

The existing example extension uses a makefile to install boto3 using pip install with a requirements.txt file. This is migrated to the docker build process. I must add a Python runtime to be able to run pip install as part of the build process. I use python:3.8-alpine as a minimal base image.

I create separate Dockerfiles for the function and extension. The extension Dockerfile contains the following lines.

FROM python:3.8-alpine AS installer
#Layer Code
COPY extensionssrc /opt/
COPY extensionssrc/requirements.txt /opt/
RUN pip install -r /opt/requirements.txt -t /opt/extensions/lib

FROM scratch AS base
WORKDIR /opt/extensions
COPY --from=installer /opt/extensions .

I build, tag, login, and push the extension container image to an existing ECR repository.

docker build -t log-extension-image:latest  .
docker tag log-extension-image:latest 123456789012.dkr.ecr.us-east-1.amazonaws.com/log-extension-image:latest
aws ecr get-login-password --region us-east-1 | docker login --username AWS --password-stdin 123456789012.dkr.ecr.us-east-1.amazonaws.com
docker push 123456789012.dkr.ecr.us-east-1.amazonaws.com/log-extension-image:latest

The function Dockerfile contains the following lines, which add the files from the previously created extension image to the function image. There is no need to run pip install for the function as it does not require any additional dependencies.

FROM 123456789012.dkr.ecr.us-east-1.amazonaws.com/log-extension-image:latest AS layer
FROM public.ecr.aws/lambda/python:3.8
# Layer code
WORKDIR /opt
COPY --from=layer /opt/ .
# Function code
WORKDIR /var/task
COPY app.py .
CMD ["app.lambda_handler"]

I build, tag, and push the function container image to a separate existing ECR repository. This creates an immutable image of the Lambda function.

docker build -t log-extension-function:latest  .
docker tag log-extension-function:latest 123456789012.dkr.ecr.us-east-1.amazonaws.com/log-extension-function:latest
docker push 123456789012.dkr.ecr.us-east-1.amazonaws.com/log-extension-function:latest

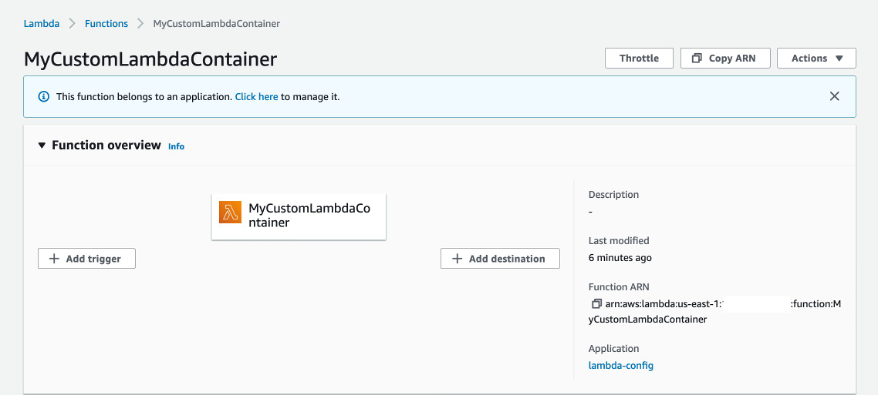
The function requires a unique S3 bucket to store the logs files, which I create in the S3 console. I create a Lambda function from the ECR repository image, and specify the bucket name as a Lambda environment variable.

aws lambda create-function --region us-east-1  --function-name log-extension-function \
--package-type Image --code ImageUri=123456789012.dkr.ecr.us-east-1.amazonaws.com/log-extension-function:latest \
--role "arn:aws:iam:: 123456789012:role/lambda-role" \
--environment  "Variables": {"S3_BUCKET_NAME": "s3-logs-extension-demo-logextensionsbucket-us-east-1"}

For subsequent extension code changes, I need to update both the extension and function images. If only the function code changes, I need to update the function image. I push the function image as the :latest image to ECR. I then update the function code deployment to use the updated :latest ECR image.

aws lambda update-function-code --function-name log-extension-function --image-uri 123456789012.dkr.ecr.us-east-1.amazonaws.com/log-extension-function:latest

Using custom runtimes with container images

With .zip archive functions, custom runtimes are added using Lambda layers. With container images, you no longer need to copy in Lambda layer code for custom runtimes.

You can build your own custom runtime images starting with AWS provided base images for custom runtimes. You can add your preferred runtime, dependencies, and code to these images. To communicate with Lambda, the image must implement the Lambda Runtime API. We provide Lambda runtime interface clients for all supported runtimes, or you can implement your own for additional runtimes.

Running extensions in container images

A Lambda extension running in a function packaged as a container image works in the same way as a .zip archive function. You build a function container image including the extension files, or adding an extension image layer. Lambda looks for any external extensions in the /opt/extensions directory and starts initializing them. Extensions must be executable as binaries or scripts.

Internal extensions modify the Lambda runtime startup behavior using language-specific environment variables, or wrapper scripts. For language-specific environment variables, you can set the following environment variables in your function configuration to augment the runtime command line.

  • JAVA_TOOL_OPTIONS (Java Corretto 8 and 11)
  • NODE_OPTIONS (Node.js 10 and 12)
  • DOTNET_STARTUP_HOOKS (.NET Core 3.1)

An example Lambda environment variable for JAVA_TOOL_OPTIONS:

-javaagent:"/opt/ExampleAgent-0.0.jar"

Wrapper scripts delegate the runtime start-up to a script. The script can inject and alter arguments, set environment variables, or capture metrics, errors, and other diagnostic information. The following runtimes support wrapper scripts: Node.js 10 and 12, Python 3.8, Ruby 2.7, Java 8 and 11, and .NET Core 3.1

You specify the script by setting the value of the AWS_LAMBDA_EXEC_WRAPPER environment variable as the file system path of an executable binary or script, for example:

/opt/wrapper_script

Conclusion

You can now package and deploy Lambda functions as container images in addition to .zip archives. Lambda functions packaged as container images do not directly support adding Lambda layers to the function configuration as .zip archives do.

In this post, I show a number of solutions to use the functionality of Lambda layers and extensions with container images, including example Dockerfiles.

I show how to migrate an existing Lambda function and extension from a .zip archive to separate function and extension container images. Follow the instructions in the README.md file in the GitHub repository.

For more serverless learning resources, visit https://serverlessland.com.

Creating multi-architecture Docker images to support Graviton2 using AWS CodeBuild and AWS CodePipeline

Post Syndicated from Tyler Lynch original https://aws.amazon.com/blogs/devops/creating-multi-architecture-docker-images-to-support-graviton2-using-aws-codebuild-and-aws-codepipeline/

This post provides a clear path for customers who are evaluating and adopting Graviton2 instance types for performance improvements and cost-optimization.

Graviton2 processors are custom designed by AWS using 64-bit Arm Neoverse N1 cores. They power the T4g*, M6g*, R6g*, and C6g* Amazon Elastic Compute Cloud (Amazon EC2) instance types and offer up to 40% better price performance over the current generation of x86-based instances in a variety of workloads, such as high-performance computing, application servers, media transcoding, in-memory caching, gaming, and more.

More and more customers want to make the move to Graviton2 to take advantage of these performance optimizations while saving money.

During the transition process, a great benefit AWS provides is the ability to perform native builds for each architecture, instead of attempting to cross-compile on homogenous hardware. This has the benefit of decreasing build time as well as reducing complexity and cost to set up.

To see this benefit in action, we look at how to build a CI/CD pipeline using AWS CodePipeline and AWS CodeBuild that can build multi-architecture Docker images in parallel to aid you in evaluating and migrating to Graviton2.

Solution overview

With CodePipeline and CodeBuild, we can automate the creation of architecture-specific Docker images, which can be pushed to Amazon Elastic Container Registry (Amazon ECR). The following diagram illustrates this architecture.

Solution overview architectural diagram

The steps in this process are as follows:

  1. Create a sample Node.js application and associated Dockerfile.
  2. Create the buildspec files that contain the commands that CodeBuild runs.
  3. Create three CodeBuild projects to automate each of the following steps:
    • CodeBuild for x86 – Creates a x86 Docker image and pushes to Amazon ECR.
    • CodeBuild for arm64 – Creates a Arm64 Docker image and pushes to Amazon ECR.
    • CodeBuild for manifest list – Creates a Docker manifest list, annotates the list, and pushes to Amazon ECR.
  4. Automate the orchestration of these projects with CodePipeline.

Prerequisites

The prerequisites for this solution are as follows:

  • The correct AWS Identity and Access Management (IAM) role permissions for your account allowing for the creation of the CodePipeline pipeline, CodeBuild projects, and Amazon ECR repositories
  • An Amazon ECR repository named multi-arch-test
  • A source control service such as AWS CodeCommit or GitHub that CodeBuild and CodePipeline can interact with
  • The source code repository initialized and cloned locally

Creating a sample Node.js application and associated Dockerfile

For this post, we create a sample “Hello World” application that self-reports the processor architecture. We work in the local folder that is cloned from our source repository as specified in the prerequisites.

  1. In your preferred text editor, add a new file with the following Node.js code:

# Hello World sample app.
const http = require('http');

const port = 3000;

const server = http.createServer((req, res) => {
  res.statusCode = 200;
  res.setHeader('Content-Type', 'text/plain');
  res.end(`Hello World. This processor architecture is ${process.arch}`);
});

server.listen(port, () => {
  console.log(`Server running on processor architecture ${process.arch}`);
});
  1. Save the file in the root of your source repository and name it app.js.
  2. Commit the changes to Git and push the changes to our source repository. See the following code:

git add .
git commit -m "Adding Node.js sample application."
git push

We also need to create a sample Dockerfile that instructs the docker build command how to build the Docker images. We use the default Node.js image tag for version 14.

  1. In a text editor, add a new file with the following code:

# Sample nodejs application
FROM node:14
WORKDIR /usr/src/app
COPY package*.json app.js ./
RUN npm install
EXPOSE 3000
CMD ["node", "app.js"]
  1. Save the file in the root of the source repository and name it Dockerfile. Make sure it is Dockerfile with no extension.
  2. Commit the changes to Git and push the changes to our source repository:

git add .
git commit -m "Adding Dockerfile to host the Node.js sample application."
git push

Creating a build specification file for your application

It’s time to create and add a buildspec file to our source repository. We want to use a single buildspec.yml file for building, tagging, and pushing the Docker images to Amazon ECR for both target native architectures, x86, and Arm64. We use CodeBuild to inject environment variables, some of which need to be changed for each architecture (such as image tag and image architecture).

A buildspec is a collection of build commands and related settings, in YAML format, that CodeBuild uses to run a build. For more information, see Build specification reference for CodeBuild.

The buildspec we add instructs CodeBuild to do the following:

  • install phase – Update the yum package manager
  • pre_build phase – Sign in to Amazon ECR using the IAM role assumed by CodeBuild
  • build phase – Build the Docker image using the Docker CLI and tag the newly created Docker image
  • post_build phase – Push the Docker image to our Amazon ECR repository

We first need to add the buildspec.yml file to our source repository.

  1. In a text editor, add a new file with the following build specification:

version: 0.2
phases:
    install:
        commands:
            - yum update -y
    pre_build:
        commands:
            - echo Logging in to Amazon ECR...
            - $(aws ecr get-login --no-include-email --region $AWS_DEFAULT_REGION)
    build:
        commands:
            - echo Build started on `date`
            - echo Building the Docker image...          
            - docker build -t $IMAGE_REPO_NAME:$IMAGE_TAG .
            - docker tag $IMAGE_REPO_NAME:$IMAGE_TAG $AWS_ACCOUNT_ID.dkr.ecr.$AWS_DEFAULT_REGION.amazonaws.com/$IMAGE_REPO_NAME:$IMAGE_TAG      
    post_build:
        commands:
            - echo Build completed on `date`
            - echo Pushing the Docker image...
            - docker push $AWS_ACCOUNT_ID.dkr.ecr.$AWS_DEFAULT_REGION.amazonaws.com/$IMAGE_REPO_NAME:$IMAGE_TAG
  1. Save the file in the root of the repository and name it buildspec.yml.

Because we specify environment variables in the CodeBuild project, we don’t need to hard code any values in the buildspec file.

  1. Commit the changes to Git and push the changes to our source repository:

git add .
git commit -m "Adding CodeBuild buildspec.yml file."
git push

Creating a build specification file for your manifest list creation

Next we create a buildspec file that instructs CodeBuild to create a Docker manifest list, and associate that manifest list with the Docker images that the buildspec file builds.

A manifest list is a list of image layers that is created by specifying one or more (ideally more than one) image names. You can then use it in the same way as an image name in docker pull and docker run commands, for example. For more information, see manifest create.

As of this writing, manifest creation is an experimental feature of the Docker command line interface (CLI).

Experimental features provide early access to future product functionality. These features are intended only for testing and feedback because they may change between releases without warning or be removed entirely from a future release. Experimental features must not be used in production environments. For more information, Experimental features.

When creating the CodeBuild project for manifest list creation, we specify a buildspec file name override as buildspec-manifest.yml. This buildspec instructs CodeBuild to do the following:

  • install phase – Update the yum package manager
  • pre_build phase – Sign in to Amazon ECR using the IAM role assumed by CodeBuild
  • build phase – Perform three actions:
    • Set environment variable to enable Docker experimental features for the CLI
    • Create the Docker manifest list using the Docker CLI
    • Annotate the manifest list to add the architecture-specific Docker image references
  • post_build phase – Push the Docker image to our Amazon ECR repository and use docker manifest inspect to echo out the contents of the manifest list from Amazon ECR

We first need to add the buildspec-manifest.yml file to our source repository.

  1. In a text editor, add a new file with the following build specification:

version: 0.2
# Based on the Docker documentation, must include the DOCKER_CLI_EXPERIMENTAL environment variable
# https://docs.docker.com/engine/reference/commandline/manifest/    

phases:
    install:
        commands:
            - yum update -y
    pre_build:
        commands:
            - echo Logging in to Amazon ECR...
            - $(aws ecr get-login --no-include-email --region $AWS_DEFAULT_REGION)
    build:
        commands:
            - echo Build started on `date`
            - echo Building the Docker manifest...   
            - export DOCKER_CLI_EXPERIMENTAL=enabled       
            - docker manifest create $AWS_ACCOUNT_ID.dkr.ecr.$AWS_DEFAULT_REGION.amazonaws.com/$IMAGE_REPO_NAME $AWS_ACCOUNT_ID.dkr.ecr.$AWS_DEFAULT_REGION.amazonaws.com/$IMAGE_REPO_NAME:latest-arm64v8 $AWS_ACCOUNT_ID.dkr.ecr.$AWS_DEFAULT_REGION.amazonaws.com/$IMAGE_REPO_NAME:latest-amd64    
            - docker manifest annotate --arch arm64 $AWS_ACCOUNT_ID.dkr.ecr.$AWS_DEFAULT_REGION.amazonaws.com/$IMAGE_REPO_NAME $AWS_ACCOUNT_ID.dkr.ecr.$AWS_DEFAULT_REGION.amazonaws.com/$IMAGE_REPO_NAME:latest-arm64v8
            - docker manifest annotate --arch amd64 $AWS_ACCOUNT_ID.dkr.ecr.$AWS_DEFAULT_REGION.amazonaws.com/$IMAGE_REPO_NAME $AWS_ACCOUNT_ID.dkr.ecr.$AWS_DEFAULT_REGION.amazonaws.com/$IMAGE_REPO_NAME:latest-amd64

    post_build:
        commands:
            - echo Build completed on `date`
            - echo Pushing the Docker image...
            - docker manifest push $AWS_ACCOUNT_ID.dkr.ecr.$AWS_DEFAULT_REGION.amazonaws.com/$IMAGE_REPO_NAME
            - docker manifest inspect $AWS_ACCOUNT_ID.dkr.ecr.$AWS_DEFAULT_REGION.amazonaws.com/$IMAGE_REPO_NAME
  1. Save the file in the root of the repository and name it buildspec-manifest.yml.
  2. Commit the changes to Git and push the changes to our source repository:

git add .
git commit -m "Adding CodeBuild buildspec-manifest.yml file."
git push

Setting up your CodeBuild projects

Now we have created a single buildspec.yml file for building, tagging, and pushing the Docker images to Amazon ECR for both target native architectures: x86 and Arm64. This file is shared by two of the three CodeBuild projects that we create. We use CodeBuild to inject environment variables, some of which need to be changed for each architecture (such as image tag and image architecture). We also want to use the single Docker file, regardless of the architecture. We also need to ensure any third-party libraries are present and compiled correctly for the target architecture.

For more information about third-party libraries and software versions that have been optimized for Arm, see the Getting started with AWS Graviton GitHub repo.

We use the same environment variable names for the CodeBuild projects, but each project has specific values, as detailed in the following table. You need to modify these values to your numeric AWS account ID, the AWS Region where your Amazon ECR registry endpoint is located, and your Amazon ECR repository name. The instructions for adding the environment variables in the CodeBuild projects are in the following sections.

Environment Variable x86 Project values Arm64 Project values manifest Project values
1 AWS_DEFAULT_REGION us-east-1 us-east-1 us-east-1
2 AWS_ACCOUNT_ID 111111111111 111111111111 111111111111
3 IMAGE_REPO_NAME multi-arch-test multi-arch-test multi-arch-test
4 IMAGE_TAG latest-amd64 latest-arm64v8 latest

The image we use in this post uses architecture-specific tags with the term latest. This is for demonstration purposes only; it’s best to tag the images with an explicit version or another meaningful reference.

CodeBuild for x86

We start with creating a new CodeBuild project for x86 on the CodeBuild console.

CodeBuild looks for a file named buildspec.yml by default, unless overridden. For these first two CodeBuild projects, we rely on that default and don’t specify the buildspec name.

  1. On the CodeBuild console, choose Create build project.
  2. For Project name, enter a unique project name for your build project, such as node-x86.
  3. To add tags, add them under Additional Configuration.
  4. Choose a Source provider (for this post, we choose GitHub).
  5. For Environment image, choose Managed image.
  6. Select Amazon Linux 2.
  7. For Runtime(s), choose Standard.
  8. For Image, choose aws/codebuild/amazonlinux2-x86_64-standard:3.0.

This is a x86 build image.

  1. Select Privileged.
  2. For Service role, choose New service role.
  3. Enter a name for the new role (one is created for you), such as CodeBuildServiceRole-nodeproject.

We reuse this same service role for the other CodeBuild projects associated with this project.

  1. Expand Additional configurations and move to the Environment variables
  2. Create the following Environment variables:
Name Value Type
1 AWS_DEFAULT_REGION us-east-1 Plaintext
2 AWS_ACCOUNT_ID 111111111111 Plaintext
3 IMAGE_REPO_NAME multi-arch-test Plaintext
4 IMAGE_TAG latest-amd64 Plaintext
  1. Choose Create build project.

Attaching the IAM policy

Now that we have created the CodeBuild project, we need to adjust the new service role that was just created and attach an IAM policy so that it can interact with the Amazon ECR API.

  1. On the CodeBuild console, choose the node-x86 project
  2. Choose the Build details
  3. Under Service role, choose the link that looks like arn:aws:iam::111111111111:role/service-role/CodeBuildServiceRole-nodeproject.

A new browser tab should open.

  1. Choose Attach policies.
  2. In the Search field, enter AmazonEC2ContainerRegistryPowerUser.
  3. Select AmazonEC2ContainerRegistryPowerUser.
  4. Choose Attach policy.

CodeBuild for arm64

Now we move on to creating a new (second) CodeBuild project for Arm64.

  1. On the CodeBuild console, choose Create build project.
  2. For Project name, enter a unique project name, such as node-arm64.
  3. If you want to add tags, add them under Additional Configuration.
  4. Choose a Source provider (for this post, choose GitHub).
  5. For Environment image, choose Managed image.
  6. Select Amazon Linux 2.
  7. For Runtime(s), choose Standard.
  8. For Image, choose aws/codebuild/amazonlinux2-aarch64-standard:2.0.

This is an Arm build image and is different from the image selected in the previous CodeBuild project.

  1. Select Privileged.
  2. For Service role, choose Existing service role.
  3. Choose CodeBuildServiceRole-nodeproject.
  4. Select Allow AWS CodeBuild to modify this service role so it can be used with this build project.
  5. Expand Additional configurations and move to the Environment variables
  6. Create the following Environment variables:
Name Value Type
1 AWS_DEFAULT_REGION us-east-1 Plaintext
2 AWS_ACCOUNT_ID 111111111111 Plaintext
3 IMAGE_REPO_NAME multi-arch-test Plaintext
4 IMAGE_TAG latest-arm64v8 Plaintext
  1. Choose Create build project.

CodeBuild for manifest list

For the last CodeBuild project, we create a Docker manifest list, associating that manifest list with the Docker images that the preceding projects create, and pushing the manifest list to ECR. This project uses the buildspec-manifest.yml file created earlier.

  1. On the CodeBuild console, choose Create build project.
  2. For Project name, enter a unique project name for your build project, such as node-manifest.
  3. If you want to add tags, add them under Additional Configuration.
  4. Choose a Source provider (for this post, choose GitHub).
  5. For Environment image, choose Managed image.
  6. Select Amazon Linux 2.
  7. For Runtime(s), choose Standard.
  8. For Image, choose aws/codebuild/amazonlinux2-x86_64-standard:3.0.

This is a x86 build image.

  1. Select Privileged.
  2. For Service role, choose Existing service role.
  3. Choose CodeBuildServiceRole-nodeproject.
  4. Select Allow AWS CodeBuild to modify this service role so it can be used with this build project.
  5. Expand Additional configurations and move to the Environment variables
  6. Create the following Environment variables:
Name Value Type
1 AWS_DEFAULT_REGION us-east-1 Plaintext
2 AWS_ACCOUNT_ID 111111111111 Plaintext
3 IMAGE_REPO_NAME multi-arch-test Plaintext
4 IMAGE_TAG latest Plaintext
  1. For Buildspec name – optional, enter buildspec-manifest.yml to override the default.
  2. Choose Create build project.

Setting up CodePipeline

Now we can move on to creating a pipeline to orchestrate the builds and manifest creation.

  1. On the CodePipeline console, choose Create pipeline.
  2. For Pipeline name, enter a unique name for your pipeline, such as node-multi-architecture.
  3. For Service role, choose New service role.
  4. Enter a name for the new role (one is created for you). For this post, we use the generated role name CodePipelineServiceRole-nodeproject.
  5. Select Allow AWS CodePipeline to create a service role so it can be used with this new pipeline.
  6. Choose Next.
  7. Choose a Source provider (for this post, choose GitHub).
  8. If you don’t have any existing Connections to GitHub, select Connect to GitHub and follow the wizard.
  9. Choose your Branch name (for this post, I choose main, but your branch might be different).
  10. For Output artifact format, choose CodePipeline default.
  11. Choose Next.

You should now be on the Add build stage page.

  1. For Build provider, choose AWS CodeBuild.
  2. Verify the Region is your Region of choice (for this post, I use US East (N. Virginia)).
  3. For Project name, choose node-x86.
  4. For Build type, select Single build.
  5. Choose Next.

You should now be on the Add deploy stage page.

  1. Choose Skip deploy stage.

A pop-up appears that reads Your pipeline will not include a deployment stage. Are you sure you want to skip this stage?

  1. Choose Skip.
  2. Choose Create pipeline.

CodePipeline immediately attempts to run a build. You can let it continue without worry if it fails. We are only part of the way done with the setup.

Adding an additional build step

We need to add the additional build step for the Arm CodeBuild project in the Build stage.

  1. On the CodePipeline console, choose node-multi-architecture pipeline
  2. Choose Edit to start editing the pipeline stages.

You should now be on the Editing: node-multi-architecture page.

  1. For the Build stage, choose Edit stage.
  2. Choose + Add action.

Editing node-multi-architecture

  1. For Action name, enter Build-arm64.
  2. For Action provider, choose AWS CodeBuild.
  3. Verify your Region is correct.
  4. For Input artifacts, select SourceArtifact.
  5. For Project name, choose node-arm64.
  6. For Build type, select Single build.
  7. Choose Done.
  8. Choose Save.

A pop-up appears that reads Saving your changes cannot be undone. If the pipeline is running when you save your changes, that execution will not complete.

  1. Choose Save.

Updating the first build action name

This step is optional. The CodePipeline wizard doesn’t allow you to enter your Build action name during creation, but you can update the Build stage’s first build action to have consistent naming.

  1. Choose Edit to start editing the pipeline stages.
  2. Choose the Edit icon.
  3. For Action name, enter Build-x86.
  4. Choose Done.
  5. Choose Save.

A pop-up appears that says Saving your changes cannot be undone. If the pipeline is running when you save your changes, that execution will not complete.

  1. Choose Save.

Adding the project

Now we add the CodeBuild project for manifest creation and publishing.

  1. On the CodePipeline console, choose node-multi-architecture pipeline.
  2. Choose Edit to start editing the pipeline stages.
  3. Choose +Add stage below the Build
  4. Set the Stage name to Manifest
  5. Choose +Add action group.
  6. For Action name, enter Create-manifest.
  7. For Action provider, choose AWS CodeBuild.
  8. Verify your Region is correct.
  9. For Input artifacts, select SourceArtifact.
  10. For Project name, choose node-manifest.
  11. For Build type, select Single build.
  12. Choose Done.
  13. Choose Save.

A pop-up appears that reads Saving your changes cannot be undone. If the pipeline is running when you save your changes, that execution will not complete.

  1. Choose Save.

Testing the pipeline

Now let’s verify everything works as planned.

  1. In the pipeline details page, choose Release change.

This runs the pipeline in stages. The process should take a few minutes to complete. The pipeline should show each stage as Succeeded.

Pipeline visualization

Now we want to inspect the output of the Create-manifest action that runs the CodeBuild project for manifest creation.

  1. Choose Details in the Create-manifest

This opens the CodeBuild pipeline.

  1. Under Build logs, we should see the output from the manifest inspect command we ran as the last step in the buildspec-manifest.yml See the following sample log:

[Container] 2020/10/07 16:47:39 Running command docker manifest inspect $AWS_ACCOUNT_ID.dkr.ecr.$AWS_DEFAULT_REGION.amazonaws.com/$IMAGE_REPO_NAME
{
   "schemaVersion": 2,
   "mediaType": "application/vnd.docker.distribution.manifest.list.v2+json",
   "manifests": [
      {
         "mediaType": "application/vnd.docker.distribution.manifest.v2+json",
         "size": 1369,
         "digest": "sha256:238c2762212ff5d7e0b5474f23d500f2f1a9c851cdd3e7ef0f662efac508cd04",
         "platform": {
            "architecture": "amd64",
            "os": "linux"
         }
      },
      {
         "mediaType": "application/vnd.docker.distribution.manifest.v2+json",
         "size": 1369,
         "digest": "sha256:0cc9e96921d5565bdf13274e0f356a139a31d10e95de9ad3d5774a31b8871b05",
         "platform": {
            "architecture": "arm64",
            "os": "linux"
         }
      }
   ]
}

Cleaning up

To avoid incurring future charges, clean up the resources created as part of this post.

  1. On the CodePipeline console, choose the pipeline node-multi-architecture.
  2. Choose Delete pipeline.
  3. When prompted, enter delete.
  4. Choose Delete.
  5. On the CodeBuild console, choose the Build project node-x86.
  6. Choose Delete build project.
  7. When prompted, enter delete.
  8. Choose Delete.
  9. Repeat the deletion process for Build projects node-arm64 and node-manifest.

Next we delete the Docker images we created and pushed to Amazon ECR. Be careful to not delete a repository that is being used for other images.

  1. On the Amazon ECR console, choose the repository multi-arch-test.

You should see a list of Docker images.

  1. Select latest, latest-arm64v8, and latest-amd64.
  2. Choose Delete.
  3. When prompted, enter delete.
  4. Choose Delete.

Finally, we remove the IAM roles that we created.

  1. On the IAM console, choose Roles.
  2. In the search box, enter CodePipelineServiceRole-nodeproject.
  3. Select the role and choose Delete role.
  4. When prompted, choose Yes, delete.
  5. Repeat these steps for the role CodeBuildServiceRole-nodeproject.

Conclusion

To summarize, we successfully created a pipeline to create multi-architecture Docker images for both x86 and arm64. We referenced them via annotation in a Docker manifest list and stored them in Amazon ECR. The Docker images were based on a single Docker file that uses environment variables as parameters to allow for Docker file reuse.

For more information about these services, see the following:

About the Authors


Tyler Lynch photo

Tyler Lynch
Tyler Lynch is a Sr. Solutions Architect focusing on EdTech at AWS.


Alistair McLean photo

Alistair McLean

Alistair is a Principal Solutions Architect focused on State and Local Government and K12 customers at AWS.


Reducing Docker image build time on AWS CodeBuild using an external cache

Post Syndicated from Camillo Anania original https://aws.amazon.com/blogs/devops/reducing-docker-image-build-time-on-aws-codebuild-using-an-external-cache/

With the proliferation of containerized solutions to simplify creating, deploying, and running applications, coupled with the use of automation CI/CD pipelines that continuously rebuild, test, and deploy such applications when new changes are committed, it’s important that your CI/CD pipelines run as quickly as possible, enabling you to get early feedback and allowing for faster releases.

AWS CodeBuild supports local caching, which makes it possible to persist intermediate build artifacts, like a Docker layer cache, locally on the build host and reuse them in subsequent runs. The CodeBuild local cache is maintained on the host at best effort, so it’s possible several of your build runs don’t hit the cache as frequently as you would like.

A typical Docker image is built from several intermediate layers that are constructed during the initial image build process on a host. These intermediate layers are reused if found valid in any subsequent image rebuild; doing so speeds up the build process considerably because the Docker engine doesn’t need to rebuild the whole image if the layers in the cache are still valid.

This post shows how to implement a simple, effective, and durable external Docker layer cache for CodeBuild to significantly reduce image build runtime.

Solution overview

The following diagram illustrates the high-level architecture of this solution. We describe implementing each stage in more detail in the following paragraphs.

CodeBuildExternalCacheDiagram

In a modern software engineering approach built around CI/CD practices, whenever specific events happen, such as an application code change is merged, you need to rebuild, test, and eventually deploy the application. Assuming the application is containerized with Docker, the build process entails rebuilding one or multiple Docker images. The environment for this rebuild is on CodeBuild, which is a fully managed build service in the cloud. CodeBuild spins up a new environment to accommodate build requests and runs a sequence of actions defined in its build specification.

Because each CodeBuild instance is an independent environment, build artifacts can’t be persisted in the host indefinitely. The native CodeBuild local caching feature allows you to persist a cache for a limited time so that immediate subsequent builds can benefit from it. Native local caching is performed at best effort and can’t be relied on when multiple builds are triggered at different times. This solution describes using an external persistent cache that you can reuse across builds and is valid at any time.

After the first build of a Docker image is complete, the image is tagged and pushed to Amazon Elastic Container Registry (Amazon ECR). In each subsequent build, the image is pulled from Amazon ECR and the Docker build process is forced to use it as cache for its next build iteration of the image. Finally, the newly produced image is pushed back to Amazon ECR.

In the following paragraphs, we explain the solution and walk you through an example implementation. The solution rebuilds the publicly available Amazon Linux 2 Standard 3.0 image, which is an optimized image that you can use with CodeBuild.

Creating a policy and service role

The first step is to create an AWS Identity and Access Management (IAM) policy and service role for CodeBuild with the minimum set of permissions to perform the job.

  1. On the IAM console, choose Policies.
  2. Choose Create policy.
  3. Provide the following policy in JSON format:
    CodeBuild Docker Cache Policy:

    {
        "Version": "2012-10-17",
        "Statement": [
            {
                "Effect": "Allow",
                "Action": [
                    "ecr:GetAuthorizationToken",
                    "ecr:BatchCheckLayerAvailability",
                    "ecr:GetDownloadUrlForLayer",
                    "ecr:GetRepositoryPolicy",
                    "ecr:DescribeRepositories",
                    "ecr:ListImages",
                    "ecr:DescribeImages",
                    "ecr:BatchGetImage",
                    "ecr:ListTagsForResource",
                    "ecr:DescribeImageScanFindings",
                    "ecr:InitiateLayerUpload",
                    "ecr:UploadLayerPart",
                    "ecr:CompleteLayerUpload",
                    "ecr:PutImage"
                ],
                "Resource": "*"
            }
        ]
    }
  4. In the Review policy section, enter a name (for example, CodeBuildDockerCachePolicy).
  5. Choose Create policy.
  6. Choose Roles on the navigation pane.
  7. Choose Create role.
  8. Keep AWS service as the type of role and choose CodeBuild from the list of services.
  9. Choose Next.
  10. Search for and add the policy you created.
  11. Review the role and enter a name (for example, CodeBuildDockerCacheRole).
  12. Choose Create role.

Creating an Amazon ECR repository

In this step, we create an Amazon ECR repository to store the built Docker images.

  1. On the Amazon ECR console, choose Create repository.
  2. Enter a name (for example, amazon_linux_codebuild_image).
  3. Choose Create repository.

Configuring a CodeBuild project

You now configure the CodeBuild project that builds the Docker image and configures its cache to speed up the process.

  1. On the CodeBuild console, choose Create build project.
  2. Enter a name (for example, SampleDockerCacheProject).
  3. For Source provider, choose GitHub.
  4. For Repository, select Public repository.
  5. For Repository URL, enter https://github.com/aws/aws-codebuild-docker-images.
    CodeBuildGitHubSourceConfiguration
  6. In the Environment section, for Environment image, select Managed image.
  7. For Operating system, choose Amazon Linux 2.
  8. For Runtime(s), choose Standard.
  9. For Image, enter aws/codebuild/amazonlinux2-x86_64-standard:3.0.
  10. For Image version, choose Always use the latest image for this runtime version.
  11. For Environment type, choose Linux.
  12. For Privileged, select Enable this flag if you want to build Docker images or want your builds to get elevated privileges.
  13. For Service role, select Existing service role.
  14. For Role ARN, enter the ARN for the service role you created (CodeBuildDockerCachePolicy).
  15. Select Allow AWS CodeBuild to modify this service so it can be used with this build project.
    CodeBuildEnvironmentConfiguration
  16. In the Buildspec section, select Insert build commands.
  17. Choose Switch to editor.
  18. Enter the following build specification (substitute account-ID and region).
    version: 0.2
    
    env:
        variables:
        CONTAINER_REPOSITORY_URL: account-ID.dkr.ecr.region.amazonaws.com/amazon_linux_codebuild_image
        TAG_NAME: latest
    
    phases:
      install:
        runtime-versions:
          docker: 19
    
    pre_build:
      commands:
        - $(aws ecr get-login --no-include-email)
        - docker pull $CONTAINER_REPOSITORY_URL:$TAG_NAME || true
    
    build:
      commands:
        - cd ./al2/x86_64/standard/1.0
        - docker build --cache-from $CONTAINER_REPOSITORY_URL:$TAG_NAME --tag
    $CONTAINER_REPOSITORY_URL:$TAG_NAME .
    
    post_build:
        commands:
          - docker push $CONTAINER_REPOSITORY_URL
  19. Choose Create the project.

The provided build specification instructs CodeBuild to do the following:

  • Use the Docker 19 runtime to run the build. The following process doesn’t work reliably with Docker versions lower than 19.
  • Authenticate with Amazon ECR and pull the image you want to rebuild if it exists (on the first run, this image doesn’t exist).
  • Run the image rebuild, forcing Docker to consider as cache the image pulled at the previous step using the –cache-from parameter.
  • When the image rebuild is complete, push it to Amazon ECR.

Testing the solution

The solution is fully configured, so we can proceed to evaluate its behavior.

For the first run, we record a runtime of approximately 39 minutes. The build doesn’t use any cache and the docker pull in the pre-build stage fails to find the image we indicate, as expected (the || true statement at the end of the command line guarantees that the CodeBuild instance doesn’t stop because the docker pull failed).

The second run pulls the previously built image before starting the rebuild and completes in approximately 6 minutes, most of which is spent downloading the image from Amazon ECR (which is almost 5 GB).

We trigger another run after simulating a change halfway through the Dockerfile (addition of an echo command to the statement at line 291 of the Dockerfile). Docker still reuses the layers in the cache until the point of the changed statement and then rebuilds from scratch the remaining layers described in the Dockerfile. The runtime was approximately 31 minutes; the overhead of downloading the whole image first partially offsets the advantages of using it as cache.

It’s relevant to note the image size in this use case is considerably large; on average, projects deal with smaller images that introduce less overhead. Furthermore, the previous run had the built-in CodeBuild feature to cache Docker layers at best effort disabled; enabling it provides further efficiency because the docker pull specified in the pre-build stage doesn’t have to download the image if the one available locally matches the one on Amazon ECR.

Cleaning up

When you’re finished testing, you should un-provision the following resources to avoid incurring further charges and keep the account clean from unused resources:

  • The amazon_linux_codebuild_image Amazon ECR repository and its images;
  • The SampleDockerCacheProject CodeBuild project;
  • The CodeBuildDockerCachePolicy policy and the CodeBuildDockerCacheRole role.

Conclusion

In this post, we reviewed a simple and effective solution to implement a durable external cache for Docker on CodeBuild. The solution provides significant improvements in the execution time of the Docker build process on CodeBuild and is general enough to accommodate the majority of use cases, including multi-stage builds.

The approach works in synergy with the built-in CodeBuild feature of caching Docker layers at best effort, and we recommend using it for further improvements. Shorter build processes translate to lower compute costs, and overall determine a shorter development lifecycle for features released faster and at a lower cost.

About the Author


Camillo Anania is a Global DevOps Consultant with AWS Professional Services, London, UK.


James Jacob is a Global DevOps Consultant with AWS Professional Services, London, UK.