Amol Dwshmukh from the University of Glasgow got in touch with us about a social robot designed to influence young people’s handwashing behaviour, which the design team piloted in a rural school in Kerala, India.
In the pilot study, the hand-shaped Pepe robot motivated a 40% increase in the quality and levels of handwashing. It was designed by AMMACHI Labs and University of Glasgow researchers, with a Raspberry Pi serving as its brain and powering the screens that make up its mouth and eyes.
How does Pepe do it?
The robot is very easy to attach to the wall next to a handwashing station and automatically detects approaching people. Using AI software, it encourages, monitors, and gives verbal feedback to children on their handwashing, all in a fun and engaging way.
Little boy is thinking: “What the…” then “OK, surrrrre”
Amol thinks the success of the robot was due to its eye movements, as people change their behaviour when they know they are being observed. A screen displaying a graphical mouth also meant the robot could show it was happy when the children washed their hands correctly; positive feedback such as this promotes learning new skills.
Socialising with Pepe keeps children at the sinks for longer
Amol’s team started work on this idea last year, and they were keen to test the Pepe robot with a group of people who had never been exposed to social robots before. They presented their smiling hand-face hybrid creation at the IEEE International Conference on Robot & Human Interactive Communication (see photo below). And now that hand washing has become more important than ever due to coronavirus, the project is getting mainstream media attention as well.
The team is now planning to improve Pepe’s autonomous intelligence and scale up the intervention across more schools through the Embracing the World network.
More than 90% of the students liked the robot and said they would like to see Pepe again after school vacation.
67% of the respondents thought the robot was male, while 33% thought it was female, mostly attributing to the robot’s voice as the reason
60% said it was younger than them, feeling Pepe was like a younger brother or sister, while 33% thought it was older, and 7% perceived the robot to be of the same age
72% of the students thought Pepe was alive, largely due to its ability to talk
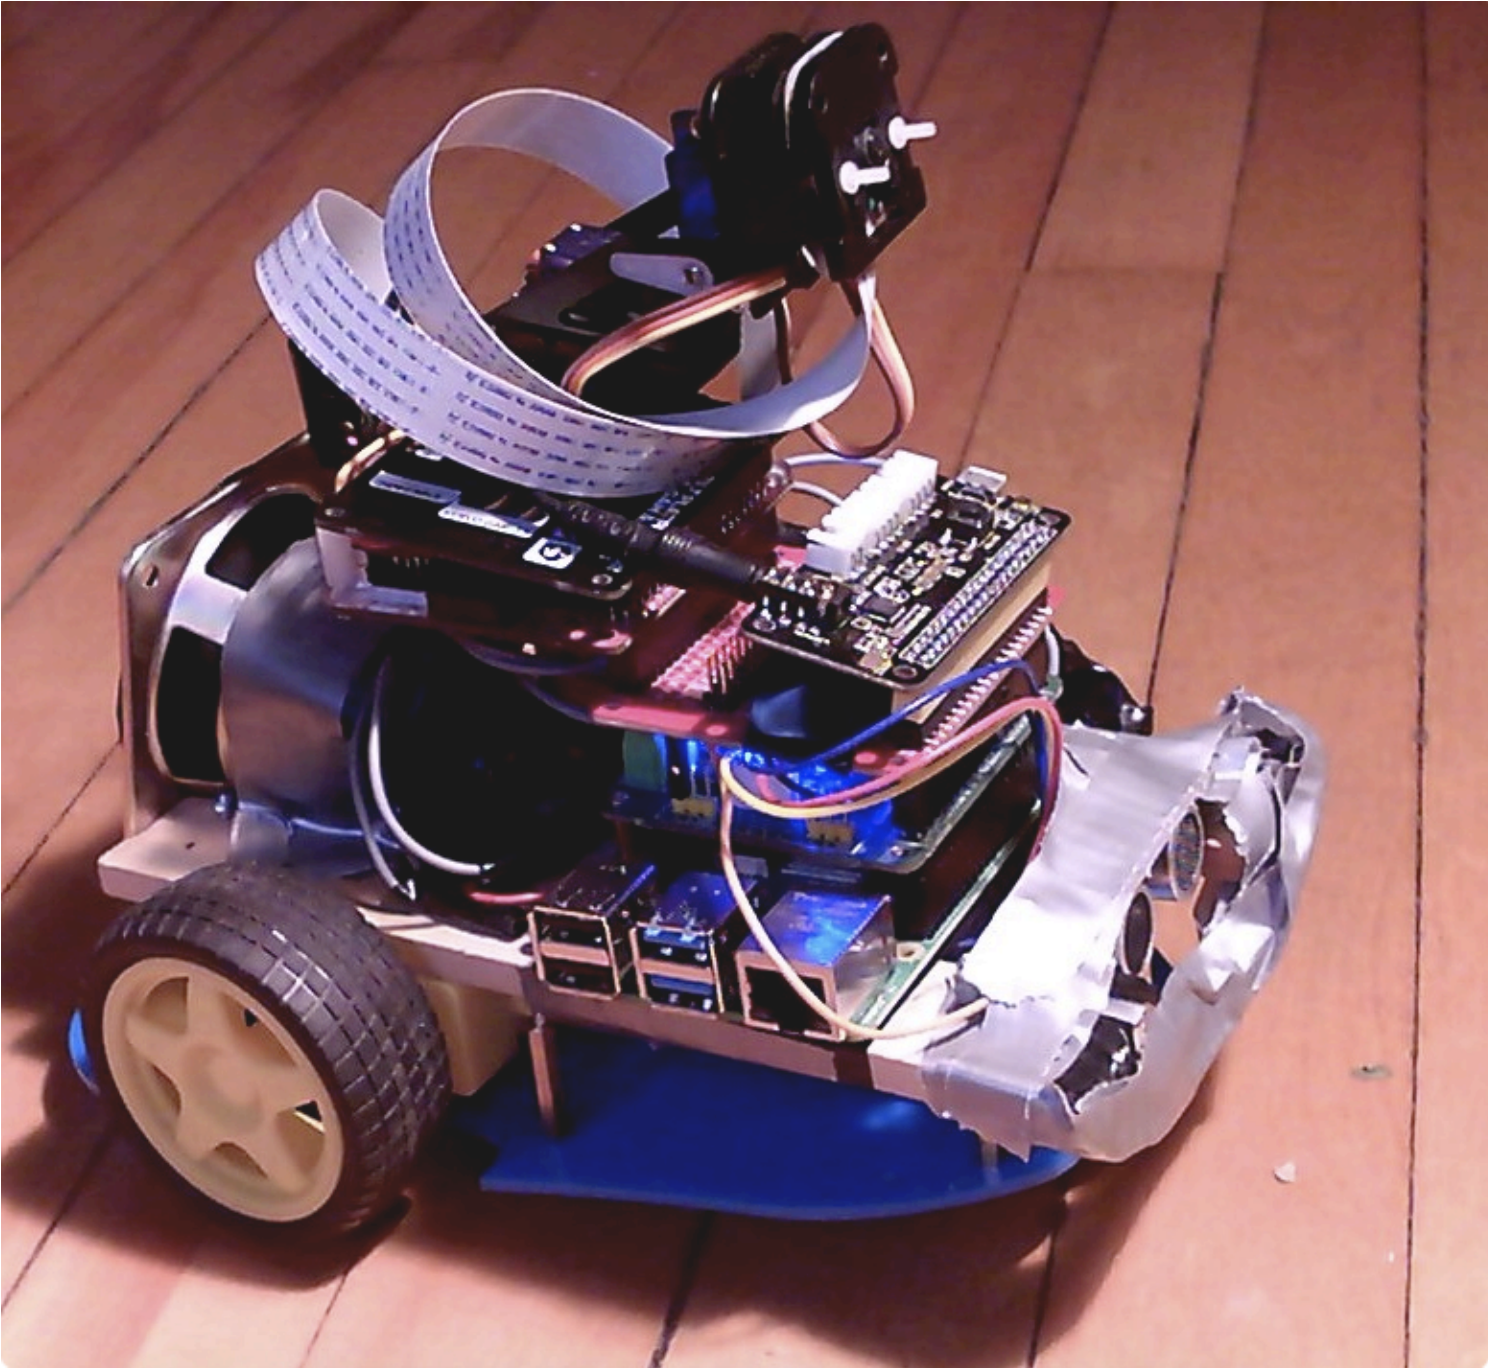
Nandu Vadakkath was inspired by a line-following robot built (literally) entirely from salvage materials that could wait patiently and purchase beer for its maker in Tamil Nadu, India. So he set about making his own, but with the goal of making it capable of slightly more sophisticated tasks.
Robot comes when called, and recognises you as its special human
Software
Nandu had ambitious plans for his robot: navigation, speech and listening, recognition, and much more were on the list of things he wanted it to do. And in order to make it do everything he wanted, he incorporated a lot of software, including:
Robot shares Nandu’s astrological chart
Python 3
virtualenv, a tool for creating isolating virtual Python environments
the OpenCV open source computer vision library
the spaCy open source natural language processing library
the TensorFlow open source machine learning platform
Haar cascade algorithms for object detection
A ResNet neural network with the COCO dataset for object detection
DeepSpeech, an open source speech-to-text engine
eSpeak NG, an open source speech synthesiser
The MySQL database service
So how did Nandu go about trying to make the robot do some of the things on his wishlist?
Context and intents engine
The engine uses spaCy to analyse sentences, classify all the elements it identifies, and store all this information in a MySQL database. When the robot encounters a sentence with a series of possible corresponding actions, it weighs them to see what the most likely context is, based on sentences it has previously encountered.
Getting to know you
The robot has been trained to follow Nandu around but it can get to know other people too. When it meets a new person, it takes a series of photos and processes them in the background, so it learns to remember them.
There she blows!
Speech
Nandu didn’t like the thought of a basic robotic voice, so he searched high and low until he came across the MBROLA UK English voice. Have a listen in the videos above!
Object and people detection
The robot has an excellent group photo function: it looks for a person, calculates the distance between the top of their head and the top of the frame, then tilts the camera until this distance is about 60 pixels. This is a lot more effort than some human photographers put into getting all of everyone’s heads into the frame.
Nandu has created a YouTube channel for his robot companion, so be sure to keep up with its progress!
This fully automated M&M’s-launching machine delivers chocolate on voice command, wherever you are in the room.
A quick lesson in physics
To get our head around Harrison McIntyre‘s project, first we need to understand parabolas. Harrison explains: “If we ignore air resistance, a parabola can be defined as the arc an object describes when launching through space. The shape of a parabolic arc is determined by three variables: the object’s departure angle; initial velocity; and acceleration due to gravity.”
Harrison uses a basketball shooter to illustrate parabolas
Lucky for us, gravity is always the same, so you really only have to worry about angle and velocity. You could also get away with only changing one variable and still be able to determine where a launched object will land. But adjusting both the angle and the velocity grants much greater precision, which is why Harrison’s machine controls both exit angle and velocity of the M&M’s.
Kit list
The M&M’s launcher comprises:
2 Arduino Nanos
1 Raspberry Pi 3
3 servo motors
2 motor drivers
1 DC motor
1 Hall effect limit switch
2 voltage converters
1 USB camera
“Lots” of 3D printed parts
1 Amazon Echo Dot
A cordless drill battery is the primary power source.
The project relies on similar principles as a baseball pitching machine. A compliant wheel is attached to a shaft sitting a few millimetres above a feeder chute that can hold up to ten M&M’s. To launch an M&M’s piece, the machine spins up the shaft to around 1500 rpm, pushes an M&M’s piece into the wheel using a servo, and whoosh, your M&M’s piece takes flight.
Controlling velocity, angle and direction
To measure the velocity of the fly wheel in the machine, Harrison installed a Hall effect magnetic limit switch, which gets triggered every time it is near a magnet.
Two magnets were placed on opposite sides of the shaft, and these pass by the switch. By counting the time in between each pulse from the limit switch, the launcher determines how fast the fly wheel is spinning. In response, the microcontroller adjusts the motor output until the encoder reports the desired rpm. This is how the machine controls the speed at which the M&M’s pieces are fired.
Now, to control the angle at which the M&M’s pieces fly out of the machine, Harrison mounted the fly wheel assembly onto a turret with two degrees of freedom, driven by servos. The turret controls the angle at which the sweets are ‘pitched’, as well as the direction of the ‘pitch’.
So how does it know where I am?
With the angle, velocity, and direction at which the M&M’s pieces fly out of the machine taken care of, the last thing to determine is the expectant snack-eater’s location. For this, Harrison harnessed vision processing.
Harrison used a USB camera and a Python script running on Raspberry Pi 3 to determine when a human face comes into view of the machine, and to calculate how far away it is. The turret then rotates towards the face, the appropriate parabola is calculated, and an M&M’s piece is fired at the right angle and velocity to reach your mouth. Harrison even added facial recognition functionality so the machine only fires M&M’s pieces at his face. No one is stealing this guy’s candy!
So what’s Alexa for?
This project is topped off with a voice-activation element, courtesy of an Amazon Echo Dot, and a Python library called Sinric. This allowed Harrison to disguise his Raspberry Pi as a smart TV named ‘Chocolate’ and command Alexa to “increase the volume of ‘Chocolate’ by two” in order to get his machine to fire two M&M’s pieces at him.
Drawbacks
In his video, Harrison explaining that other snack-launching machines involve a spring-loaded throwing mechanism, which doesn’t let you determine the snack’s exit velocity. That means you have less control over how fast your snack goes and where it lands. The only drawback to Harrison’s model? His machine needs objects that are uniform in shape and size, which means no oddly shaped peanut M&M’s pieces for him.
He’s created quite the monster here, in that at first, the machine’s maximum firing speed was 40 mph. And no one wants crispy-shelled chocolate firing at their face at that speed. To keep his teeth safe, Harrison switched out the original motor for one with a lower rpm, which reduced the maximum exit velocity to a much more sensible 23 mph… Please make sure you test your own snack-firing machine outdoors before aiming it at someone’s face.
Go subscribe
Check out the end of Harrison’s videos for some more testing to see what his machine was capable of: he takes out an entire toy army and a LEGO Star Wars squad by firing M&M’s pieces at them. And remember to subscribe to his channel and like the video if you enjoyed what you saw, because that’s just a nice thing to do.
Using a simple Arduino sketch, an AWS Serverless Application Repository application, and a microcontroller, you can build a basic serverless workflow for communicating with an AWS IoT Core device.
A microcontroller is a programmable chip and acts as the brain of an electronic device. It has input and output pins for reading and writing on digital or analog components. Those components could be sensors, relays, actuators, or various other devices. It can be used to build remote sensors, home automation products, robots, and much more. The ESP32 is a powerful low-cost microcontroller with Wi-Fi and Bluetooth built in and is used this walkthrough.
The Arduino IDE, a lightweight development environment for hardware, now includes support for the ESP32. There is a large collection of community and officially supported libraries, from addressable LED strips to spectral light analysis.
The following walkthrough demonstrates connecting an ESP32 to AWS IoT Core to allow it to publish and subscribe to topics. This means that the device can send any arbitrary information, such as sensor values, into AWS IoT Core while also being able to receive commands.
Solution overview
This post walks through deploying an application from the AWS Serverless Application Repository. This allows an AWS IoT device to be messaged using a REST endpoint powered by Amazon API Gateway and AWS Lambda. The AWS SAR application also configures an AWS IoT rule that forwards any messages published by the device to a Lambda function that updates an Amazon DynamoDB table, demonstrating basic bidirectional communication.
The last section explores how to build an IoT project with real-world application. By connecting a thermal printer module and modifying a few lines of code in the example firmware, the ESP32 device becomes an AWS IoT–connected printer.
All of this can be accomplished within the AWS Free Tier, which is necessary for the following instructions.
An example of an AWS IoT project using an ESP32, AWS IoT Core, and an Arduino thermal printer.
Required steps
To complete the walkthrough, follow these steps:
Create an AWS IoT device.
Install and configure the Arduino IDE.
Configure and flash an ESP32 IoT device.
Deploying the lambda-iot-rule AWS SAR application.
Monitor and test.
Create an IoT thermal printer.
Creating an AWS IoT device
To communicate with the ESP32 device, it must connect to AWS IoT Core with device credentials. You must also specify the topics it has permissions to publish and subscribe on.
In the AWS IoT console, choose Register a new thing, Create a single thing.
Name the new thing. Use this exact name later when configuring the ESP32 IoT device. Leave the remaining fields set to their defaults. Choose Next.
Choose Create certificate. Only the thing cert, private key, and Amazon Root CA 1 downloads are necessary for the ESP32 to connect. Download and save them somewhere secure, as they are used when programming the ESP32 device.
Choose Activate, Attach a policy.
Skip adding a policy, and choose Register Thing.
In the AWS IoT console side menu, choose Secure, Policies, Create a policy.
Name the policy Esp32Policy. Choose the Advanced tab.
Replace REGION with the matching AWS Region you’re currently operating in. This can be found on the top right corner of the AWS console window.
Replace ACCOUNT_ID with your own, which can be found in Account Settings.
Replace THINGNAME with the name of your device.
Choose Create.
In the AWS IoT console, choose Secure, Certification. Select the one created for your device and choose Actions,Attach policy.
Choose Esp32Policy, Attach.
Your AWS IoT device is now configured to have permission to connect to AWS IoT Core. It can also publish to the topic esp32/pub and subscribe to the topic esp32/sub. For more information on securing devices, see AWS IoT Policies.
Installing and configuring the Arduino IDE
The Arduino IDE is an open-source development environment for programming microcontrollers. It supports a continuously growing number of platforms including most ESP32-based modules. It must be installed along with the ESP32 board definitions, MQTT library, and ArduinoJson library.
For Additional Board Manager URLs, add https://dl.espressif.com/dl/package_esp32_index.json.
Choose Tools, Board, Boards Manager.
Search esp32 and install the latest version.
Choose Sketch, Include Library, Manage Libraries.
Search MQTT, and install the latest version by Joel Gaehwiler.
Repeat the library installation process for ArduinoJson.
The Arduino IDE is now installed and configured with all the board definitions and libraries needed for this walkthrough.
Configuring and flashing an ESP32 IoT device
A collection of various ESP32 development boards.
For this section, you need an ESP32 device. To check if your board is compatible with the Arduino IDE, see the boards.txt file. The following code connects to AWS IoT Core securely using MQTT, a publish and subscribe messaging protocol.
This project has been tested on the following devices:
Install the required serial drivers for your device. Some boards use different USB/FTDI chips for interfacing. Here are the most commonly used with links to drivers.
Enter the name of your AWS IoT thing, as it is in the console, in the field THINGNAME.
To connect to Wi-Fi, add the SSID and PASSWORD of the desired network. Note: The network name should not include spaces or special characters.
The AWS_IOT_ENDPOINT can be found from the Settings page in the AWS IoT console.
Copy the Amazon Root CA 1, Device Certificate, and Device Private Key to their respective locations in the secrets.h file.
Choose the tab for the main sketch file, and paste the following.
#include "secrets.h"
#include <WiFiClientSecure.h>
#include <MQTTClient.h>
#include <ArduinoJson.h>
#include "WiFi.h"
// The MQTT topics that this device should publish/subscribe
#define AWS_IOT_PUBLISH_TOPIC "esp32/pub"
#define AWS_IOT_SUBSCRIBE_TOPIC "esp32/sub"
WiFiClientSecure net = WiFiClientSecure();
MQTTClient client = MQTTClient(256);
void connectAWS()
{
WiFi.mode(WIFI_STA);
WiFi.begin(WIFI_SSID, WIFI_PASSWORD);
Serial.println("Connecting to Wi-Fi");
while (WiFi.status() != WL_CONNECTED){
delay(500);
Serial.print(".");
}
// Configure WiFiClientSecure to use the AWS IoT device credentials
net.setCACert(AWS_CERT_CA);
net.setCertificate(AWS_CERT_CRT);
net.setPrivateKey(AWS_CERT_PRIVATE);
// Connect to the MQTT broker on the AWS endpoint we defined earlier
client.begin(AWS_IOT_ENDPOINT, 8883, net);
// Create a message handler
client.onMessage(messageHandler);
Serial.print("Connecting to AWS IOT");
while (!client.connect(THINGNAME)) {
Serial.print(".");
delay(100);
}
if(!client.connected()){
Serial.println("AWS IoT Timeout!");
return;
}
// Subscribe to a topic
client.subscribe(AWS_IOT_SUBSCRIBE_TOPIC);
Serial.println("AWS IoT Connected!");
}
void publishMessage()
{
StaticJsonDocument<200> doc;
doc["time"] = millis();
doc["sensor_a0"] = analogRead(0);
char jsonBuffer[512];
serializeJson(doc, jsonBuffer); // print to client
client.publish(AWS_IOT_PUBLISH_TOPIC, jsonBuffer);
}
void messageHandler(String &topic, String &payload) {
Serial.println("incoming: " + topic + " - " + payload);
// StaticJsonDocument<200> doc;
// deserializeJson(doc, payload);
// const char* message = doc["message"];
}
void setup() {
Serial.begin(9600);
connectAWS();
}
void loop() {
publishMessage();
client.loop();
delay(1000);
}
Choose File, Save, and give your project a name.
Flashing the ESP32
Plug the ESP32 board into a USB port on the computer running the Arduino IDE.
Choose Tools, Board, and then select the matching type of ESP32 module. In this case, a Sparkfun ESP32 Thing was used.
Choose Tools, Port, and then select the matching port for your device.
Choose Upload. Arduino reads Done uploading when the upload is successful.
Choose the magnifying lens icon to open the Serial Monitor. Set the baud rate to 9600.
Keep the Serial Monitor open. When connected to Wi-Fi and then AWS IoT Core, any messages received on the topic esp32/sub are logged to this console. The device is also now publishing to the topic esp32/pub.
// The MQTT topics that this device should publish/subscribe
#define AWS_IOT_PUBLISH_TOPIC "esp32/pub"
#define AWS_IOT_SUBSCRIBE_TOPIC "esp32/sub"
Within this sketch, the relevant functions are publishMessage() and messageHandler().
The publishMessage() function creates a JSON object with the current time in milliseconds and the analog value of pin A0 on the device. It then publishes this JSON object to the topic esp32/pub.
The messageHandler() function prints out the topic and payload of any message from a subscribed topic. To see all the ways to parse JSON messages in Arduino, see the deserializeJson() example.
Additional topic subscriptions can be added within the connectAWS() function by adding another line similar to the following.
// Subscribe to a topic
client.subscribe(AWS_IOT_SUBSCRIBE_TOPIC);
Serial.println("AWS IoT Connected!");
Deploying the lambda-iot-rule AWS SAR application
Now that an ESP32 device has been connected to AWS IoT, the following steps walk through deploying an AWS Serverless Application Repository application. This is a base for building serverless integration with a physical device.
On the lambda-iot-rule AWS Serverless Application Repository application page, make sure that the Region is the same as the AWS IoT device.
Choose Deploy.
Under Application settings, for PublishTopic, enter esp32/sub. This is the topic to which the ESP32 device is subscribed. It receives messages published to this topic. Likewise, set SubscribeTopic to esp32/pub, the topic on which the device publishes.
Choose Deploy.
When creation of the application is complete, choose Test app to navigate to the application page. Keep this page open for the next section.
Monitoring and testing
At this stage, two Lambda functions, a DynamoDB table, and an AWS IoT rule have been deployed. The IoT rule forwards messages on topic esp32/pub to TopicSubscriber, a Lambda function, which inserts the messages on to the DynamoDB table.
On the application page, under Resources, choose MyTable. This is the DynamoDB table that the TopicSubscriber Lambda function updates.
Choose Items. If the ESP32 device is still active and connected, messages that it has published appear here.
The TopicPublisher Lambda function is invoked by the API Gateway endpoint and publishes to the AWS IoT topic esp32/sub.
1. On the application page, find the Application endpoint.
2. To test that the TopicPublisher function is working, enter the following into a terminal or command-line utility, replacing ENDPOINT with the URL from above.
curl -d '{"text":"Hello world!"}' -H "Content-Type: application/json" -X POST https://ENDPOINT/publish
Upon success, the request returns a copy of the message.
Back in the Serial Monitor, the message published to the topic esp32/sub prints out.
Creating an IoT thermal printer
With the completion of the previous steps, the ESP32 device currently logs incoming messages to the serial console.
The following steps demonstrate how the code can be modified to use incoming messages to interact with a peripheral component. This is done by wiring a thermal printer to the ESP32 in order to physically print messages. The REST endpoint from the previous section can be used as a webhook in third-party applications to interact with this device.
A wiring diagram depicting an ESP32 connected to a thermal printer.
Follow the product instructions for powering, wiring, and installing the correct Arduino library.
Ensure that the thermal printer is working by holding the power button on the printer while connecting the power. A sample receipt prints. On that receipt, the default baud rate is specified as either 9600 or 19200.
In the Arduino code from earlier, include the following lines at the top of the main sketch file. The second line defines what interface the thermal printer is connected to. &Serial2 is used to set the third hardware serial interface on the ESP32. For this example, the pins on the Sparkfun ESP32 Thing, GPIO16/GPIO17, are used for RX/TX respectively.
Replace the setup() function with the following to initialize the printer on device bootup. Change the baud rate of Serial2.begin() to match what is specified in the test print. The default is 19200.
After the firmware has successfully uploaded, open the Serial Monitor to confirm that the board has connected to AWS IoT.
Enter the following into a command-line utility, replacing ENDPOINT, as in the previous section. curl -d '{"message": "Hello World!"}' -H "Content-Type: application/json" -X POST https://ENDPOINT/publish
If successful, the device prints out the message “Hello World” from the attached thermal printer. This is a fully serverless IoT printer that can be triggered remotely from a webhook. As an example, this can be used with GitHub Webhooks to print a physical readout of events.
Conclusion
Using a simple Arduino sketch, an AWS Serverless Application Repository application, and a microcontroller, this post demonstrated how to build a basic serverless workflow for communicating with a physical device. It also showed how to expand that into an IoT thermal printer with real-world applications.
With the use of AWS serverless, advanced compute and extensibility can be added to an IoT device, from machine learning to translation services and beyond. By using the Arduino programming environment, the vast collection of open-source libraries, projects, and code examples open up a world of possibilities. The next step is to explore what can be done with an Arduino and the capabilities of AWS serverless. The sample Arduino code for this project and more can be found at this GitHub repository.
Need a project for the week? We’ve got one for you. Learn to build a Raspberry Pi robot buggy and control it via voice, smart device or homemade controller with our free online resources.
Build your robot buggy
To build a basic Raspberry Pi-powered robot buggy, you’ll need to start with a Raspberry Pi. For our free tutorial, the team uses a Raspberry Pi 3B+, though you should be good with most models.
You’ll also need some wheels, 12v DC motors, and a motor controller board, along with a few other peripherals such as jumper wires and batteries.
Our project resource will talk you through the whole set up, from setting up your tech and assembling your buggy, to writing code that will allow you to control your buggy with Python.
Control your robot buggy
Our follow-up resource will then show you how to set up your Android smartphone or Google AIY kit as a remote control for your robot. Or, for the more homebrew approach, you can find out how to build your own controller using a breadboard and tactile buttons.
Make your robot buggy do cool things
And, lastly, you can show off your coding skills, and the wonder of your new robot by programming it to do some pretty neat tricks, such as line following. Our last tutorial in the Buggy Robot trio will show you how to use sensors and write a line-following algorithm.
The William Gates Building in Cambridge will this weekend be home to Pi Wars, the “two-day family-friendly event in which teams compete for prestige and prizes on non-destructive challenge courses”. As the name suggests, all robots competing in the Pi Wars events have Raspberry Pi innards, and we love seeing the crazy creations made by members of the community.
If you can make it to the event, tickets are available here – a lot of us will be there, both as spectators and as judges (we’re not really allowed to participate, bums bums). And if you can’t, follow #PiWars on Twitter for updates throughout the event.
Hey folks, Rob here! It’s the last Thursday of the month, and that means it’s time for a brand-new The MagPi. Issue 70 is all about home automation using your favourite microcomputer, the Raspberry Pi.
Home automation in this month’s The MagPi!
Raspberry Pi home automation
We think home automation is an excellent use of the Raspberry Pi, hiding it around your house and letting it power your lights and doorbells and…fish tanks? We show you how to do all of that, and give you some excellent tips on how to add even more automation to your home in our ten-page cover feature.
Upcycle your life
Our other big feature this issue covers upcycling, the hot trend of taking old electronics and making them better than new with some custom code and a tactically placed Raspberry Pi. For this feature, we had a chat with Martin Mander, upcycler extraordinaire, to find out his top tips for hacking your old hardware.
Upcycling is a lot of fun
But wait, there’s more!
If for some reason you want even more content, you’re in luck! We have some fun tutorials for you to try, like creating a theremin and turning a Babbage into an IoT nanny cam. We also continue our quest to make a video game in C++. Our project showcase is headlined by the Teslonda on page 28, a Honda/Tesla car hybrid that is just wonderful.
We review PiBorg’s latest robot
All this comes with our definitive reviews and the community section where we celebrate you, our amazing community! You’re all good beans
An amazing, and practical, Raspberry Pi project
Get The MagPi 70
Issue 70 is available today from WHSmith, Tesco, Sainsbury’s, and Asda. If you live in the US, head over to your local Barnes & Noble or Micro Center in the next few days for a print copy. You can also get the new issue online from our store, or digitally via our Android and iOS apps. And don’t forget, there’s always the free PDF as well.
New subscription offer!
Want to support the Raspberry Pi Foundation and the magazine? We’ve launched a new way to subscribe to the print version of The MagPi: you can now take out a monthly £4 subscription to the magazine, effectively creating a rolling pre-order system that saves you money on each issue.
You can also take out a twelve-month print subscription and get a Pi Zero W plus case and adapter cables absolutely free! This offer does not currently have an end date.
Python code creates curious, wordless comic strips at random, spewing them from the thermal printer mouth of a laser-cut body reminiscent of Disney Pixar’s WALL-E: meet the Vomit Comic Robot!
The age of the thermal printer!
Thermal printers allow you to instantly print photos, data, and text using a few lines of code, with no need for ink. More and more makers are using this handy, low-maintenance bit of kit for truly creative projects, from Pierre Muth’s tiny PolaPi-Zero camera to the sound-printing Waves project by Eunice Lee, Matthew Zhang, and Bomani McClendon (and our own Secret Santa Babbage).
Vomiting robots
Interaction designer and developer Cadin Batrack, whose background is in game design and interactivity, has built the Vomit Comic Robot, which creates “one-of-a-kind comics on demand by processing hand-drawn images through a custom software algorithm.”
The robot is made up of a Raspberry Pi 3, a USB thermal printer, and a handful of LEDs.
At the press of a button, Processing code selects one of a set of Cadin’s hand-drawn empty comic grids and then randomly picks images from a library to fill in the gaps.
Each image is associated with data that allows the code to fit it correctly into the available panels. Cadin says about the concept behing his build:
Although images are selected and placed randomly, the comic panel format suggests relationships between elements. Our minds create a story where there is none in an attempt to explain visuals created by a non-intelligent machine.
The Raspberry Pi saves the final image as a high-resolution PNG file (so that Cadin can sell prints on thick paper via Etsy), and a Python script sends it to be vomited up by the thermal printer.
For more about the Vomit Comic Robot, check out Cadin’s blog. If you want to recreate it, you can find the info you need in the Imgur album he has put together.
We cute robots
We have a soft spot for cute robots here at Pi Towers, and of course we make no exception for the Vomit Comic Robot. If, like us, you’re a fan of adorable bots, check out Mira, the tiny interactive robot by Alonso Martinez, and Peeqo, the GIF bot by Abhishek Singh.
Earlier this year on 3 and 4 March, communities around the world held Raspberry Jam events to celebrate Raspberry Pi’s sixth birthday. We sent out special birthday kits to participating Jams — it was amazing to know the kits would end up in the hands of people in parts of the world very far from Raspberry Pi HQ in Cambridge, UK.
The Raspberry Jam Camer team: Damien Doumer, Eyong Etta, Loïc Dessap and Lionel Sichom, aka Lionel Tellem
Preparing for the #PiParty
One birthday kit went to Yaoundé, the capital of Cameroon. There, a team of four students in their twenties — Lionel Sichom (aka Lionel Tellem), Eyong Etta, Loïc Dessap, and Damien Doumer — were organising Yaoundé’s first Jam, called Raspberry Jam Camer, as part of the Raspberry Jam Big Birthday Weekend. The team knew one another through their shared interests and skills in electronics, robotics, and programming. Damien explains in his blog post about the Jam that they planned ahead for several activities for the Jam based on their own projects, so they could be confident of having a few things that would definitely be successful for attendees to do and see.
Show-and-tell at Raspberry Jam Cameroon
Loïc presented a Raspberry Pi–based, Android app–controlled robot arm that he had built, and Lionel coded a small video game using Scratch on Raspberry Pi while the audience watched. Damien demonstrated the possibilities of Windows 10 IoT Core on Raspberry Pi, showing how to install it, how to use it remotely, and what you can do with it, including building a simple application.
Loïc showcases the prototype robot arm he built
There was lots more too, with others discussing their own Pi projects and talking about the possibilities Raspberry Pi offers, including a Pi-controlled drone and car. Cake was a prevailing theme of the Raspberry Jam Big Birthday Weekend around the world, and Raspberry Jam Camer made sure they didn’t miss out.
Yay, birthday cake!!
A big success
Most visitors to the Jam were secondary school students, while others were university students and graduates. The majority were unfamiliar with Raspberry Pi, but all wanted to learn about Raspberry Pi and what they could do with it. Damien comments that the fact most people were new to Raspberry Pi made the event more interactive rather than creating any challenges, because the visitors were all interested in finding out about the little computer. The Jam was an all-round success, and the team was pleased with how it went:
What I liked the most was that we sensitized several people about the Raspberry Pi and what one can be capable of with such a small but powerful device. — Damien Doumer
The Jam team rounded off the event by announcing that this was the start of a Raspberry Pi community in Yaoundé. They hope that they and others will be able to organise more Jams and similar events in the area to spread the word about what people can do with Raspberry Pi, and to help them realise their ideas.
Raspberry Jam Camer gets the thumbs-up
The Raspberry Pi community in Cameroon
In a French-language interview about their Jam, the team behind Raspberry Jam Camer said they’d like programming to become the third official language of Cameroon, after French and English; their aim is to to popularise programming and digital making across Cameroonian society. Neither of these fields is very familiar to most people in Cameroon, but both are very well aligned with the country’s ambitions for development. The team is conscious of the difficulties around the emergence of information and communication technologies in the Cameroonian context; in response, they are seizing the opportunities Raspberry Pi offers to give children and young people access to modern and constantly evolving technology at low cost.
Thanks to Lionel, Eyong, Damien, and Loïc, and to everyone who helped put on a Jam for the Big Birthday Weekend! Remember, anyone can start a Jam at any time — and we provide plenty of resources to get you started. Check out the Guidebook, the Jam branding pack, our specially-made Jam activities online (in multiplelanguages), printable worksheets, and more.
Three soldiers from Blandford Camp have successfully designed and built an autonomous robot as part of their Foreman of Signals Course at the Dorset Garrison.
Autonomous robots
Forces Radio BFBS carried a story last week about Staff Sergeant Jolley, Sergeant Rana, and Sergeant Paddon, also known as the “Project ROVER” team. As part of their Foreman of Signals training, their task was to design an autonomous robot that can move between two specified points, take a temperature reading, and transmit the information to a remote computer. The team comments that, while semi-autonomous robots have been used as far back as 9/11 for tasks like finding people trapped under rubble, nothing like their robot and on a similar scale currently exists within the British Army.
The ROVER buggy
Their build is named ROVER, which stands for Remote Obstacle aVoiding Environment Robot. It’s a buggy that moves on caterpillar tracks, and it’s tethered; we wonder whether that might be because it doesn’t currently have an on-board power supply. A demo shows the robot moving forward, then changing its path when it encounters an obstacle. The team is using RealVNC‘s remote access software to allow ROVER to send data back to another computer.
Applications for ROVER
Dave Ball, Senior Lecturer in charge of the Foreman of Signals course, comments that the project is “a fantastic opportunity for [the team] to, even only halfway through the course, showcase some of the stuff they’ve learnt and produce something that’s really quite exciting.” The Project ROVER team explains that the possibilities for autonomous robots like this one are extensive: they include mine clearance, bomb disposal, and search-and-rescue campaigns. They point out that existing semi-autonomous hardware is not as easy to program as their build. In contrast, they say, “with the invention of the Raspberry Pi, this has allowed three very inexperienced individuals to program a robot very capable of doing these things.”
We make Raspberry Pi computers because we want building things with technology to be as accessible as possible. So it’s great to see a project like this, made by people who aren’t techy and don’t have a lot of computing experience, but who want to solve a problem and see that the Pi is an affordable and powerful tool that can help.
Earlier this spring, an excited group of STEM educators came together to participate in the first ever Raspberry Pi and Arduino workshop in Puerto Rico.
Their three-day digital making adventure was led by MakerTechPR’s José Rullán and Raspberry Pi Certified Educator Alex Martínez. They ran the event as part of the Robot Makers challenge organized by Yees! and sponsored by Puerto Rico’s Department of Economic Development and Trade to promote entrepreneurial skills within Puerto Rico’s education system.
Over 30 educators attended the workshop, which covered the use of the Raspberry Pi 3 as a computer and digital making resource. The educators received a kit consisting of a Raspberry Pi 3 with an Explorer HAT Pro and an Arduino Uno. At the end of the workshop, the educators were able to keep the kit as a demonstration unit for their classrooms. They were enthusiastic to learn new concepts and immerse themselves in the world of physical computing.
In their first session, the educators were introduced to the Raspberry Pi as an affordable technology for robotic clubs. In their second session, they explored physical computing and the coding languages needed to control the Explorer HAT Pro. They started off coding with Scratch, with which some educators had experience, and ended with controlling the GPIO pins with Python. In the final session, they learned how to develop applications using the powerful combination of Arduino and Raspberry Pi for robotics projects. This gave them a better understanding of how they could engage their students in physical computing.
“The Raspberry Pi ecosystem is the perfect solution in the classroom because to us it is very resourceful and accessible.” – Alex Martínez
Computer science and robotics courses are important for many schools and teachers in Puerto Rico. The simple idea of programming a microcontroller from a $35 computer increases the chances of more students having access to more technology to create things.
Puerto Rico’s education system has faced enormous challenges after Hurricane Maria, including economic collapse and the government’s closure of many schools due to the exodus of families from the island. By attending training like this workshop, educators in Puerto Rico are becoming more experienced in fields like robotics in particular, which are key for 21st-century skills and learning. This, in turn, can lead to more educational opportunities, and hopefully the reopening of more schools on the island.
“We find it imperative that our children be taught STEM disciplines and skills. Our goal is to continue this work of spreading digital making and computer science using the Raspberry Pi around Puerto Rico. We want our children to have the best education possible.” – Alex Martínez
After attending Picademy in 2016, Alex has integrated the Raspberry Pi Foundation’s online resources into his classroom. He has also taught small workshops around the island and in the local Puerto Rican makerspace community. José is an electrical engineer, entrepreneur, educator and hobbyist who enjoys learning to use technology and sharing his knowledge through projects and challenges.
If, like us, you’ve been bingeflixing your way through Netflix’s new show, Lost in Space, you may have noticed a Raspberry Pi being used as futuristic space tech.
Danger, Will Robinson, that probably won’t work
This isn’t the first time a Pi has been used as a film or television prop. From Mr. Robot and Disney Pixar’s Big Hero 6 to Mr. Robot, Sense8, and Mr. Robot, our humble little computer has become quite the celeb.
Raspberry Pi Spy has been working hard to locate and document the appearance of the Raspberry Pi in some of our favourite shows and movies. He’s created this video covering 2010-2017:
Since 2012 the Raspberry Pi single board computer has appeared in a number of movies and TV shows. This video is a run through of those appearances where the Pi has been used as a prop.
For 2018 appearances and beyond, you can find a full list on the Raspberry Pi Spy website. If you’ve spotted an appearance that’s not on the list, tell us in the comments!
Today, I’m pleased to announce that, as of April 24th 2018, the AWS IoT Analytics service is generally available. Customers can use IoT Analytics to clean, process, encrich, store, and analyze their connected device data at scale. AWS IoT Analytics is now available in US East (N. Virginia), US West (Oregon), US East (Ohio), and EU (Ireland). In November of last year, my colleague Tara Walker wrote an excellent post that walks through some of the features of the AWS IoT Analytics service and Ben Kehoe (an AWS Community Hero and Research Scientist at iRobot) spoke at AWS Re:Invent about replacing iRobot’s existing “rube goldberg machine” for forwarding data into an elasticsearch cluster with AWS IoT Analytics.
Iterating on customer feedback received during the service preview the AWS IoT Analytics team has added a number of new features including the ability to ingest data from external souces using the BatchPutMessage API, the ability to set a data retention policy on stored data, the ability to reprocess existing data, preview pipeline results, and preview messages from channels with the SampleChannelData API.
Let’s cover the core concepts of IoT Analytics and then walk through an example.
AWS IoT Analytics Concepts
AWS IoT Analytics can be broken down into a few simple concepts. For data preparation customers have: Channels, Pipelines, and Data Stores. For analyzing data customers have: Datasets and Notebooks.
Data Preparation
Channels are the entry point into IoT Analytics and they collect data from an existing IoT Core MQTT topic or from external sources that send messages to the channel using the Ingestion API. Channels are elastically scalable and consume messages in Binary or JSON format. Channels also immutably store raw device data for easily reprocessing using different logic if your needs change.
Pipelines consume messages from channels and allow you to process messages with steps, called activities, such as filtering on attributes, transforming the content of the message by adding or remvoing fields, invoking lambda functions for complex transformations and adding data from external data sources, or even enriching the messages with data from IoT Core. Pipelines output their data to a Data Store.
Data Stores are a queryable IoT-optimized data storage solution for the output of your pipelines. Data stores support custom retention periods to optimize costs. When a customer queries a Data Store the result is put into a Dataset.
Data Analytics
Datasets are similar to a view in a SQL database. Customers create a dataset by running a query against a data store. Data sets can be generated manually or on a recurring schedule.
Notebooks are Amazon SageMaker hosted Jupyter notebooks that let customers analyze their data with custom code and even build or train ML models on the data. IoT Analytics offers several notebook templates with pre-authored models for common IoT use cases such as Predictive Maintenance, Anomaly Detection, Fleet Segmentation, and Forecasting.
Additionally, you can use IoT analytics as a data source for Amazon QuickSight for easy visualizations of your data. You can find pricing information for each of these services on the AWS IoT Analytics Pricing Page.
IoT Analytics Walkthrough
While this walkthrough uses the console everything shown here is equally easy to do with the CLI. When we first navigate to the console we have a helpful guide telling us to build a channel, pipeline, and a data store: Our first step is to create a channel. I already have some data into an MQTT channel with IoT core so I’ll select that channel. First we’ll name the channel and select a retention period.
Now, I’ll select my IoT Core topic and grab the data. I can also post messages directly into the channel with the PutMessages APIs.
Now that I have a channel my next step is to create a pipeline. To do this I’ll select “Create a pipeline from this channel” from the “Actions” drop down.
Now, I’ll walk through the pipeline wizard giving my pipeline a name and a source.
I’ll select which of the message attributes the pipeline should expect. This can draw from the channel with the sampling API and guess at which attributes are needed or I could upload a specification in JSON.
Next I define the pipeline activities. If I’m dealing with binary data I need a lambda function to first deserialize the message into JSON so the other filter functions can operate on it. I can create filters, calculate attributes based on other attributes, and I can also enrich the message with metadata from IoT core registry.
For now I just want to filter out some messages and make a small transform with a Lambda function.
Finally, I choose or create a data store to output the results of my pipeline.
Now that I have a data store, I can create a view of that data by creating a data set.
I’ll just select all the data from the data store for this dataset but I could also select individual attributes as needed.
I have a data set! I can adjust the cron expression in the schedule to re-run this as frequently or infrequently as I wish.
If I want to create a model from my data I can create a SageMaker powered Jupyter notebook. There are a few templates that are great starting points like anomaly detection or output forecasting.
Here you can see an example of the anomaly detection notebook.
Finally, if I want to create simple visualizations of my data I can use QuickSight to bring in an IoT Analytics data set.
Let Us Know
I’m excited to see what customers build with AWS IoT Analytics. My colleagues on the IoT teams are eager to hear your feedback about the service so please let us know in the comments or on Twitter what features you want to see.
In December 2016, we launched the Outbound Network Access functionality for Amazon RDS for Oracle, enabling customers to use their RDS for Oracle database instances to communicate with external web endpoints using the utl_http and utl tcp packages, and sending emails through utl_smtp. We extended the functionality by adding the option of using custom DNS servers, allowing such outbound network accesses to make use of any DNS server a customer chooses to use. These releases enabled HTTP, TCP and SMTP communication originating out of RDS for Oracle instances – limited to non-secure (non-SSL) mediums.
To overcome the limitation over SSL connections, we recently published a whitepaper, that guides through the process of creating customized Oracle wallet bundles on your RDS for Oracle instances. By making use of such wallets, you can now extend the Outbound Network Access capability to have external communications happen over secure (SSL/TLS) connections. This opens up new use cases for your RDS for Oracle instances.
With the right set of certificates imported into your RDS for Oracle instances (through Oracle wallets), your database instances can now:
Communicate with a HTTPS endpoint: Using utl_http, access a resource such as https://status.aws.amazon.com/robots.txt
Download files from Amazon S3 securely: Using a presigned URL from Amazon S3, you can now download any file over SSL
Extending Oracle Database links to use SSL: Database links between RDS for Oracle instances can now use SSL as long as the instances have the SSL option installed
Sending email over SMTPS:
You can now integrate with Amazon SES to send emails from your database instances and any other generic SMTPS with which the provider can be integrated
These are just a few high-level examples of new use cases that have opened up with the whitepaper. As a reminder, always ensure to have best security practices in place when making use of Outbound Network Access (detailed in the whitepaper).
About the Author
Surya Nallu is a Software Development Engineer on the Amazon RDS for Oracle team.
HackSpace magazine is back with our brand-new issue 6, available for you on shop shelves, in your inbox, and on our website right now.
Inside Hackspace magazine 6
Paper is probably the first thing you ever used for making, and for good reason: in no other medium can you iterate through 20 designs at the cost of only a few pennies. We’ve roped in Rob Ives to show us how to make a barking paper dog with moveable parts and a cam mechanism. Even better, the magazine includes this free paper automaton for you to make yourself. That’s right: free!
At the other end of the scale, there’s the forge, where heat, light, and noise combine to create immutable steel. We speak to Alec Steele, YouTuber, blacksmith, and philosopher, about his amazingly beautiful Damascus steel creations, and about why there’s no difference between grinding a knife and blowing holes in a mountain to build a road through it.
Do it yourself
You’ve heard of reading glasses — how about glasses that read for you? Using a camera, optical character recognition software, and a text-to-speech engine (and of course a Raspberry Pi to hold it all together), reader Andrew Lewis has hacked together his own system to help deal with age-related macular degeneration.
It’s the definition of hacking: here’s a problem, there’s no solution in the shops, so you go and build it yourself!
Radio
60 years ago, the cutting edge of home hacking was the transistor radio. Before the internet was dreamt of, the transistor radio made the world smaller and brought people together. Nowadays, the components you need to build a radio are cheap and easily available, so if you’re in any way electronically inclined, building a radio is an ideal excuse to dust off your soldering iron.
Tutorials
If you’re a 12-month subscriber (if you’re not, you really should be), you’ve no doubt been thinking of all sorts of things to do with the Adafruit Circuit Playground Express we gave you for free. How about a sewable circuit for a canvas bag? Use the accelerometer to detect patterns of movement — walking, for example — and flash a series of lights in response. It’s clever, fun, and an easy way to add some programmable fun to your shopping trips.
We’re also making gin, hacking a children’s toy car to unlock more features, and getting started with robot sumo to fill the void left by the cancellation of Robot Wars.
All this, plus an 11-metre tall mechanical miner, in HackSpace magazine issue 6 — subscribe here from just £4 an issue or get the PDF version for free. You can also find HackSpace magazine in WHSmith, Tesco, Sainsbury’s, and independent newsagents in the UK. If you live in the US, check out your local Barnes & Noble, Fry’s, or Micro Center next week. We’re also shipping to stores in Australia, Hong Kong, Canada, Singapore, Belgium, and Brazil, so be sure to ask your local newsagent whether they’ll be getting HackSpace magazine.
This post courtesy of Paul Johnston, AWS Senior Developer Advocate – Serverless
Welcome to the first edition of the AWS Serverless ICYMI (In case you missed it) quarterly recap! Every quarter we’ll share all of the most recent product launches, feature enhancements, blog posts, webinars, Twitch live streams, and other interesting things that you might have missed!
Alexa Random Restaurant – Python-based backend for an Alexa skill that returns an open restaurant in a specified city using the Yelp API. Published by: Harsha Warrdhan Sharma
Podless – A serverless application that downloads podcasts to an S3 bucket. Published by: Stilvoid
Crypto-monitor – Collect and store crypto currency prices and send yourself an alert if one changes significantly. Published by: Drew Dresser
DailyDoggo – Send a daily link to a random dog picture to a phone number, via AWS Lambda and SNS. Published by: Kevin McCandless
These runtimes give Lambda developers and development teams even greater options for coding serverless, on-demand, compute solutions.
The AWS SAM 1.4.0 release was one of its biggest. The release added features for configuring many aspects of Amazon API Gateway, including CORS support, regional endpoints, binary media types, and stage settings. It also included per function concurrency support, tags and TableName for SimpleTable, and many documentation updates. Check out the release notes for the full list!
AppSync came out of the whitelisted preview and added a whole bunch of new features:
Here are the three webinars we delivered in Q1. We hold several Serverless webinars throughout the year, so look out for them in the Serverless section of the AWS Online Tech Talks page:
Keep an eye on AWS on Twitch for more Serverless videos and on the Join us on the Twitch AWS page for information about upcoming broadcasts and recent live streams.
Case studies
We’ve published several new case studies this quarter to help you with understanding how other organizations are using serverless technologies:
If you haven’t read the AWS Well Architected Framework Serverless Application Lens document, then it’s worth taking the time to do so. The document covers common serverless applications scenarios and identifies key elements to ensure that your workloads are architected according to best practices.
From now on, if you find issues with documentation we have open-sourced, you can tell us via a Pull Request rather than tweeting or emailing us. The current available serverless repositories are here:
We’re always looking to help people start learning how to build serverless applications. Our serverless web application workshops are online and you can do the hands-on labs yourself: Build a Serverless web application
Still looking for more?
The Serverless landing page has lots of information including a resources page containing case studies, webinars, whitepapers, customer stories, reference architectures, and even more Getting Started tutorials. Check it out!
A simple Raspberry Pi based project using TCS3200 Color Sensor. The project demonstrates how to interface a Color Sensor (like TCS3200) with Raspberry Pi and implement a simple Color Detector using Raspberry Pi.
What is a TCS3200 colour sensor?
Colour sensors sense reflected light from nearby objects. The bright light of the TCS3200’s on-board white LEDs hits an object’s surface and is reflected back. The sensor has an 8×8 array of photodiodes, which are covered by either a red, blue, green, or clear filter. The type of filter determines what colour a diode can detect. Then the overall colour of an object is determined by how much light of each colour it reflects. (For example, a red object reflects mostly red light.)
As Electronics Hub explains:
TCS3200 is one of the easily available colour sensors that students and hobbyists can work on. It is basically a light-to-frequency converter, i.e. based on colour and intensity of the light falling on it, the frequency of its output signal varies.
I’ll save you a physics lesson here, but you can find a detailed explanation of colour sensing and the TCS3200 on the Electronics Hub blog.
Raspberry Pi colour sensor
The TCS3200 colour sensor is connected to several of the onboard General Purpose Input Output (GPIO) pins on the Raspberry Pi.
These connections allow the Raspberry Pi 3 to run one of two Python scripts that Electronics Hub has written for the project. The first displays the RAW RGB values read by the sensor. The second detects the primary colours red, green, and blue, and it can be expanded for more colours with the help of the first script.
Electronic Hub’s complete build uses a breadboard for simply prototyping
Use it in your projects
This colour sensing setup is a simple means of adding a new dimension to your builds. Why not build a candy-sorting robot that organises your favourite sweets by colour? Or add colour sensing to your line-following buggy to allow for multiple path options!
If your Raspberry Pi project uses colour sensing, we’d love to see it, so be sure to share it in the comments!
After the outstanding success of their AIY Projects Voice and Vision Kits, Google has announced the release of upgraded kits, complete with Raspberry Pi Zero WH, Camera Module, and preloaded SD card.
Google’s AIY Projects Kits
Google launched the AIY Projects Voice Kit last year, first as a cover gift with The MagPi magazine and later as a standalone product.
Makers needed to provide their own Raspberry Pi for the original kit. The new kits include everything you need, from Pi to SD card.
Within a DIY cardboard box, makers were able to assemble their own voice-activated AI assistant akin to the Amazon Alexa, Apple’s Siri, and Google’s own Google Home Assistant. The Voice Kit was an instant hit that spurred no end of maker videos and tutorials, including our own free tutorial for controlling a robot using voice commands.
Later in the year, the team followed up the success of the Voice Kit with the AIY Projects Vision Kit — the same cardboard box hosting a camera perfect for some pretty nifty image recognition projects.
For more on the AIY Voice Kit, here’s our release video hosted by the rather delightful Rob Zwetsloot.
Check out the exclusive Google AIY Projects Kit that comes free with The MagPi 57! Grab yourself a copy in stores or online now: http://magpi.cc/2pI6IiQ This first AIY Projects kit taps into the Google Assistant SDK and Cloud Speech API using the AIY Projects Voice HAT (Hardware Accessory on Top) board, stereo microphone, and speaker (included free with the magazine).
AIY Projects 2
So what’s new with version 2 of the AIY Projects Voice Kit? The kit now includes the recently released Raspberry Pi Zero WH, our Zero W with added pre-soldered header pins for instant digital making accessibility. Purchasers of the kits will also get a micro SD card with preloaded OS to help them get started without having to set the card up themselves.
Everything you need to build your own Raspberry Pi-powered Google voice assistant
“Everything you need to get started is right there in the box,” explains Billy Rutledge, Google’s Director of AIY Projects. “We knew from our research that even though makers are interested in AI, many felt that adding it to their projects was too difficult or required expensive hardware.”
Google is also hard at work producing AIY Projects companion apps for Android, iOS, and Chrome. The Android app is available now to coincide with the launch of the upgraded kits, with the other two due for release soon. The app supports wireless setup of the AIY Kit, though avid coders will still be able to hack theirs to better suit their projects.
Google has also updated the AIY Projects website with an AIY Models section highlighting a range of neural network projects for the kits.
Get your kit
The updated Voice and Vision Kits were announced last night, and in the US they are available now from Target. UK-based makers should be able to get their hands on them this summer — keep an eye on our social channels for updates and links.
Hi folks, Rob from The MagPi here! You may remember that a couple of weeks ago, the Raspberry Pi 3 Model B+ was released, the updated version of the Raspberry Pi 3 Model B. It’s better, faster, and stronger than the original and it’s also the main topic in The MagPi issue 68, out now!
Everything you need to know about the new Raspberry Pi 3B+
What goes into ‘plussing’ a Raspberry Pi? We talked to Eben Upton and Roger Thornton about the work that went into making the Raspberry Pi 3B+, and we also have all the benchmarks to show you just how much the new Pi 3B+ has been improved.
Super fighting robots
Did you know that the next Pi Wars is soon? The 2018 Raspberry Pi robotics competition is taking place later in April, and we’ve got a full feature on what to expect, as well as top tips on how to make your own kick-punching robot for the next round.
More to read
Still want more after all that? Well, we have our usual excellent selection of outstanding project showcases, reviews, and tutorials to keep you entertained.
See pictures from Raspberry Pi’s sixth birthday, celebrated around the world!
This includes amazing projects like a custom Pi-powered, Switch-esque retro games console, a Minecraft Pi hack that creates a house at the touch of a button, and the Matrix Voice.
With a Pi and a 3D printer, you can make something as cool as this!
Get The MagPi 68
Issue 68 is available today from WHSmith, Tesco, Sainsbury’s, and Asda. If you live in the US, head over to your local Barnes & Noble or Micro Center in the next few days for a print copy. You can also get the new issue online from our store, or digitally via our Android and iOS apps. And don’t forget, there’s always the free PDF as well.
New subscription offer!
Want to support the Raspberry Pi Foundation and the magazine? We’ve launched a new way to subscribe to the print version of The MagPi: you can now take out a monthly £4 subscription to the magazine, effectively creating a rolling pre-order system that saves you money on each issue.
You can also take out a twelve-month print subscription and get a Pi Zero W, Pi Zero case, and adapter cables absolutely free! This offer does not currently have an end date.
We love Mugsy, the Raspberry Pi coffee robot that has smashed its crowdfunding goal within days! Our latest YouTube video shows our catch-up with Mugsy and its creator Matthew Oswald at Maker Faire New York last year.
Labelled ‘the world’s first hackable, customisable, dead simple, robotic coffee maker’, Mugsy allows you to take control of every aspect of the coffee-making process: from grind size and water temperature, to brew and bloom time. Feeling lazy instead? Read in your beans’ barcode via an onboard scanner, and it will automatically use the best settings for your brew.
Looking to start your day with your favourite coffee straight out of bed? Send the robot a text, email, or tweet, and it will notify you when your coffee is ready!
Learning through product development
“Initially, I used [Mugsy] as a way to teach myself hardware design,” explained Matthew at his Editor’s Choice–winning Maker Faire stand. “I really wanted to hold something tangible in my hands. By using the Raspberry Pi and just being curious, anytime I wanted to use a new technology, I would try to pull back [and ask] ‘How can I integrate this into Mugsy?’”
By exploring his passions and using Mugsy as his guinea pig, Matthew created a project that not only solves a problem — how to make amazing coffee at home — but also brings him one step closer to ‘making things’ for a living. “I used to dream about this stuff when I was a kid, and I used to say ‘I’m never going to be able to do something like that.’” he admitted. But now, with open-source devices like the Raspberry Pi so readily available, he “can see the end of the road”: making his passion his livelihood.
Back Mugsy
With only a few days left on the Kickstarter campaign, Mugsy has reached its goal and then some. It’s available for backing from $150 if you provide your own Raspberry Pi 3, or from $175 with a Pi included — check it out today!
By continuing to use the site, you agree to the use of cookies. more information
The cookie settings on this website are set to "allow cookies" to give you the best browsing experience possible. If you continue to use this website without changing your cookie settings or you click "Accept" below then you are consenting to this.