Tag Archives: Raspberry Pi Zero

Robotic waiter learning to serve drinks

Post Syndicated from Ashley Whittaker original https://www.raspberrypi.org/blog/robotic-waiter-learning-to-serve-drinks/

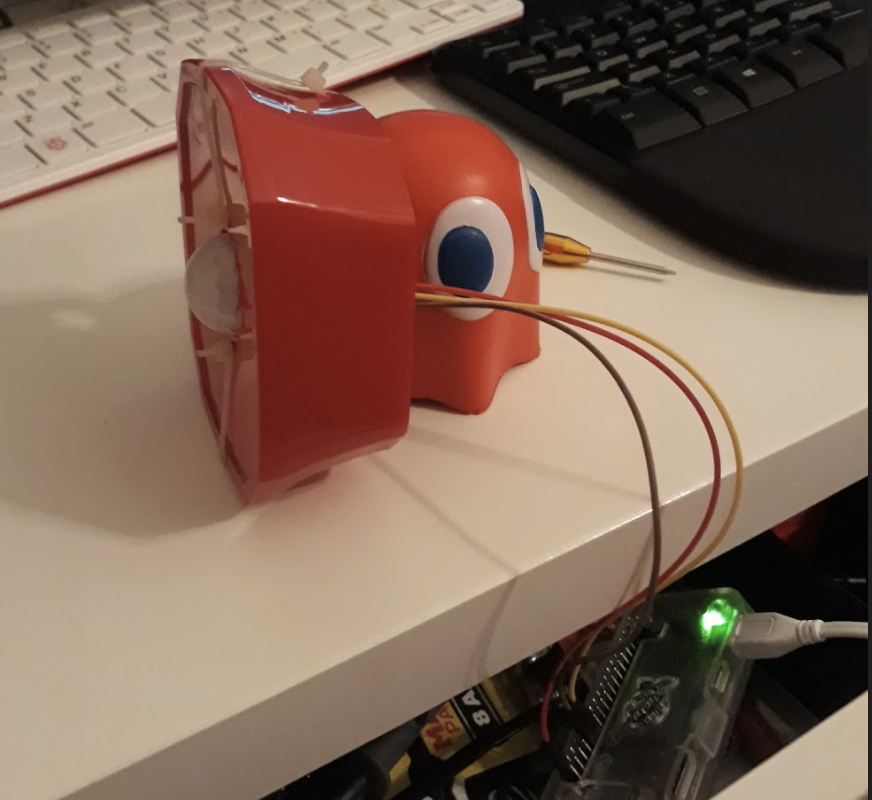
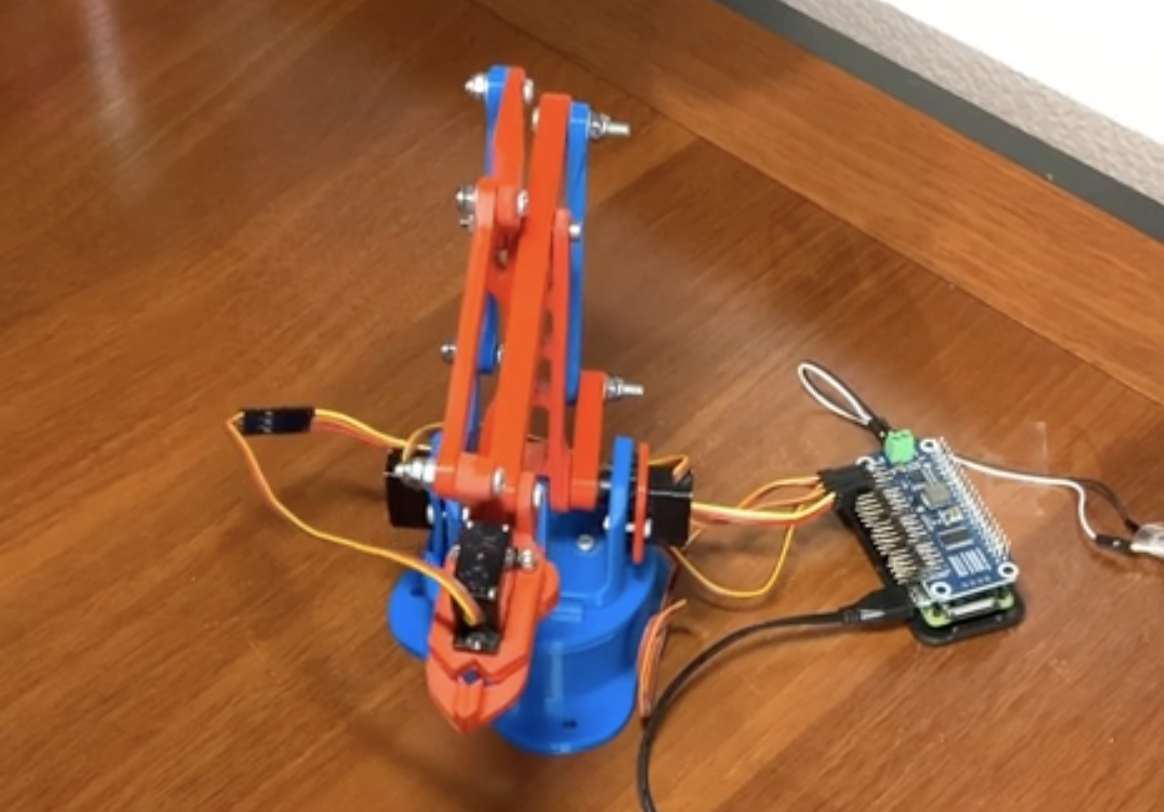
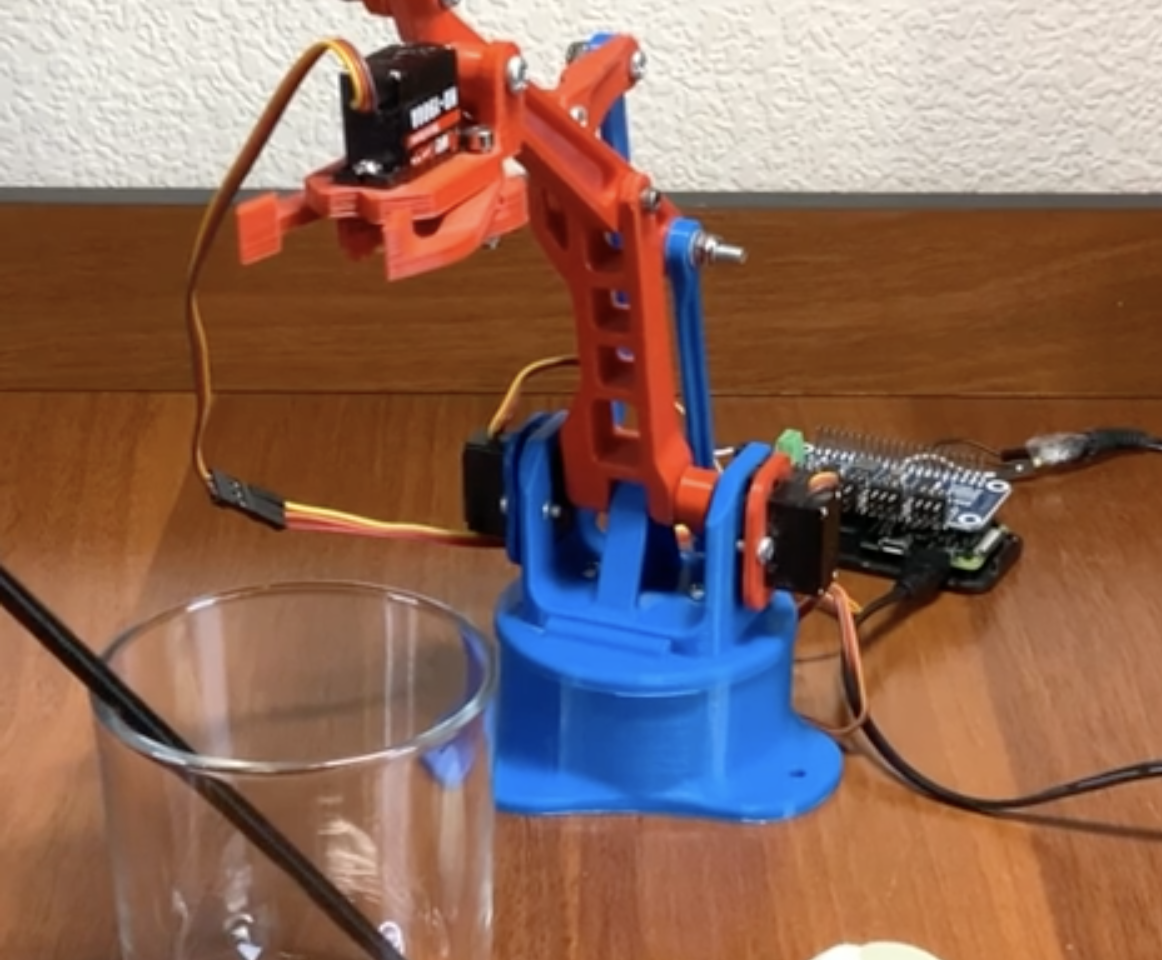
The maker of this robotic waiter had almost all of the parts for this project just sat around collecting dust on a shelf. We’re delighted they decided to take the time to pick up the few extra bits they needed online, then take the extra hour (just an hour?!) to write a program in Python to get this robotic waiter up and running.

It’s learning! Bartending is hard

We are also thrilled to report (having spotted it in the reddit post we found this project on) that the maker had “so much fun picking up and sometimes crushing small things with this claw.” The line between serving drinks and wanting to crush things is thinner than you might imagine.

And in even better news, all the code you need to recreate this build is on GitHub.

Robo arm, HAT, and Raspberry Pi all together

Parts list

First successful straw-drop. Perfecto!

reddit comments bantz

One of our favourite things about finding Raspberry Pi-powered projects on reddit is the comments section. It’s (usually) the perfect mix of light adoration, constructive suggestions, and gateways to tangents we cannot ignore.

Like this one recalling the Rick and Morty sketch in which a cute tiny robot realises their sole purpose is to pass butter:

No swears in this scene! But it is an adult cartoon in general

And also this one pointing us to another robotic arm having a grand old time picking up a tiny ball, sending it down a tiny slide, and then doing it all over again. Because it’s important we know how to make our own fun:

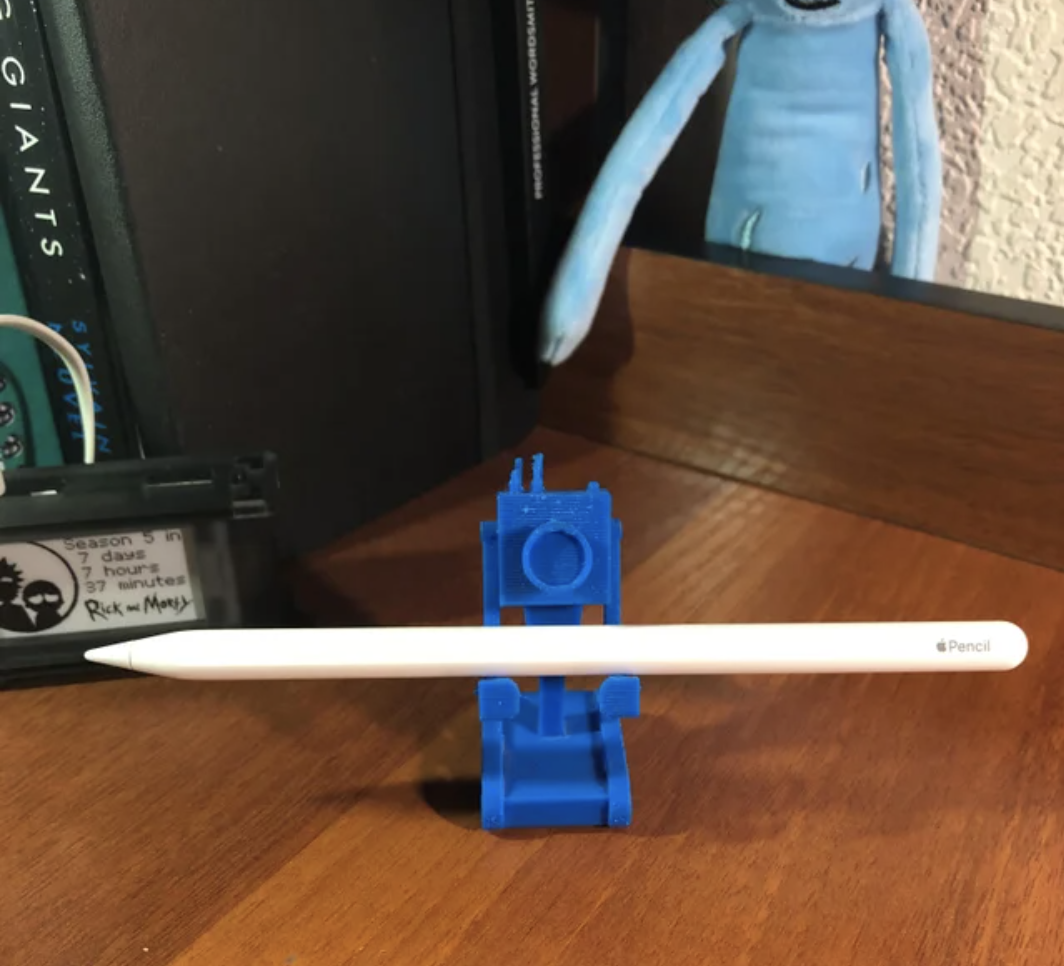
We also greatly enjoyed the fact that the original maker couldn’t use the Rick and Morty “what is my purpose” line to share this project because they are such an uber fan that they already used it for a project they posted just the day before. This cute creation’s sole reason for existing is to hold an Apple pencil while looking fabulous. And we are HERE for it:

The post Robotic waiter learning to serve drinks appeared first on Raspberry Pi.

Top project ideas for Raspberry Pi Zero

Post Syndicated from Ashley Whittaker original https://www.raspberrypi.org/blog/top-project-ideas-for-raspberry-pi-zero/

We came across this ‘Top 15 Raspberry Pi Zero Projects’ video and realised that it’s been a while since we showed our tiniest computer some love on this blog.

Too many cool projects to blog about here, so give the full compilation video a watch for more ideas

The compilation features full build videos for 15 Raspberry Pi Zero projects. Too many to go into detail about here, so we’ve picked out a few of our favourites to share.

Origami sunrise lamp

Time to wake up!

This Sunrise lamp doubles as a psychedelic night light, and is built with snapology origami. Raspberry Pi Zero W powers an Adafruit NeoPixel ring and does a great job of letting maker Russell Eveleigh sleep in past 5am.

Russell coded different sequences to make the NeoPixel lights turn to a calming blue at bedtime, and then brighten up to sunshine yellow when it’s time for the kids to wake up.

mintyPi retro gaming handheld

How could we not share a retro gaming device hidden in an Altoids tin? Raspberry Pi Zero runs RetroPie software, and gameplay lasts up to five hours!

mintyPi is a nice simple do-it-yourself project, and you can find links for the parts at sudomod.com. Good luck finding an Altoids tin in the UK though. If you’ve found a good alternative, let us know in the comments.

Fresh coffee monitor

Brew is ready

We picked this project because Raspberry Pi Towers coffee drinkers have been thinking about making something similar.

Caleb Brewer made his office coffee machine smart by building an alert system that sends notifications when someone brews a fresh pot. A waterproof temperature sensor constantly monitors the coffee pot, and Raspberry Pi Zero W turns on an alert light and sends a Slack notification when a new hot tasty brew is ready.

If you’re into compilation videos featuring Raspberry Pi and Arduino projects, follow Top Projects Compilation on YouTube, Facebook or Instagram for more.

The post Top project ideas for Raspberry Pi Zero appeared first on Raspberry Pi.

Humane mouse trap | The MagPi #108

Post Syndicated from Ashley Whittaker original https://www.raspberrypi.org/blog/humane-mouse-trap-the-magpi-108/

Safely catching mice is a better way of fixing a problem, and using Raspberry Pi means it needs less supervision. In the new issue of The MagPi magazine, Rob Zwetsloot takes a look with the maker, Andrew Taylor.

With some IoT projects, it’s the little things that help. For example, take Andrew Taylor, who did the good thing of setting up a humane mousetrap. However, checking it to see if any mice had been caught in it, while necessary, was getting a little boring.

There’s one major component to the setup, which is the PIR sensor

“If a mouse had gone in and I did not check it, the mouse would quickly run out of food and water!” Andrew tells us. “Having been interested in Raspberry Pi for a couple of years and having recently begun learning Python using the Enviro+ environment sensors, I figured a Raspberry Pi with a motion sensor would be an ideal way to check.”

It’s a fairly simple setup, one commonly used in CCTV builds and some fun ‘parent detectors’ on the Raspberry Pi Foundation’s projects site.

An old coffee tub is used as a case for the sensor, a good way to recycle

Mouse motion

“I came across a couple of automated mousetraps that people had made from scratch, but wanting to keep it simple and cheap,” Andrew explains. “I wanted to use off-the-shelf parts where possible and keep costs down. The Pi Hut had a tutorial for a DIY burglar alarm utilising a PIR sensor, IFTTT, and Pushbullet, which seemed like an ideal starting point.”

A Raspberry Pi Zero is used to check the motion sensor and send data if it’s activated

IFTTT – If This Then That – is an online service popular with IoT folks. It’s great for small things like cross-posting images on social media services, or sending a push notification when motion is detected in a mousetrap.

“I have only had one mouse since, but it worked!” Andrew says. “I was averaging about 800 detections a day and suddenly got well over a 1000. Sure enough, there was a mouse in the trap which I released shortly afterwards. I do tend to notice that the values fluctuate a bit, so it is always worth checking over the previous day’s results to see if it is notably higher.”

Wiring up the PIR to Raspberry Pi is quite simple, and means the project is easy to maintain

You might think that 800 push notifications a day is far worse than just occasionally checking your garage, and you’d be right, so Andrew tweaked the code a bit: “The code examples I found sent a notification for each movement detection – which I knew would be rather annoying, considering how randomly PIR sensors sometimes seem to trigger. My script instead logs any hits at a max of 1 per 30 seconds and then triggers a notification once every 24 hours, meaning I just get one notification a day.”

It’s a simple design, and was kept simple to keep to a small budget

Beat a path

There’s always room for improvement, as Andrew explains: “I intend to improve the code so that it can record running averages and give an indication as to whether it believes there has been a significant spike that might necessitate me checking it out.”

The first successful capture was released back outside the garage

Whilst the aim of the project was to keep costs down, Andrew is tempted to experiment by adding a camera, and possibly a light, so he can have a peek remotely when there has been a spike in the readings and to see if it is a false alarm. Which, as he admits, is “a new height in laziness!”

The MagPi #108 out NOW!

You can grab the brand-new issue right now from the Raspberry Pi Press store, or via our app on Android or iOS. You can also pick it up from supermarkets and newsagents. There’s also a free PDF you can download.

The post Humane mouse trap | The MagPi #108 appeared first on Raspberry Pi.

Raspberry Pi makes your retro analogue camera digital

Post Syndicated from Ashley Whittaker original https://www.raspberrypi.org/blog/raspberry-pi-makes-your-retro-analogue-camera-digital/

Befinitiv has built a custom film cartridge, using a Raspberry Pi Zero W, that turned their gorgeous old analogue camera into a digital one, and enabled it to take digital photos, videos, and even wirelessly live stream to the Internet.

A quick, simple build video for a smooth-running project

The analogue camera they used in the build was considered state-of-the-art around fifty years ago, but it lives on to capture another day, all thanks to a tiny computer we made just a few years ago.

analogue to digital camera original model hero shot
It’s a beauty

The maker replaced the old-fashioned camera film roll with a digital cartridge housing a tiny Raspberry Pi camera — with the lens removed — and a Raspberry Pi Zero W. The housing was designed to fit in the back of the camera where original photographers would have clipped the film roll in, and then spooled it over.

analogue to digital camera film with raspberry pi stuff in
Designed to fit

Along with the camera and the Raspberry Pi Zero W, the custom-built cartridge also houses a LiPo battery and a DC to DC converter, used to boost the power supply to the Raspberry Pi up to +5V.

analogue to digital camera insides
Teeny tech packed into a teeny space

The whole project took just two hours to complete from start to finish, everything worked first time. Befinitiv had wanted to use the Raspberry Pi High Quality Camera, but space inside the housing was just too tight. Maybe next time? Perhaps they can use one of those giant ancient cameras, where the photographer had to flip a blanket over their head, all while holding a stick in the air with the flash.

analogue to digital camera looking out the window
This old analogue camera is now fully digital

More retro projects from the maker

Fancy more where this retrofit goodness came from? The maker has also upgraded a flip phone from the year 2000. Oh! I just realised the year 2000 was more than 20 years ago. Watch the build video while I go and burn all of my skater boy jeans and slogan t-shirts…

Don’t let your old flip phone die

They also did something weird but cool sounding with this noisy teletype machine. Is it a teletype machine? What’s a teletype machine? I saw a fax machine once..?

I know EXACTLY what a “teletype message” is…

The post Raspberry Pi makes your retro analogue camera digital appeared first on Raspberry Pi.

Translate dog barks with Raspberry Pi

Post Syndicated from Ashley Whittaker original https://www.raspberrypi.org/blog/translate-dog-barks-with-raspberry-pi/

I speak English. Super well. And I can read the rough, overall vibe of writing in French. I can also order beer and taxis in Spanish. Alas, my dog can do none of these things, and we are left in communication limbo. I try asking them (in English) why they’re so mean to that one Cockapoo who lives across the road, or why they don’t understand the importance of the eyedrops the vet insists I have to hold their eyelids open to administer. They just respond with a variety of noises that I cannot translate. We need to fix this, and thankfully NerdStroke has harnessed Raspberry Pi to build a solution.

NerdStroke’s YouTube channel is new, but good. Subscribe to it!
(Video features some bleeped-out strong language, as well as one unbleeped mild swear)

How does it work?

The dog wears a harness with a microphone that picks up its barks. The barks get processed through a device that determines what the dog is saying and then outputs it through speakers.

Raspberry Pi Zero is the affordable brain powering NerdStroke’s solution to this age-old human-and-pup problem. But writing code that could translate the multitude of frequencies coming out of a dog’s mouth when it barks was a trickier problem. NerdStroke tried to work it through on Twitch with fellow hobbyists, but alas, the original dream had to be modified.

dog bark translator hardware
The kit worked fine – it was the coding challenge that changed the course of this project

Spoiler alert: fast Fourier transforms did not work. You would need a clear, pure tone for that to work in a project like this, but as we said above, dogs bark in a rainbow of tones, pitches, and all the rest.

So what’s the solution?

Because of this, a time-based model was devised to predict what a dog is likely to be barking about at any given time of day. For example, if it’s early morning, they probably want to go out to pee. But if it’s mid-morning, they’re probably letting you know the postman has arrived and is trying to challenge your territory by pushing thin paper squares through the flap in your front door. It’s a dangerous world out there, and dogs just want to protect us.

Nerdstroke had his good friend record some appropriate soundbites to go with each bark, depending on what time of day it happened. And now, Nugget the dog can tell you “I want to cuddle” or “Why aren’t you feeding me?”

Same, Nugget, same

While the final project couldn’t quite translate the actual thoughts of a dog, we love the humour behind this halfway solution. And we reckon the product name, Holler Collar, would definitely sell.

Follow NerdStroke’s future projects

NerdStroke is all over the socials, so follow them on your platform of choice:

TWITCH – twitch.tv/nerdstoke
INSTAGRAM – instagram.com/nerdstoke
TWITTER – twitter.com/nerdstoke
GITHUB – github.com/nerdstoke
EMAIL – [email protected]

The post Translate dog barks with Raspberry Pi appeared first on Raspberry Pi.

Raspberry Pi Zero makes a xylophone play itself

Post Syndicated from Ashley Whittaker original https://www.raspberrypi.org/blog/raspberry-pi-zero-makes-a-xylophone-play-itself/

When maker Stéphane (aka HalStar) set about building this self-playing xylophone, their goal was to learn more about robotics, and to get hands-on with some mechanical parts they had never used before, in this case solenoids.

They also wanted to experiment with Raspberry Pi to build something that reflected their love of music. This automated instrument, capable of playing hundreds of MIDI files, fits the brief.

Let me introduce you to Stéphane’s self-playing xylophone

Two factors constrained the design: Stéphane wanted to be able to do it all using parts from the local DIY store, and to use as many regular modules as possible. So, no breadboard or wires everywhere, and no custom PCB. Just something simple to assemble and neat.

This extra video goes into more detail about the build process

Hardware

Raspberry Pi Zero WH is the teeny tiny brain of the self-playing xylophone. And its maker’s build details video very helpfully labels all the parts, where they sit, and what’s connected to what.

self playing xylophone hardware
There we are (#4) working away to make the xylophone play

These three buttons select the tracks, set the tempo, and set the mode. Choose between playing all loaded tracks or just one. You can also decide whether you want all tracks to play on repeat in a loop, or stop after your selections have played through. A two-inch LCD screen shows you what’s going on.

self playing xylophone track selection buttons
Twist and click to choose your settings

The right notes

While there are thousands of MIDI files freely available online, very few of them could actually be played by the xylophone. With only 32 notes, the instrument is limited in what it can play without losing any notes. Also, even when a MIDI file uses just 32 consecutive notes, they might not be the same range of 32 notes as the xylophone has, so you need to transpose. Stéphane developed a tool in Python to filter out 32-note tunes from thousands of MIDI files and automatically transpose them so the xylophone can play them. And, yes, everything you need to copy this filtering and transposing function is on GitHub.

self playing xylophone hero
In all its glory

Now, Stéphane says that whenever friends or family visit their home, they’re curious and impressed to see this strange instrument play by itself. Sadly, we are not among Stéphane’s family or friends; fortunately, though, this project has an entire YouTube playlist, so we can still have a look and a listen to see it in action up close.

Wait, isn’t that a glockenspiel?

We know it’s technically a glockenspiel. Stéphane acknowledges it is technically a glockenspiel. But we are firm fans of their going down the xylophone route, because way more people know what one of those is. If you’re interested, the difference between a xylophone and the glockenspiel is the material used for the bars. A xylophone has wooden bars, whereas glockenspiel bars are metal.

The post Raspberry Pi Zero makes a xylophone play itself appeared first on Raspberry Pi.

Raspberry Pi smart IoT glove

Post Syndicated from Ashley Whittaker original https://www.raspberrypi.org/blog/raspberry-pi-smart-iot-glove/

Animator/engineer Ashok Fair has put witch-level finger pointing powers in your hands by sticking a SmartEdge Agile, wirelessly controlled by Raspberry Pi Zero, to a golf glove. You could have really freaked the bejeezus out of Halloween party guests with this (if we were allowed to have Halloween parties that is).

The build uses a Smart Edge Agile IoT device with Brainium, a cloud-based tool for performing machine learning tasks.

The Rapid IoT kit is interfaced with Raspberry Pi Zero and creates a thread network connecting to light, car, and fan controller nodes.

The Brainium app is installed on Raspberry Pi and bridges between the cloud and Smart Edge device. MQTT is running on Python and processes the Rapid IoT Kit’s data.

The device is mounted onto a golf glove, giving the wearer seemingly magical powers with the wave of a hand.

Kit list

  • Raspberry Pi Zero
  • Avnet SmartEdge Agile (the white box attached to the glove)
  • NXP Rapid IoT Prototyping Kit (the square blue screen stuck on the adaptor board with the Raspberry Pi Zero)
  • Brainium AI Studio app
  • Golf glove
Waking up the Rapid IoT screen

To get started, the glove wearer draws a pattern above the screen attached to the Raspberry Pi to unlock it and wake up all the controller nodes.

The light controller node is turned on by drawing a clockwise circle, and turned off with an counter-clockwise circle.

The full kit and caboodle

The fan is turned on and off in the same way, and you can increase the fan’s speed by moving your hand upwards and reduce the speed by moving your hand down. You know it’s working by the look of the fan’s LEDs: they blinker faster as the fan speeds up.

Make a pushing motion in the air above the car to make it move forward, and you can also make it turn and reverse.

“Driving glove”

If you wear the glove while driving, it collects data in real time and logs it on the Brainium cloud so you can review your driving style.

Keep up with Ashok’s projects on Twitter or Facebook.

The post Raspberry Pi smart IoT glove appeared first on Raspberry Pi.