Tag Archives: Raspberry Pi Cameras

Charge your Tesla automatically with Raspberry Pi

Post Syndicated from Ashley Whittaker original https://www.raspberrypi.org/blog/charge-your-tesla-automatically-with-raspberry-pi/

It’s the worst feeling in the world: waking up and realising you forgot to put your electric car on charge overnight. What do you do now? Dig a bike out of the shed? Wait four hours until there’s enough juice in the battery to get you where you need to be? Neither option works if you’re running late. If only there were a way to automate the process, so that when you park up, the charger find its way to the charging port on its own. That would make life so much easier.

This is quite the build

Of course, this is all conjecture, because I drive a car made in the same year I started university. Not even the windows go up and down automatically. But I can dream, and I still love this automatic Tesla charger built with Raspberry Pi.

Wait, don’t Tesla make those already?

Back in 2015 Tesla released a video of their own prototype which can automatically charge their cars. But things have gone quiet, and nothing seems to be coming to market any time soon – nothing directly from Tesla, anyway. And while we like the slightly odd snake-charmer vibes the Tesla prototype gives off, we really like Pat’s commitment to spending hours tinkering in order to automate a 20-second manual job. It’s how we do things around here.

This video makes me feel weird

Electric vehicle enthusiast Andrew Erickson has been keeping up with the prototype’s whereabouts, and discussed it on YouTube in 2020.

How did Pat build his home-made charger?

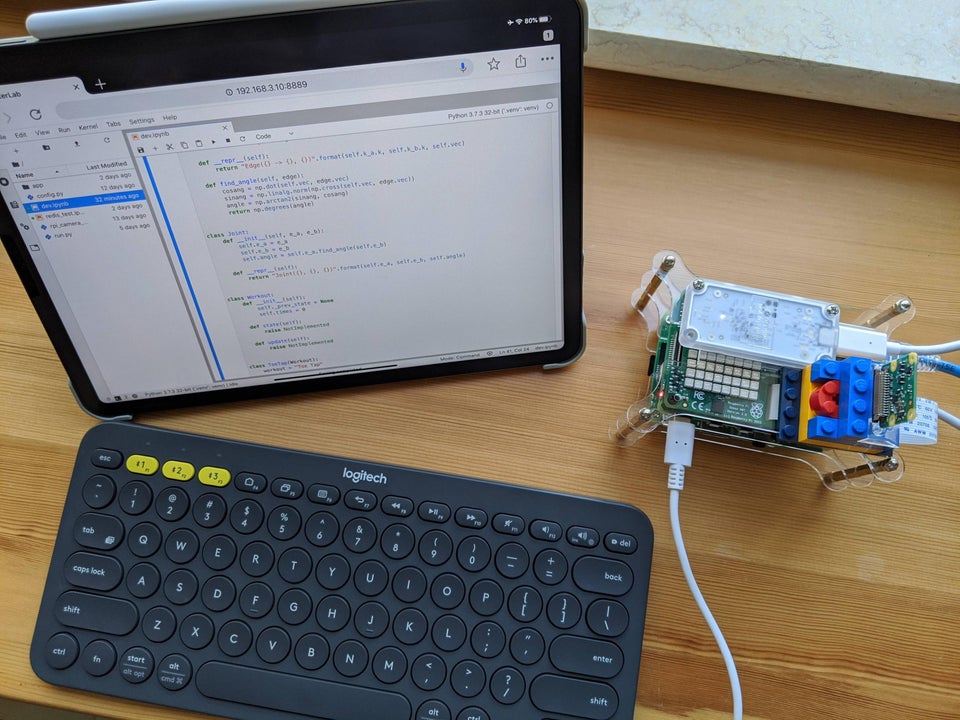
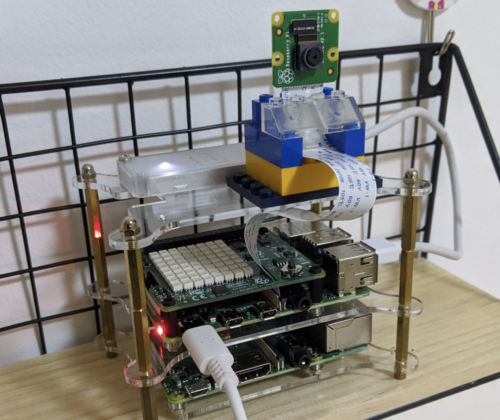
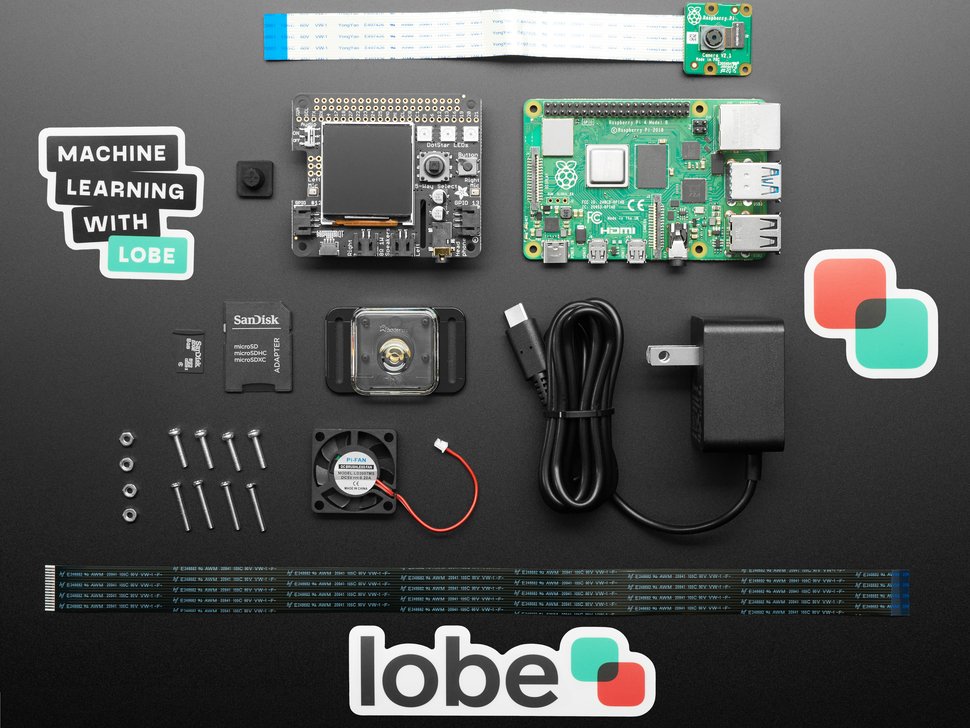
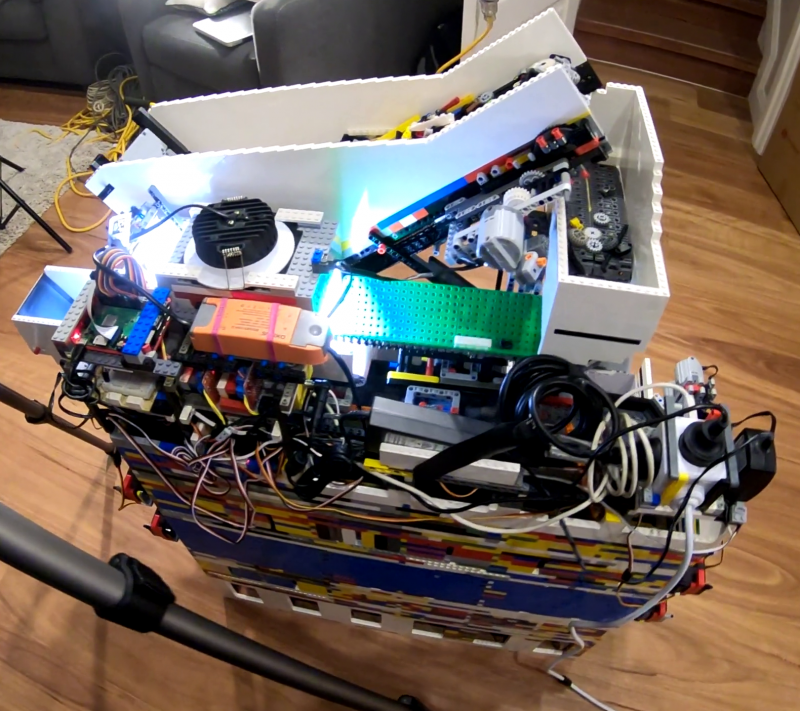
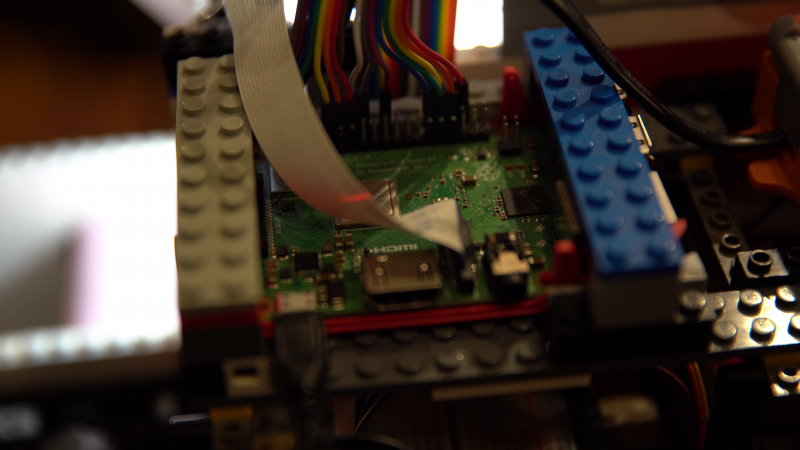
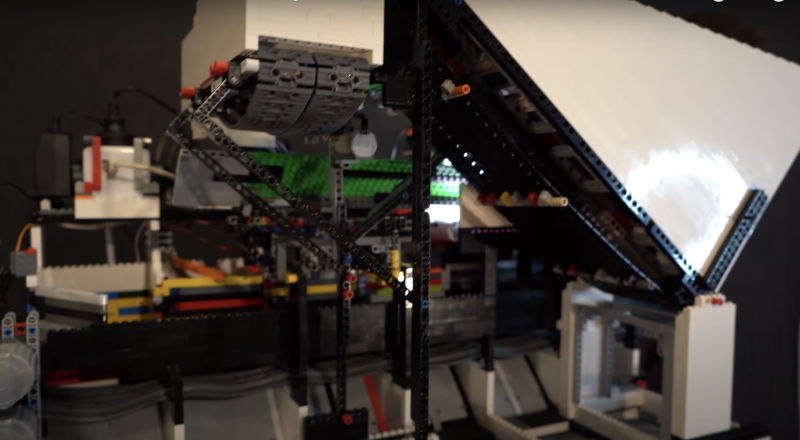
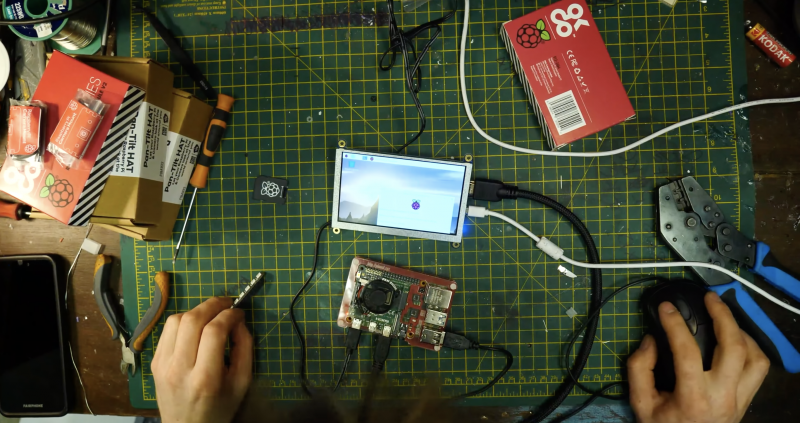
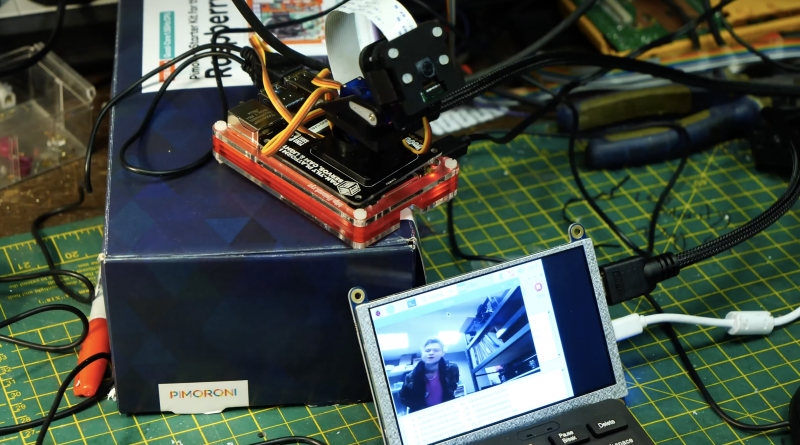
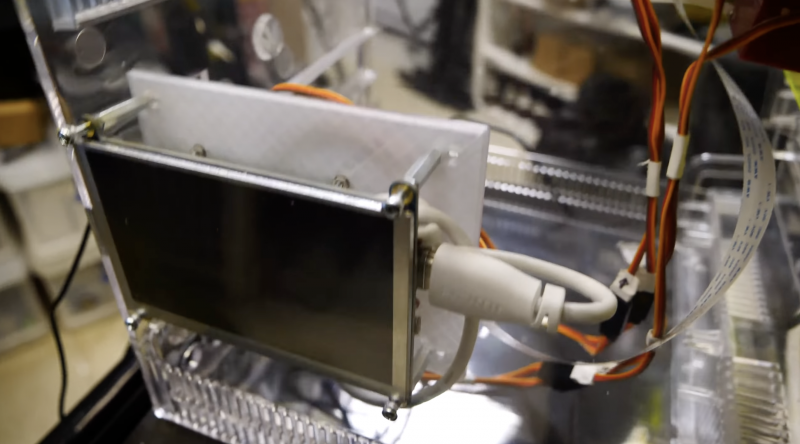
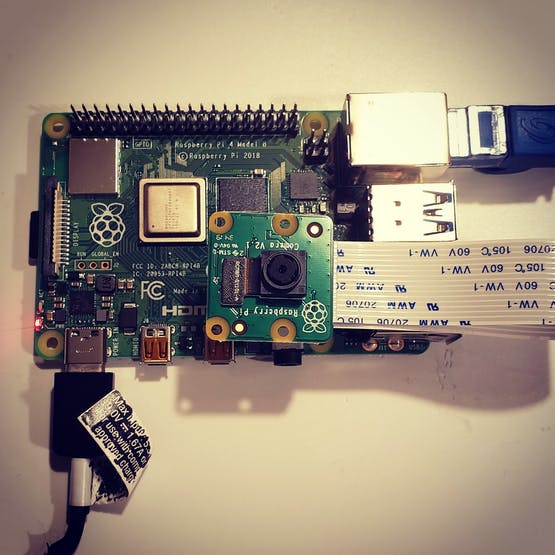
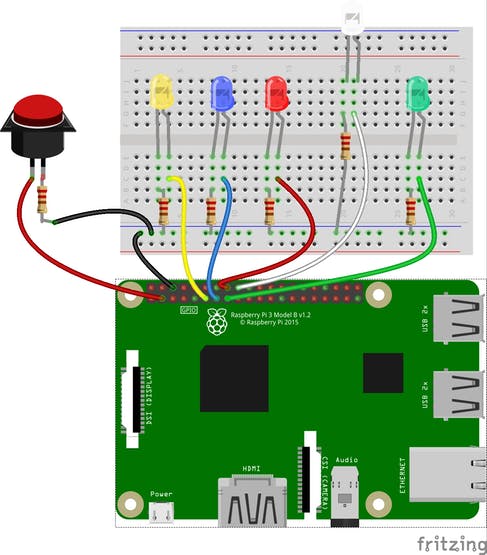
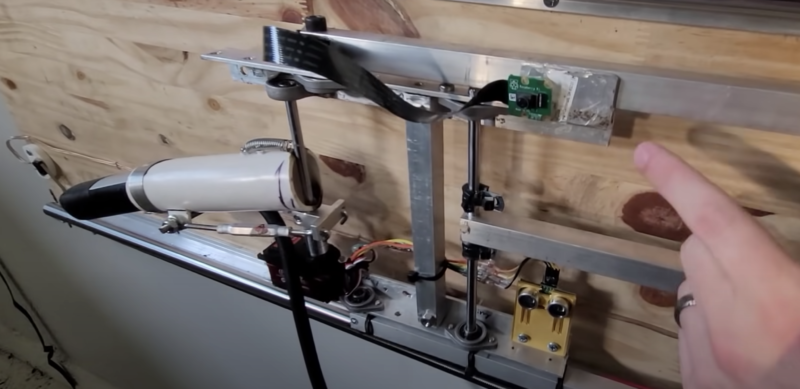
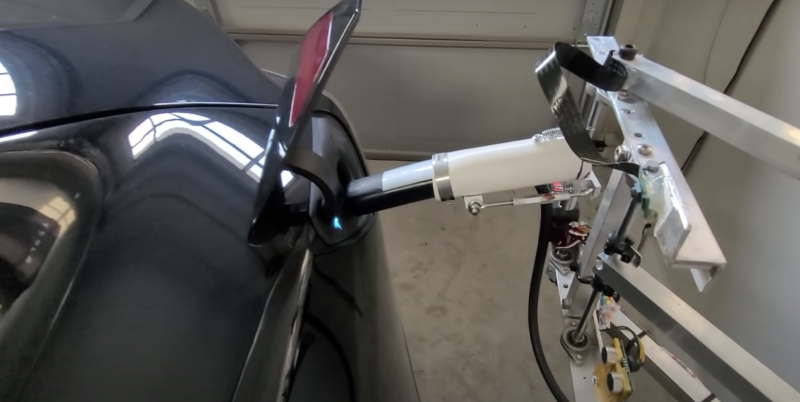
Tired of waiting on Tesla, Pat took matters into his own hands and developed a home-made solution with Raspberry Pi 4. Our tiny computer is the “brains of everything”, and is mounted to a carriage on Pat’s garage wall.

automatic tesla charger rig mounted on garage wall
The entire rig mounted to Pat’s garage wall

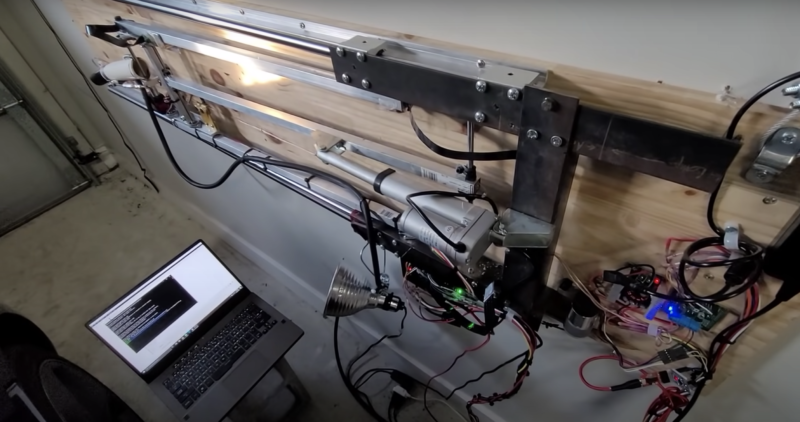
There’s a big servo at the end of the carriage, which rotates the charging arm out when it’s needed. And an ultrasonic distance sensor ensures none of the home-made apparatus hits the car.

automatic tesla charger sensors
Big white thing on the left is the charging arm. Pat pointing to the little green Raspberry Pi camera module up top. And the yellow box at the bottom is the distance sensor

How does the charger find the charging port?

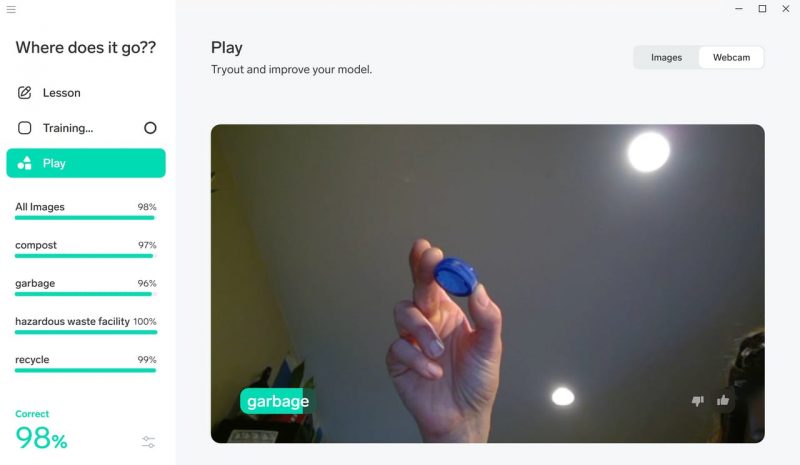
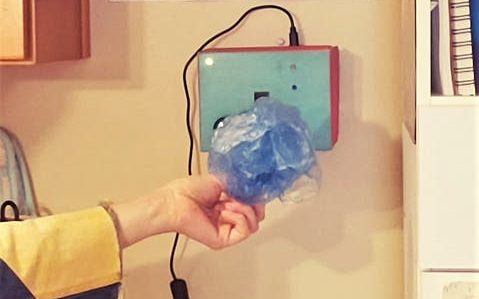
A Raspberry Pi Camera Module takes photos and sends them back to a machine learning model (Pat used TensorFlow Lite) running on his Raspberry Pi 4. This is how the charging arm finds its way to the port. You can watch the model in action from this point in the build video.

automatic tesla charger in action
“Marco!” “Polo!” “Marco!” “Polo!”

Top stuff, Pat. Now I just need to acquire a Tesla from somewhere so I can build one for my own garage. Wait, I don’t have a garage either…

The post Charge your Tesla automatically with Raspberry Pi appeared first on Raspberry Pi.

HIIT Pi makes Raspberry Pi your home workout buddy

Post Syndicated from Ashley Whittaker original https://www.raspberrypi.org/blog/hiit-pi-makes-raspberry-pi-your-home-workout-buddy/

Has your fitness suffered during locked down? Have you been able to keep up diligently with your usual running routine? Maybe you found it easy to recreate you regular gym classes in your lounge with YouTube coaches. Or maybe, like a lot of us, you’ve not felt able to do very much at all, and needed a really big push to keep moving.

From James’s YouTube channel

Maker James Wong took to Raspberry Pi to develop something that would hold him accountable for his daily HIIT workouts, and hopefully keep his workouts on track while alone in lockdown.

What is a HIIT workout?

HIIT is the best kind of exercise, in that it doesn’t last long and it’s effective. You do short bursts of high-intensity physical movement between short, regular rest periods. HIIT stands for High Intensity Interval Training.

James’s model can detect how well you perform a burpee, as well as many other exercise movements

James was attracted to HIIT during lockdown as it didn’t require any gym visits or expensive exercise equipment. He had access to endless online training sessions, but felt he needed that extra level of accountability to make sure he kept up with his at-home fitness regime. Hence, HIIT Pi.

So what does HIIT Pi actually do?

HIIT Pi is a web app that uses machine learning on Raspberry Pi to help track your workout in real time. Users can interact with the app via any web browser running on the same local network as the Raspberry Pi, be that on a laptop, tablet, or smartphone.

HIIT Pi running software on server from ipad using raspberry pi
An iPad accessing a remote server running on James’s Raspberry Pi

HIIT Pi is simple in that it only does two things:

  • Uses computer vision to automatically capture and track detected poses and movement
  • Scores them according to a set of rules and standards
HIIT Pi running on Raspberry Pi and a Raspberry Pi camera module, propped up on a shelf
HIIT Pi is watching you via a Raspberry Pi camera module (top right)

So, essentially, you’ve got a digital personal trainer in the room monitoring your movements and letting you know whether they’re up to standard and whether you’re likely to achieve your fitness goals.

James calls HIIT Pi an “electronic referee”, and we agree that if we had one of those in the room while muddling through a Yoga With Adriene session on YouTube, we would try a LOT harder.

How does it work?

A Raspberry Pi camera module streams raw image data from the sensor roughly at 30 frames per second. James devised a custom recording stream handler that works off this pose estimation model and takes frames from the video stream, spitting out pose confidence scores using pre-set keypoint position coordinates.

HIIT Pi dashboard
HIIT Pi uses Dash, a laudable open source tool from the Plotly team

James’s original project post details the inner workings. You can also grab the code needed to create your own at-home Raspberry Pi personal trainer.

Get in touch with James here.

The post HIIT Pi makes Raspberry Pi your home workout buddy appeared first on Raspberry Pi.

Machine Learning made easy with Raspberry Pi, Adafruit and Microsoft

Post Syndicated from Ashley Whittaker original https://www.raspberrypi.org/blog/machine-learning-made-easy-with-raspberry-pi-adafruit-and-microsoft/

Machine learning can sound daunting even for experienced Raspberry Pi hobbyists, but Microsoft and Adafruit Industries are determined to make it easier for everyone to have a go. Microsoft’s Lobe tool takes the stress out of training machine learning models, and Adafruit have developed an entire kit around their BrainCraft HAT, featuring Raspberry Pi 4 and a Raspberry Pi Camera, to get your own machine learning project off to a flying start.

adafruit lobe kit
Adafruit developed this kit especially for the BrainCraft HAT to be used with Microsoft Lobe on Raspberry Pi

Adafruit’s BrainCraft HAT

Adafruit’s BrainCraft HAT fits on top of Raspberry Pi 4 and makes it really easy to connect hardware and debug machine learning projects. The 240 x 240 colour display screen also lets you see what the camera sees. Two microphones allow for audio input, and access to the GPIO means you can connect things likes relays and servos, depending on your project.

Adafruit’s BrainCraft HAT in action detecting a coffee mug

Microsoft Lobe

Microsoft Lobe is a free tool for creating and training machine learning models that you can deploy almost anywhere. The hardest part of machine learning is arguably creating and training a new model, so this tool is a great way for newbies to get stuck in, as well as being a fantastic time-saver for people who have more experience.

Get started with one of three easy, medium, and hard tutorials featured on the lobe-adafruit-kit GitHub.

This is just a quick snippet of Microsoft’s full Lobe tutorial video.
Look how quickly the tool takes enough photos to train a machine learning model

‘Bakery’ identifies and prices different pastries

Lady Ada demonstrated Bakery: a machine learning model that uses an Adafruit BrainCraft HAT, a Raspberry Pi camera, and Microsoft Lobe. Watch how easy it is to train a new machine learning model in Microsoft Lobe from this point in the Microsoft Build Keynote video.

A quick look at Bakery from Adafruit’s delightful YouTube channel

Bakery identifies different baked goods based on images taken by the Raspberry Pi camera, then automatically identifies and prices them, in the absence of barcodes or price tags. You can’t stick a price tag on a croissant. There’d be flakes everywhere.

Extra functionality

Running this project on Raspberry Pi means that Lady Ada was able to hook up lots of other useful tools. In addition to the Raspberry Pi camera and the HAT, she is using:

  • Three LEDs that glow green when an object is detected
  • A speaker and some text-to-speech code that announces which object is detected
  • A receipt printer that prints out the product name and the price

All of this running on Raspberry Pi, and made super easy with Microsoft Lobe and Adafruit’s BrainCraft HAT. Adafruit’s Microsoft Machine Learning Kit for Lobe contains everything you need to get started.

full adafruit lobe kit
The full Microsoft Machine Learning Kit for Lobe with Raspberry Pi 4 kit

Watch the Microsoft Build keynote

And finally, watch Microsoft CTO Kevin Scott introduce Limor Fried, aka Lady Ada, owner of Adafruit Industries. Lady Ada joins remotely from the Adafruit factory in Manhattan, NY, to show how the BrainCraft HAT and Lobe work to make machine learning accessible.

The post Machine Learning made easy with Raspberry Pi, Adafruit and Microsoft appeared first on Raspberry Pi.

Raspberry Pi LEGO sorter

Post Syndicated from Ashley Whittaker original https://www.raspberrypi.org/blog/raspberry-pi-lego-sorter/

Raspberry Pi is at the heart of this AI–powered, automated sorting machine that is capable of recognising and sorting any LEGO brick.

And its maker Daniel West believes it to be the first of its kind in the world!

Best ever

This mega-machine was two years in the making and is a LEGO creation itself, built from over 10,000 LEGO bricks.

A beast of 10,000 bricks

It can sort any LEGO brick you place in its input bucket into one of 18 output buckets, at the rate of one brick every two seconds.

While Daniel was inspired by previous LEGO sorters, his creation is a huge step up from them: it can recognise absolutely every LEGO brick ever created, even bricks it has never seen before. Hence the ‘universal’ in the name ‘universal LEGO sorting machine’.

Hardware

There we are, tucked away, just doing our job

Software

The artificial intelligence algorithm behind the LEGO sorting is a convolutional neural network, the go-to for image classification.

What makes Daniel’s project a ‘world first’ is that he trained his classifier using 3D model images of LEGO bricks, which is how the machine can classify absolutely any LEGO brick it’s faced with, even if it has never seen it in real life before.

We LOVE a thorough project video, and we love TWO of them even more

Daniel has made a whole extra video (above) explaining how the AI in this project works. He shouts out all the open source software he used to run the Raspberry Pi Camera Module and access 3D training images etc. at this point in the video.

LEGO brick separation

The vibration plate in action, feeding single parts into the scanner

Daniel needed the input bucket to carefully pick out a single LEGO brick from the mass he chucks in at once.

This is achieved with a primary and secondary belt slowly pushing parts onto a vibration plate. The vibration plate uses a super fast LEGO motor to shake the bricks around so they aren’t sitting on top of each other when they reach the scanner.

Scanning and sorting

A side view of the LEFO sorting machine showing a large white chute built from LEGO bricks
The underside of the beast

A Raspberry Pi Camera Module captures video of each brick, which Raspberry Pi 3 Model B+ then processes and wirelessly sends to a more powerful computer able to run the neural network that classifies the parts.

The classification decision is then sent back to the sorting machine so it can spit the brick, using a series of servo-controlled gates, into the right output bucket.

Extra-credit homework

A front view of the LEGO sorter with the sorting boxes visible underneath
In all its bricky beauty, with the 18 output buckets visible at the bottom

Daniel is such a boss maker that he wrote not one, but two further reading articles for those of you who want to deep-dive into this mega LEGO creation:

The post Raspberry Pi LEGO sorter appeared first on Raspberry Pi.

These Furby-‘controlled’ Raspberry Pi-powered eyes follow you

Post Syndicated from Ashley Whittaker original https://www.raspberrypi.org/blog/these-furby-controlled-raspberry-pi-powered-eyes-follow-you/

Sam Battle aka LOOK MUM NO COMPUTER couldn’t resist splashing out on a clear Macintosh case for a new project in his ‘Cosmo’ series of builds, which inject new life into retro hardware.

furby facial recognition robot in a clear case in front of a dark background
AAGGGGHHHHHHH!

This time around, a Raspberry Pi, running facial recognition software, and one of our Camera Modules enable Furby-style eyes to track movement, detect faces, and follow you around the room.

Give LOOK MUM NO COMPUTER a follow on YouTube

He loves a good Furby does Sam. Has a whole YouTube playlist dedicated to projects featuring them. Seriously.

Raspberry Pi  with camera module attached to small screen loading software needed to run face recognition
Sam got all the Raspberry Pi kit needed from Pimoroni

Our favourite bit of the video is when Sam meets Raspberry Pi for the first time, boots it up, and says:

“Wait, I didn’t know it was a computer. It’s an actual computer computer. What?!”

face recognition software running on small screen with raspberry pi camera behind it, looking at the maker
Face recognition software up and running on Raspberry Pi

The eyes are ping pong balls cut in half so you can fit a Raspberry Pi Camera Module inside them. (Don’t forget to make a hole in the ‘pupil’ so the lens can peek through).

Maker inserting raspberry pi camera module inside a sliced ping pong ball. You can see the ribbons of the camera module sticking out of the ping pong ball half
Raspberry Pi Camera Module tucked inside ping pong ball as it’s mounted to a 3D-printed part

The Raspberry Pi and display screen are neatly mounted on the side of the Macintosh so they’re easily accessible should you need to make any changes.

Raspberry Pi and display screen mounted on the side of a clear macintosh frame
Easy access

All the hacked, repurposed junky bits sit inside or are mounted on swish 3D-printed parts.

Add some joke shop chatterbox teeth, and you’ve got what looks like the innards of a Furby staring at you. See below for a harrowing snapshot of Zach’s ‘Furlexa’ project, featured on our blog last year. We still see it when we sleep.

It gets worse the more you look around

It wasn’t enough for Furby-mad Sam to have created a Furby look-a-like face-tracking robot, he needed to go further. Inside the clear Macintosh case, you can see a de-furred Furby skeleton atop a 3D-printed plinth, with redundant ribbon cables flowing from its eyes into the back of the face-tracking robot face, thus making it appear as though the Furby is the brains behind this creepy creation that is following your every move.

a side view of the entire build with a furby skeleton visible inside
Hey in there. We see you! You dark lord of robo-controlling

Eventually, Sam’s Raspberry Pi–powered creation will be on display at the Museum of Everything Else, so you can go visit it and play with all the “obsolete and experimental technology” housed there. The museum is funded by the Look Mum No Computer Patreon page.

The post These Furby-‘controlled’ Raspberry Pi-powered eyes follow you appeared first on Raspberry Pi.

Classify your trash with Raspberry Pi

Post Syndicated from Ashley Whittaker original https://www.raspberrypi.org/blog/classify-your-trash-with-raspberry-pi/

Maker Jen Fox took to hackster.io to share a Raspberry Pi–powered trash classifier that tells you whether the trash in your hand is recyclable, compostable, or just straight-up garbage.

Jen reckons this project is beginner-friendly, as you don’t need any code to train the machine learning model, just a little to load it on Raspberry Pi. It’s also a pretty affordable build, costing less than $70 including a Raspberry Pi 4.

“Haz waste”?!

Hardware:

  • Raspberry Pi 4 Model B
  • Raspberry Pi Camera Module
  • Adafruit push button
  • Adafruit LEDs
Watch Jen giving a demo of her creation

Software

The code-free machine learning model is created using Lobe, a desktop tool that automatically trains a custom image classifier based on what objects you’ve shown it.

The image classifier correctly guessing it has been shown a bottle cap

Training the image classifier

Basically, you upload a tonne of photos and tell Lobe what object each of them shows. Jen told the empty classification model which photos were of compostable waste, which were of recyclable and items, and which were of garbage or bio-hazardous waste. Of course, as Jen says, “the more photos you have, the more accurate your model is.”

Loading up Raspberry Pi

Birds eye view of Raspberry Pi 4 with a camera module connected
The Raspberry Pi Camera Module attached to Raspberry Pi 4

As promised, you only need a little bit of code to load the image classifier onto your Raspberry Pi. The Raspberry Pi Camera Module acts as the image classifier’s “eyes” so Raspberry Pi can find out what kind of trash you hold up for it.

The push button and LEDs are wired up to the Raspberry Pi GPIO pins, and they work together with the camera and light up according to what the image classifier “sees”.

Here’s the fritzing diagram showing how to wire the push button and LEDS to the Raspberry Pi GPIO pins

You’ll want to create a snazzy case so your trash classifier looks good mounted on the wall. Kate cut holes in a cardboard box to make sure that the camera could “see” out, the user can see the LEDs, and the push button is accessible. Remember to leave room for Raspberry Pi’s power supply to plug in.

Jen’s hand-painted case mounted to the wall, having a look at a plastic bag

Jen has tonnes of other projects on her Hackster profile — check out the micro:bit Magic Wand.

The post Classify your trash with Raspberry Pi appeared first on Raspberry Pi.

Hire Raspberry Pi as a robot sous-chef in your kitchen

Post Syndicated from Ashley Whittaker original https://www.raspberrypi.org/blog/hire-raspberry-pi-as-a-robot-sous-chef-in-your-kitchen/

Design Engineering student Ben Cobley has created a Raspberry Pi–powered sous-chef that automates the easier pan-cooking tasks so the head chef can focus on culinary creativity.

Ben named his invention OnionBot, as the idea came to him when looking for an automated way to perfectly soften onions in a pan while he got on with the rest of his dish. I have yet to manage to retrieve onions from the pan before they blacken so… *need*.

OnionBot robotic sous-chef set up in a kitchen
The full setup (you won’t need a laptop while you’re cooking, so you’ll have counter space)

A Raspberry Pi 4 Model B is the brains of the operation, with a Raspberry Pi Touch Display showing the instructions, and a Raspberry Pi Camera Module keeping an eye on the pan.

OnionBot robotic sous-chef hardware mounted on a board
Close up of the board-mounted hardware and wiring

Ben’s affordable solution is much better suited to home cooking than the big, expensive robotic arms used in industry. Using our tiny computer also allowed Ben to create something that fits on a kitchen counter.

OnionBot robotic sous-chef hardware list

What can OnionBot do?

  • Tells you on-screen when it is time to advance to the next stage of a recipe
  • Autonomously controls the pan temperature using PID feedback control
  • Detects when the pan is close to boiling over and automatically turns down the heat
  • Reminds you if you haven’t stirred the pan in a while
OnionBot robotic sous-chef development stages
Images from Ben’s blog on DesignSpark

How does it work?

A thermal sensor array suspended above the stove detects the pan temperature, and the Raspberry Pi Camera Module helps track the cooking progress. A servo motor controls the dial on the induction stove.

Screenshot of the image classifier of OnionBot robotic sous-chef
Labelling images to train the image classifier

No machine learning expertise was required to train an image classifier, running on Raspberry Pi, for Ben’s robotic creation; you’ll see in the video that the classifier is a really simple drag-and-drop affair.

Ben has only taught his sous-chef one pasta dish so far, and we admire his dedication to carbs.

Screenshot of the image classifier of OnionBot robotic sous-chef
Training the image classifier to know when you haven’t stirred the pot in a while

Ben built a control panel for labelling training images in real time and added labels at key recipe milestones while he cooked under the camera’s eye. This process required 500–1000 images per milestone, so Ben made a LOT of pasta while training his robotic sous-chef’s image classifier.

Diagram of networked drivers and devices in OnionBot robotic sous-chef

Ben open-sourced this project so you can collaborate to suggest improvements or teach your own robot sous-chef some more dishes. Here’s OnionBot on GitHub.

The post Hire Raspberry Pi as a robot sous-chef in your kitchen appeared first on Raspberry Pi.