Tag Archives: storage

SK hynix HBM3e CXL Computational Memory MCRDIMM and More OCP Summit 2023

Post Syndicated from Patrick Kennedy original https://www.servethehome.com/sk-hynix-hbm3e-cxl-computational-memory-mcrdimm-and-more-ocp-summit-2023/

At OCP Summit 2023, we saw SK hynix HBM3e, CXL Computational Memory, MCRDIMM for 2024, PCIe Gen5 NVMe SSDs, and Accelerator in Memory modules

The post SK hynix HBM3e CXL Computational Memory MCRDIMM and More OCP Summit 2023 appeared first on ServeTheHome.

What it Takes to Handle Digital Pathology PBs of Storage and GPUs

Post Syndicated from Eric Smith original https://www.servethehome.com/what-it-takes-to-handle-digital-pathology-pbs-of-storage-gpus-quanta-qct/

Running an AI assisted digital pathology workflow takes many petabytes of storage and GPUs to help doctors make better diagnoses

The post What it Takes to Handle Digital Pathology PBs of Storage and GPUs appeared first on ServeTheHome.

Sippy helps you avoid egress fees while incrementally migrating data from S3 to R2

Post Syndicated from Phillip Jones original http://blog.cloudflare.com/sippy-incremental-migration-s3-r2/

Sippy helps you avoid egress fees while incrementally migrating data from S3 to R2

Sippy helps you avoid egress fees while incrementally migrating data from S3 to R2

Earlier in 2023, we announced Super Slurper, a data migration tool that makes it easy to copy large amounts of data to R2 from other cloud object storage providers. Since the announcement, developers have used Super Slurper to run thousands of successful migrations to R2!

While Super Slurper is perfect for cases where you want to move all of your data to R2 at once, there are scenarios where you may want to migrate your data incrementally over time. Maybe you want to avoid the one time upfront AWS data transfer bill? Or perhaps you have legacy data that may never be accessed, and you only want to migrate what’s required?

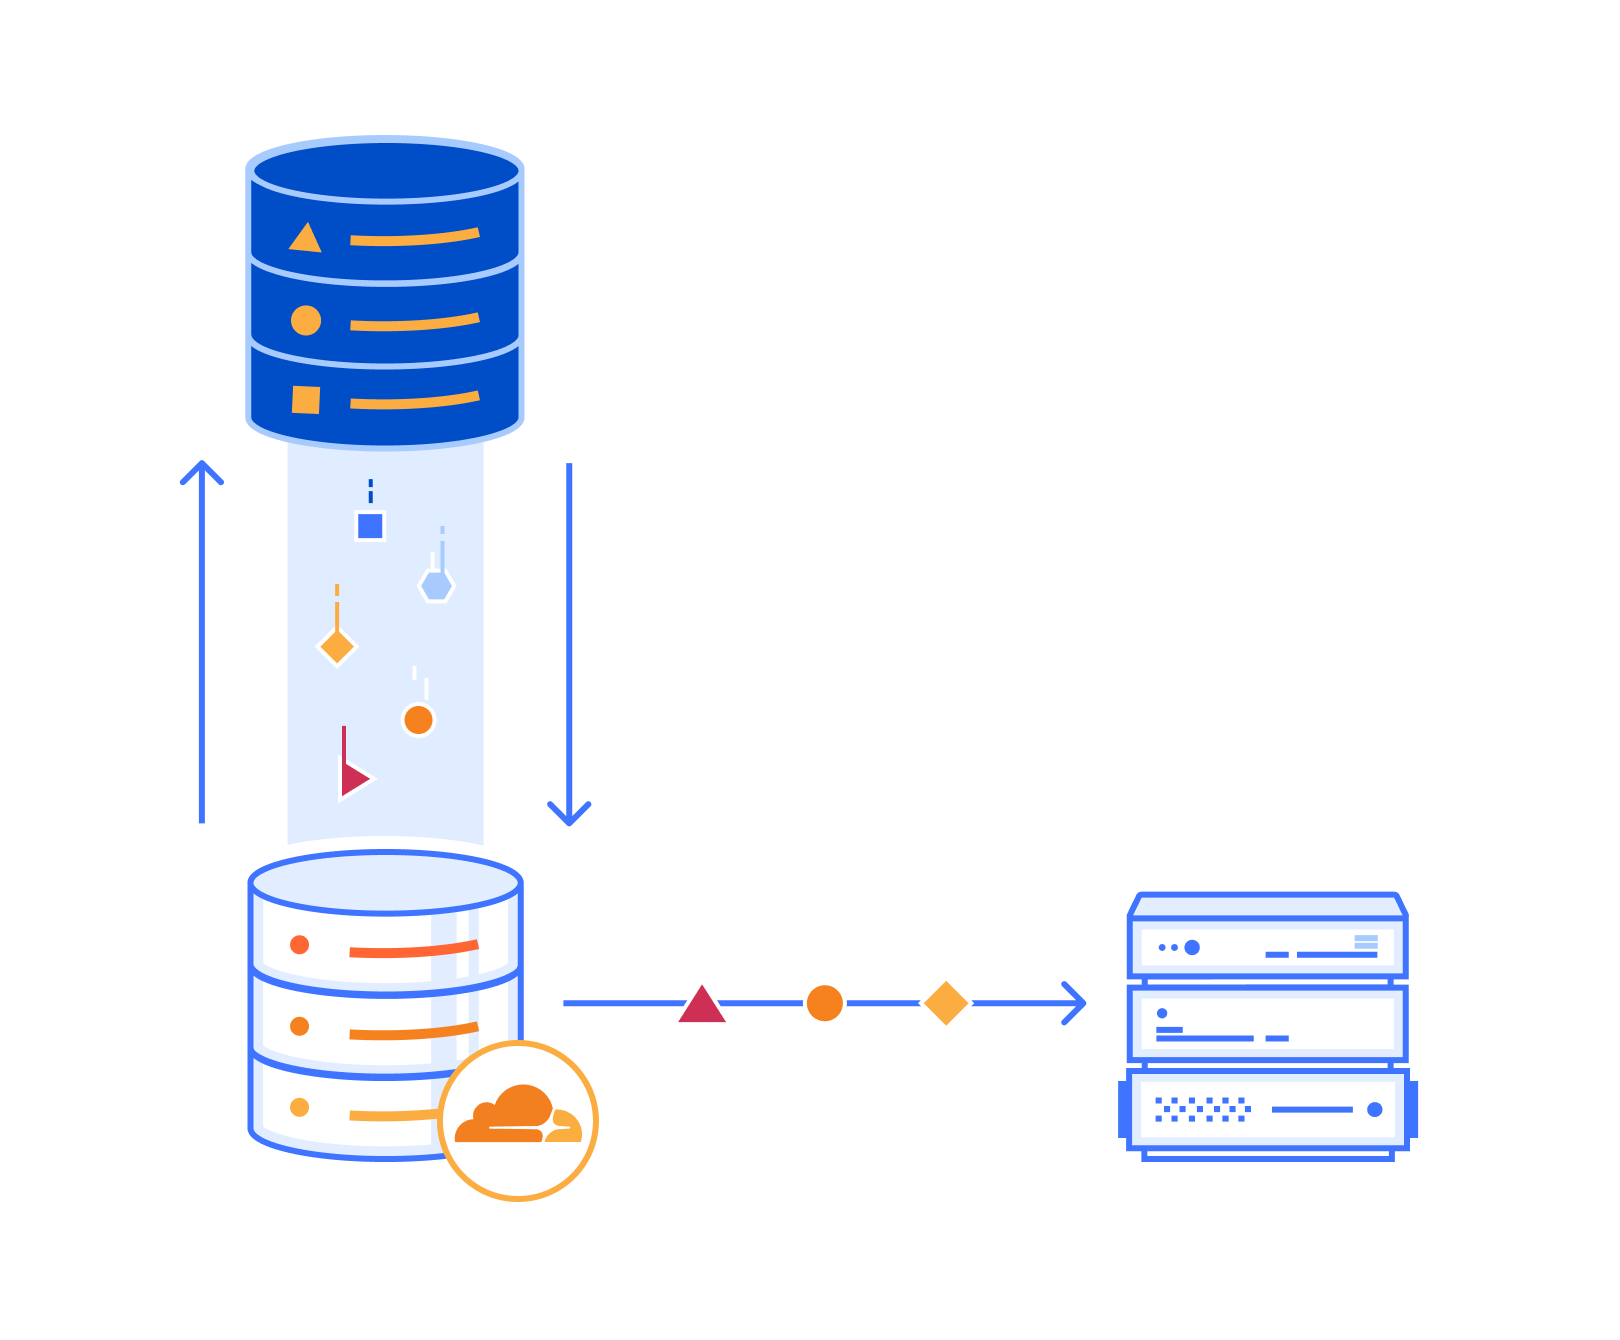
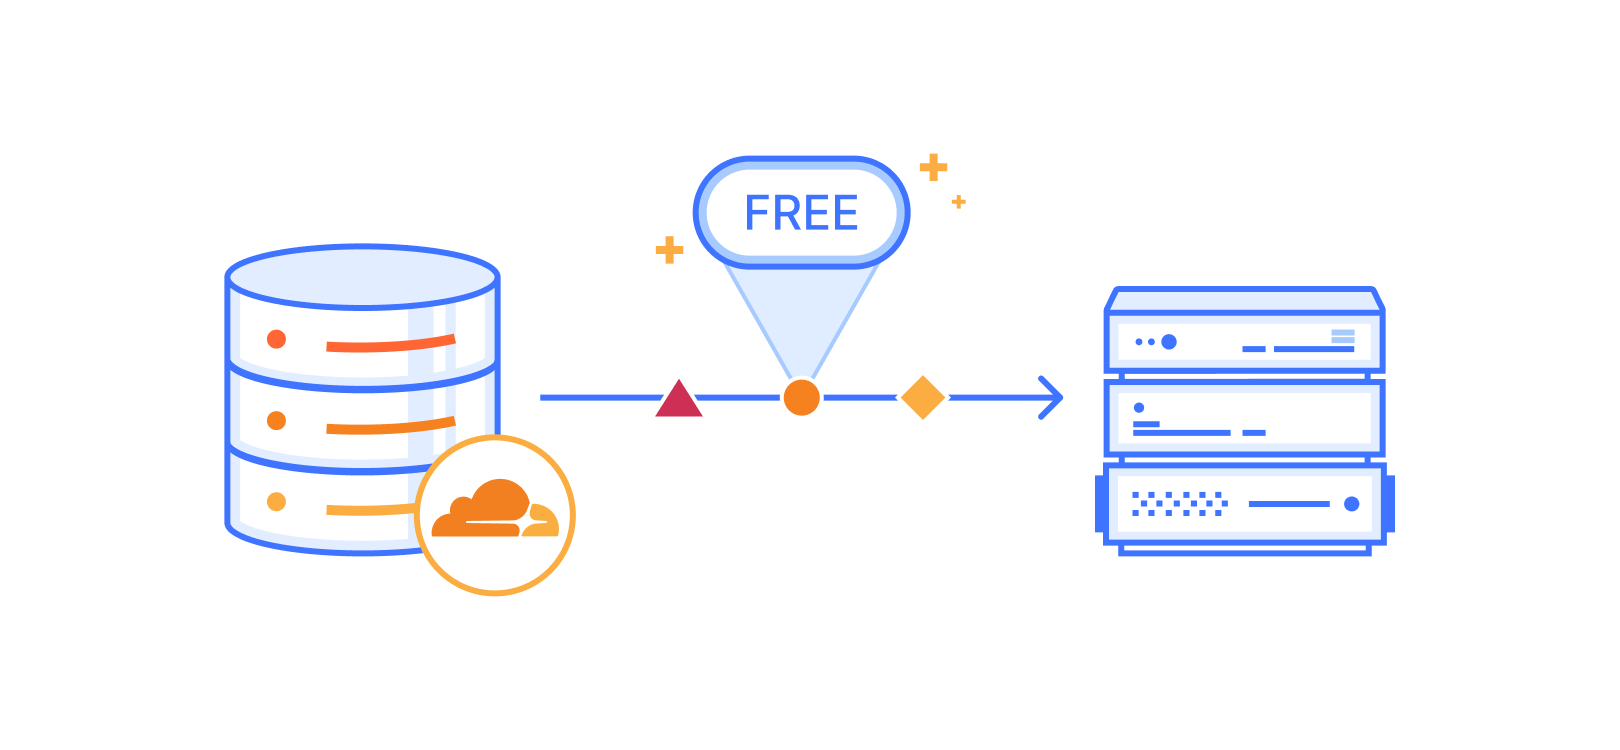
Today, we’re announcing the open beta of Sippy, an incremental migration service that copies data from S3 (other cloud providers coming soon!) to R2 as it’s requested, without paying unnecessary cloud egress fees typically associated with moving large amounts of data. On top of addressing vendor lock-in, Sippy makes stressful, time-consuming migrations a thing of the past. All you need to do is replace the S3 endpoint in your application or attach your domain to your new R2 bucket and data will start getting copied over.

How does it work?

Sippy is an incremental migration service built directly into your R2 bucket. Migration-specific egress fees are reduced by leveraging requests within the flow of your application where you’d already be paying egress fees to simultaneously copy objects to R2. Here is how it works:

When an object is requested from Workers, S3 API, or public bucket, it is served from your R2 bucket if it is found.

Sippy helps you avoid egress fees while incrementally migrating data from S3 to R2

If the object is not found in R2, it will simultaneously be returned from your S3 bucket and copied to R2.

Note: Some large objects may take multiple requests to copy.

Sippy helps you avoid egress fees while incrementally migrating data from S3 to R2

That means after objects are copied, subsequent requests will be served from R2, and you’ll begin saving on egress fees immediately.

Start incrementally migrating data from S3 to R2

Create an R2 bucket

To get started with incremental migration, you’ll first need to create an R2 bucket if you don’t already have one. To create a new R2 bucket from the Cloudflare dashboard:

  1. Log in to the Cloudflare dashboard and select R2.
  2. Select Create bucket.
  3. Give your bucket a name and select Create bucket.

​​To learn more about other ways to create R2 buckets refer to the documentation on creating buckets.

Enable Sippy on your R2 bucket

Next, you’ll enable Sippy for the R2 bucket you created. During the beta, you can do this by using the API. Here’s an example of how to enable Sippy for an R2 bucket with cURL:

curl -X PUT https://api.cloudflare.com/client/v4/accounts/{account_id}/r2/buckets/{bucket_name}/sippy \
--header "Authorization: Bearer <API_TOKEN>" \
--data '{"provider": "AWS", "bucket": "<AWS_BUCKET_NAME>", "zone": "<AWS_REGION>","key_id": "<AWS_ACCESS_KEY_ID>", "access_key":"<AWS_SECRET_ACCESS_KEY>", "r2_key_id": "<R2_ACCESS_KEY_ID>", "r2_access_key": "<R2_SECRET_ACCESS_KEY>"}'

For more information on getting started, please refer to the documentation. Once enabled, requests to your bucket will now start copying data over from S3 if it’s not already present in your R2 bucket.

Finish your migration with Super Slurper

You can run your incremental migration for as long as you want, but eventually you may want to complete the migration to R2. To do this, you can pair Sippy with Super Slurper to easily migrate your remaining data that hasn’t been accessed to R2.

What’s next?

We’re excited about open beta, but it’s only the starting point. Next, we plan on making incremental migration configurable from the Cloudflare dashboard, complete with analytics that show you the progress of your migration and how much you are saving by not paying egress fees for objects that have been copied over so far.

If you are looking to start incrementally migrating your data to R2 and have any questions or feedback on what we should build next, we encourage you to join our Discord community to share!

Sippy helps you avoid egress fees while incrementally migrating data from S3 to R2

AIC HA401-TU High-Availability SAS Storage Server Review

Post Syndicated from Patrick Kennedy original https://www.servethehome.com/aic-ha401-tu-high-availability-sas-storage-server-review-intel-micron-broadcom/

In our AIC HA401-TU reivew, we see how this 4U dual node high-availability SAS3 storage chassis is built and what makes it unique

The post AIC HA401-TU High-Availability SAS Storage Server Review appeared first on ServeTheHome.

Using and Managing Security Groups on AWS Snowball Edge devices

Post Syndicated from Macey Neff original https://aws.amazon.com/blogs/compute/using-and-managing-security-groups-on-aws-snowball-edge-devices/

This blog post is written by Jared Novotny & Tareq Rajabi, Specialist Hybrid Edge Solution Architects. 

The AWS Snow family of products are purpose-built devices that allow petabyte-scale movement of data from on-premises locations to AWS Regions. Snow devices also enable customers to run Amazon Elastic Compute Cloud (Amazon EC2) instances with Amazon Elastic Block Storage (Amazon EBS), and Amazon Simple Storage Service (Amazon S3) in edge locations.

Security groups are used to protect EC2 instances by controlling ingress and egress traffic. Once a security group is created and associated with an instance, customers can add ingress and egress rules to control data flow. Just like the default VPC in a region, there is a default security group on Snow devices. A default security group is applied when an instance is launched and no other security group is specified.  This default security group in a region allows all inbound traffic from network interfaces and instances that are assigned to the same security group, and allows and all outbound traffic. On Snowball Edge, the default security group allows all inbound and outbound traffic.

In this post, we will review the tools and commands required to create, manage and use security groups on the Snowball Edge device.

Some things to keep in mind:

  1. AWS Snowball Edge is limited to 50 security groups.
  2. An instance will only have one security group, but each group can have a total of 120 rules. This is comprised of 60 inbound and 60 outbound rules.
  3. Security groups can only have allow statements to allow network traffic.
  4. Deny statements aren’t allowed.
  5. Some commands in the Snowball Edge client (AWS CLI) don’t provide an output.
  6. AWS CLI commands can use the name or the security group ID.

Prerequisites and tools

Customers must place an order for Snowball Edge from their AWS Console to be able to run the following AWS CLI commands and configure security groups to protect their EC2 instances.

The AWS Snowball Edge client is a standalone terminal application that customers can run on their local servers and workstations to manage and operate their Snowball Edge devices. It supports Windows, Mac, and Linux systems.

AWS OpsHub is a graphical user interface that you can use to manage your AWS Snowball devices. Furthermore, it’s the easiest tool to use to unlock Snowball Edge devices. It can also be used to configure the device, launch instances, manage storage, and provide monitoring.

Customers can download and install the Snowball Edge client and AWS OpsHub from AWS Snowball resources.

Getting Started

To get started, when a Snow device arrives at a customer site, the customer must unlock the device and launch an EC2 instance. This can be done via AWS OpsHub or the AWS Snowball Edge Client. AWS Snow Family of devices support both Virtual Network Interfaces (VNI) and Direct Network interfaces (DNI), customers should review the types of interfaces before deciding which one is best for their use case. Note that security groups are only supported with VNIs, so that is what was used in this post. A post explaining how to use these interfaces should be reviewed before proceeding.

Viewing security group information

Once the AWS Snowball Edge is unlocked, configured, and has an EC2 instance running, we can dig deeper into using security groups to act as a virtual firewall and control incoming and outgoing traffic.

Although the AWS OpsHub tool provides various functionalities for compute and storage operations, it can only be used to view the name of the security group associated to an instance in a Snowball Edge device:

view the name of the security group associated to an instance in a Snowball Edge device

Every other interaction with security groups must be through the AWS CLI.

The following command shows how to easily read the outputs describing the protocols, sources, and destinations. This particular command will show information about the default security group, which allows all inbound and outbound traffic on EC2 instances running on the Snowball Edge.

In the following sections we review the most common commands with examples and outputs.

View (all) existing security groups:

aws ec2 describe-security-groups --endpoint Http://MySnowIPAddress:8008 --profile SnowballEdge
{
    "SecurityGroups": [
        {
            "Description": "default security group",
            "GroupName": "default",
            "IpPermissions": [
                {
                    "IpProtocol": "-1",
                    "IpRanges": [
                        {
                            "CidrIp": "0.0.0.0/0"
                        }
                    ]
                }
            ],
            "GroupId": "s.sg-8ec664a23666db719",
            "IpPermissionsEgress": [
                {
                    "IpProtocol": "-1",
                    "IpRanges": [
                        {
                            "CidrIp": "0.0.0.0/0"
                        }
                    ]
                }
            ]
        }
    ]
}

Create new security group:

aws ec2 create-security-group --group-name allow-ssh--description "allow only ssh inbound" --endpoint Http://MySnowIPAddress:8008 --profile SnowballEdge

The output returns a GroupId:

{  "GroupId": "s.sg-8f25ee27cee870b4a" }

Add port 22 ingress to security group:

aws ec2 authorize-security-group-ingress --group-ids.sg-8f25ee27cee870b4a --protocol tcp --port 22 --cidr 10.100.10.0/24 --endpoint Http://MySnowIPAddress:8008 --profile SnowballEdge

{    "Return": true }

Note that if you’re using the default security group, then the outbound rule is still to allow all traffic.

Revoke port 22 ingress rule from security group

aws ec2 revoke-security-group-ingress --group-ids.sg-8f25ee27cee870b4a --ip-permissions IpProtocol=tcp,FromPort=22,ToPort=22, IpRanges=[{CidrIp=10.100.10.0/24}] --endpoint Http://MySnowIPAddress:8008 --profile SnowballEdge

{ "Return": true }

Revoke default egress rule:

aws ec2 revoke-security-group-egress --group-ids.sg-8f25ee27cee870b4a  --ip-permissions IpProtocol="-1",IpRanges=[{CidrIp=0.0.0.0/0}] --endpoint Http://MySnowIPAddress:8008 --profile SnowballEdge

{ "Return": true }

Note that this rule will remove all outbound ephemeral ports.

Add default outbound rule (revoked above):

aws ec2 authorize-security-group-egress --group-id s.sg-8f25ee27cee870b4a --ip-permissions IpProtocol="-1", IpRanges=[{CidrIp=0.0.0.0/0}] --endpoint Http://MySnowIPAddress:8008 --profile SnowballEdge

{  "Return": true }

Changing an instance’s existing security group:

aws ec2 modify-instance-attribute --instance-id s.i-852971d05144e1d63 --groups s.sg-8f25ee27cee870b4a --endpoint Http://MySnowIPAddress:8008 --profile SnowballEdge

Note that this command produces no output. We can verify that it worked with the “aws ec2 describe-instances” command. See the example as follows (command output simplified):

aws ec2 describe-instances --instance-id s.i-852971d05144e1d63 --endpoint Http://MySnowIPAddress:8008 --profile SnowballEdge


    "Reservations": [{
            "Instances": [{
                    "InstanceId": "s.i-852971d05144e1d63",
                    "InstanceType": "sbe-c.2xlarge",
                    "LaunchTime": "2022-06-27T14:58:30.167000+00:00",
                    "PrivateIpAddress": "34.223.14.193",
                    "PublicIpAddress": "10.100.10.60",
                    "SecurityGroups": [
                        {
                            "GroupName": "allow-ssh",
                            "GroupId": "s.sg-8f25ee27cee870b4a"
                        }      ], }  ] }

Changing and instance’s security group back to default:

aws ec2 modify-instance-attribute --instance-ids.i-852971d05144e1d63 --groups s.sg-8ec664a23666db719 --endpoint Http://MySnowIPAddress:8008 --profile SnowballEdge

Note that this command produces no output. You can verify that it worked with the “aws ec2 describe-instances” command. See the example as follows:

aws ec2 describe-instances –instance-ids.i-852971d05144e1d63 –endpoint Https://MySnowIPAddress:8008 –profile SnowballEdge

{
    "Reservations": [
        {  "Instances": [ {
                    "AmiLaunchIndex": 0,
                    "ImageId": "s.ami-8b0223704ca8f08b2",
                    "InstanceId": "s.i-852971d05144e1d63",
                    "InstanceType": "sbe-c.2xlarge",
                    "LaunchTime": "2022-06-27T14:58:30.167000+00:00",
                    "PrivateIpAddress": "34.223.14.193",
                    "PublicIpAddress": "10.100.10.60",
                             "SecurityGroups": [
                        {
                            "GroupName": "default",
                            "GroupId": "s.sg-8ec664a23666db719" ] }

Delete security group:

aws ec2 delete-security-group --group-ids.sg-8f25ee27cee870b4a --endpoint Http://MySnowIPAddress:8008 --profile SnowballEdge

Sample walkthrough to add a SSH Security Group

As an example, assume a single EC2 instance “A” running on a Snowball Edge device. By default, all traffic is allowed to EC2 instance “A”. As per the following diagram, we want to tighten security and allow only the management PC to SSH to the instance.

1. Create an SSH security group:

aws ec2 create-security-group --group-name MySshGroup--description “ssh access” --endpoint Http://MySnowIPAddress:8008 --profile SnowballEdge

2. This will return a “GroupId” as an output:

{   "GroupId": "s.sg-8a420242d86dbbb89" }

3. After the creation of the security group, we must allow port 22 ingress from the management PC’s IP:

aws ec2 authorize-security-group-ingress --group-name MySshGroup -- protocol tcp --port 22 -- cidr 192.168.26.193/32 --endpoint Http://MySnowIPAddress:8008 --profile SnowballEdge

4. Verify that the security group has been created:

aws ec2 describe-security-groups ––group-name MySshGroup –endpoint Http://MySnowIPAddress:8008 --profile SnowballEdge

{
	“SecurityGroups”:   [
		{
			“Description”: “SG for web servers”,
			“GroupName”: :MySshGroup”,
			“IpPermissinos”:  [
				{ “FromPort”: 22,
			 “IpProtocol”: “tcp”,
			 “IpRanges”: [
			{
				“CidrIp”: “192.168.26.193.32/32”
						} ],
					“ToPort”:  22 }],}

5. After the security group has been created, we must associate it with the instance:

aws ec2 modify-instance-attribute –-instance-id s.i-8f7ab16867ffe23d4 –-groups s.sg-8a420242d86dbbb89 --endpoint Http://MySnowIPAddress:8008 --profile SnowballEdge

6. Optionally, we can delete the Security Group after it is no longer required:

aws ec2 delete-security-group --group-id s.sg-8a420242d86dbbb89 --endpoint Http://MySnowIPAddress:8008 --profile SnowballEdge

Note that for the above association, the instance ID is an output of the “aws ec2 describe-instances” command, while the security group ID is an output of the “describe-security-groups” command (or the “GroupId” returned by the console in Step 2 above).

Conclusion

This post addressed the most common commands used to create and manage security groups with the AWS Snowball Edge device. We explored the prerequisites, tools, and commands used to view, create, and modify security groups to ensure the EC2 instances deployed on AWS Snowball Edge are restricted to authorized users. We concluded with a simple walkthrough of how to restrict access to an EC2 instance over SSH from a single IP address. If you would like to learn more about the Snowball Edge product, there are several resources available on the AWS Snow Family site.

SK hynix PS1010 and PS1030 PCIe Gen5 NVMe SSDs and V9 NAND at FMS 2023

Post Syndicated from Bryan Young original https://www.servethehome.com/sk-hynix-ps1010-and-ps1030-pcie-gen5-nvme-ssds-and-v9-nand-at-fms-2023/

At FMS 2023, we saw the SK hynix PS1010 and PS1030 PCIe Gen5 NVMe SSDs using the company’s V7 TLC NAND. The company also showed off V9 NAND

The post SK hynix PS1010 and PS1030 PCIe Gen5 NVMe SSDs and V9 NAND at FMS 2023 appeared first on ServeTheHome.

New — File Release for Amazon FSx for Lustre

Post Syndicated from Veliswa Boya original https://aws.amazon.com/blogs/aws/new-file-release-for-amazon-fsx-for-lustre/

Amazon FSx for Lustre provides fully managed shared storage with the scalability and high performance of the open-source Lustre file systems to support your Linux-based workloads. FSx for Lustre is for workloads where storage speed and throughput matter. This is because FSx for Lustre helps you avoid storage bottlenecks, increase utilization of compute resources, and decrease time to value for workloads that include artificial intelligence (AI) and machine learning (ML), high performance computing (HPC), financial modeling, and media processing. FSx for Lustre integrates natively with Amazon Simple Storage Service (Amazon S3), synchronizing changes in both directions with automatic import and export, so that you can access your Amazon S3 data lakes through a high-performance POSIX-compliant file system on demand.

Today, I’m excited to announce file release for FSx for Lustre. This feature helps you manage your data lifecycle by releasing file data that has been synchronized with Amazon S3. File release frees up storage space so that you can continue writing new data to the file system while retaining on-demand access to released files through the FSx for Lustre lazy loading from Amazon S3. You specify a directory to release from, and optionally a minimum amount of time since last access, so that only data from the specified directory, and the minimum amount of time since last access (if specified), is released. File release helps you with data lifecycle management by moving colder file data to S3 enabling you to take advantage of S3 tiering.

File release tasks are initiated using the AWS Management Console, or by making an API call using the AWS CLI, AWS SDK, or Amazon EventBridge Scheduler to schedule release tasks at regular intervals. You can choose to receive completion reports at the end of your release task if so desired.

Initiating a Release Task
As an example, let’s look at how to use the console to initiate a release task. To specify criteria for files to release (for example, directories or time since last access), we define release data repository tasks (DRTs). DRTs release all files that are synchronized with Amazon S3 and that meet the specified criteria. It’s worth noting that release DRTs are processed in sequence. This means that if you submit a release DRT while another DRT (for example, import or export) is in progress, the release DRT will be queued but not processed until after the import or export DRT has completed.

Note: For the data repository association to work, automatic backups for the file system must be disabled (use the Backups tab to do this). Secondly, ensure that the file system and the associated S3 bucket are in the same AWS Region.

I already have an FSx for Lustre file system my-fsx-test.

I create a data repository association, which is a link between a directory on the file system and an S3 bucket or prefix.

I specify the name of the S3 bucket or an S3 prefix to be associated with the file system.

After the data repository association has been created, I select Create release task.

The release task will release directories or files that you want to release based on your specific criteria (again, important to remember that these files or directories must be synchronized with an S3 bucket in order for the release to work). If you specified the minimum last access for release (in addition to the directory), files that have not been accessed more recently than that will be released.

In my example, I chose to Disable completion reports. However, if you choose to Enable completion reports, the release task will produce a report at the end of the release task.

Files that have been released can still be accessed using existing FSx for Lustre functionality to automatically retrieve data from Amazon S3 back to the file system on demand. This is because, although released, their metadata stays on the file system.

File release won’t automatically prevent your file system from becoming full. It remains important to ensure that you don’t write more data than the available storage capacity before you run the next release task.

Now Available
File release on FSx for Lustre is available today in all AWS Regions where FSx for Lustre is supported, on all new or existing S3-linked file systems running Lustre version 2.12 or later. With file release on FSx for Lustre, there is no additional cost. However, if you release files that you later access again from the file system, you will incur normal Amazon S3 request and data retrieval costs where applicable when those files are read back into the file system.

To learn more, visit the Amazon FSx for Lustre Page, and please send feedback to AWS re:Post for Amazon FSx for Lustre or through your usual AWS support contacts.

Veliswa