Post Syndicated from Dustin Taylor original https://aws.amazon.com/blogs/messaging-and-targeting/the-four-pillars-of-email-reputation/
Introduction
A sender’s domain and IP reputation strongly indicate email deliverability success. Maintaining a high reputation ensures optimal recipient inboxing. This blog outlines how Amazon SES protects its network reputation to help customers deliver high-quality email consistently. Understanding sender reputation nuances across diverse mailbox providers can be challenging, making issue identification and root cause analysis difficult. We’ll explore SES’ approach to managing domain and IP reputation.
What are Domain and IP Reputation?
Domain and IP reputation are measured by mailbox providers to indicate how reputable a sender is based primarily on how recipients engage with their email. Mailbox providers have their own way of measuring reputation and typically consider indicators such as:
- A history of the emails received from the domain/IP
- The authentication technologies used during delivery (SPF, DKIM, DMARC)
- The rate of user engagement for the messages
- The rate of complaints generated by the messages
- The rate of which the mailbox providers’ spam filter determines mail to be spam from a domain/IP
While not an exhaustive list, these are some of the inputs into the reputation of a sender. Of this list, 4 of the 5 have nothing to do with the body, or viewable content, of the email that is received. This illustrates how important it is to have effective processes in place to set up sending from your domain/IPs and the management of your email sending programs.
How does Amazon SES manage Domain and IP Reputation
Management of reputation requires a multi-faceted approach distilled into four distinct pillars: Prevention, Monitoring, Analysis, and Response. Let’s dive deeper into these four pillars to see how Amazon SES operates to protect sending reputation for our service and our customers.
Prevention
Prevention is arguably the most important of the four pillars of reputation management. Abuse, or misuse, is the leading cause of poor reputation. Abuse, or misuse, can be characterized as sending phishing emails, unsolicited emails, or aggressive sending practices ignoring user feedback or lack of engagement, but this is not an exhaustive list. Prevention of abuse is accomplished through customer education (blogs, public documentation, and customer correspondence), service terms, acceptable use policies, and strict rules on setup. These abuse prevention mechanisms aid in educating customers before they use SES on prohibited sending practices as well as providing guidance on email sending best practices. SES implements several mechanisms to mitigate abuse and misuse, including:
- Production access reviews – Every customer must request access to send email outbound. This step plays two parts: 1\ giving customers an opportunity to test sending from and to verified identities and 2\ preventing malicious senders from being able to open an account and begin uninhibited sending of low-quality mail. Every customer requesting access to send via SES provides information on their sending practices and volume estimates. This information is used in three ways: first to ensure that a customer is following best practices for sending email, second to provide the appropriate limits needed for their business, and third to determine if a customer’s sending practices are a risk to other senders.
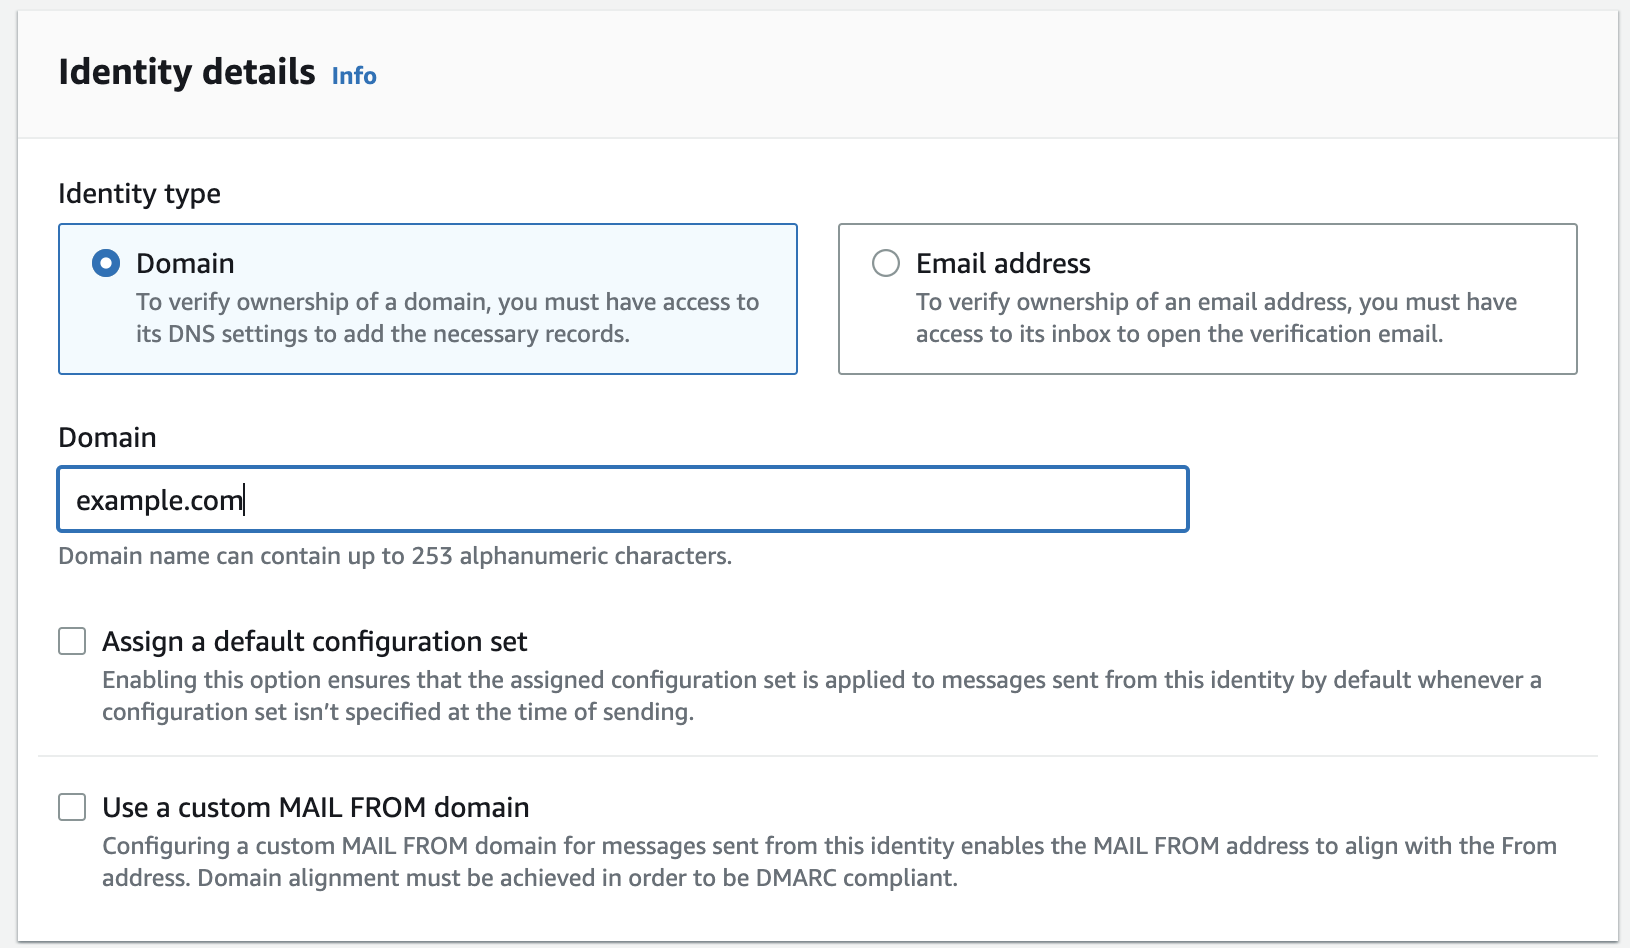
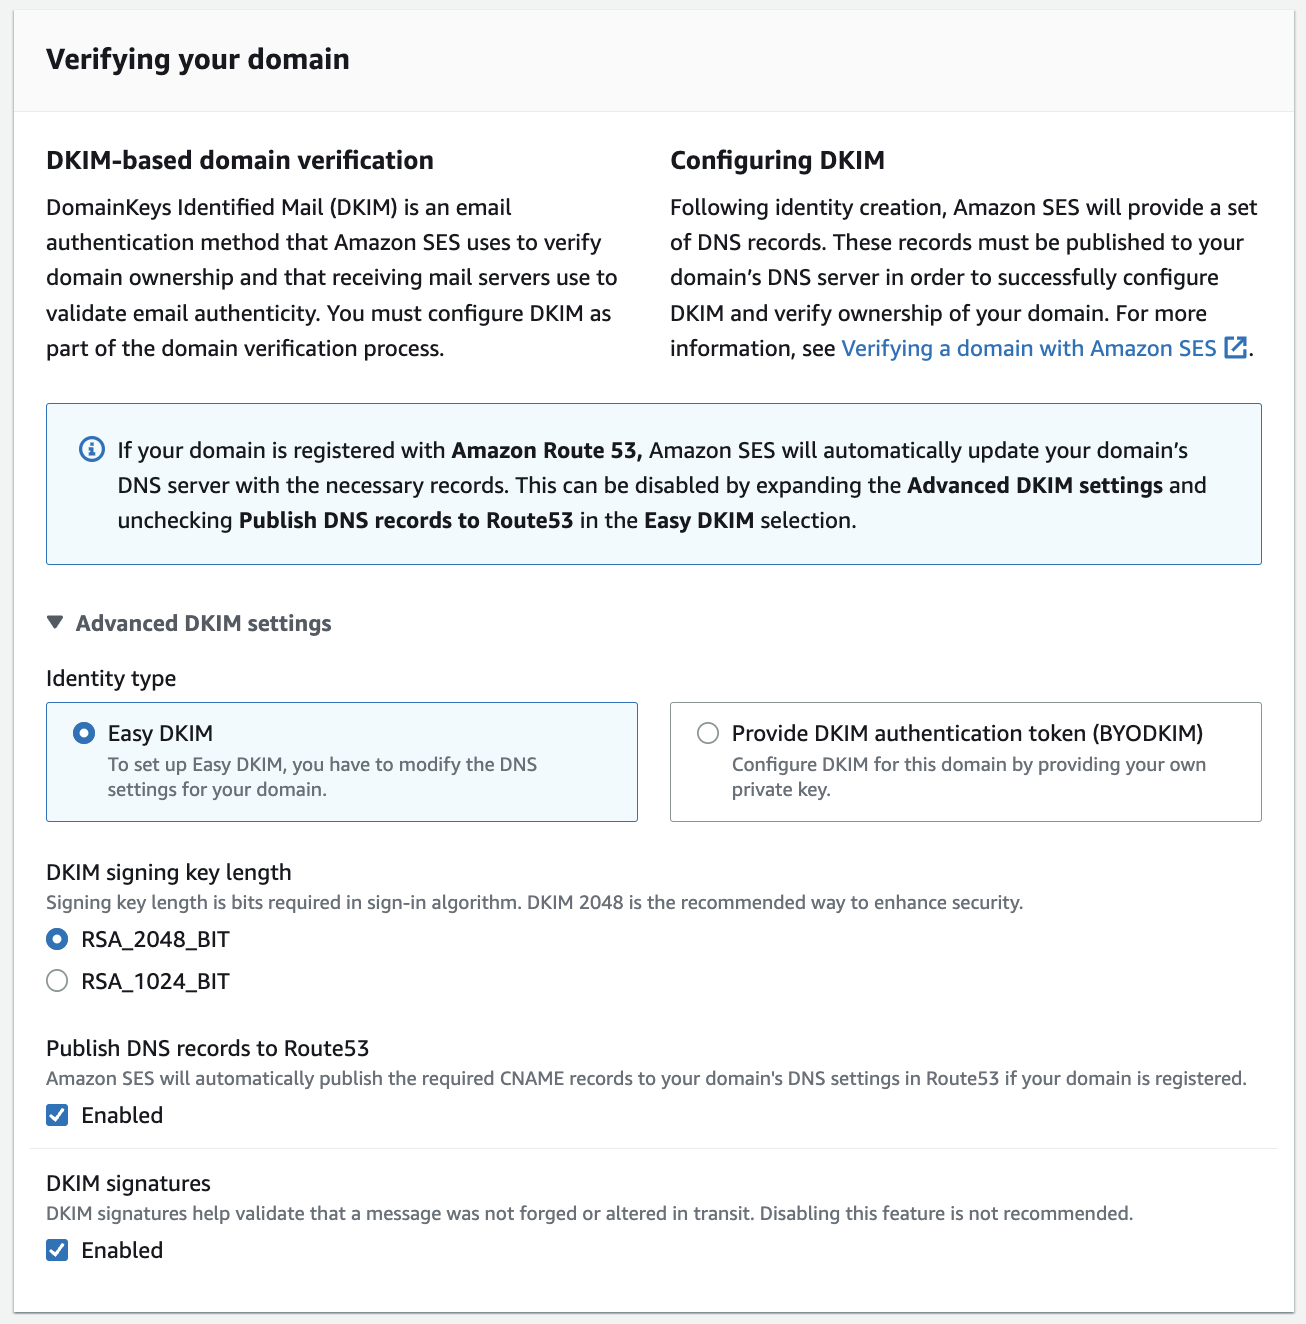
- Restricted sending from only verified identities/domains – Every customer, must verify ownership of an email address or sending domain to send an email on SES. This can be done for email addresses by clicking a verification link or for domains by placing DNS records that SES is able to verify.
- Daily volume and sending rate limits – SES applies sending limits to an account for the following reasons: prevention of reputational damage and limiting costs should a bug occur within a customer’s application, and limiting the damage an elusive bad actor may cause.
Monitoring
The second pillar of reputation management is accurately monitoring your sending performance. Amazon SES tracks metrics like bounces, complaints, abuse reports, and mailbox provider status codes. Establishing overall sending baselines is crucial to measure the impact of deliverability and reputation changes. Granular monitoring is equally important, including metrics at the account, domain, IP, and blocklist levels.
Having granular data regarding our customer’s sending performance gives SES, and our customers, the opportunity to identify mechanisms in which a customer’s sending can improve, or indicators of when a bad actor may intend to misuse SES. Some of the mechanisms that we use to reduce the risk of reputation degradation include:
- Monitoring new customer activity closely – The riskiest time for SES is when a new customer begins using SES and we have no historical precedent for the mail they are attempting to send. While the overwhelming majority of our customers send quality email, it’s important to ensure that a customer that is onboarding exhibits good sending practices. A customer may be inexperienced in their sending practices and SES will notify customers early to aid them in improving their sending. This limits the damage that can be done to both SES reputation and that of our customer.
- Monitor any customers that trend away from the baseline – SES looks to determine what customers are doing well and where they could improve. Should they be given access to send freely, or should there be restrictions?
- Monitor high-performing customers as well as low-performing customers – For SES, it’s crucial to prevent events that can degrade our reputation, such as sender compromises, uploading purchased lists, or using unsolicited recipient lists. Thoroughly reviewing all customers is essential to avoid reputational degradation from unnoticed compromises or misused recipient lists.
- Providing our customers with a way to monitor more than bounce and complaint rates – SES provides a feature called the Virtual Deliverability Manager (VDM) which gives customers the added insight into how their messages are received by mailbox providers. These insights are provided in a dashboard that customers can review and dig into problems at the domain level, and broken down by provider.
Analysis
The third of the pillars of reputation management is analysis. Understanding the history of a sender, normal behavior and trends, mailbox provider feedback patterns, and monitoring reputation from a reputation provider enables SES to build a picture of a sender. Lets speak on some specifics about each of these data points further.
- Sending Behavior – Is this a new sender, or one with an established reputation? Do they have a history of previous bounce/complaint issues? What historical volume is sent?
- Tip: Understanding the baseline or history of the sender gives you the ability to know when things have changed for the better or worse.
- Mailbox provider feedback – Amazon SES reviews mailbox provider feedback patterns to analyze responses when sending mail. If normally all SES mail is received successfully and we begin to see a spike in throttles with a negative response message such as this one from Gmail:
421-4.7.28 Gmail has detected an unusual rate of unsolicited mail originating from your DKIM domain [example.com 36]. To protect our users from spam, mail sent from your domain has been temporarily rate limited. For more information, go to https://support.google.com/mail/?p=UnsolicitedRateLimitError to review our Bulk Email Senders Guidelines. m25-20020ae9e019000000b0078edf1f4c40si26277545qkk.197 – gsmtp
this could be the first sign of reputation degradation.
- Tip: Mailbox provider feedback is a good data point for degradation, however this is a late sign as the damage has already occurred. More proactive measures should be in place to ensure this step doesn’t occur.
- Using reputation providers – External feedback on Amazon SES reputation is critical to validate our processes and identify potential gaps. Selecting a reputation provider has helped SES close this gap.
- Tip: As a mail provider, you rely on sending metrics and historical data for monitoring senders. However, you may not know how customers acquired their recipient lists – whether through confirmed opt-ins or purchased lists. Purchased lists risk your domain being blocklisted since recipients didn’t sign up for your mail. Lacking visibility into subscription workflows makes it hard to determine why blocklisting occurred. Refer to our FAQ for more on blocklists.
Response
The fourth of the pillars of reputation management is response. Understanding what to do when your reputation begins to show signs of decline is important. Some signals that show reputation declines are: low inbox rates, mail being throttled, mail being blocked, or external reputation tools showing poor reputation for your domain/IP. For Amazon SES, we take action to do the following:
- Contact customers where metrics breach alarm thresholds.
- Respond timely to signs of abuse or reputation degradation.
- Stop sending based on continued, or high-risk, signals of abuse or reputation degradation.
- Support customers in resolving sending issues to maintain the overall reputation of SES.
It is important to respond quickly to the signals of reputation degradation. The decision to impact a customer’s ability to send mail is not one that Amazon SES takes lightly. A decision to impact a customer’s ability to send mail is made when the quality of mail is abusive in nature (phishing) or if there are signals that the mail being sent is not well received by mailbox providers at scale. In some cases, a customer may not be aware that their sending patterns, practices, or content may be problematic. This can be due to a gap in monitoring, logging, or an issue with credentials being compromised. If the decision to impact a customer’s sending is made, a communication will be sent to that customer so that we can partner with them to resolve the issue.
Amazon SES doesn’t only make the decision to communicate with our customers when there is a problem. SES also communicates with customers, when appropriate, earlier in the reputation management cycle to warn of a negative trend in sending. This can be seen in the review periods that are triggered when increases in bounces, complaints, or mailbox provider feedback is seen. These review periods give SES customers the ability and time to understand the problem, and to work on fixes to avoid serious reputation impact. Being involved early in the discovery phase of a sending event improves the customer experience without the need to negatively impact sending.
Conclusion
Maintaining a positive sending reputation necessitates a diligent approach to prevent abusive emails. The four pillars outlined serve as guidelines to improve email quality: prevention, monitoring, analysis, and response. This is an iterative process that requires moving fluidly between pillars.
About the author:
|
|
Dustin TaylorDustin is the Manager of anti-abuse and email deliverability for Amazon SES. His focus is both external and internal in helping improve inbox placement for SES customers and finding new ways to fight email abuse. In his off-time he enjoys going bass fishing and is a hobbyist woodworker. |