Post Syndicated from Bruno Giorgini original https://aws.amazon.com/blogs/messaging-and-targeting/manage-incoming-emails-with-ses/
Introduction
Are you looking for an efficient way to handle incoming emails and streamline your email processing workflows? In this blog post, we’ll guide you through setting up Amazon Simple Email Service (SES) for incoming email, focusing on the setup, monitoring, and use of receipt rules to optimize your email handling.
Amazon SES is a powerful and flexible cloud-based email service that enables you to send and receive emails at scale, while ensuring high deliverability and maintaining compliance with email best practices. By using Amazon SES for incoming email, you can customize your email processing pipeline and seamlessly integrate with other AWS services such as Amazon S3, AWS Lambda, and Amazon SNS.
We’ll start by walking you through the process of verifying your domain and setting up DomainKeys Identified Mail (DKIM) to ensure your emails are secure and authenticated. Next, we’ll explain how to create and manage receipt rule sets and add receipt rules with various actions for different processing scenarios. We’ll also cover monitoring your email processing using Amazon CloudWatch metrics.
As we progress, we’ll dive into advanced topics such as conditional receipt rules and chaining receipt rules, which can help you build complex and tailored email processing workflows, including multi-tenant scenarios. By the end of this post, you’ll have a comprehensive understanding of how to harness the power of Amazon SES for your incoming email needs.
So, let’s get started on simplifying your incoming email processing with Amazon SES!
Setting up Amazon SES for email receiving
Identifying the AWS region
For new users of the Amazon Simple Email Service (SES) inbound feature, it’s important to understand that all AWS resources used for receiving email with Amazon SES, except for Amazon S3 buckets, need to be in the same AWS Region as the Amazon SES endpoint. This means that if you are using Amazon SES in a specific region, such as US West (Oregon), any additional resources like Amazon SNS topics, AWS KMS keys, and Lambda functions also need to be created in the same US West (Oregon) Region. Additionally, to successfully receive email with Amazon SES within a particular Region, you must create an active receipt rule set specifically in that Region. By adhering to these guidelines, new users can effectively configure and utilize the inbound feature of Amazon SES, ensuring seamless email reception and efficient management of related resources. Amazon SES only supports email receiving in certain AWS Regions. For a complete list of Regions where email receiving is supported, see Amazon Simple Email Service endpoints and quotas in the AWS General Reference.
Verifying your domain
Before you can start receiving emails with Amazon SES, you must verify your domain. Domain verification is a crucial step in the setup process, as it confirms your ownership of the domain and helps prevent unauthorized use. In this section, we’ll walk you through the process of verifying your domain in the Amazon SES console.
- Sign in to the AWS Management Console and open the Amazon SES console.
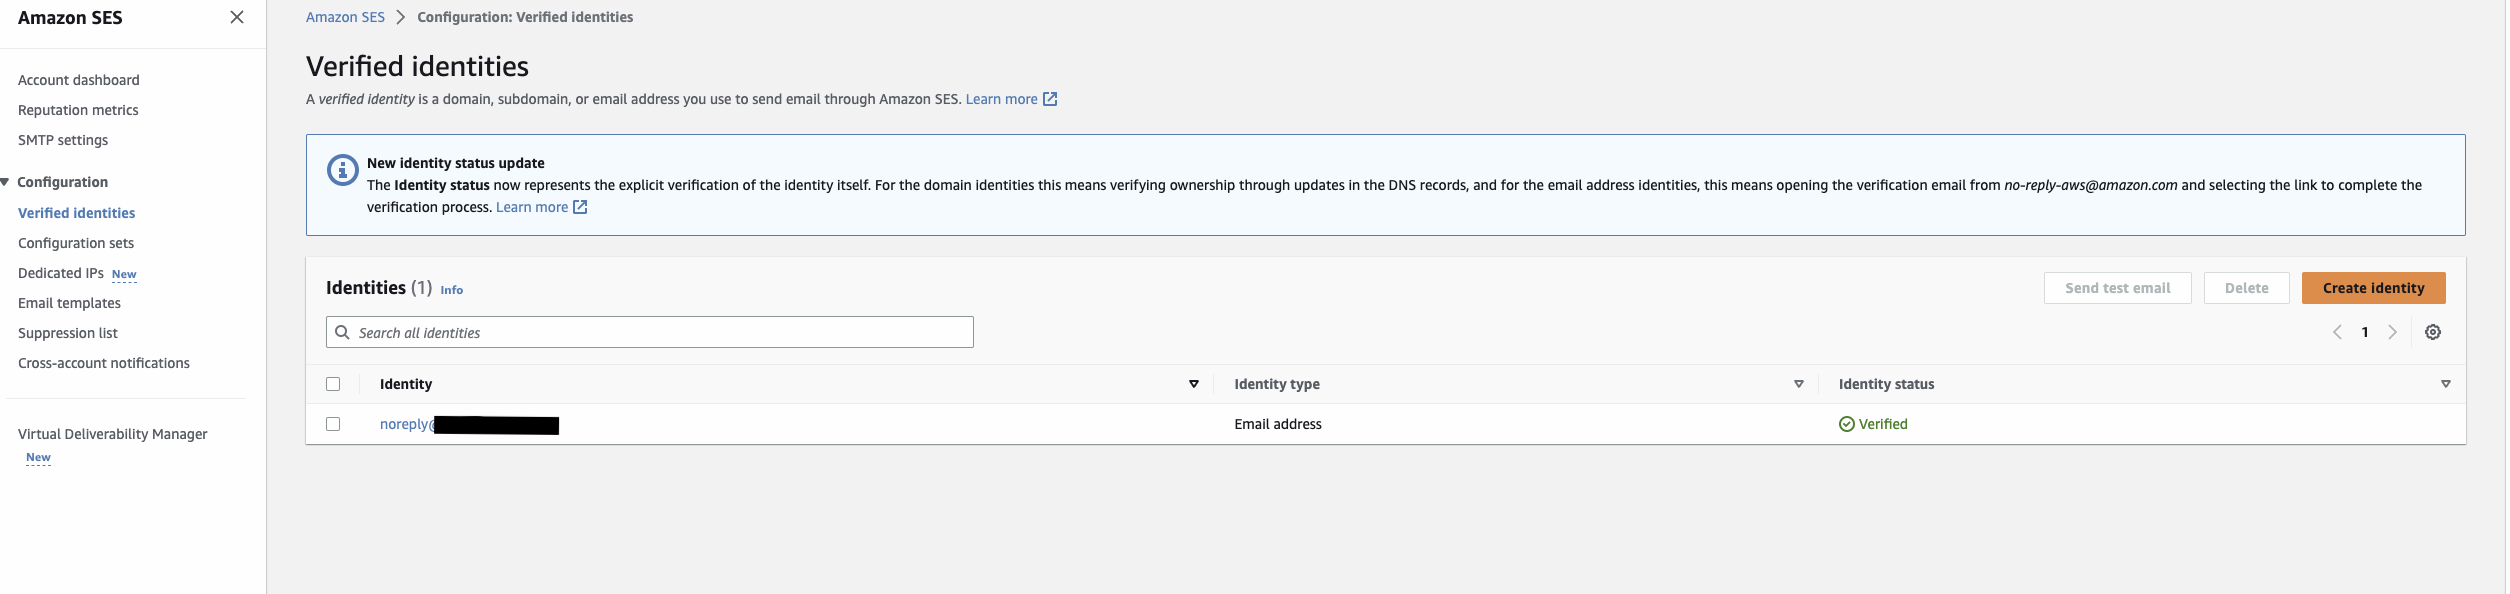
- In the navigation pane, under Configuration, choose Verified identities.
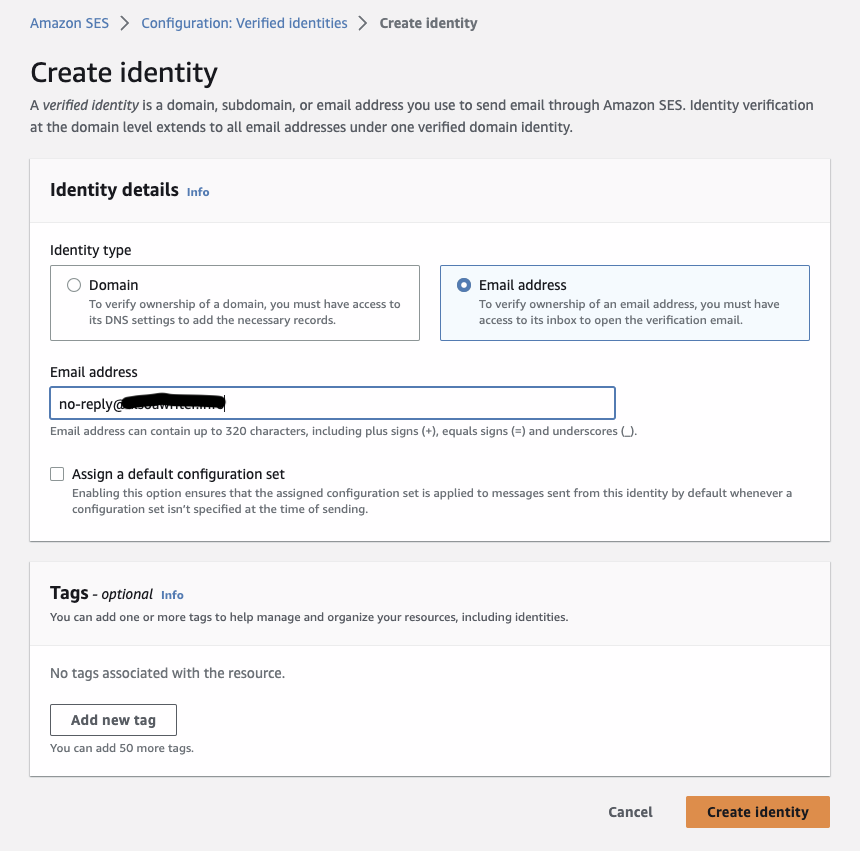
- In the list of Identities section, choose Create identity.
- Under Identity details, choose Domain as the Identity type field. You must have access to the domain’s DNS settings to complete the domain verification process.
- Enter the name of the domain or subdomain in the Domain field.
- You must configure DKIM as part of the domain verification process. For Advanced DKIM settings, ensure that the Enabled box is checked in the DKIM signatures field.
- Choose Create identity.
- This will generate a list of DNS records that you need to add to your domain’s DNS configuration. These can be found in the DomainKeys Identified Mail (DKIM) container, under Publish DNS records.

Publish DNS records
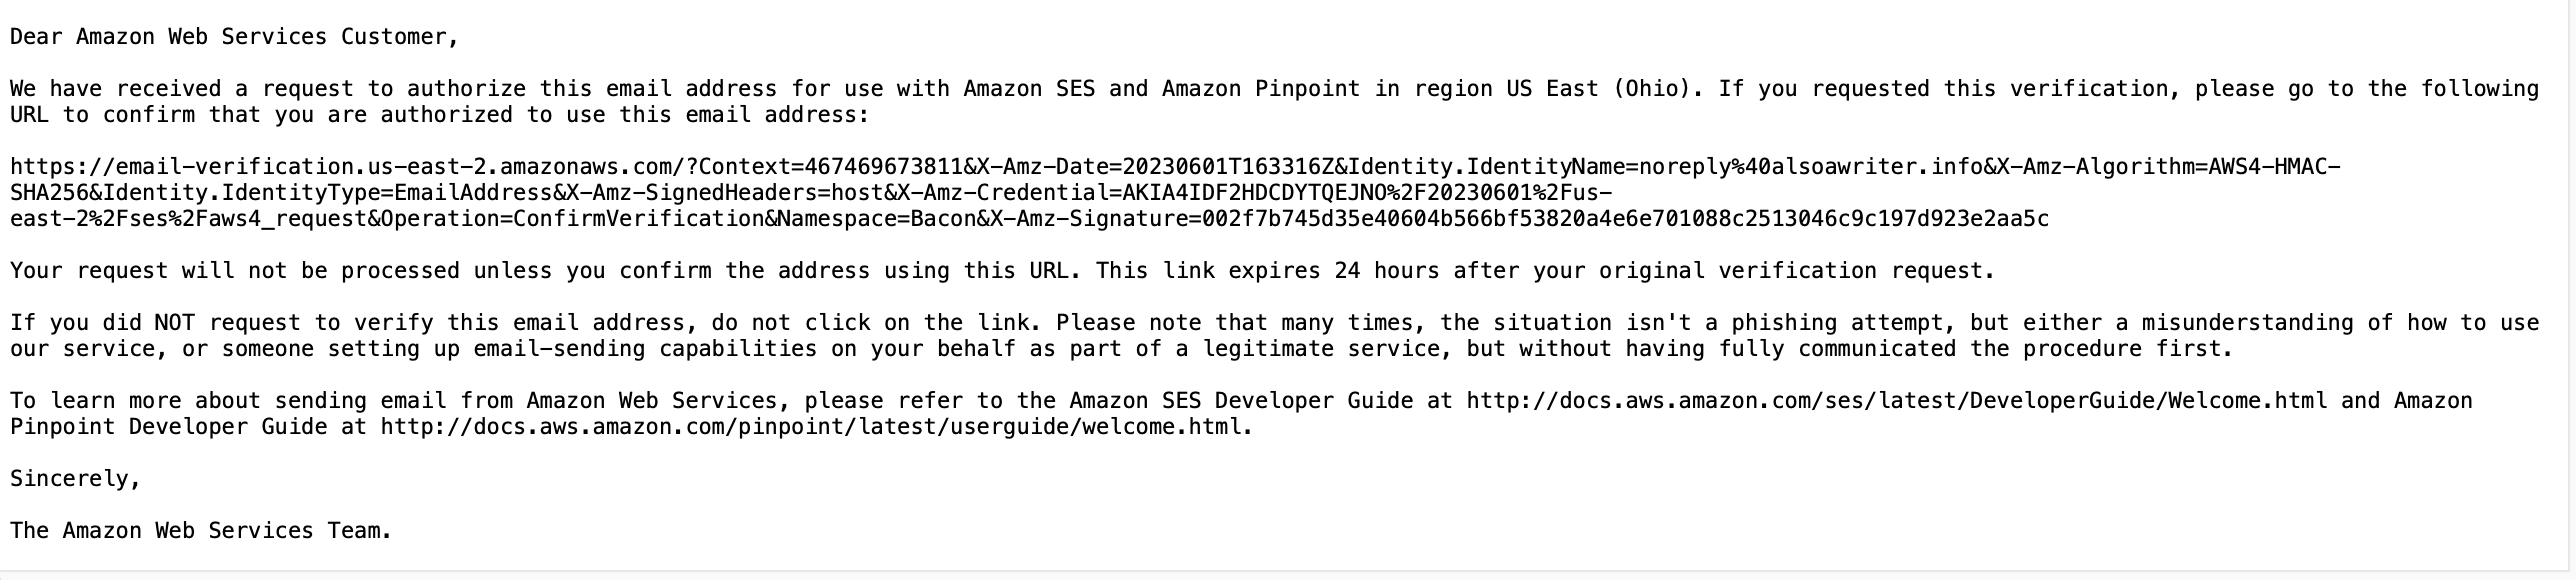
- Add the generated DNS records to your domain’s DNS configuration. These records include a Legacy TXT record for domain verification and CNAME records for DKIM authentication. You may need to consult your domain registrar’s documentation for instructions on adding DNS records.
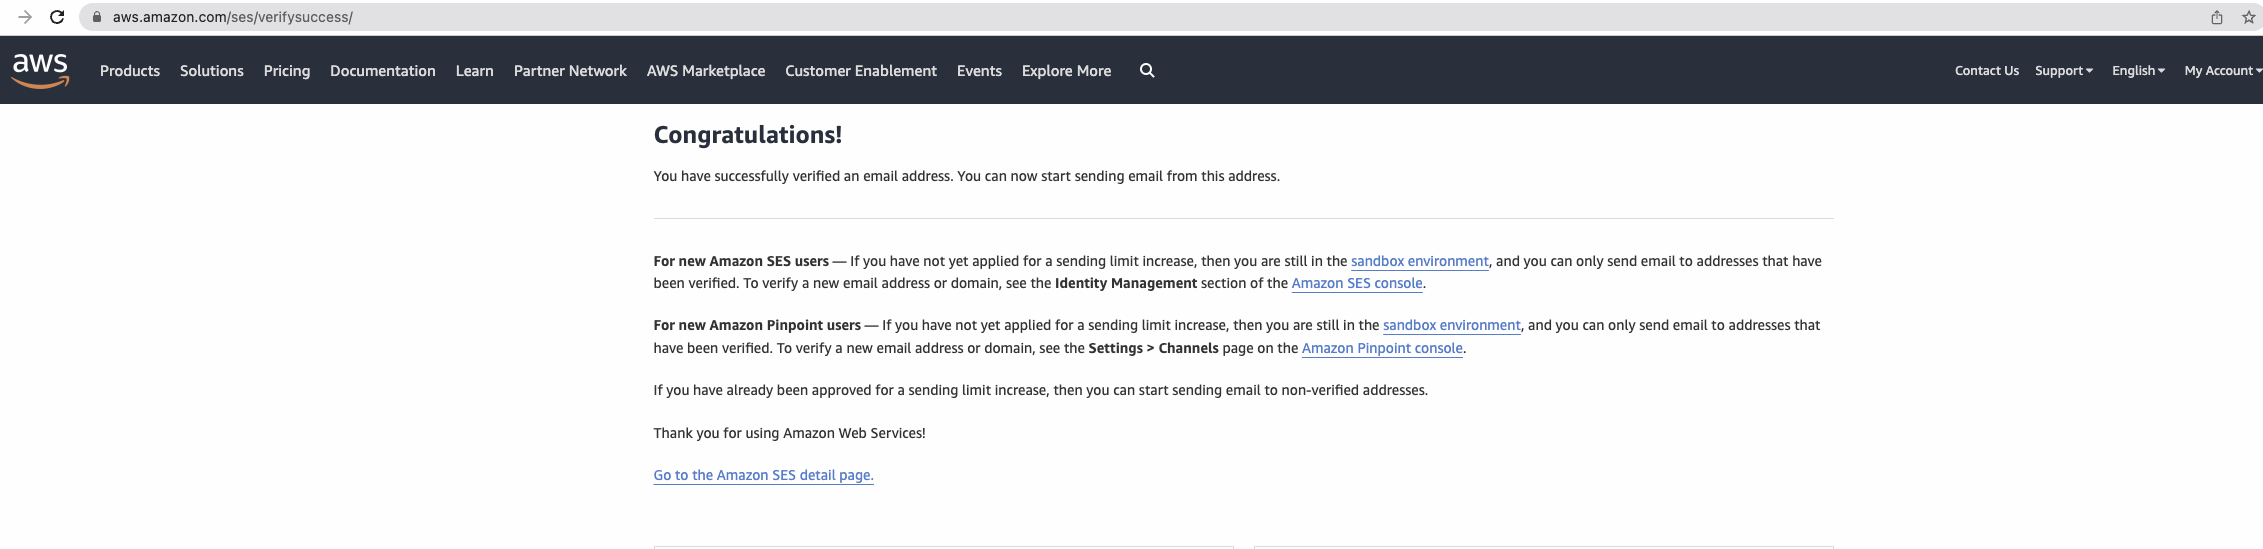
- Once the DNS records have been added, return to the Amazon SES console and wait for your domain’s verification status to change from “Verification pending” to “Verified.” This process may take up to 72 hours, depending on your domain registrar’s DNS propagation time.
Publishing an MX record for Amazon SES email receiving
To enable email receiving with Amazon SES, you need to publish an MX (Mail Exchange) record in your domain’s DNS configuration. The MX record directs incoming emails to Amazon SES for processing. Follow these steps to publish the MX record:
- Log in to your domain registrar or DNS management console.
- Locate the DNS management section for your domain.
- Create a new MX record by specifying the following details:
- Host/Name/Record: Leave this field blank or enter “@” to represent the root domain.
- Value/Points to/Target: Enter the value “
10 inbound-smtp.[AWS Region].amazonaws.com“, replacing [AWS Region] with the AWS region where you are using Amazon SES for email receiving. For example, if you are using US West (Oregon) region, the value should be “10 inbound-smtp.us-west-2.amazonaws.com“.
- TTL (Time to Live): Set a TTL value according to your preference or leave it as the default.
- Save the MX record.
Once the MX record is published with the correct value, incoming emails addressed to your domain will be routed to Amazon SES for processing. Remember to ensure that any other email-related resources, such as SNS topics or Lambda functions, are also created in the same AWS region as your Amazon SES endpoint.
For more detailed information on publishing MX records for Amazon SES email receiving, you can refer to the official documentation.
Creating a Receipt Rule set
A receipt rule set is a collection of rules that define how Amazon SES processes incoming emails for your domain. Each rule contains one or more actions that determine the processing flow of incoming emails. In this section, we’ll guide you through the process of creating a new receipt rule set in the Amazon SES console and activating it for your domain.
- Sign in to the AWS Management Console and open the Amazon SES console.
- In the navigation pane, under Configuration, choose Email receiving.
- Note: if you don’t see the Email receiving option in the menu, check again that you’re in fact in a region supporting this feature.
- Under the Receipt rule sets tab in the Email receiving pane, choose Create rule set.

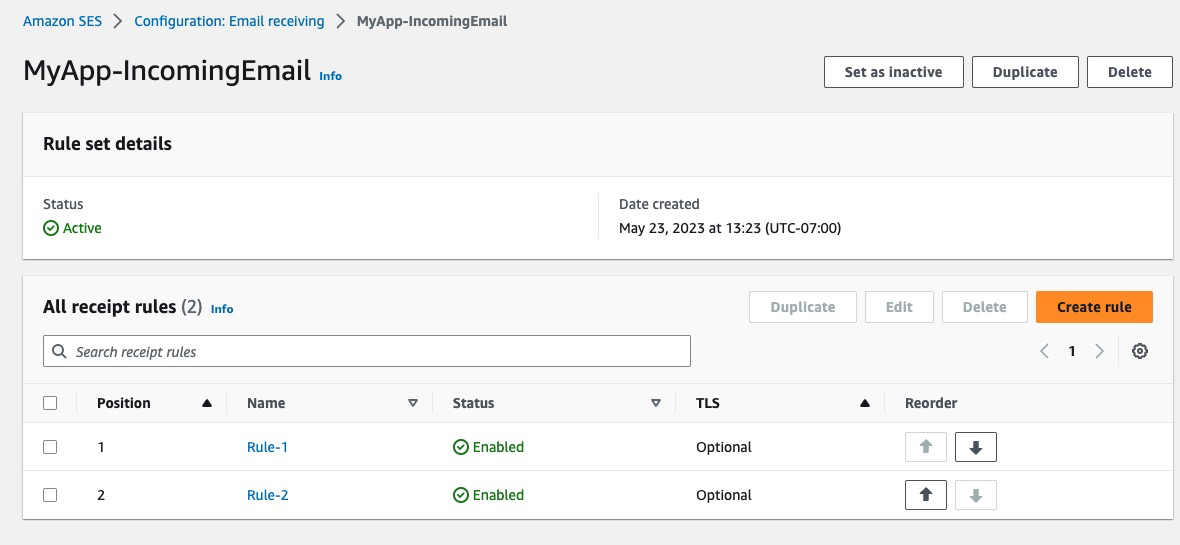
- Enter a name for your new rule set in the Rule set name field. This name should be descriptive and easy to identify, such as “MyApp-IncomingEmail.”
- After entering a unique name, choose Create rule set.
- To activate the newly created rule set, choose Set as active next to your rule set’s name. This action will ensure that Amazon SES uses this rule set for processing incoming emails to your domain. Your new rule set will now be listed in the Active rule set section.
For more information on creating and managing receipt rule sets, you can refer to the official documentation.
In the next section, we’ll explore adding receipt rules to your rule set, which define the specific actions to be taken for incoming emails.
Adding Receipt Rules
Receipt rules define the specific actions that Amazon SES should take when processing incoming emails for your domain. Common actions include saving the email to an Amazon S3 bucket, invoking an AWS Lambda function, or publishing a notification to an Amazon SNS topic. In this section, we’ll guide you through the process of adding receipt rules to your rule set in the Amazon SES console and provide examples of when to use each action.
- Sign in to the AWS Management Console and open the Amazon SES console.
- In the navigation pane, under Configuration, choose Email receiving.
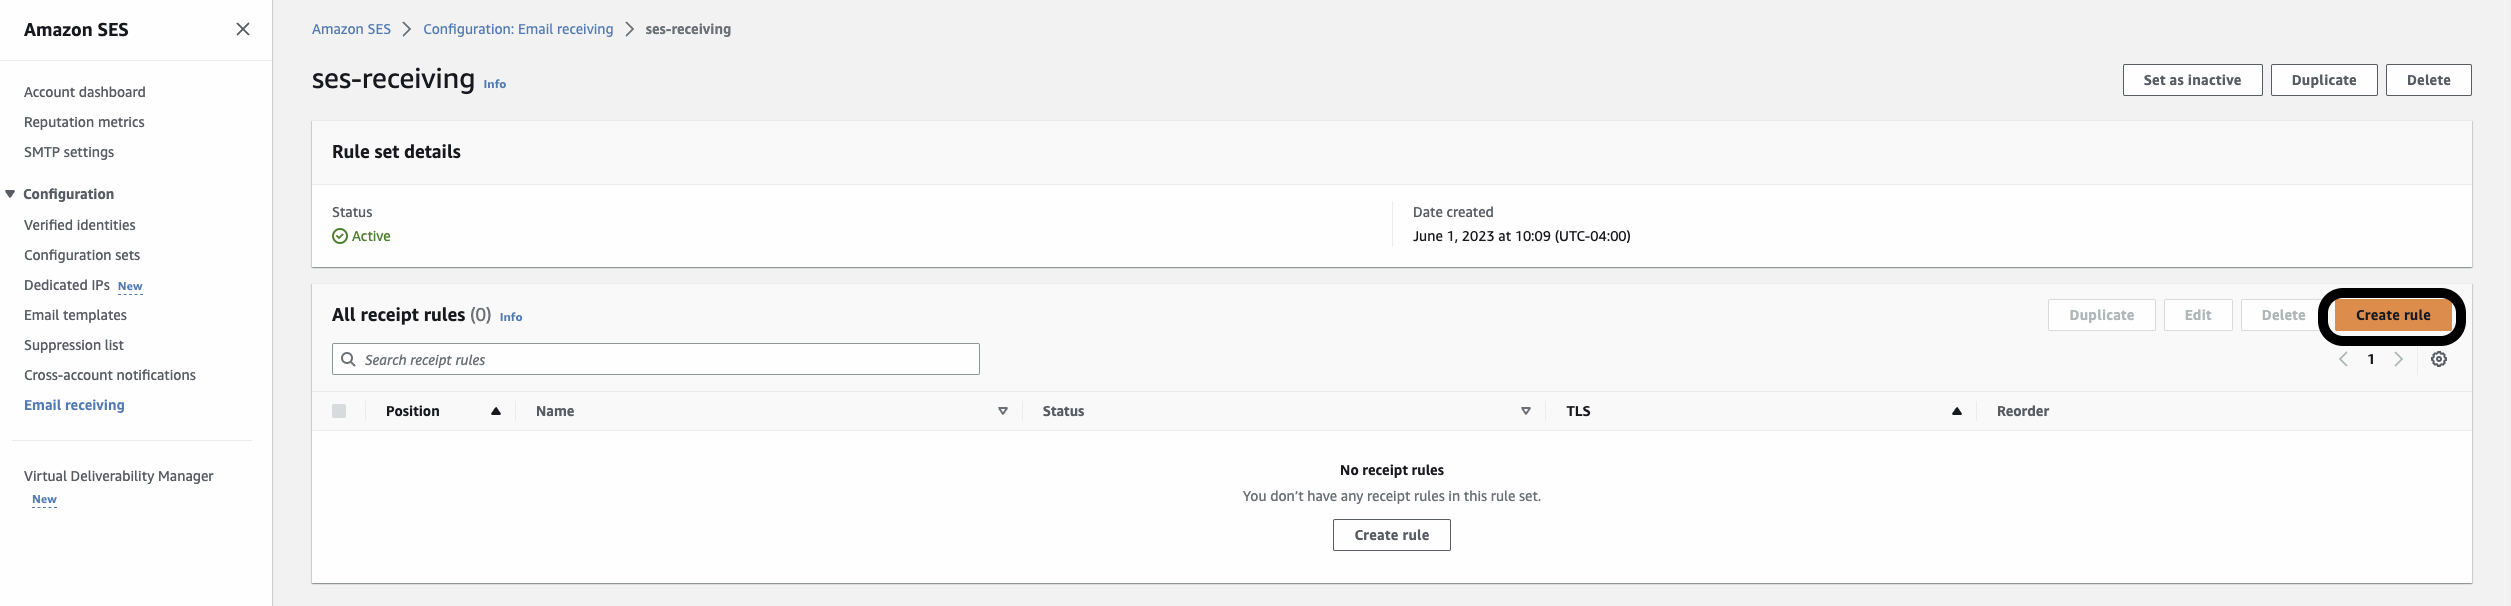
- Under the Email receiving pane, in the Receipt rule sets tab, select the name of your active rule set from the All rule sets section. This will navigate to the details page for that rule set.
- Choose Create rule to begin creating a new receipt rule.
- On the Define rule settings page, under Receipt rule details, enter a unique Rule name.
- For Status, only clear the Enabled checkbox if you don’t want to run this rule after creation.
- (Optional) For Transport Layer Security (TLS), by selecting Required you can enforce a specific TLS policy for incoming emails that match this rule. By default, Amazon SES will use the Optional policy, which means it will attempt to use TLS but will not require it.
- For Spam and virus scanning, only clear the Enabled checkbox if you don’t want Amazon SES to scan incoming messages for spam and viruses.
- After entering a unique rule name, choose Next.
- On the Add recipients conditions page, under Recipients conditions, use the following procedure to specify one or more recipient conditions. You can have a maximum of 100 recipient conditions per receipt rule.
- Under Recipient condition, specify the email addresses or domains that this rule should apply to. You can use wildcards to match multiple addresses or domains. For example, you can enter
example.com and .example.com to apply the rule to all email addresses within the example.com domain and within all of its subdomains.
- Repeat this step for each recipient condition you want to add. When you finish adding recipient conditions, choose Next.
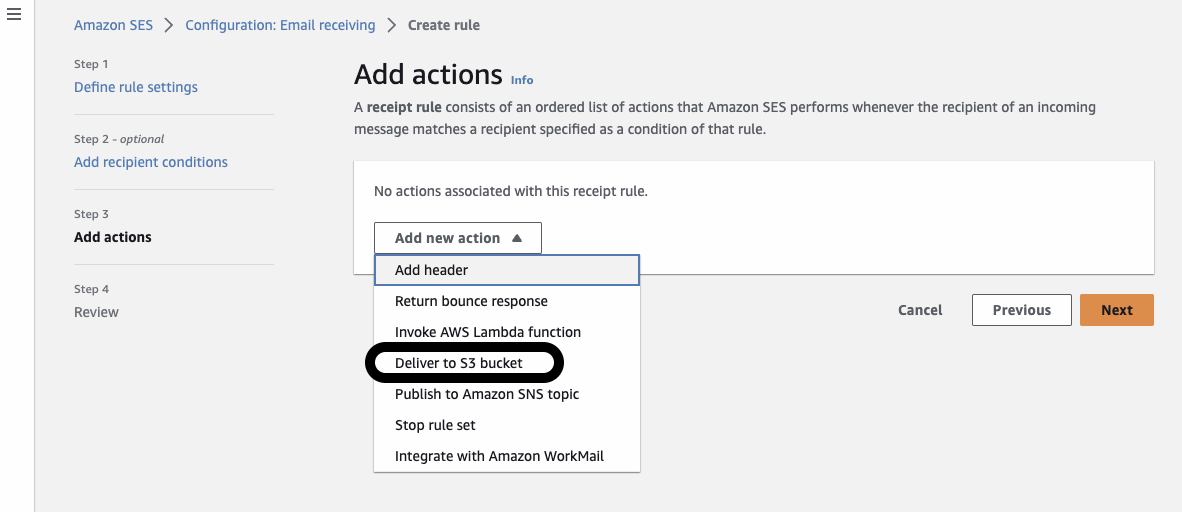
- On the Add actions page, open the Add new action menu and select the desired action from the list, such as Deliver to S3 bucket, Invoke AWS Lambda function, or Publish to Amazon SNS topic. Configure the selected action’s settings as required.
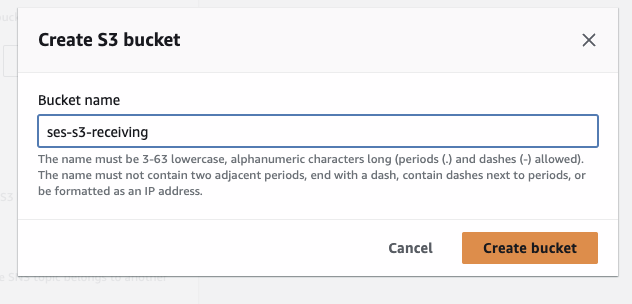
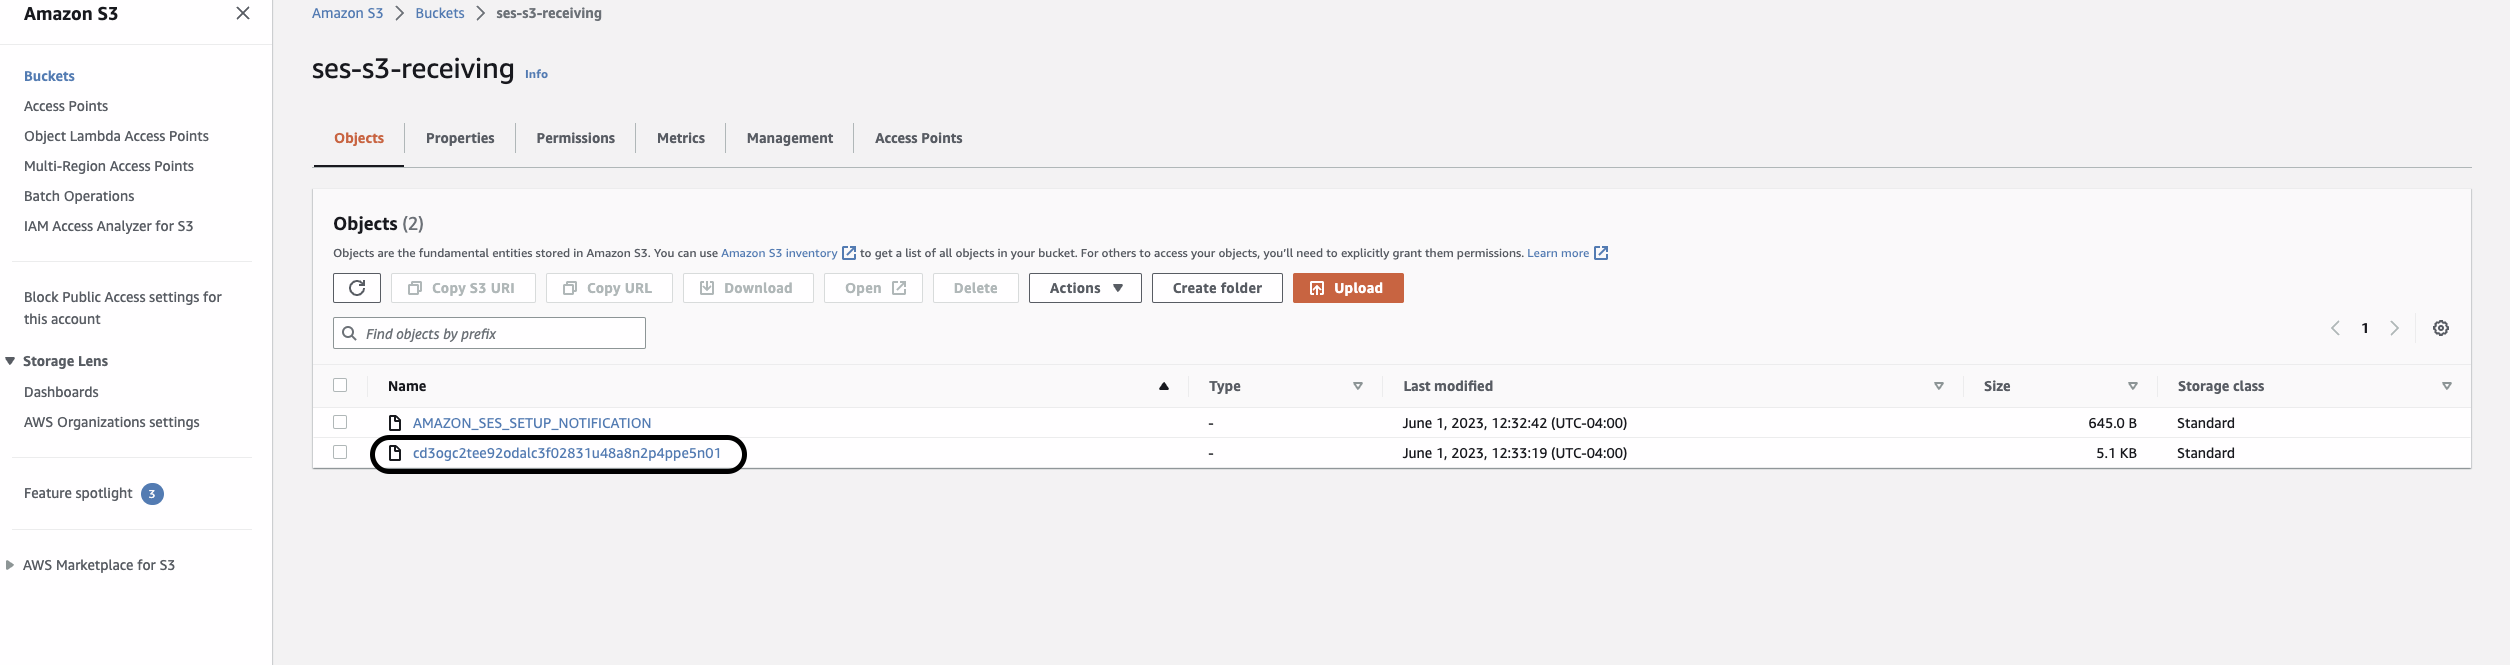
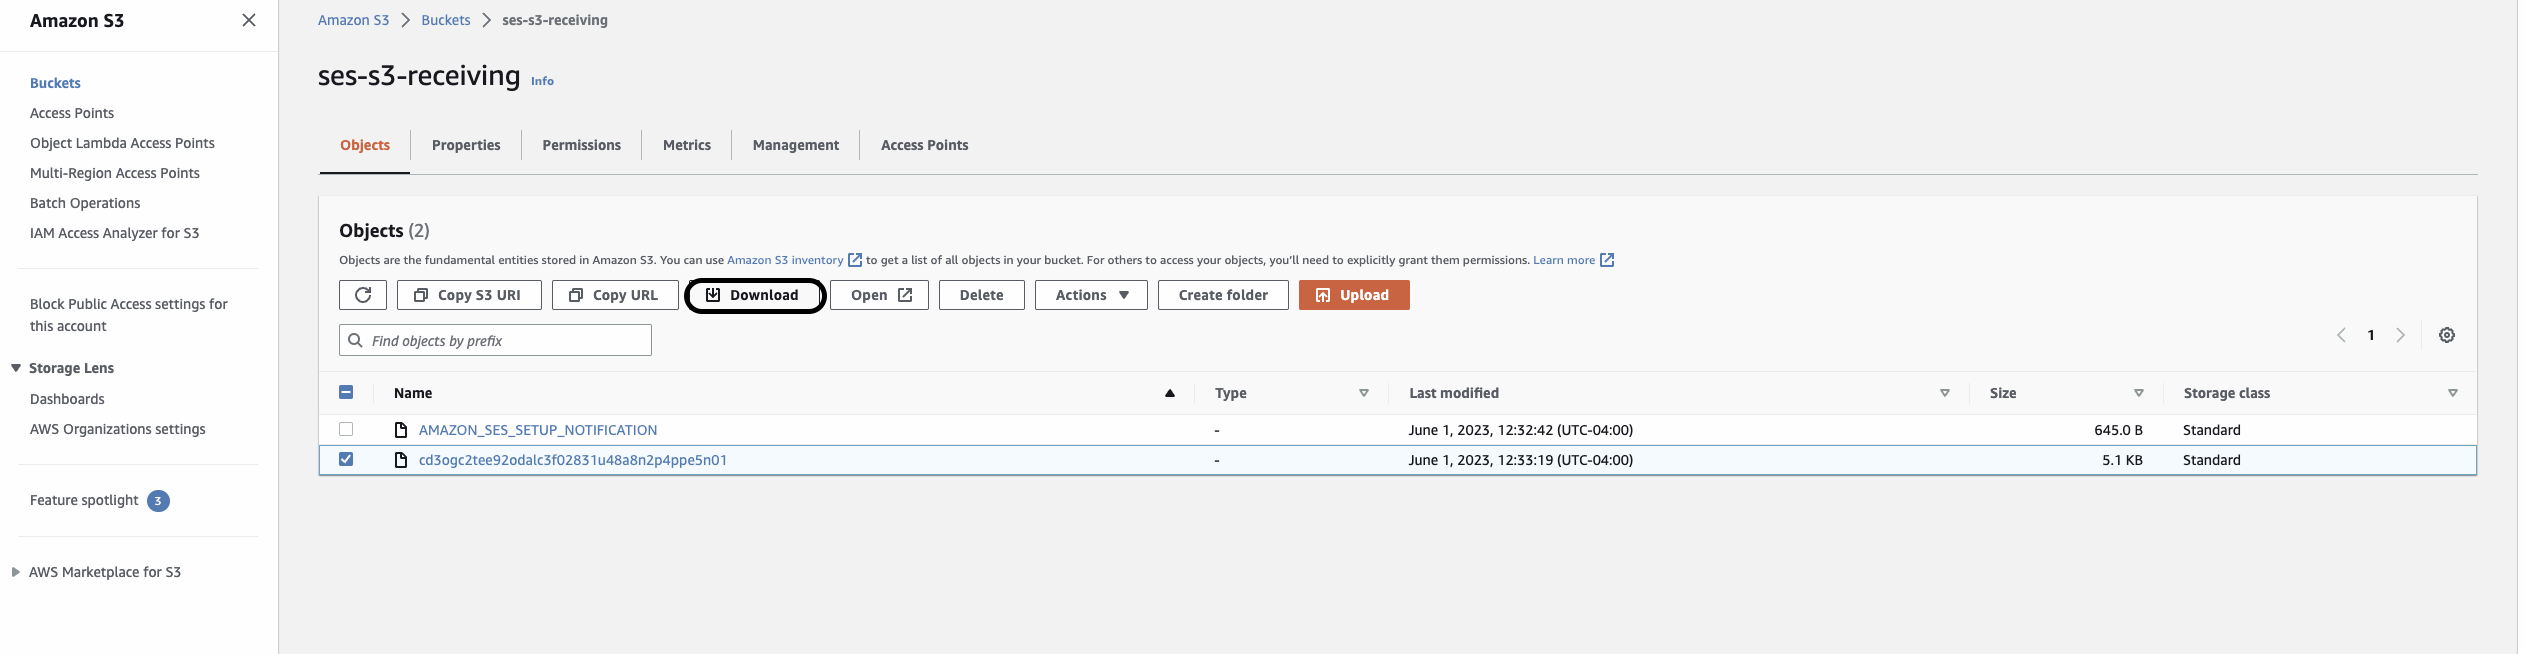
- Deliver to S3 bucket: Choose this action if you’re expecting emails with large attachments, need to store emails for archival purposes, or plan to process emails using other AWS services that integrate with Amazon S3. You’ll need to specify the Amazon S3 bucket where the incoming emails should be stored.
- Invoke AWS Lambda function: Choose this action if you want to process incoming emails using custom logic, such as filtering, parsing, or modifying the email content. You’ll need to specify the AWS Lambda function that should be invoked when an incoming email matches this rule.
- Publish to Amazon SNS topic: Choose this action if you’re processing smaller emails or want to receive real-time notifications when an email arrives. You’ll need to specify the Amazon SNS topic where notifications should be published.
- For more information and additional actions, see the Action options section of the Developer Guide.
- Once configured, choose Next to proceed to the Review page.
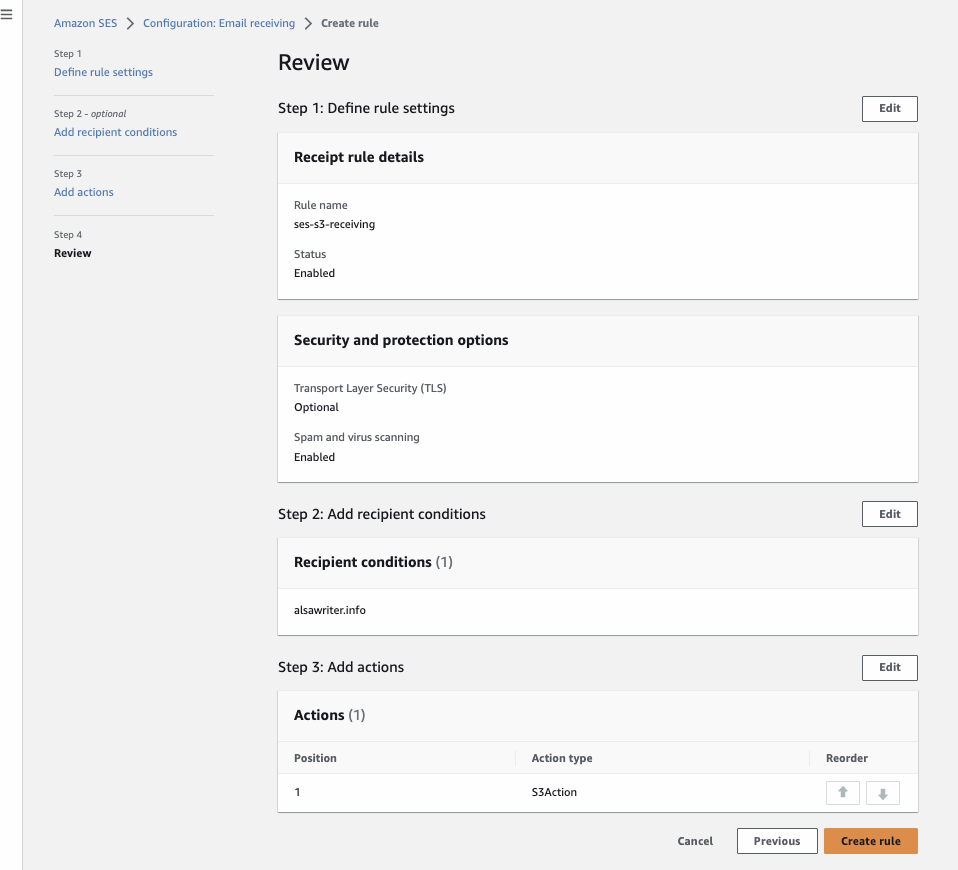
- On the Review page, review the settings and actions of the rule. If you need to make changes, choose the Edit option.
- When finished, choose Create rule to add the new receipt rule to your rule set. The rule will now be applied to incoming emails that match the specified recipient conditions.
You can create multiple receipt rules within a rule set, each with different actions and conditions. Amazon SES will apply the rules in the order they appear in the rule set. For more information on creating and managing receipt rules, you can refer to the official documentation.
Monitoring your incoming email
Configuring Amazon CloudWatch metrics
Once you have enabled email receiving in Amazon SES and created receipt rules for your emails, you can monitor and view the metrics using Amazon CloudWatch. Follow these steps to configure Amazon CloudWatch metrics for Amazon SES email receiving:
- Open the Amazon CloudWatch console.
- Navigate to the Metrics section and select All metrics.
- In the list of available metrics, locate and select SES to view SES-related metrics.
- Expand the Receipt Rule Set Metrics and Receipt Rule Metrics sections to access the specific metrics for your receipt rule sets and rules.
- Under Receipt Rule Set Metrics, you will find the following metrics:
- “Received”: Indicates whether SES successfully received a message that has at least one rule applying. The metric value is always 1.
- “PublishSuccess”: Indicates whether SES successfully executed all rules within a rule set.
- “PublishFailure”: Indicates if SES encountered an error while executing rules within a rule set. The error may allow for retrying the execution.
- “PublishExpired”: Indicates that SES will no longer retry executing the rules within a rule set after four hours.
These metrics can be filtered by the dimension RuleSetName to obtain data specific to individual rule sets.
- Under Receipt Rule Metrics, you will find the following metrics:
- “Received”: Indicates whether SES successfully received a message and will try to process the applied rule. The metric value is always 1.
- “PublishSuccess”: Indicates whether SES successfully executed a rule that applies to the received message.
- “PublishFailure”: Indicates if SES encountered an error while executing the actions in a rule. The error may allow for retrying the execution.
- “PublishExpired”: Indicates that SES will no longer retry executing the actions of a rule after four hours.
These metrics can be filtered by the dimension RuleName to obtain data specific to individual rules.
- Note that the metrics will only appear in the CloudWatch console if you have enabled email receiving, created receipt rules, and received mail that matches any of your rules.
- Keep in mind that changes made to fix your receipt rule set will only apply to emails received by Amazon SES after the update. Emails are always evaluated against the receipt rule set in place at the time of receipt.
Amazon SES also provides an Automatic Dashboard for SES in the CloudWatch console, which offers a preconfigured set of SES metrics and alarms to monitor your email sending and receiving activity. This dashboard provides a consolidated view of key metrics, making it easier to track the performance and health of your Amazon SES environment.
By configuring Amazon CloudWatch metrics, you can gain valuable insights into the performance and execution of your receipt rule sets and rules within Amazon SES. For more detailed information on viewing metrics for Amazon SES email receiving using Amazon CloudWatch, refer to the official documentation.
Using receipt rules effectively
Chaining Receipt Rules
Chaining receipt rules enable you to create sophisticated email processing workflows by linking multiple rules together, allowing each rule to apply specific actions based on the outcome of the previous rule. This advanced technique can help you achieve greater flexibility and precision in handling your incoming emails with Amazon SES. In this section, we’ll explain how to create chained receipt rules and provide examples of common use cases.
- Sign in to the AWS Management Console and open the Amazon SES console.
- Under the Email receiving pane, in the Receipt rule sets tab, select the name of your active rule set from the All rule sets section
- Review the existing rules in your rule set and ensure that they are ordered correctly. Chaining relies on the order of the rules, as each rule’s conditions and actions are evaluated sequentially. Under the Reorder tab, the rule orders can be modified by selecting the corresponding arrow associated with each.
- To chain additional rules, follow the steps previously outlined in the Adding Receipt Rules section and adjust the rule orders as necessary.
Chaining receipt rules can help you build complex email processing workflows with Amazon SES. Some common use cases include:
- Executing multiple filtering criteria in an order that you specify. For example, adding a specific header value and then sending to additional AWS services such as Amazon S3, Amazon SNS, or AWS Lambda.
- Creating multi-stage processing pipelines, where the output of one action (e.g., saving an email to Amazon S3) is used as the input for the next action (e.g., processing the email with AWS Lambda).
- Implementing fallback actions, where the first rule in the chain attempts a specific action (e.g., saving an email to a primary S3 bucket), and if it fails, the next rule in the chain applies a different action (e.g., saving the email to a secondary S3 bucket).
The following figure shows how receipt rules, rule sets, and actions relate to each other.

For more information on creating and managing receipt rules, you can refer to the official documentation.
Handling the 200 Receipt Rules per Rule Set limit
For each AWS account, Amazon SES imposes a limit of 200 receipt rules per receipt rule set. While this limit is sufficient for most use cases, there might be situations where you need to process a higher volume of incoming emails with more complex rule sets. These are some strategies to work around the 200 receipt rule limit using Amazon SES and other AWS services:
- Utilize rule chaining: As mentioned earlier, chaining receipt rules allows you to link multiple rules together, effectively extending the number of actions you can perform for a single email. By chaining rules, you can create more complex processing workflows without exceeding the 200 rule limit.
- Combine rules with actions: Instead of creating separate rules for each scenario, consider combining multiple actions within a single rule. This approach can help you reduce the total number of rules while still catering to various email processing requirements.
- Use AWS Lambda for custom processing: Leverage AWS Lambda to perform custom processing on incoming emails. By incorporating Lambda functions in your receipt rules, you can handle more complex processing tasks without increasing the number of rules. This approach also allows you to offload some processing logic from Amazon SES to Lambda, providing additional flexibility.
- Consolidate similar actions: If you have several rules performing similar actions, it is advisable to consolidate them into a single rule with multiple actions. This consolidation can help you reduce the total number of rules while maintaining the desired functionality.
- Evaluate rule usage: Regularly review and evaluate your existing receipt rules to identify any rules that are no longer in use or can be optimized. Removing or consolidating unnecessary rules can help you stay within the 200 rule limit while still addressing your email processing requirements.
By implementing these strategies, you can effectively work around the 200 receipt rule limit in Amazon SES and build more complex email processing workflows to cater to your specific needs. Remember to monitor and optimize your rule sets regularly to make the most of the available resources and maintain efficient email processing.
For more information on the inbound quotas and limits in Amazon SES, you can refer to the official AWS documentation at Quotas related to email receiving.
Best Practices for multi-tenant scenarios
When dealing with multi-tenant scenarios in your application, it’s crucial to manage incoming emails efficiently to ensure smooth operation and a seamless experience for your users. In this section, we’ll provide best practices to handle incoming emails in multi-tenant environments using Amazon SES.
In a multi-tenant scenario, where multiple customers or tenants share a single AWS account, it’s important to consider the limit of 200 receipt rules per receipt rule set imposed by Amazon SES. To ensure compliance with this limit and maintain optimal email processing, the following practices are recommended:
- Segregate tenants using email subdomains: Create unique subdomains for each tenant and route their incoming emails accordingly. This approach makes it easier to manage email processing rules and helps isolate tenants from potential issues.
- Create separate rule sets for each tenant: By creating dedicated rule sets for each tenant, you can maintain better control over email processing rules and actions specific to their needs. This can simplify management and make it easier to update rules for individual tenants without affecting others.
- Use tags to identify tenant-specific emails: Apply tags to incoming emails using the
AddHeader action in your receipt rules. These tags can include tenant-specific identifiers, which will help you route and process emails correctly. You can later use these tags in other AWS services (e.g., AWS Lambda) to process tenant-specific emails.
- Leverage conditional receipt rules: Utilize conditional receipt rules to apply tenant-specific processing based on email headers, recipients, or other criteria. This way, you can ensure that the right actions are taken for each tenant’s incoming emails.
- Monitor tenant-specific metrics: Configure Amazon CloudWatch metrics and alarms for each tenant to track their email processing performance separately. This enables you to keep a close eye on individual tenants and take appropriate actions when needed.
- Implement rate limiting: To prevent tenants from overwhelming your email processing pipeline, consider implementing rate limiting based on the number of incoming emails per tenant. This can help ensure fair resource allocation and prevent potential abuse.
- Ensure security and privacy: Always encrypt tenant data at rest and in transit, and follow best practices for data protection and privacy. Consider using AWS Key Management Service (KMS) to manage encryption keys for each tenant.
- Test and validate rule sets: Before deploying rule sets for tenants, thoroughly test and validate them to ensure they function as intended. This can help prevent unexpected behavior and maintain a high level of service quality.
By following these best practices for handling incoming emails in multi-tenant scenarios with Amazon SES, you can ensure a robust and efficient email processing pipeline that caters to each tenant’s unique requirements. As you continue to work with Amazon SES in multi-tenant environments, stay up to date with AWS documentation and best practices to further optimize your email processing workflows.
Conclusion
In this blog post, we’ve explored how to set up Amazon Simple Email Service (SES) for incoming email processing using receipt rules, rule sets, and various actions. We’ve covered domain verification, DKIM setup, creating and managing rule sets, adding receipt rules, and configuring Amazon CloudWatch metrics and alarms. We’ve also delved into advanced topics such as chaining receipt rules for more complex email processing workflows.
By following this guide, you can effectively leverage Amazon SES to process and manage your incoming emails, optimizing your email workflows, and maintaining high email deliverability standards. With Amazon SES, you can customize your email processing pipeline to meet your specific needs and seamlessly integrate with other AWS services such as Amazon S3, AWS Lambda, Amazon SNS, and Amazon CloudWatch.
In future blog posts, we will explore monitoring and alerting in more detail, providing you with additional insights on how to effectively monitor your email processing pipelines and set up alerts for critical events. Stay tuned for more information on this important aspect of managing your email infrastructure.
As you continue to work with Amazon SES and its email receiving capabilities, remember to review AWS best practices and documentation to stay up to date with new features and improvements. Don’t hesitate to experiment with different rule sets, actions, and conditions to find the perfect email processing solution for your use case.

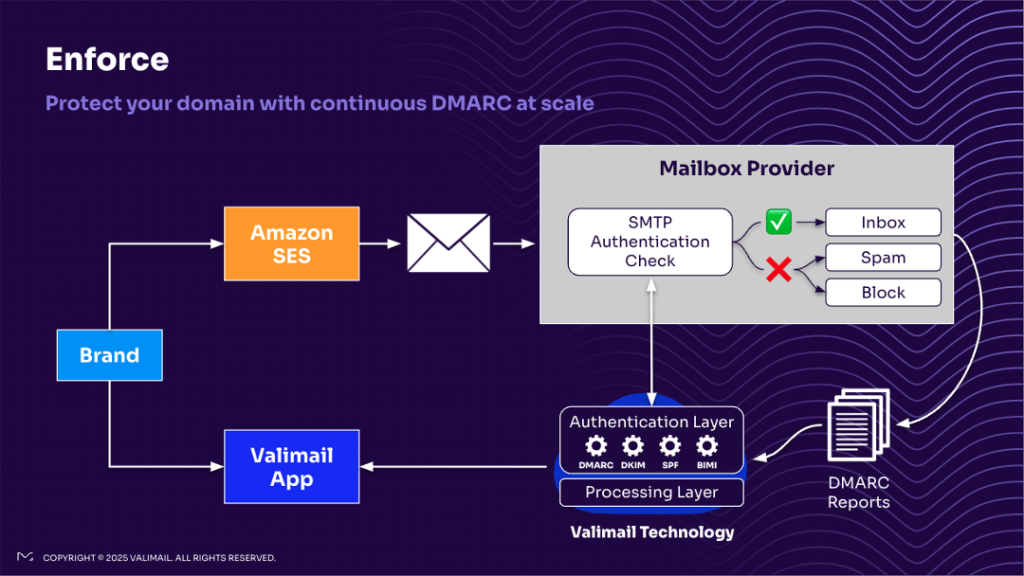
 Figure 1 – DMARC Flow