Post Syndicated from Jeff Barr original https://aws.amazon.com/blogs/aws/securely-share-aws-resources-across-vpc-and-account-boundaries-with-privatelink-vpc-lattice-eventbridge-and-step-functions/
At some point, every AWS customer tells me that they have the desire to move into the future as quickly as possible. They want to simplify their modernization efforts, drive growth, and adapt to the cloud, while also reducing costs as they proceed. These customers typically have a large suite of legacy applications, possibly running on-premises, that are running on diverse technology stacks managed by disparate parts of the organization. To make things even more challenging, these organizations often have to meet stringent security and compliance requirements.
Prepare to Share
You can now share AWS resources such as Amazon Elastic Compute Cloud (Amazon EC2) instances, Amazon Elastic Container Service (Amazon ECS) and Amazon Elastic Kubernetes Service (Amazon EKS) container services, and your own HTTPS services across Amazon Virtual Private Cloud (Amazon VPC) and AWS account boundaries and use them to build event-driven apps via Amazon EventBridge and orchestrate workflows with AWS Step Functions. You can update your existing workloads, connect your modern cloud-native apps to on-premises legacy systems, with all communication routed across private endpoints and networks.
These new features build on Amazon VPC Lattice and AWS PrivateLink, and give you a lot of new options to design and control your network, along with some cool new ways to integrate and orchestrate across all of your technology stacks. For example, you can build hybrid event-driven architectures that make use of your existing on-premises applications.
Today, some customers use AWS Lambda functions or Amazon Simple Queue Service (Amazon SQS) queues to transfer data into VPCs. This undifferentiated heavy lifting can now be replaced with a simpler and more efficient solution.
Bringing all of this together, you get a set of services that will help you to accelerate your modernization efforts and simplify integration between your applications, regardless of where they are situated. EventBridge and Step Functions work hand-in-hand with PrivateLink and VPC Lattice to enable integration of public and private HTTPS-based applications into your event-driven architectures and workflows.
Here are the essential terms and concepts:
 Resource Owner VPC – A VPC that has resources to be shared. The owner of this VPC creates a Resource Gateway with one or more associated Resource Configurations, then uses AWS Resource Access Manager (RAM) to share the Resource Configuration with the Resource Consumer, such as another AWS account, or a developer building event-driven architectures and workflows using EventBridge and Step Functions. Let’s define the Resource Owner as the person (maybe you) in your organization who is responsible for the care and feeding of this VPC.
Resource Gateway – Provides a point of ingress to a VPC so that clients can access resources in the Resource Owner VPC, as indicated by the Resource Configurations that are associated with the gateway. One Resource Gateway can make multiple resources available.
Resource – This can be a HTTPS endpoint, a database, a database cluster, an EC2 instance, an Application Load Balancer in front of multiple EC2 instances, an ECS service discoverable via AWS Cloud Map, an Amazon Elastic Kubernetes Service (Amazon EKS) service behind a Network Load Balancer, or a legacy service running in the Resource Owner VPC or running in on-premises across AWS Site-to-Site VPN or AWS Direct Connect.
Resource Configuration – Defines a set of resources that can be accessed through a particular Resource Gateway. The resources can be referenced by IP address, DNS name, or (for AWS resources) an ARN.
Resource Consumer – The person in your organization who is responsible for building applications that connect with and consume services provided by resources in a Resource Owner VPC.
Sharing Resources
You can put all of this power to use in a lot of different ways; I’ll focus on one for this post.
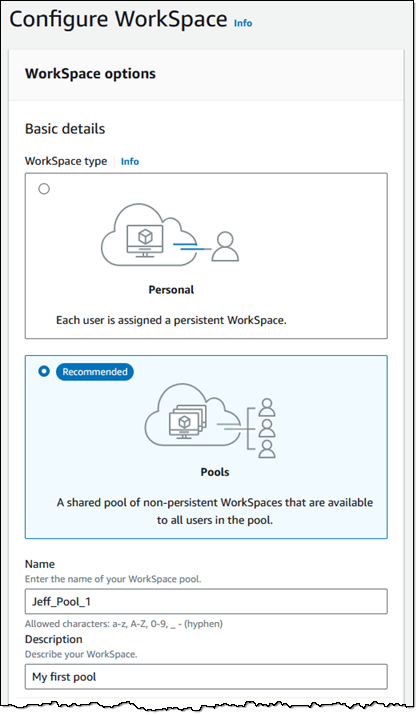
First, I will play the role of the Resource Owner. I click Resource gateways in the VPC Console, see that I don’t have a gateway, and click Create resource gateway to get started:

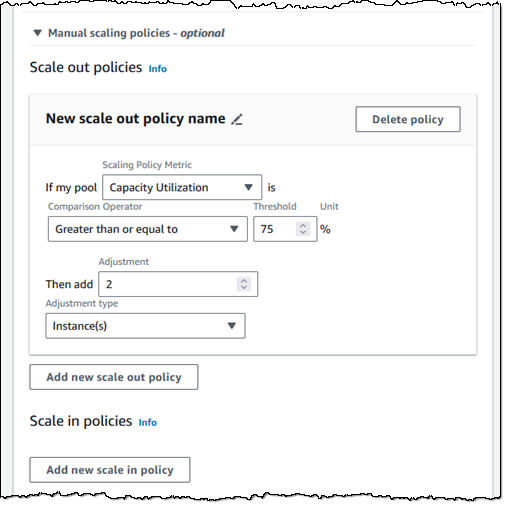
I assign a name (main-rg) and an IP address type, then pick the VPC and the private subnets where the gateway will have a presence (this is a one-shot selection that cannot be changed without creating a new Resource Gateway). I also choose up to five security groups to control inbound traffic:

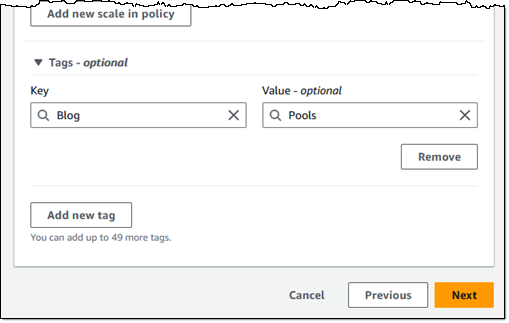
I scroll down, assign any desired tags, and click Create resource gateway to proceed:

My new gateway is active within seconds; I nod in appreciation and click Create resource configuration to move ahead:

Now I need to create my first Resource Configuration. Let’s say that I have a HTTPS service running on an EC2 instance on a private subnet in my Resource Owner VPC. I assign a DNS name to the service and use a Amazon Route 53 Alias record which returns the IP address of the instance:

I am using a public hosted zone in this example. We already working on support for private hosted zones.
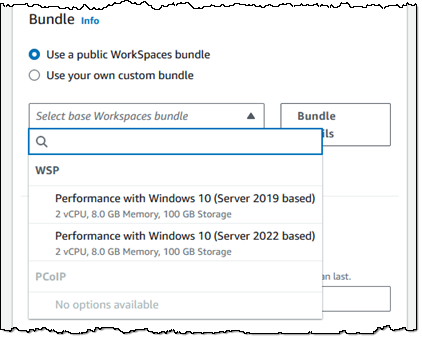
With DNS all set up, I click Create resource configuration to move ahead. I enter a name (rc-service1), choose Resource as the type, and select the Resource Gateway that I created earlier:

I scroll down and define my EC2 instance as a resource, entering the DNS name and setting up sharing for ports 80 and 443:

Now I take a small detour, and hop over to the RAM Console to create a Resource Share so that other AWS accounts can access the resources (this is optional, and only relevant for cross-account scenarios). I could create one Resource Share for each service, but in most cases I would create one share and use it to package up a collection of related services. I’ll do that, and call it shared-services:

Returning from my detour, I refresh the list of resource shares, pick the one that I created, and click Create resource configuration:

The resource configuration is ready within seconds.
Recap and Planning Time
Before moving ahead, let’s do a quick recap and make some plans. Here’s what I (in the role of Resource Provider) have so far:
- MainVPC – My Resource Owner VPC.
- main-rg – A Resource Gateway in MainVPC.
- rc-service1 – The Resource Configuration for main-rg.
- service1 – An HTTPS service hosted on an EC2 instance in a private subnet of MainVPC, at a fixed IP address.
Ok, so what’s next?
Share – This is the first and most obvious use use. I can use AWS Resource Access Manager (RAM) to share the Resource Configuration with another AWS account and access the service from another VPC. On the other side (as the Resource Consumer), I take a couple of quick steps to connect to the service that has been shared with me:
- Service Network – I can create a service network, add the Resource Configuration to the Service Network, and create a VPC endpoint in a VPC to connect to the service network.
- Endpoint – I can create a VPC endpoint in a VPC and access the shared resource via the endpoint.
Modernize – I can remove my legacy Lambda or SQS integration to get rid of some undifferentiated heavy lifting.
Build – I can use EventBridge and Step Functions to build event-driven architectures and orchestrate applications. I’ll take this option!
Accessing Private Resources with EventBridge and Step Functions
EventBridge and Step Functions already make it easy access to public HTTPS endpoints such as those from SaaS providers like Slack, Salesforce, and Adobe. With today’s launch, consuming private HTTPS services is just as easy.
As a Resource Consumer, I simply create an EventBridge connection, reference a Resource Configuration that was shared with me, and call the service from my event-driven application. Everything that I already know still applies, and I now have the new-found power to access private services.
To create the EventBridge connection, I open the EventBridge console and click Connections in the Integration menu:

I review my existing connections (none so far), then click Create connection to move ahead:

I enter a name (MyService1) and a description for my connection, select Private as the API type, and choose the Resource Configuration that I created earlier:

Scrolling down, I need to configure the authorization for the service that I am connecting to. I select Custom configuration and Basic authorization, and enter the Username and Password for my service. I also add Action=Forecast to the query string (as you can see there are a lot of options for authorization), and click Create:

The connection is created and ready within minutes. Then I use it in my Step Functions workflows by using the HTTP Task, selecting the connection, entering the URL of my API endpoint, and choosing an HTTP method:

And that’s all there is to it: your Step Functions workflows can now make use of Private Resources!
I can also use this connection as an EventBridge API destination target in Event Buses and Pipes.
Things to Know
Here a couple of things to know about these cool new features:
Pricing – Existing pricing for Step Functions, EventBridge, PrivateLink, and VPC Lattice apply including the per-GB charge for data transfer into the VPC.
Regions – You can create and use Resource Gateways and Resource Configurations in 21 AWS Regions: US East (Ohio, N. Virginia), US West (N. California, Oregon), Africa (Cape Town), Asia Pacific (Hong Kong, Mumbai, Osaka, Seoul, Singapore, Sydney, Tokyo), Canada (Central), Europe (Frankfurt, Ireland, London, Milan, Paris, Stockholm), Middle East (Bahrain), and South America (São Paulo).
In the Works – As I noted earlier, we are already working on support for private hosted zones. We are also planning to support access to other types of AWS resources through EventBridge and Step Functions .
— Jeff;


 AWS customers make use of
 Table buckets are the third type of S3 bucket, taking their place alongside the existing


 NeuronCores are at the heart of the Trainium2 chip. Each third-generation NeuronCore includes a scalar engine (1 input to 1 output), a vector engine (multiple inputs to multiple outputs), a tensor engine (systolic array multiplication, convolution, and transposition), and a GPSIMD (general purpose single instruction multiple data) core.
 Taking all of this into account, I am happy to be able to tell you about the new Amazon FSx Intelligent-Tiering storage class, available today for use with


 Resource Owner VPC – A VPC that has resources to be shared. The owner of this VPC creates a Resource Gateway with one or more associated Resource Configurations, then uses


 I have a very vague memory of a 2013-era meeting with my then-colleague
  Let’s roll back the calendar and take a look at a few of the more significant Lambda launches of the past decade:


 New Books – Take a peek at some of the newest books on serverless development and architecture:


 Graviton-4-powered, memory-optimized X8g instances are now available in ten virtual sizes and two bare metal sizes, with up to 3 TiB of DDR5 memory and up to 192 vCPUs. The X8g instances are our most energy efficient to date, with the best price performance and scale-up capability of any comparable EC2 Graviton instance to date. With a 16 to 1 ratio of memory to vCPU, these instances are designed for Electronic Design Automation, in-memory databases & caches, relational databases, real-time analytics, and memory-constrained microservices. The instances fully encrypt all high-speed physical hardware interfaces and also include additional