Tag Archives: Amazon WorkSpaces

New Amazon WorkSpaces Thin Client provides cost-effective, secure access to virtual desktops

Post Syndicated from Jeff Barr original https://aws.amazon.com/blogs/aws/new-amazon-workspaces-thin-client/

The new Amazon WorkSpaces Thin Client improves end-user and IT staff productivity with cost-effective, secure, easy-to-manage access to virtual desktops. The devices are preconfigured and shipped directly to the end user, ready to deploy, connect, and use.

Here’s my testing setup:

The Thin Client is a small cube that connects directly to a monitor, keyboard, mouse, and other USB peripherals such as headsets, microphones, and cameras. With the optional hub it can also drive a second monitor. The administrator can create environments that give users access to Amazon WorkSpaces, Amazon WorkSpaces Web, or Amazon AppStream 2.0, with multiple options for managing user identities and credentials using Active Directory.

Thin Clients in action
As a very long-time user of Amazon WorkSpaces via a thin client, I am thrilled to be able to tell you about this device and the administrative service behind it. While my priority is the ease with which I can switch from client to client while maintaining my working context (running apps, browser tabs, and so forth), administrators will find it attractive for other reasons. For example:

Cost – The device itself is low cost ($195 in the United States), far less expensive than a laptop and the associated operating system. Because the working environments are centrally configured and administered, there’s less work to be done in the field, leading to further cost savings. Further, the devices are far simpler than laptops, with less parts to break, wear out, or replace.

Security – The devices are shipped with a secure “secret” that is used to establish a trust relationship with the administrative service. There’s no data storage on the device, and it cannot host rogue apps that could attempt to exfiltrate data. It also helps to reduce risk of data leakage should a worker leave their job without returning their employer-supplied laptop.

Ease of Management – Administrators can easily create new environments for users or groups of users, distribute activation codes to them, and manage the environment via the AWS Management Console. They can set schedules for software updates and patches, verify compliance, and manage users over time.

Ease of Use – Users can unpack and connect the devices in minutes, enter their activation codes, log in to their virtual desktop environment, and start to work right away. They don’t have to take responsibility for installing software patches or updates, and can focus on their jobs.

There are lots of great use cases for these devices! First, there are situations where there’s a long-term need for regular access: call centers, task workers, training centers, and so forth. Second, there are other situations, where there’s a transient or short-term need for access: registration systems at large events, call centers stood up on a temporary basis for a special event or an emergency, disaster response, and the like. Given that some employees do not return laptops to their employers when they leave their job, providing them with inexpensive devices that do not have local storage makes a lot of sense.

Let’s walk through the process of getting set up, first as an administrator and then as a user.

Getting started as an administrator
The first step is to order some devices and have them shipped to my users, along with any desired peripherals.

Next, in my position as administrator, I open the Amazon WorkSpaces Thin Client Console, and click Get started:

Each Amazon WorkSpaces Thin Client environment provides access to a specific virtual desktop service (WorkSpaces, WorkSpaces Web, or Amazon AppStream 2.0). I click Create environment to move ahead:

I give my environment a name, indicate that I want patches applied automatically, and select WorkSpaces Web:

Next, I click Create WorkSpaces Web portal and go through those steps (not shown, basically choosing a VPC and two or more subnets, a security group, and an optional Private Certificate Authority):

I refresh, and my new portal is visible. I select it, enter a tag for tracking, and click Create environment:

My environment is ready right away. I keep a copy of the activation code (aci3a5yj) at hand to use later in the post:

I am using AWS Identity Center as my identity provider. I already set up my first user, and assigned myself to the MyWebPortal app (the precise steps that you take to do this will vary depending on your choice of identity provider):

Finally, as my last step in this process in my role as administrator, I share the activation code with my users (that would be me, in this case).

Getting started as a user
In my role as a user I return to my testing setup, power-on, go through a couple of quick steps to select my keyboard and connect to my home Wi-Fi, and enter my activation code:

Then I sign in using my AWS Identity Center user name and password:

And my WorkSpace is ready to use:

Administrator tools
As an administrator, I can manage environments, devices, and device software updates from the Thin Client Console. For example, I can review the list of devices that I manage:

Things to know
Here are a couple of things that are important to know:

Regions – The Thin Client Console is available in the US East (N. Virginia), US West (Oregon), Asia Pacific (Mumbai), Canada (Central), and Europe (Frankfurt, Ireland, Ireland, London) Regions.

Device Sales – The Amazon WorkSpaces Thin Clients are available in the United States now, with availability in other countries in early 2024.

Pricing – Devices are priced at $195, or $280 with an optional hub that allows you to use a second monitor. There’s a $6 per month fee to manage, maintain, and monitor each device, and you also pay for the underlying virtual desktop service.

Learn more
Visit the WorkSpaces Thin Client web page and Amazon Business Marketplace to learn more.

Jeff;

Announcing cross-region data replication for Amazon WorkSpaces

Post Syndicated from Jeff Barr original https://aws.amazon.com/blogs/aws/cross-region-data-replication-for-amazon-workspaces/

You can now use cross-region data replication to provide business continuity for your Amazon WorkSpaces users. Snapshots are taken every 12 hours, replicated to the desired destination region, and are used to provide a recovery point objective (RPO) of 12-24 hours.

Multi-Region Resilience Review
In her 2022 post Advancing business continuity with Amazon WorkSpaces Multi-Region Resilience, my colleague Ariel introduced you to the initial version of this feature and showed you how to use it to set up standby virtual desktops available for your users. After it has been set up, users log in with Amazon WorkSpaces registration codes that include fully qualified domain names (FQDNs). If the WorkSpaces in the primary region are unavailable, the users are redirected to standby WorkSpaces in the secondary region.

The standby WorkSpaces are available for a small, fixed monthly fee for infrastructure and storage, with a low flat rate change for each hour of usage during the month. Together, this feature and this business model make it easy and economical for you to maintain a standby deployment.

Cross-Region Data Replication
Today we are making this feature even more powerful by adding one-way cross-region data replication. Applications, documents, and other resources stored on the primary WorkSpace are snapshotted every 12 hours and copied to the region hosting the secondary WorkSpace. You get an additional layer of redundancy, enhanced data protection, and can minimize productivity that would otherwise be lost to disruptions. This is particularly helpful if users have installed and configured applications on top of the base image since they won’t have to repeat these steps on the secondary WorkSpace.

Here’s how it all works:

Normal Operation – During normal operation, the users in your WorkSpaces fleet are using the primary region. EBS snapshots of the system (C:) and data (D:) drives are created every 12 hours. Multi-Region Resilience runs in the secondary region and checks for fresh snapshots regularly. When it finds them, it initiates a copy to the secondary region. As the copies arrive in the secondary region they are used to update the secondary WorkSpace.

Failover Detection – As part of the setup process, you will follow Configure your DNS service and setup DNS routing policies to set up DNS routing policies and optional Amazon Route 53 health checks to manage cross-Region redirection.

Failover – If a large-scale event (LSE) affects the primary region and the primary WorkSpace, the failover detection that I just described goes in to effect. When users try to reconnect, they are redirected to the secondary region, the latest snapshots are used to launch a WorkSpace for them, and they are back up and running with access to data and apps that are between 12 and 24 hours old.

Failback – At the conclusion of the LSE, the users manually back up any data that they have created on the secondary WorkSpace and log out of it. Then they log in again, and this time they will be directed to the primary region and WorkSpace, where they can restore their backups and continue to work.

Getting Set Up
As a WorkSpaces administrator, I start by locating the desired primary WorkSpace:

I select it and choose Create Standby WorkSpaces from the Actions menu:

I select the desired region for the secondary WorkSpace and click Next:

Then I choose the right directory in the region, and again click Next:

If the primary WorkSpace is encrypted, I must enter the ARN of the KMS key in the secondary region (or, even better, use a multi-Region key). I check Enable data replication and confirm that I am authorizing an additional monthly charge:

On the next page I review my choices and click Create to initiate the creation of the secondary WorkSpace in the region that I selected.

As mentioned earlier I also need to set up Multi-Region Resilience. This includes setting up a domain name to use as a WorkSpaces registration code, setting up Route 53 health checks, and using them to power routing policies.

Things to Know
Here are a couple of important things to know about Cross-Region Data Replication:

Directories – You can use a self-managed Active Directory, AWS Managed AD or AD Connector configured as described in this post. Simple AD is not supported.

Snapshots – The first-ever EBS snapshot for a particular data volume is full, and subsequent snapshots are incremental. As a result, the first replication for a given WorkSpace will likely take longer than subsequent ones. Snapshots are initiated on a schedule that is internal to WorkSpaces and you cannot control the timing.

Encryption – You can use this feature with Encrypted WorkSpaces as long as you use the same AWS Key Management Service (AWS KMS) keys in the primary and secondary regions. You can also use multi-Region keys.

Bundles – You can use the Windows 10 and Windows 11 bundles, and you can also BYOL.

Accounts – Every AWS account has a fixed limit on the number of pending EBS snapshots. This may affect your ability to use this feature with large fleets of WorkSpaces.

Pricing – You pay a fixed monthly fee based on the amount of storage configured for each primary WorkSpace. See the Amazon WorkSpaces Pricing page for more information.

Jeff;

AWS Weekly Roundup – AWS Storage Day, AWS Israel (Tel Aviv) Region, and More – Aug 8, 2023

Post Syndicated from Veliswa Boya original https://aws.amazon.com/blogs/aws/aws-weekly-roundup-aws-storage-day-aws-israel-tel-aviv-region-and-more-aug-8-2023/

(Editor’s note: Today, we are changing the title of this regular weekly post from AWS Week in Review to AWS Weekly Roundup to better reflect the mix of recent top news and announcements as well as upcoming events you won’t want to miss.)


It’s taken me some time to finally be comfortable with being in front of a camera, a strange thing for a Developer Advocate to say I know! Last week I joined a couple of my team-mates at the AWS London Studios to record a series of videos that will be published in our Build On AWS YouTube Channel. Build On AWS is for the hands-on, technical AWS cloud builder who wants to become more agile and innovate faster. In the channel, you’ll find dynamic, high-quality content that’s designed for developers, by developers!

This video tells you more about what you’ll find in the channel. Check it out and consider subscribing to not miss out when we publish new content.

Now on to the AWS updates. There was a lot of news related to AWS last week, and I’ve compiled a few announcements and upcoming events you need to know about. Let’s get started!

Last Week’s Launches
Here are a few launches from last week that you might have missed:

Microsoft 365 Apps for enterprise now available on Amazon WorkSpaces servicesAmazon WorkSpaces is a fully managed, secure, and reliable virtual desktop in the AWS Cloud. With Amazon WorkSpaces, you improve IT agility and maximize user experience, while only paying for the infrastructure that you use. We announced the availability of Microsoft 365 Apps for enterprise on Amazon WorkSpaces. You can bring your own Microsoft 365 licenses (if they meet Microsoft’s licensing requirements) and activate the applications at no additional cost to run Microsoft 365 Apps for enterprise on Amazon WorkSpaces services.

AWS Israel (Tel Aviv) Region is Now Open – You can now securely store data in Israel while serving users in the vicinity with even lower latency. This is because last week we launched the Tel Aviv Region to give customers an additional option for running applications and serving users from data centers located in Israel.

Amazon Connect Launches – This is one of my favorite AWS services to write about because of how Amazon Connect is changing our customers’ engagement with their own customers. Last week, Amazon Connect announced automatic activity scheduling based on shift duration, custom flow block titles, and archiving and deleting flows from the UI, to name a few.

Other AWS News
A few more news items and blog posts you might have missed:

Customizable thresholds for health events supported on Amazon CloudWatch Internet Monitor – Until this announcement, the default threshold for overall availability and performance scores to invoke a health event was 95 percent. Now, you can customize the thresholds for when to invoke a health event for internet-facing traffic between your end users and your applications hosted on AWS.

Improved AWS Backup performance for Amazon S3 buckets – Now you can speed up your initial Amazon S3 backup workflow and back up buckets with more than 3 billion objects due to improvements to the speed of backups by up to 10x for buckets with more than 300 million objects. This performance improvement is automatically enabled at no additional cost in all Regions where AWS Backup support for Amazon S3 is available.

For AWS open-source news and updates, check out the latest newsletter curated by my colleague Ricardo Sueiras to bring you the most recent updates on open-source projects, posts, events, and more.

For a full list of AWS announcements, be sure to keep an eye on the What’s New at AWS page.

Upcoming AWS Events
We have the following upcoming events:

AWS Storage Day (August 9) – A one-day virtual event where you’ll learn how to prepare for AI/ML with the storage decisions you make now, how to do more with your budget by optimizing storage costs for on-premises and cloud data, and how to deliver holistic data protection for your organization, including recovery planning to help protect against ransomware. Learn more and register here.

AWS Summit Mexico City (August 30)Sign up for the Summit to connect and collaborate with other like-minded folks while learning about AWS.

AWS Community Days (August 12, 19) – Join these community-led conferences where event logistics and content are planned, sourced, and delivered by community leaders: Colombia (August 12), and West Africa (August 19).


P.S. We’re focused on improving our content to provide a better customer experience, and we need your feedback to do so. Take this quick survey to share insights on your experience with the AWS Blog. Note that this survey is hosted by an external company, so the link doesn’t lead to our website. AWS handles your information as described in the AWS Privacy Notice.

– Veliswa

AWS Week in Review – November 21, 2022

Post Syndicated from Danilo Poccia original https://aws.amazon.com/blogs/aws/aws-week-in-review-november-21-2022/

This post is part of our Week in Review series. Check back each week for a quick roundup of interesting news and announcements from AWS!

A new week starts, and the News Blog team is getting ready for AWS re:Invent! Many of us will be there next week and it would be great to meet in person. If you’re coming, do you know about PeerTalk? It’s an onsite networking program for re:Invent attendees available through the AWS Events mobile app (which you can get on Google Play or Apple App Store) to help facilitate connections among the re:Invent community.

If you’re not coming to re:Invent, no worries, you can get a free online pass to watch keynotes and leadership sessions.

Last Week’s Launches
It was a busy week for our service teams! Here are the launches that got my attention:

AWS Region in Spain – The AWS Region in Aragón, Spain, is now open. The official name is Europe (Spain), and the API name is eu-south-2.

Amazon Athena – You can now apply AWS Lake Formation fine-grained access control policies with all table and file format supported by Amazon Athena to centrally manage permissions and access data catalog resources in your Amazon Simple Storage Service (Amazon S3) data lake. With fine-grained access control, you can restrict access to data in query results using data filters to achieve column-level, row-level, and cell-level security.

Amazon EventBridge – With these additional filtering capabilities, you can now filter events by suffix, ignore case, and match if at least one condition is true. This makes it easier to write complex rules when building event-driven applications.

AWS Controllers for Kubernetes (ACK) – The ACK for Amazon Elastic Compute Cloud (Amazon EC2) is now generally available and lets you provision and manage EC2 networking resources, such as VPCs, security groups and internet gateways using the Kubernetes API. Also, the ACK for Amazon EMR on EKS is now generally available to allow you to declaratively define and manage EMR on EKS resources such as virtual clusters and job runs as Kubernetes custom resources. Learn more about ACK for Amazon EMR on EKS in this blog post.

Amazon HealthLake – New analytics capabilities make it easier to query, visualize, and build machine learning (ML) models. Now HealthLake transforms customer data into an analytics-ready format in near real-time so that you can query, and use the resulting data to build visualizations or ML models. Also new is Amazon HealthLake Imaging (preview), a new HIPAA-eligible capability that enables you to easily store, access, and analyze medical images at any scale. More on HealthLake Imaging can be found in this blog post.

Amazon RDS – You can now transfer files between Amazon Relational Database Service (RDS) for Oracle and an Amazon Elastic File System (Amazon EFS) file system. You can use this integration to stage files like Oracle Data Pump export files when you import them. You can also use EFS to share a file system between an application and one or more RDS Oracle DB instances to address specific application needs.

Amazon ECS and Amazon EKS – We added centralized logging support for Windows containers to help you easily process and forward container logs to various AWS and third-party destinations such as Amazon CloudWatch, S3, Amazon Kinesis Data Firehose, Datadog, and Splunk. See these blog posts for how to use this new capability with ECS and with EKS.

AWS SAM CLI – You can now use the Serverless Application Model CLI to locally test and debug an AWS Lambda function defined in a Terraform application. You can see a walkthrough in this blog post.

AWS Lambda – Now supports Node.js 18 as both a managed runtime and a container base image, which you can learn more about in this blog post. Also check out this interesting article on why and how you should use AWS SDK for JavaScript V3 with Node.js 18. And last but not least, there is new tooling support to build and deploy native AOT compiled .NET 7 applications to AWS Lambda. With this tooling, you can enable faster application starts and benefit from reduced costs through the faster initialization times and lower memory consumption of native AOT applications. Learn more in this blog post.

AWS Step Functions – Now supports cross-account access for more than 220 AWS services to process data, automate IT and business processes, and build applications across multiple accounts. Learn more in this blog post.

AWS Fargate – Adds the ability to monitor the utilization of the ephemeral storage attached to an Amazon ECS task. You can track the storage utilization with Amazon CloudWatch Container Insights and ECS Task Metadata endpoint.

AWS Proton – Now has a centralized dashboard for all resources deployed and managed by AWS Proton, which you can learn more about in this blog post. You can now also specify custom commands to provision infrastructure from templates. In this way, you can manage templates defined using the AWS Cloud Development Kit (AWS CDK) and other templating and provisioning tools. More on CDK support and AWS CodeBuild provisioning can be found in this blog post.

AWS IAM – You can now use more than one multi-factor authentication (MFA) device for root account users and IAM users in your AWS accounts. More information is available in this post.

Amazon ElastiCache – You can now use IAM authentication to access Redis clusters. With this new capability, IAM users and roles can be associated with ElastiCache for Redis users to manage their cluster access.

Amazon WorkSpaces – You can now use version 2.0 of the WorkSpaces Streaming Protocol (WSP) host agent that offers significant streaming quality and performance improvements, and you can learn more in this blog post. Also, with Amazon WorkSpaces Multi-Region Resilience, you can implement business continuity solutions that keep users online and productive with less than 30-minute recovery time objective (RTO) in another AWS Region during disruptive events. More on multi-region resilience is available in this post.

Amazon CloudWatch RUM – You can now send custom events (in addition to predefined events) for better troubleshooting and application specific monitoring. In this way, you can monitor specific functions of your application and troubleshoot end user impacting issues unique to the application components.

AWS AppSync – You can now define GraphQL API resolvers using JavaScript. You can also mix functions written in JavaScript and Velocity Template Language (VTL) inside a single pipeline resolver. To simplify local development of resolvers, AppSync released two new NPM libraries and a new API command. More info can be found in this blog post.

AWS SDK for SAP ABAP – This new SDK makes it easier for ABAP developers to modernize and transform SAP-based business processes and connect to AWS services natively using the SAP ABAP language. Learn more in this blog post.

AWS CloudFormation – CloudFormation can now send event notifications via Amazon EventBridge when you create, update, or delete a stack set.

AWS Console – With the new Applications widget on the Console home, you have one-click access to applications in AWS Systems Manager Application Manager and their resources, code, and related data. From Application Manager, you can view the resources that power your application and your costs using AWS Cost Explorer.

AWS Amplify – Expands Flutter support (developer preview) to Web and Desktop for the API, Analytics, and Storage use cases. You can now build cross-platform Flutter apps with Amplify that target iOS, Android, Web, and Desktop (macOS, Windows, Linux) using a single codebase. Learn more on Flutter Web and Desktop support for AWS Amplify in this post. Amplify Hosting now supports fully managed CI/CD deployments and hosting for server-side rendered (SSR) apps built using Next.js 12 and 13. Learn more in this blog post and see how to deploy a NextJS 13 app with the AWS CDK here.

Amazon SQS – With attribute-based access control (ABAC), you can define permissions based on tags attached to users and AWS resources. With this release, you can now use tags to configure access permissions and policies for SQS queues. More details can be found in this blog.

AWS Well-Architected Framework – The latest version of the Data Analytics Lens is now available. The Data Analytics Lens is a collection of design principles, best practices, and prescriptive guidance to help you running analytics on AWS.

AWS Organizations – You can now manage accounts, organizational units (OUs), and policies within your organization using CloudFormation templates.

For a full list of AWS announcements, be sure to keep an eye on the What’s New at AWS page.

Other AWS News
A few more stuff you might have missed:

Introducing our final AWS Heroes of the year – As the end of 2022 approaches, we are recognizing individuals whose enthusiasm for knowledge-sharing has a real impact with the AWS community. Please meet them here!

The Distributed Computing ManifestoWerner Vogles, VP & CTO at Amazon.com, shared the Distributed Computing Manifesto, a canonical document from the early days of Amazon that transformed the way we built architectures and highlights the challenges faced at the end of the 20th century.

AWS re:Post – To make this community more accessible globally, we expanded the user experience to support five additional languages. You can now interact with AWS re:Post also using Traditional Chinese, Simplified Chinese, French, Japanese, and Korean.

For AWS open-source news and updates, here’s the latest newsletter curated by Ricardo to bring you the most recent updates on open-source projects, posts, events, and more.

Upcoming AWS Events
As usual, there are many opportunities to meet:

AWS re:Invent – Our yearly event is next week from November 28 to December 2. If you can’t be there in person, get your free online pass to watch live the keynotes and the leadership sessions.

AWS Community DaysAWS Community Day events are community-led conferences to share and learn together. Join us in Sri Lanka (on December 6-7), Dubai, UAE (December 10), Pune, India (December 10), and Ahmedabad, India (December 17).

That’s all from me for this week. Next week we’ll focus on re:Invent, and then we’ll take a short break. We’ll be back with the next Week in Review on December 12!

Danilo

AWS Week in Review – October 3, 2022

Post Syndicated from Danilo Poccia original https://aws.amazon.com/blogs/aws/aws-week-in-review-october-3-2022/

This post is part of our Week in Review series. Check back each week for a quick roundup of interesting news and announcements from AWS!

A new week and a new month just started. Curious which were the most significant AWS news from the previous seven days? I got you covered with this post.

Last Week’s Launches
Here are the launches that got my attention last week:

Amazon File Cache – A high performance cache on AWS that accelerates and simplifies demanding cloud bursting and hybrid workflows by giving access to files using a fast and familiar POSIX interface, no matter if the original files live on premises on any file system that can be accessed through NFS v3 or on S3.

Amazon Data Lifecycle Manager – You can now automatically archive Amazon EBS snapshots to save up to 75 percent on storage costs for those EBS snapshots that you intend to retain for more than 90 days and rarely access.

AWS App Runner – You can now build and run web applications and APIs from source code using the new Node.js 16 managed runtime.

AWS Copilot – The CLI for containerized apps adds IAM permission boundaries, support for FIFO SNS/SQS for the Copilot worker-service pattern, and using Amazon CloudFront for low-latency content delivery and fast TLS-termination for public load-balanced web services.

Bottlerocket – The Linux-based operating system purpose-built to run container workloads is now supported by Amazon Inspector. Amazon Inspector can now recommend an update of Bottlerocket if it finds a vulnerability.

Amazon SageMaker Canvas – Now supports mathematical functions and operators for richer data exploration and to understand the relationships between variables in your data.

AWS Compute Optimizer – Now provides cost and performance optimization recommendations for 37 new EC2 instance types, including bare metal instances (m6g.metal) and compute optimized instances (c7g.2xlarge, hpc6a.48xlarge), and new memory metrics for Windows instances.

AWS Budgets – Use a simplified 1-click workflow for common budgeting scenarios with step-by-step tutorials on how to use each template.

Amazon Connect – Now provides an updated flow designer UI that makes it easier and faster to build personalized and automated end-customer experiences, as well as a queue dashboard to view and compare real-time queue performance through time series graphs.

Amazon WorkSpaces – You can now provision Ubuntu desktops and use virtual desktops for new categories of workloads, such as for your developers, engineers, and data scientists.

Amazon WorkSpaces Core – A fully managed infrastructure-only solution for third-party Virtual Desktop Infrastructure (VDI) management software that simplifies VDI migration and combines your current VDI software with the security and reliability of AWS. Read more about it in this Desktop and Application Streaming blog post.

For a full list of AWS announcements, be sure to keep an eye on the What’s New at AWS page.

Other AWS News
A few more blog posts you might have missed:

Introducing new language extensions in AWS CloudFormation – In this Cloud Operations & Migrations blog post, we introduce the new language transform that enhances CloudFormation core language with intrinsic functions that simplify handling JSON strings (Fn::ToJsonString), array lengths (Fn::Length), and update and deletion policies.

Building a GraphQL API with Java and AWS Lambda – This blog shows different options for resolving GraphQL queries using serverless technologies on AWS.

For AWS open-source news and updates, here’s the latest newsletter curated by Ricardo to bring you the most recent updates on open-source projects, posts, events, and more.

Upcoming AWS Events
As usual, there are many opportunities to meet:

AWS Summits– Connect, collaborate, and learn about AWS at these free in-person events: Bogotá (October 4), and Singapore (October 6).

AWS Community DaysAWS Community Day events are community-led conferences to share and learn together. Join us in Amersfoort, Netherlands (on October 3, today), Warsaw, Poland (October 14), and Dresden, Germany (October 19).

That’s all from me for this week. Come back next Monday for another Week in Review!

Danilo

Amazon WorkSpaces Introduces Ubuntu Desktops

Post Syndicated from Sébastien Stormacq original https://aws.amazon.com/blogs/aws/amazon-workspaces-introduces-ubuntu-desktops/

At AWS, we love to give our customers choices: the choice of infrastructure to deploy your workloads, to store your most important data, or the operating systems for your virtual desktops.

Many of you choose Amazon Workspaces to provision and distribute virtual desktops securely and at scale to your workforce. Our customers choose Workspaces when choosing a solution to enable secure remote workers or when they want to quickly provision desktop for contractors, just to name two use cases. When using Workspaces, you’ve had the choice between two operating systems: Microsoft Windows or Amazon Linux.

Starting today, you can also provision Ubuntu desktops for your developers, engineers, or data scientists. This allows virtual desktop users to have more choices and to embrace new categories of workloads. It also gives virtual desktop administrators a consistent experience whether you are managing Windows or Linux-based desktops for your workforce. You can now have one process and set of tools to manage the majority of your desktop operating systems.

According to the HackerEarth 2020 Developer Survey, Ubuntu is the most widely used operating system among professional developers (66 percent Ubuntu, 61 percent Windows, and 57 percent macOS). Many developers or DevOps engineers have a battery of scripts, tools, or libraries well tested on their Ubuntu desktops or laptops. Providing Ubuntu desktop on Workspaces gives developers and engineers a familiar and compatible environment allowing them to work from anywhere, with access to a wealth of open-source tools and libraries in cutting-edge fields like data science, AI/ML, cloud, and IoT. All Ubuntu WorkSpaces benefit from Ubuntu Pro, which includes support for expanded security patching for 10 years.

Having Ubuntu on Amazon Workspaces is important for you, but also for us, AWS, and for Canonical, the publisher of Ubuntu.


We’ve brought Ubuntu Desktop to WorkSpaces so developers can streamline the design, coding, pipelines, and deployment of Ubuntu-based workloads, whether instances or containers, all within the AWS environment,” said
Alex Gallagher, VP Cloud for
Canonical. “
Also, Ubuntu virtual desktops on WorkSpaces enable IT organizations to quickly and easily provision high-performance Ubuntu Desktop instances, delivered as a fully managed AWS service. In the face of constant and increasing pressure to support the security and productivity needs of hybrid workers, that’s a win for IT organizations and their end users.

Why a Virtual Desktop for Developers And Engineers?
There are several benefits to providing virtual cloud desktops to your technical workforce.

First, the security: all your files are securely stored on cloud-based volumes within the security perimeter of your AWS account. Application assets such as source code or design documents are not locally stored on end-user machines, and no data is at risk in case of a laptop being lost or stolen.

Second, the ease of provisioning at scale. Providing new desktops, including with the latest generation of hardware, is a matter of minutes. Onboarding new team members or contractors is accelerated, and can even be automated.

Third, the reduction in costs by paying on demand, either monthly or hourly, just for the time the resources are used.

Fourth, end-users may access their desktop from anywhere. They can work with the same desktop from on premises, from home, or when traveling.

And fifth, virtual desktop administrators now have a common administration experience across Windows and two distributions of Linux (Ubuntu and Amazon Linux).

How to Get Started
For IT administrators, provisioning Ubuntu desktops is no different than provisioning Windows or Amazon Linux desktops. You may choose the hardware bundle, with various sizes of CPUs and memory, depending on the end-user needs. Workspaces are bound to an Active Directory. You may use your on-premises AD or a fully managed directory service in the cloud.

For this blog post, I choose to show you the end-user experience instead. As a developer or engineer, once my desktop is provisioned, I receive an email like this one:

Workspaces provisioning emailI select the link and enter my password. Then, I download and install a client from https://clients.amazonworkspaces.com/.

Workspaces create password

For this demo, I am using the Windows Workspaces client. After downloading and installing it, I enter the registration code I received by email.

Workspaces enter code

A few seconds later, I have access to my Ubuntu desktop.

Ubuntu desktop from Windows

Imagine I later travel to a family member’s place, and I have to access my work desktop. I can borrow a web browser and reconnect from the web client. Not surprisingly, I find my desktop in the exact state I left it—even the mouse pointer is in the same place. When closing a session, I am confident that I did not leave any confidential files behind me. All my files, messages, and applications are securely stored within my company AWS account.

Workspaces web client

Things You Need To Know
The service team is actively listening to your feedback and building new capabilities into Workspaces.

For this launch, we chose to use version 22.04 LTS (Jammy Jellyfish). Canonical has optimized the base image for cloud development use cases. We have preinstalled AWS CLI and SDK.

You may select from a selection of Value, Standard, Performance, Power, or Power Pro bundles. These bundles provide you with computer sizes starting at 1 vCPU and 2 GB RAM, up to 8 vCPU and 32 GB RAM.

There are two features of Workspaces that are not present today for the launch of Ubuntu Workspaces. They will be added in the very near future. First, you may connect today using the Windows or web-based Workspaces clients. Linux and macOS clients will be supported as a quick follow-up to this launch. Second, the GPU-based Graphics.g4dn, and GraphicsPro.g4dn bundles will be available in the coming weeks.

Availability and Pricing
Ubuntu Workspaces are available in all AWS Regions where Workspaces is available, except a Region in China: China (Ningxia). Again, we’re working hard to add support for China (Ningxia) as a quick follow-up after launch.

Workspace pricing is either per month, for users that primarily use Workspaces as their main desktop, or per hour for those in your workforce making occasional use of the workspace. Ubuntu Workspace prices start at $23 per month and per desktop or $0.19 per hour. Our pricing page has the details.

Now go build and start your first Ubuntu Workspaces today.

— seb

AWS Week in Review – September 19, 2022

Post Syndicated from Jeff Barr original https://aws.amazon.com/blogs/aws/aws-week-in-review-september-19-2022/

Things are heating up in Seattle, with preparation for AWS re:Invent 2022 well underway. Later this month the entire News Blog team will participate in our now-legendary “speed storming” event. Over the course of three or four days, each of the AWS service teams with a launch in the works for re:Invent will give us an overview and share their PRFAQ (Press Release + FAQ) with us. After the meetings conclude, we’ll divvy up the launches and get to work on our blog posts!

Last Week’s Launches
Here are some of the launches that caught my eye last week:

Amazon Lex Visual Conversation Builder – This new tool makes bot design easier than ever. You get a complete view of the conversation in one place, and you can manage complex conversations that have dynamic paths. To learn more and see the builder in action, read Announcing Visual Conversation Builder for Amazon Lex on the AWS Machine Learning Blog.

AWS Config Conformance Pack Price Reduction – We have reduced the price for evaluation of AWS Config Conformance Packs by up to 58%. These packs contain AWS Config rules and remediation actions that can be deployed as a single entity in account and a region, or across an entire organization. The price reduction took effect September 14, 2022; it lowers the cost per evaluation and decreases the number of evaluations needed to reach each pricing tier.

CDK (Cloud Development Kit) Tree View – The AWS CloudFormation console now includes a Constructs tree view that automatically organizes the resources that were synthesized by AWS CDK constructs. The top level of the tree view includes the named constructs and the second level includes all of the resources generated by the named construct. Read the What’s New to learn more!

AWS Incident Detection and ResponseAWS Enterprise Support customers now have access to proactive monitoring and incident management for selected workloads running on AWS. As part of the onboarding process, AWS experts review workloads for reliability and operational excellence, and work with the customer to identify critical metrics and associated alarms. Incident Management Engineers then monitor the workloads, detect critical incidents, and initiate a call bridge to accelerate recovery. Read the AWS Incident Detection and Response page and the What’s New to learn more.

ECS Cluster Scale-In Speed – Auto-Scaled ECS clusters can now scale-in (reduce capacity) faster than ever before. Previously, each scale-in would reduce the capacity within an Auto Scaling Group (ASG) by 5% at a time. Now, capacity can be reduced by up to 50%. This change makes scaling more responsive to workload changes while still maintaining availability for spiky traffic patterns. Read Faster Scaling-In for Amazon ECS Cluster Auto Scaling and the What’s New to learn more.

AWS Outposts Rack Networking – AWS Outposts racks now support local gateway ingress routing to redirect incoming traffic to an Elastic Network Interface (ENI) attached to an EC2 instance before traffic reaches workloads running on the Outpost; read Deploying Local Gateway Ingress Routing on AWS Outposts to learn more. Outposts racks now also support direct VPC routing to simplify the process of communicating with your on-premises network; read the What’s New to learn more.

Amazon SWF Console Experience Updated – The new console experience for Amazon Simple Workflow Service (SWF) gives you better visibility of your SWF domains along with additional information about your workflow executions and events. You can efficiently manage high-volume workloads and quickly find the detailed information that helps you to operate at peak efficiency. Read the What’s New to learn more.

Dynamic Intermediate Certificate Authorities – According to a post on the AWS Security Blog, public certificates issued through AWS Certificate Manager (ACM) will soon (October 11, 2022) be issued from one of several intermediate certificate authorities managed by Amazon. This change will be transparent to most customers and applications, except those that make use of certificate pinning. In some cases, older browsers will need to be updated in order to properly trust the Amazon Trust Services CAs.

X in Y – We launched existing AWS services and instance types in additional regions:

Other AWS News
AWS Open Source – Check out Installment #127 of the AWS Open Source News and Updates Newsletter to learn about new tools for AWS CloudFormation, AWS Lambda, Terraform / EKS, AWS Step Functions, AWS Identity and Access Management (IAM), and more.

New Case Study – Read this new case study to learn how the Deep Data Research Computing Center at Stanford University is creating tools designed to bridge the gap between biology and computer science in order to help researchers in precision medicine deliver tangible medical solutions.

Application Management – The AWS DevOps Blog showed you how to Implement Long-Running Deployments with AWS CloudFormation Custom Resources Using AWS Step Functions.

Architecture – The AWS Architecture Blog showed you how to Maintain Visibility Over the Use of Cloud Architecture Patterns.

Big Data – The AWS Big Data Blog showed you how to Optimize Amazon EMR Costs for Legacy and Spark Workloads.

Migration – In a two-part series on the AWS Compute Blog, Marcia showed you how to Lift and Shift a Web Application to AWS Serverless (Part 1, Part 2).

Mobile – The AWS Mobile Blog showed you how to Build Your Own Application for Route Optimization and Tracking using AWS Amplify and Amazon Location Service.

Security – The AWS Security Blog listed 10 Reasons to Import a Certificate into AWS Certificate Manager and 154 AWS Services that have achieved HITRUST Certificiation.

Training and Certification – The AWS Training and Certification Blog talked about The Value of Data and Pursuing the AWS Certified Data Analytics – Specialty Certification.

Containers – The AWS Containers Blog encouraged you to Achieve Consistent Application-Level Tagging for Cost Tracking in AWS.

Upcoming AWS Events
Check your calendar and sign up for an AWS event in your locale:

AWS Summits – Come together to connect, collaborate, and learn about AWS. Registration is open for the following in-person AWS Summits: Mexico City (September 21–22), Bogotá (October 4), and Singapore (October 6).

AWS Community DaysAWS Community Day events are community-led conferences to share and learn with one another. In September, the AWS community in the US will run events in Arlington, Virginia (September 30). In Europe, Community Day events will be held in October. Join us in Amersfoort, Netherlands (October 3), Warsaw, Poland (October 14), and Dresden, Germany (October 19).

AWS Fest – This third-party event will feature AWS influencers, community heroes, industry leaders, and AWS customers, all sharing AWS optimization secrets (September 29th), register here.

Stay Informed
I hope that you have enjoyed this look back at some of what took place in AWS-land last week! To better keep up with all of this news, please check out the following resources:

Jeff;

Building Resilient and High Performing Cloud-based Applications in Hawaii

Post Syndicated from Marie Yap original https://aws.amazon.com/blogs/architecture/building-resilient-and-high-performing-cloud-based-applications-in-hawaii/

Hawaii is building a digital economy for a sustainable future. Many local businesses are already embarking on their journey to the cloud to meet their customers’ growing demand for digital services. To access Amazon Web Services (AWS) on the US mainland, customers’ data must traverse through submarine fiber-optic cable networks approximately 2,800 miles across the Pacific Ocean. As a result, organizations have two primary concerns:

  • Resiliency concerns about multiple outage events that could arise from breaks in the submarine cables.
  • Latency concerns for mission-critical applications driven by physical distance.

These problems can be solved by architecting the workloads for reliability, secure connectivity, and high performance.

Designing network connectivity that is reliable, secure, and highly performant

A typical workload in AWS can be broken down into three layers – Network, Infrastructure, and Application. For each layer, we can design for resiliency and latency concerns. Starting at the network layer, there are two recommended options for connecting the on-premises network within the island to AWS.

  • Use of AWS Direct Connect over a physical connection. AWS Direct Connect is a dedicated network connection that connects your on-premises environment to AWS Regions. In this case, the connection is traversing the fiber-optic cable across the Pacific Ocean to the mainland’s meet-me-point facilities. It can be provisioned from 50 Mbps up to 100 Gbps. This provides you with a presence in an AWS Direct Connect location, a third-party colocation facility, or an Internet Service Provider (ISP) that provides last-mile connectivity to AWS. In addition, the Direct Connect location establishes dedicated connectivity to Amazon Virtual Private Clouds (VPC). This improves application performance and addresses latency concerns by connecting directly to AWS and bypassing the public internet.
  • Use of AWS VPN over an internet connection. As a secondary option to Direct Connect, AWS Site-to-Site VPN provide connectivity into AWS over the public internet using VPN encryption technologies. The Site-to-Site VPN connects on-premises sites to AWS resources in an Amazon VPC. As a result, you can securely connect your on-premises network to AWS using an internet connection.

We recommend choosing the us-west-2 AWS Region in Oregon to build high performant connectivity closest to Hawaii. The us-west-2 Region generally provides more AWS services at a lower cost versus us-west-1. In addition, there are various options for AWS Direct Connect Locations in the US West Region. Many of these locations support up to 100 Gbps and support MACsec, which is an IEEE standard for security encryption in wired Ethernet LANs. Typically, customers will use multiple 10-Gbps connections for higher throughput and redundancy.

Subsea Cable Hawaii Cable Landing Station Mainland Cable Landing Station Nearest Direct Connect Location
Southern Cross Cable Network (SCCN)
Kahe Point (Oahu) Morro Bay, CA CoreSite, Equinix
Southern Cross Cable Network (SCCN) Kahe Point (Oahu) Hillsboro, OR Equnix, EdgeConnex, Pittock Block, CoreSite, T5, TierPoint
Hawaiki Kapolei (Oahu) Hillsboro, OR Equnix, EdgeConnex, Pittock Block, CoreSite, T5, TierPoint
Asia-America Gateway (AAG) Keawaula (Oahu) San Luis Obispo, CA CoreSite, Equinix
Japan-US Cable Network (JUS) Makaha (Oahu) Morro Bay, CA CoreSite, Equinix
SEA-US Makaha (Oahu) Hermosa Beach, CA CoreSite, Equinix, T5

Table 1. Subsea fiber-optic cables connecting Hawaii to the US mainland

(Source: Submarine Cable Map from TeleGeography)

To build resilient connectivity, six cables connect Hawaii to the mainland US: Hawaiki, SEA-US, Asia-America Gateway (AAG), Japan-US (JUS), and two Southern Cross (SCCN) cables. In addition, these cables connect to various locations on the US West Coast. If you require high resiliency, we recommend a minimum of two physically redundant Direct Connect connections into AWS. In addition, we recommend designing four Direct Connect connections that span two Direct Connect locations for maximum resiliency. If you build your architecture following these recommendations, AWS offers this published service level agreement (SLA).

Figure 1. Redundant direct connection from Hawaii to the US mainland

Figure 1. Redundant direct connection from Hawaii to the US mainland

Most customers select an ISP to get them connectivity across the Pacific Ocean to an AWS Direct location. The Direct Connect locations are third-party colocation providers who act as meet-me points for AWS customers and the AWS Regions.  For example, our local AWS Partner DRFortress connects multiple ISPs in a data center in Hawaii to the AWS US West Region. We recommend having at least two ISPs for resilient applications, each providing connectivity across a separate subsea cable from Hawaii to the mainland. If one cable should fail for any reason, connectivity to AWS would still be available. The red links in figure 2 are the ISP-provided connectivity that spans the Pacific Ocean. This is a minimum starting point for business-critical applications and should be designed with additional Direct Connect links for greater resiliency.

Architecting for high performance and resiliency

Moving from the network to the infrastructure and application layer, organizations have the option in building their application all in the cloud or in combination with an on-premises environment. An example of an application built all in the cloud is the LumiSight platform in AWS built by local AWS Partner, DataHouse. LumiSight has helped dozens of organizations quickly and securely reopen safely during the pandemic.

Other customers need a hybrid cloud architecture solution. These organizations require that their data processing and locally hosted applications analysis is close to other components within the island’s data center. With this proximity, they can deliver near real-time responses to their end users. AWS Outposts Family extends the capabilities of an AWS Region to the island. This enables local businesses to build and run low latency applications on-premises on an AWS fully managed infrastructure. You can now deploy Compute, Storage, Containers, Data Analytics clusters, Relational, and Cache databases in high performance, redundant and secure infrastructure maintained by AWS. Outposts can be shipped to Hawaii, connecting to the us-west-1 or us-west-2 Regions.

Another option for improving application performance is providing an efficient virtual desktop to access their applications anywhere. Amazon WorkSpaces provides a secure, managed cloud-based virtual desktop experience. Many workers who bring their own device (BYOD) or work remotely use Workspaces to access their corporate applications securely. Workspaces use streaming protocols that provide a secure and responsive desktop experience to end users located in remote Regions, like Hawaii. Workspaces can quickly provide a virtual desktop without managing the infrastructure, OS versions, and patches. You can test your connection to Workspaces from Hawaii, or anywhere else in the world, at the Connection Health Check page.

Architecting for resiliency in the infrastructure and application stack is vital for Business Continuity and Disaster Recovery (BCDR) plans. Organizations in Hawaii who are already using VMware can take advantage of creating a recovery site using VMware Cloud on AWS as their solution for disaster recovery. The VMware Cloud on AWS is a fully managed VMware software-defined Data Center (SDDC) running on AWS, which provides access to native AWS services. Organizations can pair their on-premises vCenter and virtual machines to the fully managed vCenter and virtual machines residing in the cloud. The active Site Recovery Manager provides the automation of failing over and failing back applications between on-premises to the cloud DR site and vice versa. Additionally, organizations can define their SDDC in the us-west-2 Region using AWS Direct Connect to minimize the latency of replicating the data from and to the data centers in the islands.

Conclusion

Organizations in Hawaii can build resilient and high performant cloud-based workloads with the help of AWS services in each layer of their workloads. Starting with the network layer, you can establish reliable and lower latency connectivity through redundant AWS Direct Connect connections. Next, for low latency, hybrid applications, we extend infrastructure capabilities locally through AWS Outposts. We also improve the user experience in accessing cloud-based applications by providing Amazon WorkSpaces as the virtual desktop. Finally, we build resilient infrastructure and applications using a familiar solution called VMware Cloud on AWS.

To start learning the fundamentals and building on AWS, visit the Getting Started Resource Center.

Field Notes: Restricting Amazon WorkSpaces Users to Run Amazon Athena Queries

Post Syndicated from Somdeb Bhattacharjee original https://aws.amazon.com/blogs/architecture/field-notes-restricting-amazon-workspaces-users-to-run-amazon-athena-queries/

One of the use cases we hear from customers is that they want to provide very limited access to Amazon Workspaces users (for example contractors, consultants) in an AWS account. At the same time they want to allow them to query Amazon Simple Storage Service (Amazon S3) data in another account using Amazon Athena over a JDBC connection.

For example, marketing companies might provide private access to the first party data to media agencies through this mechanism.

The restrictions they want to put in place are:

  • For security reasons these Amazon WorkSpaces should not have internet connectivity. So the access to Amazon Athena must be over AWS PrivateLink.
  • Public access to Athena is not allowed using the credentials used for the JDBC connection. This is to prevent the users from leveraging the credentials to query the data from anywhere else.

In this post, we show how to use Amazon Virtual Private Cloud (Amazon VPC) endpoints for Athena, along with AWS Identity and Access Management (AWS IAM) policies. This provides private access to query the Amazon S3 data while preventing users from querying the data from outside their Amazon WorkSpaces or using the Athena public endpoint.

Let’s review the steps to achieve this:

  • Initial setup of two AWS accounts (AccountA and AccountB)
  • Set up Amazon S3 bucket with sample data in AccountA
  • Set up an IAM user with Amazon S3 and Athena access in AccountA
  • Create an Amazon VPC endpoint for Athena in AccountA
  • Set up Amazon WorkSpaces for a user in AccountB
  • Install a SQL client tool (we will use DbVisualizer Free) and Athena JDBC driver in Amazon WorkSpaces in AccountB
  • Use DbVisualizer to the query the Amazon S3 data in AccountA using the Athena public endpoint
  • Update IAM policy for user in AccountA to restrict private only access

 Prerequisites

To follow the steps in this post, you need two AWS Accounts. The Amazon VPC and subnet requirements are specified in the detailed steps.

Note: The AWS CloudFormation template used in this blog post is for US-EAST-1 (N. Virginia) Region so ensure the Region setting for both the accounts are set to US-EAST-1 (N. Virginia).

Walkthrough

The two AWS accounts are:

AccountA – Contains the Amazon S3 bucket where the data is stored. For AccountA you can create a new Amazon VPC or use the default Amazon VPC.

AccountB – Amazon WorkSpaces account. Use the following AWS CloudFormation template for AccountB:

  • The AWS CloudFormation template will create a new Amazon VPC in AccountB with CIDR 10.10.0.0/16 and set up one public subnet and two private subnets.
  • It will also create a NAT Gateway in the public subnet and create both public and private route tables.
  • Since we will be launching Amazon WorkSpaces in these private subnets and not all Availability Zones (AZ) are supported by Amazon WorkSpaces, it is important to choose the right AZ when creating them.

Review the documentation to learn which AWS Regions/AZ are supported.

We have provided two parameters in the AWS CloudFormation template:

  • AZName1
  • AZName2

Step 1

Before launching the CloudFormation stack:

  • Log in to AccountB
  • Search for AWS Resource Access Manager
  • On the right-hand side, you will notice the AZ ID to AZ Name mapping. Note down the AZ Name corresponding to AZ ID use1-az2 and use1-az4
  • Now launch the CloudFormation template and remember to choose the AZ names you noted down earlier
    • https://athena-workspaces-blogpost.s3.amazonaws.com/vpc.yaml
  • Enter the CloudFormation Stack Name as – ‘AthenaWorkspaces’ and leave everything default.
  • Once the CloudFormation stack creation is complete, create a peering connection from AccountB to AccountA.
  • Update the associated route tables for the private subnets with the new peering connection.

For information on how to create a VPC peering connection, refer to AWS documentation on VPC Peering.

AccountB VPC Route Table:

AccountB VPC Route Table:

AccountA VPC Route Table:

AccountA VPC Route Table

Step 2

  • Create a new Amazon S3 bucket in AccountA with a bucket name that starts with ‘athena-’.
  • Next, you can download a sample file and upload it to the Amazon S3 bucket you just created.
  • Use the following statements to create AWS Glue database. Use an external table for the data in the Amazon S3 bucket so that you can query it from Athena.
  • Go to Athena console and define a new database:

CREATE DATABASE IF NOT EXISTS sampledb

Once the database is created, create a new table in sampledb (by selecting sampledb from the “Database” drop down menu). Replace the <<your bucket name>> with the bucket you just created:

CREATE EXTERNAL TABLE IF NOT EXISTS sampledb.amazon_reviews_tsv(
  marketplace string, 
  customer_id string, 
  review_id string, 
  product_id string, 
  product_parent string, 
  product_title string,
  product_category string,
  star_rating int, 
  helpful_votes int, 
  total_votes int, 
  vine string, 
  verified_purchase string, 
  review_headline string, 
  review_body string, 
  review_date string)
ROW FORMAT DELIMITED
  FIELDS TERMINATED BY '\t'
  ESCAPED BY '\\'
  LINES TERMINATED BY '\n'
LOCATION
  's3://<<your bucket name>>/'
TBLPROPERTIES ("skip.header.line.count"="1")


Step 3

  • In AccountA, create a new IAM user with programmatic access.
  • Save the access key and secret access key.
  • For the same user add an Inline Policy which allows the following actions:

IAM summary

{
    "Version": "2012-10-17",
    "Statement": [
        {
            "Sid": "AllowAthenaReadActions",
            "Effect": "Allow",
            "Action": [
                "athena:ListWorkGroups",
                "athena:ListDataCatalogs",
                "athena:GetExecutionEngine",
                "athena:GetExecutionEngines",
                "athena:GetNamespace",
                "athena:GetCatalogs",
                "athena:GetNamespaces",
                "athena:GetTables",
                "athena:GetTable"
            ],
            "Resource": "*"
        },
        {
            "Sid": "AllowAthenaWorkgroupActions",
            "Effect": "Allow",
            "Action": [
                "athena:StartQueryExecution",
                "athena:GetQueryResults",
                "athena:DeleteNamedQuery",
                "athena:GetNamedQuery",
                "athena:ListQueryExecutions",
                "athena:StopQueryExecution",
                "athena:GetQueryResultsStream",
                "athena:ListNamedQueries",
                "athena:CreateNamedQuery",
                "athena:GetQueryExecution",
                "athena:BatchGetNamedQuery",
                "athena:BatchGetQueryExecution",
                "athena:GetWorkGroup"
            ],
            "Resource": "*"
        },
        {
            "Sid": "AllowGlueActionsViaVPCE",
            "Effect": "Allow",
            "Action": [
                "glue:GetDatabase",
                "glue:GetDatabases",
                "glue:CreateDatabase",
                "glue:GetTables",
                "glue:GetTable"
            ],
            "Resource": "*"
        },
        {
            "Sid": "AllowGlueActionsViaAthena",
            "Effect": "Allow",
            "Action": [
                "glue:GetDatabase",
                "glue:GetDatabases",
                "glue:CreateDatabase",
                "glue:GetTables",
                "glue:GetTable"
            ],
            "Resource": "*"
        },
        {
            "Sid": "AllowS3ActionsViaAthena",
            "Effect": "Allow",
            "Action": [
                "s3:GetBucketLocation",
                "s3:GetObject",
                "s3:ListBucket",
                "s3:ListBucketMultipartUploads",
                "s3:ListMultipartUploadParts",
                "s3:AbortMultipartUpload",
                "s3:CreateBucket",
                "s3:PutObject"
            ],
            "Resource": [
                "arn:aws:s3:::athena-*"
            ]
        }
    ]
}


Step 4

  • In this step, we create an Interface VPC endpoint (AWS PrivateLink) for Athena in AccountA. When you use an interface VPC endpoint, communication between your Amazon VPC and Athena is conducted entirely within the AWS network.
  • Each VPC endpoint is represented by one or more Elastic Network Interfaces (ENIs) with private IP addresses in your VPC subnets.
  • To create an Interface VPC endpoint follow the instructions and select Athena in the AWS Services list. Do not select the checkbox for Enable Private DNS Name.
  • Ensure the security group that is attached to the Amazon VPC endpoint is open to inbound traffic on port 443 and 444 for source AccountB VPC CIDR 10.10.0.0/16. Port 444 is used by Athena to stream query results.
  • Once you create the VPC endpoint, you will get a DNS endpoint name which is in the following format. We are going to use this in JDBC connection from the SQL client.

      VPC_Endpoint_ID.athena.Region.vpce.amazonaws.com

Step 5

  • In this step we set up Amazon WorkSpaces in AccountB.
  • Each Amazon WorkSpace is associated with the specific Amazon VPC and AWS Directory Service construct that you used to create it. All Directory Service constructs (Simple AD, AD Connector, and Microsoft AD) require two subnets to operate, each in different Availability Zones. This is why we created 2 private subnets at the beginning.
  • For this blog post I have used Simple AD as the directory service for the Amazon WorkSpaces.
  • By default, IAM users don’t have permissions for Amazon WorkSpaces resources and operations.
  • To allow IAM users to manage Amazon WorkSpaces resources, you must create an IAM policy that explicitly grants them permissions
  • Then attach the policy to the IAM users or groups that require those permissions.
  • To start, go to the Amazon WorkSpaces console and select Advanced Setup.
    • Set up a new directory using the SimpleAD option.
    • Use the “small” directory size and choose the Amazon VPC and private subnets you created in Step 1 for AccountB.
    • Once you create the directory, register the directory with Amazon WorkSpaces by selecting “Register” from the “Action” menu.
    • Select private subnets you created in Step 1 for AccountB.

Directory info

  • Next, launch Amazon WorkSpaces by following the Launch WorkSpaces button.
  • Select the directory you created and create a new user.
  • For the bundle, choose Standard with Windows 10 (PCoIP).
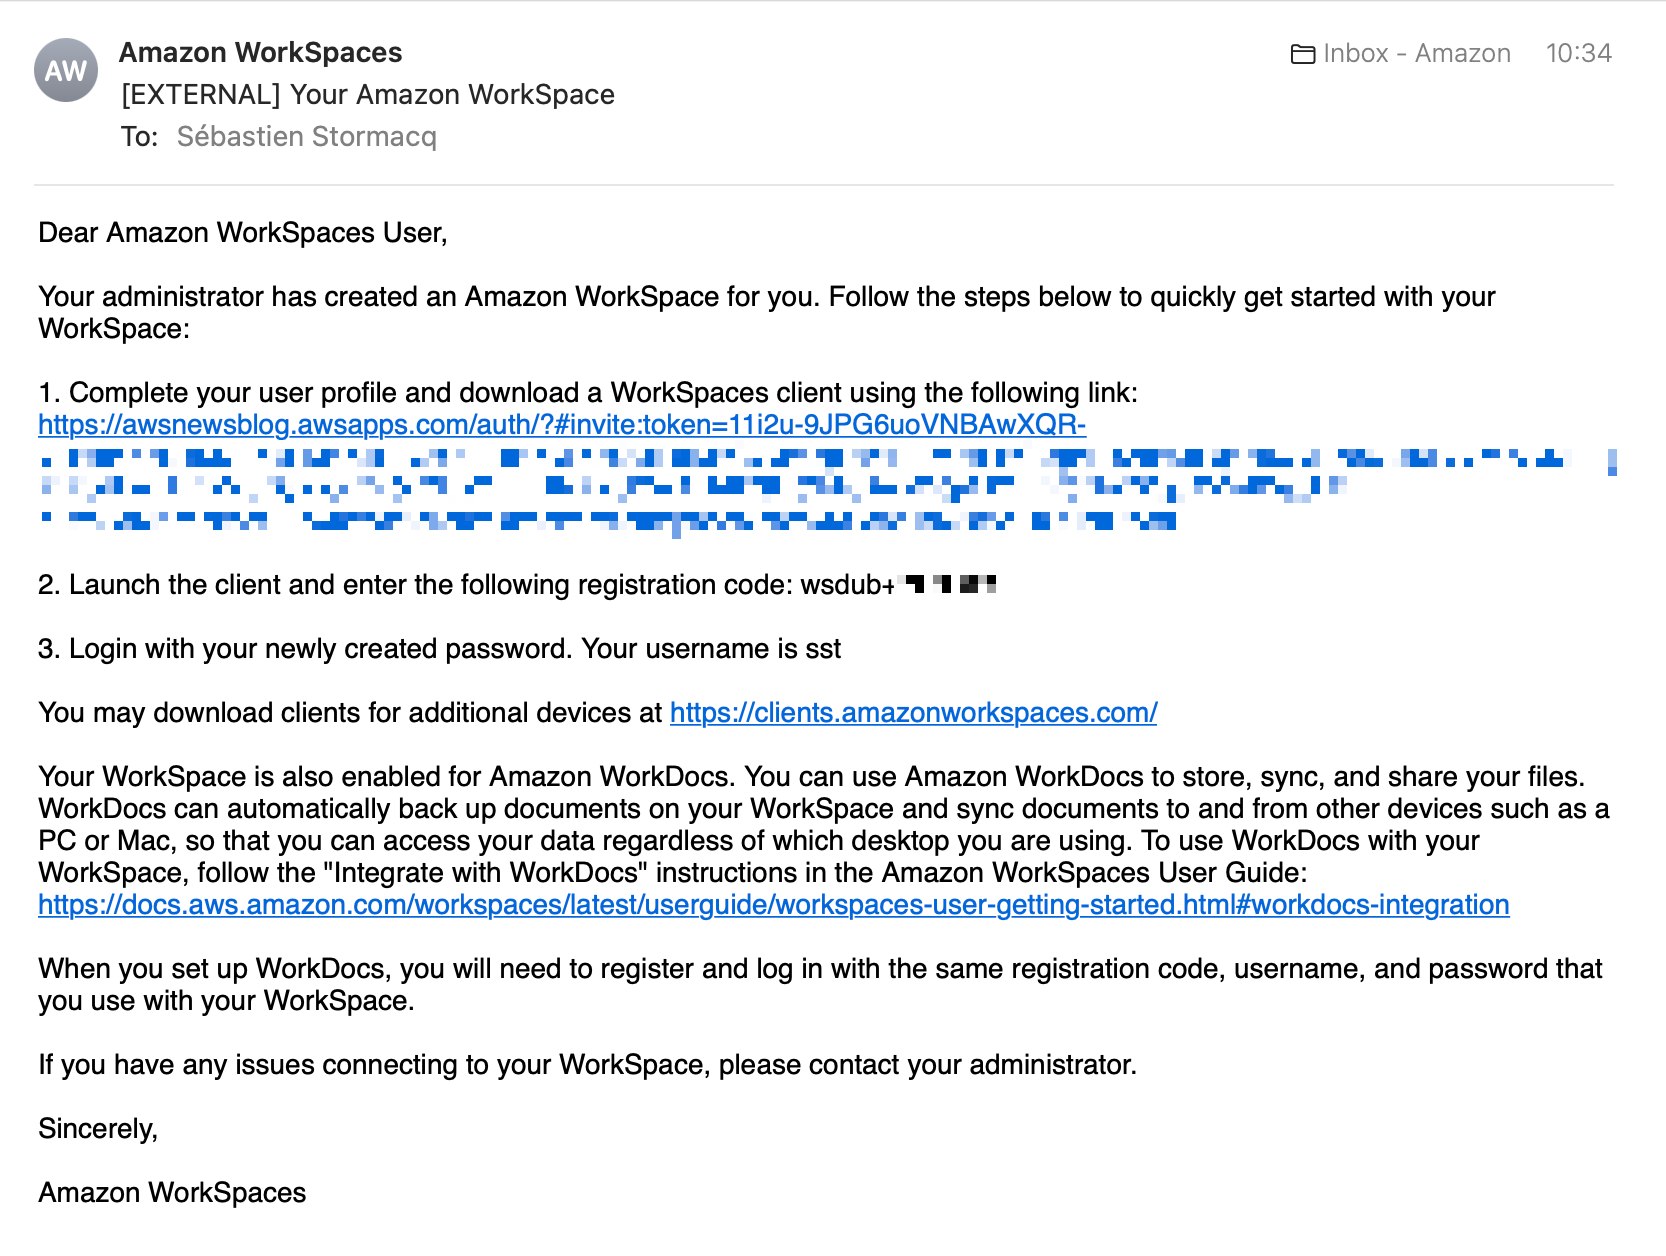
  • After the Amazon WorkSpaces is created, you can log in to the Amazon WorkSpaces using a client software. You can download it from https://clients.amazonworkspaces.com/
  • Login to your Amazon WorkSpace, install a SQL Client of your choice. At this point your Amazon WorkSpace still has Internet access via the NAT Gateway
  • I have used DbVisualizer (the free version) as the SQL client. Once you have that installed, install the JDBC driver for Athena following the instructions
  • Now you can set up the JDBC connections to Athena using the access key and secret key you set up for an IAM user in AccountA.

Step 6

To test out both the Athena public endpoint and the Athena VPC endpoint, create two connections using the same credentials.

For the Athena public endpoint, you need to use athena.us-east-1.amazonaws.com service endpoint. (jdbc:awsathena://athena.us-east-1.amazonaws.com:443;S3OutputLocation=s3://<athena-bucket-name>/)

Athena public

For the VPC Endpoint Connection, use the VPC Endpoint you created in Step 4 (jdbc:awsathena://vpce-<>.athena.us-east-1.vpce.amazonaws.com:443;S3OutputLocation=s3://<athena-bucket-name>/)

Database connection Athena

Now run a simple query to select records from the amazon_reviews_tsv table using both the connections.

SELECT * FROM sampledb.amazon_reviews_tsv limit 10

You should be able to see results using both the connections. Since the private subnets are still connected to the internet via the NAT Gateway, you can query using the Athena public endpoint.

Run the AWS Command Line Interface (AWS CLI) command using the credentials used for the JDBC connection from your workstation. You should be able to access the Amazon S3 bucket objects and the Athena query run list using the following commands.

aws s3 ls s3://athena-workspaces-blogpost

aws athena list-query-executions

Step 7

  • Now we lock down the access as described in the beginning of this blog post by taking the following actions:
  • Update the route table for the private subnets by removing the route for the internet so access to the Athena public endpoint is restricted from the Amazon WorkSpaces. The only access will be allowed through the Athena VPC Endpoint.
  • Add conditional checks to the IAM user access policy that will restrict access to the Amazon S3 buckets and Athena only if:
    • The request came in through the VPC endpoint. For this we use the “aws:SourceVpce” check and provide the VPC Endpoint ID value.
    • The request for Amazon S3 data is through Athena. For this we use the condition “aws:CalledVia” and provide a value of “athena.amazonaws.com”.
  • In the IAM access policy below replace <<your vpce id>> with your VPC endpoint id and update the previous inline policy which was added to the IAM user in Step 3.
{
    "Version": "2012-10-17",
    "Statement": [
        {
            "Sid": "AllowAthenaReadActions",
            "Effect": "Allow",
            "Action": [
                "athena:ListWorkGroups",
                "athena:ListDataCatalogs",
                "athena:GetExecutionEngine",
                "athena:GetExecutionEngines",
                "athena:GetNamespace",
                "athena:GetCatalogs",
                "athena:GetNamespaces",
                "athena:GetTables",
                "athena:GetTable"
            ],
            "Resource": "*",
            "Condition":{
               "StringEquals":{
                  "aws:SourceVpce":[
                     "<<your vpce id>>"
                  ]
               }
            }
        },
        {
            "Sid": "AllowAthenaWorkgroupActions",
            "Effect": "Allow",
            "Action": [
                "athena:StartQueryExecution",
                "athena:GetQueryResults",
                "athena:DeleteNamedQuery",
                "athena:GetNamedQuery",
                "athena:ListQueryExecutions",
                "athena:StopQueryExecution",
                "athena:GetQueryResultsStream",
                "athena:ListNamedQueries",
                "athena:CreateNamedQuery",
                "athena:GetQueryExecution",
                "athena:BatchGetNamedQuery",
                "athena:BatchGetQueryExecution",
                "athena:GetWorkGroup"
            ],
            "Resource": "*",
            "Condition":{
               "StringEquals":{
                  "aws:SourceVpce":[
                     "<<your vpce id>>"
                  ]
               }
            }
        },
        {
            "Sid": "AllowGlueActionsViaVPCE",
            "Effect": "Allow",
            "Action": [
                "glue:GetDatabase",
                "glue:GetDatabases",
                "glue:CreateDatabase",
                "glue:GetTables",
                "glue:GetTable"
            ],
            "Resource": "*",
            "Condition":{
               "StringEquals":{
                  "aws:SourceVpce":[
                     "<<your vpce id>>"
                  ]
               }
            }
        },
        {
            "Sid": "AllowGlueActionsViaAthena",
            "Effect": "Allow",
            "Action": [
                "glue:GetDatabase",
                "glue:GetDatabases",
                "glue:CreateDatabase",
                "glue:GetTables",
                "glue:GetTable"
            ],
            "Resource": "*",
            "Condition":{
               "ForAnyValue:StringEquals":{
                  "aws:CalledVia":[
                     "athena.amazonaws.com"
                  ]
               }
            }
        },
        {
            "Sid": "AllowS3ActionsViaAthena",
            "Effect": "Allow",
            "Action": [
                "s3:GetBucketLocation",
                "s3:GetObject",
                "s3:ListBucket",
                "s3:ListBucketMultipartUploads",
                "s3:ListMultipartUploadParts",
                "s3:AbortMultipartUpload",
                "s3:CreateBucket",
                "s3:PutObject"
            ],
            "Resource": [
                "arn:aws:s3:::athena-*"
            ],
            "Condition":{
               "ForAnyValue:StringEquals":{
                  "aws:CalledVia":[
                     "athena.amazonaws.com"
                  ]
               }
            }
        }
    ]
}

Once you applied the changes, try to reconnect using both the Athena VPC endpoint as well Athena public endpoint connections. The Athena VPC endpoint connection should work but the public endpoint connection will time out. Also try the same Amazon S3 and Athena AWS CLI commands. You should get access denied for both the operations.

Clean Up

To avoid incurring costs, remember to delete the resources that you created.

For AWS AccountA:

  • Delete the S3 buckets
  • Delete the database you created in AWS Glue
  • Delete the Amazon VPC endpoint you created for Amazon Athena

For AccountB:

  • Delete the Amazon Workspace you created along with the Simple AD directory. You can review more information on how to delete your Workspaces.

Conclusion

In this blog post, I showed how to leverage Amazon VPC endpoints and IAM policies to privately connect to Amazon Athena from Amazon Workspaces that don’t have internet connectivity.

Give this solution a try and share your feedback in the comments!

Field Notes provides hands-on technical guidance from AWS Solutions Architects, consultants, and technical account managers, based on their experiences in the field solving real-world business problems for customers.

How to secure your Amazon WorkSpaces for external users

Post Syndicated from Olivia Carline original https://aws.amazon.com/blogs/security/how-to-secure-your-amazon-workspaces-for-external-users/

In response to the current shift towards a remote workforce, companies are providing greater access to corporate applications from a range of different devices. Amazon WorkSpaces is a desktop-as-a-service solution that can be used to quickly deploy cloud-based desktops to your external users, including employees, third-party vendors, and consultants. Amazon WorkSpaces desktops are accessible from anywhere with an internet connection. In this blog post, I review some key security controls that you can use to architect your Amazon WorkSpaces environment to provide external users access to your corporate applications and data in a way that satisfies your unique security and compliance objectives.

Amazon Workspaces provides a virtual desktop infrastructure that removes the need for upfront infrastructure expenditure. Instead, you can pay for Windows or Linux desktop environments as you need them. These environments can be provisioned in a few minutes, and enable you to scale up to thousands of desktops that can be accessed from wherever your users are located.

As part of the shared responsibility model, security is a shared responsibility between Amazon Web Services (AWS) and you. AWS is responsible for protecting the infrastructure that runs the AWS services while you are responsible for securing your data in AWS through appropriate permissions and WorkSpace management as outlined in the Best Practices for Deploying Amazon WorkSpaces whitepaper. Amazon WorkSpaces has been independently assessed to meet the requirements of a wide range of compliance programs, including IRAP, SOC, PCI DSS, FedRAMP, and HIPAA.

Prerequisites

Define user groups

A user group is a collection of people who all have the same security rights and permissions. Leveraging user groups helps you to identify the types of access and your requirements for user authentication. How you define your user groups should reflect how you classify your data and the access controls associated with the classifications. A common approach is to begin by separating your internal (employees) and external (vendors and consultants) users. Classifying your users into different groups helps you to define your security controls. For example, the security and configuration of your external users’ devices will be different from the configuration for your internal users’ devices. The identification process also helps to ensure that you’re following the principle of least privilege by limiting access to certain applications or resources. These user groups are the building blocks for designing the rest of your security controls, including the directories, access controls, and security groups.

In this blog post, I walk you through the security configurations for the following example external user groups. How you configure security for your user groups will depend on your own security requirements.

Example user groups

Internal users: Employees who need access to company resources from any location. In addition to having access to the internet and the internal network from any supported device, internal users have administrator access on their virtual desktops so they can install applications.

External users: Third-party vendors and consultants who need access to specific websites that are inside the corporate network. They have fewer permissions and tighter guardrails on their virtual desktops and can only access resources through trusted devices. External users should have access to only pre-installed applications and not be able to install additional applications onto their WorkSpaces.

At this stage, it’s okay to separate your user groups broadly based on the preceding requirements. Later, you can configure fine-grained access controls for individual users.

Configure your directories

Amazon WorkSpaces uses directories to manage information and configuration of WorkSpaces and users. Each WorkSpace that you provision exists within a directory. There are a couple of different options for configuring the directory. Amazon Workspaces can create and manage a directory for you so that users are entered into that directory when you provision a WorkSpace. As an alternative, you can integrate WorkSpaces with an existing, on-premises Microsoft Active Directory (AD) so your users can use the credentials they already know to access applications.

Within Amazon WorkSpaces, directories play a large part in how access to workspaces is configured. Directories within Amazon WorkSpaces are used to store and manage information for your WorkSpaces and users. Based on the preceding two example user groups, let’s split your users’ WorkSpaces across two directories. That will help you to establish different access control settings for the two groups.

To define the two directories, you must set up the directories within AWS Directory Service. As previously mentioned, there are various approaches to handling user management that depend on your existing user directories and requirements. For this example, you can configure two simple Active Directories—one for internal users and one for external users. Handling the external users in a separate directory allows you to ensure your user groups are configured with least privilege. With this approach, external users can still be given access to objects inside the internal directory through a trust if required but can be configured with stricter access controls than users inside the internal directory.

A comprehensive guide to setting up your directories is available in the Amazon WorkSpaces administration guide and outlines the steps to configure a directory using AWS Managed Microsoft AD, Simple AD, or AD Connector.

Configure security settings

After you define what privileges and access controls you want in place for your external users and configure the directories you need, it’s time to establish the security controls for your WorkSpaces. This blog will focus on the external users’ security configurations from the prerequisites. Use the following steps to implement the security requirements:

  1. Establish security groups
  2. Disable local administrator rights
  3. Configure IP access control groups
  4. Define trusted devices
  5. Configure monitoring of WorkSpaces

Establish security groups

With your two AD directories configured, you can start implementing the security controls for your external users. Your Amazon WorkSpaces are configured within a logically isolated network known as Amazon Virtual Private Cloud (VPC). A key concept within Amazon VPC is security groups, which act as virtual firewalls to control inbound and outbound traffic to the virtual desktops. A properly configured security group can limit access to resources in your network or to the internet at the individual WorkSpace level or at the directory level.

To ensure that your external users can access only the network resources you want them to, you can define security groups with restrictive network access settings. One approach is to configure security groups so that your external users only have HTTP and HTTPS access to specific internal websites by trusted IP addresses. To define more fine-grained access control for individual users, you can define another restrictive security group and attach it to an individual user’s WorkSpace. This way, you can use a single directory to handle many different users with different network security requirements and ensure that third-party users only have access to authorized data and systems. In addition to security groups, you can use your preferred host-based firewall on a given WorkSpace to limit network access to resources within the VPC.

To establish and configure security groups

  1. In the Amazon WorkSpaces menu, select Directories from the left menu. Choose the directory you created for your external users. Select Actions and then Update Details as shown in the following figure.
     
    Figure 1: Updating details of your directory

    Figure 1: Updating details of your directory

  2. In the Update Directory Details screen that appears, select the down arrow next to Security Group to expand the section. Select Create New next to the dropdown menu to configure a new security group.
     
    Figure 2: Adding a security group to your directory

    Figure 2: Adding a security group to your directory

  3. In the next window, select Create security group.
  4. Enter a descriptive name for the Security group name and a description for the security group in Description. For example, the description could be external-workspaces-users-sg.
  5. Change the VPC using the dropdown menu to the VPC hosting the WorkSpaces.
  6. In the Inbound rules section, leave the rules as default. The default configuration will block everything except for sessions that have been already established from the Workspace.
  7. In the Outbound rules section, configure the following settings:
    1. Select Delete the existing outbound rule.
    2. Select Add rule.
    3. Set Type to HTTP.
    4. Leave Protocol as TCP and Port range as 80.
    5. Change Source to Custom and enter the appropriate range for your Destination based on where your internal resources are located.
    6. Select Add rule again.
    7. Set Type to HTTPS.
    8. Leave Protocol as TCP and Port range as 443.
    9. Change Source to Custom and enter the appropriate range for your Destination based on where your internal resources are located.
    Figure 3: Configuring your security groups

    Figure 3: Configuring your security groups

  8. Select Create security group.
  9. Return to the WorkSpaces directory tab and select Refresh to see the newly created security group.
  10. Select Update and Exit.

Disable local administrator rights

One of the recommendations for external users is to disable the local administrator setting on their WorkSpaces and provide them with access to only specific, preinstalled applications. This guardrail helps to ensure that external users have limited permissions and to reduce the risk that they might access or share sensitive information. If local administrator isn’t disabled, users can install applications and modify settings on their WorkSpaces. You can disable local administrator access from within the external users’ directory. Changes to the directory are applied to all new WorkSpaces that you create and can be applied to existing WorkSpaces by rebuilding them after the making changes.

Note: If your internal users don’t need local administrator access, it’s a best practice to follow the principle of least privilege and disable it for them as well.

To disable local administrator rights for external users

  1. In the Amazon WorkSpaces menu, select Directories from the left menu. Choose the directory you configured for your external users.
  2. Select Actions and then Update Details.
  3. In Update Directory Details, select Local Administrator Setting and choose the Enable radio button.
  4. Select Update and Exit as shown in the following figure.
     
    Figure 4: Disabling your local administrator setting

    Figure 4: Disabling your local administrator setting

Define IP access control

So far the security groups you have defined previously allow external users access to company resources only from inside the corporate network. You can enhance this security configuration by leveraging IP access control groups to limit traffic and only allow certain IPs to access the WorkSpaces. An IP access control group acts as a virtual firewall and filters access to WorkSpaces by controlling the source classless inter-domain routing (CIDR) ranges that users can access their WorkSpaces from. Each IP access control group consists of a set of rules that specify a permitted IP address or range of addresses that Amazon WorkSpaces can be accessed from. Using this feature, you can configure rules that permit access to your WorkSpaces only if they are coming from your company’s VPN. To achieve this control, you must define rules that specify the ranges of IP addresses for your trusted networks within IP access control groups associated to the external users directory.

Note: Currently only IPV4 addresses are permitted.

To define IP access control

  1. Inside the Amazon WorkSpaces page, select IP Access Controls on the left panel. Select Create IP Group and enter a Group Name and Description in the window that appears.
  2. Select Create as shown in the following figure.
     
    Figure 5: Creating an IP group

    Figure 5: Creating an IP group

  3. Select the box next to the IP group you just created to open the new rules form.
  4. Select Add Rule.
  5. Enter the individual IP addresses or CIDR IP ranges that you want to allow WorkSpaces to have access from in Source. If you want to restrict access to your VPN make sure to add the public IPs of the VPN. Enter a description in Description.
  6. Select Save as shown in the following figure.
     
    Figure 6: Adding rules to your IP group

    Figure 6: Adding rules to your IP group

Configure trusted devices

Regulating the devices that can connect to your workspaces can help reduce the risk of unauthorized access to your network and applications. By default, all Amazon WorkSpaces users can access their virtual desktop from any supported device that has internet connectivity. However, it’s a good practice to configure additional guardrails to limit external users to only accessing their WorkSpaces through trusted devices, otherwise known as managed devices (currently this feature only applies to Amazon WorkSpaces Windows and macOS clients). With this feature enabled, only devices that have been authenticated through a certificate-based approach will have access to WorkSpaces. If the WorkSpaces client application cannot verify that a device is trusted, it blocks attempts to log in or connect from the device.

Note: If you haven’t already configured certificates, you will need to follow the steps in the Amazon WorkSpaces Administration Guide that walkthrough the requirements of the certificates as well as the process to generate one.

To configure trusted devices

  1. In the Amazon WorkSpaces menu, select Directories in the left menu. After selecting the directory that has been configured for your external users, select Actions and then Update Details.
  2. In Update Directory Details, select Access Control Options. Select Allow next to Windows and MacOS to allow only trusted Windows and macOS devices to access WorkSpaces.
  3. Select Import to import your root certificate.
  4. Next to Other Platforms select Block so that only Windows and MacOS devices will have access.
  5. Select Update and Exit.
     
    Figure 7: Establishing trusted devices

    Figure 7: Establishing trusted devices

  6. Test your settings by trying to access one of your WorkSpaces from a trusted device and from a non-trusted device.

Use Amazon CloudWatch to monitor your WorkSpaces

Once the guardrails for your external users have been set up, it’s important to monitor your environment for suspicious behavior and potential threats. Monitoring your infrastructure should be a fundamental aspect in your security plan. Amazon WorkSpaces is natively integrated with Amazon CloudWatch, which you can use to gather and analyze metrics to gain visibility into individual WorkSpaces and at a directory level. Alongside metrics, Amazon CloudWatch Events can also be used to provide visibility into your Amazon WorkSpaces fleet so you can view, filter, and respond to logins to your WorkSpaces. This approach lets you create a thorough monitoring pipeline that enhances your security. It lets you filter and automatically respond to suspicious activity in real time. A comprehensive example of this approach is outlined in this blog post that covers the steps involved to set up a CloudWatch based monitoring system for your WorkSpaces.

Conclusion

While you’ve used Amazon WorkSpaces features to help provide secure access for your external users, it’s also important to implement the principle of least privilege across all WorkSpaces users. You can use the design considerations and procedures in this blog post to help secure your WorkSpaces for all users, internal and external. You can learn more about best practices for securing your Amazon WorkSpaces by reading the Best Practices for Deploying Amazon WorkSpaces whitepaper to understand other features and capabilities that are available.

If you have feedback about this post, submit comments in the Comments section below. If you have questions about this post, start a new thread on the Amazon WorkSpaces forum or contact AWS Support.

Want more AWS Security how-to content, news, and feature announcements? Follow us on Twitter.

Author

Olivia Carline

Olivia is an Associate Solutions Architect working in the public sector team. In her role she enjoys helping customers up-skill and build their cloud knowledge with a particular focus on cloud security. In her free time, you can find her exploring local hiking tracks and trying out new recipes.