Post Syndicated from Matt Granger original https://www.youtube.com/watch?v=e5z-msarE50
Seven stable kernels for Thursday
Free vs Paid Content Filtering in UniFi: What You REALLY Get
Post Syndicated from Crosstalk Solutions original https://www.youtube.com/watch?v=I8BD5IsRmXo
Improvements to the Code Club Projects website
Post Syndicated from Divya Mahadevan original https://www.raspberrypi.org/blog/improvements-to-the-code-club-projects-website/
Getting creative with technology is now easier than ever on the Code Club Projects website. If you’ve visited Code Club Projects recently, you may have noticed that the site has changed over the last few months. In the spring, we launched an initiative to make it easier to find a project. I’m excited to share some of the changes we’ve made based on feedback from young people and mentors.

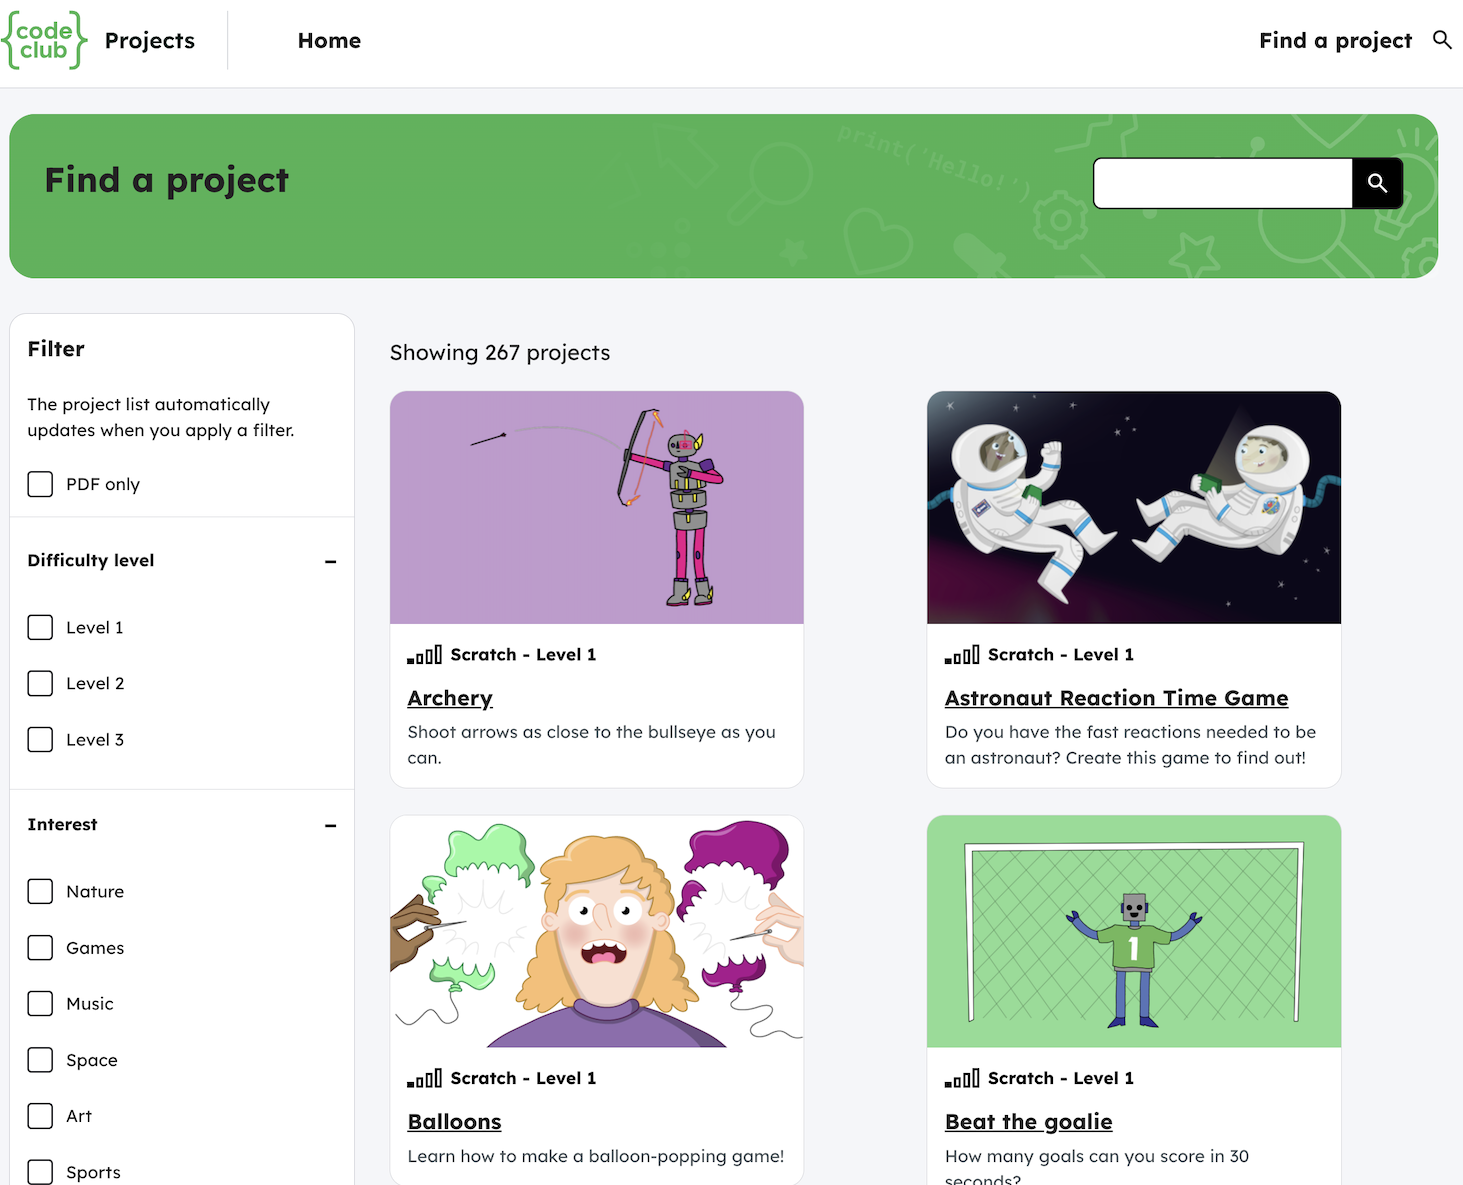
Finding projects based on difficulty
Being able to filter projects by skill level (beginner, intermediate, advanced) has been the feature most requested by mentors. A survey we ran in the spring confirmed that young people find levels helpful when trying to find a project on their own. While our project paths have always had levels, our expert educators have now reviewed every single project on the site and categorised them as a Level 1, Level 2, or Level 3 project. These difficulty levels are easily available as filters on the side of the search page.
“[The Code Club] resources are extremely helpful, particularly for mentors with limited experience; step-by-step guidance is very useful and effective.” – Code Club mentor, Tunisia
Finding projects based on interest
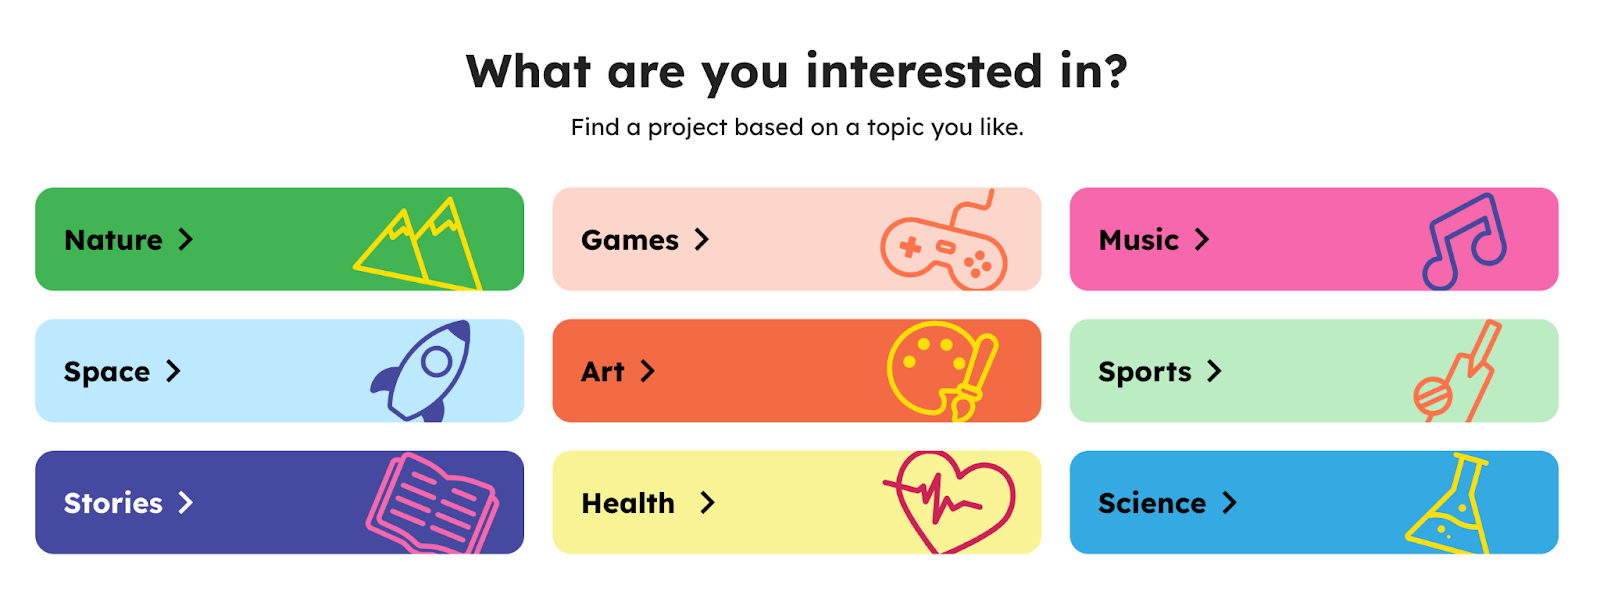
For young people and mentors who aren’t sure where to get started with coding, an easy question to ask is “What do you like to do”? With over 200+ projects on the site, there is a wide variety of projects that span a number of young people’s passions, such as games, art, or nature. In fact, in the same spring survey, young people largely preferred finding projects by interest over technology (e.g., Scratch, Python).
That’s why we’ve created a brand-new set of pages dedicated to helping young people find projects by interest. We believe making it easy to find a project by an existing interest will help young people get excited about coding.
“[Attending Code Club] … combined with watching peers make cool things seems to be a great encouragement to go build rather than just consume.” – Code club mentor, Japan
Code Clubs projects are designed to appeal to creators’ interests, including creating their own games.
Finding projects based on technology
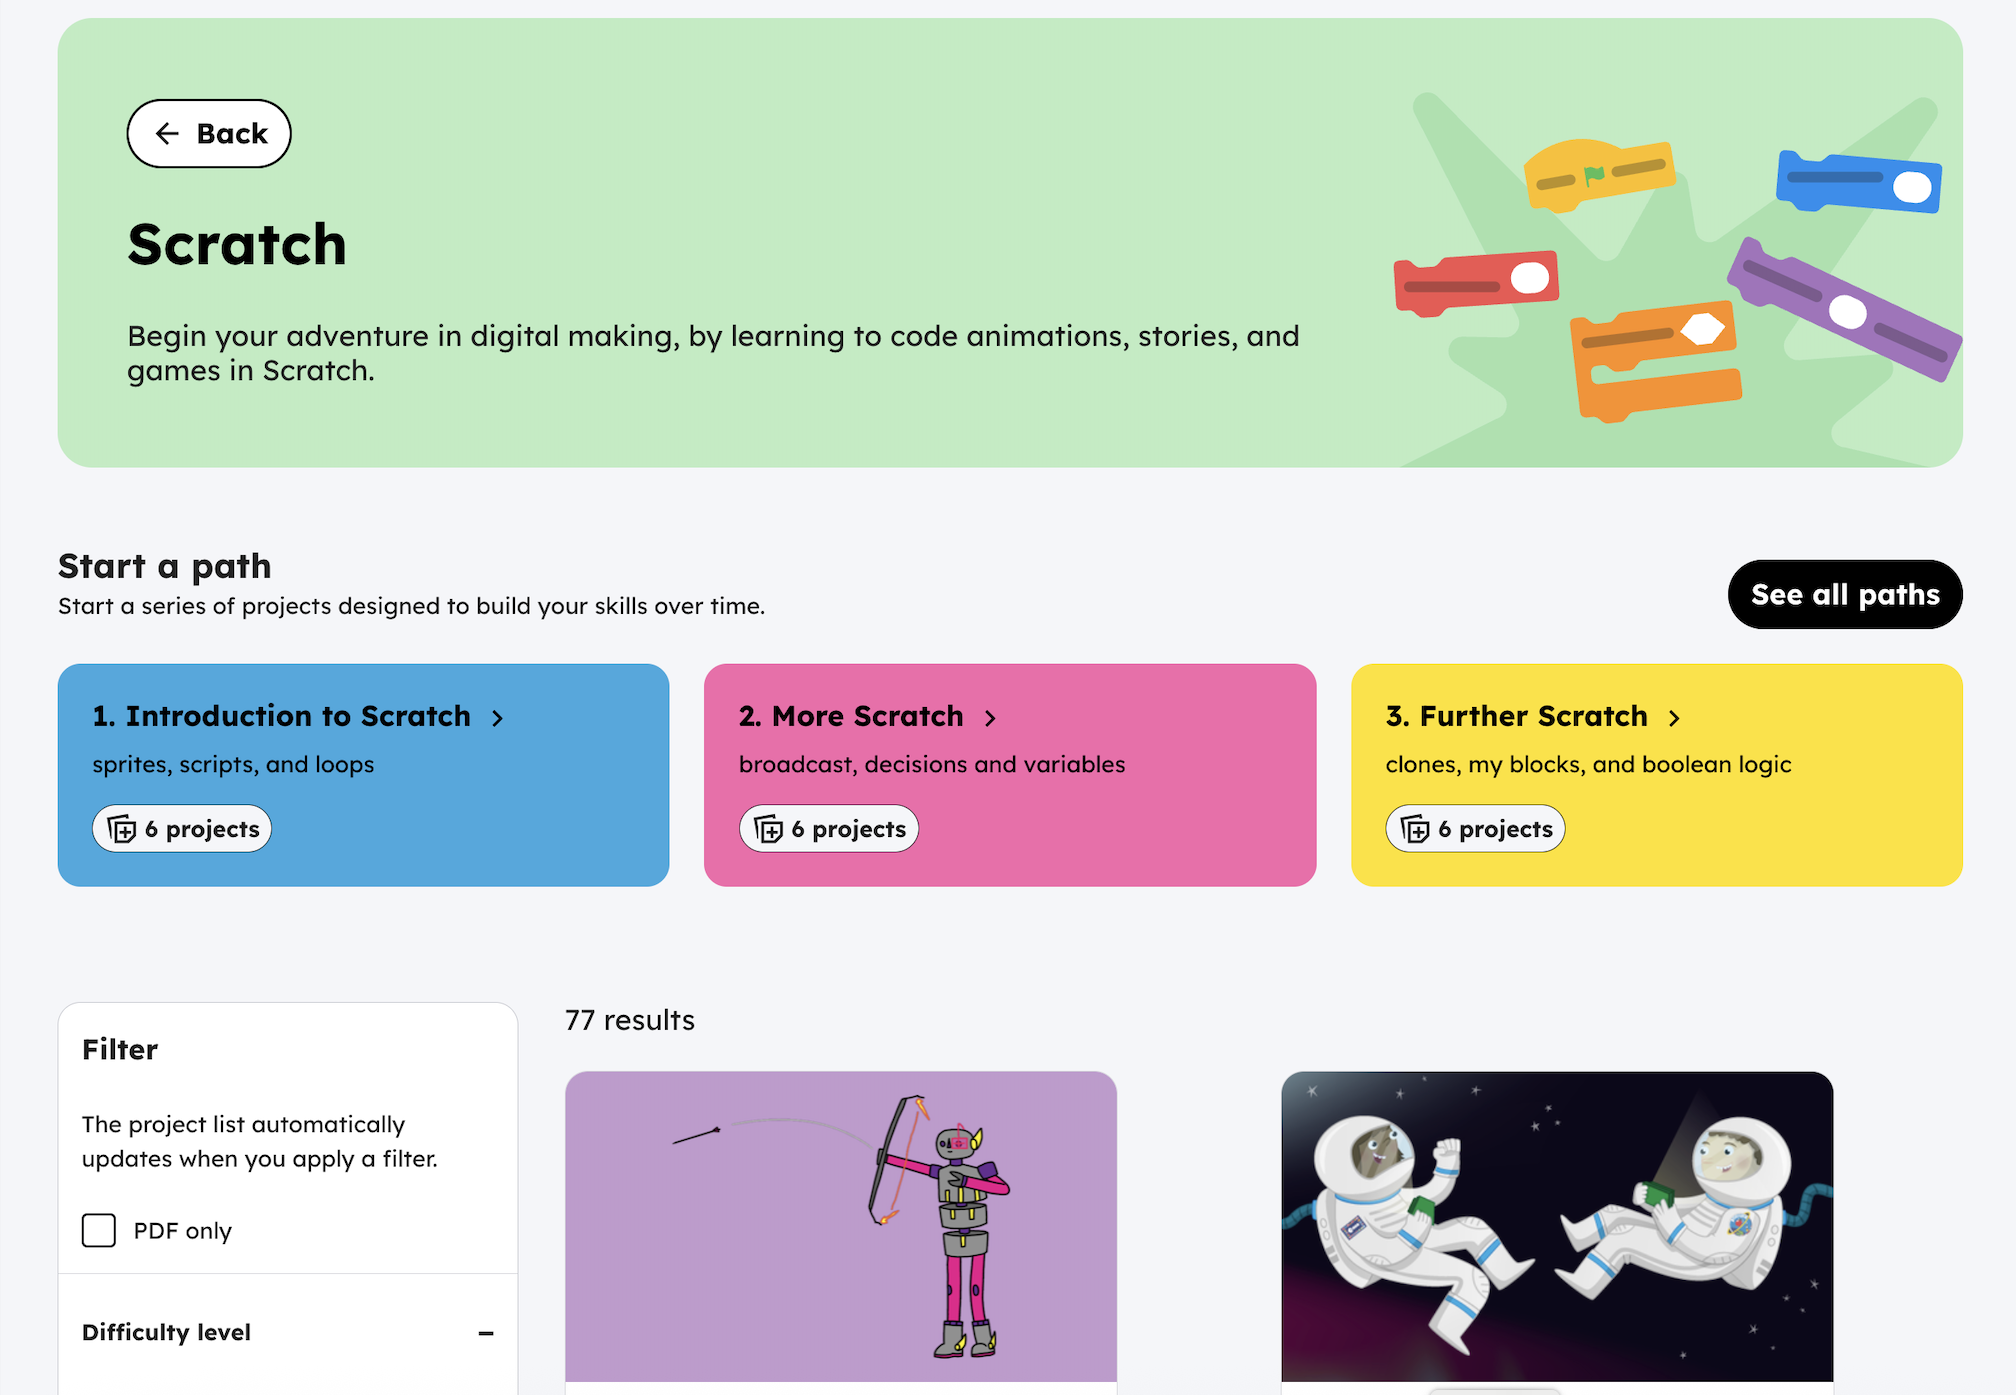
Through the Clubs annual survey, we know that some young people enjoy following our project pathways and others enjoy finding an individual project to work on during club time. We also know that some of our top search terms are “Scratch” and “Python”, which allow users to see all Scratch projects that are available on the site. We’ve redesigned our technology pages so it’s easy to see paths and projects per technology in the same place.
“I think [Raspberry Pi Foundation projects are] really easy to understand and encourage young people to learn more and more.” – Code Club leader, Brazil
What’s next?
We’ve heard from mentors that our projects are too long to print out. We’re working to improve that, starting with brand-new short PDFs for the Intro to Scratch path projects. Each PDF is no more than six pages, double-sided.
Are there other projects you’d like to see PDF versions of? Let us know.
We’re currently working on an idea tentatively titled “project challenges”. If you’re interested in helping us develop the idea, please get in touch.
If you have not started a club yet but are interested in supporting the young people in your community to explore coding, you can find out more on the Code Club website. The team will support you every step of the way with resources, training, and a collaborative community.
The post Improvements to the Code Club Projects website appeared first on Raspberry Pi Foundation.
A deeper look at AI crawlers: breaking down traffic by purpose and industry
Post Syndicated from David Belson original https://blog.cloudflare.com/ai-crawler-traffic-by-purpose-and-industry/
Search platforms historically crawled web sites with the implicit promise that, as the sites showed up in the results for relevant searches, they would send traffic on to those sites — in turn leading to ad revenue for the publisher. This model worked fairly well for several decades, with a whole industry emerging around optimizing content for optimal placement in search results. It led to higher click-through rates, more eyeballs for publishers, and, ideally, more ad revenue. However, the emergence of AI platforms over the last several years, and the incorporation of AI “overviews” into classic search platforms, has turned the model on its head. When users turn to these AI platforms with queries that used to go to search engines, they often won’t click through to the original source site once an answer is provided — and that assumes that a link to the source is provided at all! No clickthrough, no eyeballs, and no ad revenue.
To provide a perspective on the scope of this problem, Radar launched crawl/refer ratios on July 1, based on traffic seen across our whole customer base. These ratios effectively compare the number of crawling requests for HTML pages from the crawler associated with a given platform, to the number of HTML page requests referred by that platform (measuring human traffic). This data complements insights into AI bot & crawler traffic trends that were launched during Birthday Week 2024.
Today, we’re adding two new capabilities to the AI Insights page on Cloudflare Radar to give you more insight into this activity: industry-focused AI bot traffic data, and a new breakdown of AI bot traffic by its purpose.
Since the launch of LLMs into the public consciousness in November 2022, much of the crawling traffic seen from user agents associated with AI platforms has been to collect content used to train AI models. This crawling activity can be aggressive at times, often ignoring directives found in robots.txt files. In addition to offering chatbots trained on this scraped content, AI platforms have emerged that aim to replace classic search tools, while those tools have themselves integrated AI-powered summaries as part of their results. These platforms may crawl your site to build indexes for their search engines. And some AI platforms may crawl your site in response to a specific user prompt, such as looking for flights to plan a vacation.
The new Crawl purpose selector within the AI bot & crawler traffic card allows users to select between Training, Search, User action, and Undeclared. (The latter is for crawlers where no information is available from the operator or other industry sources regarding its purpose.)

Once a purpose is selected, the HTTP traffic by bot graph updates to show traffic trends over the selected time period for the top five most active AI bots that crawl for the selected purpose.
As an example, selecting User action results in a graph like the one below, which covers the first 28 days of July 2025. OpenAI’s ChatGPT-User bot is responsible for nearly three quarters of the request traffic from this cohort of crawlers. A daily cycle is clearly evident, suggesting regular usage of ChatGPT in that fashion, with such usage gradually increasing throughout the month. If ChatGPT-User is removed from the chart, Perplexity-User also exhibits a similar pattern.

A new Crawl purpose graph has also been added to Radar, breaking out traffic trends by purpose. Training traffic, responsible for nearly 80% of the crawling from AI bots, is somewhat erratic in nature, with no clear cyclical pattern. However, such patterns are visible for the User action and Undeclared purposes, as shown in the graph below, although they account for less than 5% of AI bot traffic across this time period.

Within the Data Explorer view for the AI Bots & Crawlers dataset, you can now break the data down by Crawl purpose to explore how the activity has changed over time. Alternatively, you can break the data down by User agent, and filter by Crawl purpose, to explore traffic trends across a larger set of bots (beyond the top five). Comparisons with previous time periods are available here as well.

You can use your own traffic data to see how aggressively crawlers scrape your content. You can also see how frequently they refer traffic back to you. However, you may also want to understand how those measurements compare with your peer group — are you being crawled more or less frequently, and are the platforms referring more or less traffic back to your sites? The new industry set filtering available for the HTTP traffic by bot graph and the Crawl-to-refer ratio table in the AI Insights section of Radar can provide you with this perspective.
Within the AI bot & crawler traffic card on the AI Insights page, select an industry set from the drop-down list at the top right of the card. The graphs in the HTTP traffic by bot and Crawl purpose sections of the card update to reflect the selection, as does the Crawl-to-refer ratio table. (Selecting a Crawl purpose from that drop-down menu will further update the HTTP traffic by bot graph.)

It is interesting to observe how the crawling patterns change between industry sets, along with the mix of most active bots and crawl-to-refer ratios. For example, across the first week of August, with no vertical or crawl purpose selected, ClaudeBot and GPTBot account for nearly half of the observed crawling activity, with Meta-ExternalAgent the only one among the top five exhibiting activity that remotely resembles a pattern. For the default view, Anthropic had the highest crawl-to-refer ratio at nearly 50,000:1, followed by OpenAI at 887:1 and Perplexity at 118:1.

However, when the News and Publications industry set is selected, we see a much tighter distribution of traffic among the top five, ranging from ChatGPT-User’s 14.9% share of traffic to GPTBot’s 17.4% share. ChatGPT-User’s presence among the top five suggests that a significant number of users may have been asking questions about current events during that period of time. For these News and Publications sites, the crawl-to-refer ratios are lower than the default view, with Anthropic at 2,500:1, OpenAI at 152:1, and Perplexity at 32.7:1.

As a third example, we find that the mix again shifts for the Computer and Electronics industry set. While GPTBot was again the most active AI bot, Amazonbot moved up into second place; together these bots now account for over 40% of crawling traffic. ClaudeBot and Meta-ExternalAgent both had a 13.9% share of the crawling traffic, with ByteDance’s ByteSpider rounding out the top five. The crawl-to-refer ratios for this vertical are again lower than for the unfiltered view, with Anthropic down to 8,800:1, OpenAI at 401.7:1, and Perplexity at 88:1.

Within Data Explorer, you can now break down AI Bots & Crawler data by Vertical and Industry. (A vertical is a pre-defined collection of multiple related industries), and you can also filter Crawl purpose and User agent breakdowns by Vertical and Industry. For example, the graphs below illustrate the traffic trends by AI crawler for sites within the Cryptocurrency industry under the Finance vertical, as well as the traffic trends by crawl purpose for that industry/vertical pair. While these sites see crawling traffic from quite a few bots, three-quarters of that traffic during the first week of August was concentrated in just four bots, and 80% of it was for gathering information to train models.


Because the Industry sets shown on the main AI Insights page are manually curated collections of related industries, clicking through to the Data Explorer view from one of those graphs will pre-populate the Industry selector with the relevant entries. For example, clicking through from the HTTP traffic by bot graph for the Gaming & Gambling industry set results in the following Data Explorer view, which lists the component industries.

AI crawler traffic has become a fact of life for content owners, and the complexity of dealing with it has increased as bots are used for purposes beyond LLM training. Work is underway to allow website publishers to declare how automated systems should use their content. However, it will take some time for these proposed solutions to be standardized, and for both publishers and crawlers to adopt them. As the space evolves, we’ll continue to expand Cloudflare Radar’s insights into AI crawler activity.
If you share our AI-related graphs on social media, be sure to tag us: @CloudflareRadar (X), noc.social/@cloudflareradar (Mastodon), and radar.cloudflare.com (Bluesky). If you have questions or comments, you can reach out to us on social media, or contact us via email.
The age of agents: cryptographically recognizing agent traffic
Post Syndicated from Jin-Hee Lee original https://blog.cloudflare.com/signed-agents/
On the surface, the goal of handling bot traffic is clear: keep malicious bots away, while letting through the helpful ones. Some bots are evidently malicious — such as mass price scrapers or those testing stolen credit cards. Others are helpful, like the bots that index your website. Cloudflare has segmented this second category of helpful bot traffic through our verified bots program, vetting and validating bots that are transparent about who they are and what they do.
Today, the rise of agents has transformed how we interact with the Internet, often blurring the distinctions between benign and malicious bot actors. Bots are no longer directed only by the bot owners, but also by individual end users to act on their behalf. These bots directed by end users are often working in ways that website owners want to allow, such as planning a trip, ordering food, or making a purchase.
Our customers have asked us for easier, more granular ways to ensure specific bots, crawlers, and agents can reach their websites, while continuing to block bad actors. That’s why we’re excited to introduce signed agents, an extension of our verified bots program that gives a new bot classification in our security rules and in Radar. Cloudflare has long recognized agents — but we’re now endowing them with their own classification to make it even easier for our customers to set the traffic lanes they want for their website.
Cloudflare has continuously expanded our verified bot categorization to include different functions as the market has evolved. For instance, we first announced our grouping of AI crawler traffic as an official bot category in 2023. And in 2024, when OpenAI announced a new AI search prototype and introduced three different bots with distinct purposes, we added three new categories to account for this innovation: AI Search, AI Assistant, and Archiver.
But the bot landscape is constantly evolving. Let’s unpack a common type of verified AI bot — an AI crawler such as GPTBot. Even though the bot performs an array of tasks, the bot’s ultimate purpose is a singular, repetitive task on behalf of the operator of that bot: fetch and index information. Its intelligence is applied to performing that singular job on behalf of that bot owner.
Agents, though, are different. Think about an AI agent tasked by a user to “Book the best deal for a round-trip flight to New York City next month.” These agents sometimes use remote browsing products like Cloudflare’s Browser Rendering and similar products from companies like Browserbase and Anchor Browser. And here is the key distinction: this particular type of bot isn’t operating on behalf of a single company, like OpenAI in the prior example, but rather the end users themselves.
In May, we announced Web Bot Auth, a new method of using cryptography to verify bot and agent traffic. HTTP message signatures allow bots to authenticate themselves and allow customer origins to identify them. This is one of the authentication methods we use today for our verified bots program.
What, exactly, is a signed agent? First, they are agents that are generally directed by an end user instead of a single company or entity. Second, the infrastructure or remote browsing platform the agents use is signing their HTTP requests via Web Both Auth, with Cloudflare validating these message signatures. And last, they comply with our signed agent policy.
The signed agents classification improves on our existing frameworks in a couple of ways:
-
Increased precision and visibility: we’ve updated the Cloudflare bots and agents directory to include signed agents in addition to verified bots. This allows us to verify the cryptographic signatures of a much wider set of automated traffic, and our customers to granularly apply their security preferences more easily. Bot operators can now submit signed agent applications from the Cloudflare dashboard, allowing bot owners to specify to us how they think we should segment their automated traffic.
-
Easier controls from security rules: similar to how they can take action on verified bots as a group, our Enterprise customers will be able to take action on signed agents as a group when configuring their security rules. This new field will be available in the Cloudflare dashboard under security rules soon.
To apply to have an agent added to Cloudflare’s directory of bots and agents, customers should complete the Bot Submission Form in the Cloudflare dashboard. Here, they can specify whether the submission should be considered for the signed agents list or the verified bots list. All signed agents will be recognized by their cryptographic signatures through Web Bot Auth validation.

The Bot Submission Form, available in the Cloudflare dashboard for bot owners to submit both verified bot and signed agent applications.
We want to be clear: our verified bots program isn’t going anywhere. In fact, well-behaved and transparent applications that make use of signed agents can further qualify to be a verified bot, if their specific service adheres to our policy. For instance, Cloudflare Radar’s URL Scanner, which relies on Browser Rendering as a service to scan URLs, is a verified bot. While Browser Rendering itself does not qualify to be a verified bot, URL Scanner does, since the bot owner (in this case, Cloudflare Radar) directs the traffic sent by the bot and always identifies itself with a unique Web Bot Auth signature — distinct from Browser Rendering’s signature.
Since the launch of Web Bot Auth, our own Browser Rendering product has been sending signed Web Bot Auth HTTP headers, and is always given a bot score of 1 for our Bot Management customers. As of today, Browser Rendering will now show up in this new signed agent category.

We’re also excited to announce the first cohort of agents that we’re partnering with and will be classifying as signed agents: ChatGPT agent, Goose from Block, Browserbase, and Anchor Browser. They are perfect examples of this new classification because their remote browsers are used by their end customers, not necessarily the companies themselves. We’re thrilled to partner with these teams to take this critical step for the AI ecosystem:
“When we built Goose as an open source tool, we designed it to run locally with an extensible architecture that lets developers automate complex workflows. As Goose has evolved to interact with external services and third-party sites on users’ behalf, Web Bot Auth enables those sites to trust Goose while preserving what makes it unique. This authentication breakthrough unlocks entirely new possibilities for autonomous agents.” – Douwe Osinga, Staff Software Engineer, Block
“At Browserbase, we provide web browsing capabilities for some of the largest AI applications. We’re excited to partner with Cloudflare to support the adoption of Web Bot Auth, a critical layer of identity for agents. For AI to thrive, agents need reliable, responsible web access.“ – Paul Klein, CEO, Browserbase
“Anchor Browser has partnered with Cloudflare to let developers ship verified browser agents. This way trustworthy bots get reliable access while sites stay protected.” – Idan Raman, CEO, Anchor Browser
We want everyone to be in the know about our bot classifications. Cloudflare began publishing verified bots on our Radar page back in 2022, meaning anyone on the Internet — Cloudflare customer or not — can see all of our verified bots on Radar. We dynamically update the list of bots, but show more than just a list: we announced on Content Independence Day that every verified bot would get its own page in our public-facing directory on Radar, which includes the traffic patterns that we see for each bot.
Our directory has been updated to include both signed agents and verified bots — we share exactly how Cloudflare classifies the bots that it recognizes, plus we surface all of the traffic that Cloudflare observes from these many recognized agents and bots. Through this updated directory, we’re not only giving better visibility to our customers, but also striving to set a higher standard for transparency of bot traffic on the Internet.

Cloudflare Radar’s Bots Directory, which lists verified bots and signed agents. This view is filtered to view only agent entries.

Cloudflare Radar’s signed agent page for ChatGPT agent, which includes its traffic patterns for the last 7 days, from August 21, 2025 to August 27, 2025.
As of today, the Cloudflare bot directory supports both bots and agents in a more clear-cut way, and customers or agent creators can submit agents to be signed and recognized through their account dashboard. In addition, anyone can see our signed agents and their traffic patterns on Radar. Soon, customers will be able to take action on signed agents as a group within their firewall rules, the same way you can take action on our verified bots.
Agents are changing the way that humans interact with the Internet. Websites need to know what tools are interacting with them, and for the builders of those tools to be able to easily scale. Message signatures help achieve both of these goals, but this is only step one. Cloudflare will continue to make it easier for agents and websites to interact (or not!) at scale, in a seamless way.
Make Your Website Conversational for People and Agents with NLWeb and AutoRAG
Post Syndicated from Catarina Pires Mota original https://blog.cloudflare.com/conversational-search-with-nlweb-and-autorag/
Publishers and content creators have historically relied on traditional keyword-based search to help users navigate their website’s content. However, traditional search is built on outdated assumptions: users type in keywords to indicate intent, and the site returns a list of links for the most relevant results. It’s up to the visitor to click around, skim pages, and piece together the answer they’re looking for.
AI has reset expectations and that paradigm is breaking: how we search for information has fundamentally changed.
Users no longer want to search websites the old way. They’re used to interacting with AI systems like Copilot, Claude, and ChatGPT, where they can simply ask a question and get an answer. We’ve moved from search engines to answer engines.
At the same time, websites now have a new class of visitors, AI agents. Agents face the same pain with keyword search: they have to issue keyword queries, click through links, and scrape pages to piece together answers. But they also need more: a structured way to ask questions and get reliable answers across websites. This means that websites need a way to give the agents they trust controlled access, so that information is retrieved accurately.
Website owners need a way to participate in this shift.
If AI has reset expectations, what comes next? To meet both people and agents where they are, websites need more than incremental upgrades to keyword search. They need a model that makes conversational access to content a first-class part of the web itself.
That’s what we want to deliver: combining an open standard (NLWeb) with the infrastructure (AutoRAG) to make it simple for any website to become AI-ready.
NLWeb is an open project developed by Microsoft that defines a standard protocol for natural-language queries on websites. Each NLWeb instance also operates as a Model Context Protocol (MCP) server. Cloudflare is building to this spec and actively working with Microsoft to extend the standard with the goal to let every site function like an AI app, so users and agents alike can query its contents naturally.
AutoRAG, Cloudflare’s managed retrieval engine, can automatically crawl your website, store the content in R2, and embed it into a managed vector database. AutoRAG keeps the index fresh with continuous re-crawling and re-indexing. Model inference and embedding can be served through Workers AI. Each AutoRAG is paired with an AI Gateway that can provide observability and insights into your AI model usage. This gives you a complete, managed pipeline for conversational search without the burden of managing custom infrastructure.
“Together, NLWeb and AutoRAG let publishers go beyond search boxes, making conversational interfaces for websites simple to create and deploy. This integration will enable every website to easily become AI-ready for both people and trusted agents.” – R.V. Guha, creator of NLWeb, CVP and Technical Fellow at Microsoft.
We are optimistic this will open up new monetization models for publishers:
“The challenges publishers have faced are well known, as are the risks of AI accelerating the collapse of already challenged business models. However, with NLWeb and AutoRAG, there is an opportunity to reset the nature of relationships with audiences for the better. More direct engagement on Publisher Owned and Operated (O&O) environments, where audiences value the brand and voice of the Publisher, means new potential for monetization. This would be the reset the entire industry needs.” – Joe Marchese, General & Build Partner at Human Ventures.
By combining NLWeb’s standard with Cloudflare’s AutoRAG infrastructure, we’re making it possible to easily bring conversational search to any website.
Simply select your domain in AutoRAG, and it will crawl and index your site for semantic querying. It then deploys a Cloudflare Worker, which acts as the access layer. This Worker implements the NLWeb standard and UI defined by the NLWeb project and exposes your indexed content to both people and AI agents.
The Worker includes:
-
`/ask` endpoint: The defined standard for how conversational web searches should be served. Powers the conversational UI at the root `/` as well as the embeddable preview at `/snippet.html`. It supports chat history so queries can build on one another within the same session, and includes automatic query decontextualization to improve retrieval quality.
-
`/mcp` endpoint: Implements an MCP server that trusted AI agents can connect to for structured access.
With this setup, your site content is immediately available in two ways for you to experiment: through a conversational UI that you can serve to your visitors, and through a structured MCP interface that lets trusted agents query your site reliably on your terms.
Additionally, if you prefer to deploy and host your own version of the NLWeb project, there’s also the option to use AutoRAG as the retrieval engine powering the NLWeb instance.


From your perspective, making your site conversational is just a single click. Behind the scenes, AutoRAG spins up a full retrieval pipeline to make that possible:
-
Crawling and ingestion: AutoRAG explores your site like a search engine, following `sitemap.xml` and `robots.txt` files to understand what pages are available and allowed for crawling. From there, it follows your sitemap to discover pages within your domain (up to 100k pages). Browser Rendering is used to load each page so that it can capture dynamic, JavaScript content. Crawled pages are downloaded into an R2 bucket in your account before being ingested.
-
Continuous Indexing: Once ingested, the content is parsed and embedded into Vectorize, making it queryable beyond keyword matching through semantic search. AutoRAG automatically re-crawls and re-indexes to keep your knowledge base aligned with your latest content.
-
Access & Observability: A Cloudflare Worker is deployed in your account to serve as the access layer that implements the NLWeb protocol (you can also find the deployable Worker in the Workers templates repository). Workers AI is used to seamlessly power the summarization and decontextualized query capabilities to improve responses. Soon, with the AI Gateway and Secret Store BYO keys, you’ll be able to connect models from any provider and select them directly in the AutoRAG dashboard.
Until now, AutoRAG only supported R2 as a data source. That worked well for structured files, but we needed to make a website itself a first-class data source to be indexed and searchable. Making that possible meant building website crawling into AutoRAG and strengthening the system to handle large, dynamic sources like websites.

Before implementing our web crawler, we needed to improve the reliability of data syncs. Prior users of AutoRAG lacked visibility into when indexing syncs ran and whether they were successful. To fix this, we introduced a Job module to track all syncs, store history, and provide logs. This required two new Durable Objects to be added into AutoRAG’s architecture:
-
JobManager runs a complete sync, and its duties include queuing files, embedding content, and keeping the Vectorize database up to date. To ensure data consistency, only one JobManager can run per RAG at a time, enforced by the RagManager (a Durable Object in our existing architecture), which cancels any running jobs before starting new ones which can be triggered either manually or by a scheduled sync.
-
FileManager solved scalability issues we hit when Workers ran out of memory during parallel processing. Originally, a single Durable Object was responsible for handling multiple files, but with a 128MB memory limit it quickly became a bottleneck. The solution was to break the work apart: JobManager now distributes files across many FileManagers, each responsible for a single file. By processing 20 files in parallel through 20 different FileManagers, we expanded effective memory capacity from 128MB to roughly 2.5GB per batch.
With these improvements, we were ready to build the website parser. By reusing our existing R2-based queuing logic, we added crawling with minimal disruption:
-
A JobManager designated for a website crawl begins by reading the sitemaps associated with the RAG configuration.
-
Instead of listing objects from an R2 bucket, it queues each website link into our existing R2-based queue, using the full URL as the R2 object key.
-
From here, the process is nearly identical to our file-based sync. A FileManager picks up the job and checks if the RAG is configured for website parsing.
-
If it is, the FileManager crawls the link and places the page’s HTML contents into the user’s R2 bucket, again using the URL as the object key.
After these steps, we index the data and serve it at query time. This approach maximized code reuse, and any improvements to our HTML-to-Markdown conversion now benefit both file and website-based RAGs automatically.
Getting your website ready for conversational search through NLWeb and AutoRAG is simple. Here’s how:
-
In the Cloudflare Dashboard, navigate to Compute & AI > AutoRAG.
-
Select Create in AutoRAG, then choose the NLWeb Website quick deploy option.
-
Select the domain from your Cloudflare account that you want indexed.
-
Click Start indexing.
That’s it! You can now try out your NLWeb search experience via the provided link, and test out how it will look on your site by using the embeddable snippet.

We’d love to hear your feedback as you experiment with this new capability and share your thoughts with us at [email protected].
The next step for content creators in working with AI bots: Introducing AI Crawl Control
Post Syndicated from Will Allen original https://blog.cloudflare.com/introducing-ai-crawl-control/
Empowering content creators in the age of AI with smarter crawling controls and direct communication channels
Imagine you run a regional news site. Last month an AI bot scraped 3 years of archives in minutes — with no payment and little to no referral traffic. As a small company, you may struggle to get the AI company’s attention for a licensing deal. Do you block all crawler traffic, or do you let them in and settle for the few referrals they send?
It’s picking between two bad options.
Cloudflare wants to help break that stalemate. On July 1st of this year, we declared Content Independence Day based on a simple premise: creators deserve control of how their content is accessed and used. Today, we’re taking the next step in that journey by releasing AI Crawl Control to general availability — giving content creators and AI crawlers an important new way to communicate.
Today, we’re rebranding our AI Audit tool as AI Crawl Control and moving it from beta to general availability. This reflects the tool’s evolution from simple monitoring to detailed insights and control over how AI systems can access your content.
The market response has been overwhelming: content creators across industries needed real agency, not just visibility. AI Crawl Control delivers that control.

Many content creators have faced a binary choice: either they block all AI crawlers and miss potential licensing opportunities and referral traffic; or allow them through without any compensation. Many content creators had no practical way to say “we’re open for business, but let’s talk terms first.”
Our customers are telling us:
-
We want to license our content, but crawlers don’t know how to reach us.
-
Blanket blocking feels like we’re closing doors on potential revenue and referral traffic.
-
We need a way to communicate our terms before crawling begins.
To address these needs, we are making it easier than ever to send customizable 402 HTTP status codes.
Our private beta launch of Pay Per Crawl put the HTTP 402 (“Payment Required”) response codes to use, working in tandem with Web Bot Auth to enable direct payments between agents and content creators. Today, we’re making customizable 402 response codes available to every paid Cloudflare customer — not just pay per crawl users.
Here’s how it works: in AI Crawl Control, paying Cloudflare customers will be able to select individual bots to block with a configurable message parameter and send 402 payment required responses. Think: “To access this content, email [email protected] or call 1-800-LICENSE” or “Premium content available via API at api.yoursite.com/pricing.”
On an average day, Cloudflare customers are already sending over one billion 402 response codes. This shows a deep desire to move beyond blocking to open communication channels and new monetization models. With the 402 HTTP status code, content creators can tell crawlers exactly how to properly license their content, creating a direct path from crawling to a commercial agreement. We are excited to make this easier than ever in the AI Crawl Control dashboard.
For Paid Plan Users:
-
When you block individual crawlers from the AI Crawl Control dashboard, you can now choose to send 402 Payment Required status codes and customize your message. For example: To access this content, email [email protected] or call 1-800-LICENSE.
The response will look like this:

The message can be configured from Settings in the AI Crawl Control Dashboard:

This is just the beginning. We’re planning to add additional parameters that will let crawlers understand the content’s value, freshness, and licensing terms directly in the 402 response. Imagine crawlers receiving structured data about content quality and update frequency, for example, in addition to contact information.
Meanwhile, pay per crawl continues advancing through beta, giving content creators the infrastructure to automatically monetize crawler access with transparent, usage-based pricing.
What excites us most is the market shift we’re seeing. We’re moving to a world where content creators have clear monetization paths to become active participants in the development of rich AI experiences.
The 402 response is a bridge between two industries that want to work together: content creators whose work fuels AI development, and AI companies who need high-quality data. Cloudflare’s AI Crawl Control creates the infrastructure for these partnerships to flourish.

Evaluating image segmentation models for background removal for Images
Post Syndicated from Deanna Lam original https://blog.cloudflare.com/background-removal/
Last week, we wrote about face cropping for Images, which runs an open-source face detection model in Workers AI to automatically crop images of people at scale.
It wasn’t too long ago when deploying AI workloads was prohibitively complex. Real-time inference previously required specialized (and costly) hardware, and we didn’t always have standard abstractions for deployment. We also didn’t always have Workers AI to enable developers — including ourselves — to ship AI features without this additional overhead.
And whether you’re skeptical or celebratory of AI, you’ve likely seen its explosive progression. New benchmark-breaking computational models are released every week. We now expect a fairly high degree of accuracy — the more important differentiators are how well a model fits within a product’s infrastructure and what developers do with its predictions.
This week, we’re introducing background removal for Images. This feature runs a dichotomous image segmentation model on Workers AI to isolate subjects in an image from their backgrounds. We took a controlled, deliberate approach to testing models for efficiency and accuracy.
Here’s how we evaluated various image segmentation models to develop background removal.
In computer vision, image segmentation is the process of splitting an image into meaningful parts.
Segmentation models produce a mask that assigns each pixel to a specific category. This differs from detection models, which don’t classify every pixel but instead mark regions of interest. A face detection model, such as the one that informs face cropping, draws bounding boxes based on where it thinks there are faces. (If you’re curious, our post on face cropping discusses how we use these bounding boxes to perform crop and zoom operations.)
Salient object detection is a type of segmentation that highlights the parts of an image that most stand out. Most salient detection models create a binary mask that categorizes the most prominent (or salient) pixels as the “foreground” and all other pixels as the “background”. In contrast, a multi-class mask considers the broader context and labels each pixel as one of several possible classes, like “dog” or “chair”. These multi-class masks are the basis of content analysis models, which distinguish which pixels belong to specific objects or types of objects.

In this photograph of my dog, a detection model predicts that a bounding box contains a dog; a segmentation model predicts that some pixels belong to a dog, while all other pixels don’t.
For our use case, we needed a model that could produce a soft saliency mask, which predicts how strongly each pixel belongs to either the foreground (objects of interest) or the background. That is, each pixel is assigned a value on a scale of 0–255, where 0 is completely transparent and 255 is fully opaque. Most background pixels are labeled at (or near) 0; foreground pixels may vary in opacity, depending on its degree of saliency.
In principle, a background removal feature must be able to accurately predict saliency across a broad range of contexts. For example, e-commerce and retail vendors want to display all products on a uniform, white background; in creative and image editing applications, developers want to enable users to create stickers and cutouts from uploaded content, including images of people or avatars.
In our research, we focused primarily on the following four image segmentation models:
-
U2-Net (U Square Net): Trained on the largest saliency dataset (DUST-TR) of 10,553 images, which were then horizontally flipped to reach a total of 21,106 training images.
-
IS-Net (Intermediate Supervision Network): A novel, two-step approach from the same authors of U2-Net; this model produces cleaner boundaries for images with noisy, cluttered backgrounds.
-
BiRefNet (Bilateral Reference Network): Specifically designed to segment complex and high-resolution images with accuracy by checking that the small details match the big picture.
-
SAM (Segment Anything Model): Developed by Meta to allow segmentation by providing prompts and input points.
Different scales of information allow computational models to build a holistic view of an image. Global context considers the overall shape of objects and how areas of pixels relate to the entire image, while local context traces fine details like edges, corners, and textures. If local context focuses on the trees and their leaves, then global context represents the entire forest.
U2-Net extracts information using a multi-scale approach, where it analyzes an image at different zoom levels, then combines its predictions in a single step. The model analyzes global and local context at the same time, so it works well on images with multiple objects of varying sizes.
IS-Net introduces a new, two-step strategy called intermediate supervision. First, the model separates the foreground from the background, identifying potential areas that likely belong to objects of interest — all other pixels are labeled as the background. Second, it refines the boundaries of the highlighted objects to produce a final pixel-level mask.
The initial suppression of the background results in cleaner, more precise edges, as the segmentation focuses only on the highlighted objects of interest and is less likely to mistakenly include background pixels in the final mask. This model especially excels when dealing with complex images with cluttered backgrounds.
Both models output their predictions in a single direction for scale. U2-Net interprets the global and local context in one pass, while Is-Net begins with the global context, then focuses on the local context.
In contrast, BiRefNet refines its predictions over multiple passes, moving in both contextual directions. Like Is-Net, it initially creates a map that roughly highlights the salient object, then traces the finer details. However, BiRefNet moves from global to local context, then from local context back to global. In other words, after refining the edges of the object, it feeds the output back to the large-scale view. This way, the model can check that the small-scale details align with the broader image structure, providing higher accuracy on high-resolution images.
U2-Net, IS-Net, and BiRefNet are exclusively saliency detection models, producing masks that distinguish foreground pixels from background pixels. However, SAM was designed to be more extensible and general; its primary goal is to segment any object based on specified inputs, not only salient objects. This means that the model can also be used to create multi-class masks that label various objects within an image, even if they aren’t the primary focus of an image.
In most saliency datasets, the actual location of the object is known as the ground-truth area. These regions are typically defined by human annotators, who manually trace objects of interest in each image. This provides a reliable reference to evaluate model predictions.

Photograph by Allen Fang
Each model outputs a predicted area (where it thinks the foreground pixels are), which can be compared against the ground-truth area (where the foreground pixels actually are).
Models are evaluated for segmentation accuracy based on common metrics like Intersection over Union, Dice coefficient, and pixel accuracy. Each score takes a slightly different approach to quantify the alignment between the predicted and ground-truth areas (“P” and “G”, respectively, in the formulas below).
Intersection over Union (IoU), also called the Jaccard index, measures how well the predicted area matches the true object. That is, it counts the number of foreground pixels that are shared in both the predicted and ground-truth masks. Mathematically, IoU is written as:

Jaccard formula
The formula divides the intersection (P∩G), or the pixels where the predicted and ground-truth areas overlap, by the union (P∪G), or the total area of pixels that belong to either area, counting the overlapping pixels only once.

IoU produces a score between 0 and 1. A higher value indicates a closer overlap between the predicted and ground-truth areas. A perfect match, although rare, would score 1, while a smaller overlapping area brings the score closer to 0.

The Dice coefficient, also called the Sørensen–Dice index, similarly compares how well the model’s prediction matches reality, but is much more forgiving than the IoU score. It gives more weight to the shared pixels between the predicted and actual foreground, even if the areas differ in size. Mathematically, the Dice coefficient is written as:

Sørensen–Dice formula
The formula divides twice the intersection (P∩G) by the sum of pixels in both predicted and ground-truth areas (P+G), counting any overlapping pixels twice.

Like IoU, the Dice coefficient also produces a value between 0 and 1, indicating a more accurate match as it approaches 1.
Pixel accuracy measures the percentage of pixels that were correctly labeled as either the foreground or the background. Mathematically, pixel accuracy is written as:

Pixel accuracy formula
The formula divides the number of correctly predicted pixels by the total number of pixels in the image.

The total area of correctly predicted pixels is the sum of foreground and background pixels that accurately match the ground-truth areas.
The correctly predicted foreground is the intersection of the predicted and ground-truth areas (P∩G). The inverse of the predicted area (P’, or 1–P) represents the pixels that the model identifies as the background; the inverse of the ground-truth area (G’, or 1–G) represents the actual boundaries of the background. When these two inverted areas overlap (P’∩G’, or (1–P)∩(1–G)), this intersection is the correctly predicted background.
Of the three metrics, IoU is the most conservative measure of segmentation accuracy. Small mistakes, such as including extra background pixels in the predicted foreground, reduce the score noticeably. This metric is most valuable for applications that require precise boundaries, such as autonomous driving systems.
Meanwhile, the Dice coefficient rewards the overlapping pixels more heavily, and subsequently tends to be higher than the IoU score for the same prediction. In model evaluations, this metric is favored over IoU when it’s more important to capture the object than to penalize mistakes. For example, in medical imaging, the risk of missing a true positive substantially outweighs the inconvenience of flagging a false positive.
In the context of background removal, we biased toward the IoU score and Dice coefficient over pixel accuracy. Pixel accuracy can be misleading, especially when processing an image where background pixels comprise the majority of pixels.

For example, consider an image with 900 background pixels and 100 foreground pixels. A model that correctly predicts only 5 foreground pixels — 5% of all foreground pixels — will score deceptively high in pixel accuracy. Intuitively, we’d likely say that this model performed poorly. However, assuming all 900 background pixels were correctly predicted, the model maintains 90.5% pixel accuracy, despite missing the subject almost entirely.
To determine the most suitable model for the Images API, we performed a series of tests using the open-source rembg library, which combines all relevant models in a single interface.
Each model was tasked with outputting a prediction mask to label foreground versus background pixels. We pulled images from two saliency datasets: Humans contains over 7,000 images of people with varying skin tones, clothing, and hairstyles, while DIS5K (version 1.5) spans a vast range of objects and scenes. If a model contained variants that were pre-trained on specific types of segmentation (e.g. clothes, humans), then we repeated the tests for the generalized model and each variant.
Our experiments were executed on a GPU with 23 GB VRAM to mirror realistic hardware constraints, similar to the environment where we already run a face detection model. We also replicated the same tests on a larger GPU instance with 94 GB VRAM; this served as an upper-bound reference point to benchmark potential speed gains if additional compute were available. Cloudflare typically reserves larger GPUs for more compute-intensive AI workloads — we viewed these tests more as an exploration for comparison than as a production scenario.
During our analysis, we started to see key trends emerge:
On the smaller GPU, inference times were generally faster for lightweight models like U2-Net (176 MB) and Is-Net (179 MB). The average speed across both datasets were 307 milliseconds for U2-Net and 351 milliseconds for Is-Net. On the opposite end, BiRefNet (973 MB) had noticeably slower output times, averaging 821 milliseconds across its two generalized variants.
BiRefNet ran 2.4 times faster on the larger GPU, reducing its average inference time to 351 milliseconds — comparable to the other models, despite its larger size. In contrast, the lighter models did not show any notable speed gain with additional compute, suggesting that scaling hardware configurations primarily benefits heavier models. In Appendix 1 (“Inference Time in Milliseconds”), we compare speed across models and GPU instances.

We also observed distinct patterns when comparing model performance across the two saliency datasets. Most notably, all models ran faster on the Humans dataset, where images of people tend to be single-subject and relatively uniform. The DIS5K dataset, in contrast, includes images with higher complexity — that is, images with more objects, cluttered backgrounds, or multiple objects of varying scales.
Slower predictions suggest a relationship between visual complexity and the computation needed to identify the important parts of an image. In other words, datasets with simpler, well-separated objects can be analyzed more quickly, while complex scenes require more computation to generate accurate masks.
Similarly, complexity challenges accuracy as much as it does efficiency. In our tests, all models demonstrated higher segmentation accuracy with the Humans dataset. In Appendix 2 (“Measures of Model Accuracy”), we present our results for segmentation accuracy across both datasets.
Specialized variants scored slightly higher in accuracy compared to their generalized counterparts. But in broad, practical applications, selecting a specialized model for every input isn’t realistic, at least for our initial beta version. We favored general-purpose models that can produce accurate predictions without prior classification. For this reason, we excluded SAM — while powerful in its intended use cases, SAM is designed to work with additional inputs. On unprompted segmentation tasks, it produced lower accuracy scores (and much higher inference times) amongst the models we tested.
All BiRefNet variants showed greater accuracy compared to other models. The generalized variants (-general and -dis) were just as accurate as its more specialized variants like -portrait. The birefnet-general variant, in particular, achieved a high IoU score of 0.87 and Dice coefficient of 0.92, averaged across both datasets.
In contrast, the generalized U2-Net model showed high accuracy on the Humans dataset, reaching an IoU score of 0.89 and a Dice coefficient of 0.94, but received a low IoU score of 0.39 and Dice coefficient of 0.52 on the DIS5K dataset. The isnet-general-use model performed substantially better, obtaining an average IoU score of 0.82 and Dice coefficient of 0.89 across both datasets.
We observed whether models could interpret both the global and local context of an image. In some scenarios, the U2-Net and Is-Net models captured the overall gist of an image, but couldn’t accurately trace fine edges. We designed one test around measuring how well each model could isolate bicycle wheels; for variety, we included images across both interior and exterior backgrounds. Lower scoring models, while correctly labeling the area surrounding the wheel, struggled with the pixels between the thin spokes and produced prediction masks that included these background pixels.

Photograph by Yomex Owo on Unsplash
In other scenarios, the models showed the opposite limitation: they produced masks with clean edges, but failed to identify the focus of the image. We ran another test using a photograph of a gray T-shirt against black gym flooring. Both generalized U2-Net and Is-Net models labeled only the logo as the salient object, creating a mask that omitted the rest of the shirt entirely.
Meanwhile, the BiRefNet model achieved high accuracy across both types of tests. Its architecture passes information bidirectionally, allowing details at the pixel level to be informed by the larger scene (and vice versa). In practice, this means that BiRefNet interprets how fine-grained edges fit into the broader object. For our beta version, we opted to use the BiRefNet model to drive decisions for background removal.

Unlike lower scoring models, the BiRefNet model understood that the entire shirt is the true subject of the image.
The Images API now supports automatic background removal for hosted and remote images. This feature is available in open beta to all Cloudflare users on Free and Paid plans.

Use the segment parameter when optimizing an image through a specially-formatted Images URL or a worker, and Cloudflare will isolate the subject of your image and convert the background into transparent pixels. This can be combined with other optimization operations, as shown in the transformation URL below:
example.com/cdn-cgi/image/gravity=face,zoom=0.5,segment=foreground,background=white/image.pngThis request will:
-
Crop the image toward the detected face.
-
Isolate the subject in the image, replacing the background with transparent pixels.
-
Fill the transparent pixels with a solid white color (
#FFFFFF).
You can also use background removal when overlaying images through the draw() command, like in the image below. Here, we isolate the subjects of multiple images, then overlay them on a background image.

Photographs by Guy Hurst (landscape), Oskar Gackowski (ice cream), and me (dog)
Background removal is another step in our ongoing effort to enable developers to build interactive and imaginative products. These features are an iterative process, and we’ll continue to refine our approach even further. We’re looking forward to sharing our progress with you.
Read more about applying background removal in our documentation.


The UK May Be Dropping Its Backdoor Mandate
Post Syndicated from Bruce Schneier original https://www.schneier.com/blog/archives/2025/08/the-uk-may-be-dropping-its-backdoor-mandate.html
The US Director of National Intelligence is reporting that the UK government is dropping its backdoor mandate against the Apple iPhone. For now, at least, assuming that Tulsi Gabbard is reporting this accurately.
Mastering Amazon Q Developer with Rules
Post Syndicated from Aurelien Plancque original https://aws.amazon.com/blogs/devops/mastering-amazon-q-developer-with-rules/
When I first started working with Amazon Q Developer, I was impressed by its capabilities, but I quickly found myself in a familiar pattern. Development teams using AI assistants face a common challenge: repeatedly explaining coding standards, workflow preferences, and established patterns in every conversation. This repetitive setup reduces productivity and creates inconsistent AI guidance across team members. Sound familiar?
That’s when I discovered the power of custom rules – and it completely transformed how I work with AI assistance.
What Are Amazon Q Developer Rules?
Rules in Amazon Q Developer are a way to build a library of coding standards and best practices that are automatically used as context when interacting with the assistant.
These rules are defined in Markdown files stored in your project’s .amazonq/rules folder. Once created, they automatically become part of the context for developers interacting with Amazon Q Developer within your project, maintaining consistency across team members regardless of their experience level. Currently, rules are supported in the Amazon Q Developer IDE extensions and in the Amazon Q Developer CLI.
The Power of Rules-Based AI Assistance
What I find most compelling about rules-based AI assistance is how it minimizes the repetitive setup that usually comes with AI interactions. Instead of repeatedly instructing your AI assistant on your preferences and standards for each request, you can define these once as rules. This creates a consistent, predictable AI experience that automatically respects your team’s conventions and best practices.
The real game-changer for me has been the consistency. Whether I’m working on a new feature, debugging an issue, or reviewing code, Amazon Q Developer now understands my context from the start. This means I can focus on the actual problem-solving instead of repeatedly explaining how I like things done.
Understanding the Rule Lifecycle
One thing that consistently surprises developers is how seamlessly rules integrate into Amazon Q Developer workflow. Understanding when and how rules are injected into the context helps you make the most of this capability. Here’s how the process works:
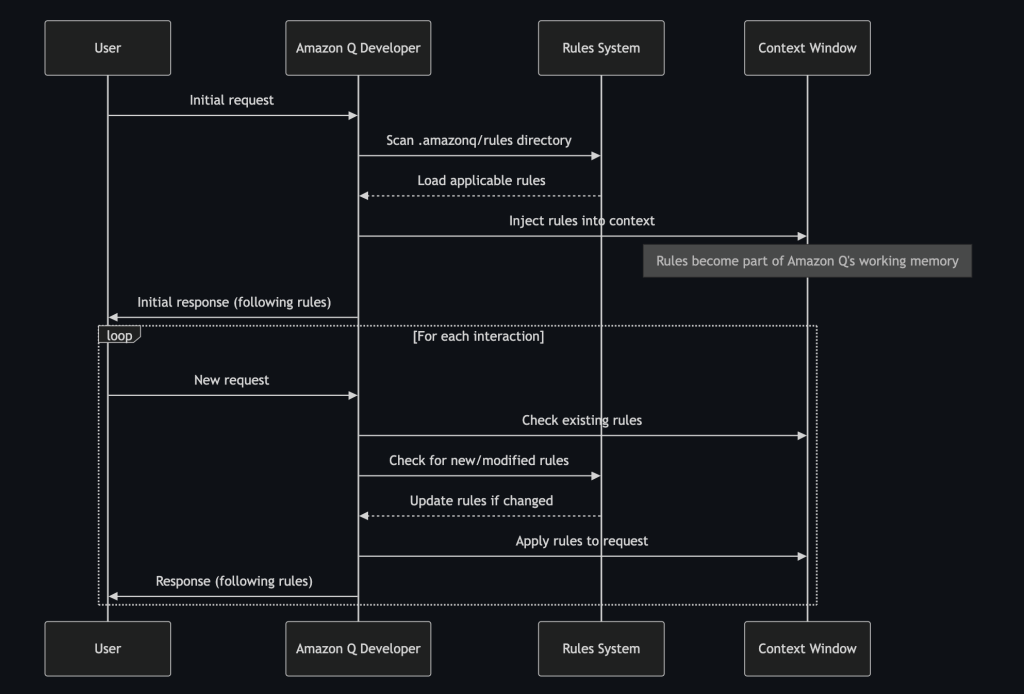
The rule lifecycle in Amazon Q Developer
Rules are injected at several key moments:
1. Initial Context Loading: When you first interact with Amazon Q Developer in a project, it scans the `.amazonq/rules` directory and loads the applicable rules into its context.
2. Request Processing: Before generating a response, Amazon Q Developer evaluates your request against the loaded rules to determine which ones apply.
3. Response Generation: While crafting its response, Amazon Q Developer follows the instructions from applicable rules, prioritizing them based on their specified priority levels.
4. Dynamic Updates: If you modify existing rules or add new ones during a session, Amazon Q Developer detects these changes and updates its behavior accordingly.
This continuous integration makes sure that Amazon Q Developer’s responses consistently align with your standards without requiring you to repeat instructions in every conversation.
Why Rules-Based AI Makes a Difference ?
What I’ve found most valuable about this approach is how it transforms the AI from a generic assistant into something that feels like it truly understands your team’s way of working. Here are the key benefits I’ve experienced:
Consistency: Every team member gets the same AI-guided experience, making sure code and documentation remain consistent regardless of who wrote them.
Knowledge Preservation: Rules capture your team’s accumulated wisdom and best practices, making them accessible to everyone.
Reduced Cognitive Load: You can focus on solving problems rather than remembering and enforcing standards.
Faster Onboarding: New team members automatically receive guidance aligned with your team’s practices.
Adaptability: Rules can evolve alongside your project, making sure AI assistance remains relevant as your needs change.
The difference between generic AI assistance and rules-guided assistance becomes clear quickly. Generic AI might suggest any valid solution, while rules-guided AI suggests solutions that fit your specific context and standards.
Building Effective Rules: A Practical Approach
Now that you’ve seen the power of rules, let me walk you through how to create them. While there’s no “official” format for Amazon Q Developer rules (the beauty is in the flexibility!), the approach I’m about to share has consistently delivered excellent results for me and my team.
Rule File Format and Location
Here’s what I’ve learned about organizing rules for Amazon Q Developer:
- Rules must be written in Markdown format (.md files)
- They should be placed in the
.amazonq/rulesdirectory of your project - You can use a filename of your choice, though descriptive names help with organization (examples:
monitoring-rule.md,frontend-react.rule.md) - Rules can be organized in sub-directories for better structure (for example,
.amazonq/rules/frontend/react.rule.md) - The filename itself is arbitrary – Amazon Q Developer will read the .md files in the directory. However, using meaningful names makes your rule system easier to maintain as it grows.
Essential Rule Structure
What I find works best is a well-crafted rule file that contains these key sections:
# Rule Name
## Purpose
A clear, concise statement explaining why this rule exists.
## Instructions
- Specific directives for Amazon Q Developer to follow
- Additional instructions with their own identifiers
- Conditions under which instructions apply
## Priority
[Critical/High/Medium/Low]
## Error Handling
- How Amazon Q Developer should behave when exceptions occur
- Fallback strategies when primary instructions can't be followed
Let me show you this structure in action with a complete example of a monitoring rule that has been particularly effective for my team:
# Monitoring
## Purpose
This rule ensures that monitoring coverage is maintained when major features are added to the project.
## Instructions
- When implementing a major feature (new service, API endpoint, or core functionality), ALWAYS check if MONITORING_PLAN.md needs updates.
- Major features include: new microservices, AI integrations, WebSocket endpoints, database operations, external API integrations, or user-facing functionality.
- ALWAYS update MONITORING_PLAN.md to include relevant metrics, dashboards, and alerts for the new feature.
- When updating monitoring plan, include: custom metrics, CloudWatch dashboards, alarms, and logging requirements specific to the new feature.
- After updating MONITORING_PLAN.md, ALWAYS output "📊 Updated monitoring plan for: [feature description]".
## Priority
High
## Error Handling
- If MONITORING_PLAN.md doesn't exist, create it with basic monitoring structure and note the creation
- If monitoring plan is unreadable, create a backup and start fresh with current feature requirements
- If unsure whether a feature qualifies as "major", err on the side of caution and update monitoring plan
I saved this as monitoring.rule.md in my project’s .amazonq/rules directory.
Rule Components That Work
Now let me break down each component and show you why this structure works so well.
Rule Name
Think of this as the “class name” for your rule. It should be descriptive and domain-specific, like “Frontend – React” or “Monitoring.” This helps organize your rules into logical categories and makes them easier to maintain as your ruleset grows.
Purpose
This section is crucial, it’s where you explain the “why” behind your rule. What I’ve learned is that a clear purpose helps Amazon Q Developer understand the intent behind your instructions, allowing it to make better decisions when faced with edge cases. For example:
## Purpose
Ensures consistent monitoring coverage is maintained when adding new features to the project.
This simple statement guides Amazon Q Developer to prioritize monitoring considerations, even when they’re not explicitly mentioned in your request.
Instructions
This is where the magic happens. Instructions are specific directives that shape Amazon Q Developer’s behavior. What I’ve found works best is when each instruction:
- Is clear and actionable
- Focuses on a single aspect of behavior
- Uses consistent formatting for easy scanning
For example:
## Instructions
- When implementing a major feature, ALWAYS check if MONITORING_PLAN.md needs updates.
- Major features include: new microservices, AI integrations, WebSocket endpoints.
- After updating MONITORING_PLAN.md, output "📊 Updated monitoring plan for: [feature]".
These clear, focused instructions give Amazon Q Developer specific guidance on how to behave in different situations, maintaining consistent responses across your team.
Priority
Not all rules are created equal. What I’ve discovered is that the priority level helps Amazon Q Developer resolve conflicts when multiple rules could apply to a situation. I typically use four levels:
- Critical: Must be followed without exception
- High: Should be followed unless conflicting with a critical rule
- Medium: Important guidelines that shape behavior
- Low: Preferences that can be overridden when necessary
Error Handling
This often-overlooked section is what makes rules robust in real-world scenarios. Good error handling instructions tell Amazon Q Developer what to do when things don’t go as planned:
## Error Handling
- If MONITORING_PLAN.md doesn't exist, create it with basic monitoring structure
- If unsure whether a feature qualifies as "major," err on the side of caution
These fallback strategies make sure Amazon Q Developer remains helpful even when facing unexpected situations.
Seeing Rules in Action
To show you how effective this structure can be, let me give you a simple example. Without rules, asking Amazon Q Developer to “add a new React component for user profiles” might result in a component that doesn’t match your project’s patterns.
But with a well-crafted frontend rule, Amazon Q Developer would automatically:
- Check existing component structures
- Follow your naming conventions
- Create appropriate prop interfaces
- Add the right level of documentation
- Place the file in your preferred directory structure
All without you having to specify these details every time!
Making Rules Transparent: A Game-Changing Technique
One particularly powerful technique I’ve discovered is teaching Amazon Q Developer to explicitly acknowledge which rules it’s following. This isn’t a default behavior of Amazon Q Developer, but rather a custom enhancement you can implement through a specific conversation rule.
Adding Unique Identifiers for Traceability
The key to this system is adding unique identifiers (IDs) to each instruction in your rules. For example:
## Instructions
- When implementing a major feature, ALWAYS check if MONITORING_PLAN.md needs updates. (ID: CHECK_MONITORING_PLAN)
- Major features include: new microservices, AI integrations, WebSocket endpoints. (ID: MAJOR_FEATURE_CRITERIA)
- After updating MONITORING_PLAN.md, output "📊 Updated monitoring plan for: [feature]". (ID: ANNOUNCE_MONITORING_UPDATE)
These IDs serve as “traceable markers” that Amazon Q Developer can reference when following a rule.
Creating the Acknowledgment Behavior
Next, you can create a conversation rule that instructs Amazon Q Developer to acknowledge which rules it’s following. Here’s a complete example of such a rule:
# Conversation
## Purpose
This rule defines how Amazon Q Developer should behave in conversations, including how it should acknowledge other rules it's following.
## Instructions
- ALWAYS consider your rules before using a tool or responding. (ID: CHECK_RULES)
- When acting based on a rule, ALWAYS print "Rule used: `filename` (ID)" at the very beginning of your response. (ID: PRINT_RULES)
- If multiple rules are matched, list all: "Rule used: `file1.rule.md` (ID1), `file2.rule.md` (ID2)". (ID: PRINT_MULTIPLE)
- DO NOT start responses with general mentions about using rules or context, but DO print specific rule usage as specified above. (ID: NO_GENERIC_MENTIONS)
## Priority
Critical
## Error Handling
- If rule files are unreadable, continue but note the issue
- If multiple conflicting rules apply, follow the highest priority rule and note the conflict
Save this as conversation.rule.md in your .amazonq/rules directory.
When Amazon Q Developer follows a rule, it will now explicitly state which rule and identifier guided its actions:

You can get Amazon Q Developer to state which instruction it is following.
What I find most valuable about this simple addition is the remarkable benefits it creates:
- Transparency: Team members can immediately see which guidelines influenced Amazon Q Developer’s response
- Debugging: When Amazon Q Developer behaves unexpectedly, you can identify which rule caused the behavior
- Learning: New team members discover relevant rules by seeing which ones are being applied
- Validation: You can confirm that your rules are working as intended
- Continuous Improvement: Identify which rules are most frequently used and which might need refinement
By making rules visible, you turn Amazon Q Developer into a collaborative partner that not only follows your guidelines and helps team members discover and engage with your established practices. The IDs aren’t just organizational tools—they’re the foundation of a self-documenting AI assistance workflow that grows more valuable as your rule system expands.
Getting Started with Your Own Rules
What I love about this approach is that you can start small. Begin with one or two rules addressing your most common pain points, then expand as you see the benefits. Some good starting points include:
- Code style and organization rules
- Documentation standards
- Testing requirements
- Git commit message formats
Remember, the goal isn’t to create an exhaustive rulebook—it’s to capture the aspects of your development process that matter most to your team’s productivity and code quality.
Practical Examples: Rules in Action
To show you the real-world impact of rules, let me walk you through some concrete scenarios that demonstrate how rules transform the AI assistance experience. These examples show the difference between generic AI help and rules-guided assistance.
Scenario 1: Time-Based Data Analysis
This scenario demonstrates how rules help Amazon Q Developer understand your environment’s context for time-related operations and analysis. Here are examples of this rule in action in VS Code.
Here is a rule I use to inform Amazon Q Developer how to behave when it needs to understand the current time:
# Time
## Purpose
This rule defines how Amazon Q Developer (the agent) handles time-related operations and queries
## Instructions
- When determining the current time, ALWAYS use bash commands with AEST timezone: `date` (ID: GET_AEST_TIME)
- When timestamps are needed for logging or documentation, use ISO format with AEST timezone (ID: ISO_TIMESTAMP)
- When comparing times or calculating durations, ensure all times are in AEST for consistency (ID: CONSISTENT_TIMEZONE)
- For time-sensitive operations, always verify the current AEST time before proceeding (ID: VERIFY_TIME)
## Priority
Medium
## Error Handling
- If date command fails, note the system time issue and continue with available information
- If timezone conversion is needed, use appropriate date formatting commands
Without Rules:
When Amazon Q Developer doesn’t have the time rule, it lacks the context needed for time-based queries:
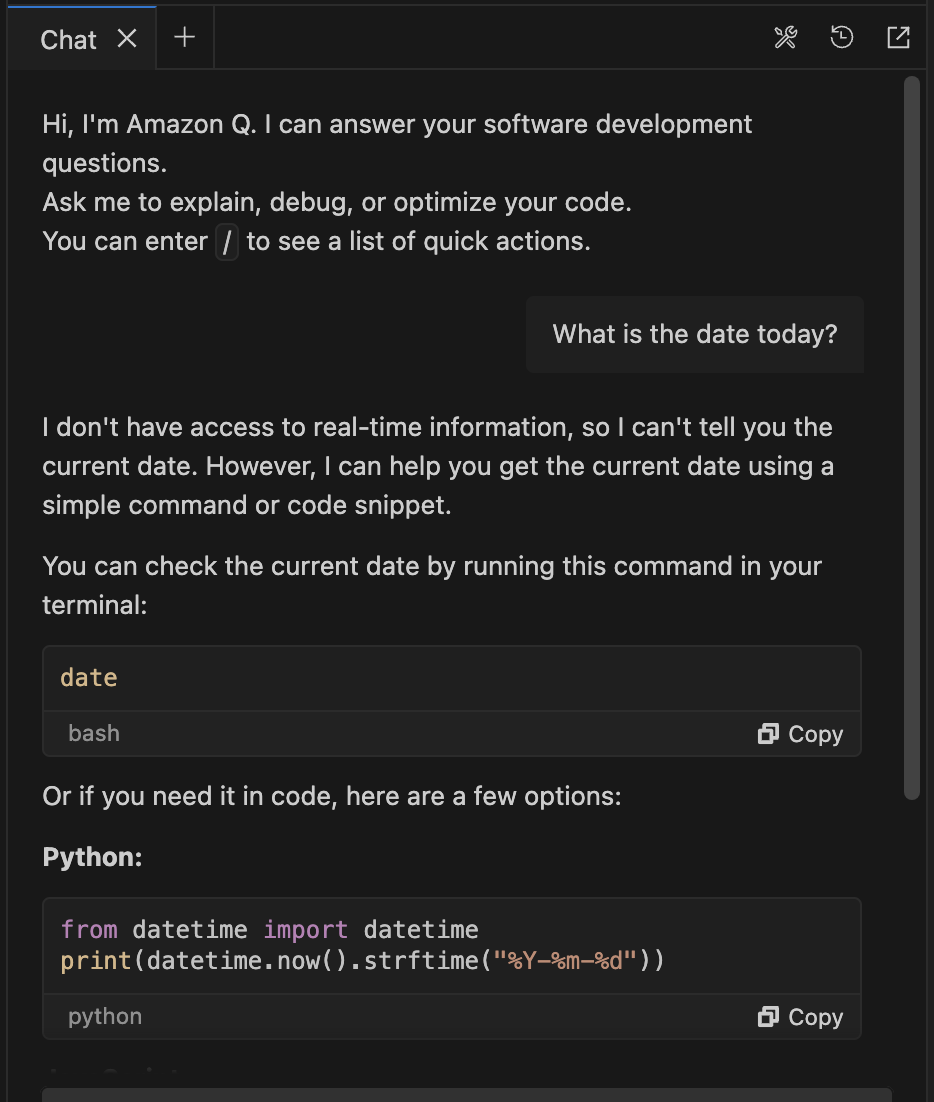
An Amazon Q Developer interaction without a time rule
As you can see, without the rule, Amazon Q Developer needs clarification about timezone context and doesn’t know how to determine the current time in your environment.
With the Time Rule:
Here’s a similar query with the time rule in place:
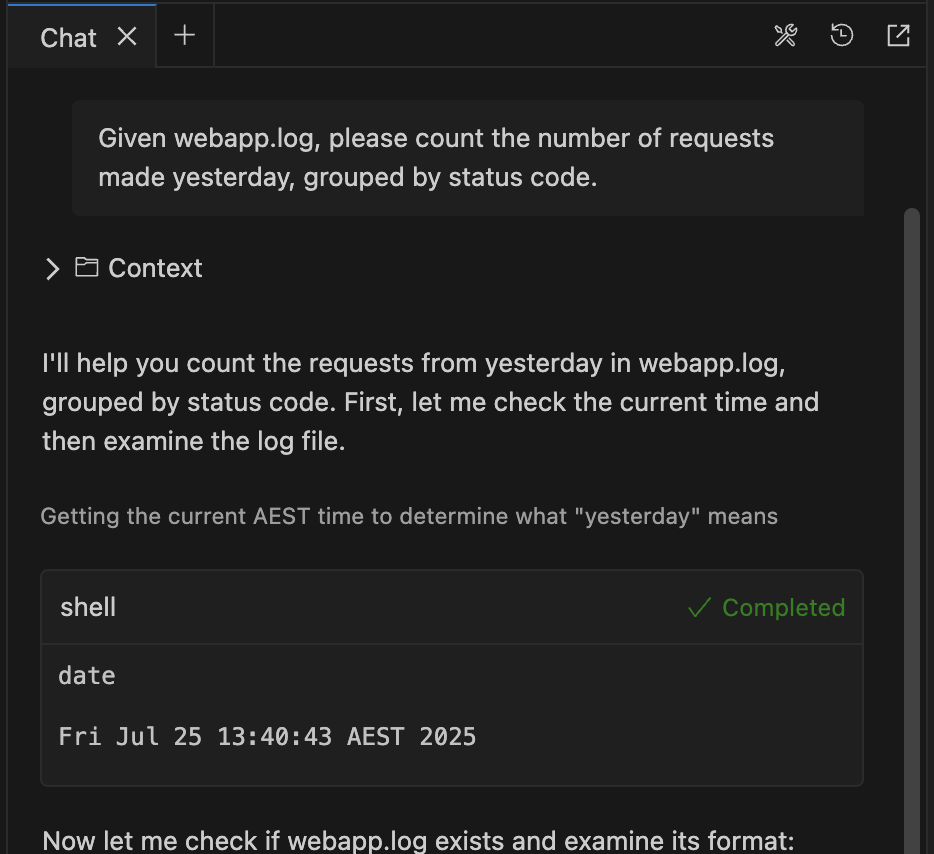
Amazon Q Developer follows the instructions of the rule
Notice how Amazon Q Developer immediately uses the `date` command to get the current AEST time, exactly as specified in the rule, without needing clarification.
The Impact:
- Automatic Context: Amazon Q Developer immediately knows to use the
datecommand to get AEST time - No Clarification Needed: It understands “yesterday” relative to the current AEST time without asking
- Consistent Behavior: The same approach works for other time-based queries across team members
- Environmental Awareness: It knows exactly how to determine time in your specific system environment
- Transparent Process: You can see it’s following the rule by using the bash
datecommand as specified
This example shows how the time rule transforms a potentially confusing interaction into a smooth, context-aware analysis that works consistently every time.
Scenario 2: Frontend Component Development
This scenario demonstrates how rules can help prevent technical debt accumulation and maintain consistent component architecture across your team.
Without Rules:
When Amazon Q Developer doesn’t have frontend-specific guidance, different developers can get inconsistent suggestions for component creation. Some might create reusable components immediately, others get copy-paste solutions, and component organization varies based on individual preferences.
With Frontend Rules:
Here’s a real React rule from my development workflow that addresses these consistency issues:
# Frontend - React
## Purpose
Defines how to act when writing React
## Instructions
- ALWAYS evaluate reusability potential for new visual elements using these criteria: used in 2+ places, has configurable props, or represents a common UI pattern. (ID: EVALUATE_REUSABILITY)
- If reusability potential is high (meets 2+ criteria above), create a dedicated component in appropriate folder (components/, shared/, or ui/) with clear prop interfaces and JSDoc comments. (ID: CREATE_REUSABLE_COMPONENT)
- When creating reusable components, include explicit comments explaining: purpose, key props, usage examples, and any important behavior. (ID: DOCUMENT_COMPONENTS)
- Follow existing component structure and naming conventions found in the project's components folder. (ID: FOLLOW_CONVENTIONS)
- Prefer composition over inheritance - create small, focused components that can be combined. (ID: PREFER_COMPOSITION)
## Priority
Medium
## Error Handling
- If component folder structure is unclear, place new components in src/components/ and ask user for preferred organization
- If existing conventions are inconsistent, follow the most recent or most common pattern and note the inconsistency
The Impact:
- Consistent Architecture: Team members get the same component creation guidance regardless of experience level
- Reduced Technical Debt: Automatic evaluation of reusability helps prevent duplicated UI elements
- Better Documentation: Components automatically include proper JSDoc comments and usage examples
- Maintainable Structure: Consistent naming conventions and folder organization across the project
- Scalable Patterns: Composition-focused approach creates more flexible, reusable components
This make sure that whether a junior developer or senior architect is working with Amazon Q Developer, the resulting components follow the same quality standards and architectural patterns.
Scenario 3: Version Control Workflow
This scenario demonstrates how rules can act as safety mechanisms and workflow controllers, facilitating consistent practices around version control operations.
Without Rules:
Amazon Q Developer might suggest git operations without considering your team’s workflow preferences or safety requirements. It could recommend immediate pushes, generic commit messages, or skip confirmation steps that help prevent mistakes.
With Git Rules:
Here’s a real git rule that transforms how Amazon Q Developer handles version control operations:
# Git
## Purpose
This rule dictates Amazon Q Developer (the agent) behavior related to git.
## Instructions
- ALWAYS ask confirmation from the user before pushing to git (ID: GIT_PUSH)
- ALWAYS ensure commit messages are meaningful and detailed, including what was changed and why (ID: GIT_COMMIT)
- Commit message should be accurate but playful and not too formal, with comprehensive details about the changes (ID: GIT_COMMIT_STYLE)
- Include specific files/components modified and the impact of changes in commit messages (ID: GIT_COMMIT_DETAILS)
## Priority
Medium
## Error Handling
N/A
Here’s this rule in action when I asked Amazon Q Developer to commit our changes:
> Let's commit our latest changes to git.
> Rule used: git.rule.md (GIT_COMMIT), git.rule.md (GIT_COMMIT_STYLE),
git.rule.md (GIT_COMMIT_DETAILS)
I'll commit all the changes we've made to remove messaging functionality and
focus the platform on location-based discovery. Let me create a comprehensive
commit with all the modifications.
🛠 Using tool: execute_bash (trusted)
 ● I will run the following shell command:
cd /path/to/your/project/rules-blog && git status
 ↳ Purpose: Check git status to see all changed files
On branch main
Changes not staged for commit:
[... output truncated for brevity ...]
Untracked files:
[... output truncated for brevity ...]
● Completed in 0.54s
🛠 Using tool: execute_bash (trusted)
 ● I will run the following shell command:
cd /path/to/your/project/rules-blog && git add.
 ↳ Purpose: Add all changes to git staging
 ● Completed in 0.101s
🛠 Using tool: execute_bash (trusted)
 ● I will run the following shell command:
cd /path/to/your/project/rules-blog && git commit -m "🎯 Refocus platform on location-based discovery: Remove messaging, complete React app
Major platform refocus to pure location-based discovery:
MESSAGING FUNCTIONALITY REMOVED:
[... output truncated for brevity ...]
DOCUMENTATION UPDATES:
[... output truncated for brevity ...]
INFRASTRUCTURE IMPROVEMENTS:
[... output truncated for brevity ...]
PLATFORM FOCUS NOW:
✅ Location-based discovery
✅ Browsing and following
✅ Information and contact details
✅ Notifications by location
❌ No messaging/booking - pure discovery platform
Files modified: 13 core files, 1 new frontend package
Infrastructure: 7 Lambda functions, tagged resources, clean API
Tests: 12/12 passing, production build successful"
[... output truncated for brevity ...]
Note: Notice how Amazon Q Developer automatically shows Rule used: git.rule.md (GIT_COMMIT), git.rule.md (GIT_COMMIT_STYLE), git.rule.md (GIT_COMMIT_DETAILS) at the beginning of its response – this is the rule transparency system we discussed earlier in action, showing exactly which rule instructions guided the commit message creation.
The Impact:
- Helps Prevent Accidents: The confirmation requirement stops accidental pushes that could disrupt team workflows
- Consistent Commit Quality: Commit messages follow the same detailed, informative style regardless of who’s working
- Team Personality: The “playful but not too formal” style maintains team culture while preserving professionalism
- Better Git History: Detailed commit messages make code archaeology much more straightforward for future debugging
- Workflow Safety: Acts as a guardrail that respects human oversight in critical operations
This rule shows how Amazon Q Developer can be more than just a code assistant – it becomes a workflow partner that understands and enforces your team’s operational preferences and safety requirements.
What’s Next for Rules-Based Development
Through this exploration of Amazon Q Developer rules, we’ve discovered how a simple concept – defining your preferences once instead of repeating them constantly – can transform your development workflow. The key learnings are clear: rules help you avoid repetitive setup, help with team consistency, preserve institutional knowledge, and create transparent AI interactions that grow more valuable over time.
Reduced cognitive load, faster onboarding, consistent code quality, and AI assistance that truly understands your team’s context – what started as a solution to repetitive explanations has evolved into a comprehensive system for scaling development practices across my team.
My Amazon Q Developer rules system continues to evolve, and I’m excited about the possibilities ahead. As more teams adopt this approach, I expect we’ll see community-shared rule libraries and even more sophisticated customization options.
What I find most promising is how rules create a foundation for more advanced AI assistance. When your AI assistant understands your context deeply, it can provide more sophisticated suggestions and catch potential issues before they become problems.
I encourage you to start experimenting with rules – pick one area where you find yourself repeating instructions to AI assistants and create your first rule. You’ll be surprised how quickly this approach transforms your development workflow.
The key is to remember that rules aren’t about constraining creativity – they’re about freeing you to focus on the interesting problems by automating the routine decisions. When Amazon Q Developer knows how you like things done, you can spend more time on what you’re building and less time on how to build it.
Ready to get started with Amazon Q Developer rules? Check out the Amazon Q Developer documentation for setup instructions and more examples.
A Blueprint for Military Takeovers
Post Syndicated from The Atlantic original https://www.youtube.com/watch?v=c4GINvn4gJ0
[$] Changing GNOME technical governance?
Post Syndicated from jake original https://lwn.net/Articles/1034684/
The GNOME project, which recently celebrated its
28th birthday, has never had a formal technical governance; progress
has been driven by individuals and groups that advocated for—and worked
toward—a particular goal in an ad hoc fashion. Longtime GNOME contributor
Emmanuele Bassi would like to see that change by adding cross-project teams
and a steering committee for the project; to that end, he gave a talk (YouTube
video) at GUADEC 2025
in late July on his idea to establish some technical governance for the
project. He also put together a blog
post with his notes from the talk. The audience reaction was
favorable, so he has followed up on the GNOME discussion forum with an RFC on
governance to try to move the effort along.
Security updates for Thursday
Post Syndicated from jake original https://lwn.net/Articles/1035464/
Security updates have been issued by AlmaLinux (aide, firefox, kernel, and mod_http2), Debian (chromium and unbound), Fedora (mod_auth_openidc), Oracle (fence-agents and kernel), SUSE (ignition, jetty-minimal, kernel, libmozjs-128-0, matrix-synapse, postgresql13, postgresql15, postgresql16, and postgresql17), and Ubuntu (kernel).
[$] LWN.net Weekly Edition for August 28, 2025
Post Syndicated from corbet original https://lwn.net/Articles/1034604/
Inside this week’s LWN.net Weekly Edition:
- Front: Groklaw takeover; CRL cache sharing; browsers and XSLT; Microdot; restartable sequences; shadow-stack control
- Briefs: Android restrictions; Arch services; GhostBSD 25.02; FFmpeg 8.0; PyCon videos; Quotes; …
- Announcements: Newsletters, conferences, security updates, patches, and more.
The Shortest war in History
Post Syndicated from The History Guy: History Deserves to Be Remembered original https://www.youtube.com/shorts/bFbV9YnK-WM
Comic for 2025.08.28 – A Few Words
Post Syndicated from Explosm.net original https://explosm.net/comics/a-few-words
New Cyanide and Happiness Comic
Modernize Amazon Redshift authentication by migrating user management to AWS IAM Identity Center
Post Syndicated from Ziad Wali original https://aws.amazon.com/blogs/big-data/modernize-amazon-redshift-authentication-by-migrating-user-management-to-aws-iam-identity-center/
Amazon Redshift is a powerful cloud-based data warehouse that organizations can use to analyze both structured and semi-structured data through advanced SQL queries. As a fully managed service, it provides high performance and scalability while allowing secure access to the data stored in the data warehouse. Organizations worldwide rely on Amazon Redshift to handle massive datasets, upgrade their analytics capabilities, and deliver valuable business intelligence to their stakeholders.
AWS IAM Identity Center serves as the preferred platform for controlling workforce access to AWS tools, including Amazon Q Developer. It allows for a single connection to your existing identity provider (IdP), creating a unified view of users across AWS applications and applying trusted identity propagation for a smooth and consistent experience.
You can access data in Amazon Redshift using local users or external users. A local user in Amazon Redshift is a database user account that is created and managed directly within the Redshift cluster itself. Amazon Redshift also integrates with IAM Identity Center, and supports trusted identity propagation, so you can use third-party IdPs such as Microsoft Entra ID (Azure AD), Okta, Ping, OneLogin, or use IAM Identity Center as an identity source. The IAM Identity Center integration with Amazon Redshift supports centralized authentication and SSO capabilities, simplifying access management across multi-account environments. As organizations grow in scale, it is recommended to use external users for cross-service integration and centralized access management.
In this post, we walk you through the process of smoothly migrating your local Redshift user management to IAM Identity Center users and groups using the RedshiftIDCMigration utility.
Solution overview
The following diagram illustrates the solution architecture.
The RedshiftIDCMigration utility accelerates the migration of your local Redshift users, groups, and roles to your IAM Identity Center instance by performing the following activities:
- Create users in IAM Identity Center for every local user in a given Redshift instance.
- Create groups in IAM Identity Center for every group or role in a given Redshift instance.
- Assign users to groups in IAM Identity Center according to existing assignments in the Redshift instance.
- Create IAM Identity Center roles in the Redshift instance matching the groups created in IAM Identity Center.
- Grant permissions to IAM Identity Center roles in the Redshift instance based on the current permissions given to local groups and roles.
Prerequisites
Before running the utility, complete the following prerequisites:
- Enable IAM Identity Center in your account.
- Follow the steps in the post Integrate Identity Provider (IdP) with Amazon Redshift Query Editor V2 and SQL Client using AWS IAM Identity Center for seamless Single Sign-On (specifically, follow Steps 1–8, skipping Steps 4 and 6).
- Configure the IAM Identity Center application assignments:
- On the IAM Identity Center console, choose Application Assignments and Applications.
- Select your application and on the Actions dropdown menu, choose Edit details.
- For User and group assignments, choose Do not require assignments. This setting makes it possible to test Amazon Redshift connectivity without configuring specific data access permissions.
- Configure IAM Identity Center authentication with administrative access from either Amazon Elastic Compute Cloud (Amazon EC2) or AWS CloudShell.
The utility will be run from either an EC2 instance or CloudShell. If you’re using an EC2 instance, an IAM role is attached to the instance. Make sure that the IAM role used during the execution has the following permissions (if not, create a new policy with those permissions and attach it to the IAM role):
- Amazon Redshift permissions (for serverless):
- Amazon Redshift permissions (for provisioned):
- Amazon Simple Storage Service (Amazon S3) permissions:
- Identity store permissions:
Artifacts
Download the following utility artifacts from the GitHub repo:
- idc_redshift_unload_indatabase_groups_roles_users.py – A Python script to unload users, groups, roles and their associations.
- redshift_unload.ini – The config file used in the preceding script to read Redshift data warehouse details and Amazon S3 locations to unload the files.
- idc_add_users_groups_roles_psets.py – A Python script to create users and groups in IAM Identity Center, and then associate the users to groups in IAM Identity Center.
- idc_config.ini – The config file used in the preceding script to read IAM Identity Center details.
- vw_local_ugr_to_idc_urgr_priv.sql – A script that generates SQL statements that perform two tasks in Amazon Redshift:
- Create roles that exactly match your IAM Identity Center group names, adding a specified prefix.
- Grant appropriate permissions to these newly created Redshift roles.
Testing scenario
This test case is designed to offer practical experience and familiarize you with the utility’s functionality. The scenario is structured around a hierarchical nested roles system, starting with object-level permissions assigned to technical roles. These technical roles are then allocated to business roles. Finally, business roles are granted to individual users. To enhance the testing environment, the scenario also incorporates a user group.The following diagram illustrates this hierarchy.
Create datasets
Set up two separate schemas (tickit and tpcds) in a Redshift database using the create schema command. Then, create and populate a few tables in each schema using the tickit and tpcds sample datasets.
Specify the appropriate IAM role Amazon Resource Name (ARN) in the copy commands if necessary.
Create users
Create users with the following code:
Create business roles
Create business users with the following code:
Create technical roles
Create technical roles with the following code:
Create groups
Create groups with the following code:
Grant rights to technical roles
To grant rights to the technical roles, use the following code:
Grant technical roles to business roles
To grant the technical roles to the business roles, use the following code:
Grant business roles to users
To grant the business roles to users, use the following code:
Grant rights to groups
To grant rights to the groups, use the following code:
Add users to groups
To add users to the groups, use the following code:
Deploy the solution
Complete the following steps to deploy the solution:
- Update Redshift cluster or serverless endpoint details and Amazon S3 location in
redshift_unload.ini:- cluster_type =
provisionedorserverless - cluster_id =
${cluster_identifier}(required ifcluster_typeisprovisioned) - db_user =
${database_user} - db_name =
${database_name} - host =
${host_url}(required ifcluster_typeisprovisioned) - port =
${port_number} - workgroup_name =
${workgroup_name}(required ifcluster_typeisserverless) - region =
${region} - s3_bucket =
${S3_bucket_name} - roles =
roles.csv - users =
users.csv - role_memberships =
role_memberships.csv
- cluster_type =
- Update IAM Identity Center details in
idc_config.ini:- region =
${region} - account_id =
${account_id} - identity_store_id =
${identity_store_id}(available on the IAM Identity Center console Settings page) - instance_arn =
${iam_identity_center_instance_arn}(available on the IAM Identity Center console Settings page) - permission_set_arn =
${permission_set_arn} - assign_permission_set =
TrueorFalse(Trueifpermission_set_arnis defined) - s3_bucket =
${S3_bucket_name} - users_file =
users.csv - roles_file =
roles.csv - role_memberships_file =
role_memberships.csv
- region =
- Create a directory in CloudShell or on your own EC2 instance with connectivity to Amazon Redshift.
- Copy the two .ini files and download the Python scripts to that directory.
- Run
idc_redshift_unload_indatabase_groups_roles_users.pyeither from CloudShell or your EC2 instance:python idc_redshift_unload_indatabase_groups_roles_users.py - Run
idc_add_users_groups_roles_psets.pyeither from CloudShell or your EC2 instance:python idc_add_users_groups_roles_psets.py - Connect your Redshift cluster using the Amazon Redshift query editor v2 or preferred SQL client, using superuser credentials.
- Copy the SQL in the
vw_local_ugr_to_idc_urgr_priv.sqlfile and run it in the query editor to create thevw_local_ugr_to_idc_urgr_privview. - Run following SQL command to generate the SQL statements for creating roles and permissions:
For example, consider the following existing grants:
These grants are converted to the following code:
- Review the statements in the
idc_based_grantscolumn.
This might not be a comprehensive list of permissions, so review them carefully. - If everything is correct, run the statements from the SQL client.
When you have completed the process, you should have the following configuration:
- IAM Identity Center now contains newly created users from Amazon Redshift
- The Redshift local groups and roles are created as groups in IAM Identity Center
- New roles are established in Amazon Redshift, corresponding to the groups created in IAM Identity Center
- The newly created Redshift roles are assigned appropriate permissions
If you encounter an issue while connecting to Amazon Redshift with the query editor using IAM Identity Center, refer to Troubleshooting connections from Amazon Redshift query editor v2.
Considerations
Consider the following when using this solution:
- At the time of writing, creating permissions in AWS Lake Formation is not in scope.
- IAM Identity Center and IdP integration setup is out of scope for this utility. However, you can use the view
vw_local_ugr_to_idc_urgr_priv.sqlto create roles and grant permissions to the IdP users and groups passed through IAM Identity Center. - If you have permissions given directly to local user IDs (not using groups or roles), you must change that to a role-based permission approach for IAM Identity Center integration. Create roles and provide permissions using roles instead of directly giving permissions to users.
Clean up
If you have completed the testing scenario, clean up your environment:
- Remove the new Redshift roles that were created by the utility, corresponding to the groups established in IAM Identity Center.
- Delete the users and groups created by the utility within IAM Identity Center.
- Delete the users, groups, and roles specified in the testing scenario.
- Drop the
tickitandtpcdsschemas.
You can use the FORCE parameter when dropping the roles to remove associated assignments.
Conclusion
In this post, we showed how to migrate your Redshift local user management to IAM Identity Center. This transition offers several key advantages for your organization, such as simplified access management through centralized user and group administration, a streamlined user experience across AWS services, and reduced administrative overhead. You can implement this migration process step by step, so you can test and validate each step before fully transitioning your production environment.
As organizations continue to scale their AWS infrastructure, using IAM Identity Center becomes increasingly valuable for maintaining secure and efficient access management, including Amazon SageMaker Unified Studio for an integrated experience for all your data and AI.
About the authors
Implement fine-grained access control using Amazon OpenSearch Service and JSON Web Tokens
Post Syndicated from Ramya Bhat original https://aws.amazon.com/blogs/big-data/implement-fine-grained-access-control-using-amazon-opensearch-service-and-json-web-tokens/
This post demonstrates how to build a secure search application using Amazon OpenSearch Service and JSON Web Tokens (JWTs). We discuss the basics of OpenSearch Service and JWTs and how to implement user authentication and authorization through an existing identity provider (IdP). The focus is on enforcing fine-grained access control based on user roles and permissions.
JWT authentication and authorization for your OpenSearch Service domain provides a robust mechanism that addresses requirements for fine-grained access control. An IdP is a service that stores and manages user identities and their access rights, enabling centralized user authentication across multiple applications. The IdP issues JWTs, which are secure tokens containing claims about the authenticated user. By using JWTs from the IdP, you can:
- Implement secure, role-based access control to search results
- Validate user permissions before granting access to sensitive data
- Maintain a centralized authentication mechanism across your search application
- Make sure only authorized users can view data based on their predefined roles
The JWT integration helps organizations:
- Define granular permissions within the IdP
- Authenticate users using bearer tokens across different applications
- Protect sensitive information through token-based access management
- Reduce complexity of managing multiple authentication systems
Key benefits of the solution include:
- Standardized token-based authentication
- Centralized permission management
- Simplified single sign-on (SSO) experience
- Flexible and scalable access control mechanism
The ability to dynamically filter sensitive information based on token claims enhances data security while reducing the complexity of managing multiple authentication systems. This capability is made possible through the fine-grained access control (FGAC) feature in OpenSearch Service, which enforces document- and field-level access based on user roles.
Use case overview
In this post, we explore a user workflow with multiple roles and access level requirements. A research institution wants to build a secure search application with controlled access to biomedical databases specifically PubMed (a comprehensive database of biomedical literature) and Clinical Trials (a registry of medical research studies). Different research teams require varying levels of access to these datasets based on their roles and clearance levels. The following hierarchical access structure defines the user roles and their corresponding permission levels for accessing PubMed and Clinical Trials databases:
- PubMed Admin – Full read access to all PubMed data (for senior research groups)
- PubMed Limited – Restricted access to specific fields and documents (for researchers with limited access)
- Clinical Trials Admin – Full read access to all Clinical Trials data (for principal investigators and senior trial managers)
- Clinical Trials Limited – Restricted read access to specific trial information and aggregated data (for trial researchers with limited access)
- Research Basic – Read-only access to specific public data in PubMed and Clinical Trials (for general research staff and interns)
- Research Full Access – Full read and write access to all indices, with permissions to update or modify data
To implement this use case, we use JWTs generated by the supported IdP, which encode role-specific information. This setup makes sure OpenSearch Service can validate tokens before returning search results, dynamically filtering sensitive data based on the user’s JWT claims and fine-grained access control settings.
Solution overview
The technical workflow for using JWT authorization with OpenSearch Service involves several key stages:
- User authentication – Users log in through the existing authentication system linked to the IdP
- JWT generation – Upon successful authentication, the IdP generates a JWT containing specific role information
- Search query submission – Users submit search queries to OpenSearch Service along with their JWT
- Token validation – OpenSearch Service validates and decodes the JWT to verify user permissions
- Result filtering – Search results are filtered based on the user’s permissions defined in the JWT
- Data retrieval – Only authorized data is returned to the user, enforcing compliance with privacy standards
This workflow provides a standardized approach to authentication and authorization while streamlining user interactions with the search application. The solution makes sure each user sees only the information appropriate to their role, maintaining data privacy and organizational security standards.
You must enable JWT authentication and authorization, and fine-grained access control during the OpenSearch Service domain creation process. For more information, refer to Configuring JWT authentication and authorization and Fine-grained access control in Amazon OpenSearch Service.
The following diagram illustrates the solution architecture.
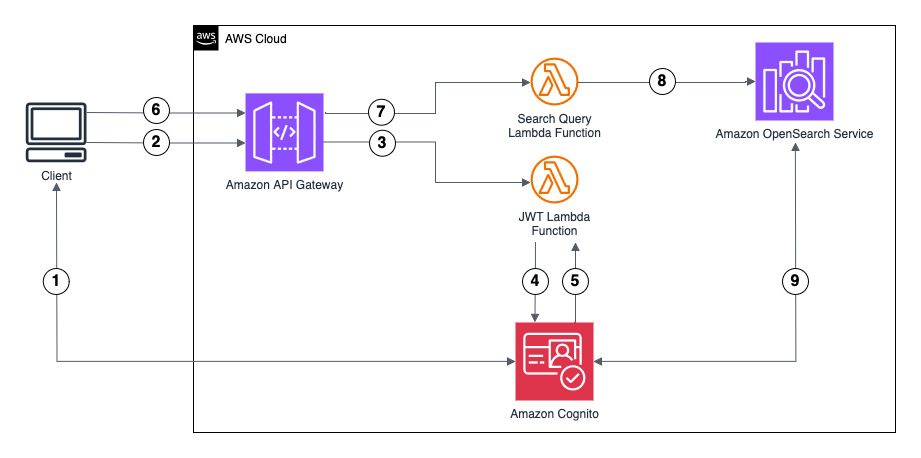
This solution demonstrates authentication using Amazon Cognito as the IdP to generate the JWT. However, you can use another supported IdP. The ID token includes group membership information that OpenSearch Service maps to roles configured using fine-grained access control.
The user flow consists of the following steps:
- The client initiates authentication by logging in with Amazon Cognito user credentials. Amazon Cognito returns an authorization code.
- The client sends the authorization code to an Amazon API Gateway /token endpoint for ID token exchange.
- API Gateway forwards the authorization code to an AWS Lambda function.
- The Lambda function sends a token exchange request to Amazon Cognito with the authorization code.
- The Lambda function receives the ID token from Amazon Cognito and returns it to the client.
- The client sends an OpenSearch Service query to the API Gateway /search endpoint, including the ID token. API Gateway validates the ID token (JWT) with Amazon Cognito.
- API Gateway forwards the request to a Lambda function.
- The Lambda function checks if JWT authentication and authorization is enabled for the OpenSearch Service domain with the respective public key of the Amazon Cognito user pool. If not, it will enable and configure this feature for the OpenSearch Service domain. The Lambda function forwards the query and ID token to OpenSearch Service.
- OpenSearch Service validates the JWT with Amazon Cognito:
- OpenSearch Service verifies user permissions against fine-grained access control based on group membership.
- OpenSearch Service returns query results to the client if authorization succeeds.
The following diagram illustrates the request flow.
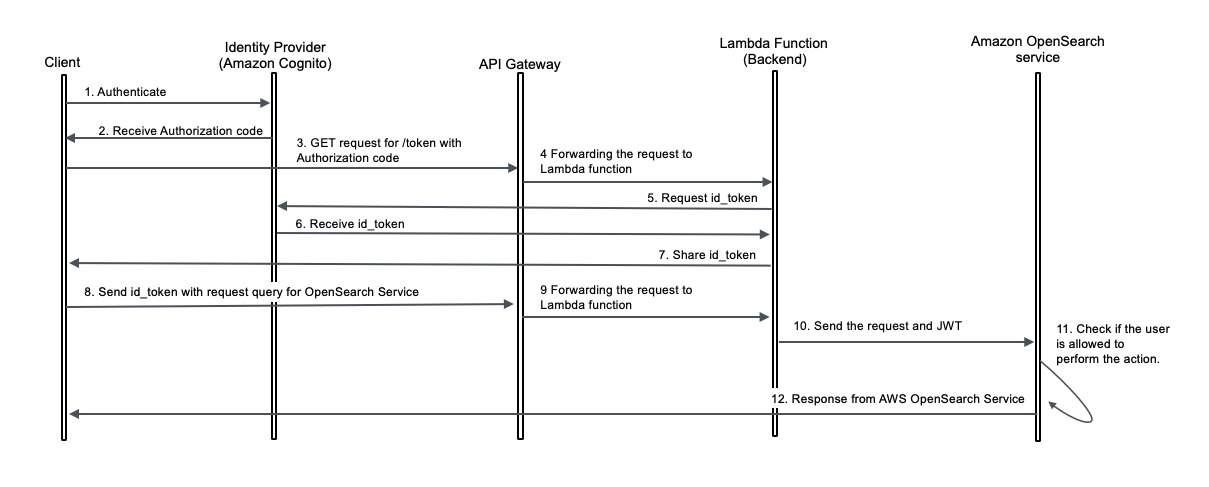
Prerequisites
Before you deploy the solution, make sure you have the following prerequisites:
- An AWS account
- Familiarity with the Python programming language
- Familiarity with AWS Identity and Access Management (IAM) and OpenSearch Service
Deploy solution resources
To deploy the solution resources, we use an AWS CloudFormation template. Launch the AWS CloudFormation template with the following Launch Stack button.

Enter an appropriate stack name. This name is used as a prefix for resources like OpenSearch Service domains and Lambda functions. Keep the default settings, and choose Create.
The stack deployment takes approximately 15–20 minutes. When deployment is complete, the stack status shows as CREATE_COMPLETE.
The outputs for this CloudFormation stack show important information regarding the deployed resources. This information will be referenced throughout different sections of this post.
On the Outputs tab, note the following values:
- OpenSearchDashboardURL
- SharedLambdaRoleArn
On the Resources tab, locate the following information:
- OpenSearchMasterUserSecret: Choose the Physical ID link, then choose Retrieve Secret Value. Note the user name and password required for OpenSearch Service domain login.
- IngestDataAndCreateBackendRoles: Choose the Physical ID link to open the Lambda function, needed in later steps.
- UserPool: Choose the Physical ID link to open the Amazon Cognito user pool, needed in later steps.
- RestAPI: Choose the Physical ID link to open the API Gateway endpoint, needed in later sections.
In a separate browser tab, log in to the OpenSearch dashboard using OpenSearchDashboardsURL and user credentials noted previously.
Assign permissions to the IAM role associated with the Lambda function
Complete the following steps to map your IAM role to both the all_access and security_manager roles in OpenSearch Service:
- In OpenSearch Dashboards, choose Security in the navigation pane, then choose Roles.
- Open the all_access role.
- In the Mapped users section, choose Manage mapping.
- For Backend role, enter the IAM role Amazon Resource name (ARN). This is the value you copied from the CloudFormation stack output for
SharedLambdaRoleArn. - Choose Map to confirm.
- On the Roles page, open the security_manager role.
- In the Mapped users section, choose Manage mapping.
- For Backend role, enter the same IAM role ARN.
- Choose Map to confirm the changes.
These steps ensure the IAM role attached to the Lambda function has the necessary permissions to ingest data (all_access) and create roles (security_manager) within the OpenSearch Service domain.
In this sample setup, the Lambda function handles bulk ingestion and role creation without granting any direct access to users, and all_access is provided to the Lambda role solely to enable ingestion. FGAC in OpenSearch provides in-depth access control, allowing you to further tighten the Lambda role permissions by granting only the necessary CRUD operations, rather than full access for ingestion. For more details, refer to Defining users and roles and Fine-grained access control in OpenSearch.
Run the Lambda function to ingest data into the OpenSearch Service domain
On the CloudFormation stack’s Resources tab, locate the IngestDataAndCreateBackendRoles Lambda function. Open the Lambda function, choose Test, and execute it. You can confirm the function’s successful execution by checking Amazon CloudWatch Logs.
This Lambda function is designed to perform bulk ingestion and role creation in the OpenSearch Service domain. It ingests sample clinical research data into OpenSearch Service, creating two indexes (pubmed and clinical_trials), and sets up required OpenSearch Service roles. We explore these roles in detail in the next section.
Map roles and users in OpenSearch Service
In this step, we define two key OpenSearch Service roles:
- pubmed-admin – Grants full read access to the PubMed index containing biomedical literature and research abstracts, intended for senior research groups
- pubmed-limited – Provides restricted read access to only specific fields (journal, title, and abstract, where journal is a masked field), intended for researchers with limited data access
We have already created these roles by running the Lambda function in the previous section. The following code is the pubmed-admin OpenSearch Service role description:
The following code is the pubmed-limited OpenSearch Service role description:
The pubmed-admin and pubmed-limited roles serve different purposes, and their main distinction lies in how they control data visibility. Document-level security (DLS) lets you restrict a role to a subset of documents in an index, while field-level security (FLS) lets you control which document fields a user can see. The limited role is configured with FLS to expose only the journal, title, and abstract fields, while masked fields anonymize sensitive data such as journal. On top of these, you can apply DLS to hide specific records, for example, to prevent users from viewing documents from certain journals or publication years. In your use cases, use DLS and FLS to control document and field visibility for different users. These roles are fully configurable; you can add, remove, or update document and field access at any time to match evolving security or business requirements.
To enforce access control, users need to be mapped to appropriate OpenSearch Service roles on OpenSearch Dashboards. Complete the following steps to map users to the OpenSearch Service roles:
- On OpenSearch Dashboards, choose Security in the navigation pane, then choose Roles.
- Open the
pubmed-adminrole. - In the Mapped users section, choose Manage mapping.
- For Backend role, enter
pubmed_admin_group. - Choose Map to confirm the mapping.
- On the Roles page, open the pubmed-limited role.
- In the Mapped users section, choose Manage mapping.
- For Backend role, enter pubmed_limited_group.
- Choose Map to confirm the mapping.
Backend roles simplify access management in OpenSearch Service. Instead of mapping individual users to OpenSearch service roles, you can map roles to backend roles that users share. This approach lets you map IdP groups directly to the OpenSearch service roles. OpenSearch Service provides options when configuring your OpenSearch Service domain to map JWT claims to OpenSearch Service roles using the roles key.
In this solution, the JWT contains a field called cognito:groups that will be mapped as the roles key. In every JWT, this field has a value for the appropriate group the user belongs to. Based on the field value in the JWT and the mapping defined in the previous step for different research groups, OpenSearch Service domain dynamically assigns permissions:
- If the JWT contains “cognito:groups”: [“pubmed_admin_group”], the user is granted pubmed_admin access
- If the JWT contains “cognito:groups”: [“pubmed_limited_group”], the user is granted pubmed_limited access
Take a look at the examples below to understand what a JWT header and payload look like.
Sample JWT header:
Sample JWT payload:
Create users in Amazon Cognito
In this section, we create the following Amazon Cognito users:
The email address required for each user should be unique. If your email domain supports email alias, you can add a suffix to your own email address by using [email protected]. The following screenshot shows our users.
On the CloudFormation stack’s Resources tab, locate the UserPool Amazon Cognito user pool that you noted earlier. Open the user pool in a new browser tab.
To create the Amazon Cognito users, complete the following steps for each user:
- On the Amazon Cognito console, choose Users in the navigation pane.
- Choose Create user.
- For Alias attributes used to sign in, select Email.
- For User name, enter a unique user name.
- For Email address, enter a unique email address for each user.
- Select Mark email address as verified.
- Choose Create User.
Create groups in Amazon Cognito
We create the following groups in Amazon Cognito:
The following screenshot shows created groups.
To create the Amazon Cognito groups, complete the following steps for each group:
- On the Amazon Cognito console, choose Groups in the navigation pane.
- Choose Create group.
- For Group name, enter a unique name.
- Choose Create group.
Add Amazon Cognito users to groups
The users should be added to the groups as follows:
- Add
PubMedAdminUserto thepubmed_admin_groupgroup - Add
PubMedLimitedUserto thepubmed_limited_groupgroup - Add
ClinicalTrialsAdminUserto theclinical_trials_admin_groupgroup - Add
ClinicalTrialsLimitedUserto theclinical_trials_limited_groupgroup - Add
ResearchBasicUserto theresearch_basic_groupgroup
To add users to their respective group, complete the following steps for each group:
- On the Amazon Cognito console, choose Groups in the navigation pane.
- Choose the group to which you want to add a user.
- Choose Add user to group.
- Choose the user and choose Add.
Log in to generate a JWT
Before running the test queries in the next section, you must obtain the id_token (JWT) for the specified users. The tokens will expire in 60 minutes. If the token is expired for a user, you must log in again to get a fresh token. To log in with your user to get the id_token, complete the following steps:
- On the Amazon Cognito console, open your user pool.
- Choose App clients in the navigation pane.
- Choose the app client.
- Choose View login page.
- Enter the user name that you used when creating the user.
- Enter the temporary password that you set when creating the user.
- For first-time logins, you will be prompted to create a new password. Enter a new password that meets the following requirements:
- At least 8 characters
- Contains uppercase and lowercase letters
- Contains at least one number
- Contains at least one special character
- Copy the id_token value you generated (without quotation marks).
Query data in OpenSearch Service
This example demonstrates how OpenSearch Service filters search results based on user permissions. We test searches using JWTs for two different users to verify access controls. Each user’s search results are limited to the indexes and documents allowed by their assigned roles.
On the CloudFormation stack’s Resources tab, locate the RestAPI value that you noted earlier. Open the API gateway in a new browser tab.
Complete the following steps to test the search API for each of the scenarios mentioned in this section:
- On the API Gateway console, choose Resources in the navigation pane.
- Choose the /search resource.
- Choose the POST method.
- Choose Test.
When submitting queries to OpenSearch Service, make sure all double quotation marks are escaped to prevent syntax errors. Additionally, make sure you complete your query before your JWT expires, or you will need to generate a new token. If you attempt to use an expired token, it will result in an error.
For Scenarios 1 and 2, log in with your PubMedAdmin user, and for Scenarios 3 and 4, log in with your PubMedLimitedUser to obtain the required id_token.
Scenario 1
In this first query, we query the pubmed index with the credentials of user PubMedAdminUser, which is part of pubmed_admin_group:
Add the following values to the respective input fields:
- For Query strings, enter query=
"{\"query\":{\"match_all\":{}}}"&index=pubmed - For Headers, enter id_token:<id-token-for-PubMedAdminUser>
The following screenshot shows our query results.
Users with the pubmed_admin role have full access to the PubMed index and can perform unrestricted searches across all fields and document types. This query successfully returns documents with the HTTP 200 status code because the user has complete read permissions on this index.
Scenario 2
Next, we query the clinical-trials index with the credentials of user PubMedAdminUser, who is part of pubmed_admin_group:
Add the following values to the respective input fields:
- For Query strings, enter query=
"{\"query\":{\"match_all\":{}}}"&index=clinical-trials - For Headers, enter
id_token:<id-token-for-PubMedAdminUser>
The following screenshot shows our query results.
Despite having admin privileges for PubMed data, this user receives a 403 Forbidden response when attempting to access the clinical-trials index. The error message indicates the lack of necessary permissions for performing search operations on this index.
Scenario 3
Now we query allowed fields in the pubmed index with the credentials of user PubMedLimitedUser, which is part of pubmed_limited_group:
Add the following values to the respective input fields:
- For Query strings, enter query=
"{\"query\":{\"match\":{\"title\": \"molecular biology\"}}}"&index=pubmed - For Headers, enter
id_token:<id-token-for-PubMedLimitedUser>
The following screenshot shows our query results.
Users with the pubmed_limited role can successfully query specific fields like title, but with restricted access to sensitive information. The query returns results with the HTTP 200 status code, but the journal field is anonymized due to field-level security policies. Users can search and view certain fields while having sensitive data automatically masked or excluded from their results.
Scenario 4
Lastly, we query unauthorized fields in the pubmed index with the credentials of user PubMedLimitedUser, which is part of pubmed_limited_group:
Add the following values to the respective input fields:
- For Query strings, enter query=
"{\"query\":{\"match\":{\"research_group\":\"RG_345\"}}}"&index=pubmed - For Headers, enter
id_token:<id-token-for-PubMedLimitedUser>
The following screenshot shows our query results.
When a user with the pubmed_limited role attempts to query the restricted research_group field, OpenSearch returns a successful response (HTTP 200) but with empty results. This behavior occurs because field-level security is enforcing access controls instead of returning a HTTP 403 error, it silently filters out the restricted field from both the query and results. This security-by-obscurity approach means that users can’t determine whether their query failed due to lack of permissions or genuine absence of matching documents.
Clean up
To avoid incurring further AWS usage charges, delete the resources created in this post by deleting the CloudFormation stack. This step will remove all resources except Lambda layers. To delete the Lambda layers, navigate to the Layers page on the Lambda console, and delete the layers named <CloudFormation-Stack-Name>-requests and <CloudFormation-Stack-Name>-crypt.
Conclusion
In this post, we discussed how JWTs provide a robust and scalable authentication mechanism that can be integrated with existing IdPs. We also demonstrated how to seamlessly integrate fine-grained access control across search applications. Organizations can define granular permissions within their IdP, making sure sensitive information remains protected. The JWT integration with OpenSearch Service enables secure, efficient access control, so users can only access role-appropriate information while simplifying compliance and access management.
If you have feedback about this post, leave them in the comments section. If you have questions about this post, start a new thread on AWS Security, Identity, and Compliance re:Post or contact AWS Support.
About the authors
 Ramya Bhat is a Data Analytics Consultant at AWS, specializing in the design and implementation of cloud-based data platforms. She builds enterprise-grade solutions across search, data warehousing, and ETL that enable organizations to modernize data ecosystems and derive insights through scalable analytics. She has delivered customer engagements across healthcare, insurance, fintech, and media sectors.
 Shubhansu Sawaria is a Sr. Delivery Consultant – SRC at AWS, based in Bangalore, India. He specializes in designing and implementing comprehensive AWS Cloud security solutions. He has developed security solutions for startups, banks, and healthcare organizations. His expertise helps organizations elevate their cloud security infrastructures, achieve compliance objectives, and provide robust data protection.
 Soujanya Konka is a Sr. Solutions Architect and Analytics Specialist at AWS, focused on helping customers build their ideas in the cloud. She has expertise in designing and implementing enterprise search solutions and advanced data analytics at scale.
How Ancestry optimizes a 100-billion-row Iceberg table
Post Syndicated from Thomas Cardenas original https://aws.amazon.com/blogs/big-data/how-ancestry-optimizes-a-100-billion-row-iceberg-table/
This is a guest post by Thomas Cardenas, Staff Software Engineer at Ancestry, in partnership with AWS.
Ancestry, the global leader in family history and consumer genomics, uses family trees, historical records, and DNA to help people on their journeys of personal discovery. Ancestry has the largest collection of family history records, consisting of 40 billion records. They serve more than 3 million subscribers and have over 23 million people in their growing DNA network. Their customers can use this data to discover their family story.
Ancestry is proud to connect users with their families past and present. They help people learn more about their own identity by learning about their ancestors. Users build a family tree through which we surface relevant records, historical documents, photos, and stories that might contain details about their ancestors. These artifacts are surfaced through Hints. The Hints dataset is one of the most interesting datasets at Ancestry. It’s used to alert users that potential new information is available. The dataset has multiple shards, and there are currently 100 billion rows being used by machine learning models and analysts. Not only is the dataset large, it also changes rapidly.
In this post, we share the best practices that Ancestry used to implement an Apache Iceberg-based hints table capable of handling 100 billion rows with 7 million hourly changes. The optimizations covered here resulted in cost reductions of 75%.
Overview of solution
Ancestry’s Enterprise Data Management (EDM) team faced a critical challenge—how to provide a unified, performant data ecosystem that could serve diverse analytical workloads across financial, marketing, and product analytics teams. The ecosystem needed to support everything from data scientists training recommendation models to geneticists developing population studies—all requiring access to the same Hints data.
The ecosystem around Hints data had been developed organically, without a well-defined architecture. Teams independently accessed Hints data through direct service calls, Kafka topic subscriptions, or warehouse queries, creating significant data duplication and unnecessary system load. To reduce cost and improve performance, EDM implemented a centralized Apache Iceberg data lake on Amazon Simple Storage Service (Amazon S3), with Amazon EMR providing the processing power. This architecture, shown in the following image, creates a single source of truth for the Hints dataset while using Iceberg’s ACID transactions, schema evolution, and partition evolution capabilities to handle scale and update frequency.
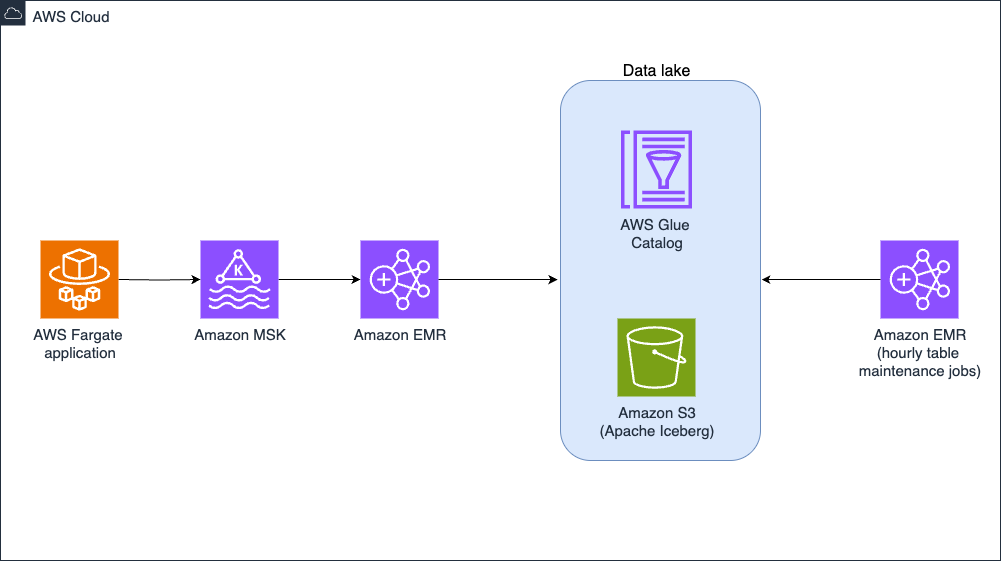
Hints table management architecture
Managing datasets exceeding one billion rows presents unique challenges, and Ancestry faced this challenge with the trees collection of 20–100 billion rows across multiple tables. At this scale, dataset updates require careful execution to control costs and prevent memory issues. To solve these challenges, EDM chose Amazon EMR on Amazon EC2 running Spark to write Iceberg tables on Amazon S3 for storage. With large and steady Amazon EMR workloads, running the clusters on Amazon EC2, as opposed to Serverless, proved cost effective. EDM has scheduled an Apache Spark job to run every hour on their Amazon EMR on EC2. This job uses the merge operation to update the Iceberg table with recently changed rows. Performing updates like this on such a large dataset can easily lead to runaway costs and out-of-memory errors.
Key optimization techniques
The engineers needed to enable fast, row-level updates without impacting query performance or incurring substantial cost. To achieve this, Ancestry used a combination of partitioning strategies, table configurations, Iceberg procedures, and incremental updates. The following is covered in detail:
- Partitioning
- Sorting
- Merge-on-read
- Compaction
- Snapshot management
- Storage-partitioned joins
Partitioning strategy
Developing an effective partitioning strategy was crucial for the 100-billion-row Hints table. Iceberg supports various partition transforms including column value, temporal functions (year, month, day, hour), and numerical transforms (bucket, truncate). Following AWS best practices, Ancestry carefully analyzed query patterns to identify a partitioning approach that would support these queries while balancing these two competing considerations:
- Too few partitions would force queries to scan excessive data, degrading performance and increasing costs.
- Too many partitions would create small files and excessive metadata, causing management overhead and slower query planning. It’s generally best to avoid parquet files smaller than 100 MB.
Through query pattern analysis, Ancestry discovered that most analytical queries filtered on hint status (particularly pending status) and hint type. This insight led us to implement a two-level partitioning strategy-first on status and then on type, which dramatically reduced the amount of data scanned during typical queries.
Sorting
To further optimize query performance, Ancestry implemented strategic data organization within partitions using Iceberg’s sort orders. While Iceberg doesn’t maintain perfect ordering, even approximate sorting significantly improves data locality and compression ratios.
For the Hints table with 100 billion rows, Ancestry faced a unique challenge: the primary identifiers (PersonId and HintId) are high-cardinality numeric columns that would be prohibitively expensive to sort completely. The solution uses Iceberg’s truncate transform function to support sorting on just a portion of the number, effectively creating another partition by grouping a collection of IDs together. For example, we can specify truncate(100_000_000, hintId) to create groups of 100 million hint IDs, greatly improving the performance of queries that specify that column.
Merge on read
With 7 million changes to the Hints table occurring hourly, optimizing write performance became critical to the architecture. In addition to making sure queries performed well, Ancestry also needed to make sure our frequent updates would perform well in both time and cost. It was quickly discovered that the default copy-on-write (CoW) strategy, which copies an entire file when any part of it changes, was too slow and expensive for their use case. Ancestry was able to get the performance we needed by instead specifying the merge-on-read (MoR) update strategy, which maintains new information in diff files that are reconciled on read. The large updates that happen every hour led us to choose faster updates at the cost of slower reads.
File compaction
The frequent updates mean files are constantly needing to be re-written to maintain performance. Iceberg provides the rewrite_data_files procedure for compaction, but default configurations proved insufficient for our scale. Leaving the default configuration in place, the rewrite operation wrote to five partitions at a time and didn’t meet our performance objective. We found that increasing the concurrent writes improved performance. We used the following set of parameters, setting a relatively high max-concurrent-file-group-rewrites value of 100 to more efficiently deal with our thousands of partitions. The default of rewriting only one file at a time couldn’t keep up with the frequency of our updates.
Key optimizations in Ancestry’s approach include:
- High concurrency: We increased
max-concurrent-file-group-rewritesfrom the default 5 to 100, enabling parallel processing of our thousands of partitions. This increased compute costs but was necessary to help ensure that the jobs finished. - Resilience at scale: We enabled
partial-progressto create compaction checkpoints, essential when operating at our scale where failures are particularly costly. - Comprehensive delta elimination: Setting
rewrite-alltotruehelps ensure that both data files and delete files are compacted, preventing the accumulation of delete files. By default, the delete files created as part of this strategy aren’t re-written and would continue to accumulate, slowing queries.
We arrived at these optimizations through successive trials and evaluations. For example, with our very large dataset, we discovered that we could use a WHERE clause to limit re-writes to a single partition. Based on the partitions, we see varied execution times and resource utilization. For some partitions, we needed to reduce concurrency to avoid running into out of memory errors.
Snapshot management
Iceberg tables maintain snapshots to preserve the history of the table, allowing you to time travel through the changes. As these snapshots accrue, they add to storage costs and degrade performance. This is why maintaining an Iceberg table requires you to periodically call the expire_snapshots procedure. We found we needed to enable concurrency for snapshot management so that it would complete in a timely manner:
Consider how to balance performance, cost, and the need to keep historical records depending on your use case. When you do so, note that there is a table-level setting for maximum snapshot age which can override the retain_last parameter and retain only the active snapshot.
Reducing shuffle with Storage-Partitioned Joins
We use Storage-Partitioned Joins (SPJ) in Iceberg tables to minimize expensive shuffles during data processing. SPJ is an advanced Iceberg feature (available in Spark 3.3 or later with Iceberg 1.2 or later) that uses the physical storage layout of tables to eliminate shuffle operations entirely. For our Hints update pipeline, this optimization was transformational.
SPJ is especially useful during MERGE INTO operations, where datasets have identical partitioning. Proper configuration helps ensure effective use of SPJ to optimize joins.
SPJ has a few requirements such as both tables must be Iceberg partitioned the same way and joined on the partition key. Then Iceberg will know that it doesn’t have to shuffle the data when the tables are loaded. This even works when there are a different number of partitions on either side.
Updates to the Hints database are first staged in the Hint Changes database where data is transformed from the original Kafka data format into how it will look in the target (Hints) table. This is a temporary Iceberg table where we are able to perform audits using Write-Audit-Publish (WAP) pattern. In addition to using the WAP pattern we are able to use the SPJ functionality.
The Hints data pipeline
Reducing full-table scans
Another strategy to reduce shuffle is minimizing the data involved in joins by dynamically pushing down filters. In production, these filters vary between batches, so a multi-step operation is often necessary for setting up merges. The following example code first limits its scope by setting minimum and maximum values for the ID, then performs an update or delete to the target table depending on whether a target value exists.
This technique reduces cost in several ways: the bounded merge reduces the number of affected rows, it allows for predicate pushdown optimization, which filters at the storage layer, and it reduces shuffle operations when compared with a join.
Additional insights
Apart from the Hints table, we have implemented over 1,000 Iceberg tables in our data ecosystem. The following are some key insights that we observed:
- Updating a table using
MERGEis typically the most expensive action, so this is where we spent the most time optimizing. It was still our best option. - Using complex data types can help co-locate similar data in the table.
- Monitor costs of each pipeline because while following good practice you can stumble across things you miss that are causing costs to increase.
Conclusion
Organizations can use Apache Iceberg tables on Amazon S3 with Amazon EMR to manage massive datasets with frequent updates. Many customers will be able to achieve excellent performance with a low maintenance burden by using the AWS Glue table optimizer for automatic, asynchronous compaction. Some customers, like Ancestry, will require custom optimizations of their maintenance procedures to meet their cost and performance goals. These customers should start with a careful assessment of query patterns to develop a partitioning strategy to minimize the amount of data that needs to be read and processed. Update frequency and latency requirements will dictate other choices, like whether merge-on-read or copy-on-write is the better strategy.
If your organization faces similar challenges with high volumes of data requiring frequent updates, you can use a combination of Apache Iceberg’s advanced features with AWS services like Amazon EMR Serverless, Amazon S3, and AWS Glue to build a truly modern data lake that delivers the scale, performance, and cost-efficiency you need.
Further reading
- How Iceberg works
- Build a high-performance, ACID compliant, evolving data lake using Apache Iceberg on Amazon EMR