Tag Archives: AWS Backup

Welcome to AWS Storage Day 2021

Post Syndicated from Marcia Villalba original https://aws.amazon.com/blogs/aws/welcome-to-aws-storage-day-2021/

Welcome to the third annual AWS Storage Day 2021! During Storage Day 2020 and the first-ever Storage Day 2019 we made many impactful announcements for our customers and this year will be no different. The one-day, free AWS Storage Day 2021 virtual event will be hosted on the AWS channel on Twitch. You’ll hear from experts about announcements, leadership insights, and educational content related to AWS Storage services.

AWS Storage DayThe first part of the day is the leadership track. Wayne Duso, VP of Storage, Edge, and Data Governance, will be presenting a live keynote. He’ll share information about what’s new in AWS Cloud Storage and how these services can help businesses increase agility and accelerate innovation. The keynote will be followed by live interviews with the AWS Storage leadership team, including Mai-Lan Tomsen Bukovec, VP of AWS Block and Object Storage.

The second part of the day is a technical track in which you’ll learn more about Amazon Simple Storage Service (Amazon S3), Amazon Elastic Block Store (EBS), Amazon Elastic File System (Amazon EFS), AWS Backup, Cloud Data Migration, AWS Transfer Family and Amazon FSx.

To register for the event, visit the AWS Storage Day 2021 event page.

Now as Jeff Barr likes to say, let’s get into the announcements.

Amazon FSx for NetApp ONTAP
Today, we are pleased to announce Amazon FSx for NetApp ONTAP, a new storage service that allows you to launch and run fully managed NetApp ONTAP file systems in the cloud. Amazon FSx for NetApp ONTAP joins Amazon FSx for Lustre and Amazon FSx for Windows File Server as the newest file system offered by Amazon FSx.

Amazon FSx for NetApp ONTAP provides the full ONTAP experience with capabilities and APIs that make it easy to run applications that rely on NetApp or network-attached storage (NAS) appliances on AWS without changing your application code or how you manage your data. To learn more, read New – Amazon FSx for NetApp ONTAP.

Amazon S3
Amazon S3 Multi-Region Access Points is a new S3 feature that allows you to define global endpoints that span buckets in multiple AWS Regions. Using this feature, you can now build multi-region applications without adding complexity to your applications, with the same system architecture as if you were using a single AWS Region.

S3 Multi-Region Access Points is built on top of AWS Global Accelerator and routes S3 requests over the global AWS network. S3 Multi-Region Access Points dynamically routes your requests to the lowest latency copy of your data, so the upload and download performance can increase by 60 percent. It’s a great solution for applications that rely on reading files from S3 and also for applications like autonomous vehicles that need to write a lot of data to S3. To learn more about this new launch, read How to Accelerate Performance and Availability of Multi-Region Applications with Amazon S3 Multi-Region Access Points.

Creating a multi-region access point

There’s also great news about the Amazon S3 Intelligent-Tiering storage class! The conditions of usage have been updated. There is no longer a minimum storage duration for all objects stored in S3 Intelligent-Tiering, and monitoring and automation charges for objects smaller than 128 KB have been removed. Smaller objects (128 KB or less) are not eligible for auto-tiering when stored in S3 Intelligent-Tiering. Now that there is no monitoring and automation charge for small objects and no minimum storage duration, you can use the S3 Intelligent-Tiering storage class by default for all your workloads with unknown or changing access patterns. To learn more about this announcement, read Amazon S3 Intelligent-Tiering – Improved Cost Optimizations for Short-Lived and Small Objects.

Amazon EFS
Amazon EFS Intelligent Tiering is a new capability that makes it easier to optimize costs for shared file storage when access patterns change. When you enable Amazon EFS Intelligent-Tiering, it will store the files in the appropriate storage class at the right time. For example, if you have a file that is not used for a period of time, EFS Intelligent-Tiering will move the file to the Infrequent Access (IA) storage class. If the file is accessed again, Intelligent-Tiering will automatically move it back to the Standard storage class.

To get started with Intelligent-Tiering, enable lifecycle management in a new or existing file system and choose a lifecycle policy to automatically transition files between different storage classes. Amazon EFS Intelligent-Tiering is perfect for workloads with changing or unknown access patterns, such as machine learning inference and training, analytics, content management and media assets. To learn more about this launch, read Amazon EFS Intelligent-Tiering Optimizes Costs for Workloads with Changing Access Patterns.
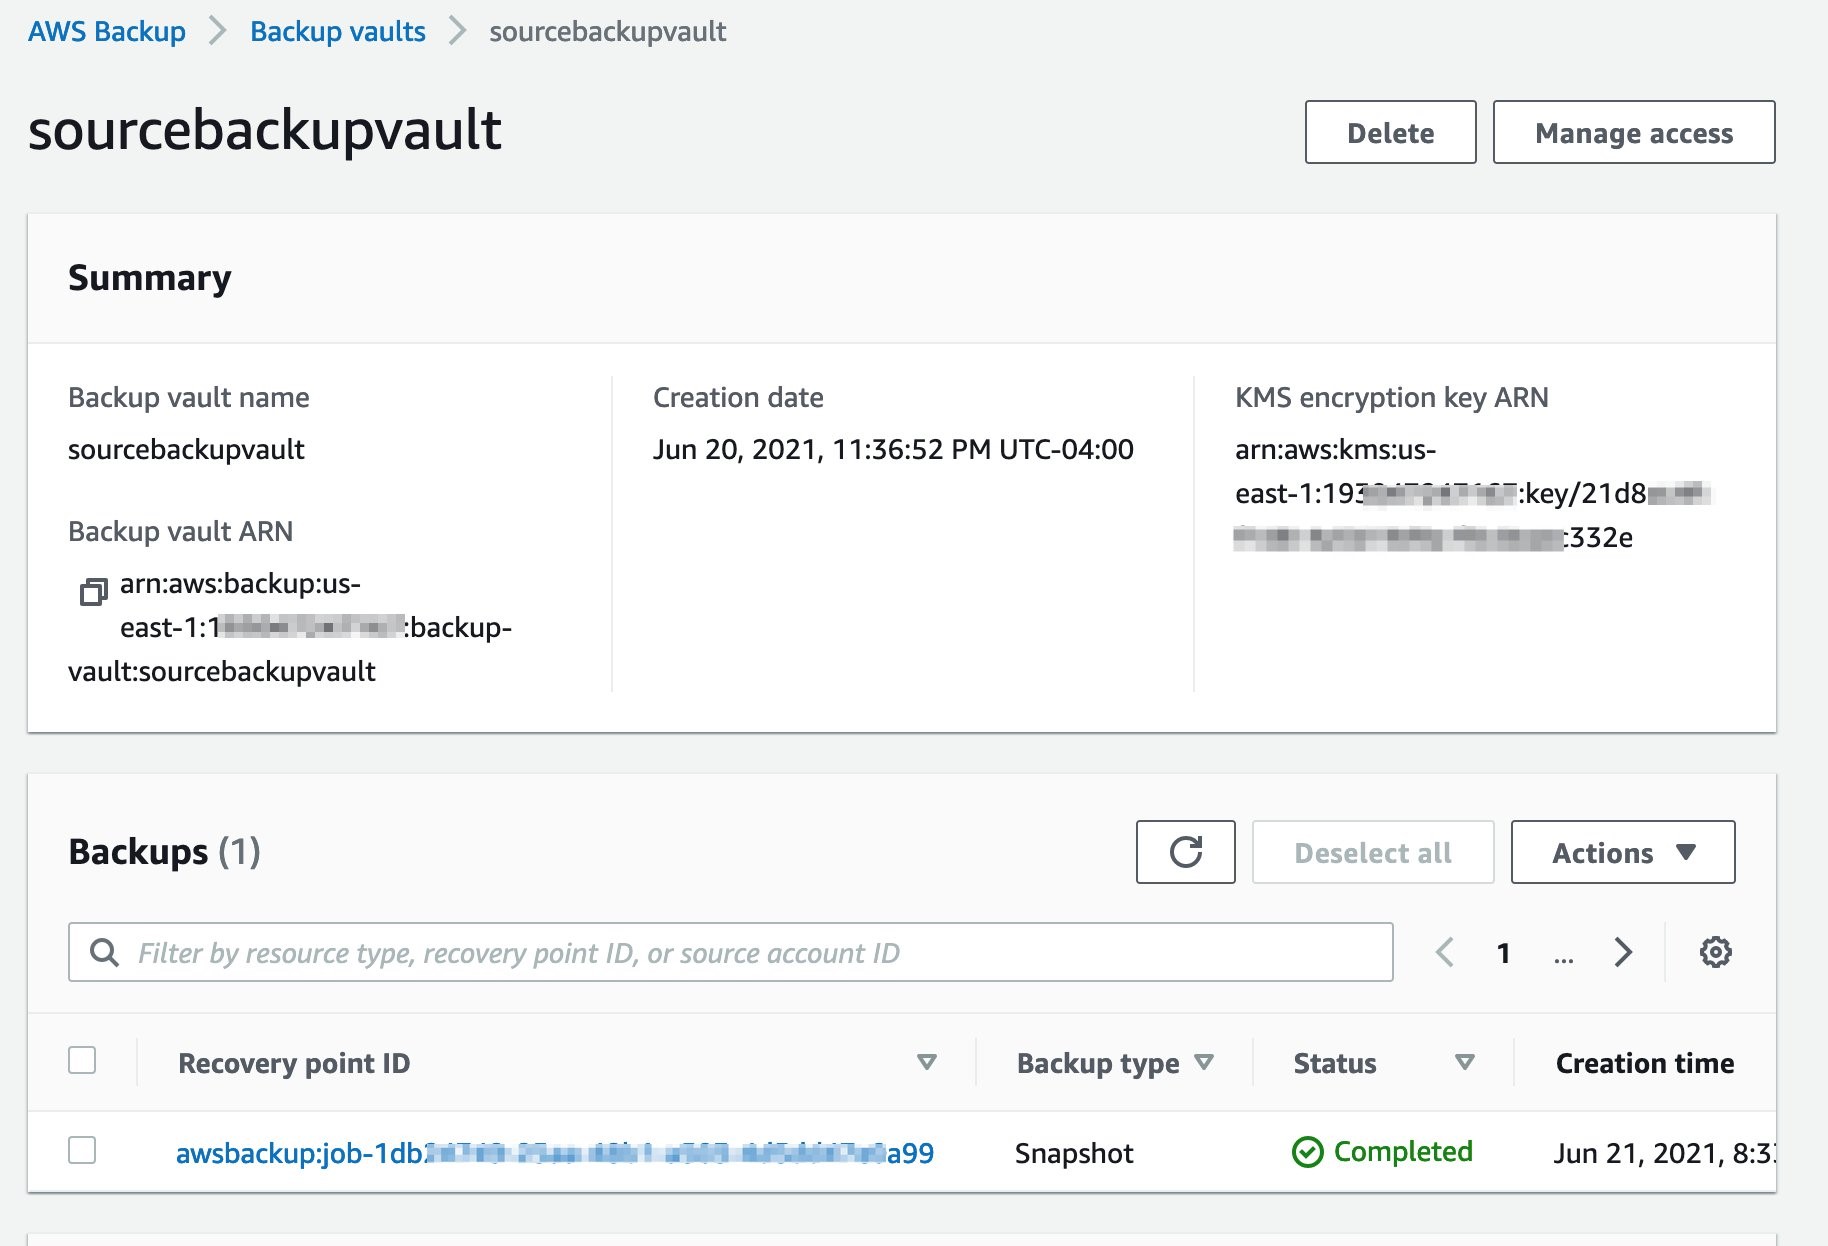
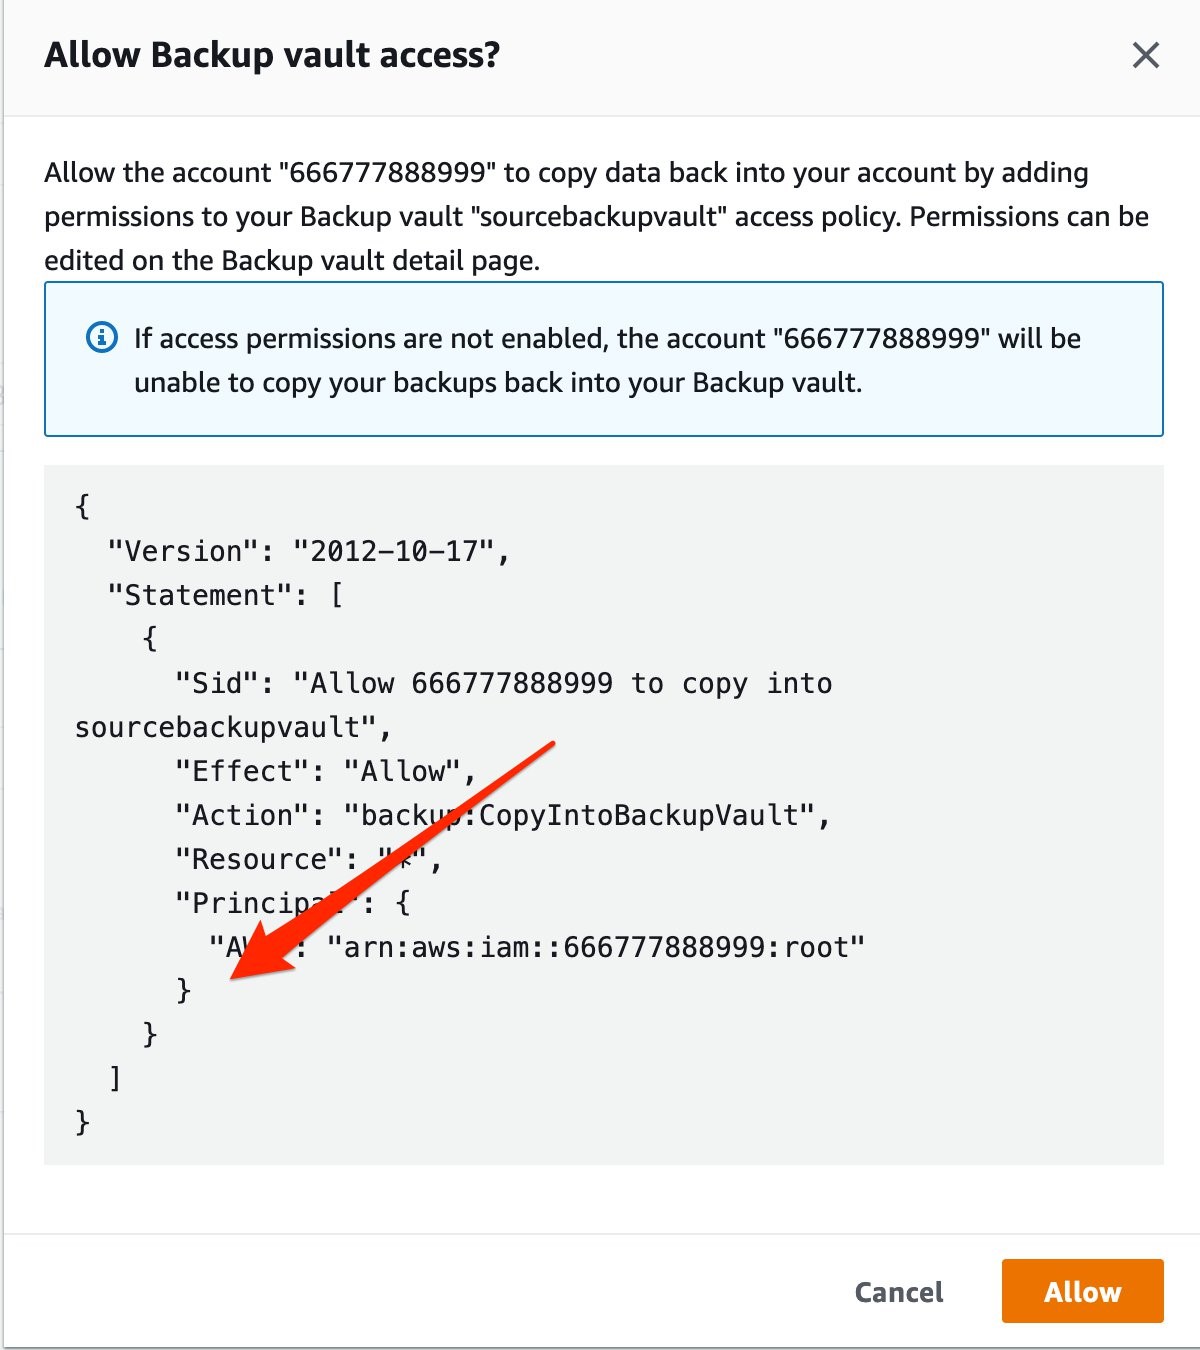
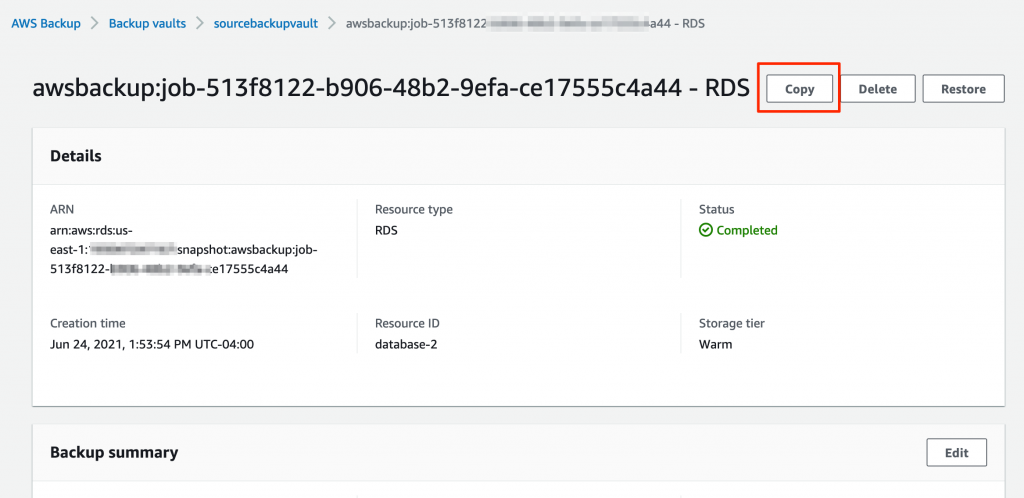
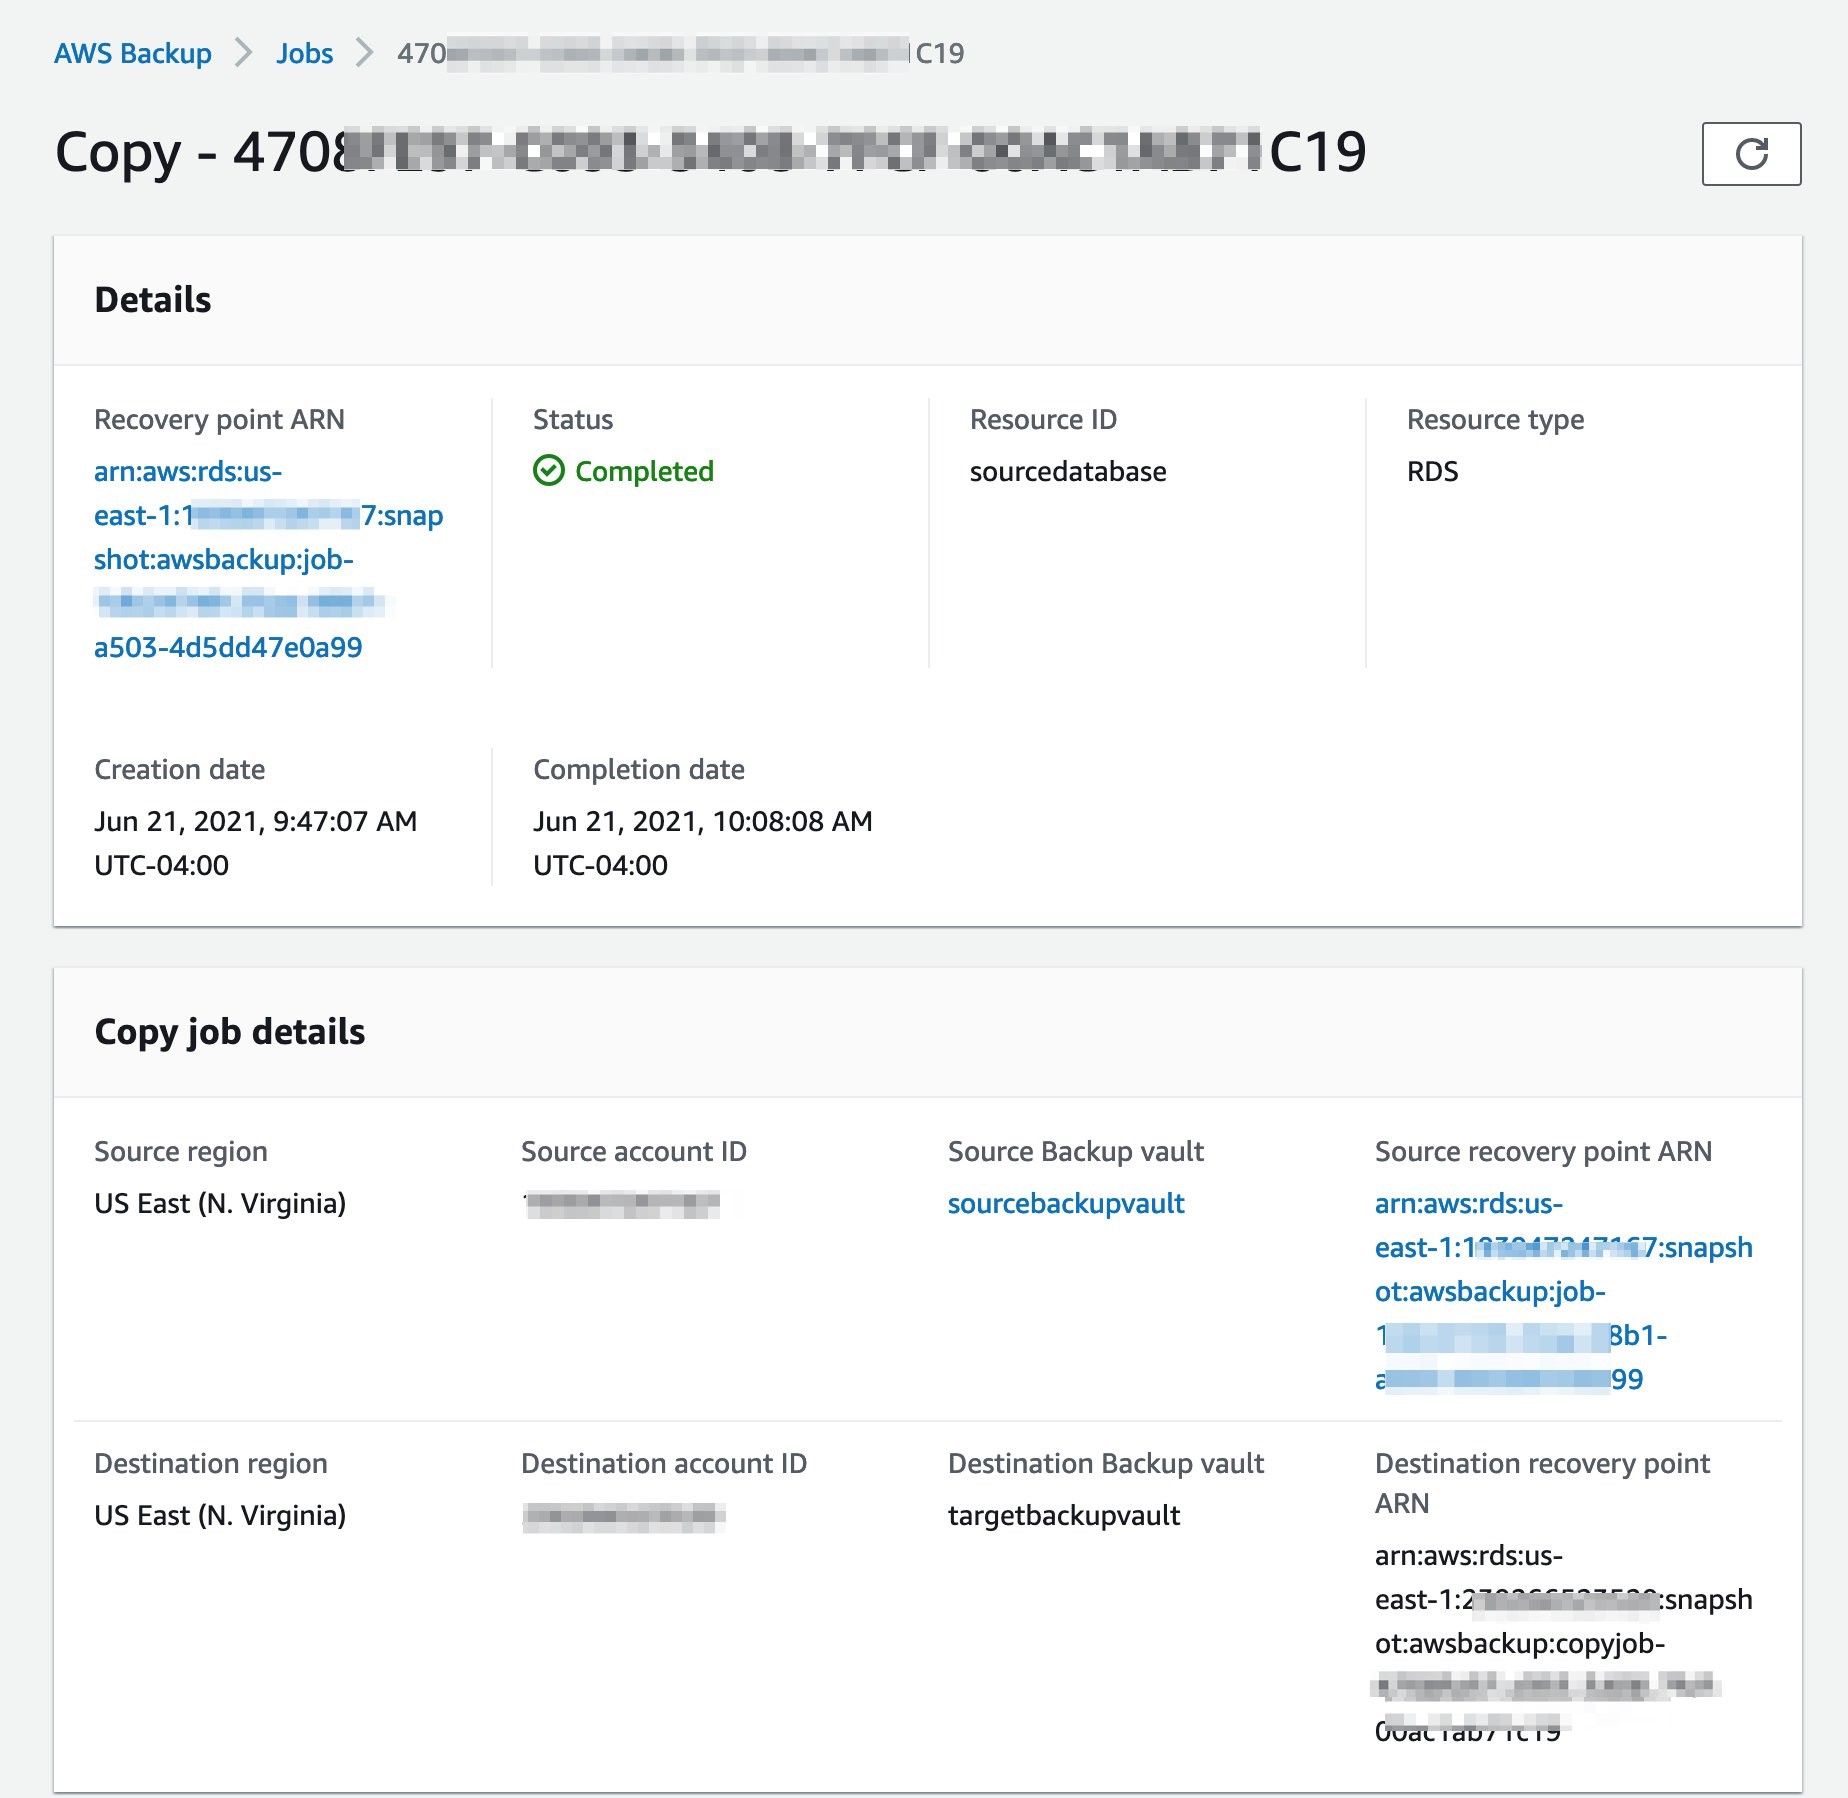
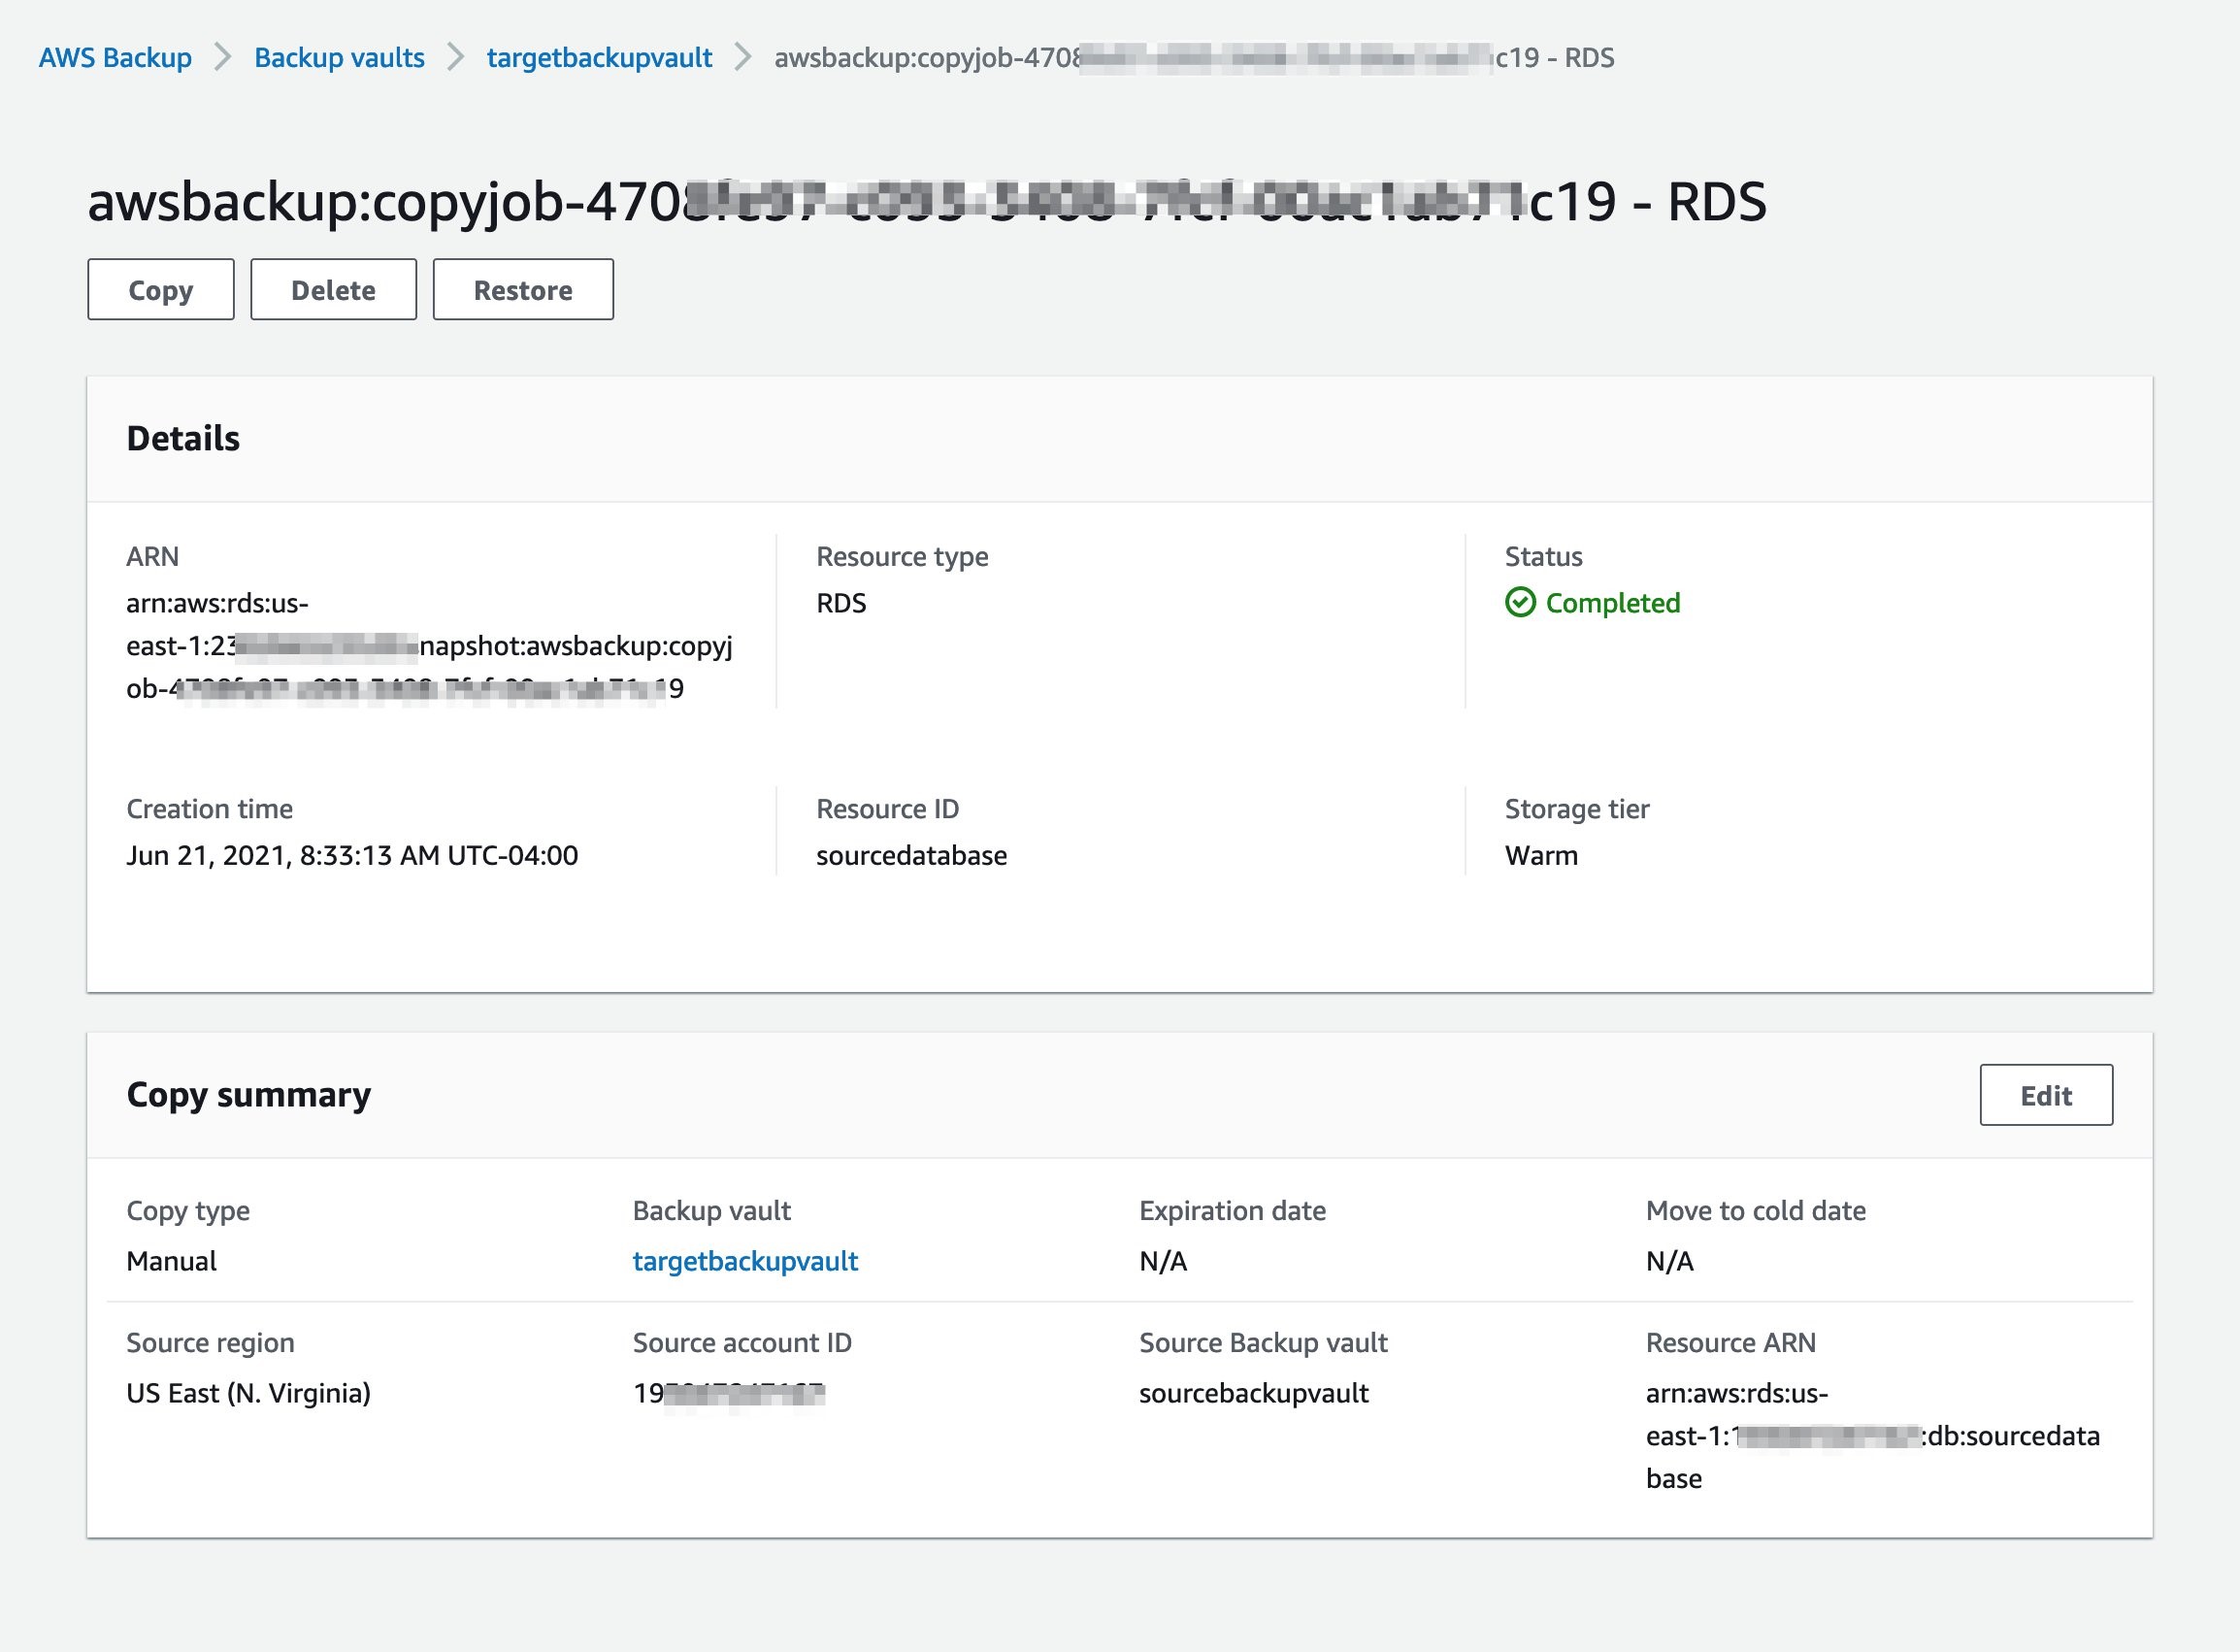
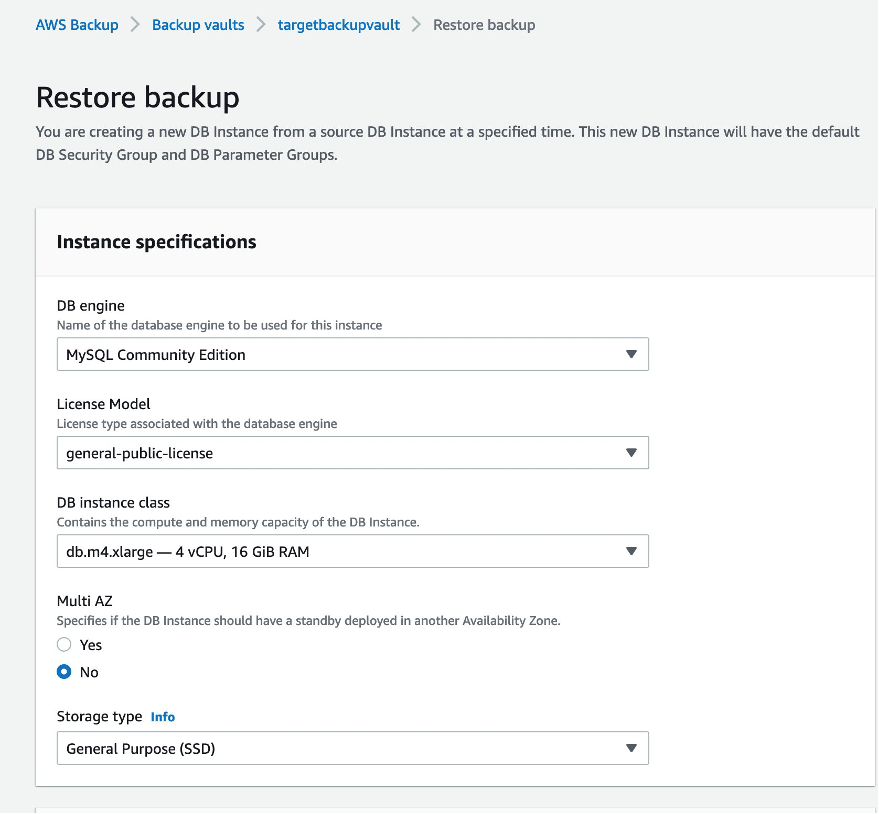
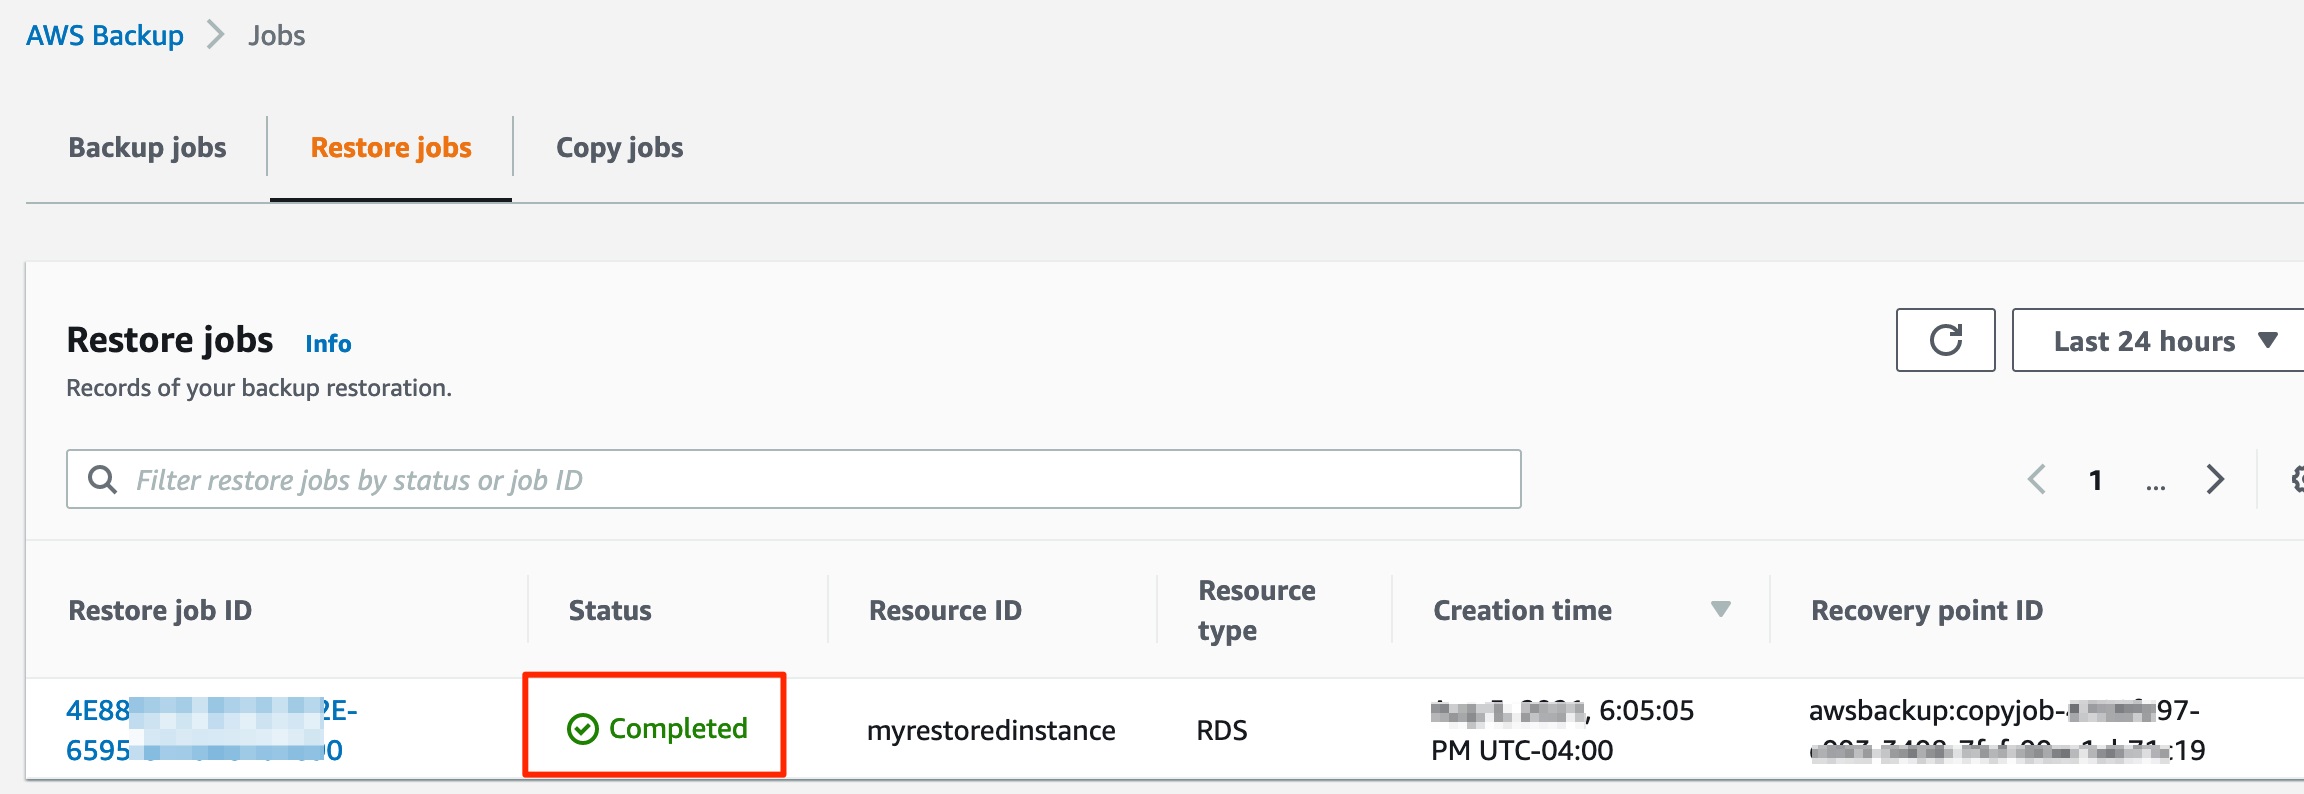
AWS Backup
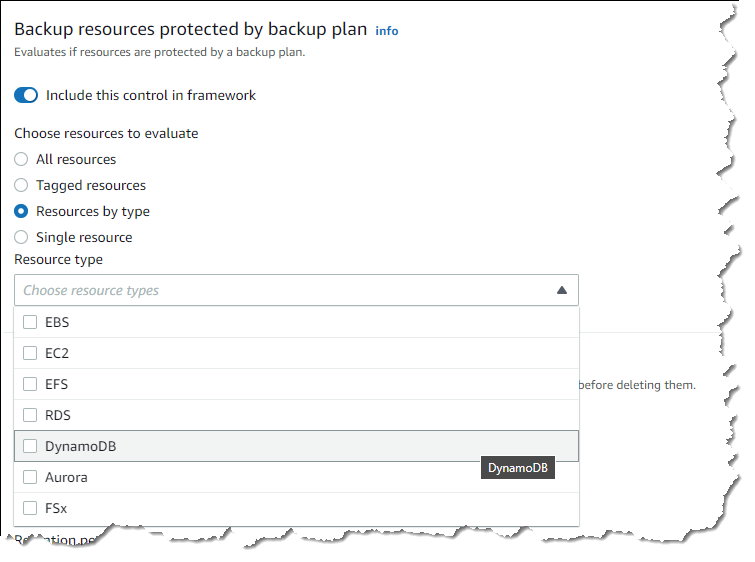
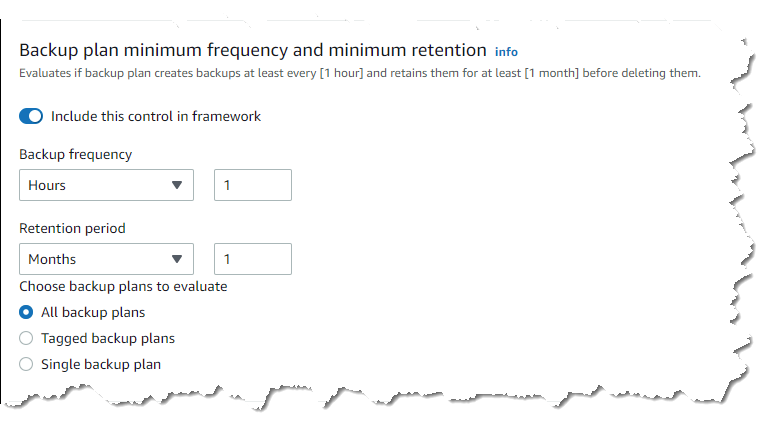
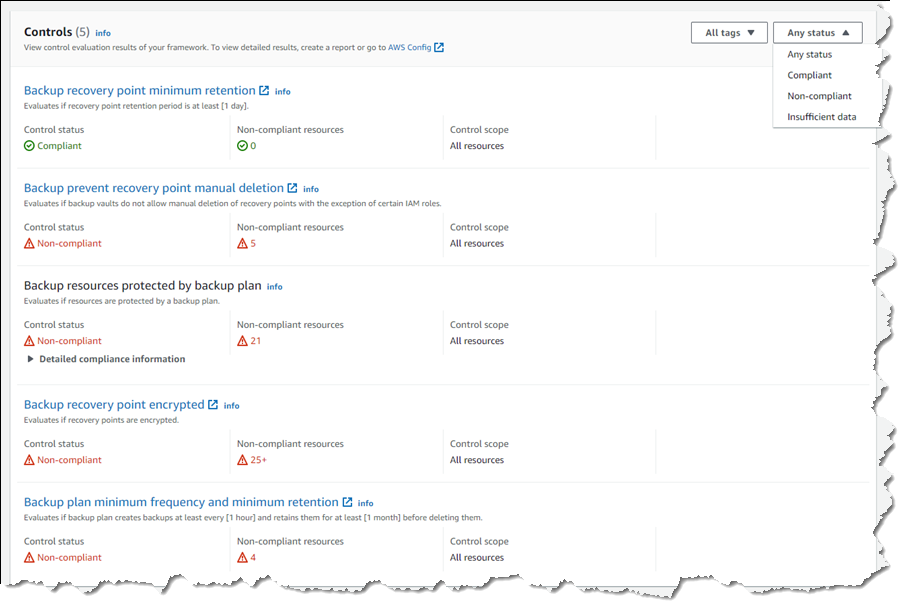
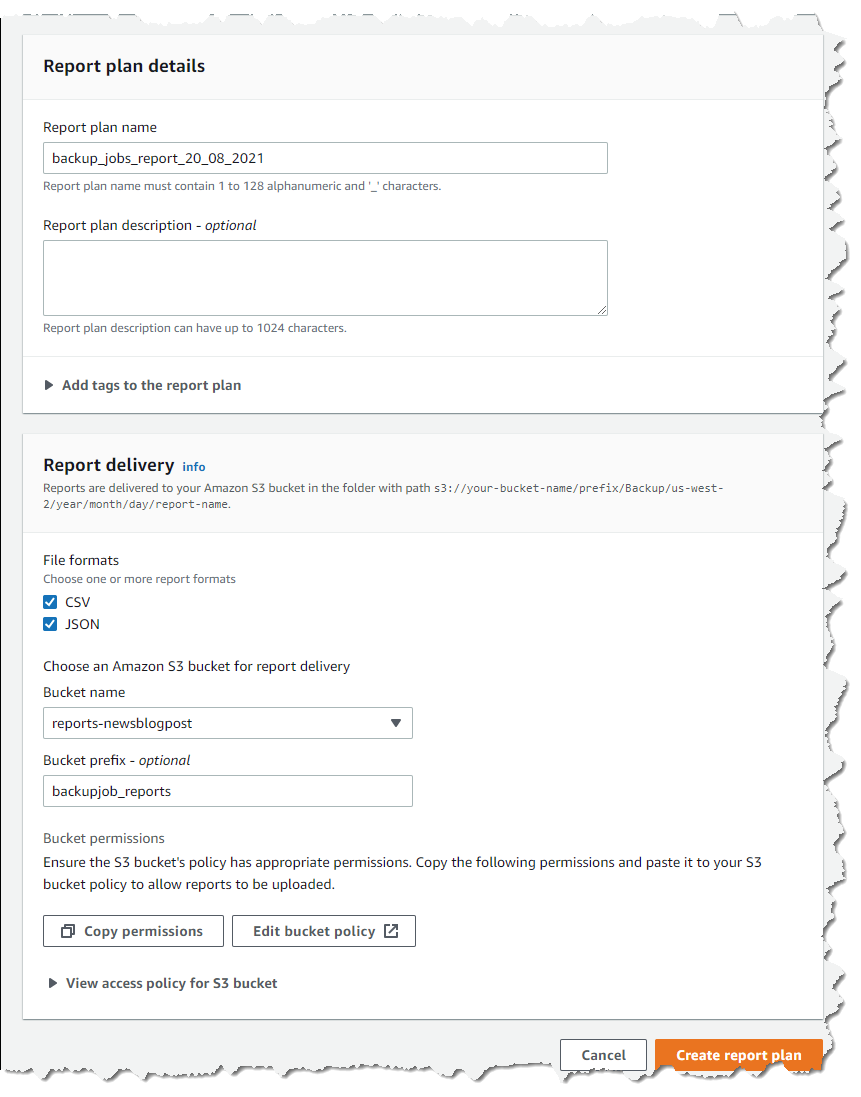
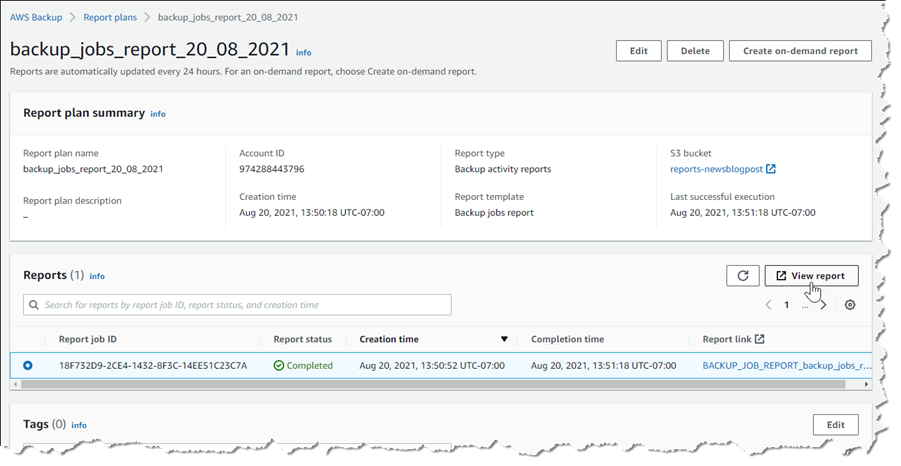
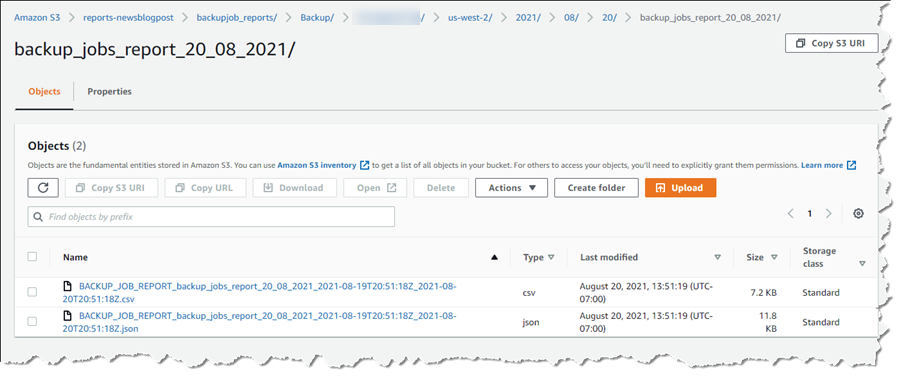
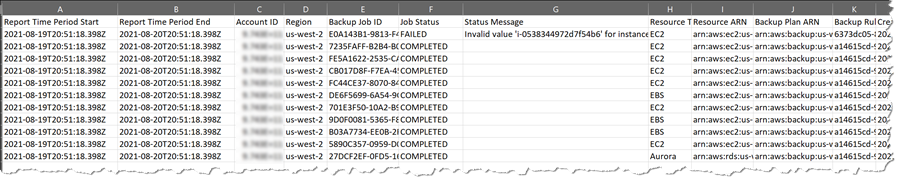
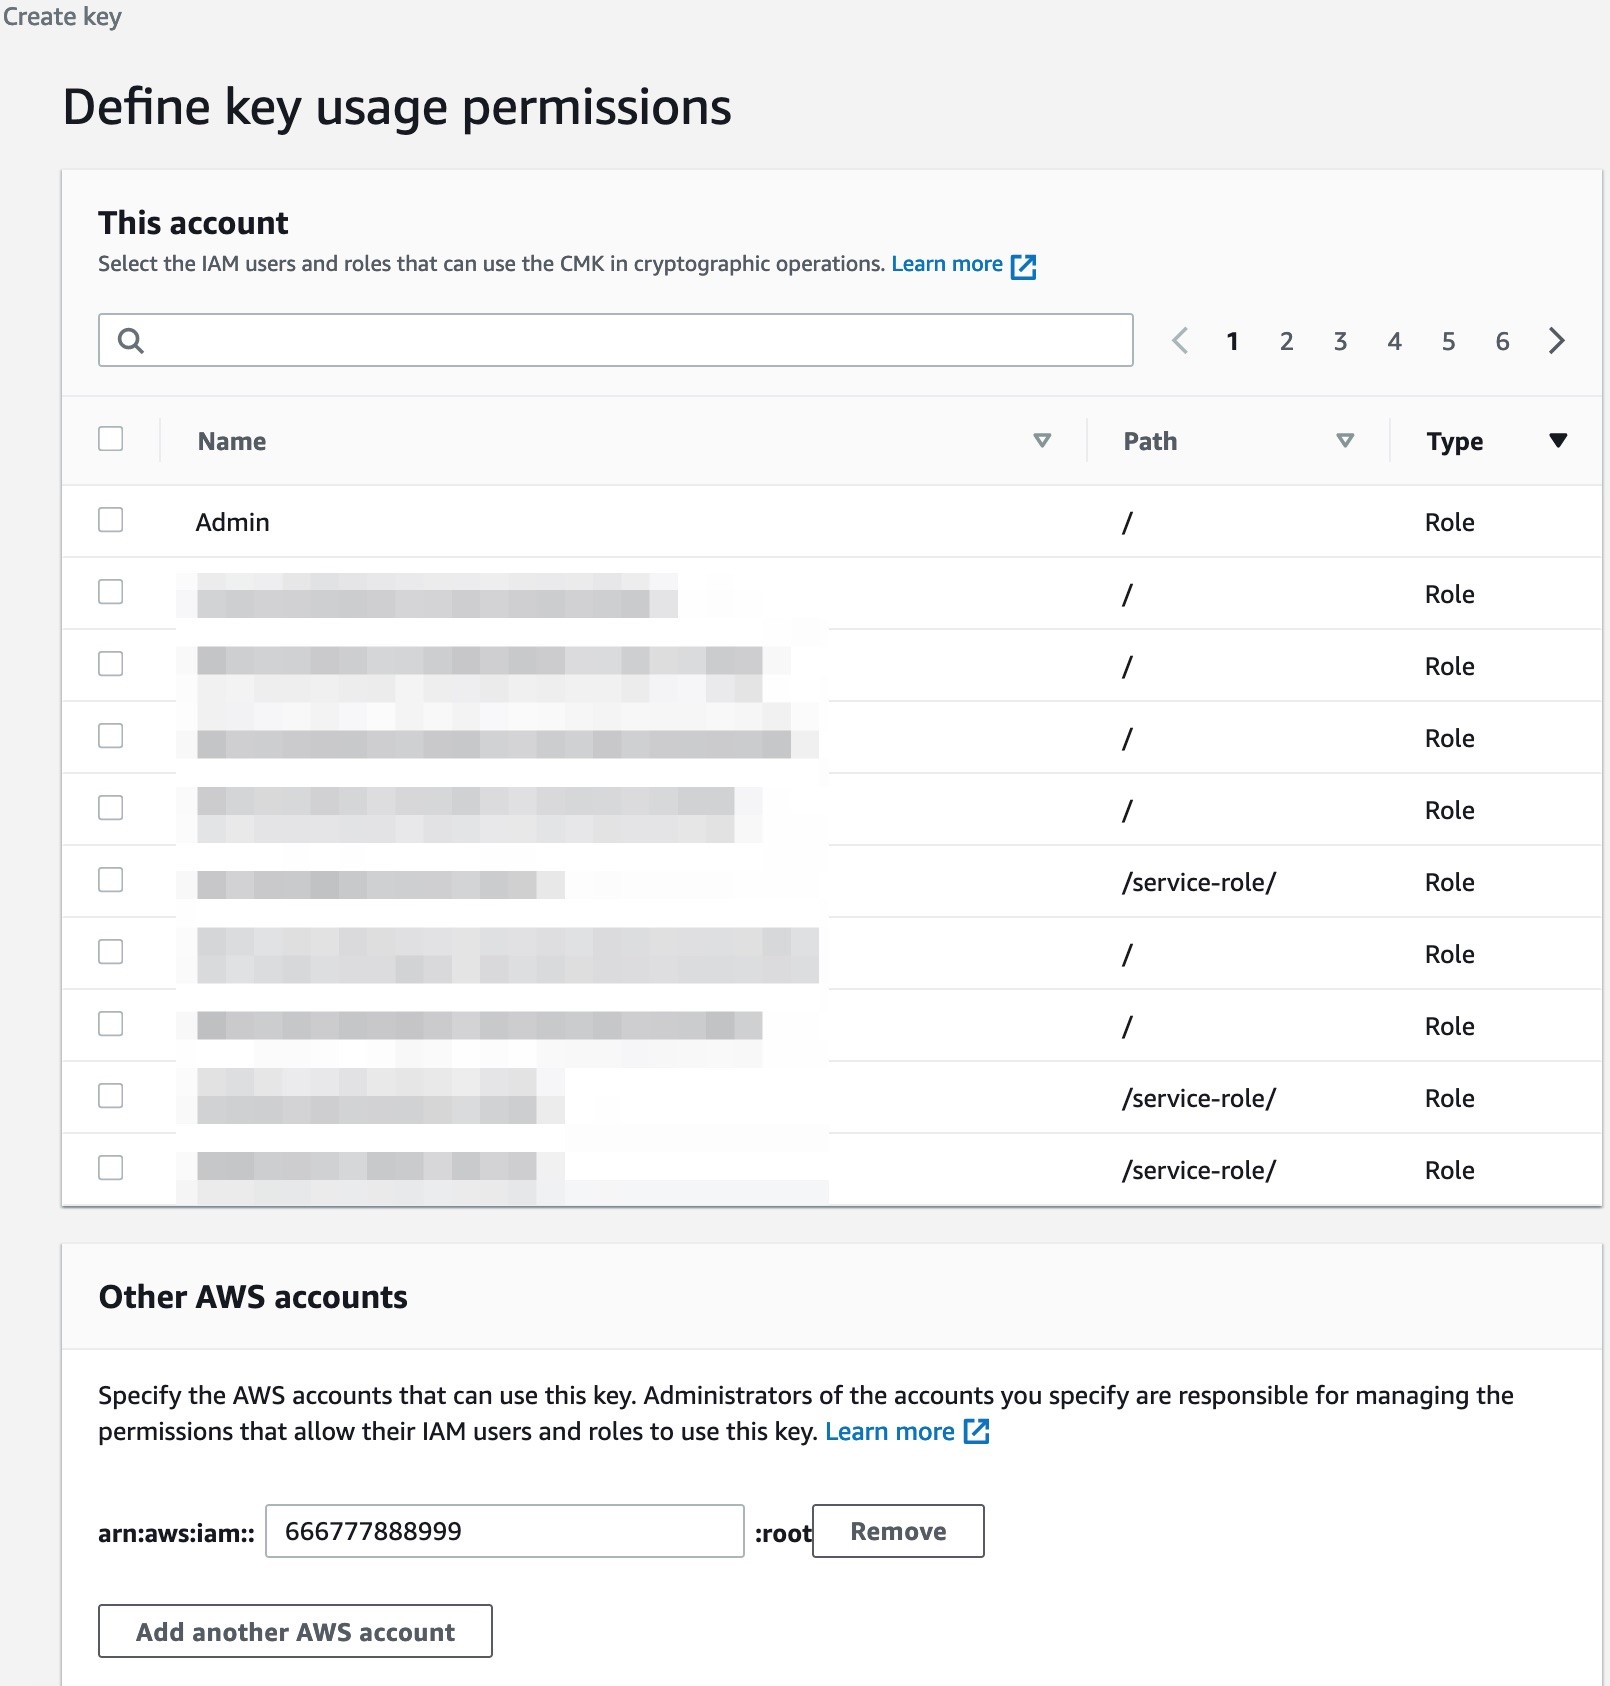
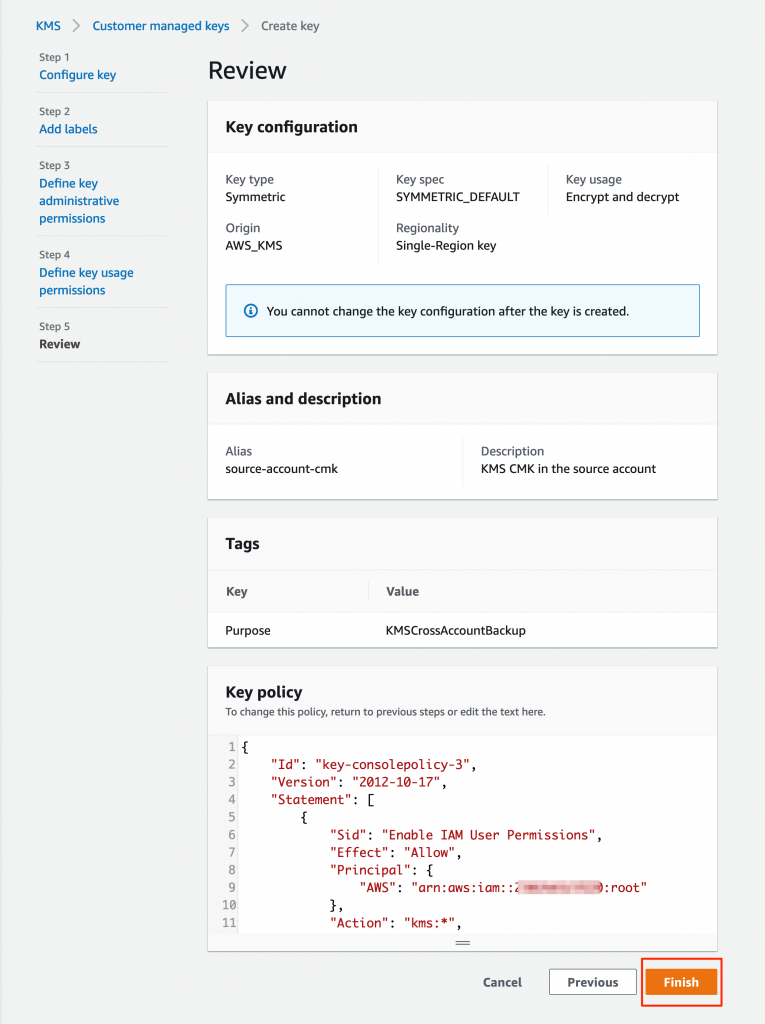
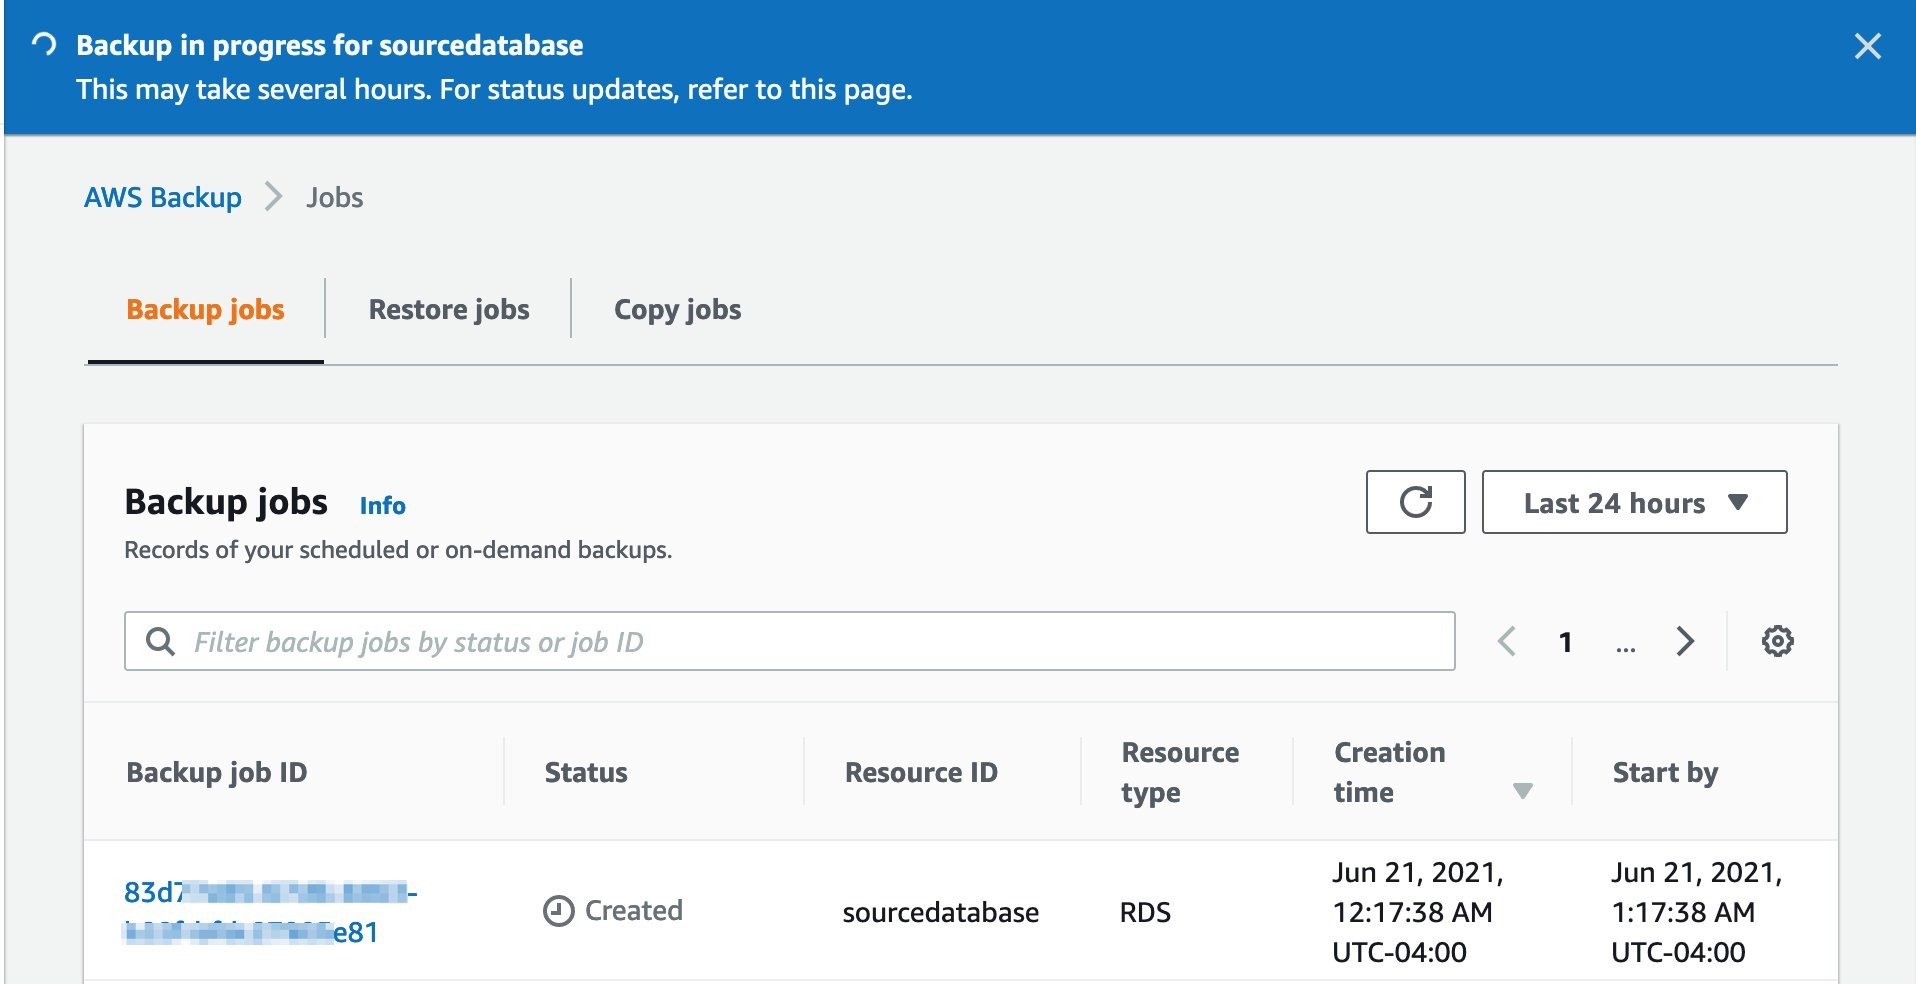
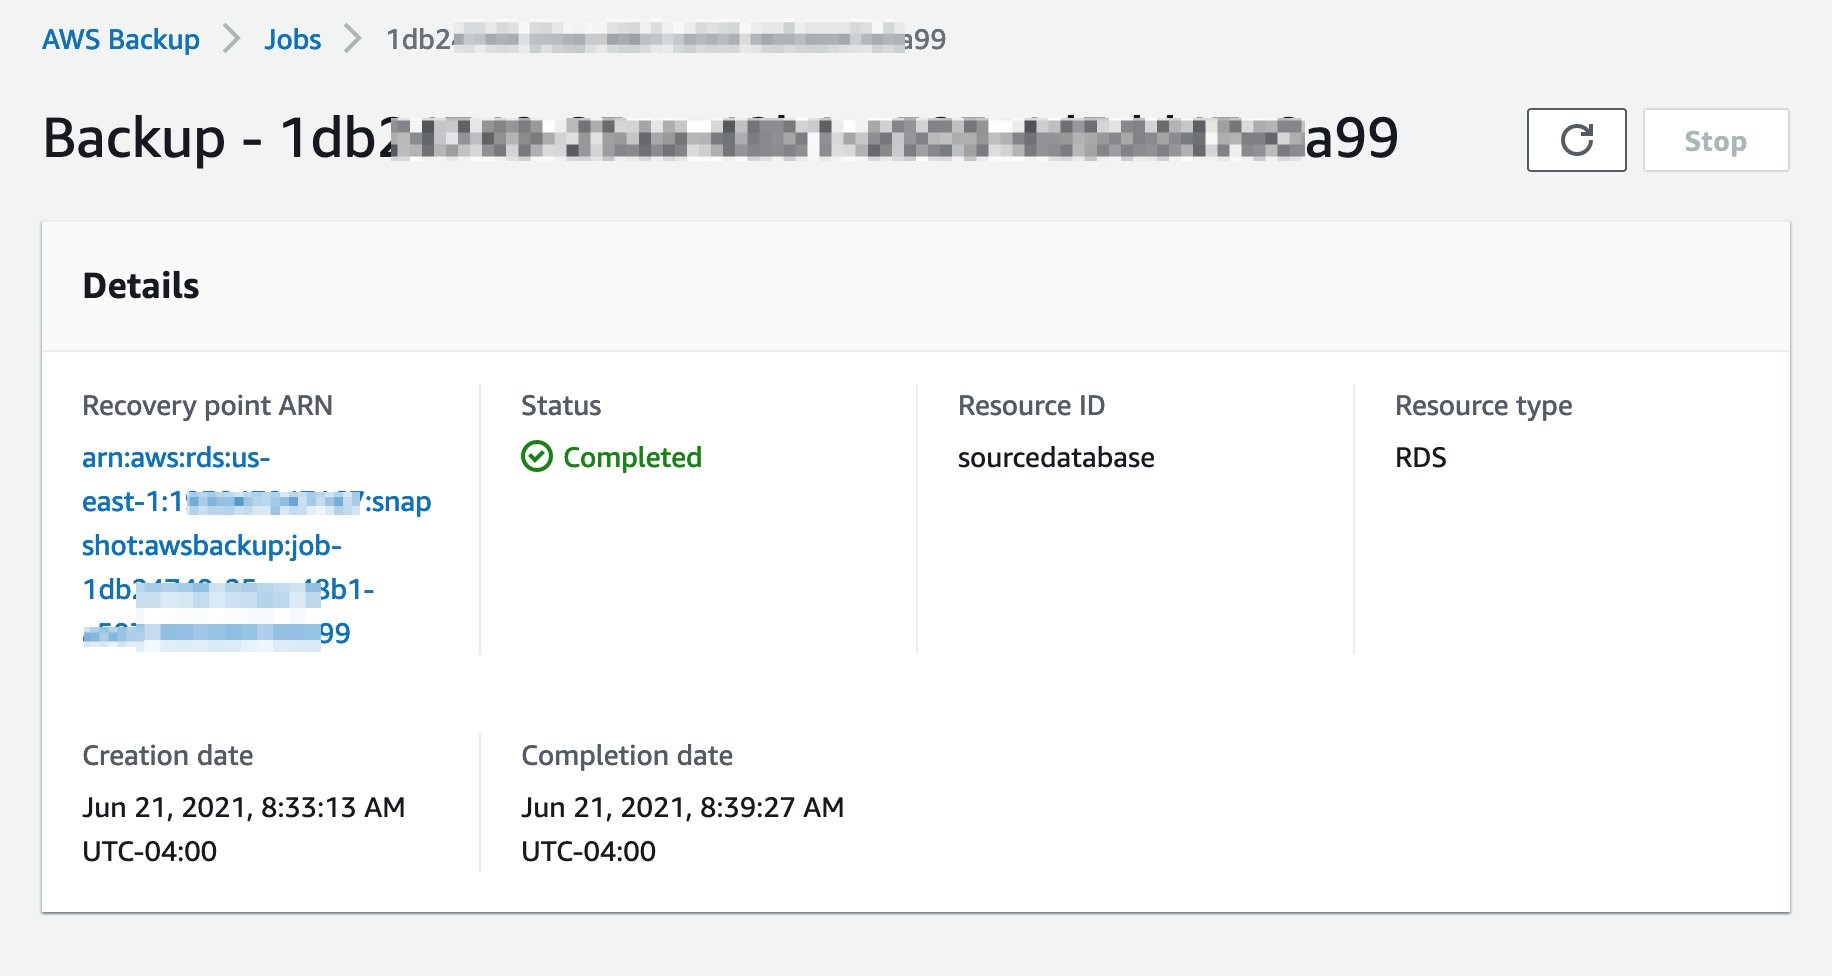
AWS Backup Audit Manager allows you to simplify data governance and compliance management of your backups across supported AWS services. It provides customizable controls and parameters, like backup frequency or retention period. You can also audit your backups to see if they satisfy your organizational and regulatory requirements. If one of your monitored backups drifts from your predefined parameters, AWS Backup Audit Manager will let you know so you can take corrective action. This new feature also enables you to generate reports to share with auditors and regulators. To learn more, read How to Monitor, Evaluate, and Demonstrate Backup Compliance with AWS Backup Audit Manager.

Amazon EBS
Amazon EBS direct APIs now support creating 64 TB EBS Snapshots directly from any block storage data, including on-premises. This was increased from 16 TB to 64 TB, allowing customers to create the largest snapshots and recover them to Amazon EBS io2 Block Express Volumes. To learn more, read Amazon EBS direct API documentation.

AWS Transfer Family
AWS Transfer Family Managed Workflows is a new feature that allows you to reduce the manual tasks of preprocessing your data. Managed Workflows does a lot of the heavy lifting for you, like setting up the infrastructure to run your code upon file arrival, continuously monitoring for errors, and verifying that all the changes to the data are logged. Managed Workflows helps you handle error scenarios so that failsafe modes trigger when needed.

AWS Transfer Family Managed Workflows allows you to configure all the necessary tasks at once so that tasks can automatically run in the background. Managed Workflows is available today in the AWS Transfer Family Management Console. To learn more, read Transfer Family FAQ.

Storage Day 2021 Join us online for more!
Don’t forget to register and join us for the AWS Storage Day 2021 virtual event. The event will be live at 8:30 AM Pacific Time (11:30 AM Eastern Time) on September 2. The event will immediately re-stream for the Asia-Pacific audience with live Q&A moderators on Friday, September 3, at 8:30 AM Singapore Time. All sessions will be available on demand next week.

We look forward to seeing you there!

Marcia

Monitor, Evaluate, and Demonstrate Backup Compliance with AWS Backup Audit Manager

Post Syndicated from Steve Roberts original https://aws.amazon.com/blogs/aws/monitor-evaluate-and-demonstrate-backup-compliance-with-aws-backup-audit-manager/

Today, I’m happy to announce the availability of AWS Backup Audit Manager, a new feature of AWS Backup that helps you monitor and evaluate the compliance status of your backups to meet business and regulatory requirements, and enables you to generate reports that help demonstrate compliance to auditors and regulators.

AWS Backup is a fully managed service that provides the ability to initiate policy-driven backups and restores of AWS applications, simplifying the process of protecting data at scale by removing the need for custom scripts and manual processes. However, customers still needed to use their own tooling for verifying that backup policies were being enforced and, as part of proving adherence to auditors, parsing backup transcripts to convert them into auditable reports.

With AWS Backup Audit Manager, you can now continuously and automatically track your backup activity, such as changes to a backup plan or backup vault, and generate automatic daily reports. AWS Backup Audit Manager provides built-in, customizable, compliance controls. Simply put, controls are procedures with backup policy parameters, for example the backup frequency or the retention period, that align with your business compliance and regulatory requirements.

You create a framework, scoped to an account and Region, and add the controls you need to it. Backup activities are tracked against the controls, automatically detecting violations of your defined data protection policies, enabling you to take quick corrective actions. To enable tracking of backup activities, AWS Backup Audit Manager requires you to enable monitoring through AWS Config for your backup plans (AWS::Backup::BackupPlan resource type), backup selection (AWS::Backup::BackupSelection), vaults (AWS::Backup::BackupVault), recovery points (AWS::Backup::RecoveryPoint), and AWS Config resource compliance (AWS::Config::ResourceCompliance). You can check the recording status of these resources in the AWS Backup console, using the Resource Tracking section of the Frameworks page.

Once you’ve added the controls you need to your framework, you deploy it. If you have different internal or regulatory standards to meet, you can create and deploy additional frameworks of controls. Once the framework is deployed, you can set up automatic daily reports of your backup activity. These are displayed in a dashboard, and you can also request on-demand reports at any time. You can also import your findings into AWS Audit Manager, a service I wrote about during AWS re:Invent 2020 in this news blog post.

This short video gives a brief overview of the new AWS Backup Audit Manager feature.

Available Controls and Backup Reports
AWS Backup Audit Manager provides five backup governance control templates and backup activity reporting on your backup jobs, copy jobs, and restore jobs. These reports improve visibility into backup activities for a single account and Region, helping you monitor your operational posture and identify failures that may need further action.

When creating a framework, you provide a name, an optional description, and you select whether to use the provided AWS Backup framework type, which includes five pre-defined controls, or you can opt to customize your framework.

Creating an AWS Backup Audit Manager framework

Choosing Custom framework expands the panel to show the available controls, their parameters, and the option to include or exclude them from your framework. The five available controls are titled Backup resources protected by backup plan, Backup plan minimum frequency and minimum retention, Backup prevent recovery point manual deletion, Backup recovery point encrypted, and Backup recovery point minimum retention. To the right of each control’s title you’ll find an info link that describes what the control evaluates, how frequently, and what it means for a resource to be compliant with the control.

Let’s examine a couple of controls. The Backup resources protected by backup plan control enables you to select all supported resources, or those identified by a tag, by type, or a particular resource. This control helps identify gaps in your backup coverage.

Backup resources protected by backup plan control resource selection

The Backup plan minimum frequency and minimum retention control has parameters governing how frequently the backup plan should be taking backups, and for how long recovery points should be maintained. The default settings require backups to occur every hour, and recovery points should be retained for a month, but you can customize the settings to meet your business compliance requirements.

Setting backup frequency and retention period controls

You complete your selections for the remaining controls, including them and setting appropriate parameter values for your needs, or excluding them from the framework, and then click Create framework to complete the process. The new framework will be created and deployed, which will take a few minutes. If needed, you can go back and edit the controls and parameters in a framework at any time.

Once deployed, the controls in the framework will start to evaluate compliance and you can inspect compliance status in the console by selecting the framework. The summary section reports the overall compliance status of the framework and the number of controls in the framework that are compliant or non-compliant, based on your deployed control definitions.

Summary of framework and control compliance

Below the summary, you’ll find a list containing compliance details for each of the controls in the framework, which can be filtered by status. Each control details whether it’s compliant or non-compliant, and how many resources monitored by the control are non-compliant. Clicking a control title will take you directly to the AWS Config dashboard, where you can view more details on the resources identified by the control.

Control compliance detail

Automated reports on backup activity can be used to demonstrate compliance to auditors and regulators. To set up reports, first click the Reports entry in the navigation toolbar, and then click Create report plan. You’ll be asked to select a report template.

Selecting audit report template

With the template selected (I chose Backup jobs report), you fill in a name and optional description, choose where in your Amazon Simple Storage Service (Amazon S3) buckets you want the report to be delivered, and the report file formats, and then click Create report plan. Your report will update every 24 hours, and you can run an on-demand report at any time.

Editing report settings

Once a report has been run, either automatically or on-demand, you can view the report data by first selecting the report in your Report plans list, followed by clicking View report. You’ll be taken directly to the chosen S3 location of the report files, where you’ll see one object (report) per chosen file type.

Selecting a report to view

Report files in Amazon S3

Downloading the file shows you the time period in which the resources were evaluated, the backup job details, failure or completion status, status messages, the resource type and backup plan, and more. Here I’ve opened the CSV format file in a spreadsheet.

Backup report data

Open Raven Launch Partnership
With this launch, we’re excited to have Open Raven join us as an AWS Backup partner. Open Raven is a cloud-native data security platform purpose-built for protecting modern data lakes and warehouses. From finding all data locations to proactively identifying exposure, their platform solves a broad spectrum of problems that organizations commonly face when living with large amounts of cloud-based data.

Open Raven Chief Technology Officer Mark Curphey had this to say about the new AWS Backup feature: “To successfully recover from a ransomware attack, organizations need to plan ahead by completing two foundational tasks, identifying critical data and systems and backing them up as per organizational requirements so that they can be protected and recovered. The combination of AWS Backup Audit Manager and Open Raven streamlines this effort, eliminating guesswork and hours of manual toil.”

Start Using AWS Backup Audit Manager Today
AWS Backup Audit Manager is available today in the US East (N. Virginia, Ohio), US West (N. California, Oregon), Canada (Central), EU (Frankfurt, Ireland, London, Paris, Stockholm), South America (Sao Paulo), Asia Pacific (Hong Kong, Mumbai, Seoul, Singapore, Sydney, Tokyo), and Middle East (Bahrain) Regions.

For more information about Backup Audit Manager, refer to this section in the AWS Backup Developer Guide. To get started, visit the AWS Backup console.

— Steve

Field Notes: How to Back Up a Database with KMS Encryption Using AWS Backup

Post Syndicated from Ram Konchada original https://aws.amazon.com/blogs/architecture/field-notes-how-to-back-up-a-database-with-kms-encryption-using-aws-backup/

An AWS security best practice from The 5 Pillars of the AWS Well-Architected Framework is to ensure that data is protected both in transit and at rest. One option is to use SSL/TLS to encrypt data in transit, and use cryptographic keys to encrypt data at rest. To meet your organization’s disaster recovery goals, periodic snapshots of databases should be scheduled and stored across Regions and across administrative accounts. This ensures quick Recovery Point Objective (RPO) and Recovery Time Objective (RTO).

From a security standpoint, these snapshots should also be encrypted. Consider a scenario where one administrative AWS account is used for running the Amazon Relational Database Service (Amazon RDS) instance and backups. In this scenario, you may discover a situation where data cannot be recovered either from production instance or backups if this AWS account is compromised. Amazon RDS snapshots encrypted using AWS managed customer master keys (CMKs) cannot be copied across accounts. Cross-account backup helps you avoid this situation.

This blog post presents a solution that helps you to perform cross-account backup using AWS Backup service and restore database instance snapshots encrypted using AWS Key Management Service (KMS) CMKs across the accounts. This can help you to meet your security, compliance, and business continuity requirements. Although the solution uses RDS as the database choice, it can be applied to other database services (with some limitations).

Architecture

Figure 1 illustrates the solution described in this blog post.

Figure 1: Reference architecture for Amazon RDS with AWS Backup using KMS over two different accounts

Figure 1: Reference architecture for Amazon RDS with AWS Backup using KMS over two different accounts

Solution overview

When your resources like Amazon RDS (including Aurora clusters) are encrypted, cross-account copy can only be performed if they are encrypted by AWS KMS customer managed customer master keys (CMK). The default vault is encrypted using Service Master Keys (SMK). Therefore, to perform cross-account backups, you must use CMK encrypted vaults instead of using your default backup vault.

  1. In the source account, create a backup of the Amazon RDS instance encrypted with customer managed key.
  2. Give the backup account access to the customer-managed AWS KMS encryption key used by the source account’s RDS instance.
  3. In the backup account, ensure that you have a backup vault encrypted using a customer-managed key created in the backup account. Also, make sure that this vault is shared with the different account using vault policy.
  4. Copy the encrypted snapshots to the target account. This will re-encrypt snapshots using the target vault account’s AWS KMS encryption keys in the target Region.

Prerequisites

  • Ensure you are in the correct AWS Region of operation.
  • Two AWS accounts within the same AWS Organization.
  • Source account where you have a CMK encrypted Amazon RDS instance.
  • Opt-in to cross-account backup.
  • Backup account to which you will copy the encrypted snapshots.
  • A backup vault encrypted with backup CMK (different from source CMK) in the backup account.
  • An IAM role to perform cross-account backup. You can also use the AWSBackupDefaultServiceRole.

Solution

In this blog post, two accounts are used that are part of the same organization. Ensure that you update your account IDs accordingly.

Source account – 111222333444
AWS Backup account – 666777888999

Create a customer-managed key in the source account

Step 1 – Create CMKs

Create symmetric and asymmetric CMKs in the AWS Management Console. During this process, you will determine the cryptographic configuration of your CMK and the origin of its key material. You cannot change these properties after the CMK is created. You can also set the key policy for the CMK, which can be changed later. Follow key rotation best practices to ensure maximum security.

  1. Choose Create key.
  2. To create a symmetric CMK, for key type choose Symmetric. Use AWS KMS as the key material origin, and choose the single-region key for Regionality.
  3. Choose Next, and proceed with Step 2.

Step 2 – Add labels

  1. Type an alias for the CMK (alias cannot begin with aws/. The aws/ prefix is reserved by Amazon Web Services to represent AWS managed CMKs in your account).
  2. Add a description that identifies the key usage.
  3. Add tags based on an appropriate tagging strategy.
  4. Choose Next, and proceed with Step 3.

Step 3 – Key administrative permissions

Select the IAM users and roles that can administer the CMK. Ensure that least privilege design is implemented when assigning roles and permissions, in addition to following best practices.

Step 4 – Key usage permissions

Next, we will need to define the key usage and permissions. Complete the following steps:

  1. Select the IAM users and roles that can use the CMK for cryptographic operations.
  2. Within the Other AWS accounts section, type the 12-digit account number of the backup account.
Figure 2: Key usage permissions

Figure 2: Key usage permissions

Step 5 – Key configuration

Review the chosen settings, and press the Finish button to complete key creation.

Figure 3: Key configuration

Figure 3: Key configuration


Cross-account access key policy

Read the blog post on sharing custom encryption keys more securely between accounts using AWS Key Management Service for more information.

Step 6 – CMK verification

Within the AWS KMS console page, verify that the CMK key has been successfully created and status is enabled.

Create an Amazon RDS database in source account

  1. Choose the correct AWS Region.
  2. Navigate to RDS through the console search option.
  3. Choose Create a Database option, and choose your Database type.
  4. In Database encryption settings, use the CMK key you created in the preceding steps.
  5. Create the database.
  6. Follow Amazon RDS security best practices.

Create an AWS Backup vault in the source account

  1. On the AWS Backup service, navigate to AWS Backup > AWS Backup vault.
  2. Create a backup vault by specifying the name, and add tags based on an appropriate tagging strategy.

Create an on-demand AWS Backup in the source account

For the purpose of this solution, we will create an on-demand backup from the AWS Backup dashboard. You can also choose an existing snapshot if it is already available.

  1. Choose Create on-demand backup. Choose resource type as Amazon RDS, and select the appropriate database name. Choose the option to create backup now. Complete the setup by providing an appropriate IAM role and tag values (you can use the prepopulated default IAM role).
  2. Wait for the backup to be created, processed, and completed. This may take several hours, depending on the size of the database. If this step is too close to an existing scheduled backup time, you may see the following message on the console: Note – this step might fail if the on-demand backup window is too close to or overlapping the scheduled backup time determined by the Amazon RDS service. If this occurs, then create an on-demand backup after the scheduled backup is completed.
Figure 4: Create on-demand backup

Figure 4: Create on-demand backup

  1. Confirm the status is completed once the backup process has finished.
Figure 5: Completed on-demand backup

Figure 5: Completed on-demand backup

  1. If you navigate to the backup vault you should see the recovery point stored within the source account’s vault.
Figure 6: Backup vault

Figure 6: Backup vault

Prepare AWS Backup account (666777888999)

Create SYMMETRIC CMK in the backup account

Follow the same steps as before in creating a symmetric CMK in backup account. Ensure that you do not grant access to the source AWS account to this key.

Figure 7: CMK in backup account

Figure 7: CMK in backup account

Add IAM policy to users and roles to use CMK created in source account

The key policy in the account, that owns the CMK, sets the valid range for permissions. But, users and roles in the external account cannot use the CMK until you attach IAM policies that delegate those permissions or use grants to manage access to the CMK. The IAM policies are set in the external account and follow the best practices for IAM policies. Review the blog post on sharing custom encryption keys more securely between accounts using AWS Key Management Service for more information.

Create an AWS Backup vault in backup account

In the backup account, navigate to the “Backup vaults” section on the AWS Backup service page, and choose Create Backup vault. Next, provide a backup vault name, and choose the CMK key you previously created. In addition, you can specify Backup vault tags. Finally, press the Create Backup vault button.

Figure 8: Create backup vault

Figure 8: Create backup vault

Allow access to the backup vault from organization (or organizational unit)

This step will enable multiple accounts with the organization to store snapshots in the backup vault.

{

    "Version": "2012-10-17",

    "Statement": [

        {

            "Effect": "Allow",

            "Principal": "*",

            "Action": "backup:CopyIntoBackupVault",

            "Resource": "*",

            "Condition": {

                "StringEquals": {

                    "aws:PrincipalOrgID": "o-XXXXXXXXXX"

                }

            }

        }

    ]

}

Copy recovery point from source account vault to backup account vault

Initiate a recovery point copy by navigating to the backup vault in the source account, and create a copy job. Select the correct Region, provide the backup vault ARN, and press the Copy button.

Figure 9: Copy job initiation

Figure 9: Copy job initiation

Next, allow the backup account to copy the data back into source account by adding permissions to your back vault “sourcebackupvault” access policy.

Figure 10: Allow AWS Backup vault access

Figure 10: Allow AWS Backup vault access

Initiate copy job

From the backup vault in the source account, press the Copy button to copy a recovery point to the backup account (shown in Figure 11).

Figure 11: Initiate copy job

Figure 11: Initiate copy job

Verify copy job is successfully completed

Verify that the copy job is completed and the recovery point is copied successfully to the AWS Backup account vault.

Figure 12: Copy job is completed

Figure 12: Copy job is completed

Restore Amazon RDS database in AWS Backup account

Initiate restore of recovery point

In the backup account, navigate to the backup vault on the AWS Backup service page. Push the Restore button to initiate the recovery job.

Figure 13: Restore recovery point

Figure 13: Restore recovery point

Restore AWS Backup

The process of restoring the AWS backup will automatically detect the database (DB) engine. Choose the DB instance class, storage type, and the Multi-AZ configuration based on your application requirements. Set the encryption key to the CMK created in the backup account.

Scroll down to bottom of the page, and press the Restore backup button.

Figure 14: Restore backup

Figure 14: Restore backup

Restore job verification

Confirm that Restore job is completed in the Status field.

Figure 15: Restore job verification

Figure 15: Restore job verification

Database verification

Once the job completes, the database is restored. This can be verified on the Management Console of the RDS service.

Conclusion

In this blog post, we showed you how to cross-account backup AWS KMS encrypted RDS instances using AWS Backup and CMK. We also verified the encryption keys used by the source and backup snapshots.

Using AWS Backup cross-account backup and cross-Region copy capabilities, you can quickly restore data to your backup accounts in your preferred AWS Region. This helps AWS Backup users to minimize business impact in the event of compromised accounts, unexpected disaster or service interruption. You can create consistent database snapshots and recover them across regions to meet your security, compliance, RTO and RPO requirements.

Thanks for reading this blog post. If you have any feedback or questions, please add them in the comments section.


Field Notes provides hands-on technical guidance from AWS Solutions Architects, consultants, and technical account managers, based on their experiences in the field solving real-world business problems for customers.