If you’re responsible for protecting company data, you know that any number of things can jeopardize the data on workstations, be it human error or natural disaster. It’s your job to reduce risk, but to do that you need the ability to fine-tune your backup systems.
Backblaze Computer Backup gives you an easy, automatic, centrally-managed solution for backup. And, starting today IT administrators can take greater control of their endpoint backups—from how employees authenticate to what they can and cannot restore—with the introduction of our new Enterprise Control for Backblaze Computer Backup.
Ready to Turn the Dials?
Enterprise Control is available for enterprises with more than 20 Computer Backup licenses at an additional $2 per license. To take advantage of greater administrative control, contact a Sales representative. Learn more about how to set up Enterprise Control by visiting our technical documentation on the subject.
What’s New in Enterprise Control?
Whether you’re an IT manager or an MSP responsible for protecting business data, Enterprise Control allows you to meet your full business continuity and data security standards for workstation data and better support a hybrid and remote workforce. Here’s what you can do with Enterprise Control:
Fine-Grained Access Permissions: Manage access to group member data on a granular level for enterprise operations. This includes control over members’ ability to delete their own backups, admin’s ability to delete member backups, and admin’s permissions for restoring data on a member’s behalf.
Advanced Single Sign-On: Enable OpenID Connect (OIDC) single sign-on (SSO) and the ability to use tools like Okta and Azure Active Directory in addition to GSuite and Microsoft. This enhances security control, allowing you to ramp up authentication practices, verifying member identity and streamlining identity management.
Group Management Controls: Prevent members from leaving a group, taking data with them, or ordering restore hard drives or snapshot hard drives without permission. You also have the option to hide the ability to update the client through the desktop app, rename or purge end user backups from the web application, and prevent Group members from updating the client app on their own.
Compliance Support: Benefits businesses who are mandated to apply greater controls given compliance, cyber insurance, or heightened recovery point objective (RPO) and recovery time objective (RTO) requirements.
We’ve been using Backblaze to reliably back up our 400 endpoints for years. We’re excited at the possibility of having even more control to meet our growing administration and data protection needs with this new Computer Backup with Enterprise Control solution.
—Sintya Pappagallo, IT Manager, North Point Ministries
Enterprise Control Gives You The Guardrails
Backblaze Computer Backup reduces IT burden with its simplicity, and consistently ranked as Wirecutter’s Best Online Cloud Backup Service. Now, we’ve wrapped that simplicity with the enterprise features larger organizations require so you can reduce risk, achieve compliance, and better support your cybersecurity and disaster recovery goals.
How to Upgrade to Enterprise Control
Enterprise Control is available for Groups with 20 or more Computer Backup licenses. To take advantage of Enterprise Control or to purchase Backblaze Computer Backup for your organization, contact your Sales representative. Or, learn more about how to implement Enterprise Control by visiting our technical documentation article.
If you have additional feature requests, please visit our Product Portal or let us know in the comments below.
It’s that time again—cozy season is upon us and your Backblaze authors are eager to share some of their favorite reads. Feel free to use them as a gift guide (if you still have gifts to give, that is), as a list of recs to start your New Year’s resolutions off right, or just some excellent excuses to take some much-needed solo time away from the family.
So, whether the weather outside is frightful, or, like at our home office in San Mateo, weird and drizzly, we hope you enjoy! And, as always, feel free to let us know what you thought in the comments.
Tech Expertise and Whimsical Reads, All in One List
In 1979, a clutch of young, multiracial bands burst onto the music scene in the UK, each offering their own take on ska, the precursor to reggae that originated in 1950’s Jamaica. “Too Much Too Young”, named after The Specials’ 1980 UK number one hit, tells the fascinating story of how bands such as The Specials, The Selecter, and The Beat (ok, “The English Beat” in the U.S.) took punk’s do-it-yourself ethic, blended it with reggae rhythms, and, as the 70s turned into the 80s, released a string of singles and albums that dominated the pop charts.
Looking back from 2023, it’s astonishing to realize that this was the first time many audiences had seen black and white musicians on stage together, and musician-turned-author Daniel Rachel does a great job telling the 2 Tone story in the context of the casual racism, economic recession, and youth unemployment of the time. Highly recommended for any music fan, whether or not you remember moonstomping back in the day!
I picked up this book while waiting for a flight at an airport and it quickly became a source of inspiration. Authored by Tony Fadell, who played a significant role in building successful tech products like iPod, iPhone, and the Nest thermostat, the book provides insights and strategies on how to build yourself, build your career, and ultimately build products that users love. What I love about the book is how it creates a practical roadmap for building things in life and business, and it makes those things seem more possible and achievable regardless of what stage of career (or life) you’re in. I’d highly recommend this for anyone who loves to build things, but is not sure what to focus on in what order.
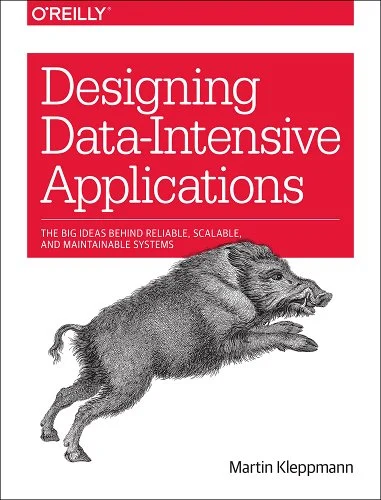
Backblaze has created several data intensive applications, and while normally I am not a fan of deeply technical books because I am a learn-by-doing type of person, I think this book does a fantastic job at explaining the strengths and weaknesses of various strategies to handling large amounts of data. It also helps that I am a big fan of the freedom/speed of NoSQL, and here at Backblaze we use Cassandra to keep our index of over 500 billion Backblaze B2 files. 🙂
It’s probably the shortest book I read this year, but the one that stuck with me the most. “Before the Coffee Gets Cold” is a new take (at least for me) on time traveling that dives into what would you do if you could go back in time, but it doesn’t change anything (or does it?). Each chapter is a short story following a different character’s journey to decide to sit in the chair and drink the coffee. You won’t regret picking up this book!
I reread “A Brief History of Time” by Stephen Hawking this past year. I read it years ago to understand the science. This time as I read it I felt an appreciation for the elegance that is the universe. The book is an approachable scientific read, but it does demand your full attention while reading, and if you slept through your high school and college physics classes, the book may not be for you.
“Demon Copperhead” is the book that brought me back to reading for pleasure after having a baby. Some perspective for new parents—he’s almost one and a half, so… go easy on yourselves. Anyway, about this book: you probably never thought you wanted to get inside the head of a teenage boy from the hollers of coal country, but you do. Trust me, you do. Barbara Kingsolver doesn’t hold back when it comes to, let’s say, the authenticity of what a teenage boy from the hollers of coal country thinks about, and she somehow manages to do it without being cringe. It’s a damning critique of social services, the foster care system, the school system to some extent, Big Pharma to a huge extent, and even Big City Liberals in a way that’s clarifying for this Big City Liberal who now lives …in the hollers of coal country.
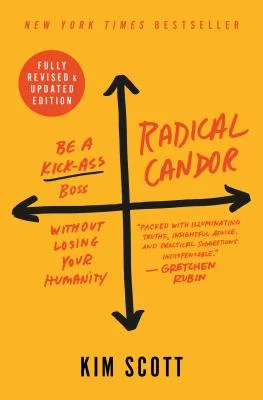
The book that really stuck with me this year is “Radical Candor” by Kim Scott. This was the best book on leadership and management I’ve ever read, and I’ve been recommending it to my friends and colleagues who are looking for ways to improve in those skills. I love how Scott gives you actionable items to take with you into the workplace rather than generalized advice that’s less applicable to specific situations. I loved the book so much I started listening to the Radical Candor podcast, which has quickly become a favorite of mine as well.
For fans of “The Handmaid’s Tale”, “Hunger Games”, and any other books where women are badasses (can I say that?) fighting a dystopian empire, “The Grace Year” will not disappoint. This book examines the often fraught and complex relationships between women, with a magical bent. Think Lady of the Flies. Just like the mentioned references, this thrilling read will leave you feeling both hopeful and sad—exactly the mix of feelings we’re all looking for at the end of the year, amIright?
I do not feel like I need to sell this book too hard. Here’s the gist. Jim Butcher (of Dresden Files and Codex Alera fame) wrote this book. It’s about an airship-filled steampunk society that’s divided into living habitats they call spires. It has air ship battles. Magic. Snarky characters. And possibly most important of all: TALKING CATS AS A MAIN CHARACTER. Enjoy.
I don’t really have a book recommendation, but I have a few books that I’m reading at the moment: “To Shape a Dragon’s Breath” (a recommendation from a fellow Backblazer that I’m only a couple of chapters into) and Robert Jordan’s “The Eye of the World” (has been on my list for over a decade, so far I’m underwhelmed).
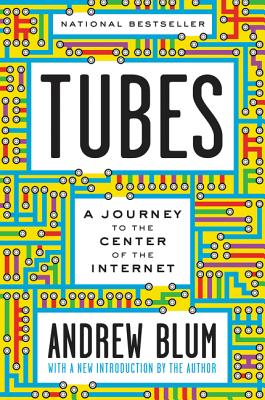
The idea that the internet is “a series of tubes” may have been widely mocked when former Senator Ted Stevens of Alaska famously described it. But he wasn’t entirely wrong. I love how Blum starts with a simple question: “Where does this cord that comes out of my modem actually go?” and then that takes him on a journey of exploration around the world.
Mary Roach presents a unique view of the challenges of space, investigating the comical side of planetary exploration, from zero-gravity hijinks to the surprisingly practical challenges of personal hygiene in orbit. Forget packing trendy outfits in your stylish carry-on; in the cosmos, it’s all about zero-gravity hairstyles and toothpaste that doesn’t float away mid-brush.
This book is a wonderful mashup of near-future sci fi, magical realism, strong character arcs, and so much more. It’s brilliant at taking things that seem familiar—urban San Francisco for example, or science as a concept—and inserting chaos and whimsy in ways that challenge our base assumptions and create a totally unexpected, but absolutely believable, universe. It’s so matter-of-fact in tone, that you may just question whether magic does exist. And, with all that, the book ends by delivering a poignant and thoughtful ending that turns all that quirkiness inside out, and forces you to wonder about the world you’re living in right now, and how you can change things. It’s one of my go-to recommendations for fans of all kinds of fiction.
So, full disclosure—I continue to struggle with being a toddler dad when it comes to reading. (Evidence: I’ve read “The Grinch”10 times in the last 24 hours and my heart is feeling three sizes too small). So this isn’t a new recommendation, but rather a recommendation I’m realizing not enough people in tech have received yet. “Mr. Penumbra’s 24-Hour Bookstore” brings together my two worlds: books and tech… and, well, fantasy and mystery sort of (not my worlds, but I like to dwell in the idea that there’s a near-real fantasy world at the edge of our experience). If you like data and narrative structure, or if you like a spooky adventure, or if you like dusty old bookshops, Robin Sloan has you covered with this one. And, once you’ve read this, get on his email lists, he writes about history, fiction, and technology (and olive oil) beautifully. P.S.: I don’t know why Picador insists on this terrible cover, it does little to convey the world inside the book—don’t make my mistake and judge this book by its cover).
Happy Reading From Backblaze
We hope this list piques your interest—we may be a tech company, but nothing beats a good, old fashioned book (or audiobook) to help you unwind, disconnect, and lose yourself in someone else’s story for a while. (Okay, we may be biased on the Publishing team.)
Any reading recommendations to give us? Let us know in the comments.
Everyone has their arsenal of indispensable gadgets and apps they absolutely couldn’t live without, and we had a feeling the folks here at Backblaze would have a lot to say about the subject. We tapped the smart, savvy minds that keep our storage cloud up and running, and discovered a treasure trove of insights into the tech essentials that power their daily lives.
From budgeting apps to text editors to humble charging jacks, our staff share the tools they can’t live without. So, without further ado, let’s dig into the gear that keeps our collective gears turning:
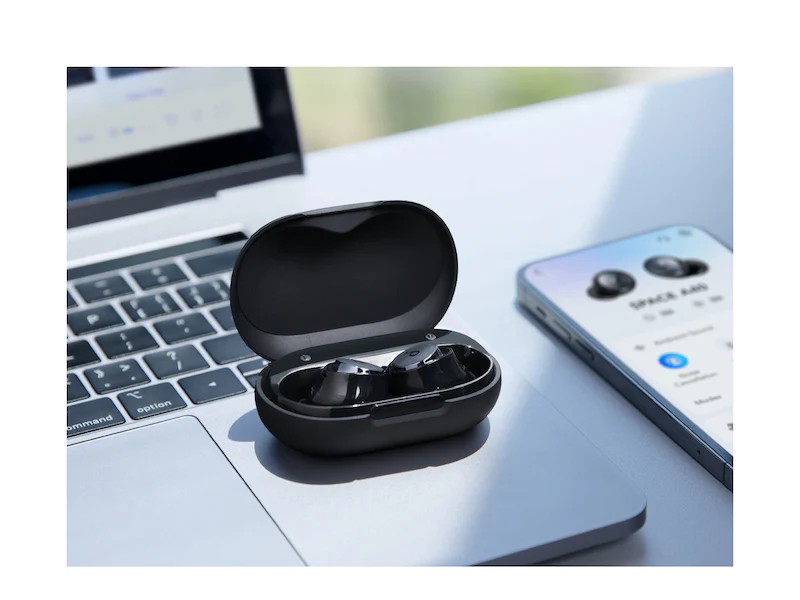
As a Mac guy, I love my Airpod Pros and the way they work seamlessly with my iPhone, Macbook Pro, and iPad. But things get a little wonky when you try to use them outside of the Apple ecosystem. I tried many different wireless earbuds and settled on the Anker Soundcore Space A40 Earbuds. I’m a big fan of The Wirecutter by the New York Times (and they’re big fans of us) and they had these at the top of their list. I love the sound quality, noise canceling, and excellent battery life. My Airpod Pros are still my go to when I’m out of the house, but when I need a good headset at home for my PC and other non-Apple devices, these have become my go to earbuds.
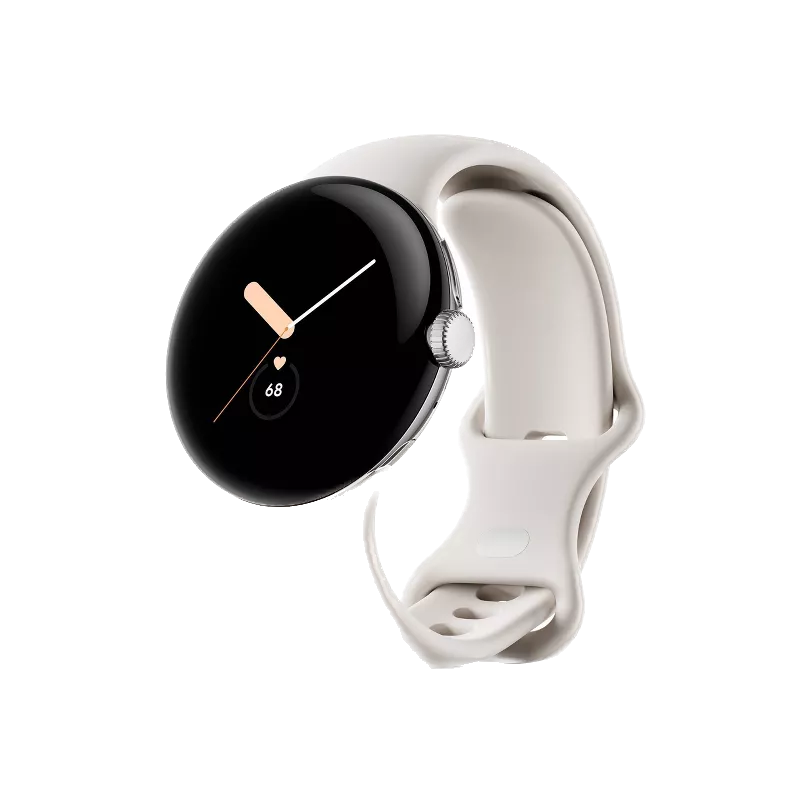
You know what I hate? Getting my phone out at inopportune times. You know what I don’t mind so much? Glancing down at my Google Pixel Watch to see that the cold call I’m receiving is being answered by my phone’s call screening and I don’t have to pick it up. Whether it’s the first version or the second, I have grown accustomed to having something on my wrist that acts as an extension of my phone. True digital bliss.
I use my webcam a LOT: Zoom and Google Meet with coworkers, FaceTime with family and friends, webinars with the Backblaze community of developers and admins, and quick-start videos for the Backblaze YouTube channel. Ever since I got my PlexiCam Pro mount about a year ago, it’s been my secret weapon in every one of those interactions. It’s a transparent plexiglass webcam mount that hangs from the top edge of my monitor, allowing me to position my webcam in my eyeline, just above my focus. To anyone on the call, I appear to be looking directly into the camera.
At $85, it’s not cheap, but it’s well designed and constructed, and feels like it will last forever. Highly recommended for anyone who spends a lot of time flicking their eyes between the screen and the webcam!
Ah, the age old debate of Emacs versus Vim: the two most widely used editors for Linux operating systems. I solidly planted my flag on team Vim once I learned how to save and exit the program. 😉
I do aspire to one day having a computer that only runs Emacs because byte compiled Emacs is cool to me. Until I graduate to that level of wizardry, I stick to Neovim when I need to quickly edit something from a terminal or want to appear cool in front of my coworkers. I mostly use the Vim extension in Intellij for day-to-day modifying of code and configs. If you would like to also learn Vim, I really enjoyed playing through Vim Adventures, which is a free game that teaches you a lot of the shortcuts and movements in Vim.
Continuing the discussion in favor of Vim, specifically Neovim. You only have to learn the keybindings once. There is a fantastic set of plugins to customize it to your heart’s content—Visual Studio Code has VSCodeVim, Intellij has IdeaVim, for example. Then you don’t have to relearn keybindings while switching between languages, projects, and code.
Tmux the terminal multiplexer: like Vim, it may have a steep learning curve but once you learn it you can’t live without it. The tmux wiki has some great getting started guides. I strongly recommend remapping the leader key (mine is Caps + A, or Caps Lock + A on Windows keyboards). You can set up customized tmux scripts to re-create all your environments (one session for server code, another for a different codebase, another for your notes, and so on). Each session then has multiple windows which you can create, split, and close quickly, no need to leave your keyboard.
For web technologies, learn the toolset available in the browser developer tools. Remember to preserve logs filter to specific responses so you won’t be overwhelmed looking at messages.
Stepping away from the browser and back into the terminal, learn Curl and ag or rg. For every “old” unix command there’s likely a modern replacement that’s 100s of times faster with much more customization available.
But there’s always the middle ground for situations where you may need to initiate a complex series of browser–webapp interactions and you need to modify or test something quickly. To do this, learn how to use Burp. In the long run it’s well worth it. It makes it a breeze to modify data between the browser and your app.
Last tip: for native code, just learn how to use the debugger.
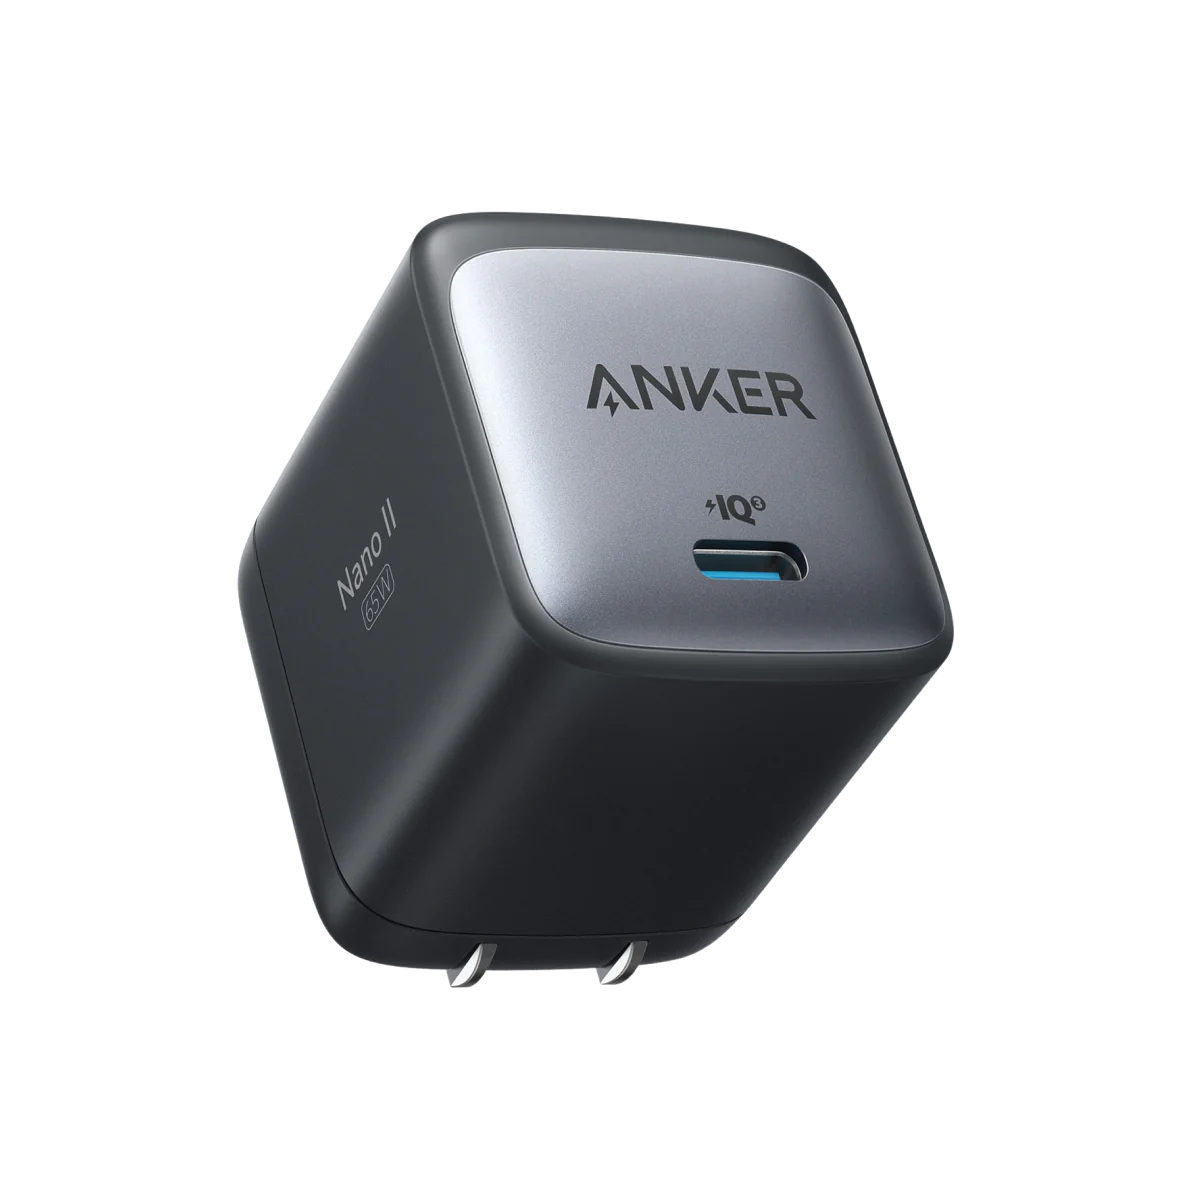
One power adapter to rule them all: the Anker 715 Charger (Nano II 65W). This one little power adapter can power my personal laptop, work laptop, headphones, and more. With one cable, one small charger cube, and a few small USB end adapters, I can charge everything.
A Roku. I use it at home for streaming apps, but I also carry one in my travel bag. There’s nothing worse than flipping through basic cable channels in a hotel when you’re traveling. Wait, yes there is—signing in to Netflix on the hotel TV and forgetting to sign out. If I travel with it, I just plug it in and I’m already signed in to all my apps.
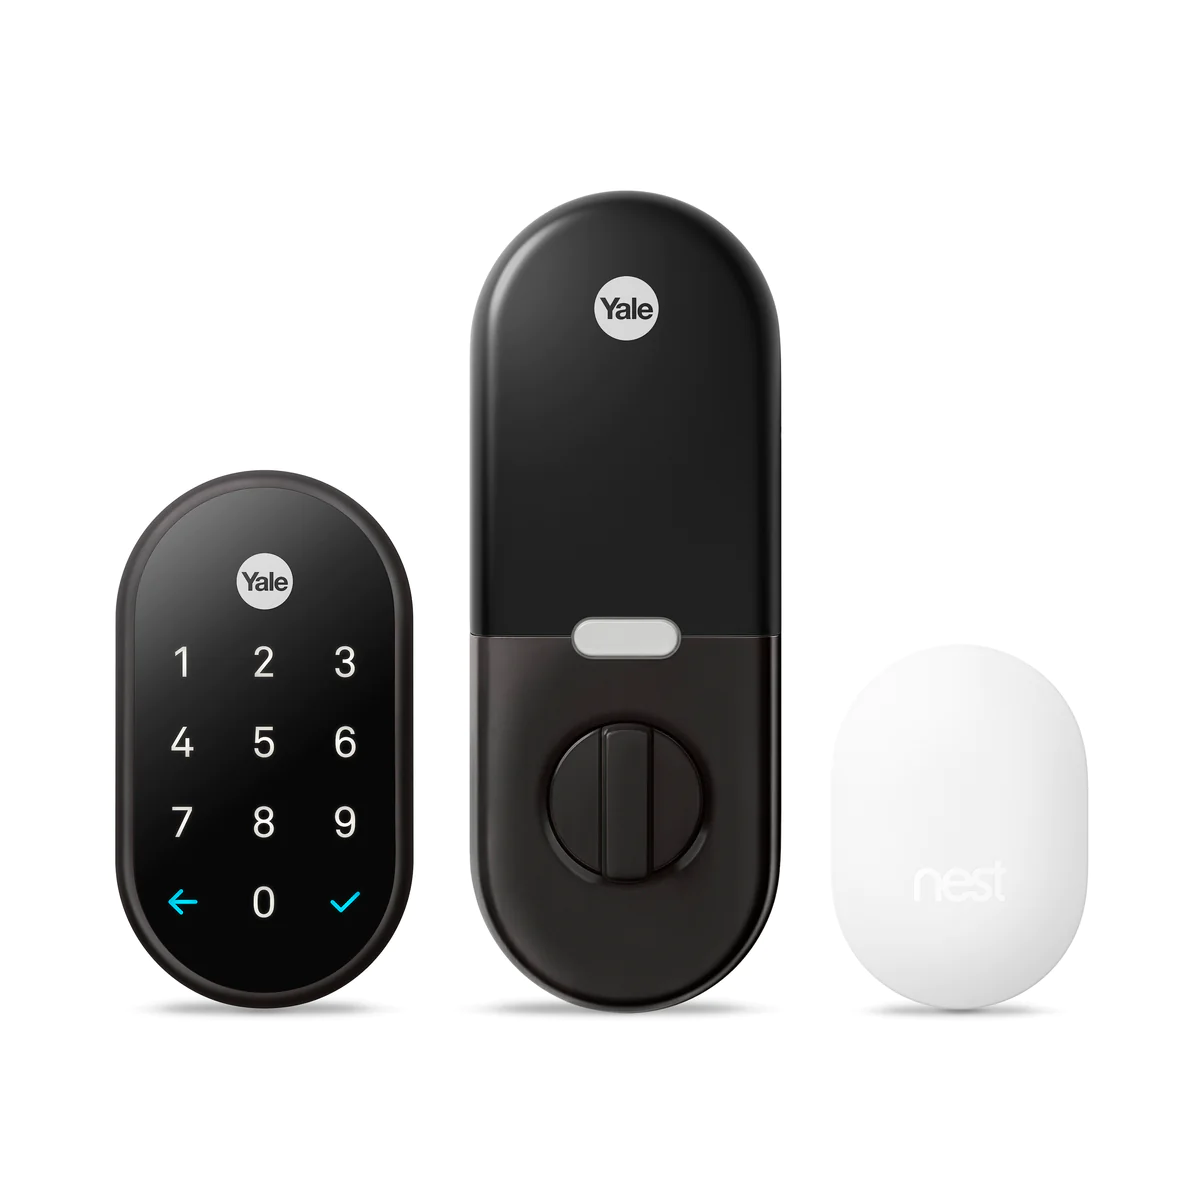
I got tired of locking myself out of my own house and forgetting who I gave spare keys to, so I really appreciate this Yale Lock with Nest Connect. It works with the Nest cameras that I mostly use to see whether the UPS or DoorDash delivery person has the nerve to ring my doorbell. (Drop it and run, people!)
It’s secure and easy-to-use; no more locking myself out of my own house in the middle of winter. I can give a code to a friend so they can feed my cats while I’m away, or create temporary passcodes so I don’t have to wait around for the cable guy.
I have a hard time turning my brain off at night, so I used to pop in earbuds to listen to something soothing (not comfortable at all!). Then I got this Cozyband as a gift and became 100% addicted to it. I CAN fall asleep without it, but I don’t do it willingly. It’s also good for working out if you hate sweaty earbuds slipping out all the time.
It gets cold in my home, and I don’t necessarily want to heat the whole place when it’s just me. A good old fashioned heated blanket does the trick. All the tech in the world won’t help you when you’re shivering.
As a working mom with two boys, I am always on the go. Both of my boys are now playing for AAA travel teams. I try my best to keep up with all their games, and LiveBarn is how I stay connected to them. It allows me to pull up a live feed or on-demand video of the game. Last weekend was a great example: they were playing at two different rinks across town. I was able to pull up one game on LiveBarn on my phone, and watch both games literally at the same time. When my older son came home and asked me if I saw his goal, I was able to say, “I heard Coach yell, ‘Nice shot, Newy!’”
My life changed when I adopted a password manager years ago. Before I went back to full-time corporate life in 2020, I freelanced quite a bit—which means an endless series of logins and passwords, depending on how you’re engaging with your clients. And, while I enjoy making up 13–15 character passphrases with a mix of upper and lowercase letters, at least one symbol with some outlawed symbols (but different ones on each site), and then remembering which ones I’ve used for which accounts without reusing them… Oh wait, I actually really don’t like that. I’d rather have a password manager like Bitwarden that can generate passwords, follows me device to device, and allows me to enable biometric controls. And, spoiler alert for any of my family members who diligently read my work (I’m sure): This year the whole family is getting a subscription as a gift, and I can centrally manage it for my non-tech-inclined family members.
I’m not going into the story of how I got hooked on this app, but I will tell you that CENTR’s meal planning tool is a life saver. You can set a crazy variety of dietary needs, select your meals and portions for a week, and it spits out a perfectly organized shopping list. Then, when you want to make a meal, you just pop into the app and it tells you exactly how to look like you know what you’re doing in the kitchen. It’s sort of pricey, but the amount of money I save by not ordering in or wasting food that I bought without a plan more than makes up for it.
And, oh yeah, Chris Hemsworth is one of its founders.
Hoping on the app train here. The one I can’t live without is definitely YNAB. I’m trying to get better at budgeting ahead (and get my husband and I on the same page—haha!) and I like their philosophical approach to a typically boring subject.
I don’t have a favorite tech thing. I certainly use lots of them, but I would not be lost without them because I was raised without any of the current tech. I know how to tie my shoes without watching a Youtube video. Just sayin’.
But, you know, just in case.
Thanks, Andy
Leave it to Andy to send us off with a reminder to put the tech down sometimes, as we hope you all get a chance to do this holiday season. But, we also want to know: what’s the tech that you can’t live without? Let us know in the comments.
What better time for a reminder to back up your data than after a serious data loss event? If you are concerned about the safety of your Google Drive data after the reports of unexplained data loss by Google Drive users last week, then read on to learn how to download and back up your Google Drive.
More than one billion businesses and individuals use Google Drive according to, well, a quick search on Google. If most of those one billion people are like me, they save pretty much everything there.
Whether the data is professional or personal, the end result is a lot of important files that aren’t necessarily backed up anywhere. Maybe your school is closing your account and you need to move all of your data somewhere else. Maybe your account gets attacked by cybercriminals. Or maybe Google goes down or loses your data. In order to protect your important Google Drive files, you need to understand how to go about downloading and backing up your account.
In this post, you’ll learn some simple steps to achieve that, including how to download your Google Drive, how to back up your computer, and how to back up your Google Drive.
We’ve gathered a handful of guides to help you protect social content across many different platforms. We’re working on developing this list—please comment below if you’d like to see another platform covered.
Most people have multiple email accounts, so first it is important to make sure you are logged in to the correct Google Account before you start this process.
Once you’re signed in, you will want to go to Google Drive: drive.google.com. From there, you can download individual files if you don’t have that many or do a bulk download.
To download individual files:
Hold shift while you select all of your files.
Right click and select download.
To do a bulk download:
Go to your account at myaccount.google.com.
Go to Data & privacy.
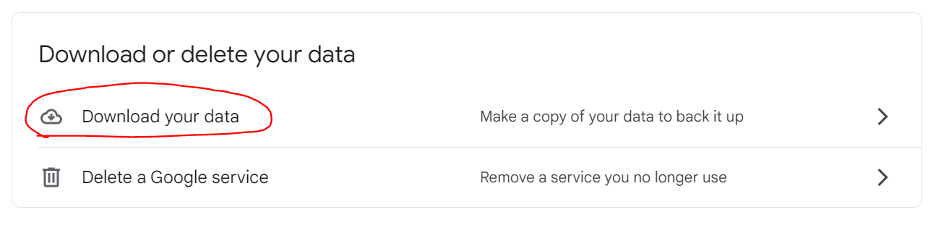
Scroll down to the section of the page titled “Download or delete your data” and click “Download your data.” This allows you to download all of the data in your Google account (not just Google Drive) via Google Takeout.
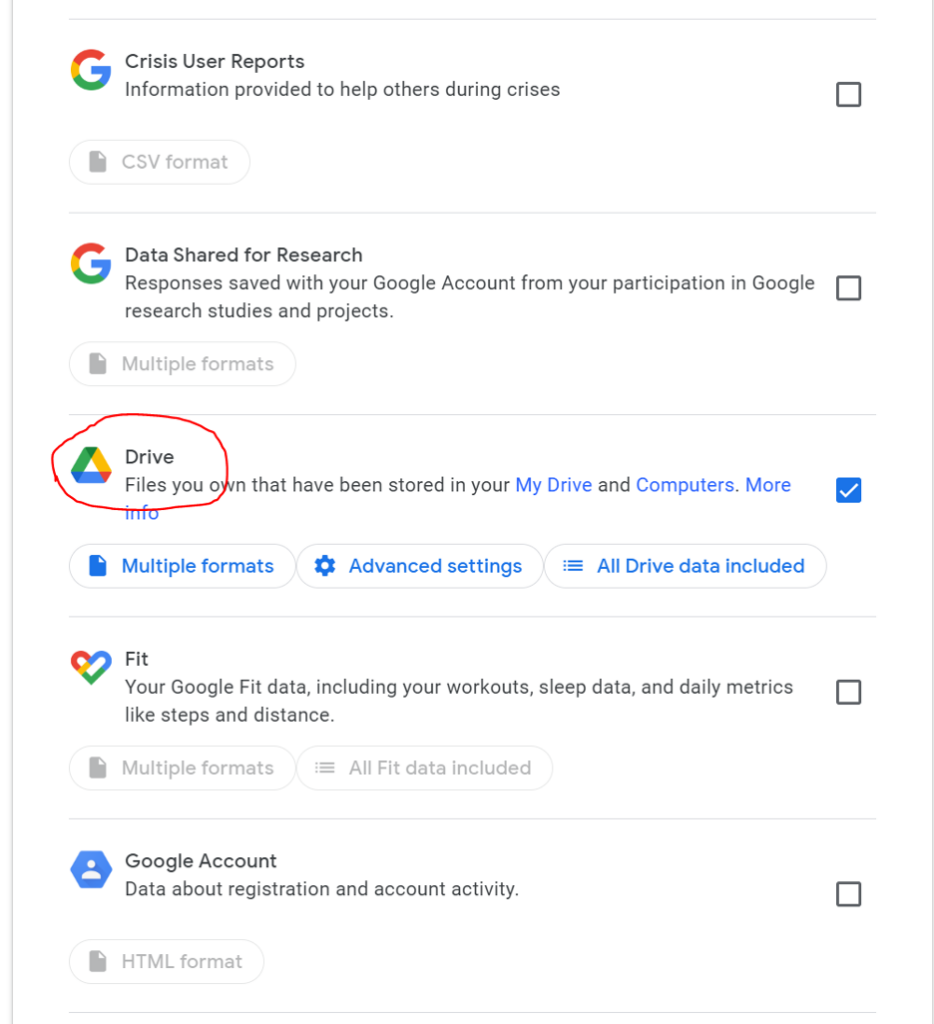
Select Google Drive (and whatever other services you might want to download data from).
You then have a few options to select:
Multiple formats: Here you can tell Google the formats of the files you want to download. For example, if you want to download documents as .docx files or as PDFs.
Advanced settings: Here you can tell Google to download additional data, including previous versions and the names of your folders.
All Drive data included: Here you can select all data, or deselect specific folders if you want to.
Scroll down to the bottom and click on Next Step.
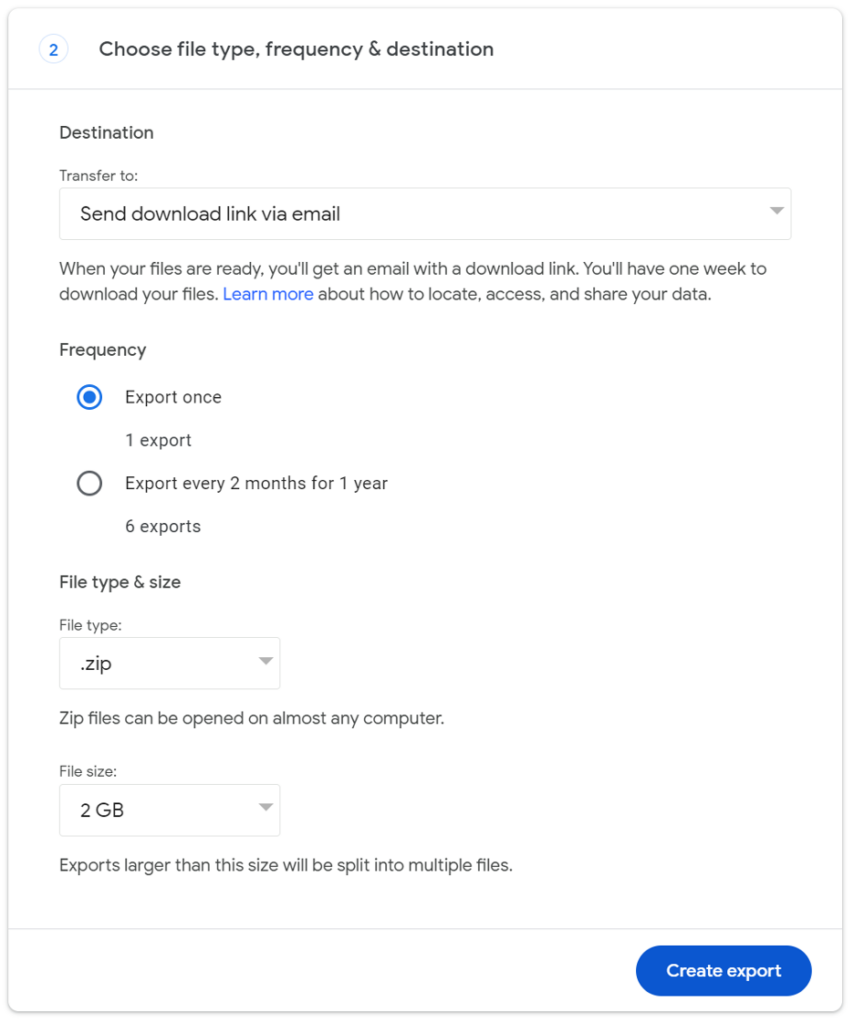
You’ll be prompted to specify your delivery method. Select Send download link via email.
You can then specify your frequency. You can select a single export or an export every two months for a year. For our purposes, you can select a single export. (We’ll talk about options for backing up your data more frequently later.)
Specify the file type and the file size you want to export.
You can choose to have these files sent as a .zip file or a .tgz (tar) file. The main difference between the two options is that a .zip file compresses every file independently in the archive, but a .tgz file compresses the archive as a whole.
The file size tells Google when to split your data into a separate file. Depending on the size of your data, Google may send you multiple emails with different sizes of files.
Click Create export.
When most people think about downloading the data they store in Google Drive, they’re thinking about the documents, photos, and other larger files they work with, but (as Google Takeout makes clear) you have a lot more data stored with Google outside of Drive.
Here’s why you might choose to export everything:
To have a copy of bookmarked websites.
To have a copy of emails that may contain files you’ve lost over time.
To have a copy of important voicemails from loved ones in Google’s Voice product that you want to keep forever.
Also, when you download all of your data it is a good reminder of what information Google has of yours.
After you click Create export, you’ll get an email in a few minutes, hours, or a couple of days, depending on the size of your data, informing you that your Google data is ready to download.
How to Back Up Your Computer
You now have your Google Drive data out of the Google Cloud and on your computer. Next, you’ll want to make sure it’s backed up. Your computer can fail just like Google, so simply downloading it isn’t enough. Protecting your newly downloaded Google data with a good cloud backup strategy should be the next thing you do.
Make sure to have at least three copies of your data: two local including one on your desktop and one on a different storage medium, like a hard drive. Then, you should have one off-site, and these days that means in the cloud.
Note that when we’re using the word “cloud” here, we specifically mean that you’re backing up to the cloud. Often using a “cloud drive” means that you’re syncing, and, as the current data loss snafu at Google shows, there’s a big difference between sync and backup.
How to Back Up Google Drive
Downloading your data once and backing it all up is a good step. But, you’re adding documents to Google Drive all the time, and downloading your data manually can get tedious if you want to make sure your work is consistently and reliably backed up.
Of course, as we noted above, you can set your Google Drive bulk download frequency to a regular cadence. You’d still have to manually download your data and add it to your computer’s local storage, then back it up using the same method you would for your computer data. If you’re using Backblaze Computer Backup, which automatically runs in the background on your computer, those files would be backed once they entered your local storage.
Still, that means that you have the possibility of losing files if your cadence isn’t frequent enough, and if you forget to manually download and replace those files sent to you in email, then you might run into trouble.
Alternatively, there are a few services that will back up your Google Drive data for you. With something like Movebot, you can set up your Google Drive to sync and back up to a cloud storage service like Backblaze B2. If you’re a little more tech savvy, you can also use rclone to do the same thing.
These tools are a bit more complex than using your Backblaze Computer Backup account, but you can configure these tools to back up your Google Drive at a frequency that makes sense for you to make sure new data is getting backed up as you add it.
Do you have any techniques on how you download your data from Google Drive or other Google products? Share them in the comments section below!
FAQ
How do I download individual files from Google?
You can simply select the files you want to download, right click, and select Download.
How do I download my entire Google Drive?
You can use Google Takeout to download your entire Google Drive as well as any data you have in other Google services. Go to your account, click on Data & privacy, and click on Download your data to get started.
How do I back up my Google data once I download it?
You can back up your Google Data once you’ve downloaded it to your computer by using a trusted cloud computer backup service. Make sure to follow a 3-2-1 backup strategy by keeping at least two backups in addition to your data in Google drive: one local, on your desktop or on a hard drive, and one in the cloud.
How do I back up my Google Drive?
There are many backup software services available to help you back up your Google drive data. With something like Movebot, you can set up your Google Drive to sync and back up to a cloud storage service like Backblaze B2. If you’re a little more tech savvy, you can also use rclone to do the same thing.
The holidays are fast approaching and with them the many cyber sales that provide both inspiration and opportunity for gift giving on any budget. To help narrow the field, every year I ask my fellow Backblazers to submit the gifts that they are looking forward to both gifting and receiving. (Hopefully some of their loved ones read the blog?) And of course, I’ve sprinkled in a few of my favorites as well. Without further ado, here’s what we suggest looking into for your 2023 gift giving!
This little thing is pretty neat. It helps you keep track of your health, tracking everything from sleep to stress levels. It lasts for a week on a single charge, and is super easy on the eyes, so you’ll want to wear it all over the place.
We have a lot of hikers, joggers, and runners at Backblaze and, as firm believers in thinking about your backup options before a disaster, the Garmin is an awesome-to-have trail buddy.
While a cocktail shaker is a pretty common household item, this one is sure to impress. Ask questions like, “Could my drink possibly get any colder and stay that way?” and “Can I customize my shaker with a sticker of my cat’s face?” And the Yeti’s answer is yes. Also, you know we love when a product comes in red.
Wine anyone? If you or someone in your life is a big wino, older wines are a delicious treat, with a potentially fatal stumbling block: old, crumbly corks. The Durand corkscrew helps take them out with no breakage.
Another one for winos, the Coravin is an incredible wine system that uses tiny needles and argon gas to pour wine into your glass without having to actually open it. I can personally vouch for this one as a single human who has nice wine bottles and often wants a single glass once or twice a week.
Tea time is a dreamy time and this matcha set allows you to make yourself a traditional cup. And if you need some matcha powder for it, this one comes high comes highly recommended: Organic Ceremonial Grade Matcha Powder.
Tea and coffee at a campsite are a must-have, and if you’ve never tried a Jet Boil, this model is easy to use. Also helpful for those times where you lose power and need to make some hot water in a hurry.
Foodies know and love the sous vide method, a.k.a. low temperature, long time (LTLT). If you’re into cooking your food in a hot tub, you’ll be happy to know that this accessory has come down in price dramatically over time. We like this version of a kitchen appliance, but there is certainly a wide world of sous vide gadgets out there if you’re interested.
Love fancy foods but can’t travel to get them? Goldbelly has become the go-to for nationwide delivery of local favorites, and they now do meal kits as well. We’re not going to say you should give up on your standard, probably nutritionally balanced Hello Freshes of the world, but we will say that these are a whole lot more, well, iconic.
Have your own mini-garden whether you’re in a house or an apartment. With just a little bit of counter space, a semi-green thumb, some patience, and water, you’ll never have herbs go bad in your fridge again.
Not since the times of the Game Boy Advance or maybe the Nintendo 3DS have handheld gaming systems seen such a rise in popularity. Along with the Nintendo Switch, these three handhelds bring the power of a computer to your fingertips on the go. While it’s not quite a gaming rig, it’s good enough for most airline flights, and hey…they’ll all play Baldur’s Gate 3.
It’s a great time to be a nerd. Critical Role, Dimension 20, The Adventure Zone, and many more role playing games (RPGs) are super popular nowadays, and it’s high time you take part. Get the D&D starter kit, some dice, and your soon-to-be best friends, create your character and get rolling.
Backblaze is based in California, but that doesn’t mean that we don’t know about weather. (What’s this wet stuff falling from the sky again?) That said, as a Midwesterner by heritage (dontcha know), I know something about staying warm. Heated clothes take the benefits of your favorite heated blanket and give them to you on the go.
We’re all about being good community members, and this local (to us) company makes hats, fanny packs, and bomber jackets using environmentally friendly materials. They’re good products, in more ways than one.
Studies have shown that meditation has measurable benefits for your mind and body. There are a plethora of tools out there to help you build good habits (see below), but this one is stinkin’ cute. Let this little guy help visually take you through a guided meditation. Bonus: it’s a great gift for kids, too.
The Calm app helps people stay mindful with everything from guided meditation to celebrity-read stories. We’re big fans of their social posts that just encourage you to take a 15 second break—it’s a positive interruption to the doomscroll effect, and a great way to preview some of the app’s content.
A twist on photo frames: you can send pictures to it and have all of your favorite memories staring back at you when you look over. Or, send photos to anyone, anywhere. Definitely some potential prank opportunities to be had; but it’s also a great way to keep in touch with far-flung family members.
Sonos surround systems are a great addition to homes. Multiple speakers can sync up to make sure that you’re never far away from rocking out to Weird Al, no matter where you are in the house.
For the audiophiles in your life, the AirPods Max are the over-the-ear variant of the traditional AirPod. They’re much harder to lose, giving you that impressive combo of sound and noise cancellation you’ve come to expect.
To balance the scales for our Android lovers, here are Google’s in-ear buds. They have a lot of bells and whistles including noise cancellation and built-in Android Assistant. Now when you talk to yourself, someone will answer. (That’s a good thing right?).
LEGO
LEGO is having a bit of a moment (at least in my family) and we have spent a lot of time building complicated models. For the adults in your life that love to tinker, we recommend some of these cool sets!
And, of course, we’d be remiss if we didn’t remind you that Backblaze Computer Backup makes a great gift. Help your family and friends experience the sweet, sweet peace of mind that comes from a good backup strategy and make sure they never lose a file again. Bonus: you don’t even have to go to the store to get it.
Go Forth and Gift!
We hope this guide sparked some ideas and simplified some choices. We’ll also be publishing our second-annual book guide in December if you’re struggling with something for the literary folks in your life. (There’s some good stuff in the first one too.) We love hearing about what folks are excited about, so feel free to give us some more good options in the comments below.
The year is 2023, and the human race has spread across the globe. Nuclear powered flying cars are everywhere, and the first colonies have landed on Mars! [Radio crackles.]
Okay, so that isn’t exactly how it’s gone down, but in honor of Halloween, the day celebrates the whimsy of all things being possible, let’s talk about things that used to be science fiction and aren’t anymore.
Artificial Intelligence (AI)
Have we gotten reader fatigue from this topic yet? (As technology people by nature, we’re deep in it.) The rise of generative AI over the past year or so has certainly brought this subject into the spotlight, so in some ways it seems “early” to judge all the ways that AI will change things. On the other hand, there are lots of tools and functions we’ve been using for a while that have been powered by AI algorithms, including AI assistants.
Shout out to this content creator for a hilarious video.
At the risk of not doing this topic justice in this list, I’ll say that there’s plenty of reporting on—and plenty of potential for—AI now and in the future.
Aliens
This year, the U.S. House Oversight Committee was conducting an investigation on unidentified flying objects (UFOs). While many UFOs turn out to be things like weather balloons and drones designed for home use, well, some apparently aren’t. Three military veterans, including a former intelligence officer, went on record saying that the government has a secret facility where it’s been reverse engineering highly advanced vehicles, and that the U.S. has recovered “non-human biologics” from these crash sites. (Whatever that means—but we all know what that means, right…)
Here’s the video, if you want to see for yourself.
Weirdly, the public response was… not much of one. (The last couple of years have been “a year”.) But, chalk this one up as confirmed.
Space Stations
The list of sci-fi shows and books set on space stations is definitely too long to list item by item. Depending on your age (and we won’t ask you to tell us), you may think of Isaac Asimov’s Foundation series (the books), Star Wars, Zenon, Girl of the 21st Century (or maybe the Zequel?), Babylon 5, or the Expanse.
Back in the real world, the International Space Station (ISS) has been in orbit since 1998 and runs all manner of scientific experiments. Notably, these experiments include the Alpha Meter Spectrometer (AMS-02) which is designed to detect things like dark matter and antimatter and solve the fundamental mysteries of the universe. (No big deal.)
For those of us stuck on Earth (for now), you can keep up with the ISS in lots of ways. Check out this map that lets you track whether you can see it from your current location. (Wave the next time it floats over!) And, of course, there are some fun YouTube channels streaming the ISS. Here’s just one:
Universal Translators
Okay, universal translators is the cool sci-fi name, but if you want the actual, machine learning (ML) name, folks call that interlingual machine translation. Translation may seem straightforward at first glance, but, as this legendary Star Trek episode demonstrates, things are not always so simple.
And sure, it’s easy to say that this is an unreasonable standard given that most human languages are known—but are they? Native language reclamation projects like those from the Cherokee and Oneida tribes demonstrate how easy it is to lose the nuance of a language without those who natively speak it. Advanced degrees in poetry translation, like this Masters of Fine Arts from the University of Iowa (go Hawks!), help specialists grapple with and capture the nuance between smell, scent, odor, and stench across different languages. And, add to those challenges that translators also have to contend with the wide array of accents in each language.
With that in mind, it’s pretty amazing that we now have translation devices that can be as small as earbuds. Most still require an internet connection, and some are more effective than others, but it’s safe to say we live in the future, folks. Case in point: I had a wine tasting in Tuscany a few months ago where we used Google Translate exclusively to speak with the winemaker and proprietor.
iPads
“What?” you say. “iPads are so normal!” Sure, now you’re used to touch screens. But, let me present you with this image from a show that is definitely considered science fiction:
Shockingly, not an iPad.
Yes, folks, that’s Captain Jean Luc Picard from Star Trek: The Next Generation. And here’s a later one, from Star Trek: Deep Space Nine.
These are plans for the arboretum, so Keiko is probably dropping some knowledge.
Star Trek wikis describe the details of a Personal Access Display Device, or PADD, including a breakdown of how they changed over time in the series. Uhura even had a “digital clipboard” in the original Star Trek series:
We’d have to revisit the episode to see what this masterful side-eye is about.
And, just for the record, we’ll always have a soft spot in our heart for Chief O’Brien’s love of backups.
Robot Domestic Laborer
If you were ever a fan of this lovely lady—
Rosie the Robot, of course, longtime employee and friend of The Jetsons.
—then you’ll be happy to know that your robot caretaker(s) have arrived. Just as Rosie was often seen using a separate vacuum cleaner, they’re not all integrated into one charming package—yet. If you’re looking for the full suite of domestic help, you’ll have to get a few different products.
First up, the increasingly popular (and, as time goes on, increasingly affordable) robot vacuum. There are tons of models, from the simple vacuum to the vacuum/mop. While they’re reportedly prone to some pretty hilarious (horrific?) accidents, having one or several of these disk-shaped appliances saves lots of folks lots of time. Bonus: just add cat, and you have adorable internet content in the comfort of your own home.
Next up, the Snoo, marketed as a smart bassinet, will track everything baby, then use that data to help said baby sleep. Parents who can afford to buy or rent this item sing its praises, noting that you can swaddle the baby for safety and review the data collected to better care for your child.
And, don’t forget to round out your household with this charming toilet cleaning robot.
Robot Bartenders
In this iconic scene from The Fifth Element, Luc Besson’s 1997 masterpiece, a drunken priest waxes poetic about a perfect being (spoiler: she’s a woman) to a robot bartender. “Do you know what I mean?” the priest asks. The robot shakes its head. “Do you want some more?”
Start at about 2:00 minutes.
These days, you can actually visit robot bartenders in Las Vegas or on Royal Caribbean cruise ships. Or, if you’re looking for a robot bartender that does more than serve up a great Sazerac, you can turn to Brillo, a robot bartender powered by AI who can also engage in complex dialogue.
Please politely ignore that his face is the stuff of nightmares…it’s what’s on the inside (and in the glass) that counts.
And, if leaving your house sounds terrible, don’t worry: you can also get a specialized appliance for your home.
It’s a Good Time to Be Cloud Storage
One thing that all these current (and future) tech developments have in common: you never see them carting something trailing wires. That means (you guessed it!) that they’re definitely using a central data source delivered via wireless network, a.k.a the cloud.
After you’ve done all the work to, say, study an alien life form or design and program the perfect cocktail, you definitely don’t want to do that work twice. And, do you see folks slowing down to schedule a backup? Definitely not. Easy, online, always updating backups are the way to go.
So, we’re not going to say Backblaze Computer Backup makes the list as a sci-fi idea that we’ve made real; we’re just saying that it’s probably one of those things that people leave off-stage, like characters brushing their teeth on a regular basis. And, past or future, we’re here to remind you that you should always back up your data.
Things We Still Want (Get On It, Scientists!)
Everything we just listed is really cool and all, but let’s not forget that we are still waiting for some very important things. Help us out scientists; we really need these:
We feel compelled to add that, despite our jocular tone, the line between science and science fiction has always been something of a thin one. Studies have shown and inventors like Motorola’s Martin Cooper have gone on record pointing to their inspiration in the imaginative works of science fiction.
So, that leaves us standing by for new developments! Let’s see what 2024 brings. Let us know in the comments section what cool tech in your life fits this brief.
When it comes to navigating the treacherous landscape of a household’s digital ecosystem, from smartphones and laptops to smart homes and millions of subscriptions, there often emerges a silent hero—the ever-humble, quietly toiling, underappreciated Family IT Manager. This unsung role, typically filled by a tech-savvy-est member of the family, takes on the responsibility of keeping everyone’s digital lives running smoothly. Maybe you know one of these vaillant souls. Or maybe, just maybe, it’s you.
As the Family IT Manager, having one more arrow in your quiver with which to slay the dreaded data loss dragon is always helpful. And that’s what Backblaze Groups is all about—making it easier for you to keep track of everyone’s data in one place.
Today, we’re sharing some practical tips and tricks for using Groups to better manage your family’s backups.
Groups helps you manage the backups your family creates without having to log in and out of individual accounts. This makes it simple to keep track of everyone in one place. All the backup accounts are linked to the same credit card (they can Venmo you later), and you can even help someone else in your family create a backup or restore files easily with Groups. Need to help a family member with a computer emergency? Log in, access their most recent backup, and restore everything. Is your sibling unsure that you really added Backblaze to their computer? Log in, view their account, and get the screenshots to prove it to them (and everyone else).
By the way, this would be a great time to give the new Restore App, included with Backblaze Computer Backup v9.0, a spin.
One point of clarification: You might see Backblaze Groups referred to as “Business Groups,” but you don’t have to be a business to use Groups. They work equally well for businesses and personal users alike, including Family IT Managers (and, truly, running family IT is kind of like running a business, isn’t it?).
Why Use Groups?
You can already manage multiple computers on a single Backblaze account. So why use Groups instead? Well, with Groups, each user has individual access to, and control of, their account. You—as Group administrator—manage billing and, as needed, data recovery. This is a more secure and safer method than sharing the same account credentials among several computers used by different people.
Have multiple households or groupings of folks in your life that you need to manage? You can have as many Groups as you like to help you keep track of everyone and everything, and each of those Groups can have separate billing.
What Do I Need to Know About Setting Up Backblaze Groups for My Family?
The Groups feature streamlines the management of the accounts you need to monitor. As the Group administrator, you have total control over who’s included as part of your Group. You can send out email invitations, or alternatively, you can use a unique Group invitation link that allows anyone you share it with to easily join.
Here’s the visual of where you’d find everything in your account.
Being in a Group is entirely voluntary. Any member of a Group can leave any time they want, and Group administrators can also remove individuals from a Group at any time.
If you dissolve your Group for some reason or if someone chooses to leave, the removed person can decide whether they want to keep using Backblaze by establishing their own payment method. Perfect for when it’s time to wean the kiddos off of your shared accounts—whether they like it or not.
One last note: while you can set up and administer more than one Group with separate billing, you can only be a member in one Group.
Once you create a Group, you can invite members to join it. Copy the Group invite link Backblaze generates automatically for you. Give it to friends and family via email, chat, or any other means you’d like.
We promise to send the emails. You may have to remind them to check their email.
When the person you’ve invited clicks on the link, they will be prompted to either create a Backblaze account (if they don’t have one) or log in to their existing account. After completing this step, they will be prompted to download Backblaze. If they are already using Backblaze, there is no need for a reinstallation; they will seamlessly become a part of your Group.
Once an existing user successfully joins your Group, they’ll be under your billing account. Their existing credit card will automatically receive a prorated refund for the remaining portion of their previous Backblaze license. There is no need to worry about re-uploading data—their backup remains securely stored in Backblaze.
Newcomers to Backblaze can download and install the client to initiate their initial backup process. As the Group administrator, you will have the capability to monitor their backup progress. Remember that the first backup of data may take some time, but after that, everything will run smoothly in the background.
Go Forth and Conquer, Mighty IT Manager
We understand that being the go-to “tech person” for your family and friends can be challenging. We hope that Groups simplifies the process, making it easier for you to help keep your family’s data safe.
A while back, I received a frantic phone call from a long time friend who teaches ninth grade English. Now, don’t get me wrong, this friend, let’s call her Alex, is a tech-savvy person. She has more apps on her smartphone than I knew existed, but she had never used an external hard drive before.
Her school district had given them out to help make remote learning easier on teachers, but she was nervous about using it incorrectly, breaking it, or even just being able to find it on her computer. And she was a little embarrassed because it seemed like something everyone else already knew how to use.
If you’ve ever felt a bit lost when it comes to hard drives, don’t worry—you’re not alone. If you’re one of many folks who’ve asked themselves, “What is this thing?” and “How will it be helpful to me?” and “What if I break it?” then I’m here to walk you through everything I walked Alex through. Lots of folks have the same questions, and we’ll answer them in this guide for setting up and protecting your new hard drive.
A Guide to Setting Up Your First External Hard Drive
Getting Started
While it might seem like a no-brainer, the first step for setting up your hard drive is to plug it into your computer. Small, external, portable hard drives typically have one cord that plugs into your computer so you can transfer data. It also powers the hard drive. Some models may have another cord for added power—if so, you’ll want to plug in both.
Finding Your Hard Drive on Your Computer
On a Mac, locating your connected external drive is straightforward. Open Finder, which you can access by clicking the default Finder icon in your applications Dock, using Command + Space bar to search for Finder, or pressing Shift + Command + C. Once in Finder, your drives should appear either immediately or in the left-hand navigation column under “Locations.” Click on the specific drive you want to access to view its contents.
For Windows computers, the steps may vary depending on your Windows version. In general, you can find your drives in File Explorer by clicking on Computer or This PC in the left-hand navigation bar of a File Explorer window. If you’re unsure how to open File Explorer, look for it in your Start Menu, or try clicking on your desktop and pressing Windows Key + E together. Once you’ve located your drives, simply click on the one you wish to explore to access its contents.
Saving Files to Your External Hard Drive
External hard drives are a breeze to use. Once you’ve plugged them in and found them on your computer, you can simply copy files onto the hard drive by clicking and dragging them into the Finder or File Explorer window. This creates a copy on your hard drive, while leaving the original on your computer or laptop.
External Hard Drive Best Practices
Once you know how to use your external hard drive, there are a number of things you can do to maintain it and keep it organized. Your hard drive will fail eventually (more on that later), but there are things you can do to keep it working as long as possible. And there are things you can do to make sure you can easily find what you’re looking for.
1. Keep Your Drive Clean
Maintaining the cleanliness of your external hard drive involves two essential steps: caring for the hard drive itself and keeping the surrounding computer area tidy. The biggest priority is to ensure that both your hard drive and its immediate environment remain free from dust. A dust-free environment contributes to unimpeded airflow within your device, reducing the risk of overheating. If your hard drive has already been exposed to a dusty environment, compressed air is the most effective cleaning tool to remove it.
To effectively use compressed air, first identify key areas for cleaning. Look for the fan vent, inspect the USB ports, and examine other spots on the external hard drive that may accumulate dust over time. Then, simply blast those areas with the compressed air to remove some of the built up dust. (Bonus: it’s super fun.)
Lastly, it’s crucial to maintain an uncluttered area around your external hard drive to facilitate optimal airflow. Take the time to relocate any objects that might obstruct the airflow, such as books, papers, and other potential obstructions. This simple step can significantly enhance the longevity and performance of your external hard drive.
2. Keep Your Operating System Up to Date
The second best practice has more to do with your computer or laptop than your hard drive, but that’s what your hard drive connects to—so it’s important to keep it working, too.
We have all hit “remind me later” on an update dialog from our computer at some point in our lives, but updating your operating system (OS) will ensure that your computer is secure, that your system can run better, and that hard drives are able to properly connect to your files. Updating your OS can vary depending on what kind of computer you have. The best place to look for how to update your OS is in your system’s preferences.
Depending on the age of your computer, however, you should reach out to your local IT person before updating. Some older computers are not able to run, or run very poorly, on newer systems.
3. Know What’s On Your External Hard Drive
External hard drives are simple: you plug them in, they appear on your computer, and you can simply click and drag your files onto them to copy the files onto the hard drive. If you’re a more advanced user, you may have set up your external hard drive so that there are files that only exist on that device. Either way, it’s important to monitor what’s on your external hard drive and minimize digital clutter, just like you would with your computer or laptop. You can do this by periodically checking your drive to make sure your files are up to date and still needed.
4. Delete Duplicates
When you’re reviewing the contents of your external hard drive, keep in mind the significance of deleting duplicates. There are times when we unintentionally generate multiple copies of a project or document or save several versions of the same file, especially when finalizing edits. Removing redundant duplicates not only contributes to a speedier hard drive performance but also creates room for additional files. You can either manually inspect your files for duplications or use specialized applications designed to detect and delete duplicate files residing on your drive.
Protecting Your Data on an External Hard Drive
3-2-1 Backup
Implementing a 3-2-1 backup strategy means maintaining a minimum of three complete copies of your data. Two of these copies should reside locally but on distinct types of media, such as an external hard drive. The third copy must be stored offsite, away from your primary location. For instance, if you have your files on your computer and an external hard drive (which should be stored separately from your computer when not in use), you should maintain one additional copy stored independently, beyond the confines of your home. This is where the cloud comes in.
There are several cloud-based services that will back up your computer and your attached drives. We’re partial to our own, of course, and, here’s our guide to making sure your external hard drives are backed up. And, with Backblaze’s Forever Version History, you’ll always have a copy of your hard drive data, updated from the most recent time you plugged it in.
Prepare for a Drive Failure
The only truth about computer hardware is that it will fail eventually. We know a little bit about that. Most hard drive manufacturer warranties span only three to five years, and budget-friendly drives often have even shorter lifespans. These time frames don’t factor in variables like physical wear and tear, specific make or model, or storage conditions.
When using an external hard drive, you have to prepare for the day that it fails. Fortunately, there are several methods to monitor your external hard drive’s health, with telltale signs that it’s approaching the end of its service life. These signs may include unusual clicking or screeching sounds, sluggish performance, and frequent errors when attempting to access folders on the drive. You can also manually assess your drives’ status directly from your computer.
How to Find Out if Your Drive Is Failing
For a Windows computer, you’ll use a simple command prompt that will tell your computer where to look and what to check. Just right-click the Start menu on your computer, select Run, and type “cmd” or type “cmd” into the search bar. In the Command Line window that opens, copy and paste wmic diskdrive get status and hit enter. This command will run and it will return “Pred Fail” if your drive is not performing, or “OK” if the drive is performing well.
For a Mac computer, you can monitor the status of your external hard drive by opening Disk Utility. You can find it by going to Applications and then Utilities. Next, you will click on the drive you would like to test to see how it’s performing. Click the View button in the toolbar, then select Show SMART Status. This will display the SMART status of your hard drive as either “Verified” (healthy) or “Failing” (indicating a potential problem). Disk Utility will not detect or repair all problems that a disk may have, but it can give you a general picture.
Note: The process for running these diagnostics may vary slightly depending on your OS and the specific utility you use.
How to Run SMART Diagnostics on Your Hard Drive
Running SMART (Self-Monitoring, Analysis, and Reporting Technology) diagnostics on your hard drive is a smart (see what we did there?) way to assess its health and predict potential issues. SMART diagnostics provide valuable insights into your drive’s performance and can help you detect problems before they lead to data loss. You can use third-party software utilities like CrystalDiskInfo or HDDScan to access more detailed SMART data and view drive health in a user-friendly interface. Download and install one of these tools, then launch it and select your hard drive to view its SMART attributes and health status.
In Conclusion
Starting out with an external hard drive is exactly like starting out with any piece of technology you might own. The more you educate yourself on the ins and outs of taking care of it, the better it will run for you. But if something bad were to happen, you should always have a backup plan (we suggest Backblaze, but you probably already know that) to protect your new piece of equipment.
External Hard Drive FAQs
1. How do I find a hard drive on my computer?
On a Mac, open Finder. Once in Finder, your drives should appear either immediately or in the left-hand navigation column under “Locations.” For Windows computers, the steps may vary depending on your Windows version. In general, you can find your drives in File Explorer by clicking on Computer or This PC in the left-hand navigation bar of a File Explorer window.
2. How do I save files to a hard drive?
Once you’ve plugged in your hard drive and found it on your computer, you can simply copy files onto the hard drive by clicking and dragging them into the Finder or File Explorer window. This creates a copy on your hard drive, while leaving the original on your computer or laptop.
3. How do I keep my hard drive maintained?
Keeping your drive clean and dust-free is the best way to maintain it. This involves two essential steps: caring for the hard drive itself and keeping the surrounding computer area tidy. The biggest priority is to ensure that both your hard drive and its immediate environment remain free from dust. A dust-free environment contributes to unimpeded airflow within your device, reducing the risk of overheating. If your hard drive has already been exposed to a dusty environment, compressed air is the most effective cleaning tool to remove it.
4. How do I know if my hard drive is failing?
There are several telltale signs that your hard drive is approaching the end of its service life. These signs may include unusual clicking or screeching sounds, sluggish performance, and frequent errors when attempting to access folders on the drive. You can also manually assess your drives’ status directly from your computer.
Get ready. The release of Backblaze Computer Backup 9.0 is rolling out now through the end of September.
Backblaze Computer Backup 9.0 is available today in early access, and restoring your files is about to get a whole lot easier.
What’s New in Backblaze Computer Backup 9.0?
Whether you’re a longtime user or just getting started with Backblaze, version 9.0 provides you with an unparalleled backup and restore solution. With our latest release, you get our most requested feature: a dedicated restore app for both macOS and Windows clients that makes the process of restoring your data even more intuitive, seamless, and streamlined than before. The new version also comes with essential bug fixes and performance improvements to keep your back up experience ahead of the curve for both security and speed.
Backblaze Restore App: macOS and Windows Highlights
Whether you’re using our macOS or Windows clients, you can now recover your important data with even more ease.
The restore app sign in screen.Your library of files in the restore app. What it looks like when you prepare a restore. A handy Restore Log so you can track your progress.Check out some of the things you can expect to see from the restore app.
Here’s a peek into some of the new features we have in store with our new Restore Client App:
Simplified restore initiation process. When you’ve lost important files, the last thing you want is a demanding process sitting between you and restoring your data. With the restore app, you authenticate your Backblaze account and initiate the restore directly from your desktop. Once authenticated, you can browse your file tree and kick off the restore process immediately.
No limits for restore size. There are no limits to restore sizes inside of the restore app. Conserving disk space is important and you shouldn’t have to worry about downloading a .zip and having enough additional space to unzip it as well.
If you’re interested in a comprehensive tutorial on how to use the new restore app, we’re here to guide you. Let us walk you through the process.
We’re excited that our version 9.0 release compliments your already robust methods of accessing your data. To access your backup from anywhere, you can log in to www.backblaze.com to initiate a restore and use our iOS and Android apps to access your files on the go.
Backblaze v9.0 Is Available in Early Access Today: September 13, 2023
We will be taking feedback and slowly auto-updating all users in the coming weeks, but if you can’t wait and want to download the early access release now on your Mac or PC:
Go to: https://www.backblaze.com/status/backup-beta
Select your operating system and download the v9.0 app.
Install the early access release on your computer.
Please note, since this is in early access you might hit some bugs. Please reach out to our Support Team if you have any questions or if you want to give feedback—we always like to know how things are going.
The terms NAS and SAN can be confusing—the technology is similar and, making matters worse, the acronyms are the reverse of each other. NAS stands for network attached storage and SAN stands for storage area network. They were both developed to solve the problem of making stored data available to many users at once. But, they couldn’t be more different in how they achieve that goal.
The TL/DR:
NAS is a single storage device that serves files over ethernet and is relatively inexpensive. NAS devices are easier for a home user or small business to set up.
A SAN is a tightly coupled network of multiple devices that is more expensive and complex to set up and manage. A SAN is better suited for larger businesses and requires administration by IT staff.
Read on and we’ll dissect the nuances of NAS and SANs to help you make informed decisions about which solution best suits your storage needs.
Check Out Our New Technical Documentation Portal
When you’re working on a storage project, you need to be able to find instructions about the tools you’re using quickly. And, it helps if those instructions are easy to use, easy to understand, and easy to share. Our Technical Documentation Portal has been completely overhauled to deliver on-demand content in a user-friendly way so you can find the information you need. Check out the NAS section, including all of our Integration Guides.
Basic Definitions: What Is NAS?
NAS is a device or devices with a large data storage capacity that provides file-based data storage services to other devices on a network. Usually, they also have a client or web portal interface that’s easy to navigate, as well as services like QNAP’s Hybrid Backup Sync or Synology’s Hyper Backup to help manage your files. In other words, NAS is synonymous with user-friendly file sharing.
NAS with eight drive bays for 3.5″ disk drives.
At its core, NAS operates as a standalone device connected to a network, offering shared access to files and folders. NAS volumes appear to the user as network-mounted volumes. The files to be served are typically contained on one or more hard drives in the system, often arranged in RAID arrays. Generally, the more drive bays available within the NAS, the larger and more flexible storage options you have.
Key Characteristics of NAS:
File-Level Access: NAS provides file-level access, ideal for environments where collaborative work and content sharing are paramount.
Simplicity: NAS solutions offer straightforward setups and intuitive interfaces, making them accessible to users with varying levels of technical expertise.
Scalability: While NAS devices can be expanded by adding more drives, there may be limitations in terms of performance and scalability for large-scale enterprise use.
How NAS Works
The NAS device itself is a network node—much like computers and other TCP/IP devices, all of which maintain their own IP address—and the NAS file service uses the ethernet network to send and receive files. This system employs protocols like network file system (NFS) and server message block (SMB), enabling seamless data exchange between multiple users.
The NAS system and clients connect via your local network—all file service occurs via ethernet.
Benefits of NAS
NAS devices are designed to be easy to manage, making them a popular choice for home users, small businesses, and departments seeking straightforward centralized storage. They offer an easy way for multiple users in multiple locations to access data, which is valuable when users are collaborating on projects or need to share information.
For individual home users, if you’re currently using external hard drives or direct attached storage, which can be vulnerable to drive failure, upgrading to a NAS ensures your data is better protected.
For small business or departments, installing NAS is typically driven by the desire to share files locally and remotely, have files available 24/7, achieve data redundancy, have the ability to replace and upgrade hard drives in the system, and most importantly, support integrations with cloud storage that provide a location for necessary automatic data backups.
NAS offers robust access controls and security mechanisms to facilitate collaborative efforts. Moreover, it empowers non-technical individuals to oversee and manage data access through an embedded web server. Its built-in redundancy, often achieved through RAID configurations, ensures solid data resilience. This technology merges multiple drives into a cohesive unit, mimicking a single, expansive volume capable of withstanding the failure of a subset of its constituent drives.
Summary of NAS Benefits:
Relatively inexpensive.
A self-contained solution.
Easy administration.
Remote data availability and 24/7 access.
Wide array of systems and sizes to choose from.
Drive failure-tolerant storage volumes.
Automatic backups to other devices and the cloud.
Limitations of NAS
The weaknesses of NAS primarily revolve around scalability and performance. If more users need access, the server might struggle to keep pace. If you overprovisioned your NAS, you may be able to add storage. But sooner or later you’ll need to upgrade to a more powerful system with a bigger on-board processor, more memory, and faster and larger network connections.
Another drawback ties back to ethernet’s inherent nature. Ethernet divides data into packets, forwarding them to their destination. Yet, depending on network traffic or other issues, potential delays or disorder in packet transmission can hinder file availability until all packets arrive and are put back in order.
Although minor latency (slowness) is not usually noticed by users for small files, in data-intensive domains like video production, where large files are at play, even milliseconds of latency can disrupt operations, particularly video editing workflows.
Basic Definitions: What Is a SAN?
On the other end of the spectrum, SANs are engineered for high-performance and mission-critical applications. They function by connecting multiple storage devices, such as disk arrays or tape libraries, to a dedicated network that is separate from the main local area network (LAN). This isolation ensures that storage traffic doesn’t interfere with regular network traffic, leading to optimized performance and data availability.
Unlike NAS, a SAN operates at the block level, allowing servers to access storage blocks directly. This architecture is optimized for data-intensive tasks like database management and virtualization or video editing, where low latency and consistent high-speed access are essential.
Key Characteristics of SANs:
Block-Level Access: SANs provide direct access to storage blocks, which is advantageous for applications requiring fast, low-latency data retrieval.
Performance: SANs are designed to meet the rigorous demands of enterprise-level applications, ensuring reliable and high-speed data access.
Scalability: SANs offer greater scalability by connecting multiple storage devices, making them suitable for businesses with expanding storage needs.
How Does a SAN Work?
A SAN is built from a combination of servers and storage over a high speed, low latency interconnect that allows direct Fibre Channel (FC) connections from the client to the storage volume to provide the fastest possible performance. The SAN may also require a separate, private ethernet network between the server and clients to keep the file request traffic out of the FC network for even more performance.
By joining together the clients, SAN server, and storage on a FC network, the SAN volumes appear and perform as if it were a directly connected hard drive. Storage traffic over FC avoids the TCP/IP packetization and latency issues, as well as any LAN congestion, ensuring the highest access speed available for media and mission critical stored data.
The SAN management server, storage arrays, and clients all connect via a FC network—all file serving occurs over Fibre Channel.
Benefits of a SAN
Because it’s considerably more complex and expensive than NAS, a SAN is typically used by businesses versus individuals and typically requires administration by an IT staff.
The primary strength of a SAN is that it allows simultaneous shared access to shared storage that becomes faster with the addition of storage controllers. SANs are optimized for data-intensive applications. For example, hundreds of video editors can simultaneously access tens of GB per second of storage simultaneously without straining the network.
SANs can be easily expanded by adding more storage devices, making them suitable for growing storage needs. Storage resources can be efficiently managed and allocated from a central location. SANs also typically include redundancy and fault tolerance mechanisms to ensure data integrity and availability.
Summary of a SAN’s Benefits:
Extremely fast data access with low latency.
Relieves stress on a local area network.
Can be scaled up to the limits of the interconnect.
Operating system level (“native”) access to files.
Often the only solution for demanding applications requiring concurrent shared access.
Limitations of a SAN
The challenge of a SAN can be summed up in its cost and administration requirements—having to dedicate and maintain both a separate ethernet network for metadata file requests and implement a FC network can be a considerable investment. That being said, a SAN is often the only way to provide very fast data access for a large number of users that also can scale to supporting hundreds of users at the same time.
The Main Differences Between NAS and SANs
NAS
SAN
Use case
Often used in homes and small to medium sized businesses.
Often used in professional and enterprise environments.
Cost
Less expensive.
More expensive.
Ease of administration
Easier to manage.
Requires more IT administration.
How data is accessed
Data accessed as if it were a network-attached drive.
Servers access data as if it were a local hard drive.
Speed
Speed is dependent on local TCP/IP ethernet network, typically 1GbE to 10GbE but can be up to 25GbE or even 40GbE connections, and affected by the number of other users accessing the storage at the same time. Generally slower throughput and higher latency due to the nature of ethernet packetization, waiting for the file server, and latency in general.
High speed using Fibre Channel, most commonly available in 16 Gb/s to 32 Gb/s however newer standards can go up to 128 Gb/s. FC can be delivered via high speed ethernet such as 10Gbit or 40Gbit+ networks using protocols such as FCoE and iSCSI.
Network connection
SMB/CIFS, NFS, SFTP, and WebDAV.
Fibre Channel, iSCSI, FCoE.
Scalability
Lower-end not highly scalable; high-end NAS scale to petabytes using clusters or scale-out nodes.
Can add more storage controllers, or expanded storage arrays allowing SAN admins to scale performance, storage, or both.
Networking method
Simply connects to your existing ethernet network.
Simply connects to your existing ethernet network.
Simply connects to your existing ethernet network.
Entry level systems often have a single point of failure, e.g. power supply.
Fault tolerant network and systems with redundant functionality.
Limitations
Subject to general ethernet issues.
Behavior is more predictable in controlled, dedicated environments.
Choosing the Right Solution
When considering a NAS device or a SAN, you might find it helpful to think of it this way: NAS is simple to set up, easy to administer, and great for general purpose applications. Meanwhile, a SAN can be more challenging to set up and administer, but it’s often the only way to make shared storage available for mission critical and high performance applications.
The choice between a NAS device and a SAN hinges on understanding your unique storage requirements and workloads. NAS is an excellent choice for environments prioritizing collaborative sharing and simple management. In contrast, a SAN shines when performance and scalability are top priorities, particularly for businesses dealing with data-heavy applications.
Ultimately, the decision should factor in aspects such as budget, anticipated growth, workload demands, and the expertise of your IT team. Striking the right balance between ease of use, performance, and scalability will help ensure your chosen storage solution aligns seamlessly with your goals.
Are You Using NAS, a SAN, or Both?
If you are using a NAS device or a SAN, we’d love to hear from you about what you’re using and how you’re using them in the comments.
Editor’s note: Since it was published in 2019, this post has been updated in 2021 and 2023 with the latest information to help you take advantage of SSDs.
Solid-state drives (SSDs) have become the norm for most laptops and desktops, replacing the older hard disk drives (HDDs) that had been in use for decades previously. If your computer still relies on an HDD, it might be time to consider upgrading to an SSD for improved performance.
Upgrading to an SSD can give your computer a significant speed and responsiveness boost, especially if your machine is more than a few years old. However, before taking the plunge, it’s essential to weigh practical considerations. Let’s take a closer look at SSDs and the factors you should consider.
What Is an SSD?
An SSD is a type of data storage device used in computers and other electronic devices. Unlike traditional HDDs, which use spinning disks and mechanical read/write heads to store and retrieve data, SSDs rely on NAND-based flash memory to store information. This flash memory is similar to the kind used in USB drives and memory cards, but it’s optimized for higher performance and reliability.
Refresher: What Is NAND?
NAND stands for “Not And.” It’s a type of logic gate used in digital circuits, specifically in memory and storage devices. In the context of NAND-based flash memory used in SSDs, the term NAND refers to the electronic structure of the memory cells that store data. The name NAND comes from its logical operation, which is the complement of the AND operation. NAND flash memory is a type of non-volatile storage, meaning it retains data even when the power is turned off, which makes it well-suited for use with things like SSDs and other data storage devices. That’s different from the regular RAM in your computer, which is reset when you turn off or restart the computer.
Compared to HDDs, SSDs are more shock resistant (due to their lack of moving parts) and are less likely to be affected by magnetic fields. They also offer faster data access times, quicker boot-up and application load times, and better overall responsiveness.
Because of their speed and efficiency, SSDs have become the preferred choice for many computing applications, ranging from laptops and desktops to servers and data centers. They are especially useful in situations where speed and reliability are crucial, such as in gaming, content creation, and tasks involving large data transfers. Despite typically offering less storage capacity compared to HDDs of similar cost, SSD performance benefits often outweigh the storage trade-off, making them a popular choice.
Depending on the task at hand, SSDs can be up to 10 times faster than their HDD counterparts. Replacing your hard drive with an SSD is one of the best things you can do to dramatically improve the performance of your older computer.
Samsung 870 QVO SATA III 2.5″ SSD 1TB.
Without any moving parts, SSDs operate more quietly, more efficiently, and with fewer breakable things than hard drives that have spinning platters. Read and write speeds for SSDs are much better than hard drives, resulting in noticeably faster operations.
For you, that means less time waiting for stuff to happen. An SSD is worth looking into if you’re frequently seeing a spinning wheel cursor on your computer screen. Modern operating systems rely more on virtual memory management, utilizing temporary swap files that are written to the disk. A faster SSD minimizes the performance impact caused by this process.
If you have just one drive in your laptop or desktop, you could replace an HDD or small SSD with a 1TB SSD for less than $40. For those dealing with substantial amounts of data, concentrating on replacing the drive that houses your operating system and applications can yield a significant speed boost. Put your working data on additional internal or external hard drives, and you’re ready to tackle a mountain of photos, videos, or supersized databases. Just be sure to implement a backup plan to make sure you keep a copy of that data safe on additional local drives, network attached drives, or in the cloud.
Are There Any Reasons Not to Upgrade to an SSD?
If SSDs are so much better than hard drives, why aren’t all drives SSDs? The two biggest reasons are cost and capacity. SSDs are more expensive than hard drives. A 1TB SSD or HDD now cost about the same, $30–$50, with HDDs being slightly less, maybe around $25.
That’s not much of a difference, but as drive capacity gets larger, the cost differential gets increasingly larger. For example, an 8TB HDD drive runs $120–$180, while 8TB SSDs start at around $350. In short, while upgrading the 1TB internal hard drive on your computer to an SSD is cost effective, the same may not be true for replacing larger capacity drives, like those used in external drives, unless the increased speed is worth the increased cost.
Whether your computer can use an SSD is another question. It all depends on the computer’s age and how it was designed. Let’s take a look at that question next.
How Do You Upgrade to an SSD?
Does your computer use a regular off-the-shelf SATA HDD? If so, you can upgrade it with an SSD.
SSDs are compatible with both Macs and PCs. All current Mac laptops come with SSDs. Both iMacs and Mac Pros come with SSDs as well. Around 2010, Apple started moving to only SSD storage on most of its devices. That said, some Mac desktop computers continued to offer the option of both SSD and HDD storage until 2020, a setup they called a Fusion Drive.
Note that as of November 2021, Apple does not offer any Macs with a Fusion Drive. Basically, if you bought your device before 2010 or you have a desktop computer from 2021 or earlier, there’s a chance you may be using an HDD.
Determine Your Disk Type in a Mac
To determine what kind of drive your Mac uses, click on the Apple menu and select About This Mac.
Avoid the pitfall of selecting the Storage tab in the top menu. What you’ll find is that the default name of your drive is “Macintosh HD” which is confusing, given that they’re referring to the internal storage of the computer as a hard drive when (in most cases), your drive is an SSD. While you can find information about your drive on this screen, we prefer the method that provides maximum clarity.
So, on the Overview screen, click System Report. Bonus: You’ll also see what type of processor you have and your macOS version (which will be useful later).
Once there, select the Storage tab, then the volume name you want to identify. You should see a line called Medium Type, which will tell you what kind of drive you have.
Determine Your Disk Type in a PC
To determine your disk type in a Windows PC, first open the Task Manager in Windows:
Right-click the Start button and click Run. In the Run Command window, type dfrgui and click OK.
On the next screen, the type of drive will be listed under the Media Type column.
Can I Upgrade to a Better SSD?
Even if your computer already has an SSD, you may be able to upgrade it with a larger, faster SSD model. Besides SATA-based hard drive replacements, some later model PCs can be upgraded with M.2 SSDs, which look more like RAM chips than hard drives.
Some Apple laptops made before 2016 that already shipped with SSDs can be upgraded with larger ones. However, you will need to upgrade to a Mac-specific SSD. Check Other World Computing and Transcend to find ones designed to work. Apple laptop models made after 2016 have SSDs soldered to the motherboard, so you’re stuck with what you have.
M.2 SSD.
How to Install an SSD
If you’re comfortable tinkering with your computer’s guts, upgrading it with an SSD is a pretty common do-it-yourself project. Many companies offer hassle-free plug-and-play SSD replacements. Check out Amazon or NewEgg and you’ll have an embarrassment of riches. The choice is yours: Samsung, SanDisk, Crucial, and Toshiba are all popular SSD makers. There are many others, too.
However, if computer hardware isn’t your forte, it might not be worth the effort to learn from scratch. SSD upgrades are such a common aftermarket improvement most independent computer repair and service specialists will take on the task if you’re willing to pay them. Some throw in a data transfer if you’re lucky, or a skilled negotiator. Ask your friends and colleagues for recommendations. You can also hit up services like Angi to find someone.
If you are DIY inclined, YouTube has tons of walkthroughs like this one for desktop PCs, this one for laptops, and this one aimed at Mac users.
HDD/SSD to 3.5″ drive bay adapter.
Many SSDs replace 2.5 inch HDDs. Those are the same drives you find in laptop computers and even small desktop models. Have a desktop computer that uses a 3.5 inch hard drive? You may need to use a 2.5 inch to 3.5 inch mounting adapter.
A Word on SSD Compatibility
Beyond the drive size, it’s a good idea to check to see if the SSD you want to buy is compatible with your laptop or desktop, especially if your system is older than a couple of years. Here are articles from Tom’s Hardware and ShareUs which can help with that.
How to Migrate to an SSD
Buying a replacement SSD is the first step. Moving your data onto the SSD is the next step. To achieve this, you need two essential components: cloning software and an external drive case, sled, or enclosure. These tools enable you to connect your SSD to your computer through its USB port or another data transfer interface.
Cloning software creates an exact replica of your internal hard drive’s data. Once this data is successfully migrated to the SSD, you can then insert the new drive into your computer. I prefer to clone a hard drive onto an SSD whenever possible. When executed correctly, a cloned SSD retains its bootable capabilities, providing a true plug-and-play experience. Just copying files between the two drives instead may not copy all the data you need to get the computer to boot with the new drive.
How to Clone a Hard Drive to an SSD
When you buy a new SSD or even a fresh hard drive, it’s unlikely that the operating system you need will be pre-installed. Cloning your existing hard drive fixes that. However, there are instances where this may not be feasible. For example, maybe you’ve installed the SSD in a computer that previously had a bad hard drive. If so, you can do what’s called a clean install and start fresh. Different operating system providers offer distinct guidelines for this procedure. Here’s a link to Microsoft’s clean install procedure, and Apple’s clean install instructions.
As we said at the outset, SSDs tend to come at a higher cost per gigabyte compared to traditional hard drives. You may not be able to afford as large an SSD as your current drive, so make sure your data will fit on your new drive. If it won’t, you might have to pare down first. Additionally, it’s wise to leave some room for expansion. The last thing you want to do is immediately max out your new, fast drive.
Now that you’ve successfully cloned your drive and integrated the SSD into your system, what do you do with the old drive? If it’s still functional, repurposing the external drive chassis utilized during migration is a practical option. It can continue to serve as a standalone external drive or become part of a disk array, such as a network attached storage (NAS) device. You can use it for local back up—something we strongly recommend doing—in addition to using cloud back up like Backblaze. Or, just use it for extra storage needs, like for your photos or music.
Make Sure to Back Up
SSD upgrades are commonplace, but that doesn’t mean things don’t go wrong that can stop you dead in your tracks. If your computer is working fine before the SSD upgrade, make sure you have a complete backup of your computer to restore from in the event something goes wrong.
More Questions About SSDs?
You might enjoy reading other posts in our SSD 101 series.
This post has been updated since it was originally published.
Your faithful Mac has served you well for years, but it’s time to upgrade. Whether you’re selling it, giving it to a friend, donating it, or recycling it, you first need to make sure all of your personal data is wiped clean.
In this guide, we’ll take you through the process step-by-step, from backing up your files to encrypting your data, so you can make sure your private information stays private.
Before you do anything else, back up
Once you wipe your Mac, you won’t be able to access the data from your drive. Before you get started, you’ll want to make sure any important data on your hard drive has been backed up. Apple has a built-in backup utility called Time Machine backup software.
While Time Machine is a good start, it doesn’t fulfill all of the requirements of a 3-2-1 backup strategy: When you set up Time Machine backups, you choose a backup disk (an external drive or network attached storage (NAS) device) that you can save your backups to. Under the 3-2-1 backup rule (three backups, on two media types, with one off-site), that means you’d still need an off-site copy of your data, preferably saved in the cloud. Ideally, you’d pair Time Machine with a product like Backblaze Computer Backup for maximum flexibility. Note that even though backups run nearly continuously with Backblaze Computer Backup, we recommend hitting the manual backup button before you wipe your Mac to ensure you’ve got the most recent information.
Mac operating systems (OSes) and processing chips: Figuring out what you have
The process for wiping your Mac depends on a couple things:
What OS version you’re rocking
What kind of processing chip you have
Fortunately, Apple has only made it easier to wipe your computer as the years and operating systems have rolled out. If you’re using macOS Monterey or later with an Apple-based processor chip, it’s very simple—you have the option to wipe your Mac from the System Settings.
What macOS do I have?
You can see your current OS in the About This Mac screen (from the Apple menu in the upper-left corner of your screen, choose About This Mac), and below is a list of all OS releases you can compare against. You can also check out the Apple Help article on the topic.
What kind of processing chip do I have in my Mac?
The second variable you need to know is what kind of processing chip you have in your Mac—an Apple-based chip (Apple M-series) or an Intel chip.
In November 2020, Apple launched its first Macs equipped with M1 chips, replacing the Intel-based processors of the past. The evolution of the M-series Apple chips has been notable largely for performance enhancements, but given that (at the time of publishing) this was four years ago, there’s a good chance that many users will have an Intel processor.
To see what kind of chip you have, follow the same instructions as above—go to your Apple menu and select About This Mac. If you have an M-series chip, you’ll see that listed as marked in the screenshot below.
If you have an Intel-based Mac, you will see Processor, followed by the name of an Intel processor.
How to wipe your Mac
Okay, so now that you know your operating system and processing chip, we can get to the actual how-to of how to wipe your Mac. The steps will be slightly different based on each of the above variables. Let’s dig in.
Wipe a Mac with an Apple chip and a recent macOS update
If you have macOS Monterey or later with an Apple chip, then you’re going to wipe your Mac using the Erase All Content and Settings function. (You might also see this called the Erase Assistant in Apple’s Help articles.) This will delete all your data, including iCloud and Apple logins, Apple wallet information, Bluetooth pairings, fingerprint sensor profiles, and Find My Mac settings, as well as resetting your Mac to factory settings. Here’s how you find it.
If you have macOS Ventura or Sonoma:
Select the Apple menu.
Choose System Settings.
Click General in the sidebar.
Click Transfer or Reset on the right.
If you have macOS Monterey:
Select the Apple Menu.
Choose System Preferences.
Once the System Preferences window is open, select the dropdown menu in your top navigation bar. Then, select Erase All Content and Settings.
Once you’ve reached this point, then the steps will be the same for each process. Here’s what to expect.
You’ll be prompted to log in with your administrator credentials.
Next, you will be reminded to back up via Time Machine. Remember that if you choose this option, you’ll want to back up to an external device—because, of course, you’re about to get rid of all the data stored on this computer.
Click Continue to allow all your settings, data, accounts, etc. to be removed.
If you’re asked to sign out of Apple ID, enter your Apple password and hit Continue.
Click Erase all Content & Settings to confirm.
Your Mac will automatically restart. If you have an accessory like a Bluetooth keyboard, you’ll be prompted to reconnect that device.
Select a WiFi network or attach a network cable.
After joining a network, your Mac activates. Click Restart.
After your device has restarted, a setup assistant will launch (just like when you first got your Mac).
It’ll be pretty clear if you don’t meet the conditions to erase your drive using this method because you won’t see Erase All Content and Settings on the System Settings we showed you above. So, here are instructions for the other methods.
How to wipe a Mac with an Apple chip using Disk Utility
Disk Utility is exactly what it sounds like: a Mac system application that helps you to manage your various storage volumes. You’d use it to manage storage if you have additional storage volumes, like a NAS or external hard drive; to set up a partition on your drive; to create a disk image (basically, a backup); or to simply give your disks a check up if they’re acting funky.
You can access Disk Utility at any time by selecting Finder > Go > Utilities, but you can also trigger Disk Utility on startup as outlined below.
Turn on your Mac and continue to press and hold the power button until the startup options window comes up. Click Options, then click Continue.
You may be prompted to log in with either your administrative password or your Apple ID.
When the Utilities window appears, select Disk Utility and hit Continue.
If you’d previously added other drives to your startup disk, click the delete volume button (–) to erase them.
Then, choose Macintosh HD in the sidebar.
Click the Erase button, then select a file system format and enter a name for it. For Macs with an M1 chip, your option for a file system format is only Apple File System (APFS).
Click Erase or, if it’s an option, Erase Volume Group. You may be asked for your Apple ID at this point.
You’ll be prompted to confirm your choice, then your computer will restart.
Just as in the other steps, when the computer restarts, it will attempt to activate by connecting to WiFi or asking you to attach a network cable.
After it activates, select Exit to Recovery Utilities.
Once it’s done, the Mac’s hard drive will be clean as a whistle and ready for its next adventure: a fresh installation of the macOS, being donated to a relative or a local charity, or just sent to an e-waste facility. Of course, you can still drill a hole in your disk or smash it with a sledgehammer if it makes you happy, but now you know how to wipe the data from your old computer with much less ruckus.
How to wipe a Mac with an Intel Processor using Disk Utility
Last but not least, let’s talk about how to wipe an Intel-based Mac.
Starting with your Mac turned off, press the power button, then immediately hold down the command (⌘) and R keys and wait until the Apple logo appears. This will launch macOS Recovery.
You may be prompted to log in with an administrator account password.
When the Recovery window appears, select Disk Utility.
In the sidebar, choose Macintosh HD.
Click the Erase button, then select a file system format and enter a name for it. Your options for a file system format include APFS, which is the file system used by macOS 10.13 or later, and macOS Extended, which is the file system used by macOS 10.12 or earlier.
Click Erase or Erase Volume Group. You may be prompted to provide your Apple ID.
If you previously used Disk Utility to add other storage volumes, you can erase them individually using the process above.
When you’ve deleted all your drives, quit Disk Utility to return to the utilities window. You may also choose to restart your computer at this point.
Do you still need to know what kind of drive you have?
Wiping your Mac used to depend on what kind of drive you had—a hard disk drive (HDD) or solid state drive (SSD). As we’ve outlined above, today, the process depends on your OS and the type of chip you have. But some of you may have very old Macs you want to get rid of. Here we’ll talk a bit about HDDs vs SSDs and the impact that has on how you erase your computer.
Around 2010, Apple started moving to only SSD storage in many of its devices. That said, some Mac desktop computers continued to offer the option of both SSD and HDD storage until 2020, a setup they called a Fusion Drive. The Fusion Drive is not to be confused with flash storage, a term that refers to the internal storage that holds your readily available and most accessed data at lower power settings.
Note that as of November 2021, Apple does not offer any Macs with a Fusion Drive. Basically, if you bought your device before 2010 or you have a desktop computer from 2021 or earlier, there’s a chance you may be using an HDD.
To determine what kind of drive your Mac uses, click on the Apple menu and select About This Mac.
Avoid the pitfall of selecting the Storage tab in the top menu. What you’ll find is that the default name of your drive is “Macintosh HD” which is confusing, given that they’re referring to the internal storage of the computer as a hard drive when (in most cases), your drive is an SSD. While you can find information about your drive on this screen, we prefer the method that provides maximum clarity.
So, on the Overview screen, click System Report. Bonus: You’ll also see what type of processor you have and your macOS version (which will be useful later).
Once there, select the Storage tab, then the volume name you want to identify. You should see a line called Medium Type, which will tell you what kind of drive you have.
Securely erasing drives: Questions and considerations
Some of you drive experts out there might remember that there is some nuance to security when it comes to erasing drives, and that there are differences in erasing HDDs versus SSDs. Without detouring into why and how that’s the case, just know that on Fusion Drives or Intel-based Macs, you may see additional security options you can enable when erasing HDDs.
There are four options in the “Security Options” slider. “Fastest” is quick but insecure—data could potentially be rebuilt using a file recovery app. Moving that slider to the right introduces progressively more secure erasing. Disk Utility’s most secure level erases the information used to access the files on your disk, then writes zeros across the disk surface seven times to help remove any trace of what was there. This setting conforms to the DoD 5220.22-M specification. Bear in mind that the more secure method you select, the longer it will take. The most secure methods can add hours to the process. For peace of mind, we suggest choosing the most secure option to erase your hard drive. You can always start the process in the evening and let it run overnight.
After the process is complete, restart your Mac and see if you can find any data. A quick inspection is not foolproof, but it can provide some peace of mind that the process finished without an interruption.
Securely erasing SSDs and why not to
If your Mac comes equipped with an SSD, Apple’s Disk Utility software won’t actually let you zero the drive. Sounds strange, right? Apple’s online Knowledge Base explains that secure erase options are not available in Disk Utility for SSDs.
Fortunately, you are not restricted to using the standard erasure option to protect yourself. Instead, you can use FileVault, a capability built into the operating system.
Encrypting your computer with FileVault
FileVault is an excellent option to protect all of the data on a Mac SSD with encryption. FileVault is whole-disk encryption for the Mac. With FileVault engaged, you need a password to access the information on your hard drive. Even without it, your data is encrypted and it would be very difficult for anybody else to access.
Before you use FileVault, there is a crucial downside. If you lose your password or the encryption key, your data may be gone for good!
When you first set up a new Mac, you’re given the option of turning FileVault on. If you don’t do it then, you can turn on FileVault at any time by clicking on your Mac’s System Preferences, clicking on Security & Privacy, and selecting the FileVault tab. Be warned, however, that the initial encryption process can take hours, as will decryption if you ever need to turn FileVault off.
With FileVault turned on, you can restart your Mac into its Recovery System following the directions above and erase your hard drive using Disk Utility, once you’ve unlocked it (by selecting the disk, clicking the File menu, and clicking Unlock). That deletes the FileVault key, which means any data on the drive is useless.
Nowadays, most Macs manage disk encryption through the T2 chip and its Secure Enclave, which is entirely separate from the main computer itself. This is why FileVault has no CPU overhead—it’s all handled by the T2 chip. Although FileVault doesn’t impact the performance of most modern Macs, we’d suggest only using it if your Mac has an SSD, not a conventional HDD.
Securely erasing free space on your SSD
If you don’t want to take Apple’s word for it, if you’re not using FileVault, or if you just want to, there is a way to securely erase free space on your SSD. It’s a little more involved, but it works. Before we get into the nitty-gritty, let me state for the record that this really isn’t necessary to do, which is why Apple’s made it so hard to do.
To delete all data from an SSD on an Apple computer, use Apple’s Terminal app. Terminal provides you with command line interface (CLI) access to the OS X operating system. Terminal lives in the Utilities folder, but you can access Terminal from the Mac’s Recovery System. Once your Mac has booted into the Recovery partition, click the Utilities menu and launch Terminal.
From a Terminal command line, type the following:
diskutil secureErase freespace VALUE /Volumes/DRIVE
That tells your Mac to securely erase the free space on your SSD. You’ll need to change value to a number between 0 and 4. Zero is a single-pass run of zeroes, 1 is a single-pass run of random numbers, 2 is a seven-pass erase, 3 is a 35-pass erase. Finally, level 4 is a three-pass erase with random fills plus a final zero fill. drive should be changed to the name of your hard drive. To run a seven-pass erase of your SSD drive in JohnB-MacBook, you would enter the following:
Note that while Mac’s Terminal typically uses forward slashes ( / ), if you have a space in the name of your hard drive, you’ll see a backslash ( \ ) to indicate that break in syntax. (So “Macintosh HD” becomes /Macintosh\ HD.) For example, to run a 35-pass erase on a hard drive called Macintosh HD, enter the following:
diskutil secureErase freespace 3 /Volumes/Macintosh\ HD
If you’re like the majority of computer users, you’ve never opened your Terminal application—and that’s probably a good thing. If you’re providing the proper instructions, a CLI lets you directly edit the guts of your computer. If you’re not providing the proper instructions, things will just error out, and likely you won’t know why.
In conclusion, in most cases, it’s simple to wipe your Mac hard drive
All this to say: Apple has made specific choices about designing products for folks who aren’t computer experts, and in most cases, you won’t need to break out the CLI knowledge to securely erase your hard drive. While Mac sometimes limits how customizable you can get on your device (i.e. it’s super hard to zero out an SSD), it’s usually for good reason—in this case, it’s to preserve the health of your drive in the long term. So, if you personally are planning to reuse the device you’re wiping, or if you’re not being targeted in a real-life James Bond movie, in most instances, it’s a less-than-ten step process to securely wipe your Mac and send it on to a new, shiny future.
FAQ
1. How do I wipe a Mac computer?
Wiping all data from your Mac depends on what macOS you’re using and what kind of processing chip you have. For Macs using macOS Monterey or later, you can use the Erase All Content and Settings function. This will delete all your data, including iCloud and Apple logins, Apple wallet information, Bluetooth pairings, fingerprint sensor profiles, and Find My Mac settings, as well as resetting your Mac to factory settings.
2. How do I wipe a Mac with an Intel processing chip?
To wipe a Mac with an Intel processing chip, you need to use Disk Utility, a Mac system application that helps you to manage your various storage volumes. You can access Disk Utility by selecting Finder > Go > Utilities. Choose Macintosh HD in the sidebar, click the Erase button, then select a file system format and enter a name for it. Your options for a file system format include Apple File System (APFS), which is the file system used by macOS 10.13 or later, and macOS Extended, which is the file system used by macOS 10.12 or earlier. Then click Erase or, if it’s an option, Erase Volume Group.
3. How do I encrypt data on my Mac?
FileVault is an excellent option to protect all of the data on a Mac SSD with encryption. FileVault is whole-disk encryption for the Mac. With FileVault engaged, you need a password to access the information on your hard drive. Even without it, your data is encrypted and it would be very difficult for anybody else to access.
Think for a second about that Android device in your hand. Maybe it’s a smartphone, maybe it’s a tablet. Whether it’s a Samsung, Google, or Motorola, it still has Android in its DNA. But more important than its DNA is the data stored in its memory.
You probably don’t think about how much irreplaceable data is in there—treasured photos, important documentation, passwords, bank information, the list goes on. But you might want to give it a few minutes of your time because, as smart as your phone is, it’s also remarkably fragile. A trip down the stairs or a dip in the toilet and your phone is toast, taking with it all of that important data. Opening one wrong email or clicking one wrong link could be all it takes for ransomware to infiltrate your data.
In cases like these, the best solution is an ounce of prevention: Getting all those important files backed up before disaster strikes.
Before we get your Droid all backed up and ready to roll, it’s important to understand why you should back up, why syncing isn’t enough, how different phones offer different means of backup, and why a 3-2-1 backup strategy should be your ultimate goal.
And since we’re talking Androids, we’ll obviously be spending a little time in a galaxy far, far away.
“Important to Back Up Your Data, It Is.” – Master Yoda, Probably
In order to understand the importance of backing up your Android, it might help to picture perhaps two of the most famous droids in cinematic history, and in fact the characters who inspired your phone’s name: R2-D2 and C-3PO.
(Seriously, Lucasfilm registered the trademark on the word “droid” in 1977 and has licensed it to both Motorola and Verizon. If you’re reading this, Disney, please don’t sue.)
If you recall the movie “The Force Awakens,” you’ll remember the sub-plot about the search for Luke Skywalker, who had gone into hiding. As the film opens, plucky little droid BB-8 obtained part of the map that could locate him. However, the rest of the map was locked away in R2-D2’s memory units, rendering BB-8’s map useless. Since R2-D2 was mysteriously shut down for purposes of advancing the movie’s plot, that data was unobtainable and thus required a whole film’s worth of daring adventure to restore.
Protection against data loss: Maybe your phone gets dropped into a pond or maybe it gets blasted by TIE fighters. Either way, without a proper backup that data is deader than Greedo.
Easy Upgrading: Jedi Master Qui-Gonn Jinn once said there’s always a bigger fish. Likewise, there’s always a shinier, newer Android device. When you upgrade, you can pull all your old data from your backup and get started with ease.
Protecting against ransomware, malware, and viruses: Even your phone is susceptible to attacks from cybercriminals who can lock up your data and demand payment to restore it. Backing it up is like sending your vital data blasting out through an escape pod just as the Empire descends for retrieval later.
I Have a Syncing Feeling About This
Fortunately, Princess Leia and company seem to have learned their lesson about proper backups by the time of “Rise of Skywalker,” since they had a backup ready for C-3PO. After wiping his hard drive so that the protocol droid could bypass his programming and read the Sith language found on an ancient knife (yes, the plot was that ridiculous), 3PO was able to restore his memories thanks to a backup he’d entrusted to R2.
Had they chosen to merely sync C-3PO’s internal data, he would have been stuck remembering nothing of the Star Wars saga except for “Rise of Skywalker,” which would be a tragic fate for anyone.
With syncing, data is maintained in one form across devices or platforms. This has its usefulness, especially when you can edit something on your phone or tablet and see those changes on your laptop, for example, but also has drawbacks that make it a poor substitute for backing up. Among them:
Limited coverage of what gets synced: Syncing will often focus on specific verticals within data, such as photos, contacts, or calendars. For example, when you make changes to a contact in your phone or device, Google will automatically update that contact in the cloud. But it won’t necessarily automatically update your call or text message history.
Overwriting or deleting data: If C-3PO had been set to sync his data with R2-D2, once it was deleted in his shiny golden head it would be deleted across all backups, and all of the data would have been lost before you could say “Utini.” If you delete your data from your phone, it gets deleted from whatever service you’re using to sync devices.
Vulnerability to ransomware: If you click a malicious link and your device gets zapped with ransomware, your sync service will automatically synchronize the corrupted files.
These Aren’t the Droids You’re Looking For
It’s all well and good to hear about backing up fictional droids, but what about the actual Android device in your hand? Thankfully, it’s somehow even simpler in our galaxy than it is in one where people have actual spaceships.
Both Google and Samsung have backup programs for their respective devices, and we’ll explain a third option where you manage the backups.
Google One
Native to Google’s Pixel devices, but also found on nearly every Android device since it was introduced in 2021, Google One offers a backup service analogous to iCloud, with 15GB of free storage tied to your Google account.
Sorry, potential stalkers. I remembered to blur my email address.
Pros: Works automatically. Backs up apps, phone history, text messages, photos, contacts, and assorted calendar information associated with your account. It can also load data automatically onto a new device when you sign in with your Google account.
Cons: You have to pick and choose what gets backed up. Yes, this is a con. This level of control might seem nice, but again, we’d recommend you just back up everything. Honestly, the more granular you get with what gets backed up, the more likely you are to forget to back up something you might need. It also operates more like a sync than a backup, so accidental erasure is still a risk. To truly back up your data and keep it safe, you’ll need to keep a third copy of the data somewhere (we’ll explain that later). Also, if you get close to maxing out your storage, ready yourself for endless reminders to buy more storage across all of your devices.
Samsung Smart Switch
As the heavy hitter in the Android space, Samsung wasn’t about to let its Galaxy devices go without a built-in backup solution. Samsung’s Smart Switch comes pre-loaded on every Galaxy device. While it’s designed for moving data from one Galaxy to another, it can also create a backup to your Mac or PC using the Smart Switch app.
Yeah, I’m still using an S21. Don’t @ me.
Backing Up Through Your Mac or PC
Of course, one of the great advantages of the Android operating system is its ability to play nice with pretty much every other operating system, unlike its Apple counterpart. Simply plug your charging cable into an available USB slot and your phone will essentially act like an external hard drive. On a Windows machine, this will show up like a separate hard drive nested under your PC in file explorer. On a Mac, you’ll need to take the extra step of downloading Android File Transfer.
Pros: Functions essentially like an external drive, meaning you can track down individual files or whole folders for targeted backup.
Cons: Android’s file structure can often make individual files difficult to track down. Transfer times can often drag on to the point of absurdity.
How to Back Up Your Life
The guides in this series help you protect your content across many different platforms. We’re working on developing this list—please comment below if you’d like to see another platform covered.
“Come On Buddy, We’re Not Out of This Yet.” – Han Solo, Shortly After Backing Up His Phone, Probably
Now that you have your data safely backed up and secured against any accidental destruction, loss, or damage to your Android, you might think you’re safe. But the cornerstone of any good backup strategy rests on not one, not two, but three pillars.
If you really need to be told why this is important, we’ve covered it here. But suffice to say, a 3-2-1 strategy relies on a trio of separate, redundant backups. One copy of your data stays on your Android device. Another copy of your data is stored on a separate on-premises device, such as your PC or an external hard drive (or, if available, a convenient R2-model astromech). Finally, a third copy stays off-premises—preferably in the cloud—to avoid the possibility of theft, fire, or total planetary destruction via Death Star.
If you’re a Backblaze Computer Backup user, that last step is taken care of. Backblaze backs up your entire computer, including any Android backups you saved to your Mac or PC.
By maintaining three redundant copies of important data—two on local devices and a third in a separate location—you are comprehensively protected against data loss. You may not be carrying around plans for the Empire’s new battle station, but the precious memories locked away on your Android device are just as important as protecting them.
May the force be with you (and again, Disney, please don’t sue).
Erasing data from old devices is important, but it doesn’t have to be boring. Sure, you could just encrypt the data, wipe your drive, and so on, but you can also physically destroy a drive in a myriad of exciting ways. In honor of the United State’s favorite day to celebrate with explosives, let’s talk about not-so-standard ways to get rid of old data (permanently).
Know Your Device
Effective data destruction starts with good planning. When you’re looking at how to securely erase your data, there are different options for hard disk drives (HDDs) and solid state drives (SSDs).
With an HDD, spinning disks are encased in a steel enclosure. In order to do sufficient levels of damage, it’s helpful to get through this steel layer first. Once you’re in, you can drill holes in it, wash it in acid, or shred it.
With an SSD, it’s not just recommended to get through that steel layer, it’s almost essential. SSDs are more resilient because data is stored magnetically. So, pull out that screwdriver, shuck that drive like an oyster, and expose your SSD. If you’re going the physical destruction route, make sure that you’re shredding with a narrow enough width that no forensic scientist can humpty-dumpty your data together again.
Have a Blast
We do have a Sr. Infrastructure Software Engineer who’s gone on record recommending explosives. Note that while we don’t doubt the efficacy, we can’t recommend this option. On the other hand, we’re big fans of bots that smash things.
Destroy Responsibly
We could be accused of overcomplicating things. It’s very effective to wipe your device, or just encrypt your data. Here’s a list of some more extensive articles on the subject that include those options:
Each passing year brings with it a June, and with that comes a Backup Awareness Month. For those that are new to the blog, each June we partner with The Harris Poll to gauge the state of backups in the United States, by asking the simple question: “How often do you back up all the data on your computer?” (And a handful of other questions, too.) This post marks our survey’s 15th anniversary, and as you can imagine, the backup world has changed a lot in that time.
If you’ve followed our previous State of the Backup articles, you’ll know that we usually have a burning question that we want to answer. In 2021 and 2022, we were interested in the “best backer upper.” This year’s focus touches on the different “cloud” services that respondents use, and their confidence level that those services are providing them with the protection they crave—nay, deserve.
And that’s not just our (totally) normal love of backup coming out. It comes as news to no one that the world has shifted to a more digital environment, the ways we store, use, and manage data have changed. We have our data at more touchpoints in our lives, and cloud-based sync services are readily available. Being able to capture a full backup for all those various uses—business and personal—means that the need for automatic, unlimited solutions that you can access from anywhere is no longer a “nice to have.” It’s essential.
Backup Frequency Trends for 2023
This is one of my favorite graphs. Now with 15 years of data, we look at our headline question: How often do you back up all the data on your computer? This year we’re pleased that daily backups have not decreased and remain at similar levels to last year. In 2023, 11% of Americans who own a computer backed up their data at least once a day compared to 10% in 2022 and 11% in 2021. Weekly (8% in 2023 and 7% for both previous years) and monthly (15% in 2023 and 13% and 14% in the two previous years) backups among those who own a computer are similar to the past years as well.
The number of people who have never backed up data also remains at similar levels, with 18% of Americans who own a computer saying they’ve never backed up data in 2023 compared to 20% saying the same in the prior two years.
If you’ve hung around the Backblaze blog before, you likely have heard me (Yev) saying that the main competitor we have to our computer backup service is apathy. While we’re not (yet) seeing a statistically significant drop in those “never” numbers, we love to see that this category isn’t growing. And, we’ve got big plans to get more folks backing up in the future—we love using polls like this to learn more about how to move the needle. You can see from the graph below that, if you compare to 2008, we’ve certainly seen change over time.
Since some people prefer the raw data, and you can find it here, lovingly copied from Google Sheets:
While we’re past March 14, Pi Day is one of my favorite holidays to celebrate and also one of my favorite chart types. Here we have pie charts comparing the 2008 to 2023 data:
We love seeing the daily section growing while the never section shrinks—that’s progress. And, like we stated above, we view it as a big indicator of the massive shift in the ways people are using data.
Of course, we would love to see the daily backups skyrocketing year over year, because at the end of the day, if people aren’t backing up frequently, they are at risk of losing at least that day’s worth of data, which is one of the things that Backblaze Computer Backup is trying to help people avoid.
The Title of “Best” at Backing Up Is Up For Grabs
A few years ago we got curious about who is “best” at backing up. In 2021, we saw some statistical significance that indicated women between 35-44 years of age (21% likely to backup versus 9% of those 18-34 and 6% of those 55-64), and those who live in the Western United States (17% more likely to back up vs. the South and Midwest at 9% and 7%, respectively) were more likely to be computer owners who backed up once a day or more. When we checked in 2022, we found no statistical difference between the categories—but, we’ll explain why we keep checking in on this profile.
It’s worth taking a time-out for a stats mini-lesson, because we Backblaze plebeians did see some interesting fluctuations in the data, and the awesome experts at The Harris Poll let us know that these fluctuations are to be expected. Here’s why: When you’re talking about surveys rather than a census of a group, there is a sampling error that is expected just because you get a different group of people responding over time. We do statistical testing to see if the fluctuation could be due to chance (we just randomly got a different group of people) or if something has really changed in the group over time. In our survey, performed with 95% confidence, that means if we collected the survey 100 times we would report differences that would only occur in five of those surveys by chance assuming no change in the group. (Here’s an article that explains in more detail, if you’d like to dig in.)
The TL:DR of all that is that for a category to show statistical significance, it needs to be 5% greater or less than the total average of the parent category. In our parent category of computer owners who back up once a day or more,” we have a total average of 11% for 2023. Women between the ages of 35–44—clock in at 15%. So, while that’s not statistically significant, it’s certainly worth monitoring in our future surveys.
And that means that this year, the title is up for grabs! Get geared up for next year, folks: We love healthy competition about better backups.
Cloud Services Are All Around
When we started Backblaze 16 years ago, Amazon AWS had only recently started marketing Amazon Elastic Cloud Compute (in 2006, folks). Now, “the cloud” is a household name although it’s something of an amorphous concept for many—but there’s no denying that the cloud is accessible to consumers and companies alike.
Here are some indicative stats:
Nearly two in three Americans (65%) who have backed up all the data on their computer use a cloud-based system as their primary backup method.
Those who use the cloud services backup (63%), drive (67%), or sync (62%) to back up their computers are much more likely to say their backup method automatically backs up all the data on their computer than those who use an external hard drive (36%).
Those who use a cloud backup service are more likely to say they had to recover, access, or restore lost data from their computer in the past month than those who use a cloud drive service, cloud sync service, or external hard drive (18% vs. 9% and 7% each).
Some of these facts reveal very important questions about backup and sync in relation to our backup questions. We’ve talked about the differences in the past, and here we see folks who are saying that they use a drive or sync service as their backup method.
So, when those Americans using cloud-based systems think they’re backing up each day, in all likelihood, at least some of them are describing another type of data storage—syncing data across devices or storing data on a cloud drive. But, without an additional copy of your data, you aren’t truly backing up.
Still, even with more people backing up, overall data confidence is low, with fewer than one in five Americans (17%) stating they are absolutely certain that their most important computer files are safely backed up somewhere. Even more telling? 12% of Americans who use a cloud service, external hard drive, or a network attached storage (NAS) as a primary method to back up data say they are not confident the method they use is set up to protect all of the data on their computer.
That number means we need to get more people not only backing up but testing their restores. If you’ve never tested your restores, we highly recommend it. Not only does it let you see exactly where you’re storing your files and what it takes to restore them, but it also shows you how long it will take to get your files back online in the event of data loss. It’s also one of the main differentiators between “cloud” services—the ease with which you can get all your data back is a good selection criteria.
In Recovery Situations, A Plan Makes All the Difference
The whole point of a backup is to make sure that you never lose critical data. We certainly want and value this for personal recovery—check out our article about how a digital go bag can help you prepare for natural disasters and the like.
But, if you’re a business owner, any disruption in data or file loss can mean that your business is off-line. Business continuity plans help you understand how to get back online with minimal stress and as soon as possible. Especially if you’re a small or medium-sized business, you know how important that is! Services like Instant Business Recovery are a great tool in that respect: They help your business prepare for scenarios in which you might have outages and to get back online as quickly as possible.
What Are Those Services Doing Anyway?
When looking at computer owners who use a cloud backup service like Backblaze as their primary backup we find that:
63% say their service automatically backs up all the data on their computer.
27% say it backs up only the data they select with no limitations.
9% say it backs up only the data they select but with some limits.
1% marked “other.”
1% are not sure at all.
Why is this important? Well, different types of backups mean that you can recover things in different ways. For instance, a bare metal recovery is designed to take you from a computer with nothing on it—not even an operating system—to a fully-functional computer with all your files. Does your backup service support those file types?
Another example: a grandfather-father-son or a full vs. incremental backup may help you save valuable storage space when it comes to backing up (especially when your backup service may have limits or charge you based on storage space, as some folks indicate above).
Finally, our old pal, the 3-2-1 backup strategy, recommends both an on-site and an off-site copy of your data, which means that whichever method you use to backup, you’re going to want to store those backups in different and accessible ways.
It’s not only a question of knowing if your backup service is automatically backing up all the data on your computer—you also want to know where that data is being stored, what file types are supported, if or how you need to set “rules,” and more. There are positives and negatives to each backup strategy, of course, but the numbers above show us that we have some work to do to help people know where to start when it comes to building an effective plan. We see a detailed education campaign about what Backblaze backs up brewing in our future!
Backing Up Remains Paramount
When looking at the data loss statistics of Americans who own a computer:
70% report accidentally deleting something.
54% report having lost data.
54% were affected by a security incident (like ransomware or malware).
46% had an internal or external hard drive crash.
36% of those who did had crashes happen within the last year.
45% lost access to their data when a shared drive or synced drive was deleted.
This year over half of Americans who own a computer reported being affected by a security incident, and that number is in line with last year (54% this year vs. 53% last year). Over the years, ransomware has increasingly become a “when, not if” situation, which means that seemingly simple things, like making strong passwords, using virtual private networks (VPNs), and knowing how to recognize a phishing attack are more important than ever. Prevention is only half the battle of course—and a good backup and recovery plan is the other.
What’s more, these things become even more interesting when you think about data loss as it comes to our working environment. As we see modern work patterns change, we see more people working on their home networks and using mobile phones. As the workplace has shifted to include more remote and hybrid environments, employers are having to think about what it looks like to secure data across dispersed locations. Not only do you have lots of folks working on software as a service (SaaS) tools that include synced or shared drives (and have their own backup strategy demands), but you also need to capture folks saving on their local drives—which means you need individual workstation backup to ensure that you have a complete disaster recovery (DR) plan in place.
Good Backups Get Personal
Fifteen years into this Harris Poll (and 16 years into being Backblaze!), we are still driven to understand the world of backup to support our ultimate goal: making storing and using data astonishingly easy. The work of taking these disparate data points (70% of Americans who own a computer have accidentally deleted something) and turning them into solutions (hey, an automatic backup means that you can get it back) is something we can’t do without understanding the world and how it changes.
We hope you enjoy seeing the big picture as much as we do, and we hope this information ultimately helps you to find the best backup service for your data. Jump into the comments and let us know what you think!
Survey Method:
This year’s survey was conducted online within the United States by The Harris Poll on behalf of Backblaze from April 25–27, 2023, among 2,050 adults ages 18+, among whom 1,857 own a computer. The sampling precision of Harris online polls is measured by using a Bayesian credible interval. For this study, the sample data is accurate to within +/- 2.8 percentage points using a 95% confidence level.
Prior year’s surveys were conducted online by The Harris Poll on behalf of Backblaze among U.S. adults ages 18+ who own a computer in May 19–23, 2022 (n=1,861); May 12–14, 2021 (n=1,870); June 1–3, 2020 (n=1,913); June 6–10, 2019 (n=1,858); June 5–7, 2018 (n=1,871); May 19–23, 2017 (n=1,954); May 13–17, 2016 (n=1,920); May 15–19, 2015 (n=2,009); June 2-4, 2014 (n=1,991); June 13–17, 2013 (n=1,952); May 31–June 4, 2012 (n=2,176); June 28–30, 2011 (n=2,209); June 3–7, 2010 (n=2,051); May 13–14, 2009 (n=2,154); and May 27–29, 2008 (n=2,723).
For complete survey methodologies, including weighting variables and subgroup sample sizes, please contact Backblaze.
If you’ve been considering building a website, you’ve probably at least thought about using WordPress. It’s a free, open-source content management system (CMS) with a seemingly endless library of templates and plugins that allow you to easily customize your website, even if you’re not a savvy web designer—and it’s responsible for powering millions of websites.
Today, we’re digging into how to back up WordPress, including what you should be backing up, how you should be backing up, and where you should be storing those backups.
And, once you’ve gone through the trouble of building a website, all sorts of things can happen—accidental deletions, server errors, cyberattacks: the list goes on. No matter the size of your business or blog, you never want to be in the position where you lose data. Backups are an essential safeguard to protect one of your most important tools.
What’s the Diff: WordPress.org vs. WordPress.com
If you decide to build in WordPress, you might get confused by the fact that there are two related websites separated by a measly domain suffix. Once you jump into each website, you’ll even see that WordPress.com was created by a company with the same founder as WordPress.org. So, what gives? Which makes more sense for you to use?
This article will take you in-depth about all the differences between the two options, but here’s the short list of the most important info.
WordPress.org
Pro: Your site is more customizable, you can add your own analytics, and you can monetize your website.
Con: You’re responsible for your own hosting, backups, and, after you download WordPress, your own updates as well.
WordPress.com
Pro: It’s designed to be plug-and-play for less experienced users. You choose your pricing tier, and you don’t have to worry about backups and hosting.
Cons: You have far more limited options for customization (themes and plugins), and you can’t sell ads on your own site. You also can’t create e-commerce or membership sites.
Hosting and backups may sound intimidating, but they’re fairly easy to handle once you’ve got them set up—not to mention that many folks prefer not to outsource two things that are so central to website security concerns, continuity (you don’t want someone else to own your domain name!), and customer or community data, if you happen to store that. So, for the purposes of this article, when we say “WordPress,” we mean WordPress.org.
Now, let’s dive in to how to back up your site.
What to Back Up
There are two main components to your website: the files and the database.
Files are WordPress core files, plugins, theme files, uploaded images and files, code files, and static web pages.
The database contains everything else, like user information, posts, pages, links, comments, and other types of user-generated content.
Basically, the database contains your posts and lots of information created on your site, but it doesn’t include all the building blocks that create the look of your site or the backend information of your site. If you use restoring your computer as an analogy, your files are your photos, Word docs, etc., and your database includes things like your actual Word program, your login info, and so on.
Most of the services you use to host your website (like GoDaddy or Bluehost) will back up the entire server (read: both your files and your database), but it takes time to request a copy of your whole site. So, you’ll want to make sure you back up your data as well.
How to Back Up Your WordPress Files
Your hosting service may have programs or services you can use to back up, so make sure you check with them first. You’ll also want to make sure your site is syncing between your server and a second location, like a hard drive (HDD) or a network attached storage (NAS) device.
But, since syncing is not the same as back up, you’ll also want to periodically download and save your files. WordPress recommends using FTP Clients or UNIX Shell Skills to copy these files onto your computer. Unless you’re familiar with command line interface (CLI), you’ll probably find FTP Clients easier to deal with.
How to Back Up Your WordPress Database
The simplest way to backup your database is with phpMyAdmin. Once you find out how to access your site’s phpMyAdmin, just follow these steps to back up.
Click on Databases in your phpMyAdmin panel. (Sometimes you won’t have to do this, depending on your version of phpMyAdmin.)
You might have several databases, but click the database you created when you installed WordPress.
In the structure view, you’ll see something like this:
Click Export. You can choose Quick or Custom.
If you’re not familiar with SQL tables, select the Quick option. Then, choose SQL from the dropdown menu. (This is the default format used to import and export MySQL databases, and most systems support it.) Then, click Go.
If you want more control over the backup process, click Custom. Then, you’ll want to follow these steps:
In the Output section, choose Save output to a file. Then, decide if you want to compress your files or not.
Select SQL from the Format menu.
Choose Add DROP TABLE, which is useful for overwriting an existing database.
Choose IF NOT EXISTS, which prevents errors if the table is already in your back up or exported file.
Click Go.
With that, the data will be stored on your computer.
That Was a Lot. Is There an Easier Way?
Sure is. One of the reasons that people love WordPress so much is that there are a ton of plugins you can choose to handle tasks just like backing up. You can find those plugins in the Plugin Browser on the WordPress Admin screens or through the WordPress Plugin Directory.
Often, those plugins also allow you to automate your back ups—which is important when you’re thinking about how often to back up, and creating a redundant backup strategy. Make sure you’re backing up regularly, and you’ll want to do this at a time when there’s minimal activity on your site.
We’ll get into more detail about choosing the correct tool for your site, as well as some plugin recommendations, a little later. But first, let’s talk about backup best practices.
The 3-2-1 Backup Strategy
When you’re thinking about when and how to back up, you need to consider a few things: what types of files you want to store, where you want to store them, and when you want to back up. We’ve already talked about what you need to back up for your WordPress site, so let’s jump into the other details.
We at Backblaze recommend a 3-2-1 backup strategy, and we’ve talked about the specifics of that strategy for both consumers and businesses. The basics of the strategy are this: Keep three copies of your data in two separate local destinations with one copy of your data offsite.
So, if you’re backing up your WordPress site, you’d want to have one copy of your files on your computer and the second on a NAS device or hard drive (for example). Then, you’d want to keep one copy elsewhere. In the old days, that meant moving LTO tapes or servers from location to location, but, of course, now we have cloud storage.
So, to answer the question of where you want to store your backups, the answer is: on multiple devices and in multiple locations. Having your off-site backup be in the cloud is valuable for a few reasons. First, there is a minimal chance of losing data due to theft, disaster, or accident. Second, cloud services are flexible, and easy to integrate with your existing tech. You can easily add or remove access to your backup data, and if you’re running a business, most include features for things like access controls.
Now that you have selected a place to store your backup data, let’s talk about when you want to back up and different tools you can use to do so.
Choosing the Right WordPress Backup Plugin
When you’re trying to decide which tool to use, you should look at a few things to make sure that the plugin fits your needs and will continue to do so long-term.
So, one of the things that you want to look at is how much customization you can do to your backups. The most important part of this is to make sure that you can schedule your backups. It’s important to set your backup time for periods of low traffic to your site. Otherwise, you run the risk of affecting how the site is working for your users (creating slowdowns), or having incomplete backups (because new information is being added at the same time you’re creating the backups).
To ensure you’re picking a tool that will be with you for the long run, it helps to look at:
The number of active installations: If there are many installations of the plugin, this would suggest that the backup plugin is popular and more likely to stay in business for the long term.
Last updated: There are lots of reasons that tools are updated, but some of the most common are to fix bugs in usage or security vulnerabilities. Cyberattacks are constantly evolving, as are programming languages and programs. If the tool hasn’t been updated in the last 12 months, it’s likely they’re not responding to those changes.
Storage support: What we mean by this is that you can choose where to save your files. That makes it easy to set different endpoints for your backups—for instance, if you want the file to save in your cloud storage provider, you’d be able to choose that.
No Time to Research? Here Are Some of Our Favorite Plugins
While many choices are available, we recommend UpdraftPlus and XCloner for WordPress backups. These plugins have an excellent track record and work well in many environments.
With this plugin, you have several options for where to store your backups, which is always a plus. They have a free version as well as several different premium options with different prices (depending on if you need to manage more sites, want included cloud storage, etc.). That means you can pilot the tool and then upgrade if you need more capability. The premium version of UpdraftPlus supports scheduled backups, offers encryption for backup, and reporting so you can track each backup.
This WordPress backup plugin lets you schedule backups, apply retention policies, and save storage space by using file compression. The best thing about XCloner? It’s free, and not just bare-bones free: they include many features you’d find in paid backup tools. And, just like UpdraftPlus, you can store your backups to the cloud.
What’s Next?
All that’s left, then, is for you to back up your site. Check out the Backblaze blog for more useful content on backup—we’ve covered backing up your site, but it’s only one piece of your overall backup strategy. If you’re a home user running your site solo, you may want to start with Backblaze Personal Backup. If you’re a business looking for backup, check out Backblaze Business Backup and Backblaze B2 Cloud Storage. And, as always, feel free to comment below with your thoughts and suggestions about what content you’d like to see.
Hey, we can drive! (Pun absolutely intended.) Some days it’s hard to believe that what started as a “crazy” dream in a one-bedroom apartment has evolved into what we’re celebrating today—16 years of blazing on (pun, ahem, also intended).
To mark the occasion, we thought we’d share some of our highlights from past years. If you want to hear co-founder and CEO Gleb Budman talking about our evolution (plus where he thinks cloud storage is going in the future), check out his recent appearance on The Cloudcast podcast.
And, here are some other great moments for your reading and viewing pleasure:
View some of our technical content like our article on Reed-Solomon erasure coding, a history of the Python Gil, and load balancing while managing servers.
You already know there’s much, much more on the Backblaze blog, and we love chatting with folks in article comments and on socials. After all, we wouldn’t be here without all of you!
Thanks for supporting us over the years. If you feel like spreading the love, you can always refer a friend. (You’ll be prompted to log in so that you get credit for the referral.) Your friend will get a month free to try Backblaze, and when they sign up, you’ll get one too!
The first cybersecurity insurance policy was issued in 1997. In the following 27 years it’s grown from a niche insurance product to an important consideration for organizations large and small to protect their bottom line from cyber threats like malicious data breaches, malware, phishing attacks, and ransomware.
While there are many security tactics to deploy in order to maintain business continuity (BC) should any of the above happen, getting back up and running in the event of a security incident can cost time and money. Cyber insurance is one way to reduce fallout from security events, prepare your business, and support business continuity objectives.
Today, we are breaking down the basics of cyber insurance: What is it? How much will it cost? What do cyber insurance companies provide? And how do you get it?
Does my organization need cyber insurance?
Cyber insurance has become more common as part of BC planning. Like many things in the cybersecurity world, it can be a bit hard to measure precise adoption numbers because there are different industry associations, enforcement agencies, and so on in different geographic markets. According to Fortune Business Insights, the global cyber insurance market size was valued at $16.66 billion in 2023. The market is projected to grow from $20.88 billion in 2024 to $120.47 billion by 2032, exhibiting a compound annual growth rate (CAGR) of 24.5% during the forecast period.
Take a look at these three data points in cybersecurity risk:
According to a 2023 Ransomware Market Report, global ransomware costs are predicted to reach $265 billion annually by 2031, up from $20 billion in 2021.
Whether your company is a 10 person software as a service (SaaS) startup or a global enterprise, cyber insurance could be the difference between a minor interruption of business services and closing up for good. However, providers don’t opt to provide coverage for every business that applies for cyber insurance. If you want coverage (and there are plenty of reasons why you would), it helps to prepare by making your company as attractive (meaning low-risk) as possible to cyber insurers. Some cyber insurance providers like Coalition even offer assistance and services to reduce your cyber risk posture before an attack as part of a “whole package” approach.
Ransomware Protection Resource
Learn about the growing threat of ransomware and what you can do to protect against ransomware attacks.
What is cyber insurance?
Cyber insurance protects your business from losses resulting from a digital attack. This can include business income loss, but it also includes coverage for unforeseen expenses, including:
Forensic post-breach review expenses.
Additional monitoring outflows.
The expenditure for notifying parties of a breach.
It’s not guaranteed that cybercriminals will provide a decryption key to recover your data. They’re criminals after all.
Even with a decryption key, you may not be able to recover your data. This could be intentional, or simply poor design on the part of cybercriminals. Ransomware code is notoriously buggy.
Paying the ransom encourages cybercriminals to keep plying their trade, and can even result in businesses that pay being hit by the same ransomware demand twice.
Ultimately, the most effective way to undermine the motivation of these criminal groups is to reduce the potential for profit.
Types of cyber insurance
What plans cover and how much they cost can vary. Typically, you can choose between first-party coverage, third-party coverage, or both.
First-party coverage protects your own data and includes coverage for business expenses related to things like recovery of lost or stolen data, lost revenue due to business interruption, and legal counsel, and other types of expenses.
Third-party coverage protects your business from liability claims brought by someone outside the company. This type of policy might cover things like payments to consumers affected by a data breach, costs for litigation brought by third parties, and losses related to defamation.
Depending on how substantial a digital attack’s losses could be to your business, your best choice may be both first- and third-party coverage.
Cyber insurance policy coverage considerations
Cyber insurance protects your company’s bottom line by helping you pay for costs related to recovering lost or stolen data and cover costs incurred by affected third parties (if you have third-party coverage).
As you might imagine, cyber insurance policies vary. When reviewing cyber insurance policies, it’s important to ask these questions:
Does this policy cover a variety of digital attacks, especially the ones we’re most susceptible to?
What are the policy’s exclusions? For example, unlikely circumstances like acts of war or terrorism and well-known, named viruses may not be covered in the policy.
How much do the premiums and deductibles cost for the coverage we need?
What are the coverage (payout) amounts or limitations?
Keep in mind that choosing the company with the lowest premiums may not be the best strategy. For further reading, the Federal Trade Commission offers a helpful checklist of additional considerations for choosing a cyber insurance policy.
Errors & omissions (E&O) coverage
Technology errors and omissions (E&O) coverage isn’t technically cyber insurance, but could be part of a comprehensive policy. This type of coverage protects your business from expenses that may be incurred if/when your product or service fails to deliver or doesn’t work the way it’s supposed to. This can be confused with cyber insurance coverage because it protects your business in the case your technology product or service fails. The difference is that E&O coverage comes into effect when that failure is due to the business’ own negligence.
You may want to pay the upcharge for E&O coverage to protect against harm caused if/when your product or service fails to deliver or work as intended. E&O also offers coverage for data loss stemming from employee errors or employee negligence in following data safeguards already in place. Consider whether you also need this type of protection and ask your cyber insurer if they offer E&O policies.
Beyond insurance
Cybersecurity insurance providers often offer a range of holistic services designed to help you manage and mitigate cyber risks. These services go beyond traditional insurance coverage, providing proactive support in the form of risk assessment, incident response, and recovery assistance. This comprehensive approach helps you strengthen your cybersecurity posture and minimize the impact of cyber incidents.
Services potentially offered by cybersecurity insurance providers:
Risk assessment and management: Evaluating your current cybersecurity measures and identifying vulnerabilities.
Incident response planning: Assisting in the development and implementation of incident response plans.
Threat intelligence: Providing real-time information on emerging cyber threats and vulnerabilities.
Employee training and awareness: Offering programs to educate employees on best practices for cybersecurity.
Breach response services: Support during and after a cyber incident, including forensic investigation and legal assistance.
Business continuity and recovery support: Helping to restore operations and recover lost data following an incident.
Regulatory compliance guidance: Assisting in meeting industry-specific cybersecurity regulations and standards.
It’s important to ask if these services are included in your policy or if you can add them if needed.
Premiums, deductibles, and coverage
What are the average premium costs, deductible amounts, and liability coverage for a business like yours? The answer to that question turns out to be more complex than you’d think.
How are premiums determined?
Every insurance provider is different, but here are common factors that affect cyber insurance premiums:
Your industry (e.g., education, healthcare, and financial industries are higher risk)
Your company size (e.g., more employees increase risk)
Amount and sensitivity of your data (e.g., school districts with student and faculty personal identifiable information are at higher risk)
Your revenue (e.g., a profitable bank will be more attractive to cybercriminals)
Your investment in cybersecurity (e.g., lower premiums go to companies with dedicated resources and policies around cybersecurity)
Coverage limit (e.g., the cost per incident will decrease with a lower liability limit).
Deductible (e.g., the more you pay per incident, the less your plan’s premium)
But, generally speaking, if you are willing to cover more of the cost of a data breach, your deductible rises, and your premium falls. Data from TechInsurance reveals that the average cyber insurance premium is around $145 per month depending on your risk profile and the policy limits you choose.
How do I get cyber insurance?
Most companies start with an online quote from a cyber insurance provider, but many will eventually need to compile more detailed and specific information in order to get the most accurate figures.
If you’re a business owner, you may have all the information you need at hand, but for mid-market and enterprise companies, securing a cyber insurance policy should be a cross-functional effort. You’ll need information from finance, legal, and compliance departments, IT, operations, and perhaps other divisions to ensure cyber insurance coverage and policy terms meet your company’s needs.
Before the quote, an insurance company will perform a risk assessment of your business in order to determine the cost to insure you. A typical cyber insurance questionnaire might include specific, detailed questions in the areas of organizational structure, legal and compliance requirements, business policies and procedures, and questions about your technical infrastructure. Here are some questions you might encounter:
Organizational: What kind of third-party data do you store or process on your computer systems?
Legal and compliance: Are you aware of any disputes over your business website address and domain name?
Policies and procedures: Do you have a business continuity plan in place?
Technical: Do you utilize a cloud provider to store data or host applications?
Cyber insurance readiness
Now that you know the basics of cyber insurance, you can be better prepared if and when the time comes to get insured. Shoring up your vulnerability to cyber incidents goes a long way toward helping you acquire cyber insurance and get the best premiums possible. You can start by protecting business workstations with automatic backups and by protecting virtual machines (VMs), servers, and network attached storage (NAS) data for BC and disaster recovery (DR).
When you start thinking about backup strategies, it tends to get inside your head. Like Dustin Hoffman’s character in “Rain Man”, seeing equations float around him as he calculates his odds in Vegas, the mental exercise of ensuring your backups have backups of their own tends to manifest itself in the strangest places.
Take, for example, the finale of the Netflix show “Dead to Me” starring Christina Applegate and Linda Cardellini. The show wrapped up a few months back and should definitely be moving toward the top of your “I’ve been meaning to watch that” list. And if you have already seen it, I can’t stress enough how much more you pick up on a second time around.
Anyway, to a certain segment of the audience, the climax of the show served as a fitting conclusion to a whole host of storyline threads whose dense weave kept viewers enthralled from the first episode to the last. But to those of us who tend to worry about things like a proper 3-2-1- backup strategy, the final few episodes concealed a subtle message about the importance of proper data backup procedures.
Let’s dig into what “Dead to Me” can teach us about the importance of a good backup strategy.
One: On-site storage on your home device. Your phone, your laptop, your tablet, whatever. If you can physically touch it and your files are in there somewhere, that’s your first copy.
Two: On-site storage on a separate device. This can be an external hard drive, a thumb drive, or if you’re on a Mac, Time Machine. If it’s not physically in the device, but it’s still somewhere close by, that’s your second copy.
Three: Off-site backup. This should automatically scan the files on your device and upload copies to the cloud for safe-keeping. (Pssst, we’re partial to Backblaze’s astonishingly simple cloud back up here).
Okay, So What Does That Have to Do With “Dead to Me”?
There’s kind of a long road ahead, so buckle up.
For those of you who haven’t seen it, or who binged it so long ago you need a refresher, “Dead to Me” follows the story of two friends, Jen (Applegate) and Judy (Cardellini). Jen is a recently widowed mom whose husband Ted had been killed in a hit and run shortly before the show started. Judy is a woman she meets during a group therapy session, who claims to have lost her husband as well.
Only, as it turns out, Judy didn’t lose her husband. They just split up—after an argument that started when they accidentally struck and killed Jen’s husband.
Intrigued yet? We’re only on the first episode.
By the end of the first season, Jen has discovered the truth about Judy (but they’re still friends), Judy is dating a police officer who is investigating the crime she committed, and her ex-husband Steve (James Marsden, playing against his usual type as a jerk) is desperately trying to cover up the crime while avoiding the Greek mafia, who have a contract out on him.
We cannot stress enough that all of this craziness happens in the first season, which ends with Jen accidentally murdering Steve by—of course—cracking him in the head with a wooden bird, which winds up as a critical plot point.
You see tchotchke. I see danger.
From there the plot twists around on itself, throwing every curveball imaginable at you from secret twin brothers to money laundering schemes to torrid affairs (and hey, we already mentioned the Greek mafia). But critical to our point is one plot thread that could have been avoided with a proper backup strategy.
Karen and the… Let’s Call It 2-1 Strategy
A minor character in the first few seasons, Karen is a neighbor of Jen’s who… well, can be kind of a Karen. You know that person in your neighborhood that you suspect reports you to the Homeowner’s Association whenever your grass gets a little too long? That’s her.
As the neighborhood Karen, she has a natural inclination to keep an eye on things. As such, her house is ringed by security cameras. And as we learned in the season two premiere, one of those cameras just happened to spy Steve on his way to Jen’s house the night he was murdered.
Plot twist, right?
Since this is a huge piece of evidence implicating them in the murder they’re actively covering up, Jen and Judy have to ensure that the incriminating footage is destroyed forever. That means deleting the footage, which they discover has been safely stored in the cloud. They first try to convince Jeff, Karen’s ex, to log on and do it (side note: this happens after they discovered he was having an affair with one of Judy’s ex-boyfriends, because this show is bonkers) but unfortunately Karen has changed the password to her cloud storage.
So they have to sweet-talk their way into Karen’s house (greasing the wheels with her favorite dish—Mexican lasagna with extra raisins) and get her to delete the footage off the cloud. It’s a wonderful moment of female camaraderie as they convince Karen that the data on the cloud represents too many painful memories of her time with her ex. And when Karen finally drags the folder to the trash, we cheer her for finding the strength to move on.
Just a couple of friends, deleting files over coffee.
And then, the punchline.
“And if I ever want to see it again, I have it backed up on my hard drive,” she exclaims, holding up her external drive backup. Jen and Judy manage to steal that, and in doing so get away with their crime scot-free.
What Should Karen Have Done?
Look, we get that the show is trying to get us to root for Jen and Judy as our protagonists, but to be honest, murder is one of those things that is a little hard to look past.
Especially given that the FBI was looking into the crime at that point in the show, what Karen did could legally be considered obstruction of justice. Or at least unintended obstruction of justice, which we’re pretty sure is still a crime. (We on the blog team are definitely not lawyers, though.)
Had Karen utilized a proper 3-2-1 strategy, she should have had a third copy—the one on her local drive—even after she was tricked into deleting it from the cloud and handing over her external drive. And, if she was using Backblaze, she would have been able to access an earlier version of her backup with either our standard 30-day version history or Extended Version History. So, she could have pulled a copy even after she deleted it.
The Moral of the Story Is: 3-2-1 Backups Are Still the Best
Karen handed over all the incriminating evidence about the murder to the person who committed it. Which, true, made for a happy ending as far as the show is concerned. But for those of us who can’t seem to get 3-2-1 backup strategies out of our head, she committed a serious blunder. A 2-1 backup strategy just won’t cut it.
And that, folks, is how “Dead to Me” reminds us all once again that a 3-2-1 backup strategy is still the best way to keep your data safe and out of the hands of nefarious, if endearing, murderers.
Today, March 31, is World Backup Day. If you don’t know, now you know! Some years ago, we and other denizens of the internet got together because we felt that the joy of protecting your data was worthy of celebration. Each year on this day, we encourage folks to take the pledge to backup their data. This year, we wanted to share some fun facts we pulled about our Backblaze Personal Backup service, and throw in a few things we’ve learned from our yearly backup poll as well. Spoiler: We do that poll again every year in June for Backup Awareness Month, so come visit us again then and we’ll review the trends.
And, shout out to Simple Maps for providing us with geographic info that we mapped to our data.
The Winners: Which Cities Back Up the Most?
To be clear, we think anyone who’s backing up is a winner. But in this section, we decided to talk about both the cities with the most users per capita and the number of users in a city. Given that the second option rewards bigger cities, we thought it was a little unfair to just present that data.
2022 Top 5 Cities Where You’re Most Likely to Run Into a Backblaze User
Here, we take a look at the cities with the most Backblaze licenses per capita.
Pacific Palisades, CA: 136.6
Winnetka, IL: 129.1
Orinda, CA: 128.2
Beverly Hills, CA: 126.2
Mill Valley, CA: 117.1
Good job California and a very special shout out to Winnetka! Way to go!
2022 Top 5 Cities With the Most Backblaze Users
And, here, we look at cities with the highest number of users.
New York, NY: 8,401
Los Angeles, CA: 6,754
Brooklyn, NY: 5,587
San Francisco, CA: 5,117
Seattle, WA: 5,021
The Potential: The Places We Want to Give Some Back Up Love To
Hey, we get it: we’re passionate about a relatively nerdy thing. (Back up. It’s still back up.) That said, we’re always looking for ways to spread the love and peace of mind that comes from data protection.
2022 Top 5 Cities Least Likely to Run Into a Backblaze User
Here’s where we look at cities with the least Backblaze users per capita.
Lynwood, CA: .14
Arecibo, PR: .17
Trujillo Alto, PR: .17
Carolina, PR: .17
Vega Baja, PR: .18
Clearly, we haven’t been giving Puerto Rico enough love. We’re sorry, Puerto Rico! We’d love to chat about back up with you.
2022 Cities With the Fewest Users
You might be noticing a pattern. Here, we look at cities with the least number of users in our database—so, cities with one license, because there are also cities with zero users. But to figure out which cities those are, we’d have to find a list of ALL the cities in the U.S. and deduplicate it against our list of cities with at least one license. It would be a whole thing. Let it suffice to say, there are cities with zero users, and we hope someday they have more.
Arecibo, PR: 1
Canovanas, PR: 1
Carolina, PR: 1
Lynwood, CA: 1
Trujillo Alto, PR: 1
Vega Baja, PR: 1
Waianae, HI: 1
Given the amount of objectively beautiful places on this list, we’d love to assume you’re all busy outdoors and not stuck behind a computer.
State of Affairs
Okay, we’ve talked about cities, but things get even more interesting when you filter this by state instead. Buckle up, folks!
States With the Most Users Per Capita
Washington, D.C.: 26.04
Vermont: 21.67
Oregon: 21.60
Washington: 20.67
Colorado: 19.99
Finally, a list California didn’t make. (It’s number seven.) It’s super interesting when you compare this to the cities with the most users per capita, especially because our winner in that category has 136.6 compared to our winner here with 26.04.
Even if you take out Washington, D.C. (some folks might argue that it’s more fair to call it a city), Vermont comes in with 21.67 statewide. That’s less than a fifth of the concentration of users you’d find in Pacific Palisades, CA.
States With The Most Cities With Only One License Per Capita
Some nuance here: This doesn’t mean states with the least number users, but rather states with the most cities with only one license. So, in essence, this list favors states that have a lot of cities.
Pennsylvania—177
New York—172
Texas—166
Illinois—126
Ohio—126
Iowa—112
Minnesota—111
Michigan—111
California—106
Indiana—101
Look at that! Some of our standouts above become a little less impressive when you get here. And, we’d like to note that California has made all but one of the lists so far: proof that backup stories are no simple matter of “best” and “worst”.
The Even Bigger Picture
There are even more stories to tell when you compare this to our yearly backup poll. According to our data, only 12% of computer users use a cloud backup service like Backblaze. That means that the numbers we’re showing you here are a portion of the 12% of computer owners overall.
Still, the person most likely to be a backer upper—someone who owns a computer and backs it up at least once a day—likely lives in the Western United States. Even though we’re working with a smaller data set, it’s interesting to see that our data still reflects overall trends.
Celebrate With Us!
We hope you enjoyed our foray into data as much as we did. Feel free to take the World Backup Day pledge, reach out to us on socials, or comment below if you want to know more. And, check back in June to see the newest backup survey.
To provide the best experiences, we use technologies like cookies to store and/or access device information. Consenting to these technologies will allow us to process data such as browsing behavior or unique IDs on this site. Not consenting or withdrawing consent, may adversely affect certain features and functions.
Functional
Always active
The technical storage or access is strictly necessary for the legitimate purpose of enabling the use of a specific service explicitly requested by the subscriber or user, or for the sole purpose of carrying out the transmission of a communication over an electronic communications network.
Preferences
The technical storage or access is necessary for the legitimate purpose of storing preferences that are not requested by the subscriber or user.
Statistics
The technical storage or access that is used exclusively for statistical purposes.The technical storage or access that is used exclusively for anonymous statistical purposes. Without a subpoena, voluntary compliance on the part of your Internet Service Provider, or additional records from a third party, information stored or retrieved for this purpose alone cannot usually be used to identify you.
Marketing
The technical storage or access is required to create user profiles to send advertising, or to track the user on a website or across several websites for similar marketing purposes.