I’m trying to get the Wazuh agent (a fork of OSSEC, one of the most popular open source security tools, used for intrusion detection) to talk to our custom backend (namely, our LogSentinel SIEM Collector) to allow us to reuse the powerful Wazuh/OSSEC functionalities for customers that want to install an agent on each endpoint rather than just one collector that “agentlessly” reaches out to multiple sources.
But even though there’s a good documentation on the message format and encryption, I couldn’t get to successfully decrypt the messages. (I’ll refer to both Wazuh and OSSEC, as the functionality is almost identical in both, with the distinction that Wazuh added AES support in addition to blowfish)
That lead me to a two-day investigation on possible reasons. The first side-discovery was the undocumented OpenSSL auto-padding of keys and IVs described in my previous article. Then it lead me to actually writing C code (an copying the relevant Wazuh/OSSEC pieces) in order to debug the issue. With Wazuh/OSSEC I was generating one ciphertext and with Java and openssl CLI – a different one.
I made sure the key, key size, IV and mode (CBC) are identical. That they are equally padded and that OpenSSL’s EVP API is correctly used. All of that was confirmed and yet there was a mismatch, and therefore I could not decrypt the Wazuh/OSSEC message on the other end.
After discovering the 0-padding, I also discovered a mistake in the documentation, which used a static IV of FEDCA9876543210 rather than the one found in the code, where the 0 preceded 9 – FEDCA0987654321. But that didn’t fix the issue either, only got me one step closer.
A side-note here on IVs – Wazuh/OSSEC is using a static IV, which is a bad practice. The issue is reported 5 years ago, but is minor, because they are using some additional randomness per message that remediates the use of a static IV; it’s just not idiomatic to do it that way and may have unexpected side-effects.
So, after debugging the C code, I got to a simple code that could be used to reproduce the issue and asked a question on Stackoverflow. 5 minutes after posting the question I found another, related question that had the answer – using hex strings like that in C doesn’t work. Instead, they should be encoded: char *iv = (char *)"\xFE\xDC\xBA\x09\x87\x65\x43\x21\x00\x00\x00\x00\x00\x00\x00\x00";. So, the value is not the bytes corresponding to the hex string, but the ASCII codes of each character in the hex string. I validated that in the receiving Java end with this code:
This has an implication on the documentation, as well as on the whole scheme as well. Because the Wazuh/OSSEC AES key is: MD5(password) + MD5(MD5(agentName) + MD5(agentID)){0, 15}, the 2nd part is practically discarded, because the MD5(password) is 32 characters (= 32 ASCII codes/bytes), which is the length of the AES key. This makes the key derived from a significantly smaller pool of options – the permutations of 16 bytes, rather than of 256 bytes.
I raised an issue with Wazuh. Although this can be seen as a vulnerability (due to the reduced key space), it’s rather minor from security point of view, and as communication is mostly happening within the corporate network, I don’t think it has to be privately reported and fixed immediately.
Yet, I made a recommendation for introducing an additional configuration option to allow to transition to the updated protocol without causing backward compatibility issues. In fact, I’d go further and recommend using TLS/DTLS rather than a home-grown, AES-based scheme. Mutual authentication can be achieved through TLS mutual authentication rather than through a shared secret.
It’s satisfying to discover issues in popular software, especially when they are not written in your “native” programming language. And as a rule of thumb – encodings often cause problems, so we should be extra careful with them.
OpenSSL is an omnipresent tool when it comes to encryption. While in Java we are used to the native Java implementations of cryptographic primitives, most other languages rely on OpenSSL.
Yesterday I was investigating the encryption used by one open source tool written in C, and two things looked strange: they were using a 192 bit key for AES 256, and they were using a 64-bit IV (initialization vector) instead of the required 128 bits (in fact, it was even a 56-bit IV).
But somehow, magically, OpenSSL didn’t complain the way my Java implementation did, and encryption worked. So, I figured, OpenSSL is doing some padding of the key and IV. But what? Is it prepending zeroes, is it appending zeroes, is it doing PKCS padding or ISO/IEC 7816-4 padding, or any of the other alternatives. I had to know if I wanted to make my Java counterpart supply the correct key and IV.
It was straightforward to test with the following commands:
# First generate the ciphertext by encrypting input.dat which contains "testtesttesttesttesttest"
$ openssl enc -aes-256-cbc -nosalt -e -a -A -in input.dat -K '7c07f68ea8494b2f8b9fea297119350d78708afa69c1c76' -iv 'FEDCBA987654321' -out input-test.enc
# Then test decryption with the same key and IV
$ openssl enc -aes-256-cbc -nosalt -d -a -A -in input-test.enc -K '7c07f68ea8494b2f8b9fea297119350d78708afa69c1c76' -iv 'FEDCBA987654321'
testtesttesttesttesttest
# Then test decryption with different paddings
$ openssl enc -aes-256-cbc -nosalt -d -a -A -in input-test.enc -K '7c07f68ea8494b2f8b9fea297119350d78708afa69c1c76' -iv 'FEDCBA9876543210'
testtesttesttesttesttest
$ openssl enc -aes-256-cbc -nosalt -d -a -A -in input-test.enc -K '7c07f68ea8494b2f8b9fea297119350d78708afa69c1c760' -iv 'FEDCBA987654321'
testtesttesttesttesttest
$ openssl enc -aes-256-cbc -nosalt -d -a -A -in input-test.enc -K '7c07f68ea8494b2f8b9fea297119350d78708afa69c1c76000' -iv 'FEDCBA987654321'
testtesttesttesttesttest
$ openssl enc -aes-256-cbc -nosalt -d -a -A -in input-test.enc -K '07c07f68ea8494b2f8b9fea297119350d78708afa69c1c76' -iv 'FEDCBA987654321'
bad decrypt
So, OpenSSL is padding keys and IVs with zeroes until they meet the expected size. Note that if -aes-192-cbc is used instead of -aes-256-cbc, decryption will fail, because OpenSSL will pad it with fewer zeroes and so the key will be different.
Not an unexpected behavaior, but I’d prefer it to report incorrect key sizes rather than “do magic”, especially when it’s not easy to find exactly what magic it’s doing. I couldn’t find it documented, and the comments to this SO question hint in the same direction. In fact, for plaintext padding, OpenSSL uses PKCS padding (which is documented), so it’s extra confusing that it’s using zero-padding here.
In any case, follow the advice from the stackoverflow answer and don’t rely on this padding – always provide the key and IV in the right size.
Encryption is a critical component of a defense-in-depth strategy, which is a security approach with a series of defensive mechanisms designed. It means if one security mechanism fails, there’s at least one more still operating. As more organizations look to operate faster and at scale, they need ways to meet critical compliance requirements and improve data security. Encryption, when used correctly, can provide an additional layer of protection above basic access control.
How and why does encryption work?
Encryption works by using an algorithm with a key to convert data into unreadable data (ciphertext) that can only become readable again with the right key. For example, a simple phrase like “Hello World!” may look like “1c28df2b595b4e30b7b07500963dc7c” when encrypted. There are several different types of encryption algorithms, all using different types of keys. A strong encryption algorithm relies on mathematical properties to produce ciphertext that can’t be decrypted using any practically available amount of computing power without also having the necessary key. Therefore, protecting and managing the keys becomes a critical part of any encryption solution.
Encryption as part of your security strategy
An effective security strategy begins with stringent access control and continuous work to define the least privilege necessary for persons or systems accessing data. AWS requires that you manage your own access control policies, and also supports defense in depth to achieve the best possible data protection.
Encryption is a critical component of a defense-in-depth strategy because it can mitigate weaknesses in your primary access control mechanism. What if an access control mechanism fails and allows access to the raw data on disk or traveling along a network link? If the data is encrypted using a strong key, as long as the decryption key is not on the same system as your data, it is computationally infeasible for an attacker to decrypt your data. To show how infeasible it is, let’s consider the Advanced Encryption Standard (AES) with 256-bit keys (AES-256). It’s the strongest industry-adopted and government-approved algorithm for encrypting data. AES-256 is the technology we use to encrypt data in AWS, including Amazon Simple Storage Service (S3) server-side encryption. It would take at least a trillion years to break using current computing technology. Current research suggests that even the future availability of quantum-based computing won’t sufficiently reduce the time it would take to break AES encryption.
But what if you mistakenly create overly permissive access policies on your data? A well-designed encryption and key management system can also prevent this from becoming an issue, because it separates access to the decryption key from access to your data.
Requirements for an encryption solution
To get the most from an encryption solution, you need to think about two things:
Protecting keys at rest: Are the systems using encryption keys secured so the keys can never be used outside the system? In addition, do these systems implement encryption algorithms correctly to produce strong ciphertexts that cannot be decrypted without access to the right keys?
Independent key management: Is the authorization to use encryption independent from how access to the underlying data is controlled?
There are third-party solutions that you can bring to AWS to meet these requirements. However, these systems can be difficult and expensive to operate at scale. AWS offers a range of options to simplify encryption and key management.
Protecting keys at rest
When you use third-party key management solutions, it can be difficult to gauge the risk of your plaintext keys leaking and being used outside the solution. The keys have to be stored somewhere, and you can’t always know or audit all the ways those storage systems are secured from unauthorized access. The combination of technical complexity and the necessity of making the encryption usable without degrading performance or availability means that choosing and operating a key management solution can present difficult tradeoffs. The best practice to maximize key security is using a hardware security module (HSM). This is a specialized computing device that has several security controls built into it to prevent encryption keys from leaving the device in a way that could allow an adversary to access and use those keys.
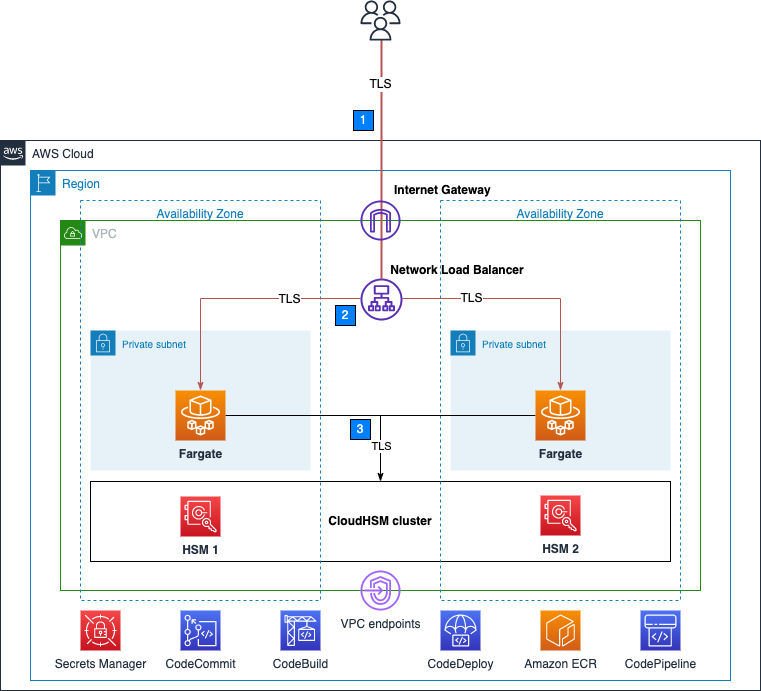
One such control in modern HSMs is tamper response, in which the device detects physical or logical attempts to access plaintext keys without authorization, and destroys the keys before the attack succeeds. Because you can’t install and operate your own hardware in AWS datacenters, AWS offers two services using HSMs with tamper response to protect customers’ keys: AWS Key Management Service (KMS), which manages a fleet of HSMs on the customer’s behalf, and AWS CloudHSM, which gives customers the ability to manage their own HSMs. Each service can create keys on your behalf, or you can import keys from your on-premises systems to be used by each service.
The keys in AWS KMS or AWS CloudHSM can be used to encrypt data directly, or to protect other keys that are distributed to applications that directly encrypt data. The technique of encrypting encryption keys is called envelope encryption, and it enables encryption and decryption to happen on the computer where the plaintext customer data exists, rather than sending the data to the HSM each time. For very large data sets (e.g., a database), it’s not practical to move gigabytes of data between the data set and the HSM for every read/write operation. Instead, envelope encryption allows a data encryption key to be distributed to the application when it’s needed. The “master” keys in the HSM are used to encrypt a copy of the data key so the application can store the encrypted key alongside the data encrypted under that key. Once the application encrypts the data, the plaintext copy of data key can be deleted from its memory. The only way for the data to be decrypted is if the encrypted data key, which is only a few hundred bytes in size, is sent back to the HSM and decrypted.
The process of envelope encryption is used in all AWS services in which data is encrypted on a customer’s behalf (which is known as server-side encryption) to minimize performance degradation. If you want to encrypt data in your own applications (client-side encryption), you’re encouraged to use envelope encryption with AWS KMS or AWS CloudHSM. Both services offer client libraries and SDKs to add encryption functionality to their application code and use the cryptographic functionality of each service. The AWS Encryption SDK is an example of a tool that can be used anywhere, not just in applications running in AWS.
Because implementing encryption algorithms and HSMs is critical to get right, all vendors of HSMs should have their products validated by a trusted third party. HSMs in both AWS KMS and AWS CloudHSM are validated under the National Institute of Standards and Technology’s FIPS 140-2 program, the standard for evaluating cryptographic modules. This validates the secure design and implementation of cryptographic modules, including functions related to ports and interfaces, authentication mechanisms, physical security and tamper response, operational environments, cryptographic key management, and electromagnetic interference/electromagnetic compatibility (EMI/EMC). Encryption using a FIPS 140-2 validated cryptographic module is often a requirement for other security-related compliance schemes like FedRamp and HIPAA-HITECH in the U.S., or the international payment card industry standard (PCI-DSS).
Independent key management
While AWS KMS and AWS CloudHSM can protect plaintext master keys on your behalf, you are still responsible for managing access controls to determine who can cause which encryption keys to be used under which conditions. One advantage of using AWS KMS is that the policy language you use to define access controls on keys is the same one you use to define access to all other AWS resources. Note that the language is the same, not the actual authorization controls. You need a mechanism for managing access to keys that is different from the one you use for managing access to your data. AWS KMS provides that mechanism by allowing you to assign one set of administrators who can only manage keys and a different set of administrators who can only manage access to the underlying encrypted data. Configuring your key management process in this way helps provide separation of duties you need to avoid accidentally escalating privilege to decrypt data to unauthorized users. For even further separation of control, AWS CloudHSM offers an independent policy mechanism to define access to keys.
Even with the ability to separate key management from data management, you can still verify that you have configured access to encryption keys correctly. AWS KMS is integrated with AWS CloudTrail so you can audit who used which keys, for which resources, and when. This provides granular vision into your encryption management processes, which is typically much more in-depth than on-premises audit mechanisms. Audit events from AWS CloudHSM can be sent to Amazon CloudWatch, the AWS service for monitoring and alarming third-party solutions you operate in AWS.
Encrypting data at rest and in motion
All AWS services that handle customer data encrypt data in motion and provide options to encrypt data at rest. All AWS services that offer encryption at rest using AWS KMS or AWS CloudHSM use AES-256. None of these services store plaintext encryption keys at rest — that’s a function that only AWS KMS and AWS CloudHSM may perform using their FIPS 140-2 validated HSMs. This architecture helps minimize the unauthorized use of keys.
When encrypting data in motion, AWS services use the Transport Layer Security (TLS) protocol to provide encryption between your application and the AWS service. Most commercial solutions use an open source project called OpenSSL for their TLS needs. OpenSSL has roughly 500,000 lines of code with at least 70,000 of those implementing TLS. The code base is large, complex, and difficult to audit. Moreover, when OpenSSL has bugs, the global developer community is challenged to not only fix and test the changes, but also to ensure that the resulting fixes themselves do not introduce new flaws.
AWS’s response to challenges with the TLS implementation in OpenSSL was to develop our own implementation of TLS, known as s2n, or signal to noise. We released s2n in June 2015, which we designed to be small and fast. The goal of s2n is to provide you with network encryption that is easier to understand and that is fully auditable. We released and licensed it under the Apache 2.0 license and hosted it on GitHub.
We also designed s2n to be analyzed using automated reasoning to test for safety and correctness using mathematical logic. Through this process, known as formal methods, we verify the correctness of the s2n code base every time we change the code. We also automated these mathematical proofs, which we regularly re-run to ensure the desired security properties are unchanged with new releases of the code. Automated mathematical proofs of correctness are an emerging trend in the security industry, and AWS uses this approach for a wide variety of our mission-critical software.
Implementing TLS requires using encryption keys and digital certificates that assert the ownership of those keys. AWS Certificate Manager and AWS Private Certificate Authority are two services that can simplify the issuance and rotation of digital certificates across your infrastructure that needs to offer TLS endpoints. Both services use a combination of AWS KMS and AWS CloudHSM to generate and/or protect the keys used in the digital certificates they issue.
Summary
At AWS, security is our top priority and we aim to make it as easy as possible for you to use encryption to protect your data above and beyond basic access control. By building and supporting encryption tools that work both on and off the cloud, we help you secure your data and ensure compliance across your entire environment. We put security at the center of everything we do to make sure that you can protect your data using best-of-breed security technology in a cost-effective way.
If you have feedback about this post, submit comments in the Comments section below. If you have questions about this post, start a new thread on the AWS KMS forum or the AWS CloudHSM forum, or contact AWS Support.
Want more AWS Security how-to content, news, and feature announcements? Follow us on Twitter.
Well, we actually won’t show you how we create the magic in our big OATH consumer mail factory. But nevertheless we wanted to share how interested developers could leverage some of our unique features we offer for our Yahoo and AOL Mail customers.
To drive experiences like our travel and shopping smart views or message threading, we tag qualified mails with something we call DECOS and THREADID. While we will not indulge in explaining how exactly we use them internally, we wanted to share how they can be used and accessed through IMAP.
So let’s just look at a sample IMAP command chain. We’ll just assume that you are familiar with the IMAP protocol at this point and you know how to properly talk to an IMAP server.
So here’s how you would retrieve DECO and THREADIDs for specific messages:
The Internet of Things (IoT) has precipitated to an influx of connected devices and data that can be mined to gain useful business insights. If you own an IoT device, you might want the data to be uploaded seamlessly from your connected devices to the cloud so that you can make use of cloud storage and the processing power to perform sophisticated analysis of data. To upload the data to the AWS Cloud, devices must pass authentication and authorization checks performed by the respective AWS services. The standard way of authenticating AWS requests is the Signature Version 4 algorithm that requires the caller to have an access key ID and secret access key. Consequently, you need to hardcode the access key ID and the secret access key on your devices. Alternatively, you can use the built-in X.509 certificate as the unique device identity to authenticate AWS requests.
AWS IoT has introduced the credentials provider feature that allows a caller to authenticate AWS requests by having an X.509 certificate. The credentials provider authenticates a caller using an X.509 certificate, and vends a temporary, limited-privilege security token. The token can be used to sign and authenticate any AWS request. Thus, the credentials provider relieves you from having to manage and periodically refresh the access key ID and secret access key remotely on your devices.
In the process of retrieving a security token, you use AWS IoT to create a thing (a representation of a specific device or logical entity), register a certificate, and create AWS IoT policies. You also configure an AWS Identity and Access Management (IAM) role and attach appropriate IAM policies to the role so that the credentials provider can assume the role on your behalf. You also make an HTTP-over-Transport Layer Security (TLS) mutual authentication request to the credentials provider that uses your preconfigured thing, certificate, policies, and IAM role to authenticate and authorize the request, and obtain a security token on your behalf. You can then use the token to sign any AWS request using Signature Version 4.
In this blog post, I explain the AWS IoT credentials provider design and then demonstrate the end-to-end process of retrieving a security token from AWS IoT and using the token to write a temperature and humidity record to a specific Amazon DynamoDB table.
Note: This post assumes you are familiar with AWS IoT and IAM to perform steps using the AWS CLI and OpenSSL. Make sure you are running the latest version of the AWS CLI.
Overview of the credentials provider workflow
The following numbered diagram illustrates the credentials provider workflow. The diagram is followed by explanations of the steps.
To explain the steps of the workflow as illustrated in the preceding diagram:
The AWS IoT device uses the AWS SDK or custom client to make an HTTPS request to the credentials provider for a security token. The request includes the device X.509 certificate for authentication.
The credentials provider forwards the request to the AWS IoT authentication and authorization module to verify the certificate and the permission to request the security token.
If the certificate is valid and has permission to request a security token, the AWS IoT authentication and authorization module returns success. Otherwise, it returns failure, which goes back to the device with the appropriate exception.
If assuming the role succeeds, AWS STS returns a temporary, limited-privilege security token to the credentials provider.
The credentials provider returns the security token to the device.
The AWS SDK on the device uses the security token to sign an AWS request with AWS Signature Version 4.
The requested service invokes IAM to validate the signature and authorize the request against access policies attached to the preconfigured IAM role.
If IAM validates the signature successfully and authorizes the request, the request goes through.
In another solution, you could configure an AWS Lambda rule that ingests your device data and sends it to another AWS service. However, in applications that require the uploading of large files such as videos or aggregated telemetry to the AWS Cloud, you may want your devices to be able to authenticate and send data directly to the AWS service of your choice. The credentials provider enables you to do that.
Outline of the steps to retrieve and use security token
Perform the following steps as part of this solution:
Create an AWS IoT thing: Start by creating a thing that corresponds to your home thermostat in the AWS IoT thing registry database. This allows you to authenticate the request as a thing and use thing attributes as policy variables in AWS IoT and IAM policies.
Register a certificate: Create and register a certificate with AWS IoT, and attach it to the thing for successful device authentication.
Create and configure an IAM role: Create an IAM role to be assumed by the service on behalf of your device. I illustrate how to configure a trust policy and an access policy so that AWS IoT has permission to assume the role, and the token has necessary permission to make requests to DynamoDB.
Create a role alias: Create a role alias in AWS IoT. A role alias is an alternate data model pointing to an IAM role. The credentials provider request must include a role alias name to indicate which IAM role to assume for obtaining a security token from AWS STS. You may update the role alias on the server to point to a different IAM role and thus make your device obtain a security token with different permissions.
Attach a policy: Create an authorization policy with AWS IoT and attach it to the certificate to control which device can assume which role aliases.
Request a security token: Make an HTTPS request to the credentials provider and retrieve a security token and use it to sign a DynamoDB request with Signature Version 4.
Use the security token to sign a request: Use the retrieved token to sign a request to DynamoDB and successfully write a temperature and humidity record from your home thermostat in a specific table. Thus, starting with an X.509 certificate on your home thermostat, you can successfully upload your thermostat record to DynamoDB and use it for further analysis. Before the availability of the credentials provider, you could not do this.
Deploy the solution
1. Create an AWS IoT thing
Register your home thermostat in the AWS IoT thing registry database by creating a thing type and a thing. You can use the AWS CLI with the following command to create a thing type. The thing type allows you to store description and configuration information that is common to a set of things.
Now, you need to have a Certificate Authority (CA) certificate, sign a device certificate using the CA certificate, and register both certificates with AWS IoT before your device can authenticate to AWS IoT. If you do not already have a CA certificate, you can use OpenSSL to create a CA certificate, as described in Use Your Own Certificate. To register your CA certificate with AWS IoT, follow the steps on Registering Your CA Certificate.
You then have to create a device certificate signed by the CA certificate and register it with AWS IoT, which you can do by following the steps on Creating a Device Certificate Using Your CA Certificate. Save the certificate and the corresponding key pair; you will use them when you request a security token later. Also, remember the password you provide when you create the certificate.
Run the following command in the AWS CLI to attach the device certificate to your thing so that you can use thing attributes in policy variables.
If the attach-thing-principal command succeeds, the output is empty.
3. Configure an IAM role
Next, configure an IAM role in your AWS account that will be assumed by the credentials provider on behalf of your device. You are required to associate two policies with the role: a trust policy that controls who can assume the role, and an access policy that controls which actions can be performed on which resources by assuming the role.
The following trust policy grants the credentials provider permission to assume the role. Put it in a text document and save the document with the name, trustpolicyforiot.json.
The following access policy allows DynamoDB operations on the table that has the same name as the thing name that you created in Step 1, MyHomeThermostat, by using credentials-iot:ThingName as a policy variable. I explain after Step 5 about using thing attributes as policy variables. Put the following policy in a text document and save the document with the name, accesspolicyfordynamodb.json.
Finally, run the following command in the AWS CLI to attach the access policy to your role.
aws iam attach-role-policy --role-name dynamodb-access-role --policy-arn arn:aws:iam::<your_aws_account_id>:policy/accesspolicyfordynamodb
If the attach-role-policy command succeeds, the output is empty.
Configure the PassRole permissions
The IAM role that you have created must be passed to AWS IoT to create a role alias, as described in Step 4. The user who performs the operation requires iam:PassRole permission to authorize this action. You also should add permission for the iam:GetRole action to allow the user to retrieve information about the specified role. Create the following policy to grant iam:PassRole and iam:GetRole permissions. Name this policy, passrolepermission.json.
Now, run the following command to attach the policy to the user.
aws iam attach-user-policy --policy-arn arn:aws:iam::<your_aws_account_id>:policy/passrolepermission --user-name <user_name>
If the attach-user-policy command succeeds, the output is empty.
4. Create a role alias
Now that you have configured the IAM role, you will create a role alias with AWS IoT. You must provide the following pieces of information when creating a role alias:
RoleAlias: This is the primary key of the role alias data model and hence a mandatory attribute. It is a string; the minimum length is 1 character, and the maximum length is 128 characters.
RoleArn: This is the Amazon Resource Name (ARN) of the IAM role you have created. This is also a mandatory attribute.
CredentialDurationSeconds: This is an optional attribute specifying the validity (in seconds) of the security token. The minimum value is 900 seconds (15 minutes), and the maximum value is 3,600 seconds (60 minutes); the default value is 3,600 seconds, if not specified.
Run the following command in the AWS CLI to create a role alias. Use the credentials of the user to whom you have given the iam:PassRole permission.
You created and registered a certificate with AWS IoT earlier for successful authentication of your device. Now, you need to create and attach a policy to the certificate to authorize the request for the security token.
Let’s say you want to allow a thing to get credentials for the role alias, Thermostat-dynamodb-access-role-alias, with thing owner Alice, thing type thermostat, and the thing attached to a principal. The following policy, with thing attributes as policy variables, achieves these requirements. After this step, I explain more about using thing attributes as policy variables. Put the policy in a text document, and save it with the name, alicethermostatpolicy.json.
If the attach-policy command succeeds, the output is empty.
You have completed all the necessary steps to request an AWS security token from the credentials provider!
Using thing attributes as policy variables
Before I show how to request a security token, I want to explain more about how to use thing attributes as policy variables and the advantage of using them. As a prerequisite, a device must provide a thing name in the credentials provider request.
Thing substitution variables in AWS IoT policies
AWS IoT Simplified Permission Management allows you to associate a connection with a specific thing, and allow the thing name, thing type, and other thing attributes to be available as substitution variables in AWS IoT policies. You can write a generic AWS IoT policy as in alicethermostatpolicy.json in Step 5, attach it to multiple certificates, and authorize the connection as a thing. For example, you could attach alicethermostatpolicy.json to certificates corresponding to each of the thermostats you have that you want to assume the role alias, Thermostat-dynamodb-access-role-alias, and allow operations only on the table with the name that matches the thing name. For more information, see the full list of thing policy variables.
Thing substitution variables in IAM policies
You also can use the following three substitution variables in the IAM role’s access policy (I used credentials-iot:ThingName in accesspolicyfordynamodb.json in Step 3):
credentials-iot:ThingName
credentials-iot:ThingTypeName
credentials-iot:AwsCertificateId
When the device provides the thing name in the request, the credentials provider fetches these three variables from the database and adds them as context variables to the security token. When the device uses the token to access DynamoDB, the variables in the role’s access policy are replaced with the corresponding values in the security token. Note that you also can use credentials-iot:AwsCertificateId as a policy variable; AWS IoT returns certificateId during registration.
6. Request a security token
Make an HTTPS request to the credentials provider to fetch a security token. You have to supply the following information:
Certificate and key pair: Because this is an HTTP request over TLS mutual authentication, you have to provide the certificate and the corresponding key pair to your client while making the request. Use the same certificate and key pair that you used during certificate registration with AWS IoT.
RoleAlias: Provide the role alias (in this example, Thermostat-dynamodb-access-role-alias) to be assumed in the request.
ThingName: Provide the thing name that you created earlier in the AWS IoT thing registry database. This is passed as a header with the name, x-amzn-iot-thingname. Note that the thing name is mandatory only if you have thing attributes as policy variables in AWS IoT or IAM policies.
Run the following command in the AWS CLI to obtain your AWS account-specific endpoint for the credentials provider. See the DescribeEndpoint API documentation for further details.
Note that if you are on Mac OS X, you need to export your certificate to a .pfx or .p12 file before you can pass it in the https request. Use OpenSSL with the following command to convert the device certificate from .pem to .pfx format. Remember the password because you will need it subsequently in a curl command.
Now, make an HTTPS request to the credentials provider to fetch a security token. You may use your preferred HTTP client for the request. I use curl in the following examples.
This command returns a security token object that has an accessKeyId, a secretAccessKey, a sessionToken, and an expiration. The following is sample output of the curl command.
Create a DynamoDB table called MyHomeThermostat in your AWS account. You will have to choose the hash (partition key) and the range (sort key) while creating the table to uniquely identify a record. Make the hash the serial_number of the thermostat and the range the timestamp of the record. Create a text file with the following JSON to put a temperature and humidity record in the table. Name the file, item.json.
You can use the accessKeyId, secretAccessKey, and sessionToken retrieved from the output of the curl command to sign a request that writes the temperature and humidity record to the DynamoDB table. Use the following commands to accomplish this.
In this blog post, I demonstrated how to retrieve a security token by using an X.509 certificate and then writing an item to a DynamoDB table by using the security token. Similarly, you could run applications on surveillance cameras or sensor devices that exchange the X.509 certificate for an AWS security token and use the token to upload video streams to Amazon Kinesis or telemetry data to Amazon CloudWatch.
If you have comments about this blog post, submit them in the “Comments” section below. If you have questions about or issues implementing this solution, start a new thread on the AWS IoT forum.
Security updates have been issued by Debian (libreoffice and mysql-5.5), Fedora (corosync), Oracle (java-1.8.0-openjdk), Red Hat (java-1.8.0-openjdk), Scientific Linux (java-1.8.0-openjdk), and Ubuntu (openssl).
Security updates have been issued by Debian (freeplane and jruby), Fedora (kernel and python-bleach), Gentoo (evince, gdk-pixbuf, and ncurses), openSUSE (kernel), Oracle (gcc, glibc, kernel, krb5, ntp, openssh, openssl, policycoreutils, qemu-kvm, and xdg-user-dirs), Red Hat (corosync, glusterfs, kernel, and kernel-rt), SUSE (openssl), and Ubuntu (openssl and perl).
Security updates have been issued by Arch Linux (lib32-openssl and zsh), Debian (patch, perl, ruby-loofah, squirrelmail, tiff, and tiff3), Fedora (gnupg2), Gentoo (go), Mageia (firefox, flash-player-plugin, nxagent, puppet, python-paramiko, samba, and thunderbird), Red Hat (flash-plugin), Scientific Linux (python-paramiko), and Ubuntu (patch, perl, and ruby).
Security updates have been issued by Arch Linux (apache), openSUSE (libvirt, openssl, policycoreutils, and zziplib), Oracle (firefox and python-paramiko), and Red Hat (python-paramiko).
Security updates have been issued by CentOS (libvorbis and thunderbird), Debian (pjproject), Fedora (compat-openssl10, java-1.8.0-openjdk-aarch32, libid3tag, python-pip, python3, and python3-docs), Gentoo (ZendFramework), Oracle (thunderbird), Red Hat (ansible, gcc, glibc, golang, kernel, kernel-alt, kernel-rt, krb5, kubernetes, libvncserver, libvorbis, ntp, openssh, openssl, pcs, policycoreutils, qemu-kvm, and xdg-user-dirs), SUSE (openssl and openssl1), and Ubuntu (python-crypto, ubuntu-release-upgrader, and wayland).
Security updates have been issued by Arch Linux (openssl and zziplib), Debian (ldap-account-manager, ming, python-crypto, sam2p, sdl-image1.2, and squirrelmail), Fedora (bchunk, koji, libidn, librelp, nodejs, and php), Gentoo (curl, dhcp, libvirt, mailx, poppler, qemu, and spice-vdagent), Mageia (389-ds-base, aubio, cfitsio, libvncserver, nmap, and ntp), openSUSE (GraphicsMagick, ImageMagick, spice-gtk, and wireshark), Oracle (kubernetes), Slackware (patch), and SUSE (apache2 and openssl).
Today we’re launching a new feature for AWS Certificate Manager (ACM), Private Certificate Authority (CA). This new service allows ACM to act as a private subordinate CA. Previously, if a customer wanted to use private certificates, they needed specialized infrastructure and security expertise that could be expensive to maintain and operate. ACM Private CA builds on ACM’s existing certificate capabilities to help you easily and securely manage the lifecycle of your private certificates with pay as you go pricing. This enables developers to provision certificates in just a few simple API calls while administrators have a central CA management console and fine grained access control through granular IAM policies. ACM Private CA keys are stored securely in AWS managed hardware security modules (HSMs) that adhere to FIPS 140-2 Level 3 security standards. ACM Private CA automatically maintains certificate revocation lists (CRLs) in Amazon Simple Storage Service (S3) and lets administrators generate audit reports of certificate creation with the API or console. This service is packed full of features so let’s jump in and provision a CA.
Provisioning a Private Certificate Authority (CA)
First, I’ll navigate to the ACM console in my region and select the new Private CAs section in the sidebar. From there I’ll click Get Started to start the CA wizard. For now, I only have the option to provision a subordinate CA so we’ll select that and use my super secure desktop as the root CA and click Next. This isn’t what I would do in a production setting but it will work for testing out our private CA.
Now, I’ll configure the CA with some common details. The most important thing here is the Common Name which I’ll set as secure.internal to represent my internal domain.
Now I need to choose my key algorithm. You should choose the best algorithm for your needs but know that ACM has a limitation today that it can only manage certificates that chain up to to RSA CAs. For now, I’ll go with RSA 2048 bit and click Next.
In this next screen, I’m able to configure my certificate revocation list (CRL). CRLs are essential for notifying clients in the case that a certificate has been compromised before certificate expiration. ACM will maintain the revocation list for me and I have the option of routing my S3 bucket to a custome domain. In this case I’ll create a new S3 bucket to store my CRL in and click Next.
Finally, I’ll review all the details to make sure I didn’t make any typos and click Confirm and create.
A few seconds later and I’m greeted with a fancy screen saying I successfully provisioned a certificate authority. Hooray! I’m not done yet though. I still need to activate my CA by creating a certificate signing request (CSR) and signing that with my root CA. I’ll click Get started to begin that process.
Now I’ll copy the CSR or download it to a server or desktop that has access to my root CA (or potentially another subordinate – so long as it chains to a trusted root for my clients).
Now I can use a tool like openssl to sign my cert and generate the certificate chain.
$openssl ca -config openssl_root.cnf -extensions v3_intermediate_ca -days 3650 -notext -md sha256 -in csr/CSR.pem -out certs/subordinate_cert.pem
Using configuration from openssl_root.cnf
Enter pass phrase for /Users/randhunt/dev/amzn/ca/private/root_private_key.pem:
Check that the request matches the signature
Signature ok
The Subject's Distinguished Name is as follows
stateOrProvinceName :ASN.1 12:'Washington'
localityName :ASN.1 12:'Seattle'
organizationName :ASN.1 12:'Amazon'
organizationalUnitName:ASN.1 12:'Engineering'
commonName :ASN.1 12:'secure.internal'
Certificate is to be certified until Mar 31 06:05:30 2028 GMT (3650 days)
Sign the certificate? [y/n]:y
1 out of 1 certificate requests certified, commit? [y/n]y
Write out database with 1 new entries
Data Base Updated
After that I’ll copy my subordinate_cert.pem and certificate chain back into the console. and click Next.
Finally, I’ll review all the information and click Confirm and import. I should see a screen like the one below that shows my CA has been activated successfully.
Now that I have a private CA we can provision private certificates by hopping back to the ACM console and creating a new certificate. After clicking create a new certificate I’ll select the radio button Request a private certificate then I’ll click Request a certificate.
From there it’s just similar to provisioning a normal certificate in ACM.
Now I have a private certificate that I can bind to my ELBs, CloudFront Distributions, API Gateways, and more. I can also export the certificate for use on embedded devices or outside of ACM managed environments.
Available Now ACM Private CA is a service in and of itself and it is packed full of features that won’t fit into a blog post. I strongly encourage the interested readers to go through the developer guide and familiarize themselves with certificate based security. ACM Private CA is available in in US East (N. Virginia), US East (Ohio), US West (Oregon), Asia Pacific (Singapore), Asia Pacific (Sydney), Asia Pacific (Tokyo), Canada (Central), EU (Frankfurt) and EU (Ireland). Private CAs cost $400 per month (prorated) for each private CA. You are not charged for certificates created and maintained in ACM but you are charged for certificates where you have access to the private key (exported or created outside of ACM). The pricing per certificate is tiered starting at $0.75 per certificate for the first 1000 certificates and going down to $0.001 per certificate after 10,000 certificates.
I’m excited to see administrators and developers take advantage of this new service. As always please let us know what you think of this service on Twitter or in the comments below.
<p>Let’s Encrypt recently <a href="https://community.letsencrypt.org/t/signed-certificate-timestamps-embedded-in-certificates/57187">launched SCT embedding in certificates</a>. This feature allows browsers to check that a certificate was submitted to a <a href="https://en.wikipedia.org/wiki/Certificate_Transparency">Certificate Transparency</a> log. As part of the launch, we did a thorough review that the encoding of Signed Certificate Timestamps (SCTs) in our certificates matches the relevant specifications. In this post, I’ll dive into the details. You’ll learn more about X.509, ASN.1, DER, and TLS encoding, with references to the relevant RFCs.</p>
<p>Certificate Transparency offers three ways to deliver SCTs to a browser: In a TLS extension, in stapled OCSP, or embedded in a certificate. We chose to implement the embedding method because it would just work for Let’s Encrypt subscribers without additional work. In the SCT embedding method, we submit a “precertificate” with a <a href="#poison">poison extension</a> to a set of CT logs, and get back SCTs. We then issue a real certificate based on the precertificate, with two changes: The poison extension is removed, and the SCTs obtained earlier are added in another extension.</p>
<p>Given a certificate, let’s first look for the SCT list extension. According to CT (<a href="https://tools.ietf.org/html/rfc6962#section-3.3">RFC 6962 section 3.3</a>), the extension OID for a list of SCTs is <code>1.3.6.1.4.1.11129.2.4.2</code>. An <a href="http://www.hl7.org/Oid/information.cfm">OID (object ID)</a> is a series of integers, hierarchically assigned and globally unique. They are used extensively in X.509, for instance to uniquely identify extensions.</p>
<p>We can <a href="https://acme-v01.api.letsencrypt.org/acme/cert/031f2484307c9bc511b3123cb236a480d451">download an example certificate</a>, and view it using OpenSSL (if your OpenSSL is old, it may not display the detailed information):</p>
<pre><code>$ openssl x509 -noout -text -inform der -in Downloads/031f2484307c9bc511b3123cb236a480d451 … CT Precertificate SCTs: Signed Certificate Timestamp: Version : v1(0) Log ID : DB:74:AF:EE:CB:29:EC:B1:FE:CA:3E:71:6D:2C:E5:B9: AA:BB:36:F7:84:71:83:C7:5D:9D:4F:37:B6:1F:BF:64 Timestamp : Mar 29 18:45:07.993 2018 GMT Extensions: none Signature : ecdsa-with-SHA256 30:44:02:20:7E:1F:CD:1E:9A:2B:D2:A5:0A:0C:81:E7: 13:03:3A:07:62:34:0D:A8:F9:1E:F2:7A:48:B3:81:76: 40:15:9C:D3:02:20:65:9F:E9:F1:D8:80:E2:E8:F6:B3: 25:BE:9F:18:95:6D:17:C6:CA:8A:6F:2B:12:CB:0F:55: FB:70:F7:59:A4:19 Signed Certificate Timestamp: Version : v1(0) Log ID : 29:3C:51:96:54:C8:39:65:BA:AA:50:FC:58:07:D4:B7: 6F:BF:58:7A:29:72:DC:A4:C3:0C:F4:E5:45:47:F4:78 Timestamp : Mar 29 18:45:08.010 2018 GMT Extensions: none Signature : ecdsa-with-SHA256 30:46:02:21:00:AB:72:F1:E4:D6:22:3E:F8:7F:C6:84: 91:C2:08:D2:9D:4D:57:EB:F4:75:88:BB:75:44:D3:2F: 95:37:E2:CE:C1:02:21:00:8A:FF:C4:0C:C6:C4:E3:B2: 45:78:DA:DE:4F:81:5E:CB:CE:2D:57:A5:79:34:21:19: A1:E6:5B:C7:E5:E6:9C:E2 </code></pre>
<p>Now let’s go a little deeper. How is that extension represented in the certificate? Certificates are expressed in <a href="https://en.wikipedia.org/wiki/Abstract_Syntax_Notation_One">ASN.1</a>, which generally refers to both a language for expressing data structures and a set of formats for encoding them. The most common format, <a href="https://en.wikipedia.org/wiki/X.690#DER_encoding">DER</a>, is a tag-length-value format. That is, to encode an object, first you write down a tag representing its type (usually one byte), then you write down a number expressing how long the object is, then you write down the object contents. This is recursive: An object can contain multiple objects within it, each of which has its own tag, length, and value.</p>
<p>One of the cool things about DER and other tag-length-value formats is that you can decode them to some degree without knowing what they mean. For instance, I can tell you that 0x30 means the data type “SEQUENCE” (a struct, in ASN.1 terms), and 0x02 means “INTEGER”, then give you this hex byte sequence to decode:</p>
<pre><code>30 06 02 01 03 02 01 0A </code></pre>
<p>You could tell me right away that decodes to:</p>
<p>Try it yourself with this great <a href="https://lapo.it/asn1js/#300602010302010A">JavaScript ASN.1 decoder</a>. However, you wouldn’t know what those integers represent without the corresponding ASN.1 schema (or “module”). For instance, if you knew that this was a piece of DogData, and the schema was:</p>
<pre><code>DogData ::= SEQUENCE { legs INTEGER, cutenessLevel INTEGER } </code></pre>
<p>You’d know this referred to a three-legged dog with a cuteness level of 10.</p>
<p>We can take some of this knowledge and apply it to our certificates. As a first step, convert the above certificate to hex with <code>xxd -ps < Downloads/031f2484307c9bc511b3123cb236a480d451</code>. You can then copy and paste the result into <a href="https://lapo.it/asn1js">lapo.it/asn1js</a> (or use <a href="https://lapo.it/asn1js/#3082062F30820517A0030201020212031F2484307C9BC511B3123CB236A480D451300D06092A864886F70D01010B0500304A310B300906035504061302555331163014060355040A130D4C6574277320456E6372797074312330210603550403131A4C6574277320456E637279707420417574686F72697479205833301E170D3138303332393137343530375A170D3138303632373137343530375A302D312B3029060355040313223563396137662E6C652D746573742E686F66666D616E2D616E64726577732E636F6D30820122300D06092A864886F70D01010105000382010F003082010A0282010100BCEAE8F504D9D91FCFC69DB943254A7FED7C6A3C04E2D5C7DDD010CBBC555887274489CA4F432DCE6D7AB83D0D7BDB49C466FBCA93102DC63E0EB1FB2A0C50654FD90B81A6CB357F58E26E50F752BF7BFE9B56190126A47409814F59583BDD337DFB89283BE22E81E6DCE13B4E21FA6009FC8A7F903A17AB05C8BED85A715356837E849E571960A8999701EAE9CE0544EAAB936B790C3C35C375DB18E9AA627D5FA3579A0FB5F8079E4A5C9BE31C2B91A7F3A63AFDFEDB9BD4EA6668902417D286BE4BBE5E43CD9FE1B8954C06F21F5C5594FD3AB7D7A9CBD6ABF19774D652FD35C5718C25A3BA1967846CED70CDBA95831CF1E09FF7B8014E63030CE7A776750203010001A382032A30820326300E0603551D0F0101FF0404030205A0301D0603551D250416301406082B0601050507030106082B06010505070302300C0603551D130101FF04023000301D0603551D0E041604148B3A21ABADF50C4B30DCCD822724D2C4B9BA29E3301F0603551D23041830168014A84A6A63047DDDBAE6D139B7A64565EFF3A8ECA1306F06082B0601050507010104633061302E06082B060105050730018622687474703A2F2F6F6373702E696E742D78332E6C657473656E63727970742E6F7267302F06082B060105050730028623687474703A2F2F636572742E696E742D78332E6C657473656E63727970742E6F72672F302D0603551D110426302482223563396137662E6C652D746573742E686F66666D616E2D616E64726577732E636F6D3081FE0603551D200481F63081F33008060667810C0102013081E6060B2B0601040182DF130101013081D6302606082B06010505070201161A687474703A2F2F6370732E6C657473656E63727970742E6F72673081AB06082B0601050507020230819E0C819B54686973204365727469666963617465206D6179206F6E6C792062652072656C6965642075706F6E2062792052656C79696E67205061727469657320616E64206F6E6C7920696E206163636F7264616E636520776974682074686520436572746966696361746520506F6C69637920666F756E642061742068747470733A2F2F6C657473656E63727970742E6F72672F7265706F7369746F72792F30820104060A2B06010401D6790204020481F50481F200F0007500DB74AFEECB29ECB1FECA3E716D2CE5B9AABB36F7847183C75D9D4F37B61FBF64000001627313EB19000004030046304402207E1FCD1E9A2BD2A50A0C81E713033A0762340DA8F91EF27A48B3817640159CD30220659FE9F1D880E2E8F6B325BE9F18956D17C6CA8A6F2B12CB0F55FB70F759A419007700293C519654C83965BAAA50FC5807D4B76FBF587A2972DCA4C30CF4E54547F478000001627313EB2A0000040300483046022100AB72F1E4D6223EF87FC68491C208D29D4D57EBF47588BB7544D32F9537E2CEC10221008AFFC40CC6C4E3B24578DADE4F815ECBCE2D57A579342119A1E65BC7E5E69CE2300D06092A864886F70D01010B0500038201010095F87B663176776502F792DDD232C216943C7803876FCBEB46393A36354958134482E0AFEED39011618327C2F0203351758FEB420B73CE6C797B98F88076F409F3903F343D1F5D9540F41EF47EB39BD61B62873A44F00B7C8B593C6A416458CF4B5318F35235BC88EABBAA34F3E3F81BD3B047E982EE1363885E84F76F2F079F2B6EEB4ECB58EFE74C8DE7D54DE5C89C4FB5BB0694B837BD6F02BAFD5A6C007D1B93D25007BDA9B2BDBF82201FE1B76B628CE34E2D974E8E623EC57A5CB53B435DD4B9993ADF6BA3972F2B29D259594A94E17BBE06F34AAE5CF0F50297548C4DFFC5566136F78A3D3B324EAE931A14EB6BE6DA1D538E48CF077583C67B52E7E8">this handy link</a>). You can also run <code>openssl asn1parse -i -inform der -in Downloads/031f2484307c9bc511b3123cb236a480d451</code> to use OpenSSL’s parser, which is less easy to use in some ways, but easier to copy and paste.</p>
<p>In the decoded data, we can find the OID <code>1.3.6.1.4.1.11129.2.4.2</code>, indicating the SCT list extension. Per <a href="https://tools.ietf.org/html/rfc5280#page-17">RFC 5280, section 4.1</a>, an extension is defined:</p>
<pre><code>Extension ::= SEQUENCE { extnID OBJECT IDENTIFIER, critical BOOLEAN DEFAULT FALSE, extnValue OCTET STRING — contains the DER encoding of an ASN.1 value — corresponding to the extension type identified — by extnID } </code></pre>
<p>We’ve found the <code>extnID</code>. The “critical” field is omitted because it has the default value (false). Next up is the <code>extnValue</code>. This has the type <code>OCTET STRING</code>, which has the tag “0x04”. <code>OCTET STRING</code> means “here’s a bunch of bytes!” In this case, as described by the spec, those bytes happen to contain more DER. This is a fairly common pattern in X.509 to deal with parameterized data. For instance, this allows defining a structure for extensions without knowing ahead of time all the structures that a future extension might want to carry in its value. If you’re a C programmer, think of it as a <code>void*</code> for data structures. If you prefer Go, think of it as an <code>interface{}</code>.</p>
<p>That’s tag “0x04”, meaning <code>OCTET STRING</code>, followed by “0x81 0xF5”, meaning “this string is 245 bytes long” (the 0x81 prefix is part of <a href="#variable-length">variable length number encoding</a>).</p>
<p>According to <a href="https://tools.ietf.org/html/rfc6962#section-3.3">RFC 6962, section 3.3</a>, “obtained SCTs can be directly embedded in the final certificate, by encoding the SignedCertificateTimestampList structure as an ASN.1 <code>OCTET STRING</code> and inserting the resulting data in the TBSCertificate as an X.509v3 certificate extension”</p>
<p>So, we have an <code>OCTET STRING</code>, all’s good, right? Except if you remove the tag and length from extnValue to get its value, you’re left with:</p>
<p>There’s that “0x04” tag again, but with a shorter length. Why do we nest one <code>OCTET STRING</code> inside another? It’s because the contents of extnValue are required by RFC 5280 to be valid DER, but a SignedCertificateTimestampList is not encoded using DER (more on that in a minute). So, by RFC 6962, a SignedCertificateTimestampList is wrapped in an <code>OCTET STRING</code>, which is wrapped in another <code>OCTET STRING</code> (the extnValue).</p>
<p>Once we decode that second <code>OCTET STRING</code>, we’re left with the contents:</p>
<pre><code>00F0007500DB74AFEEC… </code></pre>
<p>“0x00” isn’t a valid tag in DER. What is this? It’s TLS encoding. This is defined in <a href="https://tools.ietf.org/html/rfc5246#section-4">RFC 5246, section 4</a> (the TLS 1.2 RFC). TLS encoding, like ASN.1, has both a way to define data structures and a way to encode those structures. TLS encoding differs from DER in that there are no tags, and lengths are only encoded when necessary for variable-length arrays. Within an encoded structure, the type of a field is determined by its position, rather than by a tag. This means that TLS-encoded structures are more compact than DER structures, but also that they can’t be processed without knowing the corresponding schema. For instance, here’s the top-level schema from <a href="https://tools.ietf.org/html/rfc6962#section-3.3">RFC 6962, section 3.3</a>:</p>
<pre><code> The contents of the ASN.1 OCTET STRING embedded in an OCSP extension or X509v3 certificate extension are as follows:
Here, "SerializedSCT" is an opaque byte string that contains the serialized TLS structure. </code></pre>
<p>Right away, we’ve found one of those variable-length arrays. The length of such an array (in bytes) is always represented by a length field just big enough to hold the max array size. The max size of an <code>sct_list</code> is 65535 bytes, so the length field is two bytes wide. Sure enough, those first two bytes are “0x00 0xF0”, or 240 in decimal. In other words, this <code>sct_list</code> will have 240 bytes. We don’t yet know how many SCTs will be in it. That will become clear only by continuing to parse the encoded data and seeing where each struct ends (spoiler alert: there are two SCTs!).</p>
<p>Now we know the first SerializedSCT starts with <code>0075…</code>. SerializedSCT is itself a variable-length field, this time containing <code>opaque</code> bytes (much like <code>OCTET STRING</code> back in the ASN.1 world). Like SignedCertificateTimestampList, it has a max size of 65535 bytes, so we pull off the first two bytes and discover that the first SerializedSCT is 0x0075 (117 decimal) bytes long. Here’s the whole thing, in hex:</p>
<p>This can be decoded using the TLS encoding struct defined in <a href="https://tools.ietf.org/html/rfc6962#page-13">RFC 6962, section 3.2</a>:</p>
<pre><code>enum { v1(0), (255) } Version;
struct { opaque key_id[32]; } LogID;
opaque CtExtensions<0..2^16-1>; …
struct { Version sct_version; LogID id; uint64 timestamp; CtExtensions extensions; digitally-signed struct { Version sct_version; SignatureType signature_type = certificate_timestamp; uint64 timestamp; LogEntryType entry_type; select(entry_type) { case x509_entry: ASN.1Cert; case precert_entry: PreCert; } signed_entry; CtExtensions extensions; }; } SignedCertificateTimestamp; </code></pre>
<p>Breaking that down:</p>
<pre><code># Version sct_version v1(0) 00 # LogID id (aka opaque key_id[32]) DB74AFEECB29ECB1FECA3E716D2CE5B9AABB36F7847183C75D9D4F37B61FBF64 # uint64 timestamp (milliseconds since the epoch) 000001627313EB19 # CtExtensions extensions (zero-length array) 0000 # digitally-signed struct 04030046304402207E1FCD1E9A2BD2A50A0C81E713033A0762340DA8F91EF27A48B3817640159CD30220659FE9F1D880E2E8F6B325BE9F18956D17C6CA8A6F2B12CB0F55FB70F759A419 </code></pre>
<p>To understand the “digitally-signed struct,” we need to turn back to <a href="https://tools.ietf.org/html/rfc5246#section-4.7">RFC 5246, section 4.7</a>. It says:</p>
<pre><code>A digitally-signed element is encoded as a struct DigitallySigned:
<p>We have “0x0403”, which corresponds to sha256(4) and ecdsa(3). The next two bytes, “0x0046”, tell us the length of the “opaque signature” field, 70 bytes in decimal. To decode the signature, we reference <a href="https://tools.ietf.org/html/rfc4492#page-20">RFC 4492 section 5.4</a>, which says:</p>
<pre><code>The digitally-signed element is encoded as an opaque vector <0..2^16-1>, the contents of which are the DER encoding corresponding to the following ASN.1 notation.
Ecdsa-Sig-Value ::= SEQUENCE { r INTEGER, s INTEGER } </code></pre>
<p>Having dived through two layers of TLS encoding, we are now back in ASN.1 land! We <a href="https://lapo.it/asn1js/#304402207E1FCD1E9A2BD2A50A0C81E713033A0762340DA8F91EF27A48B3817640159CD30220659FE9F1D880E2E8F6B325BE9F18956D17C6CA8A6F2B12CB0F55FB70F759A419">decode</a> the remaining bytes into a SEQUENCE containing two INTEGERS. And we’re done! Here’s the whole extension decoded:</p>
<p>One surprising thing you might notice: In the first SCT, <code>r</code> and <code>s</code> are twenty bytes long. In the second SCT, they are both twenty-one bytes long, and have a leading zero. Integers in DER are two’s complement, so if the leftmost bit is set, they are interpreted as negative. Since <code>r</code> and <code>s</code> are positive, if the leftmost bit would be a 1, an extra byte has to be added so that the leftmost bit can be 0.</p>
<p>This is a little taste of what goes into encoding a certificate. I hope it was informative! If you’d like to learn more, I recommend “<a href="http://luca.ntop.org/Teaching/Appunti/asn1.html">A Layman’s Guide to a Subset of ASN.1, BER, and DER</a>.”</p>
<p><a name="poison"></a>Footnote 1: A “poison extension” is defined by <a href="https://tools.ietf.org/html/rfc6962#section-3.1">RFC 6962 section 3.1</a>:</p>
<pre><code>The Precertificate is constructed from the certificate to be issued by adding a special critical poison extension (OID `1.3.6.1.4.1.11129.2.4.3`, whose extnValue OCTET STRING contains ASN.1 NULL data (0x05 0x00)) </code></pre>
<p>In other words, it’s an empty extension whose only purpose is to ensure that certificate processors will not accept precertificates as valid certificates. The specification ensures this by setting the “critical” bit on the extension, which ensures that code that doesn’t recognize the extension will reject the whole certificate. Code that does recognize the extension specifically as poison will also reject the certificate.</p>
<p><a name="variable-length"></a>Footnote 2: Lengths from 0-127 are represented by a single byte (short form). To express longer lengths, more bytes are used (long form). The high bit (0x80) on the first byte is set to distinguish long form from short form. The remaining bits are used to express how many more bytes to read for the length. For instance, 0x81F5 means “this is long form because the length is greater than 127, but there’s still only one byte of length (0xF5) to decode.”</p>
Security updates have been issued by Debian (apache2, ldap-account-manager, and openjdk-7), Fedora (libuv and nodejs), Gentoo (glibc and libxslt), Mageia (acpica-tools, openssl, and php), SUSE (clamav, coreutils, and libvirt), and Ubuntu (kernel, libraw, linux-hwe, linux-gcp, linux-oem, and python-crypto).
Security updates have been issued by Debian (memcached, openssl, openssl1.0, php5, thunderbird, and xerces-c), Fedora (python-notebook, slf4j, and unboundid-ldapsdk), Mageia (kernel, libvirt, mailman, and net-snmp), openSUSE (aubio, cacti, cacti-spine, firefox, krb5, LibVNCServer, links, memcached, and tomcat), Slackware (ruby), SUSE (kernel and python-paramiko), and Ubuntu (intel-microcode).
Security updates have been issued by Debian (drupal7, graphicsmagick, libdatetime-timezone-perl, thunderbird, and tzdata), Fedora (gd, libtiff, mozjs52, and nmap), Gentoo (thunderbird), Red Hat (openstack-tripleo-common, openstack-tripleo-heat-templates and sensu), SUSE (kernel, libvirt, and memcached), and Ubuntu (icu, librelp, openssl, and thunderbird).
AWS Key Management Service (KMS) now uses FIPS 140-2 validated hardware security modules (HSM) and supports FIPS 140-2 validated endpoints, which provide independent assurances about the confidentiality and integrity of your keys. Having additional third-party assurances about the keys you manage in AWS KMS can make it easier to use the service for regulated workloads.
AWS KMS HSMs are designed so that no one, not even AWS employees, can retrieve your plaintext keys. The service uses the FIPS 140-2 validated HSMs to protect your keys when you request the service to create keys on your behalf or when you import them. Your plaintext keys are never written to disk and are only used in volatile memory of the HSMs while performing your requested cryptographic operation. Furthermore, AWS KMS keys are never transmitted outside the AWS Regions they were created. And HSM firmware updates are controlled by multi-party access that is audited and reviewed by an independent group within AWS.
AWS KMS HSMs are validated at level 2 overall and at level 3 in the following areas:
Cryptographic Module Specification
Roles, Services, and Authentication
Physical Security
Design Assurance
You can also make AWS KMS requests to API endpoints that terminate TLS sessions using a FIPS 140-2 validated cryptographic software module. To do so, connect to the unique FIPS 140-2 validated HTTPS endpoints in the AWS KMS requests made from your applications. AWS KMS FIPS 140-2 validated HTTPS endpoints are powered by the OpenSSL FIPS Object Module. FIPS 140-2 validated API endpoints are available in all commercial regions where AWS KMS is available.
Security updates have been issued by Debian (quagga), Mageia (freetype2, kernel-linus, and kernel-tmb), openSUSE (chromium, GraphicsMagick, mupdf, openssl-steam, and xen), Slackware (irssi), SUSE (glibc and quagga), and Ubuntu (quagga).
The collective thoughts of the interwebz
By continuing to use the site, you agree to the use of cookies. more information
The cookie settings on this website are set to "allow cookies" to give you the best browsing experience possible. If you continue to use this website without changing your cookie settings or you click "Accept" below then you are consenting to this.