Tag Archives: retrofit

Super 8 camera goes digital with Raspberry Pi

Post Syndicated from Ashley Whittaker original https://www.raspberrypi.org/blog/super-8-camera-goes-digital-with-raspberry-pi/

Clem from element14 found a discarded Super 8 camera and wanted to channel his inner filmmaking hipster, but he didn’t want to spend tons of money on analogue film, so he digitised the camera with Raspberry Pi.

Clem recreated an original Super 8 cartridge and packed it with tiny hardware to do the job of the 8mm analogue film digitally. Doing it this way also means you can just drop the new cartridge into any Super 8 camera and use it as a digital device. It also means you don’t need to cut up any part of your gorgeous retro device in the process.

super 8 camera
Ain’t she a beauty?

Hardware

  • 3D-printed Super 8 cartridge

You can download the files for the 3D-printed case and buttons from the original project post.

Tight spaces, lens alignment and controls

Getting the Raspberry Pi camera lens lined up perfectly with the original lens was the hardest part of this build. But using our tiny camera meant that the lens could be placed at exactly the right angle, because it doesn’t have to be fixed to the PCB.

Super 8 cartridges are pretty small, so the super compact Raspberry Pi 3A+ was just the right size for this project, especially as Clem needed wireless connectivity. He had to get the power supply, Raspberry Pi brain, camera, and all the wires into a tight space.

super 8 camera project
Raspberry Pi 3A+ is small but it still takes up half the space in the tiny Super 8 cartridge

Clem wanted to be able to walk around and use the Super 8 as originally intended, so an external screen with a keyboard and a mouse wouldn’t have worked to control the device. Instead, he rigged up some buttons and an LED to the Raspberry Pi’s GPIO ports. He explains it all from this point in the build video.

We love that the final output looks just like the kind of films the original camera would have captured back in the day.

The post Super 8 camera goes digital with Raspberry Pi appeared first on Raspberry Pi.

Raspberry Pi makes your retro analogue camera digital

Post Syndicated from Ashley Whittaker original https://www.raspberrypi.org/blog/raspberry-pi-makes-your-retro-analogue-camera-digital/

Befinitiv has built a custom film cartridge, using a Raspberry Pi Zero W, that turned their gorgeous old analogue camera into a digital one, and enabled it to take digital photos, videos, and even wirelessly live stream to the Internet.

A quick, simple build video for a smooth-running project

The analogue camera they used in the build was considered state-of-the-art around fifty years ago, but it lives on to capture another day, all thanks to a tiny computer we made just a few years ago.

analogue to digital camera original model hero shot
It’s a beauty

The maker replaced the old-fashioned camera film roll with a digital cartridge housing a tiny Raspberry Pi camera — with the lens removed — and a Raspberry Pi Zero W. The housing was designed to fit in the back of the camera where original photographers would have clipped the film roll in, and then spooled it over.

analogue to digital camera film with raspberry pi stuff in
Designed to fit

Along with the camera and the Raspberry Pi Zero W, the custom-built cartridge also houses a LiPo battery and a DC to DC converter, used to boost the power supply to the Raspberry Pi up to +5V.

analogue to digital camera insides
Teeny tech packed into a teeny space

The whole project took just two hours to complete from start to finish, everything worked first time. Befinitiv had wanted to use the Raspberry Pi High Quality Camera, but space inside the housing was just too tight. Maybe next time? Perhaps they can use one of those giant ancient cameras, where the photographer had to flip a blanket over their head, all while holding a stick in the air with the flash.

analogue to digital camera looking out the window
This old analogue camera is now fully digital

More retro projects from the maker

Fancy more where this retrofit goodness came from? The maker has also upgraded a flip phone from the year 2000. Oh! I just realised the year 2000 was more than 20 years ago. Watch the build video while I go and burn all of my skater boy jeans and slogan t-shirts…

Don’t let your old flip phone die

They also did something weird but cool sounding with this noisy teletype machine. Is it a teletype machine? What’s a teletype machine? I saw a fax machine once..?

I know EXACTLY what a “teletype message” is…

The post Raspberry Pi makes your retro analogue camera digital appeared first on Raspberry Pi.

Collection of Raspberry Pi retro tech projects

Post Syndicated from Ashley Whittaker original https://www.raspberrypi.org/blog/collection-of-raspberry-pi-retro-tech-projects/

During lockdown, Stuart (aka JamHamster) wanted to keep busy whilst between jobs, and ended up building a mini empire of rescued retro systems. Cassette tapes, Game Boys, and floppy disks were all among the treasures he reclaimed.

All up and running on my 'shelf of deceit' where nothing is what it seems
Stuart calls this the “shelf of deceit” – where nothing is what it appears to be

Cassette tape starter

Stuart got started by fitting a TZXDuino tape loader into a cassette tape shell. Remember those? This allows him to load software onto a ZX Spectrum by inserting a tape into the tape deck, just as Nature intended. He has since improved the design (check out V2 on YouTube) and carefully documented it on GitHub, so people can build their own.

Here’s how the cassette tape project went down

With that first project in the bag and getting attention on a Facebook group (Spectrum for Everyone), Stuart went forth and sourced more retro tech to revive with tiny pieces of new technology.

Twitter lit up for Stuart’s retrofit cassette tape

Enter Raspberry Pi

Then Stuart discovered our tiny computer and realised there was heaps of scope for hiding them inside older tech. Although we can’t quite officially endorse Stuart’s method of “carefully” removing a port on his Raspberry Pi – it’ll void your warranty – we will say that we like people who go about intentionally voiding their warranties. It’s a cool video.

Here's the collection so far and I'm really pleased with how they worked out
You can see all the modern devices labelled alongside the retro tech they’re encased in

He has since created loads of retrofit projects with Raspberry Pi. Let’s take a quick look at a few of them.

Raspberry Pi 3 Game Boy build

Another gem of a build video from JamHamster on YouTube

First up is a Game Boy build with a Raspberry Pi 3 Model A+. Stuart built an aluminium chassis from scrap, and this sandwiches the Raspberry Pi to hold it in place inside the Game Boy enclosure, as well as acting as a heatsink. There’s a grille in the cartridge and he also added four rear buttons. The hardest part of this build, apparently, was soldering the custom HDMI cable.

Better-than-real CRT screen

Stuart liked the look of an old-fashioned CRT (cathode-ray tube) screen for playing retro games on, but they chew through energy and aren’t that portable. So he had the idea to make a space-efficient LCD system that sits on a desktop and just looks like a retro TV.

Wait for the heroes in half-shells at the end

This project features a 3.5-inch screen of the type that’s usually found on a car dashboard to help the driver to reverse. Stuart converted it to 5V, and added a cut-down Raspberry Pi 3 and a custom-machined chassis. A custom-ground curved lens makes it look like a real CRT, and he added ports on the back for two Atari joysticks, as well as an external composite input and USB.

The Pi 'CRT' has two onboard Atari Joystick ports and plenty of connectors for other machines
This Raspberry Pi-powered “CRT” display has two onboard Atari joystick ports and plenty of connectors for other machines

The build process for this project is also documented on Github. Here are some extra pictures.

Sega Game Gear build

Stuart’s sister gave him her Game Gear to fix, but the batteries leaked and killed it so he converted it to a Raspberry Pi 3B portable gaming system. And because it was for his sister, he went all out, spending six weeks refining it.

He also ended up rewriting elements of the Arduino Joystick library for responsiveness and ease of configuration. Here’s the Github link for those interested in that part of the build.

Check out the carnage that Stuart rescued with Raspberry Pi 3B

RetroPie cassette

Stuart’s latest cassette build features a Raspberry Pi Zero running RetroPie. He wanted to make one with a transparent case, so he encased the Raspberry Pi in a heatsink sandwich to hide the wiring. He added a full-size USB port and a 3.5 mm media connector for sound and visuals. Here are some shots of the inside.

I'm really pleased with the 80s green
I love the 80s green

Try new things, expect failure, enjoy the process

There were far too many cracking retro builds for us to list here, so follow Stuart on Twitter @RealJamHamster and subscribe to JamHamster on YouTube to properly check everything out.

They need hefty heatsinks but I like working with metal and had fun with some of the designs
They need hefty heatsinks, but Stuart likes working with metal and had fun with some of the designs

Makers, tinkerers, and crafters don’t always have a practical reason for embarking on projects, and Stuart is no different. Here’s what he had to say about why projects like this make him happy:

“I will be happy to admit that I have no clue what I’m doing most of the time, and I am by no means an expert, but I believe everyone should try new things as you never know what you’ll be good at. 9 out of 10 of my ideas don’t work but that tenth one is generally pretty good. I’ve been between roles during lockdown so I am building these out of scrap metal and whatever I have lying around, which is an extra challenge. My philosophy is to try new things, expect failure, learn to enjoy the process and that it’ll be done when it’s done.”

The post Collection of Raspberry Pi retro tech projects appeared first on Raspberry Pi.

Raspberry Pi turns retro radio into interactive storyteller

Post Syndicated from Ashley Whittaker original https://www.raspberrypi.org/blog/raspberry-pi-turns-retro-radio-into-interactive-storyteller/

8 Bits and a Byte created this voice-controllable, interactive, storytelling device, hidden inside a 1960s radio for extra aesthetic wonderfulness.

A Raspberry Pi 3B works with an AIY HAT, a microphone, and the device’s original speaker to run chatbot and speech-to-text artificial intelligence.

This creature is a Bajazzo TS made by Telefunken some time during the 1960s in West Germany, and this detail inspired the espionage-themed story that 8 Bits and a Byte retrofitted it to tell. Users are intelligence agents whose task is to find the evil Dr Donogood.

The device works like one of those ‘choose your own adventure’ books, asking you a series of questions and offering you several options. The story unfolds according to the options you choose, and leads you to a choice of endings.

In with the new (Raspberry Pi tucked in the lower right corner)

What’s the story?

8 Bits and a Byte designed a decision tree to provide a tight story frame, so users can’t go off on question-asking tangents.

When you see the ‘choose your own adventure’ frame set out like this, you can see how easy it is to create something that feels interactive, but really only needs to understand the difference between a few phrases: ‘laser pointer’; ‘lockpick’; ‘drink’; take bribe’, and ‘refuse bribe’.

How does it interact with the user?

Skip to 03mins 30secs to see the storytelling in action

Google Dialogflow is a free natural language understanding platform that makes it easy to design a conversational user interface, which is long-speak for ‘chatbot’.

There are a few steps between the user talking to the radio, and the radio figuring out how to respond. The speech-to-text and chatbot software need to work in tandem. For this project, the data flow runs like so:

1: The microphone detects that someone is speaking and records the audio.

2-3: Google AI (the Speech-To-Text box) processes the audio and extracts the words the user spoke as text.

4-5: The chatbot (Google Dialogflow) receives this text and matches it with the correct response, which is sent back to the Raspberry Pi.

6-7: Some more artificial intelligence uses this text to generate artificial speech.

8: This audio is played to the user via the speaker.

Make sure to check out more of 8 Bits and a Byte’s projects on YouTube. We recommend Mooomba the cow roomba.

The post Raspberry Pi turns retro radio into interactive storyteller appeared first on Raspberry Pi.

Give your voice assistant a retro Raspberry Pi makeover

Post Syndicated from Ashley Whittaker original https://www.raspberrypi.org/blog/give-your-voice-assistant-a-retro-raspberry-pi-makeover/

Do you feel weird asking the weather or seeking advice from a faceless device? Would you feel better about talking to a classic 1978 2-XL educational robot from Mego Corporation? Matt over at element14 Community, where tons of interesting stuff happens, has got your back.

Watch Matt explain how the 2-XL toy robot worked before he started tinkering with it. This robot works with Google Assistant on a Raspberry Pi, and answers to a custom wake word.

Kit list

Our recent blog about repurposing a Furby as a voice assistant device would have excited Noughties kids, but this one is mostly for our beautiful 1970s- and 1980s-born fanbase.

Time travel

2-XL, Wikipedia tells us, is considered the first “smart toy”, marketed way back in 1978, and exhibiting “rudimentary intelligence, memory, gameplay, and responsiveness”. 2-XL had a personality that kept kids’ attention, telling jokes and offering verbal support as they learned.

Teardown

Delve under the robot’s armour to see how the toy was built, understand the basic working mechanism, and watch Matt attempt to diagnose why his 2-XL is not working.

Setting up Google Assistant

The Matrix Creator daughter board mentioned in the kit list is an ideal platform for developing your own AI assistant. It’s the daughter board’s 8-microphone array that makes it so brilliant for this task. Learn how to set up Google Assistant on the Matrix board in this video.

What if you don’t want to wake your retrofit voice assistant in the same way as all the other less dedicated users, the ones who didn’t spend hours of love and care refurbishing an old device? Instead of having your homemade voice assistant answer to “OK Google” or “Alexa”, you can train it to recognise a phrase of your choice. In this tutorial, Matt shows you how to set up a custom wake word with your voice assistant, using word detection software called Snowboy.

Keep an eye on element14 on YouTube for the next instalment of this excellent retrofit project.

The post Give your voice assistant a retro Raspberry Pi makeover appeared first on Raspberry Pi.

Raspberry Pi retro player

Post Syndicated from Ashley Whittaker original https://www.raspberrypi.org/blog/raspberry-pi-retro-player/

We found this project at TeCoEd and we loved the combination of an OLED display housed inside a retro Argus slide viewer. It uses a Raspberry Pi 3 with Python and OpenCV to pull out single frames from a video and write them to the display in real time.​

TeCoEd names this creation the Raspberry Pi Retro Player, or RPRP, or – rather neatly – RP squared. The Argus viewer, he tells us, was a charity-shop find that cost just 50p.  It sat collecting dust for a few years until he came across an OLED setup guide on hackster.io, which inspired the birth of the RPRP.

Timelapse of the build and walk-through of the code

At the heart of the project is a Raspberry Pi 3 which is running a Python program that uses the OpenCV computer vision library.  The code takes a video clip and breaks it down into individual frames. Then it resizes each frame and converts it to black and white, before writing it to the OLED display. The viewer sees the video play in pleasingly retro monochrome on the slide viewer.

Tiny but cute, like us!

TeCoEd ran into some frustrating problems with the OLED display, which, he discovered, uses the SH1106 driver, rather than the standard SH1306 driver that the Adafruit CircuitPython library expects. Many OLED displays use the SH1306 driver, but it turns out that cheaper displays like the one in this project use the SH1106. He has made a video to spare other makers this particular throw-it-all-in-the-bin moment.

Tutorial for using the SH1106 driver for cheap OLED displays

If you’d like to try this build for yourself, here’s all the code and setup advice on GitHub.

Wiring diagram

TeCoEd is, as ever, our favourite kind of maker – the sharing kind! He has collated everything you’ll need to get to grips with OpenCV, connecting the SH1106 OLED screen over I2C, and more. He’s even told us where we can buy the OLED board.

The post Raspberry Pi retro player appeared first on Raspberry Pi.

Raspberry Pi + Furby = ‘Furlexa’ voice assistant

Post Syndicated from Ashley Whittaker original https://www.raspberrypi.org/blog/raspberry-pi-furby-furlexa-voice-assistant/

How can you turn a redundant, furry, slightly annoying tech pet into a useful home assistant? Zach took to howchoo to show you how to combine a Raspberry Pi Zero W with Amazon’s Alexa Voice Service software and a Furby to create Furlexa.

Furby was pretty impressive technology, considering that it’s over 20 years old. It could learn to speak English, sort of, by listening to humans. It communicated with other Furbies via infrared sensor. It even slept when its light sensor registered that it was dark.

Furby innards, exploded

Zach explains why Furby is so easy to hack:

Furby is comprised of a few primary components — a microprocessor, infrared and light sensors, microphone, speaker, and — most impressively — a single motor that uses an elaborate system of gears and cams to drive Furby’s ears, eyes, mouth and rocker. A cam position sensor (switch) tells the microprocessor what position the cam system is in. By driving the motor at varying speeds and directions and by tracking the cam position, the microprocessor can tell Furby to dance, sing, sleep, or whatever.

The original CPU and related circuitry were replaced with a Raspberry Pi Zero W

Zach continues: “Though the microprocessor isn’t worth messing around with (it’s buried inside a blob of resin to protect the IP), it would be easy to install a small Raspberry Pi computer inside of Furby, use it to run Alexa, and then track Alexa’s output to make Furby move.”

What you’ll need:

Harrowing

Running Alexa

The Raspberry Pi is running Alexa Voice Service (AVS) to provide full Amazon Echo functionality. Amazon AVS doesn’t officially support the tiny Raspberry Pi Zero, so lots of hacking was required. Point 10 on Zach’s original project walkthrough explains how to get AVS working with the Pimoroni Speaker pHAT.

Animating Furby

A small motor driver board is connected to the Raspberry Pi’s GPIO pins, and controls Furby’s original DC motor and gearbox: when Alexa speaks, so does Furby. The Raspberry Pi Zero can’t supply enough juice to power the motor, so instead, it’s powered by Furby’s original battery pack.

Software

There are three key pieces of software that make Furlexa possible:

  1. Amazon Alexa on Raspberry Pi – there are tonnes of tutorials showing you how to get Amazon Alexa up and running on your Raspberry Pi. Try this one on instructables.
  2. A script to control Furby’s motor howchooer Tyler wrote the Python script that Zach is using to drive the motor, and you can copy and paste it from Zach’s howchoo walkthrough.
  3. A script that detects when Alexa is speaking and calls the motor program – Furby detects when Alexa is speaking by monitoring the contents of a file whose contents change when audio is being output. Zach has written a separate guide for driving a DC motor based on Linux sound output.
Teeny tiny living space

The real challenge was cramming the Raspberry Pi Zero plus the Speaker pHAT, the motor controller board, and all the wiring back inside Furby, where space is at a premium. Soldering wires directly to the GPIO saved a bit of room, and foam tape holds everything above together nice and tightly. It’s a squeeze!

Zach is a maker extraordinaire, so check out his projects page on howchoo.

The post Raspberry Pi + Furby = ‘Furlexa’ voice assistant appeared first on Raspberry Pi.

Atomic TV | The MagPi 97

Post Syndicated from Lucy Hattersley original https://www.raspberrypi.org/blog/atomic-tv-the-magpi-97/

Nothing on television worth watching? Ryan Cochran’s TV set is just as visually arresting when it’s turned off, as David Crookes reports in the latest issue of the MagPi magazine, out now.

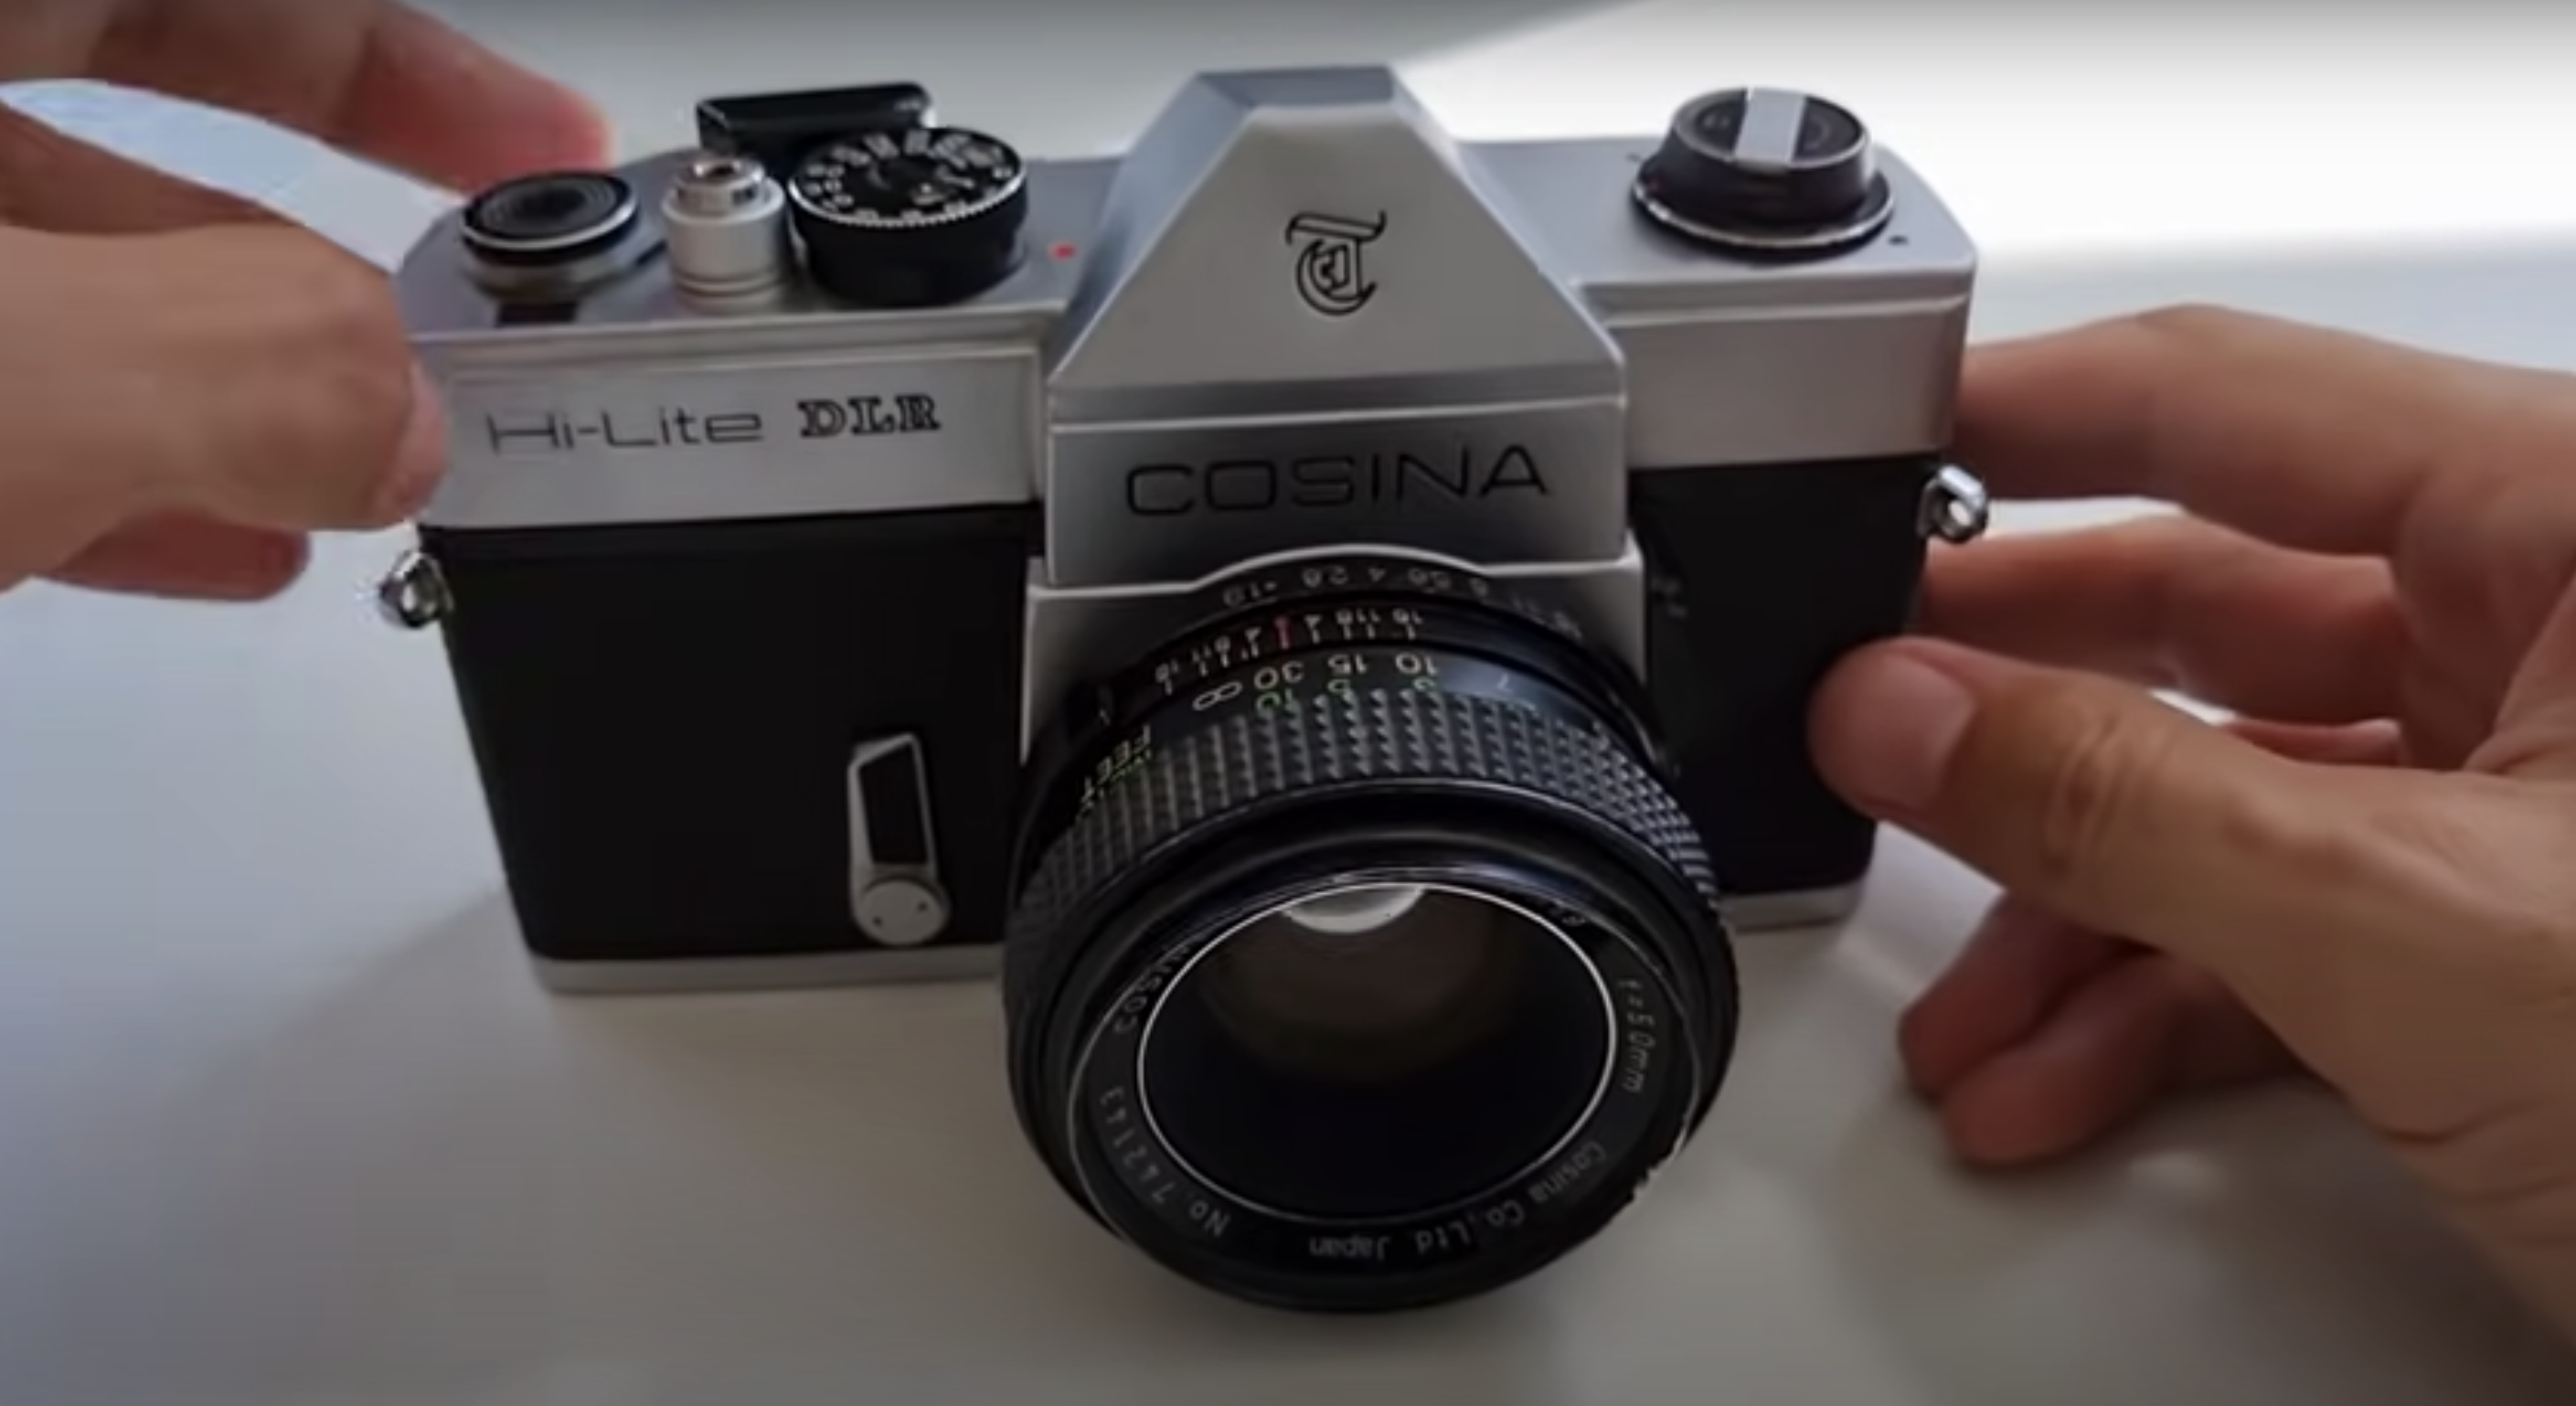
Flat-screen televisions, with their increasingly thin bezels, are designed to put the picture front and centre. Go back a few decades, however, and a number of TVs were made to look futuristic – some even sported space age designs resembling astronaut helmets or flying saucers sat upon elaborate stands. They were quirky and hugely fun.

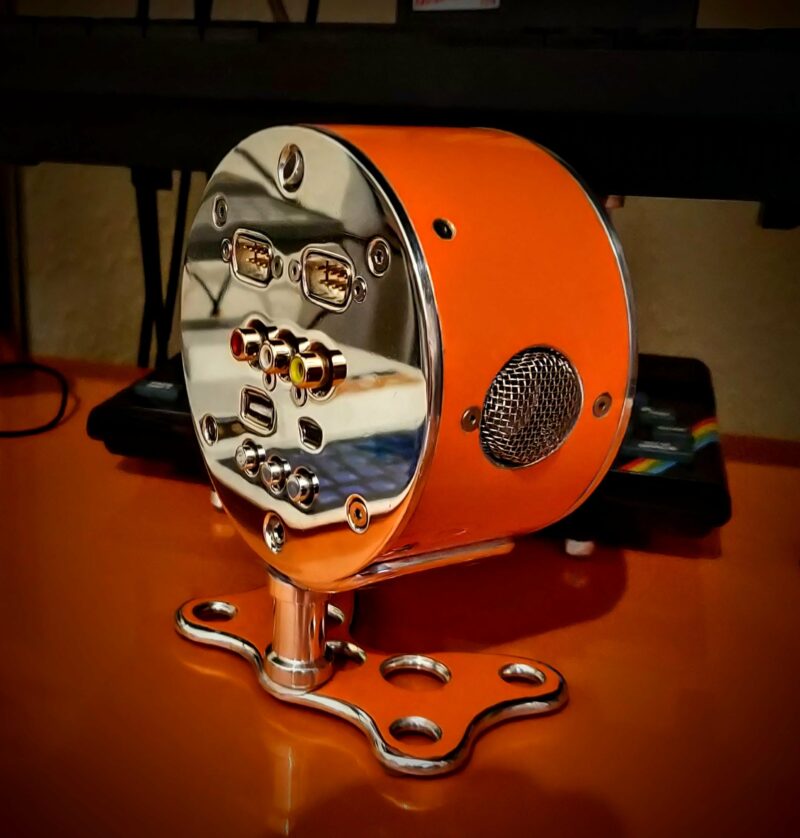
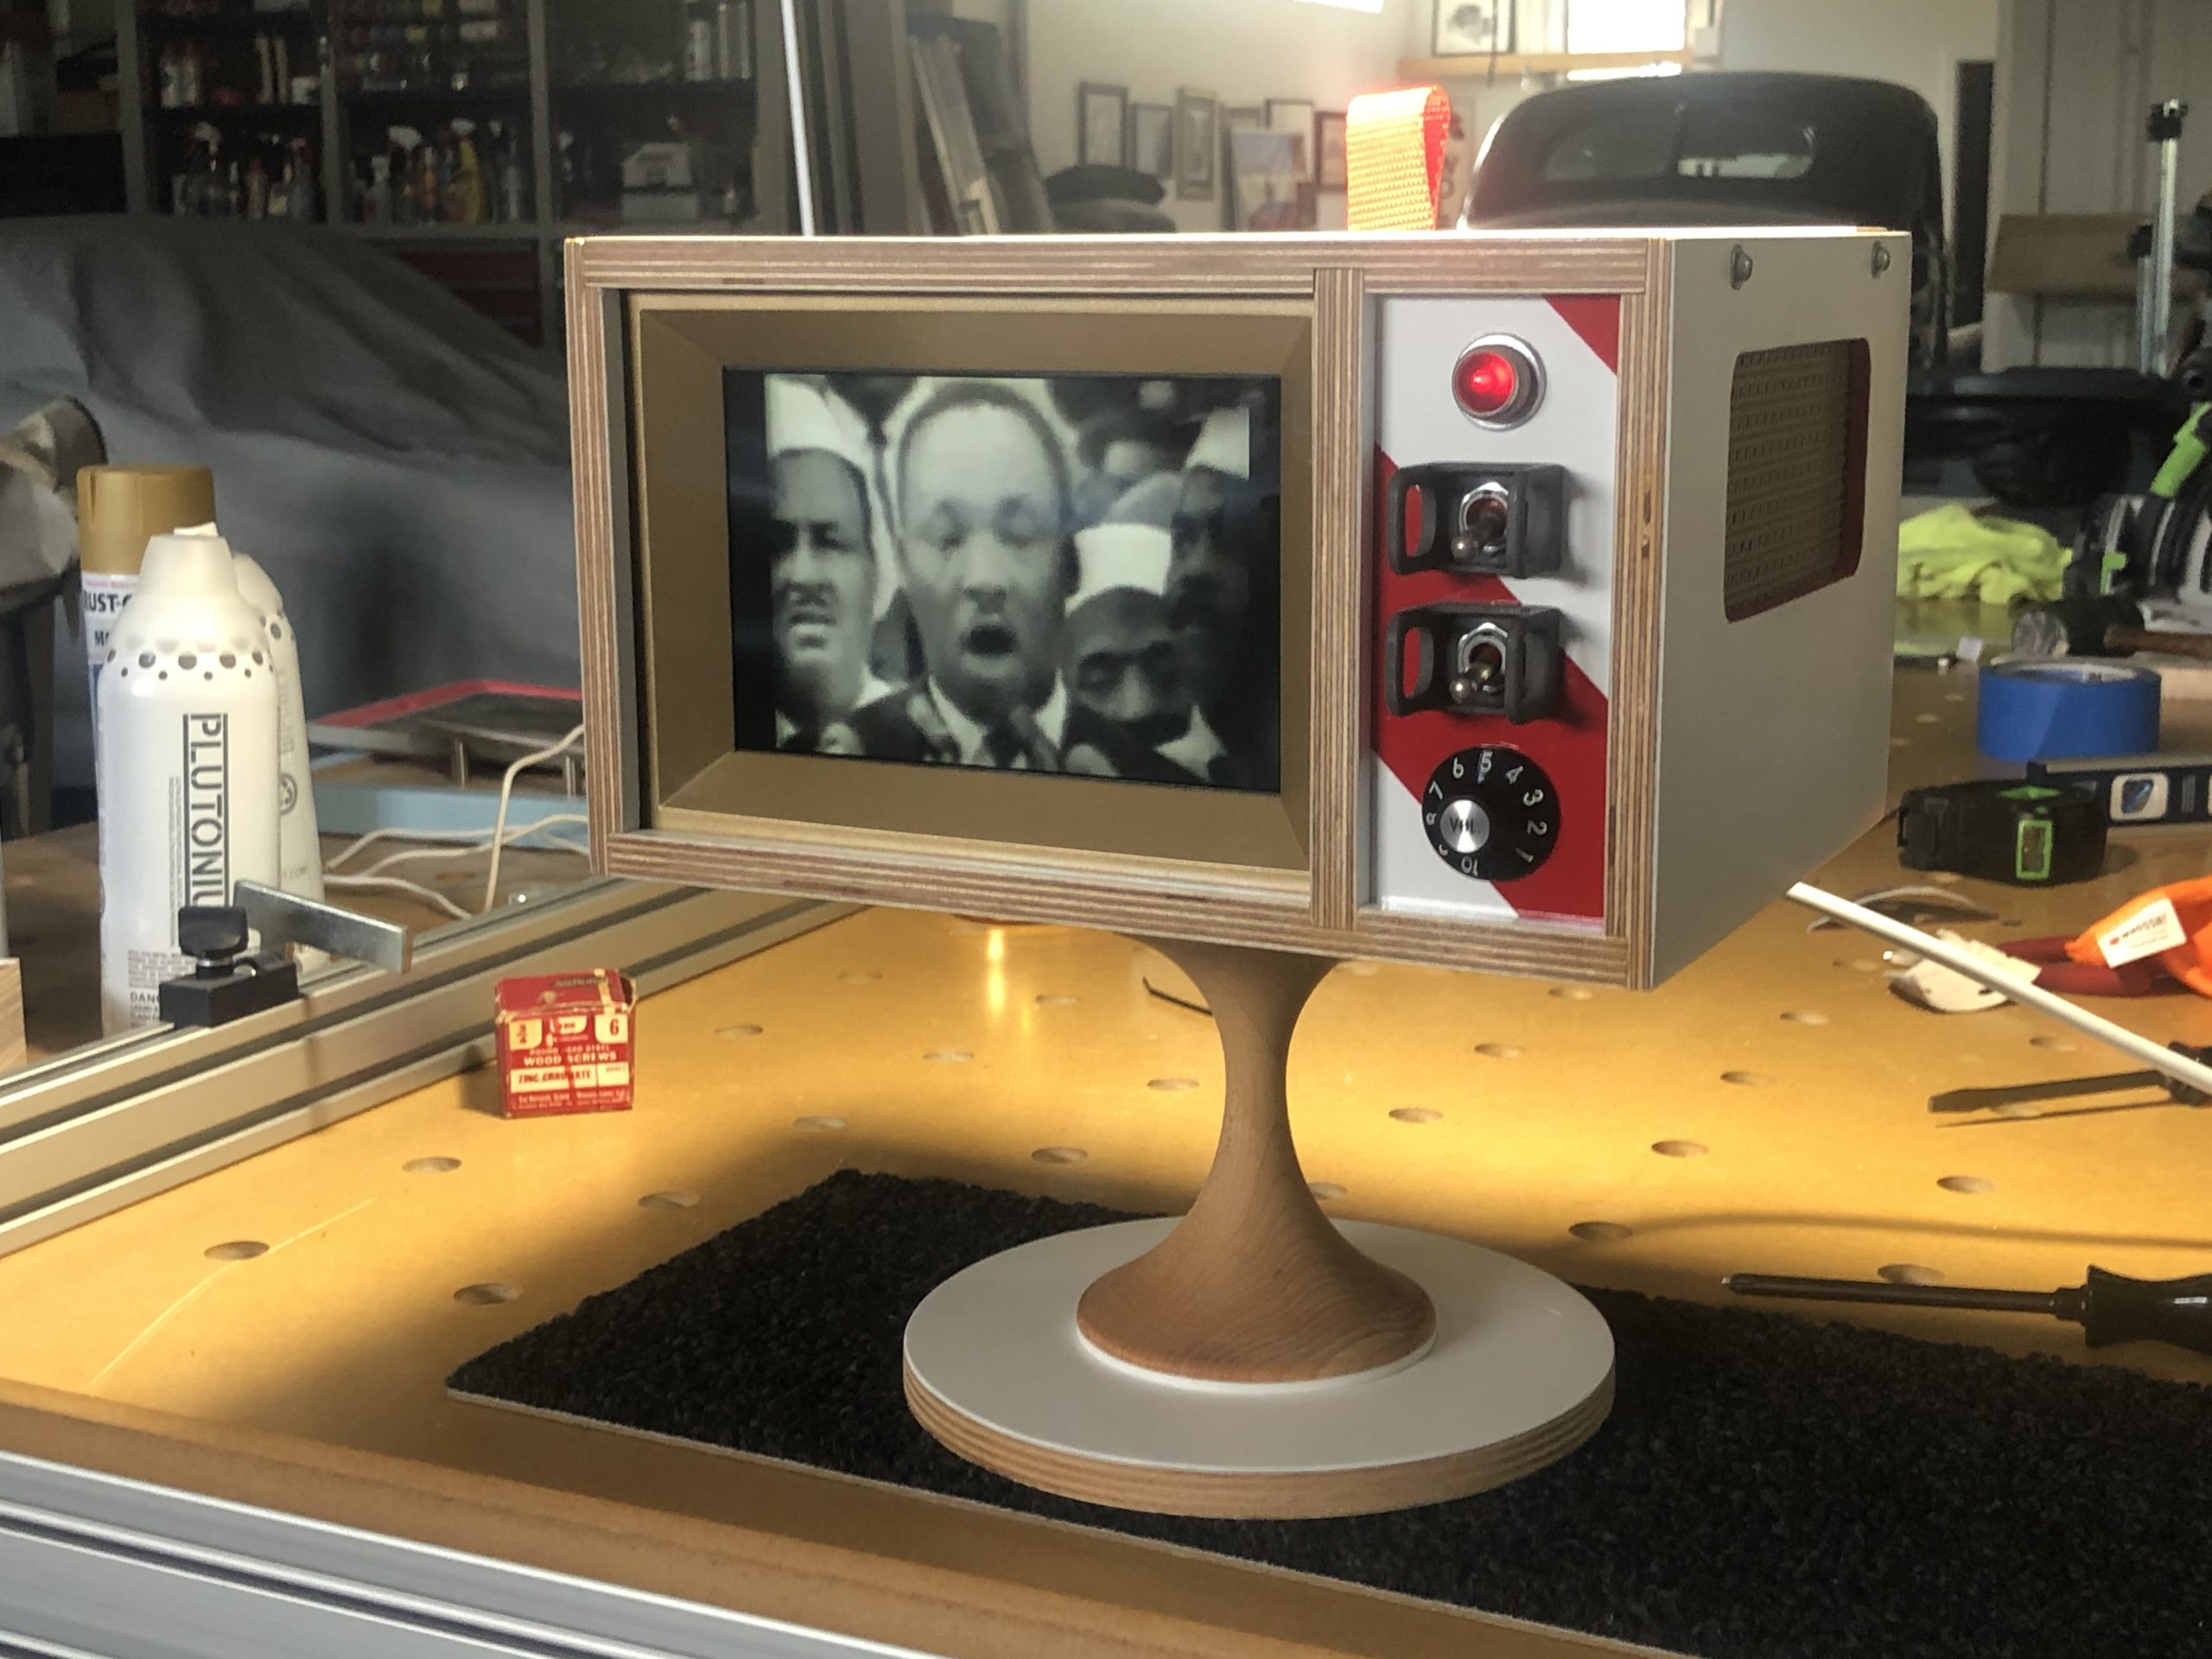
Maker Ryan Cochran’s project evokes such memories of the past. “I have a passion for vintage modern design and early NASA aesthetics, and I wanted to make something which would merge the two into an art piece that could fit on my shelf,” he recalls. “The first thing I could think of was a small television.” And so the idea for the Atomic TV came into being.

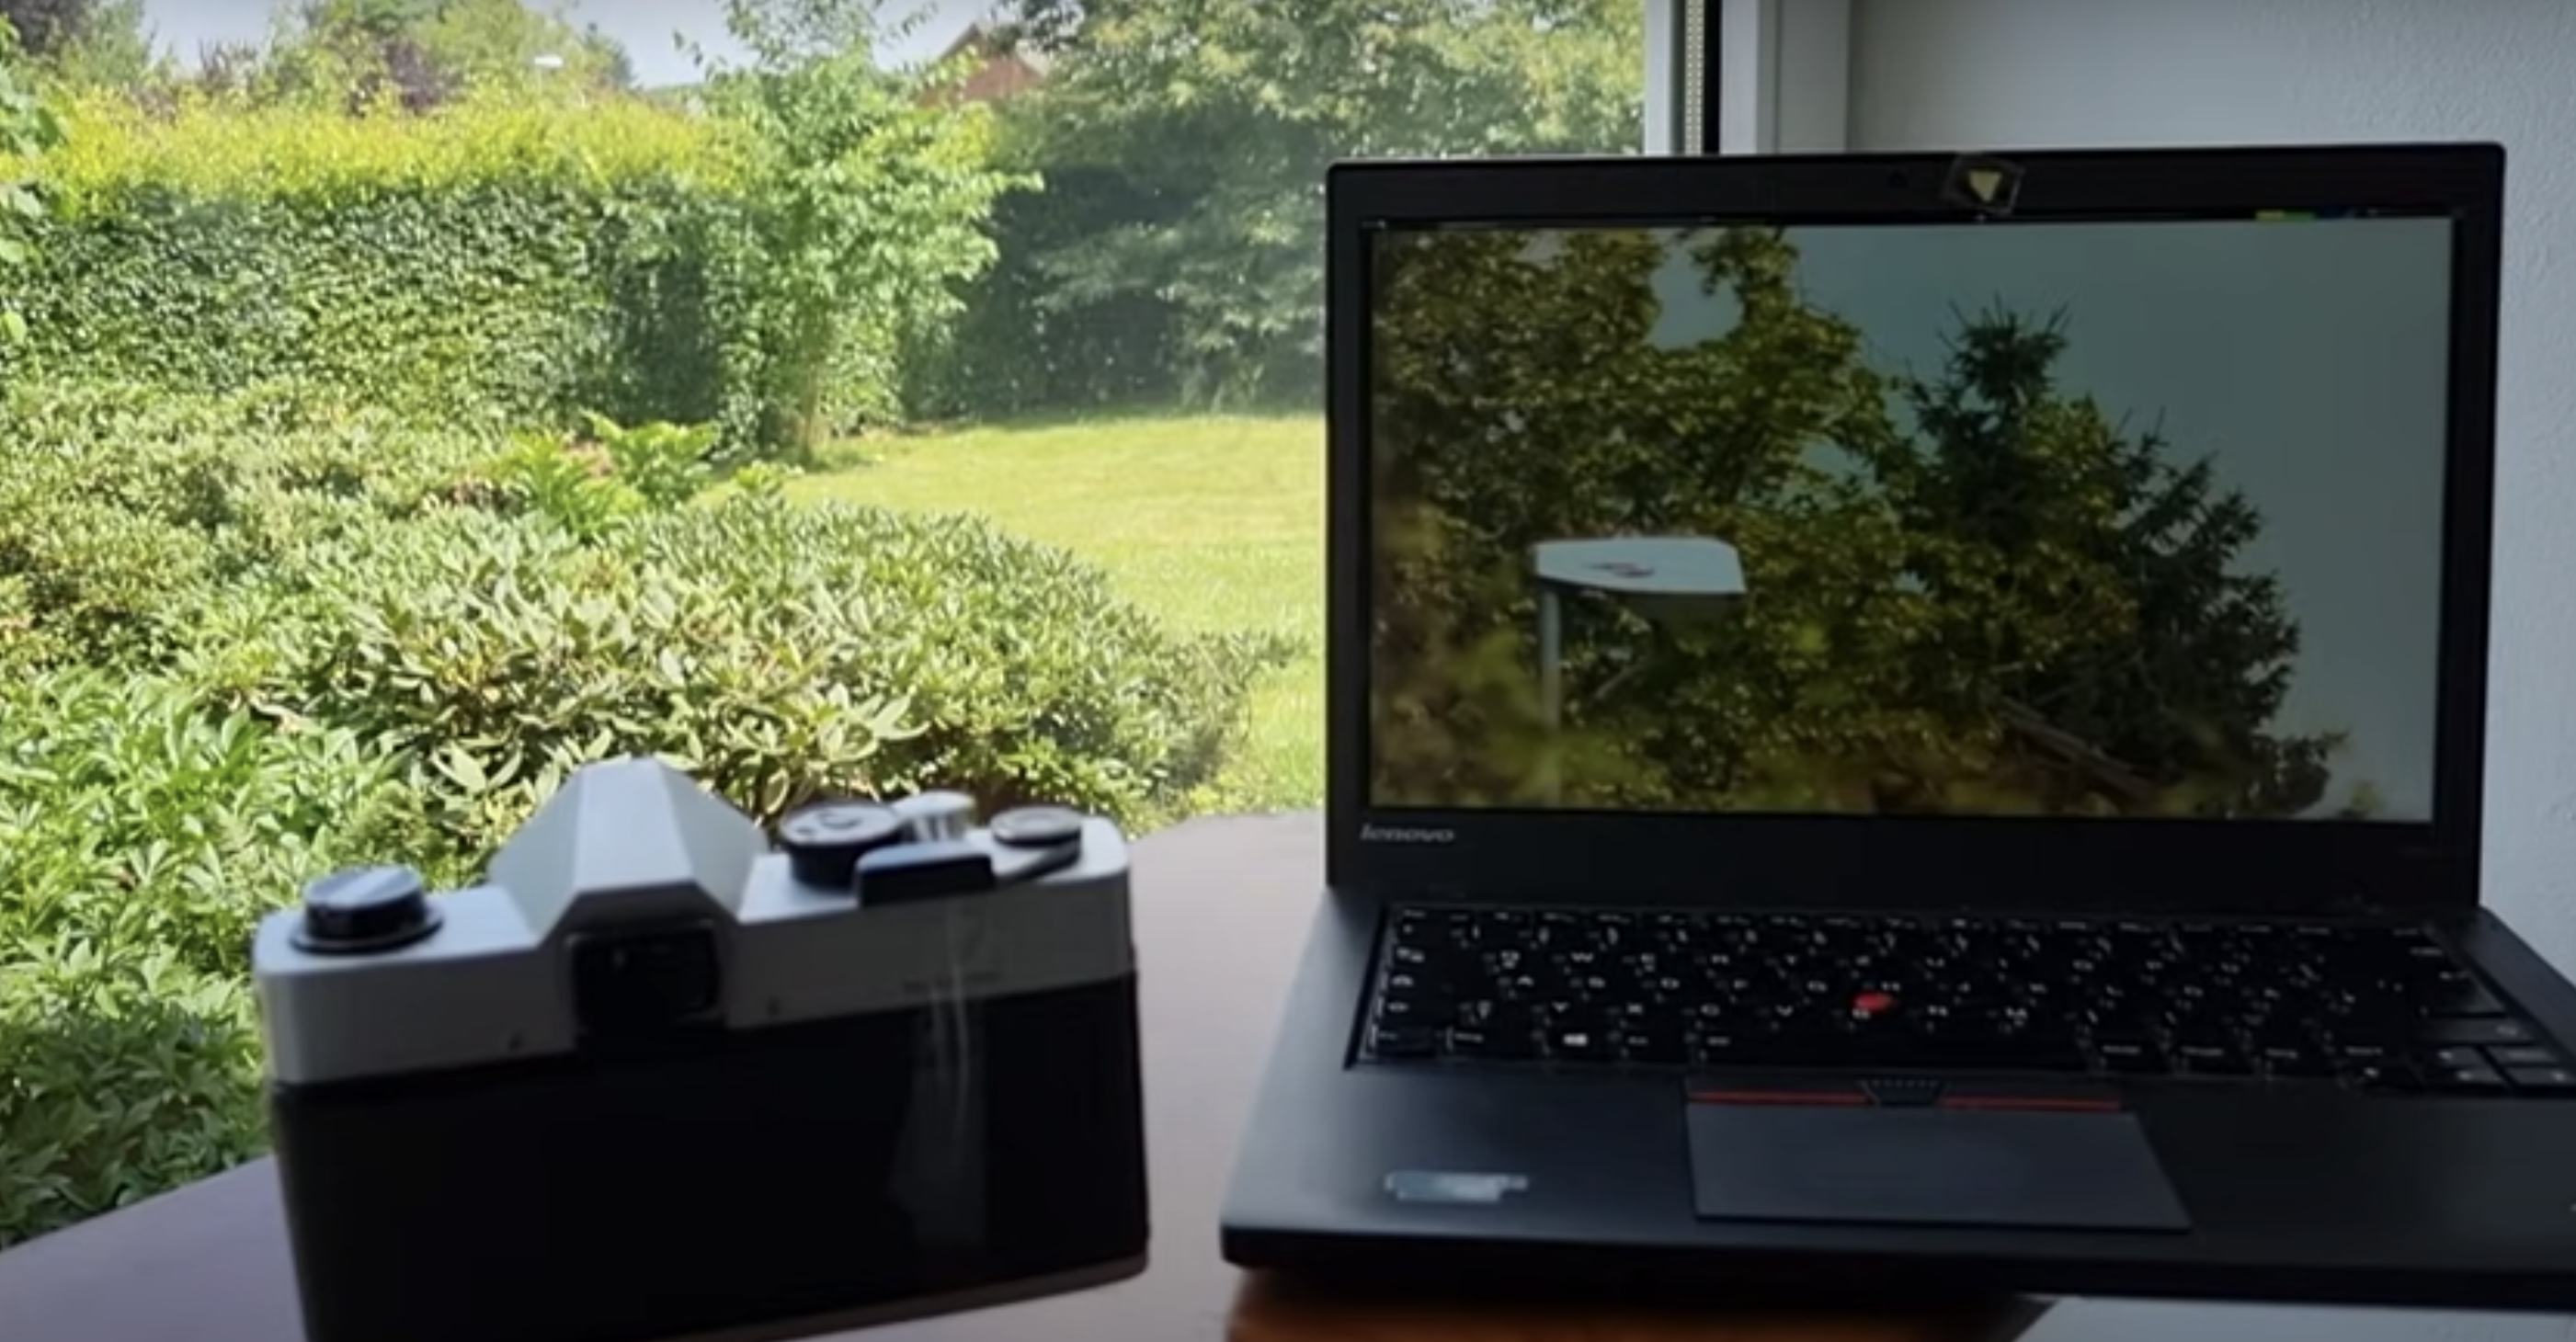
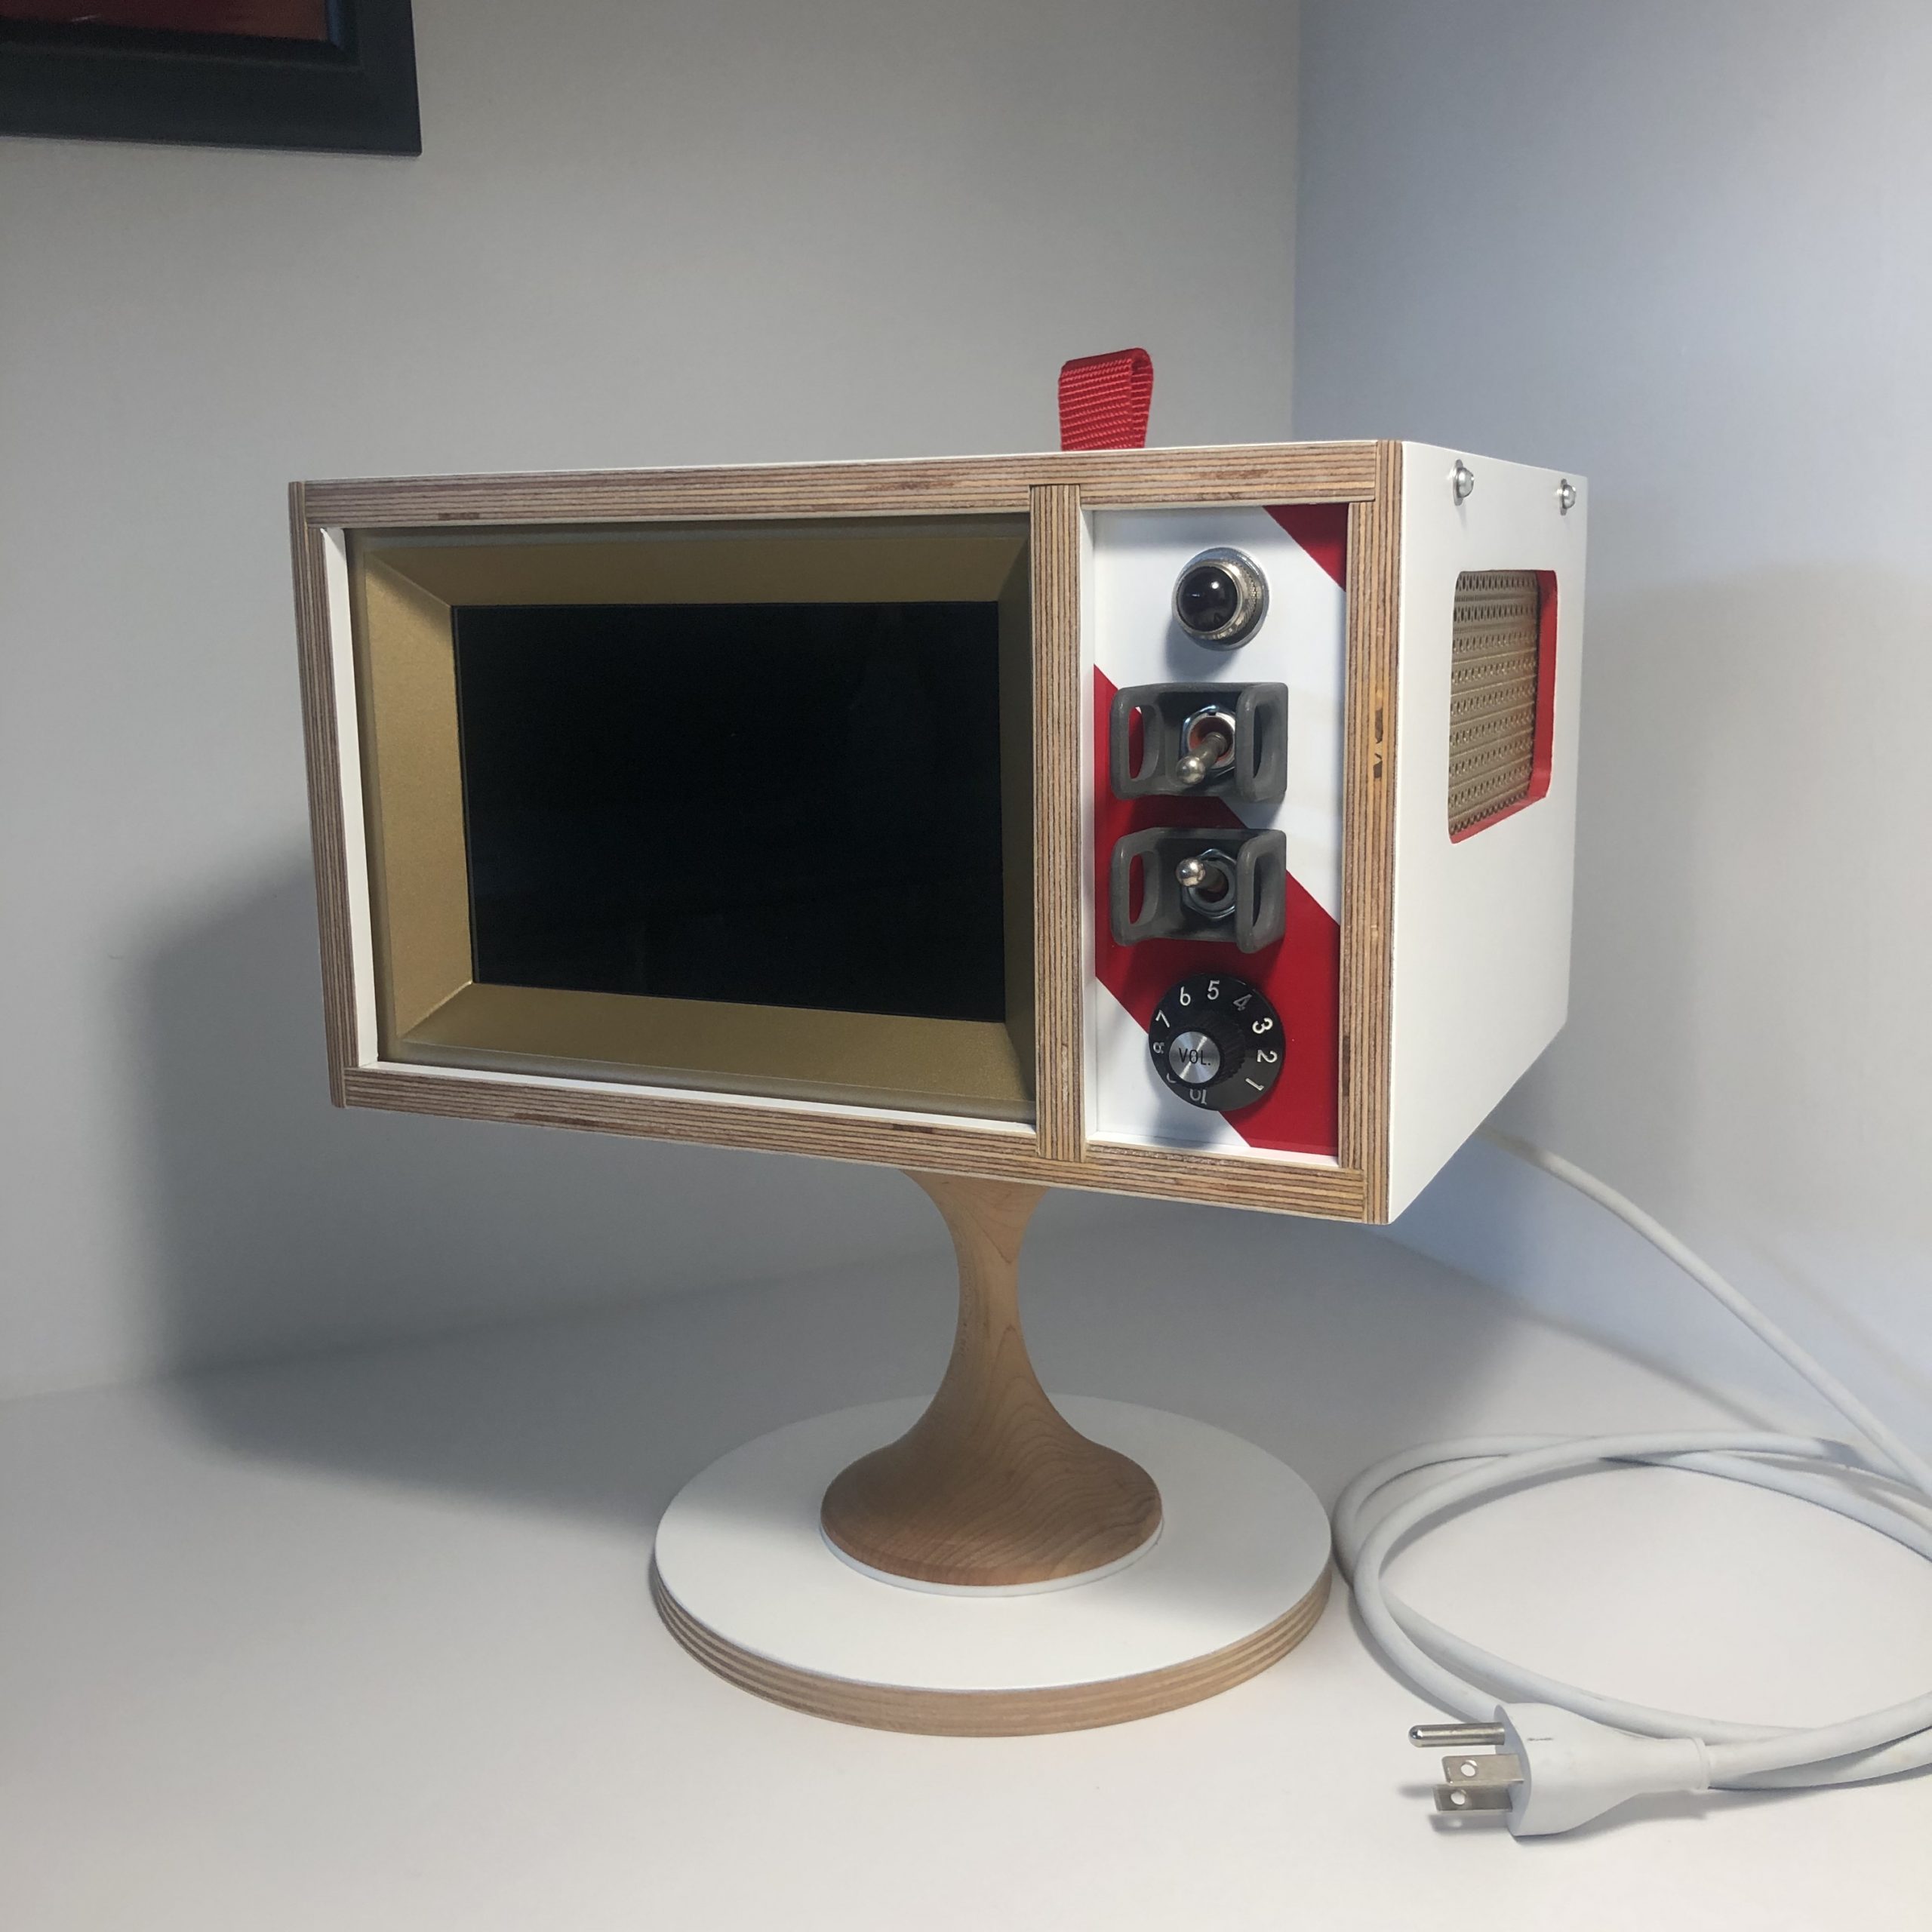
Made of wood and using spare tech parts left over from a couple of past projects, it’s a television that’s as compelling to look at when it’s turned off as when it’s playing videos on a loop. “My main concern was fit and finish,” he says. “I didn’t want this thing to look amateurish at all. I wanted it to look like a professionally built prototype from 1968.”

Turn on

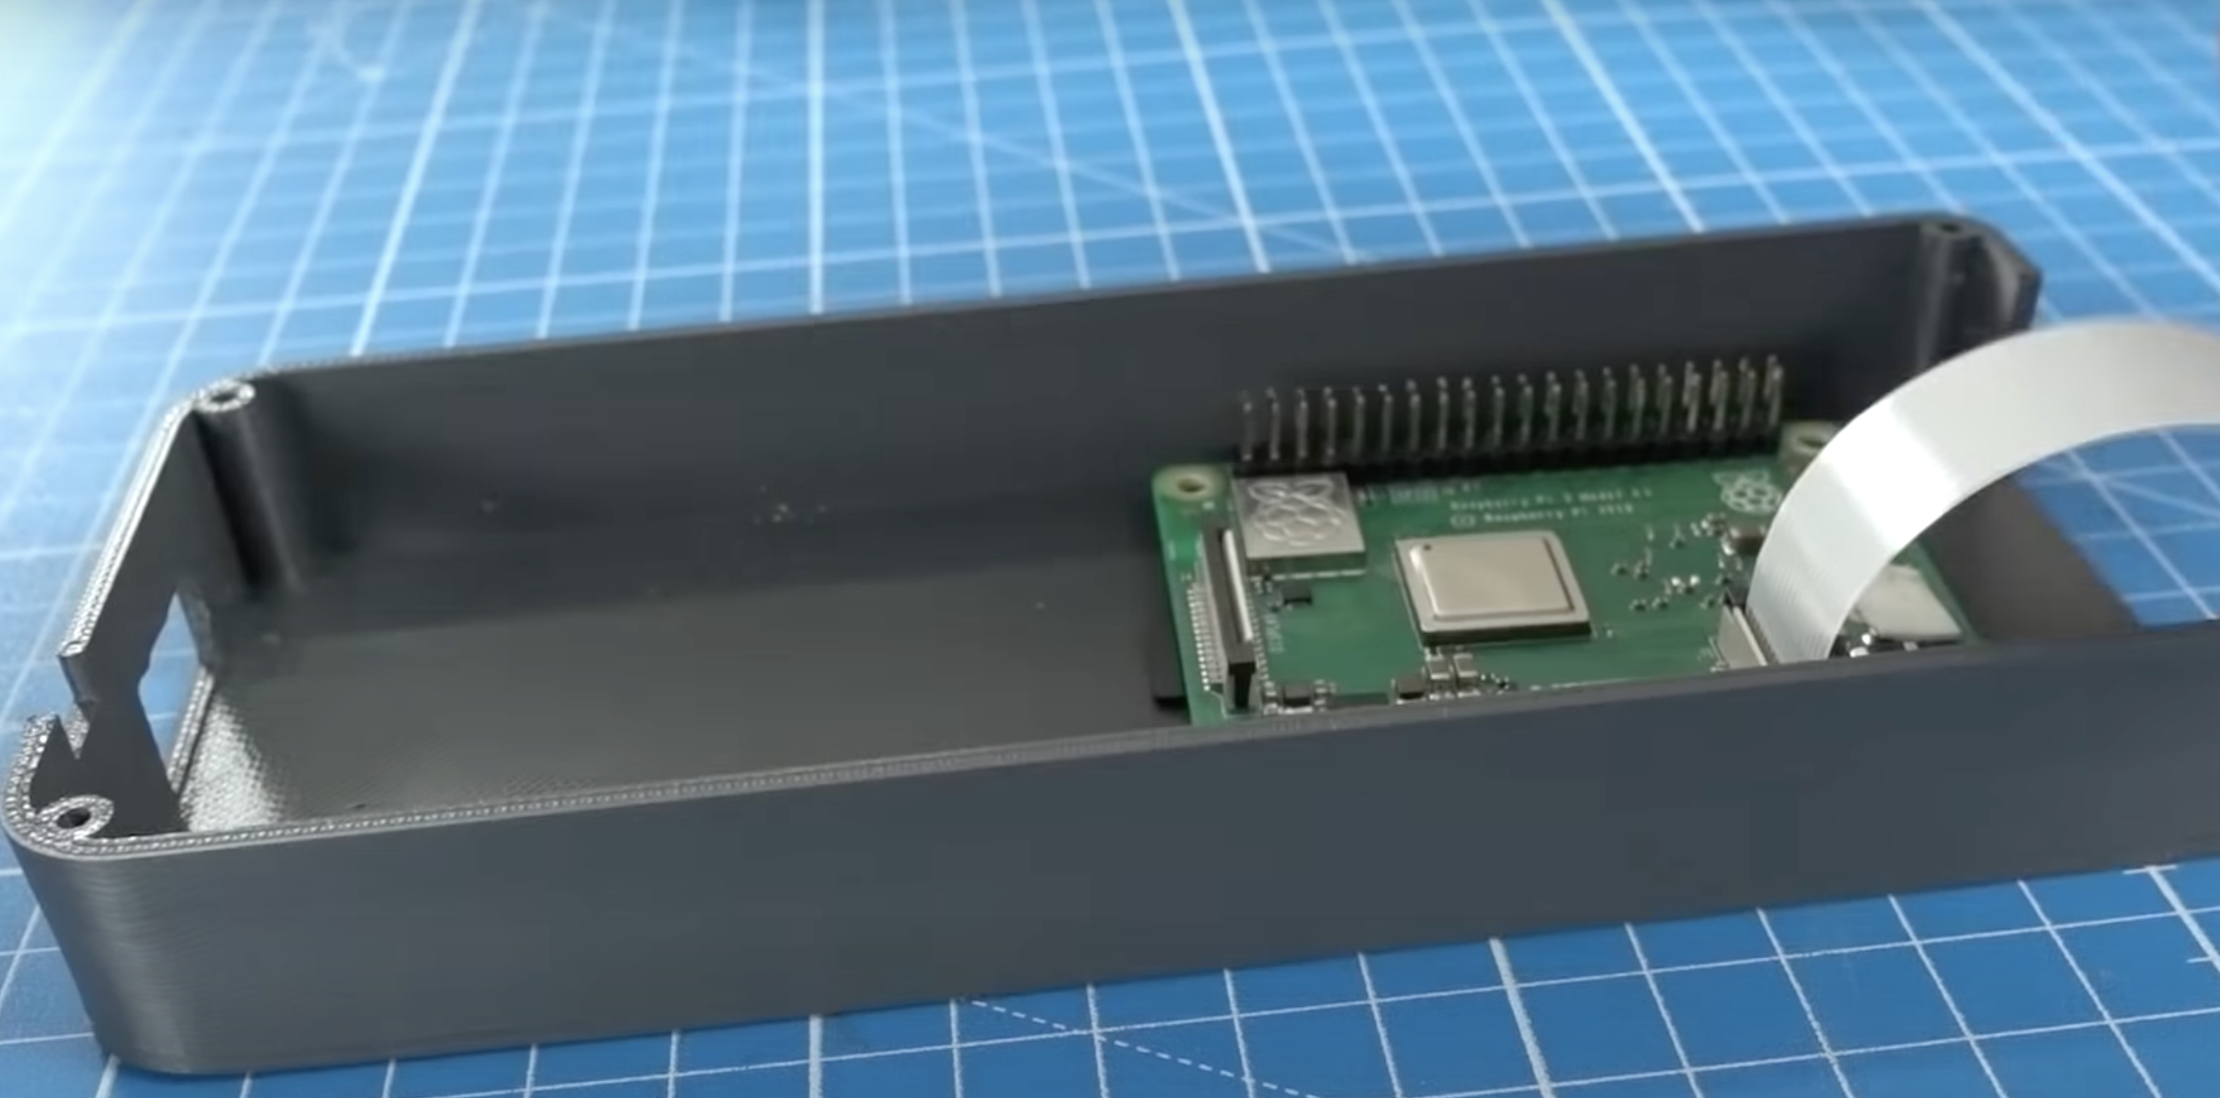
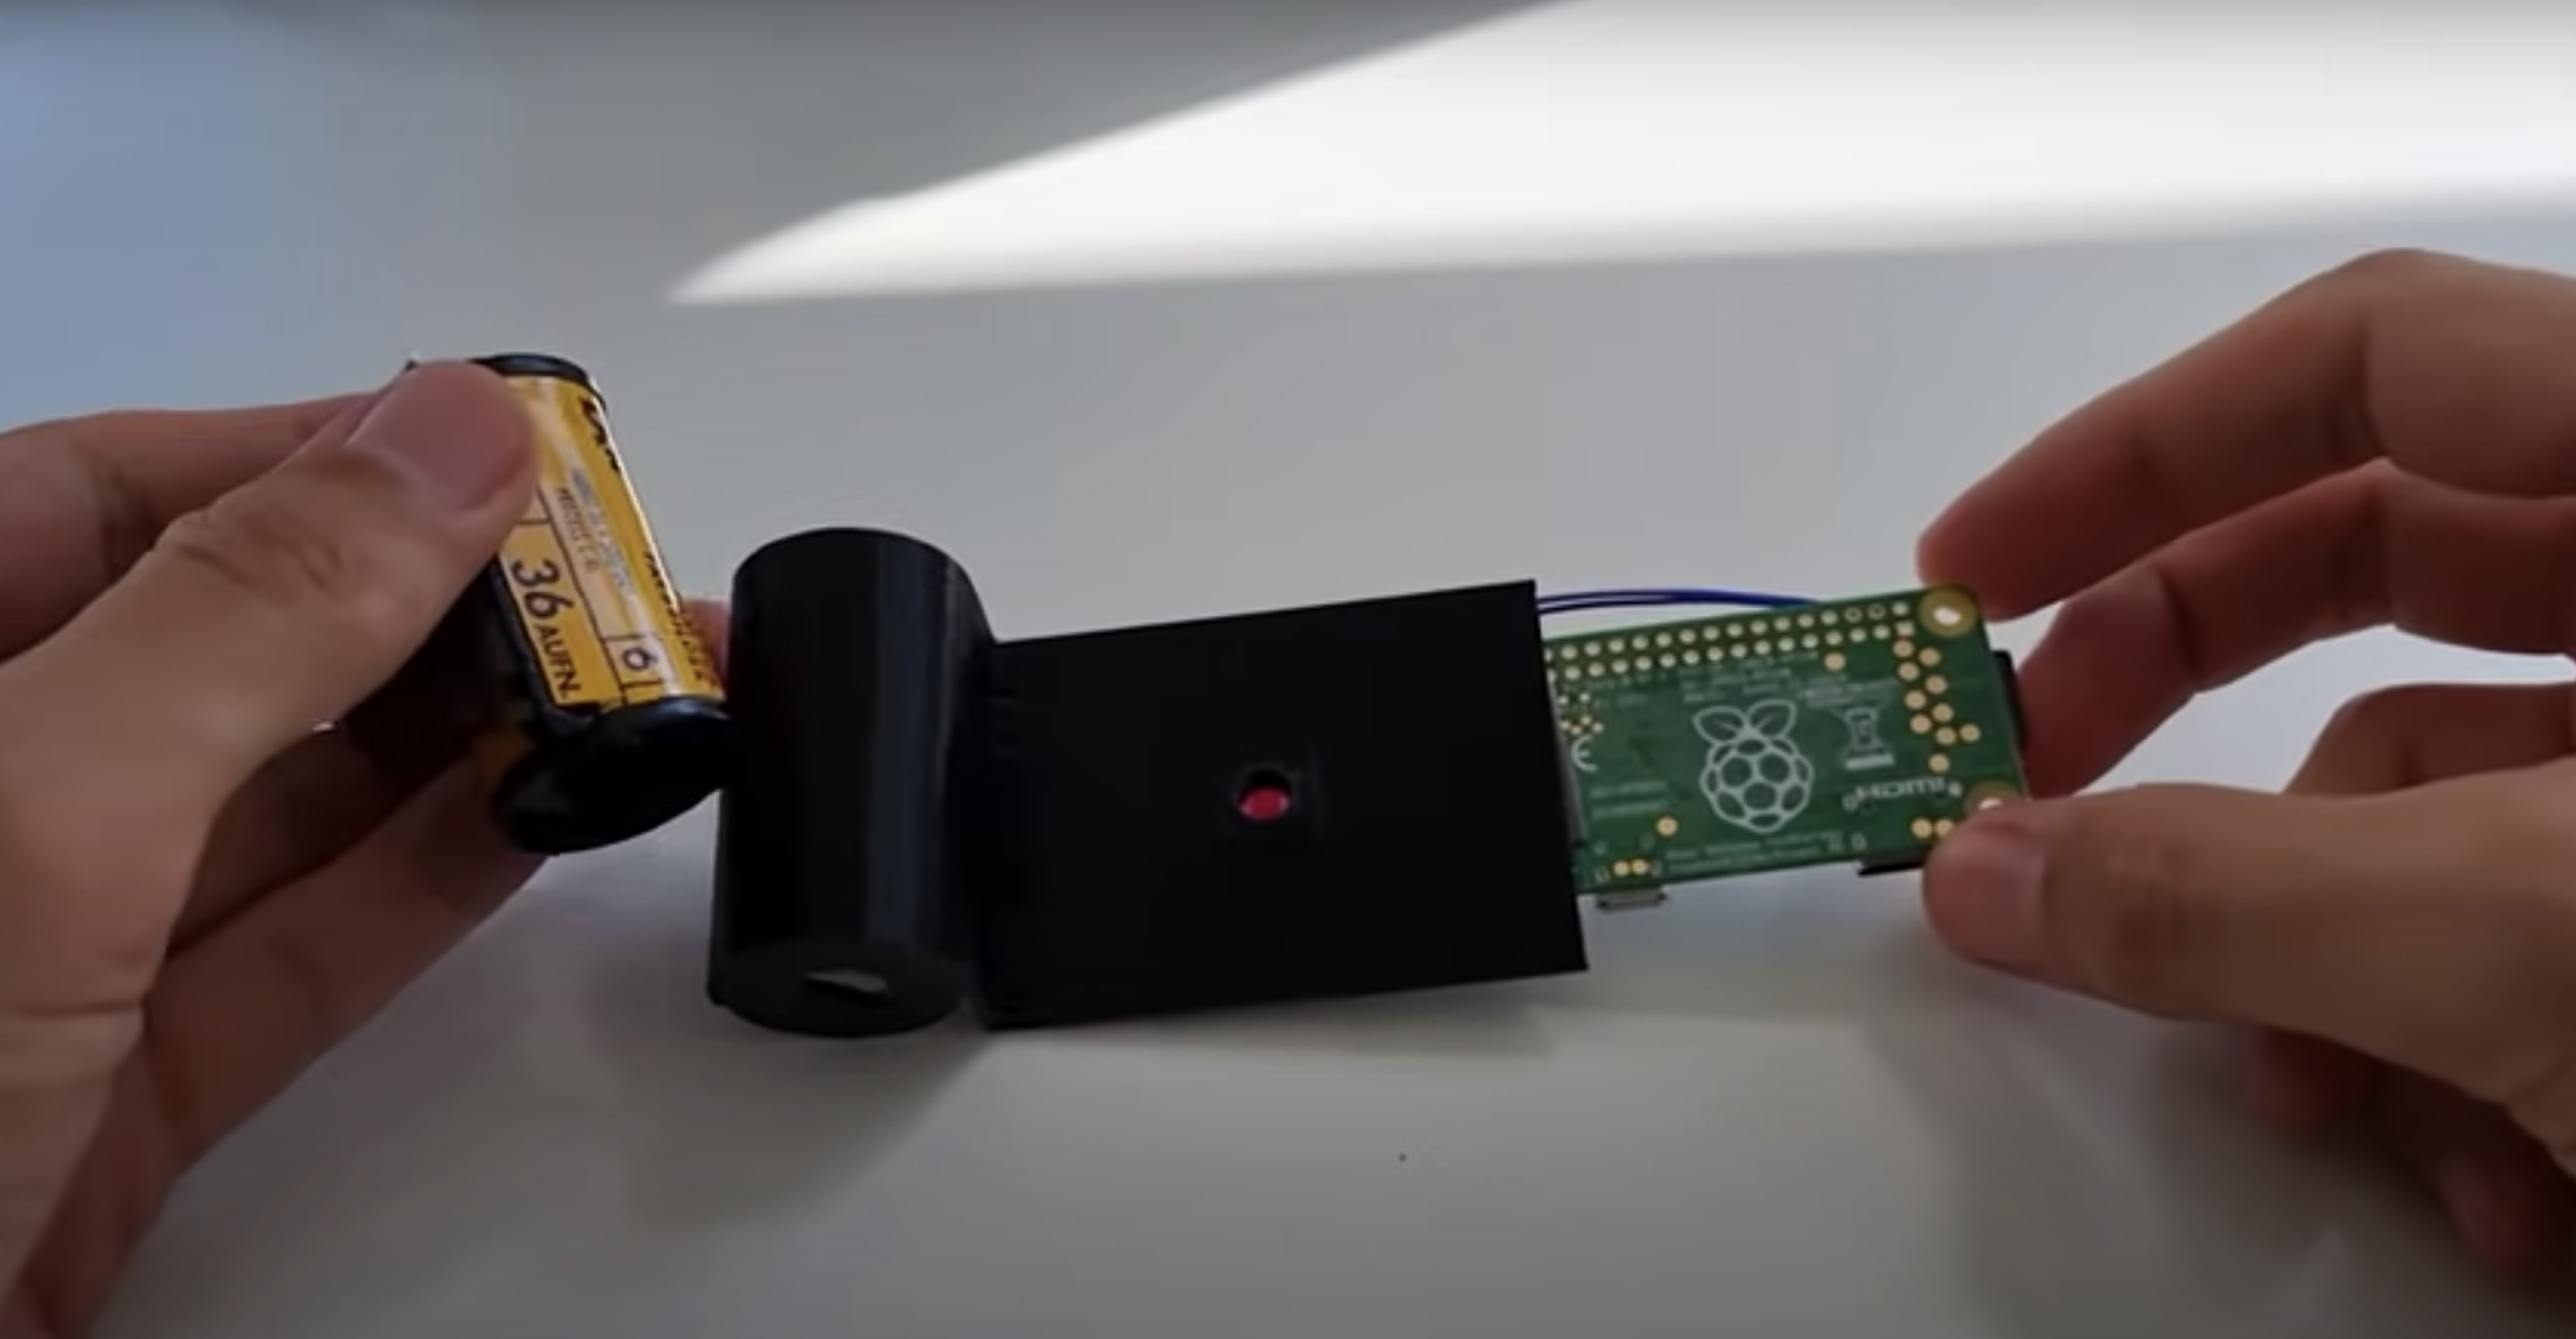
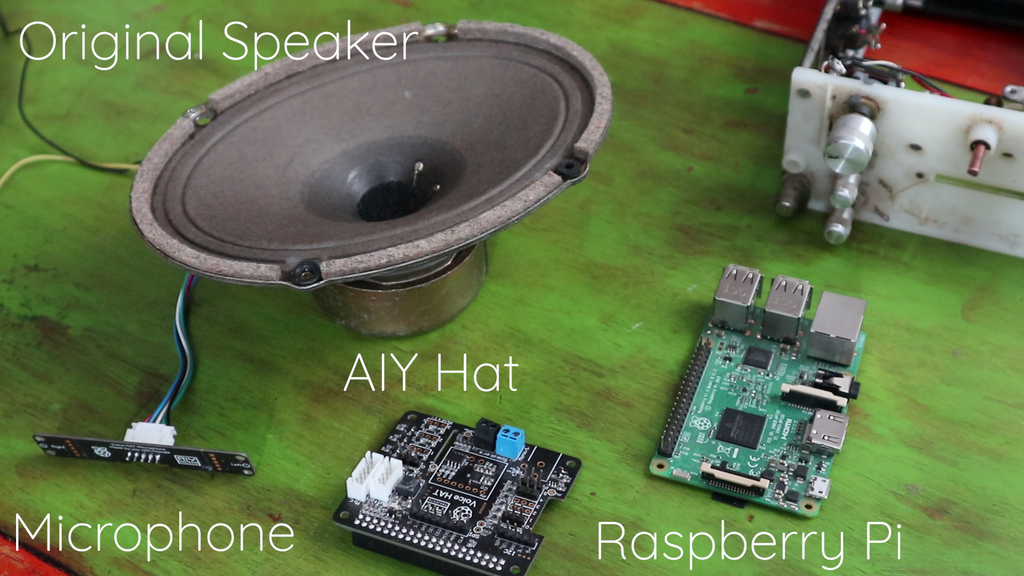
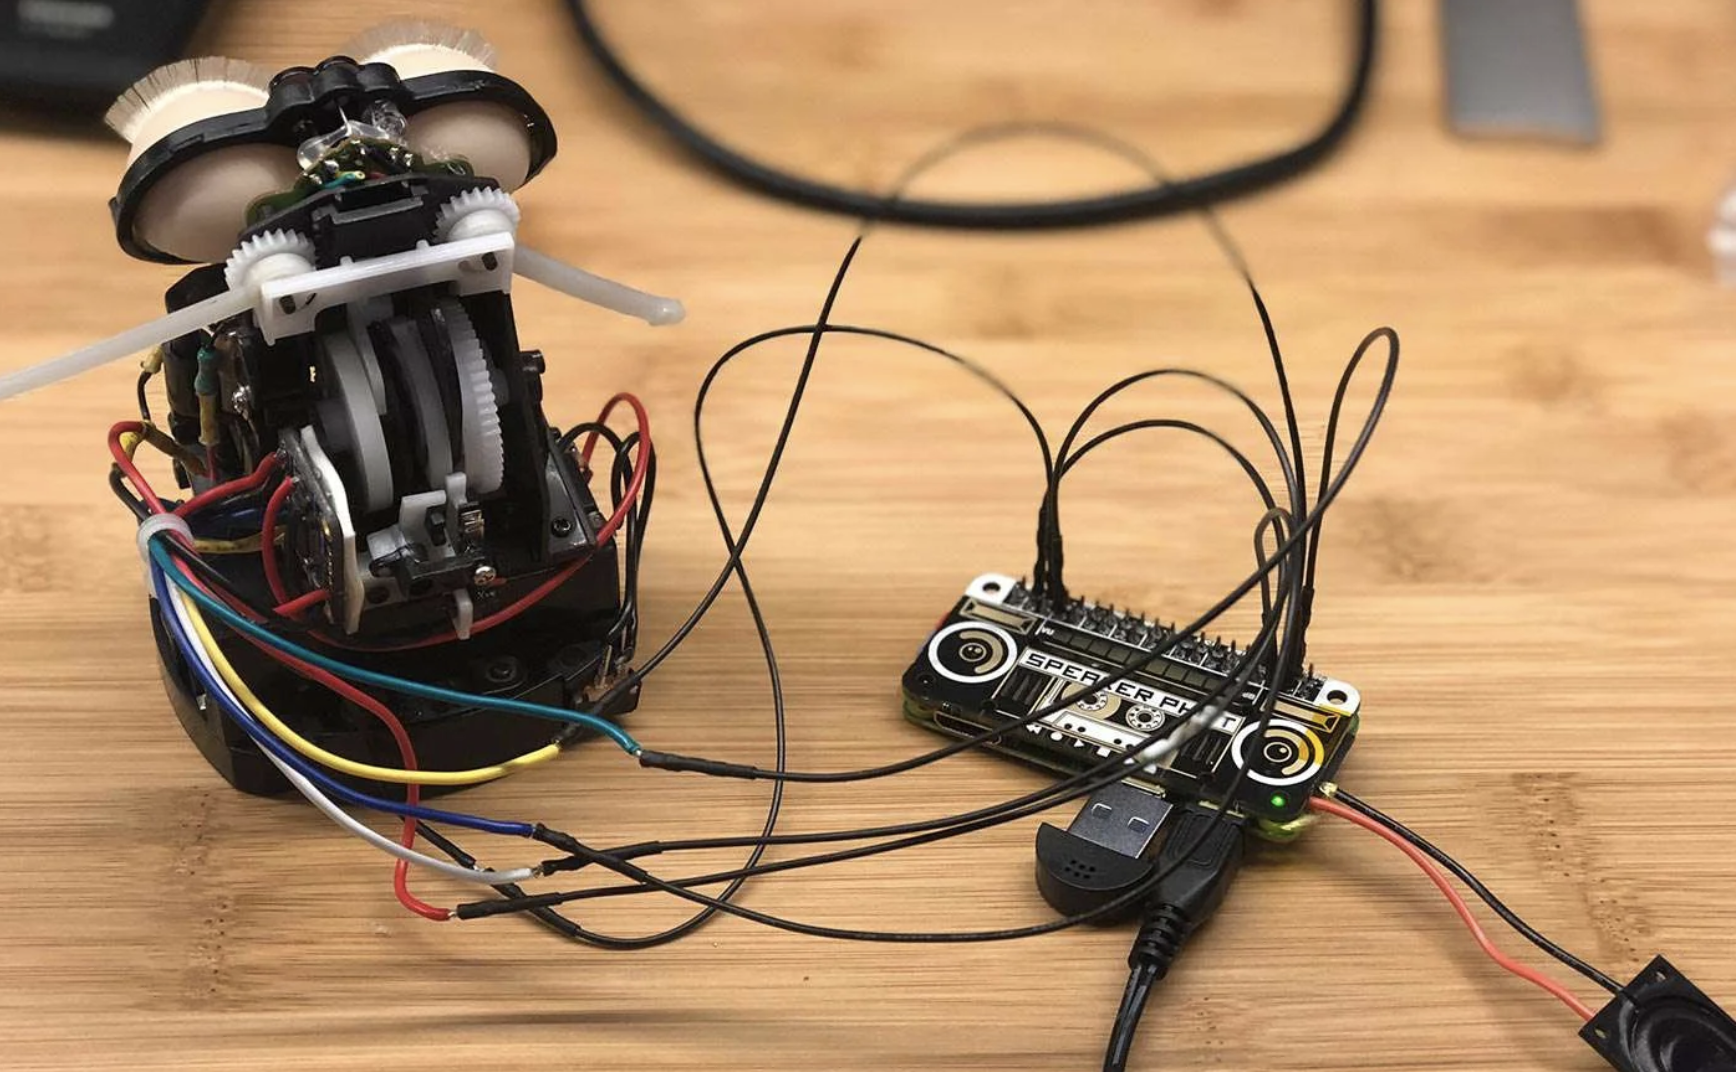
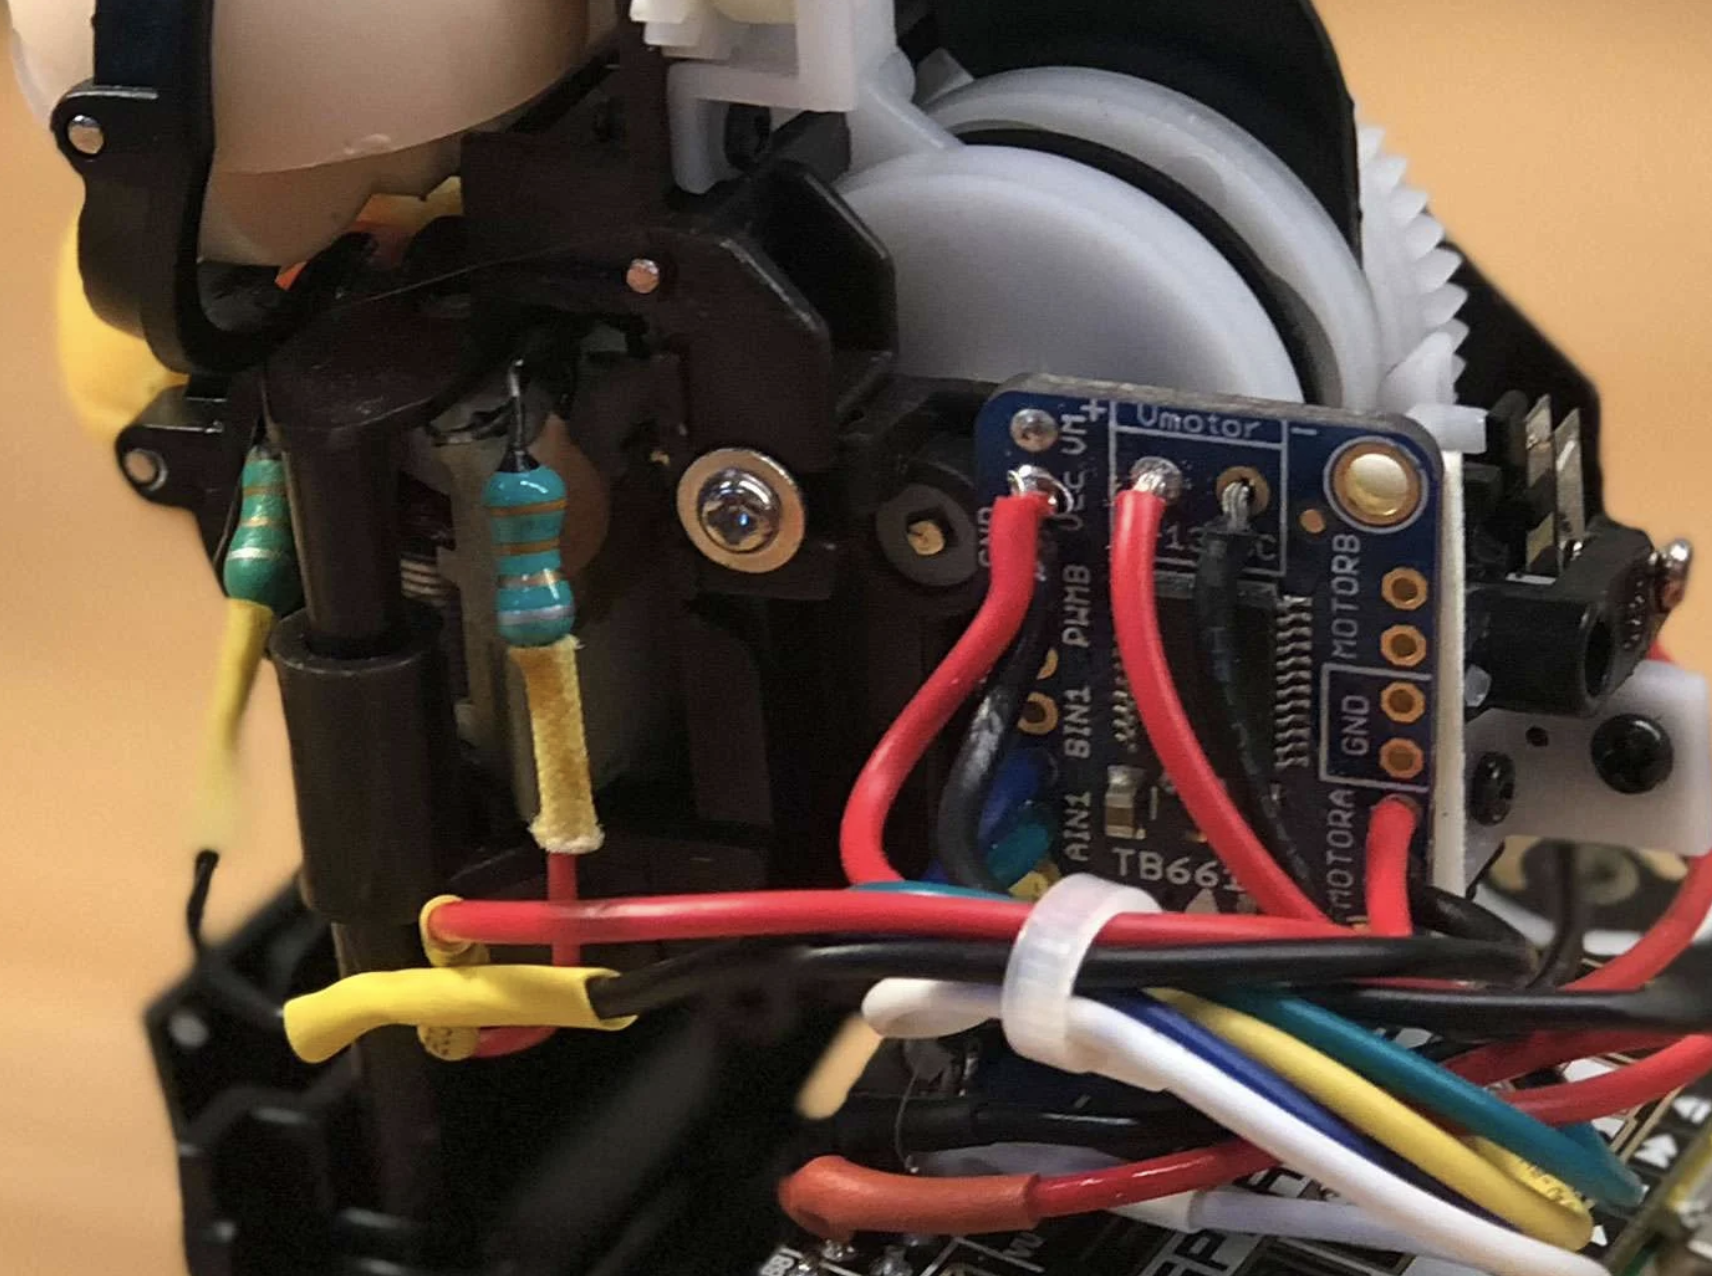
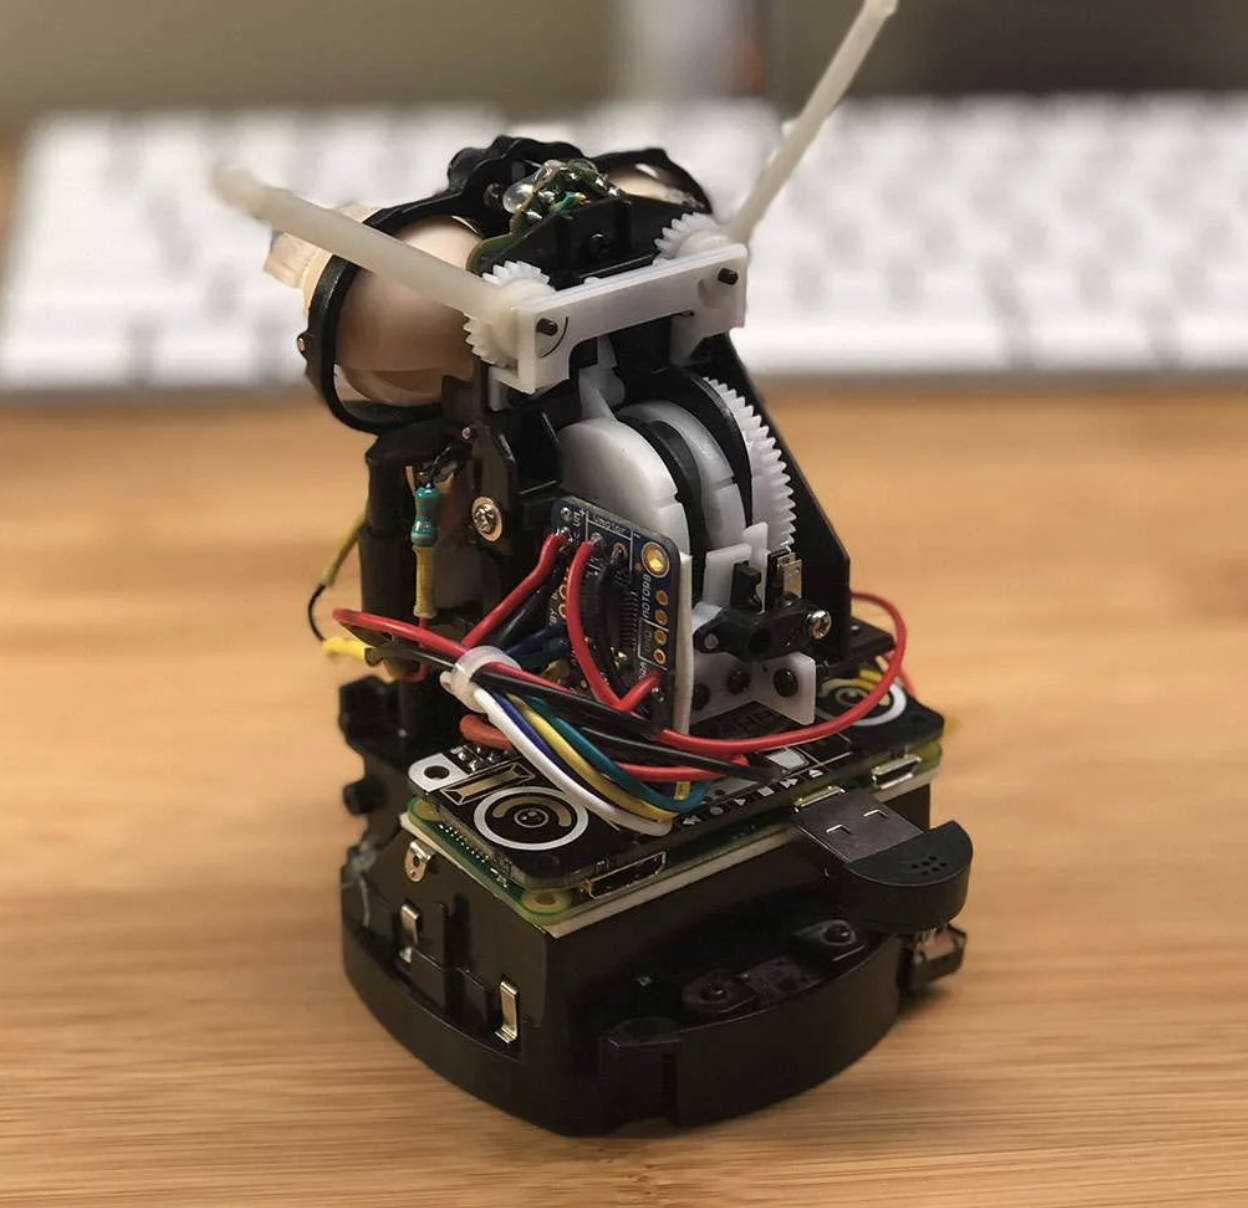
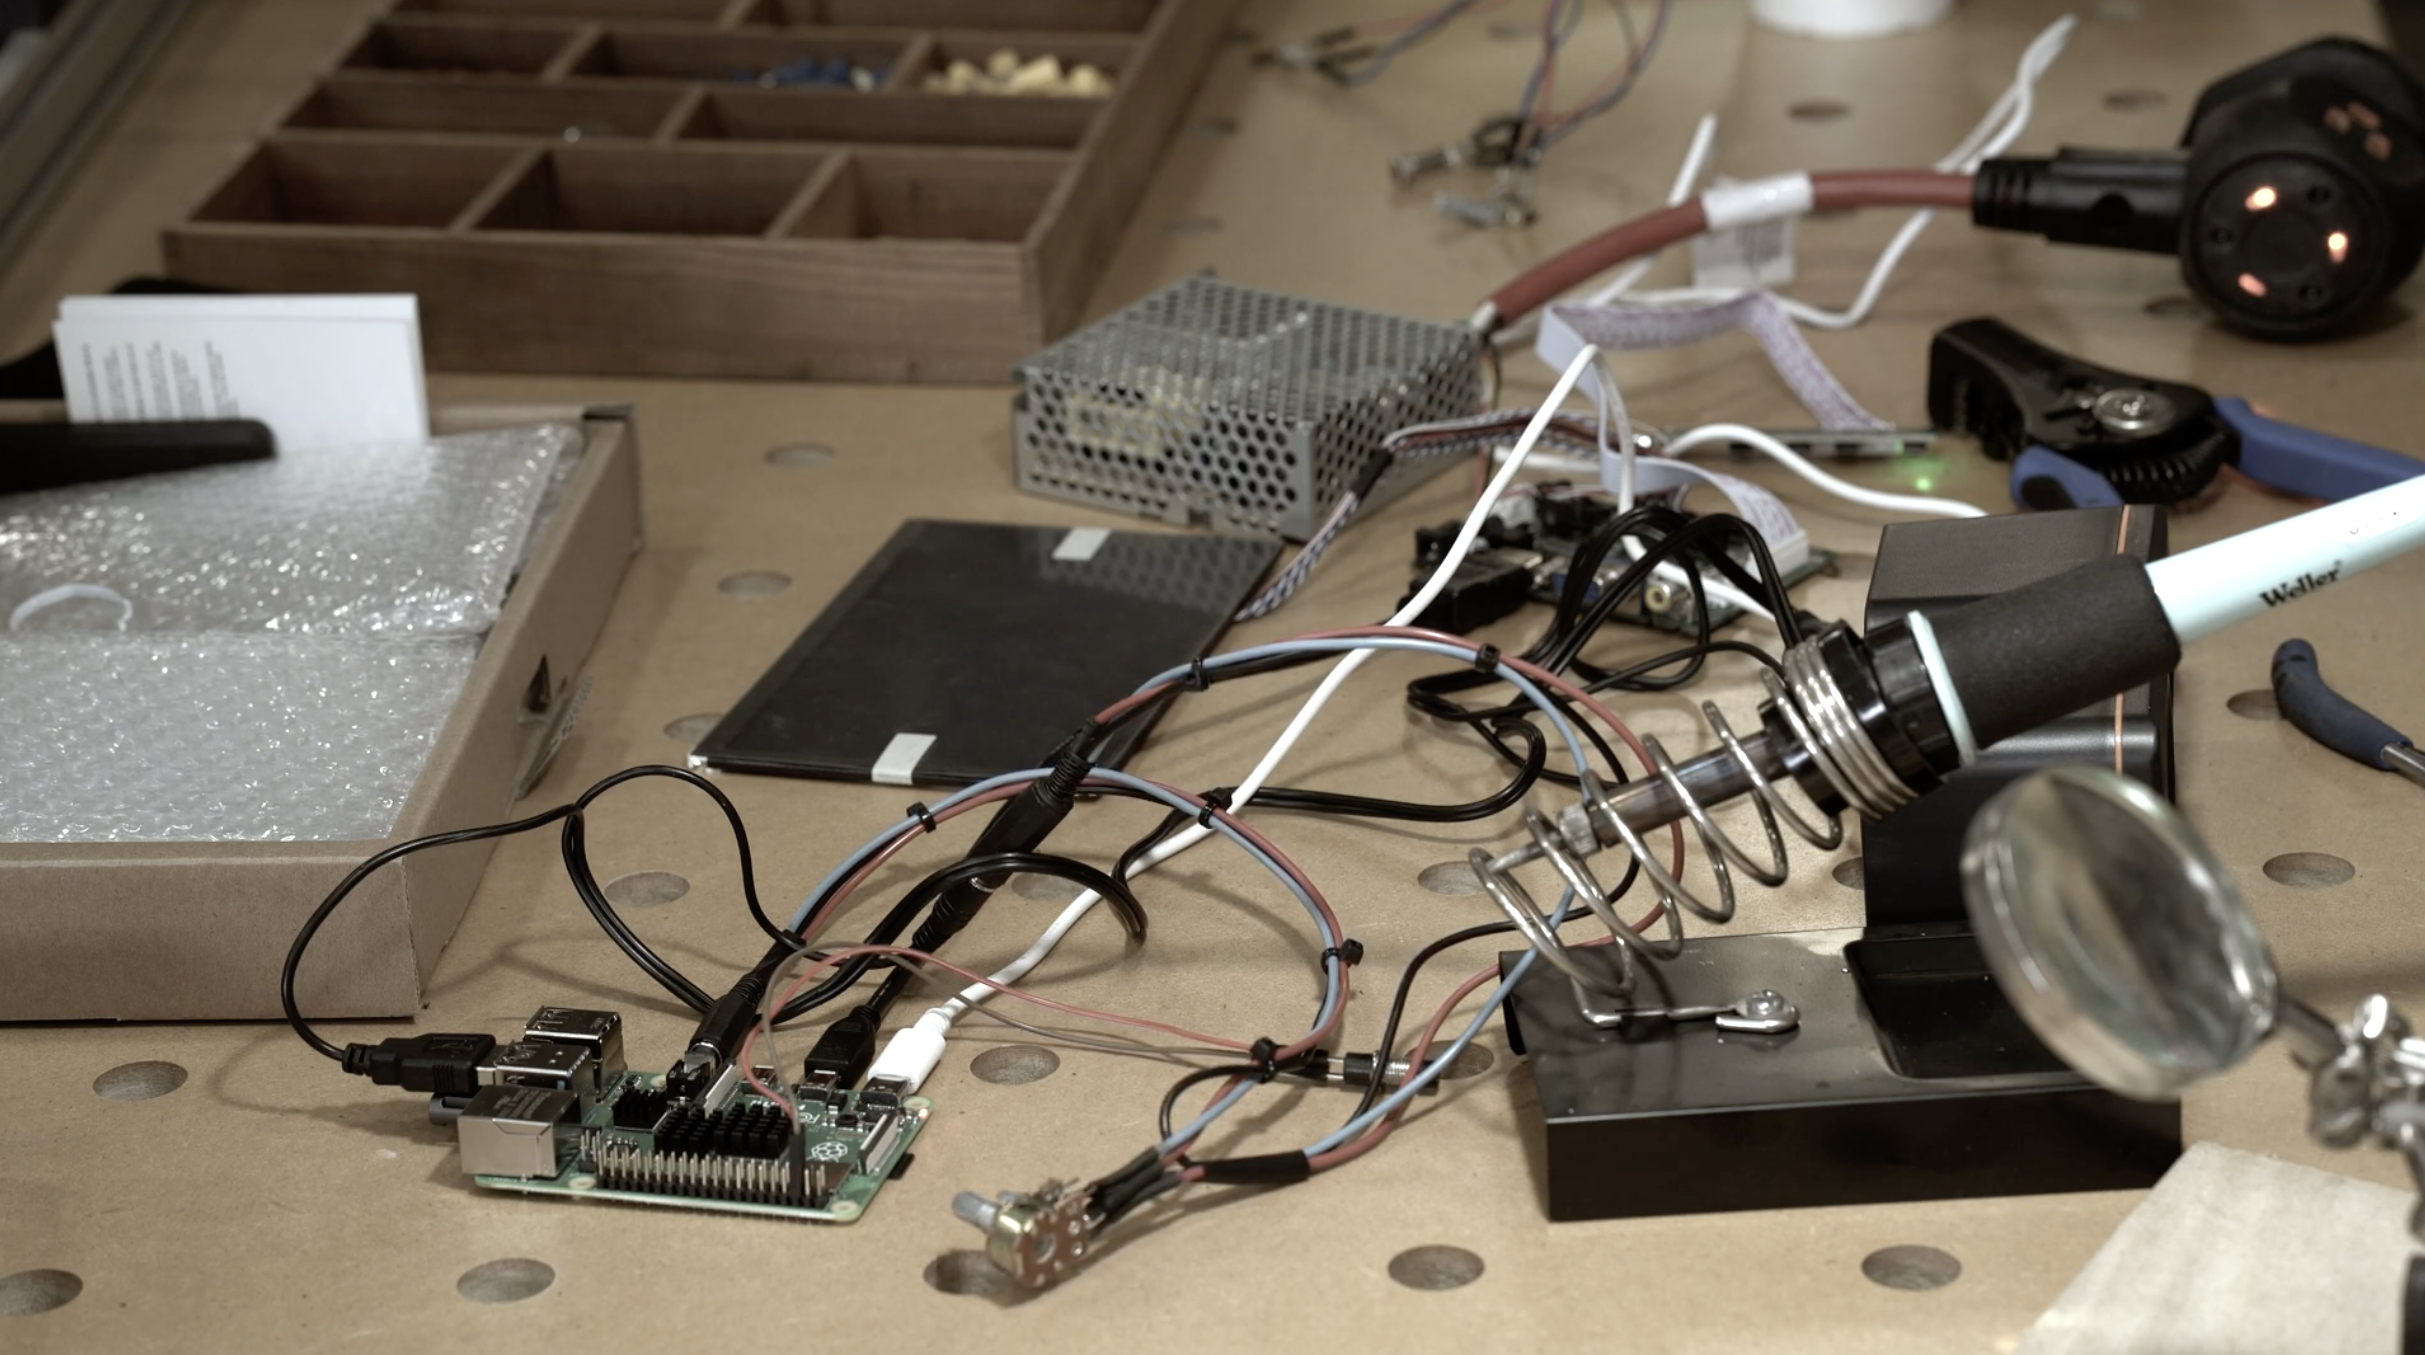
Before he began planning the look of the project, Ryan wanted to make sure everything would connect. “The parts sort of drove the direction of the project, so the first thing I did was mock everything up without a cabinet to make sure everything worked together,” he says.

This posed some problems. “The display is 12 volts, and I would have preferred to simplify things by using one of the 5-volt displays on the market, but I had what I had, so I figured a way to make it work,” Ryan explains, discovering the existence of a dual 5 V-12 V power supply.

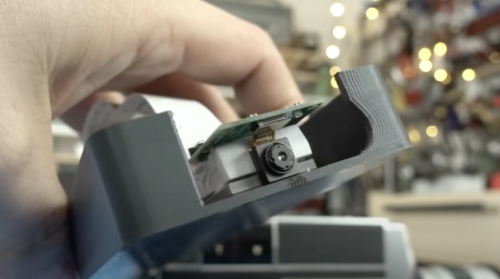
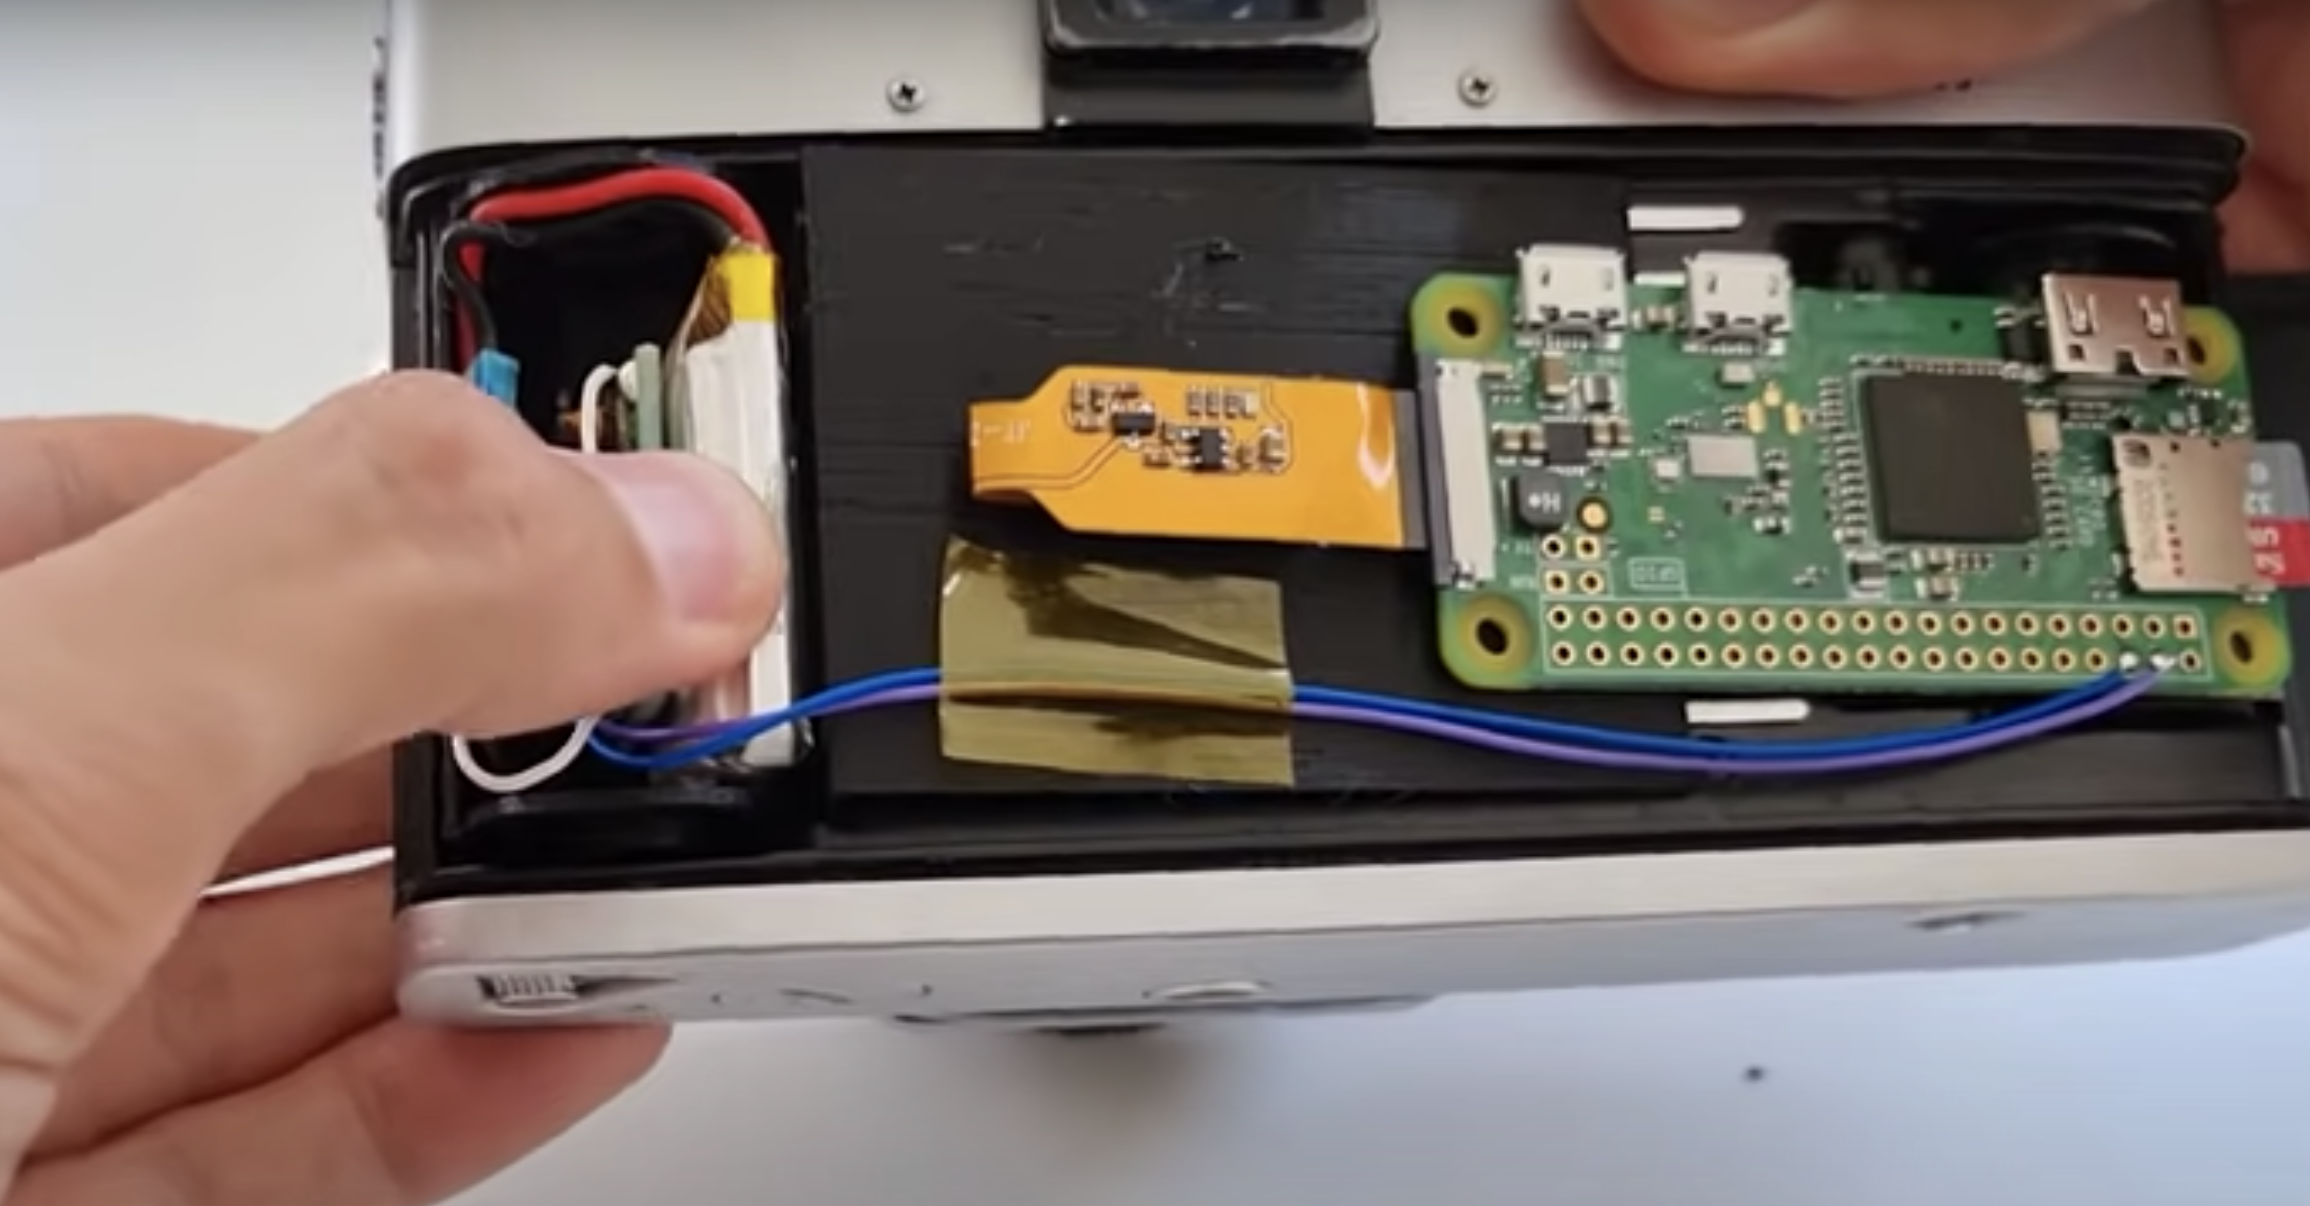
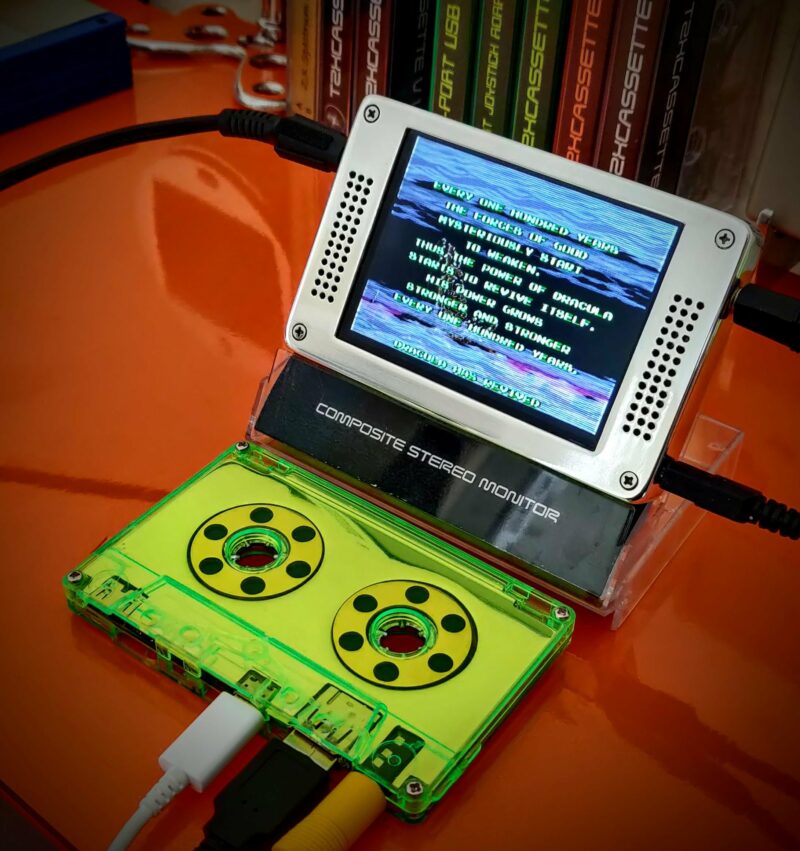
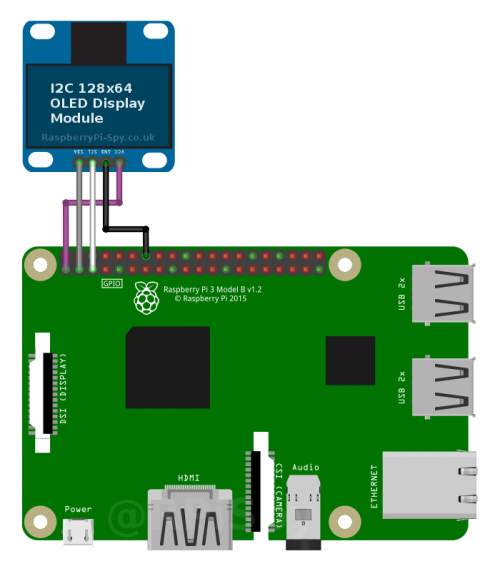
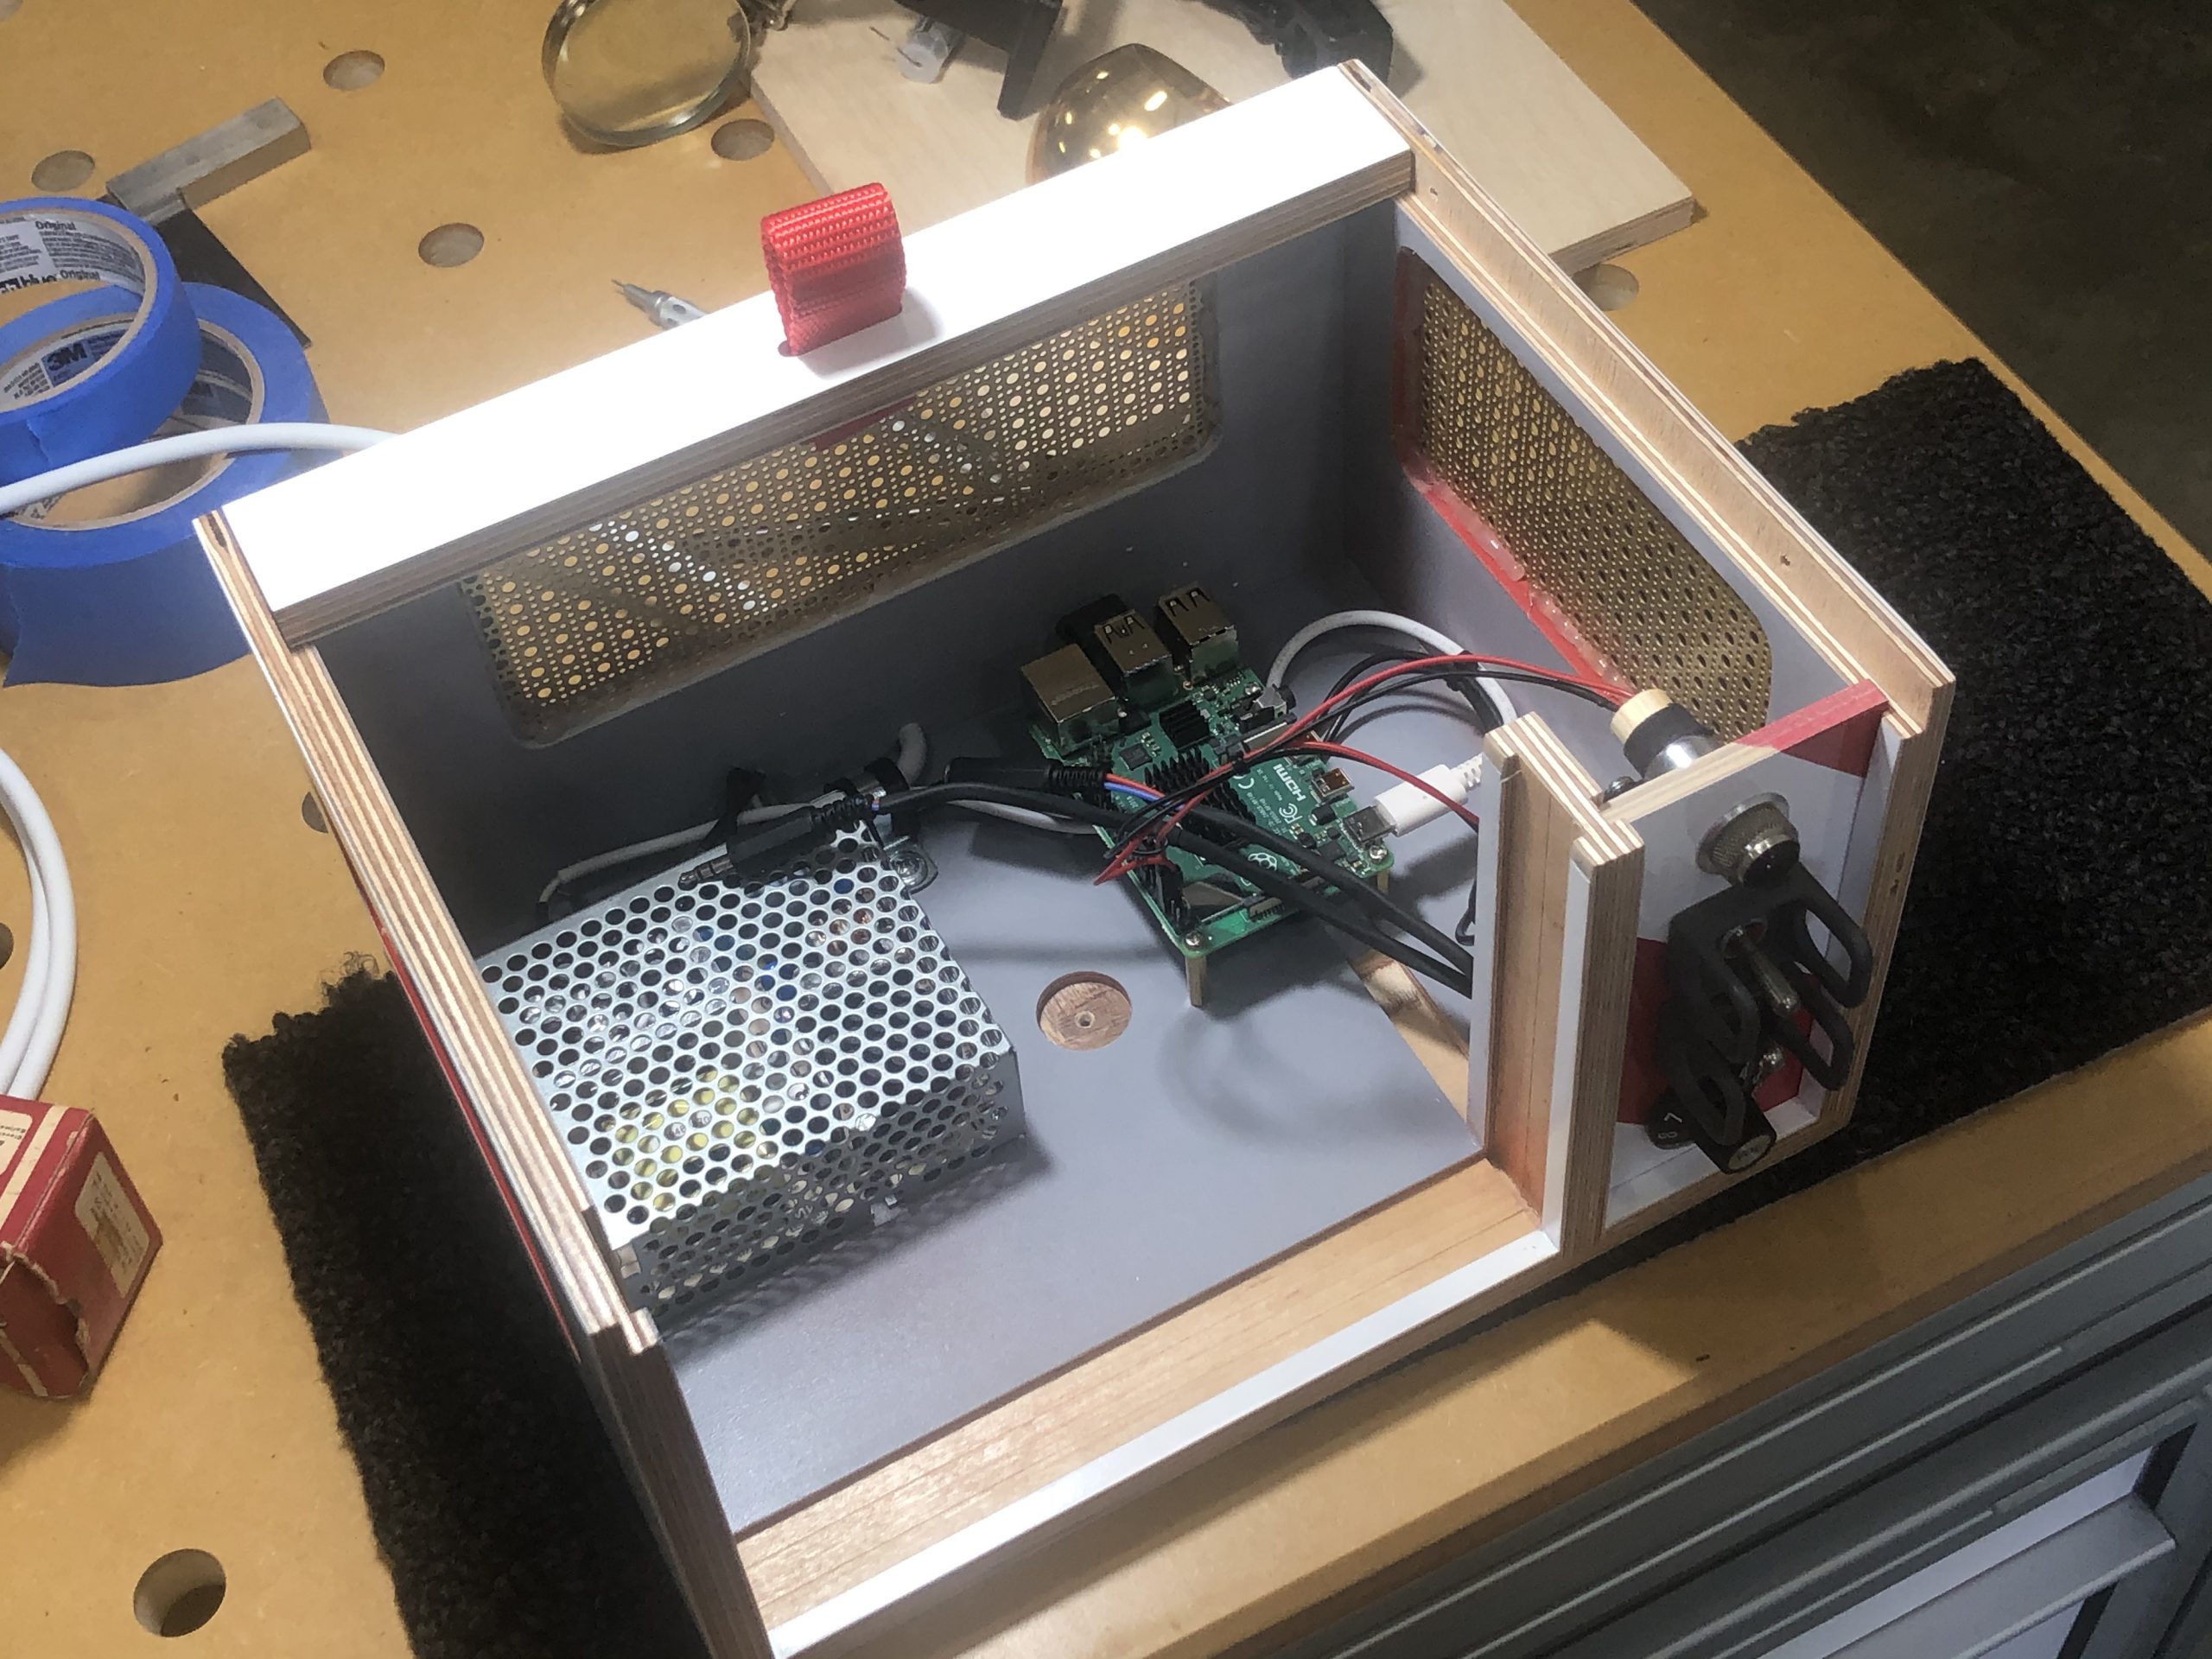
With a Raspberry Pi 4 computer, the LCD display, a driver board, and a pair of USB speakers borrowed from his son all firmly in hand, he worked on a way of controlling the volume and connected everything up.

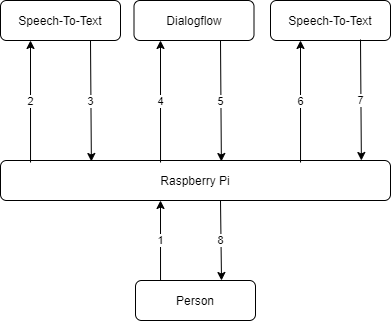
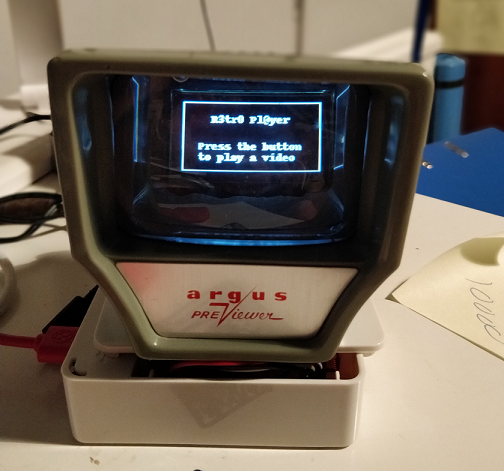
“Power comes in and goes to an on/off switch,” he begins. “From there, it goes to the dual voltage power supply with the 12 V running the display and the 5 V running Raspberry Pi 4 and the small amp for the speakers. Raspberry Pi runs Adafruit’s Video Looper script and pulls videos from a USB thumb drive. It’s really simple, and there are no physical controls other than on/off switch and volume.”

Tune in

The bulk of the work came with the making of the project’s housing. “I wanted to nod the cap to Tom Sachs, an artist who does a lot of work I admire and my main concern was fit and finish,” Ryan reveals.

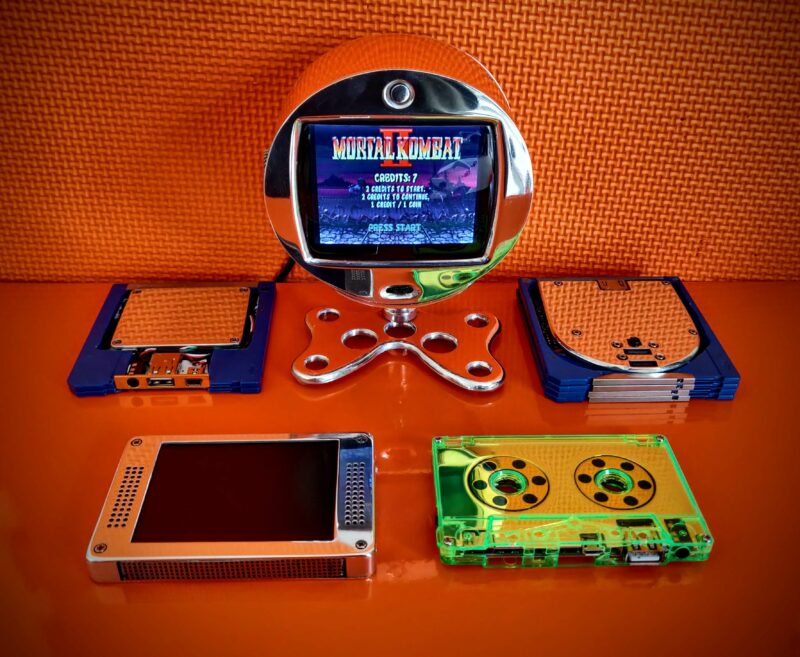
He filmed the process from start to end, showing the intricate work involved, including a base created from a cake-stand and a red-and-white panel for the controls. To ensure the components wouldn’t overheat, a fan was also included.

“The television runs 24/7 and it spends 99 percent of its time on mute,” says Ryan. “It’s literally just moving art that sits on my shelf playing my favourite films and video clips and, every now and then, I’ll look over, notice a scene I love, and turn up the volume to watch for a few minutes. It’s a great way to relax your brain and escape reality every now and then.”

Get The MagPi magazine issue 97 — out today

The MagPi magazine is out now, available in print from the Raspberry Pi Press onlinestore, your local newsagents, and the Raspberry Pi Store, Cambridge.

You can also download the PDF directly from the MagPi magazine website.

Subscribers to the MagPi for 12 months get a free Adafruit Circuit Playground, or can choose from one of our other subscription offers, including this amazing limited-time offer of three issues and a book for only £10!

The post Atomic TV | The MagPi 97 appeared first on Raspberry Pi.