Tag Archives: Raspberry Pi Zero W

Zippy the Raspberry Pi Zero-powered mini Mars Rover

Post Syndicated from Ashley Whittaker original https://www.raspberrypi.org/blog/zippy-the-raspberry-pi-zero-powered-mini-mars-rover/

Maker Mellow was inspired by watching the progress of NASA’s Perseverance Mars rover and wanted in on the interplanetary robot scene. Their first idea was to build a scale version of Perseverance, but when their partner stepped in to suggest that starting smaller might be a little easier, Zippy was born.
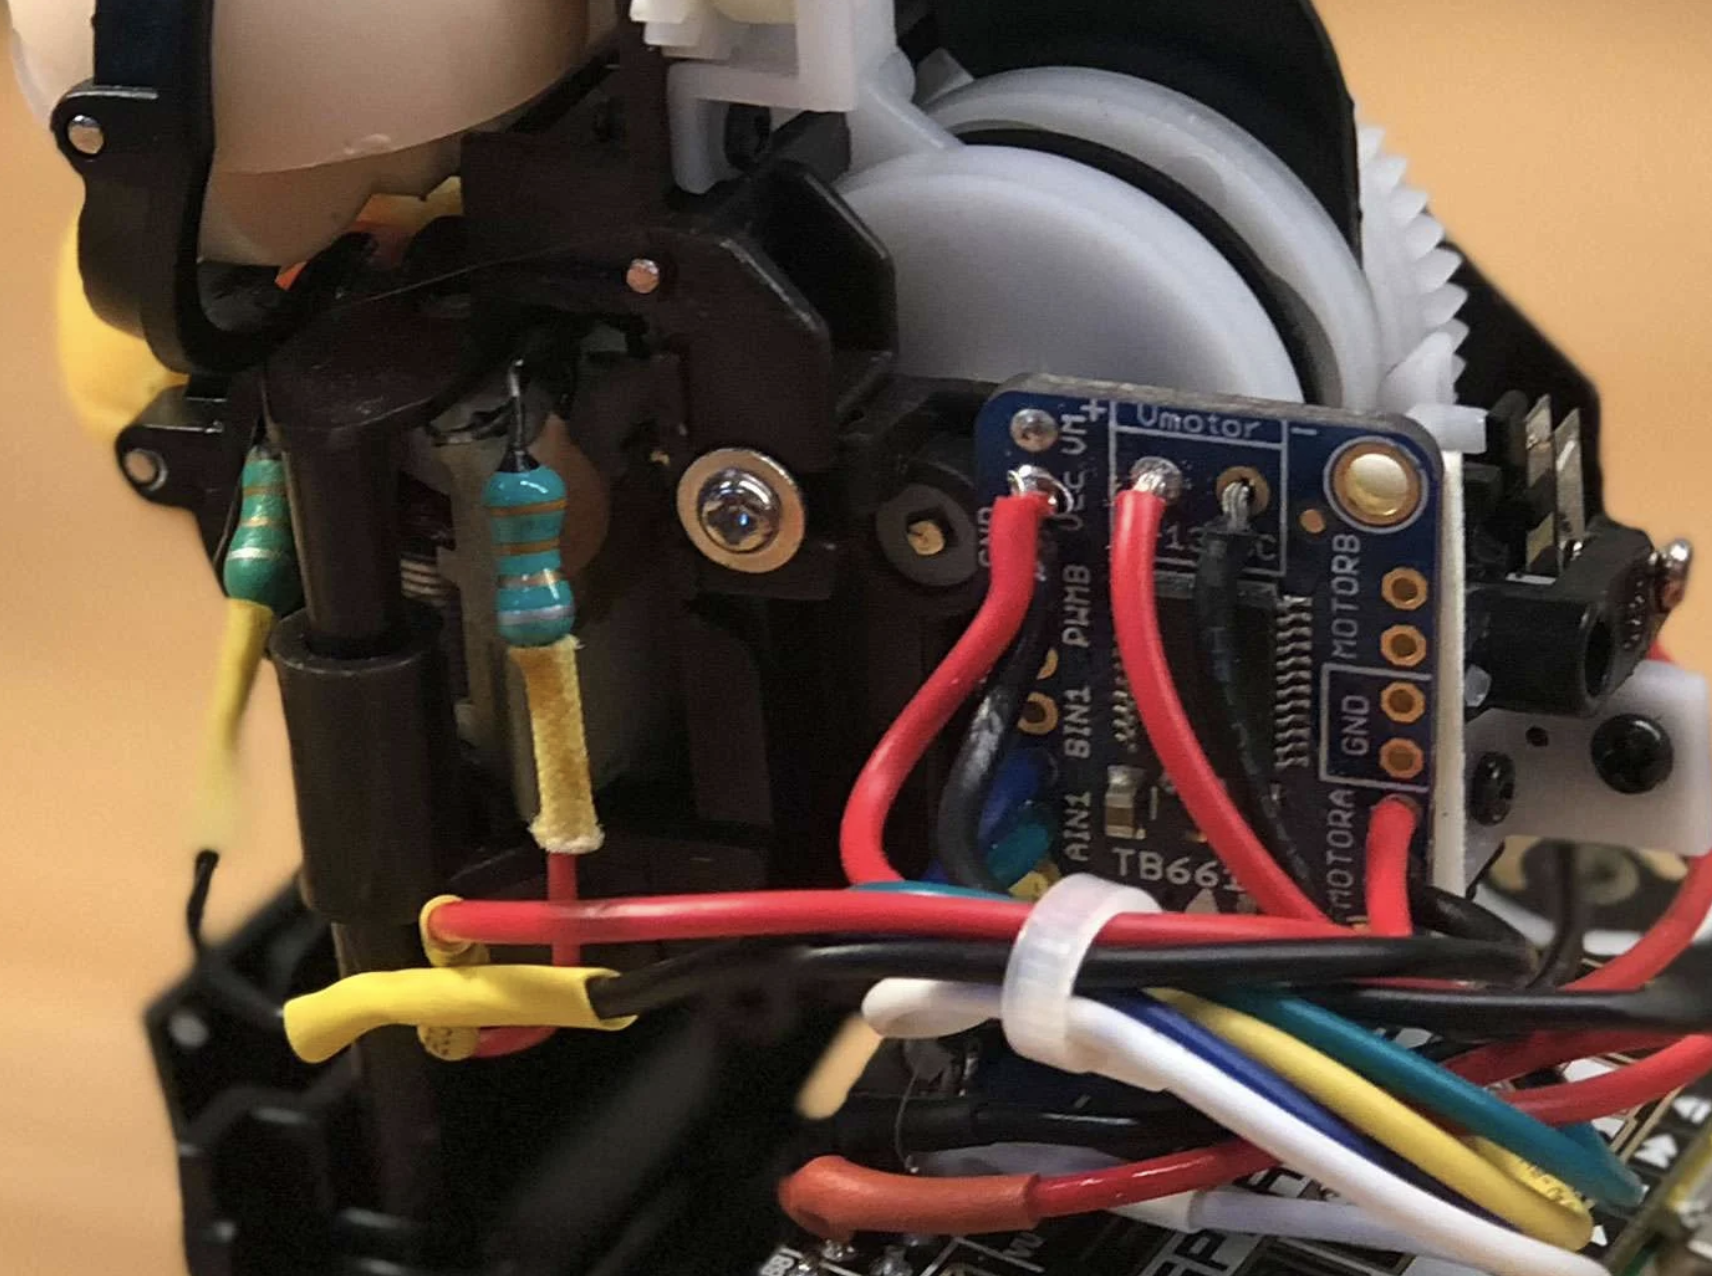
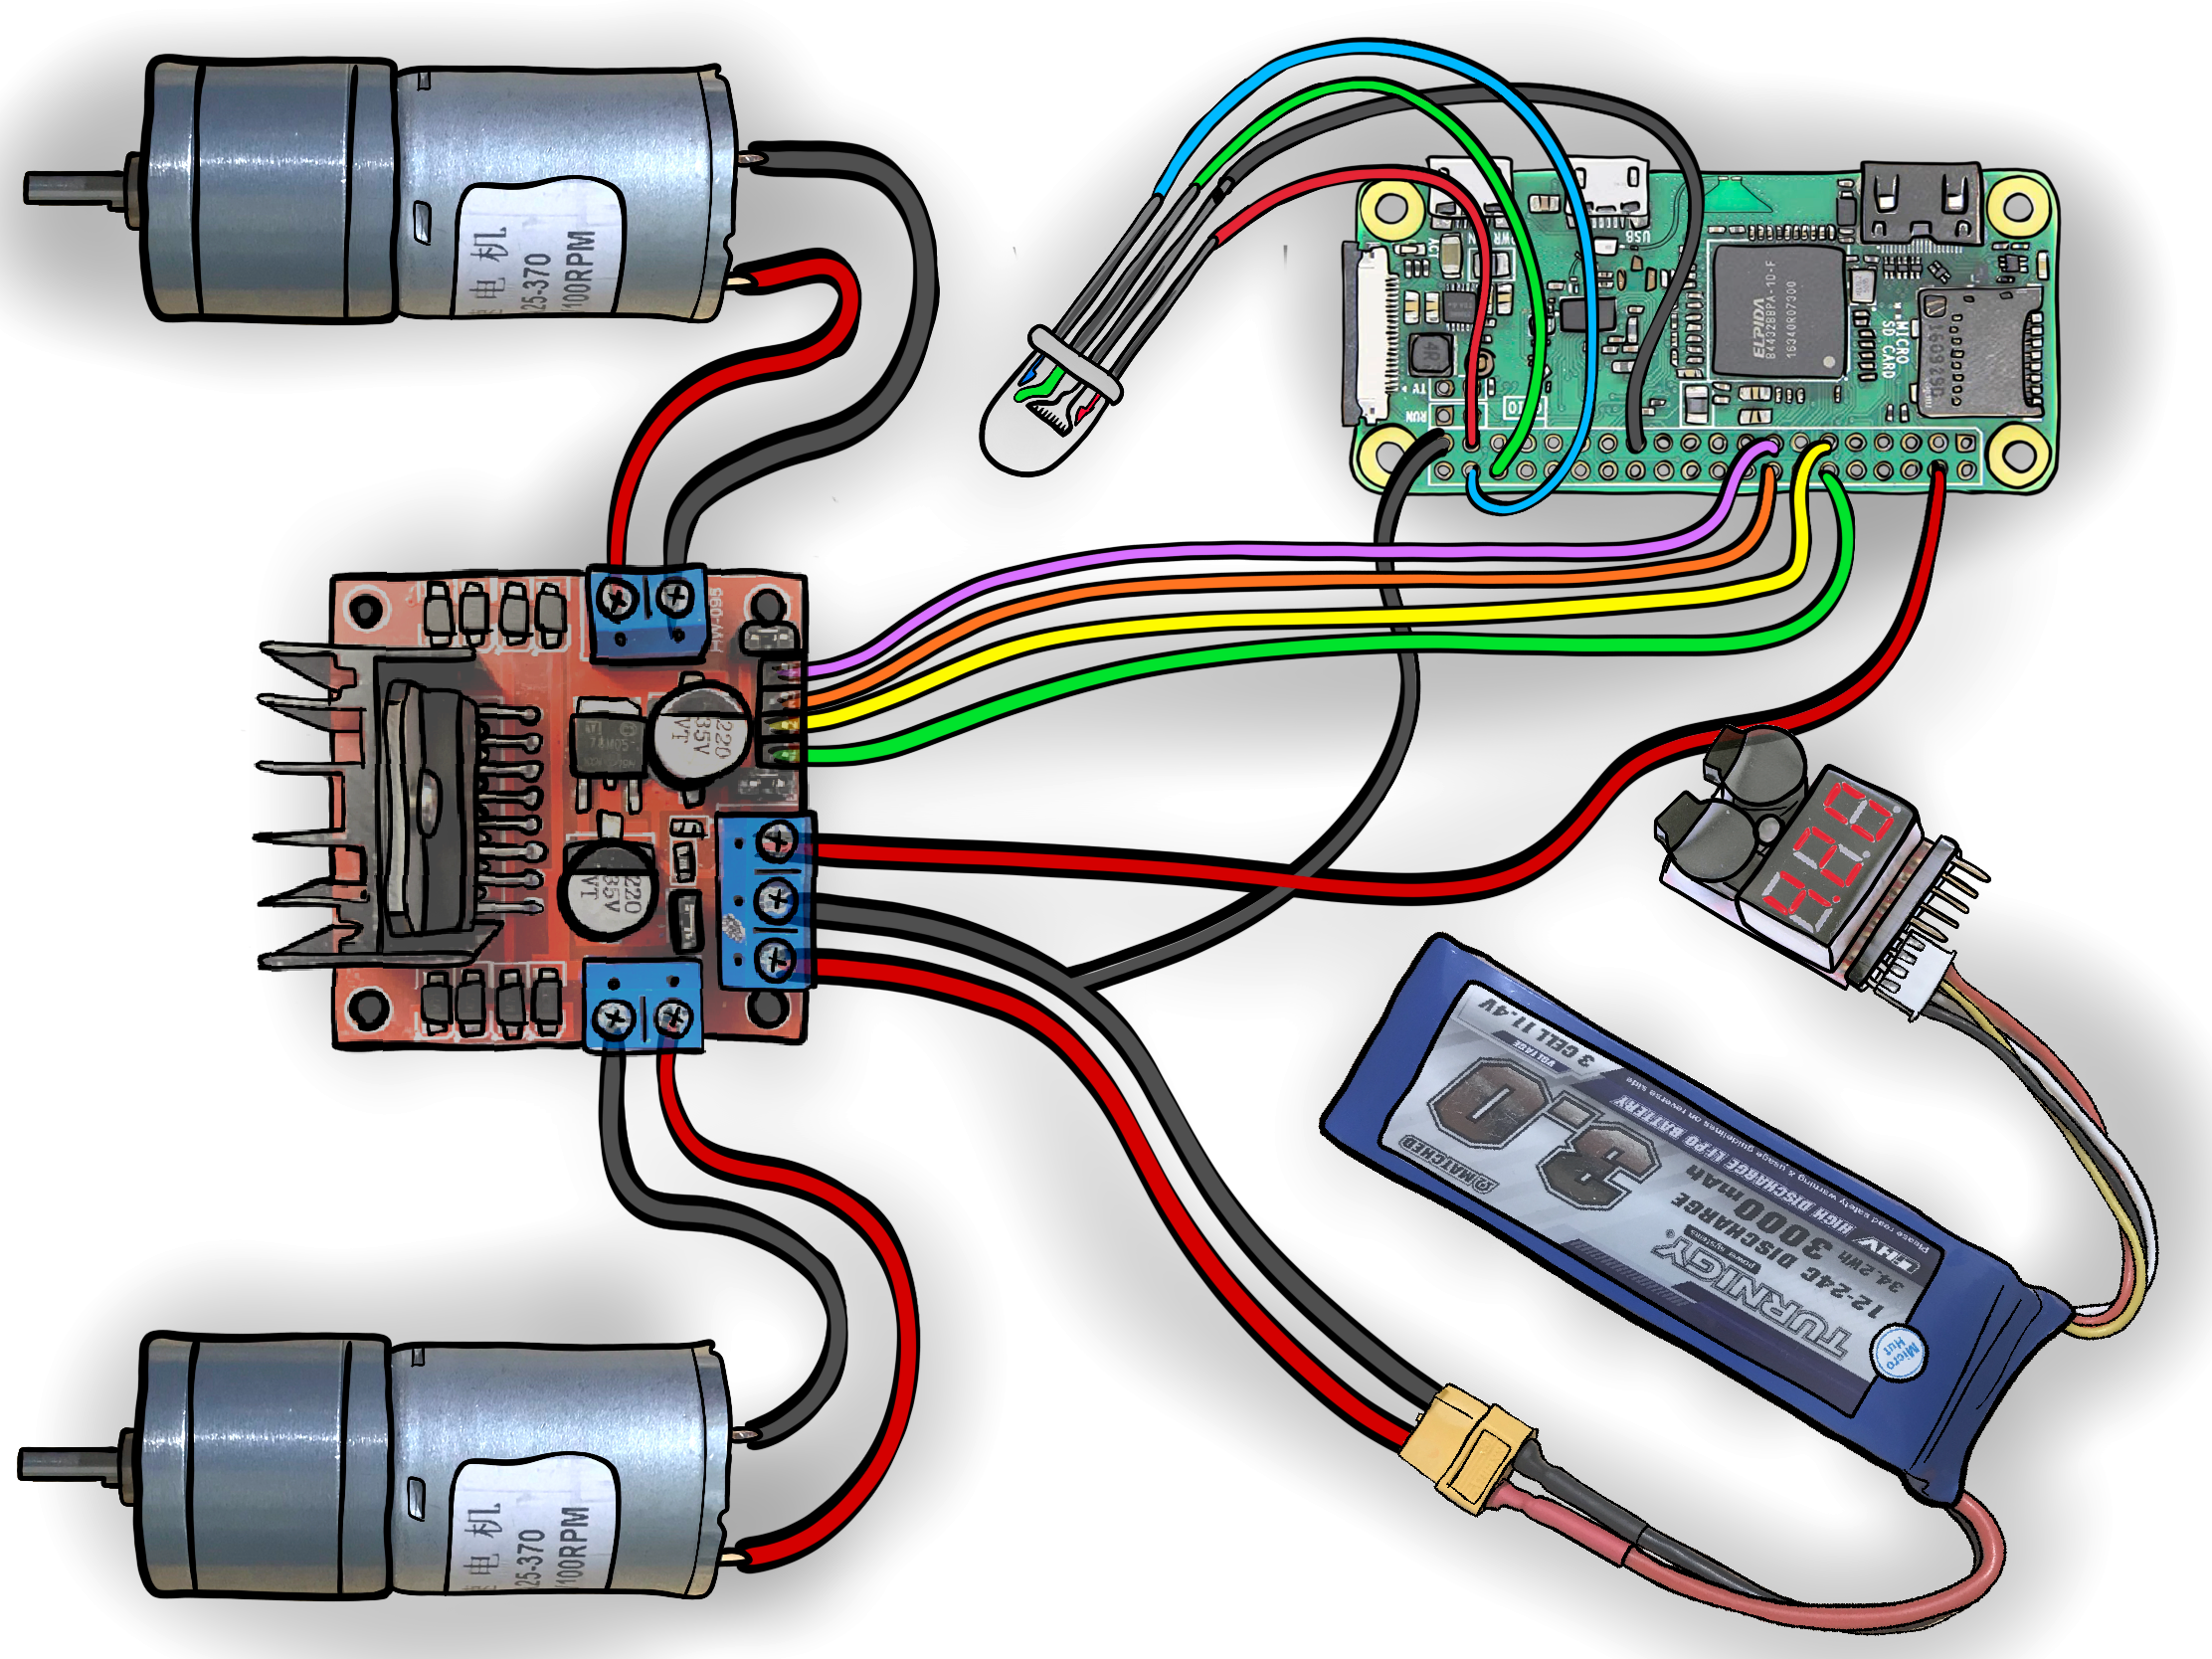
Zippy 3.0 showcase courtesy of Mellow’s reddit post

Hardware

Raspberry Pi Zero W

Motor driver L298N Mini

3V-6V gear motors

Buck converter

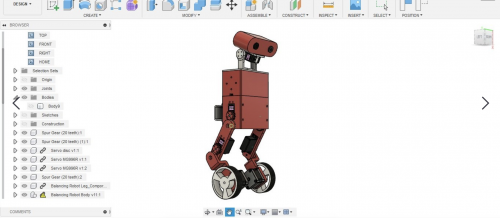
ProtoTank (a bolt-together modular tank-style robotics platform)

Zippy mini mars rover insides
Inside Zippy

Zippy’s basic parts haven’t changed much through its three iterations. You can follow the journey of Zippy 1.0 through 3.0 on Mellow’s website. You’ll see that some additional hardware was required when Mellow made some improvements.
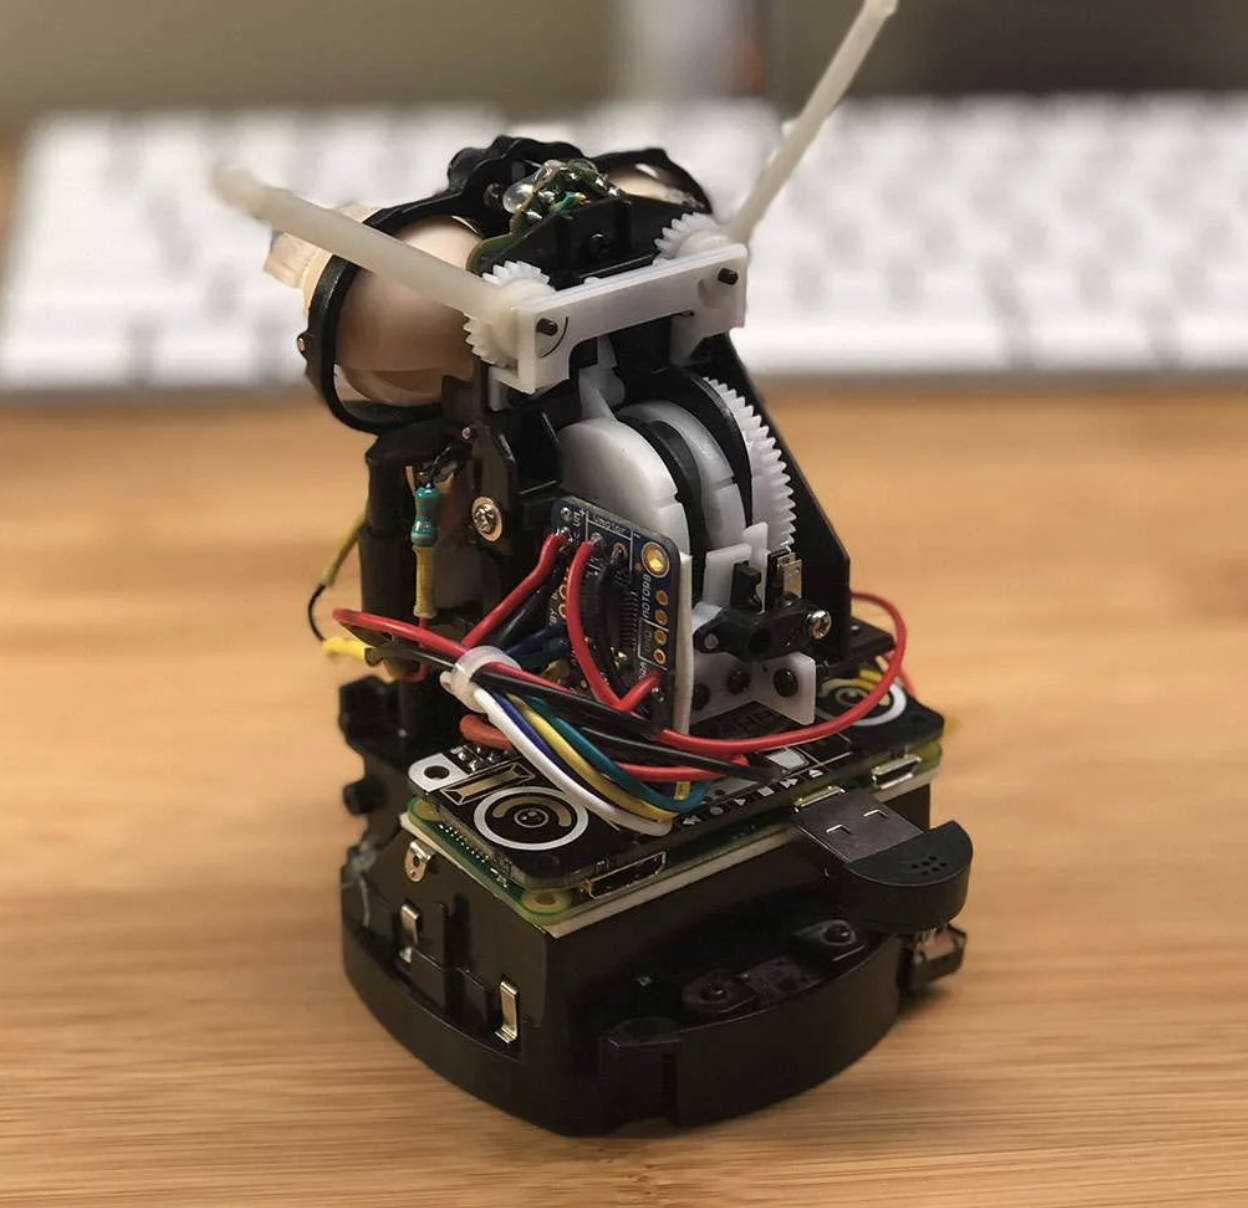
Baby Zippy

The first version of Mellow’s mini Mars rover was just a motor on a 3D-printed body, controlled by plugging in wires to the battery. But Mellow was desperate to level up their robot and build something that could be controlled by an Xbox controller. They reached that goal with Zippy 2.0 and can drive the mini Mars rover remotely via Bluetooth. However, the range is quite tight, so slow runners need not apply for the job of pilot.

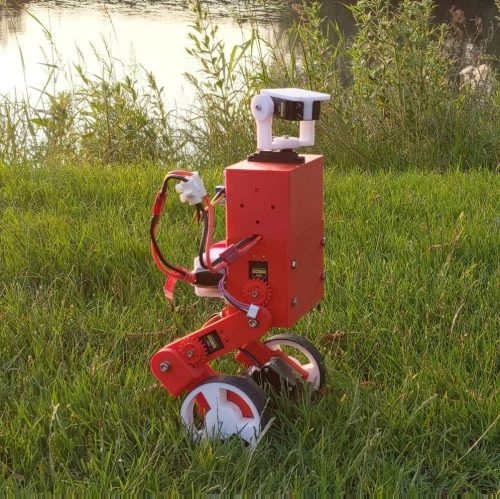
Zippy 3.0 comes complete with a DJI Osmo Action camera to capture its adventures.

Baby Zippy 1.0 playing on the carpet

What surfaces can Zippy ride on?

Our favourite part of Mellow’s original project post is the list rating how good Zippy is at navigating various types of terrain (some of which are showcased in the video up top):

Sand – NO it gets stuck in the wheels

Big rocks – NO the robot is too low to the ground and gets stuck

Pebbles – with determination

Grass – only very short grass

Human bodies – surprisingly well

Carpets – Zippy loves carpets

Flat terrain – definitely

Zippy 2.0 out on the road

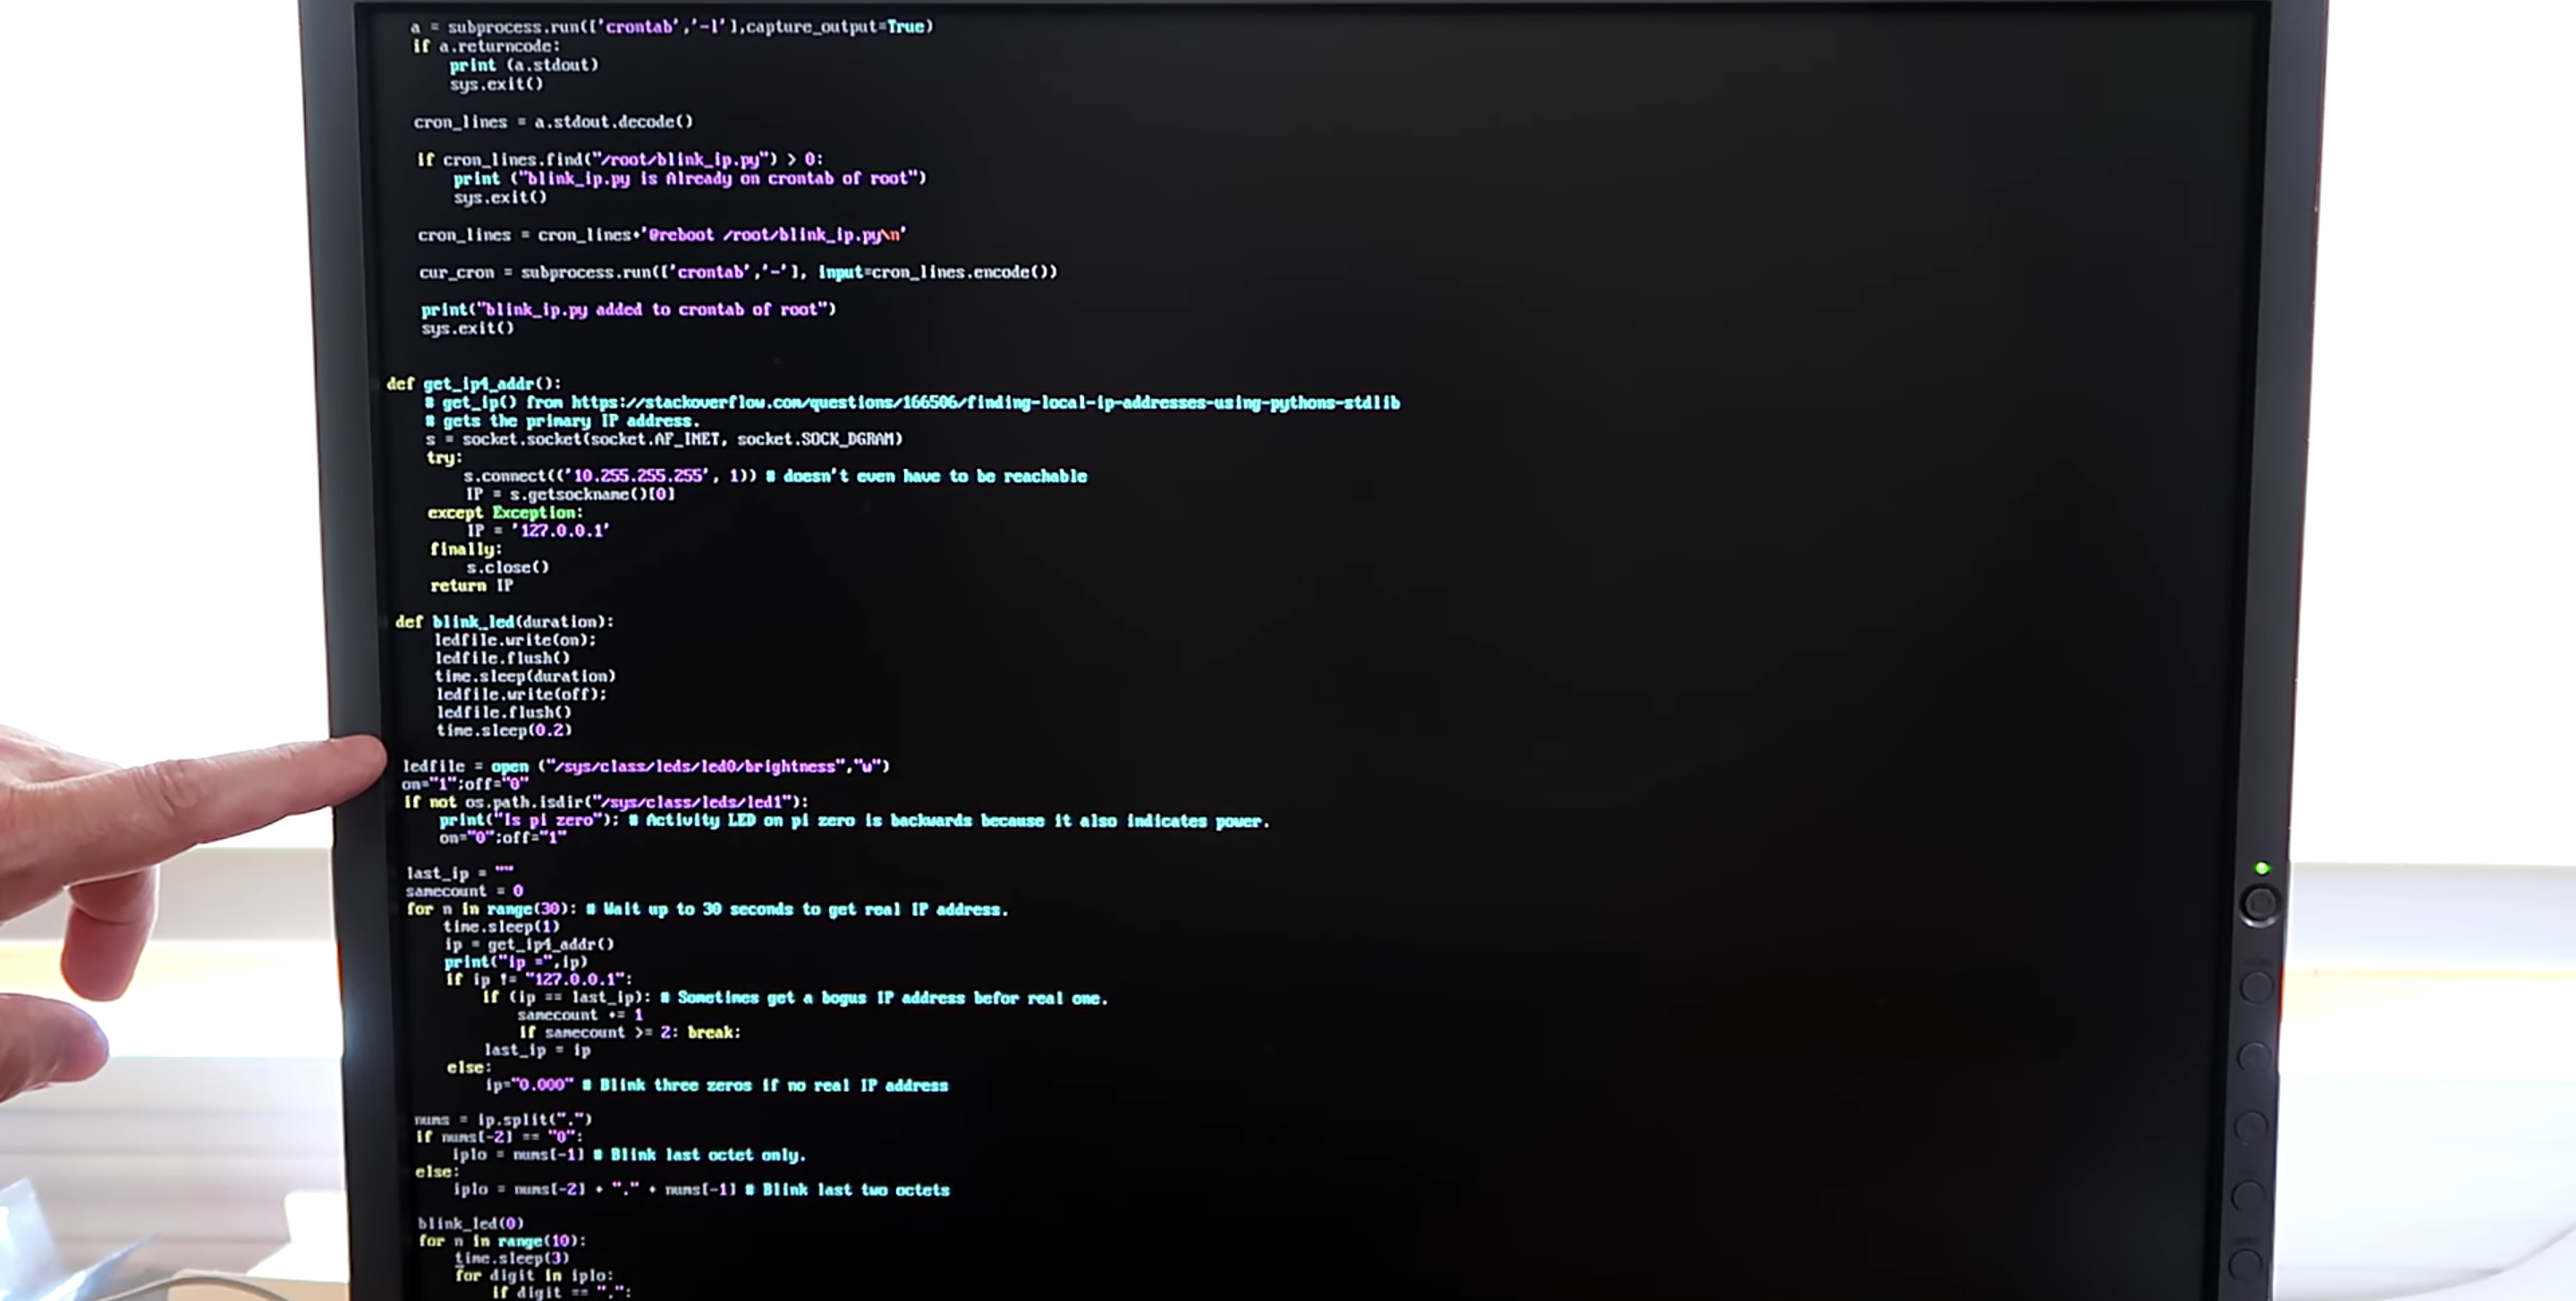
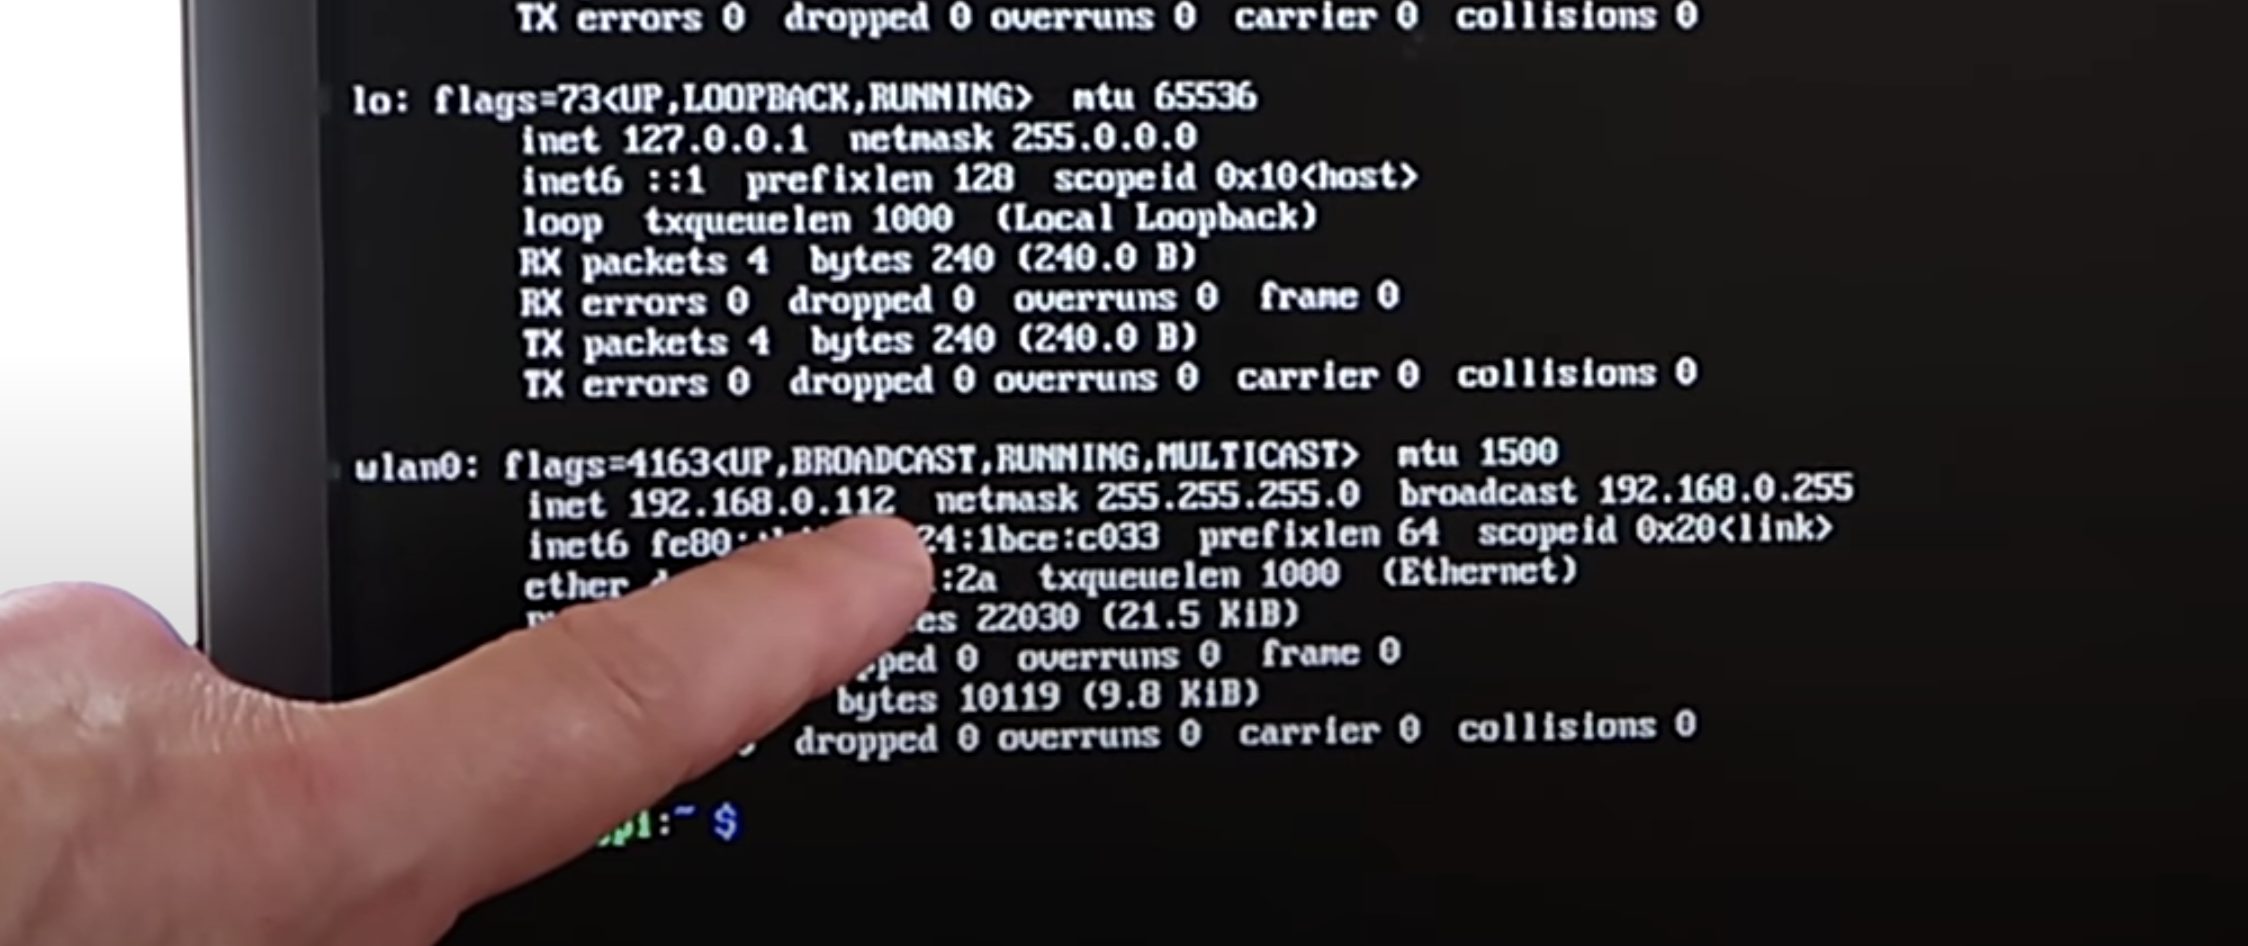
Here’s all the code you need to build your own mini Mars rover.

Follow the real thing on Mars

Keep up with NASA’s Perseverance Mars rover on Twitter. Perseverance spent its summer drilling into rocks, and has photos to prove it.

The post Zippy the Raspberry Pi Zero-powered mini Mars Rover appeared first on Raspberry Pi.

Teasmade comes back to life with Raspberry Pi

Post Syndicated from Ashley Whittaker original https://www.raspberrypi.org/blog/teasmade-comes-back-to-life-with-raspberry-pi/

It hurts our aged soul to think how many of you won’t know what a teasmade is. So here is a quick overview of this classic 20th-century technology. Now we will tell you how VEEB brought such a contraption back to life with Raspberry Pi.

Yeah, we love the project video as much as you do. The clattering trolley rolling in with this ancient tea-making machine on top. Then loudly making a Google calendar note to brew the tea for you while you do something more useful. Genius.

Parts list

teasmade with raspberry pi attached
Look how cute we look stuck on the side of a Teasmade

How does it work?

Raspberry Pi reads your Google calendar and automatically activates the kettle ten minutes before the time when you’ve said you want a coffee.

Then it gets super noisy. Teasmades are like that. But it’s worth it, trust me. To cover the sound of the janky old machine, VEEB has added a speaker that plays God save the Queen as the water heats up and pours into the clever dripper with the coffee filter in it. I’m not sure there is anything more English than that, other than if this project actually made tea and not coffee. I think coffee belongs to Seattle, but I’m not sure Seattle has a national anthem of its own. Correct me in the comments. Maybe Nirvana?

teasmade working with google calendar
You have to log that brew time

Anywho, then you sprinkle your coffee grounds into the hot water, give it a stir with a spoon, and hey presto, you have [kind of automatically brewed] coffee!

File this in the list of projects we love because engineers like to spend several hours building something to automate an activity that takes one second. In this case, switching on a kettle to boil water for your coffee.

For more of VEEBs wonderful projects, check out their YouTube channel.

Public Service Announcement

A quick PSA to share with those not in the know the wonder that is the limited television series Father Ted. The Mrs Doyle character was infamous for her fervent insistence on making everyone a cup of tea and she was crushed when her parochial employer, Father Ted, gave her a Teasmade for Christmas to take the “misery” out of making tea. It is not a miserable task. It is a calming, soothing ritual. Stupid Father Ted.

If you want to watch the whole episode, it’s the 1996 Christmas special

The post Teasmade comes back to life with Raspberry Pi appeared first on Raspberry Pi.

Top project ideas for Raspberry Pi Zero

Post Syndicated from Ashley Whittaker original https://www.raspberrypi.org/blog/top-project-ideas-for-raspberry-pi-zero/

We came across this ‘Top 15 Raspberry Pi Zero Projects’ video and realised that it’s been a while since we showed our tiniest computer some love on this blog.

Too many cool projects to blog about here, so give the full compilation video a watch for more ideas

The compilation features full build videos for 15 Raspberry Pi Zero projects. Too many to go into detail about here, so we’ve picked out a few of our favourites to share.

Origami sunrise lamp

Time to wake up!

This Sunrise lamp doubles as a psychedelic night light, and is built with snapology origami. Raspberry Pi Zero W powers an Adafruit NeoPixel ring and does a great job of letting maker Russell Eveleigh sleep in past 5am.

Russell coded different sequences to make the NeoPixel lights turn to a calming blue at bedtime, and then brighten up to sunshine yellow when it’s time for the kids to wake up.

mintyPi retro gaming handheld

How could we not share a retro gaming device hidden in an Altoids tin? Raspberry Pi Zero runs RetroPie software, and gameplay lasts up to five hours!

mintyPi is a nice simple do-it-yourself project, and you can find links for the parts at sudomod.com. Good luck finding an Altoids tin in the UK though. If you’ve found a good alternative, let us know in the comments.

Fresh coffee monitor

Brew is ready

We picked this project because Raspberry Pi Towers coffee drinkers have been thinking about making something similar.

Caleb Brewer made his office coffee machine smart by building an alert system that sends notifications when someone brews a fresh pot. A waterproof temperature sensor constantly monitors the coffee pot, and Raspberry Pi Zero W turns on an alert light and sends a Slack notification when a new hot tasty brew is ready.

If you’re into compilation videos featuring Raspberry Pi and Arduino projects, follow Top Projects Compilation on YouTube, Facebook or Instagram for more.

The post Top project ideas for Raspberry Pi Zero appeared first on Raspberry Pi.

Raspberry Pi ‘WeatherClock’ shows you the hour’s forecast

Post Syndicated from Ashley Whittaker original https://www.raspberrypi.org/blog/raspberry-pi-weatherclock-shows-you-the-hours-forecast/

Meet Eli’s WeatherClock, a digital–analogue timepiece that displays the weather at each hour of the day as well as the time. Here’s an example: every day at 3pm, instead of the hour hand just pointing to a number three on the clock’s face, it also points to a visual representation of what the weather is doing. Obviously, Eli’s WeatherClock still tells the time using the standard positions of the hour and minute hands, but it does two jobs in one, and it looks much more interesting than a regular clock.

We agree, she is lovely (sound on for the video will make that make sense)

Detailed forecast

You can also press on every hour position of the watch’s touchscreen display to see more detailed meteorological information, such as temperature and the likelihood of rain. Then once you’ve gotten all the detail you need, you return to the simple analogue resting face to by pressing the centre of the touchscreen.

Weather details view of the weatherclock digital-analogue clock project.
weatherClock can give you more detail if you want it to

Under the hood

The device uses the openWeatherMap API to fetch weather data for your location. It’s a simple build powered by Raspberry Pi Zero W with a Pimoroni 4″ HyperPixel Hi-Res Display providing the user interface. And its slim, pocket-sized design means you can take it with you on your travels.

Inside view of the weatherclock digital-analogue clock project.
Tiny Raspberry Pi Zero W and a Pimoroni 4″ touchscreen fit inside perfectly

We found this creation on The Digital Vagrant‘s YouTube channel. A friend named Eli gave them the idea so the maker named the project after him. The Digital Vagrant liked the idea of being able to quickly check the weather before leaving the house — no need to check a computer or get your phone out of your bag.

Side view of the weatherclock digital-analogue clock project.
Its super slim design makes WeatherClock portable

Want to make your own WeatherClock? The lovely maker has deposited everything you need on GitHub.

The post Raspberry Pi ‘WeatherClock’ shows you the hour’s forecast appeared first on Raspberry Pi.

Bluebot Shoal Fish Robot

Post Syndicated from Rosie Hattersley original https://www.raspberrypi.org/blog/bluebot-shoal-fish-robot/

If you loved the film Finding Dory, you might just enjoy the original story of these underwater robots, fresh out of the latest issue of The MagPi Magazine.

It’s no coincidence that the shoal of robot fish in this Raspberry Pi Zero W project look more than a little like Dory from Pixar’s movie. As with the film character, the Bluebot robot fish are based on the blue tang or surgeonfish. Unlike Dory, however, these robot fish are designed to be anything but loners. They behave collectively, which is the focus of the Blueswarm research project that began in 2016 at Harvard University.

Linked cameras attached to Raspberry Pi Zero W monitor what surrounding fish are doing. The Bluebot robot then mimics their behaviour, such as moving its fins
The Blueswarm team designed a PCB and wrote custom Python code for their subterranean Raspberry Pi experiments

Florian Berlinger and his PhD research project colleagues Radhika Nagpal, Melvin Gauci, Jeff Dusek, and Paula Wulko set out to investigate the behaviour of a synchronised group of underwater robots and how groups of such robot fish are co‑ordinated by observing each other’s movements. In the wild, birds, fish, and some animals co-ordinate in this way when migrating, looking for food and as a means of detecting and collectively avoiding predators. Simulations of such swarm behaviour exist, but Blueswarm has the additional challenge of operating underwater. Raspberry Pi Zero W works well here because multiple Bluebot robots can be accessed remotely over a secure wireless connection, and Raspberry Pi Zero W is physically small and light enough to fit inside a palm-sized robot. 

Mimicking movements

The team designed the fish-inspired, 3D-printed robot body as well as the fin-like actuators and the on-board printed circuit board which connects to all the electronics and communicates with Raspberry Pi Zero W. Designing the robot fish took the team four years, from working out how each robot fish would move and adding sensing capabilities, to refining the design and implementing collective behaviours, coded using Python 3. 

The Blueswarm team designed a PCB and wrote custom Python code for their subterranean Raspberry Pi experiments

They used as many off-the-shelf electronics as possible to keep the robots simple, but adapted existing software algorithms for the purposes of their investigations, “with several clever twists on existing algorithms to make them run fast on Raspberry Pi,” adds Florian. 

On-board cameras that offer “an amazing 360-degree field of view” are one of the project’s real triumphs. These cameras are connected to Raspberry Pi via a duplexer board (so two cameras can operate as one) the project team co-designed with Arducam. Each Raspberry Pi Zero W inside follows the camera images and instructs the fins to move accordingly. The team developed custom algorithms for synchronisation, flocking, milling, and search behaviours to simulate how real fish move individually and as a group. As a result, says Florian, “Blueswarm can be used to study inter-robot co-ordination in the laboratory and to learn more about collective intelligence in nature.” He suggests other robot-based projects could make use of a similar setup. 

Imitation of life

Each robot fish cost around $250 and took approximately six hours to make. To make your own, you’d need a 3D printer, Raspberry Pi Zero W, a soldering station – and a suitably large tank for your robot shoal! Although the team hasn’t made the code available, the Blueswarm project paper has recently been published in Science Robotics and by the IEEE Robots and Automation Society. Several biology researchers have also been using the Bluebot shoal as ‘fish surrogates’ in their studies of swimming and schooling.

It may look cute, but Bluebot has a serious purpose

The MagPi #107 out NOW!

MagPi 107 cover

You can grab the brand-new issue right now from the Raspberry Pi Press store, the Raspberry Pi Store, Cambridge, or via our app on Android or iOS. You can also pick it up from supermarkets and newsagents. There’s also a free PDF you can download.

The post Bluebot Shoal Fish Robot appeared first on Raspberry Pi.

What the blink is my IP address?

Post Syndicated from Ashley Whittaker original https://www.raspberrypi.org/blog/what-the-blink-is-my-ip-address/

Picture the scene: you have a Raspberry Pi configured to run on your network, you power it up headless (without a monitor), and now you need to know which IP address it was assigned.

Matthias came up with this solution, which makes your Raspberry Pi blink its IP address, because he used a Raspberry Pi Zero W headless for most of his projects and got bored with having to look it up with his DHCP server or hunt for it by pinging different IP addresses.

How does it work?

A script runs when you start your Raspberry Pi and indicates which IP address is assigned to it by blinking it out on the device’s LED. The script comprises about 100 lines of Python, and you can get it on GitHub.

A screen running Python
Easy peasy GitHub breezy

The power/status LED on the edge of the Raspberry Pi blinks numbers in a Roman numeral-like scheme. You can tell which number it’s blinking based on the length of the blink and the gaps between each blink, rather than, for example, having to count nine blinks for a number nine.

Blinking in Roman numerals

Short, fast blinks represent the numbers one to four, depending on how many short, fast blinks you see. A gap between short, fast blinks means the LED is about to blink the next digit of the IP address, and a longer blink represents the number five. So reading the combination of short and long blinks will give you your device’s IP address.

You can see this in action at this exact point in the video. You’ll see the LED blink fast once, then leave a gap, blink fast once again, then leave a gap, then blink fast twice. That means the device’s IP address ends in 112.

What are octets?

Luckily, you usually only need to know the last three numbers of the IP address (the last octet), as the previous octets will almost always be the same for all other computers on the LAN.

The script blinks out the last octet ten times, to give you plenty of chances to read it. Then it returns the LED to its default functionality.

Which LED on which Raspberry Pi?

On a Raspberry Pi Zero W, the script uses the green status/power LED, and on other Raspberry Pis it uses the green LED next to the red power LED.

The green LED blinking the IP address (the red power LED is slightly hidden by Matthias’ thumb)

Once you get the hang of the Morse code-like blinking style, this is a really nice quick solution to find your device’s IP address and get on with your project.

The post What the blink is my IP address? appeared first on Raspberry Pi.

Raspberry Pi + Furby = ‘Furlexa’ voice assistant

Post Syndicated from Ashley Whittaker original https://www.raspberrypi.org/blog/raspberry-pi-furby-furlexa-voice-assistant/

How can you turn a redundant, furry, slightly annoying tech pet into a useful home assistant? Zach took to howchoo to show you how to combine a Raspberry Pi Zero W with Amazon’s Alexa Voice Service software and a Furby to create Furlexa.

Furby was pretty impressive technology, considering that it’s over 20 years old. It could learn to speak English, sort of, by listening to humans. It communicated with other Furbies via infrared sensor. It even slept when its light sensor registered that it was dark.

Furby innards, exploded

Zach explains why Furby is so easy to hack:

Furby is comprised of a few primary components — a microprocessor, infrared and light sensors, microphone, speaker, and — most impressively — a single motor that uses an elaborate system of gears and cams to drive Furby’s ears, eyes, mouth and rocker. A cam position sensor (switch) tells the microprocessor what position the cam system is in. By driving the motor at varying speeds and directions and by tracking the cam position, the microprocessor can tell Furby to dance, sing, sleep, or whatever.

The original CPU and related circuitry were replaced with a Raspberry Pi Zero W

Zach continues: “Though the microprocessor isn’t worth messing around with (it’s buried inside a blob of resin to protect the IP), it would be easy to install a small Raspberry Pi computer inside of Furby, use it to run Alexa, and then track Alexa’s output to make Furby move.”

What you’ll need:

Harrowing

Running Alexa

The Raspberry Pi is running Alexa Voice Service (AVS) to provide full Amazon Echo functionality. Amazon AVS doesn’t officially support the tiny Raspberry Pi Zero, so lots of hacking was required. Point 10 on Zach’s original project walkthrough explains how to get AVS working with the Pimoroni Speaker pHAT.

Animating Furby

A small motor driver board is connected to the Raspberry Pi’s GPIO pins, and controls Furby’s original DC motor and gearbox: when Alexa speaks, so does Furby. The Raspberry Pi Zero can’t supply enough juice to power the motor, so instead, it’s powered by Furby’s original battery pack.

Software

There are three key pieces of software that make Furlexa possible:

  1. Amazon Alexa on Raspberry Pi – there are tonnes of tutorials showing you how to get Amazon Alexa up and running on your Raspberry Pi. Try this one on instructables.
  2. A script to control Furby’s motor howchooer Tyler wrote the Python script that Zach is using to drive the motor, and you can copy and paste it from Zach’s howchoo walkthrough.
  3. A script that detects when Alexa is speaking and calls the motor program – Furby detects when Alexa is speaking by monitoring the contents of a file whose contents change when audio is being output. Zach has written a separate guide for driving a DC motor based on Linux sound output.
Teeny tiny living space

The real challenge was cramming the Raspberry Pi Zero plus the Speaker pHAT, the motor controller board, and all the wiring back inside Furby, where space is at a premium. Soldering wires directly to the GPIO saved a bit of room, and foam tape holds everything above together nice and tightly. It’s a squeeze!

Zach is a maker extraordinaire, so check out his projects page on howchoo.

The post Raspberry Pi + Furby = ‘Furlexa’ voice assistant appeared first on Raspberry Pi.

Boston Dynamics’ Handle robot recreated with Raspberry Pi

Post Syndicated from Ashley Whittaker original https://www.raspberrypi.org/blog/boston-dynamics-handle-robot-recreated-with-raspberry-pi/

You in the community seemed so impressed with this recent Boston Dynamics–inspired build that we decided to feature another. This time, maker Harry was inspired by Boston Dynamics’ research robot Handle, which stands 6.5 ft tall, travels at 9 mph and jumps 4​ ​feet vertically. Here’s how Harry made his miniature version, MABEL (Multi Axis Balancer Electronically Levelled).

MABEL has individually articulated legs to enhance off-road stability, prevent it from tipping, and even make it jump (if you use some really fast servos). Harry is certain that anyone with a 3D printer and a “few bits” can build one.

MABEL builds on the open-source YABR project for its PID controller, and it’s got added servos and a Raspberry Pi that helps interface them and control everything.

Installing MABEL’s Raspberry Pi brain and wiring the servos

Thanks to a program based on the open-source YABR firmware, an Arduino handles all of the PID calculations using data from an MPU-6050 accelerometer/gyro. Raspberry Pi, using Python code, manages Bluetooth and servo control, running an inverse kinematics algorithm to translate the robot legs perfectly in two axes.

Kit list

If you want to attempt this project yourself, the files for all the hard 3D-printed bits are on Thingiverse, and all the soft insides are on GitHub.

IKSolve is the class that handles the inverse kinematics functionality for MABEL (IKSolve.py) and allows for the legs to be translated using (x, y) coordinates. It’s really simple to use: all that you need to specify are the home values of each servo (these are the angles that, when passed over to your servos, make the legs point directly and straight downwards at 90 degrees).

When MABEL was just a twinkle in Harry’s eye

MABEL is designed to work by listening to commands on the Arduino (PID contoller) end that are sent to it by Raspberry Pi over serial using pySerial. Joystick data is sent to Raspberry Pi using the Input Python library. Harry first tried to get the joystick data from an old PlayStation 3 controller, but went with the PiHut’s Raspberry Pi Compatible Wireless Gamepad in the end for ease.

Keep up with Harry’s blog or give Raspibotics a follow on Twitter, as part 3 of his build write-up should be dropping imminently, featuring updates that will hopefully get MABEL jumping!

The post Boston Dynamics’ Handle robot recreated with Raspberry Pi appeared first on Raspberry Pi.