Tag Archives: Image Resizing

Preserving content provenance by integrating Content Credentials into Cloudflare Images

Post Syndicated from Will Allen original https://blog.cloudflare.com/preserve-content-credentials-with-cloudflare-images/

Today, we are thrilled to announce the integration of the Coalition for Content Provenance and Authenticity (C2PA) provenance standard into Cloudflare Images. Content creators and publishers can seamlessly preserve the entire provenance chain — from how an image was created and by whom, to every subsequent edit — across the Cloudflare network.

What is the C2PA and the Content Authenticity Initiative?

When you hear the word provenance, you might have flashbacks to your high school Art History class. In that context, it means that the artwork you see at the Met in New York really came from the artist in question and isn’t a fake. Its provenance is how that piece of physical art changed possession over time, from the original artist all the way to the museum. 

Digital content provenance builds upon this concept. It helps you understand how a piece of digital media — images, videos, PDFs, and more — was created and subsequently edited. The provenance of a photo I posted on Instagram might look like this: I took the picture with my iPhone, performed an auto-magic edit using Apple Photos’ editing tools, uploaded it to Instagram, cropped it using Instagram’s editing tools, and then posted it. 

Why does digital content provenance matter? At a fundamental level, it’s an important way to give content creators credit for their work. Many photographers have had the experience of seeing their photograph or video go viral online, but with their name and attribution stripped away. In that scenario, the opportunities that might have accrued to the creator once the world saw their work don’t materialize. If you help ensure an artist or content creator gets credit for their work, that exposure could result in more career opportunities. 

Digital content provenance can also be an important tool in understanding the world around us. If you see a video or a photo of a newsworthy event, you’d like to know if that photo was really taken at that particular location, or if it was from years prior at a different location. If you see a grainy picture of a UFO flying over New Jersey, knowing when and where that photo was taken is helpful information in understanding what is actually happening. 

The C2PA is a project of the non-profit Joint Development Foundation and has developed technical specifications for attaching digital content provenance to a piece of media. The standards also specify how to cryptographically sign that manifest, thereby allowing anyone to verify that the manifest hasn’t been tampered with. The JSON manifests and the associated signatures are together referred to as Content Credentials.

The Adobe-led Content Authenticity Initiative, which has thousands of members across a variety of industries, aims to drive global adoption of Content Credentials. 

Why integrate Content Credentials into Cloudflare Images?

Cloudflare Images allows you to build an effortlessly scalable and cost-effective image pipeline. With our new Content Credentials integration, you can now preserve existing Content Credentials, ensuring they remain intact from creation all the way to end-user delivery.

Many media organizations across the globe, such as the BBC, the New York Times, and Dow Jones, are members of the Content Authenticity Initiative. Imagine one of these news organizations wanted to include the Content Credentials of their photojournalist’s photos and allow anyone to verify the provenance of that image. Before now, even if the news organization was using a C2PA-compliant camera and editing flow, these credentials would frequently be stripped if the image was transformed by their CDN.

If you use Cloudflare, that is now a solved problem. In Cloudflare Images, you can now preserve Content Credentials when transforming images from remote sources. Enabling this integration will retain any existing Content Credentials that are embedded in the image.

When you use Images to resize or change the file format to your images, these transformations will be cryptographically signed by Cloudflare. This ensures, for example, that the end-user who sees the photograph on your website can use an open-source verification service such as contentcredentials.org/verify  to verify the full provenance chain. 

How it works

Imagine you are a photojournalist using a Nikon camera that has C2PA-compliant signing. That photojournalist  could opt to attach Content Credentials to their photo, identifying the key elements of the photograph such as the camera model, the original image size, and aperture settings. 

Below is a simplified example of what a C2PA-compliant Content Credential for a photograph taken with that Nikon camera could look like. 

Content Credentials are stored using JUMBF (JPEG Universal Metadata Box Format), which serves as a standardized container format for embedding metadata within files. You can think of it as an envelope system that packages together both the data about where a piece of digital content came from and how it changed, as well as the cryptographic signatures that can be used to verify that data.

The assertions, or facts about the content provenance, are typically written in JSON for a better developer experience. Note that this example deliberately simplifies the JUMBF box nesting and adds comments to make it easier to follow.

{
  "jumbf": {
    "c2pa.manifest": {
      "claim_generator": "Nikon Z9 Firmware v1.2",
      "assertions": [
        {
          "label": "c2pa.actions",
          "data": {
            "actions": [
              {
                "action": "c2pa.captured",
                "when": "2025-01-10T12:00:00Z",
                "softwareAgent": "Nikon Z9",
                "parameters": {
                  "captureDevice": "NIKON Z9",
                  "serialNumber": "7DX12345",
                  "exposure": "1/250",
                  "aperture": "f/2.8",
                  "iso": 100,
                  "focalLength": "70mm"
                }
              }
            ]
          }
        }
      ],
      "signature_info": {
        "issuer": "Nikon",
        "time": "2025-01-10T12:00:00Z",
        "cert_fingerprint": "01234567890abcdef"
      },
      "claim_metadata": {
        "claim_id": "nikon_z9_123"
      }
    }
  }
}

Now imagine that you want to use this photograph on your website. 

If you’ve enabled the Preserve Content Credentials setting in Cloudflare, then that metadata is now preserved in Cloudflare Images. 

If you use Cloudflare Images to dynamically resize or transform this image, then Cloudflare automatically appends and cryptographically signs any additional actions in that same manifest. Below we show what the new Content Credentials could look like. 

{
  "jumbf": {
    // Original Nikon manifest
    "c2pa.manifest.nikon": {
  /*unchanged*/      
},

    // New Cloudflare manifest
    "c2pa.manifest.cloudflare": {
      "claim_generator": "Cloudflare Images",
      "assertions": [
        {
          "label": "c2pa.actions",
          "data": {
            "actions": [
              {
                "action": "c2pa.resized",
                "when": "2025-01-10T12:05:00Z",
                "softwareAgent": "Cloudflare Images",
                "parameters": {
                  "originalDimensions": {
                    "width": 8256,
                    "height": 5504
                  },
                  "newDimensions": {
                    "width": 800,
                    "height": 533
                  }
                }
              }
            ]
          }
        }
      ],
      "signature_info": {
        "issuer": "Cloudflare, Inc",
        "time": "2025-01-10T12:05:00Z",
        "cert_fingerprint": "fedcba9876543210"
      },
      "claim_metadata": {
        "claim_id": "cf_resize_123",
        "parent_claim_id": "nikon_z9_123"
      }
    }
  }
}

In this example, the c2pa.action.resized entry describes a non-destructive transformation from one set of dimensions to another. This is included as a separate, independent assertion about this particular photograph. 

Notice how there are two cryptographic signatures in this manifest, each referenced by signature_info. Since there were two entities involved in this example image — Nikon for the image’s creation, then Cloudflare for resizing it — both Nikon and Cloudflare independently signed their respective assertions about the content provenance.  

In this example, the signature reference looks like this: 

"signature_info": {
        "issuer": "Cloudflare, Inc",
        "time": "2025-01-10T12:05:00Z",
        "cert_fingerprint": "fedcba9876543210"

During the creation, editing, and resizing process of a piece of digital content, a unique hash of metadata is created for each action and then signed using a private key. The signature, along with the signer’s public certificate or reference to it, are contained in the JUMBF container as referenced by this JSON. 

These hashes and signatures allow any open source verification tool to recalculate the hash, validate it against the signature, and check the certificate chain to ensure trustworthiness for each action taken on the image. This is what is meant by Content Credentials being tamper-evident: if any of these hashes and signatures fail to validate, it means that the metadata has been tampered with. 

Each cryptographic signature is part of a Trust List, allowing anyone to verify the provenance chain across various entities, such as from a camera manufacturer to photo editing software to distribution across Cloudflare. More from the Content Authenticity Initiative

Trust lists connect the end-entity certificate that signed a manifest back to the originating root CA. This is accomplished by supplying the subordinate public X.509 certificates forming the trust chain (the public X.509 certificate chain).

In order for Cloudflare to append the Content Credentials with any transformations, we needed to have a publicly available end-entity certificate and join this Trust List. Here we used DigiCert for our end-entity certificate and reference this certificate in the JSON manifests that we are now creating in production:

"signature_info": {
        "alg": "sha256",
        "issuer": "Cloudflare, Inc",
        "cert_serial_number": "073E9F61ADE599BE128B02EDC5BD2BDE",
        "time": "2024-01-06T22:42:36+00:00"
      },

The end result is that news organizations, journalists, and content companies can now create an auditable chain of digital provenance whose claims can be verified using public-key cryptography.  

Let’s see an example

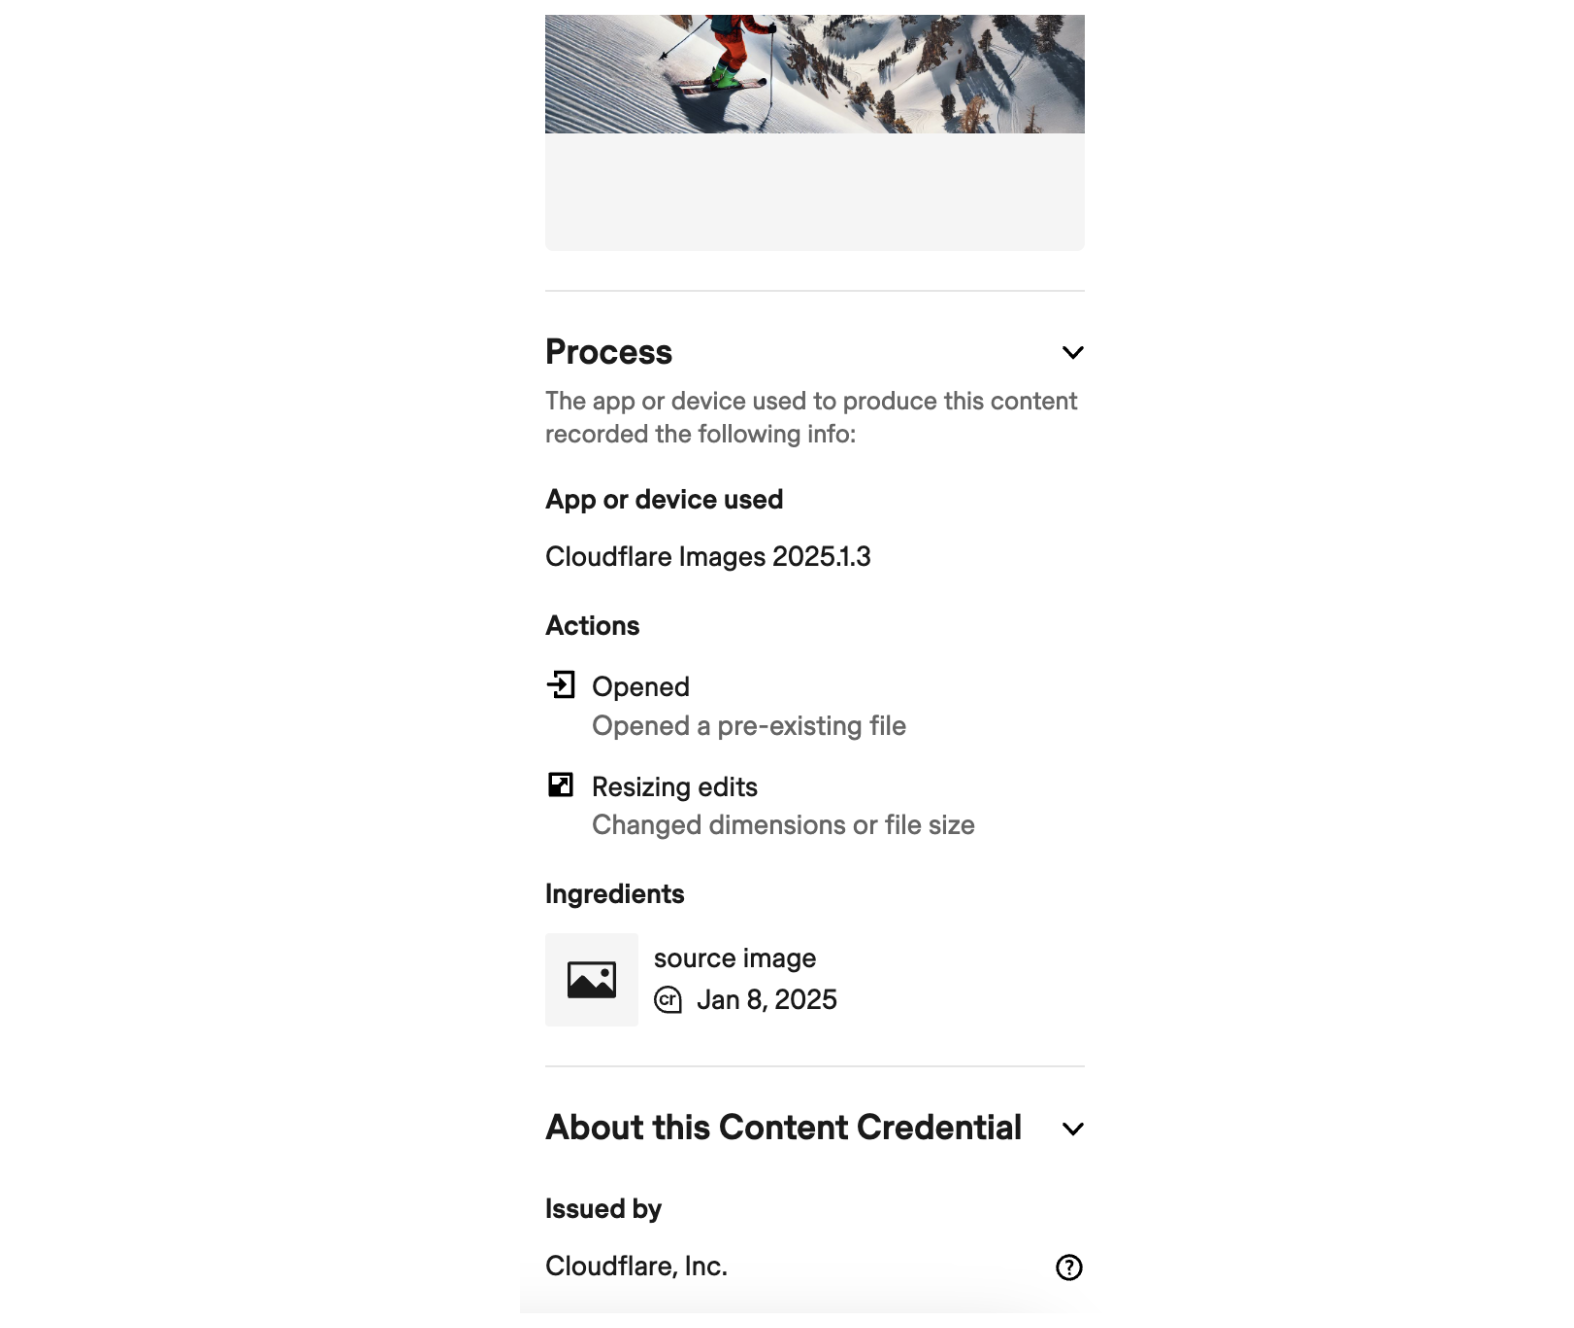
Earlier this year, OpenAI announced their support for including Content Credentials in DALL-E. I recently created an image in DALL-E (with ski season on my mind).

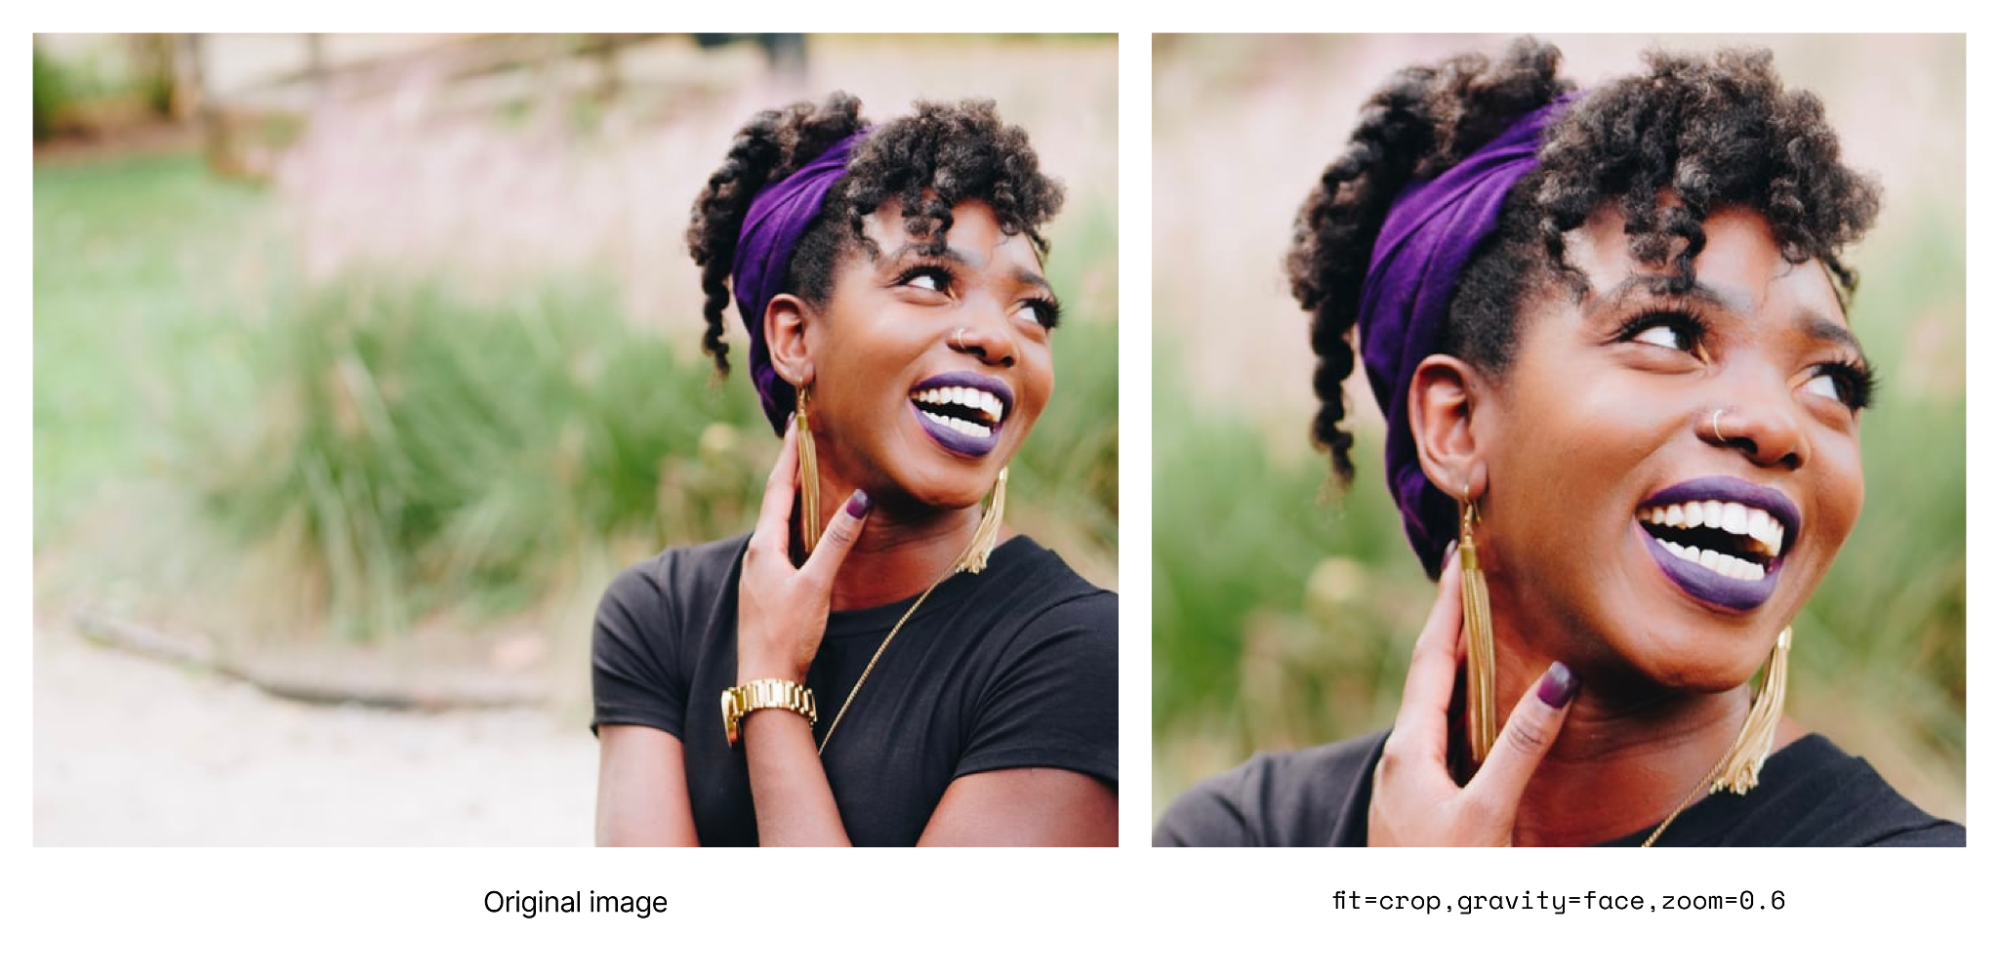
Cloudflare Images allows you to transform any image by URL. You can do so by simply changing the URL structure using this syntax: 

https://<ZONE>/cdn-cgi/image/<OPTIONS>/<SOURCE-IMAGE>

We can break down each of these parameters:

  • ZONE is your particular domain.

  • cdn-cgi/image is a fixed prefix that identifies that this is a special path handled by a built-in Worker.

  • The OPTIONS parameter allows you to then transform the image — rotating it, changing the width, compressing it, and more. 

  • SOURCE-IMAGE is the URL where your image is currently hosted.

To tie these together, I then have a new URL structure where I want to change the width and quality of the image I created in DALL-E and display this on my personal website. After uploading the image from DALL-E to one of my R2 buckets, I can create this URL: 

https://williamallen.com/cdn-cgi/image/width=1000,quality=75,format=webp/https://pub-3d2658f6f7004dc38a4dd6be147b6a86.r2.dev/dalle.webp

Anyone can now verify its provenance using the Content Credentials Verify tool to see the result. The provenance chain is fully intact, even after using the Cloudflare Images transformation shown above to resize the image. 


There are numerous open source command line tools that allow you to explore the full details of the Content Credentials. The C2PA Tool is created and maintained by the Content Authenticity Initiative. You can read more about the tool here and view the source code for it on GitHub.

There are two ways to install the tool: through a pre-built binary executable, or using Cargo Binstall if you have already installed Rust. Once installed, the C2PA Tool uses this syntax in your command line: 

c2patool [OPTIONS] <PATH> [COMMAND]

If I navigate to the link of the image in my browser and save it to my downloads folder on my Mac, then I simply need to use the command -d (short for -detailed) to see the full details of the JSON manifest. Of course, you should change yourusername to your actual Mac username.

c2patool /Users/yourusername/Downloads/dalle.webp -d

And if you wanted to output this to a JSON file that you can review in VSCode or Cursor, use this command instead:

c2patool /Users/yourusername/Downloads/dalle.webp -d > manifest.json

This allows you to not just trust, but verify, the details of the image transformation yourself. 

How to start using Cloudflare Images with Content Credentials 

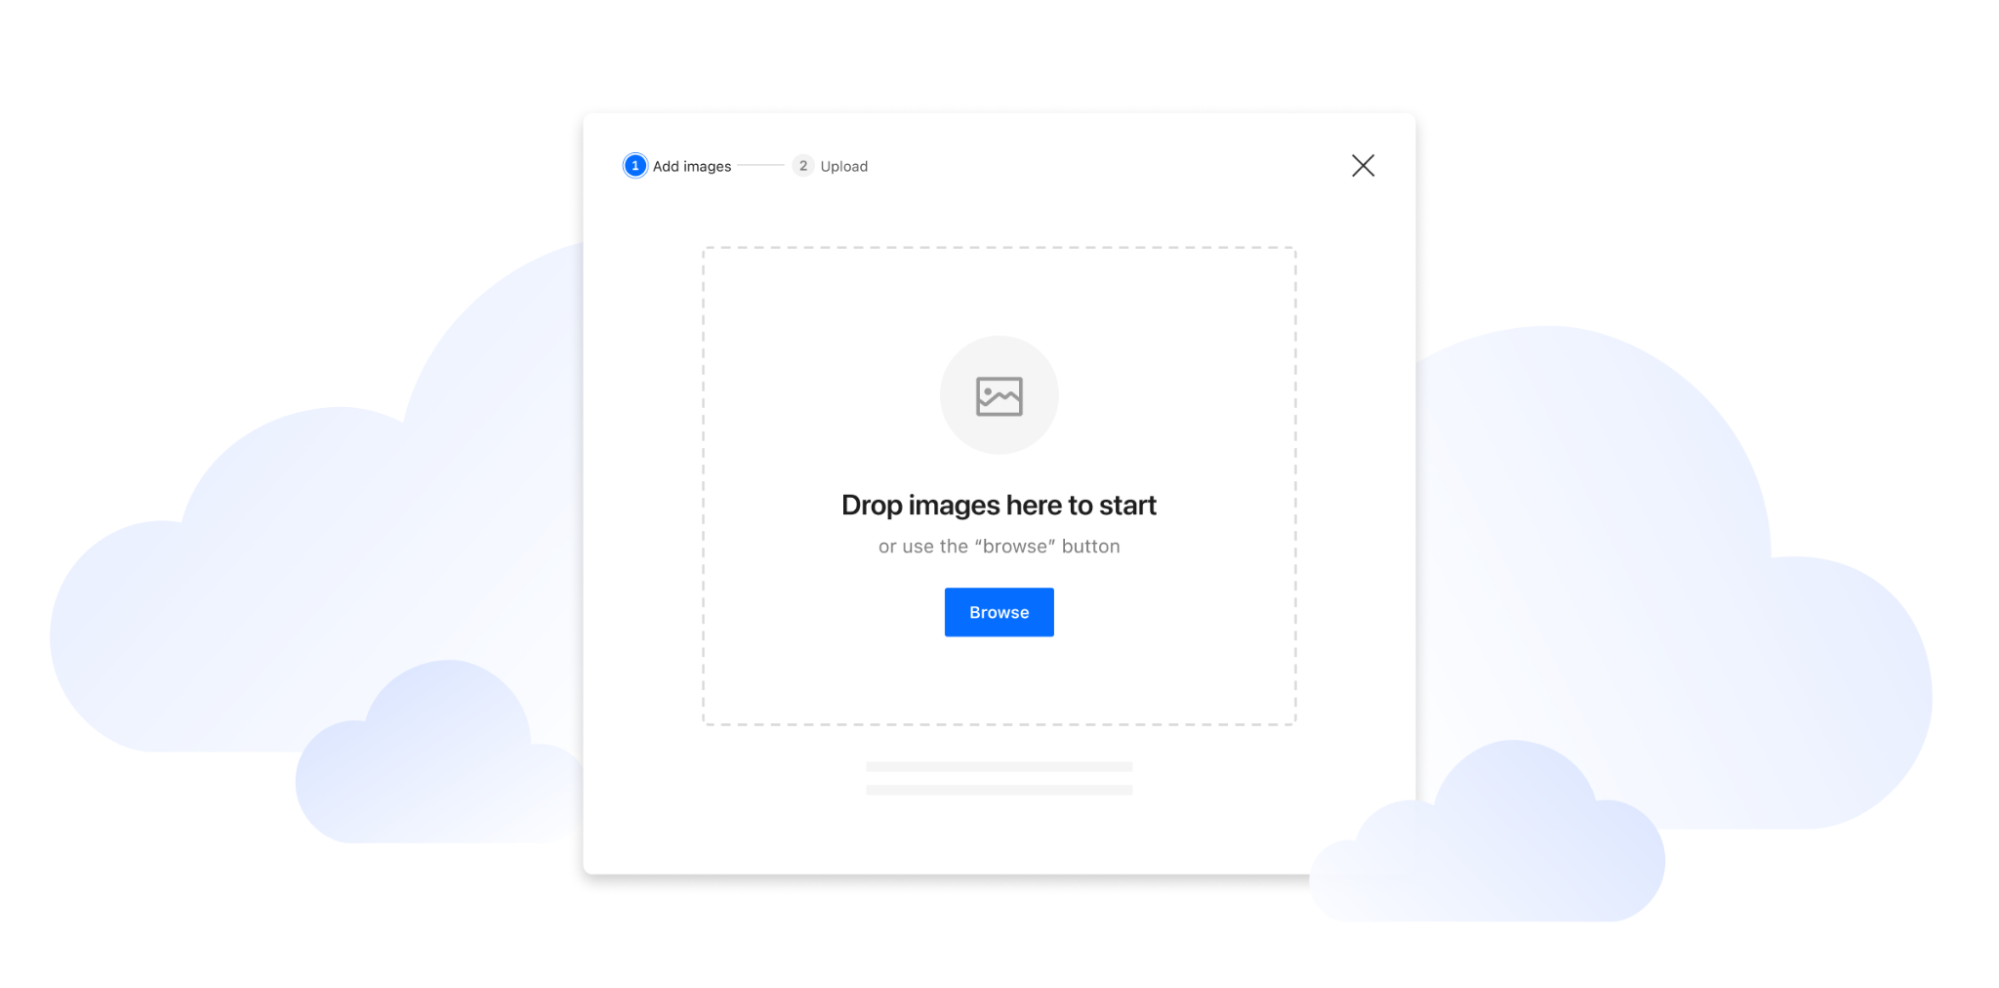
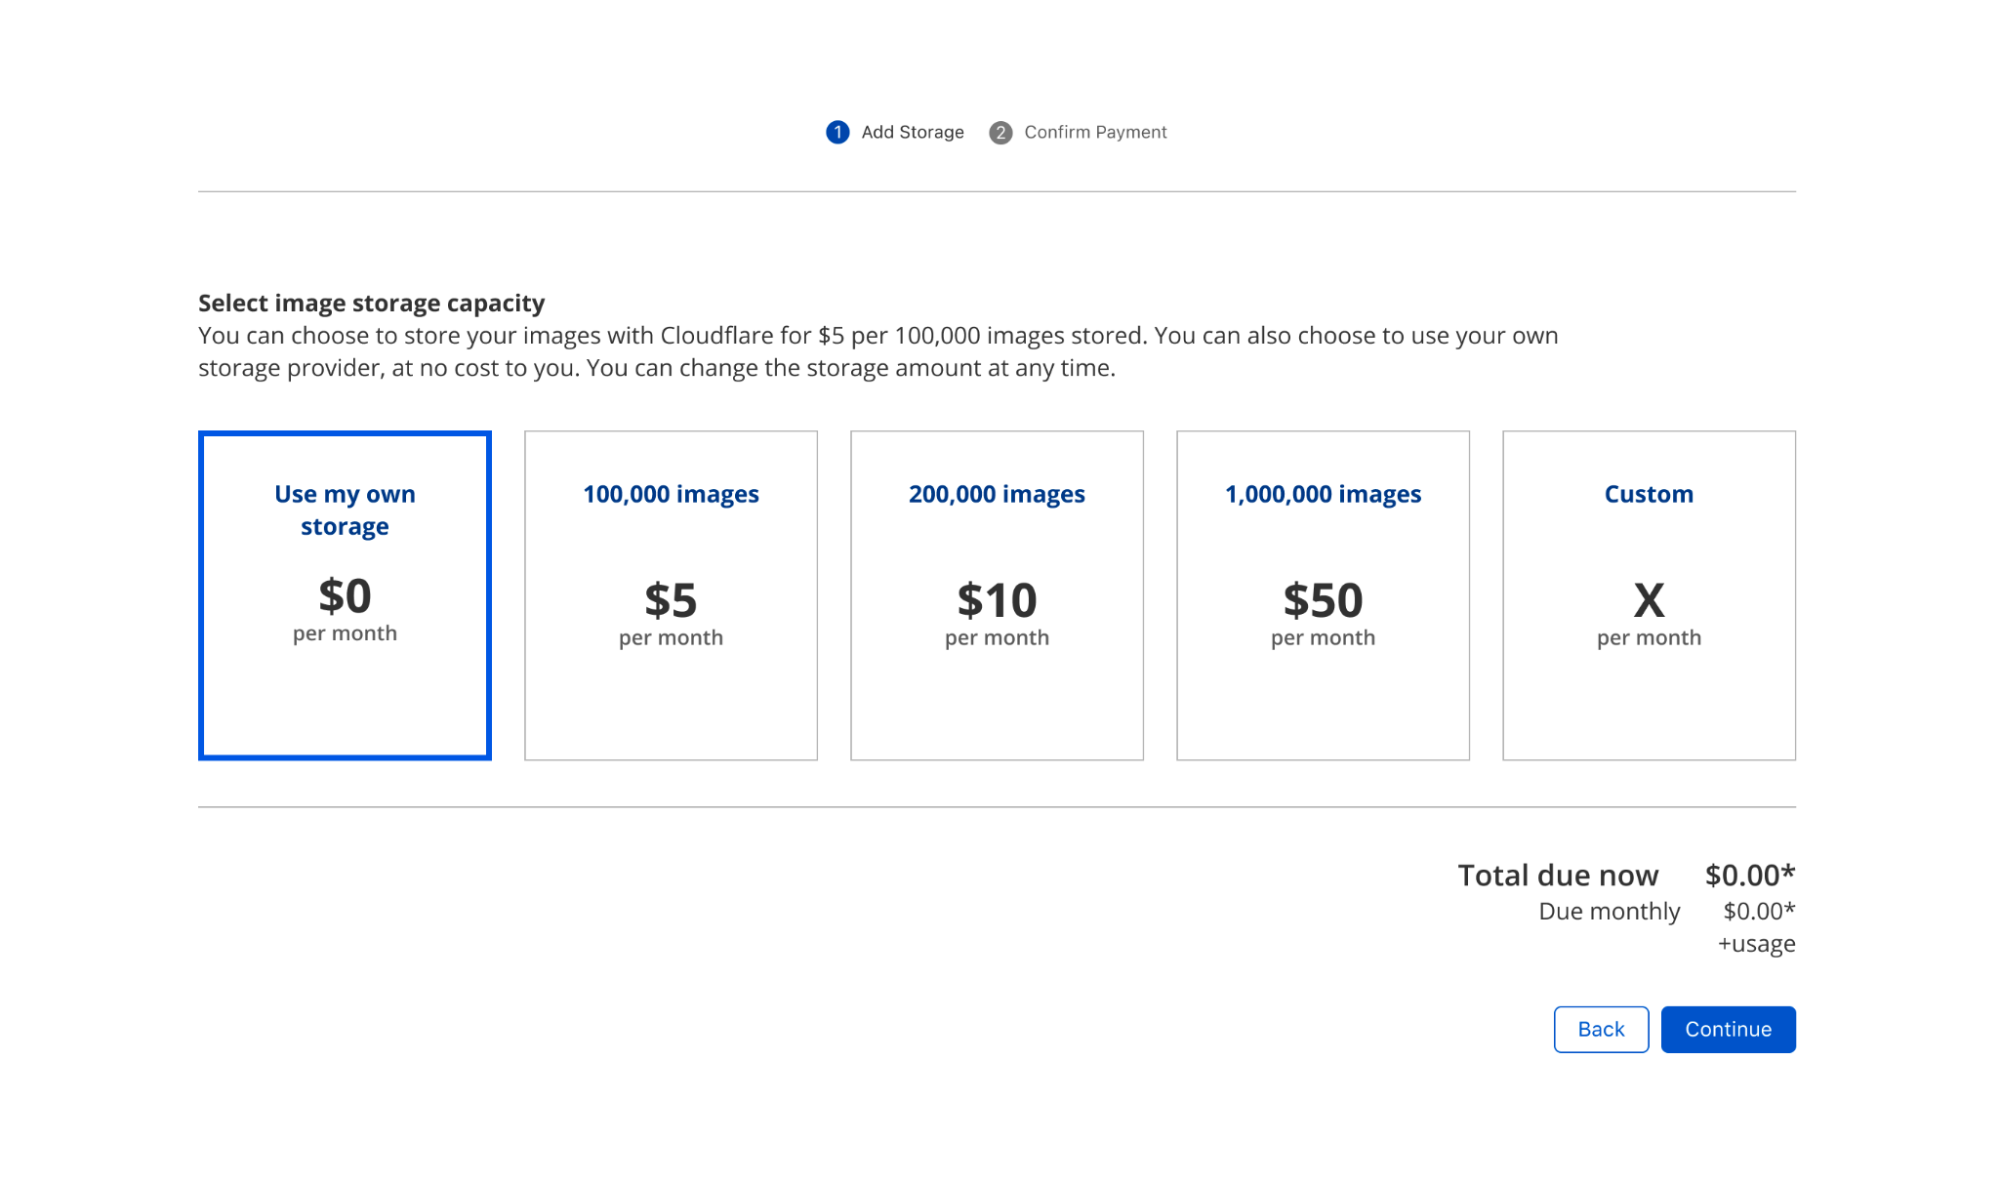
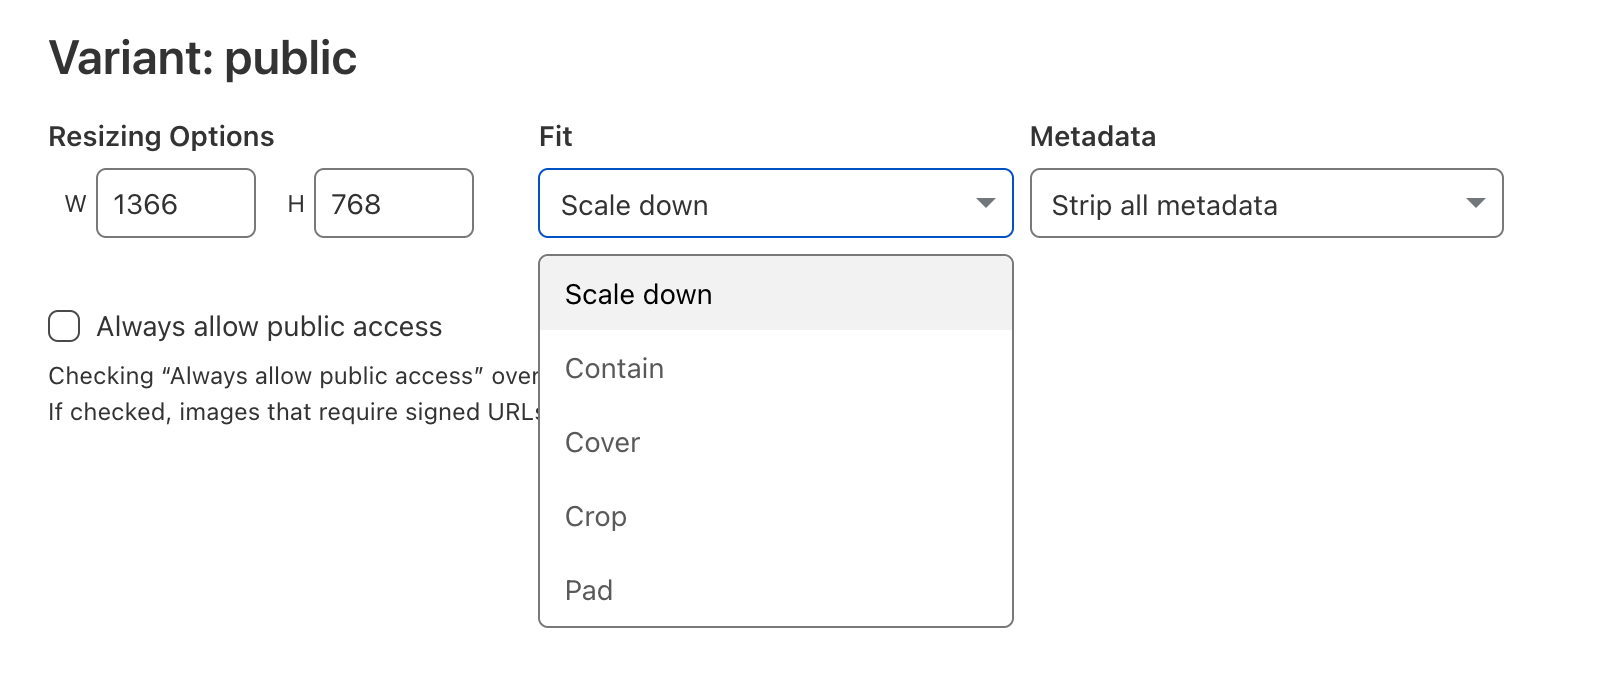
It’s straightforward to start preserving Content Credentials. Log in to your Cloudflare dashboard and navigate to Images in the dashboard. From there, choose Transformations and choose a Zone where you want to enable this feature. Then toggle this option to on:


If the images you are transforming do not contain any Content Credentials, no action is taken. But if they do, we preserve those Content Credentials and attest to any transformations. 

Looking ahead

We are excited to continue to partner with Adobe and many other organizations to extend support for preserving Content Credentials across our products and services. If you are interested in learning more, we’d love to hear from you: I’m @williamallen on X or on LinkedIn.

What’s new with Cloudflare Media: updates for Calls, Stream, and Images

Post Syndicated from Deanna Lam original https://blog.cloudflare.com/whats-next-for-cloudflare-media


Our customers use Cloudflare Calls, Stream, and Images to build live, interactive, and real-time experiences for their users. We want to reduce friction by making it easier to get data into our products. This also means providing transparent pricing, so customers can be confident that costs make economic sense for their business, especially as they scale.

Today, we’re introducing four new improvements to help you build media applications with Cloudflare:

  • Cloudflare Calls is in open beta with transparent pricing
  • Cloudflare Stream has a Live Clipping API to let your viewers instantly clip from ongoing streams
  • Cloudflare Images has a pre-built upload widget that you can embed in your application to accept uploads from your users
  • Cloudflare Images lets you crop and resize images of people at scale with automatic face cropping

Build real-time video and audio applications with Cloudflare Calls

Cloudflare Calls is now in open beta, and you can activate it from your dashboard. Your usage will be free until May 15, 2024. Starting May 15, 2024, customers with a Calls subscription will receive the first terabyte each month for free, with any usage beyond that charged at $0.05 per real-time gigabyte. Additionally, there are no charges for inbound traffic to Cloudflare.

To get started, read the developer documentation for Cloudflare Calls.

Live Instant Clipping: create clips from live streams and recordings

Live broadcasts often include short bursts of highly engaging content within a longer stream. Creators and viewers alike enjoy being able to make a “clip” of these moments to share across multiple channels. Being able to generate that clip rapidly enables our customers to offer instant replays, showcase key pieces of recordings, and build audiences on social media in real-time.

Today, Cloudflare Stream is launching Live Instant Clipping in open beta for all customers. With the new Live Clipping API, you can let your viewers instantly clip and share moments from an ongoing stream – without re-encoding the video.

When planning this feature, we considered a typical user flow for generating clips from live events. Consider users watching a stream of a video game: something wild happens and users want to save and share a clip of it to social media. What will they do?

First, they’ll need to be able to review the preceding few minutes of the broadcast, so they know what to clip. Next, they need to select a start time and clip duration or end time, possibly as a visualization on a timeline or by scrubbing the video player. Finally, the clip must be available quickly in a way that can be replayed or shared across multiple platforms, even after the original broadcast has ended.

That ideal user flow implies some heavy lifting in the background. We now offer a manifest to preview recent live content in a rolling window, and we provide the timing information in that response to determine the start and end times of the requested clip relative to the whole broadcast. Finally, on request, we will generate on-the-fly that clip as a standalone video file for easy sharing as well as an HLS manifest for embedding into players.

Live Instant Clipping is available in beta to all customers starting today! Live clips are free to make; they do not count toward storage quotas, and playback is billed just like minutes of video delivered. To get started, check out the Live Clipping API in developer documentation.

Integrate Cloudflare Images into your application with only a few lines of code

Building applications with user-uploaded images is even easier with the upload widget, a pre-built, interactive UI that lets users upload images directly into your Cloudflare Images account.

Many developers use Cloudflare Images as an end-to-end image management solution to support applications that center around user-generated content, from AI photo editors to social media platforms. Our APIs connect the frontend experience – where users upload their images – to the storage, optimization, and delivery operations in the backend.

But building an application can take time. Our team saw a huge opportunity to take away as much extra work as possible, and we wanted to provide off-the-shelf integration to speed up the development process.

With the upload widget, you can seamlessly integrate Cloudflare Images into your application within minutes. The widget can be integrated in two ways: by embedding a script into a static HTML page or by installing a package that works with your favorite framework. We provide a ready-made Worker template that you can deploy directly to your account to connect your frontend application with Cloudflare Images and authorize users to upload through the widget.

To try out the upload widget, sign up for our closed beta.

Optimize images of people with automatic face cropping for Cloudflare Images

Cloudflare Images lets you dynamically manipulate images in different aspect ratios and dimensions for various use cases. With face cropping for Cloudflare Images, you can now crop and resize images of people’s faces at scale. For example, if you’re building a social media application, you can apply automatic face cropping to generate profile picture thumbnails from user-uploaded images.

Our existing gravity parameter uses saliency detection to set the focal point of an image based on the most visually interesting pixels, which determines how the image will be cropped. We expanded this feature by using a machine learning model called RetinaFace, which classifies images that have human faces. We’re also introducing a new zoom parameter that you can combine with face cropping to specify how closely an image should be cropped toward the face.

To apply face cropping to your image optimization, sign up for our closed beta.

Photo by Eye for Ebony on Unsplash
https://example.com/cdn-cgi/image/fit=crop,width=500,height=500,gravity=face,zoom=0.6/https://example.com/images/picture.jpg

Meet the Media team over Discord

As we’re working to build the next set of media tools, we’d love to hear what you’re building for your users. Come say hi to us on Discord. You can also learn more by visiting our developer documentation for Calls, Stream, and Images.

Image optimization made simpler and more predictable: we’re merging Cloudflare Images and Image Resizing

Post Syndicated from Deanna Lam original http://blog.cloudflare.com/merging-images-and-image-resizing/

Image optimization made simpler and more predictable: we’re merging Cloudflare Images and Image Resizing

Image optimization made simpler and more predictable: we’re merging Cloudflare Images and Image Resizing

Starting November 15, 2023, we’re merging Cloudflare Images and Image Resizing.

All Image Resizing features will be available as part of the Cloudflare Images product. To let you calculate your monthly costs more accurately and reliably, we’re changing how we bill to resize images that aren’t stored at Cloudflare. Our new pricing model will cost $0.50 per 1,000 unique transformations.

For existing Image Resizing customers, you can continue to use the legacy version of Image Resizing. When the merge is live, then you can opt into the new pricing model for more predictable pricing.

In this post, we'll cover why we came to this decision, what's changing, and how these changes might impact you.

Simplifying our products

When you build an application with images, you need to think about three separate operations: storage, optimization, and delivery.

In 2019, we launched Image Resizing, which can optimize and transform any publicly available image on the Internet based on a set of parameters. This enables our customers to deliver variants of a single image for each use case without creating and storing additional copies.

For example, an e-commerce platform for furniture retailers might use the same image of a lamp on both the individual product page and the gallery page for all lamps. They can use Image Resizing to optimize the image in its original aspect for a slider view, or manipulate and crop the image for a thumbnail view.

Image optimization made simpler and more predictable: we’re merging Cloudflare Images and Image Resizing

Two years later, we released Images to let developers build an end-to-end image management pipeline. Developers no longer need to use different vendors to handle storage, optimization, and delivery. With Images, customers can store and deliver their images from a single bucket at Cloudflare to streamline their workflow and eliminate egress fees.

Both products have overlapping features to optimize and manipulate images, which can be confusing for customers. Over the years, we've received numerous questions about which product is optimal for which use cases.

To simplify our products, we're merging Cloudflare Images and Image Resizing to let customers store, optimize, and deliver their images all from one product. Customers can continue to optimize their images without using Cloudflare for storage or purchase storage to manage their entire image pipeline through Cloudflare.

Transparent and predictable pricing

Pricing can cause headaches for Image Resizing customers.

We often hear from customers seeking guidance for calculating how much Image Resizing will cost each month. Today, you are billed for Image Resizing by the number of uncached requests to transform an image. However, caching behavior is often unpredictable, and you can't guarantee how long a given image stays cached. This means that you can't reliably predict their costs.

If you make 1M total requests to Image Resizing each month, then you won't know whether you'll be billed for 10K or 100K of these requests because our pricing model relies on cache. Since assets can be ejected from cache for a variety of reasons, bills for Image Resizing are unpredictable month over month. In some cases, the monthly bills are inconsistent even when traffic remains constant. In other cases, the monthly bill is much higher than our customers expected.

With the new Cloudflare Images, you will be billed only once per 30 days for each unique request to transform an image stored outside of Cloudflare, whether the transformation is cached. Customers will be billed $0.50 per 1,000 unique transformations per month.

In other words, if you resize one image to 100×100, then our new pricing model guarantees that you will be billed only once per month, whether there are 10K or 100K uncached requests to deliver the image at this size. If you resize 200 images to 100×100, then you will be billed for only 200 unique transformations — one for each image at this size — each month.

This change aligns more closely with how our customers think about their usage, as well as ensures that our customers can accurately estimate their costs with confidence. You won't need to consider how your cache hit ratio will affect your bill. To estimate your costs, you'll need to know only the number of unique images and the number of different ways that you need to transform those images each month.

Resize without storage with Cloudflare Images

For developers who only want to resize and optimize images, Cloudflare Images now offers a zero-storage plan. This new plan enables you to transform images while keeping your existing storage and delivery solution unchanged (just like the current Image Resizing product does).

Image optimization made simpler and more predictable: we’re merging Cloudflare Images and Image Resizing

If you want to store your images with Cloudflare Images, then you can always upgrade your plan to purchase storage at any time.

Image Resizing is currently available only for accounts with a Pro or higher plan. The merged Cloudflare Images product will be available for all customers, with pricing plans that are tailored to meet specific use cases.

Existing customers can opt into new pricing

The new version of Cloudflare Images is available on November 15, 2023.

If you currently use Image Resizing, you will have the option to migrate to the new Cloudflare Images at no cost, or continue using Image Resizing.

The functionality and usability of the product will remain the same. You will still manage stored images under the Cloudflare Images tab and can enable transformations from the Speed tab.

As we execute, we'll continue to make improvements in the Dashboard to bring a more centralized and unified experience for Cloudflare Images.

You can learn more about our current image optimization capabilities in the Developer Docs. If you have feedback or thoughts, we'd love to hear from you on the Cloudflare Developers Discord.

Cloudflare Images introduces AVIF, Blur and Bundle with Stream

Post Syndicated from Marc Lamik original https://blog.cloudflare.com/images-avif-blur-bundle/

Cloudflare Images introduces AVIF, Blur and Bundle with Stream

Cloudflare Images introduces AVIF, Blur and Bundle with Stream

Two months ago we launched Cloudflare Images for everyone, and we are amazed about the adoption and the feedback we received.

Let’s start with some numbers:

More than 70 million images delivered per day on average in the week of November 5 to 12.

More than 1.5 million images have been uploaded so far, growing faster every day.

But we are just getting started and are happy to announce the release of the most requested features, first we talk about the AVIF support for Images, converting as many images as possible with AVIF results in highly compressed, fast delivered images without compromising on the quality.

Secondly we introduce blur. By blurring an image, in combination with the already supported protection of private images via signed URL, we make Cloudflare Images a great solution for previews for paid content.

For many of our customers it is important to be able to serve Images from their own domain and not only via imagedelivery.net. Here we show an easy solution for this using a custom Worker or a special URL.

Last but not least we announce the launch of new attractively priced bundles for both Cloudflare Images and Stream.

Images supports AVIF

We announced support for the new AVIF image format in Image Resizing product last year.

Last month we added AVIF support in Cloudflare Images. It compresses images significantly better than older-generation formats such as WebP and JPEG. Today, AVIF image format is supported both in Chrome and Firefox. Globally, almost 70% of users have a web browser that supports AVIF.

What is AVIF

As we explained previously, AVIF is a combination of the HEIF ISO standard, and a royalty-free AV1 codec by Mozilla, Xiph, Google, Cisco, and many others.

“Currently, JPEG is the most popular image format on the web. It’s doing remarkably well for its age, and it will likely remain popular for years to come thanks to its excellent compatibility. There have been many previous attempts at replacing JPEG, such as JPEG 2000, JPEG XR, and WebP. However, these formats offered only modest compression improvements and didn’t always beat JPEG on image quality. Compression and image quality in AVIF is better than in all of them, and by a wide margin.”1

How Cloudflare Images supports AVIF

As a reminder, image delivery is done through the Cloudflare managed imagedelivery.net domain. It is powered by Cloudflare Workers. We have the following logic to request the AVIF format based on the Accept HTTP request header:

const WEBP_ACCEPT_HEADER = /image\/webp/i;
const AVIF_ACCEPT_HEADER = /image\/avif/i;

addEventListener("fetch", (event) => {
  event.respondWith(handleRequest(event));
});

async function handleRequest(event) {
  const request = event.request;
  const url = new URL(request.url);
  
  const headers = new Headers(request.headers);

  const accept = headers.get("accept");

  let format = undefined;

  if (WEBP_ACCEPT_HEADER.test(accept)) {
    format = "webp";
  }

  if (AVIF_ACCEPT_HEADER.test(accept)) {
    format = "avif";
  }

  const resizingReq = new Request(url, {
    headers,
    cf: {
      image: { ..., format },
    },
  });

  return fetch(resizingReq);
}

Based on the Accept header, the logic in the Worker detects if WebP or AVIF format can be served. The request is passed to Image Resizing. If the image is available in the Cloudflare cache it will be served immediately, otherwise the image will be resized, transformed, and cached. This approach ensures that for clients without AVIF format support we deliver images in WebP or JPEG formats.

The benefit of Cloudflare Images product is that we added AVIF support without a need for customers to change a single line of code from their side.

The transformation of an image to AVIF is compute-intensive but leads to a significant benefit in file-size. We are always weighing the cost and benefits in the decision which format to serve.

It Is worth noting that all the conversions to WebP and AVIF formats happen on the request phase for image delivery at the moment. We will be adding the ability to convert images on the upload phase in the future.

Introducing Blur

One of the most requested features for Images and Image Resizing was adding support for blur. We recently added the support for blur both via URL format and with Cloudflare Workers.

Cloudflare Images uses variants. When you create a variant, you can define properties including variant name, width, height, and whether the variant should be publicly accessible. Blur will be available as a new option for variants via variant API:

curl -X POST "https://api.cloudflare.com/client/v4/accounts/9a7806061c88ada191ed06f989cc3dac/images/v1/variants" \
     -H "Authorization: Bearer <api_token>" \
     -H "Content-Type: application/json" \
     --data '{"id":"blur","options":{"metadata":"none","blur":20},"neverRequireSignedURLs":true}'

One of the use cases for using blur with Cloudflare Images is to control access to the premium content.

The customer will upload the image that requires an access token:

curl -X POST "https://api.cloudflare.com/client/v4/accounts/9a7806061c88ada191ed06f989cc3dac/images/v1" \
     -H "Authorization: Bearer <api_token>"
     --form 'file=@./<file_name>' \
     --form 'requireSignedURLs=true'

Using the variant we defined via API we can fetch the image without providing a signature:

Cloudflare Images introduces AVIF, Blur and Bundle with Stream

To access the protected image a valid signed URL will be required:

Cloudflare Images introduces AVIF, Blur and Bundle with Stream
Lava lamps in the Cloudflare lobby. Courtesy of @mahtin

The combination of image blurring and restricted access to images could be integrated into many scenarios and provides a powerful tool set for content publishers.

The functionality to define a variant with a blur option is coming soon in the Cloudflare dashboard.

Serving images from custom domains

One important use case for Cloudflare Images customers is to serve images from custom domains. It could improve latency and loading performance by not requiring additional TLS negotiations on the client. Using Cloudflare Workers customers can add this functionality today using the following example:

const IMAGE_DELIVERY_HOST = "https://imagedelivery.net";

addEventListener("fetch", async (event) => {
  event.respondWith(handleRequest(event.request));
});

async function handleRequest(request) {
  const url = new URL(request.url);
  const { pathname, search } = url;

  const destinationURL = IMAGE_DELIVERY_HOST + pathname + search;
  return fetch(new Request(destinationURL));
}

For simplicity, the Workers script makes the redirect from the domain where it’s deployed to the imagedelivery.net. We assume the same format as for Cloudflare Images URLs:

https://<customdomain.net>/<encoded account id>/<image id>/<variant name>

The Worker could be adjusted to fit customer needs like:

  • Serving images from a specific domains’ path e.g. /images/
  • Populate account id or variant name automatically
  • Map Cloudflare Images to custom URLs altogether

For customers who just want the simplicity of serving Cloudflare Images from their domains on Cloudflare we will be adding the ability to serve Cloudflare Images using the following format:

https://<customdomain.net>/cdn-cgi/imagedelivery/<encrypted_account_id>/<_image_id>/<variant_name>

Image delivery will be supported from all customer domains under the same Cloudflare account where Cloudflare Images subscription is activated. This will be available to all Cloudflare Images customers before the holidays.

Images and Stream Bundle

Creator platforms, eCommerce, and many other products have one thing in common: having an easy and accessible way to upload, store and deliver your images and videos in the best and most affordable way is vital.

We teamed up with the Stream team to create a set of bundles that make it super easy to get started with your product.

The Starter bundle is perfect for experimenting and a first MVP. For just $10 per month it is 50% cheaper than the unbundled option, and includes enough to get started:

  • Stream: 1,000 stored minutes and 5,000 minutes served
  • Images: 100,000 stored images and 500,000 images served

For larger and fast scaling applications we have the Creator Bundle for $50 per month which saves over 60% compared to the unbundled products. It includes everything to start scaling:

  • Stream: 10,000 stored minutes and 50,000 minutes served
  • Images: 500,000 stored images and 1,000,000 images served

Cloudflare Images introduces AVIF, Blur and Bundle with Stream

These new bundles will be available to all customers from the end of November.

What’s next

We are not stopping here, and we already have the next features for Images lined up. One of them is Images Analytics. Having great analytics for a product is vital, and so we will be introducing analytics functionality for Cloudflare Images for all customers to be able to keep track of all images and their usage.


1/generate-avif-images-with-image-resizing/#what-is-avif

Cloudflare Images Now Available to Everyone

Post Syndicated from Zaid Farooqui original https://blog.cloudflare.com/announcing-cloudflare-images/

Cloudflare Images Now Available to Everyone

Cloudflare Images Now Available to Everyone

Today, we are launching Cloudflare Images for all customers. Images is a single product that stores, resizes, optimizes and serves images. We built Cloudflare Images so customers of all sizes can build a scalable and affordable image pipeline in minutes.

Store images efficiently

Many legacy image pipelines are architected to take an image and create multiple copies of it to account for different sizes and formats. These copies are then stored in a storage bucket and delivered using a CDN. This architecture can be hard to maintain and adds infrastructure cost in unpredictable ways.

With Cloudflare Images, you don’t need to worry about creating and storing multiple versions of the same image in different sizes and formats. Cloudflare Images makes a clear distinction between your stored images and the variants. Once you upload an image, you can apply any defined variant to the uploaded image. The variants and different formats don’t count towards your stored images quota.

This means that when a user uploads a picture that you need to resize in three different ways and serve in two different formats, you pay for one stored image instead of seven different images (the original, plus three variants for each of the two formats.)

Built-in access control

Every image that is uploaded to Cloudflare Images can be marked private, so it can only be accessed using an expiring signed URL token. This is ideal for use cases like membership sites that sell premium content.

Signed URLs give you the flexibility to validate if someone is a paying member using your custom logic and only give them access to the set of images they have paid for.

Eliminate egress costs

Egress cost is the cost of getting your data out of a storage provider. The most common case being when you serve an image from storage you pay for the bits transmitted. And you end up paying every, single time that same image is displayed. It is easy to not account for this cost when you are doing cost-benefit analysis between different solutions. But egress costs add up rapidly, and it is not uncommon for customers to pay their storage provider a very large multiple of their total storage cost in egress.

When you use a multi-vendor solution for your image pipeline, you might use vendor A for storage, vendor B for resizing the images and vendor C for delivering the images. At face value, this solution might appear cheaper because you think “we’ve picked the most affordable option for each piece of our image pipeline.” But in this setup, the resizing service (vendor B) and the CDN (vendor C) still need to request images from vendor A.

With Cloudflare Images, you never have to worry about egress costs because the images are stored, optimized and delivered by a single product. And you will see only two line items on your bill for Cloudflare Images. You pay \$5/month for every 100,000 stored images and \$1 per 100,000 delivered images. There are no additional resizing, compute or egress costs.

Uploading Images

Cloudflare Images offers multiple ways to upload your images. We accept all the common file formats including JPEG, GIF and WEBP. Each image uploaded to Images can be up to 10 MB.

If you only have a few images or simply want a taste of the product, you can use the Images Dashboard. Simply drag and drop one or more images:

Cloudflare Images Now Available to Everyone
Cloudflare Images Dashboard

If you have an app that lets your users upload images, you can use the Direct Creator Uploads feature of Cloudflare Images.

The Direct Creator Uploads API lets you request single-use tokens. These one-time upload URLs can be used by your app to upload your user’s submissions without exposing your API Key or Token. Here is an example cURL that returns a one-use upload url:

curl --request POST \
  --url https://api.cloudflare.com/client/v4/accounts/:account_id/images/v1/direct_upload \
  --header 'Content-Type: application/json' \
  --header 'Authorization: Bearer :token'

If the call is successful, you’ll receive a response that looks like this:

{
  "result": {
    "id": "2cdc28f0-017a-49c4-9ed7-87056c839c2",
    "uploadURL": "https://upload.imagedelivery.net/2cdc28f0-017a-49c4-9ed7-87056c839c2"
  },
  "result_info": null,
  "success": true,
  "errors": [],
  "messages": []
}

Your client-side app can now upload the image directly to the uploadURL without exposing your account credentials to the client.

Resizing with Variants

Cloudflare Images lets you define variants and apply them to your uploaded images. You can define up to 20 different variants to support different use cases. Each variant has properties including the width and height of resized images.

Cloudflare Images Now Available to Everyone
Configure variants in Cloudflare Images

You can also configure the fit property to describe how the width and height dimensions should be interpreted.

Fit Option Behavior
Scale Down Image will be shrunk in size to fully fit within the given width or height, but won’t be enlarged.
Contain Image will be resized (shrunk or enlarged) to be as large as possible within the given width or height while preserving the aspect ratio.
Cover Image will be resized to exactly fill the entire area specified by width and height, and will be cropped if necessary.
Crop Image will be shrunk and cropped to fit within the area specified by width and height. The image won’t be enlarged. For images smaller than the given dimensions it’s the same as scale-down. For images larger than the given dimensions, it’s the same as cover.
Pad Image will be resized (shrunk or enlarged) to be as large as possible within the given width or height while preserving the aspect ratio, and the extra area will be filled with a background color (white by default)

We plan to add more properties to give you maximum flexibility. If there is a particular property you’d love to see, let us know.

Once you define your variants, you can begin using them with any image. From the Dashboard, simply click on Variants to quickly preview how any image would be rendered using each of your variants.

Cloudflare Images Now Available to Everyone
Previewing variants in Cloudflare Images

Optimized image delivery

Once you’ve uploaded your first image, you will see the Image Delivery URL in your Images Dashboard:

Cloudflare Images Now Available to Everyone
Serving images with Cloudflare Images

A typical Image Delivery URL looks like this:

https://imagedelivery.net/ZWd9g1K7eljCn_KDTu_OWA/:image_id/:variant_name

You can use this url template to form the final URL that returns any image and variant combination.

When a client requests an image, Cloudflare Images will pick the optimal format between WebP, PNG, JPEG and GIF. The format served to the eyeball is determined by client headers and the image type. Cloudflare Images will soon support AVIF, offering further compression. One of the best parts of using Cloudflare Images is that when we add support for newer formats such as AVIF, you will get the upside without needing to make any changes to your codebase.

What’s next

All Cloudflare customers can sign up to use Cloudflare Images this week. We built Cloudflare Images for developers. Check out the Cloudflare Images developer docs for examples of implementing common use-cases such as letting your users upload images directly to Images and using signed URLs to implement access control.

We’re just getting started with Cloudflare Images. Here are some of the features we plan to support soon:

  • AVIF support for even smaller file sizes and faster load times.
  • Variants that add a blur effect to your images.
  • Analytics to better understand your use of Images.

Introducing support for the AVIF image format

Post Syndicated from Kornel Lesiński original https://blog.cloudflare.com/generate-avif-images-with-image-resizing/

Introducing support for the AVIF image format

Introducing support for the AVIF image format

We’ve added support for the new AVIF image format in Image Resizing. It compresses images significantly better than older-generation formats such as WebP and JPEG. It’s supported in Chrome desktop today, and support is coming to other Chromium-based browsers, as well as Firefox.

What’s the benefit?

More than a half of an average website’s bandwidth is spent on images. Improved image compression can save bandwidth and improve overall performance of the web. The compression in AVIF is so good that images can reduce to half the size of JPEG and WebP

What is AVIF?

AVIF is a combination of the HEIF ISO standard, and a royalty-free AV1 codec by Mozilla, Xiph, Google, Cisco, and many others.

Currently JPEG is the most popular image format on the Web. It’s doing remarkably well for its age, and it will likely remain popular for years to come thanks to its excellent compatibility. There have been many previous attempts at replacing JPEG, such as JPEG 2000, JPEG XR and WebP. However, these formats offered only modest compression improvements, and didn’t always beat JPEG on image quality. Compression and image quality in AVIF is better than in all of them, and by a wide margin.

Introducing support for the AVIF image format Introducing support for the AVIF image format Introducing support for the AVIF image format
JPEG (17KB) WebP (17KB) AVIF (17KB)

Why a new image format?

One of the big things AVIF does is it fixes WebP’s biggest flaws. WebP is over 10 years old, and AVIF is a major upgrade over the WebP format. These two formats are technically related: they’re both based on a video codec from the VPx family. WebP uses the old VP8 version, while AVIF is based on AV1, which is the next generation after VP10.

WebP is limited to 8-bit color depth, and in its best-compressing mode of operation, it can only store color at half of the image’s resolution (known as chroma subsampling). This causes edges of saturated colors to be smudged or pixelated in WebP. AVIF supports 10- and 12-bit color at full resolution, and high dynamic range (HDR).

Introducing support for the AVIF image format JPEG
Introducing support for the AVIF image format WebP
Introducing support for the AVIF image format WebP (sharp YUV option)
Introducing support for the AVIF image format AVIF

AV1 also uses a new compression technique: chroma-from-luma. Most image formats store brightness separately from color hue. AVIF uses the brightness channel to guess what the color channel may look like. They are usually correlated, so a good guess gives smaller file sizes and sharper edges.

Adoption of AV1 and AVIF

VP8 and WebP suffered from reluctant industry adoption. Safari only added WebP support very recently, 10 years after Chrome.

Chrome 85 supports AVIF already. It’s a work in progress in other Chromium-based browsers, and Firefox. Apple hasn’t announced whether Safari will support AVIF. However, this time Apple is one of the companies in the Alliance for Open Media, creators of AVIF. The AV1 codec is already seeing faster adoption than the previous royalty-free codecs. Latest GPUs from Nvidia, AMD, and Intel already have hardware decoding support for AV1.

AVIF uses the same HEIF container as the HEIC format used in iOS’s camera. AVIF and HEIC offer similar compression performance. The difference is that HEIC is based on a commercial, patent-encumbered H.265 format. In countries that allow software patents, H.265 is illegal to use without obtaining patent licenses. It’s covered by thousands of patents, owned by hundreds of companies, which have fragmented into two competing licensing organizations. Costs and complexity of patent licensing used to be acceptable when videos were published by big studios, and the cost could be passed on to the customer in the price of physical discs and hardware players. Nowadays, when video is mostly consumed via free browsers and apps, the old licensing model has become unsustainable. This has created a huge incentive for Web giants like Google, Netflix, and Amazon to get behind the royalty-free alternative. AV1 is free to use by anyone, and the alliance of tech giants behind it will defend it from patent troll’s lawsuits.

Non-standard image formats usually can only be created using their vendor’s own implementation. AVIF and AV1 are already ahead with multiple independent implementations: libaom, Intel SVT-AV1, libgav1, dav1d, and rav1e. This is a sign of a healthy adoption and a prerequisite to be a Web standard. Our Image Resizing is implemented in Rust, so we’ve chosen the rav1e encoder to create a pure-Rust implementation of AVIF.

Caveats

AVIF is a feature-rich format. Most of its features are for smartphone cameras, such as “live” photos, depth maps, bursts, HDR, and lossless editing. Browsers will support only a fraction of these features. In our implementation in Image Resizing we’re supporting only still standard-range images.

Two biggest problems in AVIF are encoding speed and lack of progressive rendering.

AVIF images don’t show anything on screen until they’re fully downloaded. In contrast, a progressive JPEG can display a lower-quality approximation of the image very quickly, while it’s still loading. When progressive JPEGs are delivered well, they make websites appear to load much faster. Progressive JPEG can look loaded at half of its file size. AVIF can fully load at half of JPEG’s size, so it somewhat overcomes the lack of progressive rendering with the sheer compression advantage. In this case only WebP is left behind, which has neither progressive rendering nor strong compression.

Decoding AVIF images for display takes relatively more CPU power than other codecs, but it should be fast enough in practice. Even low-end Android devices can play AV1 videos in full HD without help of hardware acceleration, and AVIF images are just a single frame of an AV1 video. However, encoding of AVIF images is much slower. It may take even a few seconds to create a single image. AVIF supports tiling, which accelerates encoding on multi-core CPUs. We have lots of CPU cores, so we take advantage of this to make encoding faster. Image Resizing doesn’t use the maximum compression level possible in AVIF to further increase compression speed. Resized images are cached, so the encoding speed is noticeable only on a cache miss.

We will be adding AVIF support to Polish as well. Polish converts images asynchronously in the background, which completely hides the encoding latency, and it will be able to compress AVIF images better than Image Resizing.

Note about benchmarking

It’s surprisingly difficult to fairly and accurately judge which lossy codec is better. Lossy codecs are specifically designed to mainly compress image details that are too subtle for the naked eye to see, so “looks almost the same, but the file size is smaller!” is a common feature of all lossy codecs, and not specific enough to draw conclusions about their performance.

Lossy codecs can’t be compared by comparing just file sizes. Lossy codecs can easily make files of any size. Their effectiveness is in the ratio between file size and visual quality they can achieve.

The best way to compare codecs is to make each compress an image to the exact same file size, and then to compare the actual visual quality they’ve achieved. If the file sizes differ, any judgement may be unfair, because the codec that generated the larger file may have done so only because it was asked to preserve more details, not because it can’t compress better.

How and when to enable AVIF today?

We recommend AVIF for websites that need to deliver high-quality images with as little bandwidth as possible. This is important for users of slow networks and in countries where the bandwidth is expensive.

Browsers that support the AVIF format announce it by adding image/avif to their Accept request header. To request the AVIF format from Image Resizing, set the format option to avif.

The best method to detect and enable support for AVIF is to use image resizing in Workers:

addEventListener('fetch', event => {
  const imageURL = "https://jpeg.speedcf.com/cat/4.jpg";

  const resizingOptions = {
    // You can set any options here, see:
    // https://developers.cloudflare.com/images/worker
    width: 800,
    sharpen: 1.0,
  };

  const accept = event.request.headers.get("accept");
  const isAVIFSupported = /image\/avif/.test(accept);
  if (isAVIFSupported) {
    resizingOptions.format = "avif";
  }
  event.respondWith(fetch(imageURL), {cf:{image: resizingOptions}})
})

The above script will auto-detect the supported format, and serve AVIF automatically. Alternatively, you can use URL-based resizing together with the <picture> element:

<picture>
    <source type="image/avif" 
            srcset="/cdn-cgi/image/format=avif/image.jpg">
    <img src="/image.jpg">
</picture>

This uses our /cdn-cgi/image/… endpoint to perform the conversion, and the alternative source will be picked only by browsers that support the AVIF format.

We have the format=auto option, but it won’t choose AVIF yet. We’re cautious, and we’d like to test the new format more before enabling it by default.