QUIC is a new Internet transport protocol for secure, reliable and multiplexed communications. HTTP/3 builds on top of QUIC, leveraging the new features to fix performance problems such as Head-of-Line blocking. This enables web pages to load faster, especially over troublesome networks.
QUIC and HTTP/3 are open standards that have been under development in the IETF for almost exactly 4 years. On October 21, 2020, following two rounds of Working Group Last Call, draft 32 of the family of documents that describe QUIC and HTTP/3 were put into IETF Last Call. This is an important milestone for the group. We are now telling the entire IETF community that we think we’re almost done and that we’d welcome their final review.
Speaking personally, I’ve been involved with QUIC in some shape or form for many years now. Earlier this year I was honoured to be asked to help co-chair the Working Group. I’m pleased to help shepherd the documents through this important phase, and grateful for the efforts of everyone involved in getting us there, especially the editors. I’m also excited about future opportunities to evolve on top of QUIC v1 to help build a better Internet.
There are two aspects to protocol development. One aspect involves writing and iterating upon the documents that describe the protocols themselves. Then, there’s implementing, deploying and testing libraries, clients and/or servers. These aspects operate hand in hand, helping the Working Group move towards satisfying the goals listed in its charter. IETF Last Call marks the point that the group and their responsible Area Director (in this case Magnus Westerlund) believe the job is almost done. Now is the time to solicit feedback from the wider IETF community for review. At the end of the Last Call period, the stakeholders will take stock, address feedback as needed and, fingers crossed, go onto the next step of requesting the documents be published as RFCs on the Standards Track.
Although specification and implementation work hand in hand, they often progress at different rates, and that is totally fine. The QUIC specification has been mature and deployable for a long time now. HTTP/3 has been generally available on the Cloudflare edge since September 2019, and we’ve been delighted to see support roll out in user agents such as Chrome, Firefox, Safari, curl and so on. Although draft 32 is the latest specification, the community has for the time being settled on draft 29 as a solid basis for interoperability. This shouldn’t be surprising, as foundational aspects crystallize the scope of changes between iterations decreases. For the average person in the street, there’s not really much difference between 29 and 32.
So today, if you visit a website with HTTP/3 enabled—such as https://cloudflare-quic.com—you’ll probably see response headers that contain Alt-Svc: h3-29=”… . And in a while, once Last Call completes and the RFCs ship, you’ll start to see websites simply offer Alt-Svc: h3=”… (note, no draft version!).
Need a deep dive?
We’ve collected a bunch of resource links at https://cloudflare-quic.com. If you’re more of an interactive visual learner, you might be pleased to hear that I’ve also been hosting a series on Cloudflare TV called “Levelling up Web Performance with HTTP/3”. There are over 12 hours of content including the basics of QUIC, ways to measure and debug the protocol in action using tools like Wireshark, and several deep dives into specific topics. I’ve also been lucky to have some guest experts join me along the way. The table below gives an overview of the episodes that are available on demand.
Understanding the role of congestion control in QUIC. Featuring Junho Choi.
Whither QUIC?
So does Last Call mean QUIC is “done”? Not by a long shot. The new protocol is a giant leap for the Internet, because it enables new opportunities and innovation. QUIC v1 is basically the set of documents that have gone into Last Call. We’ll continue to see people gain experience deploying and testing this, and no doubt cool blog posts about tweaking parameters for efficiency and performance are on the radar. But QUIC and HTTP/3 are extensible, so we’ll see people interested in trying new things like multipath, different congestion control approaches, or new ways to carry data unreliably such as the DATAGRAM frame.
We’re also seeing people interested in using QUIC for other use cases. Mapping other application protocols like DNS to QUIC is a rapid way to get its improvements. We’re seeing people that want to use QUIC as a substrate for carrying other transport protocols, hence the formation of the MASQUE Working Group. There’s folks that want to use QUIC and HTTP/3 as a “supercharged WebSocket”, hence the formation of the WebTransport Working Group.
Whatever the future holds for QUIC, we’re just getting started, and I’m excited.
Today we’re excited to announce Magic Firewall™, a network-level firewall delivered through Cloudflare to secure your enterprise. Magic Firewall covers your remote users, branch offices, data centers and cloud infrastructure. Best of all, it’s deeply integrated with Cloudflare One™, giving you a one-stop overview of everything that’s happening on your network.
Cloudflare Magic Transit™ secures IP subnets with the same DDoS protection technology that we built to keep our own global network secure. That helps ensure your network is safe from attack and available and it replaces physical appliances that have limits with Cloudflare’s network.
That still leaves some hardware onsite, though, for a different function: firewalls. Networks don’t just need protection from DDoS attacks; administrators need a way to set policies for all traffic entering and leaving the network. With Magic Firewall, we want to help your team deprecate those network firewall appliances and move that burden to the Cloudflare global network.
Firewall boxes are miserable to manage
Network firewalls have always been clunky. Not only are they expensive, they are bound by their own hardware constraints. If you need more CPU or memory, you have to buy more boxes. If you lack capacity, the entire network suffers, directly impacting employees that are trying to do their work. To compensate, network operators and security teams are forced to buy more capacity than we need, resulting in having to pay more than necessary.
We’ve heard this problem from our Magic Transit customers who are constantly running into capacity challenges:
“We’re constantly running out of memory and running into connection limits on our firewalls. It’s a huge problem.”
Network operators find themselves piecing together solutions from different vendors, mixing and matching features, and worrying about keeping policies in sync across the network. The result is more headache and added cost.
The solution isn’t more hardware
Some organizations then turn to even more vendors and purchase additional hardware to manage the patchwork firewall hardware they have deployed. Teams then have to balance refresh cycles, updates, and end of life management across even more platforms. These are band-aid solutions that do not solve the fundamental problem: how do we create a single view of the entire network that gives insights into what is happening (good and bad) and apply policy instantaneously, globally?
Traditional Firewall Architecture
Introducing Magic Firewall
Instead of more band-aids, we’re excited to launch Magic Firewall as a single, comprehensive, solution to network filtering. Unlike legacy appliances, Magic Firewall runs in the Cloudflare network. That network scales up or down with a customer’s needs at any given time.
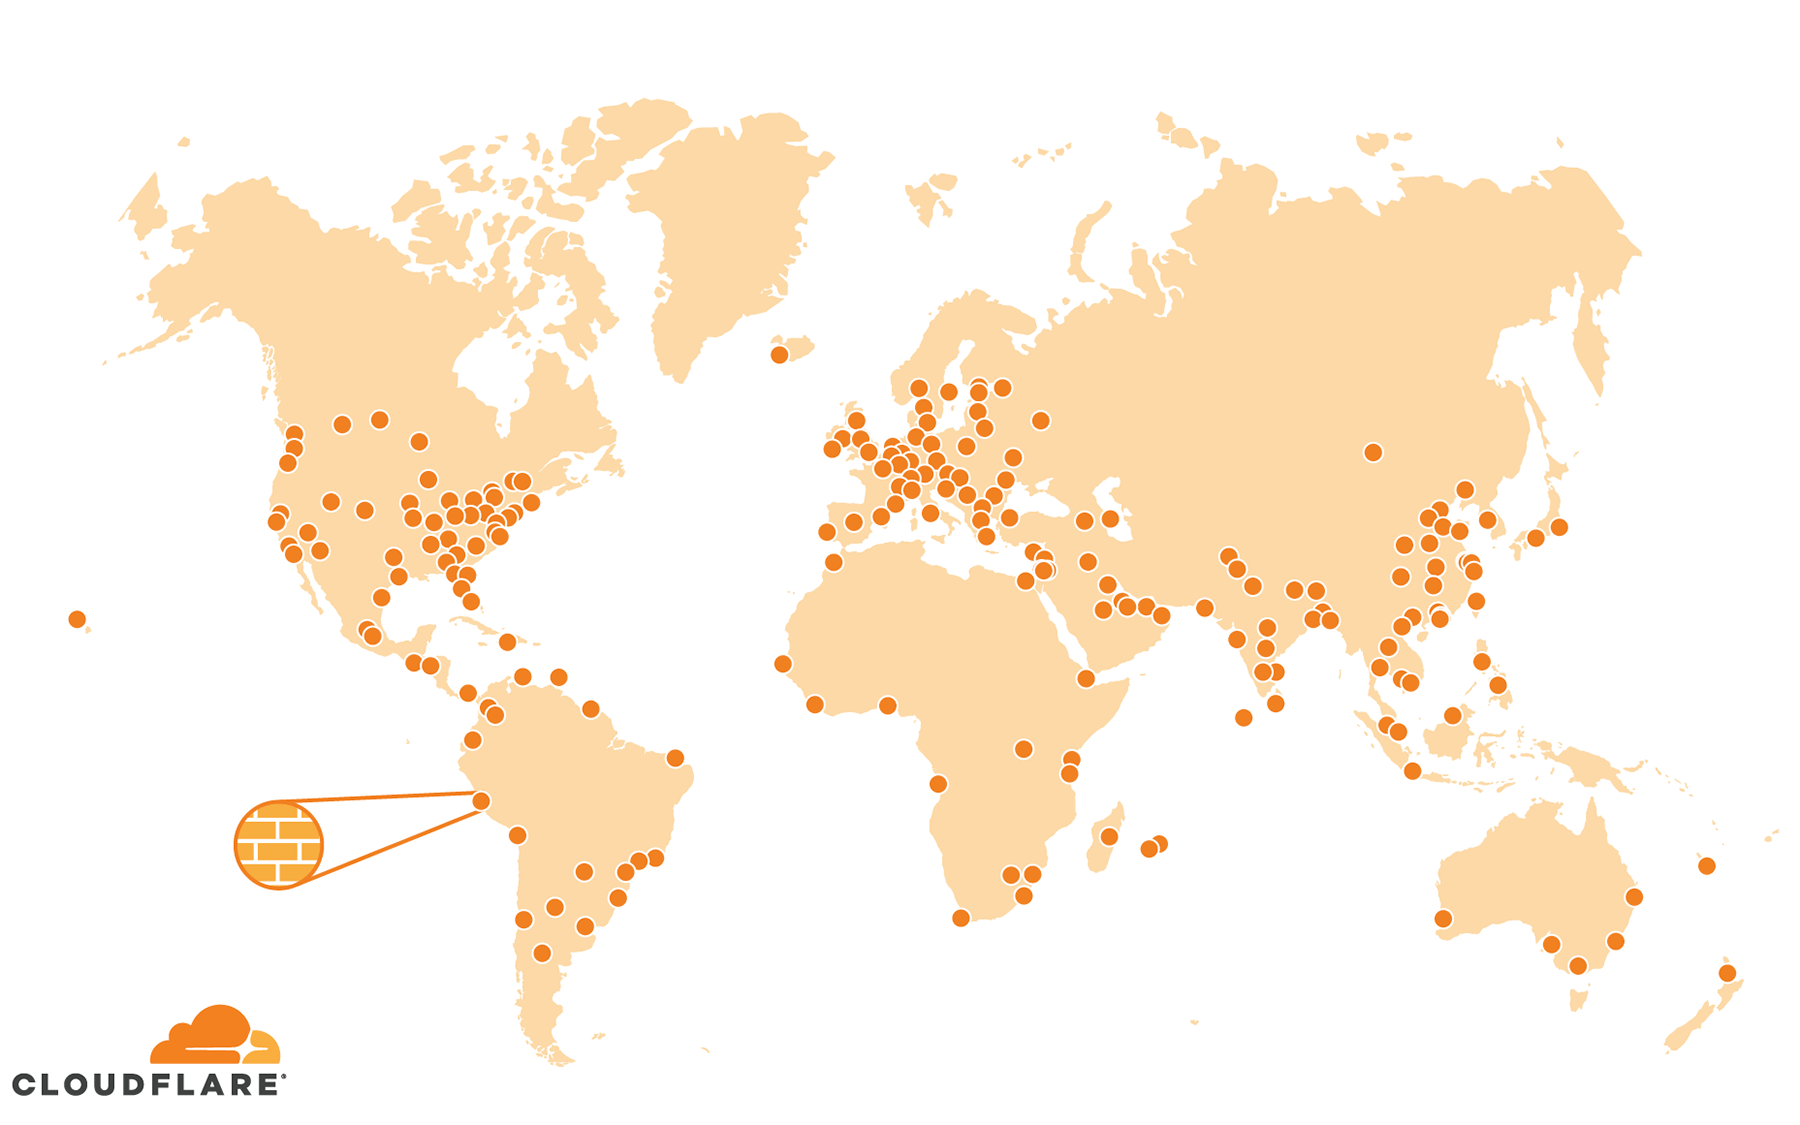
Running in our network delivers an added benefit. Many customers backhaul network traffic to single chokepoints in order to perform firewalling operations, adding latency. Cloudflare operates data centers in 200 cities around the world and each of those points of presence is capable of delivering the same solution. Regional offices and data centers can instead rely on a Cloudflare Magic Firewall engine running within 100 milliseconds of their operation.
Integrated with Cloudflare One
Cloudflare One consists of products that allow you to apply a single filtering engine with consistent security controls to your entire network, not just part of it. The same types of controls that your organization wants to apply to traffic leaving your networks should be applied to traffic leaving your devices.
Magic Firewall will integrate with what you’re already using in Cloudflare. For example, traffic leaving endpoints outside of the network can reach Cloudflare using the Cloudflare WARP client where Gateway will apply the same rules your team configures for network level filtering. Branch offices and data centers can connect through Magic Transit with the same set of rules. This gives you a one-stop overview of your entire network instead of having to hunt down information across multiple devices and vendors.
How does it work?
So what is Magic Firewall? Magic Firewall is a way to replace your antiquated on-premises network firewall with an as-a-service solution, pushing your perimeter out to the edge. We already allow you to apply firewall rules at our edge with Magic Transit, but the process to add or change rules has previously involved working with your account team or Cloudflare support. Our first version, generally available in the next few months, will allow all our Magic Transit customers to apply static OSI Layer 3 & 4 mitigations completely self-service, at Cloudflare scale.
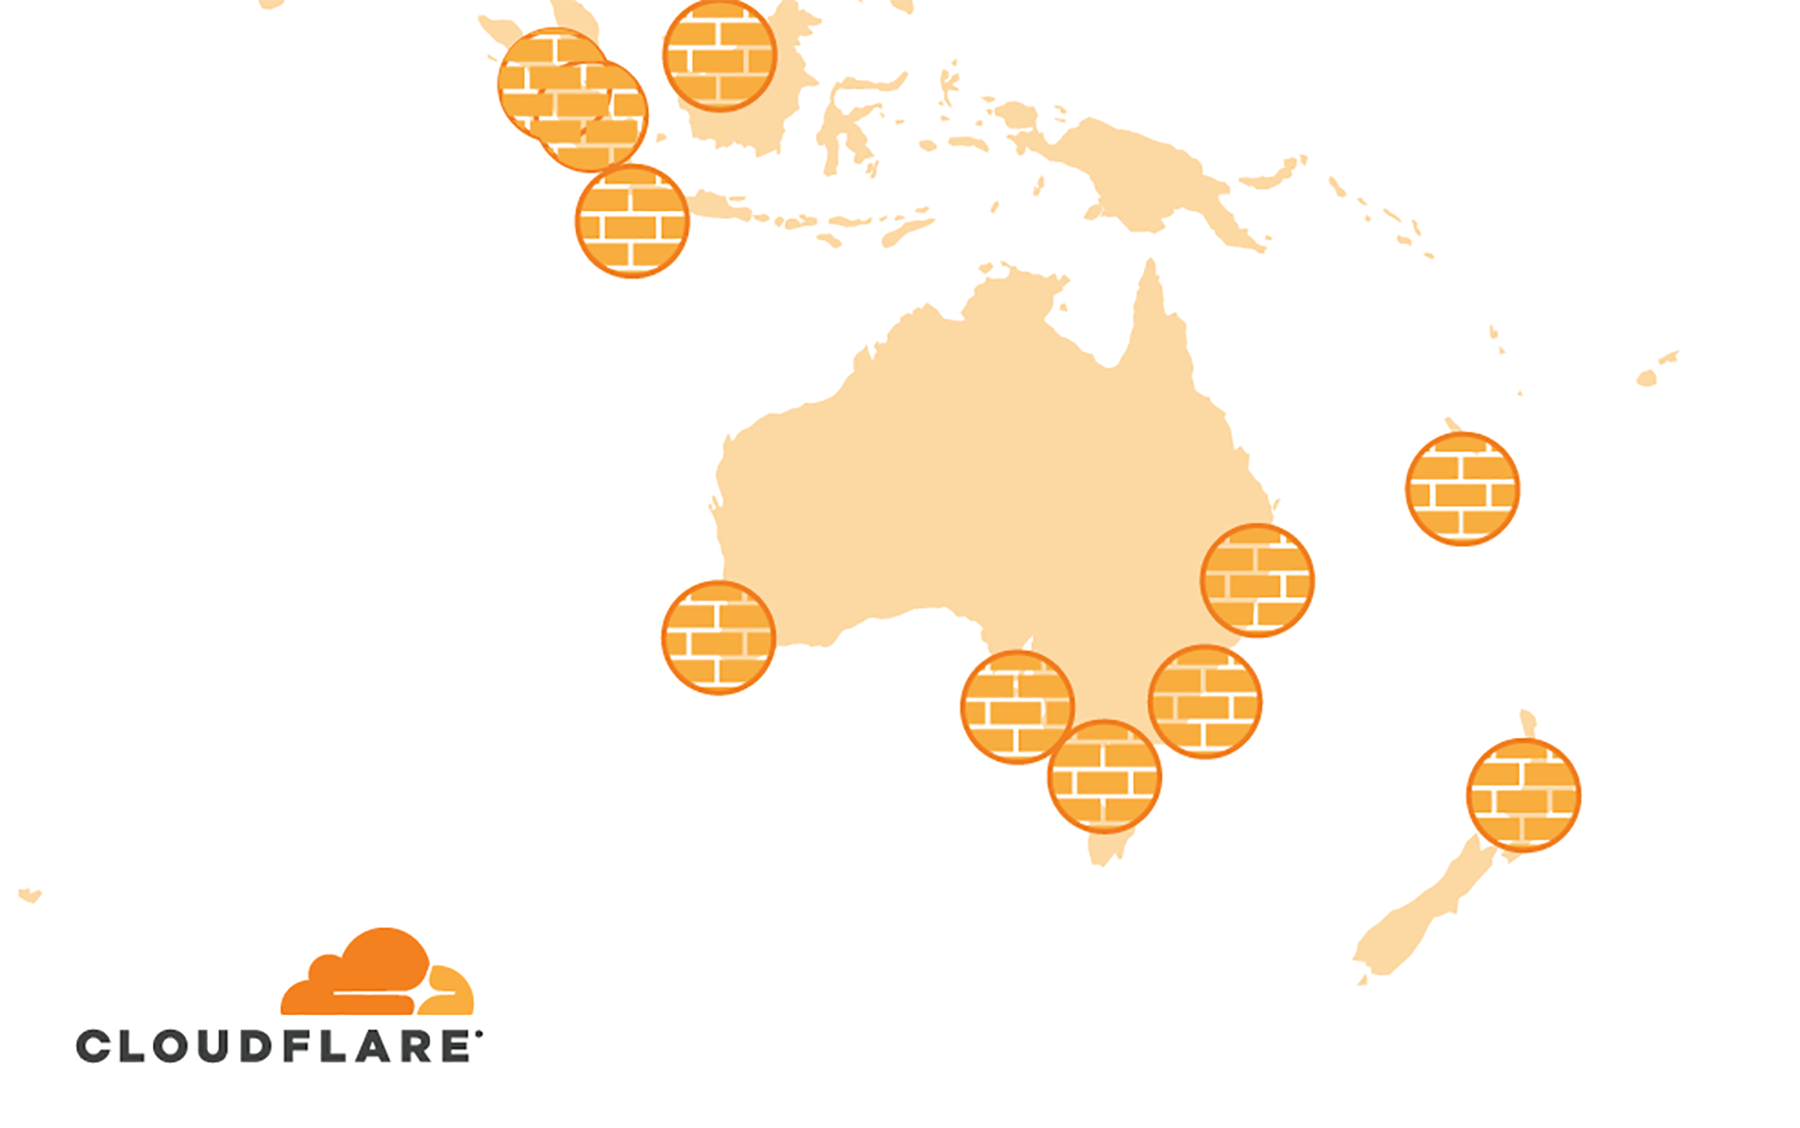
Cloudflare applies firewall policies at every data center
Meaning you have firewalls applying policies across the globe
Our first version of Magic Firewall will focus on static mitigations, allowing you to set a standard set of rules that apply to your entire network, whether devices or applications are sitting in the cloud, an employee’s device or a branch office. You’ll be able to express rules allowing or blocking based on:
Protocol
Source or destination IP and port
Packet length
Bit field match
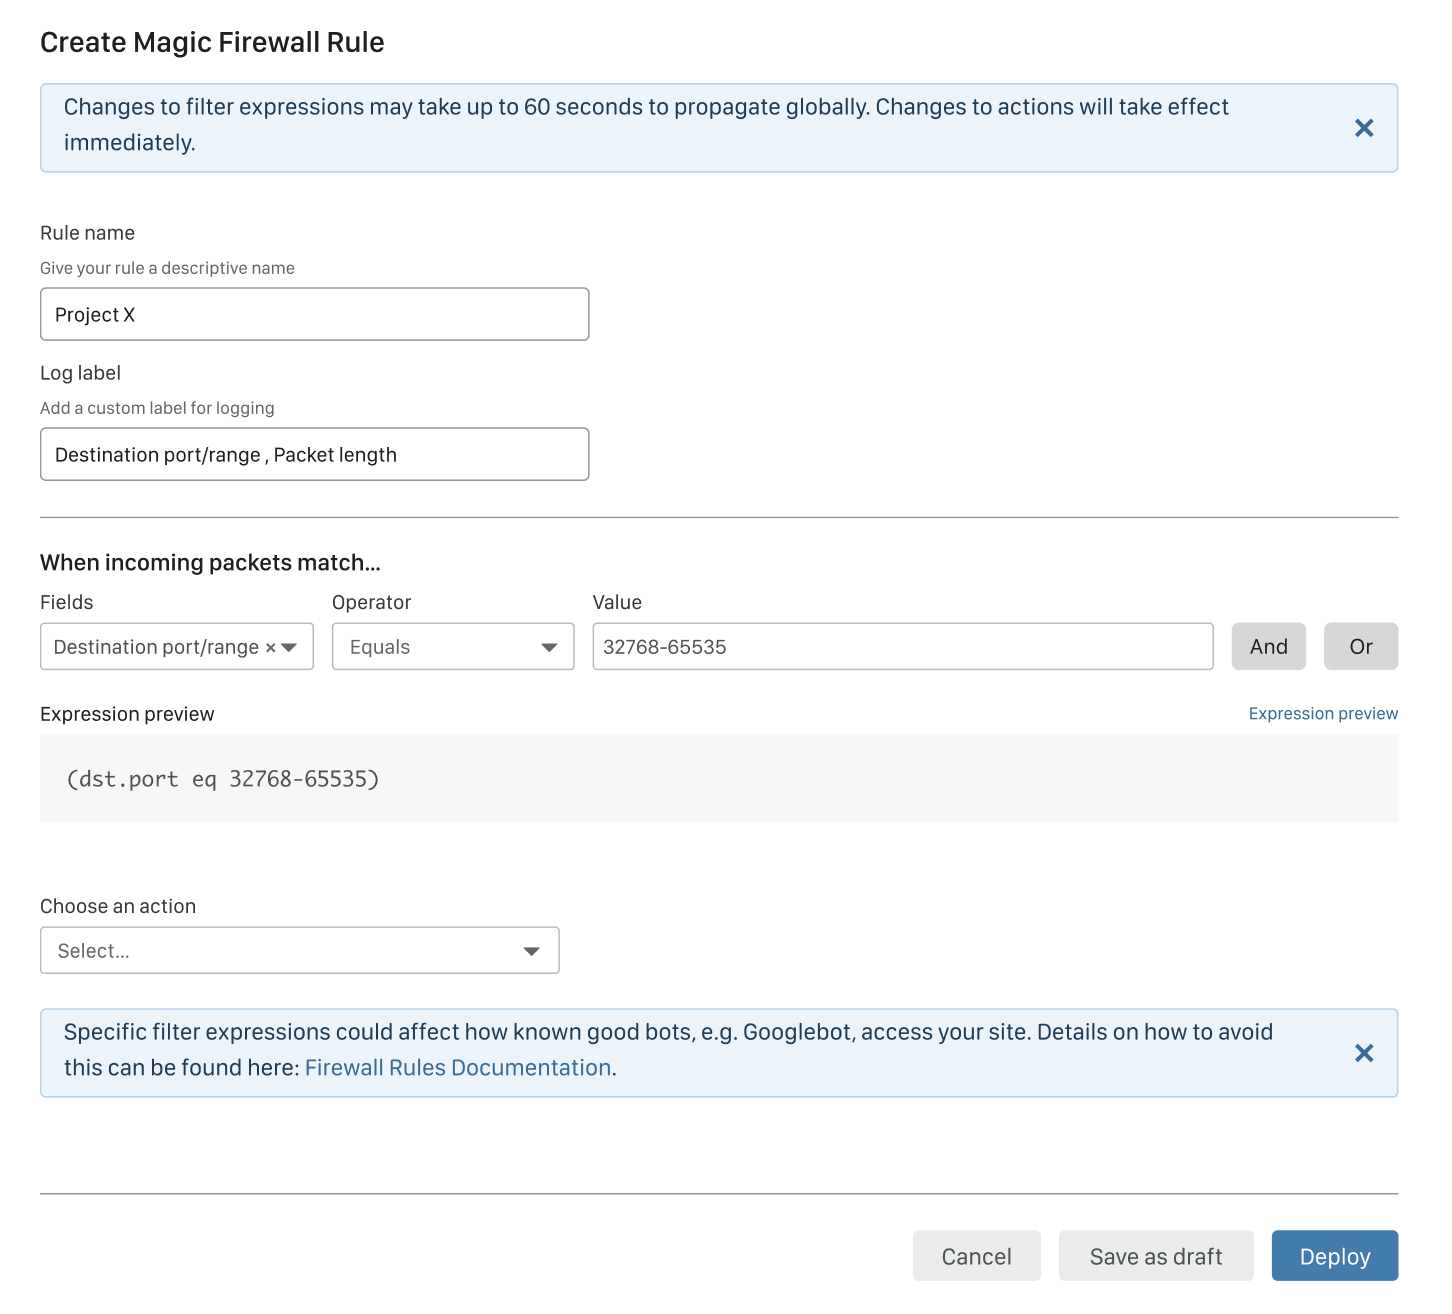
Rules can be crafted in Wireshark syntax, a domain specific language common in the networking world and the same syntax we use across our other products. With this syntax, you can easily craft extremely powerful rules to precisely allow or deny any traffic in or out of your network. If you suspect there’s a bad actor inside or outside of your perimeter, simply log on to the dashboard and block that traffic. Rules are pushed out globally in seconds, shutting down threats at the edge.
Configuring firewalls should be easy and powerful. With Magic Firewall, rules can be configured using an easy UI that allows for complex logic. Or, just type the filter rule manually using Wireshark filter syntax and configure that way. Don’t want to mess with a UI? Rules can be added just as easily through the API.
What’s next?
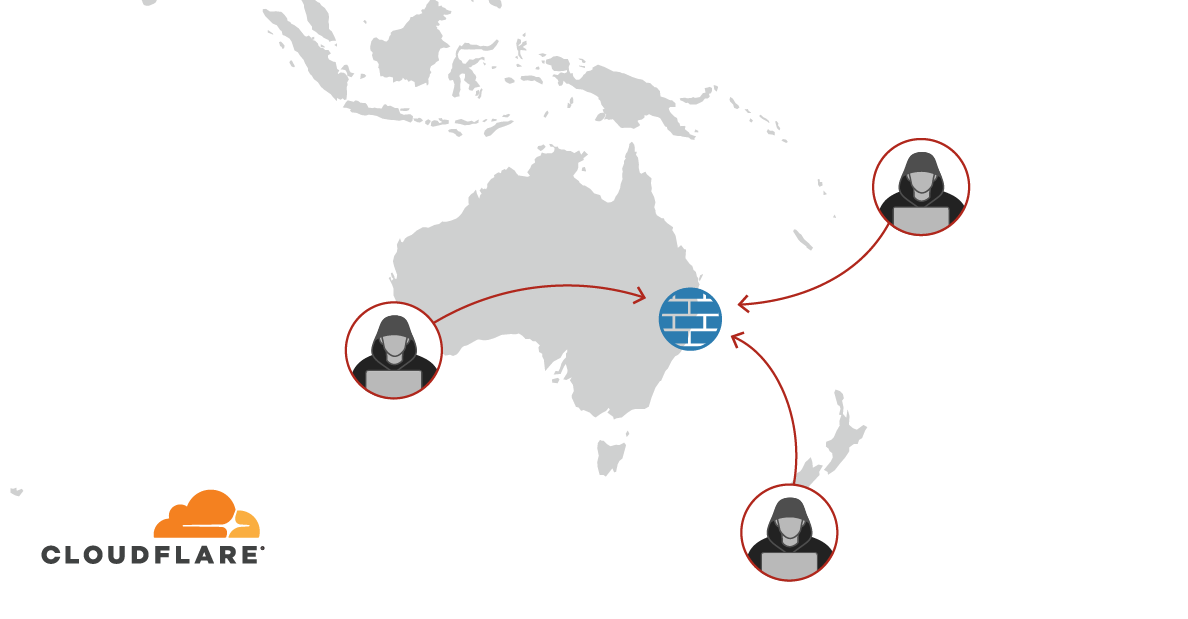
Looking at packets is not enough… Even with firewall rules, teams still need visibility into what’s actually happening on their network: what’s happening inside of these datastreams? Is this legitimate traffic or do we have malicious actors either inside or outside of our network doing nefarious things? Deploying Cloudflare to sit between any two actors that interact with any of your assets (be they employee devices or services exposed to the Internet) allows us to enforce any policy, anywhere, either on where the traffic is coming from or what’s inside the traffic. Applying policies based on traffic type is just around the corner and we’re excited to announce that we’re planning to add additional capabilities to automatically detect intrusion events based on what’s happening inside datastreams in the near future.
We’re excited about this new journey. With Cloudflare One, we’re reinventing what the network looks like for corporations. We integrate access management, security features and performance across the board: for your network’s visitors but also for anyone inside it. All of this built on top of a network that was #BuiltForThis.
We’ll be opening up Magic Firewall in a limited beta, starting with existing Magic Transit customers. If you’re interested, please let us know.
APIs are the lifeblood of modern Internet-connected applications. Every millisecond they carry requests from mobile applications—place this food delivery order, “like” this picture—and directions to IoT devices—unlock the car door, start the wash cycle, my human just finished a 5k run—among countless other calls.
They’re also the target of widespread attacks designed to perform unauthorized actions or exfiltrate data, as data from Gartner increasingly shows: “by 2021, 90% of web-enabled applications will have more surface area for attack in the form of exposed APIs rather than the UI, up from 40% in 2019, and “Gartner predicted that, by 2022, API abuses will move from an infrequent to the most-frequent attack vector, resulting in data breaches for enterprise web applications”. Of the 18 million requests per second that traverse Cloudflare’s network, 50% are directed towards APIs—with the majority of these requests blocked as malicious.
To combat these threats, Cloudflare is making it simple to secure APIs through the use of strong client certificate-based identity and strict schema-based validation. As of today, these capabilities are available free for all plans within our new “API Shield” offering. And as of today, the security benefits also extend to gRPC-based APIs, which use binary formats such as protocol buffers rather than JSON, and have been growing in popularity with our customer base.
Continue reading to learn more about the new capabilities, or jump right to the “Demonstration” paragraph for examples of how to get started configuring your first API Shield rule.
Positive security models and client certificates
A “positive security” model is one that allows only known behavior and identities, while rejecting everything else. It is the opposite of the traditional “negative security” model enforced by a Web Application Firewall (WAF) that allows everything except for requests coming from problematic IPs, ASNs, countries or requests with problematic signatures (SQL injection attempts, etc.).
Implementing a positive security model for APIs is the most direct way to eliminate the noise of credential stuffing attacks and other automated scanning tools. And the first step towards a positive model is deploying strong authentication such as mutual TLS authentication, which is not vulnerable to the reuse or sharing of passwords.
Just as we simplified the issuance of server certificates back in 2014 with Universal SSL, API Shield reduces the process of issuing client certificates to clicking a few buttons in the Cloudflare Dashboard. By providing a fully hosted private public key infrastructure (PKI), you can focus on your applications and features—rather than operating and securing your own certificate authority (CA).
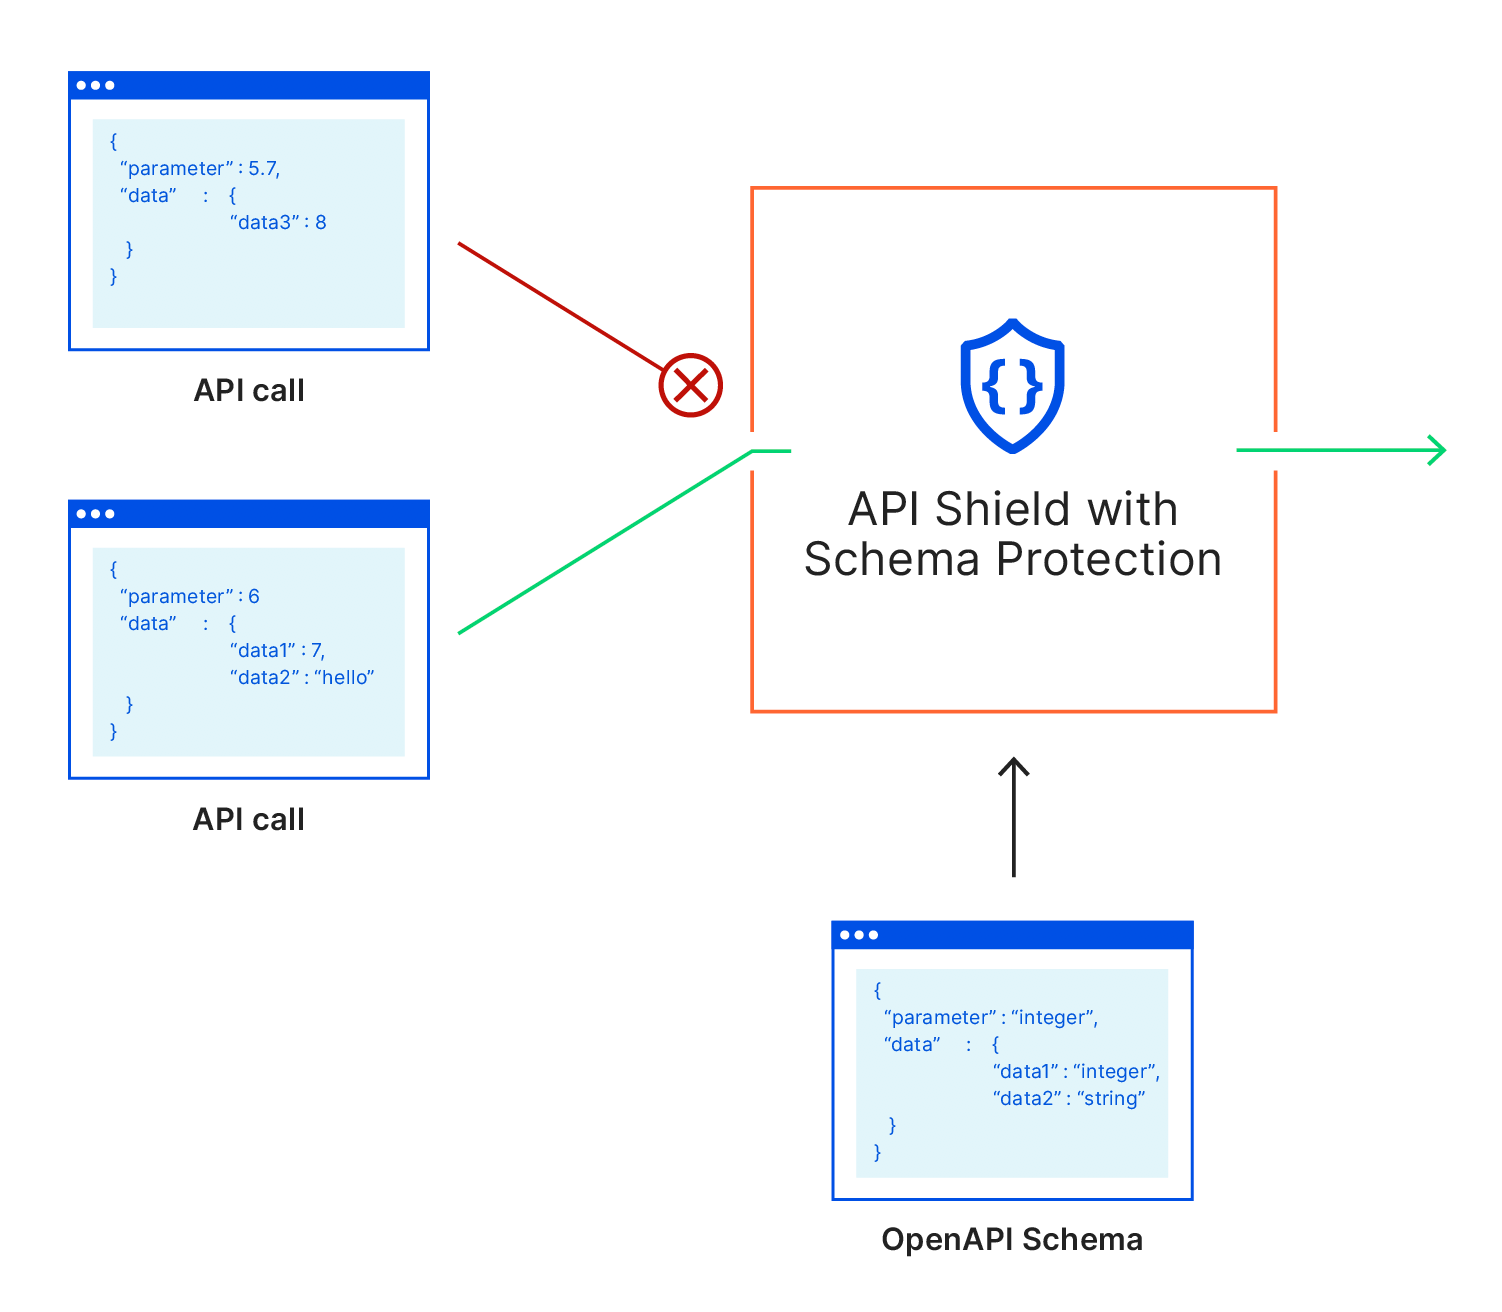
Enforcing valid requests with schema validation
Once developers can be sure that only legitimate clients (with SSL certificates in hand) are connecting to their APIs, the next step in implementing a positive security model is making sure that those clients are making valid requests. Extracting a client certificate from a device and reusing elsewhere is difficult, but not impossible, so it’s also important to make sure that the API is being called as intended.
Requests containing extraneous input may not have been anticipated by the API developer, and can cause problems if processed directly by the application, so these should be dropped at the edge if possible. API Schema validation works by matching the contents of API requests—the query parameters that come after the URL and contents of the POST body—against a contract or “schema” that contains the rules for what is expected. If validation fails, the API call is blocked protecting the origin from an invalid request or a malicious payload.
Schema validation is currently in closed beta for JSON payloads, with gRPC/protocol buffer support on the roadmap. If you would like to join the beta please open a support ticket with the subject “API Schema Validation Beta”. After the beta has ended, we plan to make schema validation available as part of the API Shield user interface.
Demonstration
To demonstrate how the APIs powering IoT devices and mobile applications can be secured, we have built an API Shield demonstration using client certificates and schema validation.
Temperatures are captured by an IoT device, represented in the demo by a Raspberry Pi 3 Model B+ with an external infrared temperature sensor, and then transmitted via a POST request to a Cloudflare-protected API. Temperatures are subsequently retrieved by GET requests and then displayed in a mobile application built in Swift for iOS.
In both cases, the API was actually built using Cloudflare Workers® and Workers KV, but can be replaced by any Internet-accessible endpoint.
1. API Configuration
Before configuring the IoT device and mobile application to communicate securely with the API, we need to bootstrap the API endpoints. To keep the example simple, while also allowing for additional customization, we’ve implemented the API as a Cloudflare Worker (borrowing code from the To-Do List tutorial).
In this particular example the temperatures are stored in Workers KV using the source IP address as a key, but this could easily be replaced by a value from the client certificate, e.g., the fingerprint. The code below saves a temperature and timestamp into KV when a POST is made, and returns the most recent 5 temperatures when a GET request is made.
const defaultData = { temperatures: [] }

const getCache = key => TEMPERATURES.get(key)
const setCache = (key, data) => TEMPERATURES.put(key, data)

async function addTemperature(request) {

    // pull previously recorded temperatures for this client
    const ip = request.headers.get('CF-Connecting-IP')
    const cacheKey = `data-${ip}`
    let data
    const cache = await getCache(cacheKey)
    if (!cache) {
        await setCache(cacheKey, JSON.stringify(defaultData))
        data = defaultData
    } else {
        data = JSON.parse(cache)
    }

    // append the recorded temperatures with the submitted reading (assuming it has both temperature and a timestamp)
    try {
        const body = await request.text()
        const val = JSON.parse(body)

        if (val.temperature && val.time) {
            data.temperatures.push(val)
            await setCache(cacheKey, JSON.stringify(data))
            return new Response("", { status: 201 })
        } else {
            return new Response("Unable to parse temperature and/or timestamp from JSON POST body", { status: 400 })
        }
    } catch (err) {
        return new Response(err, { status: 500 })
    }
}

function compareTimestamps(a,b) {
    return -1 * (Date.parse(a.time) - Date.parse(b.time))
}

// return the 5 most recent temperature measurements
async function getTemperatures(request) {
    const ip = request.headers.get('CF-Connecting-IP')
    const cacheKey = `data-${ip}`

    const cache = await getCache(cacheKey)
    if (!cache) {
        return new Response(JSON.stringify(defaultData), { status: 200, headers: { 'content-type': 'application/json' } })
    } else {
        data = JSON.parse(cache)
        const retval = JSON.stringify(data.temperatures.sort(compareTimestamps).splice(0,5))
        return new Response(retval, { status: 200, headers: { 'content-type': 'application/json' } })
    }
}

async function handleRequest(request) {

    if (request.method === 'POST') {
        return addTemperature(request)
    } else {
        return getTemperatures(request)
    }

}

addEventListener('fetch', event => {
  event.respondWith(handleRequest(event.request))
})
Before adding mutual TLS authentication, we’ll test POST’ing a random temperature reading:
With our API in hand, it’s time to lock it down to require a valid client certificate. Before doing so we’ll want to generate those certificates. To do so, you can either go to the SSL/TLS → Client Certificates tab of the Cloudflare Dashboard and click “Create Certificate” or you can automate the process via API calls.
Because most developers at scale will be generating their own private keys and CSRs and requesting that they be signed via API, we’ll show that process here. Using Cloudflare’s PKI toolkit CFSSL we’ll first create a bootstrap certificate fo the iOS application, and then we’ll create a certificate for the IoT device:
$ cat <<'EOF' | tee -a csr.json
{
    "hosts": [
        "ios-bootstrap.devices.upinatoms.com"
    ],
    "CN": "ios-bootstrap.devices.upinatoms.com",
    "key": {
        "algo": "rsa",
        "size": 2048
    },
    "names": [{
        "C": "US",
        "L": "Austin",
        "O": "Temperature Testers, Inc.",
        "OU": "Tech Operations",
        "ST": "Texas"
    }]
}
EOF

$ cfssl genkey csr.json | cfssljson -bare certificate
2020/09/27 21:28:46 [INFO] generate received request
2020/09/27 21:28:46 [INFO] received CSR
2020/09/27 21:28:46 [INFO] generating key: rsa-2048
2020/09/27 21:28:47 [INFO] encoded CSR

$ mv certificate-key.pem ios-key.pem
$ mv certificate.csr ios.csr

// and do the same for the IoT sensor
$ sed -i.bak 's/ios-bootstrap/sensor-001/g' csr.json
$ cfssl genkey csr.json | cfssljson -bare certificate
...
$ mv certificate-key.pem sensor-key.pem
$ mv certificate.csr sensor.csr
Generate a private key and CSR for the IoT device and iOS application
// we need to replace actual newlines in the CSR with ‘\n’ before POST’ing
$ CSR=$(cat ios.csr | perl -pe 's/\n/\\n/g')
$ request_body=$(< <(cat <<EOF
{
  "validity_days": 3650,
  "csr":"$CSR"
}
EOF
))

// save the response so we can view it and then extract the certificate
$ curl -H 'X-Auth-Email: YOUR_EMAIL' -H 'X-Auth-Key: YOUR_API_KEY' -H 'Content-Type: application/json' -d “$request_body” https://api.cloudflare.com/client/v4/zones/YOUR_ZONE_ID/client_certificates > response.json

$ cat response.json | jq .
{
  "success": true,
  "errors": [],
  "messages": [],
  "result": {
    "id": "7bf7f70c-7600-42e1-81c4-e4c0da9aa515",
    "certificate_authority": {
      "id": "8f5606d9-5133-4e53-b062-a2e5da51be5e",
      "name": "Cloudflare Managed CA for account 11cbe197c050c9e422aaa103cfe30ed8"
    },
    "certificate": "-----BEGIN CERTIFICATE-----\nMIIEkzCCA...\n-----END CERTIFICATE-----\n",
    "csr": "-----BEGIN CERTIFICATE REQUEST-----\nMIIDITCCA...\n-----END CERTIFICATE REQUEST-----\n",
    "ski": "eb2a48a19802a705c0e8a39489a71bd586638fdf",
    "serial_number": "133270673305904147240315902291726509220894288063",
    "signature": "SHA256WithRSA",
    "common_name": "ios-bootstrap.devices.upinatoms.com",
    "organization": "Temperature Testers, Inc.",
    "organizational_unit": "Tech Operations",
    "country": "US",
    "state": "Texas",
    "location": "Austin",
    "expires_on": "2030-09-26T02:41:00Z",
    "issued_on": "2020-09-28T02:41:00Z",
    "fingerprint_sha256": "84b045d498f53a59bef53358441a3957de81261211fc9b6d46b0bf5880bdaf25",
    "validity_days": 3650
  }
}

$ cat response.json | jq .result.certificate | perl -npe 's/\\n/\n/g; s/"//g' > ios.pem

// now ask that the second client certificate signing request be signed
$ CSR=$(cat sensor.csr | perl -pe 's/\n/\\n/g')
$ request_body=$(< <(cat <<EOF
{
  "validity_days": 3650,
  "csr":"$CSR"
}
EOF
))

$ curl -H 'X-Auth-Email: YOUR_EMAIL' -H 'X-Auth-Key: YOUR_API_KEY' -H 'Content-Type: application/json' -d "$request_body" https://api.cloudflare.com/client/v4/zones/YOUR_ZONE_ID/client_certificates | perl -npe 's/\\n/\n/g; s/"//g' > sensor.pem
Ask Cloudflare to sign the CSRs with the private CA issued for your zone
3. API Shield rule creation
With certificates in hand we can now configure the API endpoint to require their use. Below is a demonstration of how to create such a rule.
The steps include specifying which hostnames to prompt for certificates, e.g., shield.upinatoms.com, and then creating the API Shield rule.
4. IoT Device Communication
To prepare the IoT device for secure communication with our API endpoint we need to embed the certificate on the device, and then point our application to it so it can be used when making the POST request to the API endpoint.
We securely copied the private key and certificate into /etc/ssl/private/sensor-key.pem and /etc/ssl/certs/sensor.pem, and then modified our sample script to point to these files:
import requests
import json
from datetime import datetime

def readSensor():

    # Takes a reading from a temperature sensor and store it to temp_measurement

    dateTimeObj = datetime.now()
    timestampStr = dateTimeObj.strftime(‘%Y-%m-%dT%H:%M:%SZ’)

    measurement = {'temperature':str(36.5),'time':timestampStr}
    return measurement

def main():

    print("Cloudflare API Shield [IoT device demonstration]")

    temperature = readSensor()
    payload = json.dumps(temperature)

    url = 'https://shield.upinatoms.com/temps'
    json_headers = {'Content-Type': 'application/json'}
    cert_file = ('/etc/ssl/certs/sensor.pem', '/etc/ssl/private/sensor-key.pem')

    r = requests.post(url, headers = json_headers, data = payload, cert = cert_file)

    print("Request body: ", r.request.body)
    print("Response status code: %d" % r.status_code)
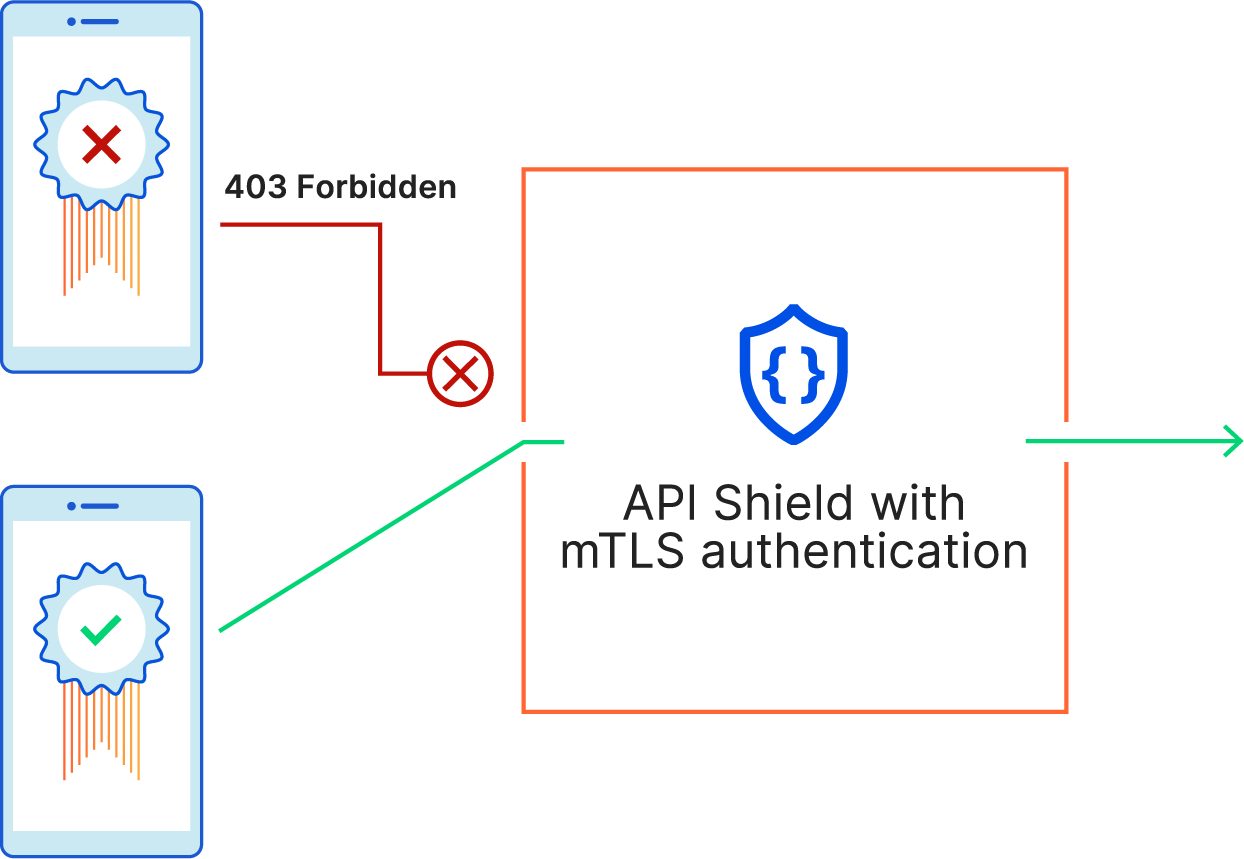
When the script attempts to connect to https://shield.upinatoms.com/temps, Cloudflare requests that a ClientCertificate is sent, and our script sends the contents of sensor.pem before demonstrating it has possession of sensor-key.pem as required to complete the SSL/TLS handshake.
If we fail to send the client certificate or attempt to include extraneous fields in the API request, the schema validation (configuration not shown) fails and the request is rejected:
Cloudflare API Shield [IoT device demonstration]
Request body:  {"temperature": "36.5", "time": "2020-09-28T15:52:19Z"}
Response status code: 403
If instead a valid certificate is presented and the payload follows the schema previously uploaded, our script POSTs the latest temperature reading to the API.
Cloudflare API Shield [IoT device demonstration]
Request body:  {"temperature": "36.5", "time": "2020-09-28T15:56:45Z"}
Response status code: 201
5. Mobile Application (iOS) Communication
Now that temperature requests have been sent to our API endpoint, it’s time to read them securely from our mobile application using one of the client certificates.
For purposes of brevity, we’re going to embed a “bootstrap” certificate and key as a PKCS#12 file within the application bundle. In a real world deployment, this bootstrap certificate should only be used alongside users’ credentials to authenticate to an API endpoint that can return a unique user certificate. Corporate users will want to use MDM to distribute certificates so that the underlying mobile
Package the certificate and private key
Before adding the bootstrap certificate and private key, we need to combine them into a binary PKCS#12 file. This binary file will then be added to our iOS application bundle.
$ openssl pkcs12 -export -out bootstrap-cert.pfx -inkey ios-key.pem -in ios.pem
Enter Export Password:
Verifying - Enter Export Password:
Add the certificate bundle to your iOS application
Within XCode, click File → Add Files To “[Project Name]” and select your .pfx file. Make sure to check “Add to target” before confirming.
Modify your URLSession code to use the client certificate
This article provides a nice walkthrough of using a PKCS#11 class and URLSessionDelegate to modify your application to complete mutual TLS authentication when connecting to an API that requires it.
Looking Forward
In the coming months, we plan to expand API Shield with a number of additional features designed to protect API traffic. For customers that want to use their own PKI, we will provide the ability to import their own CAs, something available today as part of Cloudflare Access.
As we receive feedback on our schema validation beta, we will look to make the capability generally available to all customers. If you’re trying out the beta and have thoughts to share, we’d love to hear your feedback.
Beyond certificates and schema validation, we’re excited to layer on additional API security capabilities as well as deep analytics to help you better understand your APIs. If you there are features you’d like to see, let us know in the comments below!
In late June, Cloudflare’s resolver team noticed a spike in DNS requests for the 65479 Resource Record thanks to data exposed through our new Radar service. We began investigating and found these to be a part of Apple’s iOS14 beta release where they were testing out a new SVCB/HTTPS record type.
Once we saw that Apple was requesting this record type, and while the iOS 14 beta was still on-going, we rolled out support across the Cloudflare customer base.
This blog post explains what this new record type does and its significance, but there’s also a deeper story: Cloudflare customers get automatic support for new protocols like this.
That means that today if you’ve enabled HTTP/3 on an Apple device running iOS 14, when it needs to talk to a Cloudflare customer (say you browse to a Cloudflare-protected website, or use an app whose API is on Cloudflare) it can find the best way of making that connection automatically.
And if you’re a Cloudflare customer you have to do… absolutely nothing… to give Apple users the best connection to your Internet property.
Negotiating HTTP security and performance
Whenever a user types a URL in the browser box without specifying a scheme (like “https://” or “http://”), the browser cannot assume, without prior knowledge such as a Strict-Transport-Security (HSTS) cache or preload list entry, whether the requested website supports HTTPS or not. The browser will first try to fetch the resources using plaintext HTTP, and only if the website redirects to an HTTPS URL, or if it specifies an HSTS policy in the initial HTTP response, the browser will then fetch the resource again over a secure connection.
This means that the latency incurred in fetching the initial resource (say, the index page of a website) is doubled, due to the fact that the browser needs to re-establish the connection over TLS and request the resource all over again. But worse still, the initial request is leaked to the network in plaintext, which could potentially be modified by malicious on-path attackers (think of all those unsecured public WiFi networks) to redirect the user to a completely different website. In practical terms, this weakness is sometimes used by said unsecured public WiFi network operators to sneak advertisements into people’s browsers.
Unfortunately, that’s not the full extent of it. This problem also impacts HTTP/3, the newest revision of the HTTP protocol that provides increased performance and security. HTTP/3 is advertised using the Alt-Svc HTTP header, which is only returned after the browser has already contacted the origin using a different and potentially less performant HTTP version. The browser ends up missing out on using faster HTTP/3 on its first visit to the website (although it does store the knowledge for later visits).
The fundamental problem comes from the fact that negotiation of HTTP-related parameters (such as whether HTTPS or HTTP/3 can be used) is done through HTTP itself (either via a redirect, HSTS and/or Alt-Svc headers). This leads to a chicken and egg problem where the client needs to use the most basic HTTP configuration that has the best chance of succeeding for the initial request. In most cases this means using plaintext HTTP/1.1. Only after it learns of parameters can it change its configuration for the following requests.
But before the browser can even attempt to connect to the website, it first needs to resolve the website’s domain to an IP address via DNS. This presents an opportunity: what if additional information required to establish a connection could be provided, in addition to IP addresses, with DNS?
That’s what we’re excited to be announcing today: Cloudflare has rolled out initial support for HTTPS records to our edge network. Cloudflare’s DNS servers will now automatically generate HTTPS records on the fly to advertise whether a particular zone supports HTTP/3 and/or HTTP/2, based on whether those features are enabled on the zone.
Service Bindings via DNS
The new proposal, currently discussed by the Internet Engineering Task Force (IETF) defines a family of DNS resource record types (“SVCB”) that can be used to negotiate parameters for a variety of application protocols.
The generic DNS record “SVCB” can be instantiated into records specific to different protocols. The draft specification defines one such instance called “HTTPS”, specific to the HTTP protocol, which can be used not only to signal to the client that it can connect in over a secure connection (skipping the initial unsecured request), but also to advertise the different HTTP versions supported by the website. In the future, potentially even more features could be advertised.
example.com 3600 IN HTTPS 1 . alpn=”h3,h2”
The DNS record above advertises support for the HTTP/3 and HTTP/2 protocols for the example.com origin.
This is best used alongside DNS over HTTPS or DNS over TLS, and DNSSEC, to again prevent malicious actors from manipulating the record.
The client will need to fetch not only the typical A and AAAA records to get the origin’s IP addresses, but also the HTTPS record. It can of course do these lookups in parallel to avoid additional latency at the start of the connection, but this could potentially lead to A/AAAA and HTTPS responses diverging from each other. For example, in cases where the origin makes use of DNS load-balancing: if an origin can be served by multiple CDNs it might happen that the responses for A and/or AAAA records come from one CDN, while the HTTPS record comes from another. In some cases this can lead to failures when connecting to the origin (say, if the HTTPS record from one of the CDNs advertises support for HTTP/3, but the CDN the client ends up connecting to doesn’t support it).
This is solved by the SVCB and HTTPS records by providing the IP addresses directly, without the need for the client to look at A and AAAA records. This is done via the “ipv4hint” and “ipv6hint” parameters that can optionally be added to these records, which provide lists of IPv4 and IPv6 addresses that can be used by the client in lieu of the addresses specified in A and AAAA records. Of course clients will still need to query the A and AAAA records, to support cases where no SVCB or HTTPS record is available, but these IP hints provide an additional layer of robustness.
example.com 3600 IN HTTPS 1 . alpn=”h3,h2” ipv4hint=”192.0.2.1” ipv6hint=”2001:db8::1”
In addition to all this, SVCB and HTTPS can also be used to define alternative endpoints that are authoritative for a service, in a similar vein to SRV records:
example.com 3600 IN HTTPS 1 example.net alpn=”h3,h2”
example.com 3600 IN HTTPS 2 example.org alpn=”h2”
In this case the “example.com” HTTPS service can be provided by both “example.net” (which supports both HTTP/3 and HTTP/2, in addition to HTTP/1.x) as well as “example.org” (which only supports HTTP/2 and HTTP/1.x). The client will first need to fetch A and AAAA records for “example.net” or “example.org” before being able to connect, which might increase the connection latency, but the service operator can make use of the IP hint parameters discussed above in this case as well, to reduce the amount of required DNS lookups the client needs to perform.
This means that SVCB and HTTPS records might finally provide a way for SRV-like functionality to be supported by popular browsers and other clients that have historically not supported SRV records.
There is always room at the top apex
When setting up a website on the Internet, it’s common practice to use a “www” subdomain (like in “www.cloudflare.com”) to identify the site, as well as the “apex” (or “root”) of the domain (in this case, “cloudflare.com”). In order to avoid duplicating the DNS configuration for both domains, the “www” subdomain can typically be configured as a CNAME (Canonical Name) record, that is, a record that maps to a different DNS record.
cloudflare.com.   3600 IN A 192.0.2.1
cloudflare.com.   3600 IN AAAA 2001:db8::1
www               3600 IN CNAME cloudflare.com.
This way the list of IP addresses of the websites won’t need to be duplicated all over again, but clients requesting A and/or AAAA records for “www.cloudflare.com” will still get the same results as “cloudflare.com”.
However, there are some cases where using a CNAME might seem like the best option, but ends up subtly breaking the DNS configuration for a website. For example when setting up services such as GitLab Pages, GitHub Pages or Netlify with a custom domain, the user is generally asked to add an A (and sometimes AAAA) record to the DNS configuration for their domain. Those IP addresses are hard-coded in users’ configurations, which means that if the provider of the service ever decides to change the addresses (or add new ones), even if just to provide some form of load-balancing, all of their users will need to manually change their configuration.
Using a CNAME to a more stable domain which can then have variable A and AAAA records might seem like a better option, and some of these providers do support that, but it’s important to note that this generally only works for subdomains (like “www” in the previous example) and not apex records. This is because the DNS specification that defines CNAME records states that when a CNAME is defined on a particular target, there can’t be any other records associated with it. This is fine for subdomains, but apex records will need to have additional records defined, such as SOA and NS, for the DNS configuration to work properly and could also have records such as MX to make sure emails get properly delivered. In practical terms, this means that defining a CNAME record at the apex of a domain might appear to be working fine in some cases, but be subtly broken in ways that are not immediately apparent.
But what does this all have to do with SVCB and HTTPS records? Well, it turns out that those records can also solve this problem, by defining an alternative format called “alias form” that behaves in the same manner as a CNAME in all the useful ways, but without the annoying historical baggage. A domain operator will be able to define a record such as:
example.com. 3600 IN HTTPS example.org.
and expect it to work as if a CNAME was defined, but without the subtle side-effects.
One more thing
Encrypted SNI is an extension to TLS intended to improve privacy of users on the Internet. You might remember how it makes use of a custom DNS record to advertise the server’s public key share used by clients to then derive the secret key necessary to actually encrypt the SNI. In newer revisions of the specification (which is now called “Encrypted ClientHello” or “ECH”) the custom TXT record used previously is simply replaced by a new parameter, called “echconfig”, for the SVCB and HTTPS records.
This means that SVCB/HTTPS are a requirement to support newer revisions of Encrypted SNI/Encrypted ClientHello. More on this later this year.
What now?
This all sounds great, but what does it actually mean for Cloudflare customers? As mentioned earlier, we have enabled initial support for HTTPS records across our edge network. Cloudflare’s DNS servers will automatically generate HTTPS records on the fly to advertise whether a particular zone supports HTTP/3 and/or HTTP/2, based on whether those features are enabled on the zone, and we will later also add Encrypted ClientHello support.
Thanks to Cloudflare’s large network that spans millions of web properties (we happen to be one of the most popular DNS providers), serving these records on our customers’ behalf will help build a more secure and performant Internet for anyone that is using a supporting client.
Adopting new protocols requires cooperation between multiple parties. We have been working with various browsers and clients to increase the support and adoption of HTTPS records. Over the last few weeks, Apple’s iOS 14 release has included client support for HTTPS records, allowing connections to be upgraded to QUIC when the HTTP/3 parameter is returned in the DNS record. Apple has reported that so far, of the population that has manually enabled HTTP/3 on iOS 14, 8% of the QUIC connections had the HTTPS record response.
Other browser vendors, such as Google and Mozilla, are also working on shipping support for HTTPS records to their users, and we hope to be hearing more on this front soon.
Terminology-wise, there is a clear distinction between two-factor authentication (multi-factor authentication) and two-step verification (authentication), as this article explains. 2FA/MFA is authentication using more than one factors, i.e. “something you know” (password), “something you have” (token, card) and “something you are” (biometrics). Two-step verification is basically using two passwords – one permanent and another one that is short-lived and one-time.
At least that’s the theory. In practice it’s more complicated to say which authentication methods belongs to which category (“something you X”). Let me illustrate that with a few emamples:
An OTP hardware token is considered “something you have”. But it uses a shared symmetric secret with the server so that both can generate the same code at the same time (if using TOTP), or the same sequence. This means the secret is effectively “something you know”, because someone may steal it from the server, even though the hardware token is protected. Unless, of course, the server stores the shared secret in an HSM and does the OTP comparison on the HSM itself (some support that). And there’s still a theoretical possibility for the keys to leak prior to being stored on hardware. So is a hardware token “something you have” or “something you know”? For practical purposes it can be considered “something you have”
Smartphone OTP is often not considered as secure as a hardware token, but it should be, due to the secure storage of modern phones. The secret is shared once during enrollment (usually with on-screen scanning), so it should be “something you have” as much as a hardware token
SMS is not considered secure and often given as an example for 2-step verification, because it’s just another password. While that’s true, this is because of a particular SS7 vulnerability (allowing the interception of mobile communication). If mobile communication standards were secure, the SIM card would be tied to the number and only the SIM card holder would be able to receive the message, making it “something you have”. But with the known vulnerabilities, it is “something you know”, and that something is actually the phone number.
Fingerprint scanners represent “something you are”. And in most devices they are built in a way that the scanner authenticates to the phone (being cryptographically bound to the CPU) while transmitting the fingerprint data, so you can’t just intercept the bytes transferred and then replay them. That’s the theory; it’s not publicly documented how it’s implemented. But if it were not so, then “something you are” is “something you have” – a sequence of bytes representing your fingerprint scan, and that can leak. This is precisely why biometric identification should only be done locally, on the phone, without any server interaction – you can’t make sure the server is receiving sensor-scanned data or captured and replayed data. That said, biometric factors are tied to the proper implementation of the authenticating smartphone application – if your, say, banking application needs a fingerprint scan to run, a malicious actor should not be able to bypass that by stealing shared credentials (userIDs, secrets) and do API calls to your service. So to the server there’s no “something you are”. It’s always “something that the client-side application has verified that you are, if implemented properly”
A digital signature (via a smartcard or yubikey or even a smartphone with secure hardware storage for private keys) is “something you have” – it works by signing one-time challenges, sent by the server and verifying that the signature has been created by the private key associated with the previously enrolled public key. Knowing the public key gives you nothing, because of how public-key cryptography works. There’s no shared secret and no intermediary whose data flow can be intercepted. A private key is still “something you know”, but by putting it in hardware it becomes “something you have”, i.e. a true second factor. Of course, until someone finds out that the random generation of primes used for generating the private key has been broken and you can derive the private key form the public key (as happened recently with one vendor).
There isn’t an obvious boundary between theoretical and practical. “Something you are” and “something you have” can eventually be turned into “something you know” (or “something someone stores”). Some theoretical attacks can become very practical overnight.
I’d suggest we stick to calling everything “two-factor authentication”, because it’s more important to have mass understanding of the usefulness of the technique than to nitpick on the terminology. 2FA does not solve phishing, unfortunately, but it solves leaked credentials, which is good enough and everyone should have some form of it. Even SMS is better than nothing (obviously, for high-profile systems, digital signatures is the way to go).
To provide the best experiences, we use technologies like cookies to store and/or access device information. Consenting to these technologies will allow us to process data such as browsing behavior or unique IDs on this site. Not consenting or withdrawing consent, may adversely affect certain features and functions.
Functional
Always active
The technical storage or access is strictly necessary for the legitimate purpose of enabling the use of a specific service explicitly requested by the subscriber or user, or for the sole purpose of carrying out the transmission of a communication over an electronic communications network.
Preferences
The technical storage or access is necessary for the legitimate purpose of storing preferences that are not requested by the subscriber or user.
Statistics
The technical storage or access that is used exclusively for statistical purposes.The technical storage or access that is used exclusively for anonymous statistical purposes. Without a subpoena, voluntary compliance on the part of your Internet Service Provider, or additional records from a third party, information stored or retrieved for this purpose alone cannot usually be used to identify you.
Marketing
The technical storage or access is required to create user profiles to send advertising, or to track the user on a website or across several websites for similar marketing purposes.