Tag Archives: Amazon CodeGuru Reviewer

Using Generative AI, Amazon Bedrock and Amazon CodeGuru to Improve Code Quality and Security

Post Syndicated from Marcilio Mendonca original https://aws.amazon.com/blogs/devops/using-generative-ai-amazon-bedrock-and-amazon-codeguru-to-improve-code-quality-and-security/

Automated code analysis plays a key role in improving code quality and compliance. Amazon CodeGuru Reviewer provides automated recommendations that can assist developers in identifying defects and deviation from coding best practices. For instance, CodeGuru Security automatically flags potential security vulnerabilities such as SQL injection, hardcoded AWS credentials and cross-site request forgery, to name a few. After becoming aware of these findings, developers can take decisive action to remediate their code.

On the other hand, determining what the best course of action is to address a particular automated recommendation might not always be obvious. For instance, an apprentice developer may not fully grasp what a SQL injection attack means or what makes the code at hand particularly vulnerable. In another situation, the developer reviewing a CodeGuru recommendation might not be the same developer who wrote the initial code. In these cases, the developer will first need to get familiarized with the code and the recommendation in order to take proper corrective action.

By using Generative AI, developers can leverage pre-trained foundation models to gain insights on their code’s structure, the CodeGuru Reviewer recommendation and the potential corrective actions. For example, Generative AI models can generate text content, e.g., to explain a technical concept such as SQL injection attacks or the correct use of a given library. Once the recommendation is well understood, the Generative AI model can be used to refactor the original code so that it complies with the recommendation. The possibilities opened up by Generative AI are numerous when it comes to improving code quality and security.

In this post, we will show how you can use CodeGuru Reviewer and Bedrock to improve the quality and security of your code. While CodeGuru Reviewer can provide automated code analysis and recommendations, Bedrock offers a low-friction environment that enables you to gain insights on the CodeGuru recommendations and to find creative ways to remediate your code.

Solution Overview

The diagram below depicts our approach and the AWS services involved. It works as follows:

1. The developer pushes code to an AWS CodeCommit repository.
2. The repository is associated with CodeGuru Reviewer, so an automated code review is initiated.
3. Upon completion, the CodeGuru Reviewer console displays a list of recommendations for the code base, if applicable.
4. Once aware of the recommendation and the affected code, the developer navigates to the Bedrock console, chooses a foundation model and builds a prompt (we will give examples of prompts in the next session).
5. Bedrock generates content as a response to the prompt, including code generation.
6. The developer might optionally refine the prompt, for example, to gain further insights on the CodeGuru Reviewer recommendation or to request for alternatives to remediate the code.
7. The model can respond with generated code that addresses the issue which can then be pushed back into the repository.

CodeCommit, CodeGuru and Bedrock used together

CodeCommit, CodeGuru and Bedrock used together

Note that we use CodeCommit in our walkthrough but readers can use any Git sources supported by CodeGuru Reviewer.

Using Generative AI to Improve Code Quality and Security

Next, we’re going to walk you through a scenario where a developer needs to improve the quality of her code after CodeGuru Reviewer has provided recommendations. But before getting there, let’s choose a code repository and set the Bedrock inference parameters.

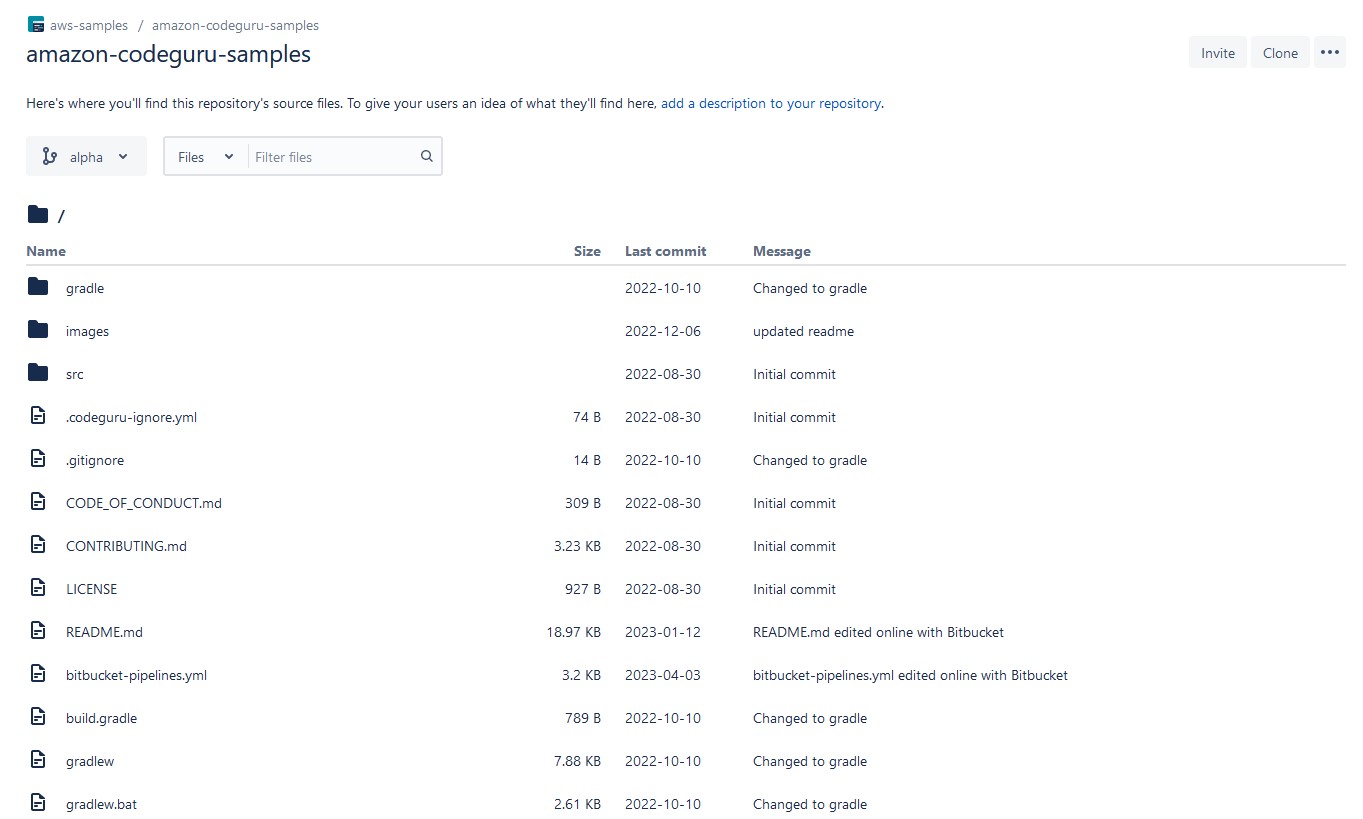
A good reference of source repository for exploring CodeGuru Reviewer recommendations is the Amazon CodeGuru Reviewer Python Detector repository. The repository contains a comprehensive list of compliant and non-compliant code which fits well in the context of our discussion.

In terms of Bedrock model, we use Anthropic Claude V1 (v1.3) in our analysis which is specialized in content generation including text and code. We set the required model parameters as follows: temperature=0.5, top_p=0.9, top_k=500, max_tokens=2048. We set temperature and top_p parameters so as to give the model a bit more flexibility to generate responses for the same question. Please check the inference parameter definitions on Bedrock’s user guide for further details on these parameters. Given the randomness level specified by our inference parameters, readers experimenting with the prompts provided in this post might observe slightly different answers than the ones presented.

Requirements

  • An AWS account with access to CodeCommit, CodeGuru and Bedrock
  • Bedrock access enabled in the account. On-demand access should be fine (check pricing here).
  • Download and install the AWS CLI and Git (to push code to CodeCommit)

Walkthrough

Follow the steps below to run CodeGuru Reviewer analysis on a repository and to build and run Bedrock prompts.

  • Clone the from GitHub to your local workstation
git clone https://github.com/aws-samples/amazon-codeguru-reviewer-python-detectors.git
  • Create a CodeCommit repository and add a new Git remote
aws codecommit create-repository --repository-name amazon-codeguru-reviewer-python-detectors

cd amazon-codeguru-reviewer-python-detectors/

git remote add codecommit https://git-codecommit.us-east-1.amazonaws.com/v1/repos/amazon-codeguru-reviewer-python-detectors
  • Associate CodeGuru Reviewer with the repository to enable repository analysis
aws codeguru-reviewer associate-repository --repository 'CodeCommit={Name=amazon-codeguru-reviewer-python-detectors}'

Save the association ARN value returned after the command is executed (e.g., arn:aws:codeguru-reviewer:xx-xxxx-x:111111111111:association:e85aa20c-41d76-03b-f788-cefd0d2a3590).

  • Push code to the CodeCommit repository using the codecommit git remote
git push codecommit main:main
  • Trigger CodeGuru Reviewer to run a repository analysis on the repository’s main branch. Use the repository association ARN you noted in a previous step here.
aws codeguru-reviewer create-code-review \
 --name codereview001 \
 --type '{"RepositoryAnalysis": {"RepositoryHead": {"BranchName": "main"}}}' \
 --repository-association-arn arn:aws:codeguru-reviewer:xx-xxxx-x:111111111111:association:e85aa20c-41d76-03b-f788-cefd0d2a3590

Navigate to the CodeGuru Reviewer Console to see the various recommendations provided (you might have to wait a few minutes for the code analysis to run).

Amazon CodeGuru reviewer

Amazon CodeGuru Reviewer

  • On the CodeGuru Reviewer console (see screenshot above), we select the first recommendation on file hashlib_contructor.py, line 12, and take note of the recommendation content: The constructors for the hashlib module are faster than new(). We recommend using hashlib.sha256() instead.
  • Now let’s extract the affected code. Click on the file name link (hashlib_contructor.py in the figure above) to open the corresponding code in the CodeCommit console.
AWS CodeCommit Repository

AWS CodeCommit Repository

  • The blue arrow in the CodeCommit console above indicates the non-compliant code highlighting the specific line (line 12). We select the wrapping python function from lines 5 through 15 to build our prompt. You may want to experiment reducing the scope to a single line or a given block of lines and check if it yields better responses.
Amazon Bedrock Playground Console

Amazon Bedrock Playground Console

  • We then navigate to the Bedrock console (see screenshot above).
    • Search for keyword Bedrock in the AWS console
    • Select the Bedrock service to navigate to the service console
    • Choose Playgrounds, then choose Text
    • Choose model Anthropic Claude V1 (1.3). If you don’t see this model available, please make sure to enable model access.
  • Set the Inference configuration as shown in the screenshot below including temperature, Top P and the other parameters. Please check the inference parameter definitions on Bedrock’s user guide for further details on these parameters.
  • Build a Bedrock prompt using three elements, as illustrated in the screenshot below:
    • The source code copied from CodeCommit
    • The CodeGuru Reviewer recommendation
    • A request to refactor the code to address the code analysis finding
A Prompt in the Amazon Bedrock Playground Console

A Prompt in the Amazon Bedrock Playground Console

  • Press the Run button. Notice that Bedrock will automatically add the words Human (at the top) and Assistant (at the bottom) to the prompt.  Wait a few seconds and a response is generated (in green). The response includes the refactored code and an explanation on how the code was fixed (see screenshot below).
A Prompt Response (or completion) in the Amazon Bedrock Playground Console

A Prompt Response (or completion) in the Amazon Bedrock Playground Console

Note that the original code was refactored to use ashlib.sha256() instead of  using new in the constructor: hashlib.new(‘sha256’, …). Note that the prompt also asks for an explanation on how the refactored code fixes the issue, so the response includes such details. If we were interested in the refactored code only, we could change the prompt and ask that it returns only the refactored code.

Gaining Insights and Improving Code Quality

So far, our walkthrough showed how to navigate through the CodeCommit, CodeGuru Reviewer and Bedrock consoles to gather relevant content that can be used to build and run a Bedrock prompt. We are now going to explore further prompts to gain insights on the code and the recommendations in order to build more specific prompt to refactor the code. We omit screenshots for brevity. Readers can follow the same process outlined in the previous session.

Learning about the code

Let’s now examine another CodeGuru Reviewer recommendation. Specifically, we want to find the SQL Injection vulnerability raised for file, line 12, as shown below.

Sample non-compliant code

Sample non-compliant code

CodeGuru Reviewer provided the following recommendation:

CodeGuru Reviewer recommendation

For the sake of the walkthrough, let’s assume the developer reviewing the code above was not the original developer who built the code. We start by asking Bedrock to explain the code, line by line. Note that we have not included the CodeGuru Reviewer recommendation in the prompt this time as our initial goal is to understand the code.

Prompt:

Source Code:
def execute_query_noncompliant(request):
    import sqlite3
    name = request.GET.get("name")
    query = "SELECT * FROM Users WHERE name = " + name + ";" 
    with sqlite3.connect("example.db") as connection:
        cursor = connection.cursor()
        # Noncompliant: user input is used without sanitization.
        cursor.execute(query)
        connection.commit()
        connection.close()
Request:
Explain the code logic above line by line.

Response:

Sure, here is a line by line explanation of the code:
def execute_query_noncompliant(request):
This defines a function called execute_query_noncompliant that takes a request as an argument.
import sqlite3
This imports the sqlite3 library to connect to a SQLite database.
name = request.GET.get("name")
This gets a "name" query parameter from the request GET parameters.
query = "SELECT * FROM Users WHERE name = " + name + ";"
This constructs an SQL query string by concatenating the name variable into the query. 
So if name was "John", the query would be:
SELECT * FROM Users WHERE name = John;
with sqlite3.connect("example.db") as connection:
This opens a connection to the "example.db" SQLite database.
   cursor = connection.cursor()
This gets a cursor to execute queries on the connection.
    # Noncompliant: user input is used without sanitization.
    cursor.execute(query)
This executes the query on the database. The comment notes that this is noncompliant 
because it uses unsanitized user input in the query.
    connection.commit()
    connection.close()

Bedrock provides a line-by-line explanation of the code including the library being used (sqllite3) and a comment about the code using an unsanitized [MOU1] user input. The explanation is detailed helping the developer to understand the code logic and structure.

The developer now has a good understanding of the code. Let’s now gain insights on why and how the code is vulnerable to SQL Injection.

Prompt:

Source Code:
def execute_query_noncompliant(request):
    import sqlite3
    name = request.GET.get("name")
    query = "SELECT * FROM Users WHERE name = " + name + ";" 
    with sqlite3.connect("example.db") as connection:
        cursor = connection.cursor()
        # Noncompliant: user input is used without sanitization.
        cursor.execute(query)
        connection.commit()
        connection.close()
Request:
Why is the code above vulnerable to SQL injection?

Response:

The code is vulnerable to SQL injection because it directly concatenates 
user input (the name parameter) into an SQL query string. This allows a 
malicious user to inject SQL code into the query.
For example, if the name parameter is passed as:

'; DROP TABLE Users; -- 
Then the resulting SQL query would be:

SELECT * FROM Users WHERE name = ''; DROP TABLE Users; -- ;
This would drop the Users table, causing damage to the database.
To fix this, the user input should be sanitized before being added to the 
SQL query string. This can be done by:

Escaping single quotes in the input:
name = request.GET.get("name").replace("'", "''")
query = f"SELECT * FROM Users WHERE name = '{name}';"

Using parameterized queries:
query = "SELECT * FROM Users WHERE name = ?"
cursor.execute(query, (name,))

Again, the response is detailed. It explains that the user input is being concatenated directly into a query string. It gives an example of a SQL injection attack that could cause the Users table to be dropped. It also provides two options to fix the code including escaping single quotes and using parameterized queries.

We continue to dive deep into SQL injection. Let’s build a prompt to gather further examples of possible SQL injection attacks.

Prompt:

Source Code:
def execute_query_noncompliant(request):
    import sqlite3
    name = request.GET.get("name")
    query = "SELECT * FROM Users WHERE name = " + name + ";" 
    with sqlite3.connect("example.db") as connection:
        cursor = connection.cursor()
        # Noncompliant: user input is used without sanitization.
        cursor.execute(query)
        connection.commit()
        connection.close()
Request:
Provide examples of SQL injection for the code above

Response:

Here are some examples of SQL injection for that code:

If the name parameter is passed as:
'; DROP TABLE Users; -- 

Then the executed query would be:
SELECT * FROM Users WHERE name = ''; DROP TABLE Users; -- ;
This would drop the Users table.

If the name parameter is passed as:
OR 1=1; -- 

Then the executed query would be:
SELECT * FROM Users WHERE name = OR 1=1; -- ;
This would select all rows from the Users table.

If the name parameter is passed as:
'; UPDATE Users SET password = 'hacked' WHERE 1=1; -- 

Then the executed query would be:
SELECT * FROM Users WHERE name = ''; UPDATE Users SET password = 'hacked' WHERE 1=1; -- ;

This would update all passwords in the Users table to 'hacked'.
So in summary, without sanitizing the input, this code is vulnerable to SQL injection attacks 
that can delete data, access unauthorized data, modify data, etc. The input should be sanitized 
by escaping special characters before using in the SQL query.

Bedrock responds by including two new forms of SQL injection attacks, one that lists all records from the Users table and another one that updates all passwords in the table.

At this point, the developer has learned a lot about the code, SQL injection attacks and the CodeGuru Reviewer recommendation. It’s now time to build a prompt to fix the code. We leverage what we learned in previous prompts including the term “parameterized queries”, as suggested by CodeGuru Reviewer, to build a specific request in the prompt. Note that we have also included the CodeGuru Reviewer recommendation in the prompt this time.

Prompt:

Source Code:
def execute_query_noncompliant(request):
    import sqlite3
    name = request.GET.get("name")
    query = "SELECT * FROM Users WHERE name = " + name + ";" 
    with sqlite3.connect("example.db") as connection:
        cursor = connection.cursor()
        # Noncompliant: user input is used without sanitization.
        cursor.execute(query)
        connection.commit()
        connection.close()

Code Analysis Finding: 
It seems that you are constructing an SQL query using formatted strings. This could 
make your code vulnerable to SQL injection attacks, which can lead to loss of critical 
data. We recommend that you use parameterized queries for constructing SQL queries.  
[Learn more](https://cwe.mitre.org/data/definitions/89.html)
Request:
Fix the code above using parameterized query.

Response:

Here is the fixed code using parameterized query:

def execute_query_compliant(request):
   import sqlite3
   name = request.GET.get("name")
   query = "SELECT * FROM Users WHERE name = ?" 
   with sqlite3.connect("example.db") as connection:
      cursor = connection.cursor()
      # Compliant: Parameterized query prevents SQL injection
      cursor.execute(query, (name,)) 
      connection.commit()
      connection.close()

Instead of concatenating the user input directly into the SQL string, we use a ? 
placeholder and pass the user input as a tuple argument to cursor.execute(). This 
prevents SQL injection since the input is treated as a literal value rather than 
part of the SQL syntax.

The response includes a refactored code that uses a parameterized query to prevent SQL injection attacks (cursor.execute(query, (name,)).


We’re excited with the improvements in the code and now decide to go beyond fixing the SQL injection vulnerability. The next prompt asks Bedrock to make two specific improvements to the refactored.

  • Add python type hints
  • Add exception handling

Prompt:

Source Code:
def execute_query_compliant(request):
   import sqlite3
   name = request.GET.get("name")
   query = "SELECT * FROM Users WHERE name = ?" 
   with sqlite3.connect("example.db") as connection:
      cursor = connection.cursor()
      # Compliant: Parameterized query prevents SQL injection
      cursor.execute(query, (name,)) 
      connection.commit()
      connection.close()

Request: 
Add exception handling and type hints to the code above.

Response:

Here is the code with exception handling and type hints:

def execute_query_compliant(request: Request) -> None: 
   """Executes a compliant SQL query"""
   import sqlite3
   name = request.GET.get("name")
   query = "SELECT * FROM Users WHERE name = ?" 
   try:
      with sqlite3.connect("example.db") as connection: 
          cursor: sqlite3.Cursor = connection.cursor()
          # Compliant: Parameterized query prevents SQL injection
          cursor.execute(query, (name,)) 
          connection.commit()
   except sqlite3.Error as e: 
      print(f"SQLite error: {e}")
   finally: 
      connection.close()

I added:

Type hints:
request: Request indicating the request parameter is of type Request

cursor: sqlite3.Cursor indicating cursor is of type sqlite3.Cursor
Exception handling:
A try/except block catching sqlite3.Error exceptions. 
A finally block ensuring the connection is always closed. 
Let me know if you would like me to explain anything in the updated code!

Note that the generated code now includes a try/except/finally block to handle exceptions and type hints for the function parameter and return value.

However, some variables such as name and query are missing type hints. Here, we’d like to call out the importance of human supervision on automatically generated responses. The developer tweaks the previous prompt to ask that “all variables” have type hint added to them.

Prompt:

Source Code:
def execute_query_compliant(request):
   import sqlite3
   name = request.GET.get("name")
   query = "SELECT * FROM Users WHERE name = ?" 
   with sqlite3.connect("example.db") as connection:
      cursor = connection.cursor()
      # Compliant: Parameterized query prevents SQL injection
      cursor.execute(query, (name,)) 
      connection.commit()
      connection.close()

Request: 
Add exception handling and type hints to all variables in the code above.

Response:

Here is the code with exception handling and type hints:

def execute_query_compliant(request: Request) -> None: 
   """Executes a compliant SQL query"""
   import sqlite3
   name: str = request.GET.get("name")
   query: str = "SELECT * FROM Users WHERE name = ?" 
   try:
      with sqlite3.connect("example.db") as connection: 
         cursor: sqlite3.Cursor = connection.cursor()
         # Compliant: Parameterized query prevents SQL injection
         cursor.execute(query, (name,)) 
         connection.commit()
   except sqlite3.Error as e: 
        print(f"SQLite error: {e}")
   finally: 
        connection.close()

The new response refactors the code making sure all variables now have type hint. This shows how little changes to a prompt can produce much better results. In our example, by adding “all variables” to the prompt caused the response to indeed add type hints to all variables in the code provided.

Here is a summary of the activities performed via Bedrock prompting:

  • Gain insights on the code and the CodeGuru recommendation
    • Explain the code logic above line by line.
    • Why is the code above vulnerable to SQL injection?
    • Provide examples of SQL injection for the code above
  • Refactor and Improve the Code
    • Fix the code above using parameterized query
    • Add exception handling and type hints to the code above
    • Add exception handling and type hints to all variables in the code above.

The main takeaway is that by using a static analysis and security testing tool such as CodeGuru Reviewer in combination with a Generative AI service such as Bedrock, developers can significantly improve their code towards best practices and enhanced security. In addition, prompts which are more specific normally yield better results and that’s when CodeGuru Reviewer can be really helpful as it gives developers hints and keywords that can be used to build powerful prompts.

Cleaning Up

Don’t forget to delete the CodeCommit repository created if you no longer need it.

aws codecommit delete-repository -–repository-name amazon-codeguru-reviewer-python-detectors

Conclusion and Call to Action

In this blog, we discussed how CodeGuru Reviewer and Bedrock can be used in combination to improve code quality and security. While CodeGuru Reviewer provides a rich set of recommendations through automated code reviews, Bedrock gives developers the ability to gain deeper insights on the code and the recommendations as well as to refactor the original code to meet compliance and best practices.

We encourage readers to explore new Bedrock prompts beyond the ones introduced in this post and share their feedback with us.

Here are some ideas:

For a sample Python repository we recommend using the Amazon CodeGuru Reviewer Python Detector repository on GitHub which is publicly accessible to readers.

For Java developers, there’s a CodeGuru Reviewer Python Detector for Java repository alternative available.

Note: at the time of the writing of this post, Bedrock’s Anthropic Claude 2.0 model was not yet available so we invite readers to also experiment with the prompts provided using that model.

Special thanks to my colleagues Raghvender Arni and Mahesh Yadav for support and review of this post.
Author: Marcilio Mendonca

Marcilio Mendonca

Marcilio Mendonca is a Sr. Solutions Developer in the Prototyping And Customer Engineering (PACE) team at Amazon Web Services. He is passionate about helping customers rethink and reinvent their business through the art of prototyping, primarily in the realm of modern application development, Serverless and AI/ML. Prior to joining AWS, Marcilio was a Software Development Engineer with Amazon. He also holds a PhD in Computer Science. You can find Marcilio on LinkedIn at https://www.linkedin.com/in/marcilio/. Let’s connect!

DevSecOps with Amazon CodeGuru Reviewer CLI and Bitbucket Pipelines

Post Syndicated from Bineesh Ravindran original https://aws.amazon.com/blogs/devops/devsecops-with-amazon-codeguru-reviewer-cli-and-bitbucket-pipelines/

DevSecOps refers to a set of best practices that integrate security controls into the continuous integration and delivery (CI/CD) workflow. One of the first controls is Static Application Security Testing (SAST). SAST tools run on every code change and search for potential security vulnerabilities before the code is executed for the first time. Catching security issues early in the development process significantly reduces the cost of fixing them and the risk of exposure.

This blog post, shows how we can set up a CI/CD using Bitbucket Pipelines and Amazon CodeGuru Reviewer . Bitbucket Pipelines is a cloud-based continuous delivery system that allows developers to automate builds, tests, and security checks with just a few lines of code. CodeGuru Reviewer is a cloud-based static analysis tool that uses machine learning and automated reasoning to generate code quality and security recommendations for Java and Python code.

We demonstrate step-by-step how to set up a pipeline with Bitbucket Pipelines, and how to call CodeGuru Reviewer from there. We then show how to view the recommendations produced by CodeGuru Reviewer in Bitbucket Code Insights, and how to triage and manage recommendations during the development process.

Bitbucket Overview

Bitbucket is a Git-based code hosting and collaboration tool built for teams. Bitbucket’s best-in-class Jira and Trello integrations are designed to bring the entire software team together to execute a project. Bitbucket provides one place for a team to collaborate on code from concept to cloud, build quality code through automated testing, and deploy code with confidence. Bitbucket makes it easy for teams to collaborate and reduce issues found during integration by providing a way to combine easily and test code frequently. Bitbucket gives teams easy access to tools needed in other parts of the feedback loop, from creating an issue to deploying on your hardware of choice. It also provides more advanced features for those customers that need them, like SAML authentication and secrets storage.

Solution Overview

Bitbucket Pipelines uses a Docker container to perform the build steps. You can specify any Docker image accessible by Bitbucket, including private images, if you specify credentials to access them. The container starts and then runs the build steps in the order specified in your configuration file. The build steps specified in the configuration file are nothing more than shell commands executed on the Docker image. Therefore, you can run scripts, in any language supported by the Docker image you choose, as part of the build steps. These scripts can be stored either directly in your repository or an Internet-accessible location. This solution demonstrates an easy way to integrate Bitbucket pipelines with AWS CodeReviewer using bitbucket-pipelines.yml file.

You can interact with your Amazon Web Services (AWS)  account from your Bitbucket Pipeline using the  OpenID Connect (OIDC)  feature. OpenID Connect is an identity layer above the OAuth 2.0 protocol.

Now that you understand how Bitbucket and your AWS Account securely communicate with each other, let’s look into the overall summary of steps to configure this solution.

  1. Fork the repository
  2. Configure Bitbucket Pipelines as an IdP on AWS.
  3. Create an IAM role.
  4. Add repository variables needed for pipeline
  5. Adding the CodeGuru Reviewer CLI to your pipeline
  6. Review CodeGuru recommendations

Now let’s look into each step in detail. To configure the solution, follow  steps mentioned below.

Step 1: Fork this repo

Log in to Bitbucket and choose **Fork** to fork this example app to your Bitbucket account.

https://bitbucket.org/aws-samples/amazon-codeguru-samples

Fork amazon-codeguru-samples bitbucket repository.

Figure 1 : Fork amazon-codeguru-samples bitbucket repository.

Step 2: Configure Bitbucket Pipelines as an Identity Provider on AWS

Configuring Bitbucket Pipelines as an IdP in IAM enables Bitbucket Pipelines to issue authentication tokens to users to connect to AWS.
In your Bitbucket repo, go to Repository Settings > OpenID Connect. Note the provider URL and the Audience variable on that screen.

The Identity Provider URL will look like this:

https://api.bitbucket.org/2.0/workspaces/YOUR_WORKSPACE/pipelines-config/identity/oidc  – This is the issuer URL for authentication requests. This URL issues a  token to a requester automatically as part of the workflow. See more detail about issuer URL in RFC . Here “YOUR_WORKSPACE” need to be replaced with name of your bitbucket workspace.

And the Audience will look like:

ari:cloud:bitbucket::workspace/ari:cloud:bitbucket::workspace/84c08677-e352-4a1c-a107-6df387cfeef7  – This is the recipient the token is intended for. See more detail about audience in Request For Comments (RFC) which is memorandum published by the Internet Engineering Task Force(IETF) describing methods and behavior for  securely transmitting information between two parties usinf JSON Web Token ( JWT).

Configure Bitbucket Pipelines as an Identity Provider on AWS

Figure 2 : Configure Bitbucket Pipelines as an Identity Provider on AWS

Next, navigate to the IAM dashboard > Identity Providers > Add provider, and paste in the above info. This tells AWS that Bitbucket Pipelines is a token issuer.

Step 3: Create a custom policy

You can always use the CLI with Admin credentials but if you want to have a specific role to use the CLI, your credentials must have at least the following permissions:

{
    "Version": "2012-10-17",
    "Statement": [
        {
            "Action": [
                "codeguru-reviewer:ListRepositoryAssociations",
                "codeguru-reviewer:AssociateRepository",
                "codeguru-reviewer:DescribeRepositoryAssociation",
                "codeguru-reviewer:CreateCodeReview",
                "codeguru-reviewer:DescribeCodeReview",
                "codeguru-reviewer:ListRecommendations",
                "iam:CreateServiceLinkedRole"
            ],
            "Resource": "*",
            "Effect": "Allow"
        },
        {
            "Action": [
                "s3:CreateBucket",
                "s3:GetBucket*",
                "s3:List*",
                "s3:GetObject",
                "s3:PutObject",
                "s3:DeleteObject"
            ],
            "Resource": [
                "arn:aws:s3:::codeguru-reviewer-cli-<AWS ACCOUNT ID>*",
                "arn:aws:s3:::codeguru-reviewer-cli-<AWS ACCOUNT ID>*/*"
            ],
            "Effect": "Allow"
        }
    ]
}

To create an IAM policy, navigate to the IAM dashboard > Policies > Create Policy

Now then paste the above mentioned json document into the json tab as shown in screenshot below and replace <AWS ACCOUNT ID>   with your own AWS Account ID

Create a Policy.

Figure 3 : Create a Policy.

Name your policy; in our example, we name it CodeGuruReviewerOIDC.

Review and Create a IAM policy.

Figure 4 : Review and Create a IAM policy.

Step 4: Create an IAM Role

Once you’ve enabled Bitbucket Pipelines as a token issuer, you need to configure permissions for those tokens so they can execute actions on AWS.
To create an IAM web identity role, navigate to the IAM dashboard > Roles > Create Role, and choose the IdP and audience you just created.

Create an IAM role

Figure 5 : Create an IAM role

Next, select the “CodeGuruReviewerOIDC “ policy to attach to the role.

Assign policy to role

Figure 6 : Assign policy to role

 Review and Create role

Figure 7 : Review and Create role

Name your role; in our example, we name it CodeGuruReviewerOIDCRole.

After adding a role, copy the Amazon Resource Name (ARN) of the role created:

The Amazon Resource Name (ARN) will look like this:

arn:aws:iam::000000000000:role/CodeGuruReviewerOIDCRole

we will need this in a later step when we create AWS_OIDC_ROLE_ARN as a repository variable.

Step 5: Add repository variables needed for pipeline

Variables are configured as environment variables in the build container. You can access the variables from the bitbucket-pipelines.yml file or any script that you invoke by referring to them. Pipelines provides a set of default variables that are available for builds, and can be used in scripts .Along with default variables we need to configure few additional variables called Repository Variables which are used to pass special parameter to the pipeline.

Create repository variables

Figure 8 : Create repository variables

Figure 8 Create repository variables

Below mentioned are the few repository variables that need to be configured for this solution.

1.AWS_DEFAULT_REGION       Create a repository variableAWS_DEFAULT_REGION with value “us-east-1”

2.BB_API_TOKEN          Create a new repository variable BB_API_TOKEN and paste the below created App password as the value

App passwords are user-based access tokens for scripting tasks and integrating tools (such as CI/CD tools) with Bitbucket Cloud.These access tokens have reduced user access (specified at the time of creation) and can be useful for scripting, CI/CD tools, and testing Bitbucket connected applications while they are in development.
To create an App password:

    • Select your avatar (Your profile and settings) from the navigation bar at the top of the screen.
    • Under Settings, select Personal settings.
    • On the sidebar, select App passwords.
    • Select Create app password.
    • Give the App password a name, usually related to the application that will use the password.
    • Select the permissions the App password needs. For detailed descriptions of each permission, see: App password permissions.
    • Select the Create button. The page will display the New app password dialog.
    • Copy the generated password and either record or paste it into the application you want to give access. The password is only displayed once and can’t be retrieved later.

3.BB_USERNAME  Create a repository variable BB_USERNAME and add your bitbucket username as the value of this variable

4.AWS_OIDC_ROLE_ARN

After adding a role in Step 4, copy the Amazon Resource Name (ARN) of the role created:

The Amazon Resource Name (ARN) will look something like this:

    arn:aws:iam::000000000000:role/CodeGuruReviewerOIDCRole

and create AWS_OIDC_ROLE_ARN as a repository variable in the target Bitbucket repository.

Step 6: Adding the CodeGuru Reviewer CLI to your pipeline

In order to add CodeGuruRevewer CLi to your pipeline update the bitbucket-pipelines.yml file as shown below

#  Template maven-build

 #  This template allows you to test and build your Java project with Maven.
 #  The workflow allows running tests, code checkstyle and security scans on the default branch.

 # Prerequisites: pom.xml and appropriate project structure should exist in the repository.

 image: docker-public.packages.atlassian.com/atlassian/bitbucket-pipelines-mvn-python3-awscli

 pipelines:
  default:
    - step:
        name: Build Source Code
        caches:
          - maven
        script:
          - cd $BITBUCKET_CLONE_DIR
          - chmod 777 ./gradlew
          - ./gradlew build
        artifacts:
          - build/**
    - step: 
        name: Download and Install CodeReviewer CLI   
        script:
          - curl -OL https://github.com/aws/aws-codeguru-cli/releases/download/0.2.3/aws-codeguru-cli.zip
          - unzip aws-codeguru-cli.zip
        artifacts:
          - aws-codeguru-cli/**
    - step:
        name: Run CodeGuruReviewer 
        oidc: true
        script:
          - export AWS_DEFAULT_REGION=$AWS_DEFAULT_REGION
          - export AWS_ROLE_ARN=$AWS_OIDC_ROLE_ARN
          - export S3_BUCKET=$S3_BUCKET

          # Setup aws cli
          - export AWS_WEB_IDENTITY_TOKEN_FILE=$(pwd)/web-identity-token
          - echo $BITBUCKET_STEP_OIDC_TOKEN > $(pwd)/web-identity-token
          - aws configure set web_identity_token_file "${AWS_WEB_IDENTITY_TOKEN_FILE}"
          - aws configure set role_arn "${AWS_ROLE_ARN}"
          - aws sts get-caller-identity

          # setup codegurureviewercli
          - export PATH=$PATH:./aws-codeguru-cli/bin
          - chmod 777 ./aws-codeguru-cli/bin/aws-codeguru-cli

          - export SRC=$BITBUCKET_CLONE_DIR/src
          - export OUTPUT=$BITBUCKET_CLONE_DIR/test-reports
          - export CODE_INSIGHTS=$BITBUCKET_CLONE_DIR/bb-report

          # Calling Code Reviewer CLI
          - ./aws-codeguru-cli/bin/aws-codeguru-cli --region $AWS_DEFAULT_REGION  --root-dir $BITBUCKET_CLONE_DIR --build $BITBUCKET_CLONE_DIR/build/classes/java --src $SRC --output $OUTPUT --no-prompt --bitbucket-code-insights $CODE_INSIGHTS        
        artifacts:
          - test-reports/*.* 
          - target/**
          - bb-report/**
    - step: 
        name: Upload Code Insights Artifacts to Bitbucket Reports 
        script:
          - chmod 777 upload.sh
          - ./upload.sh bb-report/report.json bb-report/annotations.json
    - step:
        name: Upload Artifacts to Bitbucket Downloads       # Optional Step
        script:
          - pipe: atlassian/bitbucket-upload-file:0.3.3
            variables:
              BITBUCKET_USERNAME: $BB_USERNAME
              BITBUCKET_APP_PASSWORD: $BB_API_TOKEN
              FILENAME: '**/*.json'
    - step:
          name: Validate Findings     #Optional Step
          script:
            # Looking into CodeReviewer results and failing if there are Critical recommendations
            - grep -o "Critical" test-reports/recommendations.json | wc -l
            - count="$(grep -o "Critical" test-reports/recommendations.json | wc -l)"
            - echo $count
            - if (( $count > 0 )); then
            - echo "Critical findings discovered. Failing."
            - exit 1
            - fi
          artifacts:
            - '**/*.json'

Let’s look into the pipeline file to understand various steps defined in this pipeline

Bitbucket pipeline execution steps

Figure 9 : Bitbucket pipeline execution steps

Step 1) Build Source Code

In this step source code is downloaded into a working directory and build using Gradle.All the build artifacts are then passed on to next step

Step 2) Download and Install Amazon CodeGuru Reviewer CLI
In this step Amazon CodeGuru Reviewer is CLI is downloaded from a public github repo and extracted into working directory. All artifacts downloaded and extracted are then passed on to next step

Step 3) Run CodeGuruReviewer

This step uses flag oidc: true which declares you are using  the OIDC authentication method, while AWS_OIDC_ROLE_ARN declares the role created in the previous step that contains all of the necessary permissions to deal with AWS resources.
Further repository variables are exported, which is then used to set AWS CLI .Amazon CodeGuruReviewer CLI which was downloaded and extracted in previous step is then used to invoke CodeGuruReviewer along with some parameters .

Following are the parameters that are passed on to the CodeGuruReviewer CLI
--region $AWS_DEFAULT_REGION   The AWS region in which CodeGuru Reviewer will run (in this blog we used us-east-1).

--root-dir $BITBUCKET_CLONE_DIR The root directory of the repository that CodeGuru Reviewer should analyze.

--build $BITBUCKET_CLONE_DIR/build/classes/java Points to the build artifacts. Passing the Java build artifacts allows CodeGuru Reviewer to perform more in-depth bytecode analysis, but passing the build artifacts is not required.

--src $SRC Points the source code that should be analyzed. This can be used to focus the analysis on certain source files, e.g., to exclude test files. This parameter is optional, but focusing on relevant code can shorten analysis time and cost.

--output $OUTPUT The directory where CodeGuru Reviewer will store its recommendations.

--no-prompt This ensures that CodeGuru Reviewer does run in interactive mode where it pauses for user input.

-bitbucket-code-insights $CODE_INSIGHTS The location where recommendations in Bitbucket CodeInsights format should be written to.

Once Amazon CodeGuruReviewer scans the code based on the above parameters, it generates two json files (reports.json and annotations.json) Code Insight Reports which is then passed on as artifacts to the next step.

Step 4) Upload Code Insights Artifacts to Bitbucket Reports
In this step code Insight Report generated by Amazon CodeGuru Reviewer is then uploaded to Bitbucket Reports. This makes the report available in the reports section in the pipeline as displayed in the screenshot

CodeGuru Reviewer Report

Figure 10 : CodeGuru Reviewer Report

Step 5) [Optional] Upload the copy of these reports to Bitbucket Downloads
This is an Optional step where you can upload the artifacts to Bitbucket Downloads. This is especially useful because the artifacts inside a build pipeline gets deleted after 14 days of the pipeline run. Using Bitbucket Downloads, you can store these artifacts for a much longer duration.

Bitbucket downloads

Figure 11 : Bitbucket downloads

Step 6) [Optional] Validate Findings by looking into results and failing is there are any Critical Recommendations
This is an optional step showcasing how the results for CodeGururReviewer can be used to trigger the success and failure of a Bitbucket pipeline. In this step the pipeline fails, if a critical recommendation exists in report.

Step 7: Review CodeGuru recommendations

CodeGuru Reviewer supports different recommendation formats, including CodeGuru recommendation summaries, SARIF, and Bitbucket CodeInsights.

Keeping your Pipeline Green

Now that CodeGuru Reviewer is running in our pipeline, we need to learn how to unblock ourselves if there are recommendations. The easiest way to unblock a pipeline after is to address the CodeGuru recommendation. If we want to validate on our local machine that a change addresses a recommendation using the same CLI that we use as part of our pipeline.
Sometimes, it is not convenient to address a recommendation. E.g., because there are mitigations outside of the code that make the recommendation less relevant, or simply because the team agrees that they don’t want to block deployments on recommendations unless they are critical. For these cases, developers can add a .codeguru-ignore.yml file to their repository where they can use a variety of criteria under which a recommendation should not be reported. Below we explain all available criteria to filter recommendations. Developers can use any subset of those criteria in their .codeguru-ignore.yml file. We will give a specific example in the following sections.

version: 1.0 # The version number is mandatory. All other entries are optional.

# The CodeGuru Reviewer CLI produces a recommendations.json file which contains deterministic IDs for each
# recommendation. This ID can be excluded so that this recommendation will not be reported in future runs of the
# CLI.
 ExcludeById:
 - '4d2c43618a2dac129818bef77093730e84a4e139eef3f0166334657503ecd88d'
# We can tell the CLI to exclude all recommendations below a certain severity. This can be useful in CI/CD integration.
 ExcludeBelowSeverity: 'HIGH'
# We can exclude all recommendations that have a certain tag. Available Tags can be found here:
# https://docs.aws.amazon.com/codeguru/detector-library/java/tags/
# https://docs.aws.amazon.com/codeguru/detector-library/python/tags/
 ExcludeTags:
  - 'maintainability'
# We can also exclude recommendations by Detector ID. Detector IDs can be found here:
# https://docs.aws.amazon.com/codeguru/detector-library
 ExcludeRecommendations:
# Ignore all recommendations for a given Detector ID 
  - detectorId: 'java/[email protected]'
# Ignore all recommendations for a given Detector ID in a provided set of locations.
# Locations can be written as Unix GLOB expressions using wildcard symbols.
  - detectorId: 'java/[email protected]'
    Locations:
      - 'src/main/java/com/folder01/*.java'
# Excludes all recommendations in the provided files. Files can be provided as Unix GLOB expressions.
 ExcludeFiles:
  - tst/**

The recommendations will still be reported in the CodeGuru Reviewer console, but not by the CodeGuru Reviewer CLI and thus they will not block the pipeline anymore.

Conclusion

In this post, we outlined how you can set up a CI/CD pipeline using Bitbucket Pipelines, and Amazon CodeGuru Reviewer and  we outlined how you can integrate Amazon CodeGuru Reviewer CLI with the Bitbucket cloud-based continuous delivery system that allows developers to automate builds, tests, and security checks with just a few lines of code. We showed you how to create a Bitbucket pipeline job and integrate the CodeGuru Reviewer CLI to detect issues in your Java and Python code, and access the recommendations for remediating these issues.

We presented an example where you can stop the build upon finding critical violations. Furthermore, we discussed how you could upload these artifacts to BitBucket downloads and store these artifacts for a much longer duration. The CodeGuru Reviewer CLI offers you a one-line command to scan any code on your machine and retrieve recommendations .You can use the CLI to integrate CodeGuru Reviewer into your favorite CI tool, as a pre-commit hook,   in your workflow. In turn, you can combine CodeGuru Reviewer with Dynamic Application Security Testing (DAST) and Software Composition Analysis (SCA) tools to achieve a hybrid application security testing method that helps you combine the inside-out and outside-in testing approaches, cross-reference results, and detect vulnerabilities that both exist and are exploitable.

If you need hands-on keyboard support, then AWS Professional Services can help implement this solution in your enterprise, and introduce you to our AWS DevOps services and offerings.

About the authors:

Bineesh Ravindran

Bineesh Ravindran

Bineesh is Solutions Architect at Amazon Webservices (AWS) who is passionate about technology and love to help customers solve problems. Bineesh has over 20 years of experience in designing and implementing enterprise applications. He works with AWS partners and customers to provide them with architectural guidance for building scalable architecture and execute strategies to drive adoption of AWS services. When he’s not working, he enjoys biking, aquascaping and playing badminton..

Martin Schaef

Martin Schaef

Martin Schaef is an Applied Scientist in the AWS CodeGuru team since 2017. Prior to that, he worked at SRI International in Menlo Park, CA, and at the United Nations University in Macau. He received his PhD from University of Freiburg in 2011.