Post Syndicated from Mitch Beaumont original https://aws.amazon.com/blogs/security/validate-iam-policies-by-using-iam-policy-validator-for-aws-cloudformation-and-github-actions/
In this blog post, I’ll show you how to automate the validation of AWS Identity and Access Management (IAM) policies by using a combination of the IAM Policy Validator for AWS CloudFormation (cfn-policy-validator) and GitHub Actions. Policy validation is an approach that is designed to minimize the deployment of unwanted IAM identity-based and resource-based policies to your Amazon Web Services (AWS) environments.
With GitHub Actions, you can automate, customize, and run software development workflows directly within a repository. Workflows are defined using YAML and are stored alongside your code. I’ll discuss the specifics of how you can set up and use GitHub actions within a repository in the sections that follow.
The cfn-policy-validator tool is a command-line tool that takes an AWS CloudFormation template, finds and parses the IAM policies that are attached to IAM roles, users, groups, and resources, and then runs the policies through IAM Access Analyzer policy checks. Implementing IAM policy validation checks at the time of code check-in helps shift security to the left (closer to the developer) and shortens the time between when developers commit code and when they get feedback on their work.
Let’s walk through an example that checks the policies that are attached to an IAM role in a CloudFormation template. In this example, the cfn-policy-validator tool will find that the trust policy attached to the IAM role allows the role to be assumed by external principals. This configuration could lead to unintended access to your resources and data, which is a security risk.
Prerequisites
To complete this example, you will need the following:
- A GitHub account
- An AWS account, and an identity within that account that has permissions to create the IAM roles and resources used in this example
Step 1: Create a repository that will host the CloudFormation template to be validated
To begin with, you need to create a GitHub repository to host the CloudFormation template that is going to be validated by the cfn-policy-validator tool.
To create a repository:
- Open a browser and go to https://github.com.
- In the upper-right corner of the page, in the drop-down menu, choose New repository. For Repository name, enter a short, memorable name for your repository.
- (Optional) Add a description of your repository.
- Choose either the option Public (the repository is accessible to everyone on the internet) or Private (the repository is accessible only to people access is explicitly shared with).
- Choose Initialize this repository with: Add a README file.
- Choose Create repository. Make a note of the repository’s name.
Step 2: Clone the repository locally
Now that the repository has been created, clone it locally and add a CloudFormation template.
To clone the repository locally and add a CloudFormation template:
- Open the command-line tool of your choice.
- Use the following command to clone the new repository locally. Make sure to replace <GitHubOrg> and <RepositoryName> with your own values.
- Change in to the directory that contains the locally-cloned repository.
Now that the repository is locally cloned, populate the locally-cloned repository with the following sample CloudFormation template. This template creates a single IAM role that allows a principal to assume the role to perform the S3:GetObject action.
- Use the following command to create the sample CloudFormation template file.
WARNING: This sample role and policy should not be used in production. Using a wildcard in the principal element of a role’s trust policy would allow any IAM principal in any account to assume the role.
Notice that AssumeRolePolicyDocument refers to a trust policy that includes a wildcard value in the principal element. This means that the role could potentially be assumed by an external identity, and that’s a risk you want to know about.
Step 3: Vend temporary AWS credentials for GitHub Actions workflows
In order for the cfn-policy-validator tool that’s running in the GitHub Actions workflow to use the IAM Access Analyzer API, the GitHub Actions workflow needs a set of temporary AWS credentials. The AWS Credentials for GitHub Actions action helps address this requirement. This action implements the AWS SDK credential resolution chain and exports environment variables for other actions to use in a workflow. Environment variable exports are detected by the cfn-policy-validator tool.
AWS Credentials for GitHub Actions supports four methods for fetching credentials from AWS, but the recommended approach is to use GitHub’s OpenID Connect (OIDC) provider in conjunction with a configured IAM identity provider endpoint.
To configure an IAM identity provider endpoint for use in conjunction with GitHub’s OIDC provider:
- Open the AWS Management Console and navigate to IAM.
- In the left-hand menu, choose Identity providers, and then choose Add provider.
- For Provider type, choose OpenID Connect.
- For Provider URL, enter
https://token.actions.githubusercontent.com - Choose Get thumbprint.
- For Audiences, enter sts.amazonaws.com
- Choose Add provider to complete the setup.
At this point, make a note of the OIDC provider name. You’ll need this information in the next step.
After it’s configured, the IAM identity provider endpoint should look similar to the following:
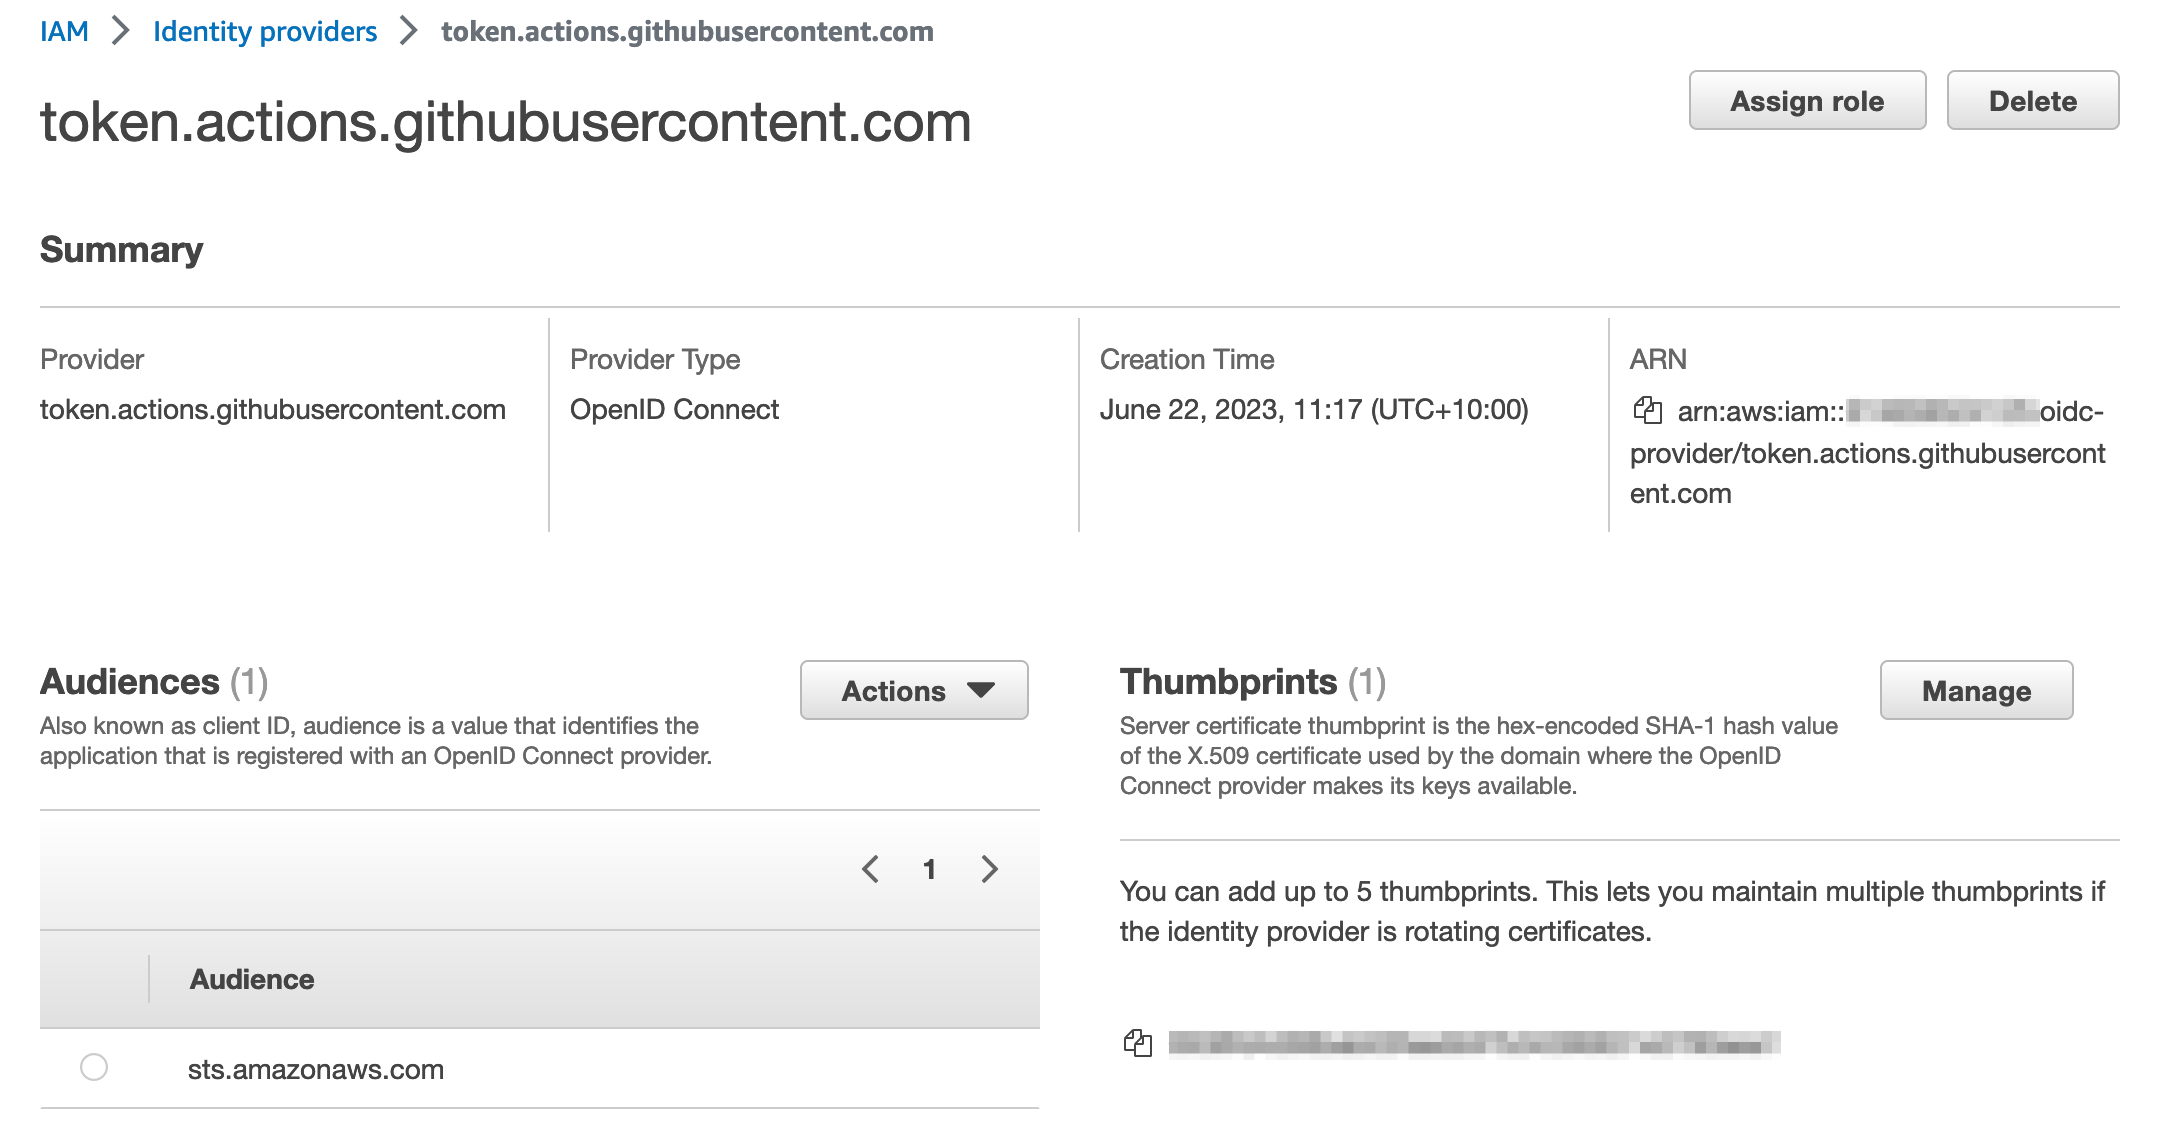
Figure 1: IAM Identity provider details
Step 4: Create an IAM role with permissions to call the IAM Access Analyzer API
In this step, you will create an IAM role that can be assumed by the GitHub Actions workflow and that provides the necessary permissions to run the cfn-policy-validator tool.
To create the IAM role:
- In the IAM console, in the left-hand menu, choose Roles, and then choose Create role.
- For Trust entity type, choose Web identity.
- In the Provider list, choose the new GitHub OIDC provider that you created in the earlier step. For Audience, select sts.amazonaws.com from the list.
- Choose Next.
- On the Add permission page, choose Create policy.
- Choose JSON, and enter the following policy:
- After you’ve attached the new policy, choose Next.
Note: For a full explanation of each of these actions and a CloudFormation template example that you can use to create this role, see the IAM Policy Validator for AWS CloudFormation GitHub project.
- Give the role a name, and scroll down to look at Step 1: Select trusted entities.
The default policy you just created allows GitHub Actions from organizations or repositories outside of your control to assume the role. To align with the IAM best practice of granting least privilege, let’s scope it down further to only allow a specific GitHub organization and the repository that you created earlier to assume it.
- Replace the policy to look like the following, but don’t forget to replace {AWSAccountID}, {GitHubOrg} and {RepositoryName} with your own values.
For information on best practices for configuring a role for the GitHub OIDC provider, see Creating a role for web identity or OpenID Connect Federation (console).
Checkpoint
At this point, you’ve created and configured the following resources:
- A GitHub repository that has been locally cloned and filled with a sample CloudFormation template.
- An IAM identity provider endpoint for use in conjunction with GitHub’s OIDC provider.
- A role that can be assumed by GitHub actions, and a set of associated permissions that allow the role to make requests to IAM Access Analyzer to validate policies.
Step 5: Create a definition for the GitHub Actions workflow
The workflow runs steps on hosted runners. For this example, we are going to use Ubuntu as the operating system for the hosted runners. The workflow runs the following steps on the runner:
- The workflow checks out the CloudFormation template by using the community actions/checkout action.
- The workflow then uses the aws-actions/configure-aws-credentials GitHub action to request a set of credentials through the IAM identity provider endpoint and the IAM role that you created earlier.
- The workflow installs the cfn-policy-validator tool by using the python package manager, PIP.
- The workflow runs a validation against the CloudFormation template by using the cfn-policy-validator tool.
The workflow is defined in a YAML document. In order for GitHub Actions to pick up the workflow, you need to place the definition file in a specific location within the repository: .github/workflows/main.yml. Note the “.” prefix in the directory name, indicating that this is a hidden directory.
To create the workflow:
- Use the following command to create the folder structure within the locally cloned repository:
- Create the sample workflow definition file in the .github/workflows directory. Make sure to replace <AWSAccountID> and <AWSRegion> with your own information.
Step 6: Test the setup
Now that everything has been set up and configured, it’s time to test.
To test the workflow and validate the IAM policy:
- Add and commit the changes to the local repository.
- Push the local changes to the remote GitHub repository.
After the changes are pushed to the remote repository, go back to https://github.com and open the repository that you created earlier. In the top-right corner of the repository window, there is a small orange indicator, as shown in Figure 2. This shows that your GitHub Actions workflow is running.

Figure 2: GitHub repository window with the orange workflow indicator
Because the sample CloudFormation template used a wildcard value “*” in the principal element of the policy as described in the section Step 2: Clone the repository locally, the orange indicator turns to a red x (shown in Figure 3), which signals that something failed in the workflow.
Figure 3: GitHub repository window with the red cross workflow indicator
- Choose the red x to see more information about the workflow’s status, as shown in Figure 4.
Figure 4: Pop-up displayed after choosing the workflow indicator
- Choose Details to review the workflow logs.
In this example, the Validate templates step in the workflow has failed. A closer inspection shows that there is a blocking finding with the CloudFormation template. As shown in Figure 5, the finding is labelled as EXTERNAL_PRINCIPAL and has a description of Trust policy allows access from external principals.
Figure 5: Details logs from the workflow showing the blocking finding
To remediate this blocking finding, you need to update the principal element of the trust policy to include a principal from your AWS account (considered a zone of trust). The resources and principals within your account comprises of the zone of trust for the cfn-policy-validator tool. In the initial version of sample-role.yaml, the IAM roles trust policy used a wildcard in the Principal element. This allowed principals outside of your control to assume the associated role, which caused the cfn-policy-validator tool to generate a blocking finding.
In this case, the intent is that principals within the current AWS account (zone of trust) should be able to assume this role. To achieve this result, replace the wildcard value with the account principal by following the remaining steps.
- Open sample-role.yaml by using your preferred text editor, such as nano.
Replace the wildcard value in the principal element with the account principal arn:aws:iam::<AccountID>:root. Make sure to replace <AWSAccountID> with your own AWS account ID.
- Add the updated file, commit the changes, and push the updates to the remote GitHub repository.


After the changes have been pushed to the remote repository, go back to https://github.com and open the repository. The orange indicator in the top right of the window should change to a green tick (check mark), as shown in Figure 6.
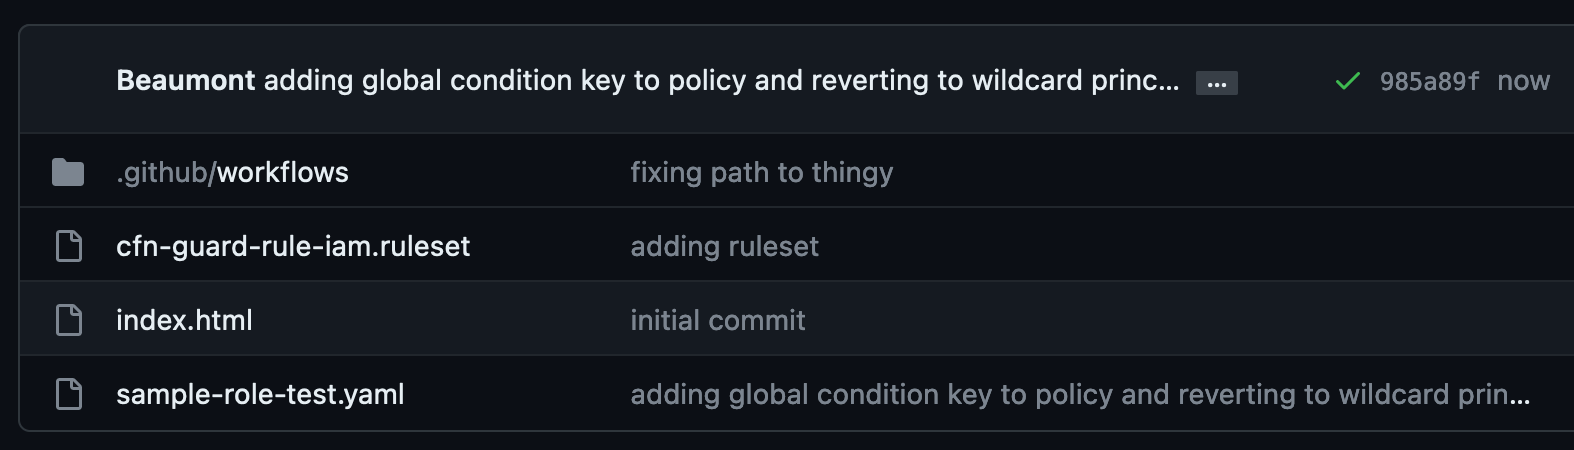
Figure 6: GitHub repository window with the green tick workflow indicator
This indicates that no blocking findings were identified, as shown in Figure 7.
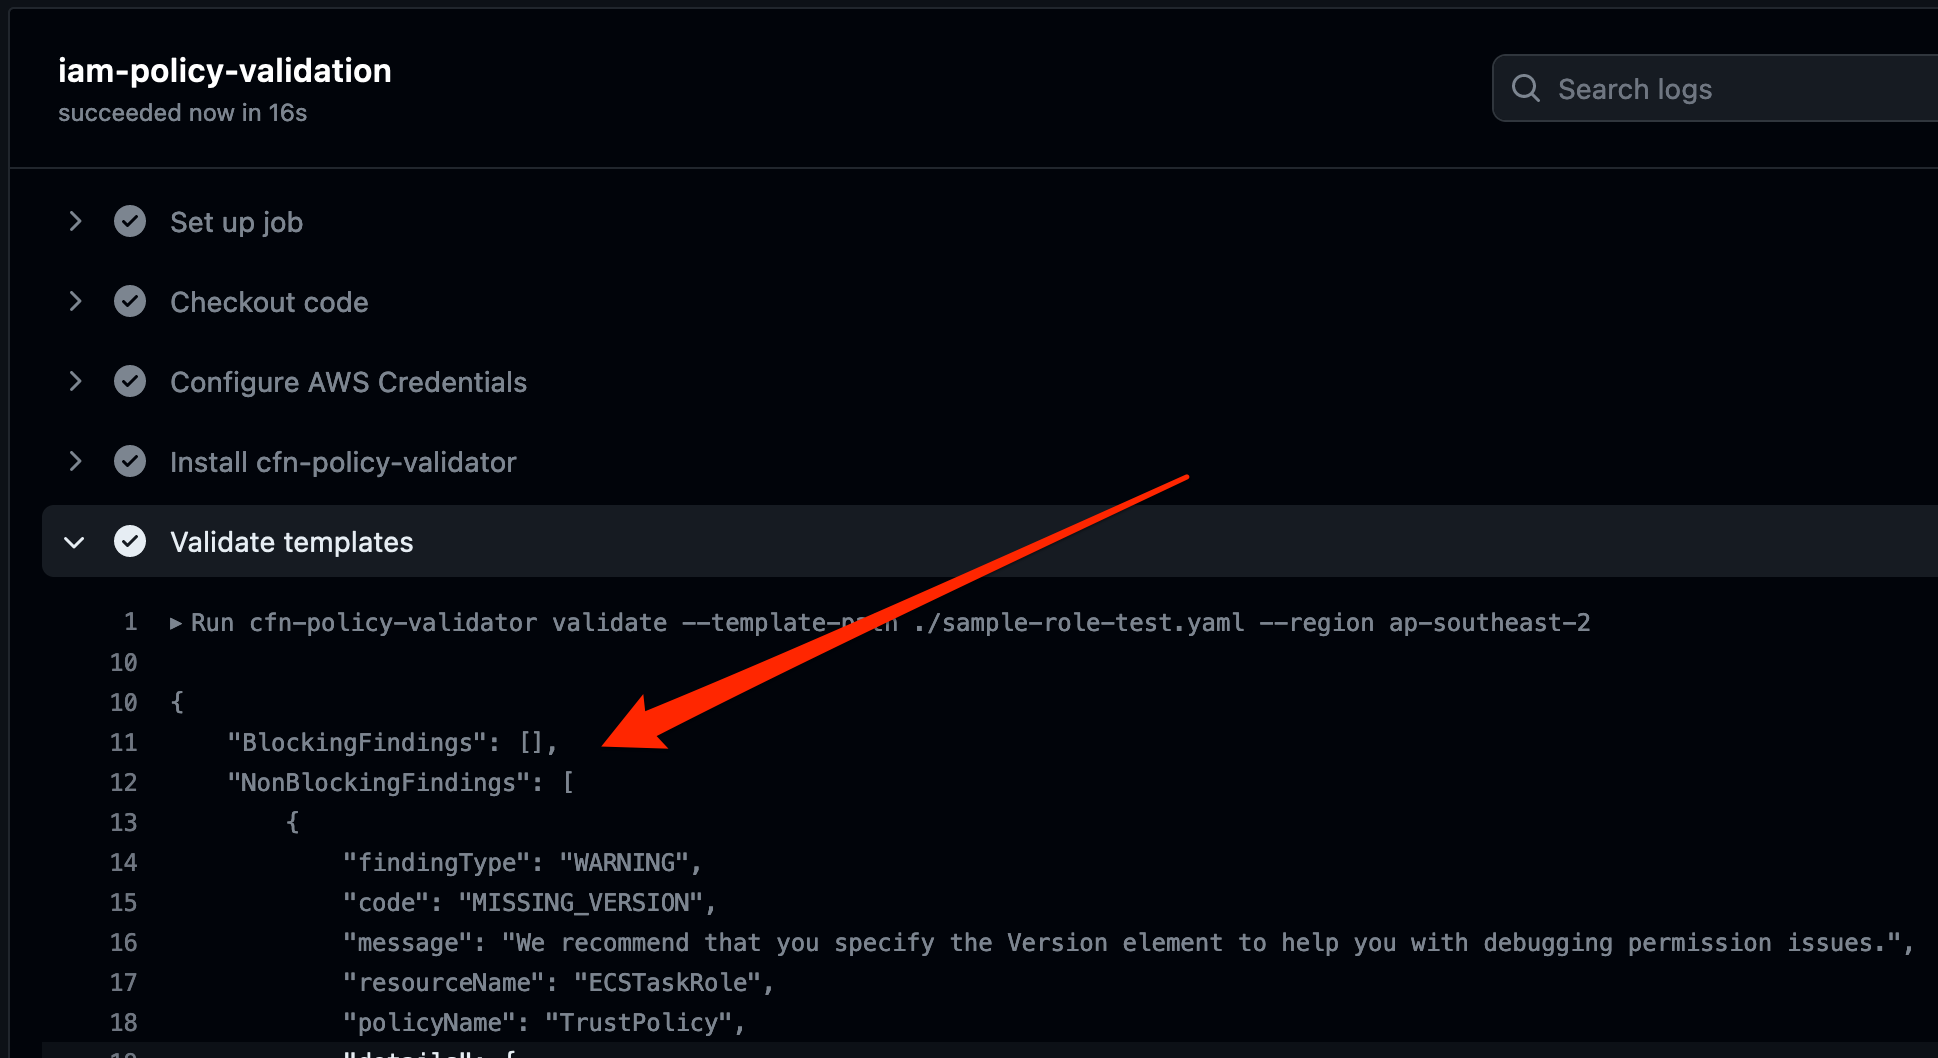
Figure 7: Detailed logs from the workflow showing no more blocking findings
Conclusion
In this post, I showed you how to automate IAM policy validation by using GitHub Actions and the IAM Policy Validator for CloudFormation. Although the example was a simple one, it demonstrates the benefits of automating security testing at the start of the development lifecycle. This is often referred to as shifting security left. Identifying misconfigurations early and automatically supports an iterative, fail-fast model of continuous development and testing. Ultimately, this enables teams to make security an inherent part of a system’s design and architecture and can speed up product development workflows.
In addition to the example I covered today, IAM Policy Validator for CloudFormation can validate IAM policies by using a range of IAM Access Analyzer policy checks. For more information about these policy checks, see Access Analyzer reference policy checks.
If you have feedback about this post, submit comments in the Comments section below. If you have questions about this post, contact AWS Support.
Want more AWS Security news? Follow us on Twitter.