Post Syndicated from Jennifer Paz original https://aws.amazon.com/blogs/security/practical-steps-to-minimize-key-exposure-using-aws-security-services/
Exposed long-term credentials continue to be the top entry point used by threat actors in security incidents observed by the AWS Customer Incident Response Team (CIRT). The exposure and subsequent use of long-term credentials or access keys by threat actors poses security risks in cloud environments. Additionally, poor key rotation practices, sharing of access keys among multiple users, or failing to revoke unused credentials can leave systems exposed.
Using long-term credentials is strongly discouraged and presents an opportunity to migrate towards AWS Identity and Access Management (IAM) roles and federated access. While our recommended best practice is for customers to migrate away from long-term credentials, we recognize that this transition might not be immediately feasible for all organizations.
Building a comprehensive defense against unintended access to long-term credentials requires a strategic layered approach. This approach is intended to bridge the gap between ideal security practices and real-world operational constraints, providing actionable steps for teams managing legacy AWS workloads that require the use of long-term credentials.
In this post, you learn how to build your defense, starting with identifying existing risks and potential exposures through services such as Amazon CodeGuru Security and AWS IAM Access Analyzer, providing visibility into credential risks across the environment. This is then complemented by establishing strict boundaries through service control policies (SCPs) and data perimeters to control how and where credentials can be created and used. With these mechanisms in place, you can strengthen your position with network-level controls that help protect the infrastructure where access keys might be used, implementing services such as AWS WAF and Amazon Inspector to help protect against exploitation of vulnerabilities. Finally, you implement operational best practices such as automated secret rotation to maintain ongoing security hygiene and minimize the impact of potential compromise.
Detect current access keys and exposure
Audit current access keys
For comprehensive auditing, organizations should regularly generate credential reports to identify IAM user ownership of long-lived credentials and other relevant information such as the last time the key was rotated, last time it was used, last service used and last region used. These reports provide essential visibility into your credential landscape, enabling you to spot unused or potentially compromised credentials by focusing on access keys with stale activity, keys exceeding rotation policies, and unexpected usage patterns from unfamiliar regions.
Detect exposed access keys
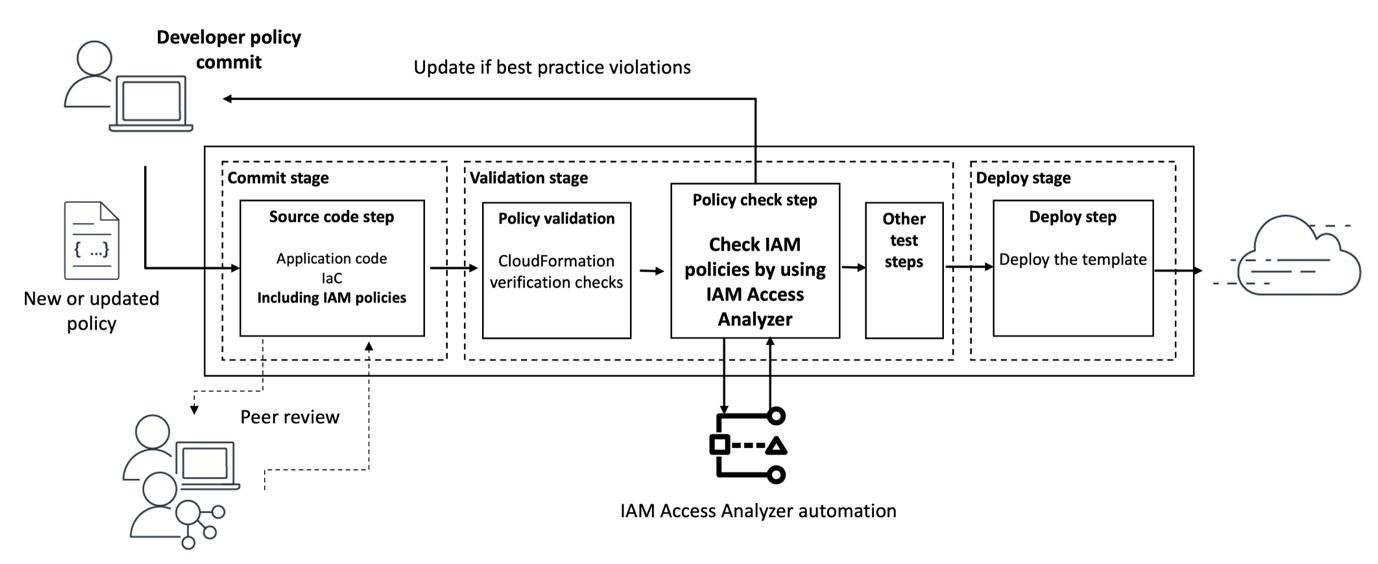
A common source of credential compromise occurs through inadvertent commits to public repositories. When developers accidentally commit credentials to public repositories, these credentials can be harvested by automated scanning tools used by adversaries. Code scanning is a foundational step that helps catch these critical security issues early, before sensitive credentials can be accidentally committed to code repositories or deployed to production environments where they could be exploited.
You can use the secrets detection capability of CodeGuru Security to proactively identify exposed sensitive data in your codebase.
The tool integrates with AWS Secrets Manager, employing detection mechanisms to locate unencrypted secrets in your code, such as AWS secret access keys, embedded passwords, and database connection strings.
When CodeGuru Security discovers unprotected secrets during a scan, it creates a finding with recommended remediation to address the vulnerability.
AWS Trusted Advisor also contains an exposed access key check that checks popular code repositories for access keys that have been exposed to the public and for irregular Amazon Elastic Compute Cloud (Amazon EC2) usage that could be the result of a compromised access key.
Note that while these are valuable security tools, they cannot detect secrets or access keys stored in locations outside their scanning scope, such as local development machines or external systems. They should be used as part of a broader security strategy, not as the sole method for identifying and preventing credential exposure.
When addressing potentially compromised access keys, it is advised to immediately rotate the keys. See instructions on how to rotate access keys for IAM Users.
Detect unused access
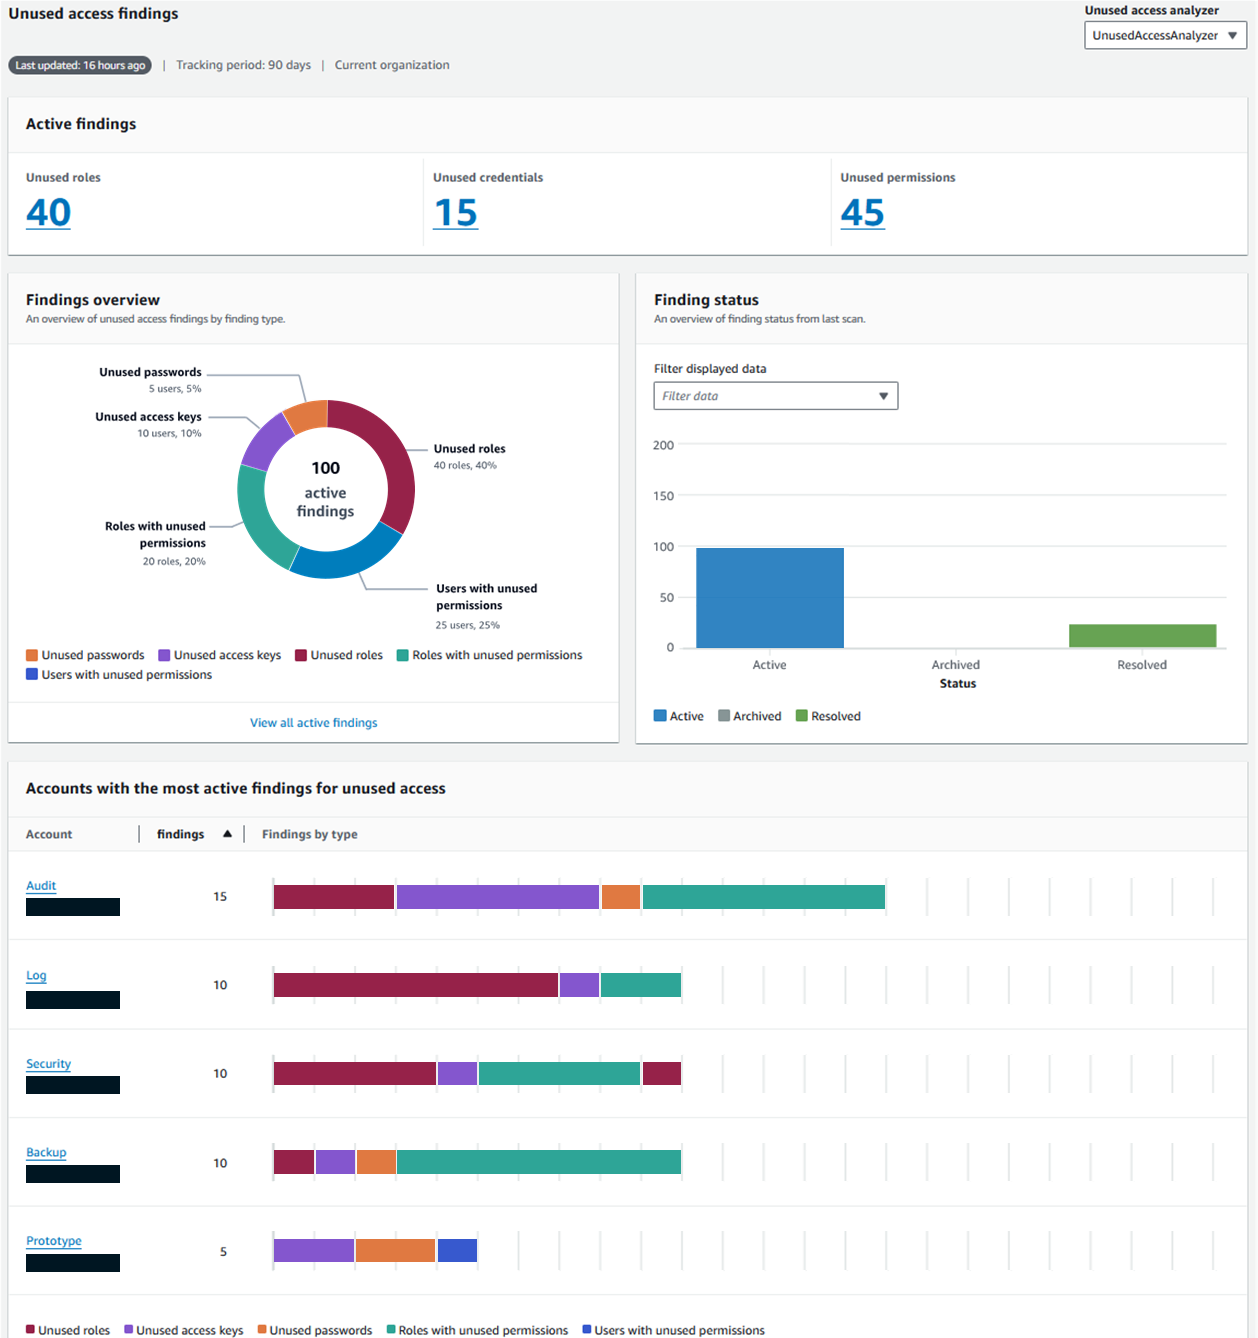
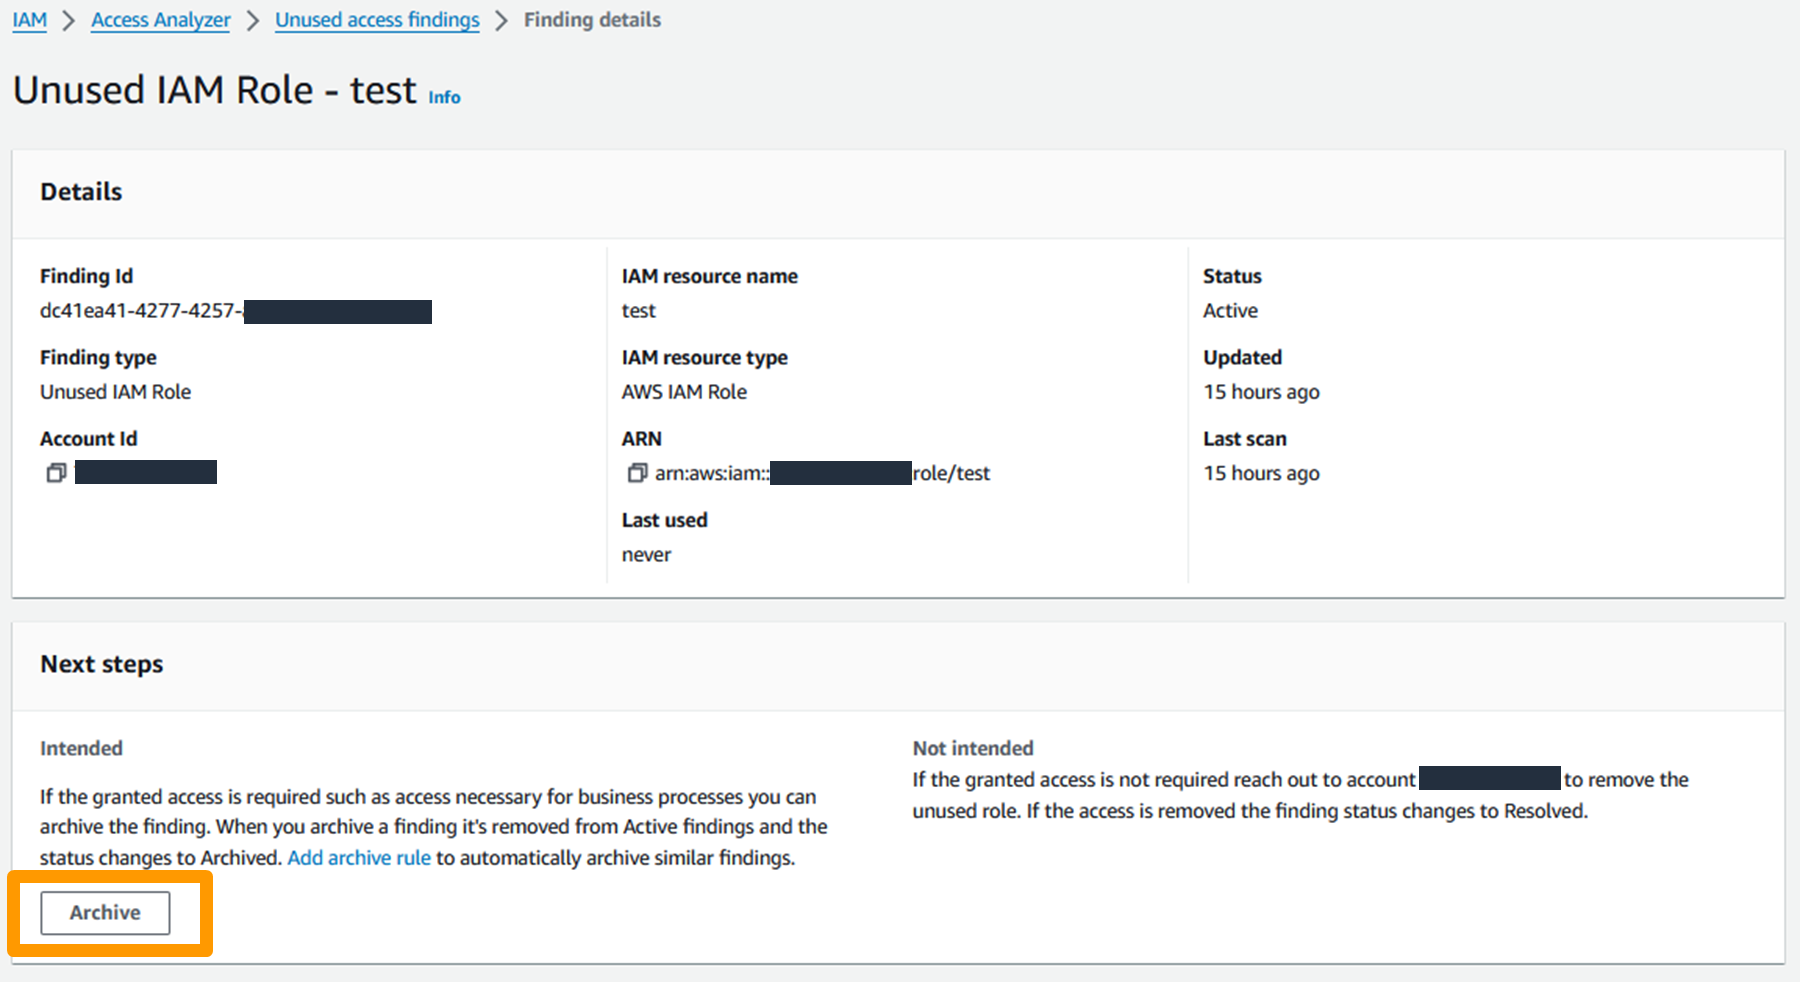
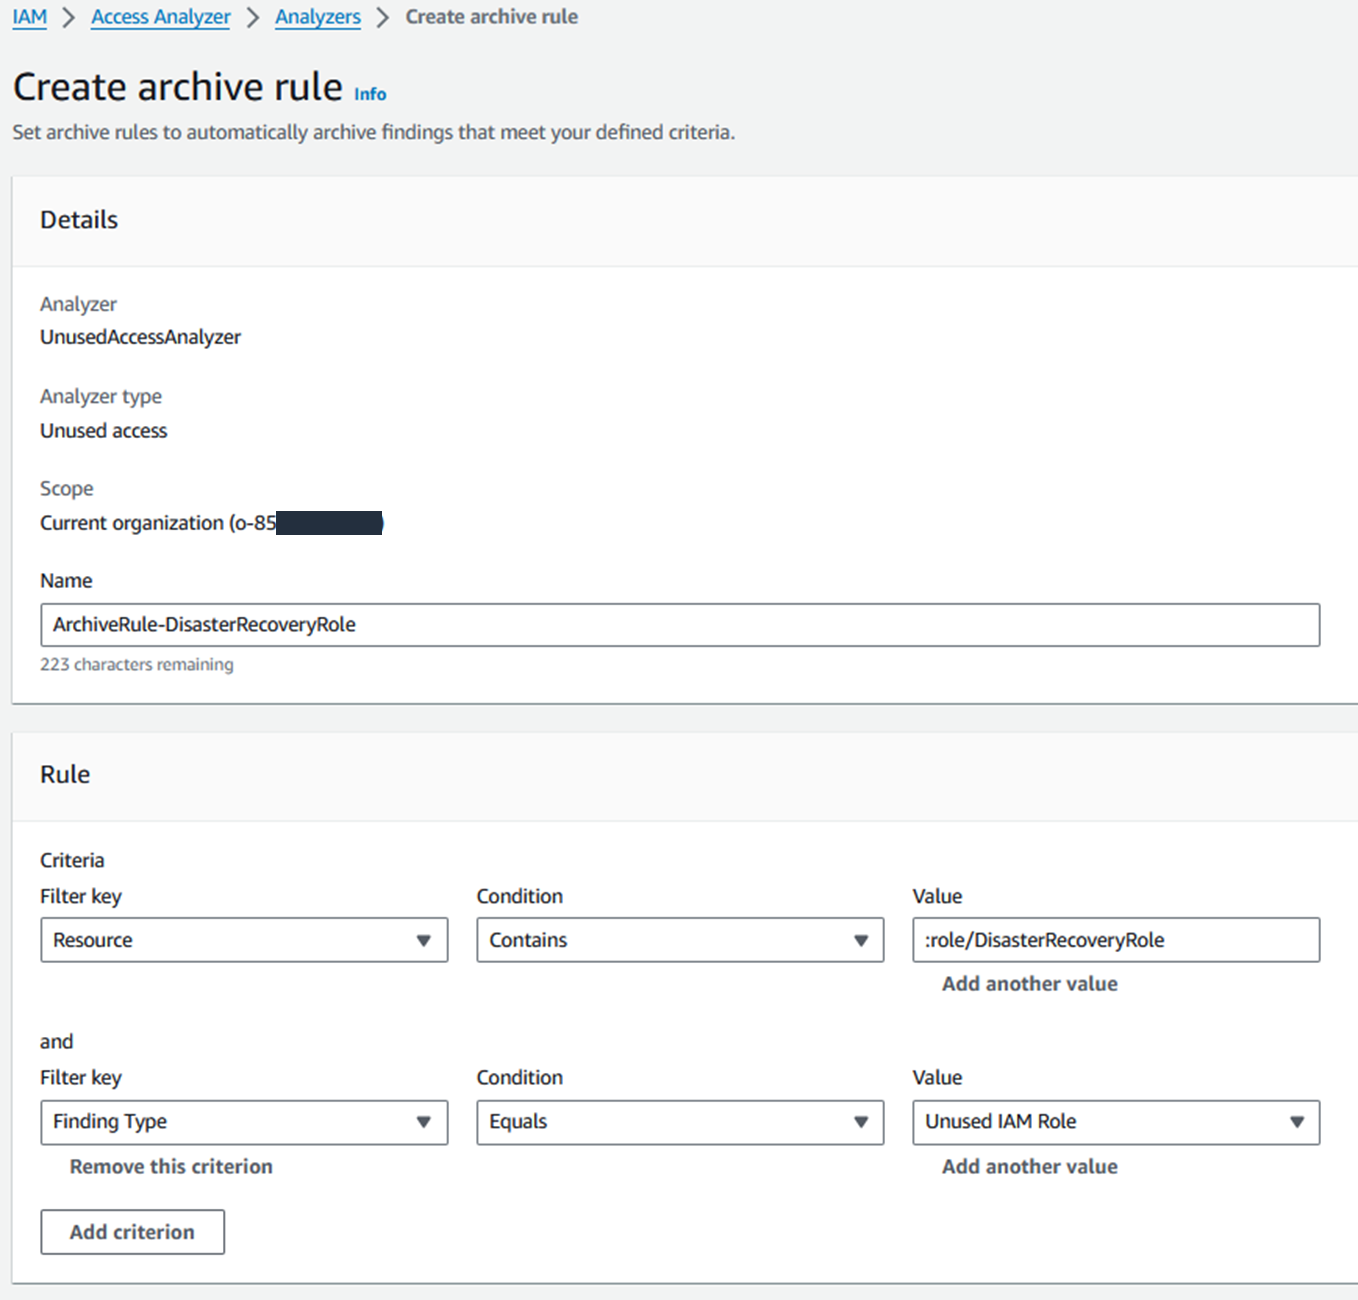
Beyond identifying exposed credentials, detecting unused access keys helps minimize the attack surface. IAM Access Analyzer contains an unused access analyzer that looks for access permissions that are either overly generous or that have fallen into disuse, including unused IAM roles, access keys for IAM users, passwords for IAM users, and services and actions for active IAM roles and users. After reviewing the findings generated by an organization-wide or account-specific analyzer, you can remove or modify permissions that aren’t needed. By identifying and revoking unused credentials and access, you can limit the impact if credentials have been obtained by a threat actor.
By implementing these tools, you can gain insights into credential risks across your environment. The combined capabilities help surface embedded secrets, exposed access keys, and credentials requiring removal.
Preventive guardrails: Establish a data perimeter
Now that you’ve learned how to identify exposed or unused credentials, let’s explore how you can use SCPs and resource control policies (RCPs) to create a data perimeter and help make sure that only your trusted identities are accessing trusted resources from expected networks. Implementing preventive guardrails around your AWS environment is crucial for helping protect against unauthorized access and potential access key compromises. For more information on what a data perimeter is and how to establish one, see the Establishing a Data Perimeter on AWS blog post series.
The following SCP denies an IAM user’s credentials from being used outside of unexpected networks (corporate Classless Inter-Domain Routing (CIDR) or specific virtual private cloud (VPC)). This policy includes several actions in the NotAction element that would impact services access if not exempted. Examples of SCPs and RCPs can be found in the data-perimeter-policy-examples, which is the source of truth for newly revised policies. The following example has been updated to address the use case of user credentials being used outside of unexpected networks.
By implementing this network perimeter, you can reduce the risk of credential compromise leading to unauthorized access and data exposure. Threat actors attempting to use stolen credentials from a coffee shop or home network will be blocked, helping to limit the impact of unintended access to credentials.
To further increase your defense in depth, you can use RCPs to help protect your data, such as by using them to control which identities can access your resources. For example, you might want to allow identities in your organization to access resources in your organization. You might also want to prevent identities external to your organization from accessing your resources. You can enforce this control using RCPs. You can use RCPs to restrict the maximum available access to your resources and include which principals, both inside and outside your organization, can access your resources. SCPs can only impact the effective permissions for principals within your AWS organization.
By implementing the following RCP, you can help make sure that if long-lived credentials are accidentally exposed, unauthorized users from outside your organization will be blocked from using them to access your critical data and resources. The policy will deny Amazon Simple Storage Service (Amazon S3) actions unless requested from your corporate CIDR range (NotIpAddressIfExists with aws:SourceIp), or from your VPC (StringNotEqualsIfExists with aws:SourceVpc). See the list of AWS services that support RCPs. Examples of SCPs and RCPs can be found in this GitHub repository, which is the source of truth for newly revised policies. The following example has been updated to address the use case discussed in this post.
If you’re ready to begin migrating away from long-term credentials, using an SCP to deny access key creation and deny updates to existing keys helps enforce the use of more secure authentication methods like IAM roles and federated access. This policy denies principals from creating or updating an AWS access key.
In addition to establishing these data perimeter controls, let’s examine how network controls protect the runtime environments where access keys operate.
Network controls: Protecting the runtime environment for access keys
Beyond building a data perimeter and using SCPs and RCPs, protecting the compute and network infrastructure that uses these access keys is essential. The risk of credential exposure through compromised runtime environments makes infrastructure protection a critical component of access key security, because bad actors often target these environments to gain unauthorized access.
Security groups and network ACLs (NACLs)
Use network-level security protections that act as firewalls for varying levels, such as the instance level or the subnet level to help protect against unauthorized access.
- Restricting critical ports, such as SSH (port 22) and RDP (port 3306), is essential because they’re prime targets for bad actors seeking unauthorized system access. Open administrative ports in your security groups can increase your attack surface and security risk. Using AWS Systems Manager Session Manager helps provide secure remote access without exposing inbound ports, alleviating the need for bastion hosts or SSH key management.
- NACLs effectively block access at the subnet level by acting as stateless packet filters at subnet boundaries. Unlike security groups that protect individual instances, NACLs help secure entire subnets with explicit allow/deny rules for both inbound and outbound traffic. They create a critical perimeter defense layer that filters traffic before reaching your instances. When deployed as part of a defense-in-depth approach, NACLs provide subnet-level isolation between application tiers, block malicious traffic patterns at the network edge, and maintain protection even if other security layers are compromised, helping to facilitate comprehensive network security through multiple independent control points.
- For enhanced network protection beyond NACLs, AWS Network Firewall enables enterprise-grade perimeter defense through comprehensive VPC protection. It combines intrusion prevention systems, domain filtering, deep packet inspection, and geographic IP controls, while automatically safeguarding your cloud environment against emerging threats using global threat intelligence gathered by Amazon. By using Network Firewall and AWS Transit Gateway integration, you can implement consistent security policies across your VPCs and Availability Zones with centralized management.
- To automate and scale network security across your organization, AWS Firewall Manager provides centralized administration of both Network Firewall rules and security group policies. As your organization grows, Firewall Manager helps maintain security by automating the deployment of common security group policies, cleaning up unused groups, and remediating overly permissive rules across multiple accounts and organizational units.
Amazon Inspector
To help identify unintended network exposure at scale, consider using Amazon Inspector. Amazon Inspector continually scans AWS workloads for software vulnerabilities and unintended network exposure, helping you identify and remediate security vulnerabilities before they can be exploited.
Key capabilities include:
- Package vulnerability: Package vulnerability findings identify software packages in your AWS environment that are exposed to Common Vulnerabilities and Exposures (CVEs). Bad actors can exploit these unpatched vulnerabilities to compromise the confidentiality, integrity, or availability of data, or to access other systems.
- Code vulnerability: Code vulnerability findings identify lines in your AWS Lambda code that bad actors could exploit. Code vulnerabilities include injection flaws, data leaks, weak cryptography, or missing encryption in your code. It identifies policy violations and vulnerabilities based on internal detectors developed in collaboration with CodeGuru Security. For a list of possible detections, see the Amazon Q Detector Library.
- Network reachability: Network reachability findings show whether your ports are reachable from the internet through an internet gateway (including instances behind Application Load Balancers or Classic Load Balancers), a VPC peering connection, or a VPN through a virtual gateway. These findings highlight network configurations that may be overly permissive, such as mismanaged security groups, NACLs or internet gateways, or that might allow for potentially malicious access. It can help identify open SSH ports on your instance security groups.
AWS WAF
Complementing your network security controls and vulnerability management, AWS WAF provides an additional layer of defense by filtering malicious web traffic that could lead to credential exposure.
AWS WAF offers several managed rule groups to protect against unauthorized access and common vulnerabilities:
- AWS WAF Fraud Control account creation fraud prevention (ACFP) rule group: ACFP uses request tokens to gather information about the client browser and about the level of human interactivity in the creation of the account creation request. The rule group detects and manages bulk account creation attempts by aggregating requests by IP address and client session and aggregating by the provided account information such as the physical address and phone number. Additionally, the rule group detects and blocks the creation of new accounts using credentials that have been compromised, which helps protect the security posture of your application and of your new users.
- AWS WAF Fraud Control account takeover prevention (ATP) rule group: To help prevent account takeovers that might lead to fraudulent activity, ATP gives you visibility and control over anomalous sign-in attempts and sign-in attempts that use stolen credentials. For Amazon CloudFront distributions, in addition to inspecting incoming sign-in requests, the ATP rule group inspects your application’s responses to sign-in attempts to track success and failure rates. ATP checks email and password combinations against its stolen credential database, which is updated regularly as new leaked credentials are found on the dark web.
Operational best practices
To complement these protective layers and maintain ongoing security posture, implement automated credential management through Secrets Manager to help facilitate proper rotation and lifecycle management of access keys throughout your environment. This automation reduces human error, helps facilitate timely credential updates and limits the exposure window if credentials are compromised.
It’s recommended to rotate keys at least every 90 days. Secrets Manager helps by automating the process of rotating secrets on a schedule, helping to make sure that credentials are regularly updated without manual intervention. It also centralizes the storage of secrets, reducing the likelihood of sharing access keys among multiple users. With Secrets Manager, you can configure automatic key rotation using a Lambda integration.
There is also an existing solution that can be deployed to implement automatic access key rotation at scale. This pattern helps you automatically rotate IAM access keys by using AWS CloudFormation templates, which are provided in the GitHub IAM key rotation repository.
If you’re unable to implement automatic rotation and need a quicker way to identify access keys that need to be rotated, AWS Trusted Advisor has a security check for IAM access key rotation that checks for active IAM access keys that haven’t been rotated in the last 90 days. You can use the security check to drill down on which access keys in your environment need to be rotated if you need to perform manual rotation.
Detect anomalous IAM activity
Finally, while proactive measures to secure your IAM infrastructure are crucial, it’s equally important to have robust detection and alerting mechanisms in place. No matter how diligent your efforts, there is still a possibility of unforeseen threats or unauthorized activities. That’s why a comprehensive defense-in-depth strategy should include the ability to quickly identify and respond to anomalous IAM-related events. Amazon GuardDuty combines machine learning and integrated threat intelligence to help protect AWS accounts, workloads, and data from threats.
GuardDuty Extended Threat Detection automatically correlates multiple events across different data sources to identify potential threats within AWS environments. When Extended Threat Detection detects suspicious sequences of activities, it generates comprehensive attack sequence findings. The system analyzes individual API activities as weak signals, which might not indicate risks independently, but when observed together in specific patterns can reveal potential security issues.
This capability is enabled by default when GuardDuty is activated in an AWS account, helping provide protection without additional configuration.
The specific attack sequence finding related to compromised credentials is AttackSequence:IAM/CompromisedCredentials which is marked as Critical severity. This finding informs you that GuardDuty detected a sequence of suspicious actions made by using AWS credentials that impacts one or more resources in your environment. Multiple suspicious and anomalous threat behaviors were observed by the same credentials, resulting in higher confidence that the credentials are being misused.
Conclusion
The security best practices outlined in this post provide a comprehensive, multi-layered approach to mitigate the risks associated with long-term credentials. By implementing proactive code scanning, automated key rotation, network-level controls, data perimeter restrictions, and threat detection, you can significantly reduce the attack surface and better protect your organization’s AWS resources until a full migration to temporary credentials is feasible.
While the recommendations provided in this post represent an ample set of controls to put organizations in a good security posture, there might be additional security measures that can be taken depending on the specific needs and risk profile of each environment. The key is to adopt a holistic, layered approach to credential management and protection. By doing so, you can bridge the gap until a complete transition to temporary credentials becomes possible.
Implementing these security measures can help reduce risks, but long-term credentials inherently carry security risks. Even with strict best practices and comprehensive security controls, the possibility of credential compromise cannot be removed completely. You should consider evaluating your organization’s security posture and prioritizing temporary credentials through IAM roles and federation whenever possible. If you have questions or need help, AWS is here to support you.


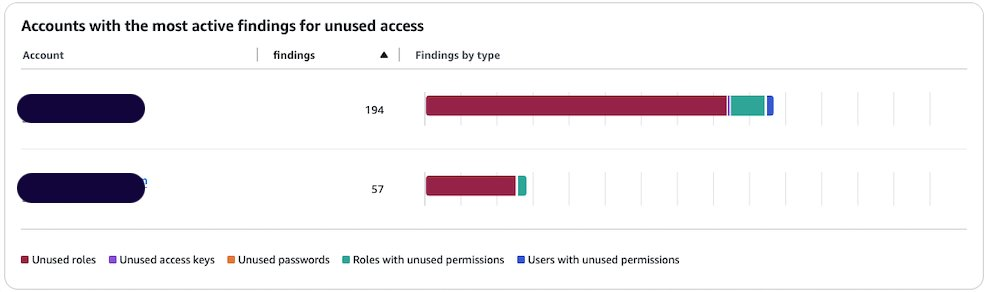
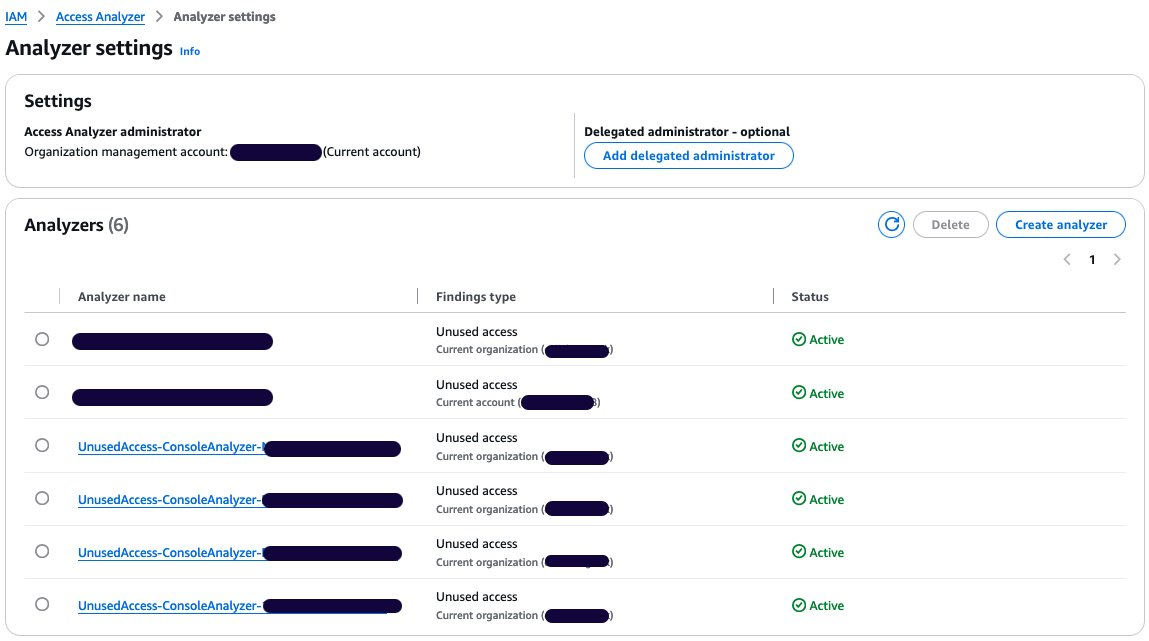
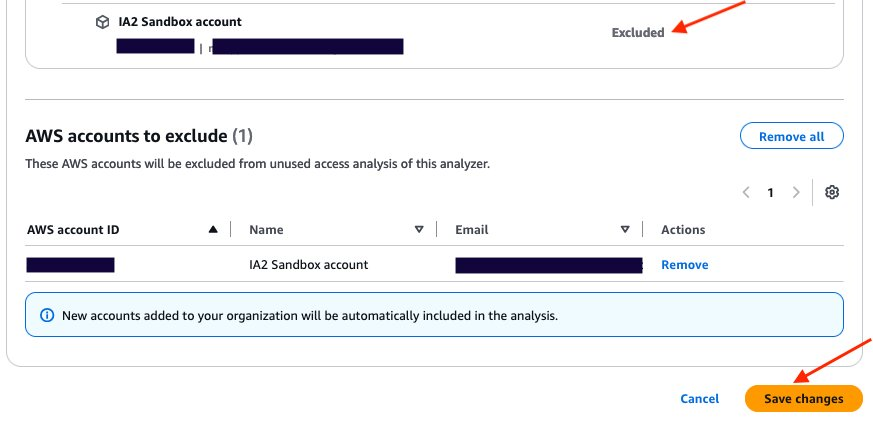
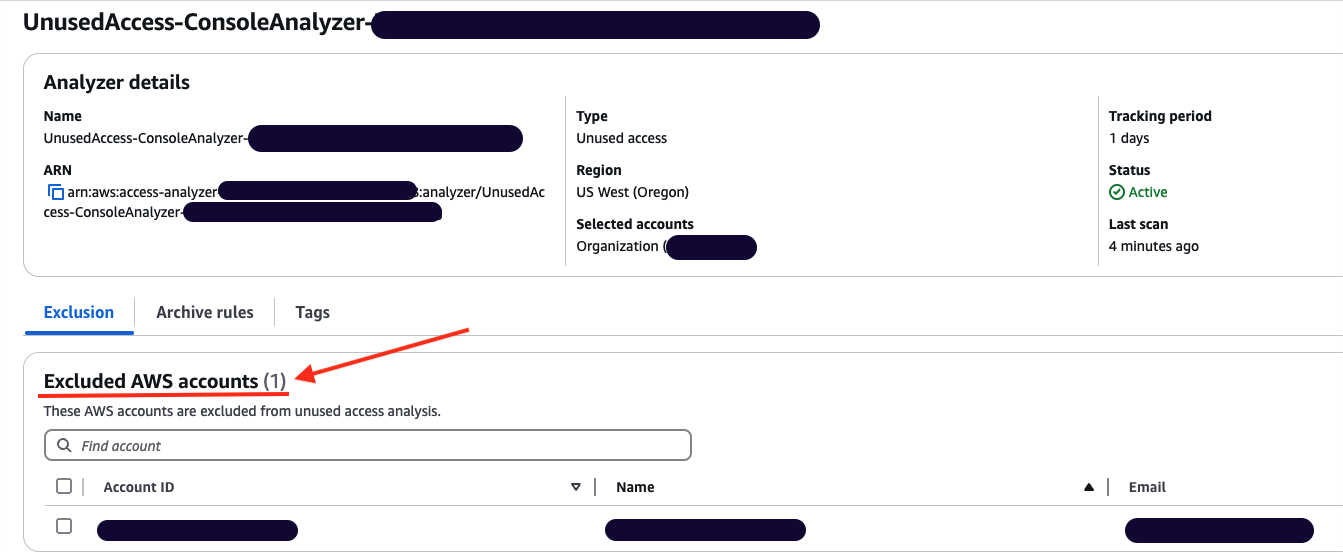

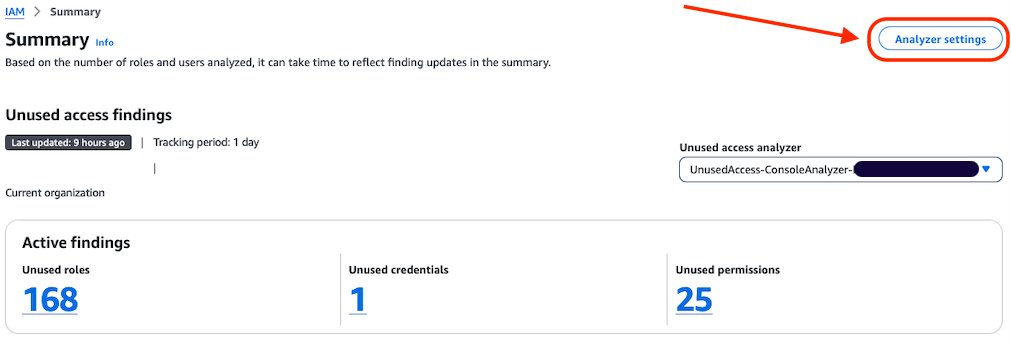
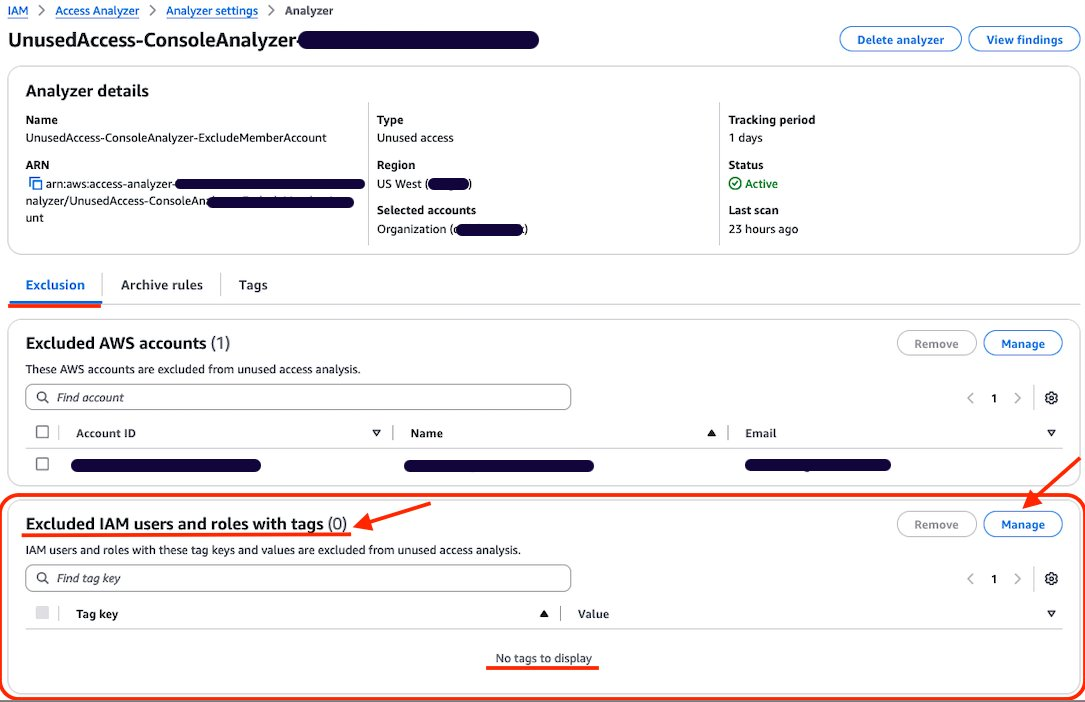


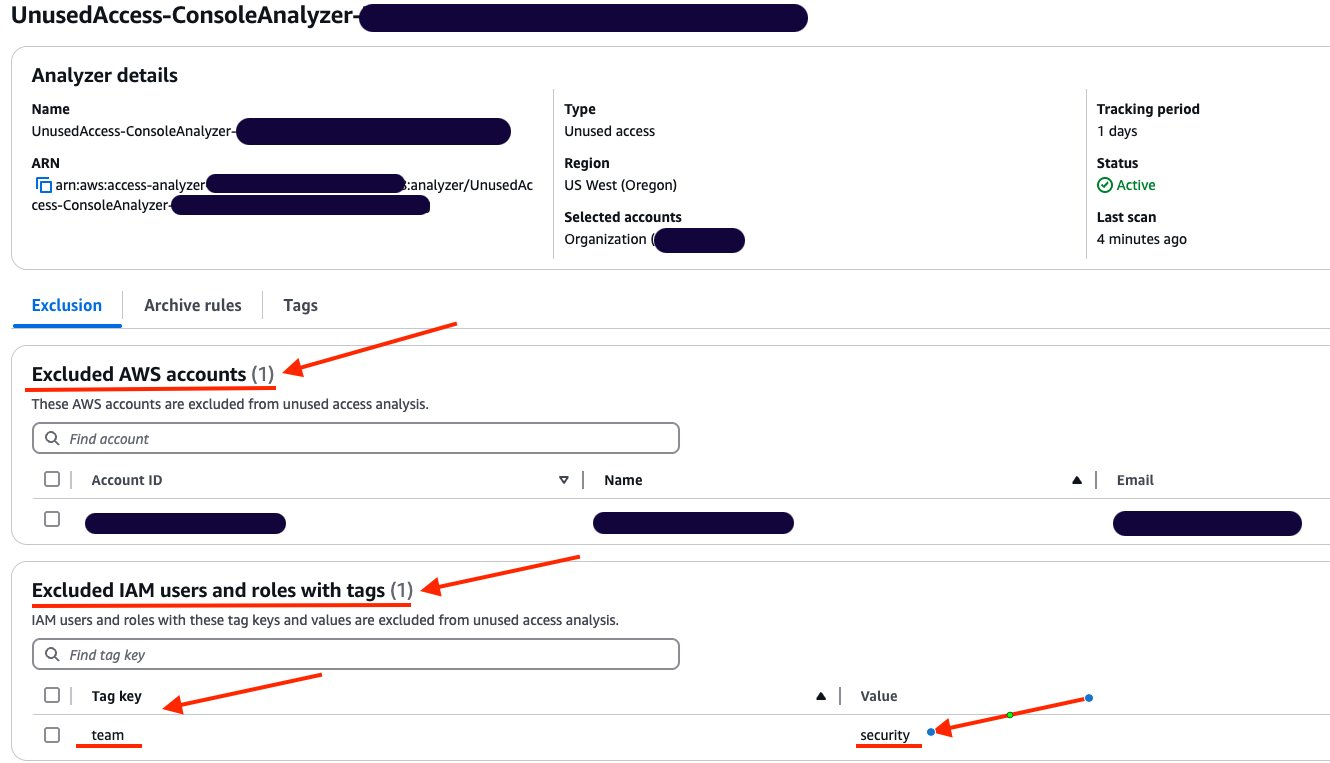
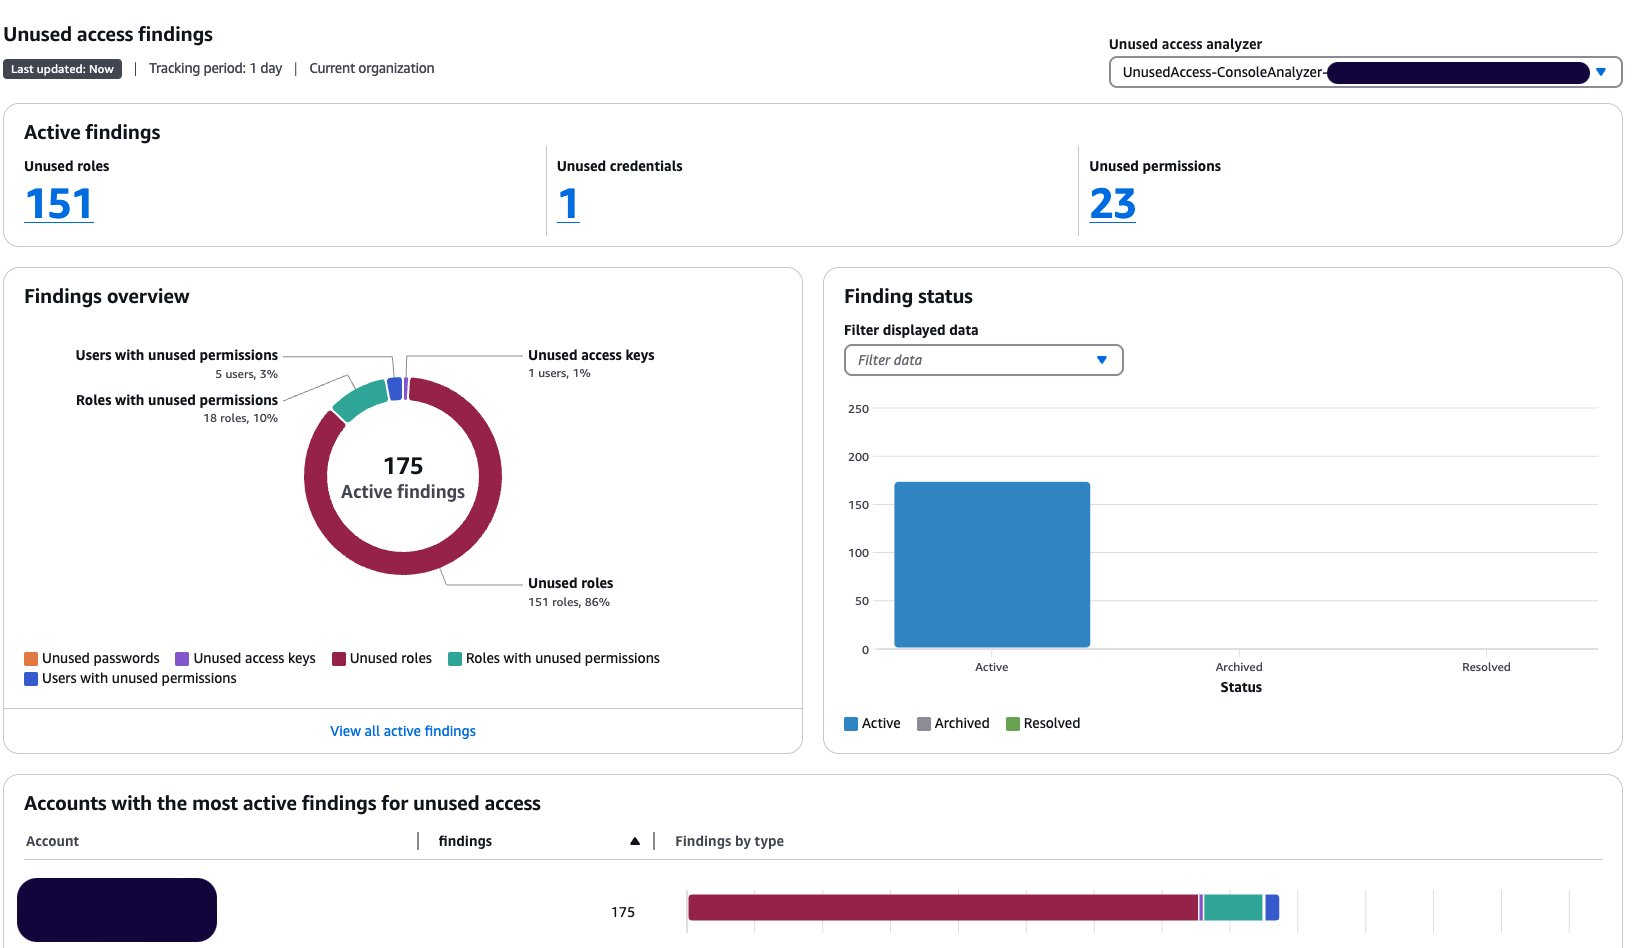


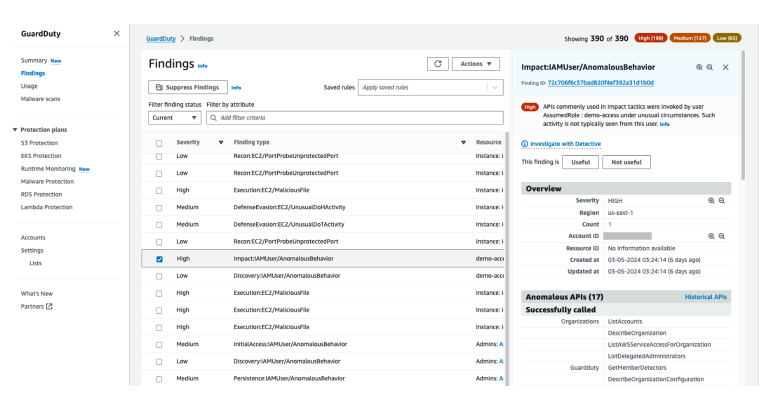
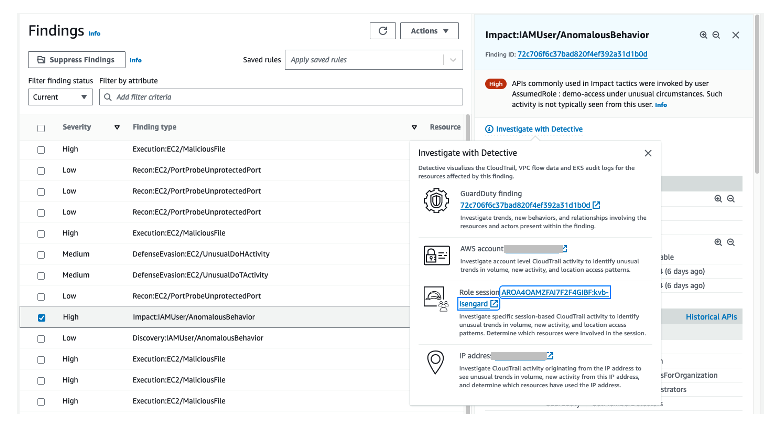
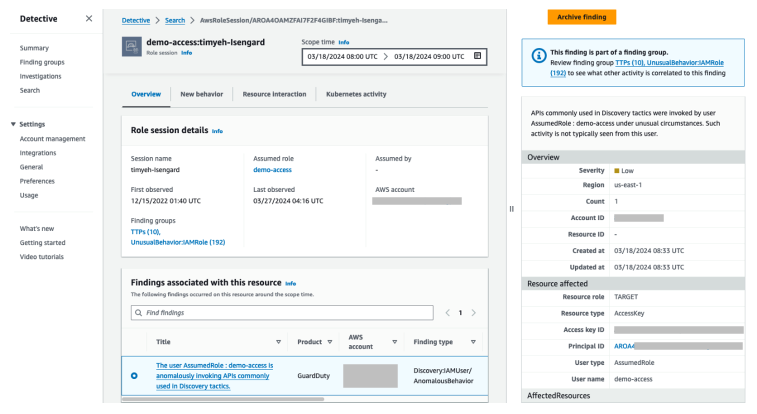
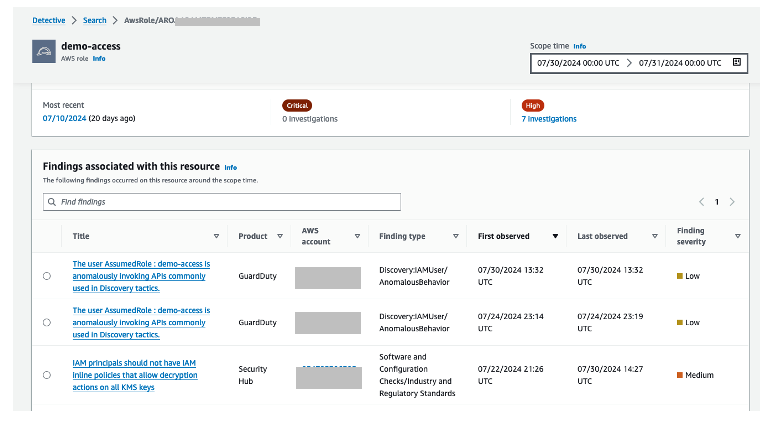
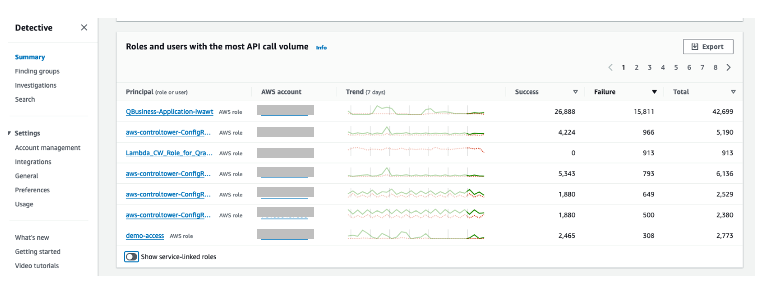
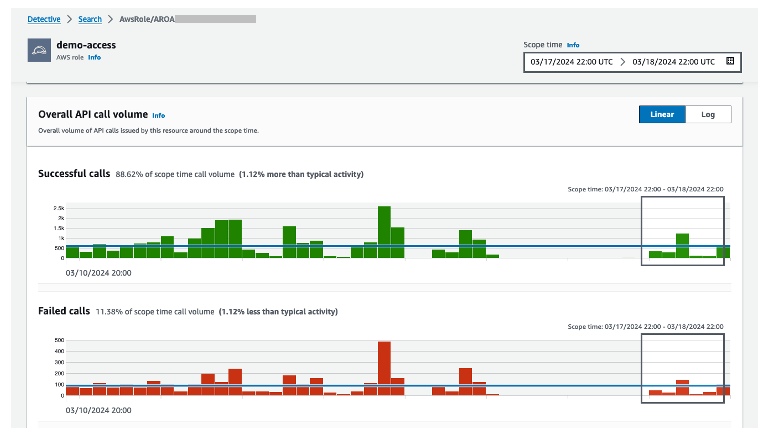
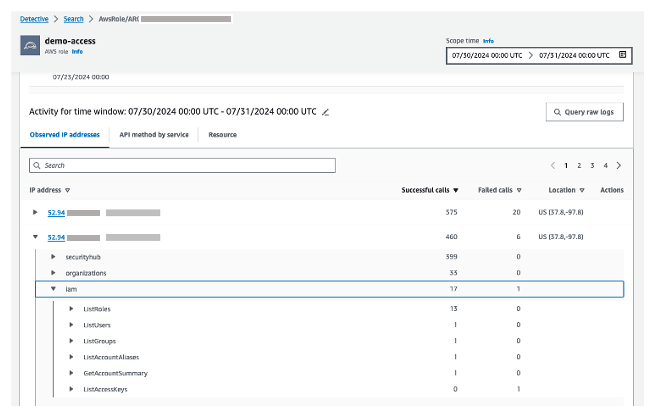
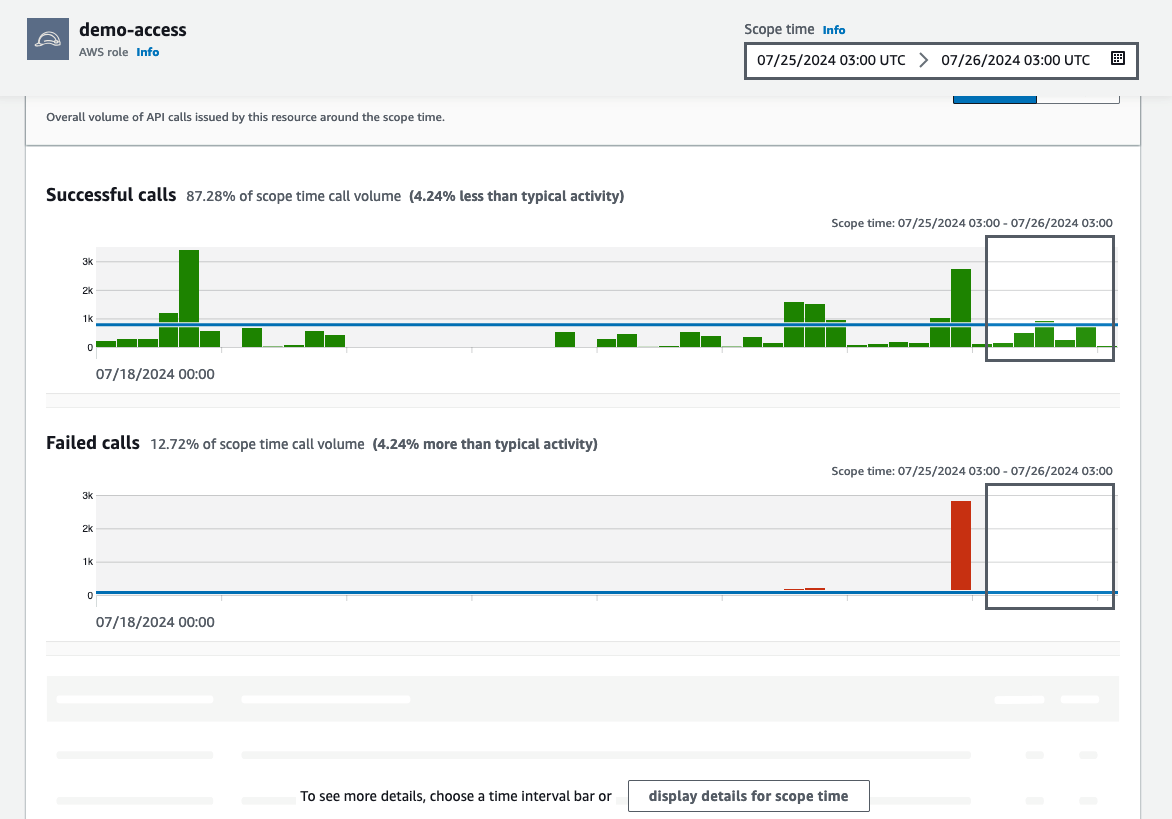 Figure 12: Overall API call volume during the specified scope time