Post Syndicated from James Beswick original https://aws.amazon.com/blogs/compute/increasing-performance-of-java-aws-lambda-functions-using-tiered-compilation/
This post is written by Mark Sailes, Specialist Solutions Architect, Serverless and Richard Davison, Senior Partner Solutions Architect.
The Operating Lambda: Performance optimization blog series covers important topics for developers, architects, and system administrators who are managing applications using AWS Lambda functions. This post explains how you can reduce the initialization time to start a new execution environment when using the Java-managed runtimes.

Many Lambda workloads are designed to deliver fast responses to synchronous or asynchronous workloads in a fraction of a second. Examples of these could be public APIs to deliver dynamic content to websites or a near-real time data pipeline doing small batch processing.
As usage of these systems increases, Lambda creates new execution environments. When a new environment is created and used for the first time, additional work is done to make it ready to process an event. This creates two different performance profiles: one with and one without the additional work.
To improve the response time, you can minimize the effect of this additional work. One way you can minimize the time taken to create a new managed Java execution environment is to tune the JVM. It can be optimized specifically for these workloads that do not have long execution durations.
One example of this is configuring a feature of the JVM called tiered compilation. From version 8 of the Java Development Kit (JDK), the two just-in-time compilers C1 and C2 have been used in combination. C1 is designed for use on the client side and to enable short feedback loops for developers. C2 is designed for use on the server side and to achieve higher performance after profiling.
Tiering is used to determine which compiler to use to achieve better performance. These are represented as five levels:

Profiling has an overhead, and performance improvements are only achieved after a method has been invoked a number of times, the default being 10,000. Lambda customers wanting to achieve faster startup times can use level 1 with little risk of reducing warm start performance. The article “Startup, containers & Tiered Compilation” explains tiered compilation further.
For customers who are doing highly repetitive processing, this configuration might not be suited. Applications that repeat the same code paths many times want the JVM to profile and optimize these paths. Concrete examples of these would be using Lambda to run Monte Carlo simulation or hash calculations. You can run the same simulations thousands of times and the JVM profiling can reduce the total execution time significantly.
Performance improvements
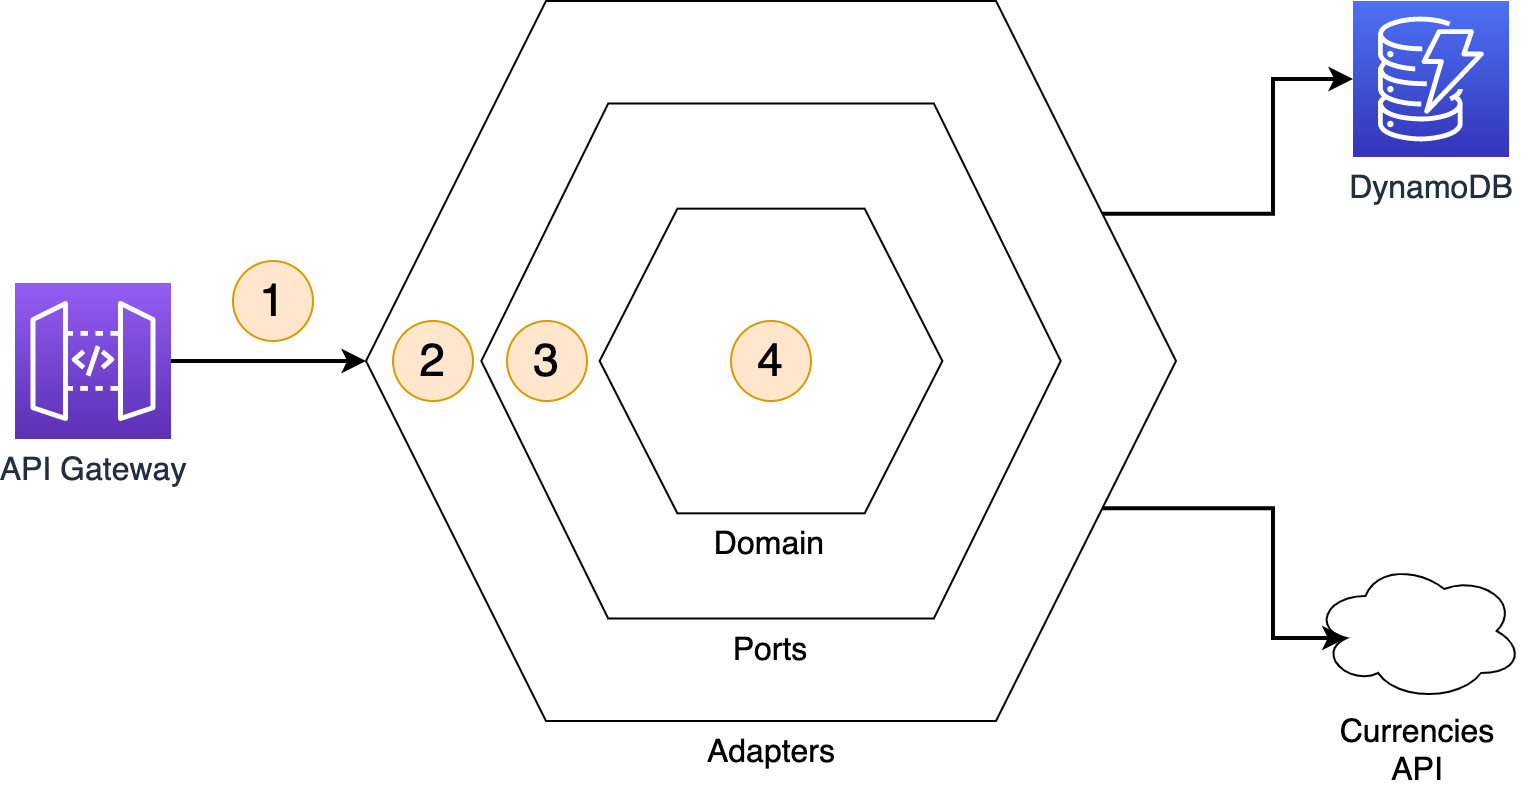
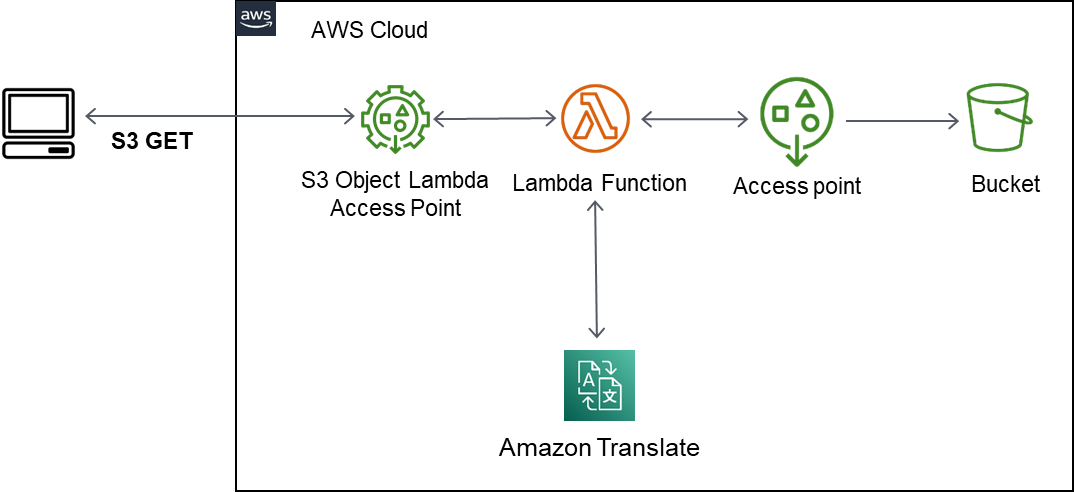
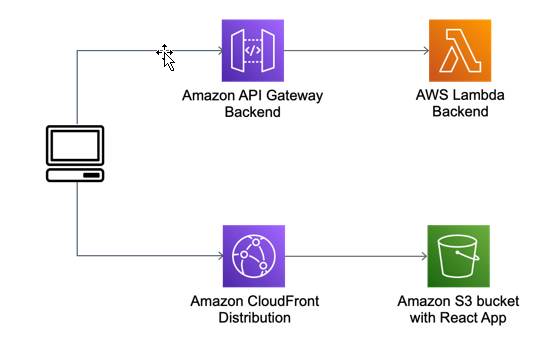
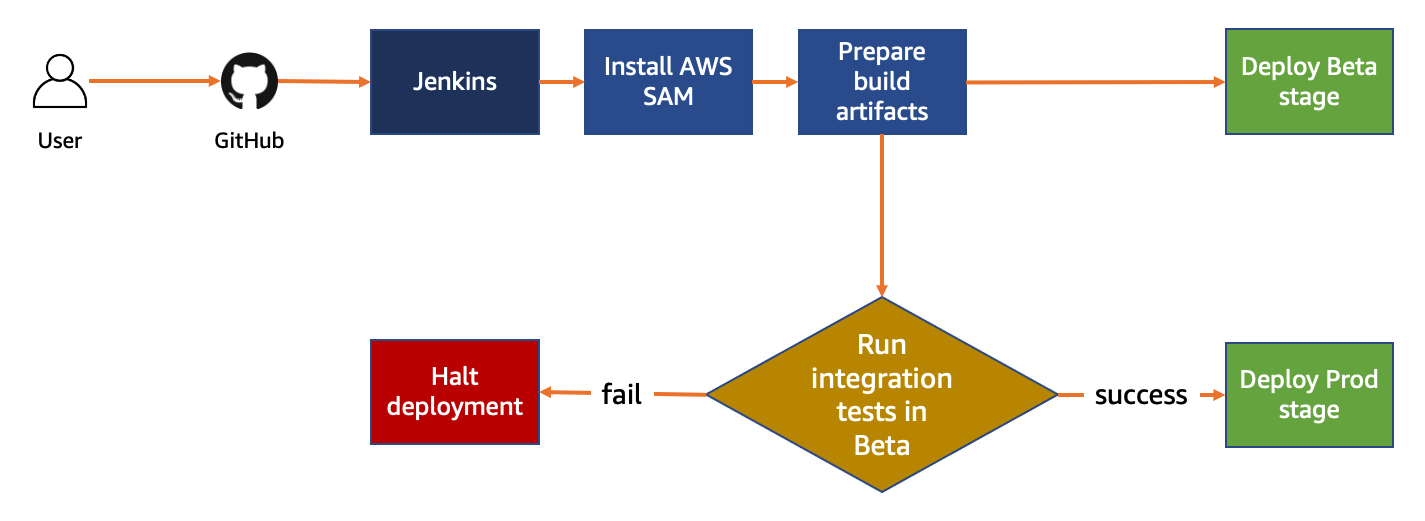
The example project is a Java 11-based application used to analyze the impact of this change. The application is triggered by Amazon API Gateway and then puts an item into Amazon DynamoDB. To compare the performance difference caused by this change, there is one Lambda function with the additional changes and one without. There are no other differences in the code.
Download the code for this example project from the GitHub repo: https://github.com/aws-samples/aws-lambda-java-tiered-compilation-example.
To install prerequisite software:
- Install the AWS CDK.
- Install Apache Maven, or use your preferred IDE.
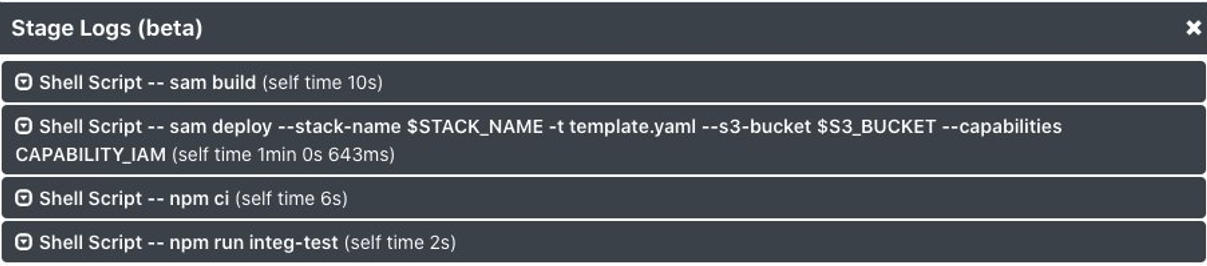
- Build and package the Java application in the software folder:
cd software/ExampleFunction/ mvn package - Zip the execution wrapper script:
cd ../OptimizationLayer/ ./build-layer.sh cd ../../ - Synthesize CDK. This previews changes to your AWS account before it makes them:
cd infrastructure cdk synth - Deploy the Lambda functions:
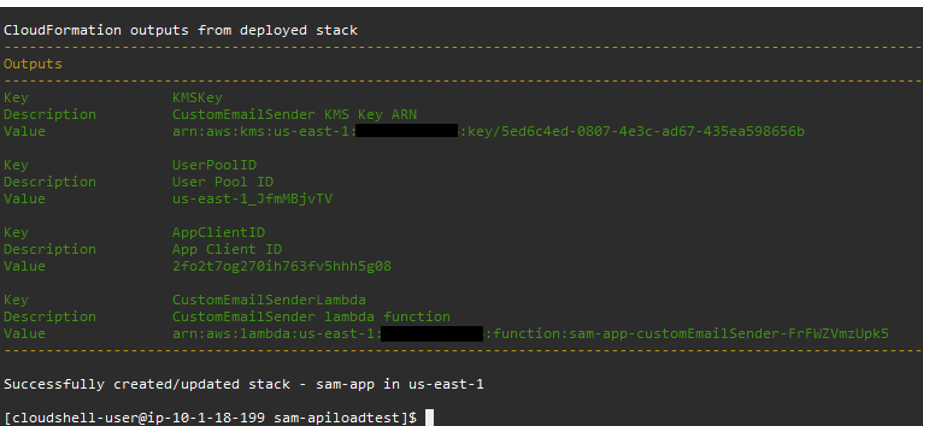
cdk deploy --outputs-file outputs.json
The API Gateway endpoint URL is displayed in the output and saved in a file named outputs.json. The contents are similar to:
InfrastructureStack.apiendpoint = https://{YOUR_UNIQUE_ID_HERE}.execute-api.eu-west-1.amazonaws.com
Using Artillery to load test the changes
First, install prerequisites:
- Install jq and Artillery Core.
- Run the following two scripts from the
/infrastructuredirectory:artillery run -t $(cat outputs.json | jq -r '.InfrastructureStack.apiendpoint') -v '{ "url": "/without" }' loadtest.yml artillery run -t $(cat outputs.json | jq -r '.InfrastructureStack.apiendpoint') -v '{ "url": "/with" }' loadtest.yml
Check the results using Amazon CloudWatch Insights
- Navigate to Amazon CloudWatch.
- Select Logs then Logs Insights.
- Select the following two log groups from the drop-down list:
/aws/lambda/example-with-layer
/aws/lambda/example-without-layer - Copy the following query and choose Run query:
    filter @type = "REPORT"
    | parse @log /\d+:\/aws\/lambda\/example-(?<function>\w+)-\w+/
    | stats
    count(*) as invocations,
    pct(@duration, 0) as p0,
    pct(@duration, 25) as p25,
    pct(@duration, 50) as p50,
    pct(@duration, 75) as p75,
    pct(@duration, 90) as p90,
    pct(@duration, 95) as p95,
    pct(@duration, 99) as p99,
    pct(@duration, 100) as p100
    group by function, ispresent(@initDuration) as coldstart
    | sort by function, coldstart

You see results similar to:

Here is a simplified table of the results:
| Settings | Type |
# of invocations |
p90 (ms) |
p95 (ms) |
p99 (ms) |
| Default settings | Cold start |
754 |
5,212 |
5,338 |
5,517 |
| Default settings | Warm start |
35,247 |
58 |
93 |
255 |
| Tiered compilation stopping at level 1 | Cold start |
383 |
2,071 |
2,086 |
2,221 |
| Tiered compilation stopping at level 1 | Warm start |
35,618 |
23 |
32 |
86 |
The results are from testing 120 concurrent requests over 5 minutes using an open-source software project called Artillery. You can find instructions on how to run these tests in the GitHub repo. The results show that for this application, cold starts for 90% of invocations improve by 3141 ms (60%). These numbers are specific for this application and your application may behave differently.
Using wrapper scripts for Lambda functions
Wrapper scripts are a feature available in Java 8 and Java 11 on Amazon Linux 2 managed runtimes. They are not available for the Java 8 on Amazon Linux 1 managed runtime.
To apply this optimization flag to Java Lambda functions, create a wrapper script and add it to a Lambda layer zip file. This script will alter the JVM flags which Java is started with, within the execution environment.
#!/bin/sh
shift
export _JAVA_OPTIONS="-XX:+TieredCompilation -XX:TieredStopAtLevel=1"
java "$@"
Read the documentation to learn how to create and share a Lambda layer.
Console walkthrough
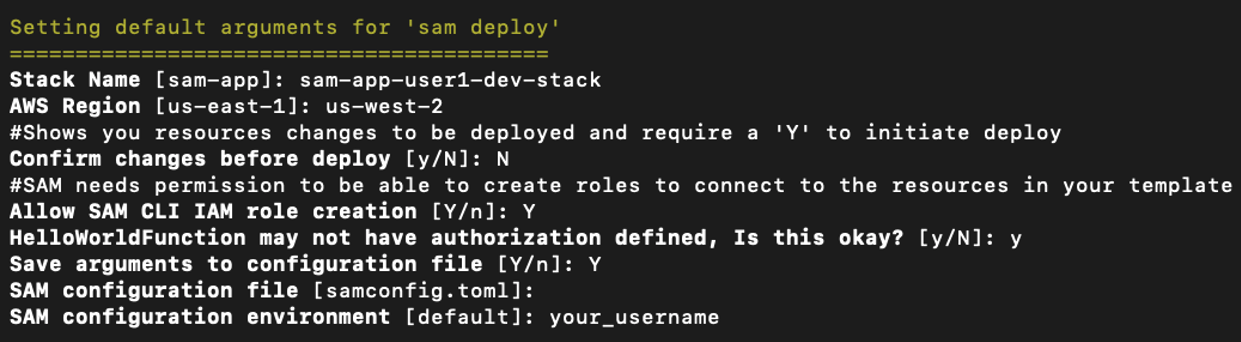
This change can be configured using AWS Serverless Application Model (AWS SAM), the AWS Command Line Interface (AWS CLI), AWS CloudFormation, or from within the AWS Management Console.
Using the AWS Management Console:
- Navigate to the AWS Lambda console.
- Select Functions and choose the Lambda function to add the layer to.

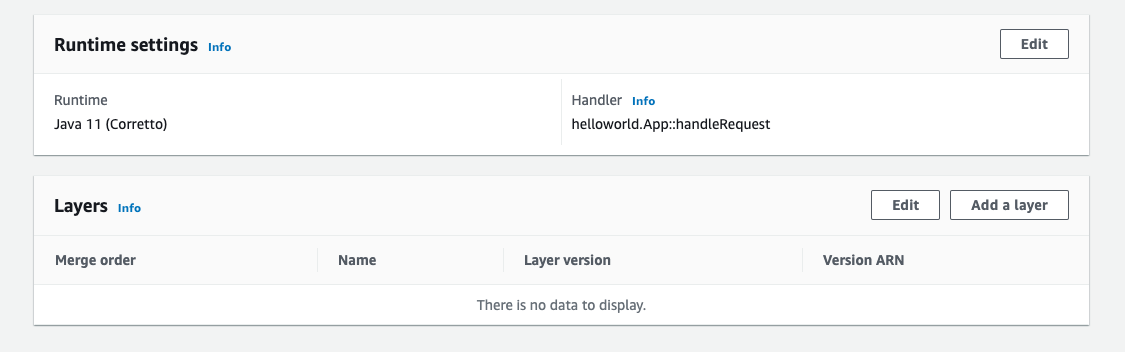
- The Code tab is selected by default. Scroll down to the Layers panel.
- Select Add a layer.

- Select Custom layers and choose your layer.

- Select the Version. Choose Add.
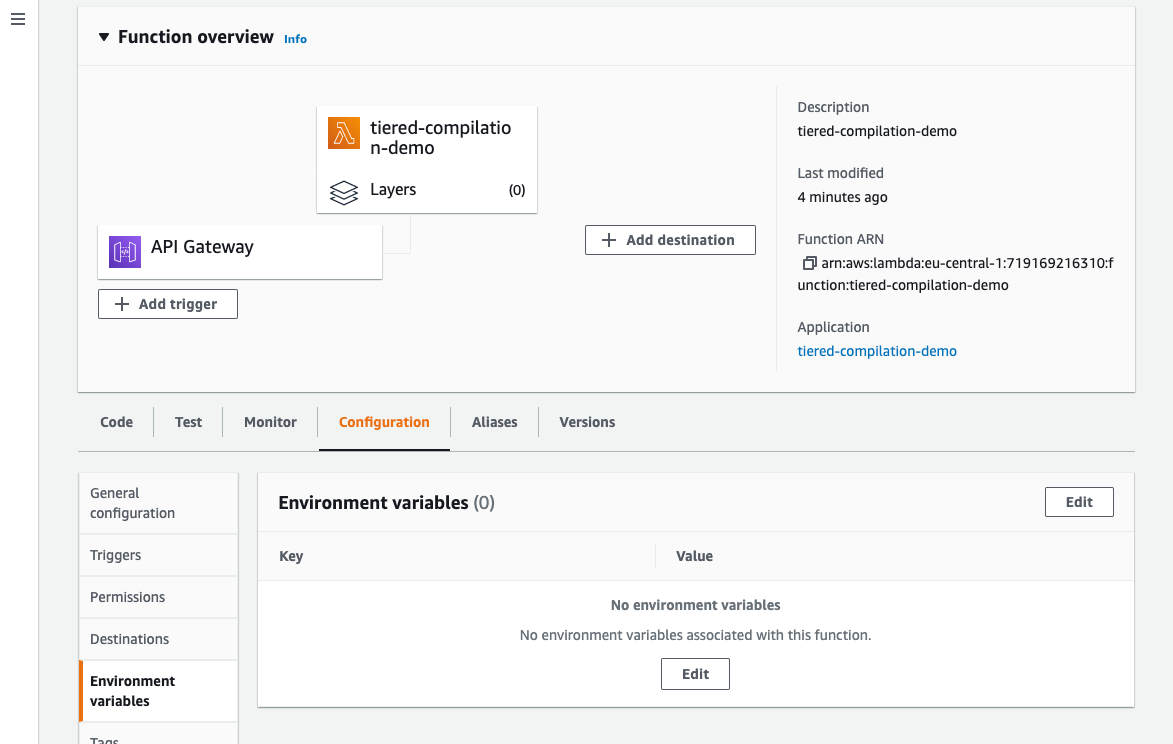
- From the menu, select the Configuration tab and Environment variables. Choose Edit.

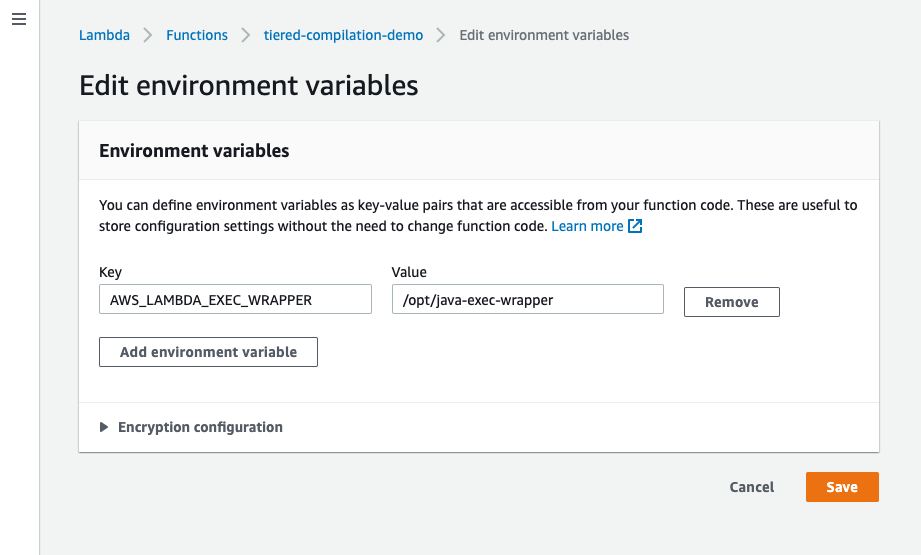
- Choose Add environment variable. Add the following:
– Key: AWS_LAMBDA_EXEC_WRAPPER
– Value: /opt/java-exec-wrapper

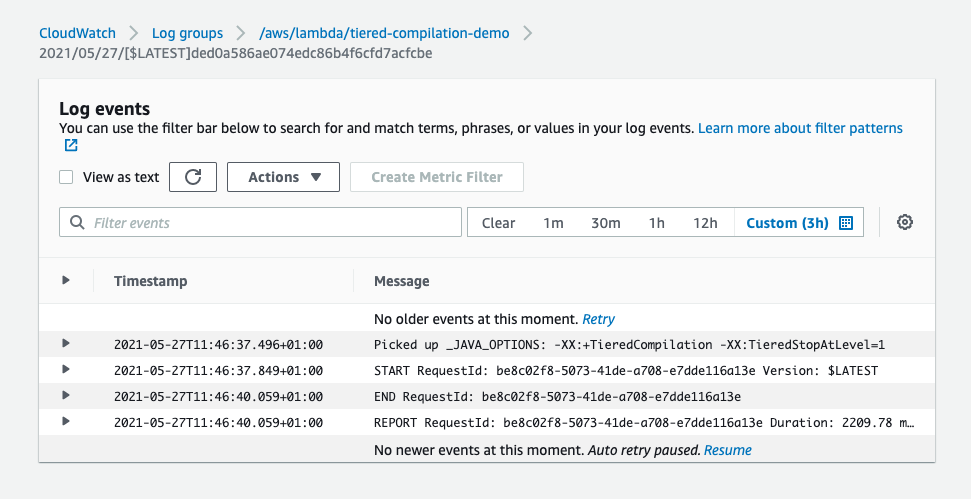
- Choose Save.You can verify that the changes are applied by invoking the function and viewing the log events. The log line Picked up _JAVA_OPTIONS: -XX:+TieredCompilation -XX:TieredStopAtLevel=1 is added.


Conclusion
Tiered compilation stopping at level 1 reduces the time the JVM spends optimizing and profiling your code. This could help reduce start up times for Java applications that require fast responses, where the workload doesn’t meet the requirements to benefit from profiling.
You can make further reductions in startup time using GraalVM. Read more about GraalVM and the Quarkus framework in the architecture blog. View the code example at https://github.com/aws-samples/aws-lambda-java-tiered-compilation-example to see how you can apply this to your Lambda functions.
For more serverless learning resources, visit Serverless Land.