Tag Archives: Featured-Cloud Storage

How to Choose the Right Enterprise NAS for Your Business

Post Syndicated from Vinodh Subramanian original https://www.backblaze.com/blog/how-to-choose-the-right-enterprise-nas-for-your-business/

A decorative image showing a building, a storage cloud, and a NAS device.

When it comes to enterprise storage, we’ve seen a rapid move to cloud-based infrastructure. But, recently, tech leaders have started to question the assumptions behind a cloud-only approach, and there are industries (particularly media and entertainment) where on-premises storage has tangible benefits. With all that in mind, enterprise-level network attached storage (NAS) in hybrid cloud setups presents a strong storage foundation for many companies.

With recent reports showing the global NAS market size is projected to grow from $26 billion to $82.9 billion in 2030, it’s clear that NAS isn’t going anywhere. So, let’s talk about how to choose an enterprise-level NAS solution.

What Is an Enterprise NAS?

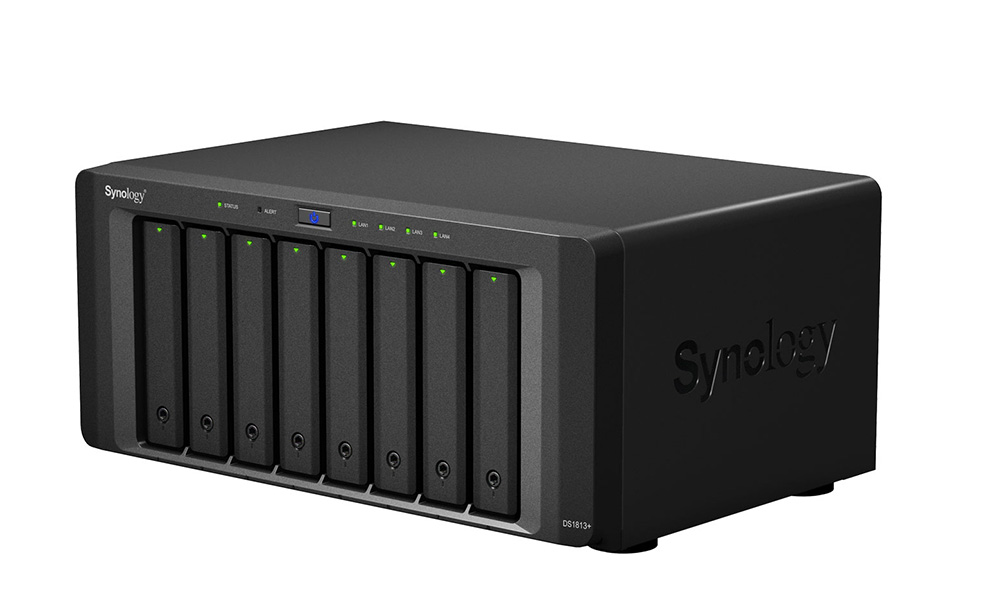
Enterprise NAS is a large-scale data storage system that is connected to a local network to provide data storage and access to the organization. It’s designed for large-scale business environments that require high-capacity storage, superior performance, and advanced data management capabilities.

Compared with home-use NAS devices, enterprise NAS devices often come with superior hardware specifications, including powerful processors, large amounts of memory (RAM), and numerous drive bays to accommodate vast amounts of data.

How Do Enterprises Use NAS Devices?

Enterprises use NAS devices for a wide range of use cases and applications:

  • File storage and sharing: NAS devices provide a centralized platform for storing and sharing files across a network. This fosters collaboration, as employees can easily access shared files regardless of their physical location.
  • Data protection: With built-in redundancy features, NAS devices offer robust data protection. This ensures data remains safe and accessible even in the event of a disk failure.
  • Disaster recovery: Snapshot and replication features allow for quick restoration of data minimizing downtime and data loss from hardware failures, cyberattacks, or natural disasters. However, it’s important to note that NAS devices alone don’t provide this protection—they’re subject to the same vulnerabilities as all on-premises devices. Rather, this benefit comes from a NAS setup that tiers to the cloud.
  • Hosting business applications: Businesses can also use NAS devices to host business applications. Much the same as how you would use a server, since these devices can handle high volumes of data traffic and support multiple connections, they are well suited for running enterprise-level applications that require high availability and performance.
  • Running virtual machines (VMs): Virtualization software providers, like VMware, support running their products on NAS. With proper configuration, including potentially adding RAM to your device, you can easily spin up virtual machines using NAS.
  • Using NAS as a file server: NAS devices can function as dedicated file servers, offering high-performance, stable environments, which are useful for businesses with large user bases requiring concurrent access to shared files.
  • Archiving: Long-term storage and archiving is another key application of NAS devices in the enterprise. There are benefits to having archival data on-premises. It can reduce recovery times in case you need to restore from backups.

Enterprise NAS vs. Server Area Networks (SAN)

As you’re choosing how to create an enterprise-level storage system, it’s important to know the differences between NAS and SAN. The short answer: From the perspective of the user, there’s not much difference. From the perspective of the person managing the system, SAN setups are more complex and have more customization options, particularly in your network connections.

However, NAS companies have done an excellent job of adding functionality to NAS devices, making those features easily manageable. Since they’re less complex, they may be easier for your internal IT team to manage—and that can translate to OpEx savings and more time for your IT team to stay on top of challenges in an ever-changing tech landscape.

What Is the Difference Between Entry-Level, Mid-Market, and Enterprise NAS Devices?

NAS devices can be grouped into three major categories based on factors such as storage capacity, performance, and scalability. The following table provides a side-by-side comparison of the key features and differences between entry-level, mid-market, and enterprise NAS devices.

Feature Entry-Level NAS Mid-Market NAS Enterprise NAS
Storage Capacity Up to a few terabytes. Can range from a few terabytes to tens of terabytes. Usually hundreds of terabytes or more, scalable to meet enterprise needs.
Performance Adequate for home use and basic file sharing. Enhanced performance for small to medium businesses with higher data traffic. High-performance systems designed to handle heavy workloads and concurrent access.
Reliability & Redundancy Basic redundancy usually with RAID 1 or RAID 5 options. More advanced redundancy options, including multiple RAID configurations. Highly reliable with advanced redundancy features (RAID, replication, etc.).
Scalability Limited scalability. Moderate scalability, depending on model. Highly scalable with clustering options.
Advanced Features Basic features like media streaming, remote access, and basic data redundancy. More advanced features like virtualization, data encryption, access control, and snapshot capability. Enterprise-grade features like high-speed data transfers, advanced backup and disaster recovery options, deduplication, encryption, and virtualization support.

How Do I Choose an Enterprise NAS Device?

Now that you understand the difference between the different types of NAS devices and their respective features, it’s crucial to understand your specific business needs before choosing an enterprise NAS device. There are several aspects to consider, so let’s take them one by one.

1. Storage Capacity

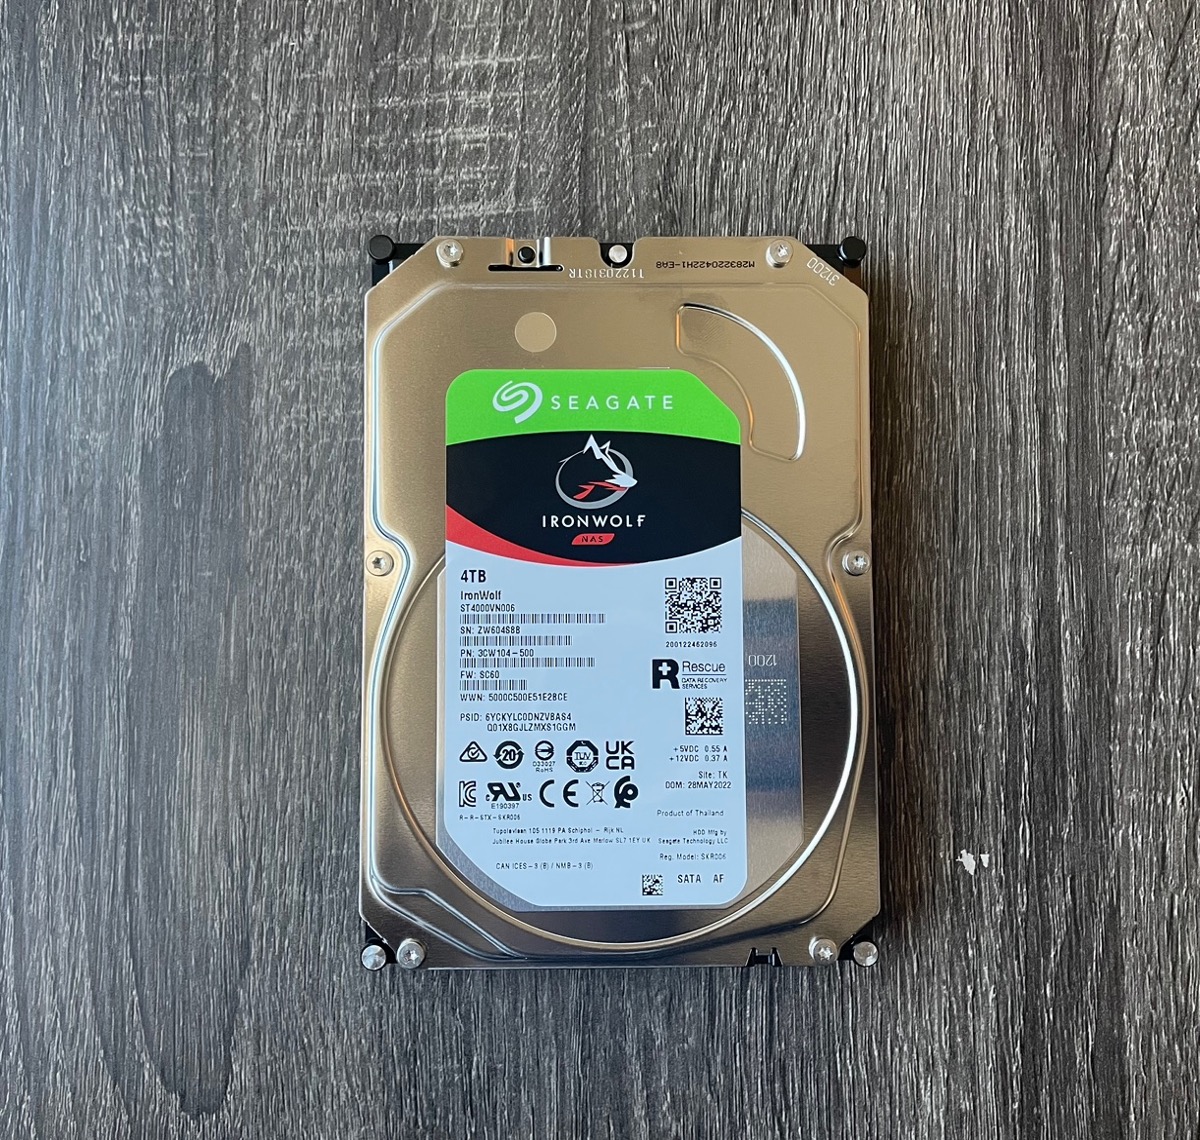
One of the first things to consider is the amount of storage your enterprise requires. This isn’t just about your current needs, but also about the projected growth of your data over time. In a NAS system, storage is defined by the number of drives, the total amount of shared volume they create, and their striping scheme. A striping scheme defines where data is stored and what kinds of redundancies it has, and is also known as RAID levels that are usually defined like so: RAID 0, 1 5, 6, etc.

There are a few ways to add storage to a NAS device.

  1. You can add drives to your NAS unit if you originally provisioned one with extra bays. This is most applicable to entry-level units.
  2. You can purchase another NAS device and network it with your first device. On the enterprise level, you’ll likely have a more complex architecture of connected NAS devices acting as clusters or nodes on your network.
  3. Finally, cloud-connected NAS devices mean that you can provision both primary and backup data to the cloud, so your setup is infinitely scalable. This means you can also nimbly add more storage on a short time frame—no need to wait for hardware upgrades (though you may still want to make upgrades in the longer term).

2. Data Access Speeds

The speed at which data can be accessed from your NAS device is another crucial factor. NAS devices are built to be directly connected to your local area network (LAN) and usually require a direct ethernet connection. An entry-level NAS system will have a gigabit ethernet connection (1GigE), and is suitable for entry-level or home NAS users.

But for enterprises that want to provide frequent and intensive data access to a large number of users, NAS vendors offer higher capacity ethernet connections on their systems. Some vendors offer 2.5 Gb/s or 5 Gb/s connections on their systems, but they usually require that you get a compatible network switch, USB adapters, or expansion cards. Still other NAS systems provide the option of Thunderbolt connections in addition to ethernet connections to provide higher bandwidth—up to 40GigE—and are good for systems that need to edit large files directly on the NAS.

3. Scalability

As your business grows, your data needs will likely increase. Therefore, it’s essential that your NAS device has the ability to grow with your business. You may not know exactly how much data you’ll need in a year or five, but you can certainly make an estimate based on your product roadmap, current rate of growth, and so on. And, we put together this handy NAS Buyer’s Guide so you can compare that potential growth to existing NAS features.

4. Data Protection and Backup Features

Effective backups are the cornerstone of any good disaster recovery (DR) plan, which is defined as the (hopefully tested!) step-by-step procedure to get your business back online and your data restored after a disruptive event like accidental deletions, cyberattacks, or natural disasters. We recommend the 3-2-1 backup strategy at minimum, and you’ll want to consider things like what kinds of restore options you prefer, compliance requirements in your industry, and how long you want to keep your backups.

With any good backup strategy, you’ll want to set up recurring and automatic backups of all your systems. Also, in complex environments like a business, backups are just as much about data management—that is, knowing where all your data is stored (the shared file system vs. employee workstations vs. the cloud) and how to back it up effectively.

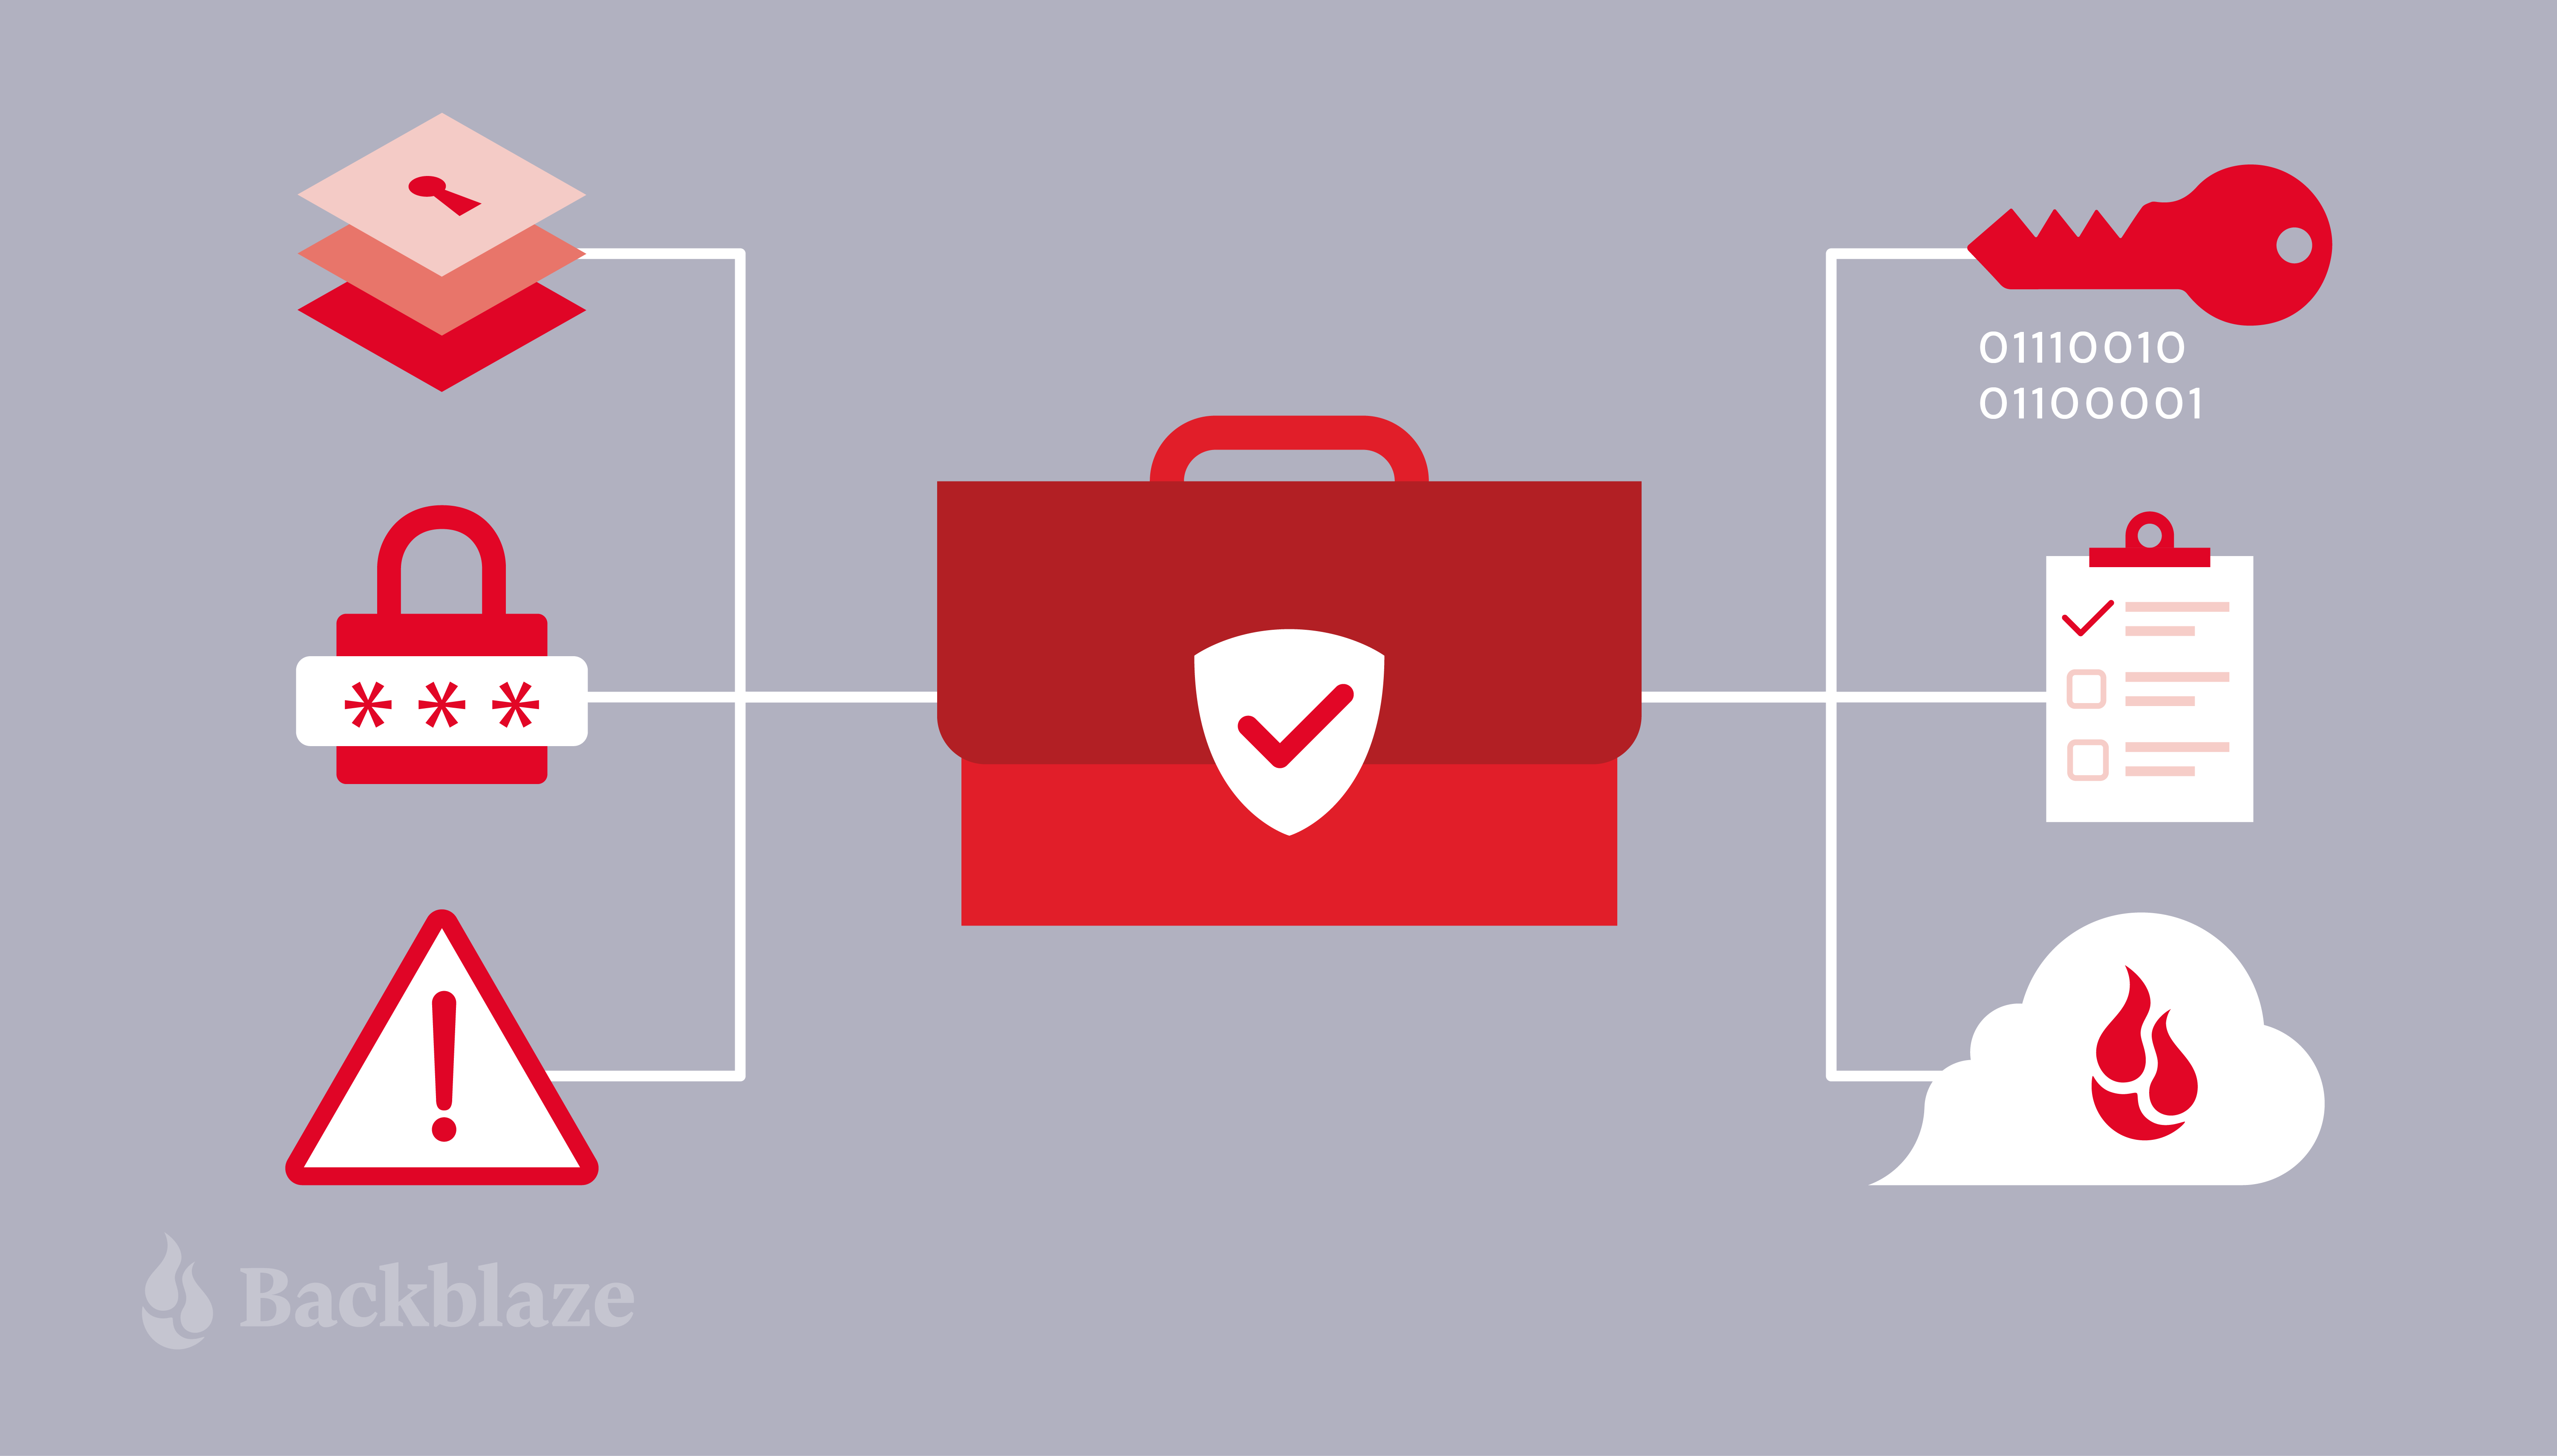
Enterprise NAS devices provide advanced data protection and backup features to protect NAS data against data loss and enhance accessibility. These include advanced RAID configurations (i.e. on what server and how redundant your data storage is), automated backup features, cloud storage integrations, enterprise grade encryption features, advanced backup and disaster recovery options, data deduplication, encryption, and virtualization support, etc.

Other features to look for can include snapshot technology, which allows capturing the state of the system at different points in time, and replication features which enable copying of data from one NAS device to another for redundancy.

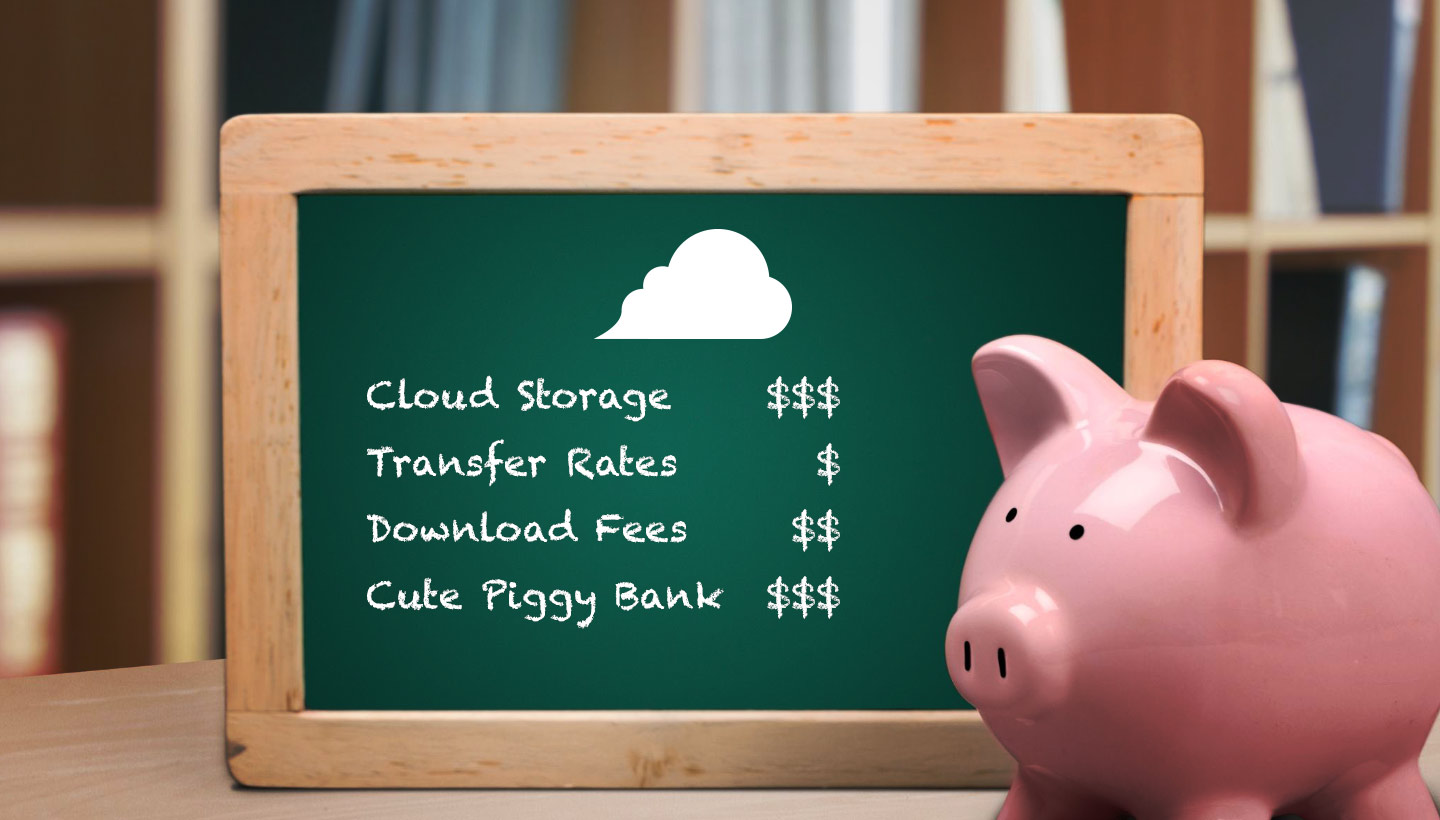
5. Evaluating Total Cost of Ownership

When evaluating an investment in an enterprise NAS device, it’s important to not limit your focus on the initial purchase price of the NAS device itself. Keep in mind that with a NAS device, you’ll need to purchase hard drives (HDDs) or solid-state drives (SSDs) (and possibly other devices) to complete your setup.

Depending on the kind of data durability you want to create, the storage hardware cost can add up if you’re aiming for high capacity storage with advanced RAID configurations. Also, make sure to take into account energy consumption, software licenses, labor and IT costs, and maintenance costs.

6. Vendor Support and Warranty

One of the often ignored and underestimated parts of selecting an enterprise NAS device is the support and warranty provided by the NAS vendors. Enterprise NAS devices are complex pieces of technology. NAS devices, in general, are designed to be user-friendly, but once you’re networking NAS devices on the enterprise level, things get more complex.

When you encounter an issue, addressing the challenges as quickly as possible can mean the difference between prolonged downtime and quick resolution. Of course, this means having in-house IT support, but it’s also absolutely critical to choose an enterprise NAS vendor that provides robust support and a good warranty to ensure the resilience and longevity of your enterprise NAS solution.

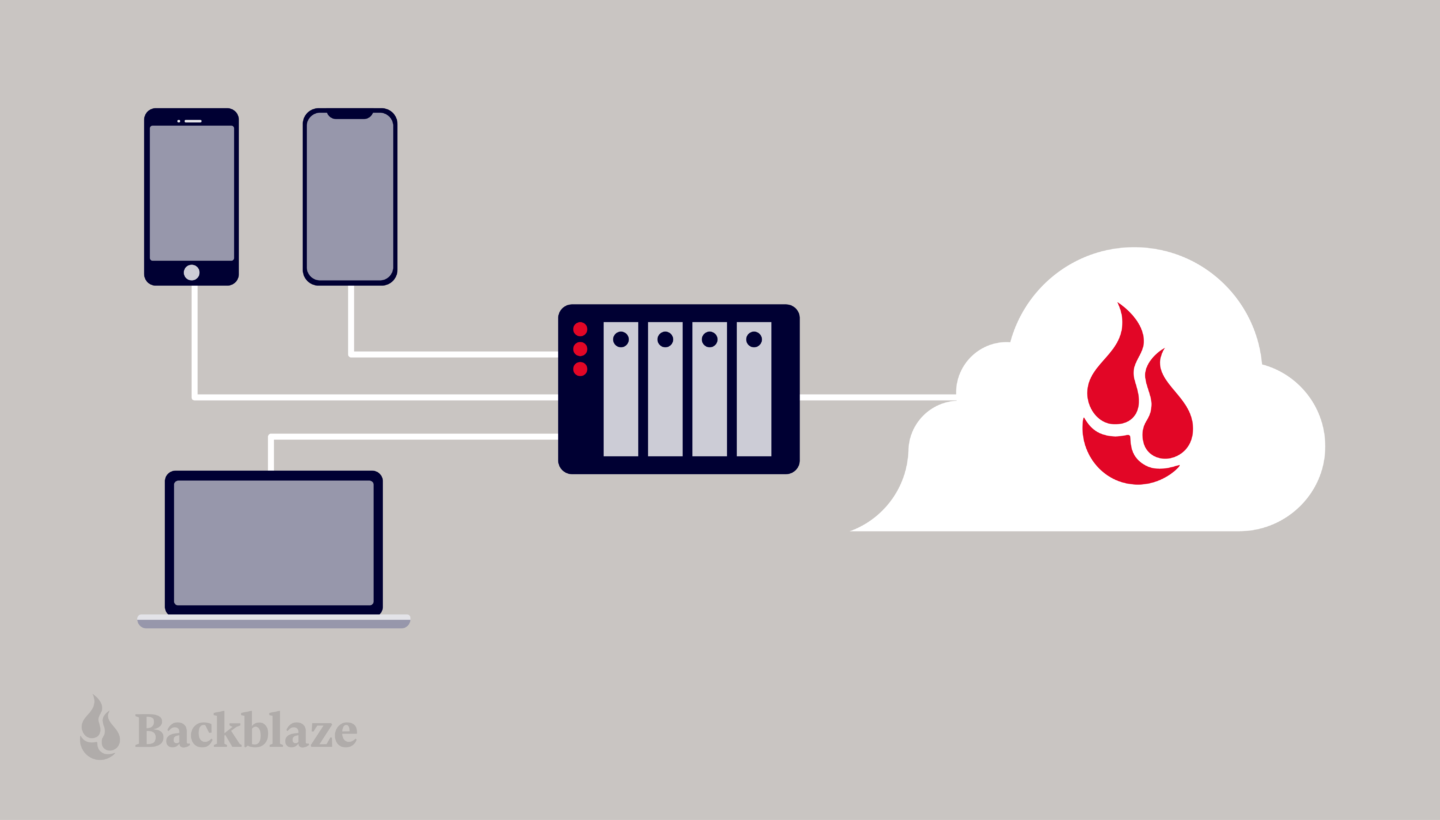
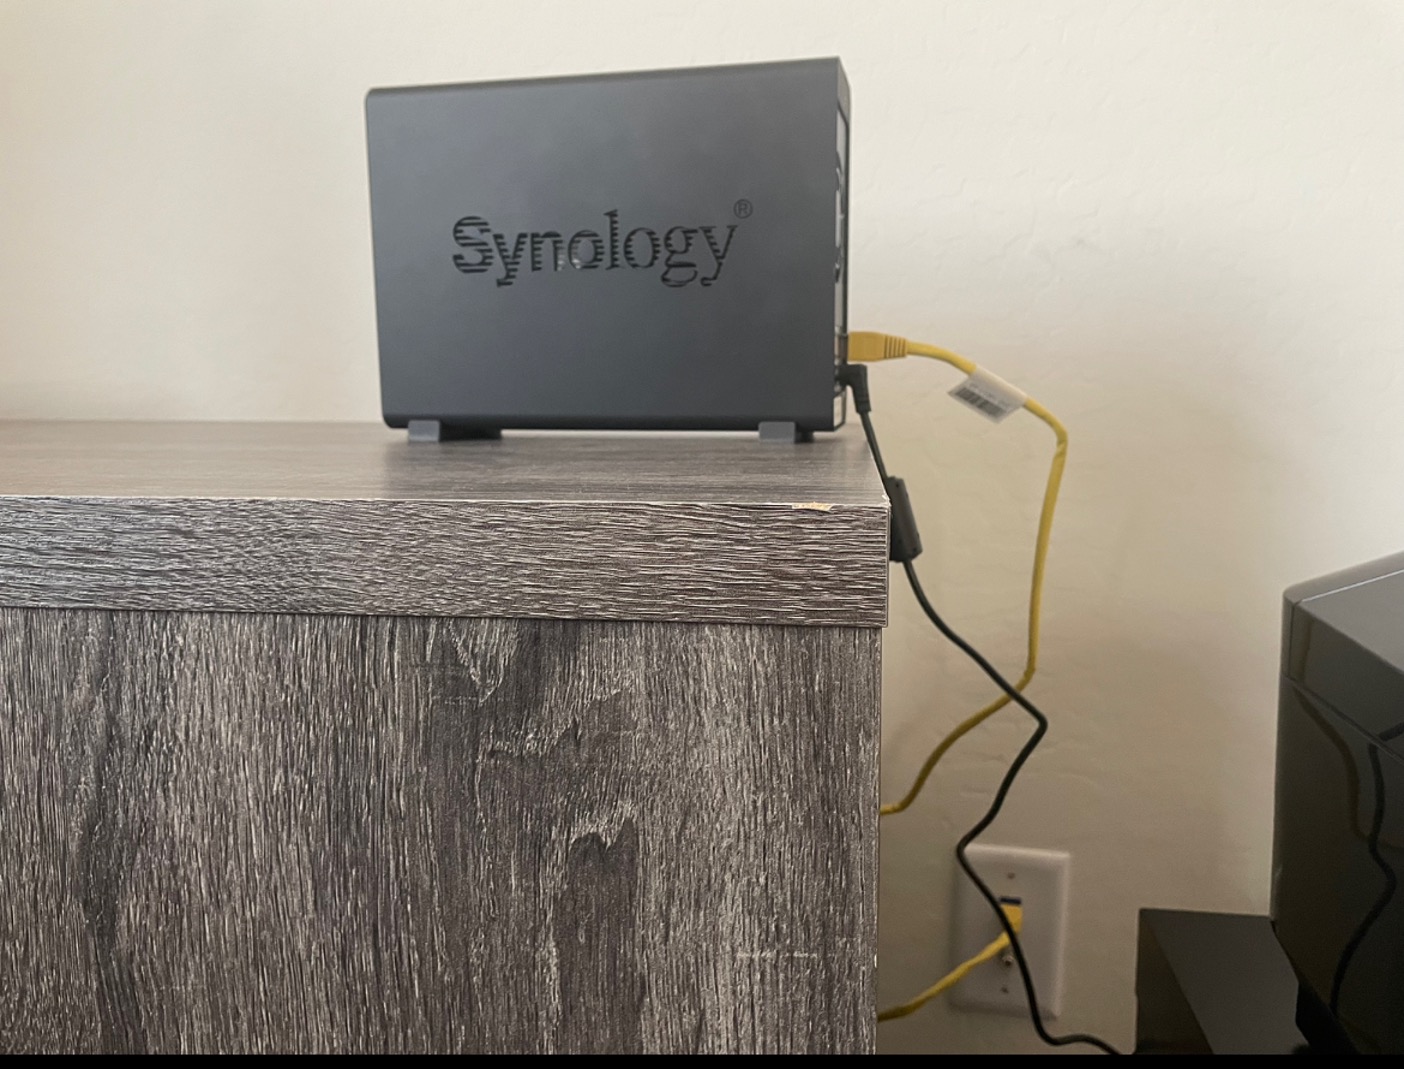
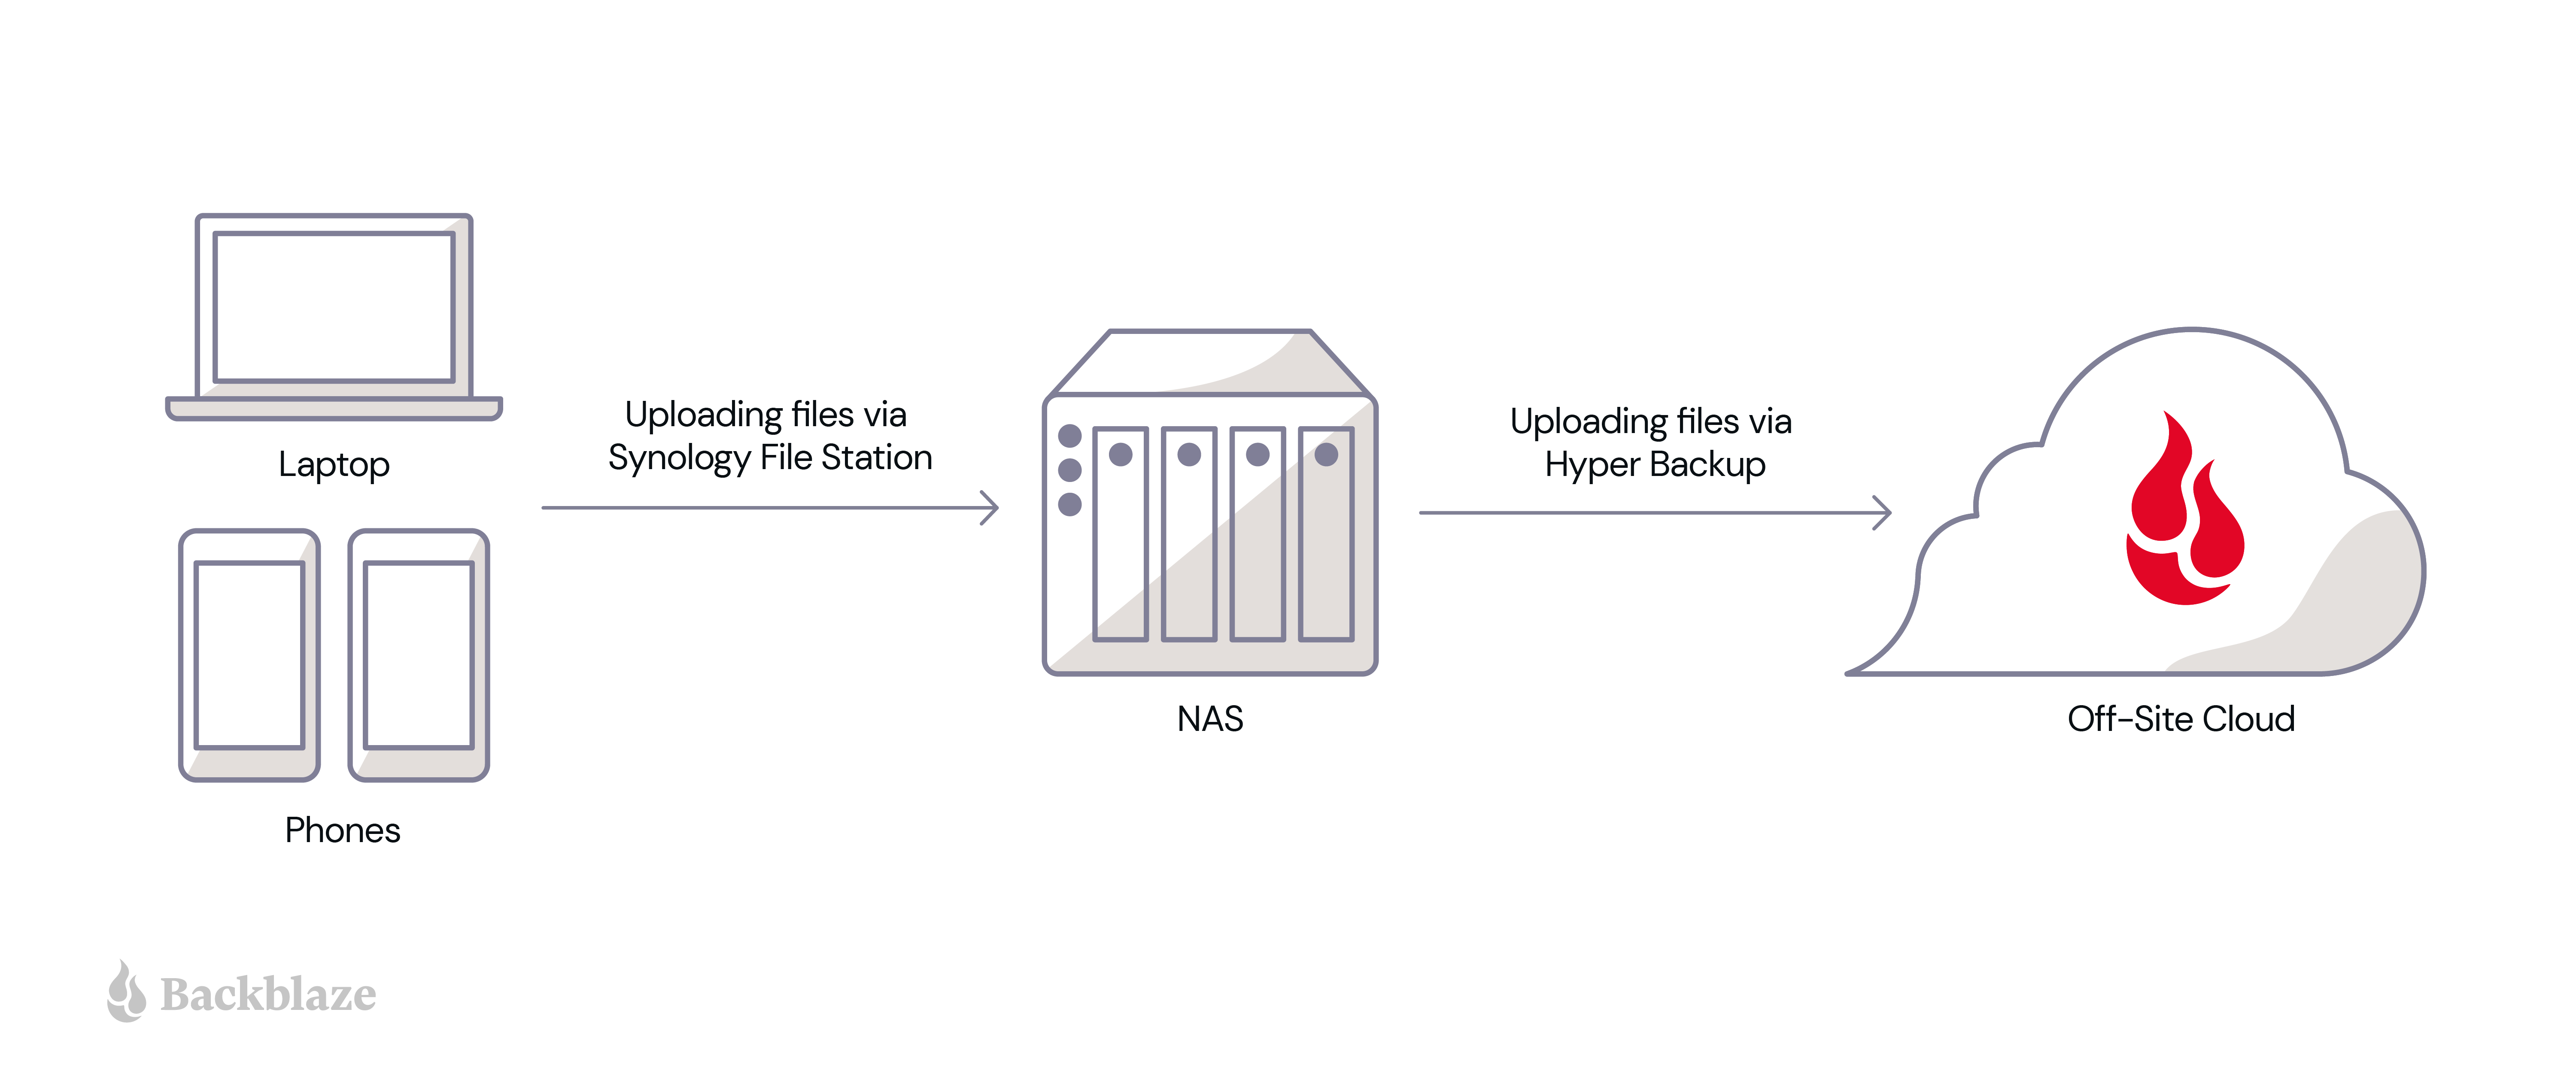
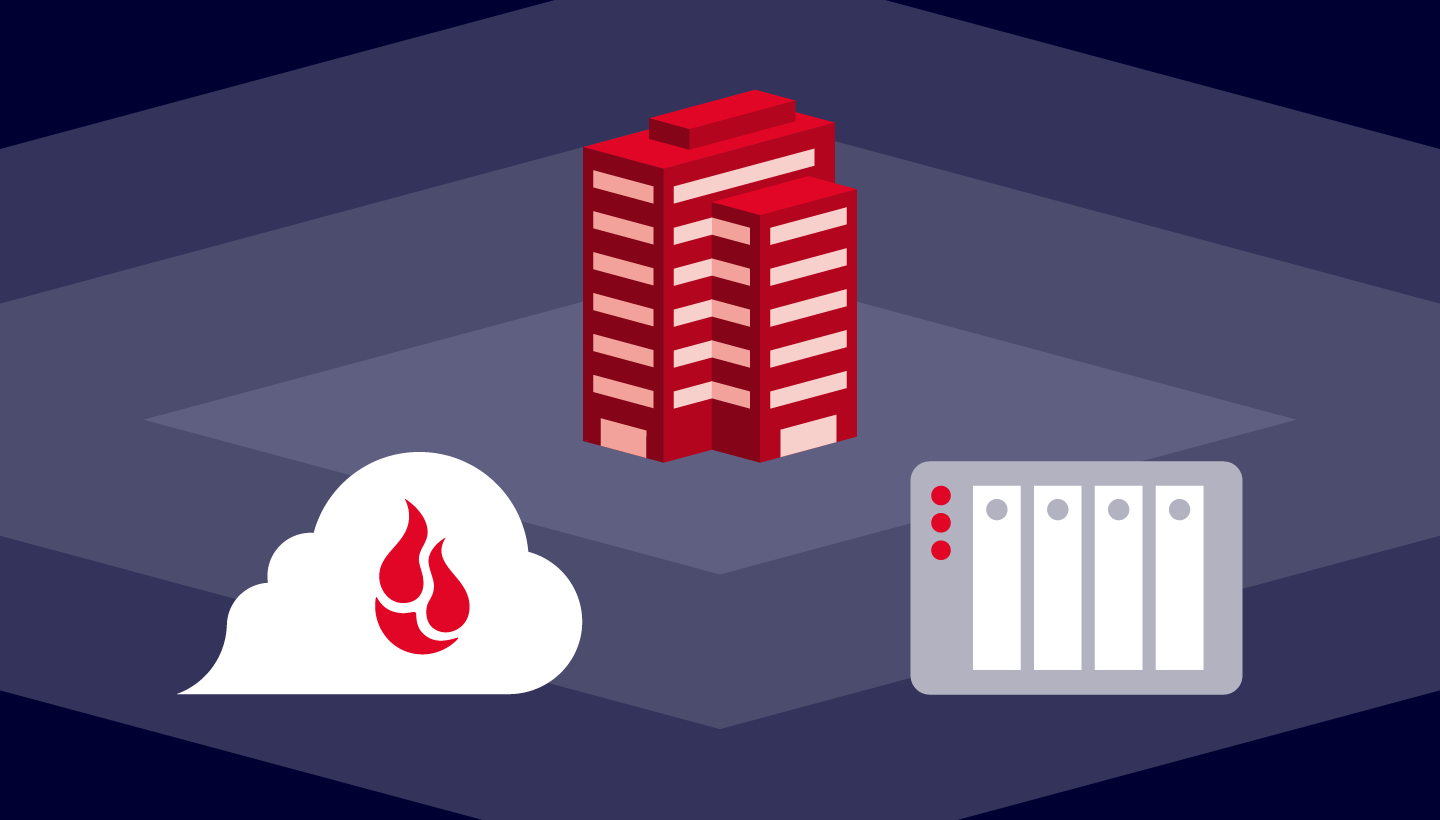
Level Up: Connect Your Enterprise NAS to the Cloud

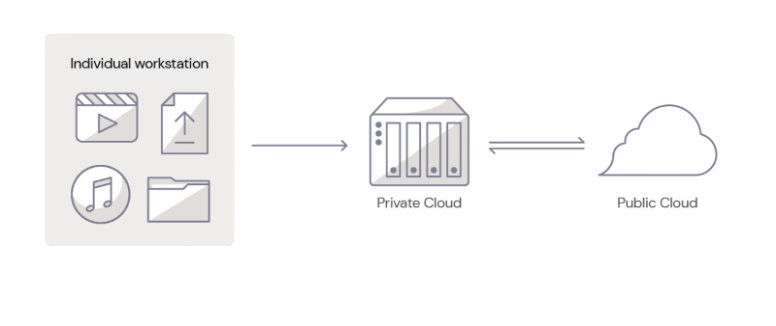
Okay, so you’ve chosen your enterprise NAS and devised your on-site, connected NAS solution. In industry parlance, what you’ve essentially done is to create a private cloud: storage dedicated solely to your organization, but accessible from anywhere. But, if you only have on-site storage, your data is vulnerable to theft, natural disasters, fire, and so on; and, as we mentioned above, you always want to have multiple copies of your data with at least one copy stored off-site.

The easiest way to achieve this is to connect your NAS to a public cloud service provider (CSP) like Backblaze. Make sure that you take into account the location of the CSP’s data centers to ensure that you have adequate geographic separation between your data. And, once connected to a CSP, you can take advantage of services like cloud replication to create yet another redundant copy of your data automatically.

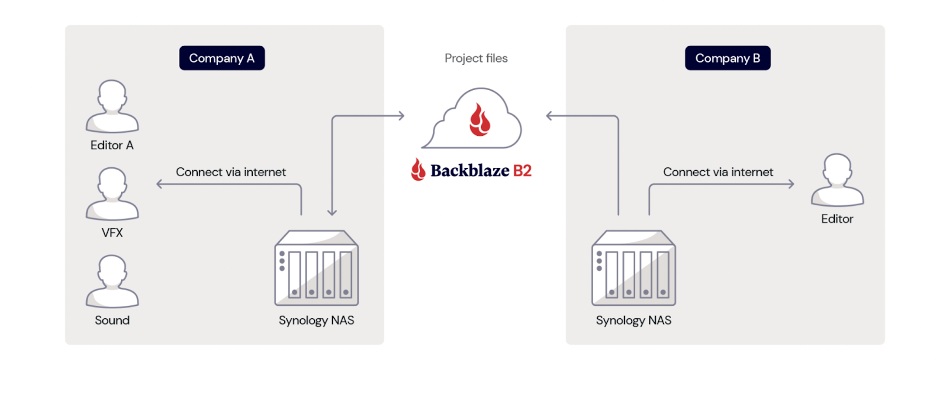
Beyond backups, data storage on your NAS vs. in the cloud can have performance (speed) differences. This has implications on both your internal workflows and your external workflows. Take the use case of a media and entertainment company: when you’re editing files, you’re typically working with large, raw files that take time to transmit. That means that on-site storage can be faster for your team. But, teams have become more remote, and you might be using freelancers.

The great news is that most NAS devices have data management and syncing features, as noted above. A NAS hybrid cloud setup lets your employees or freelancers access remotely. They can access data via cloud storage, and your NAS client takes care of making sure all versions are up-to-date.

Once you have your business’ hybrid cloud setup, then you’ve opened up several opportunities to enhance how you store, manage, and use your data.

  1. Store your data closer to delivery endpoints for faster speeds. If you’re creating, editing, or delivering large files like you would in the media and entertainment industry, the physical location of your data makes a difference to how fast you can deliver it to the end user. Depending on where your endpoints are located and what region you choose, using cloud storage as an active archive allows you to store data closer to delivery endpoints for fast access.
  2. Integrate your NAS device with software as a service (SaaS) tools. In our SaaS landscape, all of our programs are internet-connected, and all of them need to be connected to storage. Many of these tools have their own clouds (like Google Drive or Adobe Creative Cloud) that you can bypass by connecting your own cloud storage account. Your NAS client then has excellent sync tools to keep your files updated as necessary, and, since that file is on your network instead of the tool’s cloud, it will be protected by your backup rules.
  3. Actively strengthen your backups. We’ve talked about the need for geographic separation, and storing in the cloud is the easiest way to do this. (People used to ship tape backups back in the distant past of the 1990s and early 2000s.) You can also set up different rules for your different files. Your primary storage obviously needs to be modifiable, but you can use tools like Object Lock to set immutable rules on your backups as well.
  4. Scale your storage flexibly. One of the biggest challenges of on-site storage is that adding more storage means buying more drives—it’s not an instant solution—and you’re more vulnerable to fluctuations in the supply chain. (Remember the Thailand Drive Crisis?) While you want to plan for future storage needs, cloud storage lets you add more storage immediately should you have unexpected needs.

Sum Up and Get Started

As you can see, having a clear understanding of your business needs is crucial before you build your storage strategy. Choosing an enterprise NAS is not only about getting a device that works now, but one that will continue to serve your business efficiently as your organization grows and evolves. A well thought-out enterprise NAS selection can boost your data management, provide robust data protection, and support your business’s growth goals.

If you have any questions or thoughts, please feel free to share them in the comments.

The post How to Choose the Right Enterprise NAS for Your Business appeared first on Backblaze Blog | Cloud Storage & Cloud Backup.

From Response to Recovery: Developing a Cyber Resilience Framework

Post Syndicated from Kari Rivas original https://www.backblaze.com/blog/from-response-to-recovery-developing-a-cyber-resilience-framework/

A decorative image showing a globe icon surrounded by a search icon, a backup icon, a cog, a shield with a checkmark, and a checklist.

If you’re responsible for securing your company’s data, you’re likely well-acquainted with the basics of backups. You may be following the 3-2-1 rule and may even be using cloud storage for off-site backup of essential data.

But there’s a new model of iterative, process-improvement driven outcomes to improve business continuity, and it’s called cyber resilience. What is cyber resilience and why does it matter to your business? That’s what we’ll talk about today.

Join Us for Our Upcoming Webinar

Learn more about how to strengthen your organization’s cyber resilience by protecting systems, responding to incidents, and recovering with minimal disruption at our upcoming webinar “Build Your Company’s Cyber Resilience: Protect, Respond, and Recover from Security Incidents” on Friday, June 9 at 10 a.m. PT/noon CT.

Join Us June 9 ➔

Plus, see a demo of Instant Business Recovery, an on-demand, fully managed disaster recovery as a service (DRaaS) solution that works seamlessly with Veeam. Deploy and recover via a simple web interface or a phone call to instantly begin recovering critical servers and Veeam backups.

The Case for Cyber Resilience

The advance of artificial intelligence (AI) technologies, geopolitical tensions, and the ever-present threat of ransomware have all fundamentally changed the approach businesses must take to data security. In fact, the White House has prioritized cybersecurity by announcing a new cybersecurity strategy because of the increased risks of cyberattacks and the threat to critical infrastructure. And, according to the World Economic Forum’s Global Cybersecurity Outlook 2023, business continuity (67%) and reputational damage (65%) concern organization leaders more than any other cyber risk.

Cyber resilience assumes that it’s not if a security incident will occur, but when

Being cyber resilient means that a business is able to not only identify threats and protect against them, but also withstand attacks as they’re happening, respond effectively, and bounce back better—so that the business is better fortified against future incidents. 

What Is Cyber Resilience?

Cyber resilience is ultimately a holistic and continuous view of data protection; it implies that businesses can build more robust security practices, embed those throughout the organization, and put processes into place to learn from security threats and incidents in order to continuously shore up defenses. In the cyber resilience model, improving data security is no longer a finite series of checkbox items; it is not something that is ever “done.”

Unlike common backup strategies like 3-2-1 or grandfather-father-son that are well defined and understood, there is no singular model for cyber resilience. The National Institute of Standards and Technology defines cyber resiliency as the ability to anticipate, withstand, recover from, and adapt to incidents that compromise systems. You’ll often see the cyber resilience model depicted in a circular fashion because it is a cycle of continuous improvement. While cyber resilience frameworks may vary slightly from one another, they all typically focus on similar stages, including:

  • Identify: Stay informed about emerging security threats, especially those that your systems are most vulnerable to. Share information throughout the organization when employees need to install critical updates and patches. 
  • Protect: Ensure systems are adequately protected with cybersecurity best practices like multi-factor authentication (MFA), encryption at rest and in transit, and by applying the principle of least privilege. For more information on how to shore up your data protection, including data protected in cloud storage, check out our comprehensive checklist on cyber insurance best practices. Even if you’re not interested in cyber insurance, this checklist still provides a thorough resource for improving your cyber resilience.
  • Detect: Proactively monitor your network and system to ensure you can detect any threats as soon as possible.
  • Respond and Recover: Respond to incidents in the most effective way and ensure you can sustain critical business operations even while an incident is occurring. Plan your recovery in advance so your executive and IT teams are prepared to execute on it when the time comes.
  • Adapt: This is the key part. Run postmortems to understand what happened, what worked and what didn’t, and how it can be prevented in the future. This is how you truly build resilience.

Why Is Cyber Resilience Important?

Traditionally, IT leaders have excelled at thinking through backup strategy, and more and more IT administrators understand the value of next level techniques like using Object Lock to protect copies of data from ransomware. But, it’s less common to give attention to creating a disaster recovery (DR) plan, or thinking through how to ensure business continuity during and after an incident. 

In other words, we’ve been focusing too much on the time before an incident occurs and not enough on time on what to do during and after an incident. Consider the zero trust principle, which assumes that a breach is happening and it’s happening right now: taking such a viewpoint may seem negative, but it’s actually a proactive, not reactive, way to increase your business’ cyber resilience. When you assume you’re under attack, then your responsibility is to prove you’re not, which means actively monitoring your systems—and if you happen to discover that you are under attack, then your cybersecurity readiness measures kick in. 

How Is Cyber Resilience Different From Cybersecurity?

Cybersecurity is a set of practices on what to do before an incident occurs. Cyber resilience asks businesses to think more thoroughly about recovery processes and what comes after. Hence, cybersecurity is a component of cyber resilience, but cyber resilience is a much bigger framework through which to think about your business.

How Can I Improve My Business’ Cyber Resilience?

Besides establishing a sound backup strategy and following cybersecurity best practices, the biggest improvement that data security leaders can make is likely in helping the organization to shift its culture around cyber resilience.

  • Reframe cyber resilience. It is not solely a function of IT. Ensuring business continuity in the face of cyber threats can and should involve operations, legal, compliance, finance teams, and more.
  • Secure executive support now. Don’t wait until an incident occurs. Consider meeting on a regular basis with stakeholders to inform them about potential threats. Present if/then scenarios in terms that executives can understand: impact of risks, potential trade-offs, how incidents might affect customers or external partners, expected costs for mitigation and recovery, and timelines.
  • Practice your disaster recovery scenarios. Your business continuity plans should be run as fire drills. Ensure you have all stakeholders’ emergency/after hours contact information. Run tabletop exercises with any teams that need to be involved and conduct hypothetical retrospectives to determine how you can respond more efficiently if a given incident should occur.

It may seem overwhelming to try and adopt a cyber resiliency framework for your business, but you can start to move your organization in this direction by helping your internal stakeholders first shift their thinking. Acknowledging that a cyber incident will occur is a powerful way to realign priorities and support for data security leaders, and you’ll find that the momentum behind the effort will naturally help advance your security agenda.

Cyber Resilience Resources

Interested in learning more about how to improve business cyber resilience? Check out the free Backblaze resources below.

Looking for Support to Help Achieve Your Cyber Resilience Goals?

Backblaze provides end-to-end security and recovery solutions to ensure you can safeguard your systems with enterprise-grade security, immutability, and options for redundancy, plus fully-managed, on-demand disaster recovery as a service (DRaaS)—all at one-fifth the cost of AWS. Get started today or contact Sales for more information on B2 Reserve, our all-inclusive capacity-based pricing that includes premium support and no egress fees.

The post From Response to Recovery: Developing a Cyber Resilience Framework appeared first on Backblaze Blog | Cloud Storage & Cloud Backup.

Unlocking Media Collaboration: How to Use Hybrid Cloud to Boost Productivity

Post Syndicated from Vinodh Subramanian original https://www.backblaze.com/blog/unlocking-media-collaboration-how-to-use-hybrid-cloud-to-boost-productivity/

A decorative image showing a Synology NAS with various icons representing file types going up into a cloud with a Backblaze logo.

In today’s fast-paced media landscape, efficient collaboration is essential for success. With teams managing large files between geographically dispersed team members on tight deadlines, the need for a robust, flexible storage solution has never been greater. Hybrid cloud storage addresses this need by combining the power of on-premises solutions, like network attached storage (NAS) devices, with cloud storage, creating an ideal setup for enhanced productivity and seamless collaboration. 

In this post, I’ll walk you through some approaches for optimizing media workflows using hybrid cloud storage. You’ll learn how to unlock fast local storage, easy file sharing and collaboration, and enhanced data protection, which are all essential components for success in the media and entertainment industry. 

Plus, we’ll share specific media workflows for different types of collaboration scenarios and practical steps you can take to get started with your hybrid cloud approach today using Synology NAS and Backblaze B2 Cloud Storage as an example.

Common Challenges for Media Teams

Before we explore a hybrid cloud approach that combines NAS devices with cloud storage, let’s first take a look at some of the common challenges media teams face, including:

  • Data storage and accessibility.
  • File sharing and collaboration.
  • Security and data protection.

Data Storage and Accessibility Challenges

It’s no secret that recent data growth has been exponential. This is no different for media files. Cameras are creating larger and higher-quality files. There are more projects to shoot and edit. And editors and team members require immediate access to those files due to the high demand for fresh content.

File Sharing and Collaboration Challenges

Back in 2020, everyone was forced to go remote and the workforce changed. Now you can hire freelancers and vendors from around the world. This means you have to share assets with external contributors, and, in the past, this used to exclusively mean shipping hard drives to said vendors (and sometimes, it can still be necessary). Different contractors, freelancers, and consultants may use different tools and different processes.

Security and Data Protection Challenges

Data security poses unique challenges for media teams due to the industry’s specific requirements including managing large files, storing data on physical devices, and working with remote teams and external stakeholders. The need to protect sensitive information and intellectual property from data breaches, accidental deletions, and device failures adds complexity to data protection initiatives. 

How Does Hybrid Cloud Help Media Teams Solve These Challenges?

As a quick reminder, the hybrid cloud refers to a computing environment that combines the use of both private cloud and public cloud resources to achieve the benefits of each platform.

A private cloud is a dedicated and secure cloud infrastructure designed exclusively for a single tenant or organization. It offers a wide range of benefits to users. With NAS devices, organizations can enjoy centralized storage, ensuring all files are accessible in one location. Additionally, it offers fast local access to files that helps streamline workflows and productivity. 

The public cloud, on the other hand, is a shared cloud infrastructure provided by cloud storage companies like Backblaze. With public cloud, organizations can scale their infrastructure up or down as needed without the up-front capital costs associated with traditional on-premises infrastructure. 

By combining cloud storage with NAS, media teams can create a hybrid cloud solution that offers the best of both worlds. Private local storage on NAS offers fast access to large files while the public cloud securely stores those files in remote servers and keeps them accessible at a reasonable price.

How To Get Started With A Hybrid Cloud Approach

If you’d like to get started with a hybrid cloud approach, using NAS on-premises is an easy entry point. Here are a few tips to help you choose the right NAS device for your data storage and collaboration needs. 

  • Storage Requirements: Begin by assessing your data volume and growth rate to determine how much storage capacity you’ll need. This will help you decide the number of drives required to support your data growth. 
  • Compute Power: Evaluate the NAS device’s processor, controller, and memory to ensure it can handle the workloads and deliver the performance you need for running applications and accessing and sharing files.
  • Network Infrastructure: Consider the network bandwidth, speed, and port support offered by the NAS device. A device with faster network connectivity will improve data transfer rates, while multiple ports can facilitate the connection of additional devices.
  • Data Collaboration: Determine your requirements for remote access, sync direction, and security needs. Look for a NAS device that provides secure remote access options, and supports the desired sync direction (one-way or two-way) while offering data protection features such as encryption, user authentication, and access controls. 

By carefully reviewing these factors, you can choose a NAS device that meets your storage, performance, network, and security needs. If you’d like additional help choosing the right NAS device, download our complete NAS Buyer’s Guide. 

Download the Guide ➔

Real-World Examples: Using Synology NAS + Backblaze B2

Let’s explore a hybrid cloud use case. To discuss specific media workflows for different types of collaboration scenarios, we’re going to use Synology NAS as the private cloud and Backblaze B2 Cloud Storage as the public cloud as examples in the rest of this article. 

Scenario 1: Working With Distributed Teams Across Locations

In the first scenario, let’s assume your organization has two different locations with your teams working from both locations. Your video editors work in one office, while a separate editorial team responsible for final reviews operates from the second location. 

To facilitate seamless collaboration, you can install a Synology NAS device at both locations and connect them to Backblaze B2 using Cloud Sync. 

Here’s a video guide that demonstrates how to synchronize Synology NAS to Backblaze B2 using cloud sync.

This hybrid cloud setup allows for fast local access, easy file sharing, and real-time synchronization between the two locations, ensuring that any changes made at one site are automatically updated in the cloud and mirrored at the other site.

Scenario 2: Working With Distributed Teams

In this second scenario, you have teams working on your projects from different regions, let’s say the U.S. and Europe. Downloading files from different parts of the world can be time-consuming, causing delays and impacting productivity. To solve this, you can use Backblaze B2 Cloud Replication. This allows you to replicate your data automatically from your source bucket (U.S. West) to a destination bucket (EU Central). 

Source files can be uploaded into B2 Bucket on the U.S. West region. These files are then replicated to the EU Central region so you can move data closer to your team in Europe for faster access. Vendors and teams in Europe can configure their Synology NAS devices with Cloud Sync to automatically sync with the replicated files in the EU Central data center.

Scenario 3: Working With Freelancers

In both scenarios discussed so far, file exchanges can occur between different companies or within the same company across various regions of the world. However, not everyone has access to these resources. Freelancers make up a huge part of the media and entertainment workforce, and not every one of them has a Synology NAS device. 

But that’s not a problem! 

In this case, you can still use a Synology NAS to upload your project files and sync them with your Backblaze B2 Bucket. Instead of syncing to another NAS or replicating to a different region, freelancers can access the files in your Backblaze B2 Bucket using third-party tools like Cyberduck

This approach allows anyone with an internet connection and the appropriate access keys to access the required files instantly without needing to have a NAS device.

Scenario 4: Working With Vendors

In this final scenario, which is similar to the first one, you collaborate with another company or vendor located elsewhere instead of working with your internal team. Both parties can install their own Synology NAS device at their respective locations, ensuring centralized access, fast local access, and easy file sharing and collaboration. 

The two NAS devices are then connected to a Backblaze B2 Bucket using Cloud Sync, allowing for seamless synchronization of files and data between the two companies.

Whenever changes are made to files by one company, the updated files are automatically synced to Backblaze B2 and subsequently to the other company’s Synology NAS device. This real-time synchronization ensures that both companies have access to the latest versions of the files, allowing for increased efficiency and collaboration. 

Making Hybrid Cloud Work for Your Production Team

As you can see, there are several different ways you can move your media files around and get them in the hands of the right people—be it another one of your offices, vendors, or freelancers. The four scenarios discussed here are just a few common media workflows. You may or may not have the same scenario. Regardless, a hybrid cloud approach provides you with all the tools you need to customize your workflow to best suit your media collaboration needs.

Ready to Get Started?

With Backblaze B2’s pre-built integration with Synology NAS’s Cloud Sync, getting started with your hybrid cloud approach using Synology NAS and Backblaze B2 is simple and straightforward. Check out our guide, or watch the video below as Pat Patterson, Backblaze Chief Technical Evangelist, walks through how to get your Synology NAS data into B2 Cloud Storage in under 10 minutes using Cloud Sync.

Your first step is creating an account.

In addition to Synology NAS, Backblaze B2 Cloud Storage integrates seamlessly with other NAS devices such as Asustor, Ctera, Dell Isilon, iOsafe, Morro Data, OWC JellyFish, Panzura, QNAP, TrueNAS, and more. Regardless of which NAS device you use, getting started with a hybrid cloud approach is simple and straightforward with Backblaze B2.

Hybrid Cloud Unlocks Collaboration and Productivity for Media Teams

Easing collaboration and boosting productivity in today’s fast-paced digital landscape is vital for media teams. By leveraging a hybrid cloud storage solution that combines the power of NAS devices with the flexibility of cloud storage, organizations can create an efficient, scalable, and secure solution for managing their media assets. 

This approach not only addresses storage capacity and accessibility challenges, but also simplifies file sharing and collaboration, while ensuring data protection and security. Whether you’re working within your team from different locations, collaborating with external partners, or freelancers, a hybrid cloud solution offers a seamless, cost-effective, and high-performance solution to optimize your media workflows and enhance productivity in the ever-evolving world of media and entertainment. 

We’d love to hear about other different media workflow scenarios. Share with us how you collaborate with your media teams and vendors in the comments below. 

The post Unlocking Media Collaboration: How to Use Hybrid Cloud to Boost Productivity appeared first on Backblaze Blog | Cloud Storage & Cloud Backup.

6 Cybersecurity Strategies to Help Protect Your Small Business in 2023

Post Syndicated from Molly Clancy original https://www.backblaze.com/blog/6-cybersecurity-strategies-to-help-protect-your-small-business-in-2023/

Cybersecurity is a major concern for individuals as well as small businesses, and there are several strategies bad actors use to exploit small businesses and their employees. In fact, around 60% of small businesses that experienced a data breach were forced to close their doors within six months of being hacked. 

From monitoring your network endpoints to routinely educating your employees, there are several proactive steps you can take to protect against cyber attacks. In this article, we’ll share six cybersecurity protection strategies to help protect your small business.

1. Implement Layered Security

According to the FBI’s Internet Crime Report, the cost of cybercrimes to small businesses reached $2.4 billion in 2021. Yet, many small business owners believe they are not in danger of an attack. Robust and layered security allows small businesses to contend with the barrage of hackers after their information.

According to IBM, there four main layers of security need to be addressed:

  1. System Level Security. This is the security of the system you are using. For instance, many systems require a password to access their files. 
  2. Network Level Security. This layer is where the system connects to the internet. Typically, a firewall is used to filter network traffic and halt suspicious activity
  3. Application Level Security. Security is needed for any applications you choose to use to run your business, and should include safeguards for both the internal and the client side. 
  4. Transmission Level Security. Data when it travels from network to network also needs to be protected. Virtual private networks (VPNs) can be used to safeguard information.

As a business, you should always operate on the principle of least privilege. This ensures that access at each of these levels of security is limited to only those necessary to do the task at hand and reduces the potential for breaches. It also can “limit the blast radius” in the event of a breach.

The Human Element: Employee Training Is Your First Defense

The most common forms of cyberattack leverage social engineering, particularly in phishing attacks. This means that they target employees, often during busy times of the year, and attempt to gain their trust and get them to lower their guard. Training employees to spot potential phishing red flags—like incorrect domains, misspelling information, and falsely urgent requests—is a powerful tool in your arsenal.

Additionally, you’ll note that most of the things on this list just don’t work unless your employees understand how, why, and when to use them. In short, an educated staff is your best defense against cyberattacks.

2. Use Multi-Factor Authentication

Multi-factor authentication (MFA) has become increasingly common, and many organizations now require it. So what is it? Multi-factor authentication requires at least two different forms of user verification to access a program, system, or application. Generally, a user must input their password. Then, they will be prompted to enter a code they receive via email or text. Push notifications may substitute email or text codes, while biometrics like fingerprints can substitute a password. 

The second step prevents unauthorized users from gaining entry even if login credentials have been compromised. Moreover, the code or push notification alerts the user of a potential breach—if you receive a notification when you did not initiate a login attempt, then you know your account has a vulnerability. 

3. Make Sure Your Tech Stack Is Configured Properly

When systems are misconfigured, they are vulnerable. Some examples of misconfiguration are when passwords are left as their system default, software is outdated, or security settings are not properly enabled. As businesses scale and upgrade their tools, they naturally add more complexity to their tech stacks. 

It’s important to run regular audits to make sure that IT best practices are being followed, and to make sure that all of your tools are working in harmony. (Bonus: regular audits of this type can result in OpEx savings since you may identify tools you no longer use in the process.)

4. Encrypt Your Data

Encryption uses an algorithm to apply a cipher to your data. The most commonly used algorithm is known as Advanced Encryption Standard (AES). AES can be used in authenticating website servers from both the server end and the client end, as well as to encrypt transferred files between users. This can also be extended to include digital documents, messaging histories, and so on. Using encryption is often necessary to meet compliance standards, some of which are stricter based on your or your customers’ geographic location or industry

Once it’s encrypted properly, data can only be accessed with an encryption key. There are two main types of encryption key: symmetric (private) and asymmetric (public).

Symmetric (Private) Encryption Keys

In this model, you use one key to both encode and decode your data. This means that it’s particularly important to keep this key secret—if it were obtained by a bad actor, they could use it to decrypt your data.

Asymmetric (Public) Encryption Keys

Using this method, you use one key to encrypt your data and another to decrypt it. You then make the decryption key public. This is a widely-used method, and makes internet security protocols like SSL and HTTPS possible.

Server Side Encryption (SSE)

Some providers are now offering a service known as server side encryption (SSE). SSE encrypts your data as it is stored, so stolen data is unable to be read or viewed, and even your data storage provider doesn’t have access to sensitive client information.  To make data even more secure when stored, you can also make it immutable by enabling Object Lock. This means you can set periods of time that the data cannot be changed—even by those who set the object lock rules. 

Combined with SSE, you can see how it would be key to protecting against a ransomware attack: Cyberattackers may access data, but it would be difficult to decrypt with SSE, and with object lock, they wouldn’t be able to delete or modify data.

5. Have a Breach Plan

Unfortunately, as cybercrime has increased, breaches have become nearly inevitable. To mitigate damage, it is paramount to have a disaster recovery (DR) plan in place. 

This plan starts with robust and layered security. For example, a cybercriminal may gain a user’s login information, but having MFA enabled would help ensure that they don’t gain access to the account. Or, if they do gain access to an account, by operating on the principle of least privilege, you have limited the amount of information the user can access or breach. Finally, if they do gain access to your data, SSE and Object Lock can prevent sensitive data from being read, modified, or deleted. 

Hopefully, you’ve set things up so that you have all the protections you need in place before an attack, but once you’re or in the midst of an attack (or you’ve discovered a previous breach), it’s important that everyone knows what to do. Here are a few best practices to help you develop your DR plan:

Back Up Regularly and Test Your Backups

The most important thing to do is to make sure that you can reconstitute your data to continue business operations as normal—and that means that you have a solid backup plan in place, and that you’ve tested your backups and your DR plan ahead of time.

Establish Procedures for Immediate Action

First and foremost, employees should immediately inform IT of suspicious activity. The old adage “if you see something, say something,” very much applies to security. And, there should also be clear discovery and escalation procedures in effect to both evaluate and address the incident. 

Change Credentials and Monitor Accounts

Next, it is crucial to change all passwords, and identify where and how the issue occurred. Each issue is unique, so this step takes careful information gathering. Having monitoring tools set up in advance of a breach will help you gain insight into what happened.

Support Employees

It may sound out of place to consider this, but given that employees are your first line of defense and the most targeted security vulnerability, there is a measurable impact from the stress of ransomware attacks. Once the dust has settled and your business is back online, good recovery includes both insightful and responsive training as well as employee support.

Is Cyber Insurance Worth It?

You may want to consider cyber insurance as you’re thinking through different disaster recovery scenarios. Cyber insurance is still a growing field, and it can cover things like your legal fees, business expenses related to recovery, and potential liability costs. Still, even the process of preparing your business for cyber insurance coverage can be beneficial to improving your business’ overall security procedures.

6. Use Trusted Services

Every business needs to rely on other businesses to operate smoothly, but it can also expose your business to risk if you don’t perform your due diligence. Whether it is a credit card processor, bank, supplier, or another support, you will need to select reliable, reputable, and businesses that also employ good security practices. Evaluating new tools should be a multi-faceted process that engages teams with different expertises, including the stakeholder teams, security, IT, finance, and anyone else who you deem appropriate. 

And, remember that more tools are being created all the time! Often, they make things easier on employees while also solving security conundrums. Some good examples are single sign on (SSO) services, password management tools, specialized vendors that evaluate harmful links, automatic workstation backup that runs in the background, and more. Staying up-to-date on the new frontier of tools can solve long-standing problems in innovative ways.

Cybersecurity Is An Ongoing Process

The prevalence of cyber crime means it is not a matter of if a breach will happen, but when a breach will happen. These prevention measures can reduce your risk of becoming the victim of a successful attack, but you should still be prepared for when one occurs. 

Bear in mind, cybersecurity is an ongoing process. Your strategies will need to be reviewed routinely, passwords need to be changed, and software and systems will need to be updated. Lastly, knowing what types of scams are prevalent and their signs will help keep you, your business, your employees, and your clients safe.

The post 6 Cybersecurity Strategies to Help Protect Your Small Business in 2023 appeared first on Backblaze Blog | Cloud Storage & Cloud Backup.

The Free Credit Trap: Building SaaS Infrastructure for Long-Term Sustainability

Post Syndicated from Amrit Singh original https://www.backblaze.com/blog/the-free-credit-trap-building-saas-infrastructure-for-long-term-sustainability/

In today’s economic climate, cost cutting is on everyone’s mind, and businesses are doing everything they can to save money. But, it’s equally important that they can’t afford to compromise the integrity of their infrastructure or the quality of the customer experience. As a startup, taking advantage of free cloud credits from cloud providers like Amazon AWS, especially at a time like this, seems enticing. 

Using those credits can make sense, but it takes more planning than you might think to use them in a way that allows you to continue managing cloud costs once the credits run out. 

In this blog post, I’ll walk through common use cases for credit programs, the risks of using credits, and alternatives that help you balance growth and cloud costs.

The True Cost of “Free”

This post is part of a series exploring free cloud credits and the hidden complexities and limitations that come with these offers. Check out our previous installments:

The Shift to Cloud 3.0

As we see it, there have been three stages of “The Cloud” in its history:

Phase 1: What is the Cloud?

Starting around when Backblaze was founded in 2007, the public cloud was in its infancy. Most people weren’t clear on what cloud computing was or if it was going to take root. Businesses were asking themselves, “What is the cloud and how will it work with my business?”

Phase 2: Cloud = Amazon Web Services

Fast forward to 10 years later, and AWS and “The Cloud” started to become synonymous. Amazon had nearly 50% of market share of public cloud services, more than Microsoft, Google, and IBM combined. “The Cloud” was well-established, and for most folks, the cloud was AWS.

Phase 3: Multi-Cloud

Today, we’re in Phase 3 of the cloud. “The Cloud” of today is defined by the open, multi-cloud internet. Traditional cloud vendors are expensive, complicated, and seek to lock customers into their walled gardens. Customers have come to realize that (see below) and to value the benefits they can get from moving away from a model that demands exclusivity in cloud infrastructure.

An image displaying a Tweet from user Philo Hermans @Philo01 that says 

I migrated most infrastructure away from AWS. Now that I think about it, those AWS credits are a well-designed trap to create a vendor lock in, and once your credits expire and you notice the actual cost, chances are you are in shock and stuck at the same time (laughing emoji).
Source.

In Cloud Phase 3.0, companies are looking to reign in spending, and are increasingly seeking specialized cloud providers offering affordable, best-of-breed services without sacrificing speed and performance. How do you balance that with the draw of free credits? I’ll get into that next, and the two are far from mutually exclusive.

Getting Hooked on Credits: Common Use Cases

So, you have $100k in free cloud credits from AWS. What do you do with them? Well, in our experience, there are a wide range of use cases for credits, including:

  • App development and testing: Teams may leverage credits to run an app development proof of concept (PoC) utilizing Amazon EC2, RDS, and S3 for compute, database, and storage needs, for example, but without understanding how these will scale in the longer term, there may be risks involved. Spinning up EC2 instances can quickly lead to burning through your credits and getting hit with an unexpected bill.
  • Machine learning (ML): Machine learning models require huge amounts of computing power and storage. Free cloud credits might be a good way to start, but you can expect them to quickly run out if you’re using them for this use case. 
  • Data analytics: While free cloud credits may cover storage and computing resources, data transfer costs might still apply. Analyzing large volumes of data or frequently transferring data in and out of the cloud can lead to unexpected expenses.
  • Website hosting: Hosting your website with free cloud credits can eliminate the up front infrastructure spend and provide an entry point into the cloud, but remember that when the credits expire, traffic spikes you should be celebrating can crater your bottom line.
  • Backup and disaster recovery: Free cloud credits may have restrictions on data retention, limiting the duration for which backups can be stored. This can pose challenges for organizations requiring long-term data retention for compliance or disaster recovery purposes.

All of this is to say: Proper configuration, long-term management and upkeep, and cost optimization all play a role on how you scale on monolith platforms. It is important to note that the risks and benefits mentioned above are general considerations, and specific terms and conditions may vary depending on the cloud service provider and the details of their free credit offerings. It’s crucial to thoroughly review the terms and plan accordingly to maximize the benefits and mitigate the risks associated with free cloud credits for each specific use case. (And, given the complicated pricing structures we mentioned before, that might take some effort.)

Monument Uses Free Credits Wisely

Monument, a photo management service with a strong focus on security and privacy, utilized free startup credits from AWS. But, they knew free credits wouldn’t last forever. Monument’s co-founder, Ercan Erciyes, realized they’d ultimately lose money if they built the infrastructure for Monument Cloud on AWS.

He also didn’t want to accumulate tech debt and become locked in to AWS. Rather than using the credits to build a minimum viable product as fast as humanly possible, he used the credits to develop the AI model, but not to build their infrastructure. Read more about how they put AWS credits to use while building infrastructure that could scale as they grew.

➔ Read More

The Risks of AWS Credits: Lessons from Founders

If you’re handed $100,000 in credits, it’s crucial to be aware of the risks and implications that come along with it. While it may seem like an exciting opportunity to explore the capabilities of the cloud without immediate financial constraints, there are several factors to consider:

  1. The temptation to overspend: With a credit balance at your disposal just waiting to be spent, there is a possibility of underestimating the actual costs of your cloud usage. This can lead to a scenario where you inadvertently exhaust the credits sooner than anticipated, leaving you with unexpected expenses that may strain your budget.
  2. The shock of high bills once credits expire: Without proper planning and monitoring of your cloud usage, the transition from “free” to paying for services can result in high bills that catch you off guard. It is essential to closely track your cloud usage throughout the credit period and have a clear understanding of the costs associated with the services you’re utilizing. Or better yet, use those credits for a discrete project to test your PoC or develop your minimum viable product, and plan to build your long-term infrastructure elsewhere.
  3. The risk of vendor lock-in: As you build and deploy your infrastructure within a specific cloud provider’s ecosystem, the process of migrating to an alternative provider can seem complex and can definitely be costly (shameless plug: at Backblaze, we’ll cover your migration over 50TB). Vendor lock-in can limit your flexibility, making it challenging to adapt to changing business needs or take advantage of cost-saving opportunities in the future.

The problems are nothing new for founders, as the online conversation bears out.

First, there’s the old surprise bill:

A Tweet from user Ajul Sahul @anjuls that says 

Similar story, AWS provided us free credits so we though we will use it for some data processing tasks. The credit expired after one year and team forgot about the abandoned resources to give a surprise bill. Cloud governance is super importance right from the start.
Source.

Even with some optimization, AWS cloud spend can still be pretty “obscene” as this user vividly shows:

A Tweet from user DHH @dhh that says 

We spent $3,201,564.24 on cloud in 2022 at @37signals, mostly AWS. $907,837.83 on S3. $473,196.30 on RDS. $519,959.60 on OpenSearch. $123,852.30 on Elasticache. This is with long commits (S3 for 4 years!!), reserved instances, etc. Just obscene. Will publish full accounting soon.
Source.

There’s the founder raising rounds just to pay AWS bills:

A Tweet from user Guille Ojeda @itsguilleojeda that says 

Tech first startups raise their first rounds to pay AWS bills. By the way, there's free credits, in case you didn't know. Up to $100k. And you'll still need funding.
Source.

Some use the surprise bill as motivation to get paying customers.

Lastly, there’s the comic relief:

A tweet from user Mrinal Wahal @MrinalWahal that reads 

Yeah high credit card bills are scary but have you forgotten turning off your AWS instances?
Source.

Strategies for Balancing Growth and Cloud Costs

Where does that leave you today? Here are some best practices startups and early founders can implement to balance growth and cloud costs:

  1. Establishing a cloud cost management plan early on.
  2. Monitoring and optimizing cloud usage to avoid wasted resources.
  3. Leveraging multiple cloud providers.
  4. Moving to a new cloud provider altogether.
  5. Setting aside some of your credits for the migration.

1. Establishing a Cloud Cost Management Plan

Put some time into creating a well-thought-out cloud cost management strategy from the beginning. This includes closely monitoring your usage, optimizing resource allocation, and planning for the expiration of credits to ensure a smooth transition. By understanding the risks involved and proactively managing your cloud usage, you can maximize the benefits of the credits while minimizing potential financial setbacks and vendor lock-in concerns.

2. Monitoring and Optimizing Cloud Usage

Monitoring and optimizing cloud usage plays a vital role in avoiding wasted resources and controlling costs. By regularly analyzing usage patterns, organizations can identify opportunities to right-size resources, adopt automation to reduce idle time, and leverage cost-effective pricing options. Effective monitoring and optimization ensure that businesses are only paying for the resources they truly need, maximizing cost efficiency while maintaining the necessary levels of performance and scalability.

3. Leveraging Multiple Cloud Providers

By adopting a multi-cloud strategy, businesses can diversify their cloud infrastructure and services across different providers. This allows them to benefit from each provider’s unique offerings, such as specialized services, geographical coverage, or pricing models. Additionally, it provides a layer of protection against potential service disruptions or price increases from a single provider. Adopting a multi-cloud approach requires careful planning and management to ensure compatibility, data integration, and consistent security measures across multiple platforms. However, it offers the flexibility to choose the best-fit cloud services from different providers, reducing dependency on a single vendor and enabling businesses to optimize costs while harnessing the capabilities of various cloud platforms.

4. Moving to a New Cloud Provider Altogether

If you’re already deeply invested in a major cloud platform, shifting away can seem cumbersome, but there may be long-term benefits that outweigh the short term “pains” (this leads into the shift to Cloud 3.0). The process could involve re-architecting applications, migrating data, and retraining personnel on the new platform. However, factors such as pricing models, performance, scalability, or access to specialized services may win out in the end. It’s worth noting that many specialized providers have taken measures to “ease the pain” and make the transition away from AWS more seamless without overhauling code. For example, at Backblaze, we developed an S3 compatible API so switching providers is as simple as dropping in a new storage target.

5. Setting Aside Credits for the Migration

By setting aside credits for future migration, businesses can ensure they have the necessary resources to transition to a different provider without incurring significant up front expenses like egress fees to transfer large data sets. This strategic allocation of credits allows organizations to explore alternative cloud platforms, evaluate their pricing models, and assess the cost-effectiveness of migrating their infrastructure and services without worrying about being able to afford the migration.

Welcome to Cloud 3.0: Alternatives to AWS

In 2022, David Heinemeier Hansson, the creator of Basecamp and Hey, announced that he was moving Hey’s infrastructure from AWS to on-premises. Hansson cited the high cost of AWS as one of the reasons for the move. His estimate? “We stand to save $7m over five years from our cloud exit,” he said.  

Going back to on-premises solutions is certainly one answer to the problem of AWS bills. In fact, when we started designing Backblaze’s Personal Backup solution, we were faced with the same problem. Hosting data storage for our computer backup product on AWS was a non-starter—it was going to be too expensive, and our business wouldn’t be able to deliver a reasonable consumer price point and be solvent. So, we didn’t just invest in on-premises resources: We built our own Storage Pods, the first evolution of the Backblaze Storage Cloud. 

But, moving back to on-premises solutions isn’t the only answer—it’s just the only answer if it’s 2007 and your two options are AWS and on-premises solutions. The cloud environment as it exists today has better choices. We’ve now grown that collection of Storage Pods into the Backblaze B2 Storage Cloud, which delivers performant, interoperable storage at one-fifth the cost of AWS. And, we offer free egress to our content delivery network (CDN) and compute partners. Backblaze may provide an even more cost-effective solution for mid-sized SaaS startups looking to save on cloud costs while maintaining speed and performance.

As we transition to Cloud 3.0 in 2023 and beyond, companies are expected to undergo a shift, reevaluating their cloud spending to ensure long-term sustainability and directing saved funds into other critical areas of their businesses. The age of limited choices is over. The age of customizable cloud integration is here. 

So, shout out to David Heinemeier Hansson: We’d love to chat about your storage bills some time.

Want to Test It Yourself?

Take a proactive approach to cloud cost management: If you’ve got more than 50TB of data storage or want to check out our capacity-based pricing model, B2 Reserve, contact our Sales Team to test a PoC for free with Backblaze B2.

And, for the streamlined, self–serve option, all you need is an email to get started today.

FAQs About Cloud Spend

If you’re thinking about moving to Backblaze B2 after taking AWS credits, but you’re not sure if it’s right for you, we’ve put together some frequently asked questions that folks have shared with us before their migrations:

My cloud credits are running out. What should I do?

Backblaze’s Universal Data Migration service can help you off-load some of your data to Backblaze B2 for free. Speak with a migration expert today.

AWS has all of the services I need, and Backblaze only offers storage. What about the other services I need?

Shifting away from AWS doesn’t mean ditching the workflows you have already set up. You can migrate some of your data storage while keeping some on AWS or continuing to use other AWS services. Moreover, AWS may be overkill for small to midsize SaaS businesses with limited resources.

How should I approach a migration?

Identify the specific services and functionalities that your applications and systems require, such as CDN for content delivery or compute resources for processing tasks. Check out our partner ecosystem to identify other independent cloud providers that offer the services you need at a lower cost than AWS.

What CDN partners does Backblaze have?

With the ease of use, predictable pricing, zero egress, our joint solutions are perfect for businesses looking to reduce their IT costs, improve their operational efficiency, and increase their competitive advantage in the market. Our CDN partners include Fastly, bunny.net, and Cloudflare. And, we extend free egress to joint customers.

What compute partners does Backblaze have?

Our compute partners include Vultr and Equinix Metal. You can connect Backblaze B2 Cloud Storage with Vultr’s global compute network to access, store, and scale application data on-demand, at a fraction of the cost of the hyperscalers.

The post The Free Credit Trap: Building SaaS Infrastructure for Long-Term Sustainability appeared first on Backblaze Blog | Cloud Storage & Cloud Backup.

Announcing Instant Business Recovery, a Joint Solution by Continuity Centers

Post Syndicated from Elton Carneiro original https://www.backblaze.com/blog/announcing-instant-business-recovery-a-joint-solution-by-continuity-centers/

Business disruptions can be devastating, as any business owner who has been through one will tell you. This stat isn’t meant to stoke fear, but the Atlas VPN research team found that 31% of businesses in the U.S. are forced to close for a period of time as a consequence of falling victim to ransomware attacks.

It’s likely some, if not most, of those businesses had backups in place. But, having backups alone won’t necessarily save your business if it takes you days or weeks to restore operations from those backups. And true disaster recovery means more than simply having backups and a plan to restore: It means testing that plan regularly to make sure you can bring your business back online.

Today, we’re sharing news of a new disaster recovery service built on Backblaze B2 Cloud Storage that’s aimed to help businesses restore faster and more affordably: Continuity Centers’ Cloud Instant Business Recovery (Cloud IBR) which instantly recovers Veeam backups from the Backblaze B2 Storage Cloud.

Helping Businesses Recover After a Disaster

We launched the first generation version of this solution—Instant Recovery in Any Cloud—in May of 2022 to help businesses complete their disaster recovery playbook. And now, we’re building on that original infrastructure as code (IaC) package, to bring you Cloud IBR.

Cloud IBR is a second generation solution that further simplifies disaster recovery plans. The easy-to-use interface and affordability make Cloud IBR an ideal disaster recovery solution designed for small and medium size businesses (SMBs) who are typically priced out of enterprise-scale disaster recovery solutions.

How Does Cloud IBR Work?

Continuity Centers combines the automation-driven Veeam REST API calls with phoenixNAP Bare Metal Cloud platform into a unified system, and completely streamlines the user experience.

The fully-automated service deploys a recovery process through a simple web UI, and, in the background, uses phoenixNAP’s Bare Metal Cloud servers to import Veeam backups stored in Backblaze B2 Cloud Storage, and fully restores the customer’s server infrastructure. The solution hides the complexity of dealing with automation scripts and APIs and offers a simple interface to stand up an entire cloud infrastructure when you need it. Best of all, you pay for the service only for the period of time that you need.

Cloud IBR gives small and mid-market companies the highest level of business continuity available, against disasters of all types. It’s a simple and accessible solution for SMBs to embrace. We developed this solution with affordability and availability in mind, so that businesses of all sizes can benefit from our decades of disaster recovery experience, which is often financially out of reach for the SMB.

—Gregory Tellone, CEO of Continuity Centers.

Right-Sized Disaster Recovery

Previously, mid-market businesses were underserved by disaster recovery and business continuity planning because the requirements and efforts to create a disaster recovery (DR) plan are often foregone in favor of more immediate business demands. Additionally, many disaster recovery solutions are designed for larger size companies and do not meet the specific needs for SMBs. Cloud IBR allows businesses of all sizes to instantly stand up their entire server infrastructure in the cloud, at a moment’s notice and with a single click, making it easy to plan for and easy to execute.

Learn more about Cloud IBR at the Cloud IBR website.

Access Cloud IBR Through B2 Reserve

In addition to being a stand-alone offering that can be purchased alongside pay-as-you-go cloud storage, the Cloud IBR Silver Package will be offered at no cost for one year to any Veeam customers that purchase Backblaze through our capacity-based cloud storage packages, B2 Reserve. Those customers can activate Cloud IBR within 30 days of purchasing Backblaze’s B2 Reserve service.

The post Announcing Instant Business Recovery, a Joint Solution by Continuity Centers appeared first on Backblaze Blog | Cloud Storage & Cloud Backup.

A Cyber Insurance Checklist: Learn How to Lower Risk to Better Secure Coverage

Post Syndicated from Kari Rivas original https://www.backblaze.com/blog/a-cyber-insurance-checklist-learn-how-to-lower-risk-to-better-secure-coverage/

A decorative image showing a cyberpig on a laptop with a shield blocking it from accessing a server.

If your business is looking into cyber insurance to protect your bottom line against security incidents, you’re in good company. The global market for cybersecurity insurance is projected to grow from 11.9 billion in 2022 to 29.2 billion by 2027.

But you don’t want to go into buying cyber security insurance blind. We put together this cyber insurance readiness checklist to help you strengthen your cyber resilience stance in order to better secure a policy and possibly a lower premium. (And even if you decide not to pursue cyber insurance, simply following some of these best practices will help you secure your company’s data.)

What is Cyber Insurance?

Cyber insurance is a specialty insurance product that is useful for any size business, but especially those dealing with large amounts of data. Before you buy cyber insurance, it helps to understand some fundamentals. Check out our post on cyber insurance basics to get up to speed.

Once you understand the basic choices available to you when securing a policy, or if you’re already familiar with how cyber insurance works, read on for the checklist.

Cyber Insurance Readiness Checklist

Cybersecurity insurance providers use their questionnaire and assessment period to understand how well-situated your business is to detect, limit, or prevent a cyber attack. They have requirements, and you want to meet those specific criteria to be covered at the most reasonable cost.

Your business is more likely to receive a lower premium if your security infrastructure is sound and you have disaster recovery processes and procedures in place. Though each provider has their own requirements, use the checklist below to familiarize yourself with the kinds of criteria a cyber insurance provider might look for. Any given provider may not ask about or require all these precautions; these are examples of common criteria. Note: Checking these off means your cyber resilience score is attractive to providers, though not a guarantee of coverage or a lower premium.

General Business Security

  • A business continuity/disaster recovery plan that includes a formal incident response plan is in place.
  • There is a designated role, group, or outside vendor responsible for information security.
  • Your company has a written information security policy.
  • Employees must complete social engineering/phishing training.
  • You set up antivirus software and firewalls.
  • You monitor the network in real-time.
  • Company mobile computing devices are encrypted.
  • You use spam and phishing filters for your email client.
  • You require two-factor authentication (2FA) for email, remote access to the network, and privileged user accounts.
  • You have an endpoint detection and response system in place.

Cloud Storage Security

  • Your cloud storage account is 2FA enabled. Note: Backblaze accounts have 2FA via SMS or via authentication apps using ToTP.
  • You encrypt data at rest and in transit. Note: Backblaze B2 provides server-side encryption (encryption at rest), and many of our partner integration tools, like Veeam, MSP360, and Archiware, offer encryption in transit.
  • You follow the 3-2-1 or 3-2-1-1-0 backup strategies and keep an air-gapped copy of your backup data (that is, a copy that’s not connected to your network).
  • You run backups frequently. You might consider implementing grandfather-father-son strategy for your cloud backups to meet this requirement.
  • You store backups off-site and in a geographically separate location. Note: Even if you keep a backup off-site, your cyber insurance provider may not consider this secure enough if your off-site copy is in the same geographic region or held at your own data center.
  • Your backups are protected from ransomware with object lock for data immutability.

AcenTek Adopts Cloud for Cyber Insurance Requirement

Learn how Backblaze customer AcenTek secured their data with B2 Cloud Storage to meet their cyber insurance provider’s requirement that backups be secured in a geographically distanced location.

By adding features like SSE, 2FA, and object lock to your backup security, insurance companies know you take data security seriously.

Cyber insurance provides the peace of mind that, when your company is faced with a digital incident, you will have access to resources with which to recover. And there is no question that by increasing your cybersecurity resilience, you’re more likely to find an insurer with the best coverage at the right price.

Ultimately, it’s up to you to ensure you have a robust backup strategy and security protocols in place. Even if you hope to never have to access your backups (because that might mean a security breach), it’s always smart to consider how fast you can restore your data should you need to, keeping in mind that hot storage is going to give you a faster recovery time objective (RTO) without any delays like those seen with cold storage like Amazon Glacier. And, with Backblaze B2 Cloud Storage offering hot cloud storage at cold storage prices, you can afford to store all your data for as long as you need—at one-fifth the price of AWS.

Get Started With Backblaze

Get started today with pay-as-you-go pricing, or contact our Sales Team to learn more about B2 Reserve, our all-inclusive, capacity-based bundles starting at 20TB.

The post A Cyber Insurance Checklist: Learn How to Lower Risk to Better Secure Coverage appeared first on Backblaze Blog | Cloud Storage & Cloud Backup.

Python GIL vs. nogil: Boost I/O Performance 10x With One Line Change

Post Syndicated from Backblaze original https://www.backblaze.com/blog/python-gil-vs-nogil-boost-i-o-performance-10x-with-one-line-change/

A decorative image showing the words "Python 3.11 on one side and Python 3.9-nogil on the other

Last year, our team published a history of the Python GIL. We tapped two contributors, Barry Warsaw, a longtime Python core developer, and Pawel Polewicz, a backend software developer and longtime Python user, to help us write the post.

Today, Pawel is back to revisit the original inspiration for the post: the experiments he did testing different versions of Python with the Backblaze B2 CLI.

If you find the results of Pawel’s speed tests useful, sign up to get more developer content every month in our Backblaze Developer Newsletter. We’ll let Pawel take it from here.

—The Editors

I was setting up and testing a backup solution for one of my clients when I noticed a couple of interesting things I’d like to share today. I realized by using Python 3.9-nogil, I could increase I/O performance by 10x. I’ll get into the tests themselves, but first let me tell you why I’m telling this story on the Backblaze blog.

I use Backblaze B2 Cloud Storage for disaster recovery for myself and my clients for a few reasons:

  • Durability: The numbers bear out that B2 Cloud Storage is reliable.
  • Redundancy: If the entire AWS, Google Cloud Platform (GCP), or Microsoft Azure account of one of my clients (usually a startup founder) gets hacked, backups stored in B2 Cloud Storage will stay safe.
  • Affordability: The price for B2 Cloud Storage is one-fifth the cost of AWS, GCP, or Azure—better than anywhere else.
  • Availability: You can read data immediately without any special “restore from archive” steps. Those might be hard to perform when your hands are shaking after you accidentally deleted something.

Naturally, I always want to make sure my clients can get their backup data out of cloud storage fast should they need to. This brings us to “The Experiment.”

The Experiment: Speed Testing the Backblaze B2 CLI With Different Python Versions

I ran a speed test to see how quickly we could get large files back from Backblaze B2 using the B2 CLI. To my surprise, I’ve found that it depends on the Python version.

The chart below shows download speeds from different Python versions, 3.6 to 3.11, for both single-file and multi-file downloads.

What’s Going On Under the Hood?

The Backblaze B2 CLI is fetching data from the B2 Cloud Storage server using Python’s Requests library. It then saves it on a local storage device using Python threads—one writer thread per file. In this type of workload, the newer versions of Python are much faster than the older ones—developers of CPython (the standard implementation of the Python programming language) have been working hard on performance for many years. CPython 3.10 had the highest performance improvement from the official releases I’ve tested. CPython 3.11 is almost twice as fast as 3.6!

Refresher: What’s the GIL Again?

GIL stands for global interpreter lock. You can check out the history of the GIL in the post from last year for a deep dive, but essentially, the GIL is a lock that allows only a single operating system thread to run the central Python bytecode interpreter loop. It serves to serialize operations involving the Python bytecode interpreter—that is, to run tasks in an order—without which developers would need to implement fine grained locks to prevent one thread from overriding the state set by another thread.

Don’t worry—here’s a diagram.

Two threads incrementing an object reference counter.

The GIL prevents multiple threads from mutating this state at the same time, which is a good thing as it prevents data corruption, but unfortunately it also prevents any Python code from running in other threads (regardless of whether they would mutate a shared state or not).

How Did “nogil” Perform?

I ran one more test using the “nogil” fork of CPython 3.9. I had heard it improves performance in some cases, so I wanted to try it out to see how much faster my program would be without GIL.

The results of that test were added to the tests run on versions of unmodified CPython and you can see them below:

Chart showing single-file and multiple-files download performance of Backblaze B2 CLI on various CPython versions from 3.6 to 3.11, getting +60MB/s per version on average.

In this case not being limited by GIL has quite an effect! Most performance benchmarks I’ve seen show how fast the CPython test suite is, but some Python programs move data around. For this type of usage, 3.9-nogil was 2.5 or 10 times faster (for single and multiple files, respectively) on the test than unmodified CPython 3.9.

Why Isn’t nogil Even Faster?

A simple test running parallel writes on the RAID-0 array we’ve set up on an AWS EC2 i3en.24xlarge instance—a monster VM, with 96 virtual CPUs, 768 GiB RAM and 8 x 7500GB of NVMe SSD storage—shows that the bottleneck is not in userspace. The bottleneck is likely a combination of filesystem, raid driver, and the storage device. A single I/O-heavy Python process outperformed one of the fastest virtual servers you can get in 2023, and enabling nogil required just one change—the FROM line of the Dockerfile.

Why Not Use Multiprocessing?

For a single file, POSIX doesn’t guarantee consistency of writes if those are done from different threads (or processes)—that’s why the B2 Cloud Storage CLI uses a single writer thread for each file while the other threads are getting data off the network and passing it to the writer using a queue.Queue object. Using a multiprocessing.Queue in the same place results in degraded performance (approximately -15%).

The cool thing about threading is that it’s easy to learn. You can take almost any synchronous code and run it in threads in a few minutes. Using something like asyncio or multiprocessing is not so easy. In fact, whenever I tried multiprocessing, the serialization overhead was so high that the entire program slowed down instead of speeding up. As for asyncio, it won’t make Python run on 20 cores, and the cost of rewriting a program based on Requests is prohibitive. Many libraries do not support async anyway and the only way to make them work with async is to wrap them in a thread. Performance of clean async code is known to be higher than threads, but if you mix the async code with threading code, you lose this performance gain.

But Threads Can Be Hard Too!

Threads might be easy in comparison to other ways of making your program concurrent, but even that’s a high bar. While some of us may feel confident enough to go around limitations of Python by using asyncio with uvloop or writing custom extensions in C, not everyone can do that. Case in point: over the last three years I’ve challenged 1622 applicants to a senior Python backend developer job opening with a very basic task using Python threads. There was more than enough time, but only 30% of the candidates managed to complete it.

What’s Next for nogil?

On January 9, 2023, Sam Gross (the author of the nogil branch) submitted [PEP-703]—an official proposal to include the nogil mode in CPython. I hope that it will be accepted and that one day nogil will be merged into mainline, so that Python can exceed single core performance when commanded by lots of users of Python and not just those who are talented and lucky enough to be able to benefit from asyncio, multiprocessing, or custom extensions written in C.

The post Python GIL vs. nogil: Boost I/O Performance 10x With One Line Change appeared first on Backblaze Blog | Cloud Storage & Cloud Backup.

How to Use Veeam’s V12 Direct-to-Object Storage Feature

Post Syndicated from Kari Rivas original https://www.backblaze.com/blog/how-to-use-veeams-v12-direct-to-object-storage-feature/

A decorative image showing the word Veeam and a cloud with the Backblaze logo.

If you already use Veeam, you’re probably familiar with using object storage, typically in the cloud, as your secondary repository using Veeam’s Scale-Out Backup Repository (SOBR). But Veeam v12, released on February 14, 2023, introduced a new direct-to-object storage feature that expands the way enterprises can use cloud storage and on-premises object storage for data protection.

Today, I’m talking through some specific use cases as well as the benefits of the direct-to-object storage feature, including fortifying your 3-2-1 backup strategy, ensuring your business is optimizing your cloud storage, and improving cyber resilience.

Meet Us at VeeamON

We hope to see you at this year’s VeeamON conference. Here are some highlights you can look forward to:

  • Check out our breakout session “Build a DRaaS Offering at No Extra Cost” on Tuesday, May 23, 1:30 p.m. ET to create your affordable, right-sized disaster recovery plan.
  • Join our Miami Beach Pub Crawl with phoenixNAP Tuesday, May 23 at 6 p.m. ET.
  • Come by the Backblaze booth for demos, swag, and more. Don’t forget to book your meeting time.

The Basics of Veeam’s Direct-to-Object Storage

Veeam’s v12 release added the direct-to-object storage feature that allows you to add object storage as a primary backup repository. This object storage can be an on-premises object storage system like Pure Storage or Cloudian or a cloud object storage provider like Backblaze B2 Cloud Storage’s S3 compatible storage. You can configure the job to run as often as you would like, set your retention policy, and configure all the other settings that Veeam Backup & Replication provides.

Prior to v12, you had to use Veeam’s SOBR to save data to cloud object storage. Setting up the SOBR requires you to first add a local storage component, called your Performance Tier, as a primary backup repository. You can then add a Capacity Tier where you can copy backups to cloud object storage via the SOBR. Your Capacity Tier can be used for redundancy and disaster recovery (DR) purposes, or older backups can be completely off-loaded to cloud storage to free up space on your local storage component.

The diagram below shows how both the SOBR and direct-to-object storage methods work. As you can see, with the direct-to-object feature, you no longer have to first land your backups in the Performance Tier before sending them to cloud storage.

Why Use Cloud Object Storage With Veeam?

On-premises object storage systems can be a great resource for storing data locally and achieving the fastest recoveries, but they’re expensive especially if you’re maintaining capacity to store multiple copies of your data, and they’re still vulnerable to on-site disasters like fire, flood, or tornado. Cloud storage allows you to keep a backup copy in an off-site, geographically distanced location for DR purposes.

Additionally, while local storage will provide the fastest recovery time objective (RTO), cloud object storage can be effective in the case of an on-premises disaster as it serves the dual purpose of protecting your data and being off-site.

To be clear, the addition of direct-to-object storage doesn’t mean you should immediately abandon your SOBR jobs or your on-premises devices. The direct-to-object storage feature gives you more options and flexibility, and there are a few specific use cases where it works particularly well, which I’ll get into later.

How to Use Veeam’s Direct-to-Object Storage Feature

With v12, you can now use Veeam’s direct-to-object storage feature in the Performance Tier, the Capacity Tier, or both. To understand how to use the direct-to-object storage feature to its full potential, you need to understand the implications of using object storage in your different tiers. I’ll walk through what that means.

Using Object Storage in Veeam’s Performance Tier

In earlier versions of Veeam’s backup software, the SOBR required the Performance Tier to be an on-premises storage device like a network attached storage (NAS) device. V12 changed that. You can now use an on-premises system or object storage, including cloud storage, as your Performance Tier.

So, why would you want to use cloud object storage, specifically Backblaze B2, as your Performance Tier?

  • Scalability: With cloud object storage as your Performance Tier, you no longer have to worry about running out of storage space on your local device.
  • Immutability: By enabling immutability on your Veeam console and in your Backblaze B2 account (using Object Lock), you can prevent your backups from being corrupted by a ransomware network attack like they might be if your Performance Tier was a local NAS.
  • Security: By setting cloud storage as your Performance Tier in the SOBR, you remove the threat of your backups being affected by a local disaster. With your backups safely protected off-site and geographically distanced from your primary business location, you can rest assured they are safe even if your business is affected by a natural disaster.

Understandably, some IT professionals prefer to keep on-premises copies of their backups because they offer the shortest RTO, but for many organizations, the pros of using cloud storage in the Performance Tier can outweigh the slightly longer RTO.

Using Object Storage in the Performance AND Capacity Tiers

If you’re concerned about overreliance on cloud storage but also feeling eager to eliminate often unwieldy, expensive, space-consuming physical local storage appliances, consider that Veeam v12 allows you to set cloud object storage as both your Performance and Capacity tier, which could add redundancy to ease your worries.

For instance, you could follow this approach:

  1. Create a Backblaze B2 Bucket in one region and set that as your primary repository using the SOBR.
  2. Send your Backup Jobs to that bucket (and make it immutable) as often as you would like.
  3. Create a second Backblaze B2 account with a bucket in a different region, and set it as your secondary repository.
  4. Create Backup Copy Jobs to replicate your data to that second region for added redundancy.

This may ease your concerns about using the cloud as the sole location for your backup data, as having two copies of your data—in geographically disparate regions—satisfies the 3-2-1 rule (since, even though you’re using one cloud storage service, the two backup copies of your data are kept in different locations.

Refresher: What is the 3-2-1 Backup Strategy?

A 3-2-1 strategy means having at least three total copies of your data, two of which are local but on different media, and at least one off-site copy (in the cloud).

Use Cases for Veeam’s Direct-to-Object Storage Feature

Now that you know how to use Veeam’s direct-to-object storage feature, you might be wondering what it’s best suited to do. There are a few use cases where Veeam’s direct-to-object storage feature really shines, including:

  • In remote offices
  • For NAS backup
  • For end-to-end immutability
  • For Veeam Cloud and Service Providers (VCSP)

Using Direct-to-Object Storage in Remote Offices

The new functionality works well to support distributed and remote work environments.

Veeam had the ability to back up remote offices in v11, but it was unwieldy. When you wanted to back up the remote office, you had to back up the remote office to the main office, where the primary on-premises instance of Veeam Backup & Replication is installed, then use the SOBR to copy the remote office’s data to the cloud. This two-step process puts a strain on the main office network. With direct-to-object storage, you can still use a SOBR for the main office, and remote offices with smaller IT footprints (i.e. no on-premises device on which to create a Performance Tier) can send backups directly to the cloud.

If the remote office ever closes or suffers a local disaster, you can bring up its virtual machines (VMs) at the main office and get back in business quickly.

Using Direct-to-Object Storage for NAS Backup

NAS devices are often used as the Performance Tier for backups in the SOBR, and a business using a NAS may be just as likely to be storing its production data on the same NAS. For instance, a video production company might store its data on a NAS because it likes how easily a NAS incorporates into its workflows. Or a remote office branch may be using a NAS to store its data and make it easily accessible to the employees at that location.

With v11 and earlier versions, your production NAS had to be backed up to a Performance Tier and then to the cloud. And, with many Veeam users utilizing a NAS as their Performance Tier, this meant you had a NAS backing up to …another NAS, which made no sense.

For media and entertainment professionals in the field or IT administrators at remote offices, having to back up the production NAS to the main office (wherever that is located) before sending it to the cloud was inconvenient and unwieldy.

With v12, your production NAS can be backed up directly to the cloud using Veeam’s direct-to-object storage feature.

Direct-to-Object Storage for End-to-End Immutability

As I mentioned, previous versions of Veeam required you to use local storage like a NAS as the Performance Tier in your SOBR, but that left your data vulnerable to security attacks. Now, with direct-to-object storage functionality, you can achieve an end-to-end immutability. Here’s how:

  • In the SOBR, designate an on-premises appliance that supports immutability as your primary repository (Performance Tier). Cloudian and Pure Storage are popular names to consider here.
  • Set cloud storage like Backblaze B2 as your secondary repository (Capacity Tier).
  • Enable Object Lock for immutability in your Backblaze B2 account and set the date of your lock.

With this setup, you check a lot of boxes:

  • You fulfill a 3-2-1 backup strategy.
  • Both your local data and your off-site data are protected from deletion, encryption, or modification.
  • Your infrastructure is provisioned for the fastest RTO with your local storage.
  • You’ve also fully protected your data—including your local copy—from a ransomware attack.

Immutability for NAS Data in the Cloud

Backing up your NAS straight to the cloud with Veeam’s direct-to-object storage feature means you can enable immutability using the Veeam console and Object Lock in Backblaze B2. Few NAS devices natively support immutability, so using Veeam and B2 Cloud Storage to back up your NAS offers all the benefits of secure, off-site backup plus protection from ransomware.

Direct-to-Object Storage for VCSPs

The direct-to-object storage feature also works well for VCSPs. It changes how VCSPs use Cloud Connect, Veeam’s offering for service partners. A VCSP can send customer backups straight to the cloud instead of first sending them to the VCSP’s own systems.

Veeam V12 and Cyber Resiliency

When it comes to protecting your data, ultimately, you want to make the decision that best meets your business continuity and cyber resilience requirements. That means ensuring you not only have a sound backup strategy, but that you also consider what your data restoration process will look like during an active security incident (because a security incident is more likely to happen than not).

Veeam’s direct-to-object storage feature gives you more options for establishing a backup strategy that meets your RTO and DR requirements while also staying within your budget and allowing you to use the most optimal and preferred kind of storage for your use case.

Veeam + Backblaze: Now Even Easier

Get started today for $5/TB per month, pay-as-you-go cloud storage. Or contact your favorite reseller, like CDW or SHI to purchase Backblaze via B2 Reserve, our all-inclusive, capacity-based bundles.

The post How to Use Veeam’s V12 Direct-to-Object Storage Feature appeared first on Backblaze Blog | Cloud Storage & Cloud Backup.

From Chaos to Clarity: 6 Best Practices for Organizing Big Data

Post Syndicated from Bala Krishna Gangisetty original https://www.backblaze.com/blog/from-chaos-to-clarity-6-best-practices-for-organizing-big-data/

There’s no doubt we’re living in the era of big data. And, as the amount of data we generate grows exponentially, organizing it becomes all the more challenging. If you don’t organize the data well, especially if it resides in cloud storage, it becomes complex to track, manage, and process.

That’s why I’m sharing six strategies you can use to efficiently organize big data in the cloud so things don’t spiral out of control. You can consider how to organize data from different angles, including within a bucket, at the bucket level, and so on. In this article, I’ll primarily focus on how you can efficiently organize data on Backblaze B2 Cloud Storage within a bucket. With the strategies described here, you can consider what information you need about each object you store and how to logically structure an object or file name, which should hopefully equip you to better organize your data.

Before we delve into the topic, let me give a super quick primer on some basics of object storage. Feel free to skip this section if you’re familiar.

First: A Word About Object Storage

Unlike traditional file systems, when you’re using object storage, you have a simple, flat structure with buckets and objects to store your data. It’s designed as a key-value store so that it can scale to the internet.

There are no real folders in the object store file system. The impact of this is data is not separated into a hierarchical structure. That said, there are times that you actually want to limit what you’re querying. In that instance, prefixes provide a folder-like look and feel, which means that you can get all the benefits of having a folder without any major drawbacks. From here onwards, I’ll generally refer to folders as prefixes and files as objects.

With all that out of the way, let’s dive into the ways you can efficiently organize your data within a bucket. You probably don’t have to employ all these guidelines. Rather, you can pick and choose what best fits your requirements.

1. Standardize Object Naming Conventions

Naming conventions, simply put, are rules about what you and others within your organization name your files. For example, you might decide it’s important that the file name describes the type of file, the date created, and the subject. You can combine that information in different ways and even format pieces of information differently. For example, one employee may think it makes more sense to call a file Blog Post_Object Storage_May 6, 2023, while another might think it makes sense to call that same file Object Storage.Blog Post.05062023.

These decisions do have impact. For instance that second date format would confuse the majority of the world who uses the day/month/year format, as opposed to month/day/year as is common in the United States. . And, what if you take a different kind of object as your example, one that versioning becomes important for? When do code fixes for version 1.1.3 actually become version 1.2.0?

Simply put, having a consistent and well thought out naming convention for your objects makes life easy when it comes to organizing data. You can and should derive and follow a pattern while naming the objects. Based on your requirements, a consistent and well thought out pattern for naming your objects makes it easy to find and sort files.

2. Harness The Power of Prefixes

Prefixes provide a folder-like look and feel on object stores (as there are no real folders). The prefixes are powerful and immensely helpful while effectively organizing your data and allow you to make good use of the wildcard function in your command line interface (CLI). A good way to think about a prefix is that it creates hierarchical categories in your object name. So, if you were creating a prefix about locations and using slashes as a delimiter, you’d create something like this:

North America/Canada/British Columbia/Vancouver

Let’s imagine a scenario where you generate multiple objects per day, you can structure your data per year per month and per day. An example prefix would be year=2022/month=12/day=17/ for the multiple objects generated on December 17, 2022. If you queried for all objects created on that day, you might get results that look like this:

2022/12/17/Object001
2022/12/17/Object002
2022/12/17/Object003

On the Backblaze B2 secure web application, you will notice these prefixes create “folders” three levels deep, year=2022, month=12 and day=17. The folder, day=17, will contain all the objects with the example prefix in their names. Partitioning data is helpful to easily track your data. It is also helpful in the processing workflows that use your data after storing it on Backblaze B2.

3. Programatically Separate Data

After ingesting data into B2 Cloud Storage, you may have multiple workflows to make use of data. These workflows are often tied to specific environments and in turn generate more new data. Production, staging, and test are some examples of environments.

We recommend keeping the copy of raw data and the new data generated by a specific environment separate. This lets you keep track of when and how changes were made to your datasets, which in turn means you can roll back to a native state if you need to or replicate the change if it’s producing the results you want. In occasions of undesirable events like a bug in your processing workflow, you can rerun the workflow with a fix in place on the raw copy of data. To illustrate the data specific to the production environment, an example would be /data/env=prod/type=raw, and /data/env=prod/type=new.

4. Leverage Lifecycle Rules

While your data volume is ever increasing, we recommend reviewing and cleaning up unwanted data from time to time. Doing that process manually is very cumbersome, especially when you have large amounts of data. Never fear: Lifecycle rules to the rescue. You can set up lifecycle rules to automatically hide or delete data based on a certain criteria which you can configure on Backblaze B2.

For example, some workflows create temporary objects during processing. It’s useful to briefly retain these temporary objects to diagnose issues, but they have no long-term value. A lifecycle rule could specify that objects with the /tmp prefix are to be deleted two days after they are created.

5. Enable Object Lock

Object Lock makes your data immutable for a specified period of time. Once you set that period of time, even the data owner can’t modify or delete the data. This helps to prevent an accidental overwrite of your data, creates trusted backups, and so on.

Let’s imagine a scenario where you upload data to B2 Cloud Storage and run a workflow to process the data which in turn generates new data, and use our production, staging, and test example again. Due to a bug, your workflow tries to overwrite your raw data. When you have Object Lock set, the rewrite won’t happen, and your workflow will likely error out.

6. Customize Access With Application Keys

There are two types of application keys on B2 Cloud Storage:

  1. Your master application key. This is the first key you have access to and is available on the web application. This key has all capabilities, access to all buckets, and has no file prefix restrictions or expiration. You only have one master application key—if you generate a new one, your old one becomes invalid.
  2. Non-master application key(s). This is every other application key. They can be limited to a bucket, or even files within that bucket using prefixes, can set read-only, read-write, or write-only access, and can expire.

That second type of key is the important one here. Using application keys, you can grant or restrict access to data programmatically. You can make as many application keys in Backblaze B2 as you need (the current limit is 100 million). In short: you can get detailed in customizing access control.

In any organization, it’s always best practice to only grant users and applications as much access as they need, also known as the principle of least privilege. That rule of thumb reduces risk in security situations (of course), but it also reduces the possibility for errors. Extend this logic to our accidental overwrite scenario above: if you only grant access to those who need to (or know how to) use your original dataset, you’re reducing the risk of data being deleted or modified inappropriately.

Conversely, you may be in a situation where you want to grant lots of people access, such as when you’re creating a cell phone app, and you want your customers to review it (read-only access). Or, you may want to create an application key that only allows someone to upload data, not modify existing data (write-only access), which is useful for things like log files.

And, importantly, this type of application key can be set to expire, which means that you will need to actively re-grant access to people. Making granting access your default (as opposed to taking away access) means that you’re forced to review and validate who has access to what at regular intervals, which in turn means you’re less likely to have legacy stakeholders with inappropriate access to your data.

Two great places to start here are restricting the access to specific data by tying application keys to buckets and prefixes and restricting the read and write permissions of your data. You should think carefully before creating an account-wide application key, as it will have access to all of your buckets, including those that you create in the future. Restrict each application key to a single bucket wherever possible.

What’s Next?

Organizing large volumes by putting some guidelines into practice can make it easy to store your data. Pick and choose the ones that best fit your requirements and needs. So far, we have talked about organizing the data within a bucket, and, in the future, I’ll provide some guidance about organizing buckets on B2 Cloud Storage.

The post From Chaos to Clarity: 6 Best Practices for Organizing Big Data appeared first on Backblaze Blog | Cloud Storage & Cloud Backup.

Backblaze Drive Stats for Q1 2023

Post Syndicated from original https://www.backblaze.com/blog/backblaze-drive-stats-for-q1-2023/

A long time ago in a galaxy far, far away, we started collecting and storing Drive Stats data. More precisely it was 10 years ago, and the galaxy was just Northern California, although it has expanded since then (as galaxies are known to do). During the last 10 years, a lot has happened with the where, when, and how of our Drive Stats data, but regardless, the Q1 2023 drive stats data is ready, so let’s get started.

As of the end of Q1 2023, Backblaze was monitoring 241,678 hard drives (HDDs) and solid state drives (SSDs) in our data centers around the world. Of that number, 4,400 are boot drives, with 3,038 SSDs and 1,362 HDDs. The failure rates for the SSDs are analyzed in the SSD Edition: 2022 Drive Stats review.

Today, we’ll focus on the 237,278 data drives under management as we review their quarterly and lifetime failure rates as of the end of Q1 2023. We also dig into the topic of average age of failed hard drives by drive size, model, and more. Along the way, we’ll share our observations and insights on the data presented and, as always, we look forward to you doing the same in the comments section at the end of the post.

Q1 2023 Hard Drive Failure Rates

Let’s start with reviewing our data for the Q1 2023 period. In that quarter, we tracked 237,278 hard drives used to store customer data. For our evaluation, we removed 385 drives from consideration as they were used for testing purposes or were drive models which did not have at least 60 drives. This leaves us with 236,893 hard drives grouped into 30 different models to analyze.

Notes and Observations on the Q1 2023 Drive Stats

  • Upward AFR: The annualized failure rate (AFR) for Q1 2023 was 1.54%, that’s up from Q4 2022 at 1.21% and from one year ago, Q1 2022, at 1.22%. Quarterly AFR numbers can be volatile, but can be useful in identifying a trend which needs further investigation. For example, three drives in Q1 2023 (listed below) more than doubled their individual AFR from Q4 2022 to Q1 2023. As a consequence, further review (or in some cases continued review) of these drives is warranted.
  • Zeroes and ones: The table below shows those drive models with either zero or one drive failure in Q1 2023.

When reviewing the table, any drive model with less than 50,000 drive days for the quarter does not have enough data to be statistically relevant for that period. That said, for two of the drive models listed, posting zero failures is not new. The 16TB Seagate (model: ST16000NM002J) had zero failures last quarter as well, and the 8TB Seagate (model: ST8000NM000A) has had zero failures since it was first installed in Q3 2022, a lifetime AFR of 0%.

  • A new, but not so new drive model: There is one new drive model in Q1 2023, the 8TB Toshiba (model: HDWF180). Actually, it is not new, it’s just that we now have 60 drives in production this quarter, so it makes the charts. This model has actually been in production since Q1 2022, starting with 18 drives and adding more drives over time. Why? This drive model is replacing some of the 187 failed 8TB drives this quarter. We have stockpiles of various sized drives we keep on hand for just this reason.

Q1 2023 Annualized Failures Rates by Drive Size and Manufacturer

The charts below summarize the Q1 2023 data first by Drive Size and then by manufacturer.

While we included all of the drive sizes we currently use, both the 6TB and 10TB drive sizes consist of one model for each and each has a limited number of drive days in the quarter: 79,651 for the 6TB drives and 105,443 for the 10TB drives. Each of the remaining drive sizes has at least 2.2 million drive days, making their quarterly annualized failure rates more reliable.

This chart combines all of the manufacturer’s drive models regardless of their age. In our case, many of the older drive models are from Seagate and that helps drive up their overall AFR. For example, 60% of the 4TB drives are from Seagate and are, on average, 89 months old, and over 95% of the 8TB drives in production are from Seagate and they are, on average, over 70 months old. As we’ve seen when we examined hard drive life expectancy using the Bathtub Curve, older drives have a tendency to fail more often.

That said, there are outliers out there like our intrepid fleet of 6TB Seagate drives which have an average age of 95.4 months and have a Q1 2023 AFR of 0.92% and a lifetime AFR of 0.89% as we’ll see later in this report.

The Average Age of Drive Failure

Recently the folks at Blocks & Files published an article outlining the average age of a hard drive when it failed. The article was based on the work of Timothy Burlee at Secure Data Recovery. To summarize, the article found that for the 2,007 failed hard drives analyzed, the average age at which they failed was 1,051 days, or two years and 10 months. We thought this was an interesting way to look at drive failure, and we wanted to know what we would find if we asked the same question of our Drive Stats data. They also determined the current pending sector count for each failed drive, but today we’ll focus on the average age of drive failure.

Getting Started

The article didn’t specify how they collected the amount of time a drive was operational before it failed but we’ll assume they used the SMART 9 raw value for power-on hours. Given that, our first task was to round up all of the failed drives in our dataset and record the power-on hours for each drive. That query produced a list of 18,605 drives which failed between April 10, 2013 and March 30, 2023, inclusive. 

For each failed drive we recorded the date, serial_number, model, drive_capacity, failure, and SMART 9 raw value. A sample is below.

To start the data cleanup process, we first removed 1,355 failed boot drives from the dataset, leaving us with 17,250 data drives.

We then removed 95 drives for one of the following reasons:

  • The failed drive had no data recorded or a zero in the SMART 9 raw attribute.
  • The failed drive had out of bounds data in one or more fields. For example, the capacity_bytes field was negative or the model was corrupt, that is unknown or unintelligible.

In both of these cases, the drives in question were not in a good state when the data was collected and as such any other data collected could be unreliable.

We are left with 17,155 failed drives to analyze. When we compute the average age at which this cohort of drives failed we get 22,360 hours, which is 932 days, or just over two years and six months. This is reasonably close to the two years and 10 months from the Blocks & Files article, but before we confirm their numbers let’s dig into our results a bit more.

Average Age of Drive Failure by Model and Size

Our Drive Stats dataset contains drive failures for 72 drive models, and that number does not include boot drives. To make our table a bit more manageable we’ve limited the list to those drive models which have recorded 50 or more failures. The resulting list contains 30 models which we’ve sorted by average failure age:

As one would expect, there are drive models above and below our overall failure average age of two years and six months. One observation is that the average failure age of many of the smaller sized drive models (1TB, 1.5TB, 2TB, etc.) is higher than our overall average of two years and six months. Conversely, for many larger sized drive models (12TB, 14TB, etc.) the average failure age was below the average. Before we reach any conclusions, let’s see what happens if we review the average failure age by drive size as shown below.

This chart seems to confirm the general trend that the average failure age of smaller drive models is higher than larger drive models. 

At this point you might start pondering whether technologies in larger drives such as the additional platters, increased areal density, or even the use of helium would impact the average failure age of these drives. But as the unflappable Admiral Ackbar would say:

“It’s a Trap”

The trap is that the dataset for the smaller sized drive models is, in our case, complete—there are no more 1TB, 1.5TB, 2TB, 3TB, or even 5TB drives in operation in our dataset. On the contrary, most of the larger sized drive models are still in operation and therefore they “haven’t finished failing yet.” In other words, as these larger drives continue to fail over the coming months and years, they could increase or decrease the average failure age of that drive model.

A New Hope

One way to move forward at this point is to limit our computations to only those drive models which are no longer in operation in our data centers. When we do this, we find we have 35 drive models consisting of 3,379 drives that have a failed average age of two years and seven months.

Trap or not, our results are consistent with the Blocks & Files article as their failed average age of two years and 10 months for their dataset.  It will be interesting to see how this comparison holds up over time as more drive models in our dataset finish their Backblaze operational life.

The second way to look at drive failure is to view the problem from the life expectancy point of view instead. This approach takes a page from bioscience and utilizes Kaplan-Meier techniques to produce life expectancy (aka survival) curves for different cohorts, in our case hard drive models. We used such curves previously in our Hard Drive Life Expectancy and Bathtub Curve blog posts. This approach allows us to see the failure rate over time and helps answer questions such as, “If I bought a drive today, what are the chances it will survive x years?”

Let’s Recap

We have three different, but similar, values for average failure age of hard drives, and they are as follows:

SourceFailed Drive CountAverage Failed Age
Secure Data Recovery2,007 failed drives2 years, 10 months
Backblaze17,155 failed drives (all models)2 years, 6 months
Backblaze3,379 failed drives (only drive models no longer in production)2 years, 7 months

When we first saw the Secure Data Recovery average failed age we thought that two years and 10 months was too low. We were surprised by what our data told us, but a little math never hurt anyone. Given we are always adding additional failed drives to our dataset, and retiring drive models along the way, we will continue to track the average failed age of our drive models and report back if we find anything interesting.

Lifetime Hard Drive Failure Rates

As of March 31, 2023, we were tracking 237,278 hard drives. For our lifetime analysis, we removed 385 drives that were only used for testing purposes or did not have at least 60 drives. This leaves us with 236,893 hard drives grouped into 30 different models to analyze for the lifetime table below.


Notes and Observations About the Lifetime Stats

The lifetime AFR for all the drives listed above is 1.40%. That is a slight increase from the previous quarter of 1.39%. The lifetime AFR number for all of our hard drives seems to have settled around 1.40%, although each drive model has its own unique AFR value.

For the past 10 years we’ve been capturing and storing the Drive Stats data which is the source of the lifetime AFRs listed in the table above. But, why keep track of the data at all? Well, besides creating this report each quarter, we use the data internally to help run our business. While there are many other factors which go into the decisions we make, the Drive Stats data helps to surface potential issues sooner, allows us to take better informed drive related actions, and overall adds a layer of confidence in the drive-based decisions we make.

The Hard Drive Stats Data

The complete dataset used to create the information used in this review is available on our Hard Drive Test Data page. You can download and use this data for free for your own purpose. All we ask are three things: 1) you cite Backblaze as the source if you use the data, 2) you accept that you are solely responsible for how you use the data, and 3) you do not sell this data to anyone; it is free.

If you want the tables and charts used in this report, you can download the .zip file from Backblaze B2 Cloud Storage which contains an Excel file with a tab for each table or chart.

Good luck and let us know if you find anything interesting.

The post Backblaze Drive Stats for Q1 2023 appeared first on Backblaze Blog | Cloud Storage & Cloud Backup.

Cloud Storage for Higher Education: Benefits & Best Practices

Post Syndicated from Mary Ellen Cavanagh original https://www.backblaze.com/blog/cloud-storage-for-higher-education-benefits-best-practices/

A decorative image showing files and graduation caps being thrown in the air towards the Backblaze cloud.

Universities and colleges lead the way in educating future professionals and conducting ground-breaking research. Altogether, higher education generates hundreds of terabytes—even petabytes—of data. But, higher education also faces significant data risks. They are one of the most targeted industries for ransomware, with 79% of institutions reporting they were hit with ransomware in the past year.

While higher education institutions often have robust data storage systems that can even include their own off-site disaster recovery (DR) centers, cloud storage can provide several benefits that legacy storage systems cannot match. In particular, cloud storage allows schools to protect from ransomware with immutability, easily grow their datasets without constant hardware outlays, and protect faculty, student, and researchers’ computers with cloud-based endpoint backups.

Cloud storage is also a promising alternative to cloud drives, traditionally a popular option for higher education institutions. While cloud drives provide easy storage across campus, both Google and Microsoft have announced the end of their unlimited storage tiers for education. Faced with changes to the original service, many higher education institutions are looking for alternatives. Plus, cloud drives do not provide true, incremental backup, do not adequately protect from ransomware, and have limited options for recovery.   

Ultimately, cloud storage better protects your school from local disasters and ransomware with a secure, off-site copy of your data. And, with the right cloud service provider, it can be much more affordable than you think. In this article, we’ll look at the benefits of cloud storage for higher education, study some popular use cases, and explore best practices and provisioning considerations.

The Benefits of Cloud Storage in Higher Education

Cloud storage solutions present a host of benefits for organizations in any industry, but many of these benefits are particularly relevant for higher education institutions. Let’s take a look:

1. Enhanced Security

Higher education institutions have emerged as one of ransomware attackers’ favorite targets—63% of higher education CISOs say a cyber attack is likely within the next year. Data backups are a core part of any organization’s security posture, and that includes keeping those backups protected and secure in the cloud. Using cloud storage to store backups strengthens backup programs by keeping copies off-site and geographically distanced, which adheres to the 3-2-1 backup strategy (more on that later). Cloud storage can also be made immutable using tools like Object Lock, meaning data can’t be modified or deleted. This feature is often unavailable in existing data storage hardware.

2. Cost-Effective Storage

Higher education generates huge volumes of data each year. Keeping costs low without sacrificing in other areas is a key priority for these institutions, across both active data and archival data stores. Cloud storage helps higher education institutions use their storage budgets effectively by not paying to provision and maintain on-premises infrastructure they don’t need. It can also help higher education institutions migrate away from linear tape-open (LTO) which can be costly to manage.

3. Improved Scalability

As digital data continues to grow, it’s important for those institutions to be able to easily scale with their storage needs. Cloud storage allows higher education institutions to avoid potentially over-provisioning infrastructure with the ability to affordably tier off data to the cloud. 

4. Data Accessibility

Making data easily accessible is important for many aspects of higher education. From the impact of scientific researchers to the ongoing work of attracting students to the university, the increasing quantities of data that higher education creates needs to be easy to access, use, and manage. Cloud storage makes data accessible from anywhere, and with hot cloud storage, there are no access delays like there can be with cold cloud storage or LTO tape.

5. Supports Cybersecurity Insurance Requirements

It’s increasingly common to utilize cyber insurance to offset potential liabilities incurred by a cyber attack. Many of those applications ask if the covered entity has off-site backups or immutable backups. Sometimes they even specify the backup has to be held somewhere other than the organization’s own locations. (We’ve seen other organizations outside of higher ed adding cloud storage for this reason as well). Cloud storage provides a pathway to meeting cyber insurance requirements universities may face.

How Higher Ed Institutions Can Use Cloud Storage Effectively

There are many ways higher education institutions can make effective use of cloud storage solutions. The most common use case is cloud storage for backup and archive systems. Transitioning from on-premises storage to cloud-based solutions—even if an organization is only transitioning a part of their total data footprint while retaining on-premises systems—is a powerful way for higher education institutions to protect their most important data.  To illustrate, here are some common use cases with real-life examples:

LTO Replacement

It’s no surprise that maintaining tape is a pain. While it’s the only true physical air-gap solution, it’s also a time suck, and those are precious hours that your IT team should be spending on strategic initiatives. This is particularly applicable in projects that generate huge amounts of data, like scientific research. Cloud storage provides the same off-site protection as LTO with far fewer maintenance hours. 

Off-Site Backups

As mentioned, higher ed institutions often keep an off-site copy of their data, but it’s commonly a few miles down the road—perhaps at a different branch’s campus. Transitioning to cloud storage allowed Coast Community College District (CCCD) to quit chauffeuring physical tapes to an off-site backup center about five miles away and instead implement a virtualized, multi-cloud solution with truly geographically distanced backups.

Protection From Ransomware

A ransomware attack is not a matter of if, but when. Cloud storage provides immutable ransomware protection with Object Lock, which creates a “virtual” air gap. Pittsburg State University, for example, leverages cloud storage to protect university data from ransomware threats. They strengthened their protection four-fold by adding immutable off-site data backups, and are now able to manage data recovery and data integrity with a single robust solution (that doesn’t multiply their expenses).

Computer Backup

While S3 compatible object storage provides a secure destination for data from servers, virtual machines (VMs), and network attached storage (NAS), it’s important to remember to back up faculty, staff, student, and researchers’ computers as well. Workstation backup is particularly important for organizations that are leveraging cloud drives, as these platforms are only designed to capture data stored in their respective clouds, leaving local files vulnerable to loss. But, one thing you don’t want is a drain on your IT resources—you want a solution that’s easy to implement, easy to manage ongoing, and simple enough to serve users of varying tech savviness. 

Best Practices for Data Backup and Management in the Cloud

Higher education institutions (and anyone, really!) should follow basic best practices to get the most out of their cloud storage solutions. Here are a few key points to keep in mind when developing a data backup and management strategy for higher education:

The 3-2-1 Backup Strategy

This widely accepted foundational structure recommends keeping three copies of all important data (one primary copy and two backup copies) on two different media types (to diversify risk) and storing at least one copy off-site. While colleges and universities frequently have high-capacity data storage systems, they don’t always adhere to the 3-2-1 rule. For instance, a school may have an off-site disaster recovery site, but their backups are not on two different media types. Or, they may be meeting the two-media-type rule but their media are not wholly off-site. Keeping your backups at a different campus location does not constitute a true off-site backup if you’re in the same region, for instance—the closer your data storage sites are, the more likely they’ll be subject to the same risks, like network outages, natural disasters, and so on.

Regular Data Backups

You’re only as strong as your last backup. Maintaining a frequent and regular backup schedule is a tried and true way to ensure that your institution’s data is as protected as possible. Schools that have historically relied on Google Drive, Dropbox, OneDrive, and other cloud drive systems are particularly vulnerable to this gap in their data protection strategy. Cloud drives provide sync functionality; they are not a true backup. While many now have the ability to restore files, restore periods are limited and not customizable and services often only back up certain file types—so, your documents, but not your email or user data, for instance. Especially when you’re talking about larger organizations with complex file management and high compliance needs, they don’t provide adequate protection from ransomware. Speaking of ransomware…

Ransomware Protection

Educational institutions (including both K-12 and higher ed) are more frequently targeted by ransomware today than ever before. When you’re using cloud storage, you can enable security features like Object Lock to offer “air gapped” protection and data immutability in the cloud. When you add endpoint backup, you’re ensuring that all the data on a workstation is backed up—closing a gap in cloud drives that can leave certain types of data vulnerable to loss.

Disaster Recovery Planning

Incorporating cloud storage into your disaster recovery strategy is the best way to plan for the worst. If unexpected disasters occur, you’ll know exactly where your data lives and how to restore it so you can get back to work quickly. Schools will often use cross-site replication as their disaster recovery solution, but such methods can fail the 3-2-1 test (see above) and it’s not a true backup since replication functions much the same way as sync. If ransomware invades your primary dataset, it can be replicated across all your copies. Cloud storage allows you to fortify your disaster recovery strategy and plug the gaps in your data protection.

Regulatory Compliance

Universities work with and store many diverse kinds of information, including highly regulated data types like medical records and research data. It’s important for higher education to use cloud storage solutions that help them remain in compliance with data privacy laws and federal or international regulations. Providers like Backblaze that frequently work with higher education institutions will usually have a HECVAT questionnaire available so you can better understand a vendor’s compliance and security stance, and they go through regular compliance audits via regulatory agencies like StateRAMP or SOC-2 certifications.

Comprehensive Protection

While it’s obvious that data systems like servers, virtual machines, and network attached storage (NAS) should be backed up, consider the other important sources of data that should be included in your protection strategy. For instance, your Microsoft 365 data should be backed up because you cannot rely on Microsoft to provide adequate backups. Under the shared responsibility model, Microsoft and other SaaS providers state that your data is your responsibility to back up—even if it’s stored on their cloud. And don’t forget about your faculty, student, staff, and researchers’ computers. These devices can hold incredibly valuable work and having a native endpoint backup solution is critical.

The Importance of Cloud Storage for Higher Education Institutions

Institutions of higher education were already on the long road toward digital transformation before the pandemic hit, but 2020 forced any reluctant parties to accept that the future was upon us. The combination of schools’ increasing quantities of sensitive and protected data and the growing threat of ransomware in the higher education space reinforce the need for secure and robust cloud storage solutions. As time has gone on, it’s clear that the diverse needs of higher education institutions need flexible, scalable, affordable solutions, and that current and legacy solutions have room for improvement. 

Universities that leverage best practices like designing 3-2-1 backup strategies, conducting frequent and regular backups, and developing disaster recovery plans before they’re needed will be well on their way toward becoming more modern, digital-first organizations. And with the right cloud storage solutions in place, they’ll be able to move the needle with measurable business benefits like cost effectiveness, data accessibility, increased security, and scalability.

The post Cloud Storage for Higher Education: Benefits & Best Practices appeared first on Backblaze Blog | Cloud Storage & Cloud Backup.

How To Do Bare Metal Backup and Recovery

Post Syndicated from Kari Rivas original https://www.backblaze.com/blog/how-to-do-bare-metal-backup-and-recovery/

A decorative image with a broken server stack icon on one side, the cloud in the middle, then a fixed server icon on the right.

When you’re creating or refining your backup strategy, it’s important to think ahead to recovery. Hopefully you never have to deal with data loss, but any seasoned IT professional can tell you—whether it’s the result of a natural disaster or human error—data loss will happen.

With the ever-present threat of cybercrime and the use of ransomware, it is crucial to develop an effective backup strategy that also considers how quickly data can be recovered. Doing so is a key pillar of increasing your business’ cyber resilience: the ability to withstand and protect from cyber threats, but also bounce back quickly after an incident occurs. The key to that effective recovery may lie with bare metal recoveries.

In this guide, we will discuss what bare metal recovery is, its importance, the challenges of its implementation, and how it differs from other methods.

Creating Your Backup Recovery Plan

Your backup plan should be part of a broader disaster recovery (DR) plan that aims to help you minimize downtime and disruption after a disaster event.

A good backup plan starts with, at bare minimum, following the 3-2-1 rule. This involves having at least three copies of your data, two local copies (on-site) and at least one copy off-site. But it doesn’t end there. The 3-2-1 rule is evolving, and there are additional considerations around where and how you back up your data.

As part of an overall disaster recovery plan, you should also consider whether to use file and/or image-based backups. This decision will absolutely inform your DR strategy. And it leads to another consideration—understanding how to use bare metal recovery. If you plan to use bare metal recovery (and we’ll explain the reasons why you might want to), you’ll need to plan for image-based backups.

What Is Bare Metal Backup?

The term “bare metal” means a machine without an operating system (OS) installed on it. Fundamentally, that machine is “just metal”—the parts and pieces that make up a computer or server. A “bare metal backup” is designed so that you can take a machine with nothing else on it and restore it to your normal state of work. That means that the backup data has to contain the operating system (OS), user data, system settings, software, drivers, and applications, as well as all of the files. The terms image-based backups and bare metal backups are often used interchangeably to mean the process of creating backups of entire system data.

Bare metal backup is a favored method by many businesses because it ensures absolutely everything is backed up. This allows the entire system to be restored should a disaster result in total system failure. File-based backup strategies are, of course, very effective when just backing up folders and large media files, but when you’re talking about getting people back to work, a lot of man hours go into properly setting up a workstations to interact with internal networks, security protocols, proprietary or specialized software, etc. Since file-based backups do not back up the operating system and its settings, they are almost obsolete in modern IT environments, and operating on a file-based backup strategy can put businesses at significant risk or add downtime in the event of business interruption.

How Does Bare Metal Backup Work?

Bare metal backups allow data to be moved from one physical machine to another, to a virtual server, from a virtual server back to a physical machine, or from a virtual machine to a virtual server—offering a lot of flexibility.

This is the recommended method for backing up preferred system configurations so they can be transferred to other machines. The operating system and its settings can be quickly copied from a machine that is experiencing IT issues or has failing hardware, for example. Additionally, with a bare metal backup, virtual servers can also be set up very quickly instead of configuring the system from scratch.

What is Bare Metal Recovery (BMR) or Bare-Metal Restore?

As the name suggests, bare metal recovery is the process of recovering the bare metal (image-based) backup. By launching a bare metal recovery, a bare metal machine will retrieve its previous operating system, all files, folders, programs, and settings, ensuring the organization can resume operations as quickly as possible.

How Does Bare Metal Recovery Work?

A bare metal recovery (or restore) works by recovering the image of a system that was created during the bare metal backup. The backup software can then reinstate the operating system, settings, and files on a bare metal machine so it is fully functional again.

This type of recovery is typically issued in a disaster situation when a full server recovery is required, or when hardware has failed.

Why Is BMR Important?

The importance of BMR is dependent on an organization’s recovery time objective (RTO), the metric for measuring how quickly IT infrastructure can return online following a data disaster. The need for high-speed recovery, which in most cases is a necessity, means many businesses use bare metal recovery as part of their backup recovery plan.

If an OS becomes corrupted or damaged and you do not have a sufficient recovery plan in place, then the time needed to reinstall it, update it, and apply patches can result in significant downtime. BMR allows a server to be completely restored on a bare metal machine to its exact settings and configured simply and quickly.

Another key factor for choosing BMR is to protect against cybercrime. If your IT team can pinpoint the time when a system was infected with malware or ransomware, then a restore can be executed to wipe the machine clean of any threats and remove the source of infection, effectively rolling the system back to a time when everything was running smoothly.

BMR’s flexibility also means that it can be used to restore a physical or virtual machine, or simply as a method of cloning machines for easier deployment in the future.

The key advantages of bare metal recovery (BMR) are:

  • Speed: BMR offers faster recovery speeds than if you had to reinstall your OS and run updates and patches. It restores every system element to its exact state as when it was backed up, from the layout of desktop icons to the latest software updates and patches—you do not have to rebuild it step by step.
  • Security: If a system is subjected to a ransomware attack or any other type of malware or virus, a bare metal restore allows you to safely erase an entire machine or system and restore from a backup created before the attack.
  • Simplicity: Bare metal recovery can be executed without installing any additional software on the bare machine.

BMR: Some Caveats

Like any backup and recovery method, some IT environments may be more suitable for BMR than others, and there are some caveats that an organization should be aware of before implementing such a strategy.

First, bare metal recovery can experience issues if the restore is being executed on a machine with dissimilar hardware. The reason for this is that the original operating system copy needs to load the correct drivers to match the machine’s hardware. Therefore, if there is no match, then the system will not boot.

Fortunately, Backblaze Partner integrations, like MSP360, have features that allow you to restore to dissimilar hardware with no issues. This is a key feature to look for when considering BMR solutions. Otherwise, you have to seek out a new machine that has the same hardware as the corrupted machine.

Second, there may be a reason for not wanting to run BMR, such as a minor data accident when a simple file/folder restore is more practical, taking less time to achieve the desired results. A bare metal recovery strategy is recommended when a full machine needs to be restored, so it is advised to include several different options in your backup recovery plan to cover all scenarios.

Bare Metal Recovery in the Cloud

An on-premises disaster disrupts business operations and can have catastrophic implications for your bottom line. And, if you’re unable to run your preferred backup software, performing a bare metal recovery may not even be an option. Backblaze has created a solution that draws data from Veeam Backup & Replication backups stored in Backblaze B2 Cloud Storage to quickly bring up an orchestrated combination of on-demand servers, firewalls, networking, storage, and other infrastructure in phoenixNAP’s bare metal cloud servers. This Instant Business Recovery (IBR) solution includes fully-managed, affordable 24/7 disaster recovery support from Backblaze’s managed service provider partner specializing in disaster recovery as a service (DRaaS).

IBR allows your business to spin up your entire environment, including the data from your Backblaze B2 backups, in the cloud. With this active DR site in the cloud, you can keep business operations running while restoring your on-premises systems. Recovery is initiated via a simple web form or phone call. Instant Business Recovery protects your business in the case of on-premises disaster for a fraction of the cost of typical managed DRaaS solutions. As you build out your business continuity plan, you should absolutely consider how to sustain your business in the case of damage to your local infrastructure; Instant Business Recovery allows you to begin recovering your servers in minutes to ensure you meet your RTO.

BMR and Cloud Storage

Bare metal backup and recovery should be a key part of any DR strategy. From moving operating systems and files from one physical machine to another, to transferring image-based backups from a virtual machine to a virtual server, it’s a tool that makes sense as part of any IT admin’s toolbox.

Your next question is where to store your bare metal backups, and cloud storage makes good sense. Even if you’re already keeping your backups off-site, it’s important for them to be geographically distanced in case your entire area experiences a natural disaster or outage. That takes more than just backing up to the cloud, really—it’s important to know where your cloud storage provider stores their data for both compliance standards, speed of content delivery (if that’s a concern), and to ensure that you’re not unintentionally storing your off-site backup close to home.

Remember that these are critical backups you’ll need in a disaster scenario, so consider recovery time and expense when choosing a cloud storage provider. While it may seem more economical to use cold storage, it comes with long recovery times and high fees to recover quickly. Using always-hot cloud storage is imperative, both for speed and to avoid an additional expense in the form of a bill for egress fees after you’ve recovered from a cyberattack.

Host Your Bare Metal Backups in Backblaze B2 Cloud Storage

Backblaze B2 Cloud Storage provides S3 compatible, Object Lock-capable hot storage for one-fifth the cost of AWS and other public clouds—with no trade-off in performance.

Get started today, and contact us to support a customized proof of concept (PoC) for datasets of more than 50TB.

The post How To Do Bare Metal Backup and Recovery appeared first on Backblaze Blog | Cloud Storage & Cloud Backup.

10 Stories from 10 Years of Drive Stats Data

Post Syndicated from original https://www.backblaze.com/blog/10-stories-from-10-years-of-drive-stats-data/

On April 10, 2013, Backblaze saved our first daily hard drive snapshot file. We had decided to start saving these daily snapshots to improve our understanding of the burgeoning collection of hard drives we were using to store customer data. That was the beginning of the Backblaze Drive Stats reports that we know today.

Little did we know at the time that we’d be collecting the data for the next 10 years or writing various Drive Stats reports that are read by millions, but here we are.

I’ve been at Backblaze longer than Drive Stats and probably know the drive stats data and history better than most, so let’s spend the next few minutes getting beyond the quarterly and lifetime tables and charts and I’ll tell you some stories from behind the scenes of Drive Stats over the past 10 years.

1. The Drive Stats Light Bulb Moment

I have never been able to confirm whose idea it was to start saving the Drive Stats data. The two Brians—founder Brian Wilson, our CTO before he retired and engineer Brian Beach, our current CTO—take turns eating humble pie and giving each other credit for this grand experiment.

But, beyond the idea, one Brian or the other also had to make it happen. Someone had to write the Python scripts to capture and process the data, and then deploy these scripts across our fleet of shiny red Storage Pods and other storage servers, and finally someone also had to find a place to store all this newly captured data. My money’s on—to paraphrase Mr. Edison—founder Brian being the 1% that is inspiration, and engineer Brian being the 99% that is perspiration. The split could be 90/10 or even 80/20, but that’s how I think it went down.

2. The Experiment Begins

In April 2013, our Drive Stats data collection experiment began. We would collect and save basic drive information, including the SMART statistics for each drive, each day. The effort was more than a skunkworks project, but certainly not a full-fledged engineering project. Conducting such experiments has been part of our DNA since we started and we continue today, albeit with a little more planning and documentation. Still the basic process—try something, evaluate it, tweak it, and try again—still applies, and over the years, such experiments have led to the development of our Storage Pods and our Drive Farming efforts.

Our initial goal in collecting the Drive Stats data was to determine if it would help us better understand the failure rates of the hard drives we were using to store data. Questions that were top of mind included: Which drive models lasted longer? Which SMART attributes really foretold drive health? What is the failure rate of different models? And so on. The answers, we hoped, would help us make better purchasing and drive deployment decisions.

3. Where “Drive Days” Came From

To compute a failure rate of a given group of drives over a given time period, you might start with two pieces of data: the number of drives, and the number of drive failures over that period of time. So, if over the last year, you had 10 drives and one failed, you could say the 10% failure rate for the year. That works for static systems, but data centers are quite different. On a daily basis, drives enter and leave the system. There are new drives, failed drives, migrated drives, and so on. In other words, the number of drives is probably not consistent across a given time period. To address this issue, CTO Brian (current CTO Brian that is) worked with professors from UC Santa Cruz on the problem and the idea of Drive Days was born. A drive day is one drive in operation for one day, so one drive in operation for ten days is ten drive days.

To see this in action you start by defining the cohort of drives and the time period you want and then apply the following formula to get the Annualized Failure Rate (AFR).

AFR = ( Drive Failures / ( Drive Days / 365 ) )

This simple calculation allows you to compute an Annualized Failure Rate for any cohort of drives over any period of time and accounts for a variable number of drives over that period.

4. Wait! There’s No Beginning?

In testing out our elegantly simple AFR formula, we discovered a problem. Not with the formula, but with the data. We started collecting data on April 10, 2013, but many of the drives were present before then. If we wanted to compute the AFR of model XYZ for 2013, we could not count the number of drive days those drives had prior to April 10—there were none.

Never fear, SMART 9 raw value to the rescue. For the uninitiated, the SMART 9 raw value contains the number of power-on hours for a drive. A little math gets you the number of days—that is Drive Days—and you are ready to go. This little workaround was employed whenever we needed to work with drives that came into service before we started collecting data.

Why not use SMART 9 all of the time? A couple of reasons. First, sometimes the value gets corrupted. Especially when the drive is failing, it could be zero or a million or anywhere in between. Second, a new drive can have non-default SMART values. Perhaps it is just part of the burn in process or a test group at the manufacturer, or maybe the drive was a return that passed some qualification process.

Regardless, the starting value of SMART 9 wasn’t consistent across drives, so we just counted operational days in our environment and used SMART 9 as a substitute only when we couldn’t count those days. Using SMART 9 is moot now as these days there are no drives left in the current drive collection which were present prior to April 2013.

5. There’s Gold In That There Data

While the primary objective of collecting the data was to improve our operations, there was always another potential use lurking about—to write a blog post, or two, or 56. Yes, we’ve written 56 blog posts and counting based on our Drive Stats data. And no, we could have never imagined that would be the case when this all started back in 2013.

The very first Drive Stats-related blog post was written by Brian Beach (current CTO Brian, former engineer Brian) in November 2013 (we’ve updated it since then). The post had the audacious title of “How Long Do Disk Drives Last?” and a matching URL of “www.backblaze.com/blog/how-long-do-disk-drives-last/”. Besides our usual blog readers, search engines were falling all over themselves referring new readers to the site based on searches for variants of the title and the post became first page search material for multiple years. Alas, all Google things must come to an end, as the post disappeared into page two and then the oblivion beyond.

Buoyed by the success of the first post, Brian went on to write several additional posts over the next year or so based on the Drive Stats data.

That’s an impressive body of work, but Brian is, by head and heart, an engineer, and writing blog posts meant he wasn’t writing code. So after his post to open source the Drive Stats data in February 2015, he passed the reins of this nascent franchise over to me.

6. What’s in a Name?

When writing about drive failure rates, Brian used the term “Hard Drive Reliability” in his posts. When I took over, beginning with the Q1 2015 report, we morphed the term slightly to “Hard Drive Reliability Stats.” That term lasted through 2015 and in Q1 2016 it was shortened to “Hard Drive Stats.” I’d like to tell you there was a great deal of contemplation and angst that went into the decision, but the truth is the title of the Q1 2016 post “One Billion Drive Hours and Counting: Q1 2016 Hard Drive Stats,” was really long and we left out the word reliability so it wouldn’t be any longer—something about title length, the URL, search terms, and so on. The abbreviated version stuck and to this day we publish “Hard Drive Stats” reports. That said, we often shorten the term even more to just “Drive Stats,” which is technically more correct given we have solid state drives (SSDs), not just hard disk drives (HDDs), in the dataset when we talk about boot drives.

7. Boot Drives

Beginning in Q4 2013, we began collecting and storing failure and SMART stats data from some of the boot drives that we use on our storage servers in the Drive Stats data set. Over the first half of 2014, additional boot drive models were configured to report their data and by Q3 2014, all boot drives were reporting. Now the Drive Stats dataset contained both data from the data drives and the boot drives of our storage servers. There was one problem: there was no field for drive source. In other words, to distinguish a data drive from a boot drive, you needed to use the drive model.

In Q4 2018, we began using SSDs as boot drives and began collecting and storing drive stats data from the SSDs as well. Guess what? There was no drive type field either, so SSD and HDD boot drives had to be distinguished by their model numbers. Our engineering folks are really busy on product and platform features and functionality, so we use some quick-and-dirty SQL on the post-processing side to add the missing information.

The boot drive data sat quietly in the Drive Stats dataset for the next few years until Q3 2021 when we asked the question “Are SSDs Really More Reliable Than Hard Drives?” That’s the first time the boot drive data was used. In this case, we compared the failure rates of SSDs and HDDs over time. As the number of boot drive SSDs increased, we started publishing a semi-annual report focused on just the failure rates for the SSD boot drives.

8. More Drives = More Data

On April 10, 2013, data was collected for 21,195 hard drives. The .csv data file for that day was 3.2MB. The numbers of drives and the amount of data has grown just a wee bit since then, as you can see in the following charts.

The current size of a daily Drive Stats .csv file is over 87MB. If you downloaded the entire Drive Stats dataset, you would need 113GB of storage available once you unzipped all the data files. If you are so inclined, you’ll find the data on our Drive Stats page. Once there, open the “Downloading the Raw HD Test Data” link to see a complete list of the files available.

9. Who Uses The Drive Stats Dataset?

Over the years, the Drive Stats dataset has been used in multiple ways for different reasons. Using Google Scholar, you can currently find 660 citations for the term “Backblaze hard drive stats” going back to 2014. This includes 18 review articles. Here are a couple of different ways the data has been used.

      • As a teaching tool: Several universities and similar groups have used the dataset as part of their computer science, data analytics, or statistics classes. The dataset is somewhat large, but it’s still manageable, and can be divided into yearly increments if needed. In addition, it is reasonably standardized, but not perfect, providing a good data cleansing challenge. The different drive models and variable number of drive counts allows students to practice data segmentation across the various statistical methods they are studying.
      • For artificial intelligence (AI) and machine learning: Over the years several studies have been conducted using AI and machine learning techniques applied to the Drive Stats data to determine if drive failure or drive health is predictable. We looked at one method from Interpretable on our blog, but there are several others. The results have varied, but the general conclusion is that while you can predict drive failure to some degree, the results seem to be limited to a given drive model.

10. Drive Stats Experiments at Backblaze

Of course, we also use the Drive Stats data internally at Backblaze to inform our operations and run our own experiments. Here are a couple examples:

      • Inside Backblaze: Part of the process in developing and productizing the Backblaze Storage Pod was the development of the software to manage the system itself. Almost from day one, we used certain SMART stats to help determine if a drive was not feeling well. In practice, other triggers such as ATA errors or FSCKs alerts, will often provide the first indicator of a problem. We then apply the historical and current SMART stats data that we have recorded and stored to complete the analysis. For example, we receive an ATA error on a given drive. There could be several non-drive reasons for such an error, but we can quickly determine that the drive has a history of increasing bad media and command timeouts values over time. Taken together, it could be time to replace that drive.
      • Trying new things: The Backblaze Evangelism team decided that SQL was too slow when accessing the Drive Stats data. They decided to see if they could use a combination of Parquet and Trino to make the process faster. Once they had done that, they went to work duplicating some of the standard queries we run each quarter in producing our Drive Stats Reports.

What Lies Ahead

First, thank you for reading and commenting on our various Drive Stats Reports over the years. You’ve made us better and we appreciate your comments—all of them. Not everyone likes the data or the reports, and that’s fine, but most people find the data interesting and occasionally useful. We publish the data as a service to the community at large, and we’re glad many people have found it helpful, especially when it can be used in teaching people how to test, challenge, and comprehend data—a very useful skill in navigating today’s noise versus knowledge environment.

We will continue to gather and publish the Drive Stats dataset each quarter for as long as it is practical and useful to our readers. That said, I can’t imagine we’ll be writing Drive Stats reports 10 years from now, but just in case, if anyone is interested in taking over, just let me know.

The post 10 Stories from 10 Years of Drive Stats Data appeared first on Backblaze Blog | Cloud Storage & Cloud Backup.

A Tale of Two NAS Setups, Part Two: Managing Media Files

Post Syndicated from James Flores original https://www.backblaze.com/blog/a-tale-of-two-nas-setups-part-two-managing-media-files/

A decorative diagram showing icons of media files flowing through a NAS to the cloud.

Editor’s Note

This post is the second in a two-part series about sharing practical NAS tips and tricks to help readers with their own home or office NAS setups. Check out Part One where Backblazer Vinodh Subramanian walks through how he set up a NAS system at home to manage files and back up devices. And read on to learn how Backblazer James Flores uses a NAS to manage media files as a professional filmmaker.

The modern computer has been in existence for decades. As hardware and software have advanced, 5MB of data has gone from taking up a room and weighing a literal ton to being orders of magnitude more compact than what you would find on a typical smartphone. No matter how much storage there is, though, we—I know I am not alone—have been generating content to fill the space. Industry experts say that we reached 64.2 zettabytes of data created, captured, copied, and consumed globally in 2020, and we’re set to reach more than 180 zettabytes in 2025. And a lot of that is media—from .mp3s and .jpgs to .movs, we all have a stock pile of files sitting somewhere.

If you’re creating content you probably have this problem to the 10th power. I started out creating content by editing videos in high school, and my content collection has only grown from there. After a while, the mix of physical media formats had amassed into a giant box stuffed with VHS tapes, DVCPRO tapes, Mini DVs, DVDs, CD-ROMs, flash drives, external hard disk drives (HDDs), internal laptop HDDs, an Apple TimeCapsule, SD cards, and, more recently, USB 3.0 hard drives. Needless to say, it’s unruly at best, and a huge data loss event waiting to happen at worst.

Today, I’m walking through how I solved a problem most of us face: running into the limits of storage.

The Origin Story

My collection of media started because of video editing. Then, when I embarked on an IT career, the amount of data I was responsible for only grew, and my new position came with the (justifiable) paranoia of data loss. In the corporate setting, a network attached storage device (NAS) quickly became the norm—a huge central repository of data accessible to any one on the network and part of the domain.

An image of a Synology network attached storage (NAS) device.
A Synology NAS.

Meanwhile in 2018, I returned to creating content again in full swing. What started with small webinar edits on a Macbook Air quickly turned into scripted productions complete with custom graphics and 4K raw footage. And thus the data bloat continued.

But this time (informed by my IT background), the solution was easy. Instead of burning data to several DVDs and keeping them in a shoebox, I used larger volume storage like hard drives (HDDs) and NAS devices. After all, HDDs are cheap and relatively reliable.

And, I had long since learned that a good backup strategy is key. Thus, I embarked on making my backup plan an extension of my data management plan.

The Plan

The plan was simple. I wanted to have a 4TB NAS to use as a backup location and to extend my internal storage in case I needed to. After all, my internal drive was 7TB—who’s going to use more than that? (I thought at the time, unable to see my own future.) Setting up NAS is relatively simple: it replicated a standard IT setup, with a switch, a static IP address, and some cables.

But first, I needed hardwired network access in my office which is far away from my router. As anyone who works with media knows, accessing a lot of large files over wifi just isn’t fun. Luckily my house was pre-wired with CAT5—CAT5 cables that were terminated as phone lines. (Who uses a landline these days?) After terminating the cables with CAT5E adapters, installing a small 10-port patch panel and a new switch, I had a small network where my entire office was hardwired to my router/modem.

As far as the NAS goes, I chose a Synology DS214+, a simple two-bay NAS. After all, I didn’t expect to really use it all. I worked primarily off of my internal storage, then files were archived to this Synology device. I could easily move them back and forth between my primary and secondary storage because I’d created my internal network, and life was good.

Data Bloat Strikes Again

Fast forward to 2023. Now, I’m creating content routinely for two different companies, going to film school, and flexing my freelance editing skills on indie films. Even with the extra storage I’d built in for myself, I am at capacity yet again. Not only have I filled up Plan A on my internal drive, but now my Plan B NAS is nearing capacity. And, where are those backups being stored? My on-prem-only solution wasn’t cutting it.

A photograph of a room with an overwhelming amount of old and new technology and cables.
This wasn’t me—but I get it.

Okay, New Plan

So what’s next?

Since I’m already set up for it, there’s a good argument to expand the NAS. But is that really scalable? In an office full of film equipment, a desk, a lightboard, and who knows what else in the future, do I really need another piece of equipment that will run all day?

Like all things tech, the answer is in the cloud. Synology’s NAS was already set up for cloud-based workflows, which meant that I got the best of both worlds: the speed of on-prem and the flexibility of the cloud.

Synology has its own marketplace with add-on packages which are essentially apps that let you add functionality to your device. Using their Cloud Sync app, you can sync an entire folder on your NAS to a cloud object storage provider. For me that means: Instead of buying another NAS device (hardware I have to maintain) or some other type of external storage (USB drives, LTO tapes), I purchase cloud storage, set up Cloud Sync to automatically sync data to Backblaze B2 Cloud Storage, and my data is set. It’s accessible from anywhere, I can easily create off-site backups, and I am not adding hardware to my jam-packed office.

I Need a Hero

This is great for my home office and the small projects I do in my spare time but how is this simple setup being used to modernize media workflows?

A big sticking point for media folks is what we talked about before—that large files can take up too much bandwidth to work well on wifi. However, as the cloud has become more accessible to all, there are many products today on the market designed to solve that problem for media teams specifically.

Up Amongst the Clouds

One problem though: Many of these tools push their own cloud storage. You could opt to play cloud storage hopscotch: sign up for the free tier of Google Drive,  drag and drop files (and hope the browser keeps the connection going), hit capacity, then jump to the next cloud storage provider’s free tier and fill that up. With free accounts across the internet, all of the sudden you have your files stored all over the place, and you may not even remember where they all are. So, instead of my cardboard box full of various types of media, we end up with media in silos across different cloud providers.

And you can’t forget the cost. Cloud storage used to be all about the big guys. Beyond the free tiers, pricing was designed for big business, and many cloud storage providers have tiered pricing based on your usage, charges for downloads, throttled speeds, and so on. But, the cost of storage per GB has only decreased over the years, so (in theory), the cost of cloud storage should have gone down. (And I can’t resist a shameless plug here: At Backblaze, storage is ⅕ the cost of other cloud providers.)

An image of a chalkboard and a piggy bank. The chalkboard displays a list of fees with dollar signs indicating how much or little they cost.
Key takeaway: Cute piggy bank, yes. Prohibitively expensive cloud storage, no.

Using NAS for Bigger Teams

It should be news to no one that COVID changed a lot in the media and entertainment industry, bringing remote work to our front door, and readily-available cloud products are powering those remote workflows. However, when you’re storing in each individual tool, it’s like when you have a USB drive over here, and an external hard drive over there.

As the media tech stack has evolved, a few things have changed. You have more options when it comes to choosing your cloud storage provider. And, cloud storage providers have made it a priority for tools to talk to each other through APIs. Here’s a good example: now that my media files are synced to and backed up with Synology and Backblaze, they are also readily accessible for other applications to use. This could be direct access to my Backblaze storage with a nonlinear editing system (NLE) or any modern workflow automation tool. Storing files in the cloud is only an entry point for a whole host of other cloud workflow hacks that can make your life immensely easier.

These days, you can essentially “bring your own storage” (BYOS, let’s make it a thing). Now, the storage is the foundation of how I can work with other tools, and it all happens invisibly and easily. I go about my normal tasks, and my files follow me.

With many tools, it’s as simple as pointing your storage to Backblaze. When that’s not an option, that’s when you get into why APIs matter, a story for another day (or another blog post). Basically, with the right storage, you can write your own rules that your tools + storage execute, which means that things like this LucidLink, iconik, and Backblaze workflow are incredibly easy.

Headline: Cloud Saves the (Media) World

So that’s the tale of how and why I set up my home NAS, and how that’s naturally led me to cloud storage. The “how” has gotten easier over the years. It’s still important to have a hard-wired internet connection for my NAS device, but now that you can sync to the cloud and point your other tools to use those synced files, you have the best of both worlds: a hybrid cloud workflow that gives you maximum speed with the ability to grow your storage as you need to.

Are you using NAS to manage your media at home or for a creative team? We’d love to hear more about your setup and how it’s working for you.

The post A Tale of Two NAS Setups, Part Two: Managing Media Files appeared first on Backblaze Blog | Cloud Storage & Cloud Backup.

Object Storage for Film, Video, and Content Creation

Post Syndicated from James Flores original https://www.backblaze.com/blog/object-storage-for-film-video-and-content-creation/

A decorative image showing icons representing drives and storage options superimposed on a cloud. A title reads: Object Storage for Media Workflows

Twenty years ago, who would have thought going to work would mean spending most of your time on a computer and running most of your applications through a web browser or a mobile app? Today, we can do everything remotely via the power of the internet—from email to gaming, from viewing our home security cameras to watching the latest and greatest movie trailers—and we all have opinions about the best browsers, too…

Along with that easy, remote access, a slew of new cloud technologies are fueling the tech we use day in and day out. To get to where we are today, the tech industry had to rethink some common understandings, especially around data storage and delivery. Gone are the days that you save a file on your laptop, then transport a copy of that file via USB drive or CD-ROM (or, dare we say, a floppy disk) so that you can keep working on it at the library or your office. And, those same common understandings are now being reckoned with in the world of film, video, and content creation.

In this post, I’ll dive into storage, specifically cloud object storage, and what it means for the future of content creation, not only for independent filmmakers and content creators, but also in post-production workflows.

The Evolution of File Management

If you are reading this blog you are probably familiar with a storage file system—think Windows Explorer, the Finder on Mac, or directory structures in Linux. You know how to create a folder, create files, move files, and delete folders. This same file structure has made its way into cloud services such as Google Drive, Box, and Dropbox. And many of these technologies have been adopted to store some of the largest content, namely media files like .mp4, .wav, or .r3d files.

But, as camera file outputs grow larger and larger and the amount of content generated by creative teams soars, folders structures get more and more complex. Why is this important?

Well, ask yourself: How much time have you spent searching for clips you know exist, but just can’t seem to find? Sure, you can use search tools to search your folder structure but as you have more and more content, that means searching for the proverbial needle in a haystack—naming conventions can only do so much, especially when you have dozens or hundreds of people adding raw footage, creating new versions, and so on.

Finding files in a complex file structure can take so much time that many of the aforementioned companies create system limits preventing long searches. In addition, they may limit uploads and downloads making it difficult to manage the terabytes of data a modern production creates. So, this all begs the question: Is a traditional file system really the best for scaling up, especially in data-heavy industries like filmmaking and video content creation? Enter: Cloud object storage.

Refresher: What is Object Storage?

You can think of object storage as simply a big pool of storage space filled with object data. In the past we’ve defined object data as “some assemblage of data with one unique identifier and an infinite amount of metadata.” The three components that comprise objects in object storage are key here. They include:

  1. Unique Identifier: Referred to as a universally unique identifier (UUID) or global unique identifier (GUID), this is simply a complex number identifier.
  2. Infinite Metadata: Data about the data with endless possibilities.
  3. Data: The actual data we are storing.

So what does that actually mean?

It means each object (this can be any type of file—a .jpg, .mp4, .wav, .r3d, etc.) has an automatically generated unique identifier which is just a number (e.g. 4_z6b84cf3535395) versus a folder structure path you must manually create and maintain (e.g. D:\Projects\JOB4548\Assets\RAW\A001\A001_3424OP.RDM\A001_34240KU.RDC\
A001_A001_1005ku_001.R3D).

An image of a card catalog.
Interestingly enough, this is where metadata comes from.

It also means each object can have an infinite amount of metadata attached to it. Metadata, put simply, is a “tag” that identifies how the file is used or stored. There are several examples of metadata, but here are just a few:

  • Descriptive metadata, like the title or author.
  • Structural metadata, like how to order pages in a chapter.
  • Administrative metadata, like when the file was created, who has permissions to it, and so on.
  • Legal metadata, like who holds the copyright or if the file is in the public domain.

So, when you’re saying an image file is 400×400 pixels and in .jpg format, you’ve just identified two pieces of metadata about the file. In filmmaking, metadata can include things like reel numbers or descriptions. And, as artificial intelligence (AI) and machine learning tools continue to evolve, the amount of metadata about a given piece of footage or image only continues to grow. AI tools can add data around scene details, facial recognition, and other identifiers, and since those are coded as metadata, you will be able to store and search files using terms like “scenes with Bugs Bunny” or “scenes that are in a field of wildflowers”—and that means that you’ll spend less time trying to find the footage you need when you’re editing.

When you put it all together, you have one gigantic content pool that can grow infinitely. It uses no manually created complex folder structure and naming conventions. And it can hold an infinite amount of data about your data (metadata), making your files more discoverable.

Let’s Talk About Object Storage for Content Creation

You might be wondering: What does this have to do with the content I’m creating?

Consider this: When you’re editing a project, how much of your time is spent searching for files? A recent study by GISTICS found that the average creative person searches for media 83 times a week. Maybe you’re searching your local hard drive first, then your NAS, then those USB drives in your closet. Or, maybe you are restoring content off an LTO tape to search for that one clip you need. Or, maybe you moved some of your content to the cloud—is it in your Google Drive or in your Dropbox account? If so, which folder is it in? Or was it the corporate Box account? Do you have permissions to that folder? All of that complexity means that the average creative person fails to find the media they are looking for 35% of the time. But you probably don’t need a study to tell you we all spent huge amounts of time searching for content.

An image showing a command line interface window with a failed search.
Good old “request timed out.”

Here is where object storage can help. With object storage, you simply have buckets (object storage containers) where all your data can live, and you can access it from wherever you’re working. That means all of the data stored on those shuttle drives sitting around your office, your closet of LTO tapes, and even a replica of your online NAS are in a central, easily accessible location. You’re also working from the most recent file.

Once it’s in the cloud, it’s safe from the types of disasters that affect on-premises storage systems, and it’s easy to secure your files, create backups, and so on. It’s also readily available when you need it, and much easier to share with other team members. It’s no wonder many of the apps you use today take advantage of object storage as their primary storage mechanism.

The Benefits of Object Storage for Media Workflows

Object storage offers a number of benefits for creative teams when it comes to streamlining workflows, including:

  • Instant access
  • Integrations
  • Workflow interoperability
  • Easy distribution
  • Off-site back up and archive

Instant Access

With cloud object storage, content is ready when you need it. You know inspiration can strike at any time. You could be knee deep in editing a project, in the middle of binge watching the latest limited series, or out for a walk. Whenever the inspiration decides to strike, having instant access to your library of content is a game changer. And that’s the great thing about object storage in the cloud: you gain access to massive amounts of data with a few clicks.

Integrations

Object storage is a key component of many of the content production tools in use today. For example, iconik is a cloud-native media asset management (MAM) tool that can gather and organize media from any storage location. You can point iconik to your Backblaze B2 Bucket and use its advanced search functions as well as its metadata tagging.

Workflow Interoperability

What if you don’t want to use iconik, specifically? What’s great about using cloud storage as a centralized repository is that no matter what application you use, your data is in a single place. Think of it like your external hard drive or NAS—you just connect that drive with a new tool, and you don’t have to worry about downloading everything to move to the latest and greatest. In essence, you are bringing your own storage (BYOS!).

Here’s an example: CuttingRoom is a cloud native video editing and collaboration tool. It runs entirely in your web browser and lets you create unique stories that can instantly be published to your destination of choice. What’s great about CuttingRoom is its ability to read an object storage bucket as a source. By simply pointing CuttingRoom to a Backblaze B2 Bucket, it has immediate access to the media source files and you can get to editing. On the other hand, if you prefer using a MAM, that same bucket can be indexed by a tool like iconik.

Easy Distribution

Now that your edit is done, it’s time to distribute your content to the world. Or, perhaps you are working with other teams to perfect your color and sound, and it’s time to share your picture lock version. Cloud storage is ready for you to distribute your files to the next team or an end user.

Here’s a recent, real-world example: If you have been following the behind-the-scenes articles about creating Avatar: The Way of Water, you know that not only was its creation the spark of new technology like the Sony Venice camera with removable sensors, but the distribution featured a cloud centric flow. Footage (the film) was placed in an object store (read: a cloud storage database), processed into different formats, languages were added with 3D captions, and then footage was distributed directly from a central location.

And, while not all of us have Jon Landau as our producer, a huge budget, and a decade to create our product, this same flexibility exists today with object storage—with the added bonus that it’s usually budget-friendly as well.

Off-Site Back Up and Archive

And last but certainly not least, let’s talk back up and archive. Once a project is done, you need space for the next project, but no one wants to risk losing the old project. Who out there is completely comfortable hitting the delete key as well as saying yes to the scary prompt, “Are you sure you want to delete?”

Well, that’s what you would have to do in the past. These days, object storage is a great place to store your terabytes and terabytes of archived footage without cluttering your home, office, or set with additional hardware. Compared with on-premises storage, cloud storage lets you add more capacity as you need it—just make sure you understand cloud storage pricing models so that you’re getting the best bang for your buck.

If you’re using a NAS device in your media workflow, you’ll find you need to free up your on-prem storage. Many NAS devices, like Synology and QNAP, have cloud storage integrations that allow you to automatically sync and archive data from your device to the cloud. In fact, you could start taking advantage of this today.

No delete key here—just a friendly archive button.

Getting Started With Object Storage for Media Workflows

Migrating to the cloud may seem daunting, but it doesn’t have to be. Especially with the acceleration of hybrid workflows in the film industry recently, cloud-based workflows are becoming more common and better integrated with the tools we use every day. You can test this out with Backblaze using your free 10GB that you get just for signing up for Backblaze B2. Sure, that may not seem like much when a single .r3d file is 4GB. But with that 10GB, you can test upload speeds and download speeds, try out integrations with your preferred workflow tools, and experiment with AI metadata. If your team is remote, you could try an integration with LucidLink. Or if you’re looking to power a video on-demand site, you could integrate with one of our content delivery network (CDN) partners to test out content distribution, like Backblaze customer Kanopy, a streaming service that delivers 25,000 videos to libraries worldwide.

Change is hard, but cloud storage can be easy. Check out all of our media workflow solutions and get started with your 10GB free today.

The post Object Storage for Film, Video, and Content Creation appeared first on Backblaze Blog | Cloud Storage & Cloud Backup.

A Tale of Two NAS Setups, Part One: Easy Off-Site Backups

Post Syndicated from Vinodh Subramanian original https://www.backblaze.com/blog/a-tale-of-two-nas-setups-part-one-easy-off-site-backups/

A decorative images showing two phones and a laptop flowing data into a NAS device and then a storage cloud.

Network attached storage (NAS) devices offer centralized data storage solutions, enabling users to easily protect and access their data locally. You can think of a NAS device as a powerful computer that doesn’t have a display or keyboard. NAS can function as extended hard disks, virtual file cabinets, or centralized storage systems depending on individual needs. While NAS devices provide local data protection, a hybrid setup with cloud storage offers off-site protection by storing files on geographically remote servers.

This blog is the first in a two part series that will focus on home NAS setups, exploring how two Backblazers set up their NAS devices and connected them to the cloud. We’ll aim to present actionable setup tips and explain what each of our data storage needs are so that you can create your own NAS setup strategy.

I’m Vinodh, your first user. In this post, I will walk you through how I use a Synology Single-Bay NAS device and Backblaze B2 Cloud Storage.

Synology NAS device

Why Did I Need a NAS Device At My Home?

Before I share my NAS setup, let’s take a look at some of the reasons why I needed a NAS device to begin with. Knowing that will give you a better understanding of what I’m trying to accomplish with NAS.

My work at Backblaze involves guiding customers through all things NAS and cloud storage. I use a single-bay NAS device to understand its features and performance. I also create demos, test use cases, and develop marketing materials and back them up on my NAS and in the cloud to achieve the requirements of a 3-2-1 backup strategy. That strategy recommends that you have three copies of data stored in two different locations with one copy off-site.

Additionally, I use my NAS setup to off-load the (stunning!) photos and videos from my wife’s and my iPhones to free up space and protect them safely in the cloud. Lastly, I’d also like to mention that I work remotely and collaborate with people as part of my regular work, but today we’re going to talk about how I back up my files using a hybrid cloud storage setup that combines Synology NAS and Backblaze B2. Combining NAS and cloud storage is a great backup and storage solution for both business and personal use, providing a layer of protection in the event of hardware failures, accidental deletions, natural disasters, or ransomware attacks.

Now that you understand a little bit about me and what I’m trying to accomplish with my NAS device, let’s jump into my setup.

What Do I Need From My NAS Device?

Needless to say, there are multiple ways to set up a NAS device. But, the most common setup is for backing up your local devices (computer, phones, etc.) to your NAS device. A basic setup like this, with a few computers and devices backing up to the same NAS device, protects data in that you have a second copy of your data stored locally. However, the data can still be lost if there is hardware failure, theft, fire, or any other unexpected event that poses a threat to your home. This means that your backup strategy needs something more in order to truly protect your data.

Off-site protection with cloud storage solves this problem. So, when I planned my NAS setup, I wanted to make sure I had a NAS device that integrates well with a cloud storage provider to achieve a 3-2-1 backup strategy.

Now that we’ve talked about my underlying data protection strategy, here are the devices and tools I used to create a complete 3-2-1 NAS backup setup at my home:

  • Devices with data:
    • MacBook Pro–1
    • iPhone–2
  • Storage products:
    • Synology Device–1
    • Seagate 4TB internal hard disk drive–1
    • Backblaze B2 Cloud Storage
  • Applications:
    • Synology Hyper Backup
    • Synology Photos

What Did I Want to Back Up on My NAS Device?

My MacBook Pro is where I create test use cases, demos, and all the files I need to do my job, such as blog posts, briefs, presentation decks, ebooks, battle cards, and so on. In addition to creating files, I also download webinars, infographics, industry reports, video guides, and any other information that I find useful to support our sales and marketing efforts. As I mentioned previously, I want to protect this business data both locally (for quick access) and in the cloud (for off-site protection). This way, I can not only secure the files, but also remotely collaborate with people from different locations so everyone can access, review, and edit the files simultaneously to ensure timely and consistent messaging.

Meanwhile, my wife and I each have an iPhone 12 with 128GB storage space. Clearly, a total of 256GB is not enough for us—it only takes six to nine months for us to run out of storage on our devices. Once in a while, I clean up the storage space to make sure my phone runs at optimal speed by removing any duplicate or unwanted photos or movies. However, my wife doesn’t like to delete anything as she often wants to look back and remember that one time we went to that one place with those friends. But, she has hundreds of pictures of that one place with those friends. As a result, our iPhone family usage is almost always at capacity.

A screenshot of Vinodh's family storage usage on iCloud. User Sandhya shows 195.7 GB used and user Vinodh shows 58.3 GB used. A third user, Anandaraj, is not using any data.
Our shared storage.

As you can see, being able to off-load pictures and movies from our phones to a local device would give us quick access, protect our memories in the cloud, and free up our iPhone storage.

How I Set Up My NAS Device

To accomplish all that, I set up a Synology Single-Bay NAS Diskstation (Model: DS118) which is powered by a 64-bit quad-core processor and 1GB DDR4 memory. As we discussed above, a NAS device is basically a computer without a display and keyboard.

A Synology one-bay DS118 NAS device and its box.
Unboxing my Synology NAS.

Most NAS devices are diskless, meaning we’d need to buy hard disk drives (HDD) and install them on the NAS device. Also, it is important to note that NAS devices work differently than a typical computer. A NAS device is always running even if you turn off your computer or laptop. A regular hard disk drive may not support this operating pressure. Therefore, it’s essential that we get NAS drives that are suitable for NAS devices. For my NAS device, I got a 4TB HDD from Seagate. You can look up compatible drives on Synology’s compatibility list. When you buy your NAS, the manufacturer should give you a list of which hard drives are compatible, and you can always check out Drive Stats if you want to read up on how long drives last.

An image of a 4 TB Seagate hard drive.
A 4TB Seagate HDD.

After getting the NAS device and HDD, the next item I wanted to figure out is where to keep it. NAS devices typically plug into routers rather than desktops or laptops. With help from my internet service provider, I was able to connect all rooms in our house with an ethernet connection that’s attached to the router. For now, I set up the NAS device in my home office on a spare desk connected to the router via an RJ45 cable.

An image of a Synology NAS device set up on a desk and plugged into an ethernet connection.
My Synology NAS in its new home with an Ethernet connection.

In addition to protecting data locally on the NAS device, I also use B2 Cloud Storage for off-site protection. Every NAS has its own software that helps you set up how your backups occur from your personal devices to your NAS, and that software will also have a way to back up to the cloud. On a Synology NAS, that software is called Hyper Backup, and we’ll talk a little bit more about it below.

How I Back Up My Computer to My NAS Device

A diagram showing a laptop and two phones. These upload to the central image, a NAS device. The NAS device backs up to a cloud storage provider.

The above diagram shows how I use a hybrid setup using Synology NAS and B2 Cloud Storage to protect data locally and off-site.

First, I use Synology File Station to upload critical business data to the NAS device. After I configure B2 Cloud Storage with Hyper Backup, all files uploaded to the NAS device automatically get uploaded and stored in B2 Cloud Storage.

Getting set up with B2 Cloud Storage is a simple process. Check out this video demonstration that shows how to get your NAS data to B2 Cloud Storage in 10 minutes or less.

How I Back Up iPhone Photos and Videos to My NAS Device

That takes care of our computer backups. Now on to photo storage. To off-load photos and movies and create more storage space on my phone, I installed the application “Synology Photos” on my and my wife’s iPhones. Now, whenever we take a picture or shoot a movie on our phones, the Synology Photos application automatically stores a copy of the files to the NAS device. And, the Hyper Backup application then copies those photos and movies to B2 Cloud Storage automatically.

This setup has enabled us to not worry about storage space on our phones. Even if we delete those pictures and movies, we can still access them quickly via the NAS device over our local area network (LAN). But most importantly, a copy of those memories is protected off-site in the cloud, and I can access that cloud storage copy easily from anywhere in the world.

Lessons Learned: What I’d Do Differently The Next Time

So, what can you take from my experience setting up a NAS device at home? I learned a few things along the way that you might find useful. Here is my advice if I were to do things differently the second time around:

  • Number of bays: I opted for a single bay NAS device for my home setup. After using the device for about three months now, I realize how much space it saved on my MacBook and iPhones. If I were to do it again, I’d choose a NAS device with four or more bays for increased storage options.
  • Check for Ethernet connectivity: Not all rooms in my house were wired for Ethernet connectivity, and I did not realize that until I started setting up the NAS device. I needed to get in touch with my internet service provider to provide Ethernet connectivity in all rooms—which delayed the setup by two weeks. If you’re looking to set up a NAS device at home, ensure the desired location in your home has an Ethernet connection.
  • Location: I initially wanted to set up my NAS device in the laundry room. However, I realized NAS devices require a space that is well ventilated with minimum exposure to heat, dust, or moisture. Therefore, I’d chosen to set up the NAS device at my office room instead. Consider factors like ventilation, accessibility, and dust exposure of the location for the longevity and performance of your NAS device.

So, whether you are a home user who wants additional storage, a small business owner who wants to create a centralized file storage system, or an IT admin for a mid-size or enterprise organization who wants to securely protect your critical business data both on-premises and off-site storage, the use of a NAS device along with cloud storage provides the protection you need to secure your data.

What’s Next: Looking Forward to Part Two

In part one of this series, we’ve learned how setting up a NAS device at home and connecting it to the cloud can effectively back up and protect critical business data and personal files while accomplishing a 3-2-1 backup strategy. Stay tuned for part two, where James Flores will share with us how he utilizes a hybrid NAS and cloud storage solution to back up, work on, and share media files with users from different locations. In the meantime, we’d love to hear about your experience setting up and using NAS devices with cloud storage. Please share your comments and thoughts below.

The post A Tale of Two NAS Setups, Part One: Easy Off-Site Backups appeared first on Backblaze Blog | Cloud Storage & Cloud Backup.

Virtual vs. Remote vs. Hybrid Production

Post Syndicated from James Flores original https://www.backblaze.com/blog/virtual-vs-remote-vs-hybrid-production/

A decorative image showing icons of a NAS device, a video with a superimposed play button, and a cloud with the Backblaze logo.

For many of us, 2020 transformed our work habits. Changes to the way we work that always seemed years away got rolled out within a few months. Fast forward to today, and the world seems to be returning back to some sense of normalcy. But one thing that’s not going back is how we work, especially for media production teams. Virtual production, remote video production, and hybrid cloud have all accelerated, reducing operating costs and moving us closer to a cloud-based reality.

So what’s the difference between virtual production, remote production, and hybrid cloud workflows, and how can you use any or all of those strategies to improve how you work? At first glance, they all seem to be different variations of the same thing. But there are important differences, and that’s what we’re digging into today. Read on to get an understanding of these new ways of working and what they mean for your creative team.

Going to NAB in April?

Want to talk about your production setup at NAB? Backblaze will be there with exciting new updates and hands-on demos for better media workflows. Oh, and we’re bringing some really hot swag. Reserve time to meet with our team (and snap up some sweet goodies) below.

➔ Meet Backblaze at NAB

What Is Virtual Production?

Let’s start with virtual production. It sounds like doing production virtually, which could just mean “in the cloud.” I can assure you, it’s way cooler than that. When the pandemic hit, social distancing became the norm. Gathering a film crew together in a studio or in any location of the world went out the door. Never fear: virtual production came to the rescue.

Virtual production is a method of production where, instead of building a set or going to a specific location, you build a set virtually, usually with a gaming engine such as Unreal Engine. Once the environment is designed and lit within Unreal Engine, it can then be fed to an LED volume. An LED volume is exactly what it sounds like: a huge volume of LED screens connected to a single input (the Unreal Engine environment).

With virtual production, your set becomes the LED volume, and Unreal Engine can change the background to anything you can imagine at the click of a button. Now this isn’t just a LED screen as a background—what makes virtual production so powerful is its motion tracking integration with real cameras.

Using a motion sensor system attached to a camera, Unreal Engine is able to understand where your camera is pointed. (It’s way more tech-y than that, but you get the picture.) You can even match the virtual lens in Unreal Engine with the lens of your physical camera. With the two systems combined, a camera following an actor on a virtual set can react by moving the background along with the camera in real time.

Virtual Production in Action

If you were one of the millions who have been watching The Mandalorian on Disney+, check out this behind the scenes look at how they utilized a virtual production.


This also means location scouting can be done entirely inside the virtual set and the assets created for pre-vizualiation can actually carry on into post, saving a ton of time (as the post work actually starts during pre-production.

So, virtual production is easily confused with remote production, but it’s not the same. We’ll get into remote production next.

What Is Remote Production?

We’re all familiar with the stages of production: development, pre-production, production, post-production, and distribution. Remote production has more to do with post-production. Remote production is simply the ability to handle post-production tasks from anywhere.

Here’s how the pandemic accelerated remote production: In post, assets are edited on non-linear editing software (NLEs) connected to huge storage systems located deep within studios and post-production houses. When everyone was forced to work from home, it made editing quite difficult. There were, of course, solutions that allowed you to remotely control your edit bay, but remotely controlling a system from miles away and trying to scrub videos over your at-home internet bandwidth quickly became a nuisance.

To solve this problem, everyone just took their edit bay home along with a hard drive containing what they needed for their particular project. But shuttling drives all over the place and trying to correlate files across all the remote drives meant that the NAS became the next headache. To resolve this confusion over storage, production houses turned to hybrid solutions—our next topic.

What Are Hybrid Cloud Workflows?

Hybrid cloud workflows didn’t originate during the pandemic, but they did make remote production much easier. A hybrid cloud workflow is a combination of a public cloud, private cloud, and an on-premises solution like a network attached storage device (NAS) or storage area network (SAN). When we think about storage, we think about first the relationship of our NLE to our local hard drive, then our relationship between the local computer and the NAS or SAN. The next iteration of this is the relationship of all of these (NLE, local computer, and NAS/SAN) to the cloud.

For each of these on-prem solutions the primary problems faced are capacity and availability. How much can our drive hold, and how do I access the NAS—local area network (LAN) or virtual private network (VPN)? Storage in the cloud inherently solves both of these problems. It’s always available and accessible from any location with an internet connection. So, to solve the problems that remote teams of editors, visual effects (VFX), color, and sound folks faced, the cloud was integrated into many workflows.

Using the cloud, companies are able to store content in a single location where it can then be distributed to different teams (VFX, color, sound, etc.). This central repository makes it possible to move large amounts of data across different regions, making it easier for your team to access it while also keeping it secure. Many NAS devices have native cloud integrations, so the automated file synchronization between the cloud and a local environment is baked in—teams can just get to work.

The hybrid solution worked so well that many studios and post houses have adopted them as a permanent part of their workflow and have incorporated remote production into their day-to-day. A good example is the video team at Hagerty, a production crew that creates 300+ videos a year. This means that workflows that were once locked down to specific locations are now moving to the cloud. Now more than ever, API accessible resources, like cloud storage with S3 compatible APIs that integrates with your preferred tools, are needed to make these workflows actually work.

Just one example of Hagerty’s content.

Hybrid Workflows and Cloud Storage

While the world seems to be returning to a new normal, our way of work is not. For the media and entertainment world, the pandemic gave the space a jolt of electricity, igniting the next wave of innovation. Virtual production, remote production, and hybrid workflows are here to stay. What digital video started 20 years ago, the pandemic has accelerated, and that acceleration is pointing directly to the cloud.

So, what are your next steps as you future-proof your workflow? First, inspect your current set of tools. Many modern tools are already cloud-ready. For example, a Synology NAS already has Cloud Sync capabilities. EditShare also has a tool capable of crafting custom workflows, wherever your data lives. (These are just a few examples.)

Second, start building and testing. Most cloud providers offer free tiers or free trials—at Backblaze, your first 10GB are free, for example. Testing a proof of concept is the best way to understand how new workflows fit into your system without overhauling the whole thing or potentially disrupting business as usual.

And finally, one thing you definitely need to make hybrid workflows work is cloud storage. If you’re looking to make the change a lot easier, you came to the right place. Backblaze B2 Cloud Storage pairs with hundreds of integrations so you can implement it directly into your established workflows. Check out our partners and our media solutions for more.

The post Virtual vs. Remote vs. Hybrid Production appeared first on Backblaze Blog | Cloud Storage & Cloud Backup.

The SSD Edition: 2022 Drive Stats Review

Post Syndicated from original https://www.backblaze.com/blog/ssd-edition-2022-drive-stats-review/

A decorative image displaying the article title 2022 Annual Report Drive Stats SSD Edition.

Welcome to the 2022 SSD Edition of the Backblaze Drive Stats series. The SSD Edition focuses on the solid state drives (SSDs) we use as boot drives for the data storage servers in our cloud storage platform. This is opposed to our traditional Drive Stats reports which focus on our hard disk drives (HDDs) used to store customer data.

We started using SSDs as boot drives beginning in Q4 of 2018. Since that time, all new storage servers and any with failed HDD boot drives have had SSDs installed. Boot drives in our environment do much more than boot the storage servers. Each day they also read, write, and delete log files and temporary files produced by the storage server itself. The workload is similar across all the SSDs included in this report.

In this report, we look at the failure rates of the SSDs that we use in our storage servers for 2022, for the last 3 years, and for the lifetime of the SSDs. In addition, we take our first look at the temperature of our SSDs for 2022, and we compare SSD and HDD temperatures to see if SSDs really do run cooler.

Overview

As of December 31, 2022, there were 2,906 SSDs being used as boot drives in our storage servers. There were 13 different models in use, most of which are considered consumer grade SSDs, and we’ll touch on why we use consumer grade SSDs a little later. In this report, we’ll show the Annualized Failure Rate (AFR) for these drive models over various periods of time, making observations and providing caveats to help interpret the data presented.

The dataset on which this report is based is available for download on our Drive Stats Test Data webpage. The SSD data is combined with the HDD data in the same files. Unfortunately, the data itself does not distinguish between SSD and HDD drive types, so you have to use the model field to make that distinction. If you are just looking for SSD data, start with Q4 2018 and go forward.

2022 Annual SSD Failure Rates

As noted, at the end of 2022, there were 2,906 SSDs in operation in our storage servers. The table below shows data for 2022. Later on we’ll compare the 2022 data to previous years.

A table listing the Annual SSD Failure Rates for 2022.

Observations and Caveats

  • For 2022, seven of the 13 drive models had no failures. Six of the seven models had a limited number of drive days—less than 10,000—meaning that there is not enough data to make a reliable projection about the failure rates of those drive models.
  • The Dell SSD (model: DELLBOSS VD) has zero failures for 2022 and has over 100,000 drive days for the year. The resulting AFR is excellent, but this is an M.2 SSD mounted on a PCIe card (half-length and half-height form factor) meant for server deployments, and as such it may not be generally available. By the way, BOSS stands for Boot Optimized Storage Solution.
  • Besides the Dell SSD, three other drive models have over 100,000 drive days for the year, so there is sufficient data to consider their failure rates. Of the three, the Seagate (model: ZA250CM10003, aka: Seagate BarraCuda 120 SSD ZA250CM10003) has the lowest AFR at 0.73%, with the Crucial (model: CT250MX500SSD1) coming in next with an AFR of 1.04% and finally, the Seagate (model: ZA250CM10002, aka: Seagate BarraCuda SSD ZA250CM10002) delivers an AFR of 1.98% for 2022.

Annual SSD Failure Rates for 2020, 2021, and 2022

The 2022 annual chart above presents data for events that occurred in just 2022. Below we compare the 2022 annual data to the 2020 and 2021 (respectively) annual data where the data for each year represents just the events which occurred during that period.

A table of the Backblaze Annual SSD Failure Rates for 2020, 2021, and 2022.

Observations and Caveats

  • As expected, the Crucial drives (model: CT250MX500SSD1) recovered nicely in 2022 after having a couple of early failures in 2021. We expect that trend to continue.
  • Four new models were introduced in 2022, although none have a sufficient number of drive days to discern any patterns even though none of the four models have experienced a failure as of the end of 2022.
  • Two of the 250GB Seagate drives have been around all three years, but they are going in different directions. The Seagate drive (model: ZA250CM10003) has delivered a sub-1% AFR over all three years. While the AFR for the Seagate drive (model: ZA250CM10002) slipped in 2022 to nearly 2%. Model ZA250CM10003 is the newer model of the two by about a year. There is little difference otherwise except the ZA250CM10003 uses less idle power, 116mW versus 185mW for the ZA250CM10002. It will be interesting to see how the younger model fares over the next year. Will it follow the trend of its older sibling and start failing more often, or will it chart its own course?

SSD Temperature and AFR: A First Look

Before we jump into the lifetime SSD failure rates, let’s talk about SSD SMART stats. Here at Backblaze, we’ve been wrestling with SSD SMART stats for several months now, and one thing we have found is there is not much consistency on the attributes, or even the naming, SSD manufacturers use to record their various SMART data. For example, terms like wear leveling, endurance, lifetime used, life used, LBAs written, LBAs read, and so on are used inconsistently between manufacturers, often using different SMART attributes, and sometimes they are not recorded at all.

One SMART attribute that does appear to be consistent (almost) is drive temperature. SMART 194 (raw value) records the internal temperature of the SSD in degrees Celsius. We say almost, because the Dell SSD (model: DELLBOSS VD) does not report raw or normalized values for SMART 194. The chart below shows the monthly average temperature for the remaining SSDs in service during 2022.

A bar chart comparing Average SSD Temperature by Month for 2022.

Observations and Caveats

  • There were an average of 67,724 observations per month, ranging from 57,015 in February to 77,174 in December. For 2022, the average temperature varied only one degree Celsius from the low of 34.4 degrees Celsius to the high of 35.4 degrees Celsius over the period.
  • For 2022, the average temperature was 34.9 degrees Celsius. The average temperature of the hard drives in the same storage servers over the same period was 29.1 degrees Celsius. This difference seems to fly in the face of conventional wisdom that says SSDs run cooler than HDDs. One possible reason is that, in all of our storage servers, the boot drives are further away from the cool aisle than the data drives. That is, the data drives get the cool air first. If you have any thoughts, let us know in the comments.
  • The temperature variation across all drives for 2022 ranged from 20 degrees Celsius (four observations) to 61 degrees Celsius (one observation). The chart below shows the observations for the SSD’s across that temperature range.

A line graph describing SSD Daily Temperature Observations for 2022.

The shape of the curve should look familiar: it’s a bell curve. We’ve seen the same type of curve when plotting the temperature observations of the storage server hard drives. The SSD curve is for all operational SSD drives, except the Dell SSDs. We attempted to plot the same curve for the failed SSDs, but with only 25 failures in 2022, the curve was nonsense.

Lifetime SSD Failure Rates

The lifetime failure rates are based on data from the entire time the given drive model has been in service in our system. This data goes back as far as Q4 2018, although most of the drives were put in service in the last three years. The table below shows the lifetime AFR for all of the SSD drive models in service as of the end of 2022.

A table showing the SSD Lifetime Annualized Failure Rates.

Observations and Caveats

  • The overall Lifetime AFR was 0.89% as of the end of 2022. This is lower than the Lifetime AFR 1.04% as of the end of 2021.
  • There are several very large confidence intervals. That is due to the limited amount of data (drive days) for those drive models. For example, there are only 104 drive days for the WDC model WD Blue SA510 2.5. As we accumulate more data, those confidence intervals should become more accurate.
  • We like to see a confidence interval of 1.0% or less for a given drive model. Only three drive models met this criteria:
    • Dell model DELLBOSS VD: lifetime AFR–0.00%
    • Seagate model ZA250CM10003: lifetime AFR–0.66%
    • Seagate model ZA250CM10002: lifetime AFR–0.96%
  • The Dell SSD, as noted earlier in this report, is an M.2 SSD mounted on a PCIe card and may not be generally available. The two Seagate drives are consumer level SSDs. In our case, a less expensive consumer level SSD works for our needs as there is no customer data on a boot drive, just boot files as well as log and temporary files. More recently as we have purchased storage servers from Supermicro and Dell, they bundle all of the components together into a unit price per storage server. If that bundle includes enterprise class SSDs or an M.2 SSD on a PCIe card, that’s fine with us.

The SSD Stats Data

We acknowledge that 2,906 SSDs is a relatively small number of drives on which to perform our analysis, and while this number does lead to wider than desired confidence intervals, it’s a start. Of course we will continue to add SSD boot drives to the study group, which will improve the fidelity of the data presented. In the meantime, we expect our readers will apply their usual skeptical lens to the data presented and use it accordingly.

The complete dataset used to create the information used in this review is available on our Hard Drive Test Data page. As noted earlier you’ll find SSD and HDD data in the same files, and you’ll have to use the model number to distinguish one record from another. You can download and use this data for free for your own purpose. All we ask are three things: 1) you cite Backblaze as the source if you use the data, 2) you accept that you are solely responsible for how you use the data, and 3) you do not sell this data to anyone; it is free.

Good luck, and let us know if you find anything interesting.

The post The SSD Edition: 2022 Drive Stats Review appeared first on Backblaze Blog | Cloud Storage & Cloud Backup.

Work Smarter With Backblaze and Quantum H4000 Essential

Post Syndicated from Jennifer Newman original https://www.backblaze.com/blog/work-smarter-with-backblaze-and-quantum-h4000-essential/

A decorative image displaying the Backblaze and Quantum logos.

How much do you think it costs your creative team to manage data? How much time and money is spent organizing files, searching for files, and maybe never finding those files? Have you ever quantified it? One market research firm has. According to GISTICS, a creative team of eight people wastes more than $85,000 per year searching for and managing files—and larger teams waste even more than that.

Creative teams need better tools to work smarter. Backblaze has partnered with Quantum to simplify media workflows, provide easy remote collaboration, and free up on-premises storage space with seamless content archiving to the cloud. The partnership provides teams the tools needed to compete. Read on to learn more.

What Is Quantum?

Quantum is a data storage company that provides technology, software, and services to help companies make video and other unstructured data smarter—so data works for them and not the other way around. Quantum’s H4000 Essential (H4000E) asset management and shared storage solution offers customers an all-in-one appliance that integrates automatic content indexing, search, discovery, and collaboration. It couples the CatDV asset management platform with Quantum’s StorNext 7 shared storage.

How Does This Partnership Benefit Joint Customers?

By pairing Quantum H4000 Essential with Backblaze B2 Cloud Storage, you get award-winning asset management and shared storage with the ability to archive to the cloud. The partnership provides a number of benefits:

  • Better organization: Creative teams work visually, and the Quantum platform supports visual workflows. All content is available in one place, with automatic content indexing, metadata tagging, and proxy generation.
  • Searchable assets: All content and projects are searchable in an easy to use visual catalog.
  • Seamless collaboration: Teams can use production tools like Adobe Premiere Pro, Final Cut Pro X, and others to work on shared projects as well as tagging, markup, versioning, chat, and approval tools to streamline collaboration.
  • Robust archive management: Archived content can be restored easily from Backblaze B2 to CatDV to keep work in progress lean and focused.
  • On-premises efficiency: Once projects are complete, they can be quickly archived to the cloud to free up storage space on the H4000E for high-resolution production files and ongoing projects.
  • Simplified billing: Data is stored on always-hot storage, eliminating the management frustration that comes with multiple tiers and variable costs for egress and API calls.

Purchase Cloud Capacity the Same Way You Purchase On-Premises

With Backblaze B2 Reserve, you can purchase capacity-based storage starting at 20TB to pair with your Quantum H4000E if you prefer a predictable cloud spend versus consumption-based billing. Key features of B2 Reserve include:

  • Free egress up to the amount of storage purchased per month.
  • Free transaction calls.
  • Enhanced migration services.
  • No delete penalties.
  • Upgraded Tera support.

Who Would Benefit From Backblaze B2 + Quantum H4000E?

The partnership benefits any team that handles large amounts of data, specifically media files. The solution can help teams with:

  • Simplifying media workflows.
  • Easing remote project management and collaboration.
  • Cloud tiering.
  • Extending on-premises storage.
  • Implementing a cloud-first strategy.
  • Backup and disaster recovery planning.
  • Ransomware protection.
  • Managing consistent data growth.

Getting Started With Backblaze B2 and Quantum H4000E

The Quantum H4000E is a highly-integrated solution for collaborative shared storage and asset management. Configured with Backblaze B2 for content archiving and retrieval, it provides new menu options to perform cloud archiving and move, copy, and restore content, freeing up H4000 local storage for high-resolution files. You can easily add on cloud storage to improve remote media workflows, content collaboration, media asset protection, and archive.

With the H4000E, everything you need to get started is in the box, ready to connect to your 10GbE and higher network. And, a simple Backblaze B2 archive plugin connects the solution directly to your Backblaze B2 account.

Simply create a Backblaze account and configure the Backblaze CatDV panel with your credentials.

Join Backblaze at NAB Las Vegas

Join us at NAB to learn more about the Quantum + Backblaze solution. Our booths are neighbors! Schedule a meeting with us for a demo.

The post Work Smarter With Backblaze and Quantum H4000 Essential appeared first on Backblaze Blog | Cloud Storage & Cloud Backup.