Post Syndicated from Thomas Gauvin original https://blog.cloudflare.com/workers-vpc-open-beta/
In April, we shared our vision for a global virtual private cloud on Cloudflare, a way to unlock your applications from regionally constrained clouds and on-premise networks, enabling you to build truly cross-cloud applications.
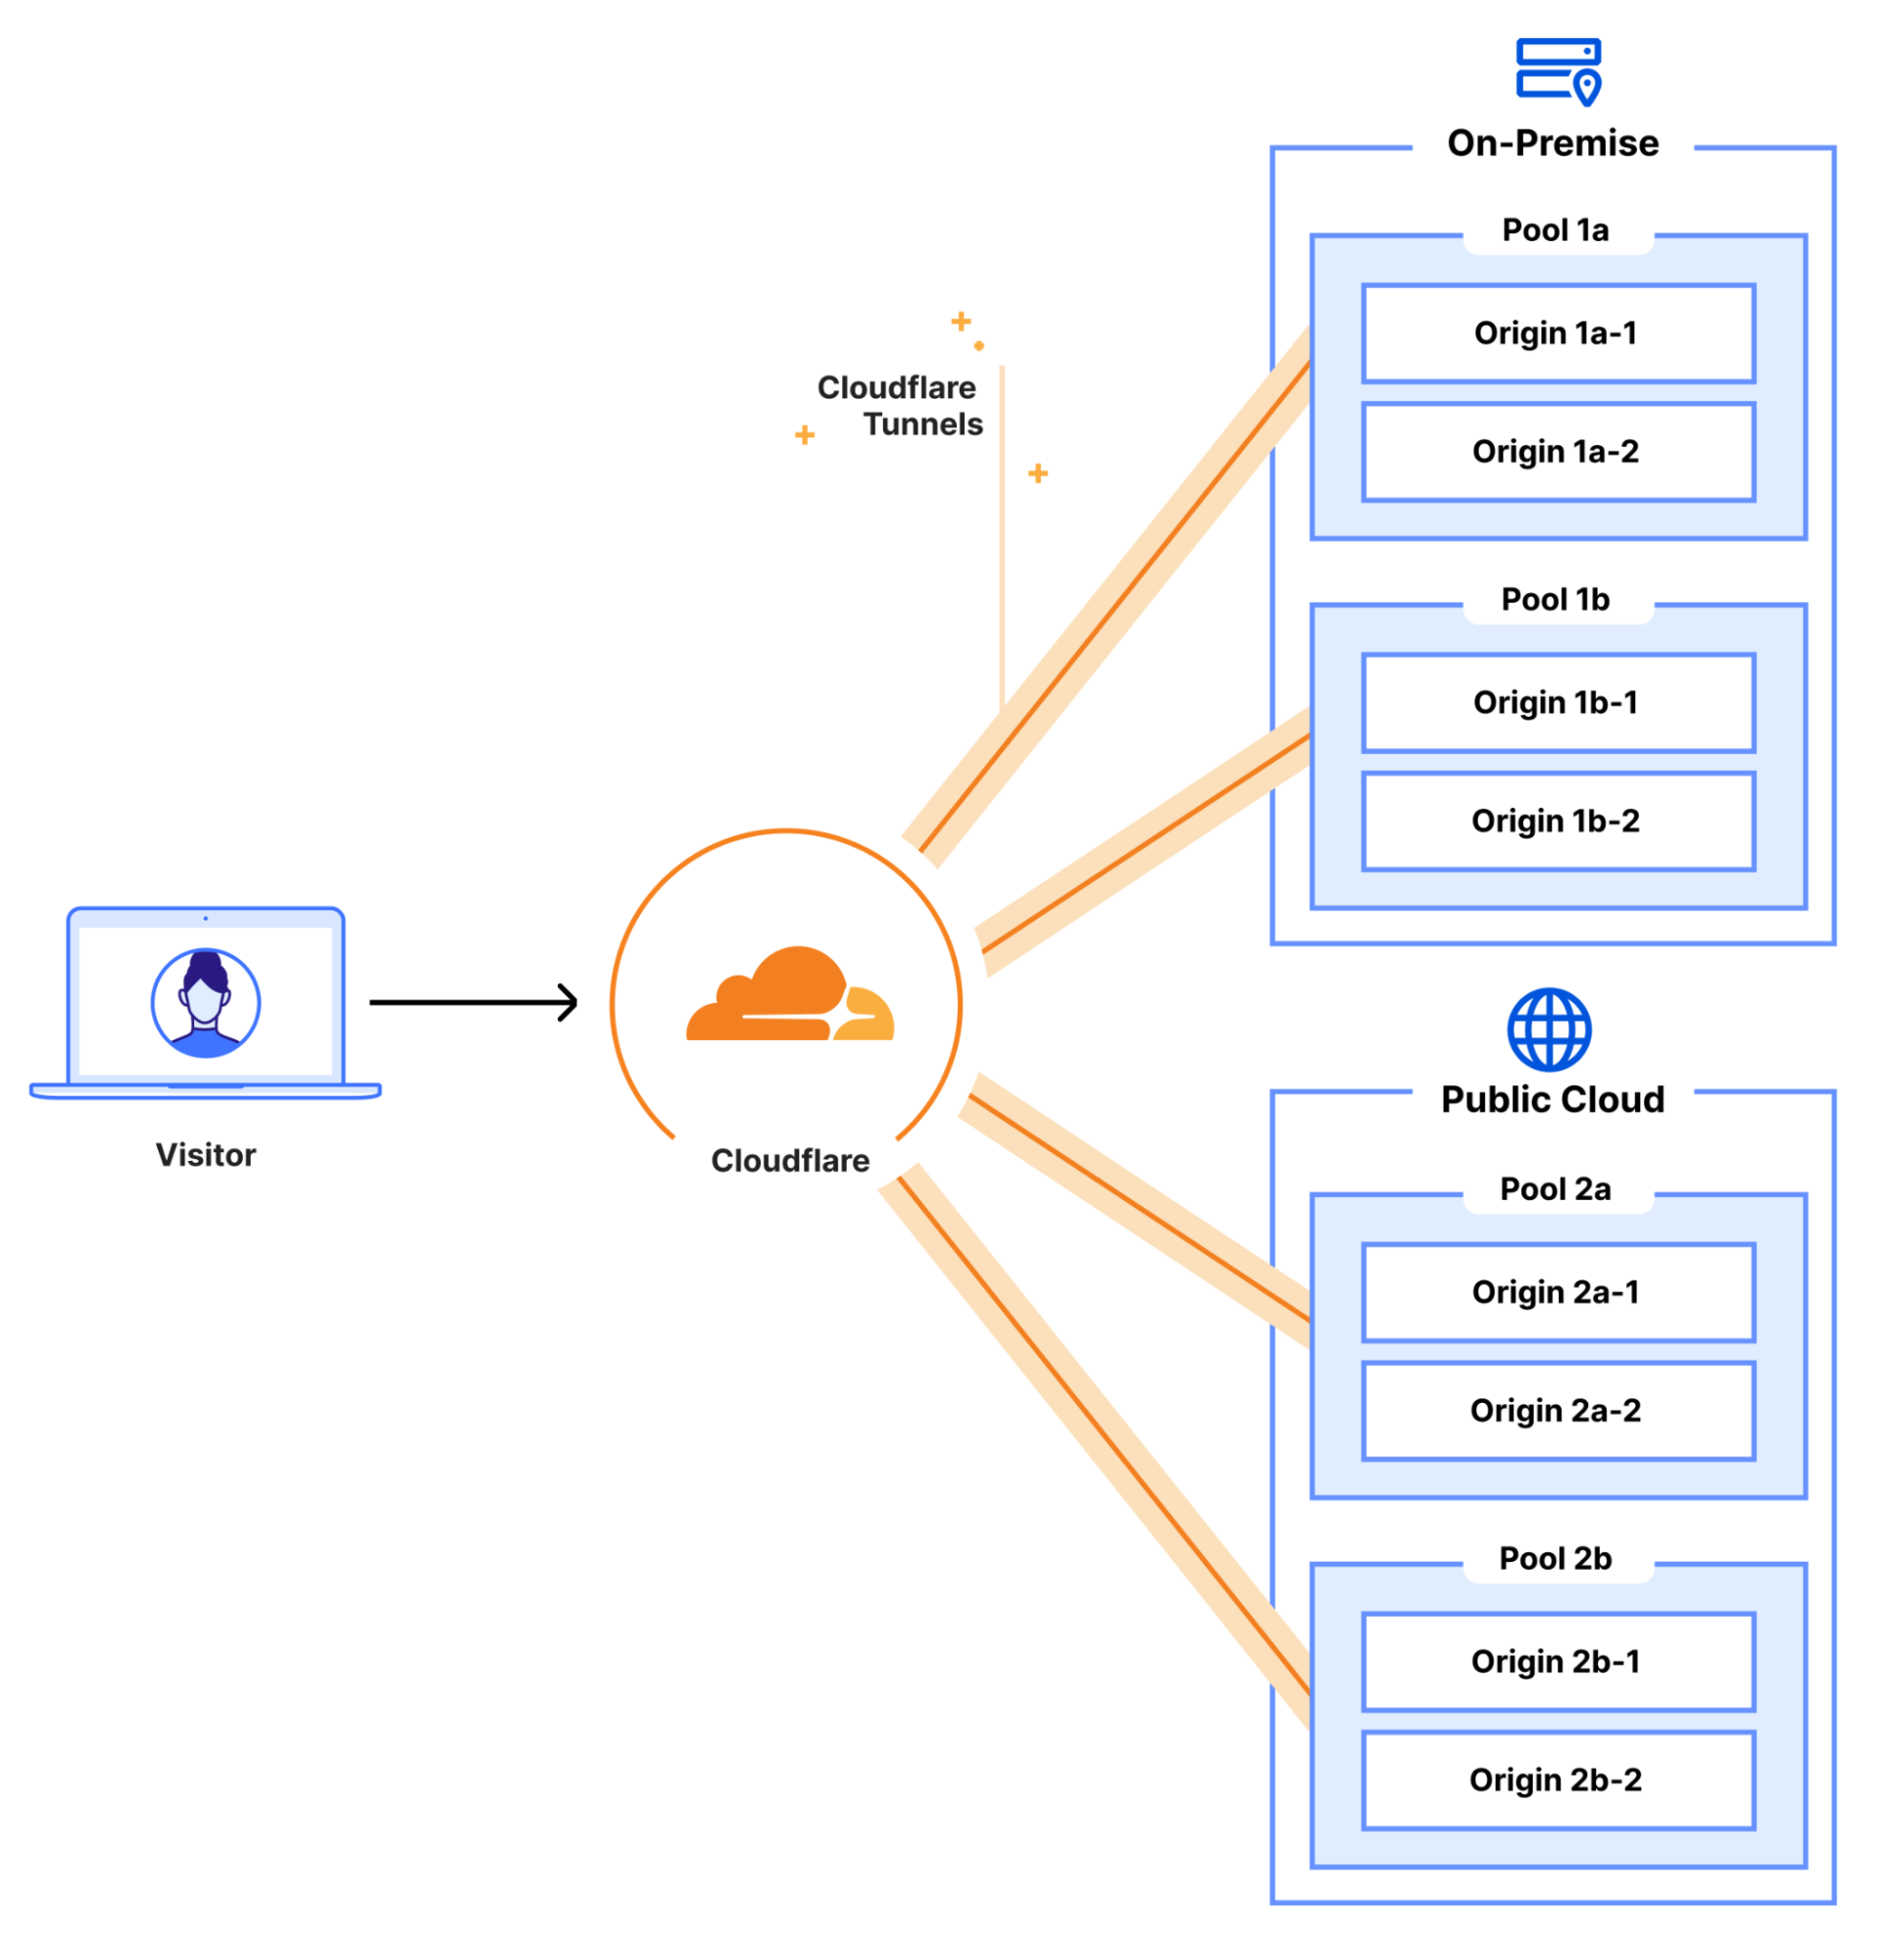
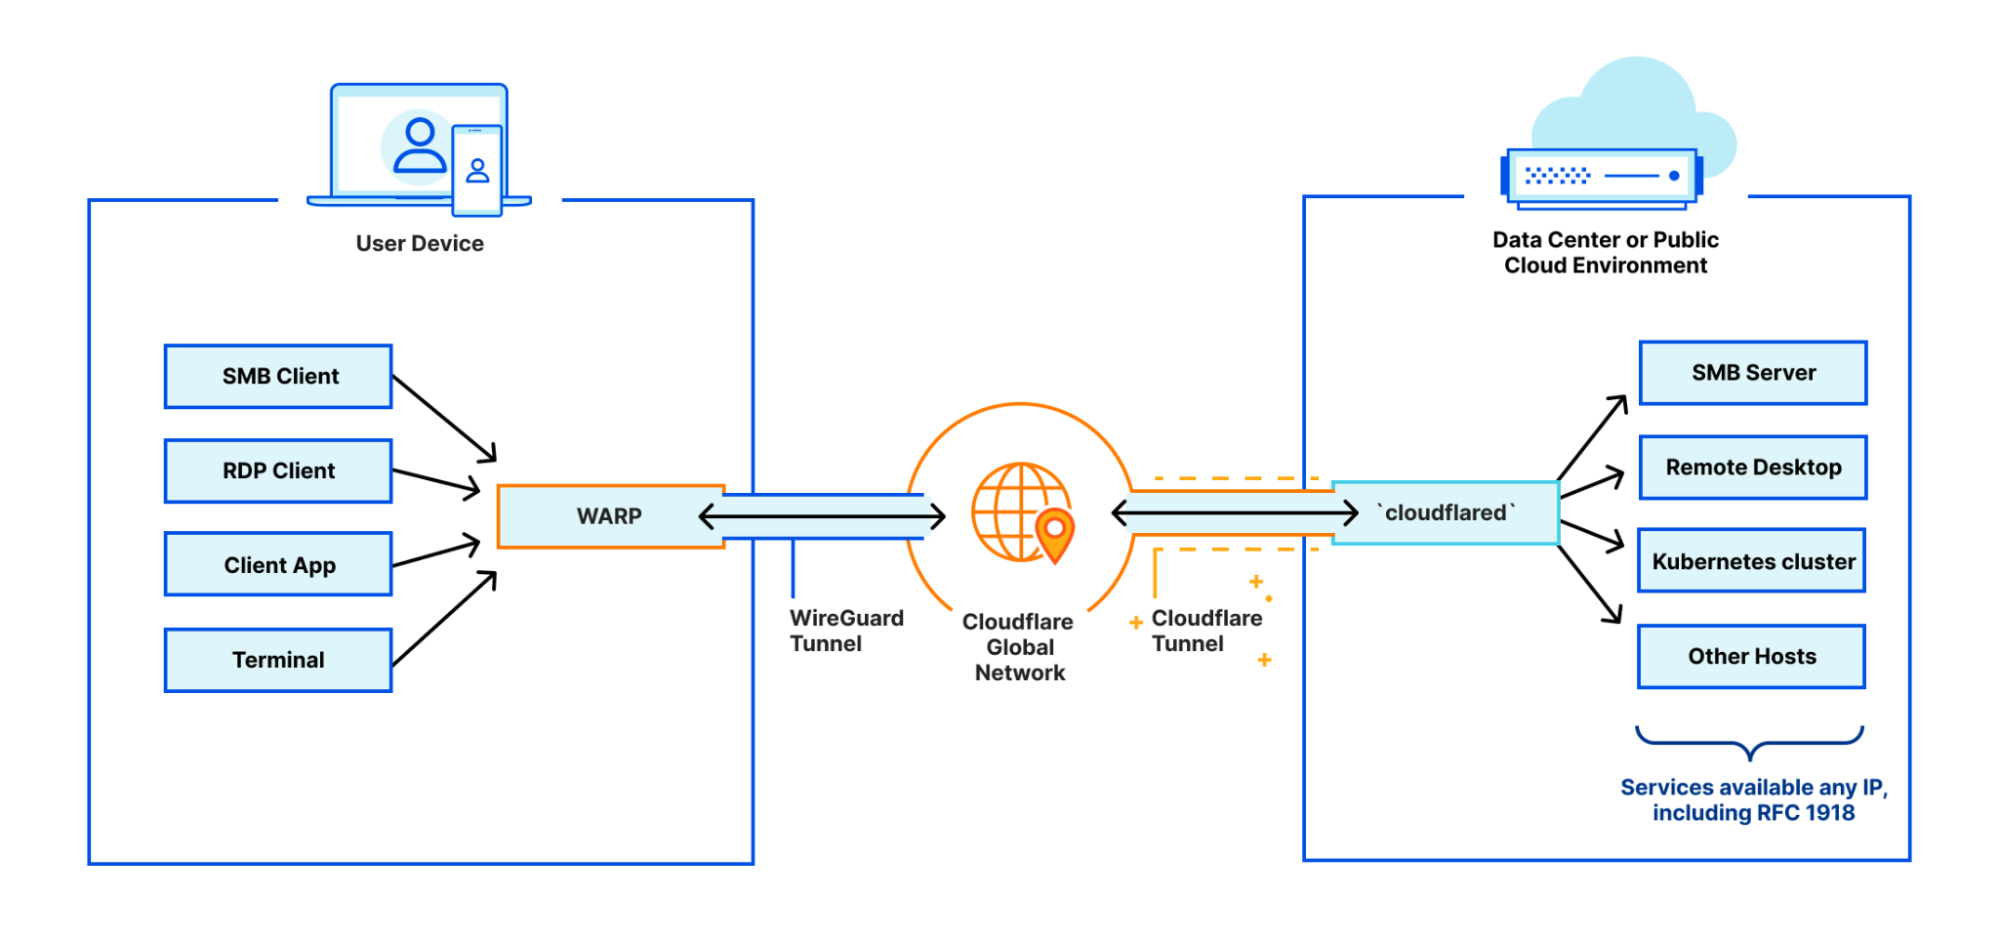
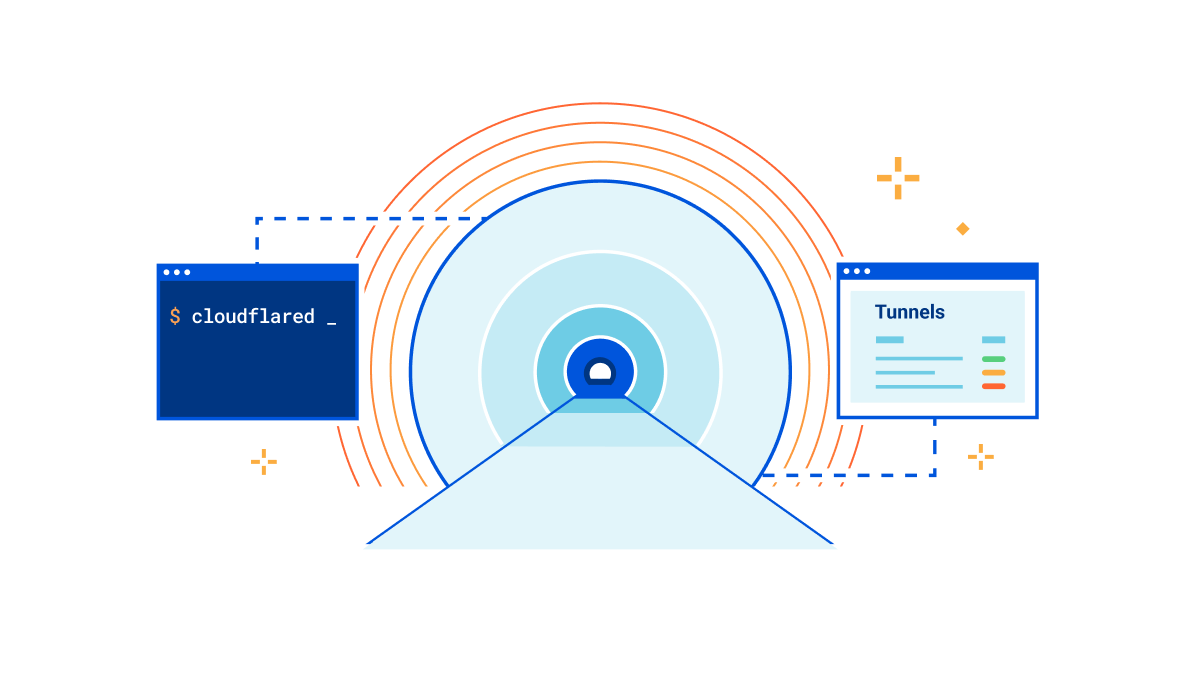
Today, we’re announcing the first milestone of our Workers VPC initiative: VPC Services. VPC Services allow you to connect to your APIs, containers, virtual machines, serverless functions, databases and other services in regional private networks via Cloudflare Tunnels from your Workers running anywhere in the world.
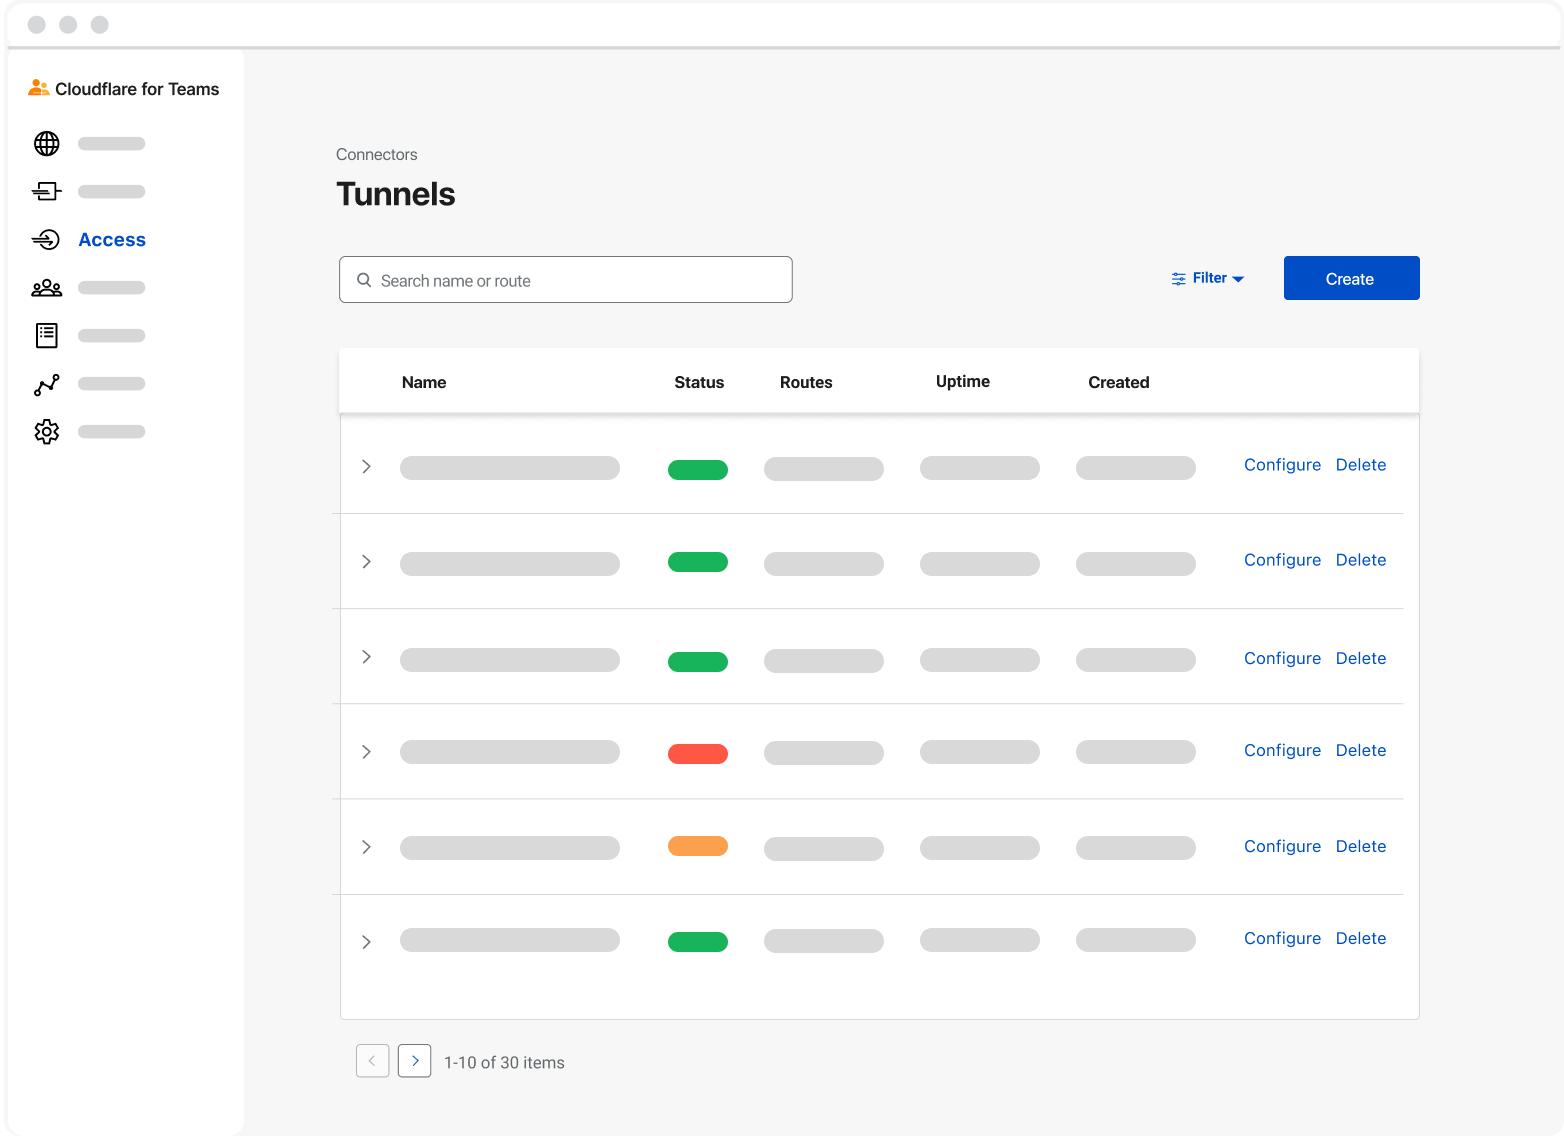
Once you set up a Tunnel in your desired network, you can register each service that you want to expose to Workers by configuring its host or IP address. Then, you can access the VPC Service as you would any other Workers service binding — Cloudflare’s network will automatically route to the VPC Service over Cloudflare’s network, regardless of where your Worker is executing:
export default {
  async fetch(request, env, ctx) {
    // Perform application logic in Workers here

    // Call an external API running in a ECS in AWS when needed using the binding
    const response = await env.AWS_VPC_ECS_API.fetch("http://internal-host.com");

    // Additional application logic in Workers
    return new Response();
  },
};
Workers VPC is now available to everyone using Workers, at no additional cost during the beta, as is Cloudflare Tunnels. Try it out now. And read on to learn more about how it works under the hood.
Your applications span multiple networks, whether they are on-premise or in external clouds. But it’s been difficult to connect from Workers to your APIs and databases locked behind private networks.
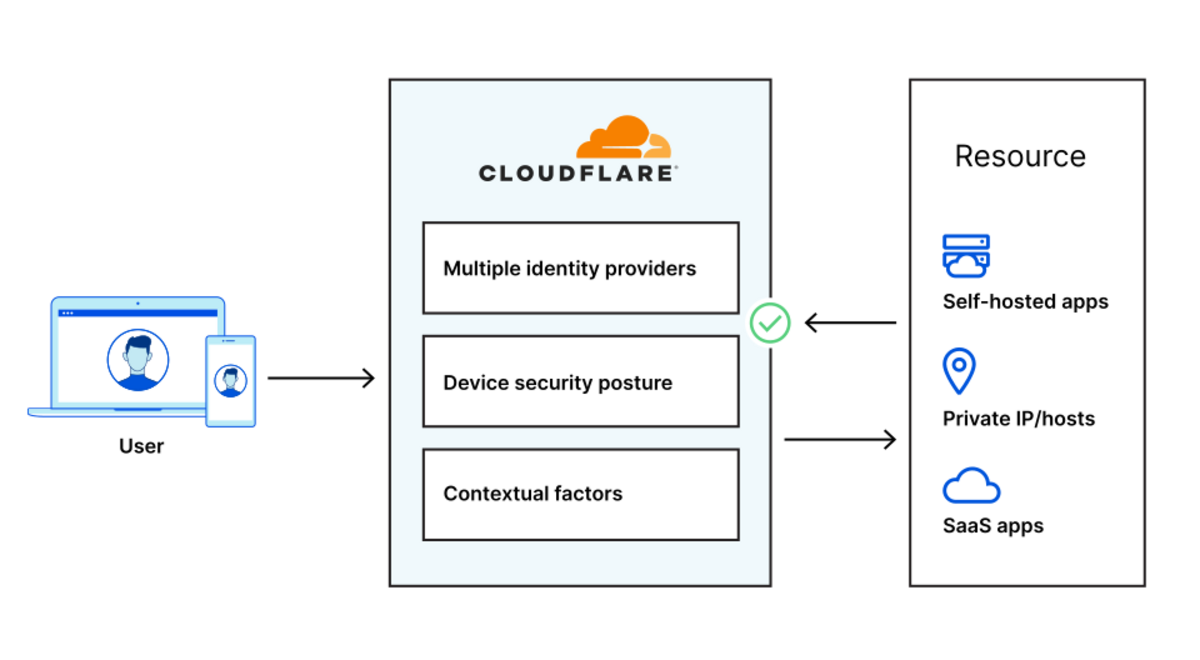
We have previously described how traditional virtual private clouds and networks entrench you into traditional clouds. While they provide you with workload isolation and security, traditional virtual private clouds make it difficult to build across clouds, access your own applications, and choose the right technology for your stack.
A significant part of the cloud lock-in is the inherent complexity of building secure, distributed workloads. VPC peering requires you to configure routing tables, security groups and network access-control lists, since it relies on networking across clouds to ensure connectivity. In many organizations, this means weeks of discussions and many teams involved to get approvals. This lock-in is also reflected in the solutions invented to wrangle this complexity: Each cloud provider has their own bespoke version of a “Private Link” to facilitate cross-network connectivity, further restricting you to that cloud and the vendors that have integrated with it.
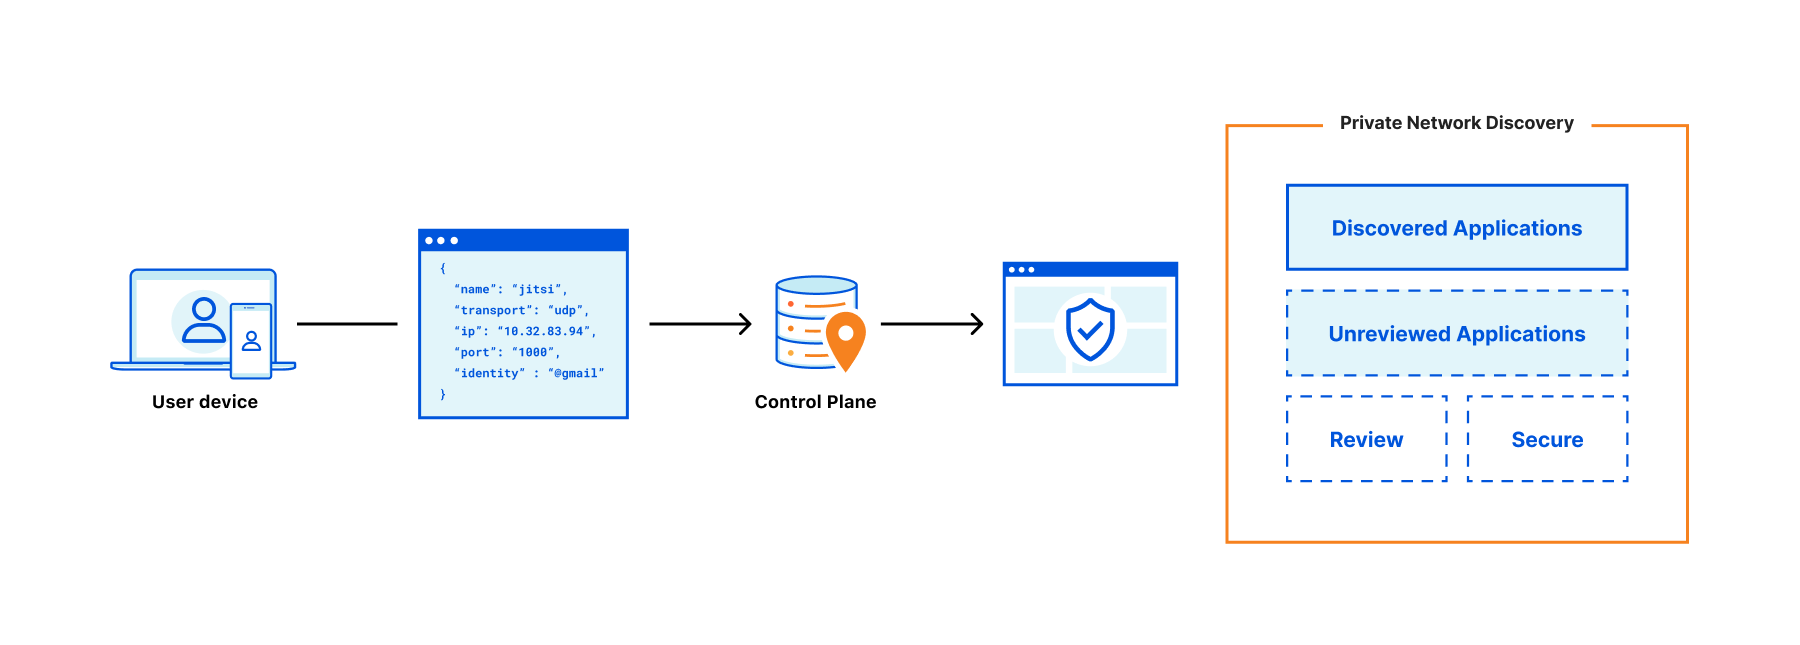
With Workers VPC, we’re simplifying that dramatically. You set up your Cloudflare Tunnel once, with the necessary permissions to access your private network. Then, you can configure Workers VPC Services, with the tunnel and hostname (or IP address and port) of the service you want to expose to Workers. Any request made to that VPC Service will use this configuration to route to the given service within the network.
{
  "type": "http",
  "name": "vpc-service-name",
  "http_port": 80,
  "https_port": 443,
  "host": {
    "hostname": "internally-resolvable-hostname.com",
    "resolver_network": {
      "tunnel_id": "0191dce4-9ab4-7fce-b660-8e5dec5172da"
    }
  }
}
This ensures that, once represented as a Workers VPC Service, a service in your private network is secured in the same way other Cloudflare bindings are, using the Workers binding model. Let’s take a look at a simple VPC Service binding example:
{
  "name": "WORKER-NAME",
  "main": "./src/index.js",
  "vpc_services": [
    {
      "binding": "AWS_VPC2_ECS_API",
      "service_id": "5634563546"
    }
  ]
}
Like other Workers bindings, when you deploy a Worker project that tries to connect to a VPC Service, the access permissions are verified at deploy time to ensure that the Worker has access to the service in question. And once deployed, the Worker can use the VPC Service binding to make requests to that VPC Service — and only that service within the network.
That’s significant: Instead of exposing the entire network to the Worker, only the specific VPC Service can be accessed by the Worker. This access is verified at deploy time to provide a more explicit and transparent service access control than traditional networks and access-control lists do.
This is a key factor in the design of Workers bindings: de facto security with simpler management and making Workers immune to Server-Side Request Forgery (SSRF) attacks. We’ve gone deep on the binding security model in the past, and it becomes that much more critical when accessing your private networks.
Notably, the binding model is also important when considering what Workers are: scripts running on Cloudflare’s global network. They are not, in contrast to traditional clouds, individual machines with IP addresses, and do not exist within networks. Bindings provide secure access to other resources within your Cloudflare account – and the same applies to Workers VPC Services.
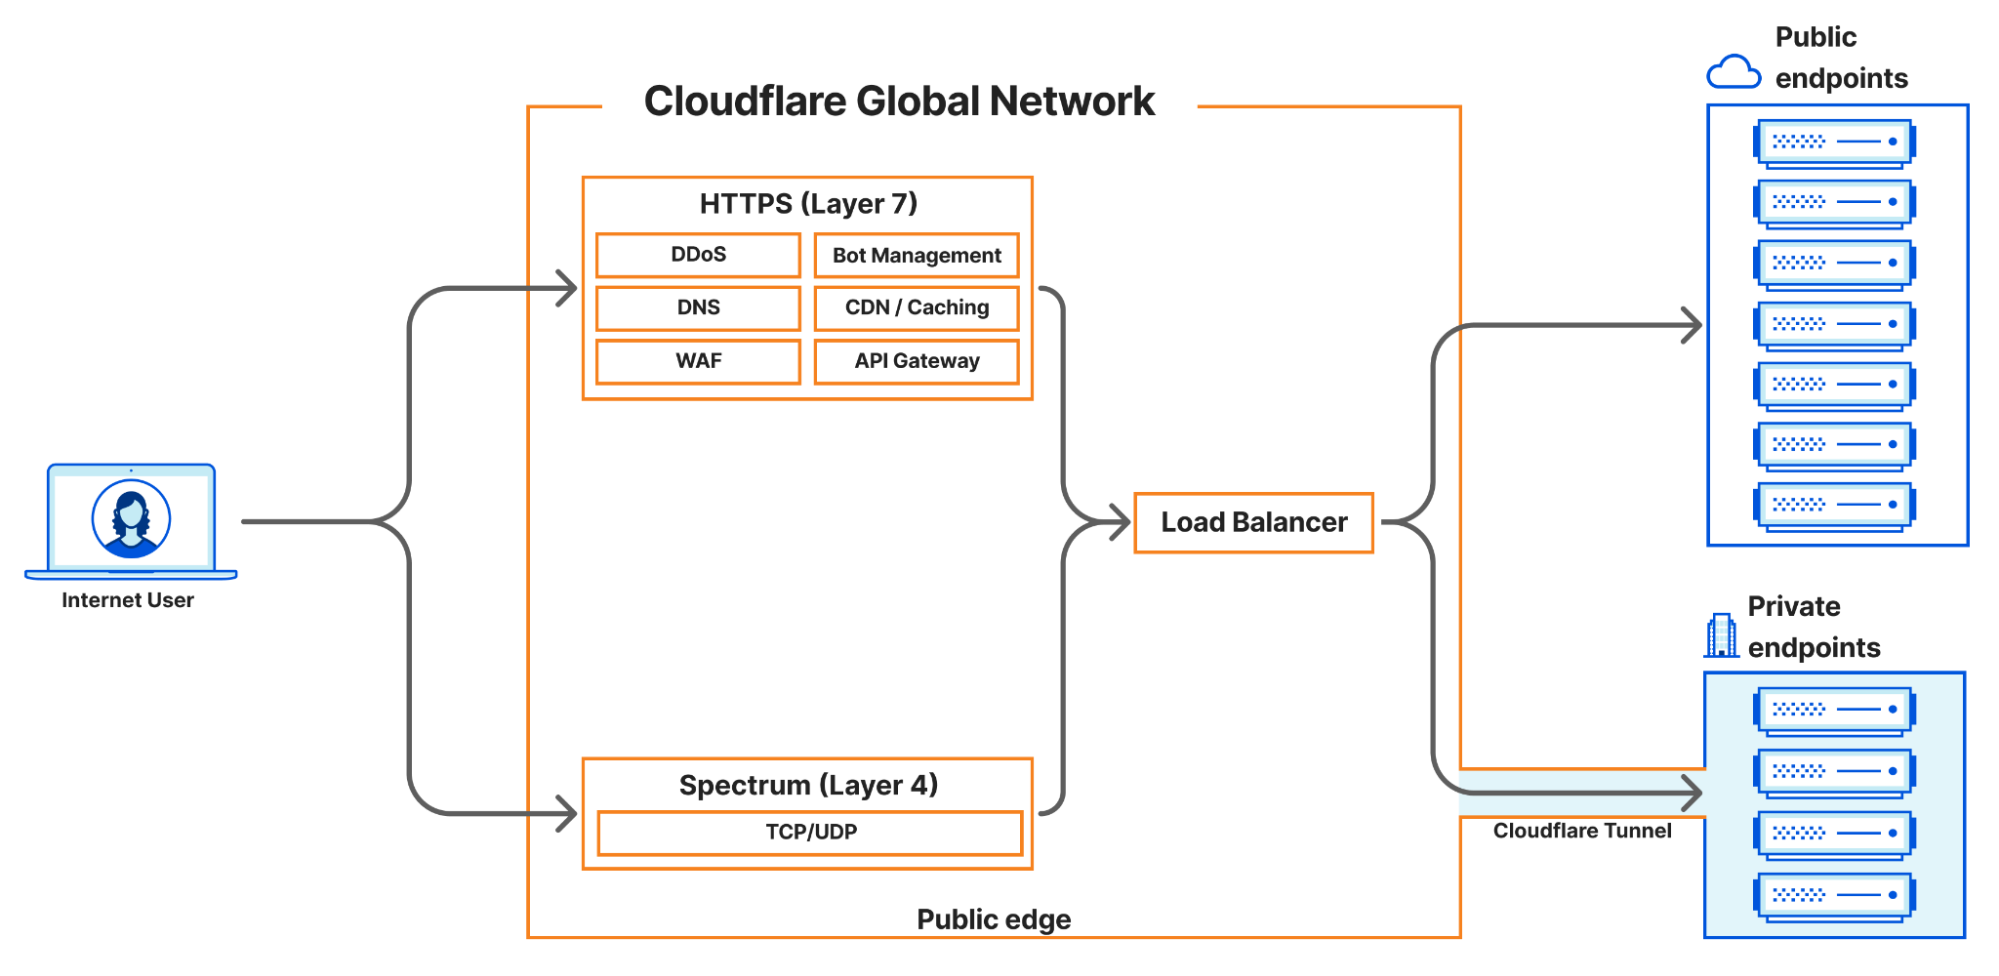
So how do VPC Services and their bindings route network requests from Workers anywhere on Cloudflare’s global network to regional networks using tunnels? Let’s look at the lifecycle of a sample HTTP Request made from a VPC Service’s dedicated fetch() request represented here:

It all starts in the Worker code, where the .fetch() function of the desired VPC Service is called with a standard JavaScript Request (as represented with Step 1). The Workers runtime will use a Cap’n Proto remote-procedure-call to send the original HTTP request alongside additional context, as it does for many other Workers bindings.
The Binding Worker of the VPC Service System receives the HTTP request along with the binding context, in this case, the Service ID of the VPC Service being invoked. The Binding Worker will proxy this information to the Iris Service within an HTTP CONNECT connection, a standard pattern across Cloudflare’s bindings to place connection logic to Cloudflare’s edge services within Worker code rather than the Workers runtime itself (Step 2).
The Iris Service is the main service for Workers VPC. Its responsibility is to accept requests for a VPC Service and route them to the network in which your VPC Service is located. It does this by integrating with Apollo, an internal service of Cloudflare One. Apollo provides a unified interface that abstracts away the complexity of securely connecting to networks and tunnels, across various layers of networking.
To integrate with Apollo, Iris must complete two tasks. First, Iris will parse the VPC Service ID from the metadata and fetch the information of the tunnel associated with it from our configuration store. This includes the tunnel ID and type from the configuration store (Step 3), which is the information that Iris needs to send the original requests to the right tunnel.
Second, Iris will create the UDP datagrams containing DNS questions for the A and AAAA records of the VPC Service’s hostname. These datagrams will be sent first, via Apollo. Once DNS resolution is completed, the original request is sent along, with the resolved IP address and port (Step 4). That means that steps 4 through 7 happen in sequence twice for the first request: once for DNS resolution and a second time for the original HTTP Request. Subsequent requests benefit from Iris’ caching of DNS resolution information, minimizing request latency.
In Step 5, Apollo receives the metadata of the Cloudflare Tunnel that needs to be accessed, along with the DNS resolution UDP datagrams or the HTTP Request TCP packets. Using the tunnel ID, it determines which datacenter is connected to the Cloudflare Tunnel. This datacenter is in a region close to the Cloudflare Tunnel, and as such, Apollo will route the DNS resolution messages and the Original Request to the Tunnel Connector Service running in that datacenter (Step 5).

The Tunnel Connector Service is responsible for providing access to the Cloudflare Tunnel to the rest of Cloudflare’s network. It will relay the DNS resolution questions, and subsequently the original request to the tunnel over the QUIC protocol (Step 6).
Finally, the Cloudflare Tunnel will send the DNS resolution questions to the DNS resolver of the network it belongs to. It will then send the original HTTP Request from its own IP address to the destination IP and port (Step 7). The results of the request are then relayed all the way back to the original Worker, from the datacenter closest to the tunnel all the way to the original Cloudflare datacenter executing the Worker request.
This unlocks a whole new tranche of applications you can build on Cloudflare. For years, Workers have excelled at the edge, but they’ve largely been kept “outside” your core infrastructure. They could only call public endpoints, limiting their ability to interact with the most critical parts of your stack—like a private accounts API or an internal inventory database. Now, with VPC Services, Workers can securely access those private APIs, databases, and services, fundamentally changing what’s possible.

This immediately enables true cross-cloud applications that span Cloudflare Workers and any other cloud like AWS, GCP or Azure. We’ve seen many customers adopt this pattern over the course of our private beta, establishing private connectivity between their external clouds and Cloudflare Workers. We’ve even done so ourselves, connecting our Workers to Kubernetes services in our core datacenters to power the control plane APIs for many of our services. Now, you can build the same powerful, distributed architectures, using Workers for global scale while keeping stateful backends in the network you already trust.
It also means you can connect to your on-premise networks from Workers, allowing you to modernize legacy applications with the performance and infinite scale of Workers. More interesting still are some emerging use cases for developer workflows. We’ve seen developers run cloudflared on their laptops to connect a deployed Worker back to their local machine for real-time debugging. The full flexibility of Cloudflare Tunnels is now a programmable primitive accessible directly from your Worker, opening up a world of possibilities.
VPC Services is the first milestone within the larger Workers VPC initiative, but we’re just getting started. Our goal is to make connecting to any service and any network, anywhere in the world, a seamless part of the Workers experience. Here’s what we’re working on next:
Deeper network integration. Starting with Cloudflare Tunnels was a deliberate choice. It’s a highly available, flexible, and familiar solution, making it the perfect foundation to build upon. To provide more options for enterprise networking, we’re going to be adding support for standard IPsec tunnels, Cloudflare Network Interconnect (CNI), and AWS Transit Gateway, giving you and your teams more choices and potential optimizations. Crucially, these connections will also become truly bidirectional, allowing your private services to initiate connections back to Cloudflare resources such as pushing events to Queues or fetching from R2.
Expanded protocol and service support. The next step beyond HTTP is enabling access to TCP services. This will first be achieved by integrating with Hyperdrive. We’re evolving the previous Hyperdrive support for private databases to be simplified with VPC Services configuration, avoiding the need to add Cloudflare Access and manage security tokens. This creates a more native experience, complete with Hyperdrive’s powerful connection pooling. Following this, we will add broader support for raw TCP connections, unlocking direct connectivity to services like Redis caches and message queues from Workers ‘connect()’.
Ecosystem compatibility. We want to make connecting to a private service feel as natural as connecting to a public one. To do so, we will be providing a unique autogenerated hostname for each Workers VPC Service, similar to Hyperdrive’s connection strings. This will make it easier to use Workers VPC with existing libraries and object–relational mapping libraries that may require a hostname (e.g., in a global ‘fetch()’ call or a MongoDB connection string). Workers VPC Service hostname will automatically resolve and route to the correct VPC Service, just as the ‘fetch()’ command does.
We’re excited to release Workers VPC Services into open beta today. We’ve spent months building out and testing our first milestone for Workers to private network access. And we’ve refined it further based on feedback from both internal teams and customers during the closed beta.
Now, we’re looking forward to enabling everyone to build cross-cloud apps on Workers with Workers VPC, available for free during the open beta. With Workers VPC, you can bring your apps on private networks to region Earth, closer to your users and available to Workers across the globe.