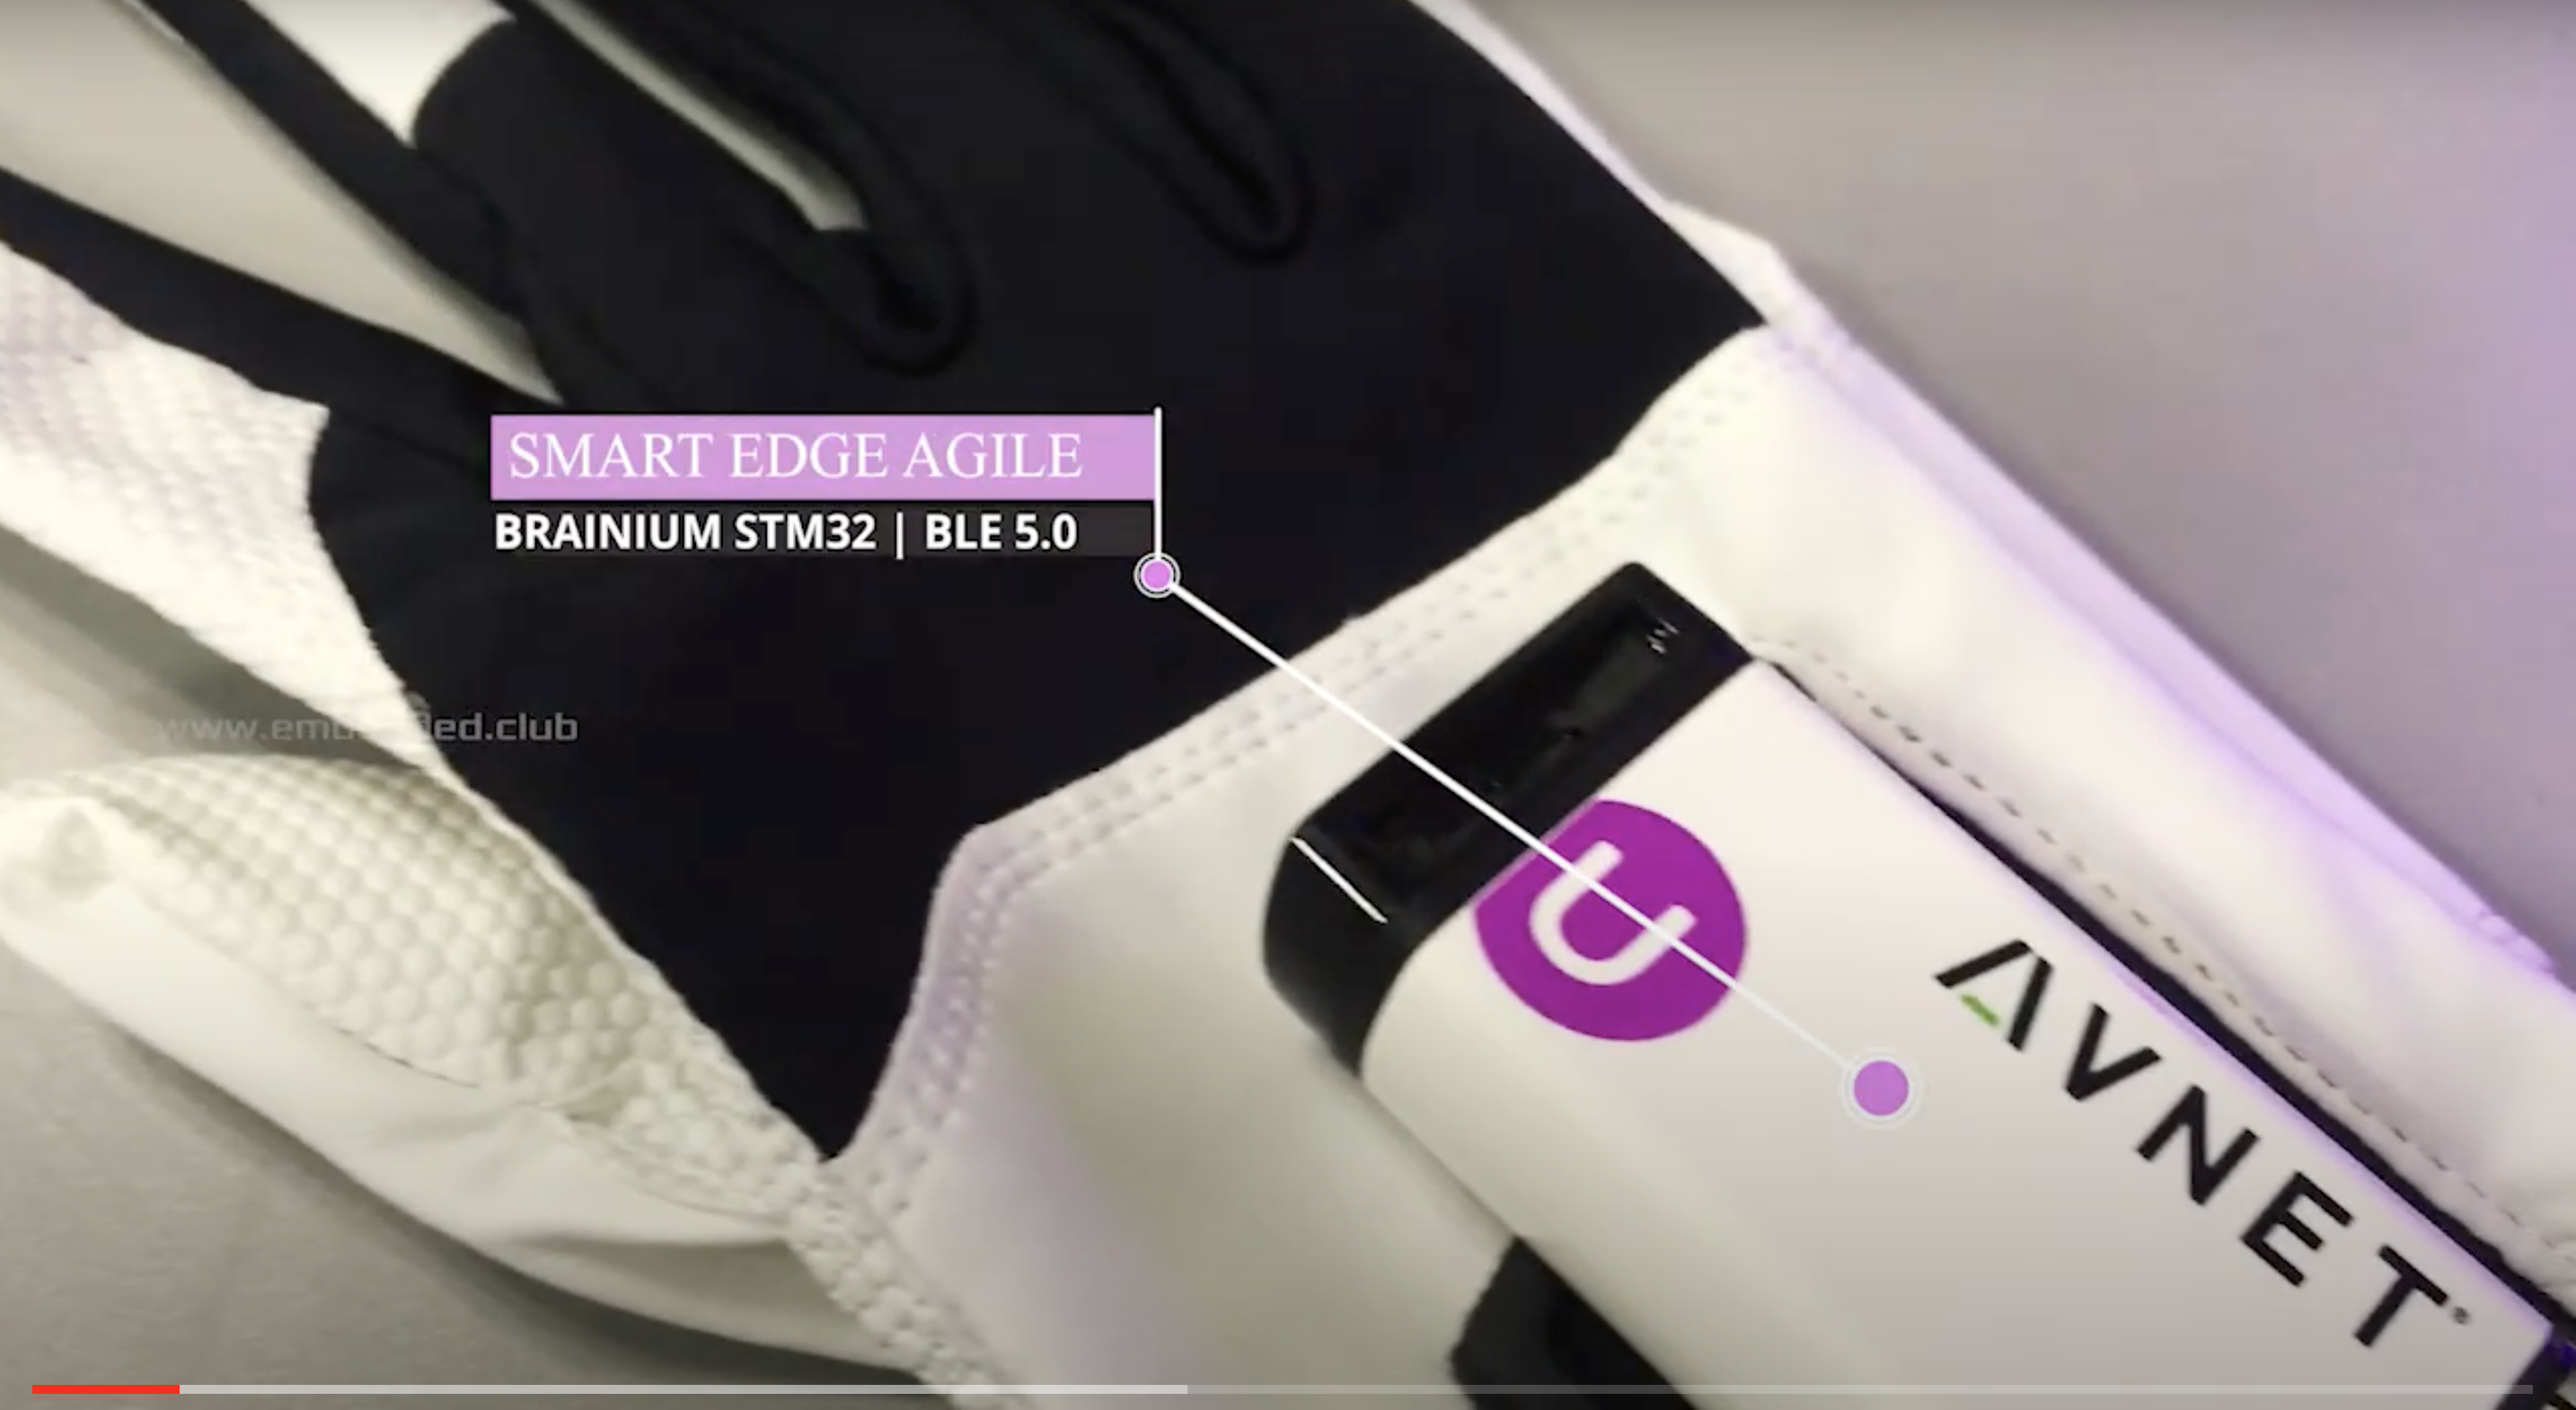
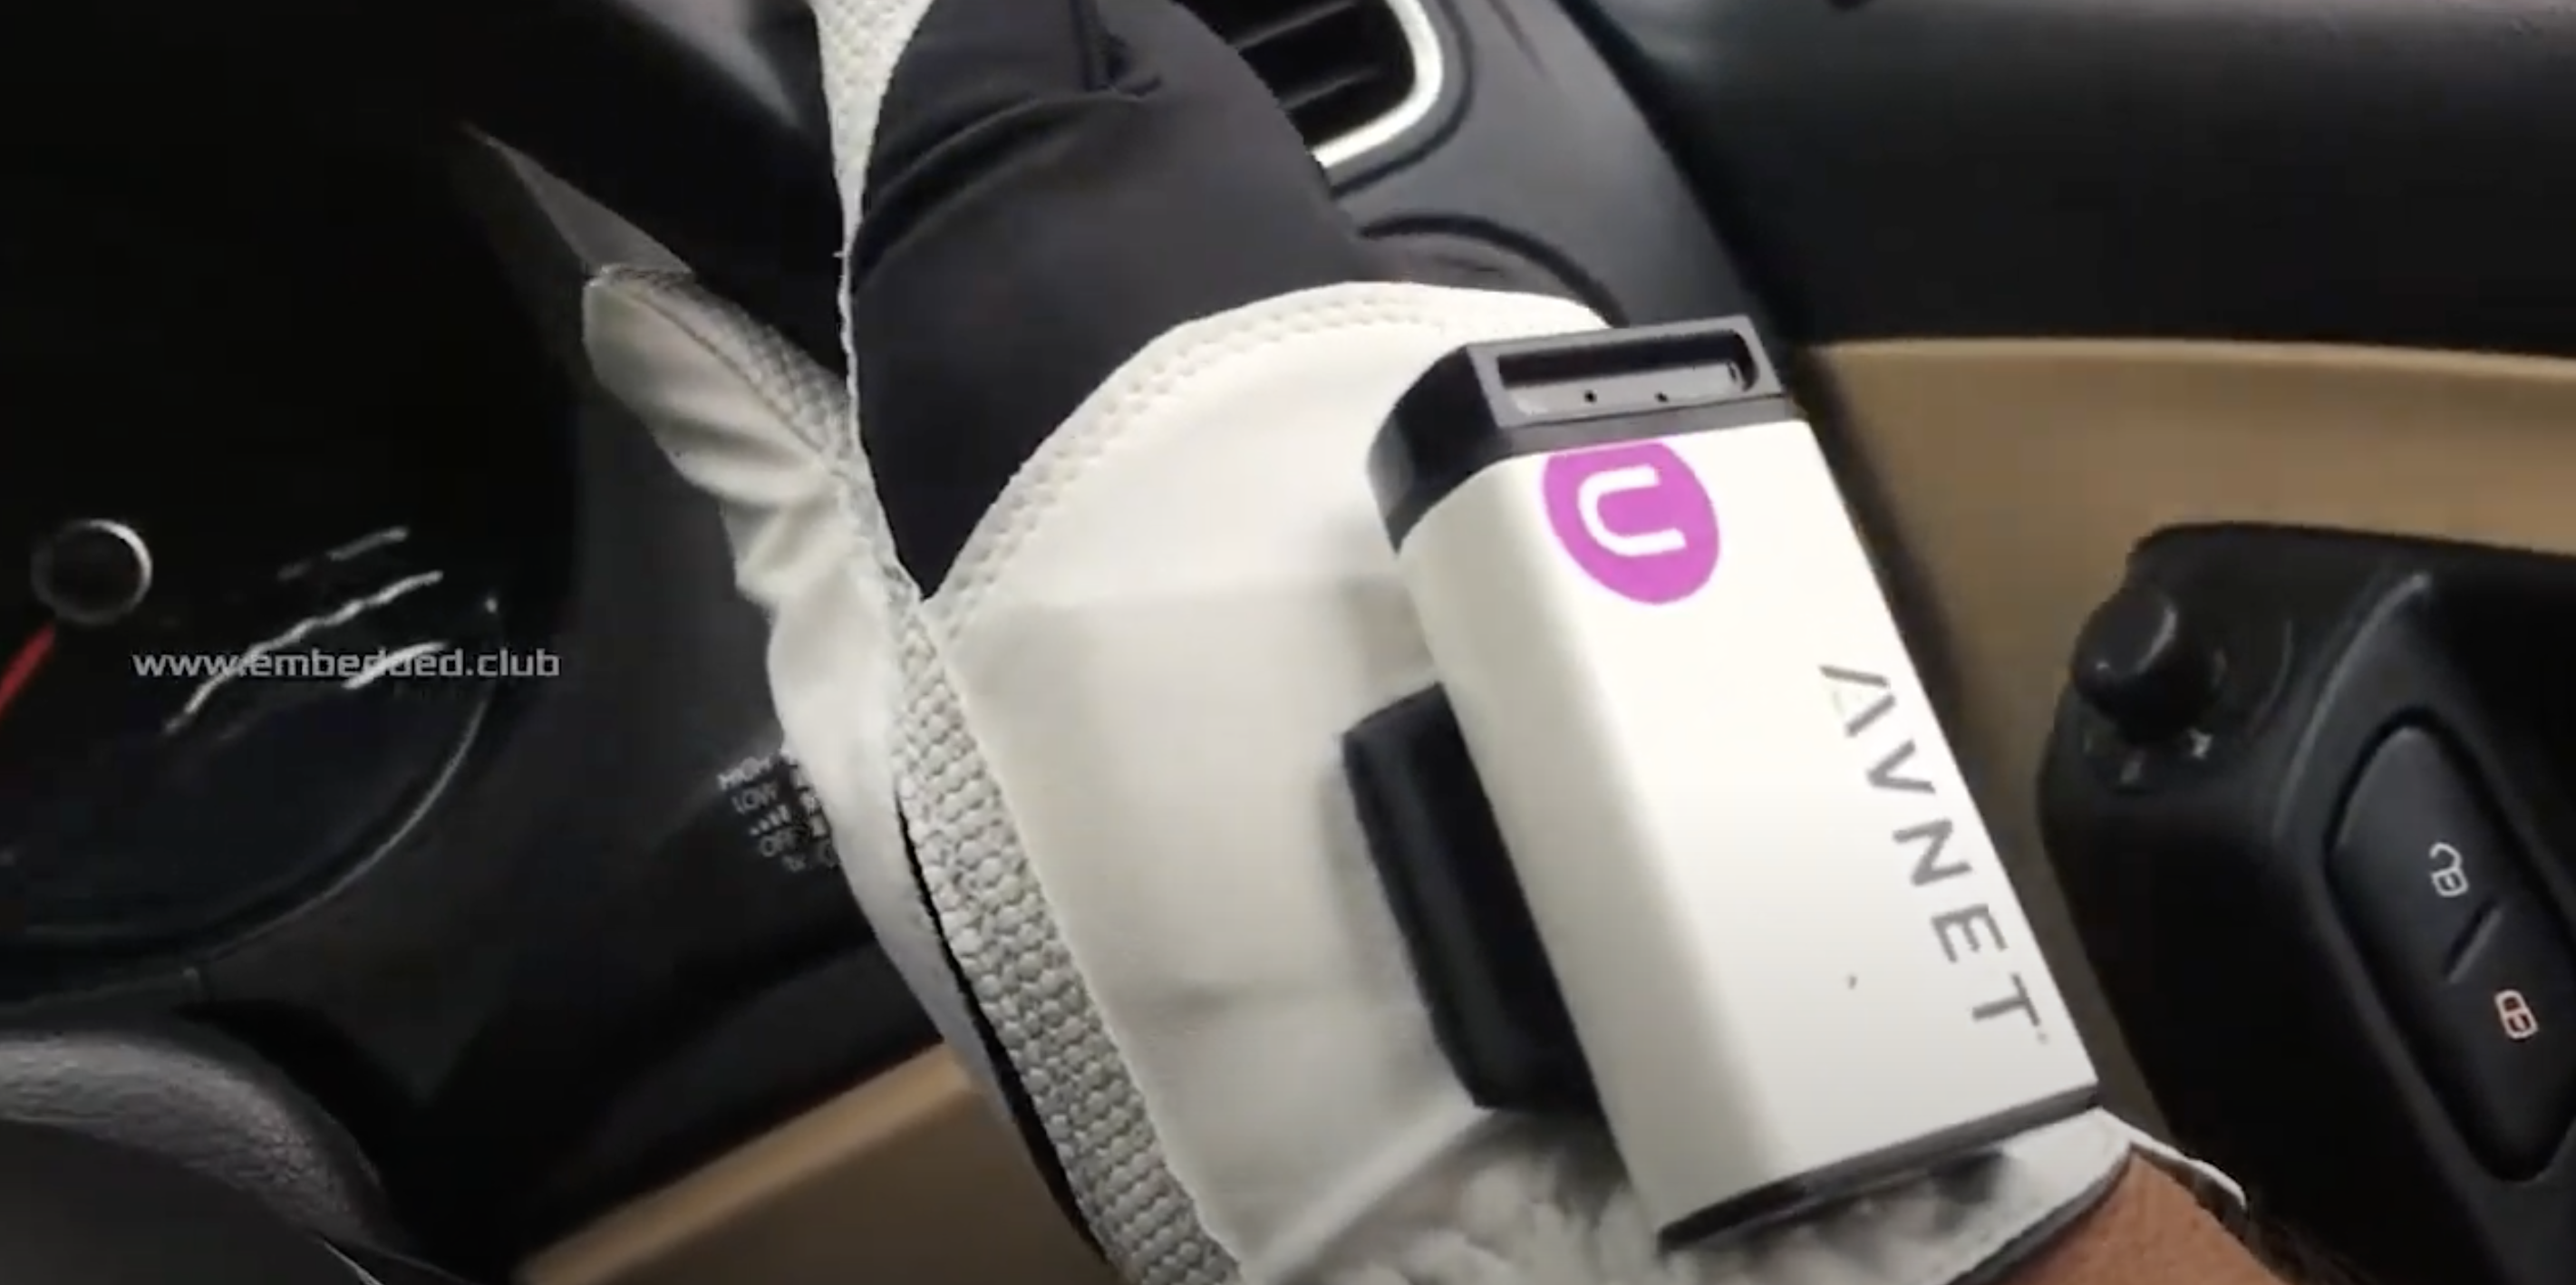
Animator/engineer Ashok Fair has put witch-level finger pointing powers in your hands by sticking a SmartEdge Agile, wirelessly controlled by Raspberry Pi Zero, to a golf glove. You could have really freaked the bejeezus out of Halloween party guests with this (if we were allowed to have Halloween parties that is).
The build uses a Smart Edge Agile IoT device with Brainium, a cloud-based tool for performing machine learning tasks.
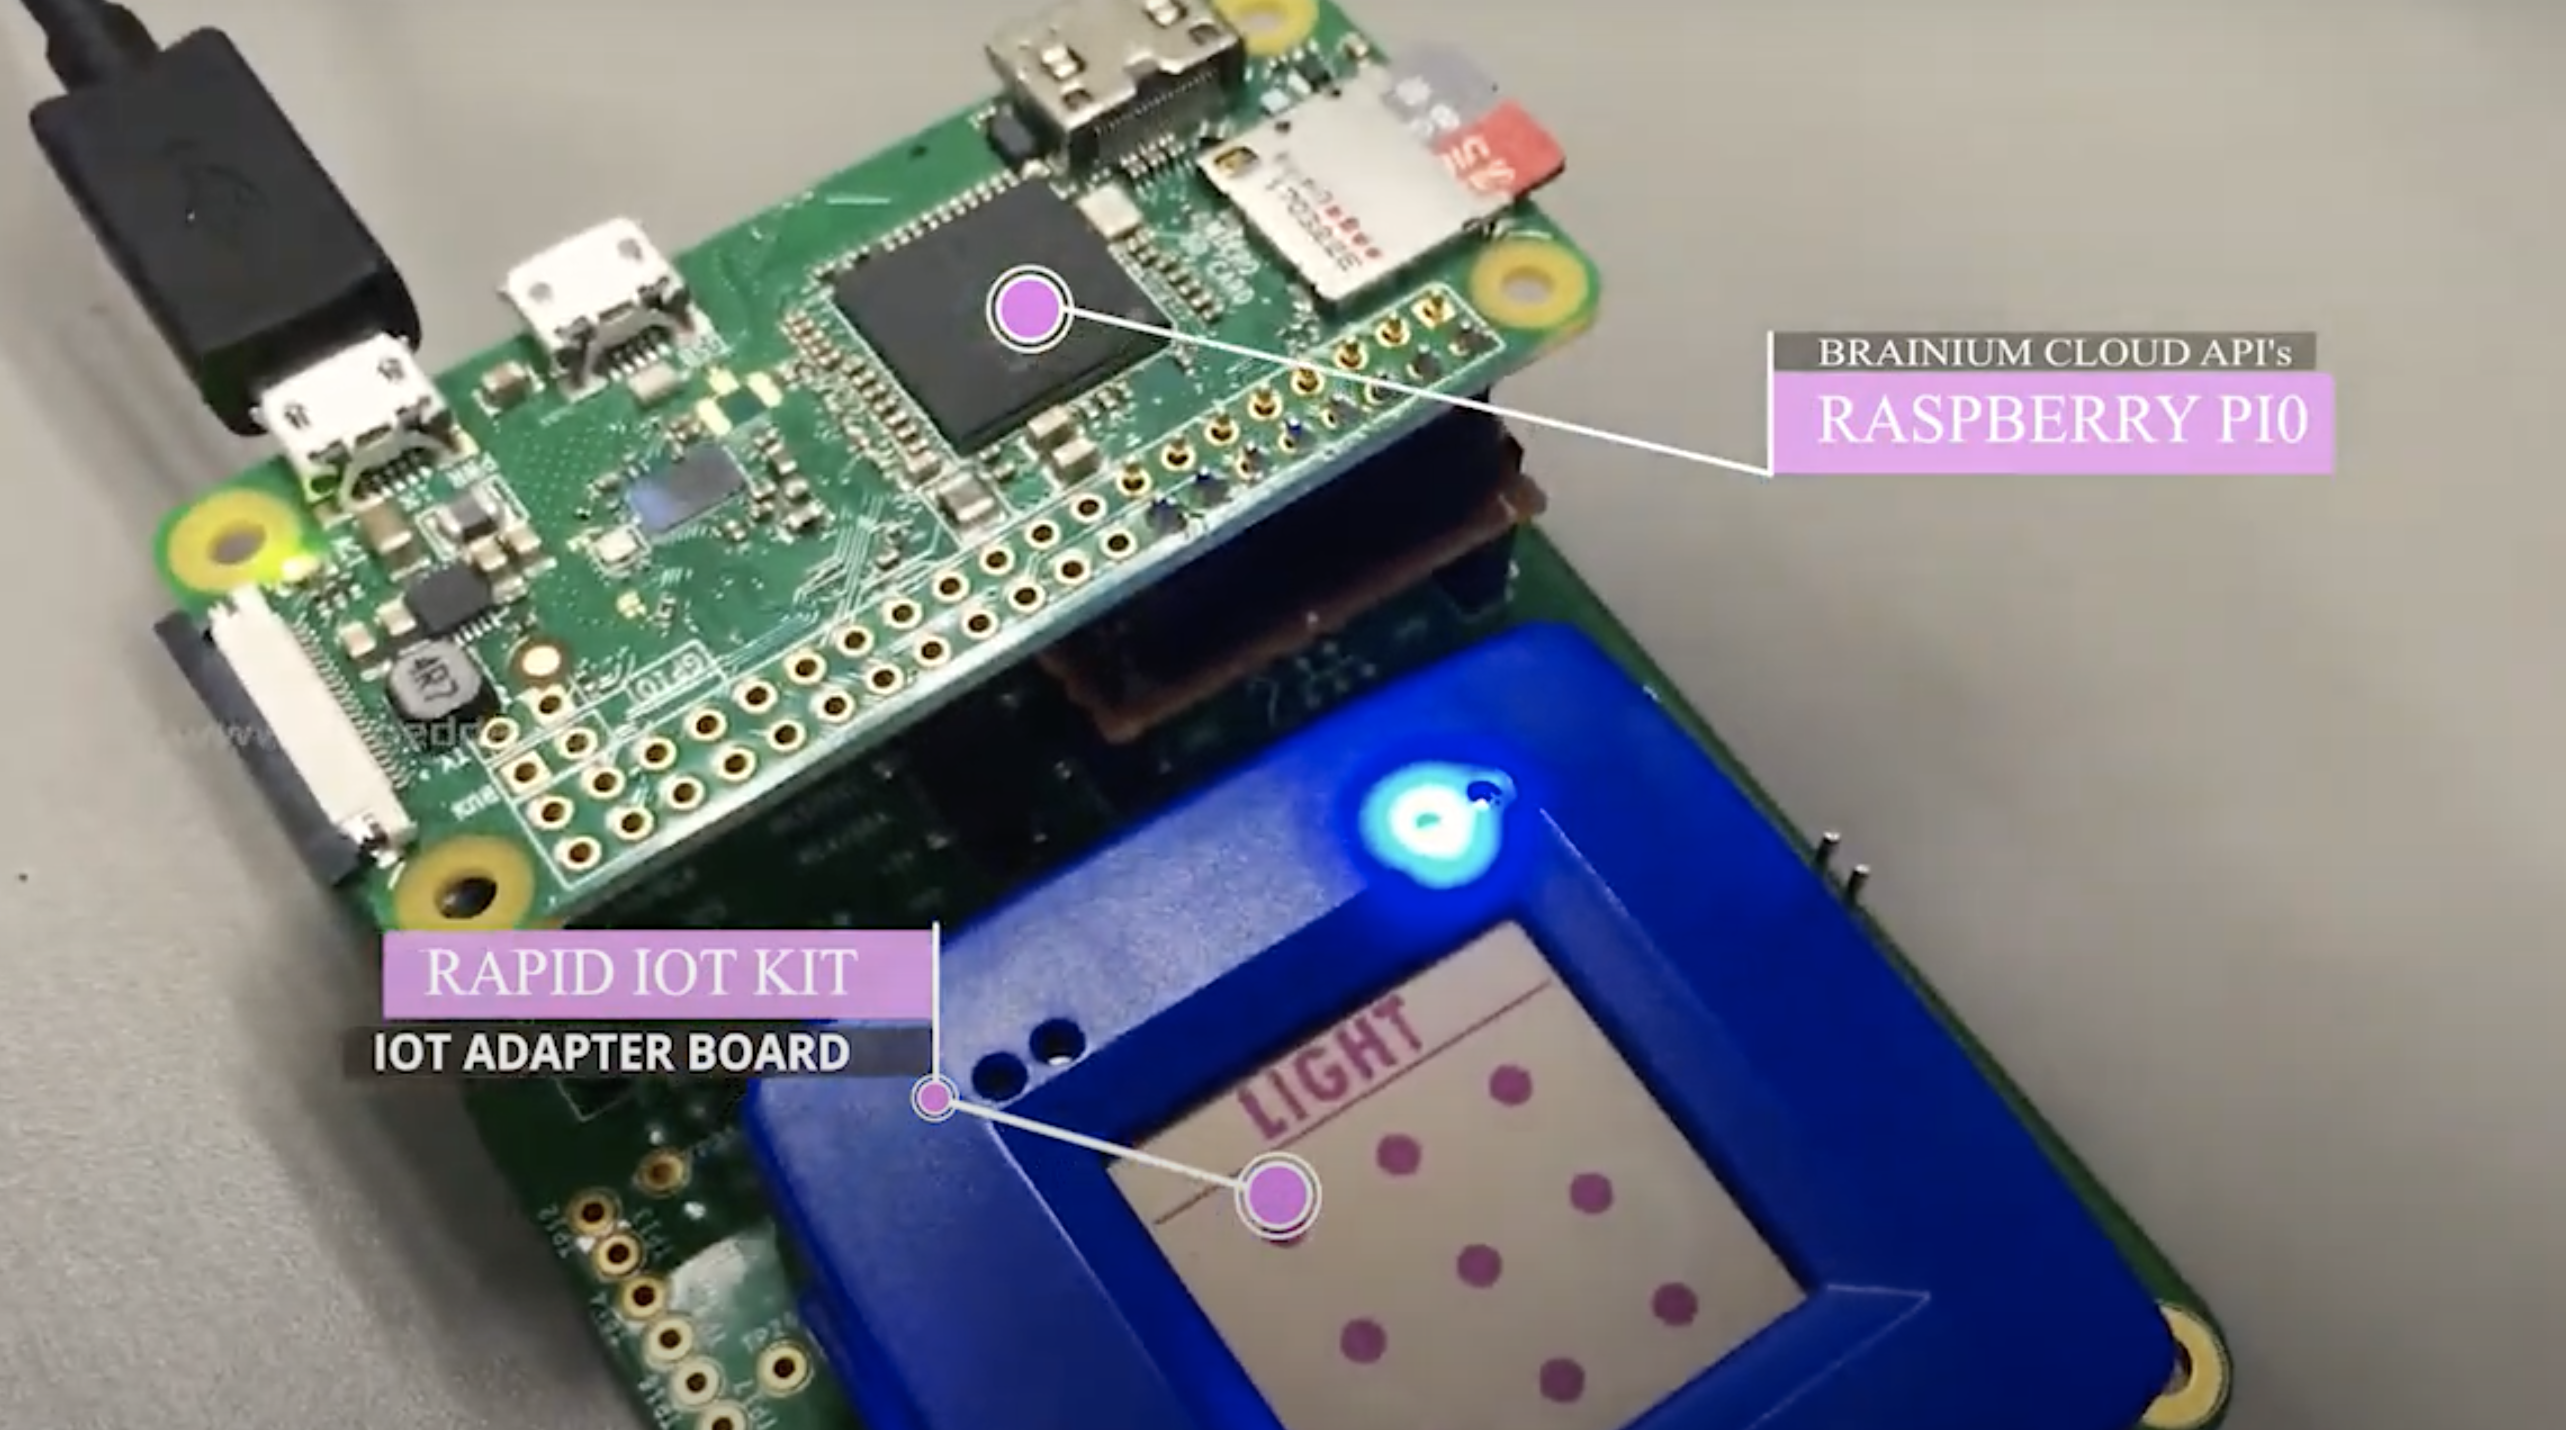
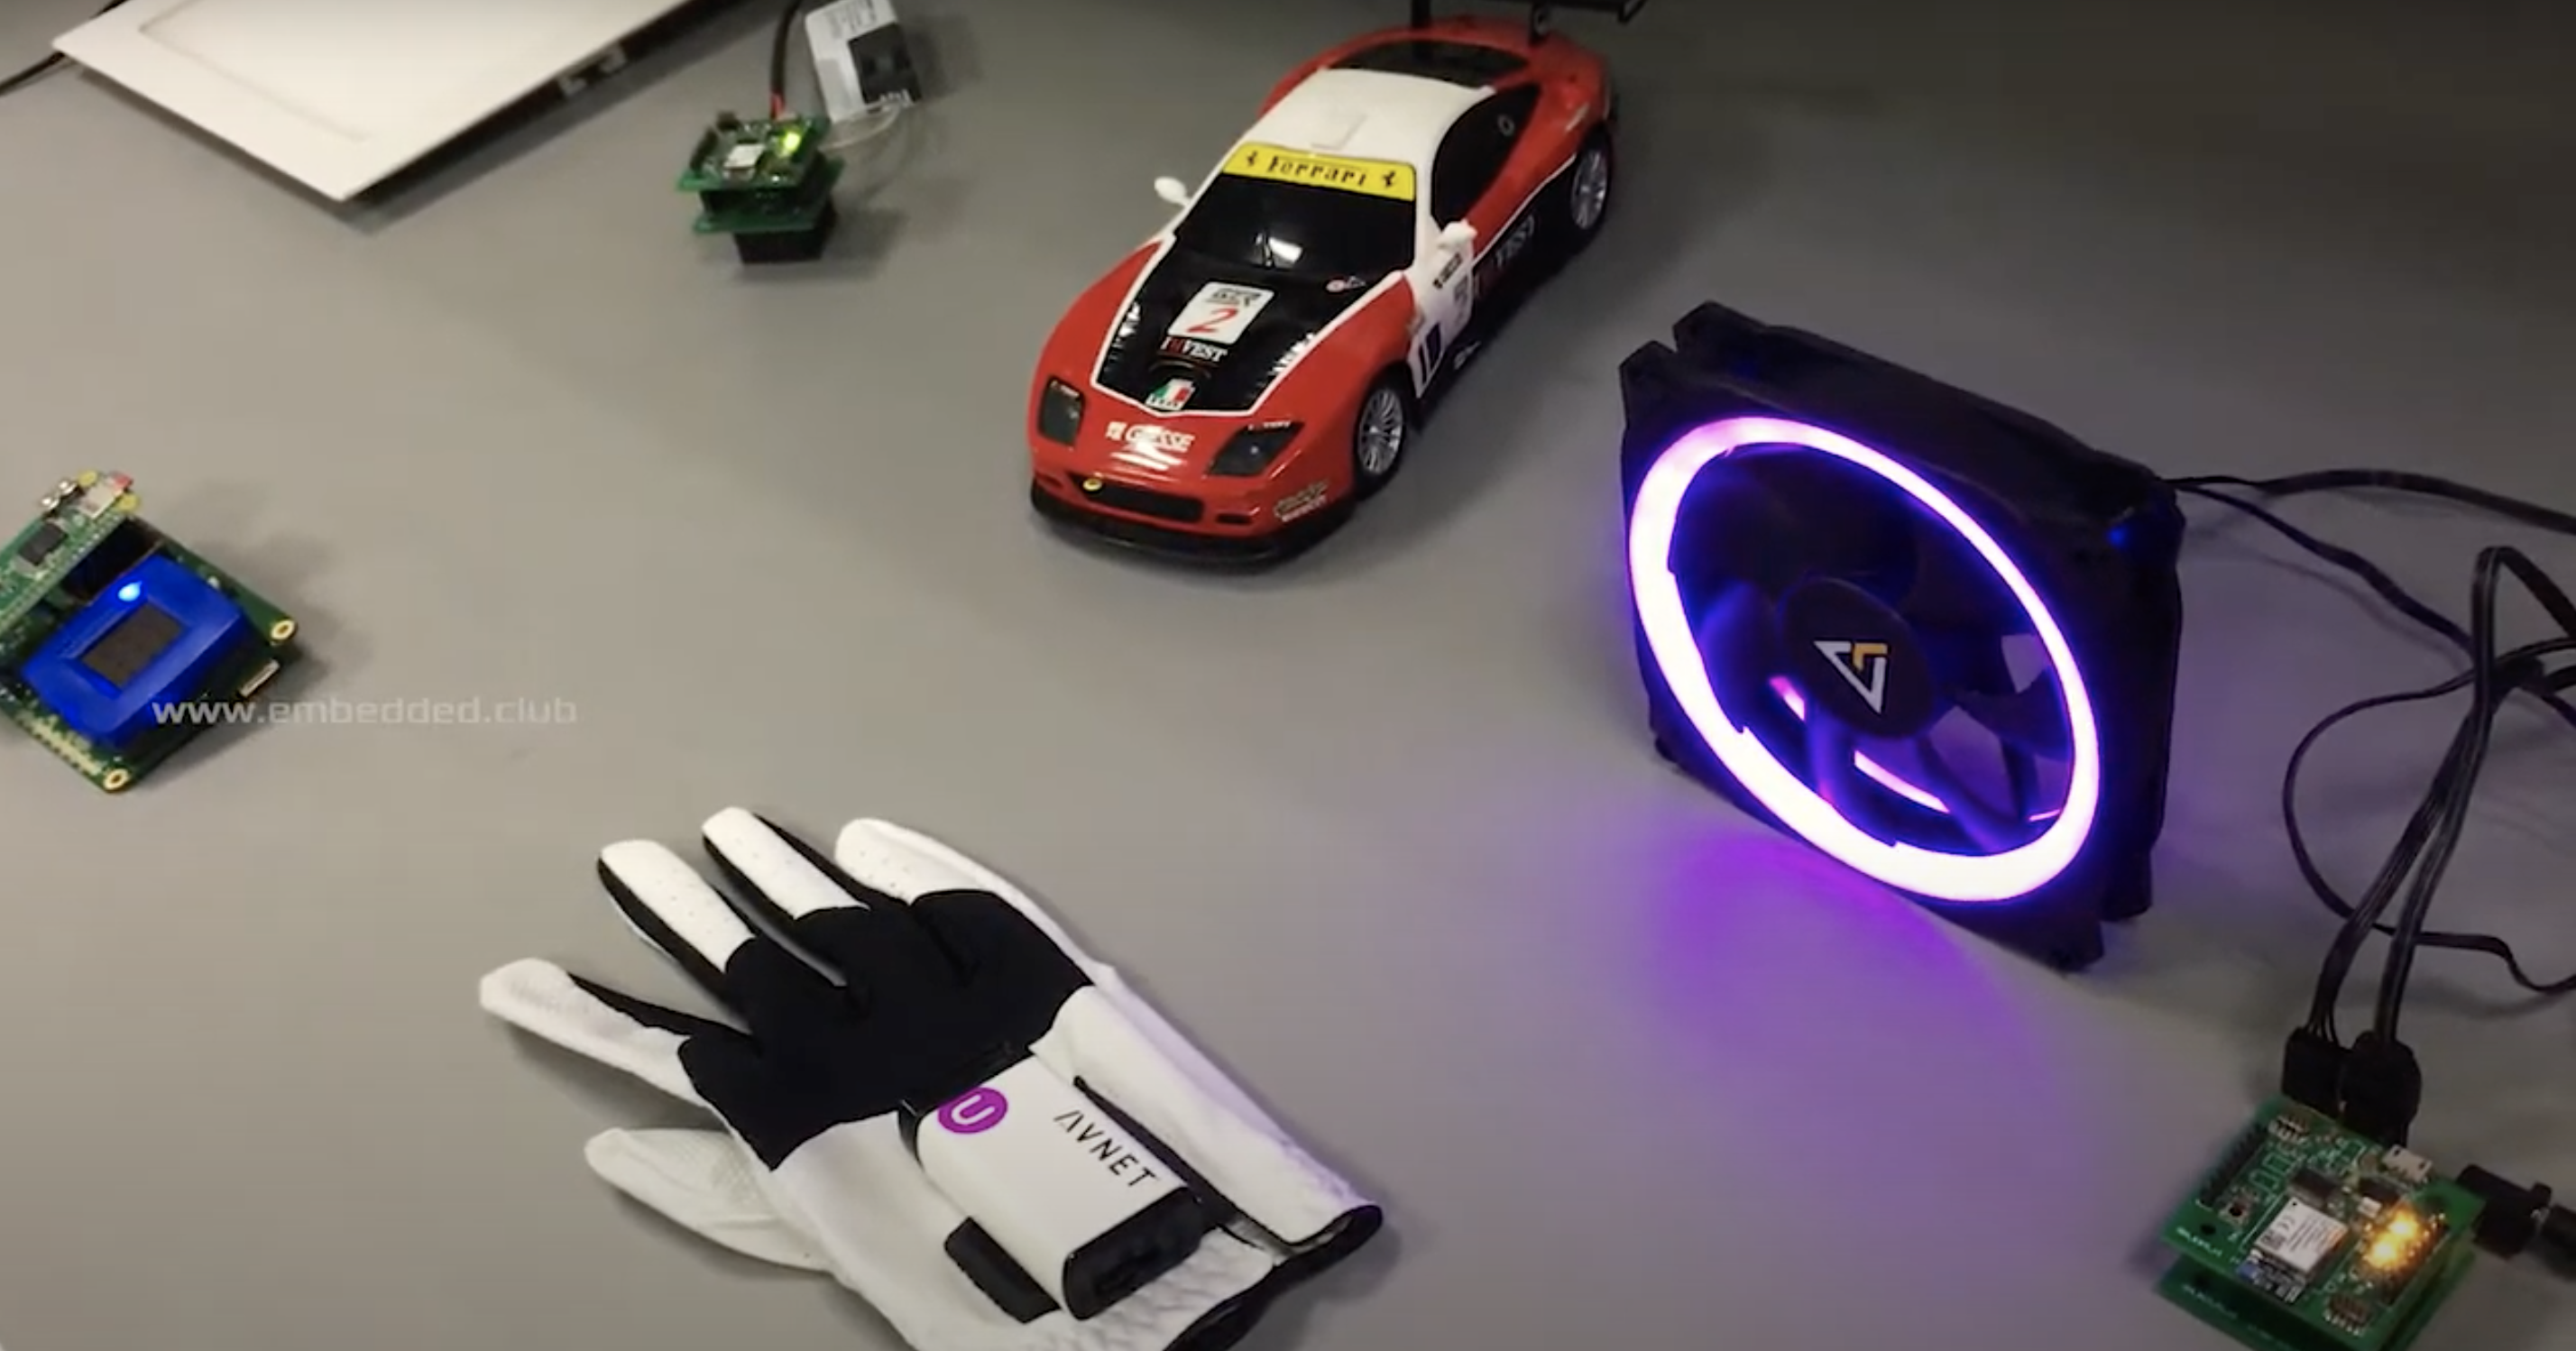
The Rapid IoT kit is interfaced with Raspberry Pi Zero and creates a thread network connecting to light, car, and fan controller nodes.
The Brainium app is installed on Raspberry Pi and bridges between the cloud and Smart Edge device. MQTT is running on Python and processes the Rapid IoT Kit’s data.
The device is mounted onto a golf glove, giving the wearer seemingly magical powers with the wave of a hand.
NXP Rapid IoT Prototyping Kit (the square blue screen stuck on the adaptor board with the Raspberry Pi Zero)
Brainium AI Studio app
Golf glove
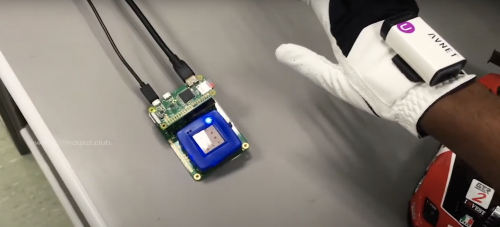
Waking up the Rapid IoT screen
To get started, the glove wearer draws a pattern above the screen attached to the Raspberry Pi to unlock it and wake up all the controller nodes.
The light controller node is turned on by drawing a clockwise circle, and turned off with an counter-clockwise circle.
The full kit and caboodle
The fan is turned on and off in the same way, and you can increase the fan’s speed by moving your hand upwards and reduce the speed by moving your hand down. You know it’s working by the look of the fan’s LEDs: they blinker faster as the fan speeds up.
Make a pushing motion in the air above the car to make it move forward, and you can also make it turn and reverse.
“Driving glove”
If you wear the glove while driving, it collects data in real time and logs it on the Brainium cloud so you can review your driving style.
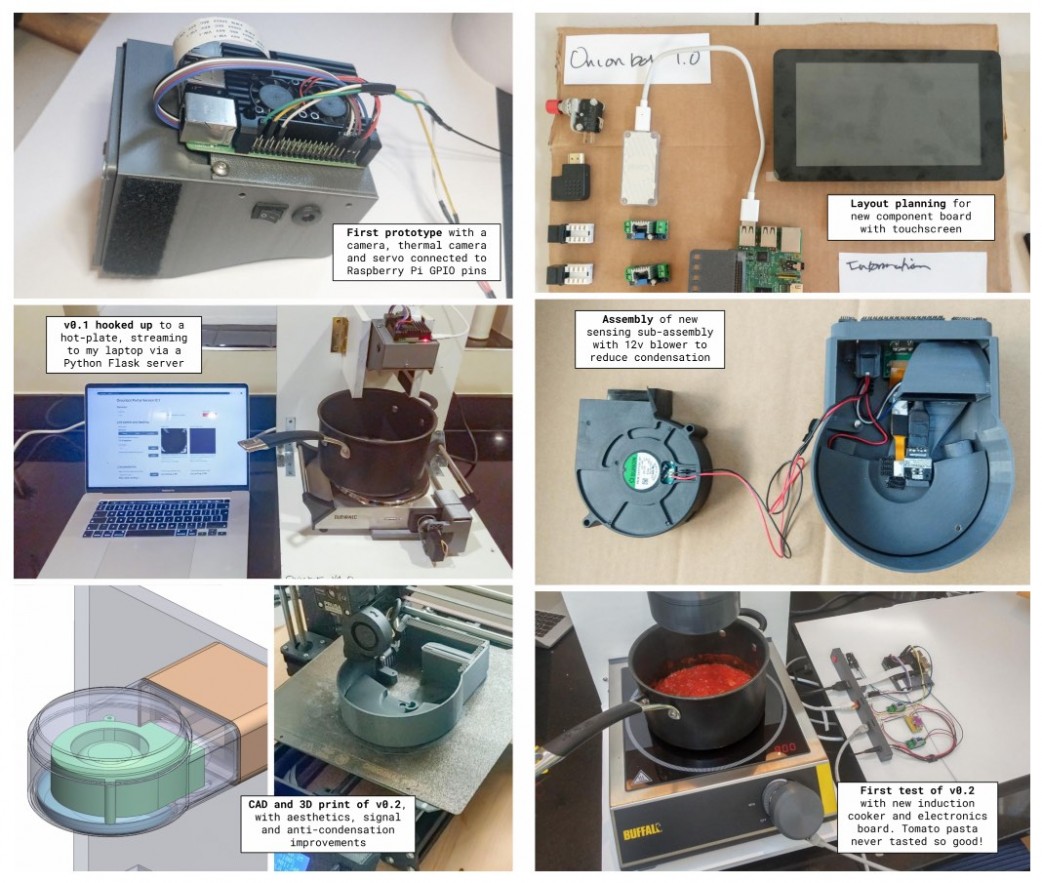
Design Engineering student Ben Cobley has created a Raspberry Pi–powered sous-chef that automates the easier pan-cooking tasks so the head chef can focus on culinary creativity.
Ben named his invention OnionBot, as the idea came to him when looking for an automated way to perfectly soften onions in a pan while he got on with the rest of his dish. I have yet to manage to retrieve onions from the pan before they blacken so… *need*.
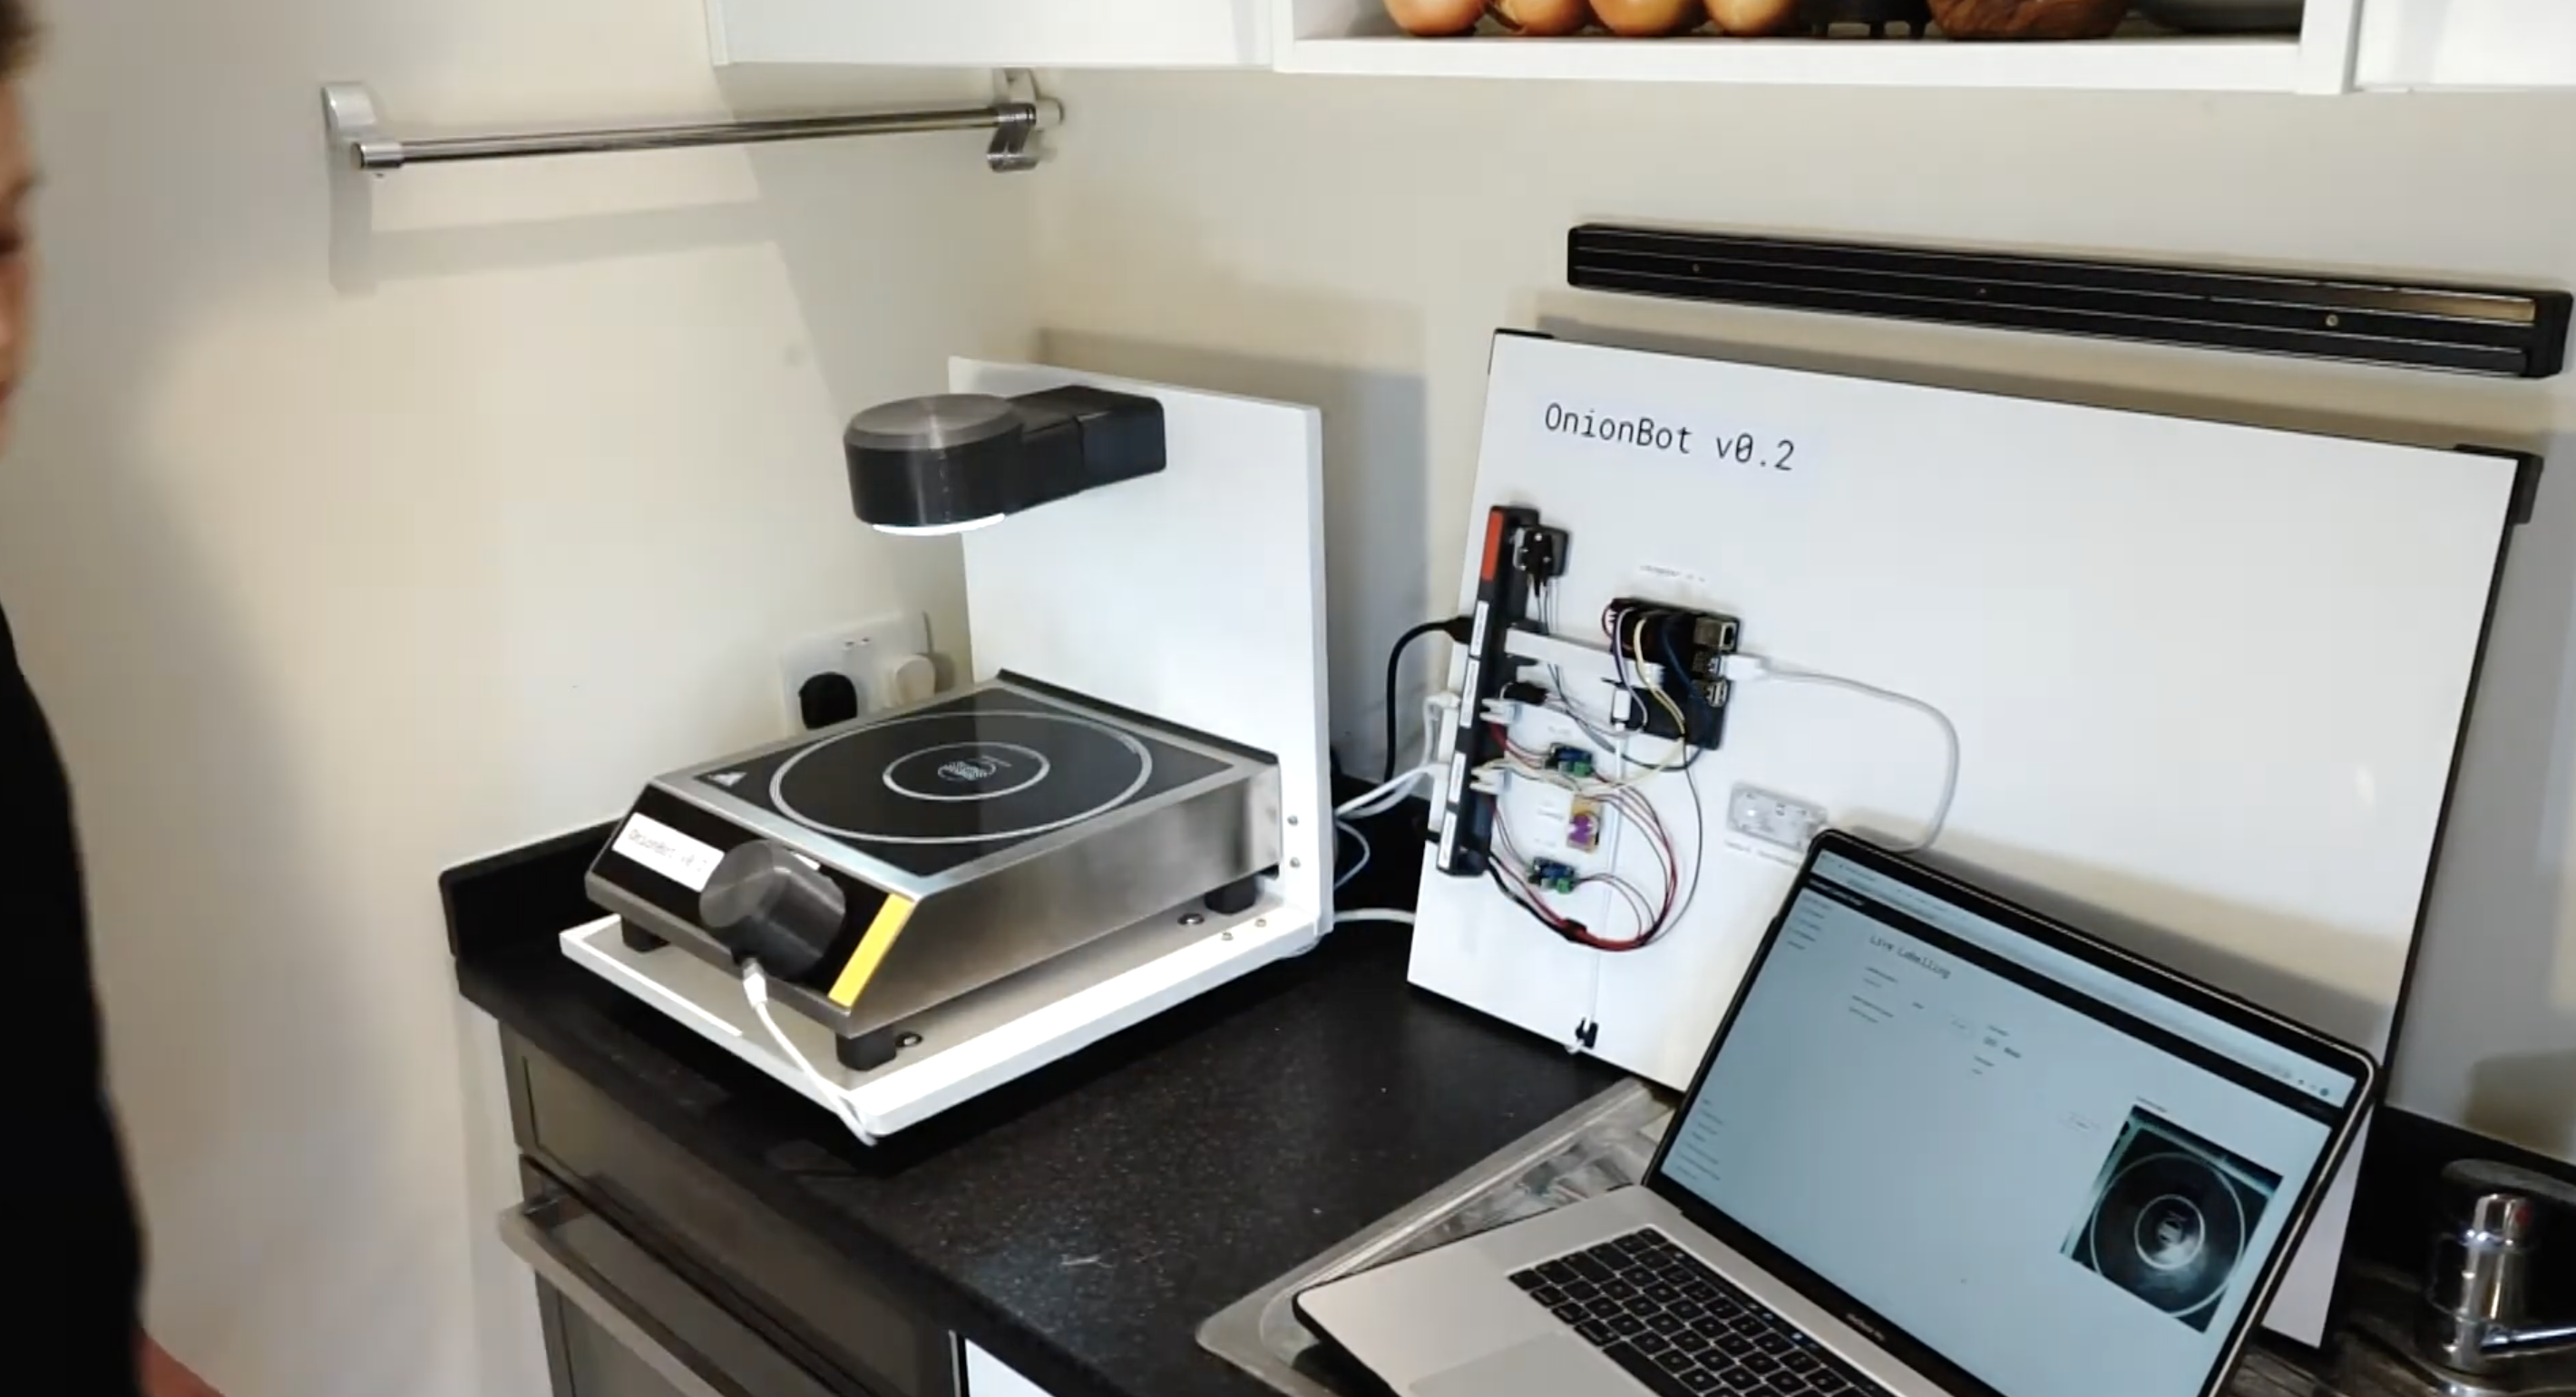
The full setup (you won’t need a laptop while you’re cooking, so you’ll have counter space)
Ben’s affordable solution is much better suited to home cooking than the big, expensive robotic arms used in industry. Using our tiny computer also allowed Ben to create something that fits on a kitchen counter.
What can OnionBot do?
Tells you on-screen when it is time to advance to the next stage of a recipe
Autonomously controls the pan temperature using PID feedback control
Detects when the pan is close to boiling over and automatically turns down the heat
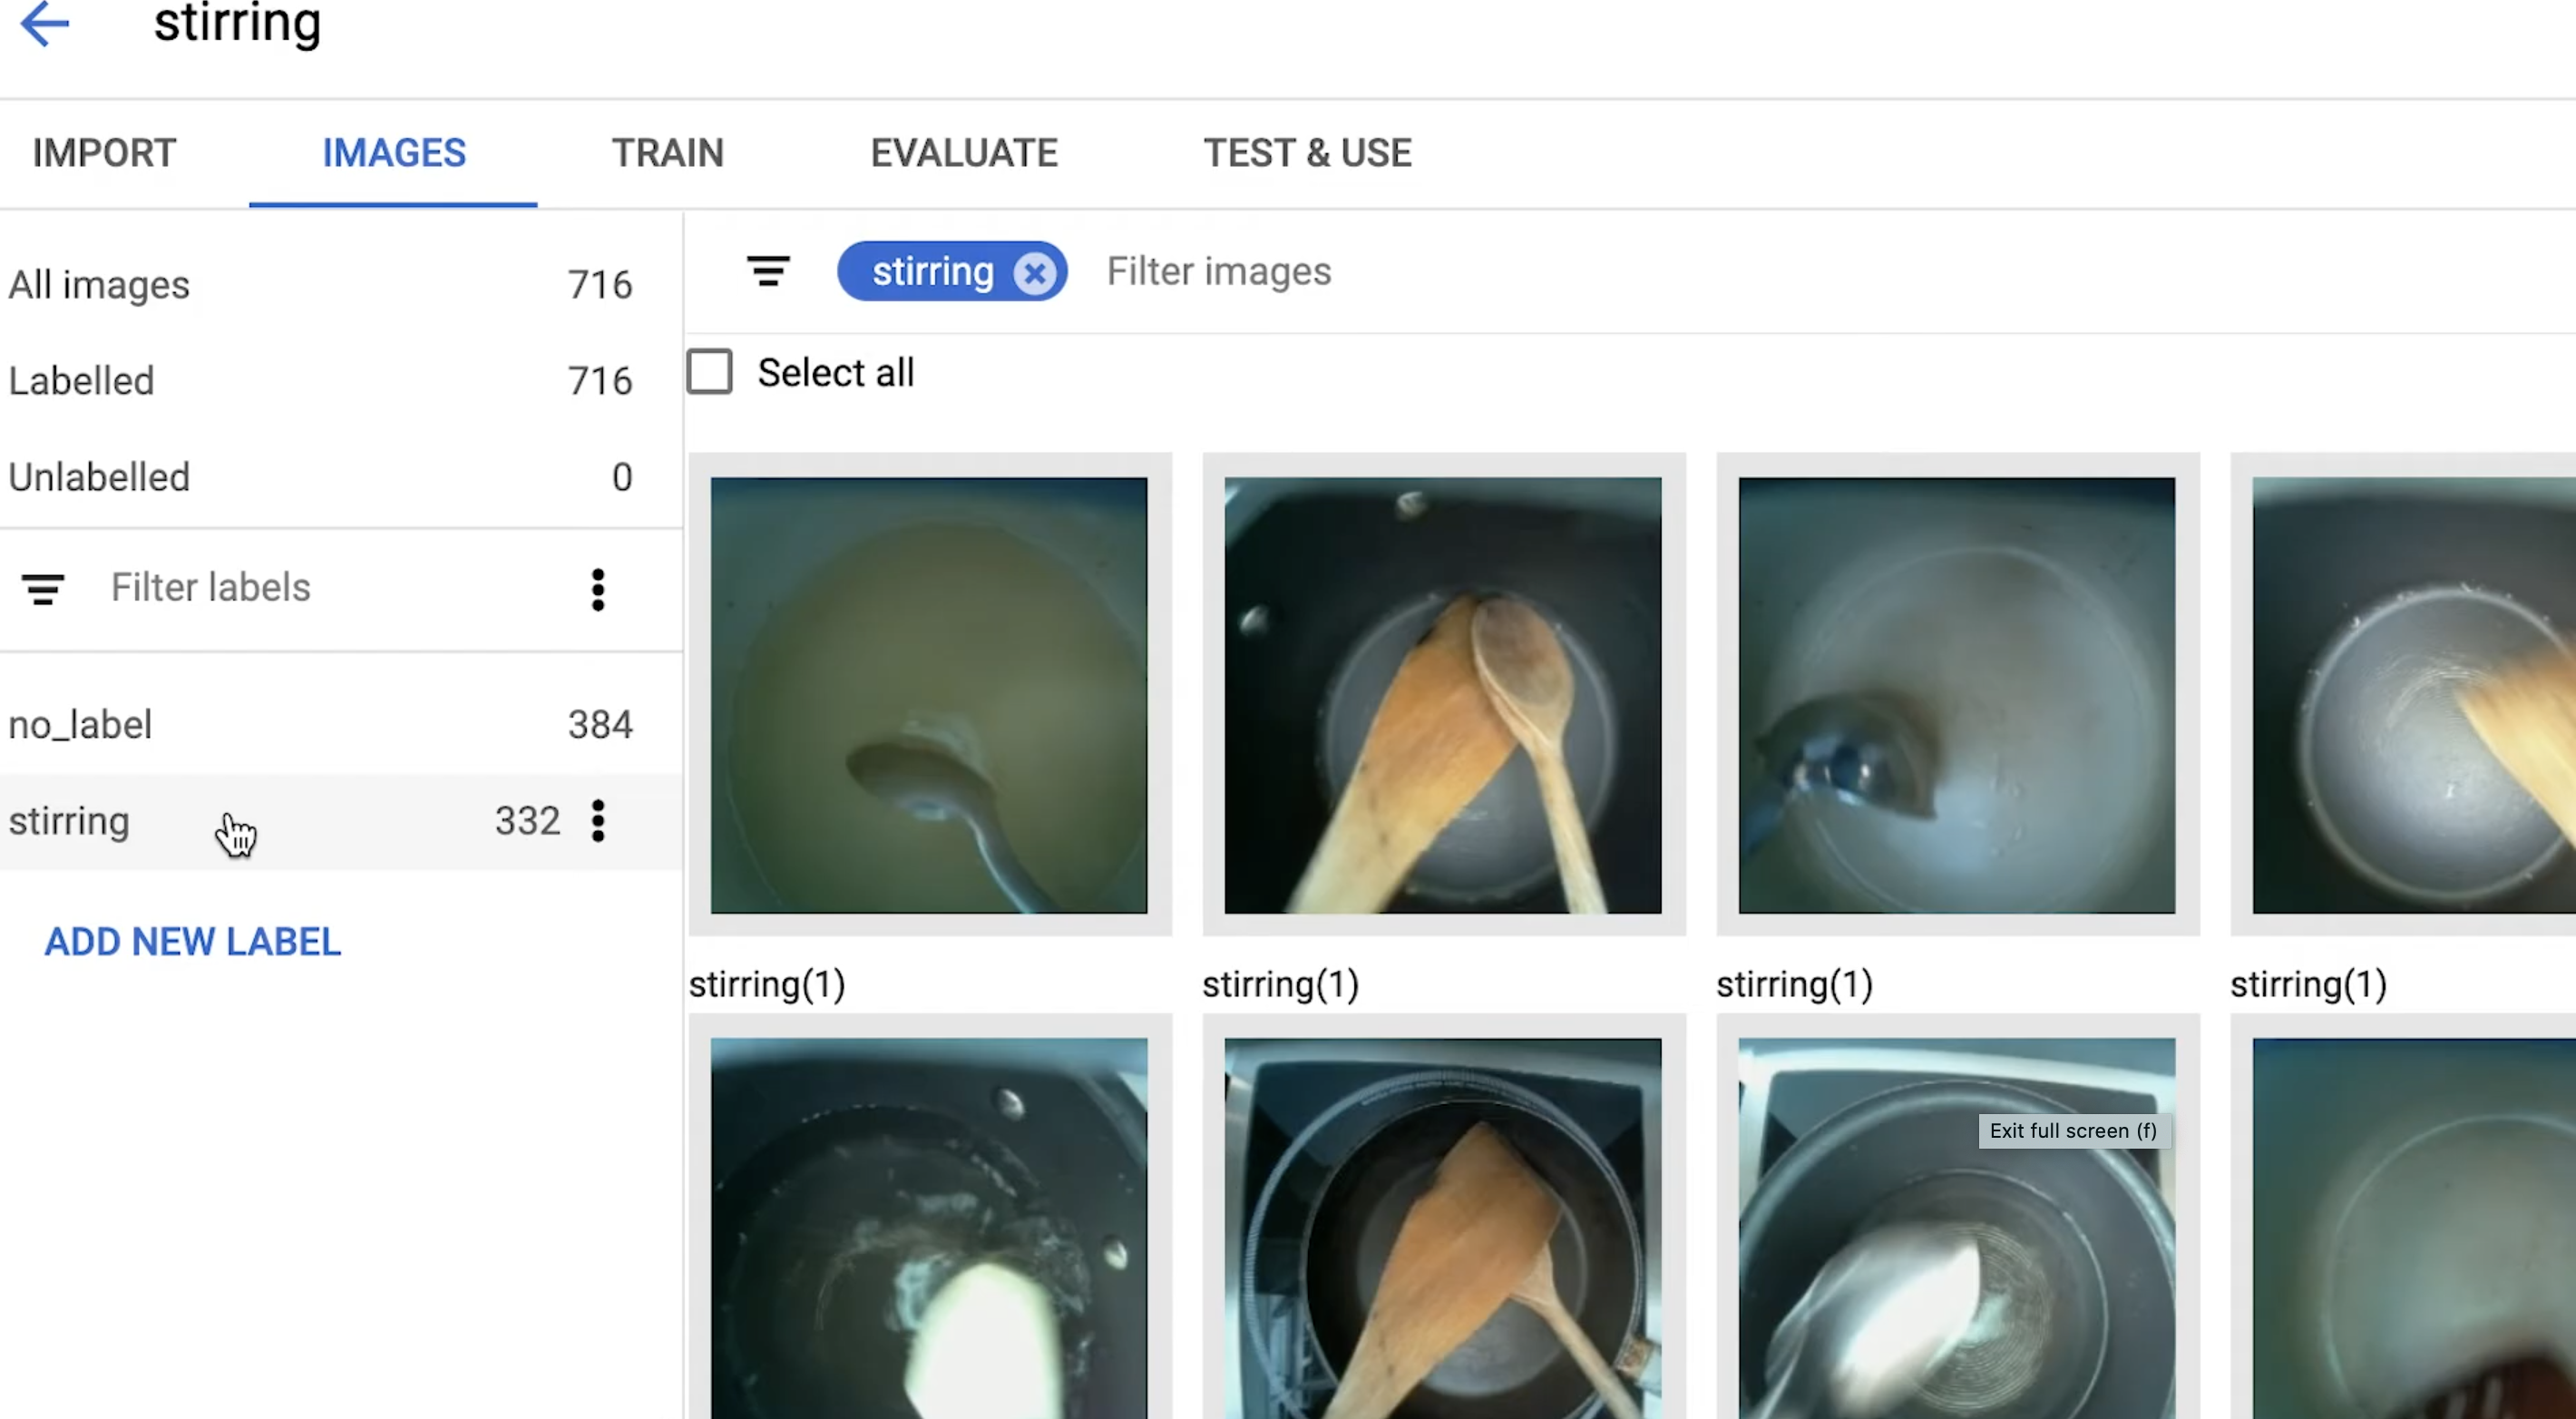
Reminds you if you haven’t stirred the pan in a while
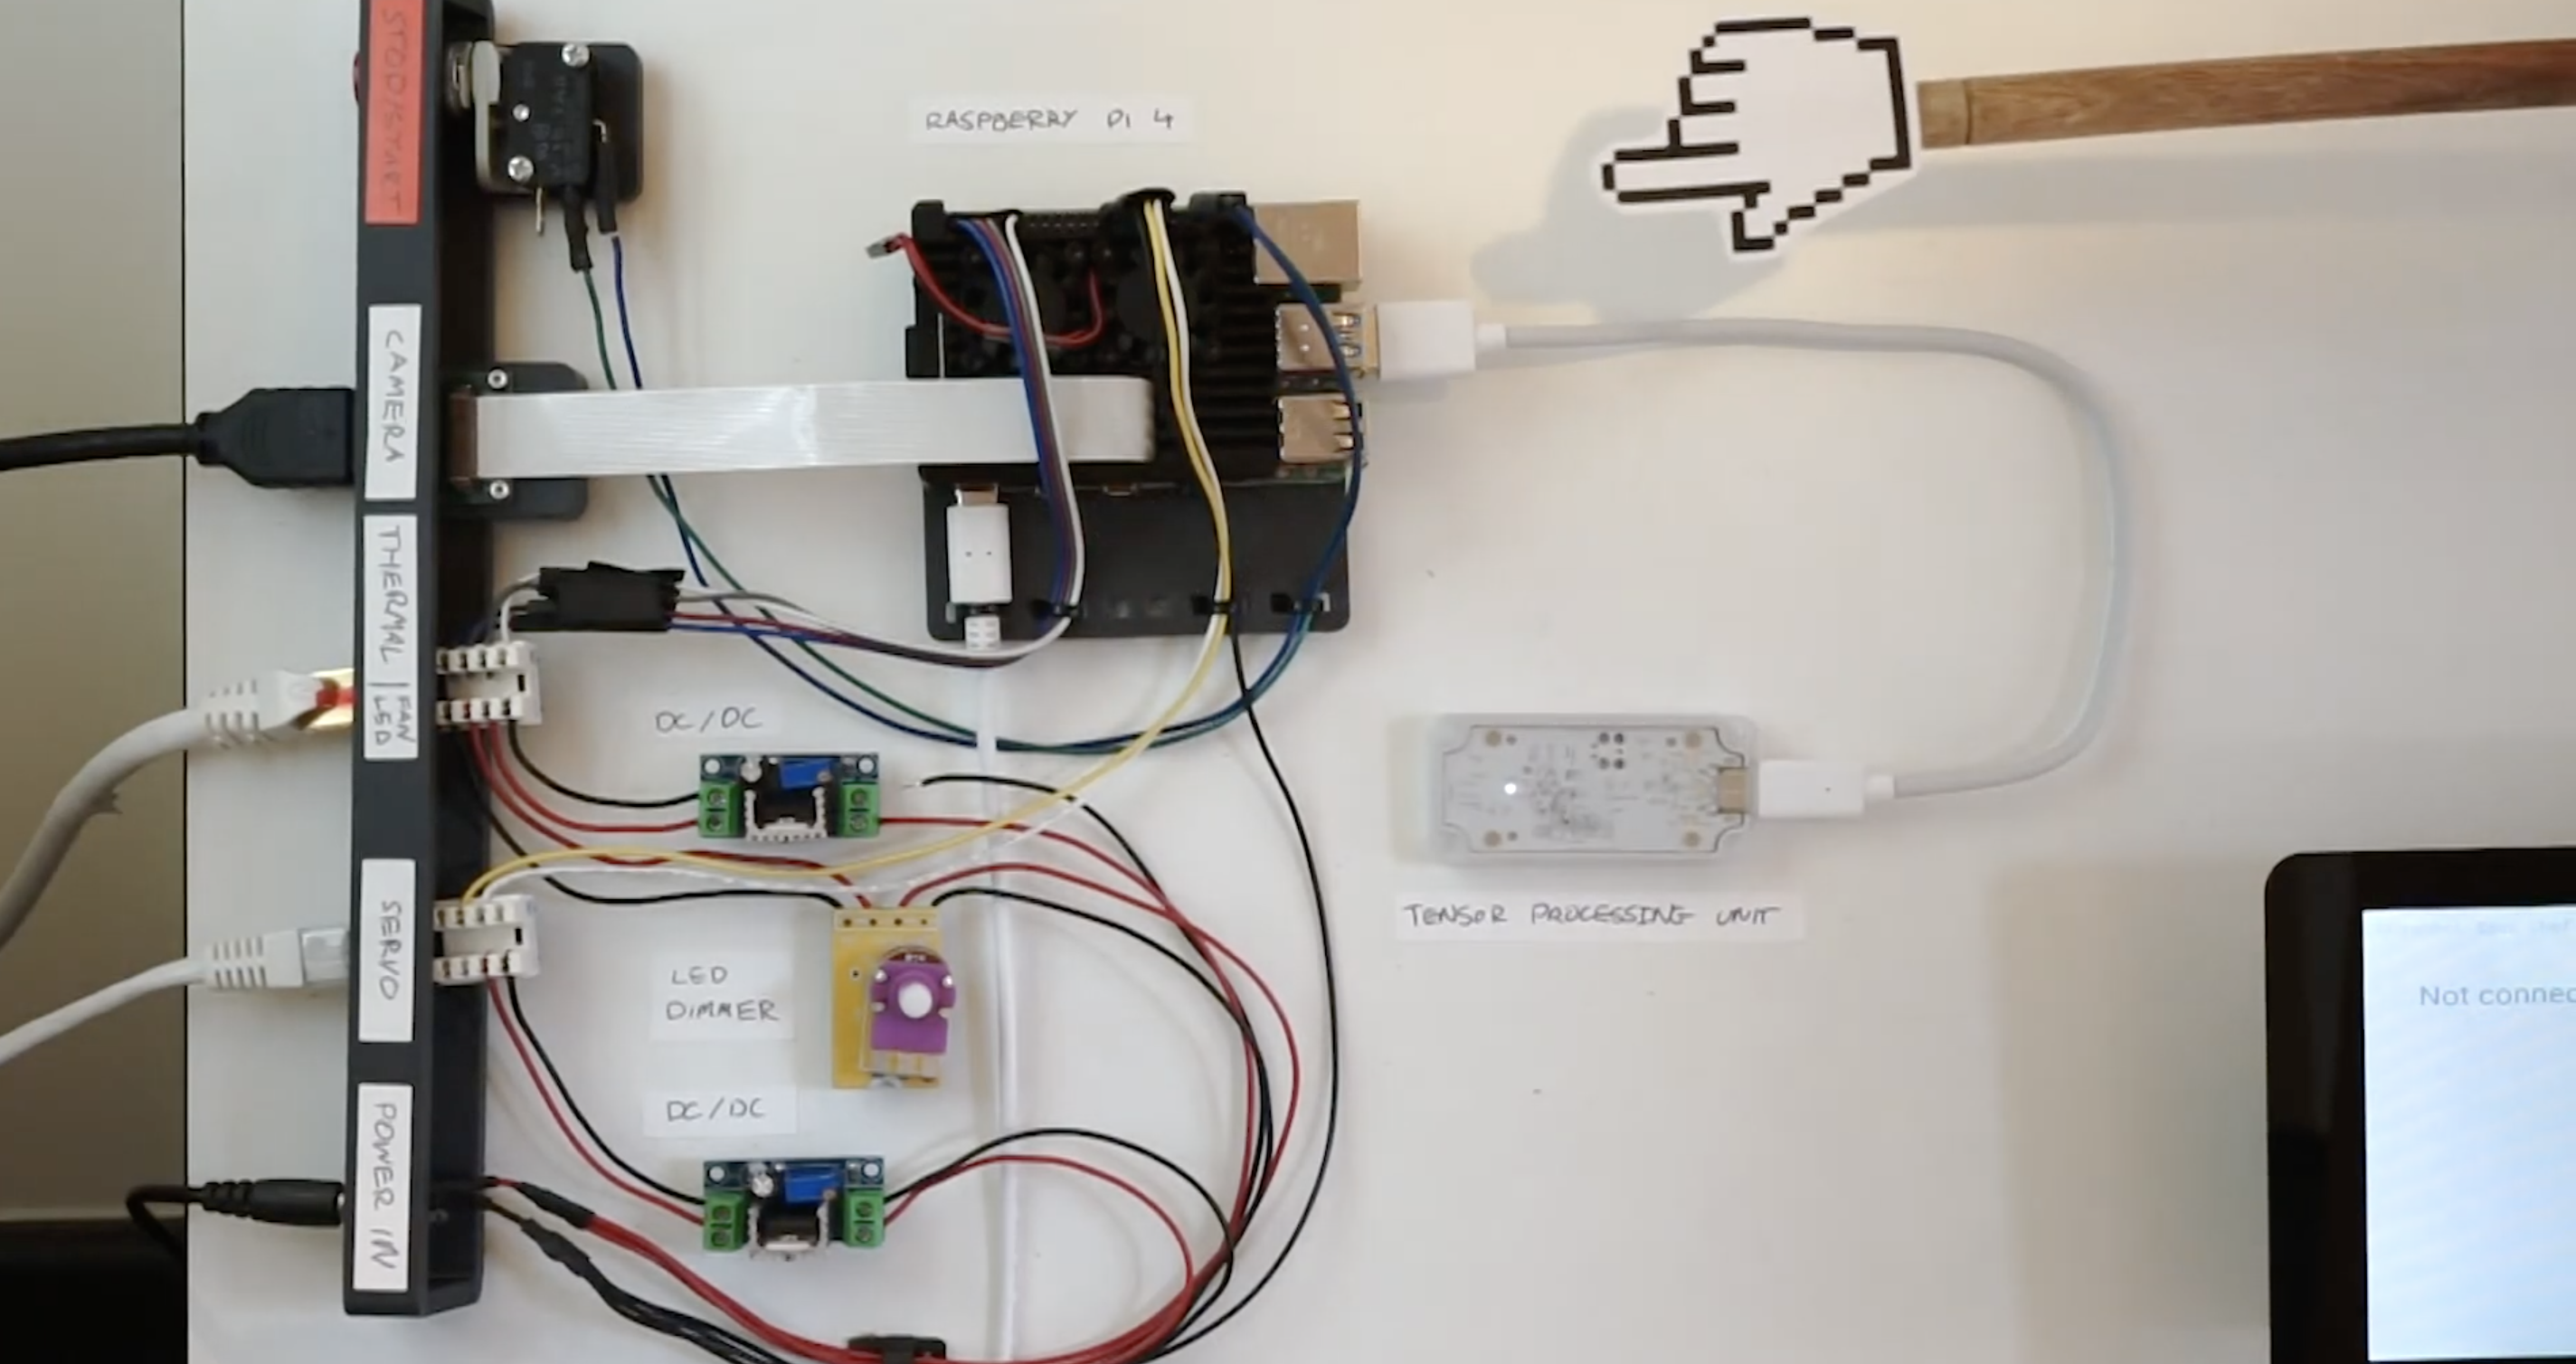
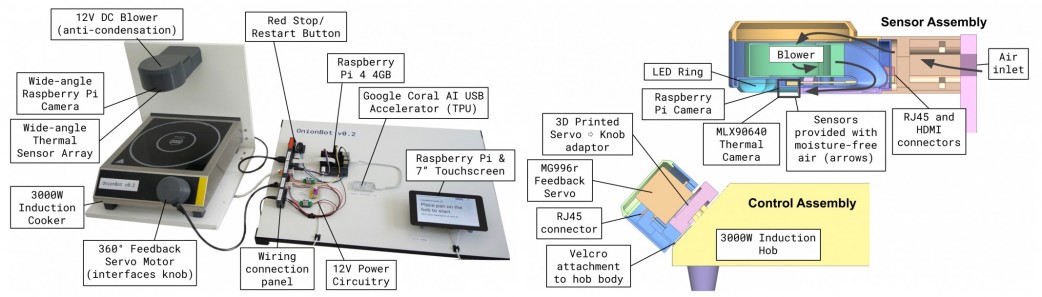
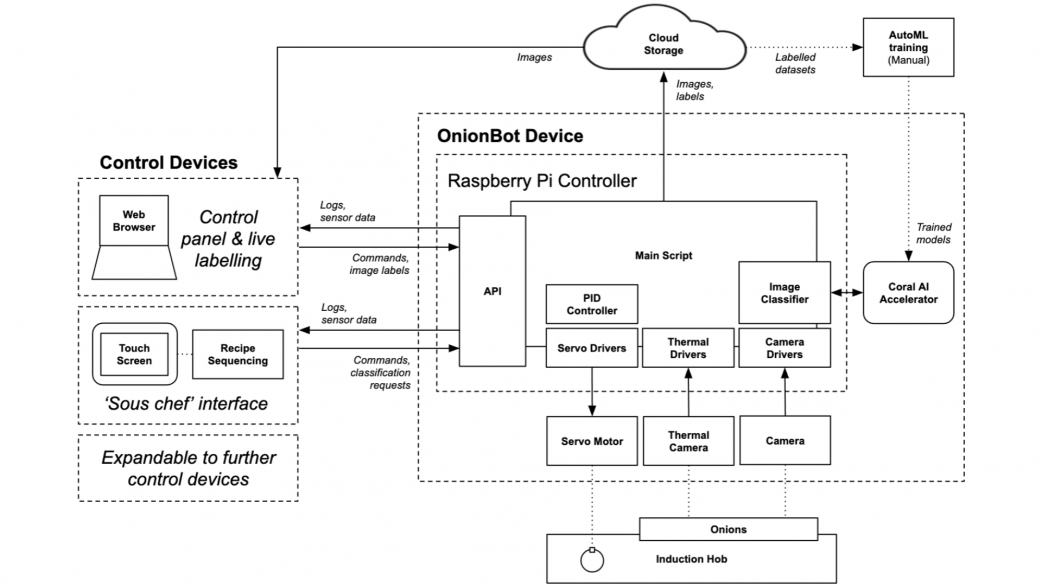
A thermal sensor array suspended above the stove detects the pan temperature, and the Raspberry Pi Camera Module helps track the cooking progress. A servo motor controls the dial on the induction stove.
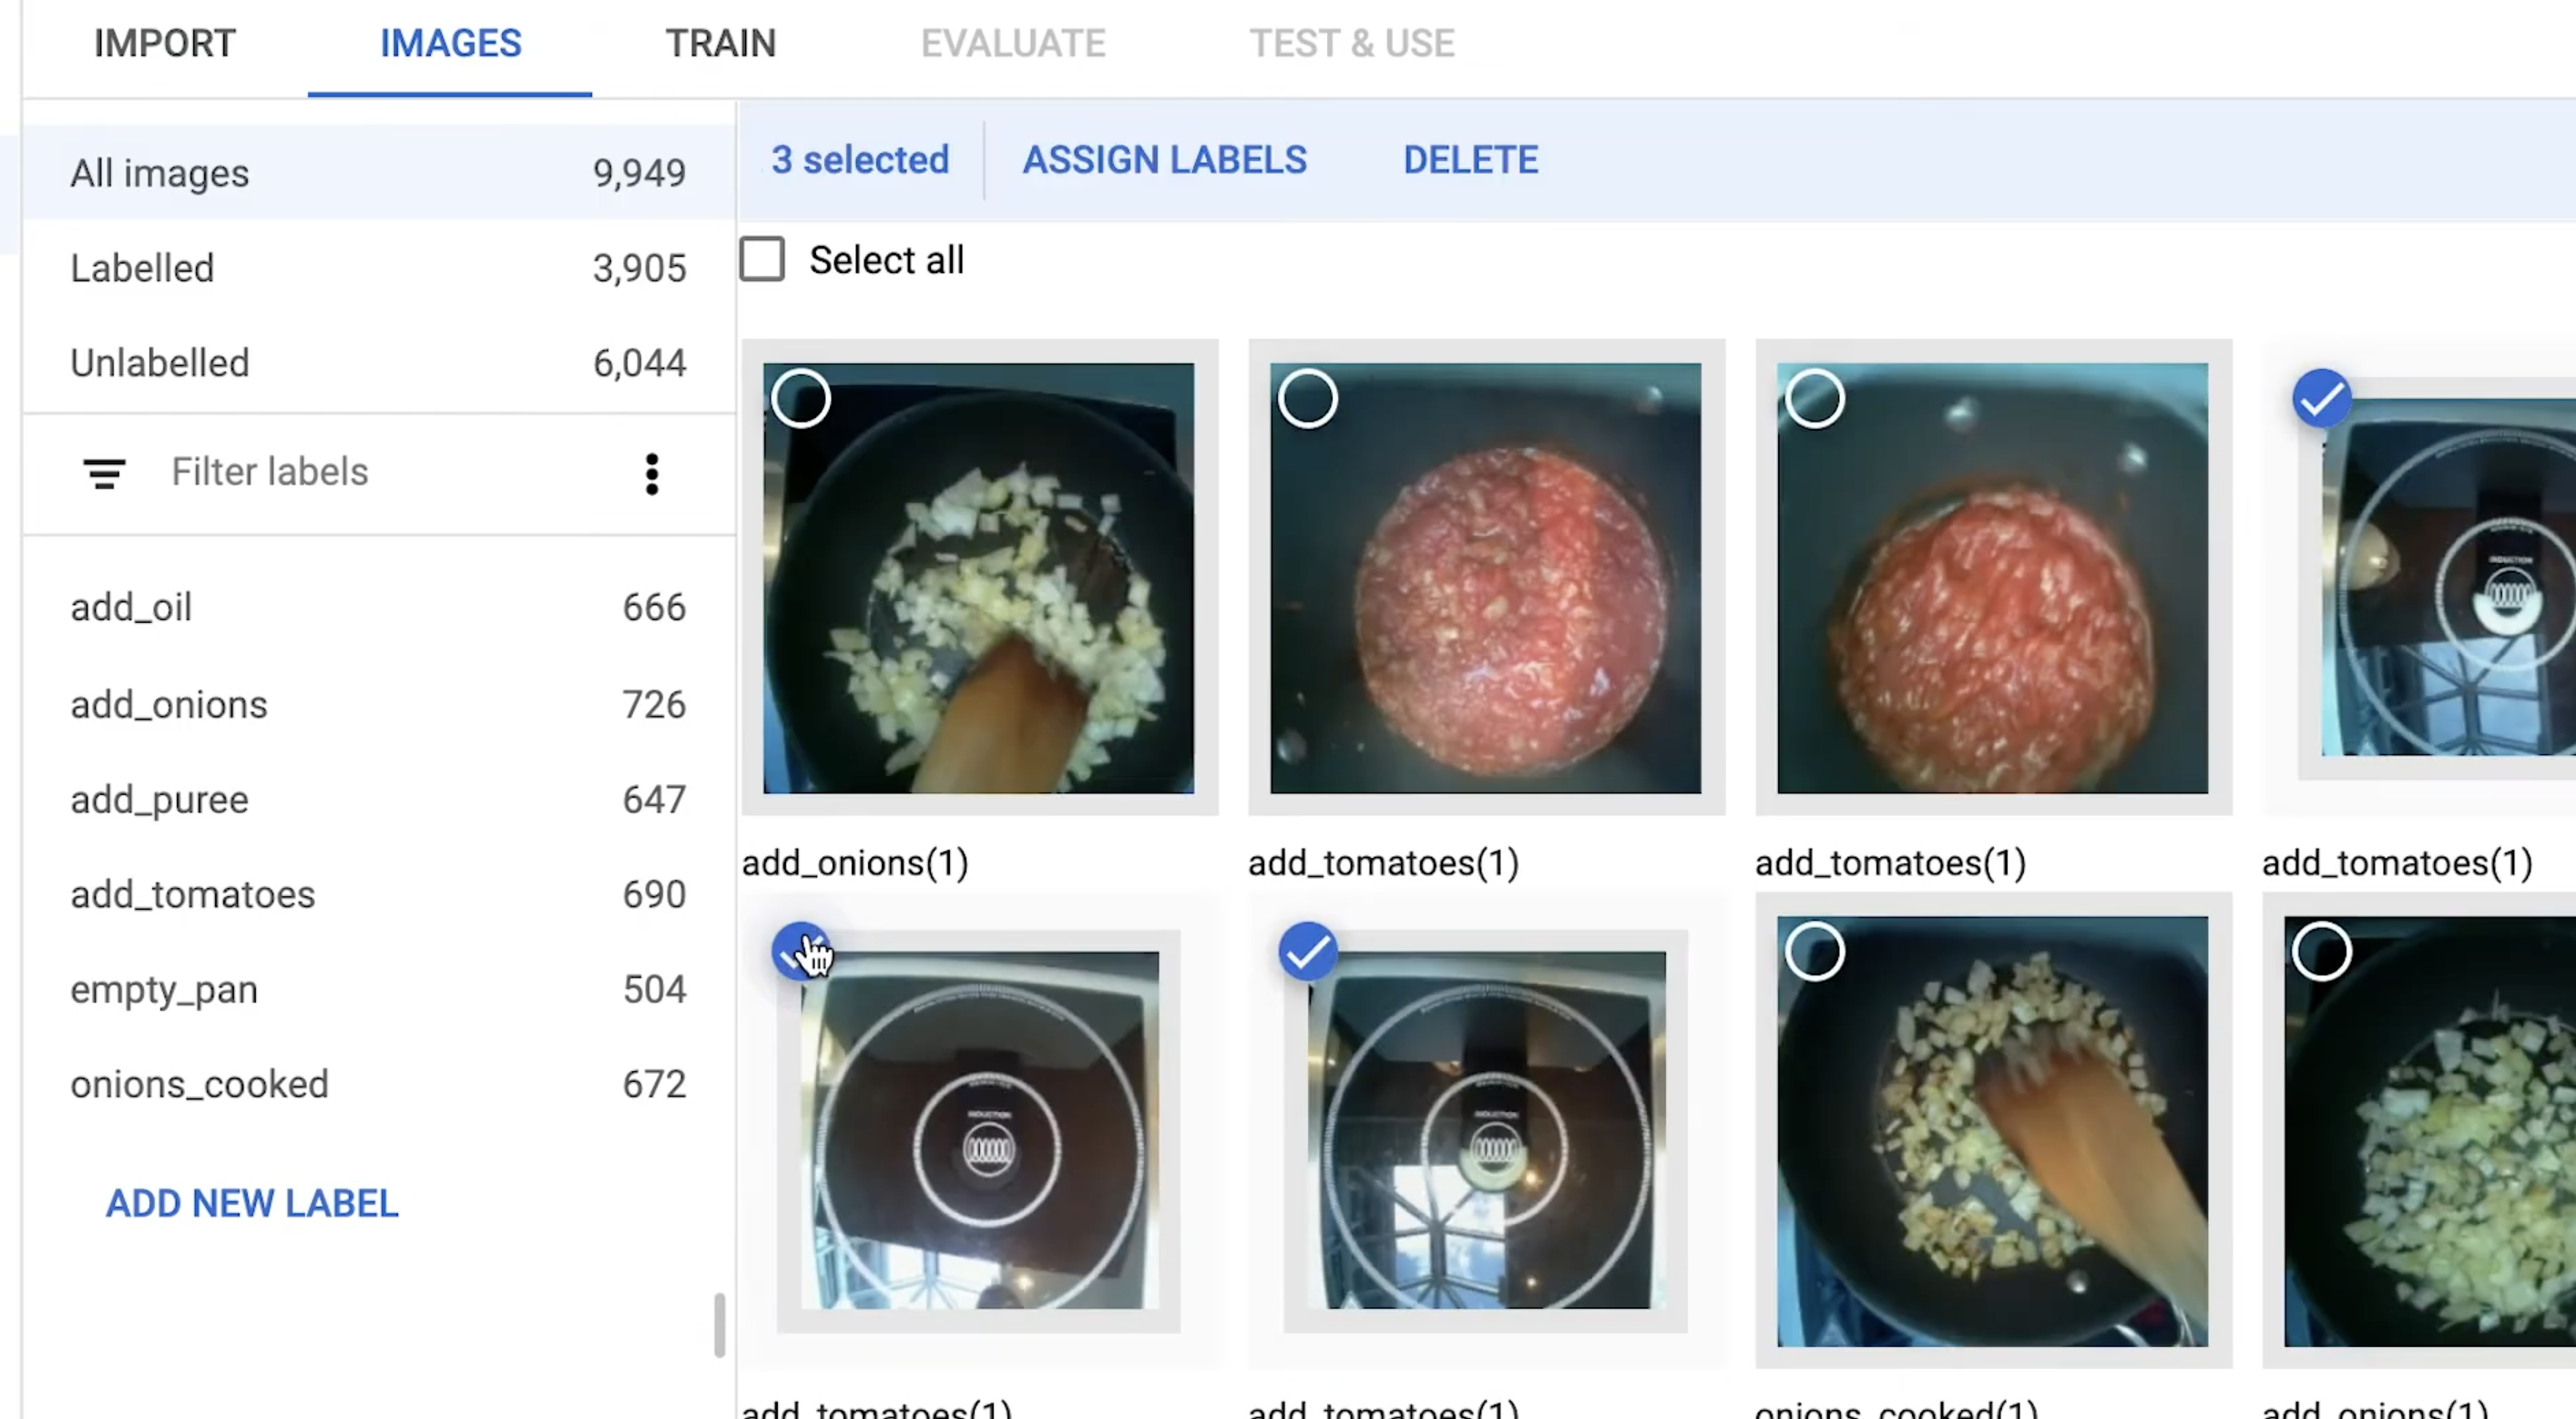
Labelling images to train the image classifier
No machine learning expertise was required to train an image classifier, running on Raspberry Pi, for Ben’s robotic creation; you’ll see in the video that the classifier is a really simple drag-and-drop affair.
Ben has only taught his sous-chef one pasta dish so far, and we admire his dedication to carbs.
Training the image classifier to know when you haven’t stirred the pot in a while
Ben built a control panel for labelling training images in real time and added labels at key recipe milestones while he cooked under the camera’s eye. This process required 500–1000 images per milestone, so Ben made a LOT of pasta while training his robotic sous-chef’s image classifier.
Ben open-sourced this project so you can collaborate to suggest improvements or teach your own robot sous-chef some more dishes. Here’s OnionBot on GitHub.
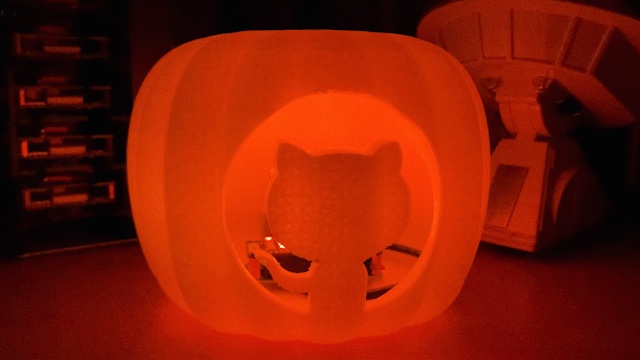
Following on from Rob Zwetsloot’s Haunted House Hacks in the latest issue of The MagPi magazine, GitHub’s Martin Woodward has created a spooky pumpkin that warns you about the thing programmers find scariest of all — broken builds. Here’s his guest post describing the project:
“When you are browsing code looking for open source projects, seeing a nice green passing build badge in the ReadMe file lets you know everything is working with the latest version of that project. As a programmer you really don’t want to accidentally commit bad code, which is why we often set up continuous integration builds that constantly check the latest code in our project.”
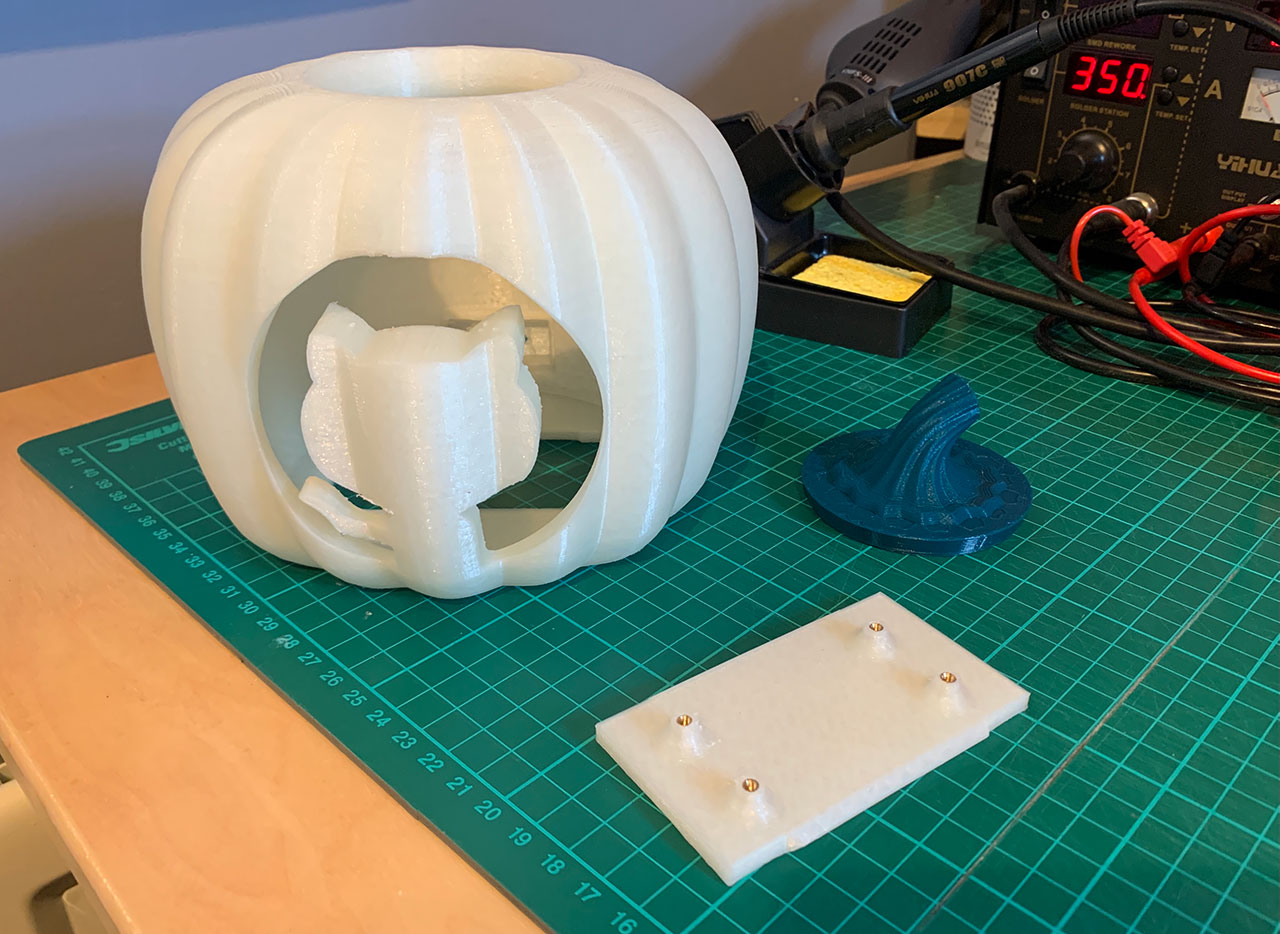
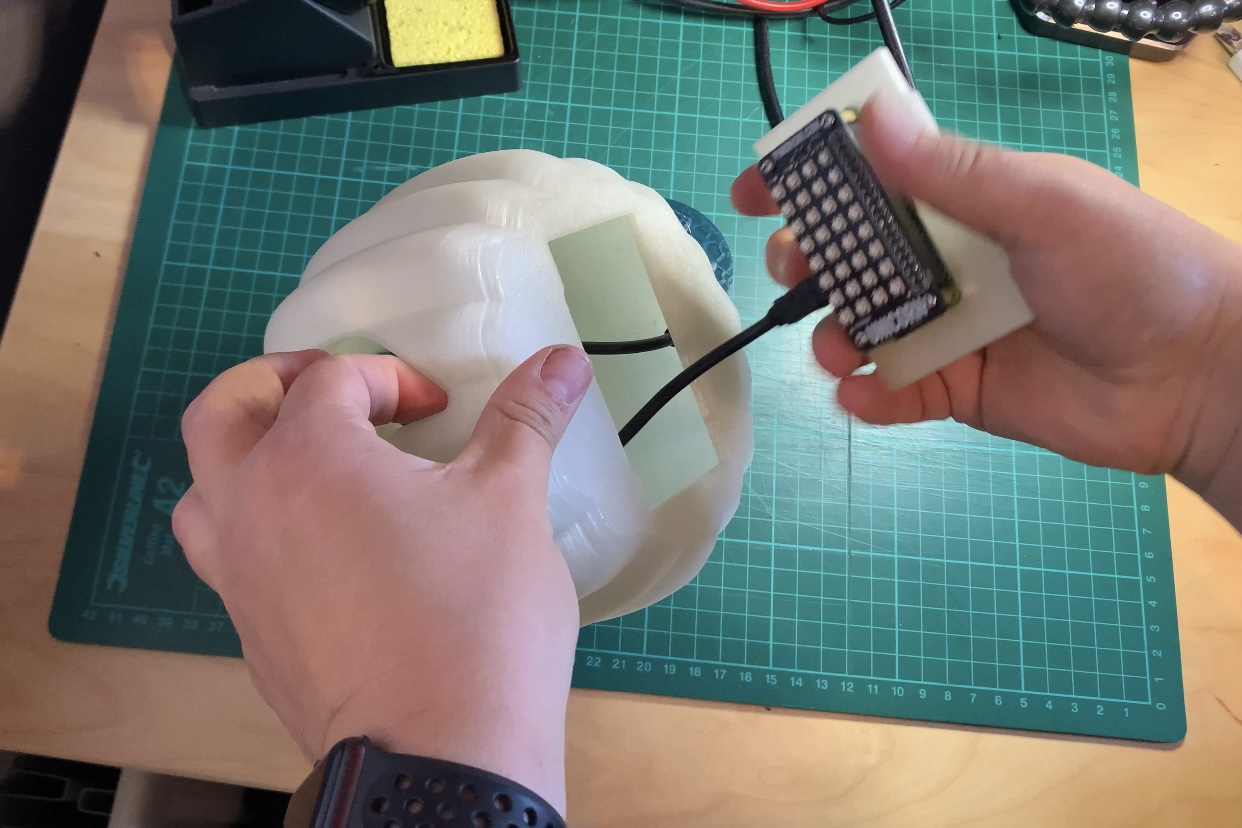
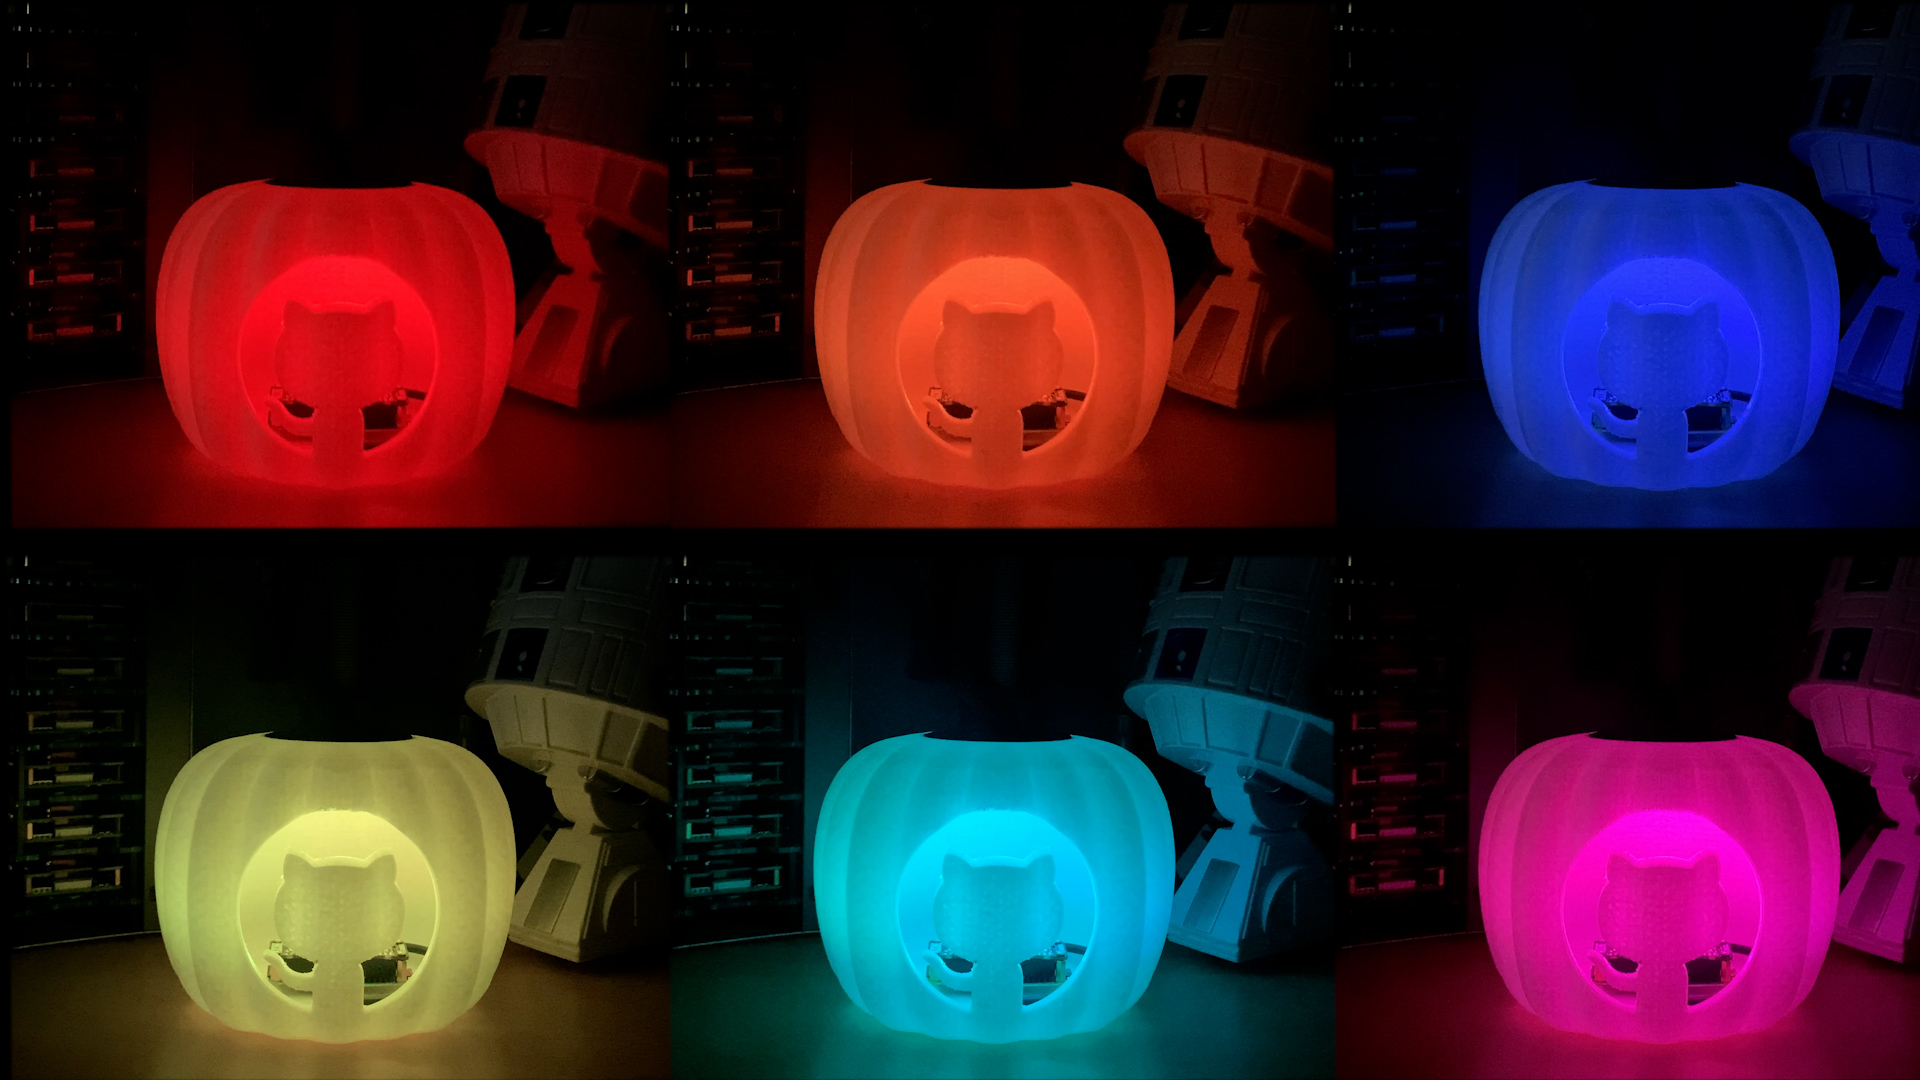
“I decided to create a 3D-printed pumpkin that would hold a Raspberry Pi Zero with an RGB LED pHat on top to show me the status of my build for Halloween. All the code is available on GitHub alongside the 3D printing models which are also available on Thingiverse.”
Components
Raspberry Pi Zero (I went for the WH version to save me soldering on the header pins)
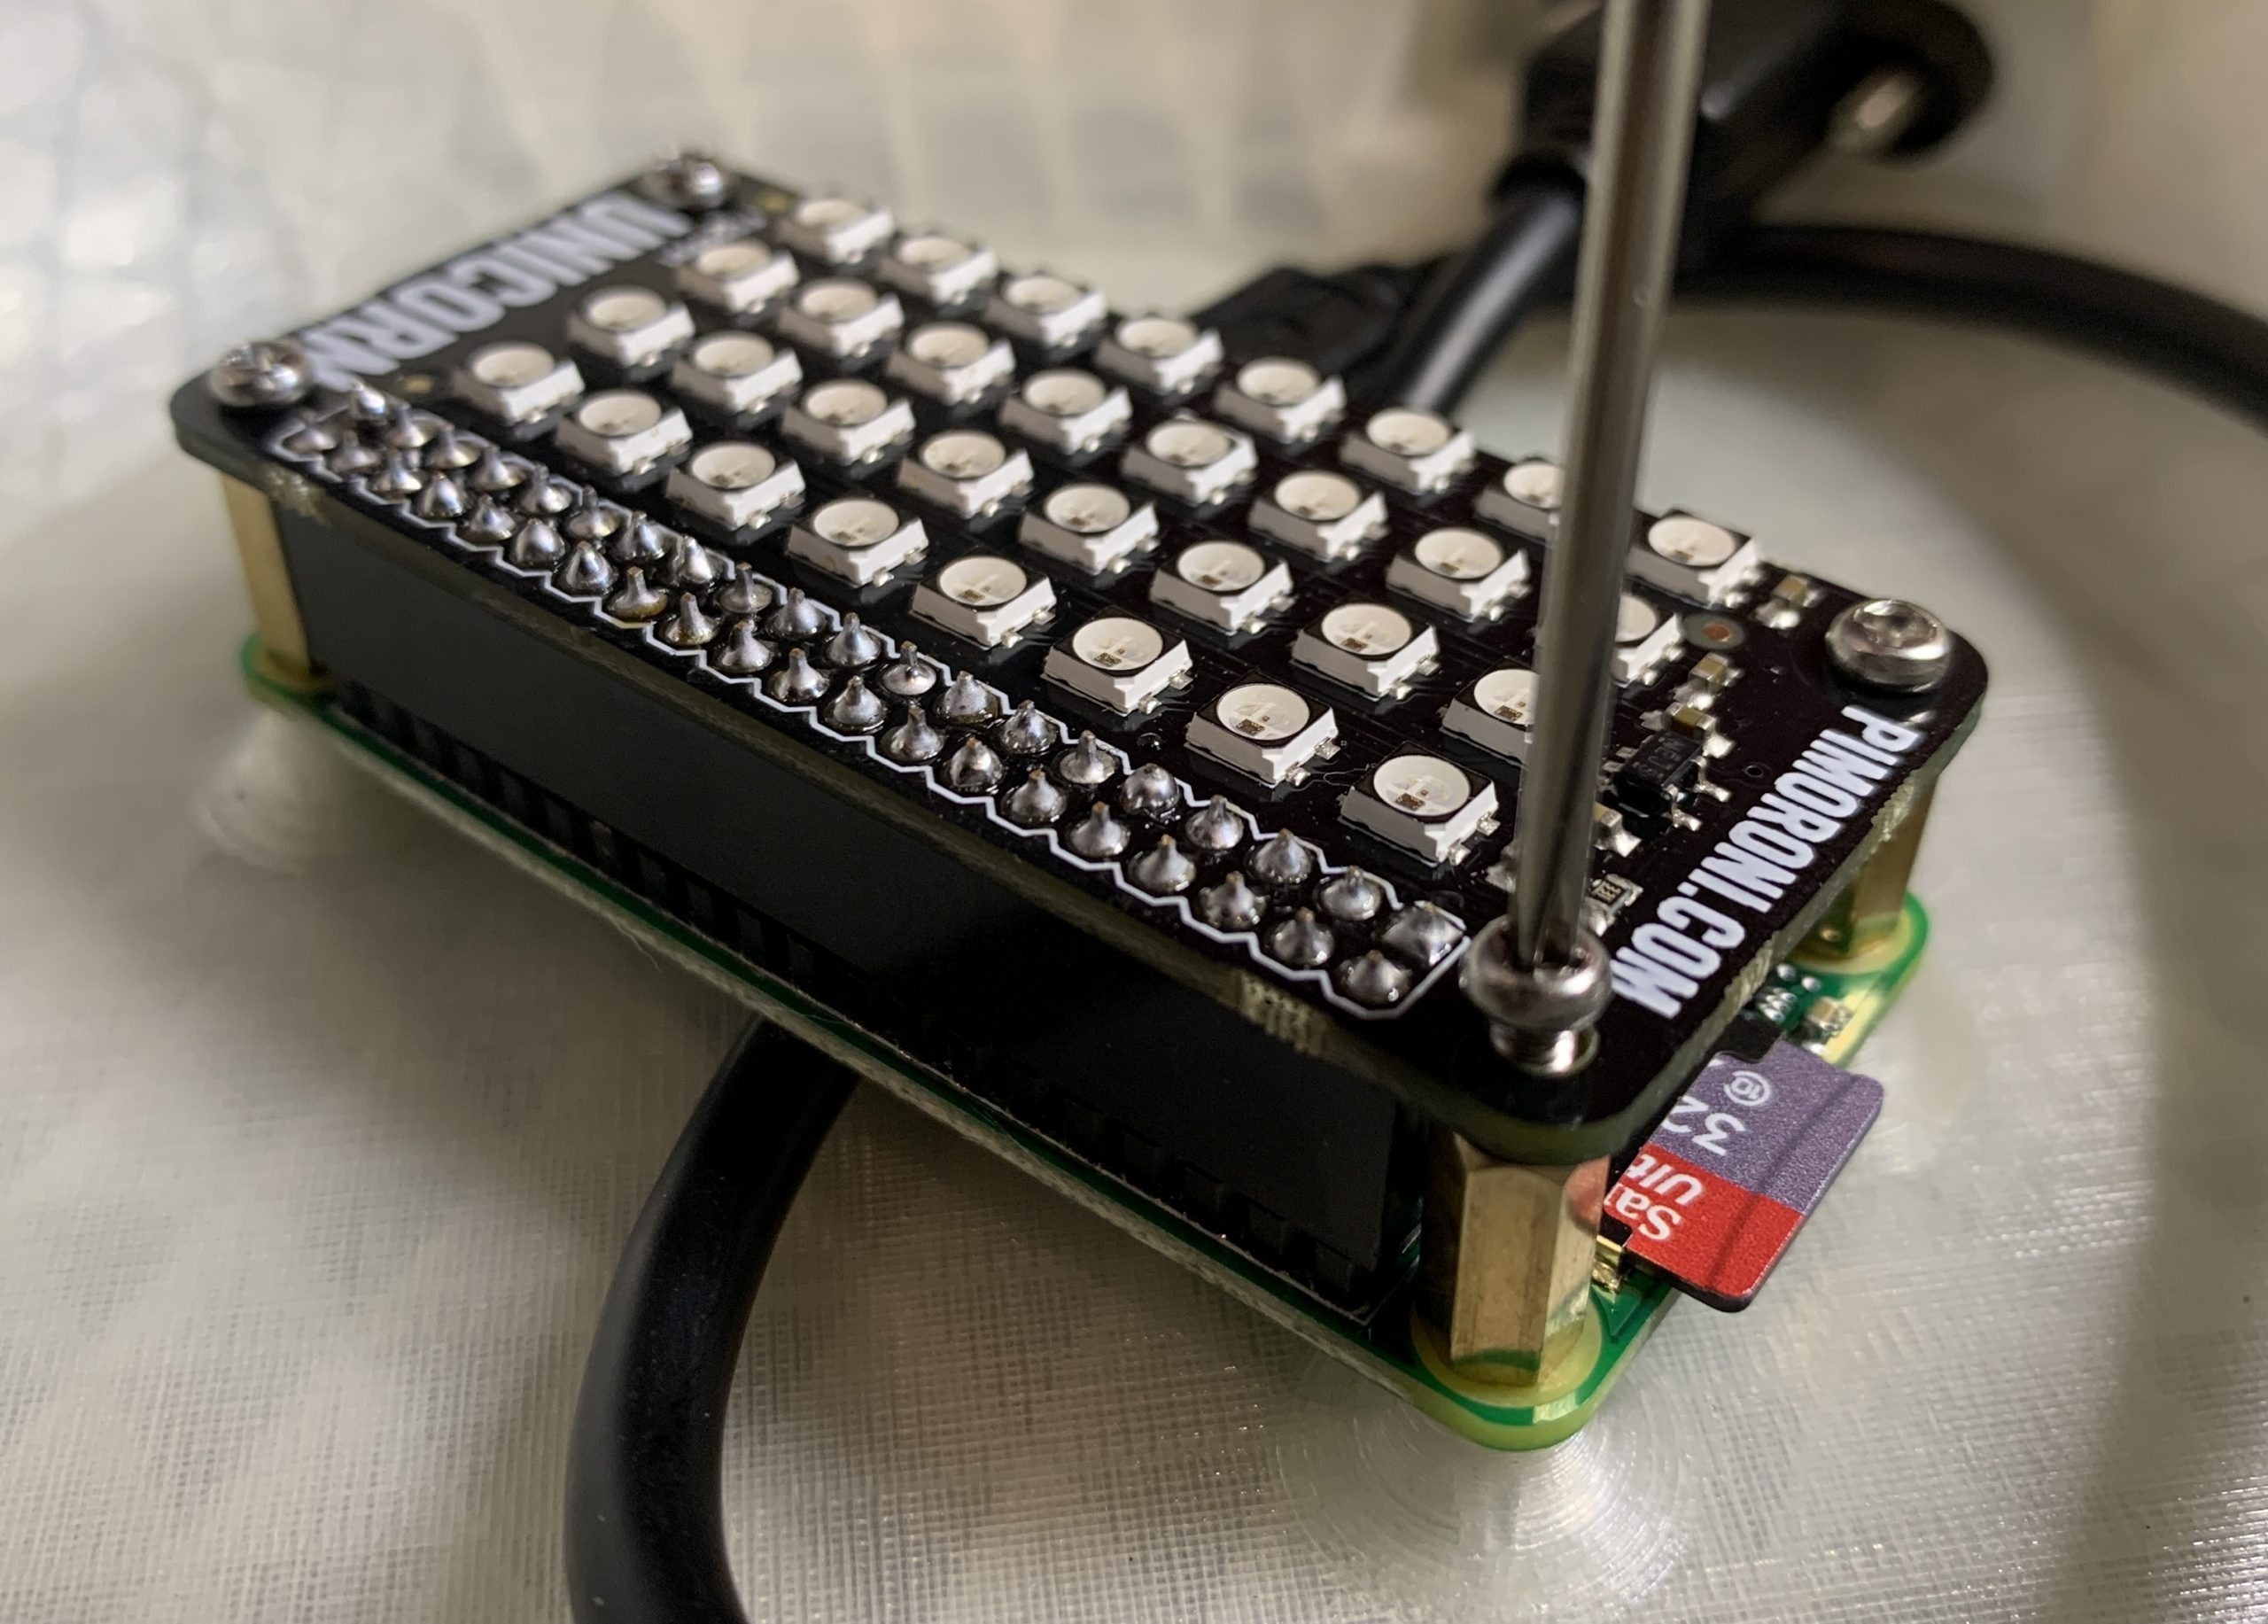
Unicorn pHat from Pimoroni
Panel mount micro-USB extension
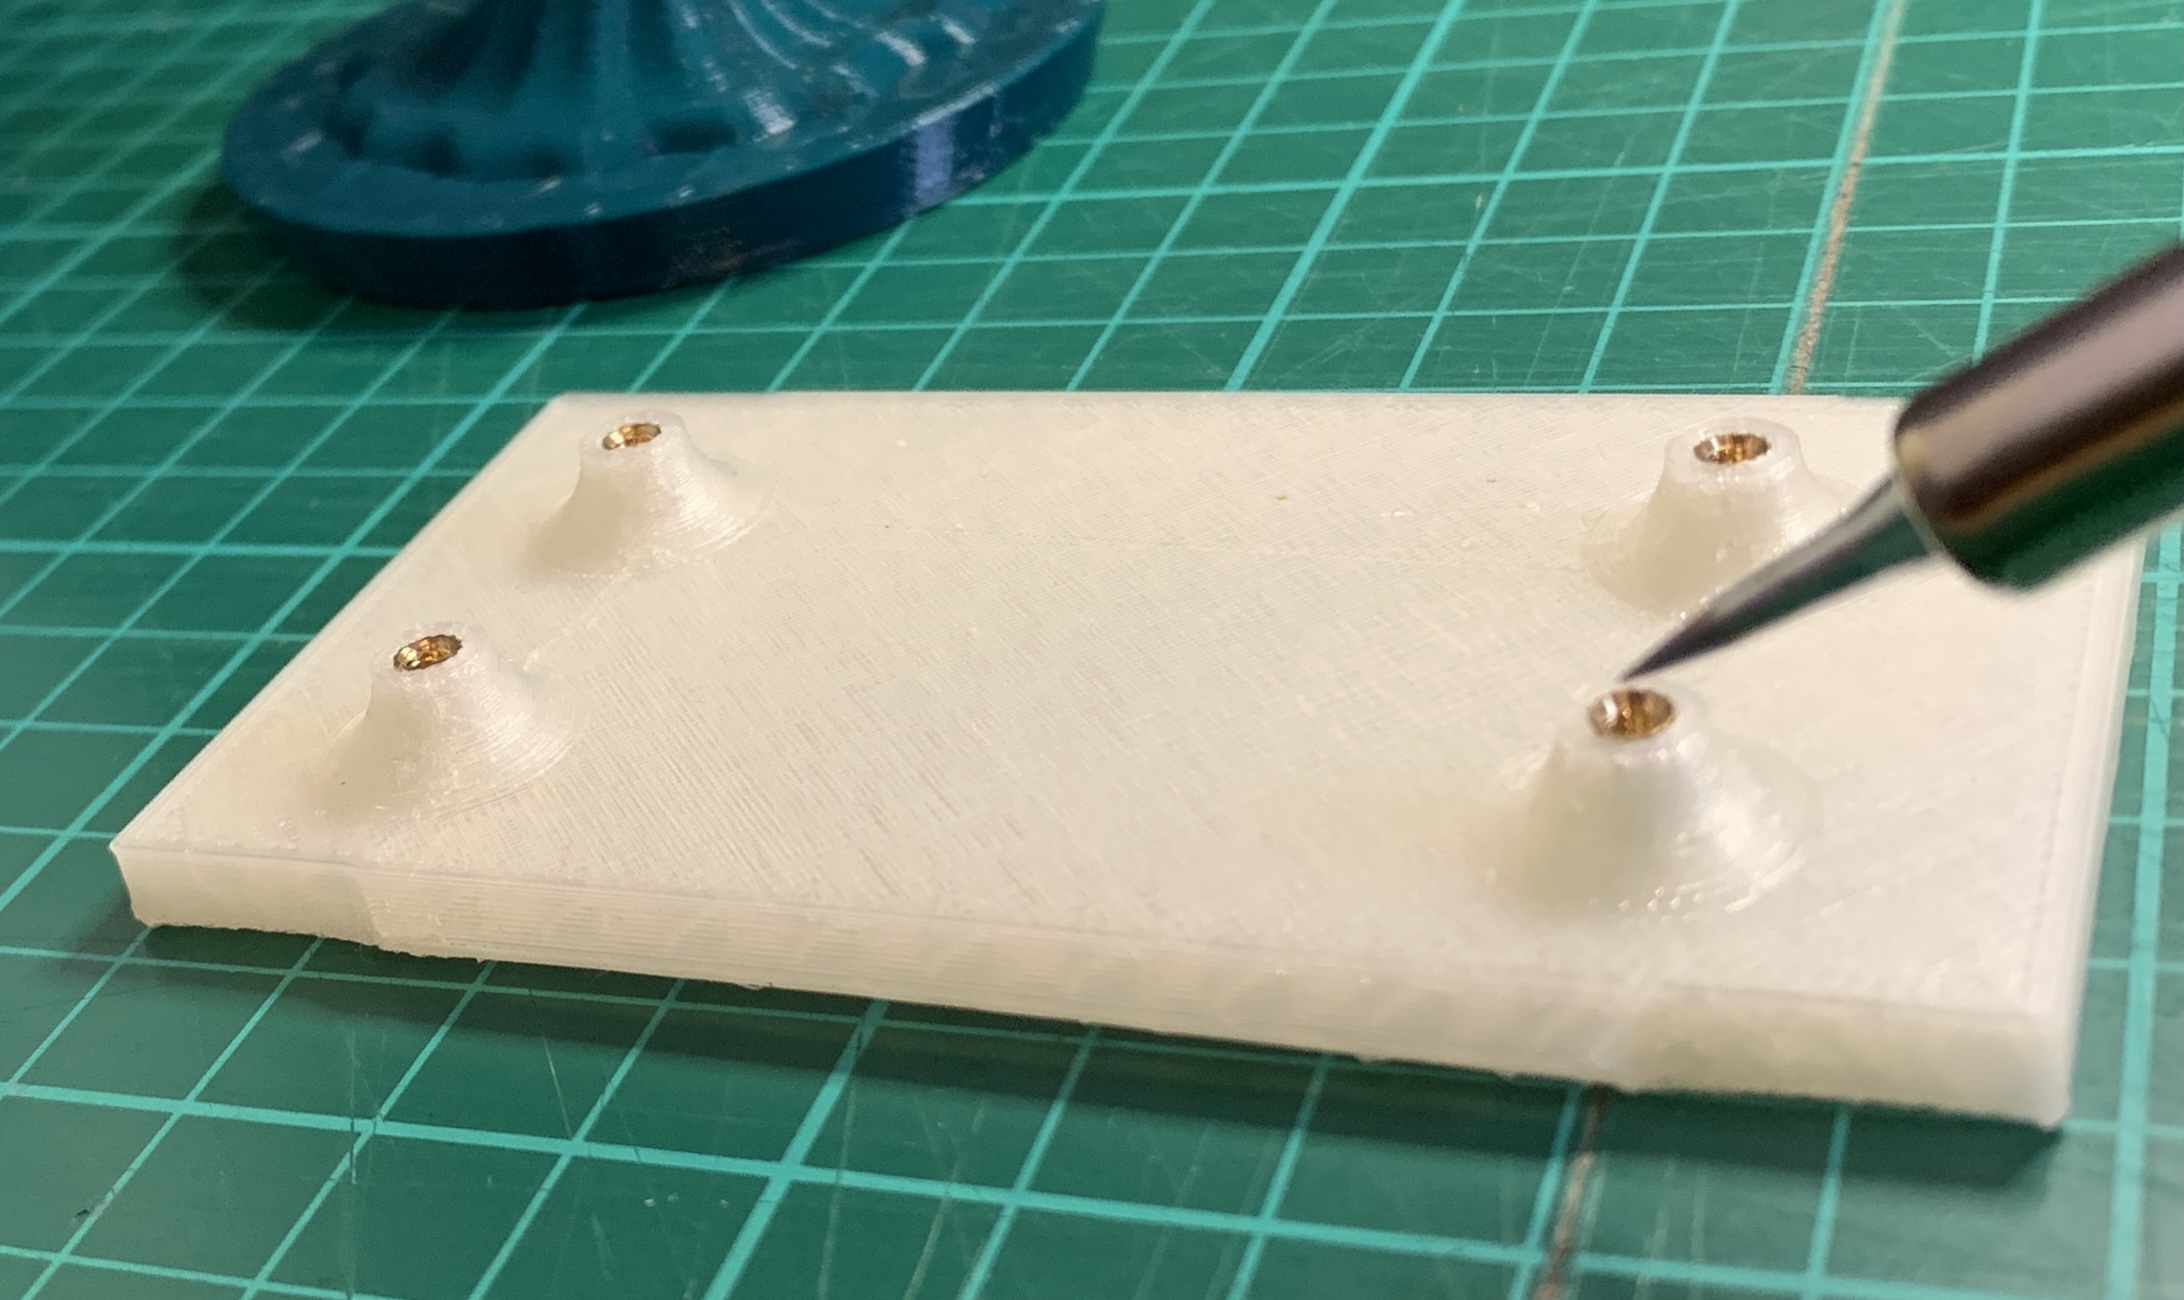
M2.5 hardware for mounting (screws, male PCB standoffs, and threaded inserts)
“For the 3D prints, I used a glow-in-the-dark PLA filament for the main body and Pi holder, along with a dark green PLA filament for the top plug.”
“I’ve been using M2.5 threaded inserts quite a bit when printing parts to fit a Raspberry Pi, as it allows you to simply design a small hole in your model and then you push the brass thread into the gap with your soldering iron to melt it securely into place ready for screwing in your device.”
Threaded insert
“Once the inserts are in, you can screw the Raspberry Pi Zero into place using some brass PCB stand-offs, place the Unicorn pHAT onto the GPIO ports, and then screw that down.”
pHAT install
“Then you screw in the panel-mounted USB extension into the back of the pumpkin, connect it to the Raspberry Pi, and snap the Raspberry Pi holder into place in the bottom of your pumpkin.”
Inserting the base
Code along with Martin
“Now you are ready to install the software. You can get the latest version from my PumpkinPi project on GitHub. “
“Format the micro SD Card and install Raspberry Pi OS Lite. Rather than plugging in a keyboard and monitor, you probably want to do a headless install, configuring SSH and WiFi by dropping an ssh file and a wpa_supplicant.conf file onto the root of the SD card after copying over the Raspbian files.”
“You’ll need to install the Unicorn HAT software, but they have a cool one-line installer that takes care of all the dependencies including Python and Git.”
# How often to check (in seconds). Remember - be nice to the server. Once every 5 minutes is plenty.
REFRESH_INTERVAL = 300
“Finally you can run the script as root:”
sudo python ~/PumpkinPi/src/pumpkinpi.py &
“Once you are happy everything is running how you want, don’t forget you can run the script at boot time. The easiest way to do this is to use crontab. See this cool video from Estefannie to learn more. But basically you do sudo crontab -e then add the following:”
“Note that we are pausing for 10 seconds before running the Python script. This is to allow the WiFi network to connect before we check on the state of our build.”
“The current version of the pumpkinpi script works with all the SVG files produced by the major hosted build providers, including GitHub Actions, which is free for open source projects. But if you want to improve the code in any way, I’m definitely accepting pull requests on it.”
“Using the same hardware you could monitor lots of different things, such as when someone posts on Twitter, what the weather will be tomorrow, or maybe just code your own unique multi-coloured display that you can leave flickering in your window.”
“If you build this project or create your own pumpkin display, I’d love to see pictures. You can find me on Twitter @martinwoodward and on GitHub.”
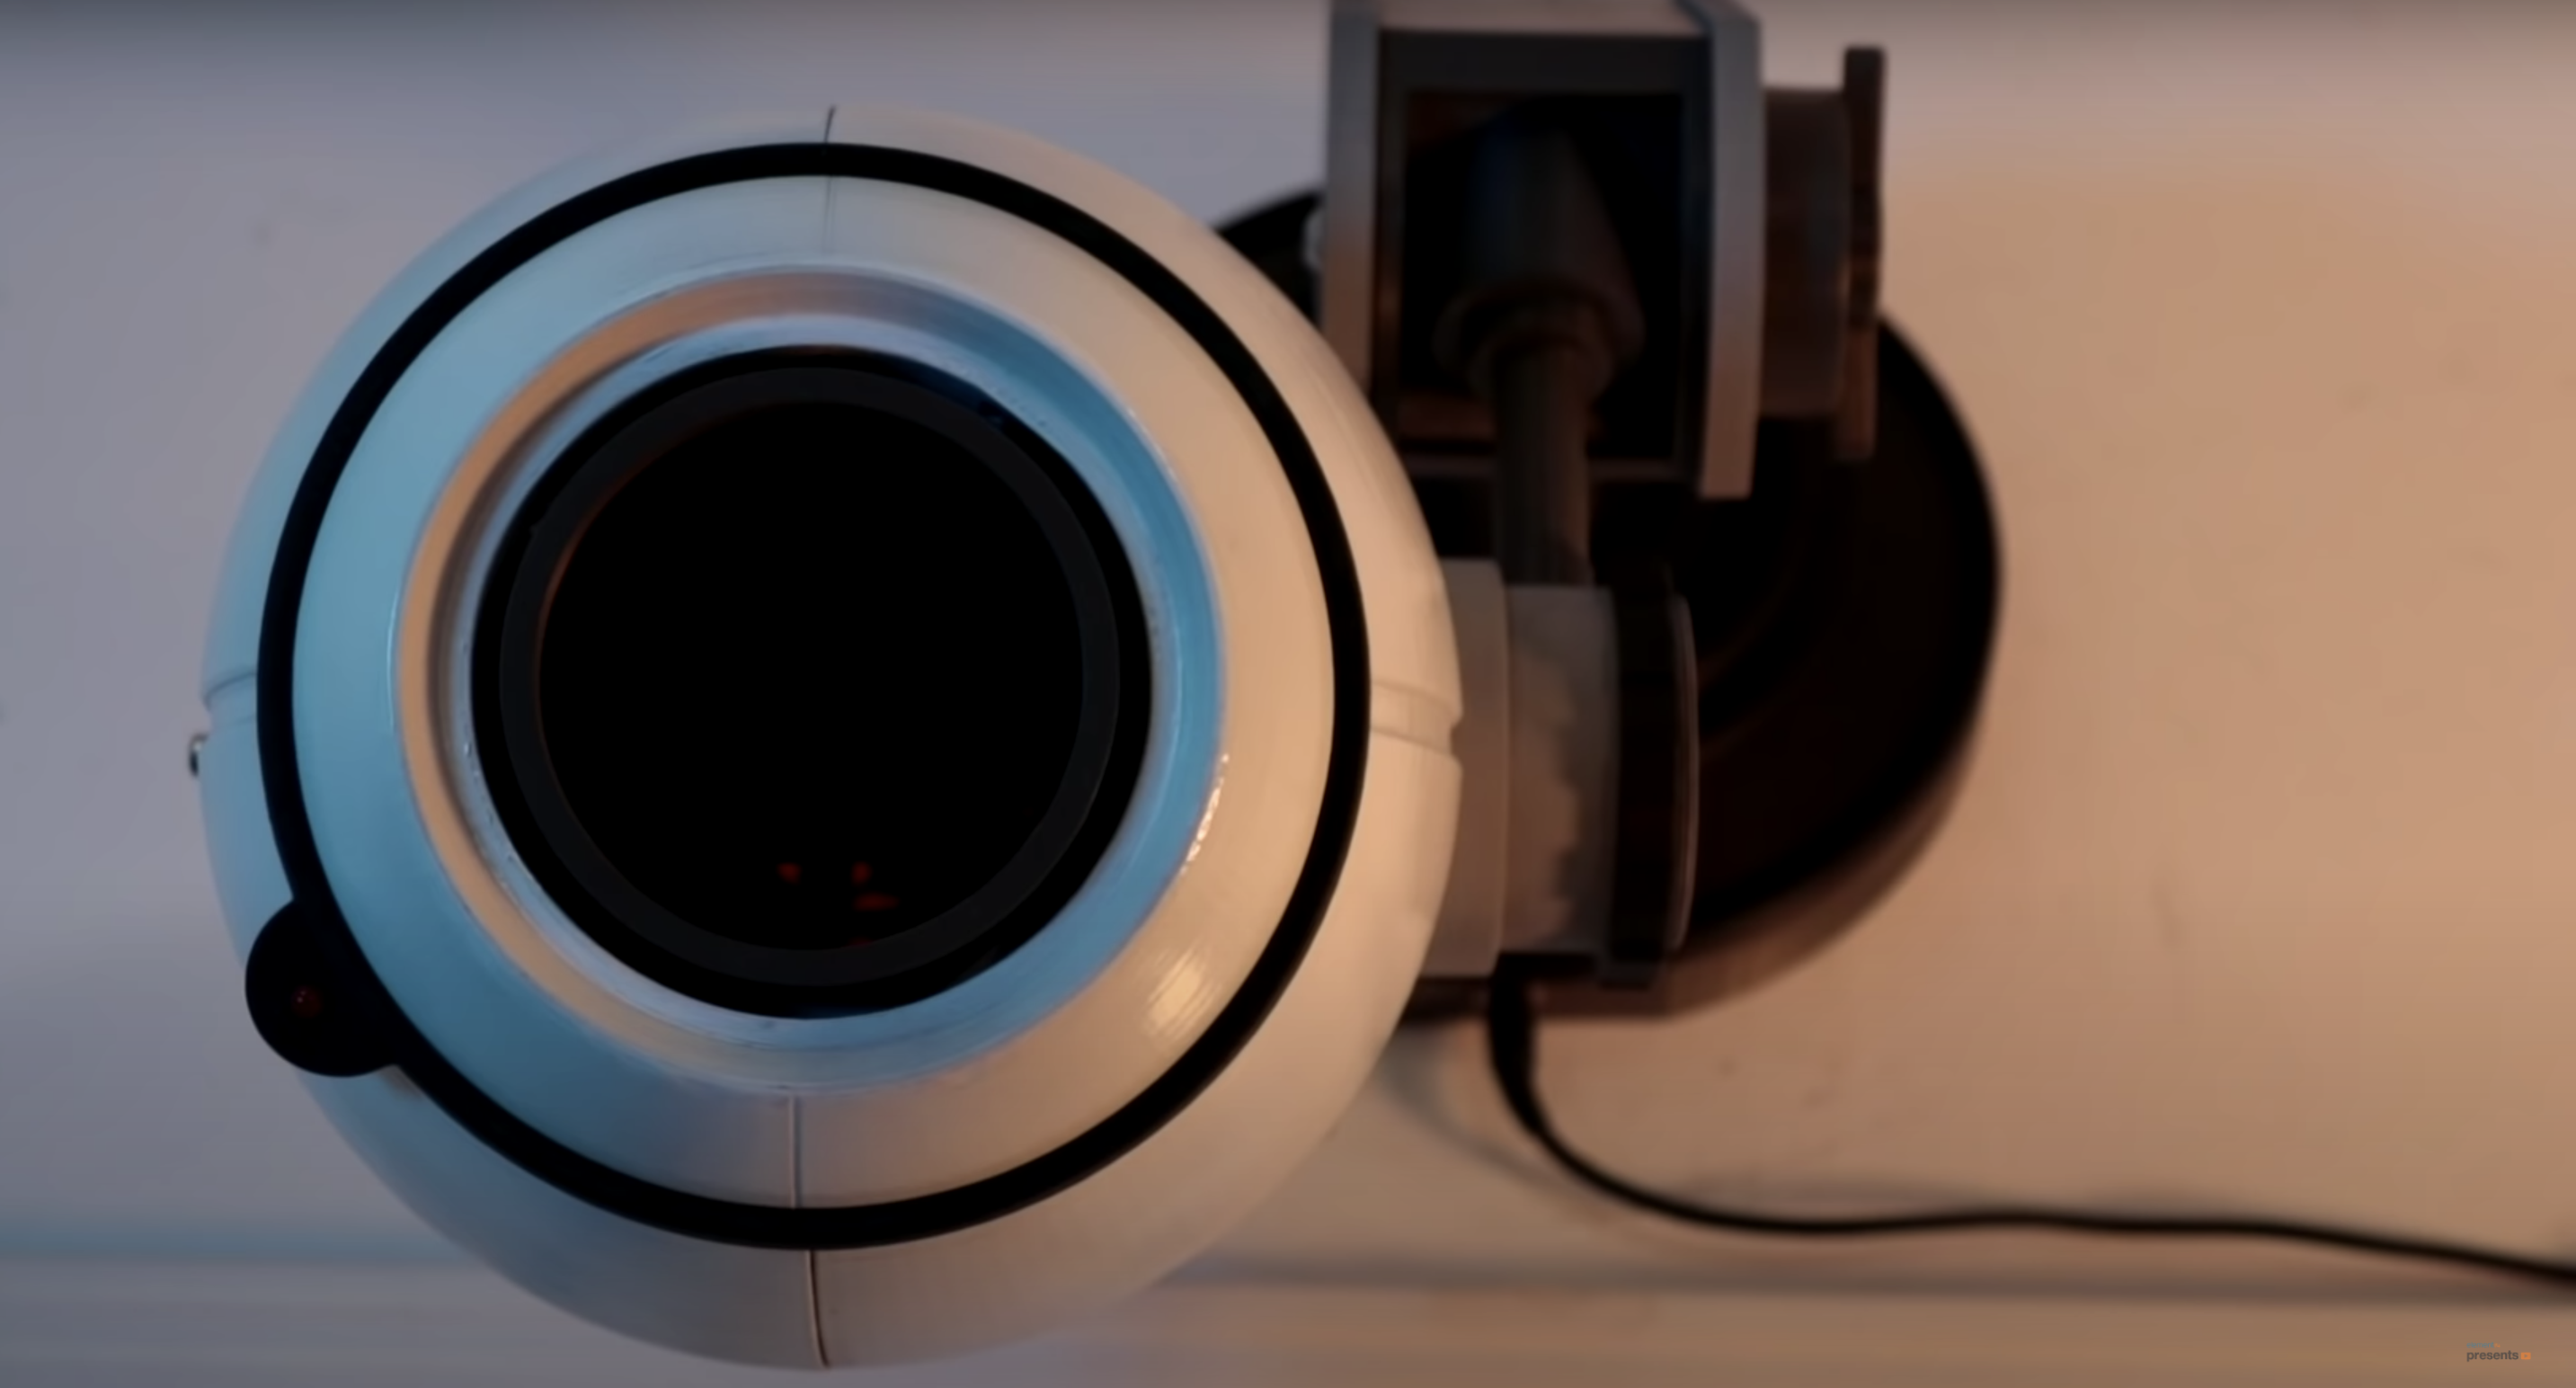
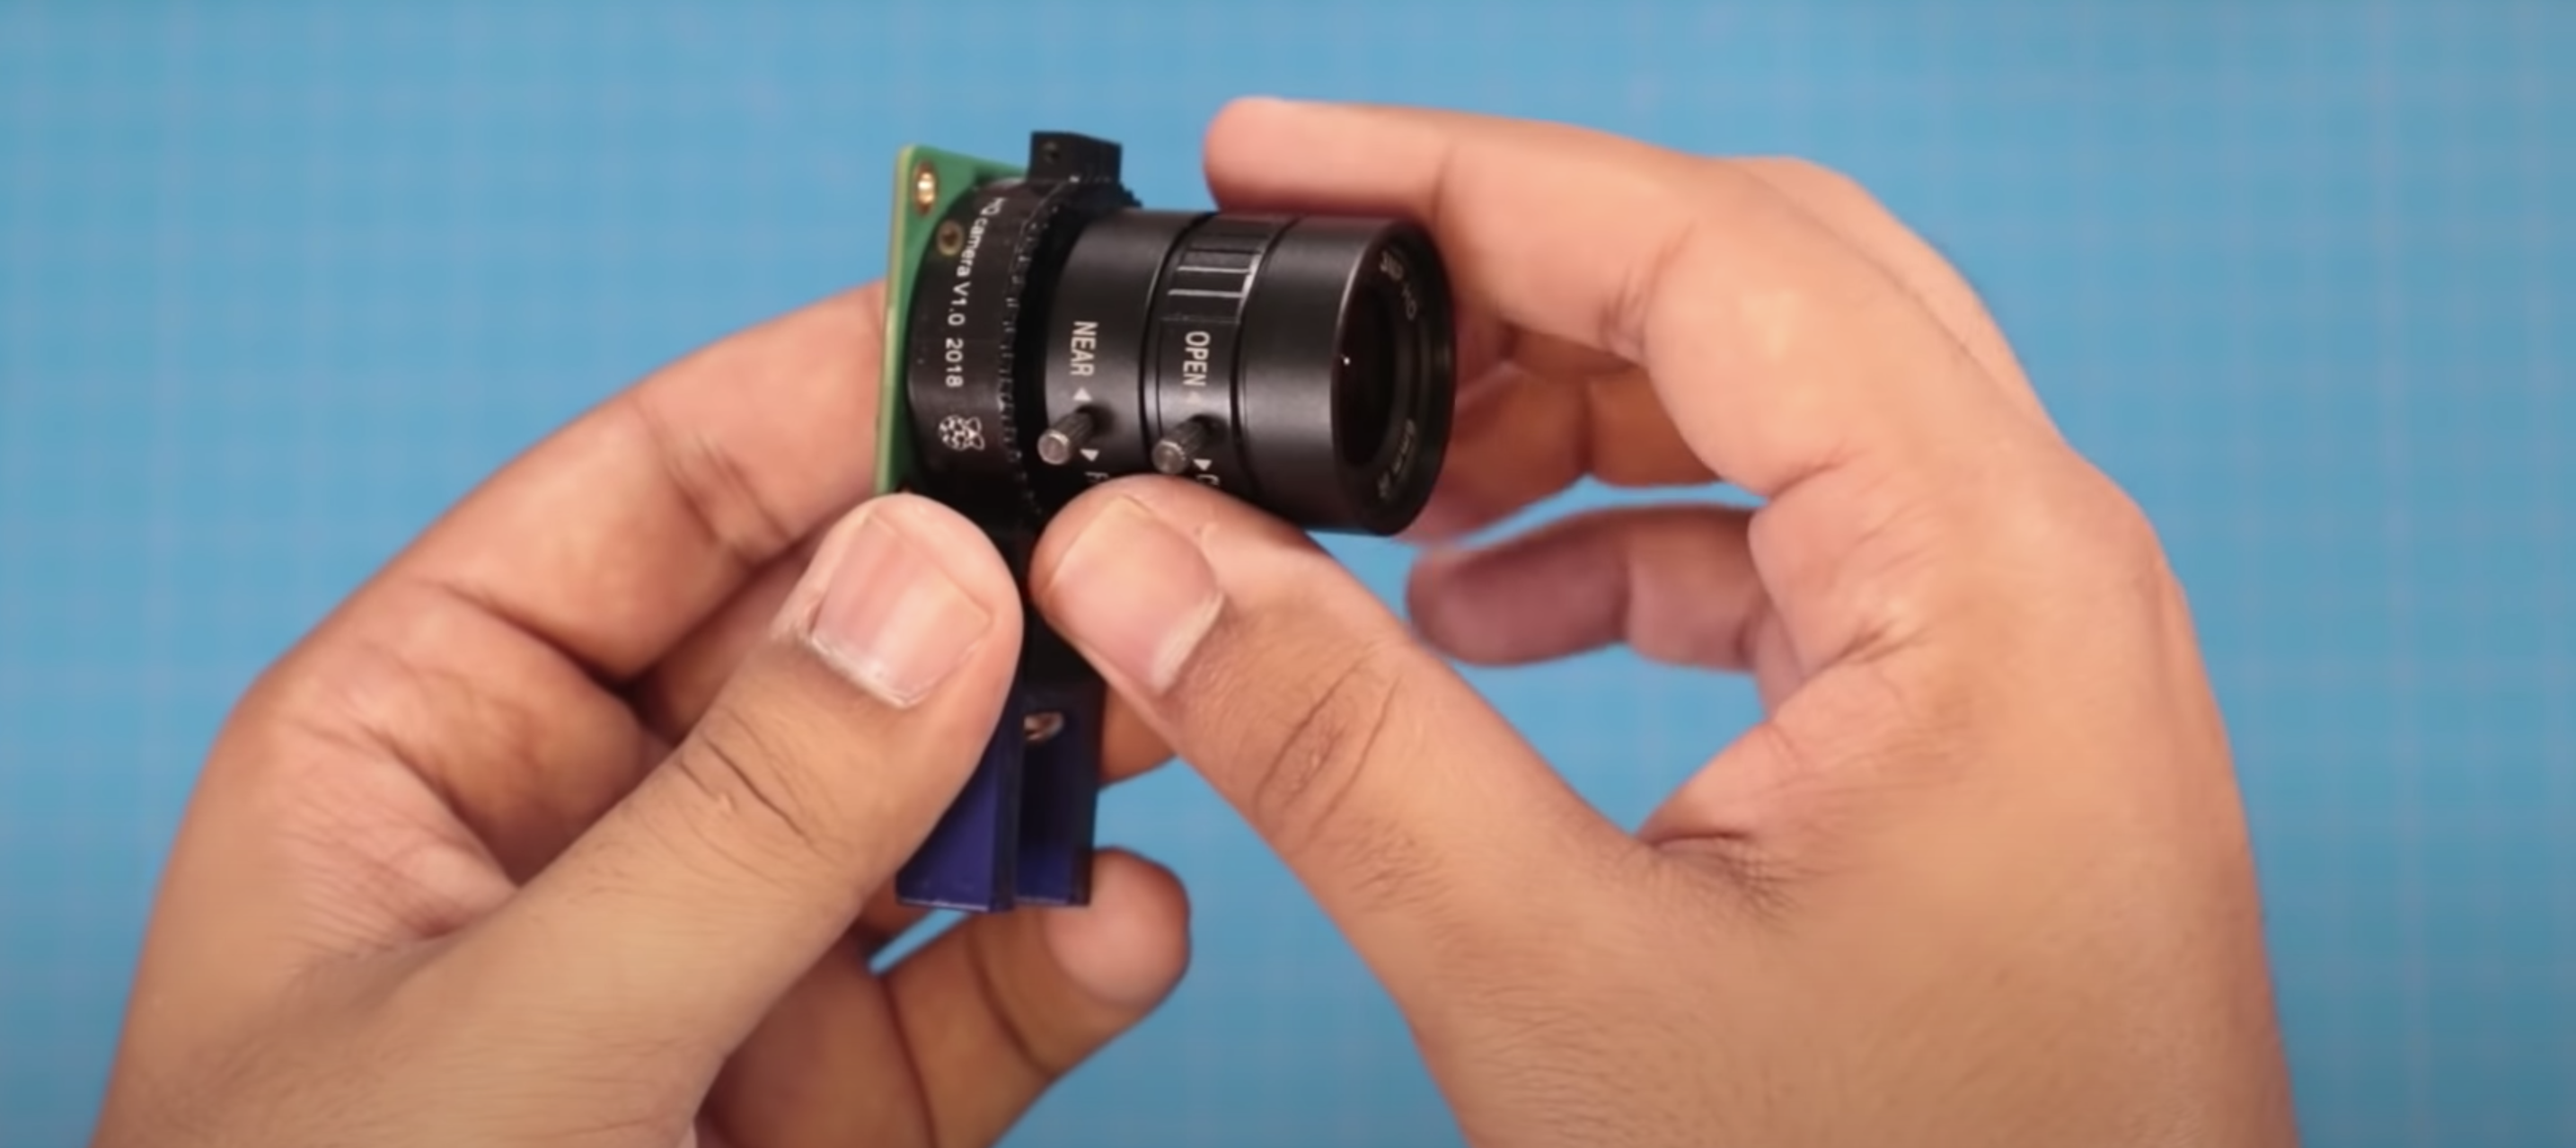
DJ from the element14 community shows you how to build a red-lensed security camera in the style of Portal 2 using the Raspberry Pi High Quality Camera.
The finished camera mounted on the wall
Portal 2 is a puzzle platform game developed by Valve — a “puzzle game masquerading as a first-person shooter”, according to Forbes.
DJ playing with the Raspberry Pi High Quality Camera
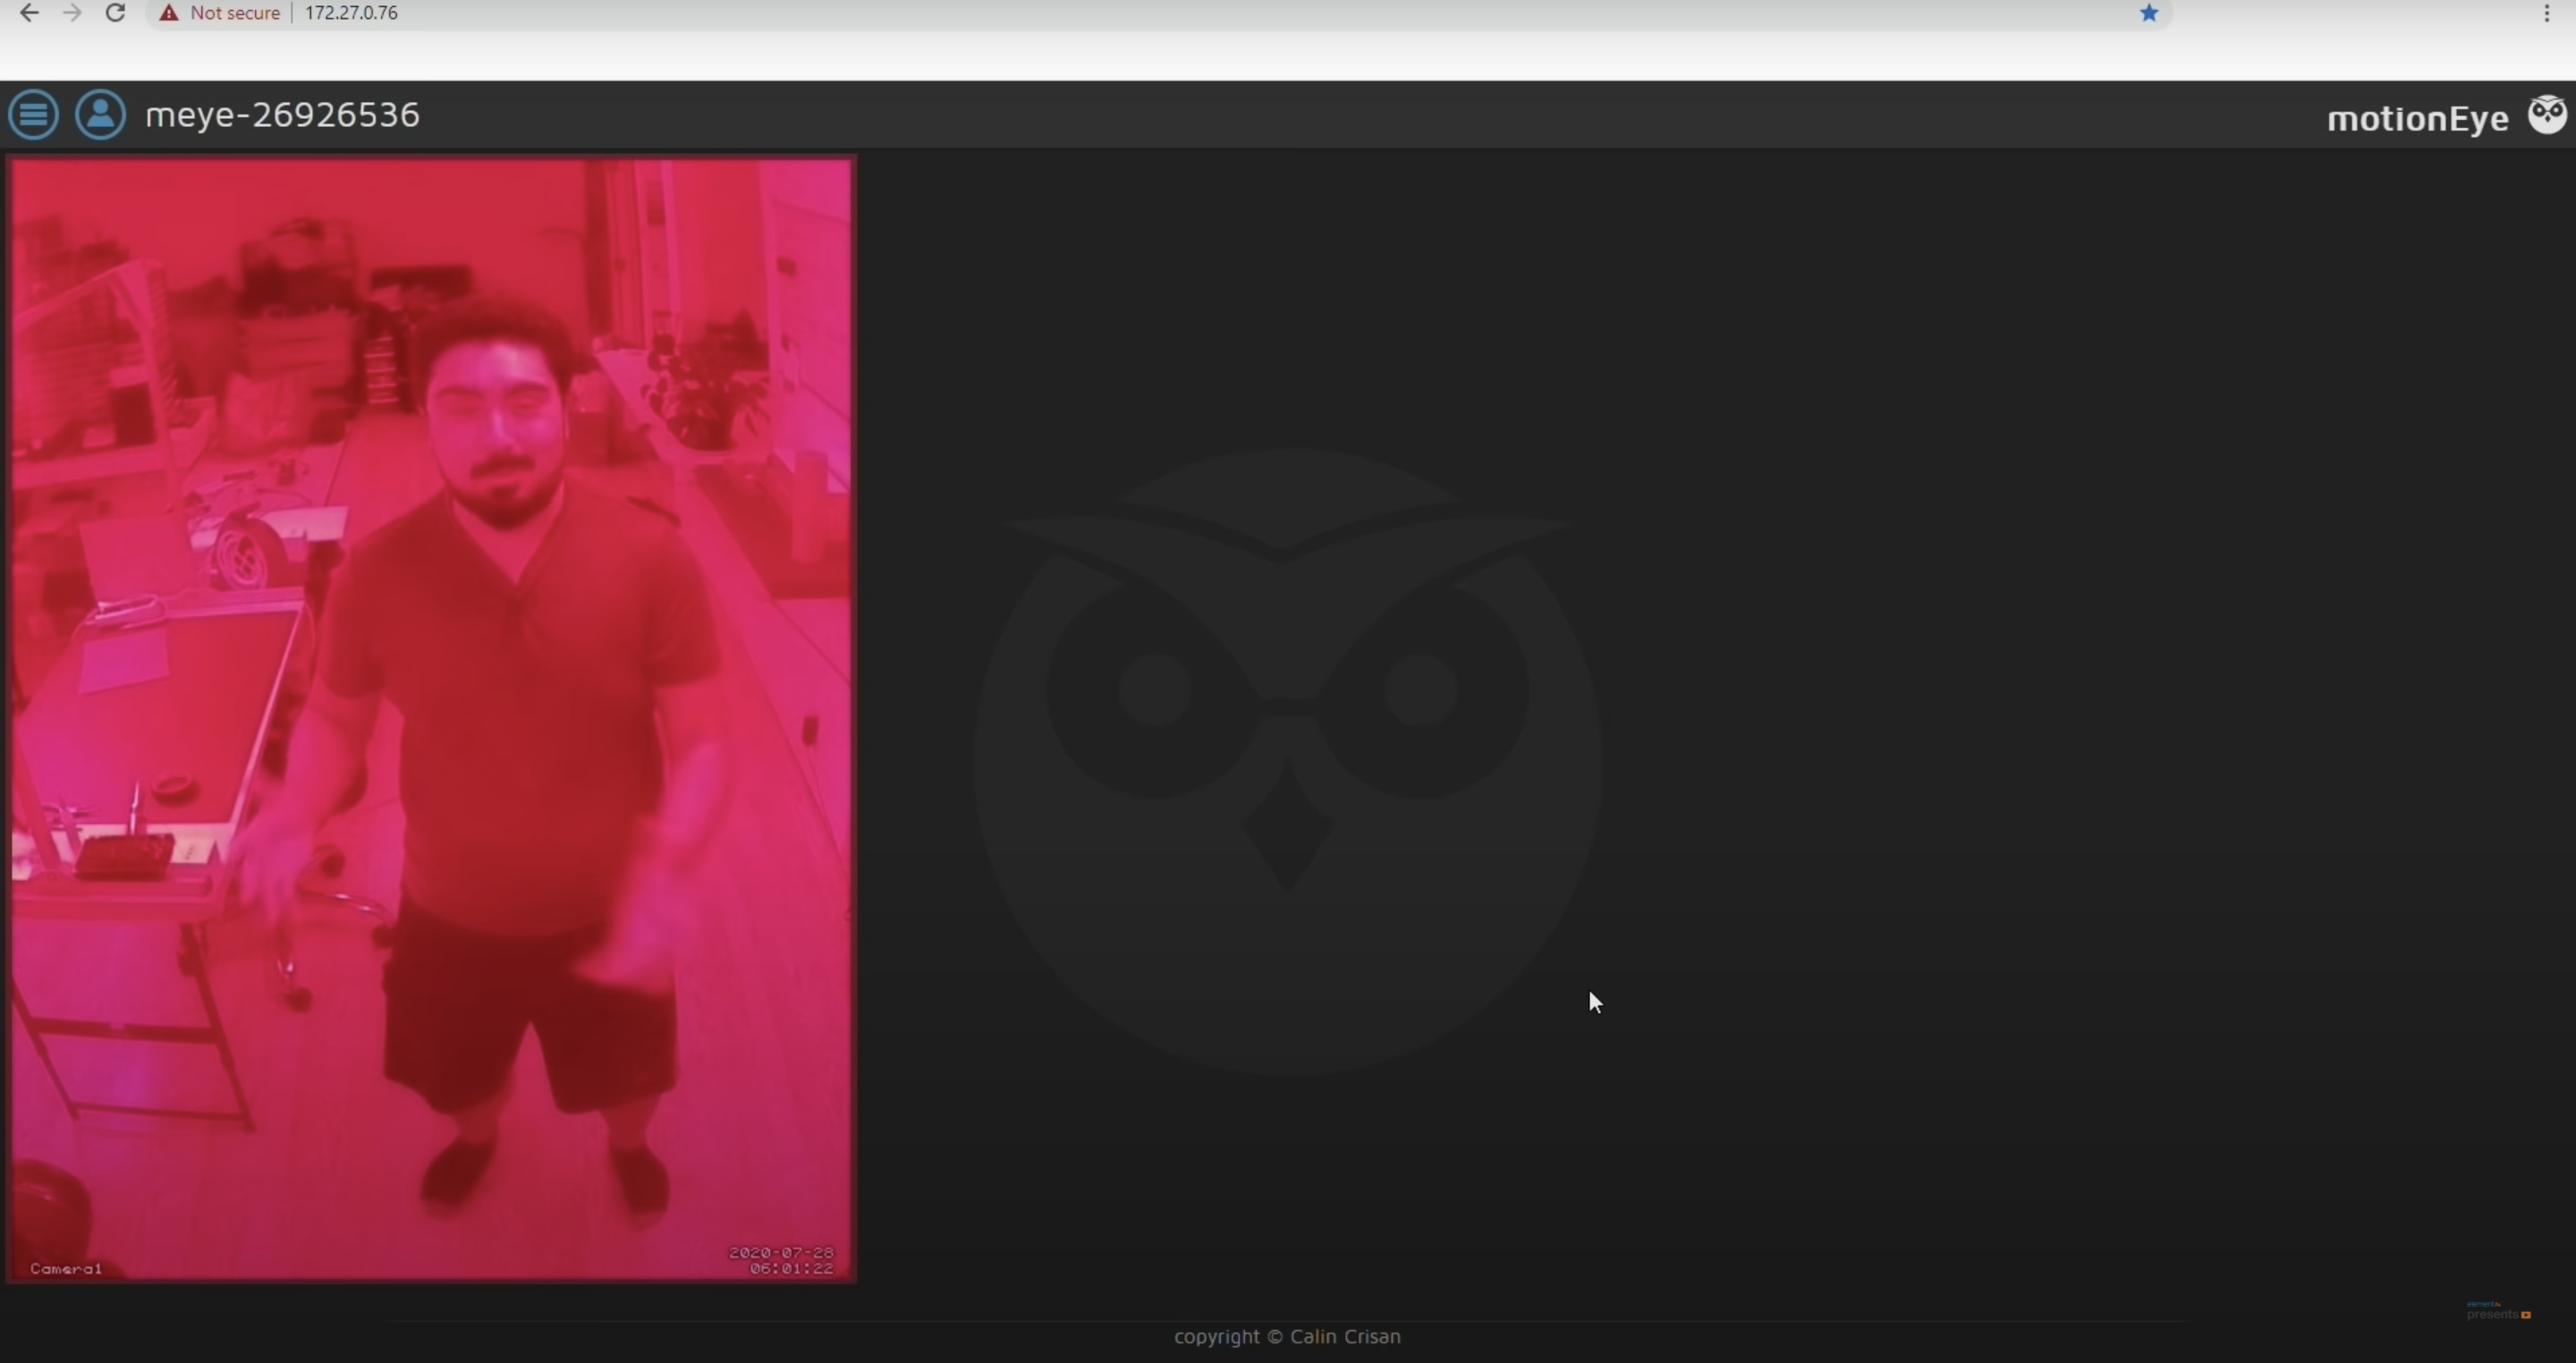
DJ was pleased to learn that you don’t need to write any code to make your own security camera, you can just use a package called motionEyeOS. All you have to do is download the motionEyeOS image, pop the flashed SD card into your Raspberry Pi, and you’re pretty much good to go.
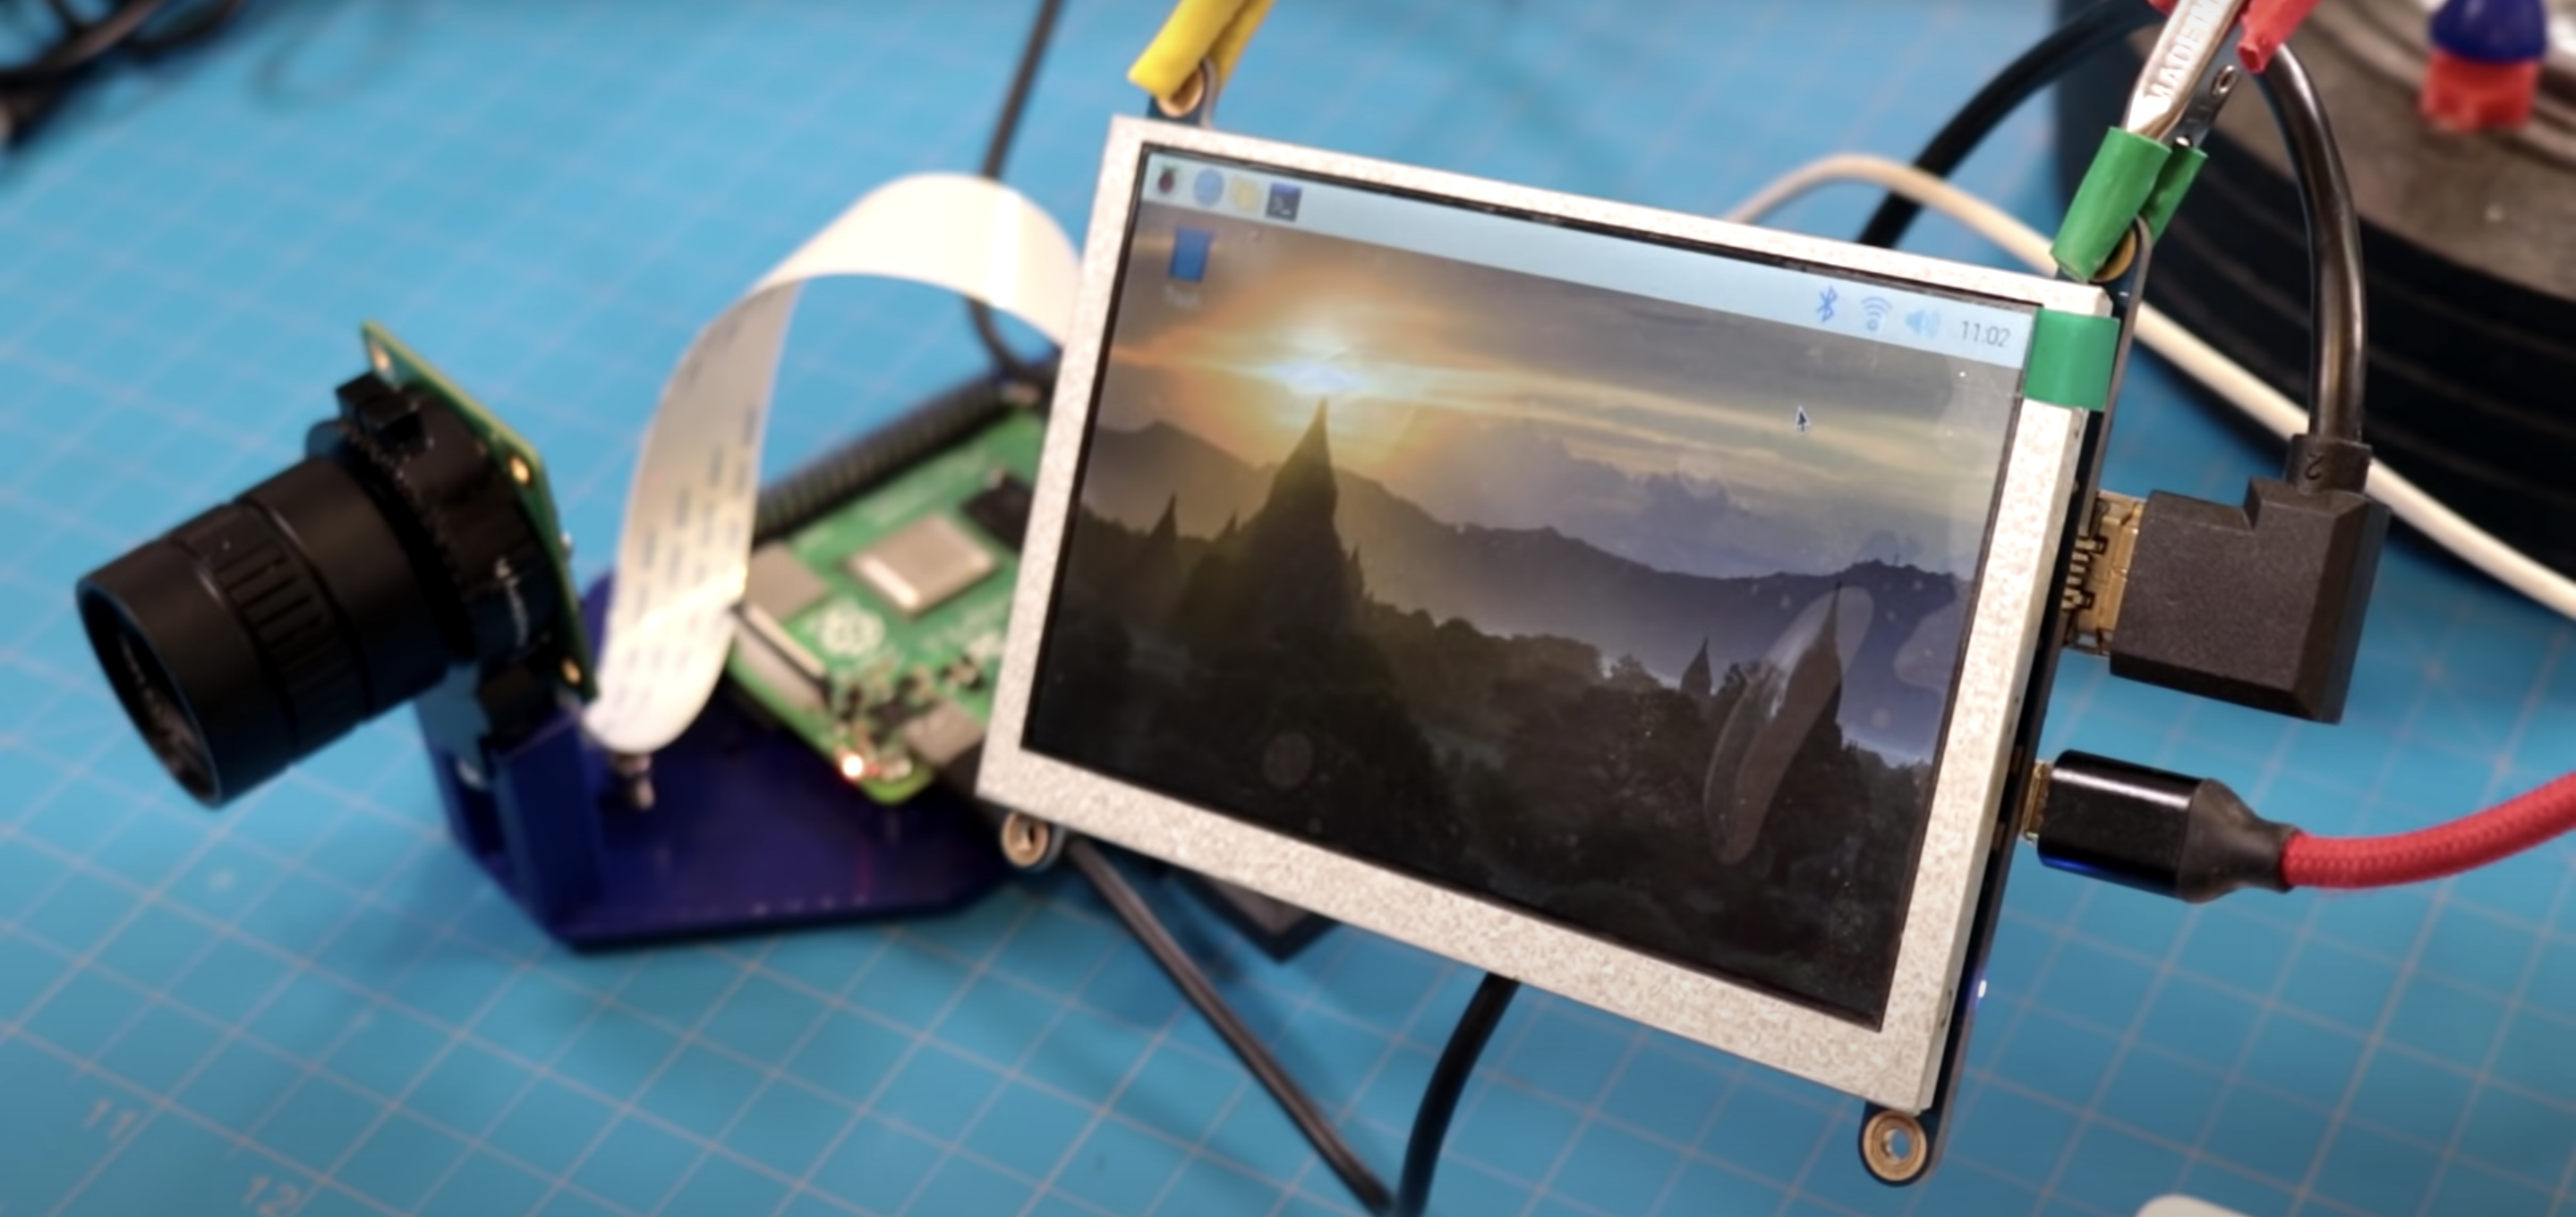
Dj got everything set up on a 5″ screen attached to the Raspberry Pi
You’ll find that the default resolution is 640×480, so it will show up as a tiny window on your monitor of choice, but that can be amended.
Simplicity
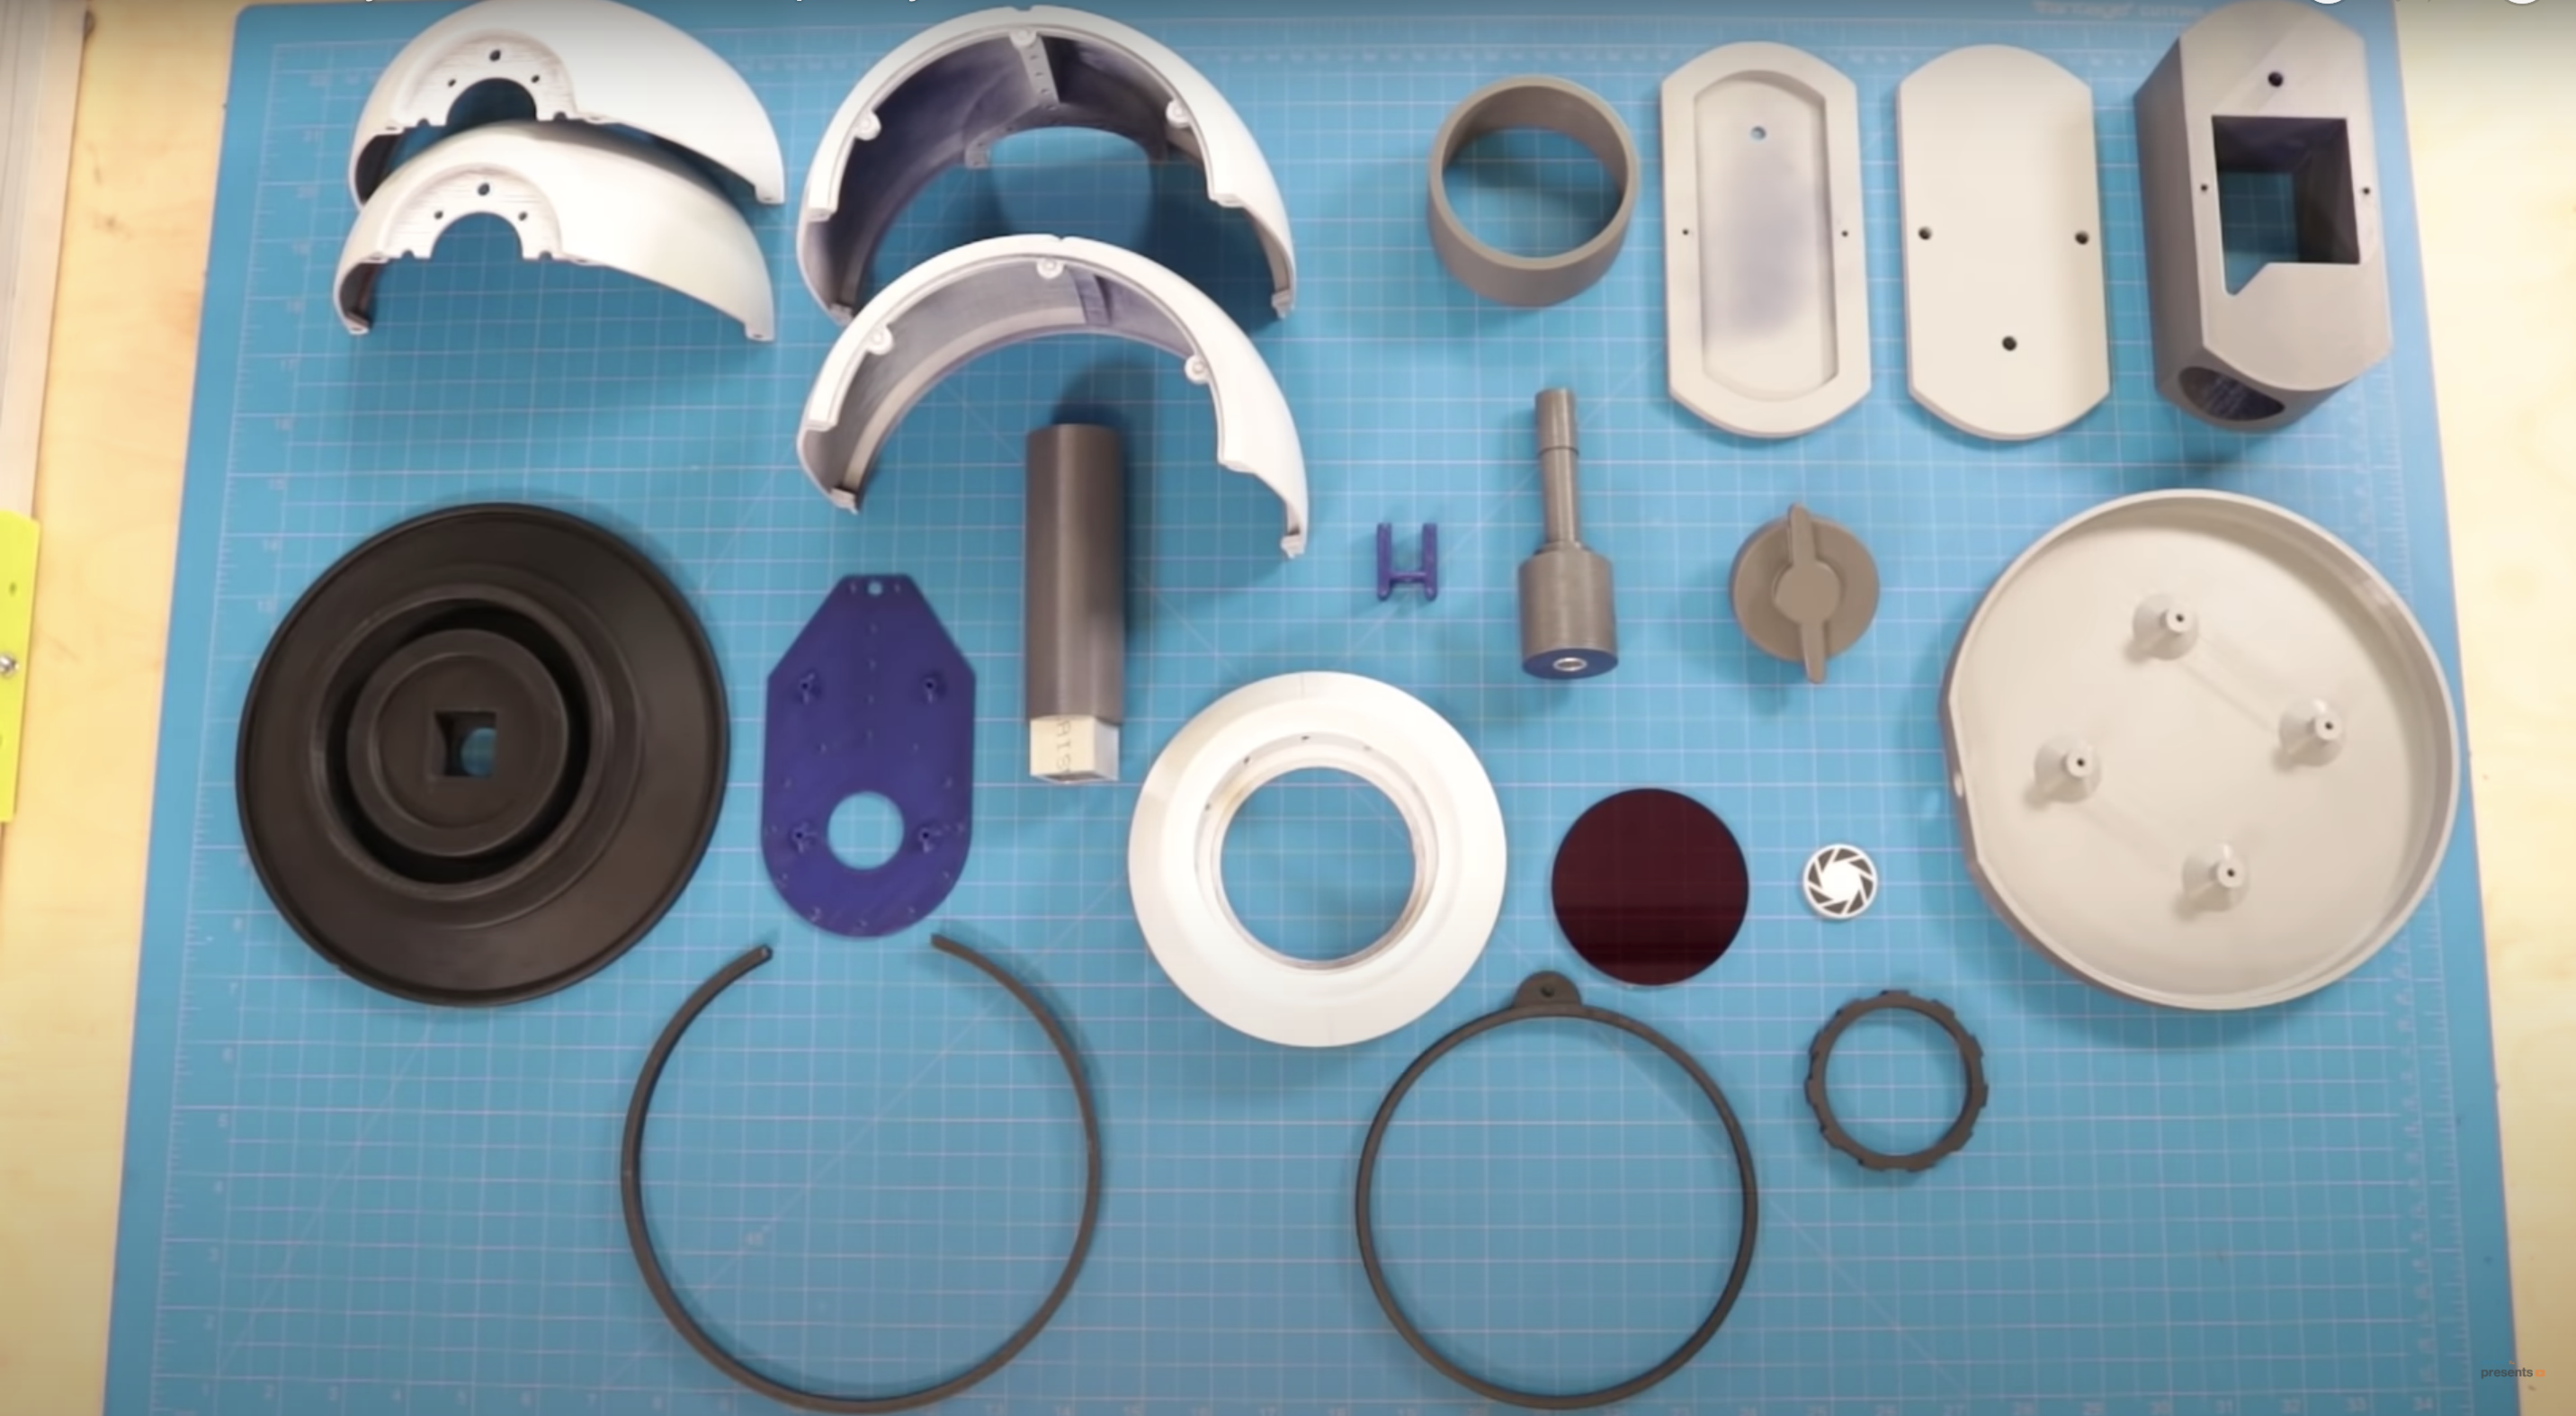
While this build is very simple electronically, the 20-part 3D-printed shell is beautiful. A Raspberry Pi is positioned on a purpose-built platform in the middle of the shell, connected to the Raspberry Pi High Quality Camera, which sits at the front of that shell, peeking out.
All the 3D printed parts ready to assemble
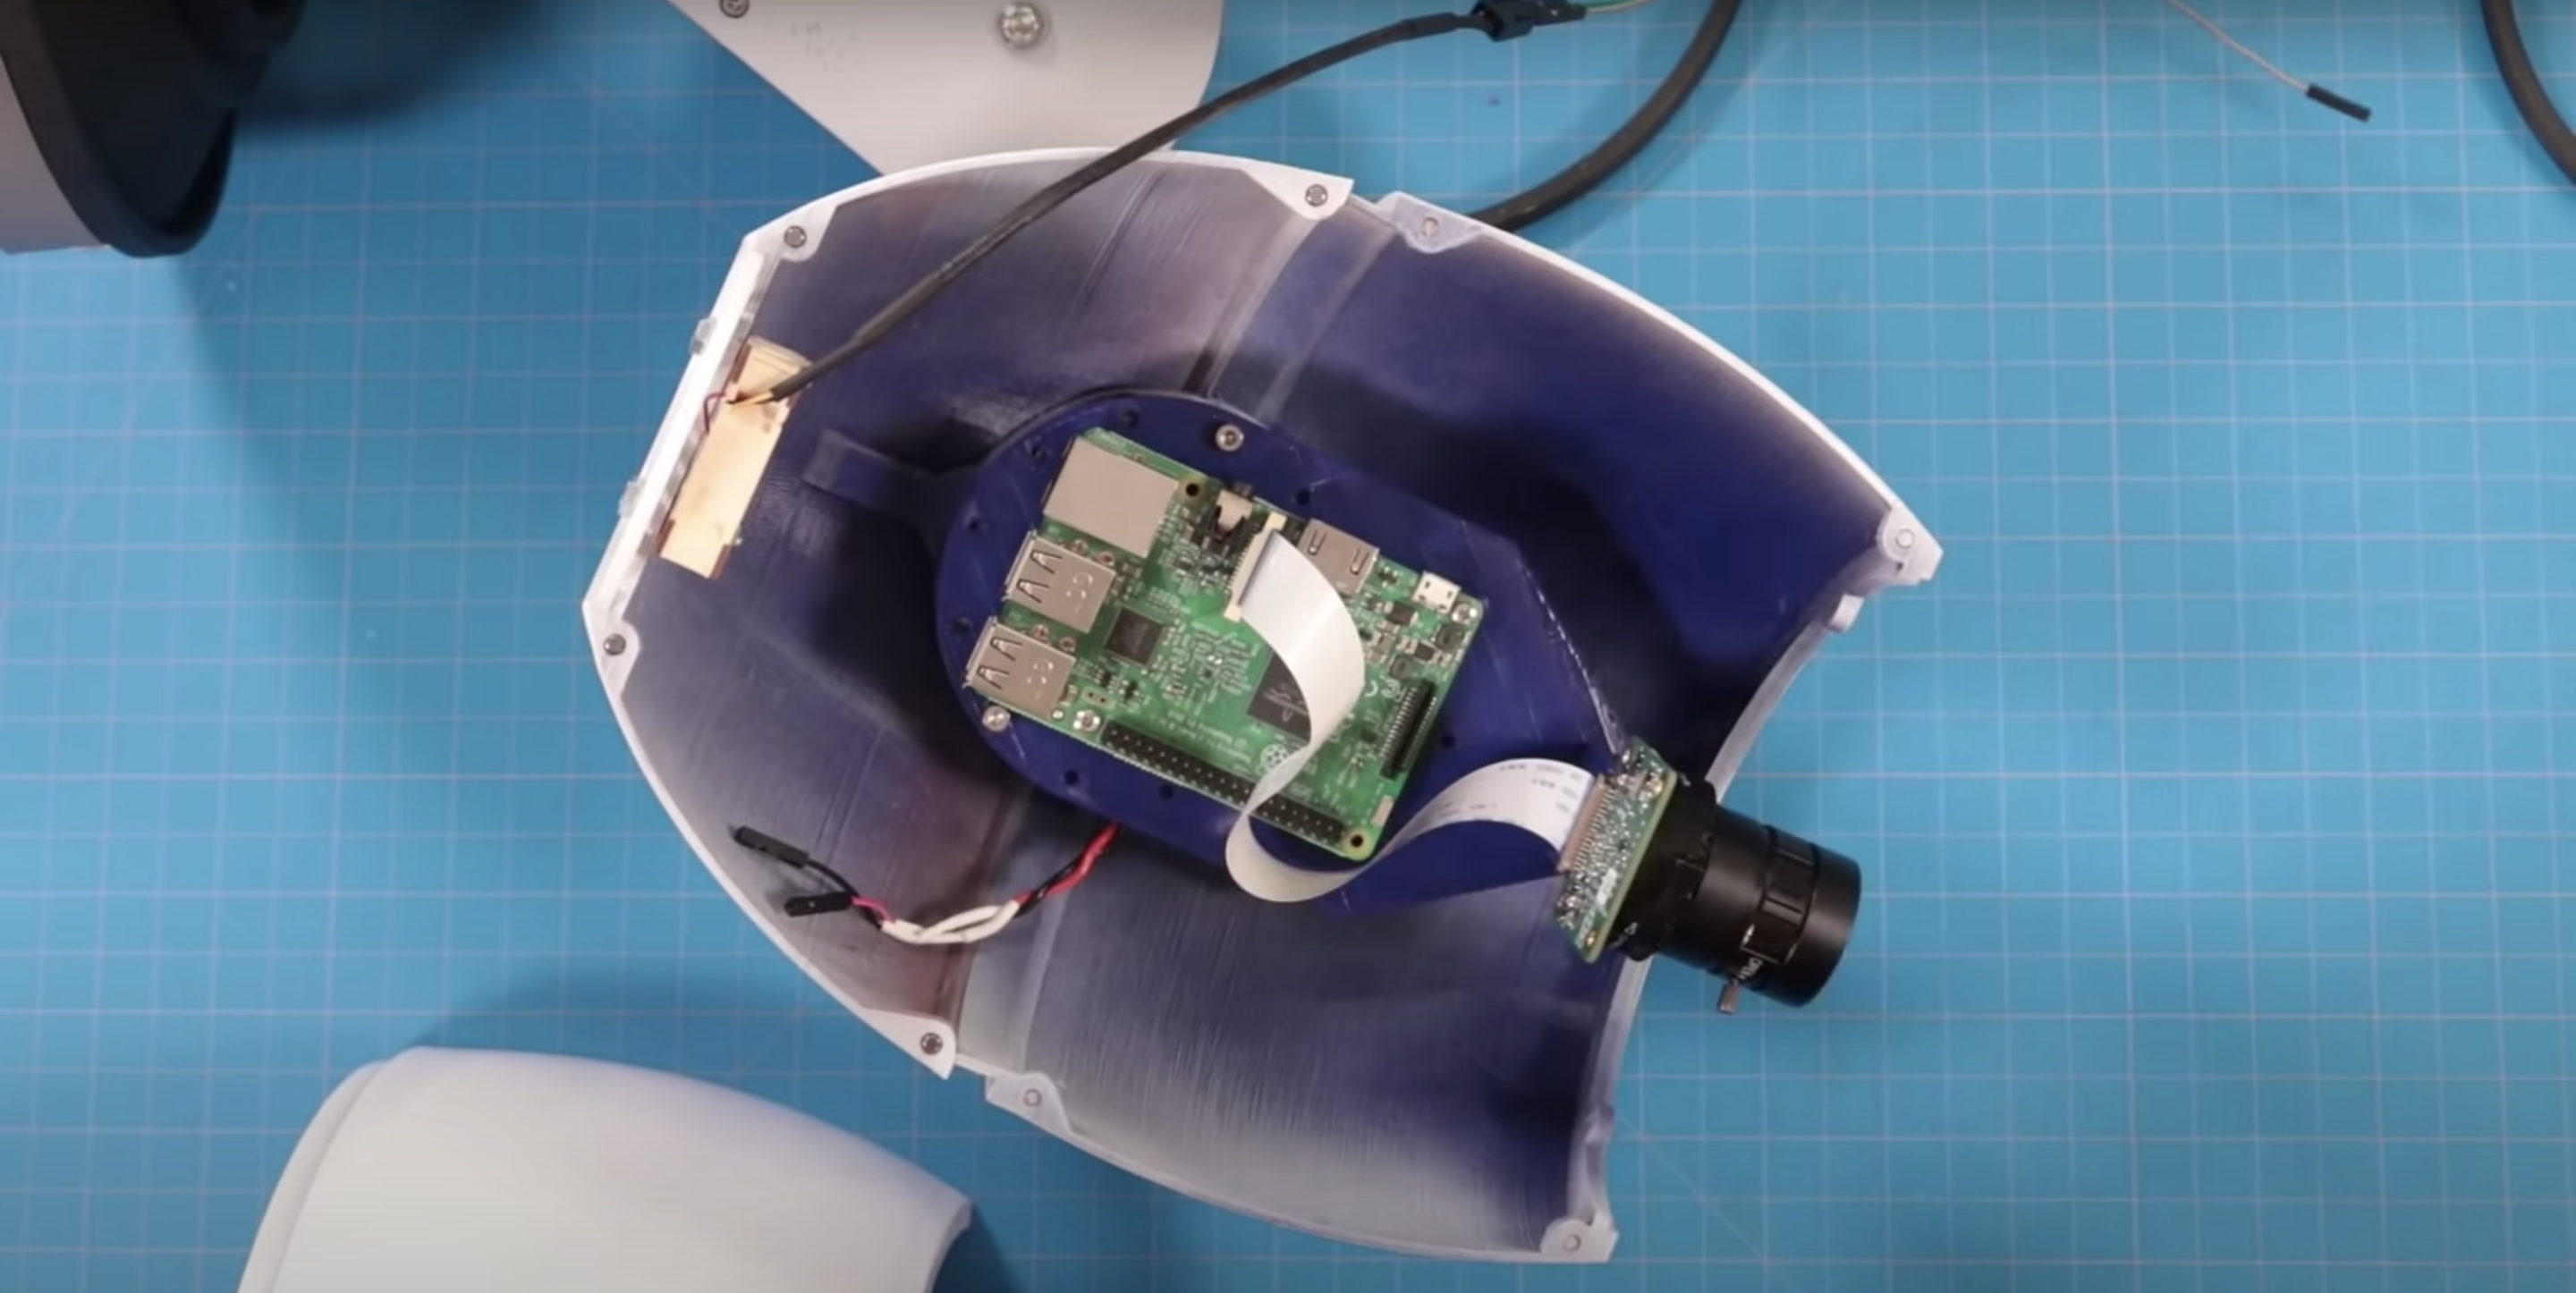
The 5V power supply is routed through the main shell into the base, which mounts the build to the wall. In order to keep the Raspberry Pi cool, DJ made some vent holes in the lens of the shell. The red LED is routed out of the side and sits on the outside body of the shell.
Magnetising
Raspberry Pi 4 (centre) and Raspberry Pi High Quality Camera (right) sat inside the 3D printed shell
This build is also screwless: the halves of the shell have what look like screw holes along the edges, but they are actually 3mm neodymium magnets, so assembly and repair is super easy as everything just pops on and off.
The final picture (that’s DJ!)
You can find all the files you need to recreate this build, or you can ask DJ a question, at element14.com/presents.
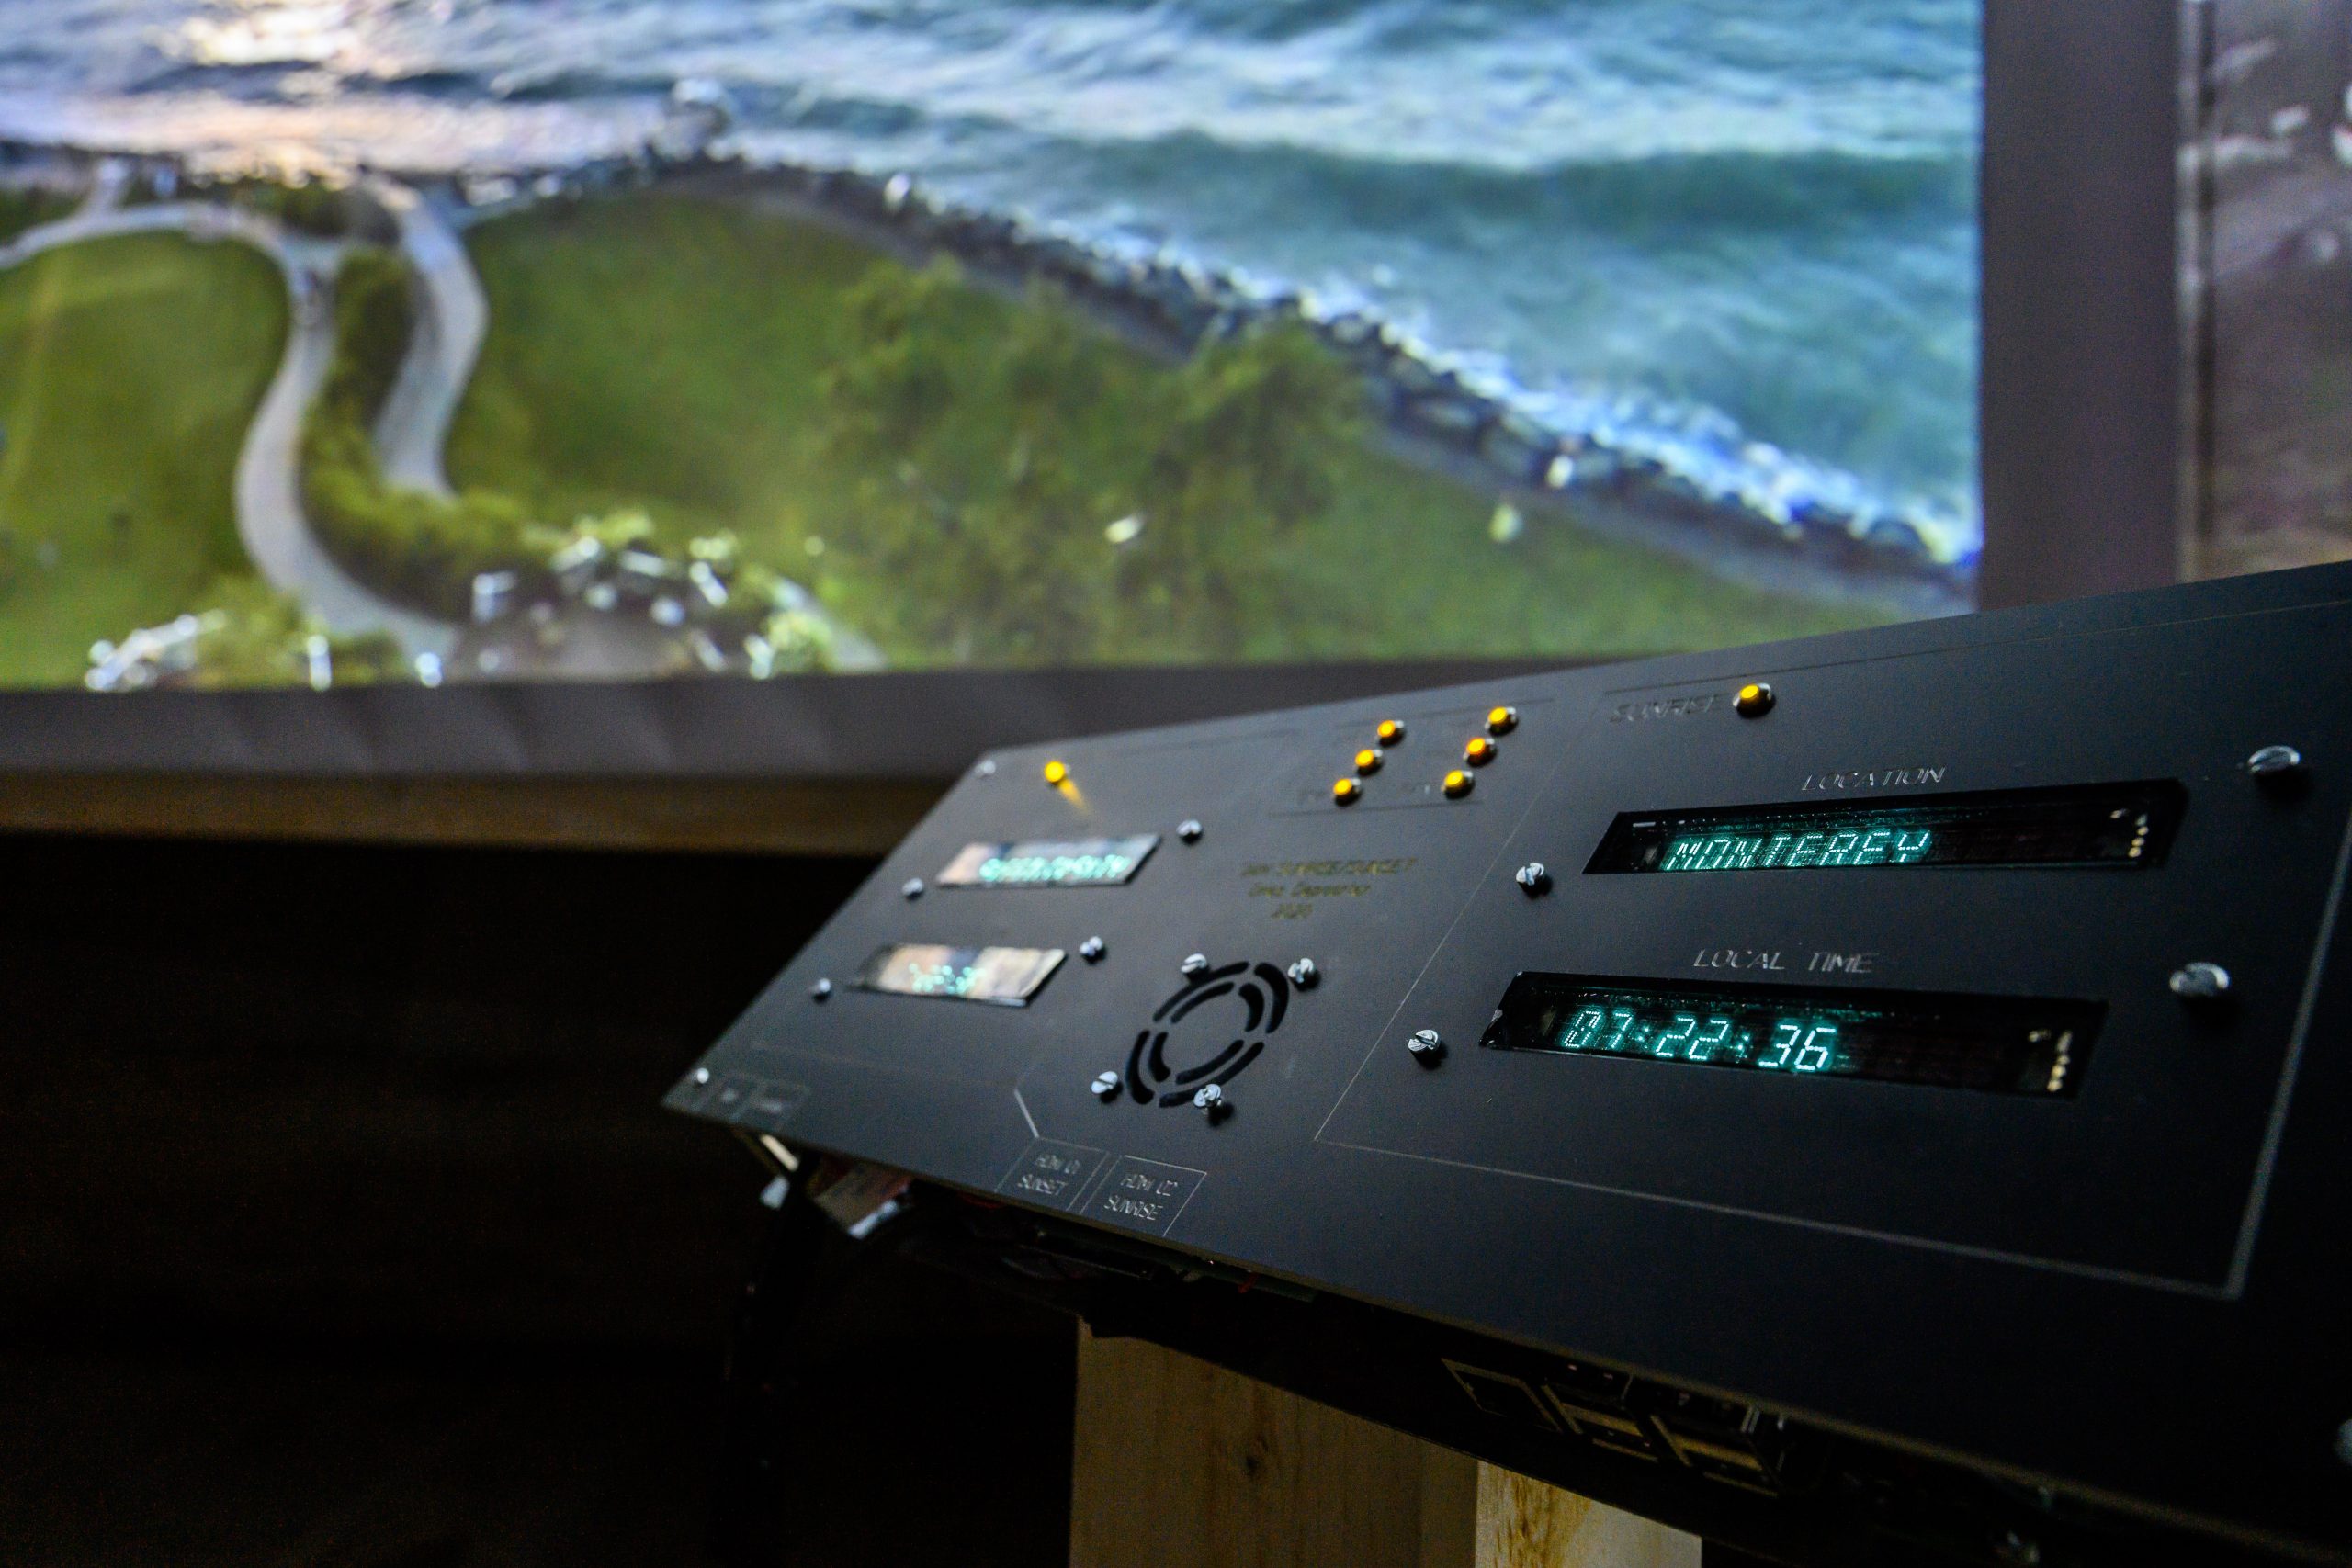
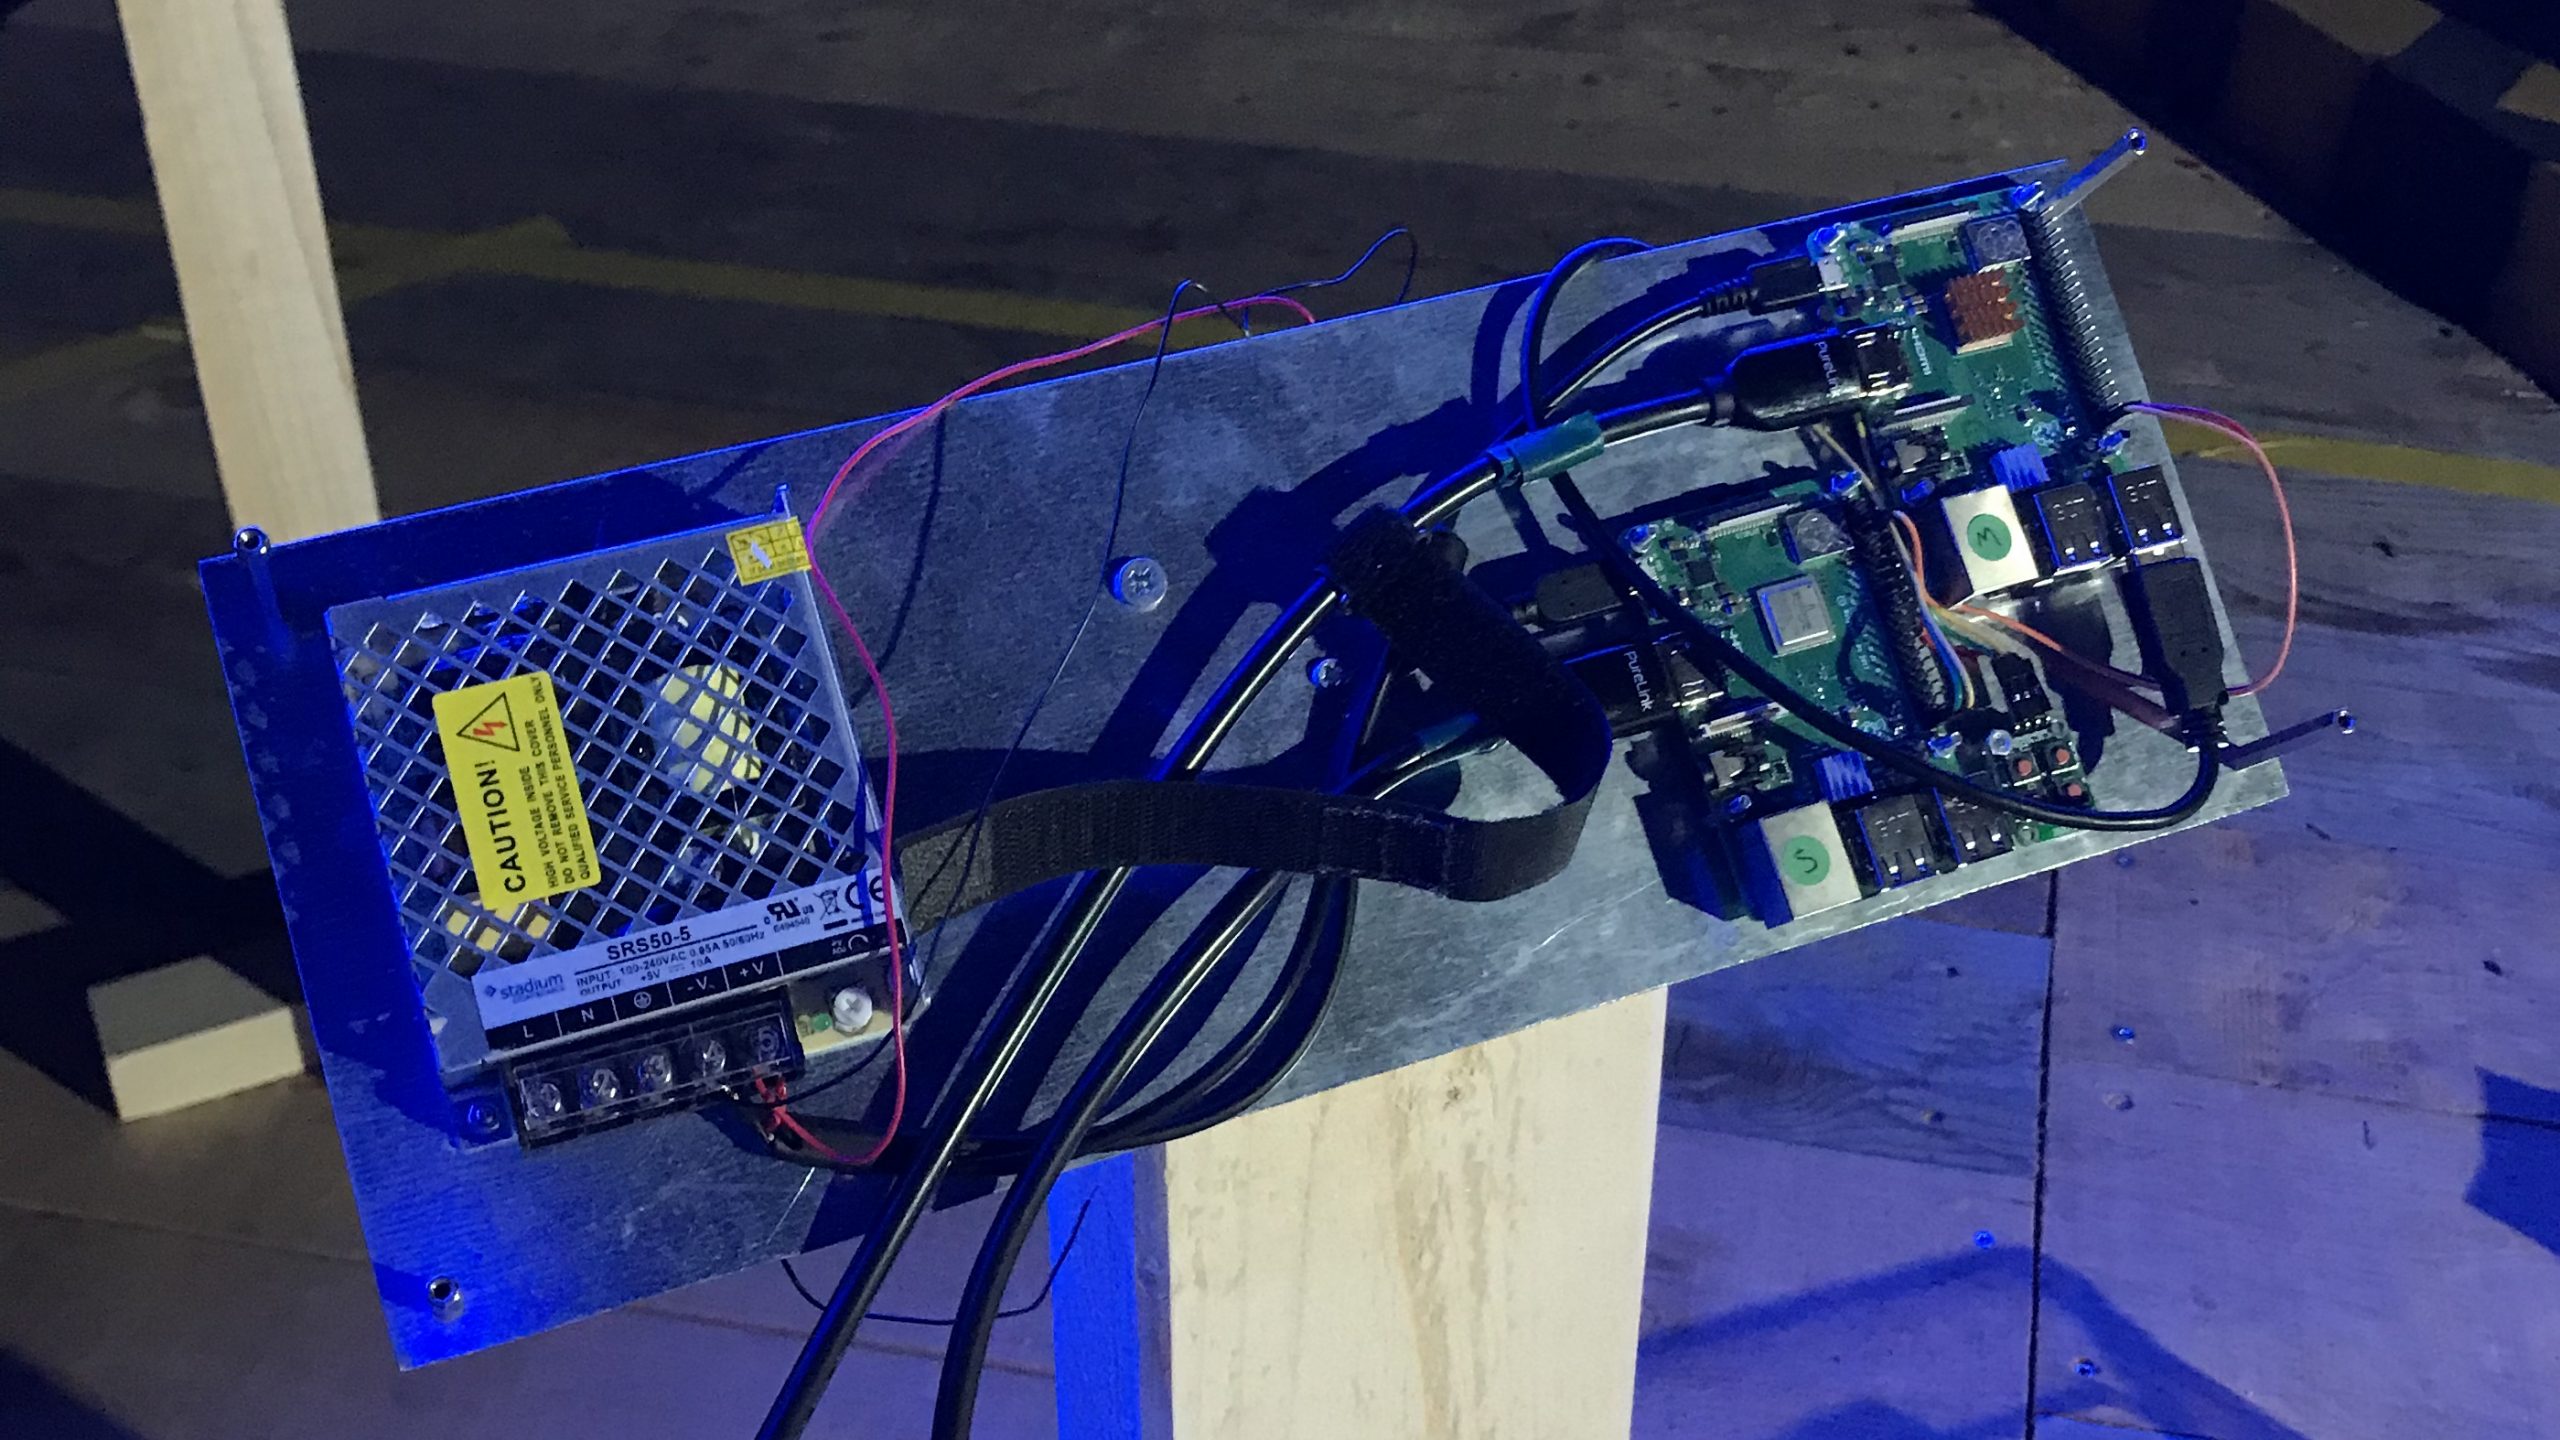
The arresting visuals are beamed to viewers using two Raspberry Pi 3B+ computers and an Arduino Nano Every that stream internet protocol (IP) cameras with the use of command line media player OMXPlayer.
Dual Raspberry Pi power
The two Raspberry Pis communicate with each other using the MQTT protocol — a standard messaging protocol for the Internet of Things (IoT) that’s ideal for connecting remote devices with a small code footprint and minimal network bandwidth.
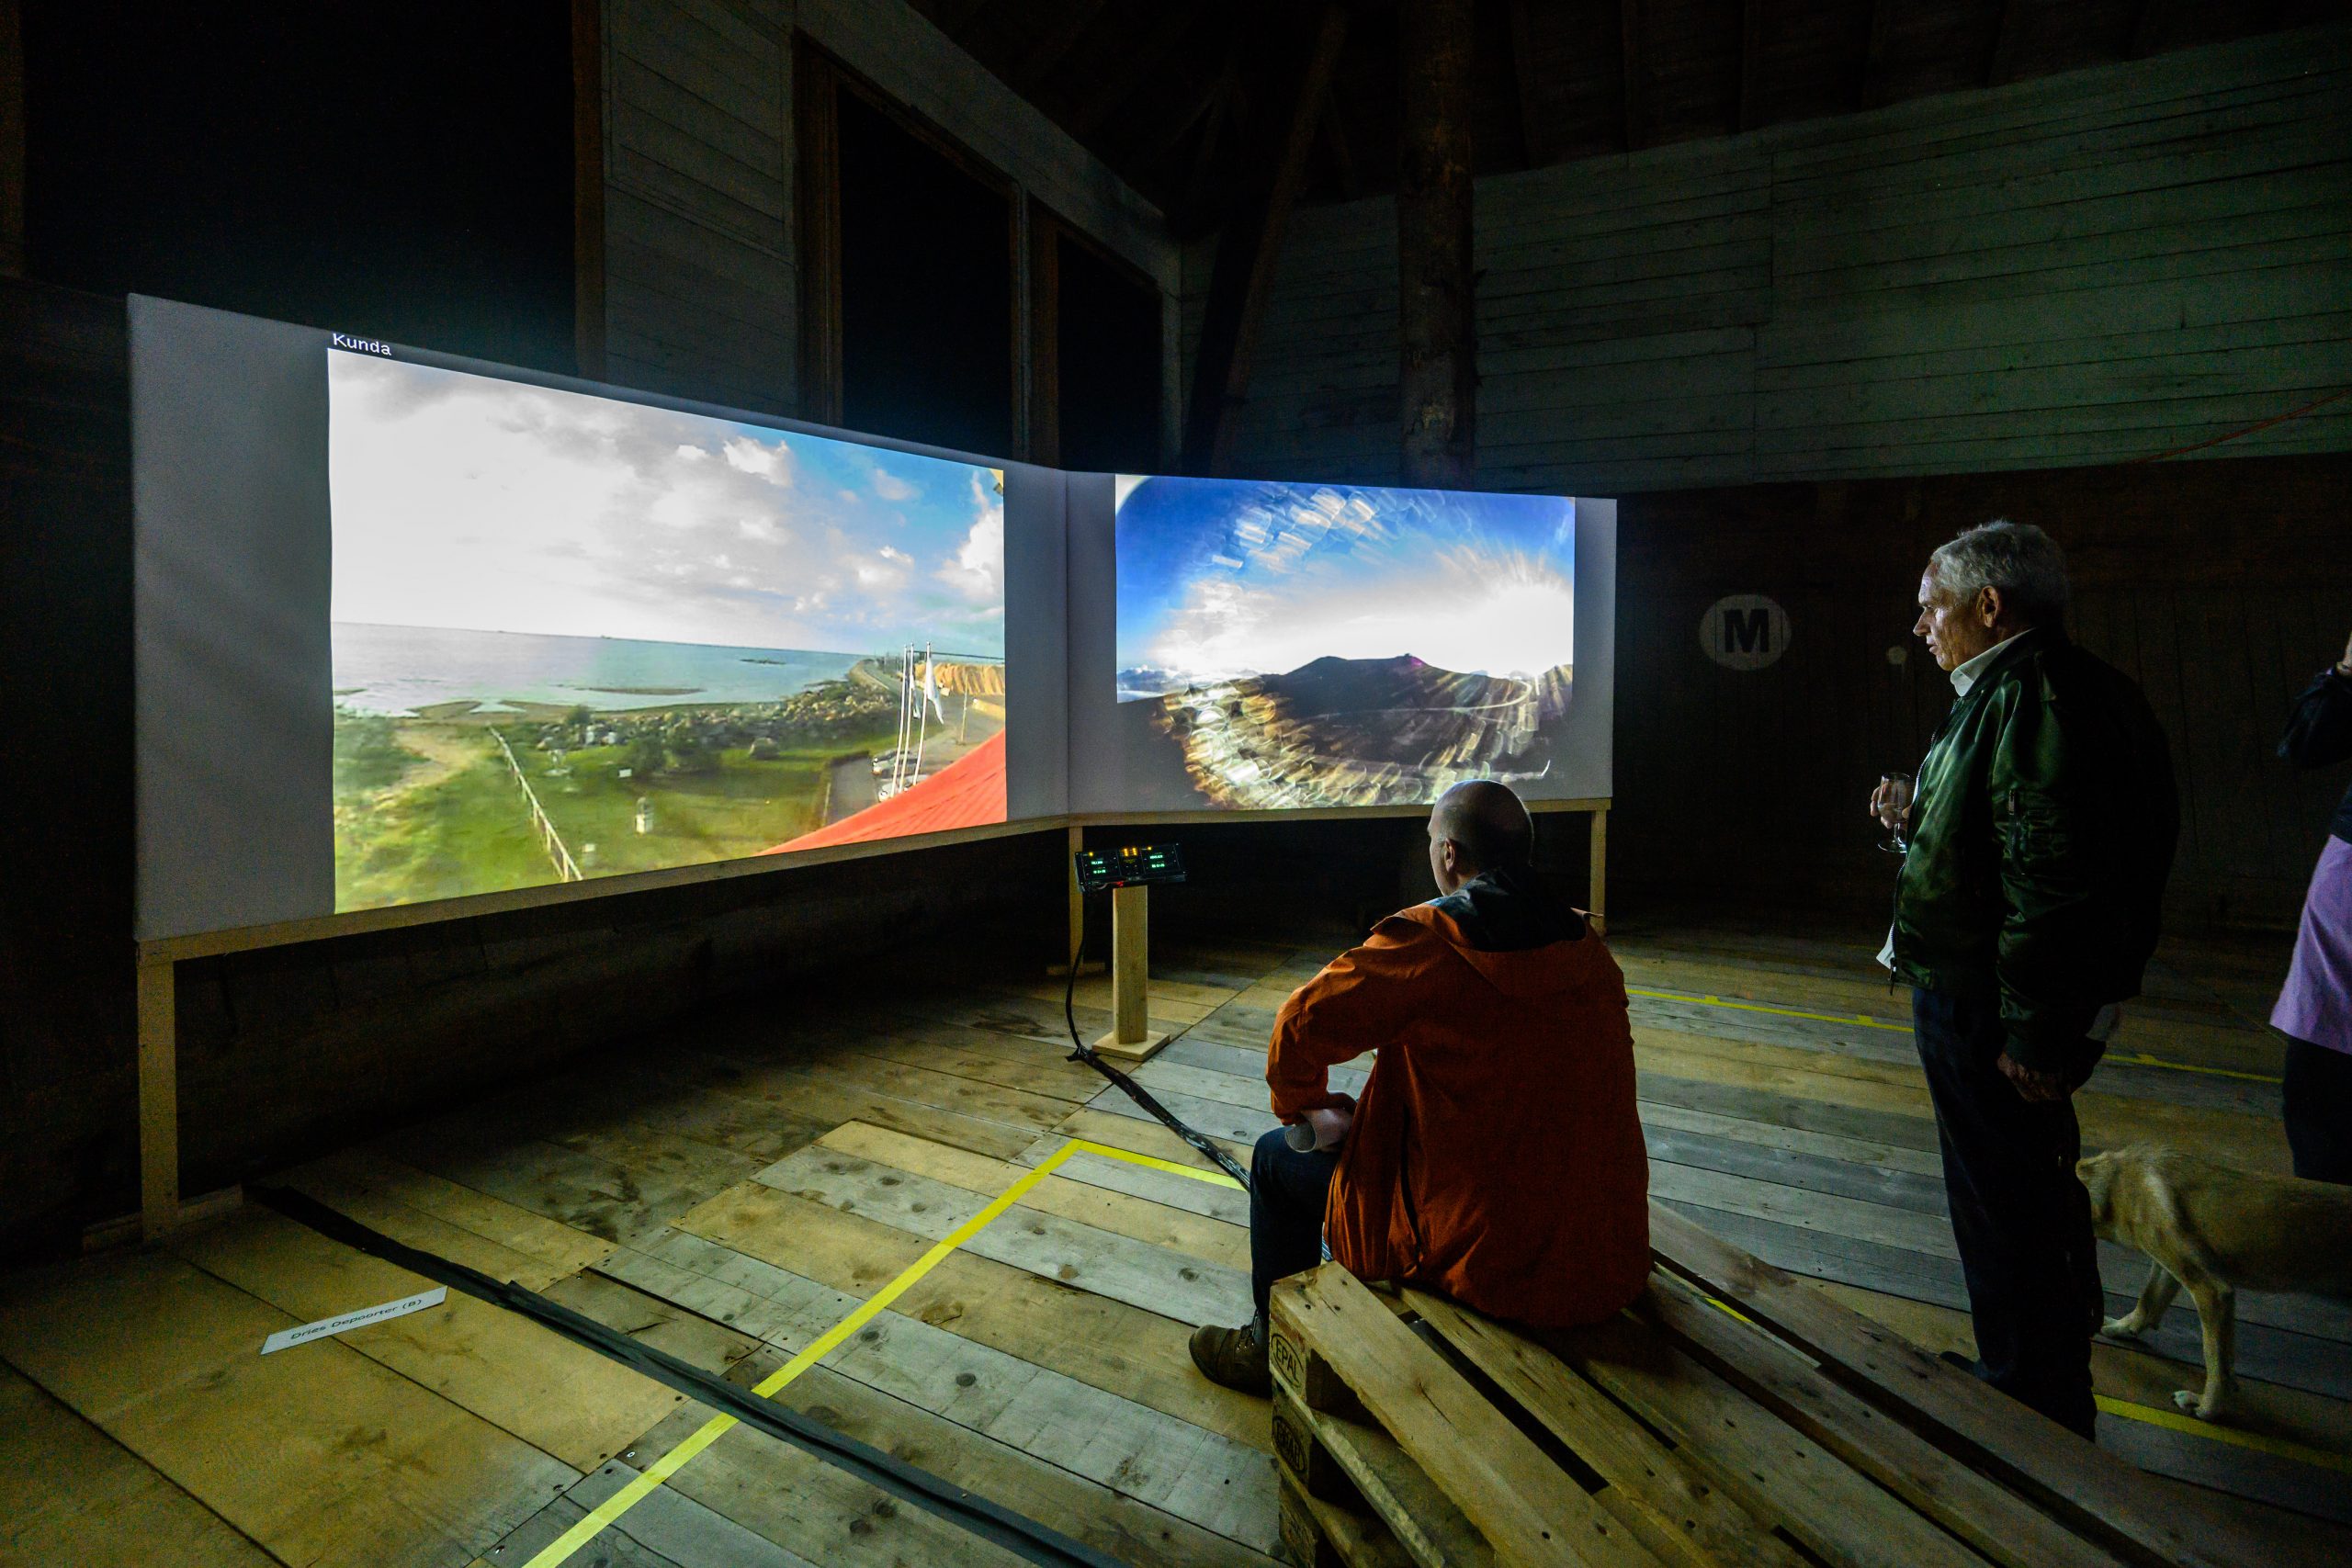
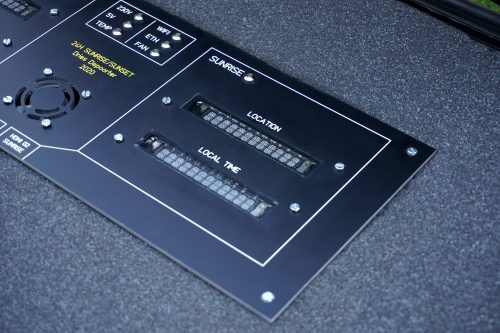
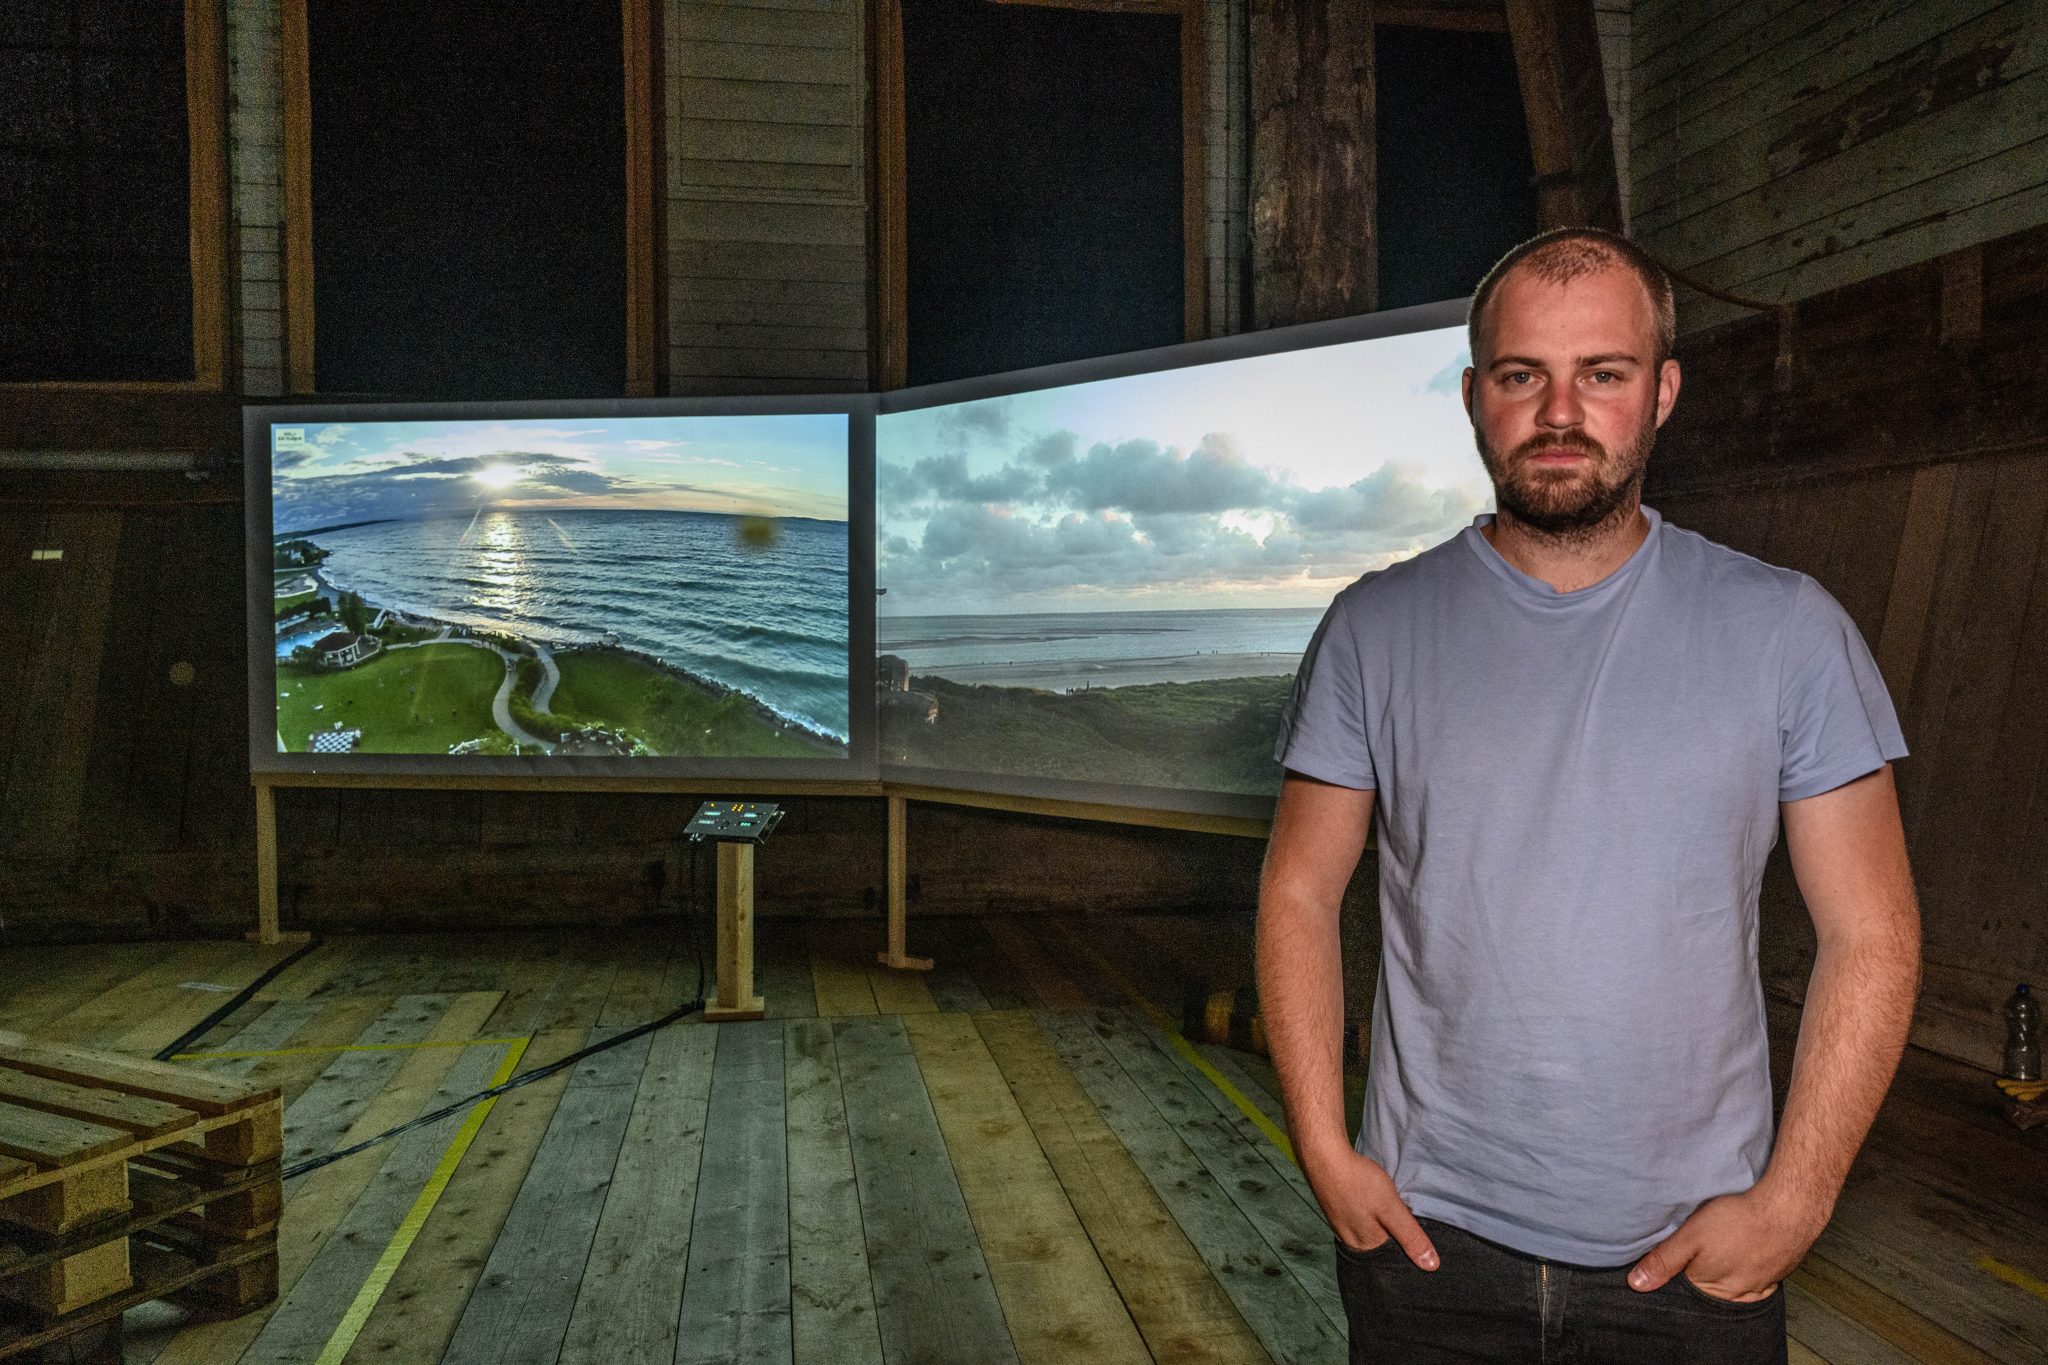
One of the Raspberry Pis checks at which location in the world a sunrise or sunset is happening and streams the closest CCTV camera.
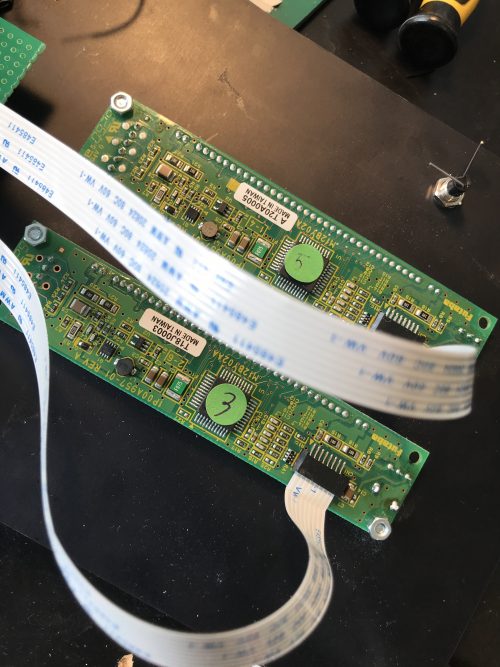
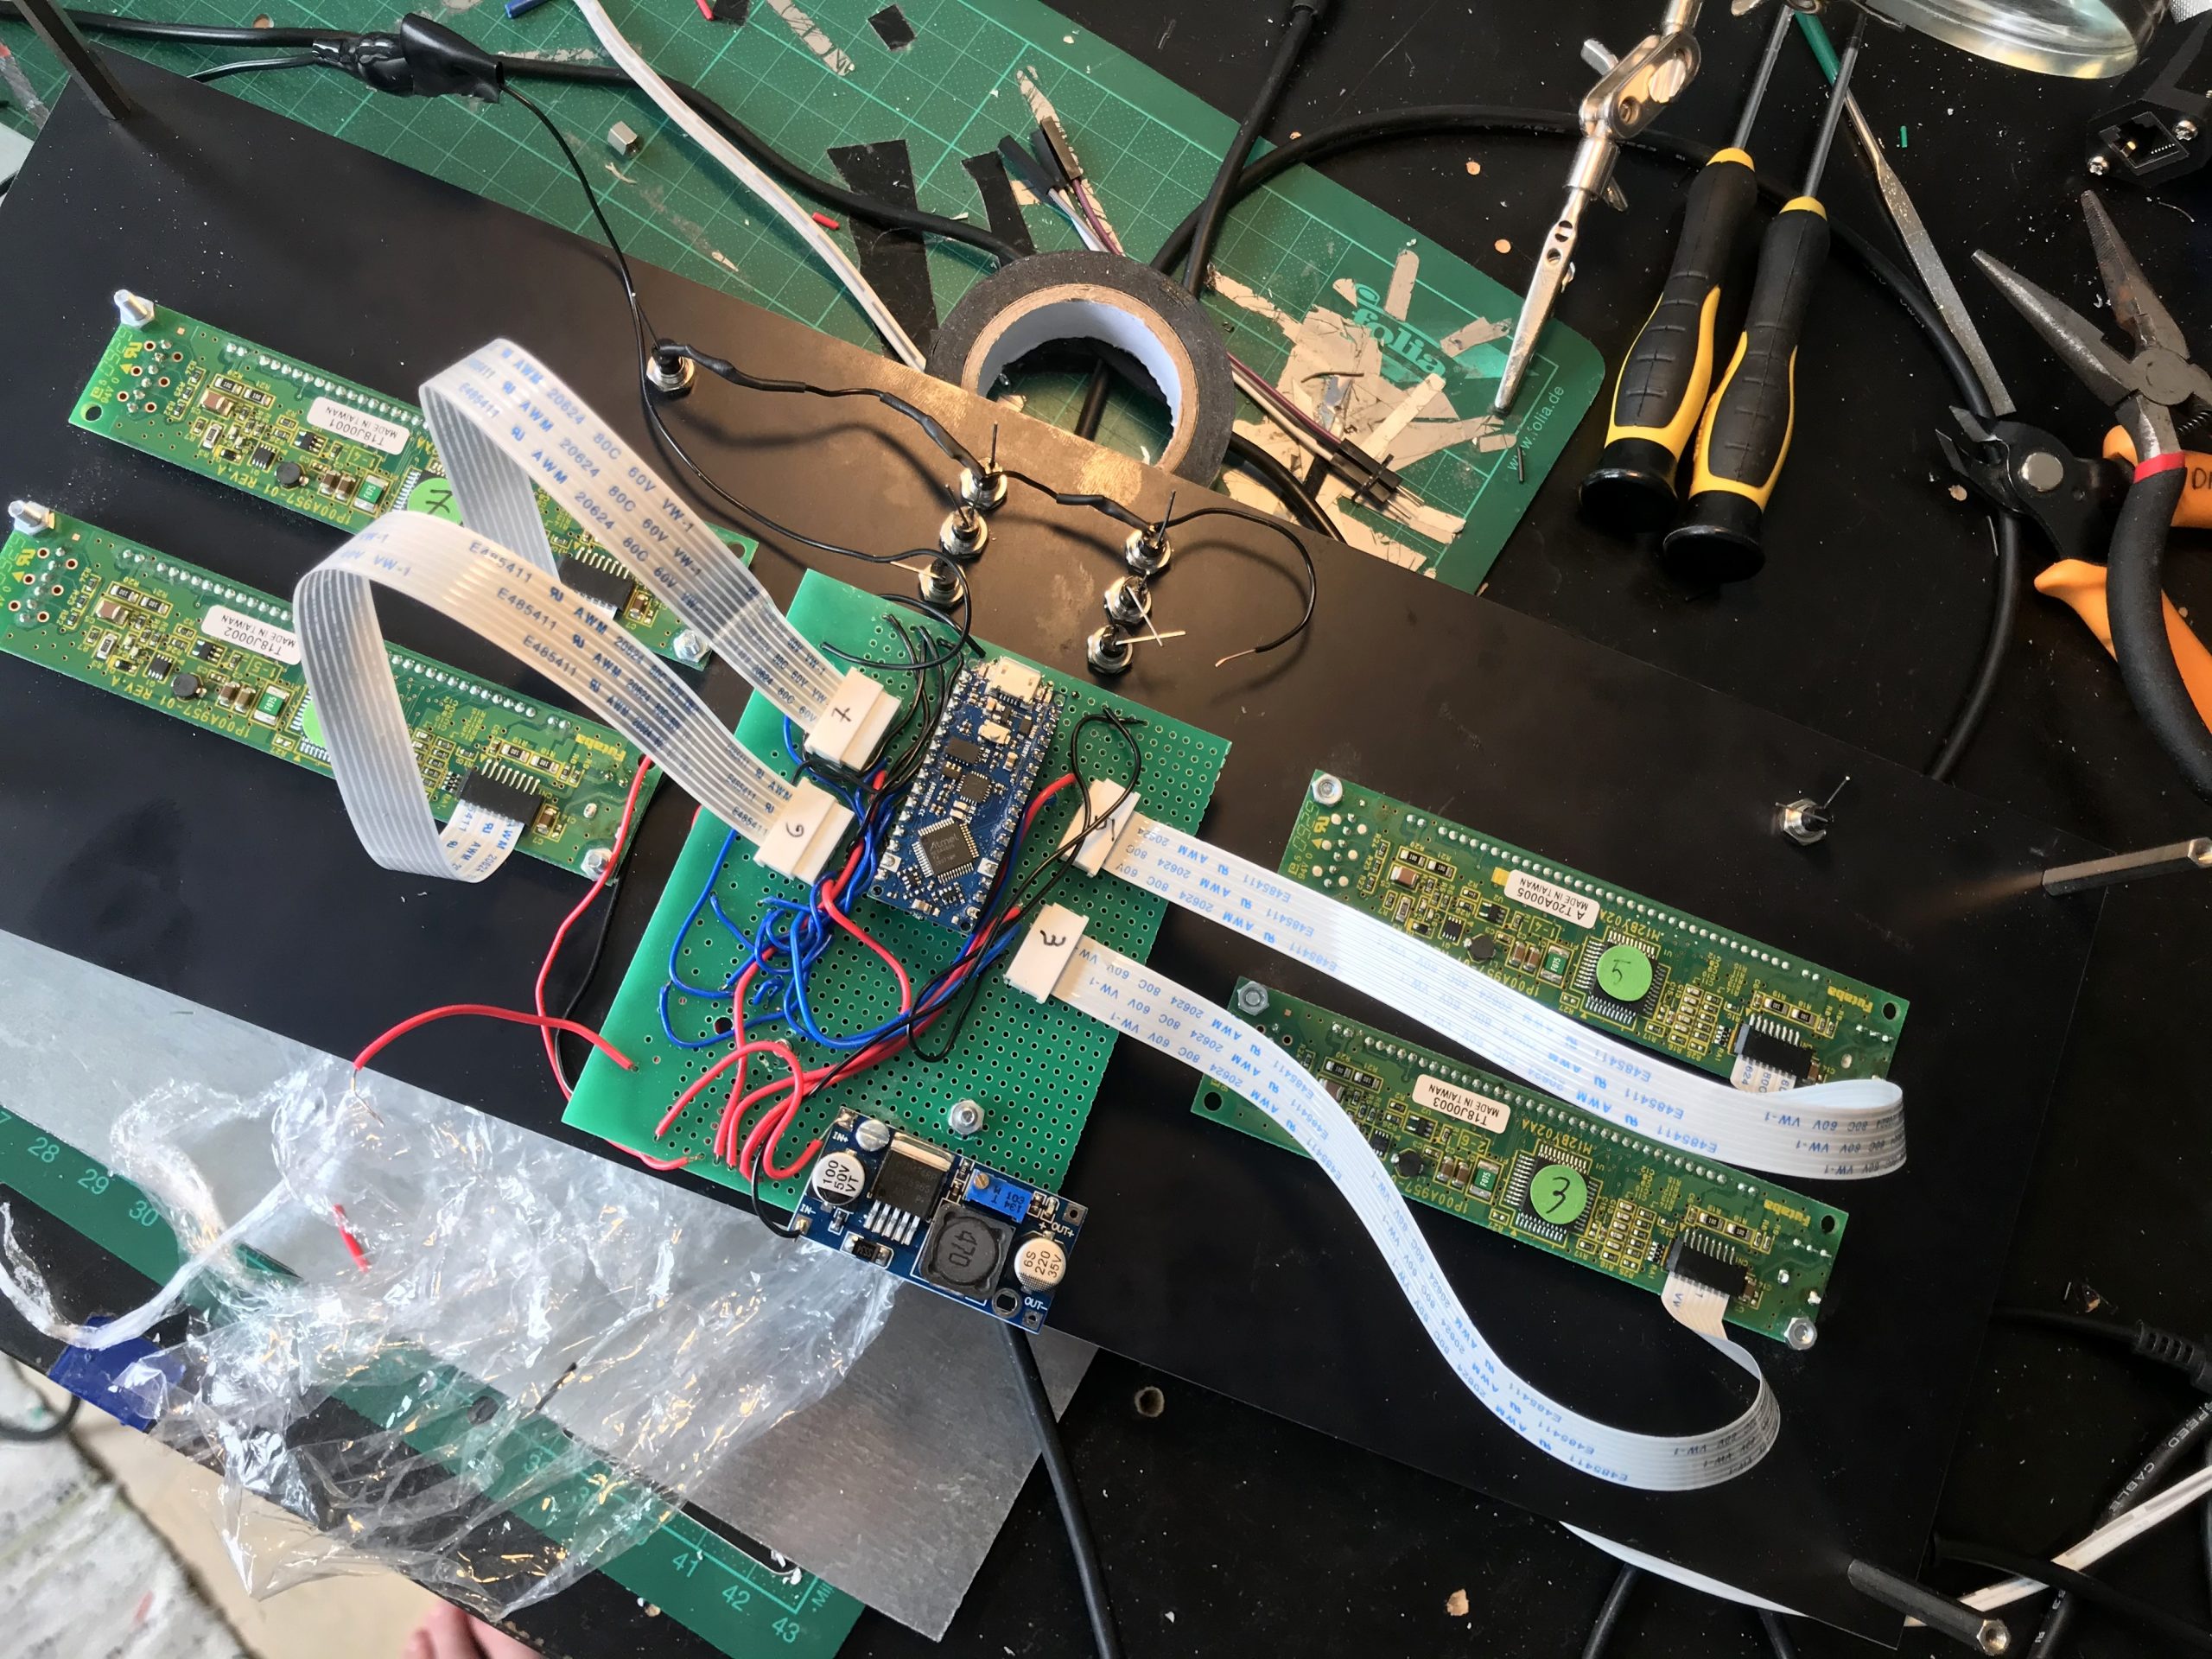
The insides of the sleek display screen…
Beam me out, Scotty
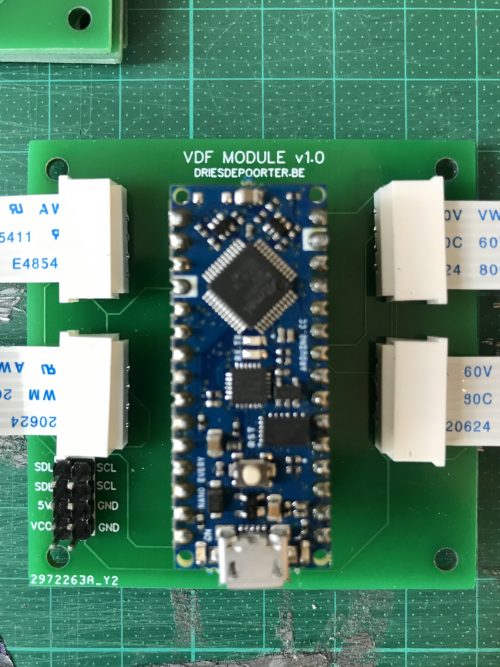
The big screens are connected with the I2C protocol to the Arduino, and the Arduino is connected serial with the second Raspberry Pi. Dries also made a custom printed circuit board (PCB) so the build looks cleaner.
All that hardware is powered by an industrial power supply, just because Dries liked the style of it.
…and the outside
Software
Everything is written in Python 3, and Dries harnessed the Python 3 libraries BeautifulSoup, Sun, Geopy, and Pytz to calculate sunrise and sunset times at specific locations. Google Firebase databases in the cloud help with admin by way of saving timestamps and the IP addresses of the cameras.
NODE has long been working to create open-source resources to help more people harness the decentralised internet, and their easily 3D-printed designs are perfect to optimise your Raspberry Pi.
NODE wanted to take advantage of the faster processor and up to 8GB RAM on Raspberry Pi 4 when it came out last year. Now that our tiny computer is more than capable of being used as as a general Linux desktop system, the NODE Mini Server version 3 has been born.
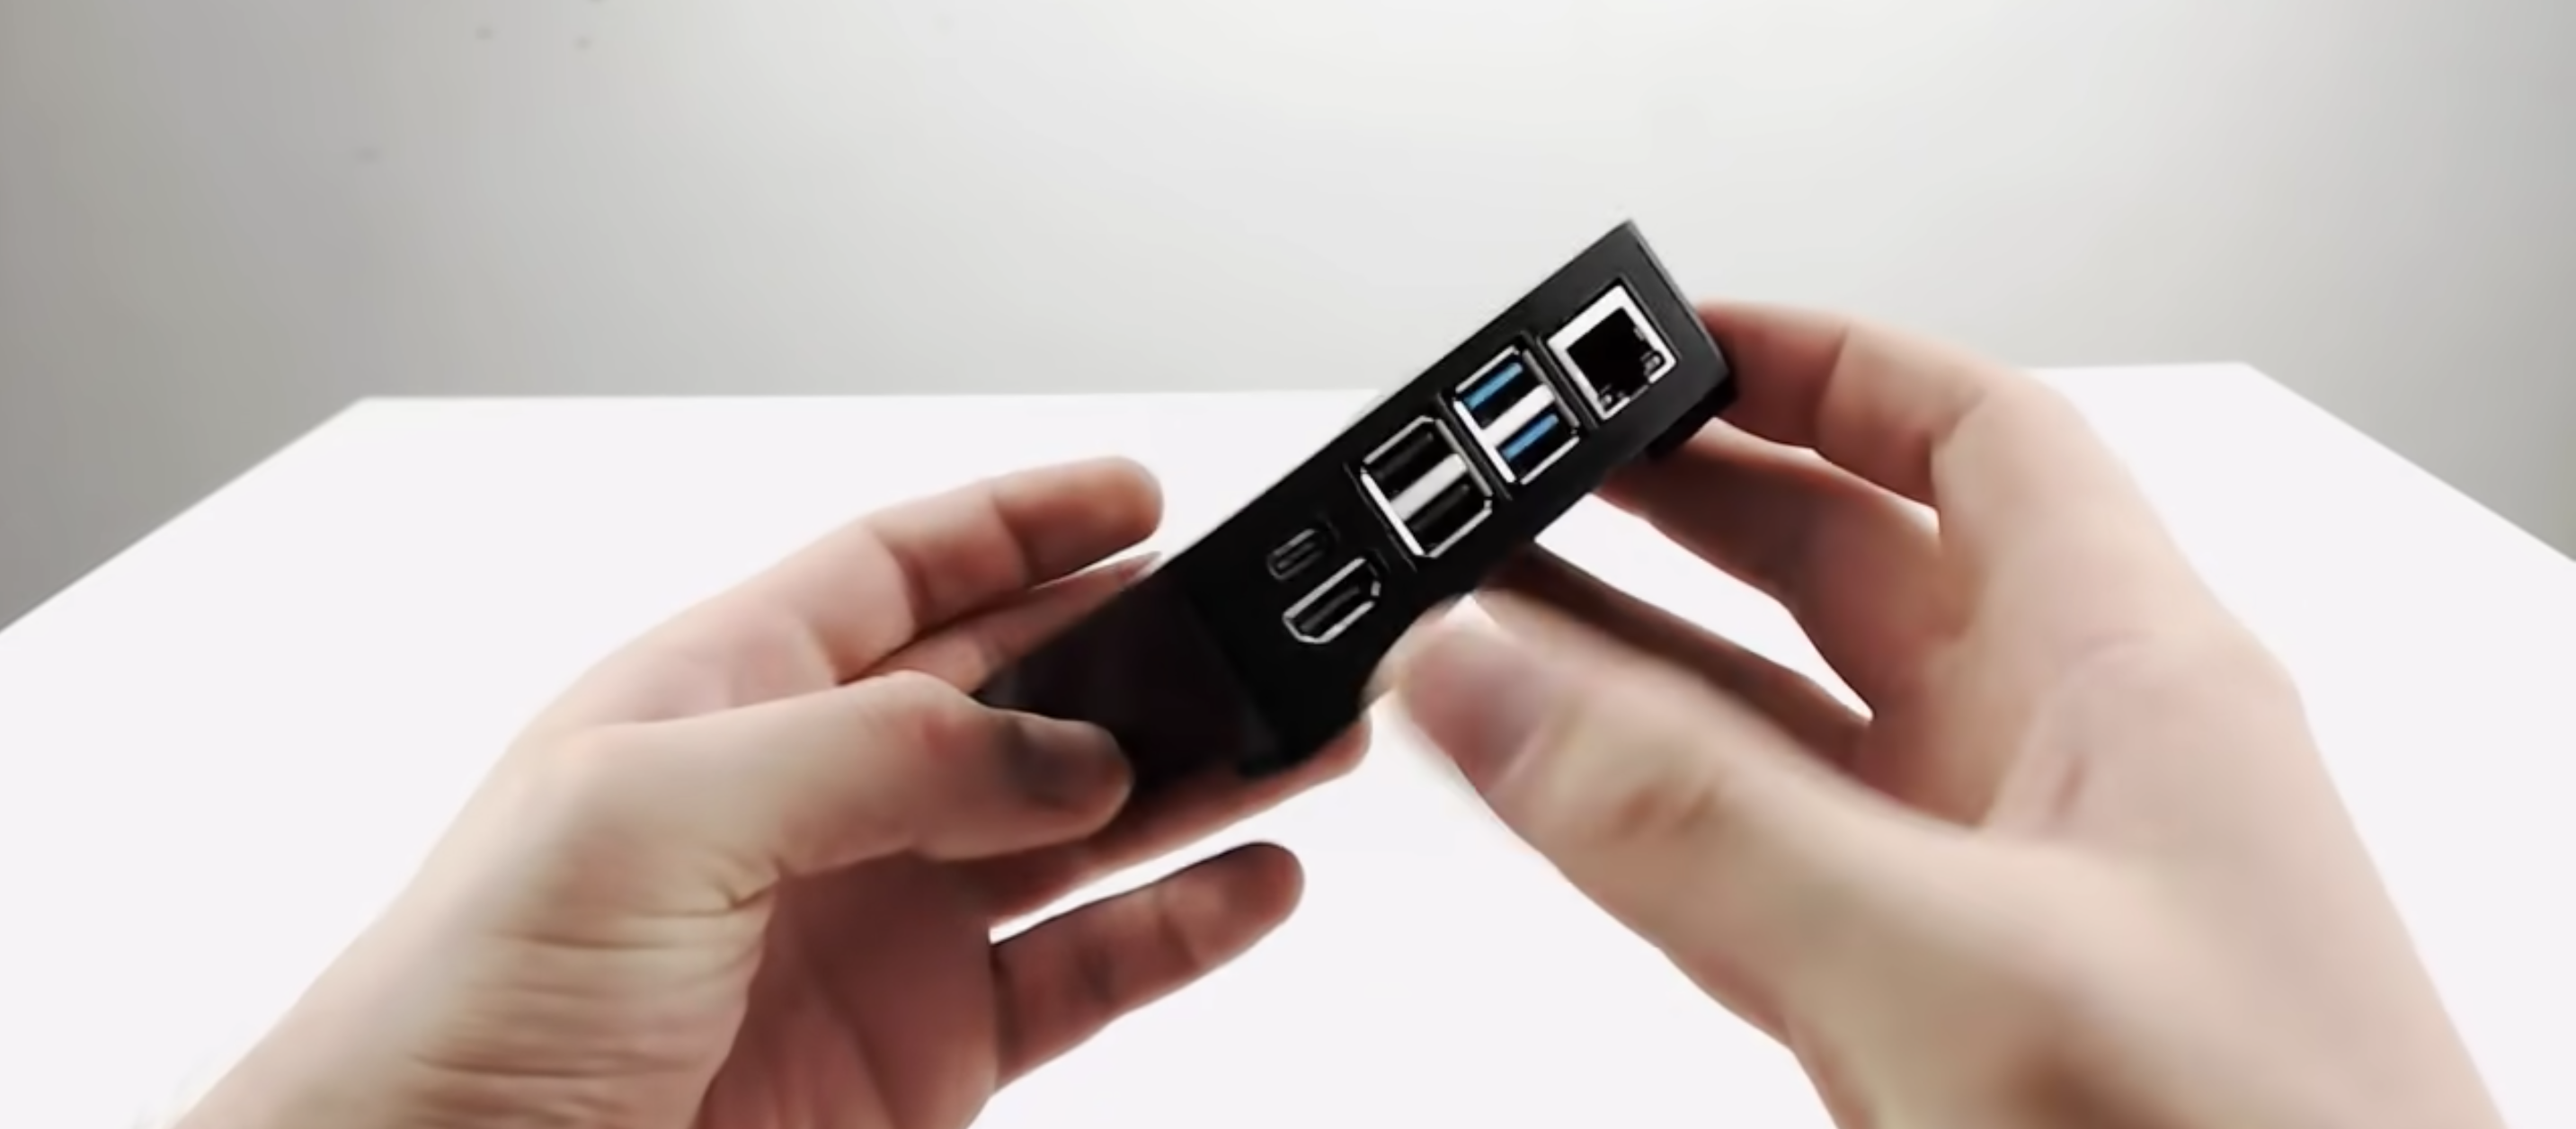
As for previous versions of NODE’s Mini Server, one of their main goals for this new iteration was to package Raspberry Pi in a way which makes it a little easier to use as a regular mini server or computer. In other words, it’s put inside a neat little box with all the ports accessible on one side.
Black is incredibly slimming
Slimmer and simpler
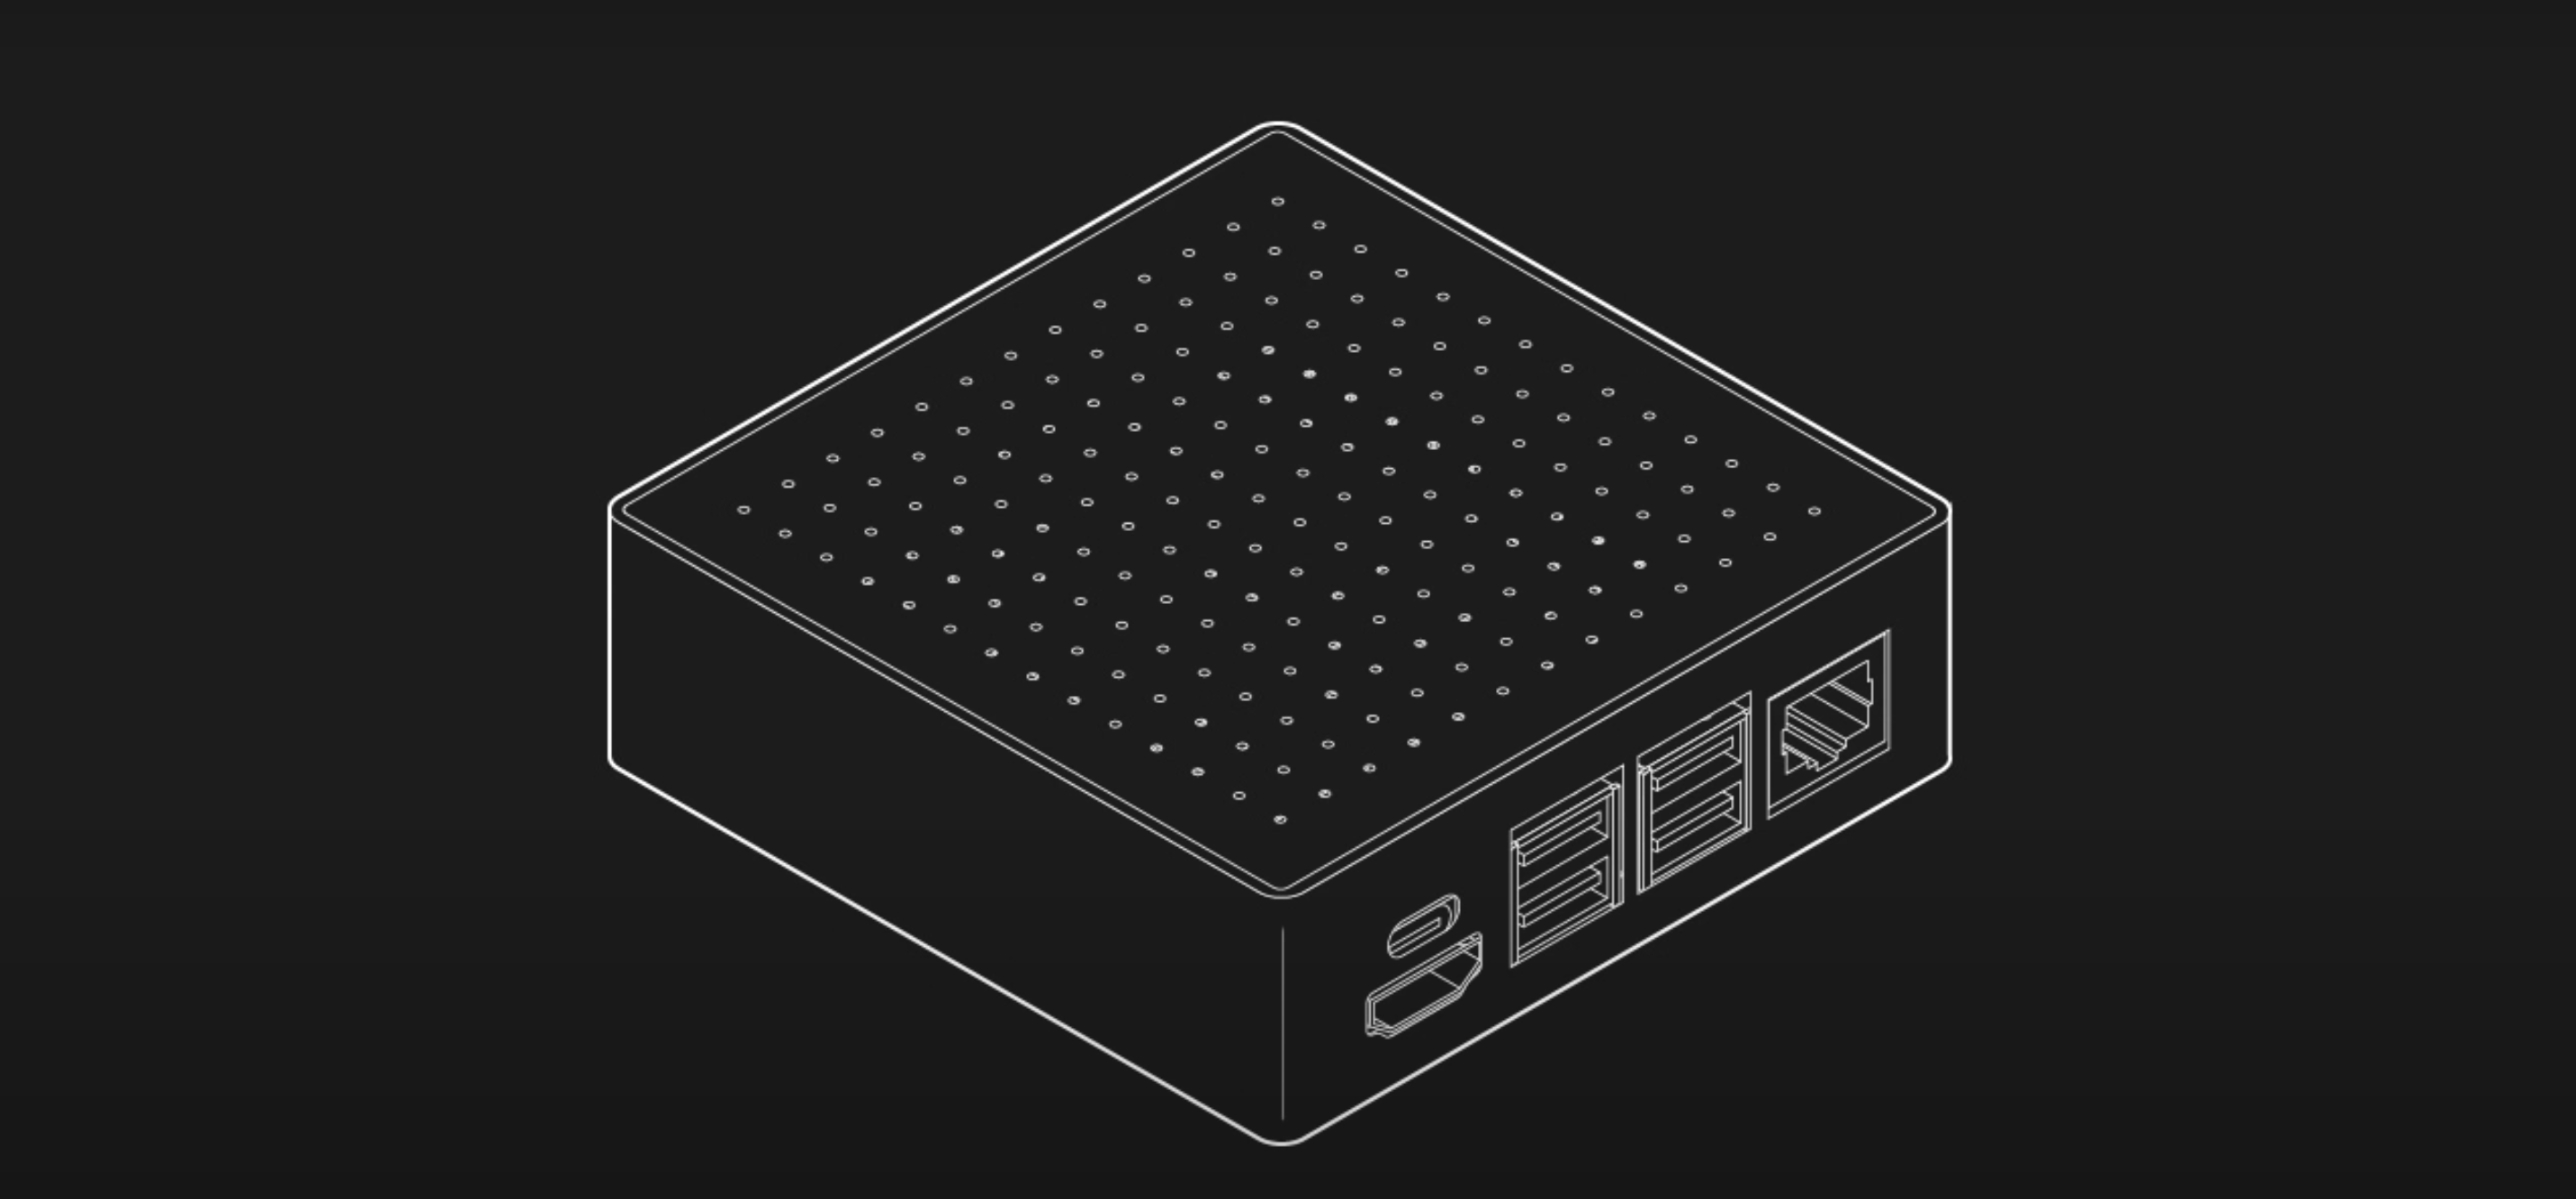
The latest design is simplified compared to previous versions. Everything lives in a 92mm × 92mm enclosure that isn’t much thicker than Raspberry Pi itself.
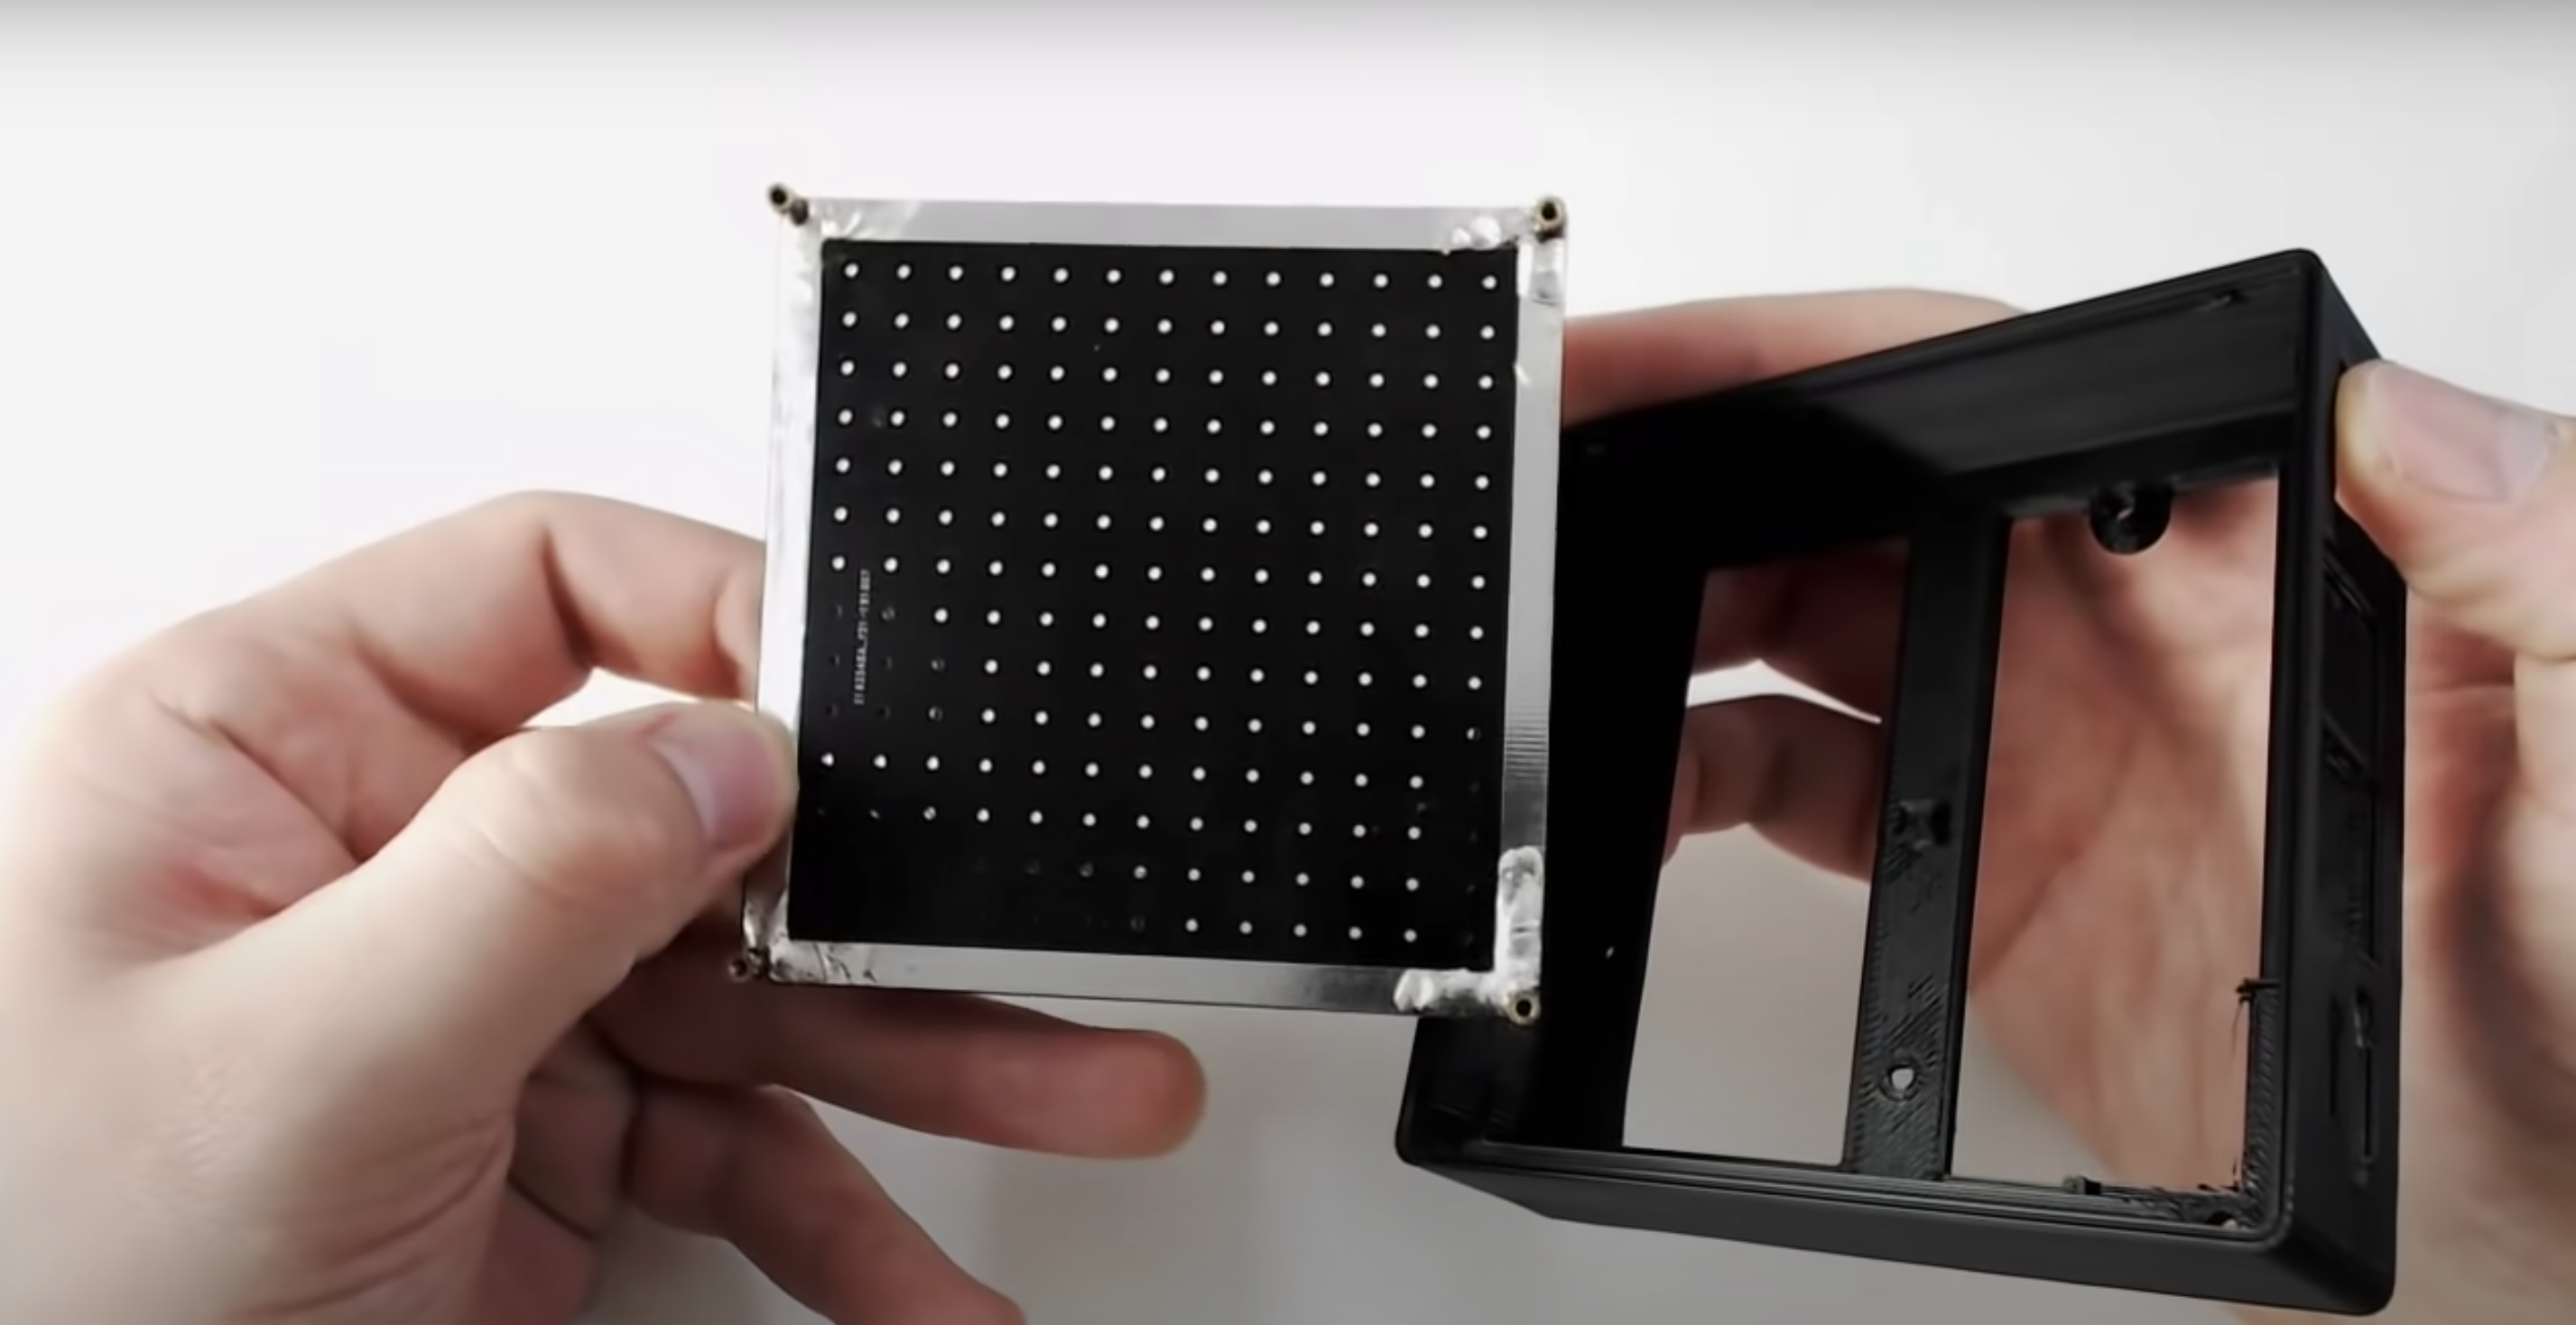
The slimmed-down new case comprises a single 3D-printed piece and a top cover made from a custom-designed printed circuit board (PCB) that has four brass-threaded inserts soldered into the corners, giving you a simple way to screw everything together.
The custom PCB cover
What are the new features?
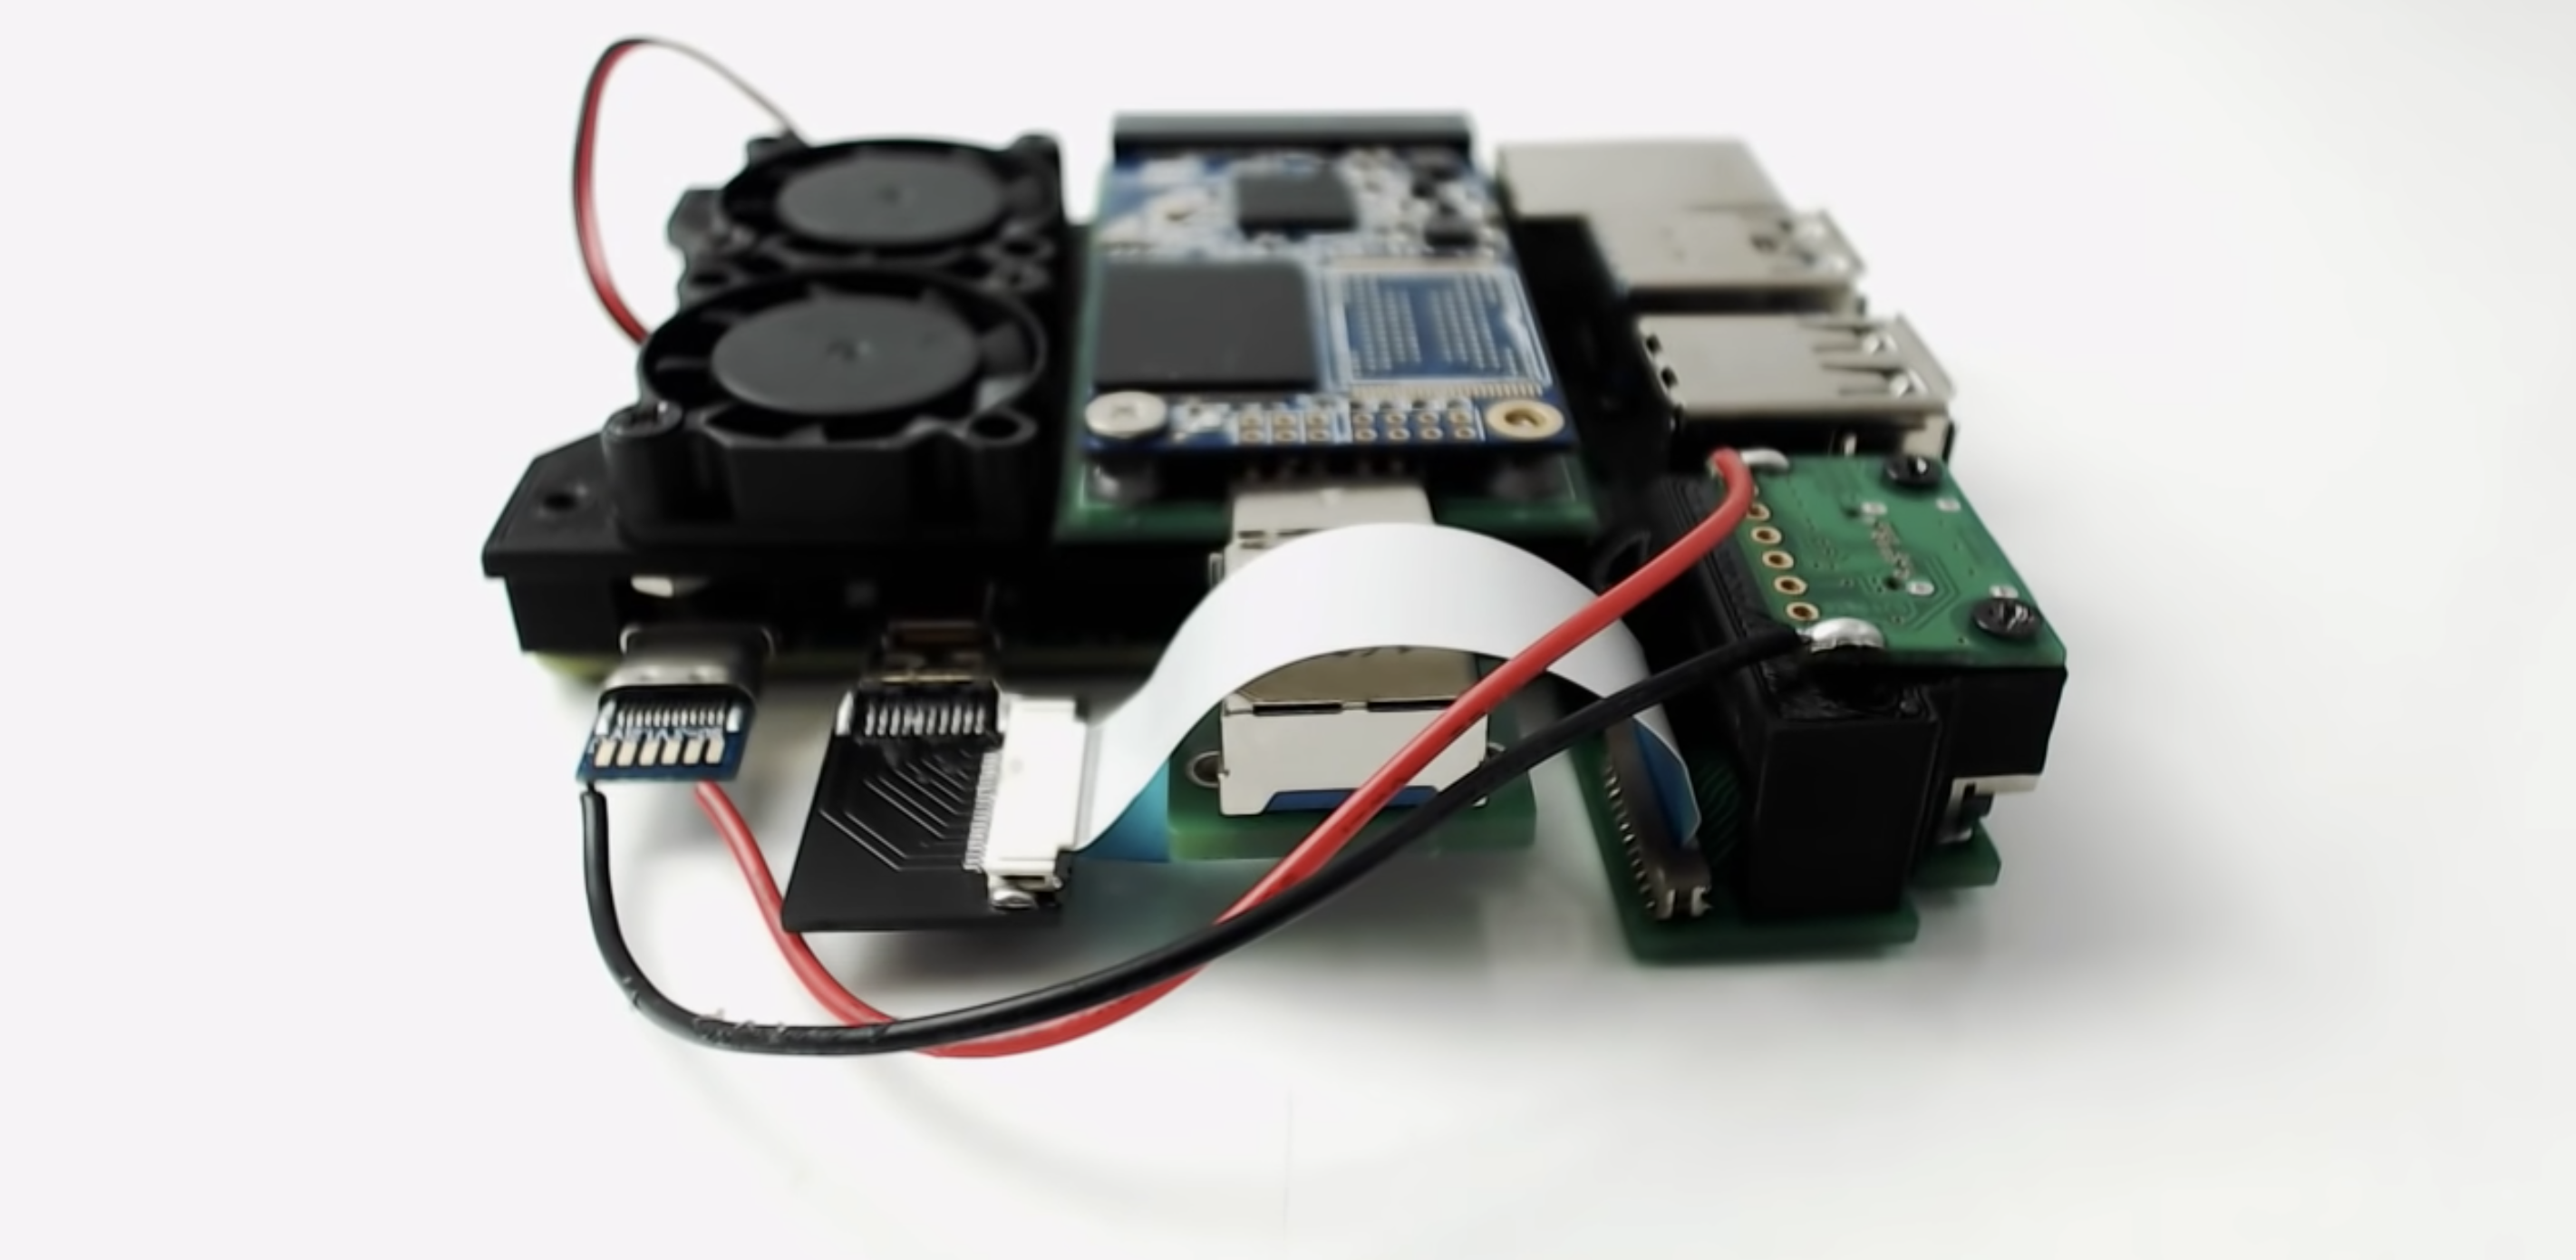
Another goal for version 3 NODE’s Mini Server was to include as much modularity as possible. That’s why this new mini server requires no modifications to the Raspberry Pi itself, thanks to a range of custom-designed adapter boards. How to take advantage of all these new features is explained at this point in NODE’s YouTube video.
Ooh, shiny and new and new and shiny
Just like for previous versions, all the files and a list of the components you need to create your own Mini Server are available for free on the NODE website.
Leave comments on NODE’s YouTube video if you’d like to create and sell your own Mini Server kits or pre-made servers. NODE is totally open to showcasing any add-ons or extras you come up with yourself.
Looking ahead, making the Mini Server stackable and improving fan circulation is next on NODE’s agenda.
By continuing to use the site, you agree to the use of cookies. more information
The cookie settings on this website are set to "allow cookies" to give you the best browsing experience possible. If you continue to use this website without changing your cookie settings or you click "Accept" below then you are consenting to this.