Post Syndicated from Michael Spence original https://aws.amazon.com/blogs/architecture/avoid-affecting-your-production-environment-during-migration-with-aws-application-migration-service/
Customers commonly use AWS Application Migration Service to migrate Active Directory joined Windows or Linux servers to Amazon Web Services (AWS). However, this process can affect the production environment during testing. For example, if you update DNS addresses during testing, clients that try to reach the original server will be redirected to the testing server.
To avoid this issue, you could launch instances in a completely isolated network environment. However, this may not be an option for you if your application stack depends on other applications or services.
In this post, we offer an architecture and process that can be applied to applications that cannot be completely isolated during testing. It uses Microsoft Domain Name System (DNS) Query Policies and a Group Policy and does not affect the production environment.
Overview of solution
Using a simple application stack of a WordPress site as an example, we’ll show you how to implement this solution. We’ll also discuss the prequisites required to implement this solution and describe potential domain issues you may encounter and how to solve them.
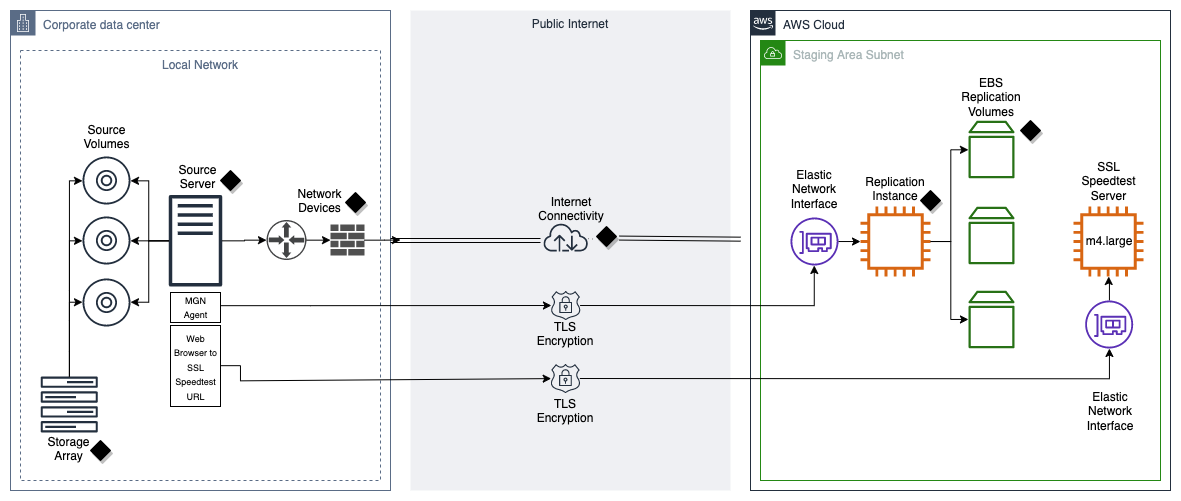
Figure 1 shows a view of the testing architecture on-premises and in AWS:
- It uses an Amazon Virtual Private Cloud (Amazon VPC) that was set up specifically for testing.
- Within this Amazon VPC, a management subnet that runs on Amazon Elastic Compute Cloud (Amazon EC2) contains the production environment’s self-managed domain controller. This domain controller provides authentication and DNS services to the instances launched during testing.
- The client that tests the application is located within the same private subnet as the applications being tested.

Figure 1. Testing architecture design
Prerequisites
To implement this solution, you will need:
- An AWS account
- Network connectivity between an on-premises server (or other cloud) and AWS
- Active Directory (Windows Server 2016 or later)
- Active Directory Integrated DNS
- Basic understanding of the following technologies:
- Application Migration Service
- EC2 launch templates
- Active Directory (Windows Version 2016, 2019, or 2022)
- Microsoft Group Policy
- Active Directory Integrated DNS
- Windows PowerShell
Potential domain issues and how to solve them
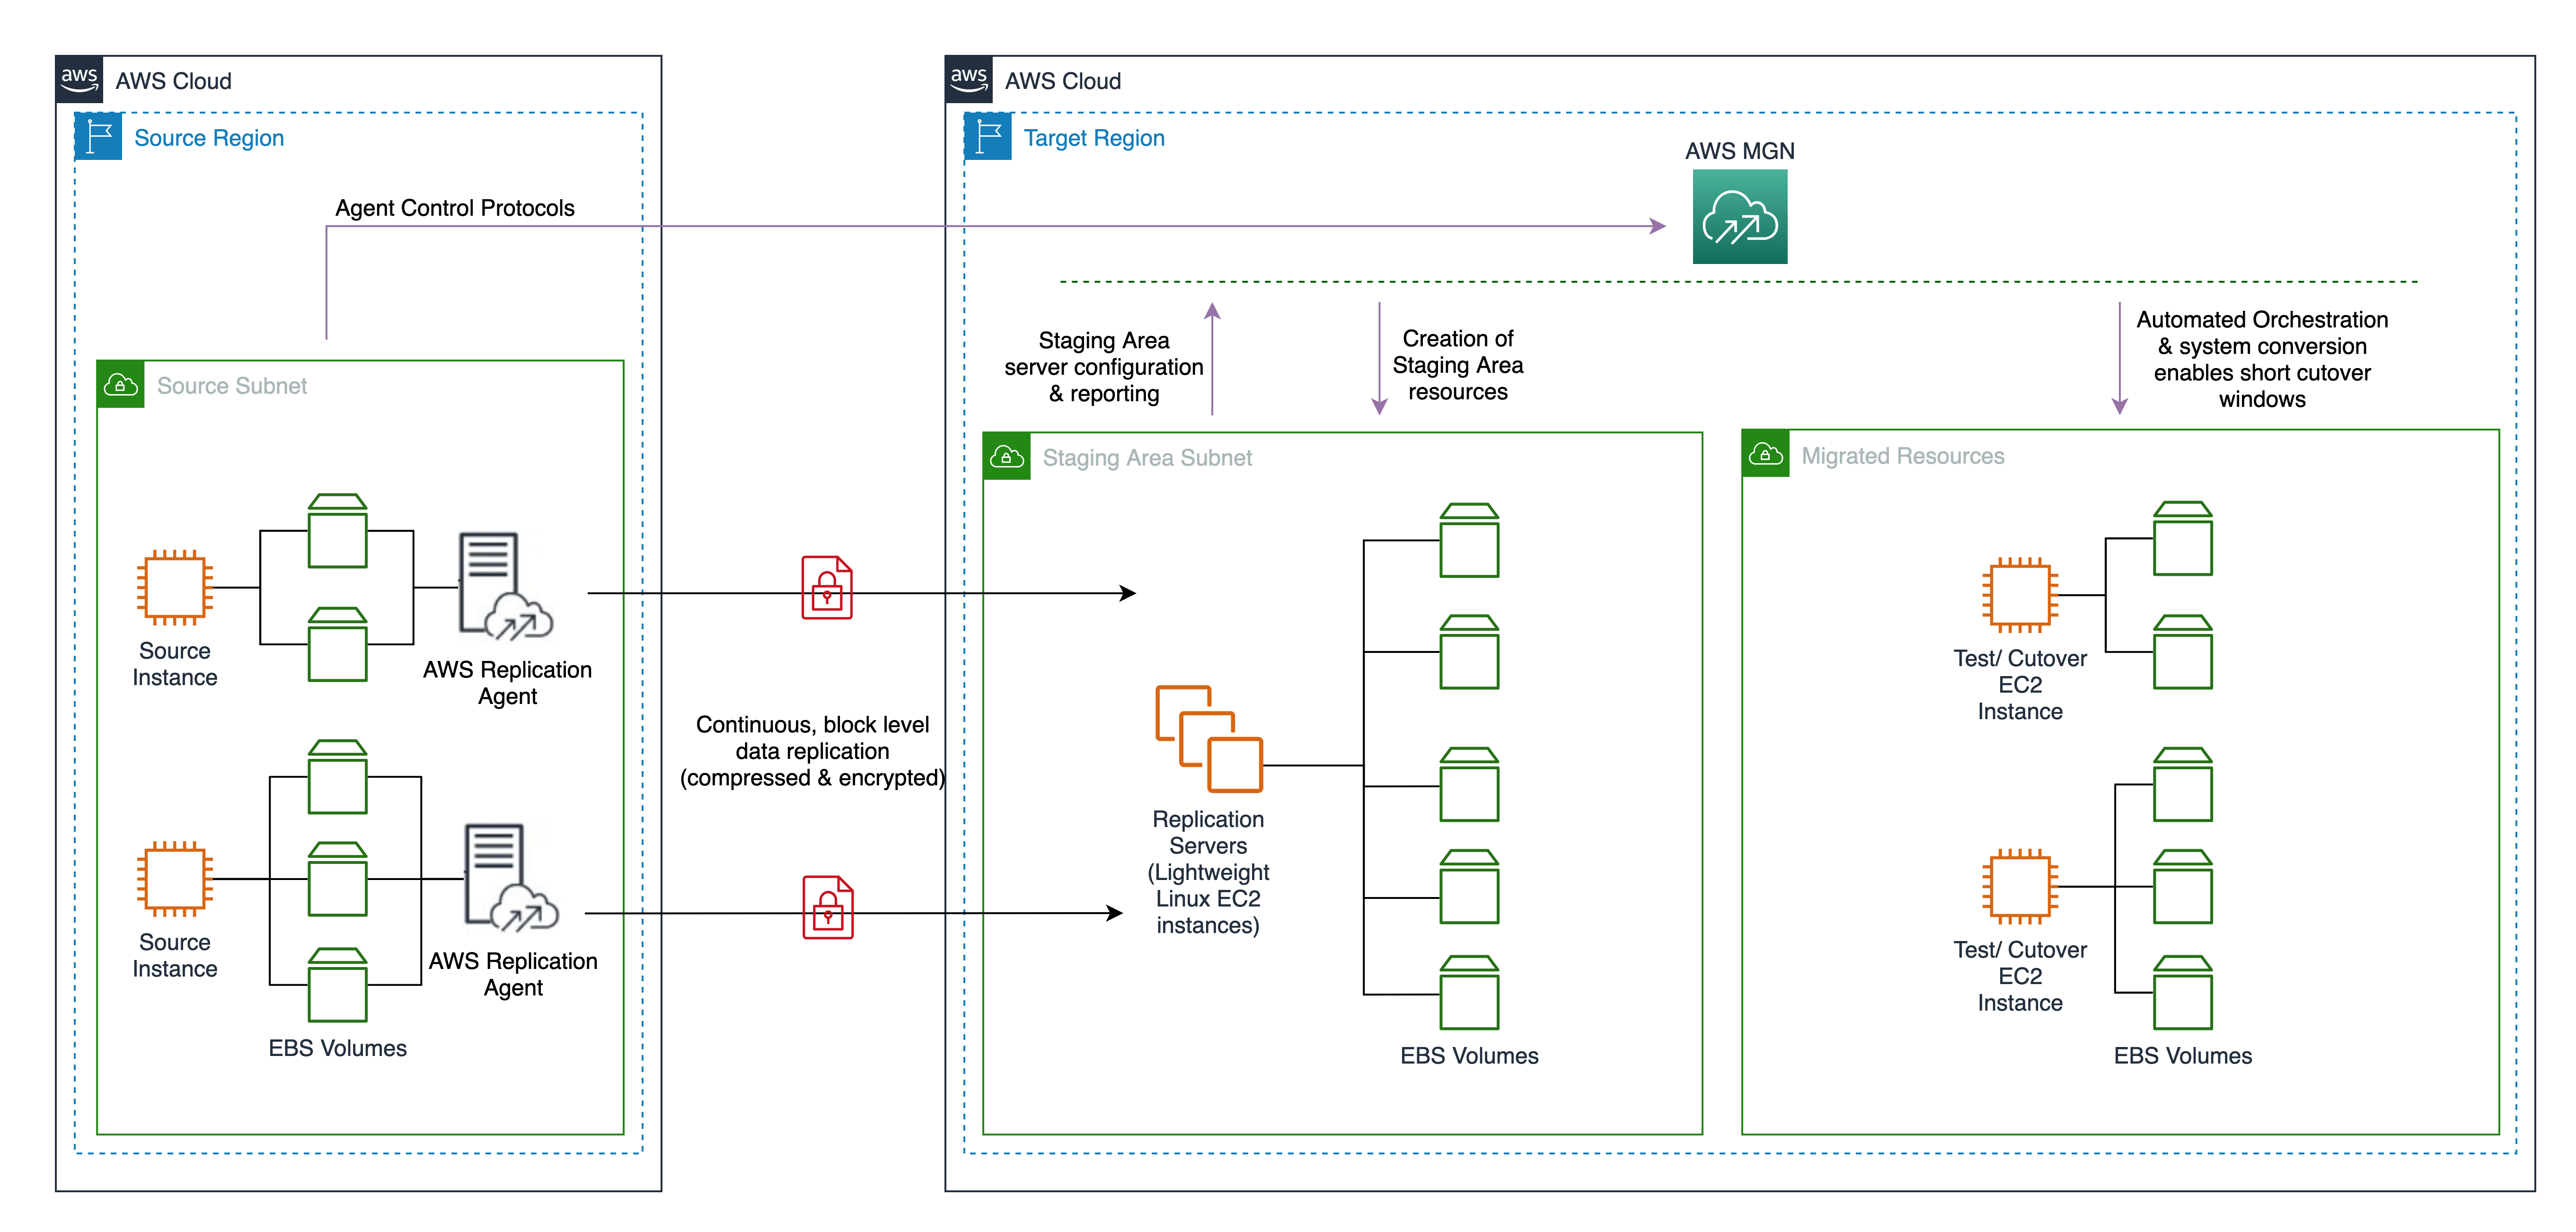
Application Migration Service is a block-level replication of the original source server, meaning that the replicated server is an exact copy of the original server. During testing, the original source server and the server that was launched for testing are active on the domain at the same time.
This has the potential to create these issues:
- Each server joined to an Active Directory domain has an associated computer object, and that object has a password. The server will change this password automatically every 30 days by default. If either server changes the password for that object, it will cause the other server to fail because it cannot establish a secure session with a domain controller.
- Active Directory supports dynamic DNS updates by allowing servers to register and dynamically update their resource records. If the replicated server updates DNS with a new IP address, that change can propagate to the rest of the environment. This means that clients trying to reach the original server will be redirected to the testing server, which will affect the production environment.
By creating a new Group Policy Object (GPO) with the following settings (and as shown in Figure 2), you can avoid these potential issues.
- Disable Machine Password Changes. Use reverse logic notation to enable the setting to disable the automatic password changes on the server.
- Disable Dynamic Updates from the DNS Client. This setting will prevent the server from updating DNS with a new IP address when you are testing it.
Apply this newly created GPO to the servers that are being migrated. The servers can be targeted for the policy by Active Directory security group, or you can move the servers to a separate organizational unit (OU) within Active Directory and apply the GPO to that OU.

Figure 2. GPO settings
After you apply GPO settings to the server being migrated, verify the GPO settings from an administrative command prompt:
C:\> gpupdate /force
C:\> gpresult /r /scope computer
Active Directory replication
You can disable outbound replication from the domain controller in the testing VPC while still allowing inbound replication. We intentionally configured the network configuration within the testing VPC to allow connectivity to on-premises and other networks.
To do this, issue the following command from an administrative command prompt with a domain administrator privileged user:
C:\> repadmin /options <Testing DC> +disable_outbound_repl
Example walkthrough
1. Example application description
Let’s look at a simple application stack of a WordPress site. It consists of a single web server and a single database server that are being migrated from on-premises to AWS. The WordPress stack could be Linux or Windows. The WordPress configuration on the web server points to the database by hostname only (not by IP address).
When the web server starts up during the testing phase, it issues a DNS query to find the database server by name. Note that we don’t want to return the IP address of the current production database server; we want the one currently being tested. When our workstation in the testing VPC opens up a browser to the WordPress site, we also want it to return the IP address of the web server being tested.
For reference, Table 1 reflects the IP addresses, network information, and URL used in the testing example.
Table 1. Example values for the testing scenario
| Testing Private Subnet CIDR |
10.0.67.0/24 |
| Domain Zone Name |
awslaunch.local |
| WordPress Site URL |
http://wswpweb1 |
| Hostname |
Original IP Address |
Testing IP Address |
| wswpweb1 |
10.0.4.171 |
10.0.67.171 |
| wswpsql1 |
10.0.4.202 |
10.0.67.202 |
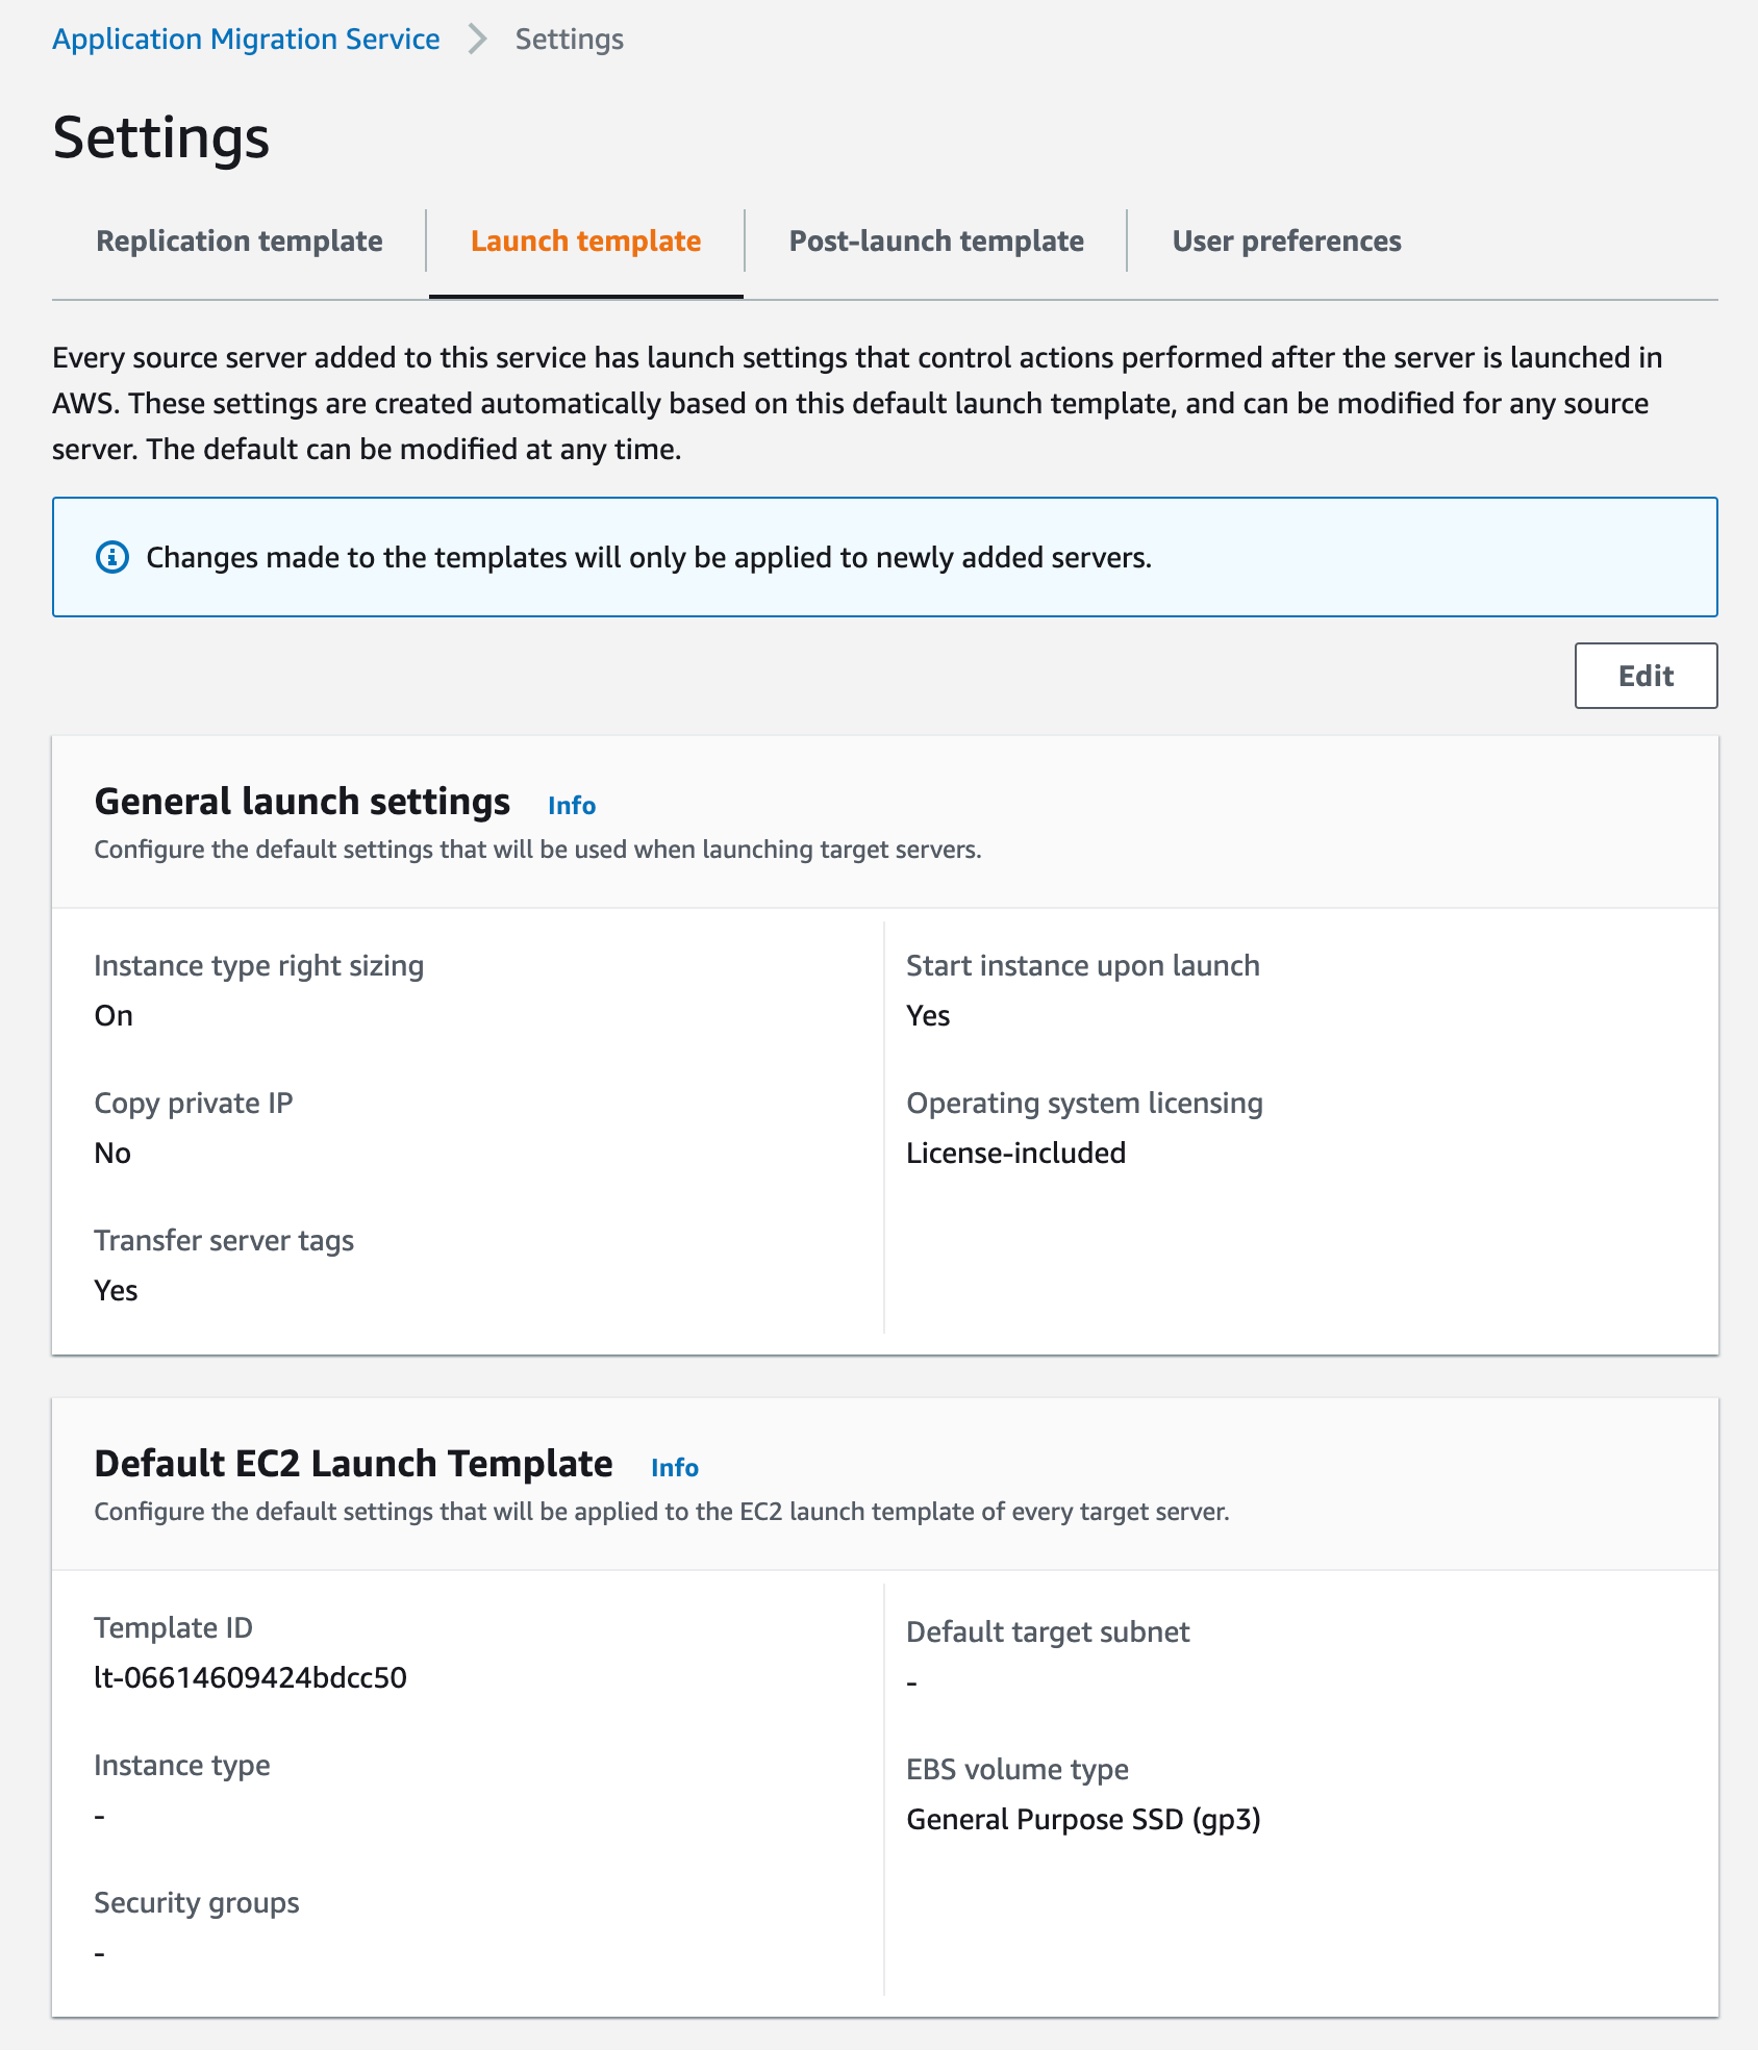
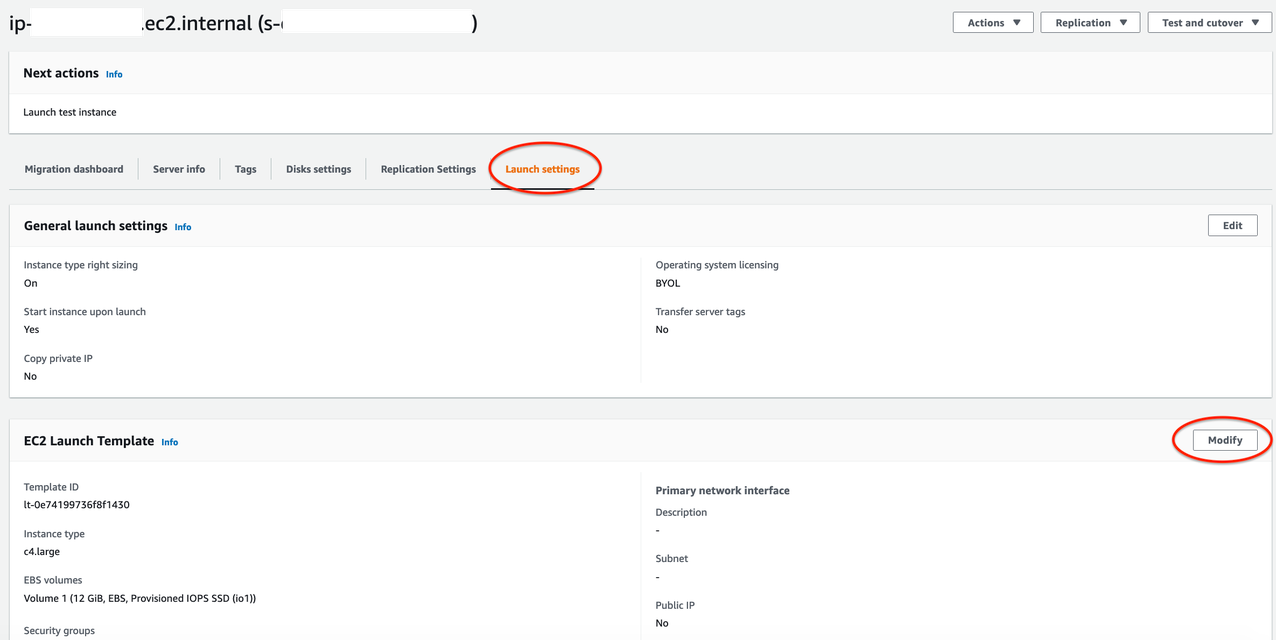
2. Modify EC2 launch templates
To ensure that we launch the EC2 instances with the IP addresses we specified in Table 1, let’s change the EC2 launch template associated with each of the source servers from within Application Migration Service. The EC2 launch template should specify the testing subnet and the IP address to be assigned to the test instances.

Figure 3. EC2 launch template settings
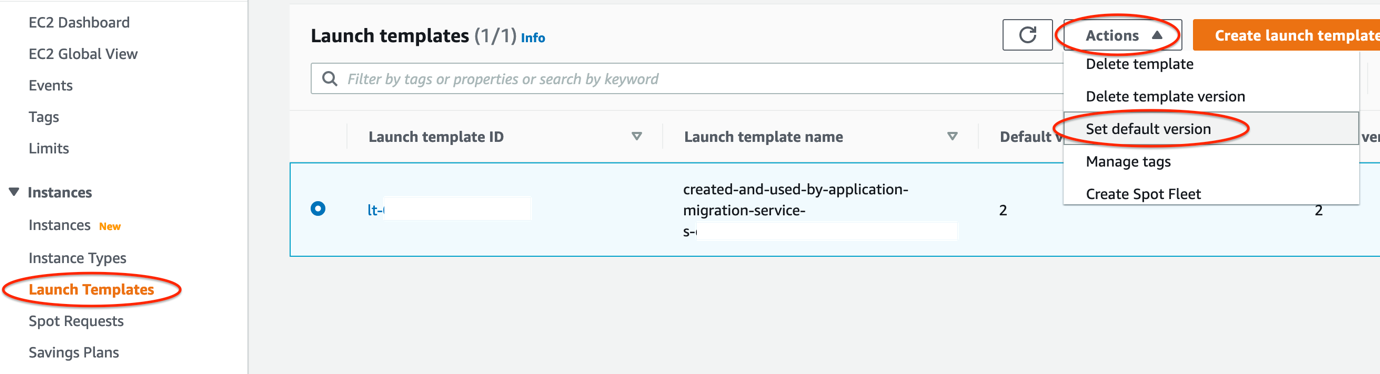
Once you’ve modified the EC2 launch template, be sure to set it as the “Default” template because this is the version of the template that Application Migration Service will launch upon testing.
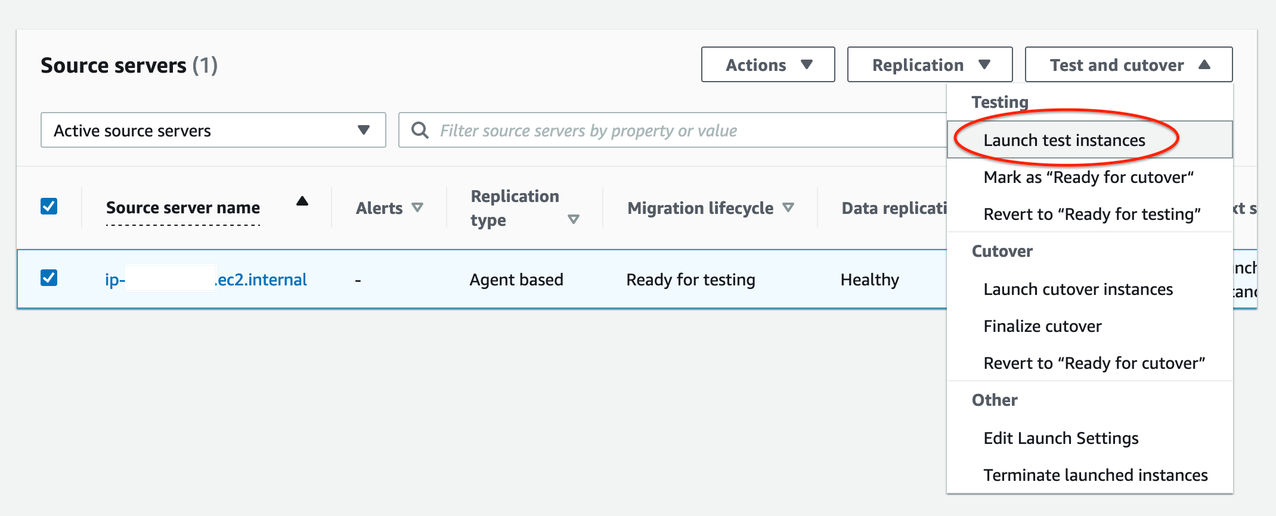
3. Create Microsoft DNS Query Policies
Now that we’ve launched the EC2 instances for testing, let’s set up DNS Query Policies for DNS to return an alternate set of IP addresses during the testing phase.
We’ll set these policies to return alternate IP addresses from DNS for the servers involved in testing and only within the boundary of the testing private subnet (Policy 3.4). By doing this, if any client outside of the testing private subnet queries this domain controller, it will return the original IP addresses and not the testing ones.
Because DNS Query Policies are specific to a specific domain controller, let’s issue the following PowerShell commands on the domain controller that is active in our testing VPC (AD-DC-2 in Figure 1) to create the following policies:
Policy 3.1 A client subnet that represents our private subnet in the testing VPC. This is a one-time configuration.
Add-DnsServerClientSubnet -Name
"MGN-Testing-AZ1" -IPv4Subnet "10.0.67.0/24"
Policy 3.2 A zone scope within the domain zone name. This is a one-time configuration.
Add-DnsServerZoneScope -ZoneName
"awslaunch.local" -Name "MGN-Testing-AZ1-Scope"
Policy 3.3 Alternative IP addresses in the new zone scope.
Add-DnsServerResourceRecord -ZoneName
"awslaunch.local" -A -Name "wswpweb1" -IPv4Address
"10.0.67.171" -ZoneScope "MGN-Testing-AZ1-Scope"
Add-DnsServerResourceRecord -ZoneName
"awslaunch.local" -A -Name "wswpsql1" -IPv4Address
"10.0.67.202" -ZoneScope "MGN-Testing-AZ1-Scope"
Policy 3.4 A query resolution policy that returns alternate IP addresses for our testing servers without impacting the rest of the domain.
Add-DnsServerQueryResolutionPolicy -Name
"MGN-Testing-AZ1-Policy" -Action ALLOW -FQDN "eq,wswpweb1.awslaunch.local,wswpsql1.awslaunch.local"
-ClientSubnet "eq,MGN-Testing-AZ1" -ZoneScope
"MGN-Testing-AZ1-Scope,1" -ZoneName "awslaunch.local"
4. Verify current production IP addresses
Now that we have our policies set, let’s make sure that the application stack IP addresses are still returning correctly from the current production environment with the following command:
C:\>nslookup wswpweb1
Server: WSDC1.awslaunch.local
Address: 10.0.5.10
Name: wswpweb1.awslaunch.local
Address: 10.0.4.171
C:\>nslookup wswpsql1
Server: WSDC1.awslaunch.local
Address: 10.0.5.10
Name: wswpsql1.awslaunch.local
Address: 10.0.4.202
These are the correct IP addresses. They match the original IP addresses from Table 1.
5. Verify testing IP addresses
Now let’s verify that the application stack IP addresses are returning correctly from the testing environment.
C:\>nslookup wswpweb1
Server: WSDC5.awslaunch.local
Address: 10.0.69.10
Name: wswpweb1.awslaunch.local
Address: 10.0.67.171
C:\>nslookup wswpsql1
Server: WSDC5.awslaunch.local
Address: 10.0.69.10
Name: wswpsql1.awslaunch.local
Address: 10.0.67.202
There are the correct addresses. They match the testing IP addresses from Table 1.
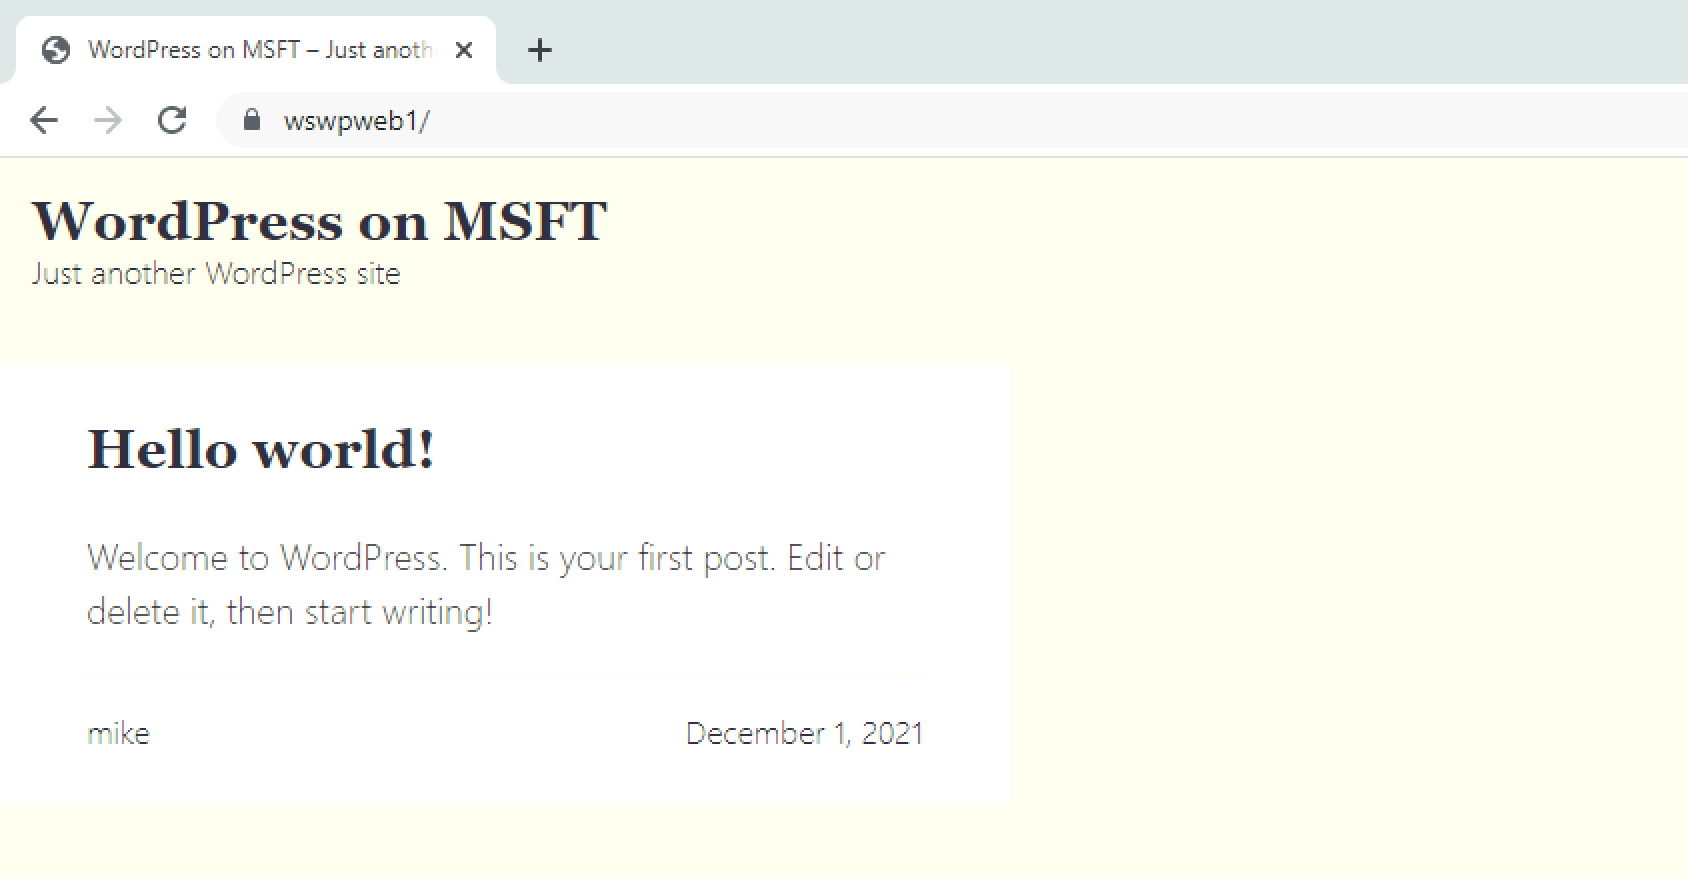
We can also verify that the WordPress site is functional by opening a browser from our testing client and browsing to the URL (https://wswpweb1, listed in Table 1).

Figure 4. WordPress site verification
Additionally, we can verify that the web server is connecting to the correct SQL server database by issuing the following command when logged into the WordPress web server:
C:\ >netstat | findstr /c:"ms-sql-s"
TCP 10.0.67.171:50355 10.0.67.202:ms-sql-s TIME_WAIT
TCP 10.0.67.171:50361
10.0.67.202:ms-sql-s
TIME_WAIT
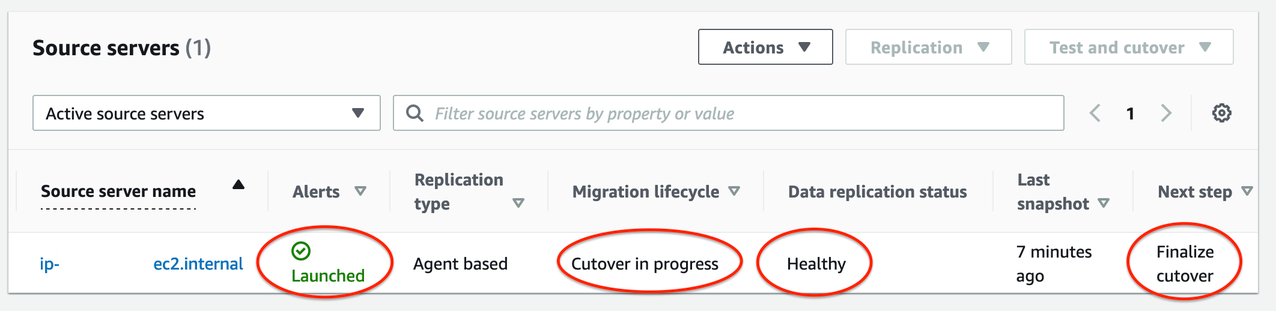
6. Cleanup
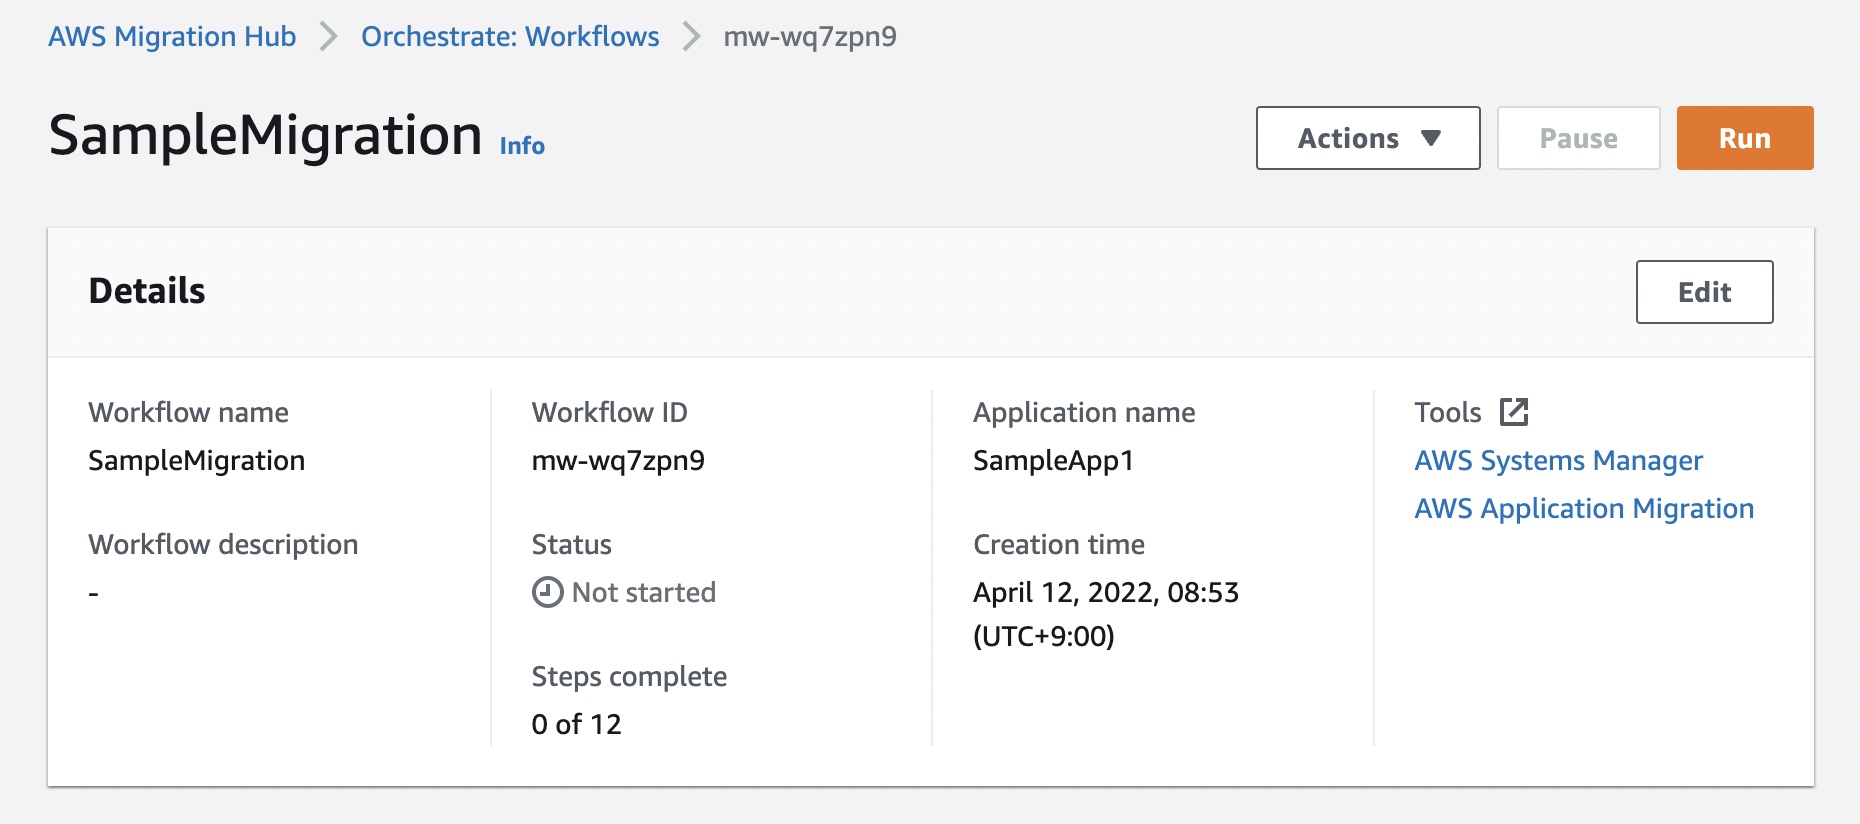
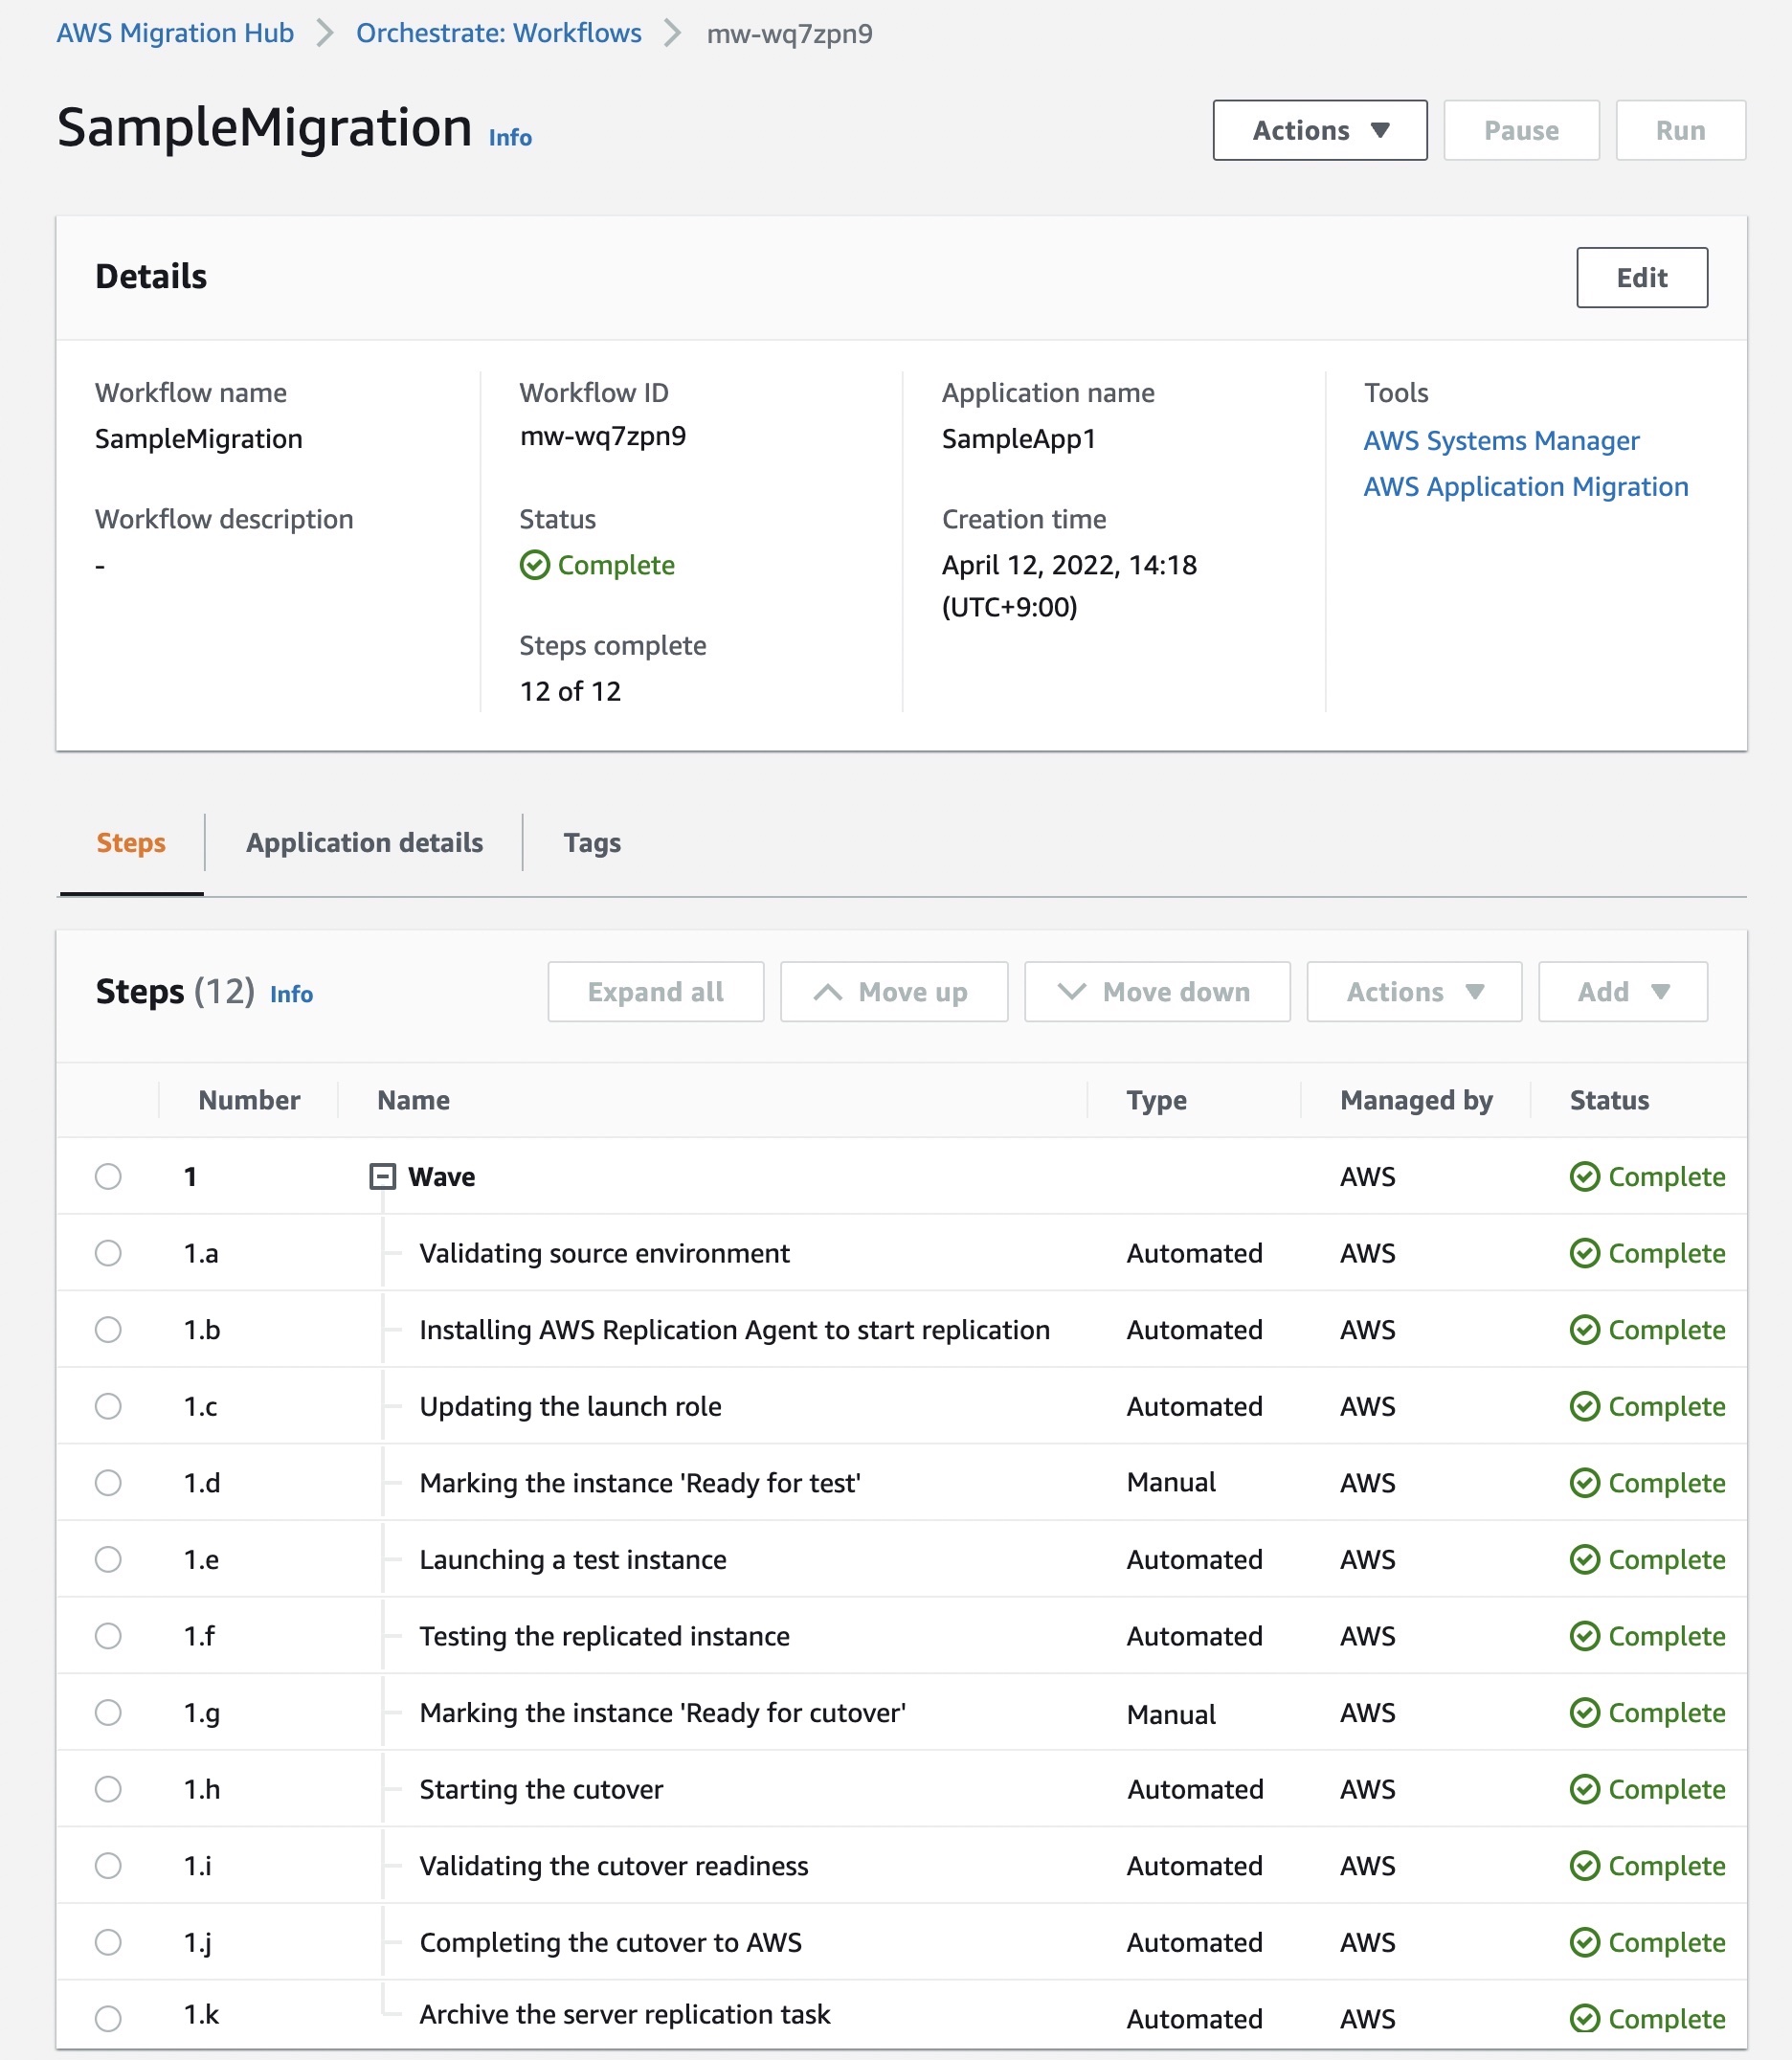
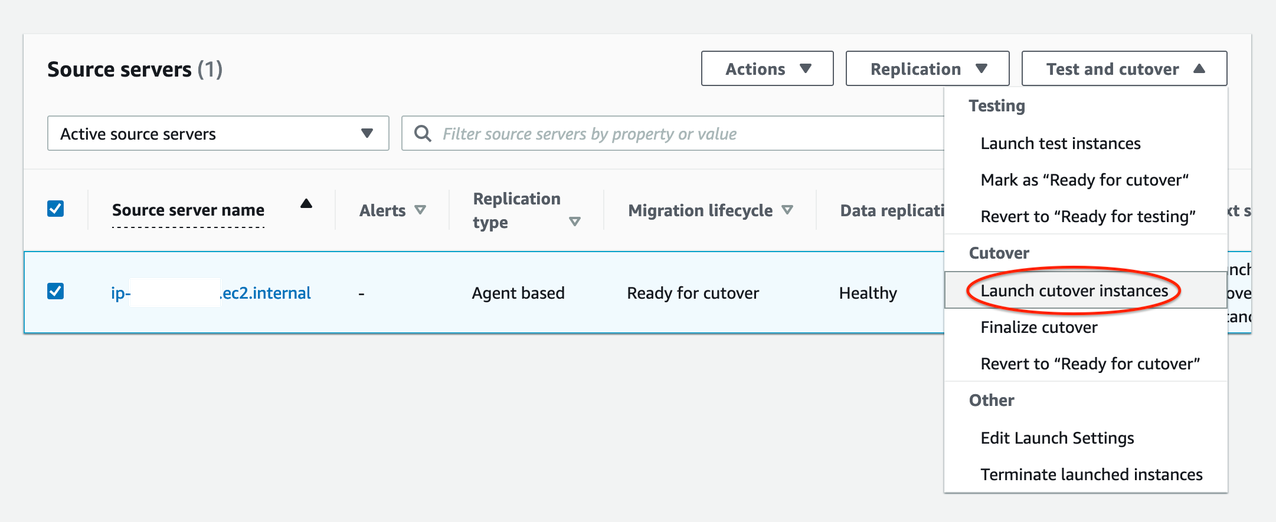
After you’ve tested everything, mark the source servers in Application Migration Service as “Ready for Cutover.” This will terminate the EC2 testing instances.
The following PowerShell commands will remove the DNS resource records and the DNS Query Policy:
Remove-DnsServerResourceRecord -ZoneName
"awslaunch.local" -ZoneScope "MGN-Testing-AZ1-Scope"
-RRType "A" -Name "wswpweb1"
Remove-DnsServerResourceRecord -ZoneName
"awslaunch.local" -ZoneScope "MGN-Testing-AZ1-Scope"
-RRType "A" -Name "wswpsql1"
Remove-DnsServerQueryResolutionPolicy -Name
"MGN-Testing-AZ1-Policy" -ZoneName "awslaunch.local"
This command will re-enable replication from the testing domain controller.
C:\> repadmin /options <Testing DC>
-disable_outbound_repl
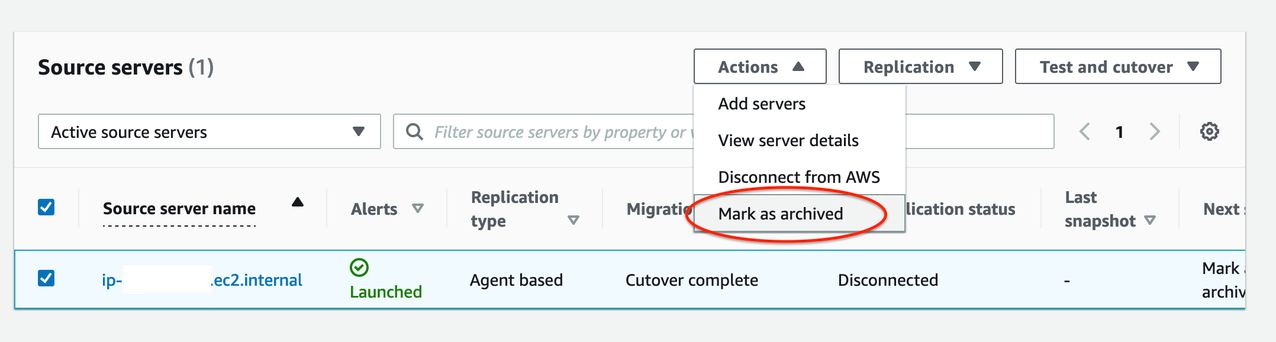
Once the servers are launched for final cutover, you can remove the Group Policy applied to the servers to allow the server to resume password changes and dynamic DNS updates.
Conclusion
When you migrate your server resources to AWS with Application Migration Service, the testing phase of the migration lifecycle is critical. It verifies that your application will function properly within the AWS environment before committing to a final cutover. The testing phase can uncover unexpected application dependencies, gauge application performance, and deliver the confidence that your migration to AWS will be successful without risks to your production environment.
In this blog post, we explored an architecture and process that uses Microsoft DNS Query Policies and Group Policy to address potential domain issues and avoids affecting the production environment. This testing framework persists during the entire cloud migration and across multiple application migrations. Once migration is complete, the testing architecture can be removed or maintained for future cloud migrations.
Ready to get started? Read more about the AWS Application Migration Service and other blog posts related to migrations on the AWS Cloud Enterprise Strategy Blog and the AWS Architecture Blog.
Looking for more architecture content? AWS Architecture Center provides reference architecture diagrams, vetted architecture solutions, Well-Architected best practices, patterns, icons, and more!