Post Syndicated from Betty Zheng (郑予彬) original https://aws.amazon.com/blogs/aws/aws-transfer-family-sftp-connectors-now-support-vpc-based-connectivity/
Many organizations rely on the Secure File Transfer Protocol (SFTP) as the industry standard for exchanging critical business data. Traditionally, securely connecting to private SFTP servers required custom infrastructure, manual scripting, or exposing endpoints to the public internet.
Today, AWS Transfer Family SFTP connectors now support connectivity to remote SFTP servers through Amazon Virtual Private Cloud (Amazon VPC) environments. You can transfer files between Amazon Simple Storage Service (Amazon S3) and private or public SFTP servers while applying the security controls and network configurations already defined in your VPC. This capability helps you integrate data sources across on-premises environments, partner-hosted private servers, or internet-facing endpoints, with the operational simplicity of a fully managed Amazon Web Services (AWS) service.
New capabilities with SFTP connectors
The following are the key enhancements:
- Connect to private SFTP servers – SFTP connectors can now reach endpoints that are only accessible within your AWS VPC connection. These include servers hosted in your VPC or a shared VPC, on-premises systems connected over AWS Direct Connect, and partner-hosted servers connected through VPN tunnels.
- Security and compliance – All file transfers are routed through the security controls already applied in your VPC, such as AWS Network Firewall or centralized ingress and egress inspection. Private SFTP servers remain private and don’t need to be exposed to the internet. You can also present static Elastic IP or bring your own IP (BYOIP) addresses to meet partner allowlist requirements.
- Performance and simplicity – By using your own network resources such as NAT gateways, AWS Direct Connect or VPN connections, connectors can take advantage of higher bandwidth capacity for large-scale transfers. You can configure connectors in minutes through the AWS Management Console, AWS Command Line Interface (AWS CLI), or AWS SDKs without building custom scripts or third-party tools.
How VPC- based SFTP connections work
SFTP connectors use Amazon VPC Lattice resources to establish secure connectivity through your VPC. Key constructs include a resource configuration and a resource gateway. The resource configuration represents the target SFTP server, which you specify using a private IP address or public DNS name. The resource gateway provides SFTP connector access to these configurations, enabling file transfers to flow through your VPC and its security controls.
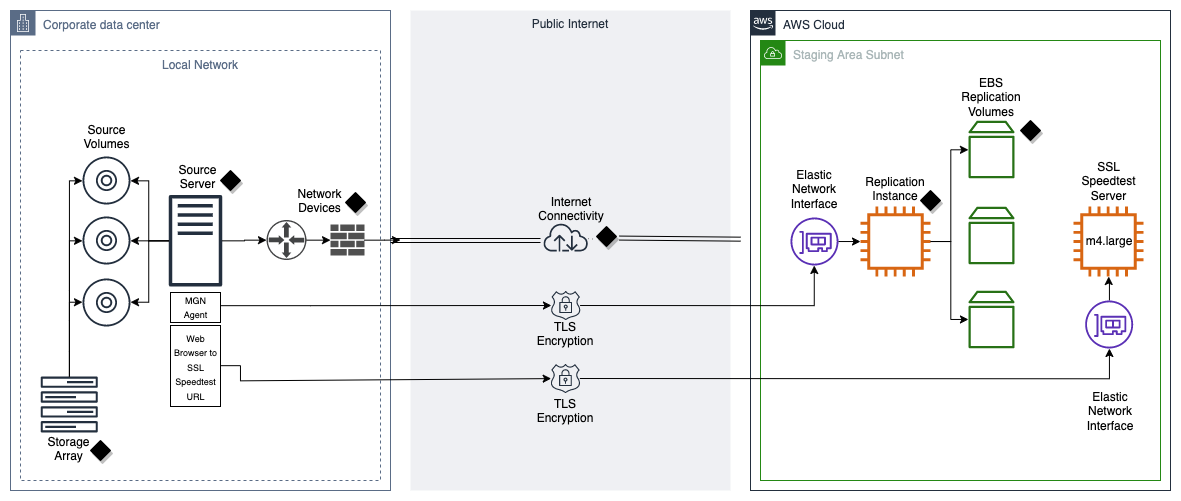
The following architecture diagram illustrates how traffic flows between Amazon S3 and remote SFTP servers. 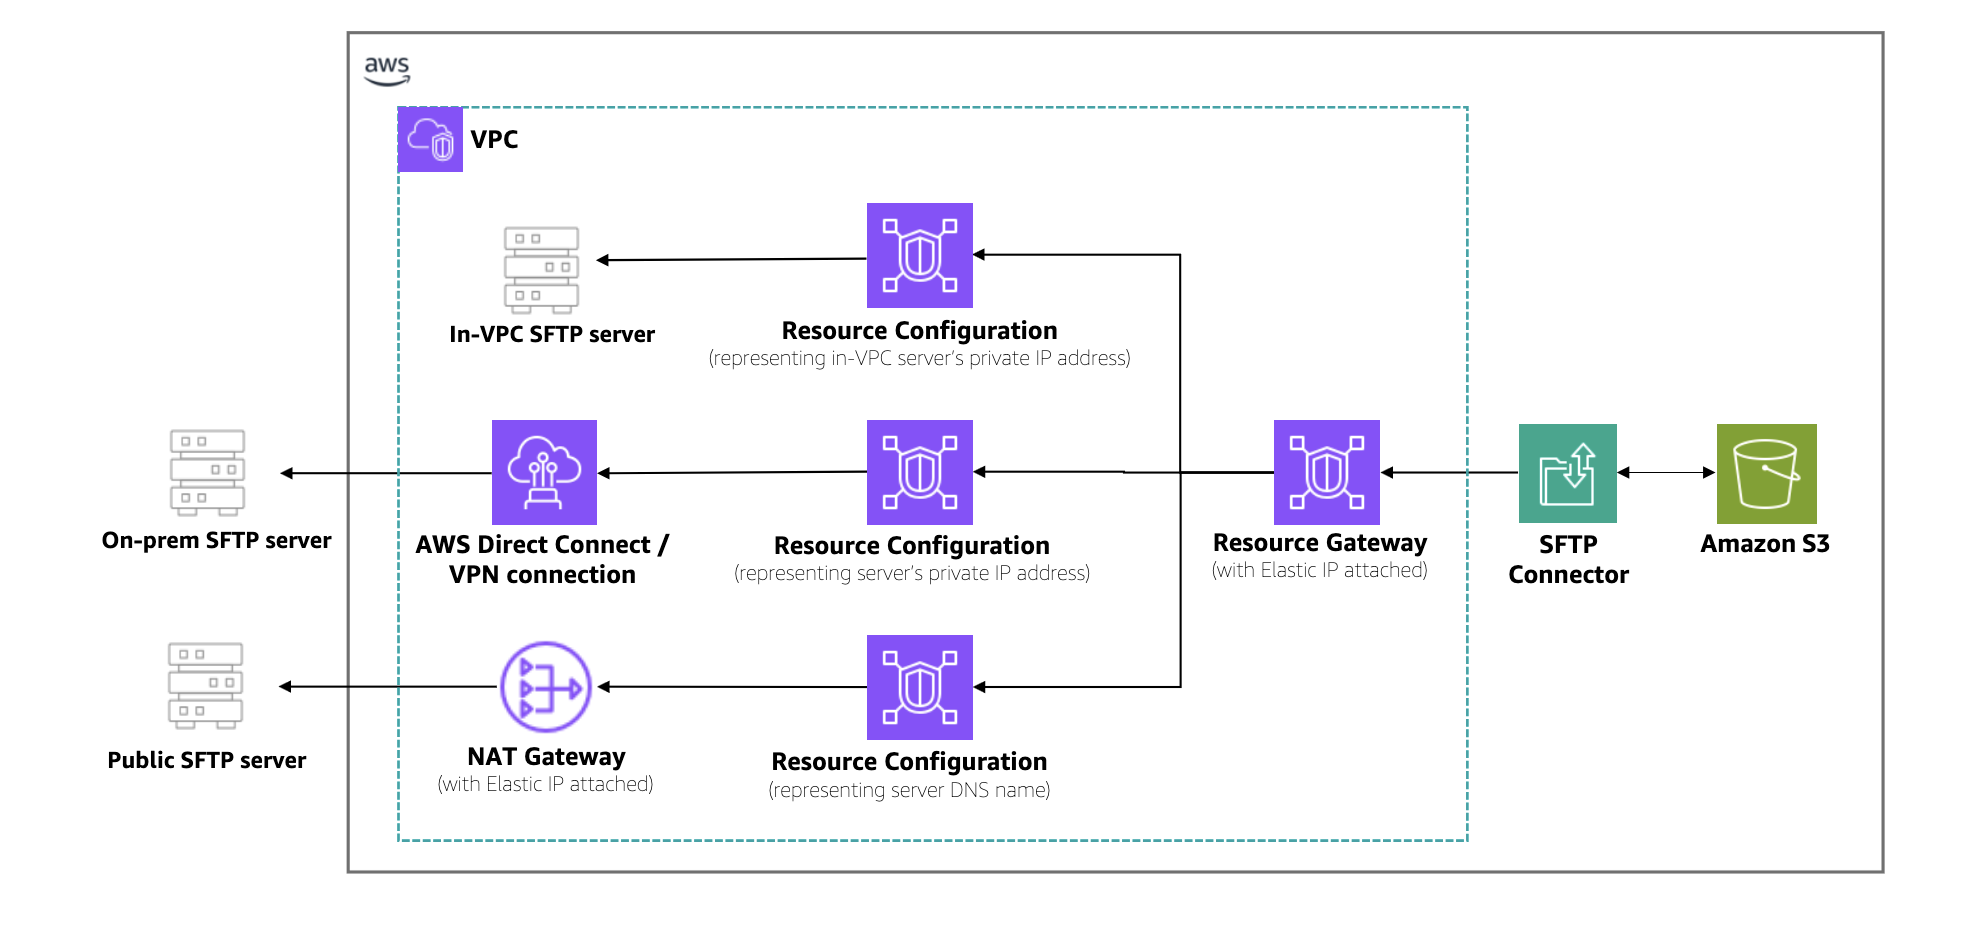 As shown in the architecture, traffic flows from Amazon S3 through the SFTP connector into your VPC. A resource gateway is the entry point that handles inbound connections from the connector to your VPC resources. Outbound traffic is routed through your configured egress path, using Amazon VPC NAT gateways with Elastic IPs for public servers or AWS Direct Connect and VPN connections for private servers. You can use existing IP addresses from your VPC CIDR range, simplifying partner server allowlists. Centralized firewalls in the VPC enforce security policies, and customer-owned NAT gateways provide higher bandwidth for large-scale transfers.
When to use this feature
With this capability, developers and IT administrators can simplify workflows while meeting security and compliance requirements across a range of scenarios:
- Hybrid environments – Transfer files between Amazon S3 and on-premises SFTP servers using AWS Direct Connect or AWS Site-to-Site VPN, without exposing endpoints to the internet.
- Partner integrations – Connect with business partners’ SFTP servers that are only accessible through private VPN tunnels or shared VPCs. This avoids building custom scripts or managing third-party tools, reducing operational complexity.
- Regulated industries – Route file transfers through centralized firewalls and inspection points in VPCs to comply with financial services, government, or healthcare security requirements.
- High-throughput transfers – Use your own network configurations such as NAT gateways, AWS Direct Connect, or VPN connections with Elastic IP or BYOIP to handle large-scale, high-bandwidth transfers while retaining IP addresses already on partner allowlists.
- Unified file transfer solution – Standardize on Transfer Family for both internal and external SFTP connectivity, reducing fragmentation across file transfer tools.
Start building with SFTP connectors
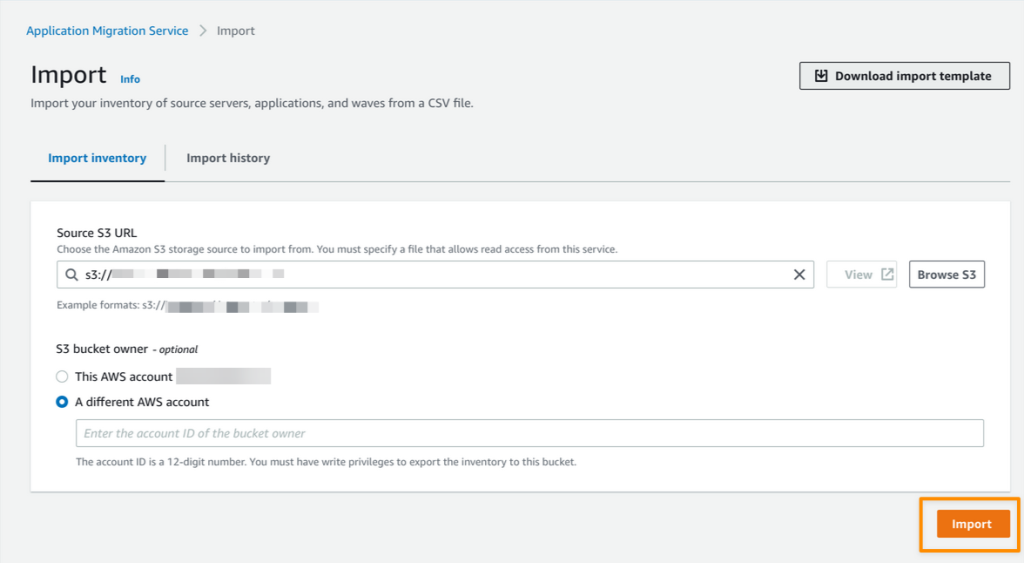
To begin transferring files with SFTP connectors through my VPC environment, I follow these steps:
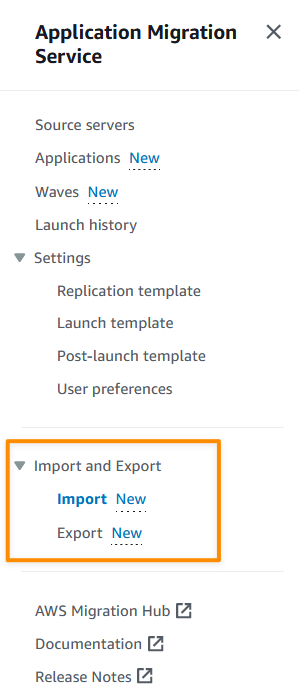
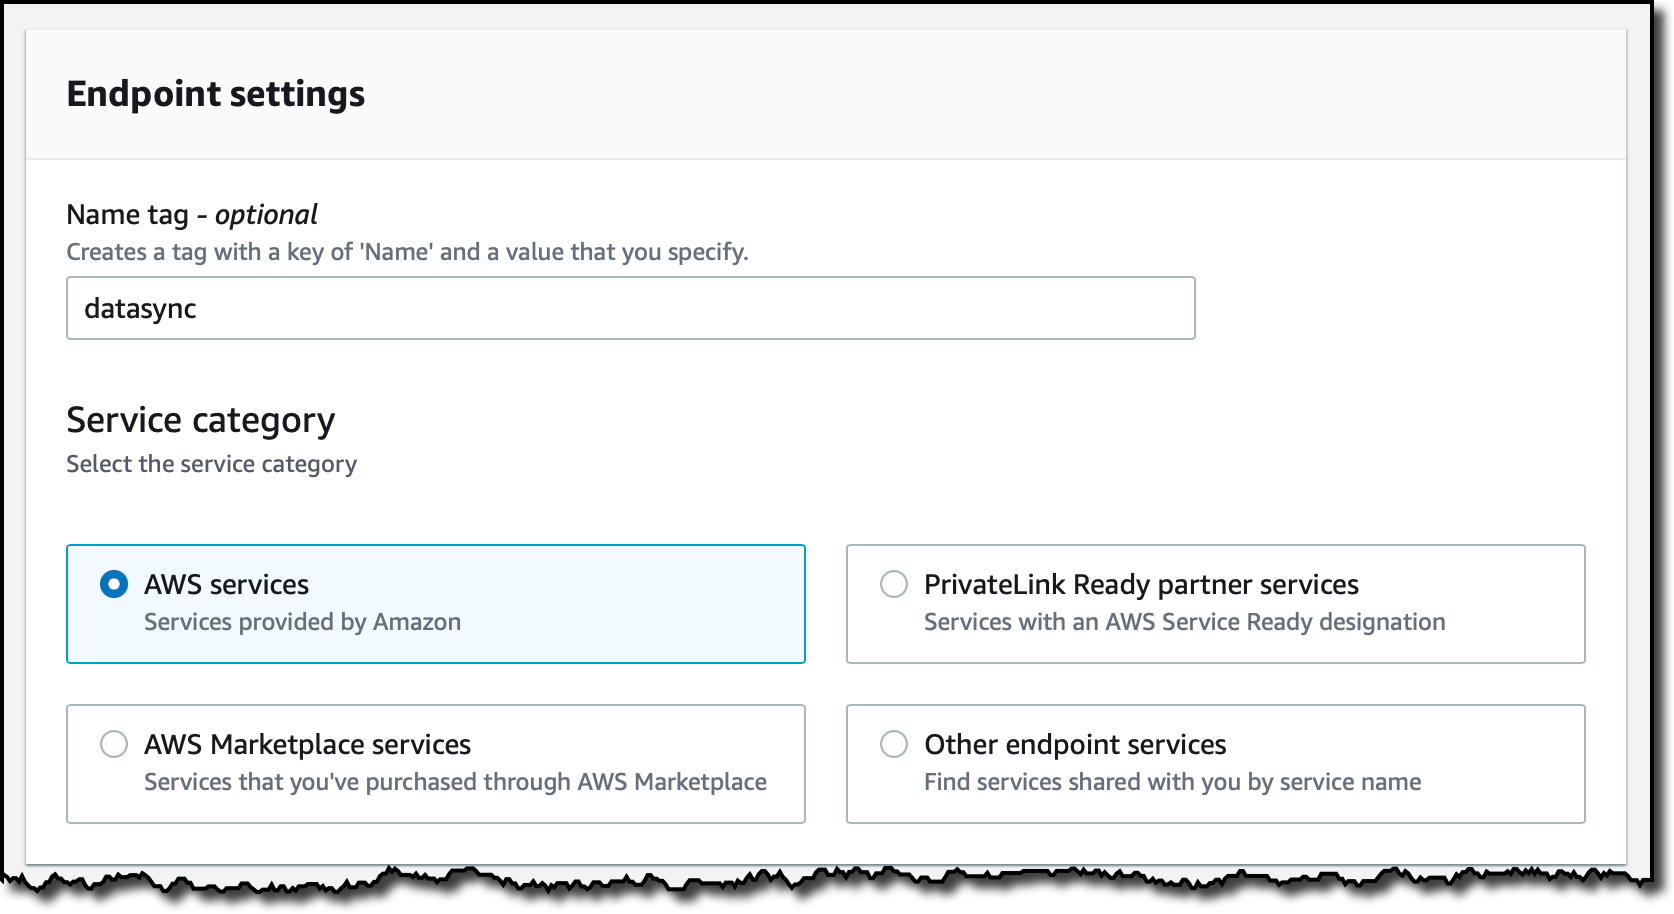
First, I configure my VPC Lattice resources. In the Amazon VPC console, under PrivateLink and Lattice in the navigation pane, I choose Resource gateways, choose Create resource gateway to create one to act as the ingress point into my VPC.  Next, under PrivateLink and Lattice in the navigation pane, I choose Resource configuration and choose Create resource configuration to create a resource configuration for my target SFTP server. Specify the private IP address or public DNS name, and the port (typically 22).
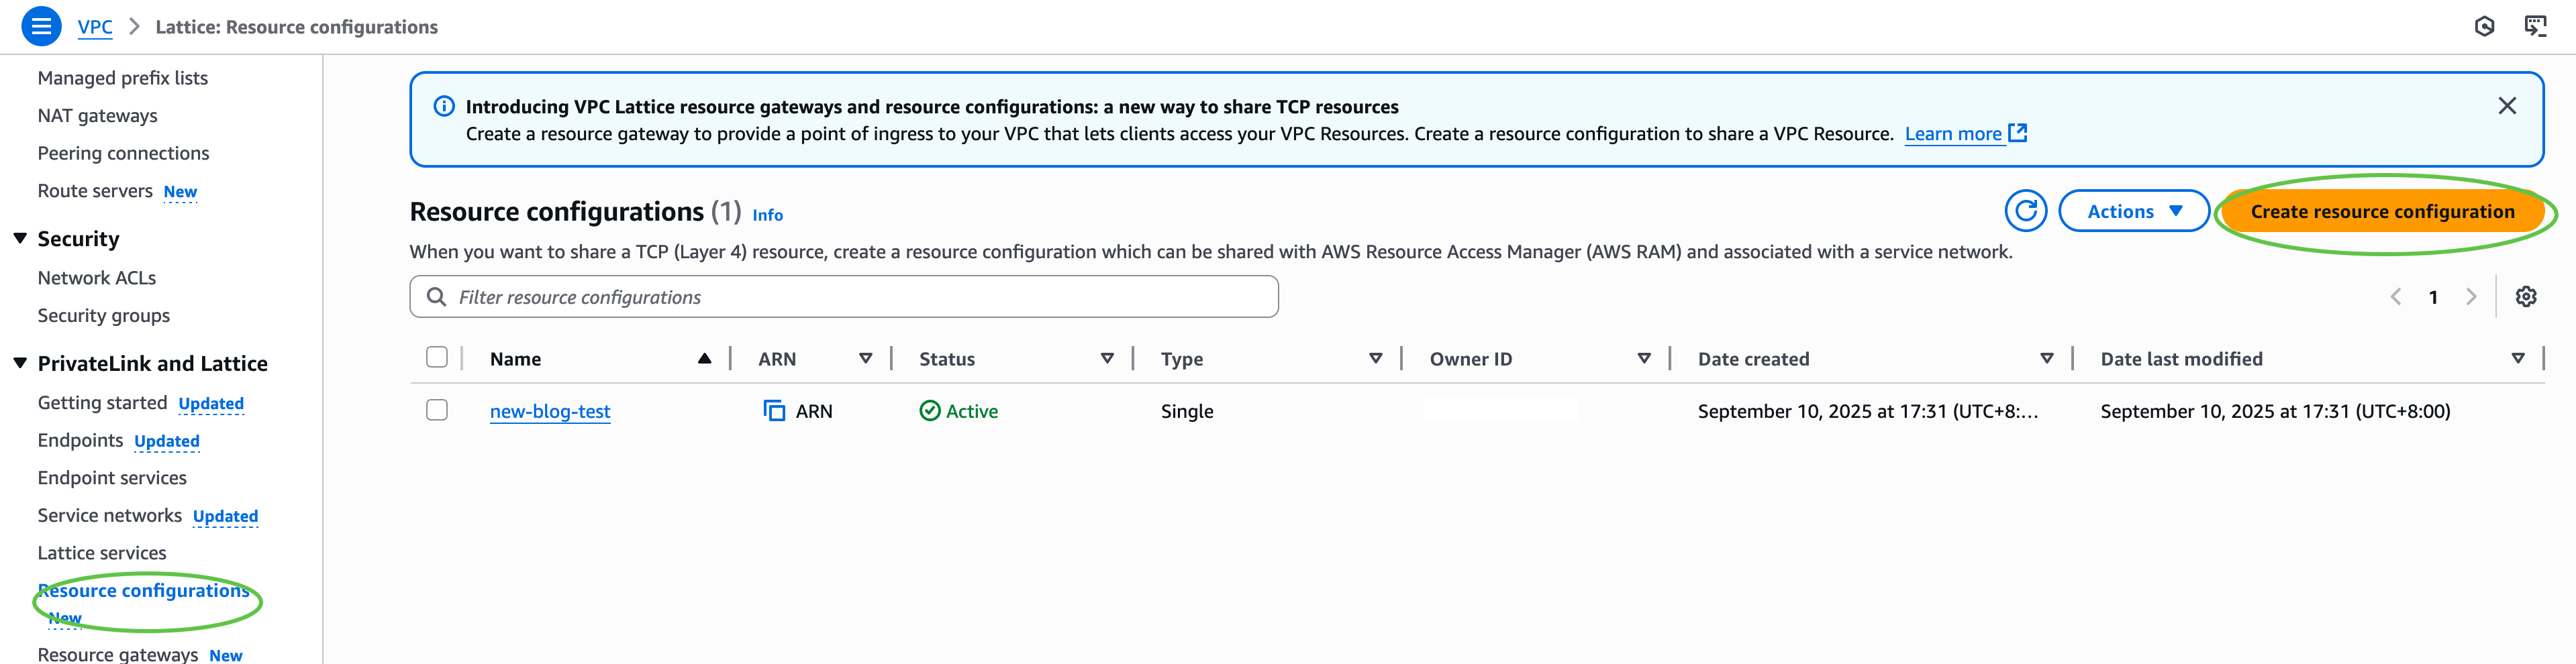
Then, I configure AWS Identity and Access Management (IAM) permissions. I ensure that the IAM role used for connector creation has transfer:* permissions, and VPC Lattice permissions (vpc-lattice:CreateServiceNetworkResourceAssociation, vpc-lattice:GetResourceConfiguration, vpc-lattice:AssociateViaAWSService). I update the trust policy on the IAM role to specify transfer.amazonaws.com as a trusted principal. This enables AWS Transfer Family to assume the role when creating and managing my SFTP connectors.
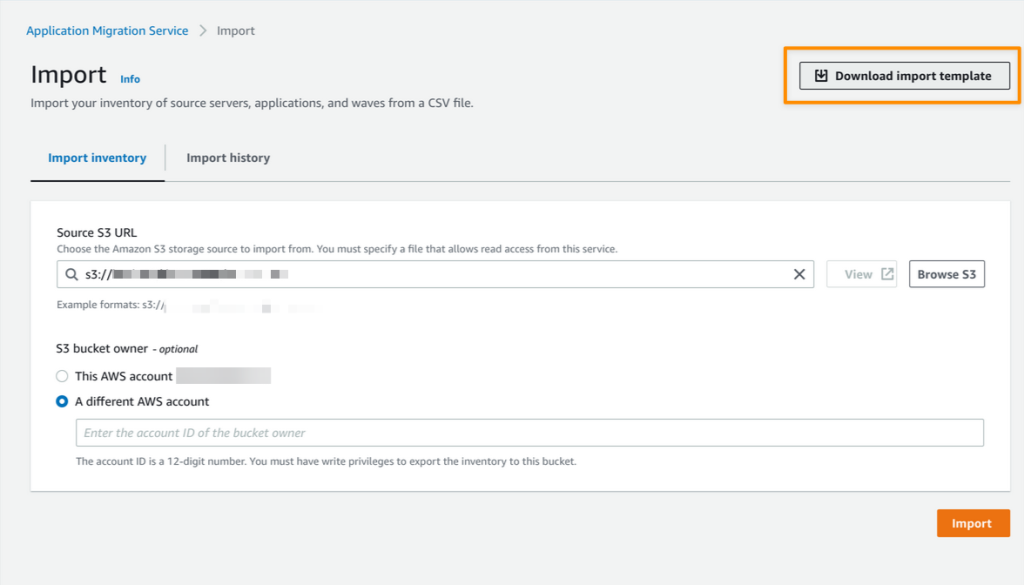
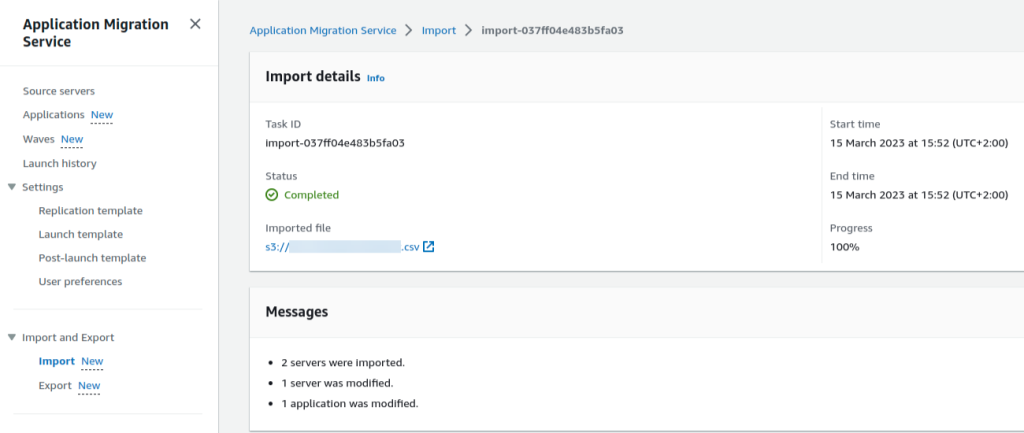
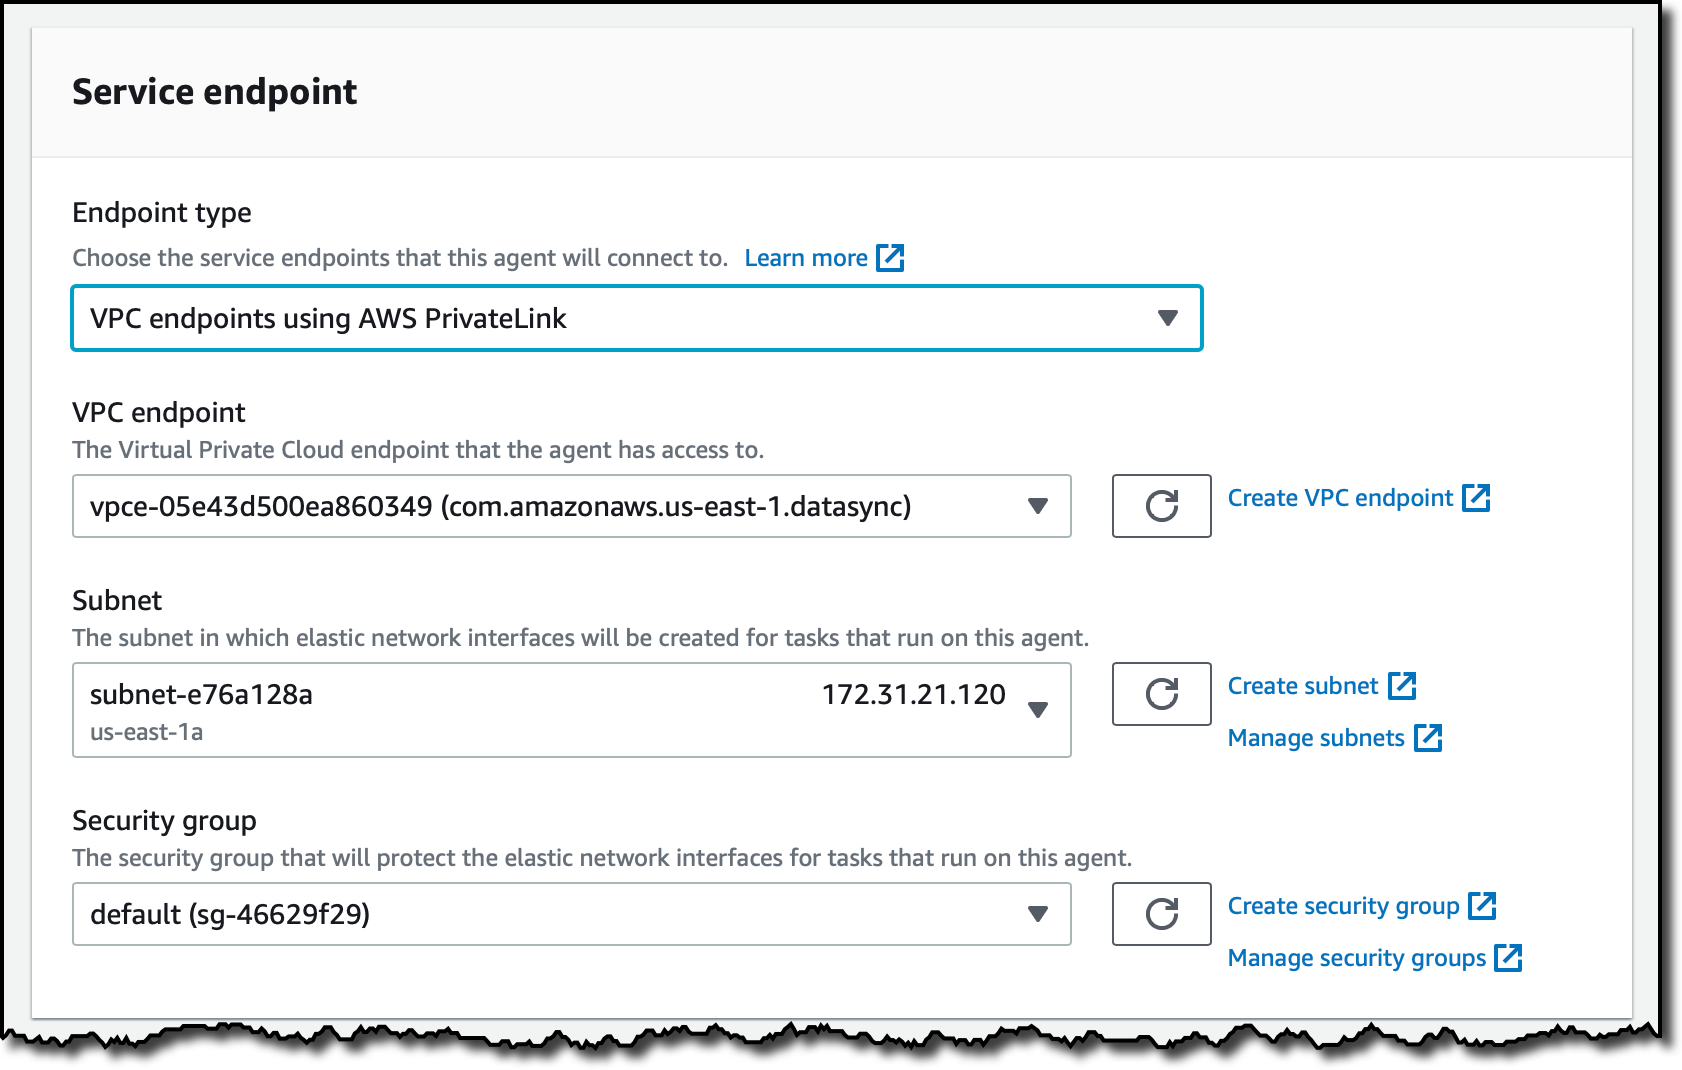
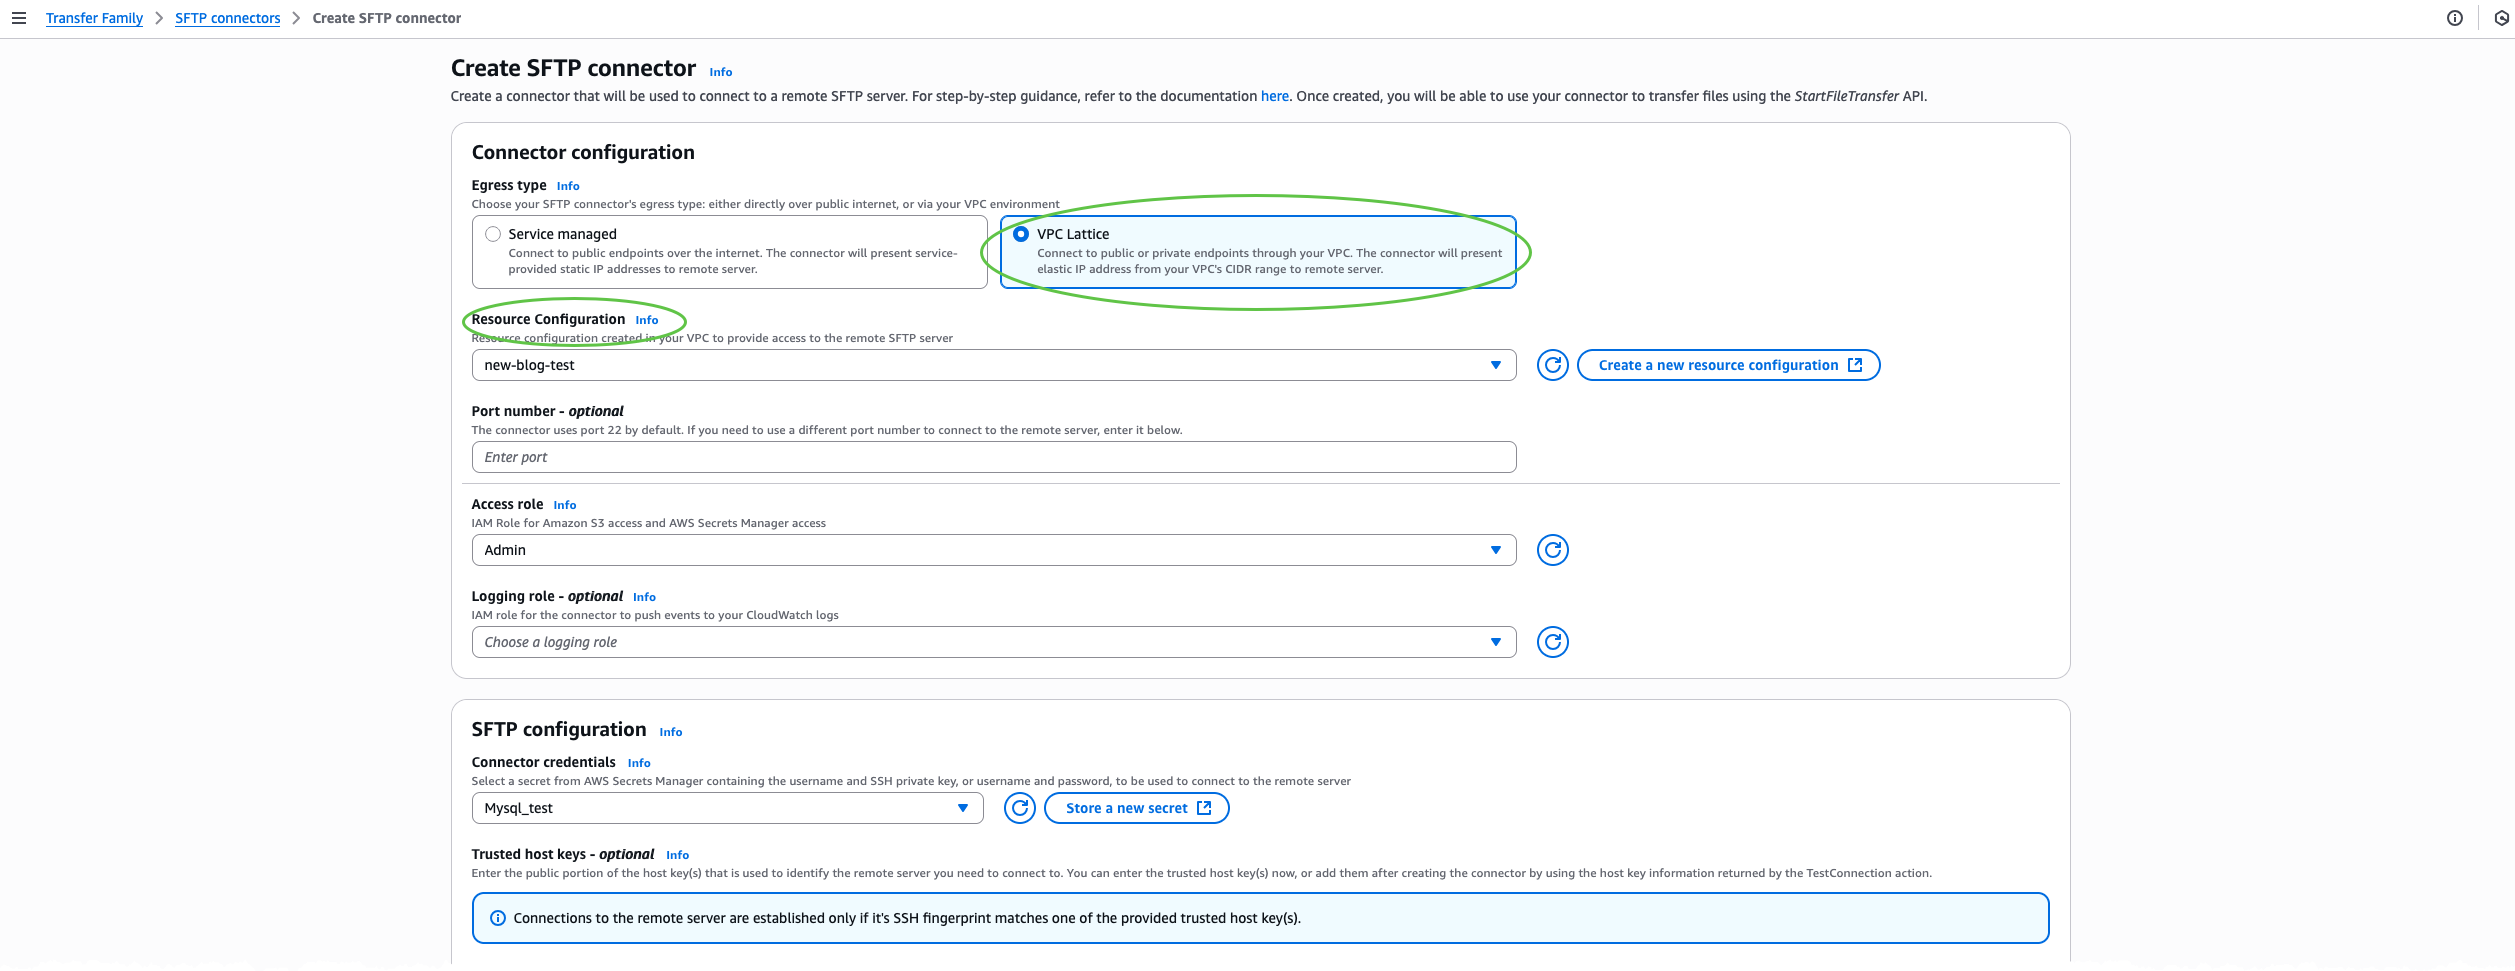
After that, I create an SFTP connector through the AWS Transfer Family console. I choose SFTP Connectors and then choose Create SFTP connector. 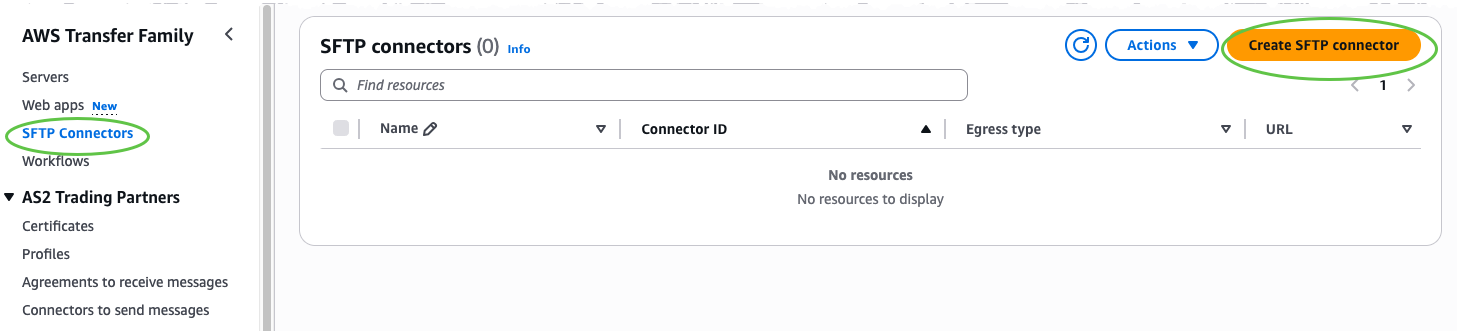 In the Connector configuration section, I select VPC Lattice as the egress type, then provide the Amazon Resource Name (ARN) of the Resource Configuration, Access role, and Connector credentials. Optionally, include a trusted host key for enhanced security, or override the default port if my SFTP server uses a nonstandard port.
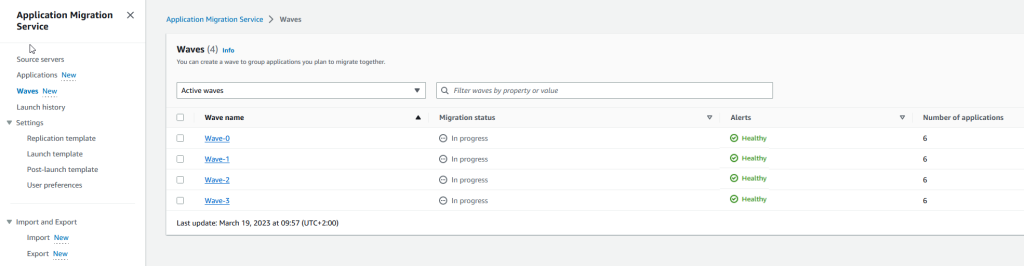
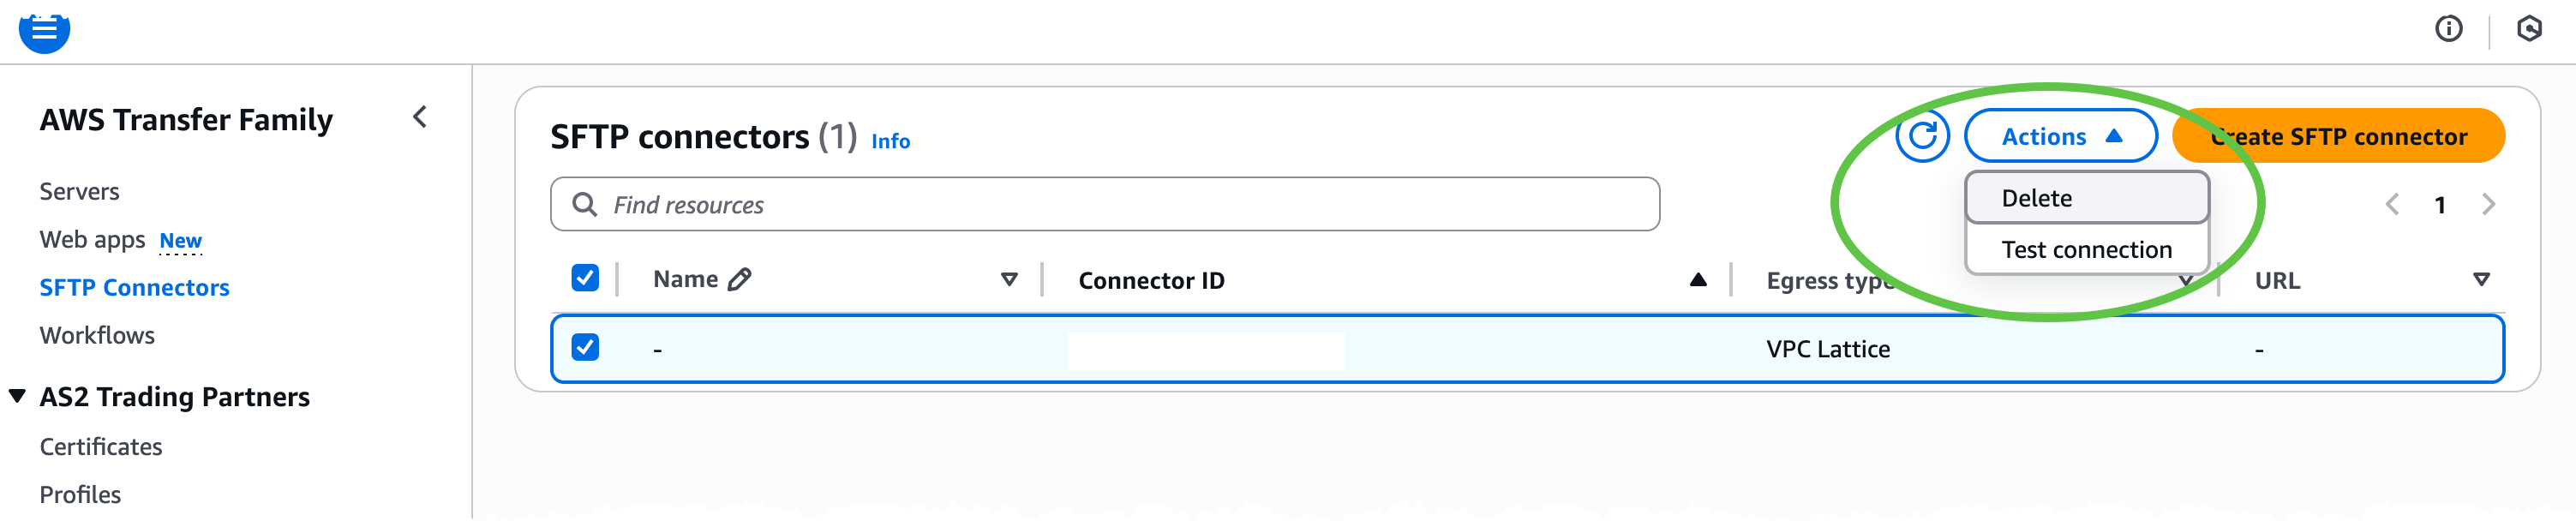
 Next, I test the connection. On the Actions menu, I choose Test connection to confirm that the connector can reach the target SFTP server.
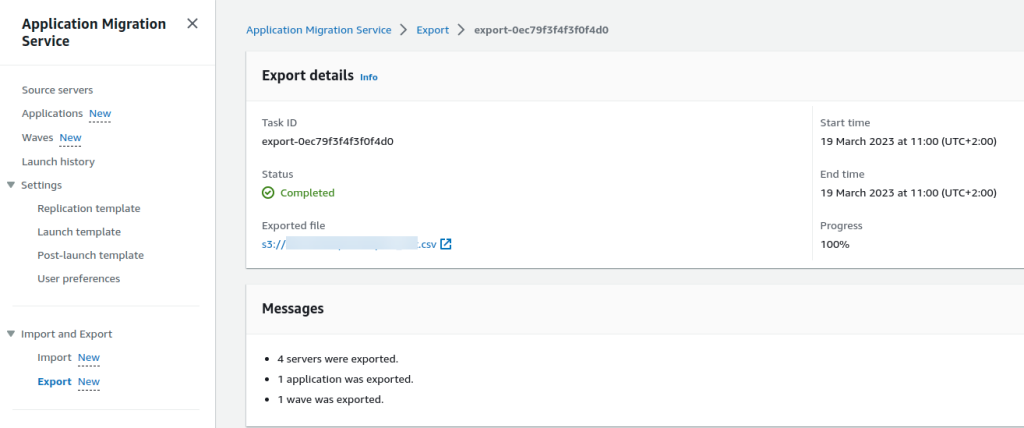
 Finally, after the connector status is ACTIVE, I can begin file operations with my remote SFTP server programmatically by calling Transfer Family APIs such as
 StartDirectoryListing, StartFileTransfer, StartRemoteDelete, or StartRemoteMove. All traffic is routed through my VPC using my configured resources such as NAT gateways, AWS Direct Connect, or VPN connections together with my IP addresses and security controls.
For the complete set of options and advanced workflows, refer to the AWS Transfer Family documentation.
Now available
SFTP connectors with VPC-based connectivity are now available in 21 AWS Regions. Check the AWS Services by Region for the latest supported AWS Regions. You can now securely connect AWS Transfer Family SFTP connectors to private, on-premises, or internet-facing servers using your own VPC resources such as NAT gateways, Elastic IPs, and network firewalls.
— Betty