Post Syndicated from John Standish original https://aws.amazon.com/blogs/devops/using-nuget-with-aws-codeartifact/
Managing NuGet packages for .NET development can be a challenge. Tasks such as initial configuration, ongoing maintenance, and scaling inefficiencies are the biggest pain points for developers and organizations. With its addition of NuGet package support, AWS CodeArtifact now provides easy-to-configure and scalable package management for .NET developers. You can use NuGet packages stored in CodeArtifact in Visual Studio, allowing you to use the tools you already know.
In this post, we show how you can provision NuGet repositories in 5 minutes. Then we demonstrate how to consume packages from your new NuGet repositories, all while using .NET native tooling.
All relevant code for this post is available in the aws-codeartifact-samples GitHub repo.
Prerequisites
For this walkthrough, you should have the following prerequisites:
- AWS Account
- AWS Command Line Interface (AWS CLI). For instructions, see Installing, updating, and uninstalling the AWS CLI version 2
- AWS Toolkit for Visual Studio
- The latest version of NuGet. For instructions, see Install NuGet client tools
- Alternatively, use .NET Core. For instructions, see Download .NET
- Visual Studio IDE (Community, Professional or Enterprise)
Architecture overview
Two core resource types make up CodeArtifact: domains and repositories. Domains provide an easy way manage multiple repositories within an organization. Repositories store packages and their assets. You can connect repositories to other CodeArtifact repositories, or popular public package repositories such as nuget.org, using upstream and external connections. For more information about these concepts, see AWS CodeArtifact Concepts.
The following diagram illustrates this architecture.
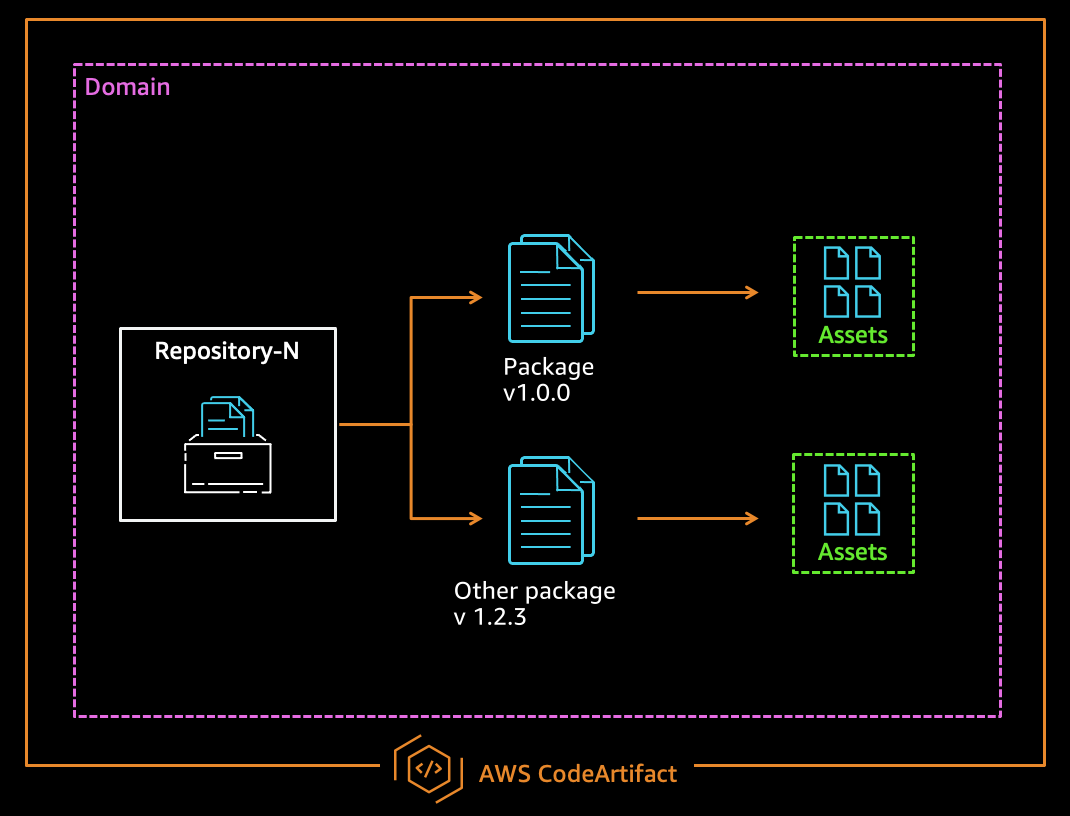
Figure: AWS CodeArtifact core concepts
Creating CodeArtifact resources with AWS CloudFormation
The AWS CloudFormation template provided in this post provisions three CodeArtifact resources: a domain, a team repository, and a shared repository. The team repository is configured to use the shared repository as an upstream repository, and the shared repository has an external connection to nuget.org.
The following diagram illustrates this architecture.
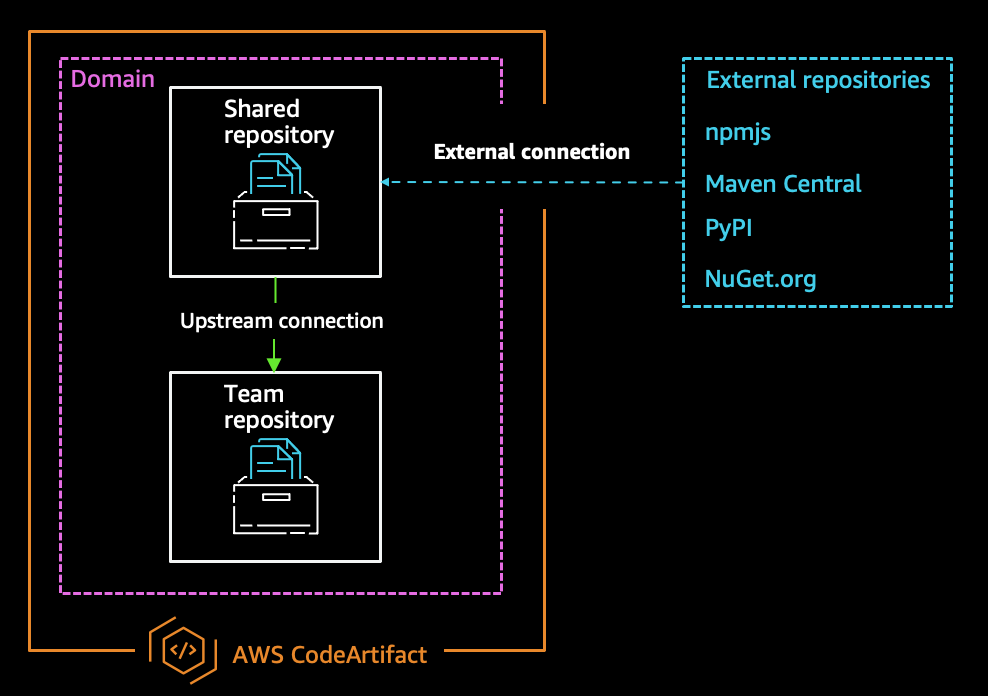
Figure: Example AWS CodeArtifact architecture
The following CloudFormation template used in this walkthrough:
AWSTemplateFormatVersion: '2010-09-09'
Description: AWS CodeArtifact resources for dotnet

Resources:
  # Create Domain
  ExampleDomain:
    Type: AWS::CodeArtifact::Domain
    Properties:
      DomainName: example-domain
      PermissionsPolicyDocument:
        Version: 2012-10-17
        Statement:
          - Effect: Allow
            Principal:
              AWS:
              - !Sub arn:aws:iam::${AWS::AccountId}:root
            Resource: "*"
            Action:
              - codeartifact:CreateRepository
              - codeartifact:DescribeDomain
              - codeartifact:GetAuthorizationToken
              - codeartifact:GetDomainPermissionsPolicy
              - codeartifact:ListRepositoriesInDomain

  # Create External Repository
  MyExternalRepository:
    Type: AWS::CodeArtifact::Repository
    Condition: ProvisionNugetTeamAndUpstream
    Properties:
      DomainName: !GetAtt ExampleDomain.Name
      RepositoryName: my-external-repository
      ExternalConnections:
        - public:nuget-org
      PermissionsPolicyDocument:
        Version: 2012-10-17
        Statement:
          - Effect: Allow
            Principal:
              AWS:
              - !Sub arn:aws:iam::${AWS::AccountId}:root
            Resource: "*"
            Action:
              - codeartifact:DescribePackageVersion
              - codeartifact:DescribeRepository
              - codeartifact:GetPackageVersionReadme
              - codeartifact:GetRepositoryEndpoint
              - codeartifact:ListPackageVersionAssets
              - codeartifact:ListPackageVersionDependencies
              - codeartifact:ListPackageVersions
              - codeartifact:ListPackages
              - codeartifact:PublishPackageVersion
              - codeartifact:PutPackageMetadata
              - codeartifact:ReadFromRepository

  # Create Repository
  MyTeamRepository:
    Type: AWS::CodeArtifact::Repository
    Properties:
      DomainName: !GetAtt ExampleDomain.Name
      RepositoryName: my-team-repository
      Upstreams:
        - !GetAtt MyExternalRepository.Name
      PermissionsPolicyDocument:
        Version: 2012-10-17
        Statement:
          - Effect: Allow
            Principal:
              AWS:
              - !Sub arn:aws:iam::${AWS::AccountId}:root
            Resource: "*"
            Action:
              - codeartifact:DescribePackageVersion
              - codeartifact:DescribeRepository
              - codeartifact:GetPackageVersionReadme
              - codeartifact:GetRepositoryEndpoint
              - codeartifact:ListPackageVersionAssets
              - codeartifact:ListPackageVersionDependencies
              - codeartifact:ListPackageVersions
              - codeartifact:ListPackages
              - codeartifact:PublishPackageVersion
              - codeartifact:PutPackageMetadata
              - codeartifact:ReadFromRepository
Getting the CloudFormation template
To use the CloudFormation stack, we recommend you clone the following GitHub repo so you also have access to the example projects. See the following code:
git clone https://github.com/aws-samples/aws-codeartifact-samples.git
cd aws-codeartifact-samples/getting-started/dotnet/cloudformation/
Alternatively, you can copy the previous template into a file on your local filesystem named deploy.yml.
Provisioning the CloudFormation stack
Now that you have a local copy of the template, you need to provision the resources using a CloudFormation stack. You can deploy the stack using the AWS CLI or on the AWS CloudFormation console.
To use the AWS CLI, enter the following code:
aws cloudformation deploy \
--template-file deploy.yml \
--region <YOUR_PREFERRED_REGION> \
--stack-name CodeArtifact-GettingStarted-DotNet
To use the AWS CloudFormation console, complete the following steps:
- On the AWS CloudFormation console, choose Create stack.
- Choose With new resources (standard).
- Select Upload a template file.
- Choose Choose file.
- Name the stack
CodeArtifact-GettingStarted-DotNet. - Continue to choose Next until prompted to create the stack.
Configuring your local development experience
We use the CodeArtifact credential provider to connect the Visual Studio IDE to a CodeArtifact repository. You need to download and install the AWS Toolkit for Visual Studio to configure the credential provider. The toolkit is an extension for Microsoft Visual Studio on Microsoft Windows that makes it easy to develop, debug, and deploy .NET applications to AWS. The credential provider automates fetching and refreshing the authentication token required to pull packages from CodeArtifact. For more information about the authentication process, see AWS CodeArtifact authentication and tokens.
To connect to a repository, you complete the following steps:
- Configure an account profile in the AWS Toolkit.
- Copy the source endpoint from the AWS Explorer.
- Set the NuGet package source as the source endpoint.
- Add packages for your project via your CodeArtifact repository.
Configuring an account profile in the AWS Toolkit
Before you can use the Toolkit for Visual Studio, you must provide a set of valid AWS credentials. In this step, we set up a profile that has access to interact with CodeArtifact. For instructions, see Providing AWS Credentials.
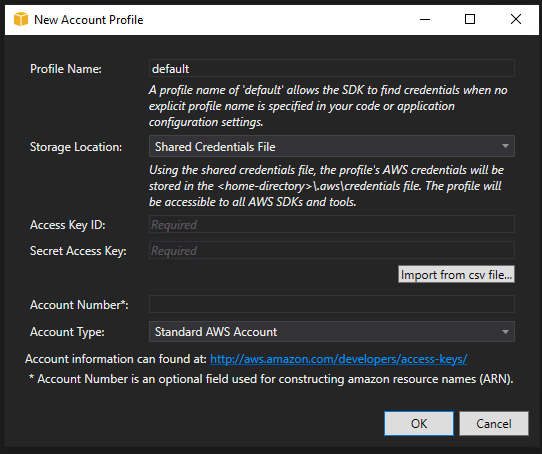
Figure: Visual Studio Toolkit for AWS Account Profile Setup
Copying the NuGet source endpoint
After you set up your profile, you can see your provisioned repositories.
- In the AWS Explorer pane, navigate to the repository you want to connect to.
- Choose your repository (right-click).
- Choose Copy NuGet Source Endpoint.
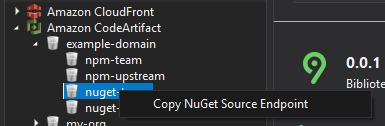
Figure: AWS CodeArtifact repositories shown in the AWS Explorer
You use the source endpoint later to configure your NuGet package sources.
Setting the package source using the source endpoint
Now that you have your source endpoint, you can set up the NuGet package source.
- In Visual Studio, under Tools, choose Options.
- Choose NuGet Package Manager.
- Under Options, choose the + icon to add a package source.
- For Name , enter
codeartifact. - For Source, enter the source endpoint you copied from the previous step.
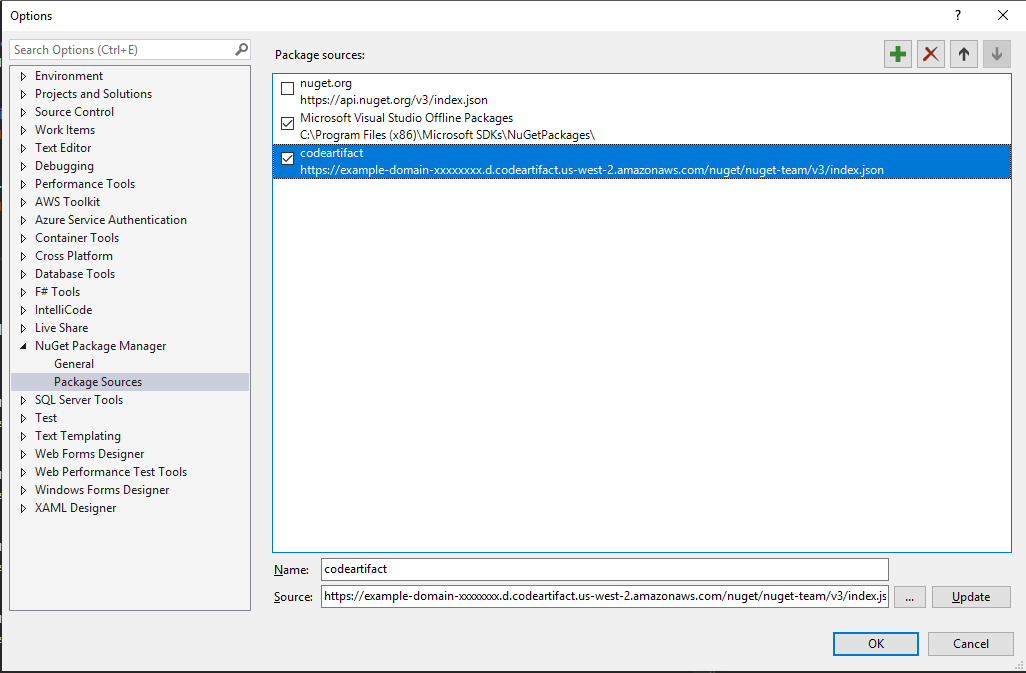
Figure: Configuring NuGet package sources for AWS CodeArtifact
Adding packages via your CodeArtifact repository
After the package source is configured against your team repository, you can pull packages via the upstream connection to the shared repository.
- Choose Manage NuGet Packages for your project.
- You can now see packages from nuget.org.
- Choose any package to add it to your project.
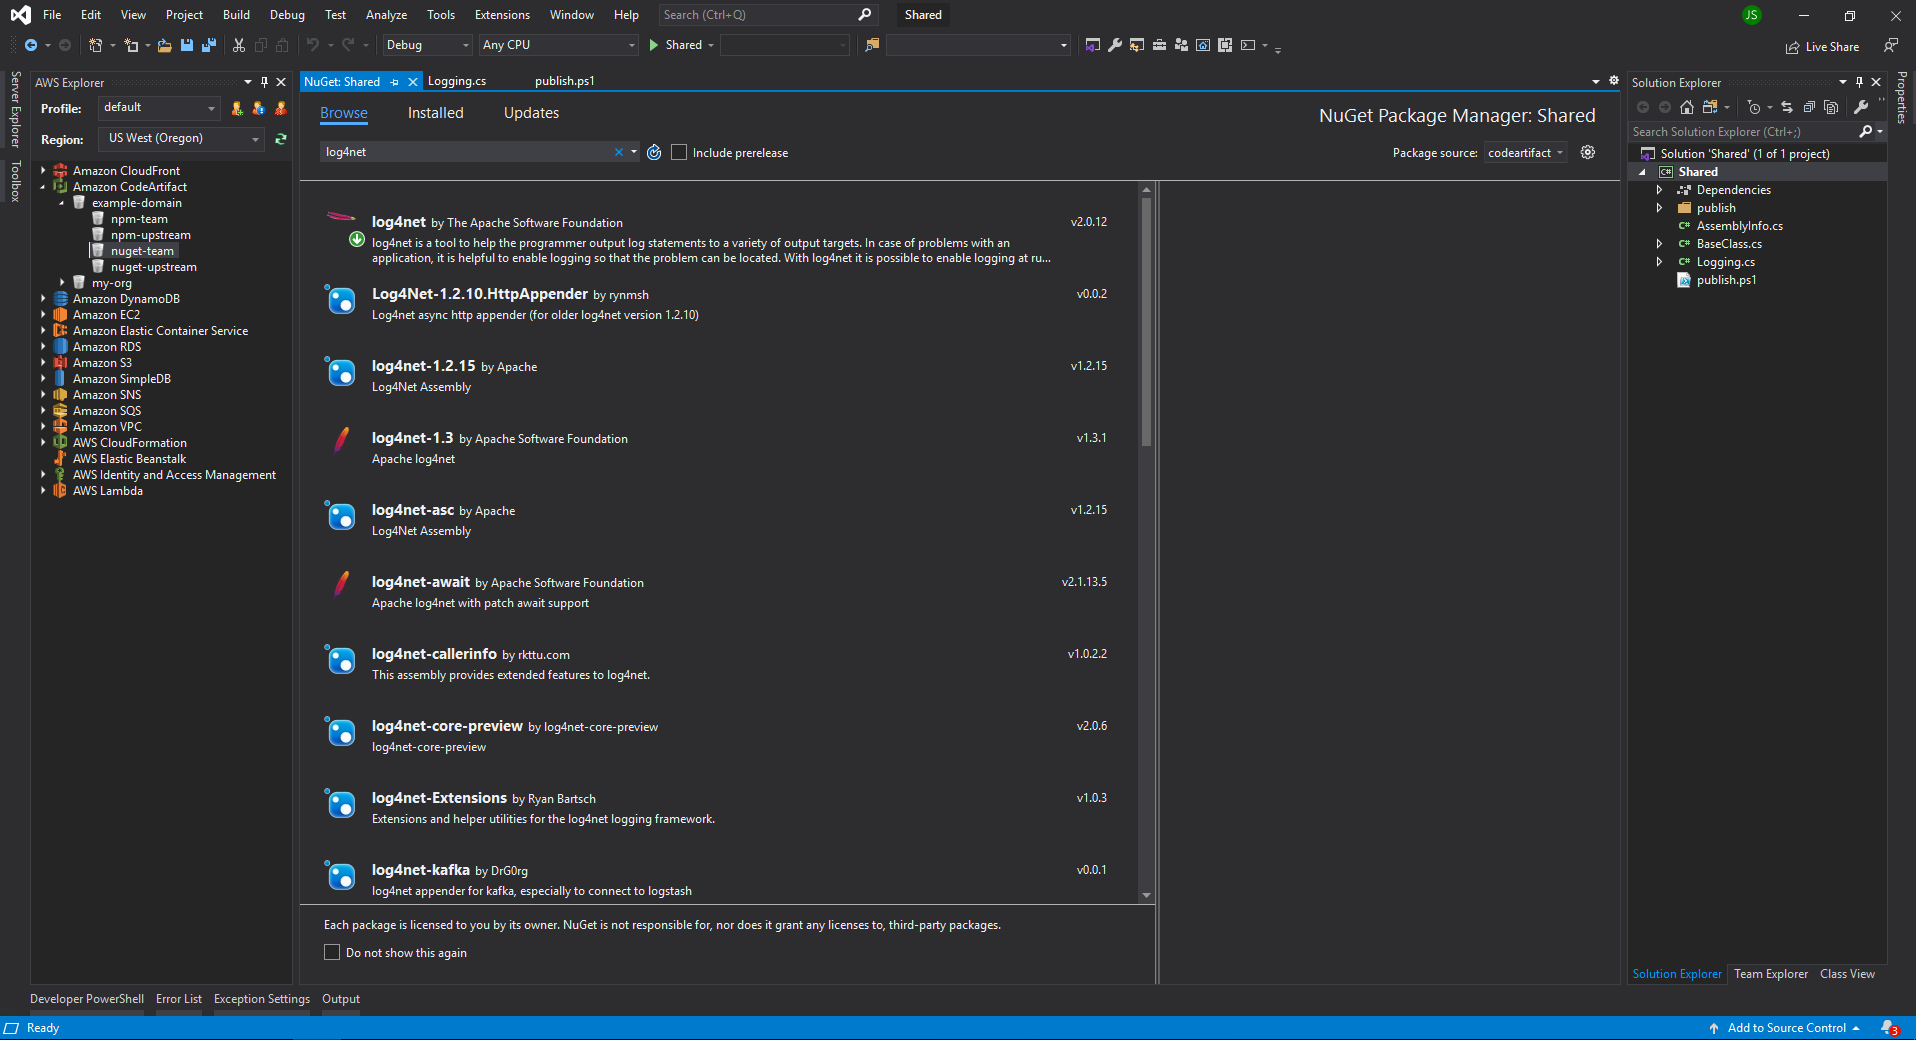
Exploring packages while connected to a AWS CodeArtifact repository
Viewing packages stored in your CodeArtifact team repository
Packages are stored in a repository you pull from, or referenced via the upstream connection. Because we’re pulling packages from nuget.org through an external connection, you can see cached copies of those packages in your repository. To view the packages, navigate to your repository on the CodeArtifact console.
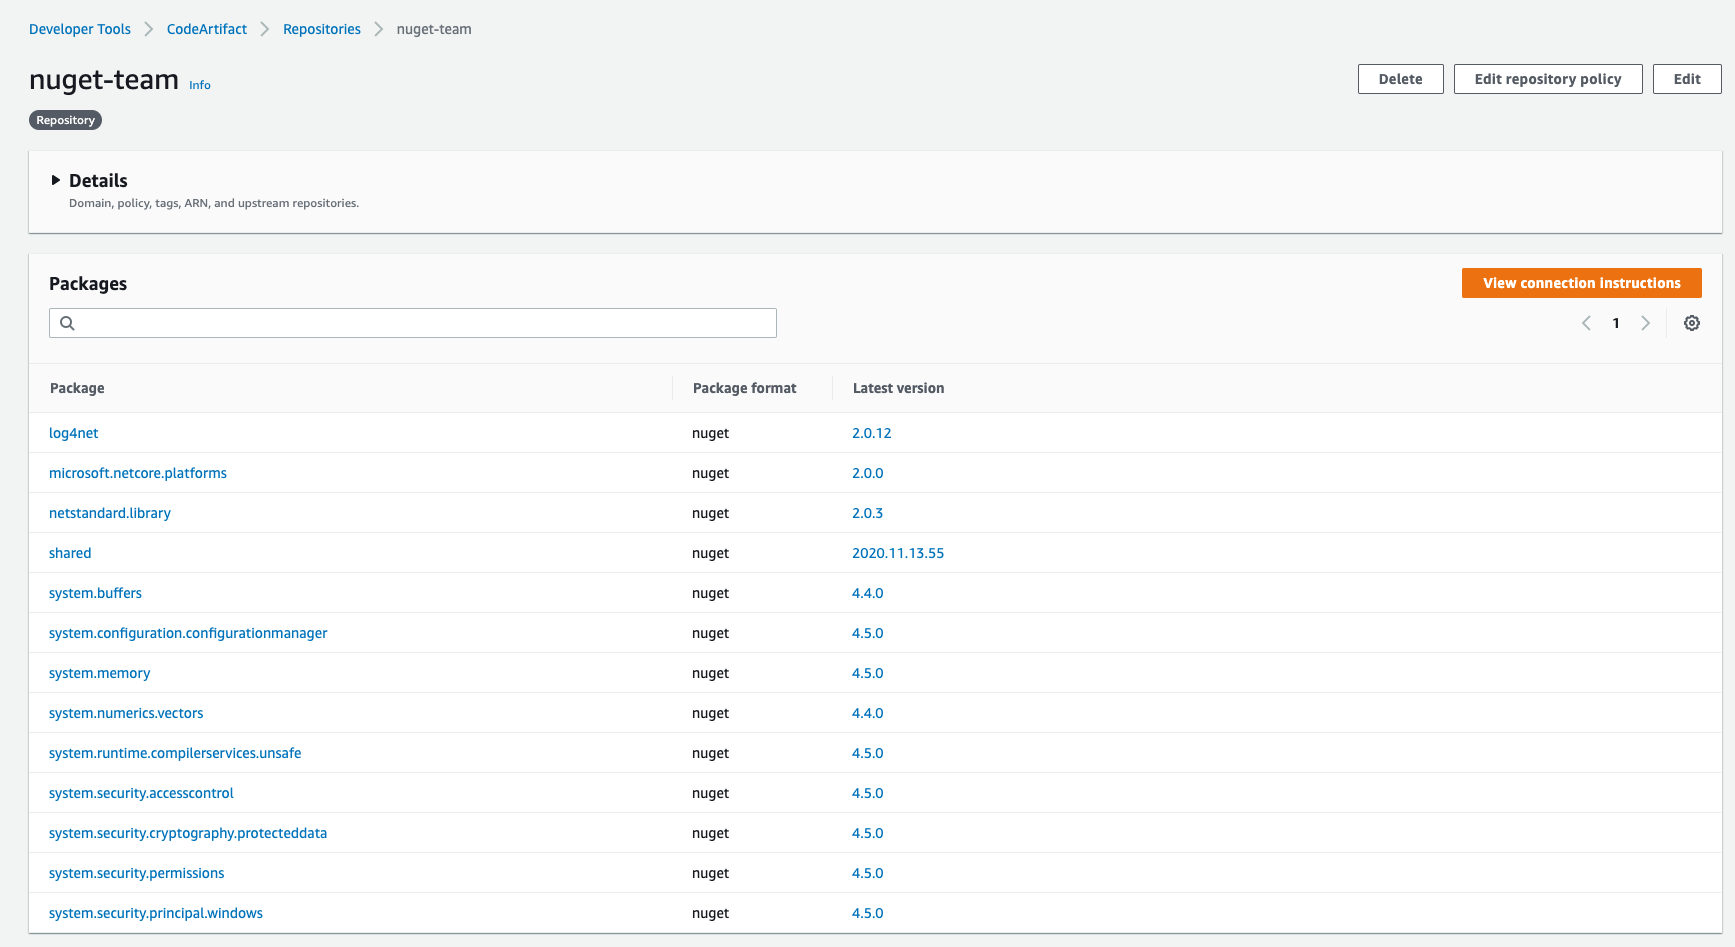
Packages stored in a AWS CodeArtifact repository
Cleaning Up
When you’re finished with this walkthrough, you may want to remove any provisioned resources. To remove the resources that the CloudFormation template created, navigate to the stack on the AWS CloudFormation console and choose Delete Stack. It may take a few minutes to delete all provisioned resources.
After the resources are deleted, there are no more cleanup steps.
Conclusion
We have shown you how to set up CodeArtifact in minutes and easily integrate it with NuGet. You can build and push your package faster, from hours or days to minutes. You can also integrate CodeArtifact directly in your Visual Studio environment with four simple steps. With CodeArtifact repositories, you inherit the durability and security posture from the underlying storage of CodeArtifact for your packages.
As of November 2020, CodeArtifact is available in the following AWS Regions:
- US: US East (Ohio), US East (N. Virginia), US West (Oregon)
- AP: Asia Pacific (Mumbai), Asia Pacific (Singapore), Asia Pacific (Sydney), Asia Pacific (Tokyo)
- EU: Europe (Frankfurt), Europe (Ireland), Europe (Stockholm)
For an up-to-date list of Regions where CodeArtifact is available, see AWS CodeArtifact FAQ.
About the Authors

John Standish
John Standish is a Solutions Architect at AWS and spent over 13 years as a Microsoft .Net developer. Outside of work, he enjoys playing video games, cooking, and watching hockey.

Nuatu Tseggai
Nuatu Tseggai is a Cloud Infrastructure Architect at Amazon Web Services. He enjoys working with customers to design and build event-driven distributed systems that span multiple services.

Neha Gupta
Neha Gupta is a Solutions Architect at AWS and have 16 years of experience as a Database architect/ DBA. Apart from work, she’s outdoorsy and loves to dance.

Elijah Batkoski
Elijah is a Technical Writer for Amazon Web Services. Elijah has produced technical documentation and blogs for a variety of tools and services, primarily focused around DevOps.