Post Syndicated from Muhammad Shahzad original https://aws.amazon.com/blogs/devops/publish-packages-to-aws-codeartifact-using-amazon-codecatalyst-actions/
Amazon CodeCatalyst is a unified software development service for development teams to quickly build, deliver and scale applications on AWS while adhering to organization-specific best practices. Developers can automate development tasks and innovate faster with generative AI capabilities, and spend less time setting up project tools, managing CI/CD pipelines, provisioning and configuring various development environments or coordinating with team members.
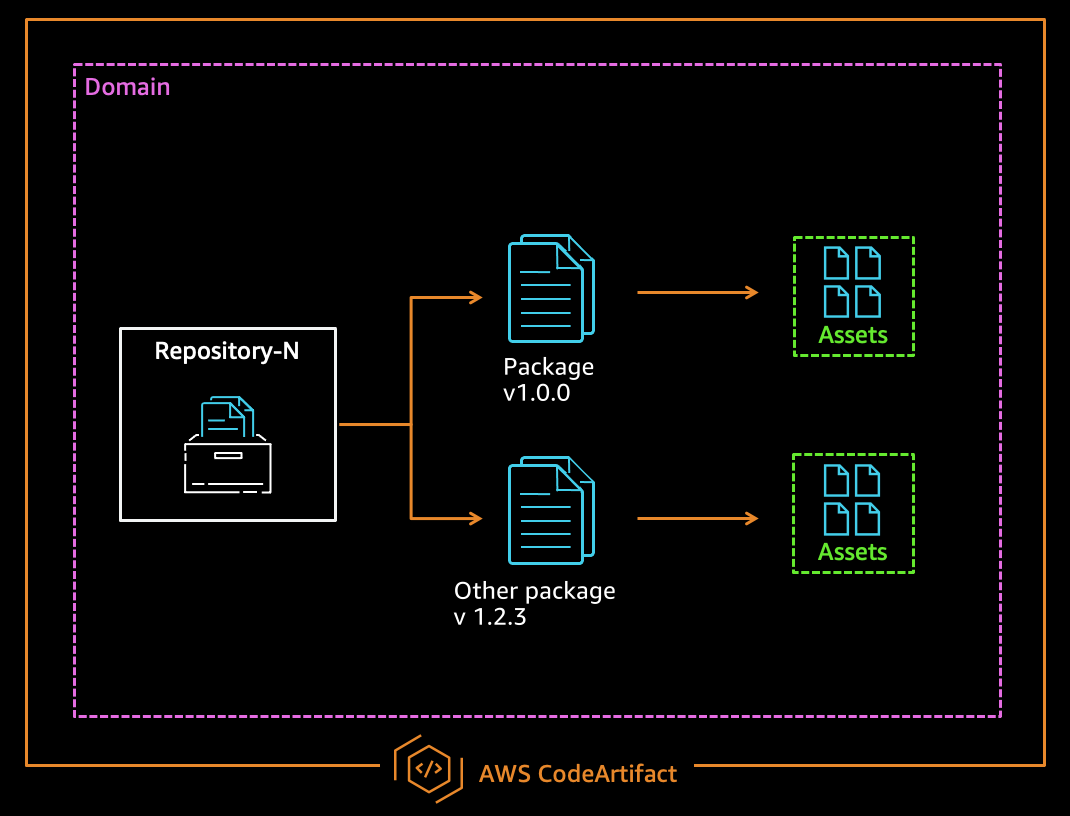
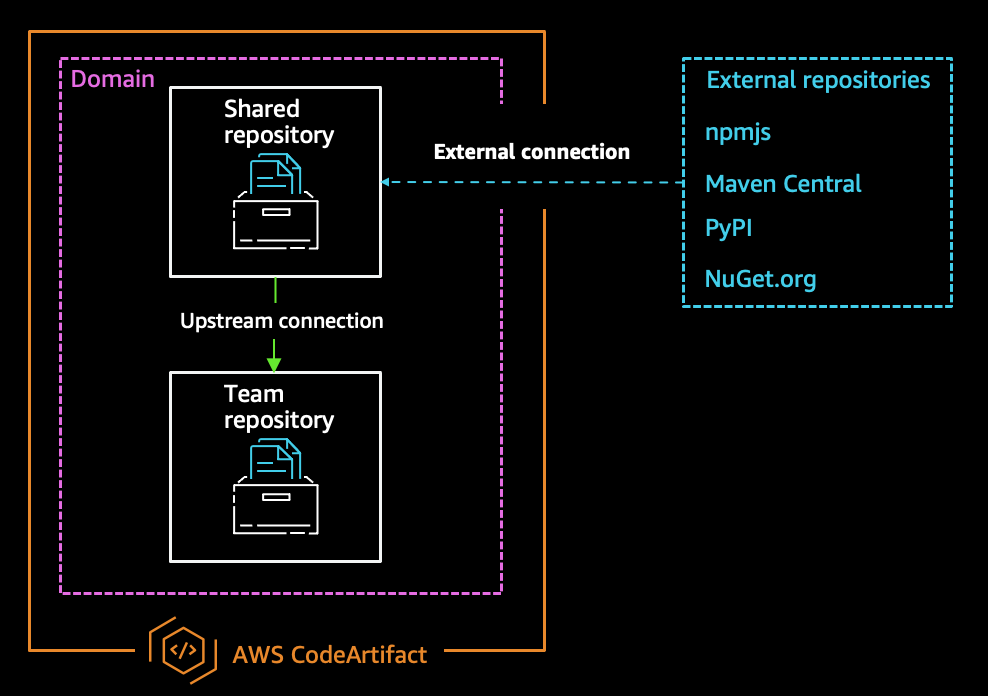
It can integrate with services like AWS CodeArtifact, which is a managed artifact repository service that lets you securely store, publish, and share software packages. In this blog post we will show you how to use Publish to AWS CodeArtifact action in a CodeCatalyst workflow to publish packages to AWS Code Artifact.
In Amazon CodeCatalyst, an action is the main building block of a workflow, and defines a logical unit of work to perform during a workflow run. Typically, a workflow includes multiple actions that run sequentially or in parallel depending on how you’ve configured them. Amazon CodeCatalyst provides a library of pre-built actions that you can use in your workflows, such as for building, testing, deploying applications, as well as the ability to create custom actions for specific tasks not covered by the pre-built options.
Following are the instructions on using Publish to AWS CodeArtifact action in Amazon CodeCatalyst workflow.
Prerequisites
To follow along with this walkthrough, you will need:
- An AWS Builder ID for signing in to AWS CodeCatalyst.
- Belong to a CodeCatalyst space and have the space administrator role assigned to you in that space. For more information, see Creating a space in CodeCatalyst, Managing members of your space, and Space administrator role.
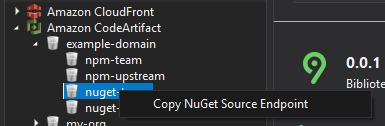
- A domain and repository created in AWS CodeArtifact for publishing your package. See Create a repository.
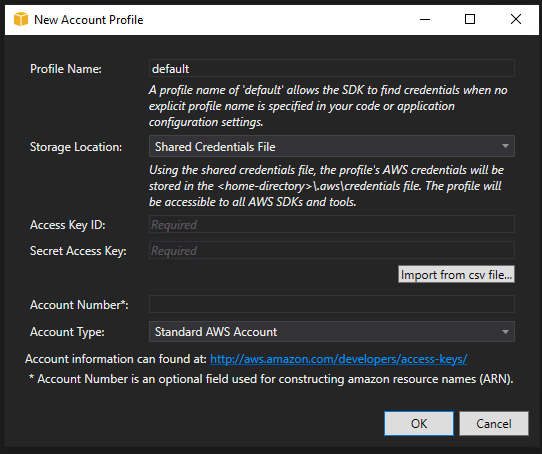
- An AWS account associated with your space and have the IAM role in that account that has permissions to publish our package to AWS Code Artifact. For more information about the role and role policy, see Creating a CodeCatalyst service role. Make sure that the role includes the following permissions policy:
And the following custom trust policy.
In the trust policy, we have specified two AWS services in the Principal element. Service principals are defined by the service. The following service principals are defined for CodeCatalyst:
- amazonaws.com – This service principal is used for a role that will grant CodeCatalyst access to AWS.
- codecatalyst-runner.amazonaws.com – This service principal is used for a role that will grant CodeCatalyst access to AWS resources in deployments for CodeCatalyst workflows.
Walkthrough
In this example, we are going to publish a npm package to a CodeArtifact repository called ‘myapp-frontend in the domain ‘myapp-artifacts. Amazon CodeCatalyst is available in two regions at the moment i.e. Europe (Ireland) and US West (Oregon). We will use ‘us-west-2’ for all the resources in this walkthrough.
Here are the steps to create your workflow.
- In the navigation pane, choose CI/CD, and then choose Workflows.
- Choose Create workflow.
The workflow definition file appears in the CodeCatalyst console’s YAML editor.
To configure your workflow
You can configure your workflow in the Visual editor, or the YAML editor. Let’s start with the YAML editor and then switch to the visual editor.
- Choose + Actions to see a list of workflow actions that you can add to your workflow.
- In the Build action, choose + to add the action’s YAML to your workflow definition file. Your workflow now looks similar to the following. You can follow the below code by editing in YAML editor.

The following code shows the newly created workflow.
In this build action, we are using ‘npm pack’ command to create a compressed tarball (.tgz) file of our package’s source code and configuration files. We are creating an output artifact named ‘ARTIFACT’ and our files are in this directory integration/npm/npm-package-example-master.
Now, we are going to select publish-to-code-artifact action from the action’s dropdown list.

The following code shows the newly added action in the workflow file.
In the above code, you can see we specified the PackageFormat, RepositoryName, DomainName and AWSRegion.These are all required fields.
For Package Path, it is the build artifact output path + the folder path.
You can find the complete workflow file in this GitHub repository.
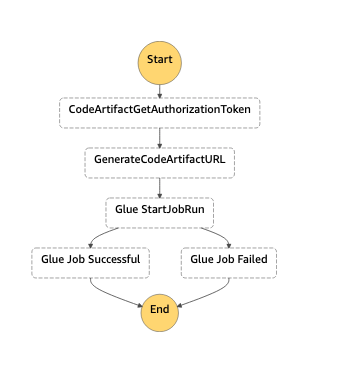
If you chose ‘Visual’ option to view the workflow definition file in the visual editor. This is going to look as shown in the image below. The fields in the visual editor let you configure the YAML properties shown in the YAML editor.

How the “Publish to AWS CodeArtifact” action works:
The “Publish to AWS CodeArtifact” action works as follows at runtime:
- Checks if the PackageFormat, PackagePath, RepositoryName, DomainNameand AWSRegionis specified, validates the configuration, and configures AWS credentials based on the Environment, Connection, and Role specified.
- Looks for package files to publish in the path configured in the PackagePathfield in the WorkflowSource If no source is configured in Sources, but an artifact is configured in Arifacts, then the action looks for the files in the configured artifact folder.
- Publishes the package to AWS CodeArtifact.
Cleanup
If you have been following along with this workflow, you should delete the resources you deployed so that you do not continue to incur charges.
- Delete the published package in AWS CodeArtifact by following these instructions.
- Delete the repository in AWS CodeArtifact by following these instructions.
- Delete the domain in AWS CodeArtifact by following these instructions.
- For Amazon CodeCatalyst, if you created a new project for this tutorial, delete it. For instructions, see Deleting a project. Deleting the project also deletes the source repository and workflow.
Conclusion
In this post, we demonstrated how to use an Amazon CodeCatalyst workflow to publish packages to AWS CodeArtifact by utilizing the Publish to AWS CodeArtifact action. By following the steps outlined in this blog post, you can ensure that your packages are readily available for your projects while maintaining version control and security.
For further reading, see Working with actions in the CodeCatalyst documentation.
About the Authors

Muhammad Shahzad is a Solutions Architect at AWS. He is passionate about helping customers achieve success on their cloud journeys, enjoys designing solutions and helping them implement DevSecOps by explaining principles, creating automated solutions and integrating best practices in their journey to the cloud. Outside of work, Muhammad plays badminton regularly, enjoys various other sports, and has a passion for hiking scenic trails.
 Alexander Schueren is a Senior Specialist Solutions Architect at AWS, dedicated to modernizing legacy applications and building event-driven serverless solutions. With a focus on simplifying complexity and bringing clarity to technical challenges, Alexander is on a mission to empower developers with the tools they need for success. As the maintainer of the open-source project “Powertools for AWS Lambda (TypeScript),” he is committed to driving innovation in serverless technologies. In his free time, Alexander channels his creativity through street photography, capturing decisive moments in the urban landscape.