For a long time, we have been focusing a lot on the hardware costs of new processors but missing the virtualization license costs. Part of that is simply due to the number of virtualization licenses and support models. Recently, we purchased the most popular barebones server and the most popular server processor on Newegg to […]
The Zabbix team is pleased to announce the release of the latest Zabbix major version – Zabbix 6.2! The latest version delivers features aimed at improving configuration management and performance on large Zabbix instances as well as extending the flexibility of the existing Zabbix functionality.
New features
A brief overview of the major new features available with the release of Zabbix 6.2:
Ability to suppress individual problems
Suppress problems indefinitely or until a specific point in time
Support of CyberArk vault for secret storage
Official AWS EC2 template
discover and monitor AWS EC2 performance statistics, alarms, and AWS EBS volumes
Ability to synchronize Zabbix proxy configuration directly from Zabbix frontend
Configuration synchronization is supported by active and passive proxies
Improved flexibility for hosts discovered from host prototypes
Link additional templates
Create and modify user macros
Populate the host with new tags
New items for VMware monitoring
The ability to further customize the hosts discovered by VMware discovery
Active agent check status can now be tracked from Zabbix frontend
Newly created items are now checked within a minute after their creation
Execute now functionality is now available from the Latest data section
A warning message is now displayed when performing Execute now on items that do not support it
Templates are now grouped in template groups, instead of host groups
Improved host and template filtering
Multiple LDAP servers can now be defined and saved under Authentication – LDAP settings
Ability to collect Windows registry key values with the new registry monitoring items
New item for OS process discovery and collecting individual process statistics
New digital clock widget
The default Global view dashboard has been updated with the latest Zabbix widgets
The Graph widget has been further improved
Added stacked graph support
Legend now provides additional information
Added support of simple trigger display
UI forms now provide direct links to the relevant documentation sections
Many other improvements and features
Enhance the observability of your VMware infrastructure with the new itemsTrack your EC2 instances in a single pane of glass viewSuppress problems indefinitely or until a specific point in timeTrack the active agent interface status from Zabbix frontend
New templates and integrations
Zabbix 6.2 comes pre-packaged with many new templates for the most popular vendors:
Envoy proxy
HashiCorp Consul
AWS EC2 Template
CockroachDB
TrueNAS
HPE MSA 2060 & 2040
HPE Primera
The S.M.A.R.T. monitoring template has received improvements
Zabbix 6.2 introduces a webhook integration for the GLPI IT Asset Management solution. This webhook can be used to forward problems created in Zabbix to the GLPi Assistance section
Zabbix 6.2 packages and images
The official Zabbix packages and images are available for:
Linux distributions for different hardware platforms on RHEL, CentOS, Oracle Linux, Debian, SUSE, Ubuntu, Raspbian, Alma Linux, Rocky Linux
Virtualization platforms based on VMware, VirtualBox, Hyper-V, XEN
Docker
Packages and precompiled agents for most popular platforms, including macOS and MSI packages for Windows
One-click deployments for the following cloud platforms are coming soon:
AWS, Azure, Google Cloud, Digital Ocean, Linode, Oracle Cloud, Red Hat OpenShift
Upgrading to Zabbix 6.2
In order to upgrade to Zabbix 6.2, you need to upgrade your repository package and download and install the new Zabbix component packages (Zabbix server, proxy, frontend, and other Zabbix components). When you start the Zabbix Server, an automatic database schema upgrade will be performed. Zabbix agents are backward compatible; therefore, it is not required to install the new agent versions. You can do it at a later time if needed.
If you’re using the official Docker container images – simply deploy a new set of containers for your Zabbix components. Once the Zabbix server container connects to the backend database, the database upgrade will be performed automatically.
You can find step-by-step instructions for the upgrade process to Zabbix 6.2 in the Zabbix documentation.
Join the webinar
If you wish to learn more about the Zabbix 6.2 features and improvements, we invite you to join our What’s new in Zabbix 6.2 public webinar.
During the webinar, you will get the opportunity to:
Learn about the Zabbix 6.2 features and improvements
See the latest Zabbix templates and integrations
Participate in a Q&A session with Zabbix founder and CEO Alexei Vladishev
Discuss the latest Zabbix version with Zabbix community and Zabbix team members
Anyone can sign up and attend the webinar at absolutely no cost
Hacking apart a sweet, innocent Raspberry Pi – who would do such a thing? Network Chuck, that’s who. But he has a very cool reason for it so, we’ll let him off the hook.
He’s figured out how to install VMware ESXi on Raspberry Pi, and he’s sharing the step-by-step process with you because he loves you. And us. We think. We hope.
Get cutting
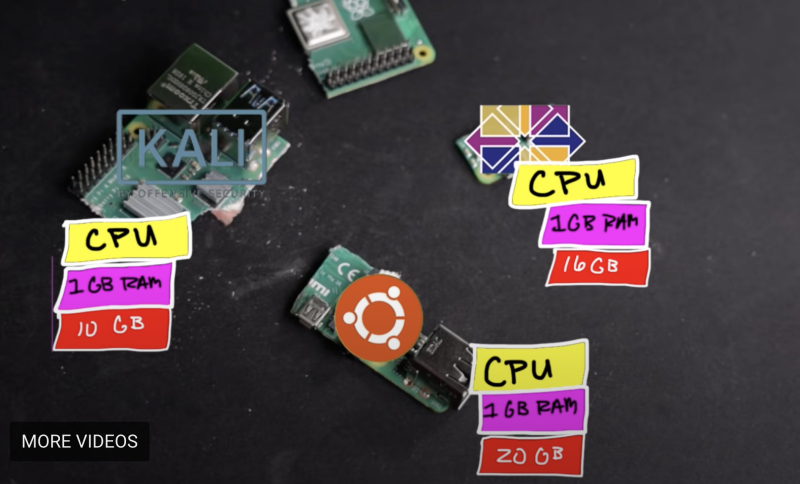
In a nutshell, Chuck hacks apart a Raspberry Pi, turning it into three separate computers, each running different software at the same time. He’s a wizard.
Our poor sweet baby 😮
VMware is cool because it’s Virtual Machine software big companies use on huge servers, but you can deploy it on one of our tiny devices and learn how to use it in the comfort of your own home if you follow Chuck’s instructions.
Useful labels explaining which bit of Raspberry Pi is capable of what
Firstly, you need to make sure you’re running the latest version of Raspberry Pi OS. Chuck uses Raspberry Pi Imager to do this, and the video above shows you how to do the same.
Format your SD card
It’s teeny, but powerful
Then you’ll need to format your SD card ready for VMware ESXi. This can be done with Raspberry Pi Imager too. You’ll need to download these two things:
Chuck is the kind of good egg who walks you through how to do this on screen at this point in the project video.
VMware installation
Then you’ll need to create the VMWare Installer to install the actual software. It’s at this point your USB flash drive takes centre stage. Here’s everything you’ll need:
And this is the point in the video at which Chuck walks you through the process.
Once that’s all done, stick your USB flash drive into your Raspberry Pi and get going. You need to be quick off the mark for this bit – there’s some urgent Escape key pressing required, but don’t worry, Chuck walks you through everything.
Create a VM and expand your storage
Once you’ve followed all those steps, you will be up, running, and ready to go. The installation process only takes up the first 15 minutes of Chuck’s project video, and he spends the rest of his time walking you through creating your first VM and adding more storage.
Top job, Chuck.
Keep up with Chuck
Fun fact: Raspberry Pi 4 is the same length as Network Chuck’s beard
To provide the best experiences, we use technologies like cookies to store and/or access device information. Consenting to these technologies will allow us to process data such as browsing behavior or unique IDs on this site. Not consenting or withdrawing consent, may adversely affect certain features and functions.
Functional
Always active
The technical storage or access is strictly necessary for the legitimate purpose of enabling the use of a specific service explicitly requested by the subscriber or user, or for the sole purpose of carrying out the transmission of a communication over an electronic communications network.
Preferences
The technical storage or access is necessary for the legitimate purpose of storing preferences that are not requested by the subscriber or user.
Statistics
The technical storage or access that is used exclusively for statistical purposes.The technical storage or access that is used exclusively for anonymous statistical purposes. Without a subpoena, voluntary compliance on the part of your Internet Service Provider, or additional records from a third party, information stored or retrieved for this purpose alone cannot usually be used to identify you.
Marketing
The technical storage or access is required to create user profiles to send advertising, or to track the user on a website or across several websites for similar marketing purposes.