Post Syndicated from Marshall Jones original https://aws.amazon.com/blogs/security/testing-and-evaluating-guardduty-detections/
Amazon GuardDuty is a threat detection service that continuously monitors, analyzes, and processes Amazon Web Services (AWS) data sources and logs in your AWS environment. GuardDuty uses threat intelligence feeds, such as lists of malicious IP addresses and domains, file hashes, and machine learning (ML) models to identify suspicious and potentially malicious activity in your AWS environment. When GuardDuty identifies a potential security issue, it creates a GuardDuty finding that gives you information about what the potential security issue is, the resources involved, and contextualized information that’s key to remediating the issue. GuardDuty helps you monitor for the latest threats by continually expanding threat detection to emerging and common threats.
Whether you’re new to GuardDuty or are a long-time user, it’s recommended that you understand the different GuardDuty finding types and finding details and practice responding to them as suggested in the security pillar of AWS Well-Architected.
In this blog post, I dive deep into an open source tool for testing GuardDuty findings and then walk through three examples of how you can use this tool to test and improve your response to GuardDuty findings.
Overview
If you want to learn more about GuardDuty, you can read about the finding types in this AWS documentation. However, customers often want realistic findings in their environment to understand what a finding looks like and to practice responding hands on. While you can use GuardDuty to create sample findings in your environment, these findings are approximations populated with placeholder values and look different from real findings. Additionally, you cannot practice remediation with these findings because they’re not tied to actual resources in your account. This can be helpful if you only want to see what details are in a finding, but if you want to practice a real-world scenario, these sample findings might not be adequate.
To address this use case and provide customers with a secure and reliable way to test the threat detection capabilities of GuardDuty, the GuardDuty service team launched an open source project called GuardDuty Tester. The GuardDuty Tester creates infrastructure in your environment to simulate different security issues so that you can test GuardDuty findings that mirror actual security issues that you might encounter, such as crypto mining or a reverse shell being created on an Amazon Elastic Compute Cloud (Amazon EC2) instance. The GuardDuty Tester was originally released in 2018 as an AWS CloudFormation template and was focused more on testing investigation workflows than on a wide range of finding types. AWS has since released an updated version that uses the AWS Cloud Development Kit (AWS CDK) to make the infrastructure code easier to read and expanded the test coverage to over 100 unique finding types and resource combinations.
The ability to create findings across different resource types such as Amazon EC2, Amazon Simple Storage Service (Amazon S3), and Amazon Elastic Kubernetes Service (Amazon EKS) is a valuable resource for your security team, allowing them to simulate various types of threats with isolated infrastructure so that you don’t need to compromise your deployed workloads to improve response actions and techniques. Remember that the GuardDuty Tester doesn’t cover every possible scenario, but is instead focused on threat intelligence and rules-based findings. Anomaly-based findings, which require learning about how you operate your environment, aren’t included in the GuardDuty Tester.
Getting started with the GuardDuty Tester
The GuardDuty Tester is deployed by using the AWS CDK to create the required infrastructure and scripts to generate the GuardDuty findings. For safety, AWS recommends that you deploy the GuardDuty Tester in a nonproduction environment in an account that’s used specifically for this purpose. This way, your security team can differentiate between test GuardDuty findings and findings for other workloads that they’re monitoring.
In this post, I won’t walk through configuring the GuardDuty Tester because this is already documented in the GuardDuty documentation. Instead, I will go over what you need to know about the GuardDuty Tester and some of the benefits.
Figure 1 shows the GuardDuty Tester architecture, which includes the resources necessary to create GuardDuty findings for various protection plans such as Amazon S3 buckets, Amazon EC2 instances, and an Amazon EKS cluster. The tester also deploys a dedicated GuardDuty Tester instance where you will run the scripts needed to create the GuardDuty findings.

Figure 1: GuardDuty Tester architecture
The GuardDuty Tester provides key features including:
- A wide range of threat scenario simulations: Resources that the GuardDuty Tester can create findings for include Amazon S3, AWS Identity and Access Management (IAM), Amazon Elastic Container Service (Amazon ECS) for both Amazon EC2 and AWS Fargate hosted workloads, Amazon EKS, and AWS Lambda and covers over 105 threat scenarios. This includes GuardDuty runtime monitoring as well as other GuardDuty protection plans.
- Access through AWS Systems Manager: The GuardDuty Tester provides secure access by using Systems Manager to minimize open ports to the internet and allowing access only through Systems Manager.
- Modular scripts: With an expanded library of tests available, the GuardDuty Tester accepts user parameters to set the scope of the tests to run, which gives you greater flexibility for different testing scenarios.
Setting up the GuardDuty Tester environment is straightforward and requires only a few commands. As outlined in the documentation and the README file in the repository, there are a number of prerequisites to set up the stack. These prerequisites include Python 3+, git, the AWS Command Line Interface (AWS CLI), AWS Systems Manager Session Manager plugin, npm, Docker, and a subscription to Kali Linux image for Amazon EC2. You will have to subscribe to the Kali Linux instance in AWS Marketplace, but will be charged for the instance only while the GuardDuty Tester is deployed. After these prerequisites are met, you can clone the repository, install the packages, and deploy the GuardDuty Tester to your AWS account.
Deploying the GuardDuty Tester can take 20–30 minutes, but if you’re following along with this post, I assume that you have deployed the GuardDuty Tester into your environment and have started your Systems Manager session as stated on Part A of Step 3 – Run tester scripts in the GuardDuty documentation. Now, I will dive into the first testing example.
Manual investigation
The first test use case is about getting familiar with what GuardDuty findings look like and the details that a finding gives you. This might be one of your first steps after turning on GuardDuty, or this might be an activity that you perform to help new team members understand GuardDuty findings.
To start a manual investigation:
- Run the following command in your Systems Manager session to view the GuardDuty Tester options.
Python3 guardduty_tester.py --help - Run the following command in your Systems Manager session to create the first test finding.
Python3 guardduty_tester.py - -ec2 - -runtime only - -tactics impact - Before creating the findings, the GuardDuty Tester prompts you to confirm that it’s allowed to change GuardDuty settings in the environment. For example, if you’ve chosen to create findings related to the GuardDuty runtime monitoring feature but don’t have this feature enabled, the GuardDuty Tester will enable it for the tests and then disable it after testing is complete.
Note: This will start the 30-day trial of the enabled features in this account, in this AWS Region, even if the feature is disabled after testing is complete. More information about GuardDuty pricing and free trials can be found on the GuardDuty pricing page.
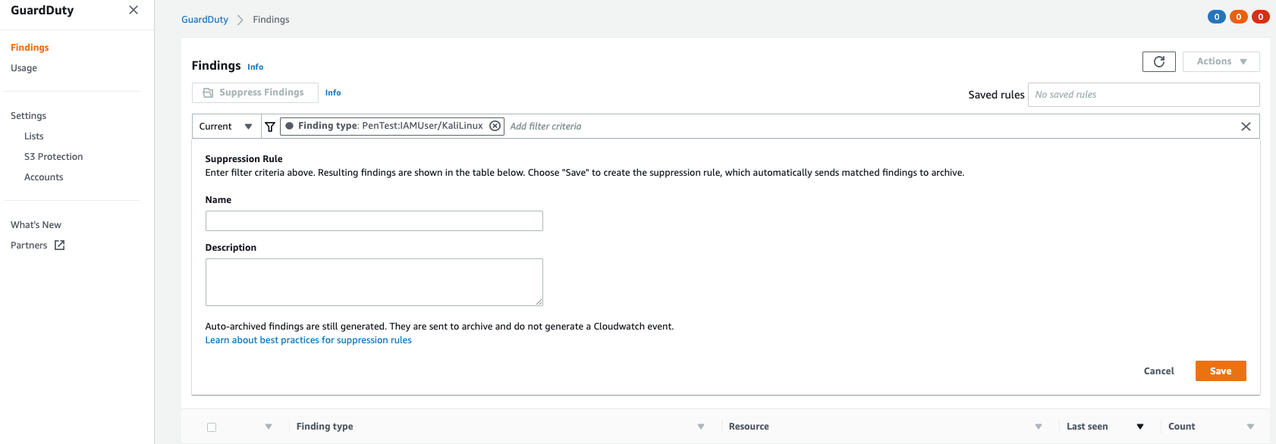
- After choosing y which indicates “yes”, the GuardDuty Tester reports the number of domain reputation findings it’s expecting. Figure 2 shows an example of the expected findings. You can learn more about domain reputation findings in the GuardDuty finding documentation.

Figure 2: Generated GuardDuty findings in the console
- After the GuardDuty Tester is finished, wait a few minutes and then go to the AWS Management Console for GuardDuty to see the findings. In this example, there are four new GuardDuty findings as expected from step 4 and shown in Figure 3. With the findings generated, you can start your manual investigation.
Figure 3: GuardDuty finding details


In the preceding figure, you can see some of the finding details presented—such as the action type and the process information—that can help you quickly identify what trigger started the suspicious communication. From here, I encourage you to use this finding to practice your runbooks for investigation and response. For example, you might start with validating and triaging the finding before moving into evidence collection and remediation. If you don’t have incident response runbooks already built, you can use this finding as an example to get started. There are multiple open source examples such as AWS incident response playbooks and AWS customer response playbook. A runbook will help your team evaluate the information provided in the GuardDuty finding and understand what else they need to know about your specific environment to properly respond to the finding. For example, in the finding, you will have resource and actor information but not things such as who is the account owner or point of contact for security for that account.
Creating alerts
The next use case highlights how to create alerts based on GuardDuty findings. When setting up alerting automation with tools such as Amazon Simple Notification Service (Amazon SNS) and Slack, you should create a finding using the GuardDuty Tester to test that you’ve configured your alert correctly. See Creating custom responses to GuardDuty findings for information about creating alerts with either of these tools. Figure 4 shows a sample EventBridge rule that will send GuardDuty findings to SNS.

Figure 4: EventBridge rule to send GuardDuty findings to SNS
For this post, I assume that you’ve already configured an Amazon EventBridge rule and Amazon SNS alert.
To test alerts:
- Run the following command in your Systems Manager session to create a privileged container finding.
Python3 guardduty_tester.py - -finding ‘PrivilegedEscalation:Kubernetes/PrivilegedContainer’ - Shortly after creating this finding, you should see an SNS alert based on the finding type.

Figure 5: SNS notification from a GuardDuty finding
If you’ve configured the alert correctly, you will see an email similar to Figure 5. The email demonstrates that SNS notifications were successfully configured and tested using the GuardDuty Tester. If this is a new finding, you will receive this SNS notification shortly after the GuardDuty Tester generates the finding, but if this is an updated finding, then the timing will be based on the notification frequency configured in the account.
There are many ways that customers consume GuardDuty findings in their environments. Whether you’re using Amazon SNS or another mechanism such as a chat application, ticketing system, or a security information and event management (SIEM) solution, you can use this example of an EventBridge rule and the GuardDuty Tester to test out your notification pipeline.
Automated response
For the third use case, I show you how to create an automated action based on a GuardDuty finding. In this example, I create a finding based on an EC2 instance connecting to a Bitcoin mining domain, then based on this finding, I use Lambda to tag the instance to assist with identification during that investigation steps that follow. Although this is a simple example, it shows you what you can do by combining EventBridge rules and Lambda functions. If you want to create an automated response for GuardDuty runtime monitoring findings that requires making a host-level modification, you can use EventBridge rules with AWS Systems Manager Run Command to run commands locally on a host to remediate a security issue.
Start by creating a Lambda function that will take a GuardDuty event delivered by EventBridge, pull out the instance ID information, and then use that as a parameter in the create_tags API call. See the following example code.
import json
import boto3
import logging

logger = logging.getLogger()
logger.setLevel(logging.INFO)

def lambda_handler(event, context):
    try:
        # Extract the necessary information from the GuardDuty finding
        instance_id = event['detail']['resource']['instanceDetails']['instanceId']
        account_id = event['detail']['accountId']
        region = event['detail']['region']

        # Create an EC2 client
        ec2 = boto3.client('ec2', region_name=region)

        # Add the "infected" and "cryptomining" tag value pair to the instance
        ec2.create_tags(
            Resources=[instance_id],
            Tags=[
                {
                    'Key': 'infected',
                    'Value': 'cryptomining'
                }
            ]
        )

        logger.info(f"Tagged instance {instance_id} with 'infected=cryptomining' in account {account_id} and region {region}")
        return {
            'statusCode': 200,
            'body': 'Instance tagged successfully'
        }
    except Exception as e:
        logger.error(f"Error tagging instance {instance_id}: {str(e)}")
        return {
            'statusCode': 500,
            'body': f"Error tagging instance: {str(e)}"
        }
Next, I create an EventBridge rule specific to the Bitcoin mining finding that I want to test, shown in Figure 6. The target is the Lambda function that I just created.

Figure 6: EventBridge rule for crypto mining GuardDuty finding
Now that the EventBridge rule is in place with the Lambda function as the target, I can use the GuardDuty Tester to trigger a Bitcoin mining finding and test my solution with the following command.
Python3 guardduty_tester.py - - finding ‘CryptoCurrency:EC2/BitcoinTool.B!DNS’After the finding is generated, I go to my EC2 instance, where there’s a new instance tag with a key of infected and a value of cryptomining, shown in Figure 7.

Figure 7: Updated tags after automated response
Although this is a general example, you can use the same approach across various actions that you might take in response to a GuardDuty finding and then test them using the GuardDuty Tester. Examples include using Lambda to add logic in AWS WAF, a network access control list (network ACL), or AWS Network Firewall to block suspicious traffic, or use Systems Manager Run Command to end a malicious process that’s running on a host.
Conclusion
The updated GuardDuty Tester represents a significant advancement in helping organizations validate and gain confidence in GuardDuty threat detection. The GuardDuty Tester now provides more comprehensive coverage of GuardDuty runtime monitoring and protection plans across various AWS services.
By using the GuardDuty Tester and following the use cases in this post, you can proactively assess your threat detection readiness, identify potential gaps, and implement necessary measures to help you fortify your AWS environments against evolving cyber threats.
If you have feedback about this post, submit comments in the Comments section below. If you have questions about this post, contact AWS Support.