AWS re:Inforce returned to Boston last week, kicking off with a keynote from Amazon Chief Security Officer Steve Schmidt and AWS Chief Information Security officer C.J. Moses:
Be sure to take some time to watch this video and the other leadership sessions, and to use what you learn to take some proactive steps to improve your security posture.
Last Week’s Launches Here are some launches that caught my eye last week:
AWS Wickr uses 256-bit end-to-end encryption to deliver secure messaging, voice, and video calling, including file sharing and screen sharing, across desktop and mobile devices. Each call, message, and file is encrypted with a new random key and can be decrypted only by the intended recipient. AWS Wickr supports logging to a secure, customer-controlled data store for compliance and auditing, and offers full administrative control over data: permissions, ephemeral messaging options, and security groups. You can now sign up for the preview.
AWS Marketplace Vendor Insights helps AWS Marketplace sellers to make security and compliance data available through AWS Marketplace in the form of a unified, web-based dashboard. Designed to support governance, risk, and compliance teams, the dashboard also provides evidence that is backed by AWS Config and AWS Audit Manager assessments, external audit reports, and self-assessments from software vendors. To learn more, read the What’s New post.
GuardDuty Malware Protection protects Amazon Elastic Block Store (EBS) volumes from malware. As Danilo describes in his blog post, a malware scan is initiated when Amazon GuardDuty detects that a workload running on an EC2 instance or in a container appears to be doing something suspicious. The new malware protection feature creates snapshots of the attached EBS volumes, restores them within a service account, and performs an in-depth scan for malware. The scanner supports many types of file systems and file formats and generates actionable security findings when malware is detected.
Amazon Neptune Global Database lets you build graph applications that run across multiple AWS Regions using a single graph database. You can deploy a primary Neptune cluster in one region and replicate its data to up to five secondary read-only database clusters, with up to 16 read replicas each. Clusters can recover in minutes in the result of an (unlikely) regional outage, with a Recovery Point Objective (RPO) of 1 second and a Recovery Time Objective (RTO) of 1 minute. To learn a lot more and see this new feature in action, read Introducing Amazon Neptune Global Database.
Amazon Detective now Supports Kubernetes Workloads, with the ability to scale to thousands of container deployments and millions of configuration changes per second. It ingests EKS audit logs to capture API activity from users, applications, and the EKS control plane, and correlates user activity with information gleaned from Amazon VPC flow logs. As Channy notes in his blog post, you can enable Amazon Detective and take advantage of a free 30 day trial of the EKS capabilities.
AWS SSO is Now AWS IAM Identity Center in order to better represent the full set of workforce and account management capabilities that are part of IAM. You can create user identities directly in IAM Identity Center, or you can connect your existing Active Directory or standards-based identify provider. To learn more, read this post from the AWS Security Blog.
AWS Config Conformance Packs now provide you with percentage-based scores that will help you track resource compliance within the scope of the resources addressed by the pack. Scores are computed based on the product of the number of resources and the number of rules, and are reported to Amazon CloudWatch so that you can track compliance trends over time. To learn more about how scores are computed, read the What’s New post.
Amazon Macie now lets you perform one-click temporary retrieval of sensitive data that Macie has discovered in an S3 bucket. You can retrieve up to ten examples at a time, and use these findings to accelerate your security investigations. All of the data that is retrieved and displayed in the Macie console is encrypted using customer-managed AWS Key Management Service (AWS KMS) keys. To learn more, read the What’s New post.
AWS Control Tower was updated multiple times last week. CloudTrail Organization Logging creates an org-wide trail in your management account to automatically log the actions of all member accounts in your organization. Control Tower now reduces redundant AWS Config items by limiting recording of global resources to home regions. To take advantage of this change you need to update to the latest landing zone version and then re-register each Organizational Unit, as detailed in the What’s New post. Lastly, Control Tower’s region deny guardrail now includes AWS API endpoints for AWS Chatbot, Amazon S3 Storage Lens, and Amazon S3 Multi Region Access Points. This allows you to limit access to AWS services and operations for accounts enrolled in your AWS Control Tower environment.
Other AWS News Here are some other news items and customer stories that you may find interesting:
AWS Open Source News and Updates – My colleague Ricardo Sueiras writes a weekly open source newsletter and highlights new open source projects, tools, and demos from the AWS community. Read installment #122 here.
Growy Case Study – This Netherlands-based company is building fully-automated robot-based vertical farms that grow plants to order. Read the case study to learn how they use AWS IoT and other services to monitor and control light, temperature, CO2, and humidity to maximize yield and quality.
Cutting Cardboard Waste – Bin packing is almost certainly a part of every computer science curriculum! In the linked article from the Amazon Science site, you can learn how an Amazon Principal Research Scientist developed PackOpt to figure out the optimal set of boxes to use for shipments from Amazon’s global network of fulfillment centers. This is an NP-hard problem and the article describes how they build a parallelized solution that explores a multitude of alternative solutions, all running on AWS.
Upcoming Events Check your calendar and sign up for these online and in-person AWS events:
AWS Global Summits – AWS Global Summits are free events that bring the cloud computing community together to connect, collaborate, and learn about AWS. Registrations are open for the following AWS Summits in August:
IMAGINE 2022 – The IMAGINE 2022 conference will take place on August 3 at the Seattle Convention Center, Washington, USA. It’s a no-cost event that brings together education, state, and local leaders to learn about the latest innovations and best practices in the cloud. You can register here.
That’s all for this week. Check back next Monday for another Week in Review!
In Part 1 of this two-part series, we shared an overview of some of the most important 2021 Amazon Web Services (AWS) Security service and feature launches. In this follow-up, we’ll dive deep into additional launches that are important for security professionals to be aware of and understand across all AWS services. There have already been plenty in the first half of 2022, so we’ll highlight those soon, as well.
AWS Identity
You can use AWS Identity Services to build Zero Trust architectures, help secure your environments with a robust data perimeter, and work toward the security best practice of granting least privilege. In 2021, AWS expanded the identity source options, AWS Region availability, and support for AWS services. There is also added visibility and power in the permission management system. New features offer new integrations, additional policy checks, and secure resource sharing across AWS accounts.
AWS Single Sign-On
For identity management, AWS Single Sign-On (AWS SSO) is where you create, or connect, your workforce identities in AWS once and manage access centrally across your AWS accounts in AWS Organizations. In 2021, AWS SSO announced new integrations for JumpCloud and CyberArk users. This adds to the list of providers that you can use to connect your users and groups, which also includes Microsoft Active Directory Domain Services, Okta Universal Directory, Azure AD, OneLogin, and Ping Identity.
For access management, there have been a range of feature launches with AWS Identity and Access Management (IAM) that have added up to more power and visibility in the permissions management system. Here are some key examples.
IAM made it simpler to relate a user’s IAM role activity to their corporate identity. By setting the new source identity attribute, which persists through role assumption chains and gets logged in AWS CloudTrail, you can find out who is responsible for actions that IAM roles performed.
IAM added support for policy conditions, to help manage permissions for AWS services that access your resources. This important feature launch of service principal conditions helps you to distinguish between API calls being made on your behalf by a service principal, and those being made by a principal inside your account. You can choose to allow or deny the calls depending on your needs. As a security professional, you might find this especially useful in conjunction with the aws:CalledVia condition key, which allows you to scope permissions down to specify that this account principal can only call this API if they are calling it using a particular AWS service that’s acting on their behalf. For example, your account principal can’t generally access a particular Amazon Simple Storage Service (Amazon S3) bucket, but if they are accessing it by using Amazon Athena, they can do so. These conditions can also be used in service control policies (SCPs) to give account principals broader scope across an account, organizational unit, or organization; they need not be added to individual principal policies or resource policies.
Another very handy new IAM feature launch is additional information about the reason for an access denied error message. With this additional information, you can now see which of the relevant access control policies (for example, IAM, resource, SCP, or VPC endpoint) was the cause of the denial. As of now, this new IAM feature is supported by more than 50% of all AWS services in the AWS SDK and AWS Command Line Interface, and a fast-growing number in the AWS Management Console. We will continue to add support for this capability across services, as well as add more features that are designed to make the journey to least privilege simpler.
IAM Access Analyzer also launched the ability to generate fine-grained policies based on analyzing past AWS CloudTrail activity. This feature provides a great new capability for DevOps teams or central security teams to scope down policies to just the permissions needed, making it simpler to implement least privilege permissions. IAM Access Analyzer launched further enhancements to expand policy checks, and the ability to generate a sample least-privilege policy from past activity was expanded beyond the account level to include an analysis of principal behavior within the entire organization by analyzing log activity stored in AWS CloudTrail.
AWS Resource Access Manager
AWS Resource Access Manager (AWS RAM) helps you securely share your resources across unrelated AWS accounts within your organization or organizational units (OUs) in AWS Organizations. Now you can also share your resources with IAM roles and IAM users for supported resource types. This update enables more granular access using managed permissions that you can use to define access to shared resources. In addition to the default managed permission defined for each shareable resource type, you now have more flexibility to choose which permissions to grant to whom for resource types that support additional managed permissions. Additionally, AWS RAM added support for global resource types, enabling you to provision a global resource once, and share that resource across your accounts. A global resource is one that can be used in multiple AWS Regions; the first example of a global resource is found in AWS Cloud WAN, currently in preview as of this publication. AWS RAM helps you more securely share an AWS Cloud WAN core network, which is a managed network containing AWS and on-premises networks. With AWS RAM global resource sharing, you can use the Cloud WAN core network to centrally operate a unified global network across Regions and accounts.
AWS Directory Service
AWS Directory Service for Microsoft Active Directory, also known as AWS Managed Microsoft Active Directory (AD), was updated to automatically provide domain controller and directory utilization metrics in Amazon CloudWatch for new and existing directories. Analyzing these utilization metrics helps you quantify your average and peak load times to identify the need for additional domain controllers. With this, you can define the number of domain controllers to meet your performance, resilience, and cost requirements.
Amazon Cognito
Amazon Cognitoidentity pools (federated identities) was updated to enable you to use attributes from social and corporate identity providers to make access control decisions and simplify permissions management in AWS resources. In Amazon Cognito, you can choose predefined attribute-tag mappings, or you can create custom mappings using the attributes from social and corporate providers’ access and ID tokens, or SAML assertions. You can then reference the tags in an IAM permissions policy to implement attribute-based access control (ABAC) and manage access to your AWS resources. Amazon Cognito also launched a new console experience for user pools and now supports targeted sign out through refresh token revocation.
Governance, control, and logging services
There were a number of important releases in 2021 in the areas of governance, control, and logging services.
This approach provides a powerful new middle ground between the older security models of prevention (which provide developers only an access denied message, and often can’t distinguish between an acceptable and an unacceptable use of the same API) and a detect and react model (when undesired states have already gone live). The Cfn-Guard 2.0 model gives builders the freedom to build with IaC, while allowing central teams to have the ability to reject infrastructure configurations or changes that don’t conform to central policies—and to do so with completely custom error messages that invite dialog between the builder team and the central team, in case the rule is unnuanced and needs to be refined, or if a specific exception needs to be created.
For example, a builder team might be allowed to provision and attach an internet gateway to a VPC, but the team can do this only if the routes to the internet gateway are limited to a certain pre-defined set of CIDR ranges, such as the public addresses of the organization’s branch offices. It’s not possible to write an IAM policy that takes into account the CIDR values of a VPC route table update, but you can write a Cfn-Guard 2.0 rule that allows the creation and use of an internet gateway, but only with a defined and limited set of IP addresses.
AWS Systems Manager Incident Manager
An important launch that security professionals should know about is AWS Systems Manager Incident Manager. Incident Manager provides a number of powerful capabilities for managing incidents of any kind, including operational and availability issues but also security issues. With Incident Manager, you can automatically take action when a critical issue is detected by an Amazon CloudWatch alarm or Amazon EventBridge event. Incident Manager runs pre-configured response plans to engage responders by using SMS and phone calls, can enable chat commands and notifications using AWS Chatbot, and runs automation workflows with AWS Systems Manager Automation runbooks. The Incident Manager console integrates with AWS Systems Manager OpsCenter to help you track incidents and post-incident action items from a central place that also synchronizes with third-party management tools such as Jira Service Desk and ServiceNow. Incident Manager enables cross-account sharing of incidents using AWS RAM, and provides cross-Region replication of incidents to achieve higher availability.
Amazon Simple Storage Service (Amazon S3) is one of the most important services at AWS, and its steady addition of security-related enhancements is always big news. Here are the 2021 highlights.
Access Points aliases
Amazon S3 introduced a new feature, Amazon S3 Access Points aliases. With Amazon S3 Access Points aliases, you can make the access points backwards-compatible with a large amount of existing code that is programmed to interact with S3 buckets rather than access points.
To understand the importance of this launch, we have to go back to 2019 to the launch of Amazon S3 Access Points. Access points are a powerful mechanism for managing S3 bucket access. They provide a great simplification for managing and controlling access to shared datasets in S3 buckets. You can create up to 1,000 access points per Region within each of your AWS accounts. Although bucket access policies remain fully enforced, you can delegate access control from the bucket to its access points, allowing for distributed and granular control. Each access point enforces a customizable policy that can be managed by a particular workgroup, while also avoiding the problem of bucket policies needing to grow beyond their maximum size. Finally, you can also bind an access point to a particular VPC for its lifetime, to prevent access directly from the internet.
With the 2021 launch of Access Points aliases, Amazon S3 now generates a unique DNS name, or alias, for each access point. The Access Points aliases look and acts just like an S3 bucket to existing code. This means that you don’t need to make changes to older code to use Amazon S3 Access Points; just substitute an Access Points aliases wherever you previously used a bucket name. As a security team, it’s important to know that this flexible and powerful administrative feature is backwards-compatible and can be treated as a drop-in replacement in your various code bases that use Amazon S3 but haven’t been updated to use access point APIs. In addition, using Access Points aliases adds a number of powerful security-related controls, such as permanent binding of S3 access to a particular VPC.
S3 Bucket Keys were launched at the end of 2020, another great launch that security professionals should know about, so here is an overview in case you missed it. S3 Bucket Keys are data keys generated by AWS KMS to provide another layer of envelope encryption in which the outer layer (the S3 Bucket Key) is cached by S3 for a short period of time. This extra key layer increases performance and reduces the cost of requests to AWS KMS. It achieves this by decreasing the request traffic from Amazon S3 to AWS KMS from a one-to-one model—one request to AWS KMS for each object written to or read from Amazon S3—to a one-to-many model using the cached S3 Bucket Key. The S3 Bucket Key is never stored persistently in an unencrypted state outside AWS KMS, and so Amazon S3 ultimately must always return to AWS KMS to encrypt and decrypt the S3 Bucket Key, and thus, the data. As a result, you still retain control of the key hierarchy and resulting encrypted data through AWS KMS, and are still able to audit Amazon S3 returning periodically to AWS KMS to refresh the S3 Bucket Keys, as logged in CloudTrail.
Returning to our review of 2021, S3 Bucket Keys gained the ability to use Amazon S3 Inventory and Amazon S3 Batch Operations automatically to migrate objects from the higher cost, slightly lower-performance SSE-KMS model to the lower-cost, higher-performance S3 Bucket Keys model.
To understand this launch, we need to go in time to the origins of Amazon S3, which is one of the oldest services in AWS, created even before IAM was launched in 2011. In those pre-IAM days, a storage system like Amazon S3 needed to have some kind of access control model, so Amazon S3 invented its own: Amazon S3 access control lists (ACLs). Using ACLs, you could add access permissions down to the object level, but only with regard to access by other AWS account principals (the only kind of identity that was available at the time), or public access (read-only or read-write) to an object. And in this model, objects were always owned by the creator of the object, not the bucket owner.
After IAM was introduced, Amazon S3 added the bucket policy feature, a type of resource policy that provides the rich features of IAM, including full support for all IAM principals (users and roles), time-of-day conditions, source IP conditions, ability to require encryption, and more. For many years, Amazon S3 access decisions have been made by combining IAM policy permissions and ACL permissions, which has served customers well. But the object-writer-is-owner issue has often caused friction. The good news for security professionals has been that a deny by either type of access control type overrides an allow by the other, so there were no security issues with this bi-modal approach. The challenge was that it could be administratively difficult to manage both resource policies—which exist at the bucket and access point level—and ownership and ACLs—which exist at the object level. Ownership and ACLs might potentially impact the behavior of only a handful of objects, in a bucket full of millions or billions of objects.
With the features released in 2021, Amazon S3 has removed these points of friction, and now provides the features needed to reduce ownership issues and to make IAM-based policies the only access control system for a specified bucket. The first step came in 2020 with the ability to make object ownership track bucket ownership, regardless of writer. But that feature applied only to newly-written objects. The final step is the 2021 launch we’re highlighting here: the ability to disable at the bucket level the evaluation of all existing ACLs—including ownership and permissions—effectively nullifying all object ACLs. From this point forward, you have the mechanisms you need to govern Amazon S3 access with a combination of S3 bucket policies, S3 access point policies, and (within the same account) IAM principal policies, without worrying about legacy models of ACLs and per-object ownership.
Additional database and storage service features
AWS Backup Vault Lock
AWS Backup added an important new additional layer for backup protection with the availability of AWS Backup Vault Lock. A vault lock feature in AWS is the ability to configure a storage policy such that even the most powerful AWS principals (such as an account or Org root principal) can only delete data if the deletion conforms to the preset data retention policy. Even if the credentials of a powerful administrator are compromised, the data stored in the vault remains safe. Vault lock features are extremely valuable in guarding against a wide range of security and resiliency risks (including accidental deletion), notably in an era when ransomware represents a rising threat to data.
ACM Private CA achieved FedRAMP authorization for six additional AWS Regions in the US.
Additional certificate customization now allows administrators to tailor the contents of certificates for new use cases, such as identity and smart card certificates; or to securely add information to certificates instead of relying only on the information present in the certificate request.
Additional capabilities were added for sharing CAs across accounts by using AWS RAM to help administrators issue fully-customized certificates, or revoke them, from a shared CA.
Integration with Kubernetes provides a more secure certificate authority solution for Kubernetes containers.
Online Certificate Status Protocol (OCSP) provides a fully-managed solution for notifying endpoints that certificates have been revoked, without the need for you to manage or operate infrastructure yourself.
Network and application protection
We saw a lot of enhancements in network and application protection in 2021 that will help you to enforce fine-grained security policies at important network control points across your organization. The services and new capabilities offer flexible solutions for inspecting and filtering traffic to help prevent unauthorized resource access.
AWS WAF
AWS WAF launched AWS WAF Bot Control, which gives you visibility and control over common and pervasive bots that consume excess resources, skew metrics, cause downtime, or perform other undesired activities. The Bot Control managed rule group helps you monitor, block, or rate-limit pervasive bots, such as scrapers, scanners, and crawlers. You can also allow common bots that you consider acceptable, such as status monitors and search engines. AWS WAF also added support for custom responses, managed rule group versioning, in-line regular expressions, and Captcha. The Captcha feature has been popular with customers, removing another small example of “undifferentiated work” for customers.
AWS Shield Advanced
AWS Shield Advanced now automatically protects web applications by blocking application layer (L7) DDoS events with no manual intervention needed by you or the AWS Shield Response Team (SRT). When you protect your resources with AWS Shield Advanced and enable automatic application layer DDoS mitigation, Shield Advanced identifies patterns associated with L7 DDoS events and isolates this anomalous traffic by automatically creating AWS WAF rules in your web access control lists (ACLs).
Amazon CloudFront
In other edge networking news, Amazon CloudFront added support for response headers policies. This means that you can now add cross-origin resource sharing (CORS), security, and custom headers to HTTP responses returned by your CloudFront distributions. You no longer need to configure your origins or use custom Lambda@Edge or CloudFront Functions to insert these headers.
Following Route 53 Resolver’s much-anticipated launch of DNS logging in 2020, the big news for 2021 was the launch of its DNS Firewall capability. Route 53 Resolver DNS Firewall lets you create “blocklists” for domains you don’t want your VPC resources to communicate with, or you can take a stricter, “walled-garden” approach by creating “allowlists” that permit outbound DNS queries only to domains that you specify. You can also create alerts for when outbound DNS queries match certain firewall rules, allowing you to test your rules before deploying for production traffic. Route 53 Resolver DNS Firewall launched with two managed domain lists—malware domains and botnet command and control domains—enabling you to get started quickly with managed protections against common threats. It also integrated with Firewall Manager (see the following section) for easier centralized administration.
AWS Network Firewall and Firewall Manager
Speaking of AWS Network Firewall and Firewall Manager, 2021 was a big year for both. Network Firewall added support for AWS Managed Rules, which are groups of rules based on threat intelligence data, to enable you to stay up to date on the latest security threats without writing and maintaining your own rules. AWS Network Firewall features a flexible rules engine enabling you to define firewall rules that give you fine-grained control over network traffic. As of the launch in late 2021, you can enable managed domain list rules to block HTTP and HTTPS traffic to domains identified as low-reputation, or that are known or suspected to be associated with malware or botnets. Prior to that, another important launch was new configuration options for rule ordering and default drop, making it simpler to write and process rules to monitor your VPC traffic. Also in 2021, Network Firewall announced a major regional expansion following its initial launch in 2020, and a range of compliance achievements and eligibility including HIPAA, PCI DSS, SOC, and ISO.
Elastic Load Balancing now supports forwarding traffic directly from Network Load Balancer (NLB) to Application Load Balancer (ALB). With this important new integration, you can take advantage of many critical NLB features such as support for AWS PrivateLink and exposing static IP addresses for applications that still require ALB.
The AWS Networking team also made Amazon VPC private NAT gateways available in both AWS GovCloud (US) Regions. The expansion into the AWS GovCloud (US) Regions enables US government agencies and contractors to move more sensitive workloads into the cloud by helping them to address certain regulatory and compliance requirements.
Compute
Security professionals should also be aware of some interesting enhancements in AWS compute services that can help improve their organization’s experience in building and operating a secure environment.
Amazon Elastic Compute Cloud (Amazon EC2) launched the Global View on the console to provide visibility to all your resources across Regions. Global View helps you monitor resource counts, notice abnormalities sooner, and find stray resources. A few days into 2022, another simple but extremely useful EC2 launch was the new ability to obtain instance tags from the Instance Metadata Service (IMDS). Many customers run code on Amazon EC2 that needs to introspect about the EC2 tags associated with the instance and then change its behavior depending on the content of the tags. Prior to this launch, you had to associate an EC2 role and call the EC2 API to get this information. That required access to API endpoints, either through a NAT gateway or a VPC endpoint for Amazon EC2. Now, that information can be obtained directly from the IMDS, greatly simplifying a common use case.
Amazon EC2 launched sharing of Amazon Machine Images (AMIs) with AWS Organizations and Organizational Units (OUs). Previously, you could share AMIs only with specific AWS account IDs. To share AMIs within AWS Organizations, you had to explicitly manage sharing of AMIs on an account-by-account basis, as they were added to or removed from AWS Organizations. With this new feature, you no longer have to update your AMI permissions because of organizational changes. AMI sharing is automatically synchronized when organizational changes occur. This feature greatly helps both security professionals and governance teams to centrally manage and govern AMIs as you grow and scale your AWS accounts. As previously noted, this feature was also added to EC2 Image Builder. Finally, Amazon Data Lifecycle Manager, the tool that manages all your EBS volumes and AMIs in a policy-driven way, now supports automatic deprecation of AMIs. As a security professional, you will find this helpful as you can set a timeline on your AMIs so that, if the AMIs haven’t been updated for a specified period of time, they will no longer be considered valid or usable by development teams.
Looking ahead
In 2022, AWS continues to deliver experiences that meet administrators where they govern, developers where they code, and applications where they run. We will continue to summarize important launches in future blog posts. If you’re interested in learning more about AWS services, join us for AWS re:Inforce, the AWS conference focused on cloud security, identity, privacy, and compliance. AWS re:Inforce 2022 will take place July 26–27 in Boston, MA. Registration is now open. Register now with discount code SALxUsxEFCw to get $150 off your full conference pass to AWS re:Inforce. For a limited time only and while supplies last. We look forward to seeing you there!
To stay up to date on the latest product and feature launches and security use cases, be sure to read the What’s New with AWS announcements (or subscribe to the RSS feed) and the AWS Security Blog.
If you have feedback about this post, submit comments in the Comments section below. If you have questions about this post, contact AWS Support.
Want more AWS Security news? Follow us on Twitter.
At Amazon Web Services (AWS), we continuously innovate to deliver you a cloud computing environment that works to help meet the requirements of the most security-sensitive organizations. To respond to evolving technology and regulatory standards for Transport Layer Security (TLS), we will be updating the TLS configuration for all AWS service API endpoints to a minimum of version TLS 1.2. This update means you will no longer be able to use TLS versions 1.0 and 1.1 with all AWS APIs in all AWS Regions by June 28, 2023. In this post, we will tell you how to check your TLS version, and what to do to prepare.
We have continued AWS support for TLS versions 1.0 and 1.1 to maintain backward compatibility for customers that have older or difficult to update clients, such as embedded devices. Furthermore, we have active mitigations in place that help protect your data for the issues identified in these older versions. Now is the right time to retire TLS 1.0 and 1.1, because increasing numbers of customers have requested this change to help simplify part of their regulatory compliance, and there are fewer and fewer customers using these older versions.
If you are one of the more than 95% of AWS customers who are already using TLS 1.2 or later, you will not be impacted by this change. You are almost certainly already using TLS 1.2 or later if your client software application was built after 2014 using an AWS Software Development Kit (AWS SDK), AWS Command Line Interface (AWS CLI), Java Development Kit (JDK) 8 or later, or another modern development environment. If you are using earlier application versions, or have not updated your development environment since before 2014, you will likely need to update.
If you are one of the customers still using TLS 1.0 or 1.1, then you must update your client software to use TLS 1.2 or later to maintain your ability to connect. It is important to understand that you already have control over the TLS version used when connecting. When connecting to AWS API endpoints, your client software negotiates its preferred TLS version, and AWS uses the highest mutually agreed upon version.
To minimize the availability impact of requiring TLS 1.2, AWS is rolling out the changes on an endpoint-by-endpoint basis over the next year, starting now and ending in June 2023. Before making these potentially breaking changes, we monitor for connections that are still using TLS 1.0 or TLS 1.1. If you are one of the AWS customers who may be impacted, we will notify you on your AWS Health Dashboard, and by email. After June 28, 2023, AWS will update our API endpoint configuration to remove TLS 1.0 and TLS 1.1, even if you still have connections using these versions.
What should you do to prepare for this update?
To minimize your risk, you can self-identify if you have any connections using TLS 1.0 or 1.1. If you find any connections using TLS 1.0 or 1.1, you should update your client software to use TLS 1.2 or later.
AWS CloudTrail records are especially useful to identify if you are using the outdated TLS versions. You can now search for the TLS version used for your connections by using the recently added tlsDetails field. The tlsDetails structure in each CloudTrail record contains the TLS version, cipher suite, and the fully qualified domain name (FQDN, also known as the URL) field used for the API call. You can then use the data in the records to help you pinpoint your client software that is responsible for the TLS 1.0 or 1.1 call, and update it accordingly. Nearly half of AWS services currently provide the TLS information in the CloudTrail tlsDetails field, and we are continuing to roll this out for the remaining services in the coming months.
We recommend you use one of the following options for running your CloudTrail TLS queries:
Amazon CloudWatch Log Insights: There are two built-in CloudWatch Log Insights sample CloudTrail TLS queries that you can use, as shown in Figure 1.
Figure 1: Available sample TLS queries for CloudWatch Log Insights
Amazon Athena: You can query AWS CloudTrail logs in Amazon Athena, and we will be adding support for querying the TLS values in your CloudTrail logs in the coming months. Look for updates and announcements about this in future AWS Security Blog posts.
In addition to using CloudTrail data, you can also identify the TLS version used by your connections by performing code, network, or log analysis as described in the blog post TLS 1.2 will be required for all AWS FIPS endpoints. Note that while this post refers to the FIPS API endpoints, the information about querying for TLS versions is applicable to all API endpoints.
Will I be notified if I am using TLS 1.0 or TLS 1.1?
If we detect that you are using TLS 1.0 or 1.1, you will be notified on your AWS Health Dashboard, and you will receive email notifications. However, you will not receive a notification for connections you make anonymously to AWS shared resources, such as a public Amazon Simple Storage Service (Amazon S3) bucket, because we cannot identify anonymous connections. Furthermore, while we will make every effort to identify and notify every customer, there is a possibility that we may not detect infrequent connections, such as those that occur less than monthly.
How do I update my client to use TLS 1.2 or TLS 1.3?
If you are using an AWS Software Developer Kit (AWS SDK) or the AWS Command Line Interface (AWS CLI), follow the detailed guidance about how to examine your client software code and properly configure the TLS version used in the blog post TLS 1.2 to become the minimum for FIPS endpoints.
We encourage you to be proactive in order to avoid an impact to availability. Also, we recommend that you test configuration changes in a staging environment before you introduce them into production workloads.
What is the most common use of TLS 1.0 or TLS 1.1?
The most common use of TLS 1.0 or 1.1 are .NET Framework versions earlier than 4.6.2. If you use the .NET Framework, please confirm you are using version 4.6.2 or later. For information about how to update and configure the .NET Framework to support TLS 1.2, see How to enable TLS 1.2 on clients in the .NET Configuration Manager documentation.
What is Transport Layer Security (TLS)?
Transport Layer Security (TLS) is a cryptographic protocol that secures internet communications. Your client software can be set to use TLS version 1.0, 1.1, 1.2, or 1.3, or a subset of these, when connecting to service endpoints. You should ensure that your client software supports TLS 1.2 or later.
Is there more assistance available to help verify or update my client software?
If you have any questions or issues, you can start a new thread on the AWS re:Post community, or you can contact AWS Support or your Technical Account Manager (TAM).
Additionally, you can use AWS IQ to find, securely collaborate with, and pay AWS certified third-party experts for on-demand assistance to update your TLS client components. To find out how to submit a request, get responses from experts, and choose the expert with the right skills and experience, see the AWS IQ page. Sign in to the AWS Management Console and select Get Started with AWS IQ to start a request.
What if I can’t update my client software?
If you are unable to update to use TLS 1.2 or TLS 1.3, contact AWS Support or your Technical Account Manager (TAM) so that we can work with you to identify the best solution.
If you have feedback about this post, submit comments in the Comments section below.
Want more AWS Security how-to content, news, and feature announcements? Follow us on Twitter.
In this post, we describe a practical approach that you can use to detect anomalous behaviors within Amazon Web Services (AWS) cloud workloads by using behavioral analysis techniques that can be used to augment existing threat detection solutions. Anomaly detection is an advanced threat detection technique that should be considered when a mature security baseline as described in the security pillar of the AWS Well-Architected framework is in place.
Why you should consider behavior-based detection in the cloud
Traditionally, threat detection solutions focus on the endpoint and the network and analyze log events for known indicators of attack and indicators of compromise Other forms of threat detection focus on the user and data using products such as data loss prevention and user and endpoint behavior analytics to detect suspicious user behavior at the data layer. Both solution types analyze operating system, application level, and network logs and focus on the detection of known tactics, techniques, and procedures, but the cloud control plane and other cloud native log sources are outside the use case of traditional threat detection solutions
Being able to detect malicious behavior in your environment is necessary to stay secure in the cloud. This includes the detection of events when cloud services might have been misused. The challenge is that related activities are logged on a control plane level and don’t leave any traces in log sources that are traditionally analyzed for threat detection. For example, unwanted data movements between cloud services or cloud accounts use the cloud backplane for data transfers and don’t necessarily touch any endpoint or network gateway. Therefore, related events only appear within cloud native logs such as AWS CloudTrail or AWS Config and not in network or operating system logs.
Figure 1: Solution architecture example
In the simplified example shown in Figure 1, only data streams that pass from the cloud to the firewall and then to AWS services are visible to the endpoint (an Amazon EC2 instance) or the gateway security solution.
Data streams that pass through serverless solutions and activities of cloud native services are only visible in cloud native logs.
Amazon GuardDuty is a threat detection service that continuously monitors for malicious activity and unauthorized behavior to protect AWS accounts, and analyzes not only the network flow logs but also the cloud control plane. GuardDuty uses threat intelligence coupled with machine learning and behavior models to detect threats such as account compromise and unusual data access or communications, and should be activated in each cloud account.
But not all unwanted behavior follows known attack patterns. Unwanted behaviors can also include normal activity inside a cloud environment that is different from the intended behavior of a particular workload. Each activity or log entry by itself might not look malicious, but a series of events can reveal possible malicious intent when compared to the individual context of the application. Because there are no bad events as such in CloudTrail like in a firewall or antivirus log, the challenge is to detect threats based on noncompliant behaviors in the context of the application use case and not on known threat vectors.
Anomaly detection is playing an increasingly important role in defense strategies because of the constantly evolving attack and obfuscation techniques that make it hard to detect threats based on known tactics, techniques, and procedures.
What does unwanted behavior look like?
One approach to identifying key events that are related to unwanted behaviors is to identify a set of anomaly-related questions around common cloud activities that consider the workload context. Depending on the workload type, unwanted cloud API events and related questions could look like the following:
Event: An EC2 instance was launched. Question: Was an unexpected user or role used or was the EC2 instance launched outside the pipeline?
Event: A user or role performs many API list and describe events within a short timeframe. Questions: Does the application normally generate list and describe API calls in production? If not, this could be reconnaissance activity performed by an intruder.
Event: A user or role creates and shares an Amazon Elastic Block Store (Amazon EBS) snapshot with another account. Question: Is the snapshot sharing event expected? If not, it could be an attempt to exfiltrate data.
Event: Many failed API calls are detected in CloudTrail. Question: Are these failed calls around sensitive services or information? If yes, an unauthorized user could be exploring the environment.
Event: Many ListBucket events are detected for a sensitive Amazon Simple Storage Service (Amazon S3) bucket. Question: Are these events unexpected and performed by an unexpected identity? If yes, an unauthorized user performing an S3 bucket enumeration might indicate a reconnaissance activity.
After a set of questions has been identified, they can be converted into application specific threat detection use cases, which can be applied to sensitive production environments. This is a useful strategy because these environments typically have a predictable usage pattern. The predictable patterns reduce the chance of false positives, making it worth the effort of developing use cases for monitoring anomalies. Threat detection use cases can be identified within CloudTrail logs using security information and event management (SIEM) tools or Amazon CloudWatch rules.
Detecting anomalies in CloudTrail with CloudWatch
Activities within your AWS account can be recorded with CloudTrail, which makes it the ideal service not only for deeper investigations into past cloud activities but also to detect unwanted behaviors in near real time. CloudTrail sends logs to an S3 bucket and can forward events to CloudWatch. Using CloudWatch, you can perform searches across all CloudTrail events and define CloudWatch alarms for automatic notifications.
You can create alerts for individual CloudTrail events that you consider an anomaly by creating CloudWatch filters and alarms. A filter defines the events that you want to monitor and an alarm defines the threshold when you want to be notified.
To create a filter for the preceding S3 bucket enumeration example, you would select the CloudTrail log group, and then select Metric Filters and create a new metric filter, as shown in Figure 2.
Figure 2: Create CloudWatch metric filter
Excluding the userAgentAWS Internal excludes S3 access activities performed by other AWS services such as AWS Access Analyzer or Amazon Macie which can be considered normal behavior.
Save this metric filter in a new name space that you use for all of your anomaly detection monitoring. After you have created the filter, create a new CloudWatch alarm based on your filter. Depending on your filter and alarm thresholds, you will receive CloudWatch alarm notifications through a Amazon Simple Notification Service (Amazon SNS) topic and have the opportunity to automatically launch other actions that can perform incident response activities.
After an alert is raised, you can use the same filter pattern to search for the relevant events in CloudWatch. The CloudTrail events will provide more information about who performed the S3 ListBucket events such as IP address (sourceIPAddress), who performed the action (userIdentity), or if the action was performed through the AWS Management Console or AWS Command Line Interface (AWS CLI) (userAgent = aws-internal or aws-cli). Figure 3 that follows is an example of a CloudTrail log.
Figure 3: CloudTrail example log
Detecting anomalies using traps
Another simple, but effective technique to detect intruders based on unwanted behaviors is to use decoy services such as canaries or honey pots. Honey pots are designed to provide information about the behavior of attackers by providing them fake production environments that they can explore—such as hosts within a subnet or data stores such as databases or storage services with dummy data. Canaries are identities or access tokens within honey pot environments that look like privileged identities. Honey pots and canaries both appear attractive to attackers due to the names that are used for users, databases, or host names, but don’t expose the organization to risk if compromised.
Using CloudWatch alarms, you can monitor CloudTrail for events that indicate that attackers have started to explore the honey pot or tried to laterally move using the canary access token. By acting like an attacker yourself, you can generate test events within CloudTrail that will help you to identify the event details—such as event sources, event names, and parameters—that you want to monitor. Here are some examples of CloudTrail events you can monitor for different kinds of traps.
Trap
Event source
Event name
Example instance or user name
Login attempt using a canary identity
signin.amazonaws.com
ConsoleLogin
Backup_Admin
Assume role attempt using a canary role
sts.amazonaws.com
AssumeRole
DevOps_role
Exploration of a honey pot database
dynamodb.amazonaws.com
ListTable
CustomerAccounts
Exploration of a honey pot storage service
s3.amazonaws.com
GetObject
PasswordBackup
Traps are typically deployed in production environments where access and use patterns are predictable and strictly controlled. They’re a cost effective and easy to implement solution that can provide alarms with a high degree of certainty. Traps also offer a good chance to catch even the most sophisticated threat actors; especially when they use highly automated attacks.
Detecting statistical anomalies
AWS CloudTrail Insights is a feature of CloudTrail that can be used to identify unusual operational activity in your AWS accounts such as spikes in resource provisioning, bursts of AWS Identity and Access Management (IAM) activity, or gaps in periodic maintenance activity.
CloudTrail Insights can provide primary indicators for noncompliant behaviors by establishing a baseline for normal behavior and then generating Insights events when it detects unusual patterns. Primary indicators are events that initiate an investigation.
But even when statistical changes haven’t reached alert thresholds and no issue is raised, statistical insights can be used as a supporting secondary indicator during investigations to better understand the context of an incident. Even minor changes of specific API calls around sensitive data can provide valuable information after an alert from another solution such as GuardDuty, or when the previously described anomaly detection techniques have been raised.
Figure 4 that follows is an example of an Insights chart showing API calls over time.
Figure 4: CloudTrail Insights example chart
Conclusion
In this post I described the importance of monitoring sensitive workloads for noncompliant or unwanted behaviors to complement existing security solutions. Anomaly detection in the cloud monitors cloud service activities on the control plane and checks to see if the behavior is expected in the context of each workload. The effort to set up and support the tools described in this blog post leads to an affordable, practical, and powerful mechanism for the detection of sophisticated threat actors in the cloud. To learn more about how you can analyze API activities in the cloud, see Analyzing AWS CloudTrail in Amazon CloudWatch in the AWS Management & Governance Blog.
If you have feedback about this post, submit comments in the Comments section below. If you have questions about this post, start a new thread on the Amazon ADD FORUM NAME AND LINK or contact AWS Support.
Want more AWS Security how-to content, news, and feature announcements? Follow us on Twitter.
Building a multi-Region application requires lots of preparation and work. Many AWS services have features to help you build and manage a multi-Region architecture, but identifying those capabilities across 200+ services can be overwhelming.
In this 3-part blog series, we’ll explore AWS services with features to assist you in building multi-Region applications. In Part 1, we’ll build a foundation with AWS security, networking, and compute services. In Part 2, we’ll add in data and replication strategies. Finally, in Part 3, we’ll look at the application and management layers.
Considerations before getting started
AWS Regions are built with multiple isolated and physically separate Availability Zones (AZs). This approach allows you to create highly available Well-Architected workloads that span AZs to achieve greater fault tolerance. There are three general reasons that you may need to expand beyond a single Region:
Expansion to a global audience as an application grows and its user base becomes more geographically dispersed, there can be a need to reduce latencies for different parts of the world.
Local laws and regulations may have strict data residency and privacy requirements that must be followed.
Ensuring security, identity, and compliance
Creating a security foundation starts with proper authentication, authorization, and accounting to implement the principle of least privilege. AWS Identity and Access Management (IAM) operates in a global context by default. With IAM, you specify who can access which AWS resources and under what conditions. For workloads that use directory services, the AWS Directory Service for Microsoft Active Directory Enterprise Edition can be set up to automatically replicate directory data across Regions. This allows applications to reduce lookup latencies by using the closest directory and creates durability by spanning multiple Regions.
AWS KMS can be used to encrypt data at rest, and is used extensively for encryption across AWS services. By default, keys are confined to a single Region. AWS KMS multi-Region keys can be created to replicate keys to a second Region, which eliminates the need to decrypt and re-encrypt data with a different key in each Region.
As your application expands to new Regions, AWS Security Hub can aggregate and link findings to a single Region to create a centralized view across accounts and Regions. These findings are continuously synced between Regions to keep you updated on global findings.
We put these features together in Figure 1.
Figure 1. Multi-Region security, identity, and compliance services
Building a global network
For resources launched into virtual networks in different Regions, Amazon Virtual Private Cloud (Amazon VPC) allows private routing between Regions and accounts with VPC peering. These resources can communicate using private IP addresses and do not require an internet gateway, VPN, or separate network appliances. This works well for smaller networks that only require a few peering connections. However, as the number of peered connections increases, the mesh of peered connections can become difficult to manage and troubleshoot.
AWS Transit Gateway can help reduce these difficulties by creating a central transitive hub to act as a cloud router. A Transit Gateway’s routing capabilities can expand to additional Regions with Transit Gateway inter-Region peering to create a globally distributed private network.
Building a reliable, cost-effective way to route users to distributed Internet applications requires highly available and scalable Domain Name System (DNS) records. Amazon Route 53 does exactly that.
Route 53 routing policies can route traffic to a record with the lowest latency, or automatically fail over a record. If a larger failure occurs, the Route 53 Application Recovery Controller can simplify the monitoring and failover process for application failures across Regions, AZs, and on-premises.
Amazon CloudFront’s content delivery network is truly global, built across 300+ points of presence (PoP) spread throughout the world. Applications that have multiple possible origins, such as across Regions, can use CloudFront origin failover to automatically fail over the origin. CloudFront’s capabilities expand beyond serving content, with the ability to run compute at the edge. CloudFront functions make it easy to run lightweight JavaScript functions, and AWS Lambda@Edge makes it easy to run Node.js and Python functions across these 300+ PoPs.
Although EC2 instances and their associated Amazon Elastic Block Store (Amazon EBS) volumes live in a single AZ, Amazon Data Lifecycle Manager can automate the process of taking and copying EBS snapshots across Regions. This can enhance DR strategies by providing a relatively easy cold backup-and-restore option for EBS volumes.
As an architecture expands into multiple Regions, it can become difficult to track where instances are provisioned. Amazon EC2 Global View helps solve this by providing a centralized dashboard to see Amazon EC2 resources such as instances, VPCs, subnets, security groups, and volumes in all active Regions.
Microservice-based applications that use containers benefit from quicker start-up times. Amazon Elastic Container Registry (Amazon ECR) can help ensure this happens consistently across Regions with private image replication at the registry level. An ECR private registry can be configured for either cross-Region or cross-account replication to ensure your images are ready in secondary Regions when needed.
We bring these compute layer features together in Figure 3.
Figure 3. AMI and EBS snapshot copy across Regions
Summary
It’s important to create a solid foundation when architecting a multi-Region application. These foundations pave the way for you to move fast in a secure, reliable, and elastic way as you build out your application. In this post, we covered options across AWS security, networking, and compute services that have built-in functionality to take away some of the undifferentiated heavy lifting. We’ll cover data, application, and management services in future posts.
Looking for more architecture content?AWS Architecture Center provides reference architecture diagrams, vetted architecture solutions, Well-Architected best practices, patterns, icons, and more!
Businesses are expanding their footprint on Amazon Web Services (AWS) and are adopting a multi-account strategy to help isolate and manage business applications and data. In the multi-account strategy, it is common to have business applications deployed in one account accessing an Amazon Simple Storage Service (Amazon S3) encrypted bucket from another AWS account.
When an application in an AWS account uses a AWS Key Management Service (AWS KMS) key owned by a different account, it’s known as a cross-account call. For cross-account requests, AWS KMS throttles the account that makes the requests, not the account that owns the AWS KMS key. These requests count toward the request quota of the caller account. Sometimes it’s essential to identify or track cross-account AWS KMS API usage. In this blog, you will learn about use cases to track these requests and steps to identify cross-account AWS KMS calls.
To understand the problem better, consider a scenario where you have multiple AWS accounts set up in a hub and spoke configuration as shown in the following diagram. Each account is administered by a different administrator. Amazon S3 data lake is located in the centralized hub account. The data lake bucket is encrypted using server-side encryption with AWS KMS (SSE-KMS) with customer-managed keys. Multiple spoke accounts access datasets from this data lake bucket. When a spoke account uploads or downloads objects from the data lake, Amazon S3 makes a GenerateDataKey (for uploads) or Decrypt (for downloads) API request to AWS KMS on behalf of the spoke account. These API requests get applied toward AWS KMS quota of the spoke account.
In the following diagram (figure 1), spoke accounts B, C, and D are uploading/downloading files from the encrypted data lake located in hub account A. Related AWS KMS API quotas will get applied to spoke accounts even though encryption/decryption is happening at the data lake S3 bucket. For example, the centralized Amazon S3 data lake is located in hub account A with an account ID 111111111111. Amazon S3 data lake bucket is encrypted using AWS KMS key ARN ending in 3aa3c82a2174.
Spoke account B with account ID 222222222222 is downloading 1,811 files and uploading 749 files from the centralized data lake. A total of 2,560 AWS KMS API calls will be counted against the request quota for account B.
Spoke account C with account ID 33333333333 is downloading 997 files and uploading 271 files from centralized data lake. A total of 1,268 AWS KMS API calls will be counted against the request quota for account C.
Spoke account D with account ID 444444444444 is downloading 638 files and uploading 306 files from centralized data lake from centralized data lake. The total 944 AWS KMS API quotas will get applied to account D.
Spoke and hub accounts are owned by separate business units and owned by different account administrators.
Note: when you configure your bucket to use an S3 Bucket Key for SSE-KMS, you may not see separate Decrypt or GenerateDataKey for each file upload or download.
Figure 1: Architecture outlining the hub and spoke accounts
This architecture design works for the following three use cases.
Use case #1:
A spoke account administrator wants to track the individual AWS KMS key-wise encryption/decryption costs using AWS Cost Explorer and cost allocation tags. Tracking costs this way works well for the AWS KMS API calls made within the same spoke account and related costs will be displayed under appropriate cost allocation tags. However, for the cross account AWS KMS API calls, cost allocation tags will not be visible outside of the hub account and will be displayed under cost allocation tag “None.” Analyzing cross-account AWS KMS API calls will help administrator determine approximate percentage usage by each cross account KMS key.
Use case # 2:
The spoke account has multiple applications, and each application has a unique AWS Identity and Access Management (IAM) principal. The spoke account administrator would like to track encryption/decryption usage. Identifying IAM principal-wise cross account calls will help the administrator determine approximate percent usage by each IAM principal /each application.
Use case # 3:
The spoke account administrator wants to understand how much AWS KMS quota is used for the cross-account specific KMS keys.
Solution Overview
Let’s discuss how we can track cross-account AWS KMS calls using AWS CloudTrail and Amazon Athena. For this solution, we will reuse your existing CloudTrail or create new CloudTrail in a Region where the hub account Amazon S3 data lake is located. As shown in the following diagram, we will use Athena to query the CloudTrail data to identify cross account AWS KMS calls used for S3 encryption/decryption.
Figure 2: Architecture outlining the CloudTrail and Athena Solution
Prerequisites
For this walkthrough, you should have the following prerequisites:
AWS accounts (one for hub and at least one for spoke)
AWS KMS (SSE-KMS) with customer managed keys encrypted S3 bucket
Walkthrough
Step 1: Activate AWS CloudTrail for the hub account
CloudTrail is a service that enables governance, compliance, operational auditing, and risk auditing of your AWS account. With CloudTrail, you can log, continuously monitor, and retain account activity across your AWS accounts. If you have already activated CloudTrail, you can reuse the same. If you haven’t, you can activate it using the steps in this tutorial. For the proposed solution, you must enable CloudTrail for management events only. You don’t require CloudTrail for data events or insight events. Also, be aware that you need only single CloudTrail and creating duplicate cloud trails can increase the service cost.
Note: you can analyze the data in Athena only when the CloudTrail data is available. Any access requests made prior to enabling CloudTrail cannot be analyzed. It takes up to 15 minutes for events to get to CloudTrail, and up to 5 minutes for CloudTrail to write to S3.
Step 2: Create Amazon Athena table to query the CloudTrail data
Amazon Athena is an interactive query service that analyzes data in Amazon S3 using standard SQL. Athena is serverless, so there is no infrastructure to manage, and you pay only for the queries that you run. Create an Athena table in any database or default database in a Region where your hub account S3 data lake bucket resides.
If you are using Athena for the first time, follow these steps to create a database. Once the database is created you need to create Athena table. Follow these steps to create a table:
Open the Athena built-in query editor,
copy the following query,
modify as suggested,
run the query.
In the LOCATION and storage.location.template clauses, replace the bucket with CloudTrail bucket. Replace accountId with hub account’s ID and replace awsRegion with region where data lake S3 bucket is located. For projection.timestamp.range, replace 2020/01/01 with the start date you want to use.
After successful initiation of the query, you will see the CloudTrail_logs table created in Athena.
CREATE EXTERNAL TABLE cloudtrail_logs_region(
eventVersion STRING,
userIdentity STRUCT<
type: STRING,
principalId: STRING,
arn: STRING,
accountId: STRING,
invokedBy: STRING,
accessKeyId: STRING,
userName: STRING,
sessionContext: STRUCT<
attributes: STRUCT<
mfaAuthenticated: STRING,
creationDate: STRING>,
sessionIssuer: STRUCT<
type: STRING,
principalId: STRING,
arn: STRING,
accountId: STRING,
userName: STRING>>>,
eventTime STRING,
eventSource STRING,
eventName STRING,
awsRegion STRING,
sourceIpAddress STRING,
userAgent STRING,
errorCode STRING,
errorMessage STRING,
requestParameters STRING,
responseElements STRING,
additionalEventData STRING,
requestId STRING,
eventId STRING,
readOnly STRING,
resources ARRAY<STRUCT<
arn: STRING,
accountId: STRING,
type: STRING>>,
eventType STRING,
apiVersion STRING,
recipientAccountId STRING,
serviceEventDetails STRING,
sharedEventID STRING,
vpcEndpointId STRING
)
PARTITIONED BY (
`timestamp` string)
ROW FORMAT SERDE 'com.amazon.emr.hive.serde.CloudTrailSerde'
STORED AS INPUTFORMAT 'com.amazon.emr.cloudtrail.CloudTrailInputFormat'
Once the Athena table is created, you can run the following query to find out cross-account AWS KMS calls made for S3 encryption /decryption.
Query:
SELECT useridentity.accountid as requestor_account_id,
resources[1].accountid as owner_account_id,
resources[1].arn as key_arn,
count(resources) as count
FROM CloudTrail_logs_us_east_2
WHERE eventsource='kms.amazonaws.com'
AND timestamp between '2021/04/01' and '2021/08/30'
AND eventname in ('Decrypt','Encrypt','GenerateDataKey')
AND useridentity.accountid!= resources[1].accountid
AND json_extract(json_extract(requestparameters , '$.encryptionContext'),'$.aws:s3:arn') is not null
GROUP BY useridentity.accountid,resources[1].accountid,resources[1].arn
ORDER BY key_arn,count desc
Result:
Result displays the cross account AWS KMS calls made for S3 encryption /decryption i.e. where caller account is not the key owner account for time period between April 1, 2021 and August 30, 2021.
The preceding example shows cross-account AWS KMS API calls generated by downloading /uploading files from centralized Amazon S3 data lake located in account A (111111111111) from spoke accounts B (222222222222), C (333333333333), and D (444444444444).
These AWS KMS quotas will get applied to caller (spoke) accounts even though key owner is hub account.
For example:
2,560 AWS KMS API call quotas will be applied to account B.
1,644 AWS KMS API call quotas will be applied to account C.
944 AWS KMS API call quotas will be applied to account D.
To identify IAM principal-wise cross account Amazon S3 encryption /decryption calls, you can run following query.
Query:
SELECT useridentity.accountid as requestor_account_id, useridentity.principalid as requestor_principal, resources[1].accountid as owner_account_id, resources[1].arn as key_arn, count(resources) as count FROM CloudTrail_logs_us_east_2 WHERE eventsource='kms.amazonaws.com' AND timestamp between '2021/04/01' and '2021/08/30' AND eventname in ('Decrypt','Encrypt','GenerateDataKey') AND useridentity.accountid!= resources[1].accountid AND json_extract(json_extract(requestparameters , '$.encryptionContext'),'$.aws:s3:arn') is not null GROUP BY useridentity.accountid,useridentity.principalid,resources[1].accountid,resources[1].arn ORDER BY requestor_account_id,count desc
Result:
The preceding result shows AWS Identity and Access Management (IAM) principal-wise cross-account AWS KMS API calls made between hub and spoke accounts. For example, Account B (22222222222) has two applications configured with IAM principals ids ending with 4C5VIMGI2, 4YFPRTQMP are accessing the centralized S3 bucket located in hub account A (111111111111).
For the time period between ‘2021/04/01’ and ‘2021/08/30’, the application configured with IAM principal ending in 4C5VIMGI2 made 1622 cross-account AWS KMS API calls. During this same time period, the application configured with IAM principal 4YFPRTQMP made 936 cross-account AWS KMS API calls.
We can further filter the results to see only KMS key ARN ending with 3aa3c82a2174 to get application- wise % of AWS KMS API calls made to the Amazon S3 centralized data lake from all the spoke accounts.
Note: we assume that each application is configured with a unique IAM principal.
SELECT useridentity.accountid as requestor_account_id,
resources[1].accountid as owner_account_id,
resources[1].arn as key_arn,
eventname as eventname,
count(resources) as count
FROM CloudTrail_logs_us_east_2
WHERE eventsource='kms.amazonaws.com'
AND timestamp between '2021/04/01' and '2021/08/30'
AND useridentity.accountid!= resources[1].accountid
AND json_extract(json_extract(requestparameters , '$.encryptionContext'),'$.aws:s3:arn') is not null
GROUP BY useridentity.accountid, resources [1].accountid,resources[1].arn,eventname
ORDER BY requestor_account_id,count desc
Result:
Amazon S3 makes decrypt API requests when you download the files and GenerateDataKey API request when you upload the file to encrypted S3 bucket. The result shows that:
Spoke account B (22222222222) made 1811 decrypt API requests to download 1811 files and 749 GenerateDataKey API requests to uploaded 749 files.
Spoke account C (33333333333) made 1373 decrypt API requests to download 1373 files and 271 GenerateDataKey API requests to uploaded 271 files.
Spoke account D (444444444444) made 638 decrypt API requests to download 638 files and 306 GenerateDataKey API requests to uploaded 306 files.
Note: When you configure your bucket to use an S3BucketKey for SSE-KMS, you may not have a separate Decrypt or GenerateDataKey for each file upload or download.
Step 6: Identify all the AWS KMS Calls.
To analyze the hub account for all the AWS KMS API calls made, run following query.
Query:
SELECT useridentity.accountid as requestor_account_id,
resources[1].accountid as owner_account_id,
resources[1].arn as key_arn,
count(resources) as count
FROM CloudTrail_logs_us_east_2
WHERE eventsource='kms.amazonaws.com'
AND timestamp between '2021/04/01' and '2021/08/30'
GROUP BY useridentity.accountid, resources [1].accountid,resources[1].arn
ORDER BY requestor_account_id,count desc
Result:
Results show all the AWS KMS API calls made in the hub account both within the account and across accounts. From this result, we can analyze that for centralized S3 data lake (KMS key ARN ending with 3aa3c82a2174), the majority of the calls are cross account AWS KMS API call and only 303 calls are made within account. You can do further analysis by refining the Amazon Athena queries based on your needs.
Cleaning up
To avoid incurring future charges, delete the resources that are no longer required.
Step 1: Delete the CloudTrail created in hub account
If you have created CloudTrail specifically for this solution, you can delete the CloudTrail by following the instructions in this user guide.
Step 2: Drop the Amazon Athena table
Log in to the Amazon Athena console and run the following drop table query:
Drop table < CloudTrail_logs_aws_region_1>
Conclusion
Tracking use of the cross-account AWS KMS APIs can be challenging in a multi-account scenario. In this blog, we learned how to use AWS CloudTrail and Amazon Athena to analyze AWS KMS API usage. In a hub and spoke account model, cross-account AWS KMS API quotas are applied to the spoke account when the spoke account accesses SSE-KMS encrypted S3 bucket in the hub account. You learned to analyze cross-account AWS KMS API quotas using AWS CloudTrail and Amazon Athena. Finally, we learned how we can identify all the AWS KMS API call within account for period of time and analyze AWS KMS API traffic within account and across account. You can repeat the process and aggregate the data across Regions.
By integrating Amazon EventBridge with Falcon Horizon, CrowdStrike has developed a real-time, cloud-based solution that allows you to detect threats in less than a second. This solution uses AWS CloudTrail and EventBridge. CloudTrail allows governance, compliance, operational auditing, and risk auditing of your AWS account. EventBridge is a serverless event bus that makes it easier to build event-driven applications at scale.
In this blog post, we’ll cover the challenges presented by using traditional log file-based security monitoring. We will also discuss how CrowdStrike used EventBridge to create an innovative, real-time cloud security solution that enables high-speed, event-driven alerts that detect malicious actors in milliseconds.
Challenges of log file-based security monitoring
Being able to detect malicious actors in your environment is necessary to stay secure in the cloud. With the growing volume, velocity, and variety of cloud logs, log file-based monitoring makes it difficult to reveal adverse behaviors in time to stop breaches.
When an attack is in progress, a security operations center (SOC) analyst has an average of one minute to detect the threat, ten minutes to understand it, and one hour to contain it. If you cannot meet this 1/10/60 minute rule, you may have a costly breach that may move laterally and explode exponentially across the cloud estate.
Let’s look at a real-life scenario. When a malicious actor attempts a ransom attack that targets high-value data in an Amazon Simple Storage Service (Amazon S3) bucket, it can involve activities in various parts of the cloud services in a brief time window.
Amazon S3: bucket and object enumeration; impair bucket encryption and versioning; bucket policy manipulation; getObject, putObject, and deleteObject APIs, etc.
With siloed log file-based monitoring, detecting, understanding, and containing a ransom attack while still meeting the 1/10/60 rule is difficult. This is because log files are written in batches, and files are typically only created every 5 minutes. Once the log file is written, it still needs to be fetched and processed. This means that you lose the ability to dynamically correlate disparate activities.
To summarize, top-level challenges of log file-based monitoring are:
Lag time between the breach and the detection
Inability to correlate disparate activities to reveal sophisticated attack patterns
Frequent false positive alarms that obscure true positives
High operational cost of log file synchronizations and reprocessing
Log analysis tool maintenance for fast growing log volume
Security and compliance is a shared responsibility between AWS and the customer. We protect the infrastructure that runs all of the services offered in the AWS Cloud. For abstracted services, such as Amazon S3, we operate the infrastructure layer, the operating system, and platforms, and customers access the endpoints to store and retrieve data.
You are responsible for managing your data (including encryption options), classifying assets, and using IAM tools to apply the appropriate permissions.
Indicators of attack by CrowdStrike with Amazon EventBridge
In real-world cloud breach scenarios, timeliness of observation, detection, and remediation is critical. CrowdStrike Falcon Horizon IOA is built on an event-driven architecture based on EventBridge and operates at a velocity that can outpace attackers.
CrowdStrike Falcon Horizon IOA performs the following core actions:
Observe: EventBridge streams CloudTrail log files across accounts to the CrowdStrike platform as activity occurs. Parallelism is enabled via event bus rules, which enables CrowdStrike to avoid the five-minute lag in fetching the log files and dynamically correlate disparate activities. The CrowdStrike platform observes end-to-end activities from AWS services and infrastructure hosted in the accounts protected by CrowdStrike.
Detect: Falcon Horizon invokes indicators of attack (IOA) detection algorithms that reveal adversarial or anomalous activities from the log file streams. It correlates new and historical events in real time while enriching the events with CrowdStrike threat intelligence data. Each IOA is prioritized with the likelihood of activity being malicious via scoring and mapped to the MITRE ATT&CK framework.
Remediate: The detected IOA is presented with remediation steps. Depending on the score, applying the remediations quickly can be critical before the attack spreads.
Prevent: Unremediated insecure configurations are revealed via indicators of misconfiguration (IOM) in Falcon Horizon. Applying the remediation steps from IOM can prevent future breaches.
Key differentiators of IOA from Falcon Horizon are:
Observability of wider attack surfaces with heterogeneous event sources
Detection of sophisticated tactics, techniques, and procedures (TTPs) with dynamic event correlation
Event enrichment with threat intelligence that aids prioritization and reduces alert fatigue
Low latency between malicious activity occurrence and corresponding detection
Insight into attacks for each adversarial event from MITRE ATT&CK framework
High-level architecture
Event-driven architectures provide advantages for integrating varied systems over legacy log file-based approaches. For securing cloud attack surfaces against the ever-evolving TTPs, a robust event-driven architecture at scale is a key differentiator.
CrowdStrike maximizes the advantages of event-driven architecture by integrating with EventBridge, as shown in Figure 1. EventBridge allows observing CloudTrail logs in event streams. It also simplifies log centralization from a number of accounts with its direct source-to-target integration across accounts, as follows:
CrowdStrike hosts an EventBridge with central event buses that consume the stream of CloudTrail log events from a multitude of customer AWS accounts.
Within customer accounts, EventBridge rules listen to the local CloudTrail and stream each activity as an event to the centralized EventBridge hosted by CrowdStrike.
CrowdStrike’s event-driven platform detects adversarial behaviors from the event streams in real time. The detection is performed against incoming events in conjunction with historical events. The context that comes from connecting new and historical events minimizes false positives and improves alert efficacy.
Events are enriched with CrowdStrike threat intelligence data that provides additional insight of the attack to SOC analysts and incident responders.
As data is received by the centralized EventBridge, CrowdStrike relies on unique customer ID and AWS Region in each event to provide integrity and isolation.
EventBridge allows relatively hassle-free customer onboarding by using cross account rules to transfer customer CloudTrail data into one common event bus that can then be used to filter and selectively forward the data into the Falcon Horizon platform for analysis and mitigation.
Conclusion
As your organization’s cloud footprint grows, visibility into end-to-end activities in a timely manner is critical for maintaining a safe environment for your business to operate. EventBridge allows event-driven monitoring of CloudTrail logs at scale.
CrowdStrike Falcon Horizon IOA, powered by EventBridge, observes end-to-end cloud activities at high speeds at scale. Paired with targeted detection algorithms from in-house threat detection experts and threat intelligence data, Falcon Horizon IOA combats emerging threats against the cloud control plane with its cutting-edge event-driven architecture.
Incident response is a core security capability for organizations to develop, and a core element in the AWS Cloud Adoption Framework (AWS CAF). Responding to security incidents quickly is important to minimize their impacts. Automating incident response helps you scale your capabilities, rapidly reduce the scope of compromised resources, and reduce repetitive work by your security team.
In this post, I show you how to use Incident Manager, a capability of AWS Systems Manager, to build an effective automated incident management and response solution to security events.
You’ll walk through three common security-related events and how you can use Incident Manager to automate your response.
AWS account root user activity: An Amazon Web Services (AWS) account root user has full access to all your resources for all AWS services, including billing information. It’s therefore elemental to adhere to the best practice of using the root user only to create your first IAM user and securely lock away the root user credentials and use them to perform only a few account and service management tasks. And it is critical to be aware when root user activity occurs in your AWS account.
Amazon GuardDuty high severity findings: Amazon GuardDuty is a threat detection service that continuously monitors for malicious or unauthorized behavior to help protect your AWS accounts and workloads. In this blog post, you’ll learn how to initiate an incident response plan whenever a high severity finding is discovered.
AWS Config rule change and S3 bucket allowing public access: AWS Config enables continuous monitoring of your AWS resources, making it simple to assess, audit, and record resource configurations and changes. You will use AWS Config to monitor your Amazon Simple Storage Service (S3) bucket ACLs and policies for settings that allow public read or public write access.
Incident Manager can start managing incidents automatically using Amazon CloudWatch or Amazon EventBridge. For the solution in this blog post, you will use EventBridge to capture events and start an incident.
To complete the steps in this walkthrough, you need the following:
An AWS account and AWS Identity Access and Management (IAM) permissions to access Systems Manager, GuardDuty, Config, S3, and EventBridge. Your IAM user or role should also have iam:CreateServiceLinkedRole permissions. Incident Manager uses this permission to create the service-linked role AWSServiceRoleforIncidentManager in your account. For more information, see Using service-linked roles for Incident Manager.
A response plan ties together the contacts, escalation plan, and runbook. When an incident occurs, a response plan defines who to engage, how to engage, which runbook to initiate, and which metrics to monitor. By creating a well-defined response plan, you can save your security team time down the road.
Add contacts
Your contacts should include everyone who might be involved in the incident. Follow these steps to add a contact.
On Contact information, enter names and define contact channels for your contacts.
Under Contact channel, you can select Email, SMS, or Voice. You can also add multiple contact channels.
In Engagement plan, specify how fast to engage your responders. In the example illustrated below, the incident responder will be engaged through email immediately (0 minutes) when an incident is detected and then through SMS 10 minutes into an incident. Complete the fields and then choose Create.
Figure 2: Engagement plan
Create a response plan
Once you’ve created your contacts, you can create a response plan to define how to respond to incidents. Refer to the Best Practices for Response Plans.
Note: (Optional) You can also create an escalation plan that lets you further define the escalation path for your contacts. You can learn more in Create an escalation plan.
Enter a unique and identifiable name for your response plan.
Enter an incident title. The incident title helps to identify an incident on the incidents home page.
Select an appropriate Impact based on the potential scope of the incident.
Figure 3: Selecting your impact level
(Optional) Choose a chat channel for the incident responders to interact in during an incident. For more information about chat channels, see Chat channels.
(Optional) For Engagement, you can choose any number of contacts and escalation plans. For this solution, select the security team responder that you created earlier as one of your contacts.
Figure 4: Adding engagements
(Optional) You can also create a runbook that can drive the incident mitigation and response. For further information, refer to Runbooks and automation.
Under Execution permissions, choose Create an IAM role using a template. Under Role name, select the IAM role you created in the prerequisites that allows Incident Manager to run SSM automation documents, and then choose Create response plan.
Monitor AWS account root activity
When you first create an AWS account, you begin with a single sign-in identity that has complete access to all AWS services and resources in the account. This identity is called the root user and is accessed by signing in with the email address and password that you used to create the account.
An AWS account root user has full access to all your resources for all AWS services, including billing information. It is critical to prevent root user access from unauthorized use and to be aware whenever root user activity occurs in your AWS account. For more information about AWS recommendations, see Security best practices in IAM.
To be certain that all root user activity is authorized and expected, it’s important to monitor root API calls to a given AWS account and to be notified when root user activity is detected.
Create an EventBridge rule
Create and validate an EventBridge rule to capture AWS account root activity.
In the navigation pane, choose Rules, and then choose Create rule.
Enter a name and description for the rule.
For Define pattern, choose Event pattern.
Choose Custom pattern.
Enter the following event pattern:
{
  "detail-type": [
    "AWS API Call via CloudTrail",
    "AWS Console Sign In via CloudTrail"
  ],
  "detail": {
    "userIdentity": {
      "type": [
        "Root"
      ]
    }
  }
}
For Select targets, choose Incident Manager response plan.
For Response plan, choose SecurityEventResponsePlan, which you created when you set up Incident Manager.
To create an IAM role automatically, choose Create a new role for this specific resource. To use an existing IAM role, choose Use existing role.
(Optional) Enter one or more tags for the rule.
Choose Create.
To validate the rule
Sign in using root credentials.
This console login activity by a root user should invoke the Incident Manager response plan and show an open incident as illustrated below. The respective contact channels that you defined earlier in your Engagement Plan, will be engaged.
GuardDuty integrates with EventBridge, which can be used to send findings data to other applications and services for processing. With EventBridge, you can use GuardDuty findings to invoke automatic responses to your findings by connecting finding events to targets such as Incident Manager response plan.
Create an EventBridge rule
You’ll use an EventBridge rule to capture GuardDuty high severity findings.
For Select targets, choose Incident Manager response plan.
For Response plan, select SecurityEventResponsePlan, which you created when you set up Incident Manager.
To create an IAM role automatically, choose Create a new role for this specific resource. To use an IAM role that you created before, choose Use existing role.
(Optional) Enter one or more tags for the rule.
Choose Create.
To validate the rule
To test and validate whether the above rule is now functional, you can generate sample findings within the GuardDuty console.
On the Settings page, under Sample findings, choose Generate sample findings.
In the navigation pane, choose Findings. The sample findings are displayed on the Current findings page with the prefix [SAMPLE].
Once you have generated sample findings, your Incident Manager response plan will be invoked almost immediately and the engagement plan with your contacts will begin.
You can select an open incident in the Incident Manager console to see additional details from the GuardDuty finding. Figure 6 shows a high severity finding.
Figure 6: Incident Manager open incident for GuardDuty high severity finding
Monitor S3 bucket settings for public access
AWS Config enables continuous monitoring of your AWS resources, making it easier to assess, audit, and record resource configurations and changes. AWS Config does this through rules that define the desired configuration state of your AWS resources. AWS Config provides a number of AWS managed rules that address a wide range of security concerns such as checking that your Amazon Elastic Block Store (Amazon EBS) volumes are encrypted, your resources are tagged appropriately, and multi-factor authentication (MFA) is enabled for root accounts.
Set up AWS Config and EventBridge
You will use AWS Config to monitor your S3 bucket ACLs and policies for violations which could allow public read or public write access. If AWS Config finds a policy violation, it will initiate an AWS EventBridge rule to invoke your Incident Manager response plan.
To create the AWS Config rule to capture S3 bucket public access
If this is your first time in the AWS Config console, refer to the Getting Started guide for more information.
Select Rules from the menu and choose Add Rule.
On the AWS Config rules page, enter S3 in the search box and select the s3-bucket-public-read-prohibited and s3-bucket-public-write-prohibited rules, and then choose Next.
Figure 7: AWS Config rules
Leave the Configure rules page as default and select Next.
On the Review page, select Add Rule. AWS Config is now analyzing your S3 buckets, capturing their current configurations, and evaluating the configurations against the rules you selected.
For Select targets, choose Incident Manager response plan.
For Response plan, choose SecurityEventResponsePlan, which you created earlier when setting up Incident Manager.
To create an IAM role automatically, choose Create a new role for this specific resource. To use an existing IAM role, choose Use existing role.
(Optional) Enter one or more tags for the rule.
Choose Create.
To validate the rule
Create a compliant test S3 bucket with no public read or write access through either an ACL or a policy.
Change the ACL of the bucket to allow public listing of objects so that the bucket is non-compliant.
Figure 8: Amazon S3 console
After a few minutes, you should see the AWS Config rule initiated which invokes the EventBridge rule and therefore your Incident Manager response plan.
Summary
In this post, I showed you how to use Incident Manager to monitor for security events and invoke a response plan via Amazon CloudWatch or Amazon EventBridge. AWS CloudTrail API activity (for a root account login), Amazon GuardDuty (for high severity findings), and AWS Config (to enforce policies like preventing public write access to an S3 bucket). I demonstrated how you can create an incident management and response plan to ensure you have used the power of cloud to create automations that respond to and mitigate security incidents in a timely manner. To learn more about Incident Manager, see What Is AWS Systems Manager Incident Manager in the AWS documentation.
If you have feedback about this post, submit comments in the comments section below. If you have questions about this post, start a new thread on the Systems Manager forum or contact AWS Support.
Want more AWS Security how-to content, news, and feature announcements? Follow us on Twitter.
“It is not the strongest of the species that survives, nor the most intelligent. It is the one that is most adaptable to change.” – often attributed to Charles Darwin
One common strategy for businesses that operate in dynamic market conditions (and thus need to continuously correct their course) is to aim for smaller, independent development teams. Microservices and two-pizza teams at Amazon are prominent examples of this strategy. But having smaller units is not the only success factor: to reduce organizational bottlenecks and make high-quality decisions quickly, these two-pizza teams need to be autonomous in most of their decision making.
Architects can no longer rely on static upfront design to meet the change rate required to be successful in such an environment.
This blog shows enterprise architects a mechanism to align decentralized architectural decision making with overall architecture goals.
Gathering data from your fitness functions
“Evolutionary architecture” was coined by Neal Ford and his colleagues from AWS Partner ThoughtWorks in their work on Building Evolutionary Architectures. It is defined as “supporting guided, incremental change as a first principle across multiple dimensions.”
Fitness functions help you obtain the necessary data to allow for the planned evolution of your architecture. They set measurable values to assess how close your solution is to achieving your set goals.
Fitness functions can and should be adapted as the architecture evolves to guide a desired change process. This provides architects with a tool to guide their teams while maintaining team autonomy.
Example of a regression fitness function in action
You’ve identified shorter time-to-market as a key non-functional requirement. You want to lower the risk of regressions and rollbacks after deployments. So, you and your team write automated test cases. To ensure that they have a good set of test cases in place, they measure test coverage. This test coverage measures the percentage of code that is tested automatically. This steers the team toward writing tests to mitigate the risk of regressions so they have fewer rollbacks and shorter time to market.
Fitness functions like this work best when they’re as automated as possible. But how do you acquire the necessary data points to use this mechanism outside of software architecture? We’ll show you how in the following sections.
AWS Cloud services with built-in fitness functions
AWS Cloud services are highly standardized, fully automated via API operations, and are built with observability in mind. This allows you to generate measurements for fitness functions automatically for areas such as availability, responsiveness, and security.
To start building your evolutionary architecture with fitness functions, use something that can be easily measured. AWS has services that can be used as inputs to fitness functions, including:
Amazon CloudWatch aggregates logs and metrics to check for availability, responsiveness, and reliability fitness functions.
AWS Security Hub provides a comprehensive view of your security alerts and security posture across your AWS accounts. Security Architects could, for example, define the fitness function of critical and high findings to be zero. Teams then would be guided into reducing the number of these findings, resulting in better security.
AWS Cost Explorer ensures your costs stay in line with value generated.
Amazon SageMakerModel Monitor continuously monitors the quality of SageMaker machine learning models in production. Detecting deviations early allows you to take corrective actions like retraining models, auditing upstream systems, or fixing quality issues.
Using the observability that the cloud provides
Fitness functions can be derived by evaluating the AWS account activity such as configuration changes. AWS CloudTrail is useful for this. It records account activity and service events from most AWS services, which can then be analyzed with Amazon Athena.
Figure 1. Fitness functions provide feedback to engineers via metrics
Example of a cloud fitness function in action
In this example, we implement a fitness function that monitors the operability of your system.
You have had certain outages due to manual tasks in operations, and you have anecdotal evidence that engineers are spending time on manual work during application rollouts. To improve operations, you want to reduce manual interactions via the shell in favor of automation. First, you prevent direct secure shell (SSH) access by blocking SSH traffic via the managed AWS Config rule restricted-ssh. Second, you make use of AWS Systems Manager Session Manager, which provides a secure and auditable way to access Amazon Elastic Compute Cloud (Amazon EC2) instances.
By counting the logged API events in CloudTrail you can measure the number of shell sessions. This is shown in this sample Athena query to count the number of shell sessions:
SELECT count(*),
       DATE(from_iso8601_timestamp(eventTime)),
       userIdentity.type,
       eventSource,
       eventName
FROM "cloudtrail_logs_partition_projection"
WHERE readonly = 'false'
  AND eventsource = 'ssm.amazonaws.com'
  AND eventname in ('StartSession',
                    'ResumeSession',
                    'TerminateSession')
GROUP BY DATE(from_iso8601_timestamp(eventTime)),
         userIdentity.type,
         eventSource,
         eventName
ORDER BY DATE(from_iso8601_timestamp(eventTime)) DESC
The number of shell sessions now act as fitness function to improve operational excellence through operations as code. Coincidently, the fitness function you defined also rewards teams moving to serverless compute services such as AWS Fargate or AWS Lambda.
Fitness through exercising
Similar to people, your architecture’s fitness can be improved by exercising. It does not take much equipment, but you need to take the first step. To get started, we encourage you to think of the desired outcomes for your architecture that you can measure (and thus guide) through fitness functions. The following lessons learned will help you focus your goals:
Requirements and business goals may differ per domain. Thus, your fitness functions might differ. Work closely with your teams when defining fitness functions.
Start by taking something that can be easily measured and communicated as a goal.
Focus on a positive trendline rather than absolute values.
Make sure you and your teams are using the same metrics and the same way to measure them. We have seen examples where central governance departments had access to data the individual teams did not, leading to frustration on all sides.
Ensure that your architecture goals fit well into the current context and time horizon.
Continuously re-visit the fitness functions to ensure that they evolve with the changing business goals.
Conclusion
Fitness functions help architects focus on building. Once established, teams can use the data points from fitness functions to make decisions and work towards a common and measurable goal. The architects in turn can use the data points they get from fitness functions to confirm their hypothesis of the current state of the architecture. Get started building your fitness functions today by:
Gathering the most important system quality attributes.
Beginning with approximately three meaningful fitness functions relying on the API operations available.
Building a dashboard that shows progress over time, share it with your teams, and rely on this data in your daily work.
This series of blog posts uses the AWS Well-Architected Tool with the Serverless Lens to help customers build and operate applications using best practices. In each post, I address the serverless-specific questions identified by the Serverless Lens along with the recommended best practices. See the introduction post for a table of contents and explanation of the example application.
Security question SEC3: How do you implement application security in your workload?
This post continues part 1 of this security question. Previously, I cover reviewing security awareness documentation such as the Common Vulnerabilities and Exposures (CVE) database. I show how to use GitHub security features to inspect and manage code dependencies. I then show how to validate inbound events using Amazon API Gateway request validation.
Required practice: Store secrets that are used in your code securely
Store secrets such as database passwords or API keys in a secrets manager. Using a secrets manager allows for auditing access, easier rotation, and prevents exposing secrets in application source code. There are a number of AWS and third-party solutions to store and manage secrets.
AWS Partner Network (APN) member Hashicorp provides Vault to keep secrets and application data secure. Vault has a centralized workflow for tightly controlling access to secrets across applications, systems, and infrastructure. You can store secrets in Vault and access them from an AWS Lambda function to, for example, access a database. You can use the Vault Agent for AWS to authenticate with Vault, receive the database credentials, and then perform the necessary queries. You can also use the Vault AWS Lambda extension to manage the connectivity to Vault.
AWS Secrets Manager enables you to replace hardcoded credentials in your code with an API call to Secrets Manager to retrieve the secret programmatically. You can protect, rotate, manage, and retrieve database credentials, API keys, and other secrets throughout their lifecycle. You can also generate secure secrets. By default, Secrets Manager does not write or cache the secret to persistent storage.
The AWS CloudFormation stack deploys an Amazon RDS MySQL database with a randomly generated password. This is stored in Secrets Manager using a secret resource. A Lambda function behind an API Gateway endpoint returns the record count in a table from the database, using the required credentials. Lambda function environment variables store the database connection details and which secret to return for the database password. The password is not stored as an environment variable, nor in the Lambda function application code.
Lambda environment variables for Secrets Manager
The application flow is as follows:
Clients call the API Gateway endpoint
API Gateway invokes the Lambda function
The Lambda function retrieves the database secrets using the Secrets Manager API
The Lambda function connects to the RDS database using the credentials from Secrets Manager and returns the query results
View the password secret value in the Secrets Manager console, which is randomly generated as part of the stack deployment.
Example password stored in Secrets Manager
The Lambda function includes the following code to retrieve the secret from Secrets Manager. The function then uses it to connect to the database securely.
Browsing to the endpoint URL specified in the CloudFormation output displays the number of records. This confirms that the Lambda function has successfully retrieved the secure database credentials and queried the table for the record count.
Lambda function retrieving database credentials
Audit secrets access through a secrets manager
Monitor how your secrets are used to confirm that the usage is expected, and log any changes to them. This helps to ensure that any unexpected usage or change can be investigated, and unwanted changes can be rolled back.
Hashicorp Vault uses Audit devices that keep a detailed log of all requests and responses to Vault. Audit devices can append logs to a file, write to syslog, or write to a socket.
Secrets Manager supports logging API calls with AWS CloudTrail. CloudTrail captures all API calls for Secrets Manager as events. This includes calls from the Secrets Manager console and from code calling the Secrets Manager APIs.
Viewing the CloudTrail event history shows the requests to secretsmanager.amazonaws.com. This shows the requests from the console in addition to the Lambda function.
CloudTrail showing access to Secrets Manager
Secrets Manager also works with Amazon EventBridge so you can trigger alerts when administrator-specified operations occur. You can configure EventBridge rules to alert on deleted secrets or secret rotation. You can also create an alert if anyone tries to use a secret version while it is pending deletion. This can identify and alert when there is an attempt to use an out-of-date secret.
Enforce least privilege access to secrets
Access to secrets must be tightly controlled because the secrets contain sensitive information. Create AWS Identity and Access Management (IAM) policies that enable minimal access to secrets to prevent credentials being accidentally used or compromised. Secrets that have policies that are too permissive could be misused by other environments or developers. This can lead to accidental data loss or compromised systems. For more information, see “Authentication and access control for AWS Secrets Manager”.
Rotate secrets frequently.
Rotating your workload secrets is important. This prevents misuse of your secrets since they become invalid within a configured time period.
Secrets Manager allows you to rotate secrets on a schedule or on demand. This enables you to replace long-term secrets with short-term ones, significantly reducing the risk of compromise. Secrets Manager creates a CloudFormation stack with a Lambda function to manage the rotation process for you. Secrets Manager has native integrations with Amazon RDS, Amazon Redshift, and Amazon DocumentDB. It populates the function with the Amazon Resource Name (ARN) of the secret. You specify the permissions to rotate the credentials, and how often you want to rotate the secret.
The CloudFormation stack creates a MySecretRotationSchedule resource with a MyRotationLambda function to rotate the secret every 30 days.
MySecretRotationSchedule:
    Type: AWS::SecretsManager::RotationSchedule
    DependsOn: SecretRDSInstanceAttachment
    Properties:
    SecretId: !Ref MyRDSInstanceRotationSecret
    RotationLambdaARN: !GetAtt MyRotationLambda.Arn
    RotationRules:
        AutomaticallyAfterDays: 30
MyRotationLambda:
    Type: AWS::Serverless::Function
    Properties:
    Runtime: python3.7
    Role: !GetAtt MyLambdaExecutionRole.Arn
    Handler: mysql_secret_rotation.lambda_handler
    Description: 'This is a lambda to rotate MySql user passwd'
    FunctionName: 'cfn-rotation-lambda'
    CodeUri: 's3://devsecopsblog/code.zip'
    Environment:
        Variables:
        SECRETS_MANAGER_ENDPOINT: !Sub 'https://secretsmanager.${AWS::Region}.amazonaws.com'
View and edit the rotation settings in the Secrets Manager console.
Secrets Manager rotation settings
Manually rotate the secret by selecting Rotate secret immediately. This invokes the Lambda function, which updates the database password and updates the secret in Secrets Manager.
View the updated secret in Secrets Manager, where the password has changed.
Secrets Manager password change
Browse to the endpoint URL to confirm you can still access the database with the updated credentials.
Access endpoint with updated Secret Manager password
You can provide your own code to customize a Lambda rotation function for other databases or services. The code includes the commands required to interact with your secured service to update or add credentials.
Conclusion
Implementing application security in your workload involves reviewing and automating security practices at the application code level. By implementing code security, you can protect against emerging security threats. You can improve the security posture by checking for malicious code, including third-party dependencies.
In this post, I continue from part 1, looking at securely storing, auditing, and rotating secrets that are used in your application code.
In the next post in the series, I start to cover the reliability pillar from the Well-Architected Serverless Lens with regulating inbound request rates.
For more serverless learning resources, visit Serverless Land.
This series uses the AWS Well-Architected Tool with the Serverless Lens to help customers build and operate applications using best practices. In each post, I address the nine serverless-specific questions identified by the Serverless Lens along with the recommended best practices. See the introduction post for a table of contents and explanation of the example application.
Security question SEC2: How do you manage your serverless application’s security boundaries?
This post continues part 1 of this security question. Previously, I cover how to evaluate and define resource policies, showing what policies are available for various serverless services. I show some of the features of AWS Web Application Firewall (AWS WAF) to protect APIs. Then then go through how to control network traffic at all layers. I explain how AWS Lambda functions connect to VPCs, and how to use private APIs and VPC endpoints. I walk through how to audit your traffic.
Required practice: Use temporary credentials between resources and components
Do not share credentials and permissions policies between resources to maintain a granular segregation of permissions and improve the security posture. Use temporary credentials that are frequently rotated and that have policies tailored to the access the resource needs.
Use dynamic authentication when accessing components and managed services
AWS Identity and Access Management (IAM) roles allows your applications to access AWS services securely without requiring you to manage or hardcode the security credentials. When you use a role, you don’t have to distribute long-term credentials such as a user name and password, or access keys. Instead, the role supplies temporary permissions that applications can use when they make calls to other AWS resources. When you create a Lambda function, for example, you specify an IAM role to associate with the function. The function can then use the role-supplied temporary credentials to sign API requests.
Use IAM for authorizing access to AWS managed services such as Lambda or Amazon S3. Lambda also assumes IAM roles, exposing and rotating temporary credentials to your functions. This enables your application code to access AWS services.
Within the serverless airline example used in this series, the loyalty service uses a Lambda function to fetch loyalty points and next tier progress. AWS AppSync acts as the client using an HTTP resolver, via an API Gateway REST API /loyalty/{customerId}/get resource, to invoke the function.
To ensure only AWS AppSync is authorized to invoke the API, IAM authorization is set within the API Gateway method request.
Viewing API Gateway IAM authorization
The IAM role specifies that appsync.amazonaws.com can perform an execute-api:Invoke on the specific API Gateway resource arn:aws:execute-api:${AWS::Region}:${AWS::AccountId}:${LoyaltyApi}/*/*/*
Use a framework such as the AWS Serverless Application Model (AWS SAM) to deploy your applications. This ensures that AWS resources are provisioned with unique per resource IAM roles. For example, AWS SAM automatically creates unique IAM roles for every Lambda function you create.
Best practice: Design smaller, single purpose functions
Creating smaller, single purpose functions enables you to keep your permissions aligned to least privileged access. This reduces the risk of compromise since the function does not require access to more than it needs.
Create single purpose functions with their own IAM role
Single purpose Lambda functions allow you to create IAM roles that are specific to your access requirements. For example, a large multipurpose function might need access to multiple AWS resources such as Amazon DynamoDB, Amazon S3, and Amazon Simple Queue Service (SQS). Single purpose functions would not need access to all of them at the same time.
With smaller, single purpose functions, it’s often easier to identify the specific resources and access requirements, and grant only those permissions. Additionally, new features are usually implemented by new functions in this architectural design. You can specifically grant permissions in new IAM roles for these functions.
Avoid sharing IAM roles with multiple cloud resources. As permissions are added to the role, these are shared across all resources using this role. For example, use one dedicated IAM role per Lambda function. This allows you to control permissions more intentionally. Even if some functions have the same policy initially, always separate the IAM roles to ensure least privilege policies.
Use least privilege access policies with your users and roles
When you create IAM policies, follow the standard security advice of granting least privilege, or granting only the permissions required to perform a task. Determine what users (and roles) must do and then craft policies that allow them to perform only those tasks.
Start with a minimum set of permissions and grant additional permissions as necessary. Doing so is more secure than starting with permissions that are too lenient and then trying to tighten them later. In the unlikely event of misused credentials, credentials will only be able to perform limited interactions.
For a Lambda function, AWS SAM scopes the permissions of your Lambda functions to the resources that are used by your application. You add IAM policies as part of the AWS SAM template. The policies property can be the name of AWS managed policies, inline IAM policy documents, or AWS SAM policy templates.
For example, the serverless airline has a ConfirmBooking Lambda function that has UpdateItem permissions to the specific DynamoDB BookingTable resource.
One of the fastest ways to scope permissions appropriately is to use AWS SAM policy templates. You can reference these templates directly in the AWS SAM template for your application, providing custom parameters as required.
Auditing permissions and removing unnecessary permissions
Audit permissions regularly to help you identify unused permissions so that you can remove them. You can use last accessed information to refine your policies and allow access to only the services and actions that your entities use. Use the IAM console to view when last an IAM role was used.
IAM last used
Use IAM access advisor to review when was the last time an AWS service was used from a specific IAM user or role. You can view last accessed information for IAM on the Access Advisor tab in the IAM console. Using this information, you can remove IAM policies and access from your IAM roles.
IAM access advisor
When creating and editing policies, you can validate them using IAM Access Analyzer, which provides over 100 policy checks. It generates security warnings when a statement in your policy allows access AWS considers overly permissive. Use the security warning’s actionable recommendations to help grant least privilege. To learn more about policy checks provided by IAM Access Analyzer, see “IAM Access Analyzer policy validation”.
With AWS CloudTrail, you can use CloudTrail event history to review individual actions your IAM role has performed in the past. Using this information, you can detect which permissions were actively used, and decide to remove permissions.
AWS CloudTrail
To work out which permissions you may need, you can generate IAM policies based on access activity. You configure an IAM role with broad permissions while the application is in development. Access Analyzer reviews your CloudTrail logs. It generates a policy template that contains the permissions that the role used in your specified date range. Use the template to create a policy that grants only the permissions needed to support your specific use case. For more information, see “Generate policies based on access activity”.
IAM Access Analyzer
Conclusion
Managing your serverless application’s security boundaries ensures isolation for, within, and between components. In this post, I continue from part 1, looking at using temporary credentials between resources and components. I cover why smaller, single purpose functions are better from a security perspective, and how to audit permissions. I show how to use AWS SAM to create per-function IAM roles.
Customers operating in hybrid environments today face tremendous challenges with regard to operational management, security/compliance, and monitoring. Systems administrators have to connect, monitor, patch, and automate across multiple Operating Systems (OS), applications, cloud, and on-premises infrastructure. Each of these scenarios has its own unique vendor and console purpose-built for a specific use case.
Using Hybrid Activations, a capability within AWS Systems Manager, you can manage resources irrespective of where they are hosted. You can securely initiate remote shell connections, automate patch management, and monitor critical metrics. You’re able to gain visibility into networking information and application installations via a single console.
In this post, we’ll discuss how the Session Manager and Patch Manager capabilities of Systems Manager allow you to securely connect to instances and virtual machines (VMs). You can centrally log session activity for later auditing and automate patch management, across both cloud and on-premises environments, within a single interface.
Session Manager
Session Manager is a fully managed feature of AWS Systems Manager. Session Manager provides secure and auditable instance management without the need to open inbound ports, maintain bastion hosts, or manage SSH keys. The centralized session management capability of Session Manager provides administrators the ability to centrally manage access to all compute instances. Irrespective of where your VM is hosted, the Session Manager session can be initiated from the AWS Management Console or from the Command-line interface (CLI). When using the CLI, the Session Manager plugin must be installed. The screenshot following shows an example of this.
Figure 1. Initiating instance management via Session Manager
The session is launched using the default system generated ssm-user account. With this account, the system does not prompt for a password when initiating root level commands. To improve security, OS accounts can be used to launch sessions using the Run As feature of Session Manager.
A session initiated via Session Manager is secure. The data exchange between the client and a managed instance takes place over a secure channel using TLS 1.2. To further improve your security posture, AWS Key Management Service (KMS) encryption can be used to encrypt the session traffic between a client and a managed instance. Encrypting session data with a customer managed key enables sessions to handle confidential data interactions. For using KMS encryption, both the user who starts sessions and the managed instance that they connect to, must have permission to use the key. Step-by-step instructions on how to set this up can be found in the Session Manager documentation.
Session Manager integrates with AWS CloudTrail, and this enables security teams to track when a user starts and shuts down sessions. Session Manager can also centrally log all session activity in Amazon CloudWatch or Amazon Simple Storage Service (S3). This gives system administrators the ability to manage details, such as when the session started, what commands were typed during the session, and when it ended. To configure session manager to send logs to CloudWatch and Amazon S3, the instance profile attached to the instance must have permissions to write to CloudWatch and S3. For the Amazon EC2 instance, this will be the IAM role attached to the instance. For VMs running on VMware Cloud on AWS, or on-premises, this is the IAM role from the “Hybrid Activations” page.
Following, we show an example of a session run on an on-premises instance via Session Manager and the corresponding logs in CloudWatch. The logs are continuously streamed into CloudWatch.
Figure 2. CloudWatch log events for session activity via Session Manager
The following screenshot displays the ipconfig /all command being run remotely within PowerShell of an instance running within VMware Cloud on AWS via Session Manager:
Figure 3. Remote PowerShell session for on-premises VM via Session Manager
Patch Manager
Patch management is vital in maintaining a secure and compliant environment. Patch Manager, a capability of AWS Systems Manager, helps you monitor, select, and deploy operating system and software patches automatically. This can happen across compute running on Amazon EC2, VMware on-premises, or VMware Cloud on AWS instances.
The Patch Manager dashboard shows details such as number of instances, high-level patch compliance summaries, compliance reporting age, and common causes of noncompliance. As Patch Manager performs patching operations, it updates the dashboard with a summary of recent patching operations and a list of recurring patching tasks. This provides the operations team a single unified view into environments and simplifies their monitoring efforts.
Figure 4. Patch Manager dashboard
Figure 5. List of all recurring patching tasks
A patch baseline in Patch Manager defines which patches are approved for installation on your instances. Patch Manager provides predefined patch baselines for each supported operating system and also lets you create your own custom patch baselines. These patch baselines let you maintain patch consistency across your deployments on Amazon EC2, VMware on-premises, and VMware Cloud on AWS.
Custom patch baselines give you greater control over which patches are approved and when they are automatically applied. By using multiple patch baselines with different auto-approval delays or cutoffs, you can test patches in your development environment. Custom patch baselines also let you assign compliance levels to indicate the severity of the compliance violation when a patch is reported as missing.
Figure 6. List of Patch baselines
You can use a patch group to associate a group of instances with a specific patch baseline in Patch Manager. This ensures that you are deploying the appropriate patches with associated patch baseline rules, to the correct set of instances. These instances can be EC2, VMware on-premises, or VMware Cloud on AWS. You can also use patch groups to schedule patching during a specific maintenance window.
Patch Manager also provides the ability to scan your instances and VMs running within VMware on-premises and/or VMware Cloud on AWS. It can report compliance adherence based on pre-defined schedules. Patch compliance reports can also be saved to an Amazon S3 bucket of your choice and generated as needed. For reports on a single instance/VM, detailed patch data will be included. For reports run on all instances, a summary of missing patch data will be provided.
The Patch Manager feature of AWS Systems Manager also integrates with AWS Security Hub, a service providing a comprehensive view of your security alerts. It additionally offers security check automation capabilities. In the following image, we show non-compliant instances and servers being reported within AWS Security Hub across EC2, VMware on-premises, and VMware Cloud on AWS:
Figure 7. Non-compliant instances and VMs being reported via AWS Security Hub
Installation and deployment
To ease installation and deployment efforts, the SSM agent is pre-installed on instances created from the following Amazon Machine Images (AMIs):
Amazon Linux
Amazon Linux 2
Amazon Linux 2 ECS-Optimized Base AMIs
macOS 10.14.x (Mojave) and 10.15.x (Catalina)
Ubuntu Server 16.04, 18.04, and 20.04
Windows Server 2008-2012 R2 AMIs published in November 2016 or later
Windows Server 2016 and 2019
For other AMI’s and VMs within VMware on-premises and/or VMware Cloud on AWS, manual agent installation must be performed.
Below is an architecture diagram of our solution described in this post:
Figure 8. General example of Systems Manager process flow
Configure Systems Manager: Use the Systems Manager console, SDK, AWS Command Line Interface (AWS CLI), or AWS Tools for Windows PowerShell to configure, schedule, automate, and run actions that you want to perform on your AWS resources.
Verification and processing: Systems Manager verifies the configurations, including permissions, and sends requests to the AWS Systems Manager SSM Agent running on your instances or servers in your hybrid environment. SSM Agent performs the specified configuration changes.
Reporting: SSM Agent reports the status of the configuration changes and actions to Systems Manager in the AWS Cloud. If configured, Systems Manager then sends the status to the user and various AWS services.
Conclusion
In this post, we showcase how AWS Systems Manager can yield a unified view within your hybrid environments. It spans native AWS, VMware on-premises, and VMware Cloud on AWS. The Session Manager and Patch Manager features simplify instance connectivity and patch management. Other native capabilities of AWS Systems Manager allow application and change management, software inventory, remote initiation, and monitoring. We encourage you to use the features discussed in this post to maintain your servers across your hybrid environment.
In the Operating Lambda series, I cover important topics for developers, architects, and systems administrators who are managing AWS Lambda-based applications. This two-part series discusses core security concepts for Lambda-based applications.
Part 1 explains the Lambda execution environment and how to apply the principles of least privilege to your workload. This post covers securing workloads with public endpoints, encrypting data, and using AWS CloudTrail for governance, compliance, and operational auditing.
Securing workloads with public endpoints
For workloads that are accessible publicly, AWS provides a number of features and services that can help mitigate certain risks. This section covers authentication and authorization of application users and protecting API endpoints.
Authentication and authorization
Authentication relates to identity and authorization refers to actions. Use authentication to control who can invoke a Lambda function, and then use authorization to control what they can do. For many applications, AWS Identity & Access Management (IAM) is sufficient for managing both control mechanisms.
For applications with external users, such as web or mobile applications, it is common to use JSON Web Tokens (JWTs) to manage authentication and authorization. Unlike traditional, server-based password management, JWTs are passed from the client on every request. They are a cryptographically secure way to verify identity and claims using data passed from the client. For Lambda-based applications, this allows you to secure APIs for each microservice independently, without relying on a central server for authentication.
You can implement JWTs with Amazon Cognito, which is a user directory service that can handle registration, authentication, account recovery, and other common account management operations. For frontend development, Amplify Framework provides libraries to simplify integrating Cognito into your frontend application. You can also use third-party partner services like Auth0.
Given the critical security role of an identity provider service, it’s important to use professional tooling to safeguard your application. It’s not recommended that you write your own services to handle authentication or authorization. Any vulnerabilities in custom libraries may have significant implications for the security of your workload and its data.
Protecting API endpoints
For serverless applications, the preferred way to serve a backend application publicly is to use Amazon API Gateway. This can help you protect an API from malicious users or spikes in traffic.
For authenticated API routes, API Gateway offers both REST APIs and HTTP APIs for serverless developers. Both types support authorization using AWS Lambda, IAM or Amazon Cognito. When using IAM or Amazon Cognito, incoming requests are evaluated and if they are missing a required token or contain invalid authentication, the request is rejected. You are not charged for these requests and they do not count towards any throttling quotas.
Unauthenticated API routes may be accessed by anyone on the public internet so it’s recommended that you limit their use. If you must use unauthenticated APIs, it’s important to protect these against common risks, such as denial-of-service (DoS) attacks. Applying AWS WAF to these APIs can help protect your application from SQL injection and cross-site scripting (XSS) attacks. API Gateway also implements throttling at the AWS account-level and per-client level when API keys are used.
In some cases, the functionality provided by an unauthenticated API can be achieved with an alternative approach. For example, a web application may provide a list of customer retail stores from an Amazon DynamoDB table to users who are not logged in. This request may originate from a frontend web application or from any other source that calls the URL endpoint. This diagram compares three solutions:
The unauthenticated API can be called by anyone on the internet. In a denial of service attack, it’s possible to exhaust API throttling limits, Lambda concurrency, or DynamoDB provisioned read capacity on an underlying table.
An Amazon CloudFront distribution in front of the API endpoint with an appropriate time-to-live (TTL) configuration may help absorb traffic in a DoS attack, without changing the underlying solution for fetching the data.
Alternatively, for static data that rarely changes, the CloudFront distribution could serve the data from an S3 bucket.
The AWS Well-Architected Tool provides a Serverless Lens that analyzes the security posture of serverless workloads.
Encrypting data in Lambda-based applications
Managing secrets
For applications handling sensitive data, AWS services provide a range of encryption options for data in transit and at rest. It’s important to identity and classify sensitive data in your workload, and minimize the storage of sensitive data to only what is necessary.
When protecting data at rest, use AWS services for key management and encryption of stored data, secrets and environment variables. Both the AWS Key Management Service and AWS Secrets Manager provide a robust approach to storing and managing secrets used in Lambda functions.
Do not store plaintext secrets or API keys in Lambda environment variables. Instead, use KMS to encrypt environment variables. Also ensure you do not embed secrets directly in function code, or commit these secrets to code repositories.
Using HTTPS securely
HTTPS is encrypted HTTP, using TLS (SSL) to encrypt the request and response, including headers and query parameters. While query parameters are encrypted, URLs may be logged by different services in plaintext, so you should not use these to store sensitive data such as credit card numbers.
AWS services make it easier to use HTTPS throughout your application and it is provided by default in services like API Gateway. Where you need an SSL/TLS certificate in your application, to support features like custom domain names, it’s recommended that you use AWS Certificate Manager (ACM). This provides free public certificates for ACM-integrated services and managed certificate renewal.
Governance controls with AWS CloudTrail
For compliance and operational auditing of application usage, AWS CloudTrail logs activity related to your AWS account usage. It tracks resource changes and usage, and provides analysis and troubleshooting tools. Enabling CloudTrail does not have any negative performance implications for your Lambda-based application, since the logging occurs asynchronously.
Separate from application logging (see chapter 4), CloudTrail captures two types of events:
Control plane: These events apply to management operations performed on any AWS resources. Individual trails can be configured to capture read or write events, or both.
Data plane: Events performed on the resources, such as when a Lambda function is invoked or an S3 object is downloaded.
For Lambda, you can log who creates and invokes functions, together with any changes to IAM roles. You can configure CloudTrail to log every single activity by user, role, service, and API within an AWS account. The service is critical for understanding the history of changes made to your account and also detecting any unintended changes or suspicious activity.
To research which AWS user interacted with a Lambda function, CloudTrail provides an audit log to find this information. For example, when a new permission is added to a Lambda function, it creates an AddPermission record. You can interpret the meaning of individual attributes in the JSON message by referring to the CloudTrail Record Contents documentation.
CloudTrail data is considered sensitive so it’s recommended that you protect it with KMS encryption. For any service processing encrypted CloudTrail data, it must use an IAM policy with kms:Decrypt permission.
By integrating CloudTrail with Amazon EventBridge, you can create alerts in response to certain activities and respond accordingly. With these two services, you can quickly implement an automated detection and response pattern, enabling you to develop mechanisms to mitigate security risks. With EventBridge, you can analyze data in real-time, using event rules to filter events and forward to targets like Lambda functions or Amazon Kinesis streams.
CloudTrail can deliver data to Amazon CloudWatch Logs, which allows you to process multi-Region data in real time from one location. You can also deliver CloudTrail to Amazon S3 buckets, where you can create event source mappings to start data processing pipelines, run queries with Amazon Athena, or analyze activity with Amazon Macie.
If you use multiple AWS accounts, you can use AWS Organizations to manage and govern individual member accounts centrally. You can set an existing trail as an organization-level trail in a primary account that can collect events from all other member accounts. This can simplify applying consistent auditing rules across a large set of existing accounts, or automatically apply rules to new accounts. To learn more about this feature, see Creating a Trail for an Organization.
Conclusion
In this blog post, I explain how to secure workloads with public endpoints and the different authentication and authorization options available. I also show different approaches to exposing APIs publicly.
CloudTrail can provide compliance and operational auditing for Lambda usage. It provides logs for both the control plane and data plane. You can integrate CloudTrail with EventBridge to create alerts in response to certain activities. Customers with multiple AWS accounts can use AWS Organizations to manage trails centrally.
For more serverless learning resources, visit Serverless Land.
Amazon QuickSight is a cloud-native BI service that allows end users to create and publish dashboards in minutes, without provisioning any servers or requiring complex licensing. You can view these dashboards on the QuickSight product console or embed them into applications and websites. After you deploy a dashboard, it’s important to assess how they and other assets are being adopted, accessed, and used across various departments or customers.
In this post, we use a QuickSight dashboard to present the following insights:
Most viewed and accessed dashboards
Most updated dashboards and analyses
Most popular datasets
Active users vs. idle users
Idle authors
Unused datasets (wasted SPICE capacity)
You can use these insights to reduce costs and create operational efficiencies in a deployment. The following diagram illustrates this architecture.
Solution components
The following table summarizes the AWS services and resources that this solution uses.
Resource Type
Name
Purpose
AWS CloudTrail logs
CloudTrailMultiAccount
Capture all API calls for all AWS services across all AWS Regions for this account. You can use AWS Organizations to consolidate trails across multiple AWS accounts.
AWS Glue crawler
QSCloudTrailLogsCrawler
QSProcessedDataCrawler
Ensures that all CloudTrail data is crawled periodically and that partitions are updated in the AWS Glue Data Catalog.
AWS Glue ETL job
QuickSightCloudTrailProcessing
Reads catalogued data from the crawler, processes, transforms, and stores it in an S3 output bucket.
AWS Lambda function
ExtractQSMetadata_func
Extracts event data using the AWS SDK for Python, Boto3. The event data is enriched with QuickSight metadata objects like user, analysis, datasets, and dashboards.
Amazon Simple Storage Service (s3)
CloudTrailLogsBucket
QuickSight-BIonBI-processed
One bucket stores CloudTrail data. The other stores processed data.
Amazon QuickSight
Quicksight_BI_On_BO_Analysis
Visualizes the processed data.
Solution walkthrough
AWS CloudTrail is a service that enables governance, compliance, operational auditing, and risk auditing of your AWS account. You can use CloudTrail to log, continuously monitor, and retain account activity related to actions across your AWS infrastructure. You can define a trail to collect API actions across all AWS Regions. Although we have enabled a trail for all Regions in our solution, the dashboard shows the data for single Region only.
After you enable CloudTrail, it starts capturing all API actions and then, at 15-minute intervals, delivers logs in JSON format to a configured Amazon Simple Storage Service (Amazon S3) bucket. Before the logs are made available to our ad hoc query engine, Amazon Athena, they must be parsed, transformed, and processed by the AWS Glue crawler and ETL job.
This will be handled by AWSGlue Crawler & AWSGlue ETL Job. The AWS Glue crawler crawls through the data every day and populates new partitions in the Data Catalog. The data is later made available as a table on the Athena console for processing by the AWS Glue ETL job. Glue ETL Job QuickSightCloudtrail_GlueJob.txt filters logs and processes only those events where the event source is QuickSight. (for example, eventSource = quicksight.amazonaws.com’).
The following screenshot shows the sample JSON for the QuickSight API calls.
The job processes those events and creates a Parquet file. The following table summarizes the file’s data points.
Quicksightlogs
Field Name
Data Type
eventtime
Datetime
eventname
String
awsregion
String
accountid
String
username
String
analysisname
String
Date
Date
The processed data is stored in an S3 folder at s3://<BucketName>/processedlogs/. For performance optimization during querying and connecting this data to QuickSight for visualization, these logs are partitioned by date field. For this reason, we recommend that you configure the AWS Glue crawler to detect the new data and partitions and update the Data Catalog for subsequent analysis. We have configured the crawler to run one time a day.
We need to enrich this log data with metadata from QuickSight, such as a list of analyses, users, and datasets. This metadata can be extracted using descibe_analysis, describe_user, describe_data_set in the AWS SDK for Python.
We provide an AWS Lambdafunction that is ideal for this extraction. We configured it to be triggered once a day through Amazon EventBridge. The extracted metadata is stored in the S3 folder at s3://<BucketName>/metadata/.
Now that we have processed logs and metadata for enrichment, we need to prepare the data visualization in QuickSight. Athena allows us to build views that can be imported into QuickSight as datasets.
We build the following views based on the tables populated by the Lambda function and the ETL job:
CREATE VIEW vw_quicksight_bionbi
AS
  SELECT Date_parse(eventtime, '%Y-%m-%dT%H:%i:%SZ') AS "Event Time",
         eventname  AS "Event Name",
         awsregion  AS "AWS Region",
         accountid  AS "Account ID",
         username   AS "User Name",
         analysisname AS "Analysis Name",
         dashboardname AS "Dashboard Name",
         Date_parse(date, '%Y%m%d') AS "Event Date"
  FROM   "quicksightbionbi"."quicksightoutput_aggregatedoutput"

CREATE VIEW vw_users
AS
  SELECT usr.username "User Name",
         usr.role     AS "Role",
         usr.active   AS "Active"
  FROM   (quicksightbionbi.users
          CROSS JOIN Unnest("users") t (usr))

CREATE VIEW vw_analysis
AS
  SELECT aly.analysisname "Analysis Name",
         aly.analysisid   AS "Analysis ID"
  FROM   (quicksightbionbi.analysis
          CROSS JOIN Unnest("analysis") t (aly))

CREATE VIEW vw_analysisdatasets
AS
  SELECT alyds.analysesname "Analysis Name",
         alyds.analysisid   AS "Analysis ID",
         alyds.datasetid    AS "Dataset ID",
         alyds.datasetname  AS "Dataset Name"
  FROM   (quicksightbionbi.analysisdatasets
          CROSS JOIN Unnest("analysisdatasets") t (alyds))

CREATE VIEW vw_datasets
AS
  SELECT ds.datasetname AS "Dataset Name",
         ds.importmode  AS "Import Mode"
  FROM   (quicksightbionbi.datasets
          CROSS JOIN Unnest("datasets") t (ds))
QuickSight visualization
Follow these steps to connect the prepared data with QuickSight and start building the BI visualization.
You can set up QuickSight access for end users through SSO providers such as AWS Single Sign-On (AWS SSO), Okta, Ping, and Azure AD so they don’t need to open the console.
On the QuickSight console, choose Datasets.
Choose New dataset to create a dataset for our analysis.
For Create a Data Set, choose Athena.
In the previous steps, we prepared all our data in the form of Athena views.
Configure permission for QuickSight to access AWS services, including Athena and its S3 buckets. For information, see Accessing Data Sources.
For Data source name, enter QuickSightBIbBI.
Choose Create data source.
On Choose your table, for Database, choose quicksightbionbi.
For Tables, select vw_quicksight_bionbi.
Choose Select.
For Finish data set creation, there are two options to choose from:
Import to SPICE for quicker analytics – Built from the ground up for the cloud, SPICE uses a combination of columnar storage, in-memory technologies enabled through the latest hardware innovations, and machine code generation to run interactive queries on large datasets and get rapid responses. We use this option for this post.
Directly query your data – You can connect to the data source in real time, but if the data query is expected to bring bulky results, this option might slow down the dashboard refresh.
Choose Visualize to complete the data source creation process.
Now you can build your visualizations sheets. QuickSight refreshes the data source first. You can also schedule a periodic refresh of your data source.
The following screenshot shows some examples of visualizations we built from the data source.
This dashboard presents us with two main areas for cost optimization:
Usage analysis – We can see how analyses and dashboards are being consumed by users. This area highlights the opportunity for cost saving by looking at datasets that have not been used for the last 90 days in any of the analysis but are still holding a major chunk of SPICE capacity.
Account governance – Because author subscriptions are charged on a fixed fee basis, it’s important to monitor if they are actively used. The dashboard helps us identify idle authors for the last 60 days.
Based on the information in the dashboard, we could do the following to save costs:
Use the SPICE capacity data to manage SPICE capacity by deleting unused datasets or purchasing additional capacity
Conclusion
In this post, we showed how you can use CloudTrail logs to review the use of QuickSight objects, including analysis, dashboards, datasets, and users. You can use the information available in dashboards to save money on storage, subscriptions, understand maturity of QuickSight Tool adoption and more.
About the Author
Sunil Salunkhe is a Senior Solution Architect working with Strategic Accounts on their vision to leverage the cloud to drive aggressive growth strategies. He practices customer obsession by solving their complex challenges in all the aspects of the cloud journey including scale, security and reliability. While not working, he enjoys playing cricket and go cycling with his wife and a son.
The collective thoughts of the interwebz
Manage Consent
To provide the best experiences, we use technologies like cookies to store and/or access device information. Consenting to these technologies will allow us to process data such as browsing behavior or unique IDs on this site. Not consenting or withdrawing consent, may adversely affect certain features and functions.
Functional
Always active
The technical storage or access is strictly necessary for the legitimate purpose of enabling the use of a specific service explicitly requested by the subscriber or user, or for the sole purpose of carrying out the transmission of a communication over an electronic communications network.
Preferences
The technical storage or access is necessary for the legitimate purpose of storing preferences that are not requested by the subscriber or user.
Statistics
The technical storage or access that is used exclusively for statistical purposes.The technical storage or access that is used exclusively for anonymous statistical purposes. Without a subpoena, voluntary compliance on the part of your Internet Service Provider, or additional records from a third party, information stored or retrieved for this purpose alone cannot usually be used to identify you.
Marketing
The technical storage or access is required to create user profiles to send advertising, or to track the user on a website or across several websites for similar marketing purposes.
 AWS Global Summits – AWS Global Summits are free events that bring the cloud computing community together to connect, collaborate, and learn about AWS. Registrations are open for the following AWS Summits in August:
 IMAGINE 2022 – The IMAGINE 2022 conference will take place on August 3 at the Seattle Convention Center, Washington, USA. It’s a no-cost event that brings together education, state, and local leaders to learn about the latest innovations and best practices in the cloud. You can register here.


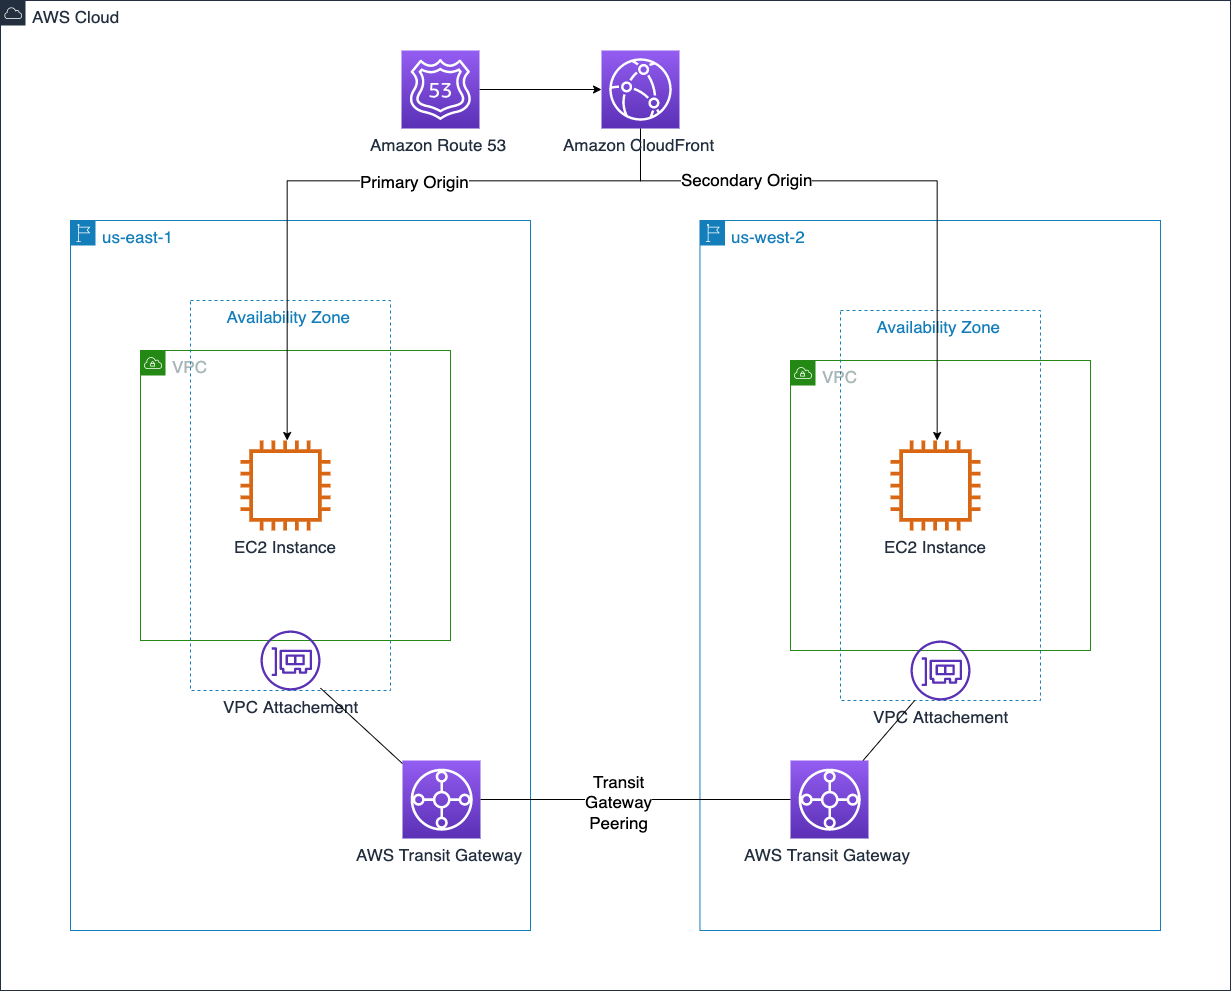


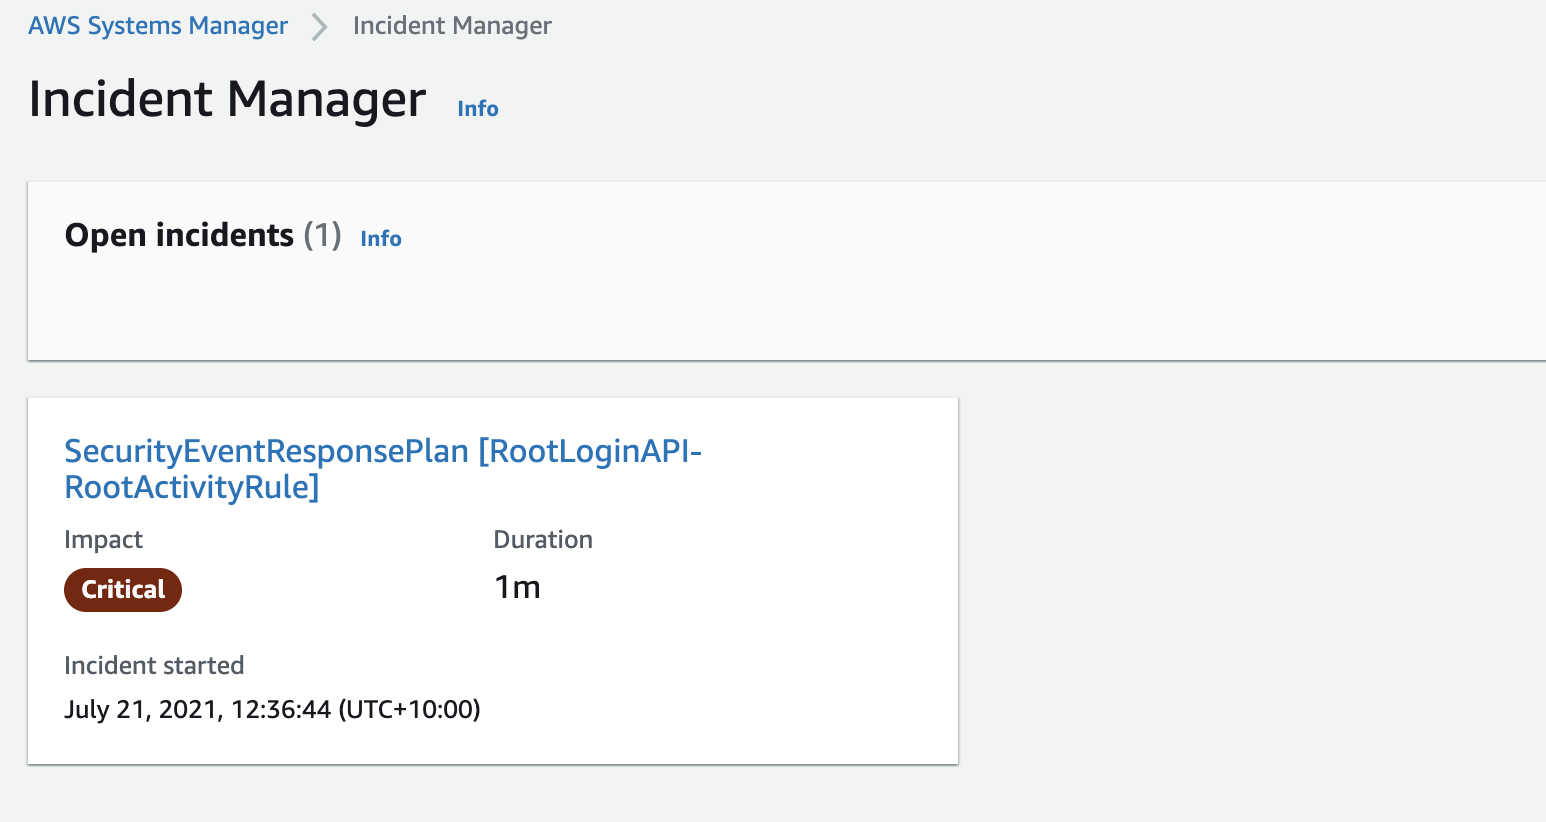
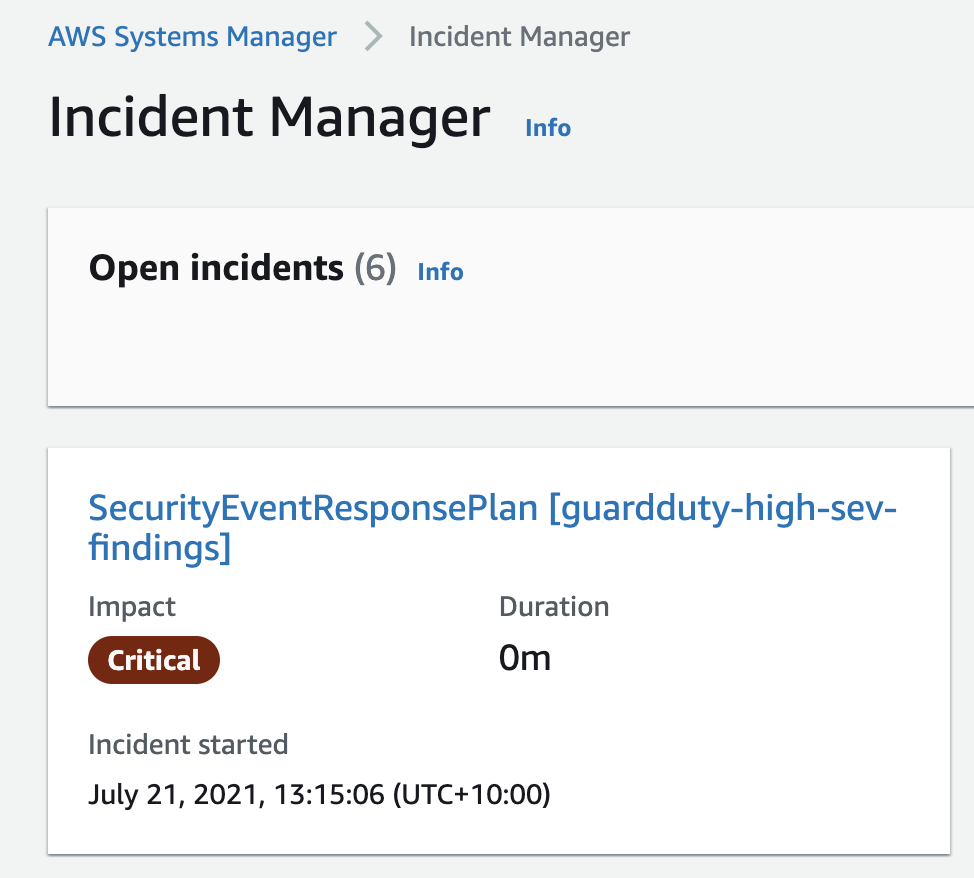


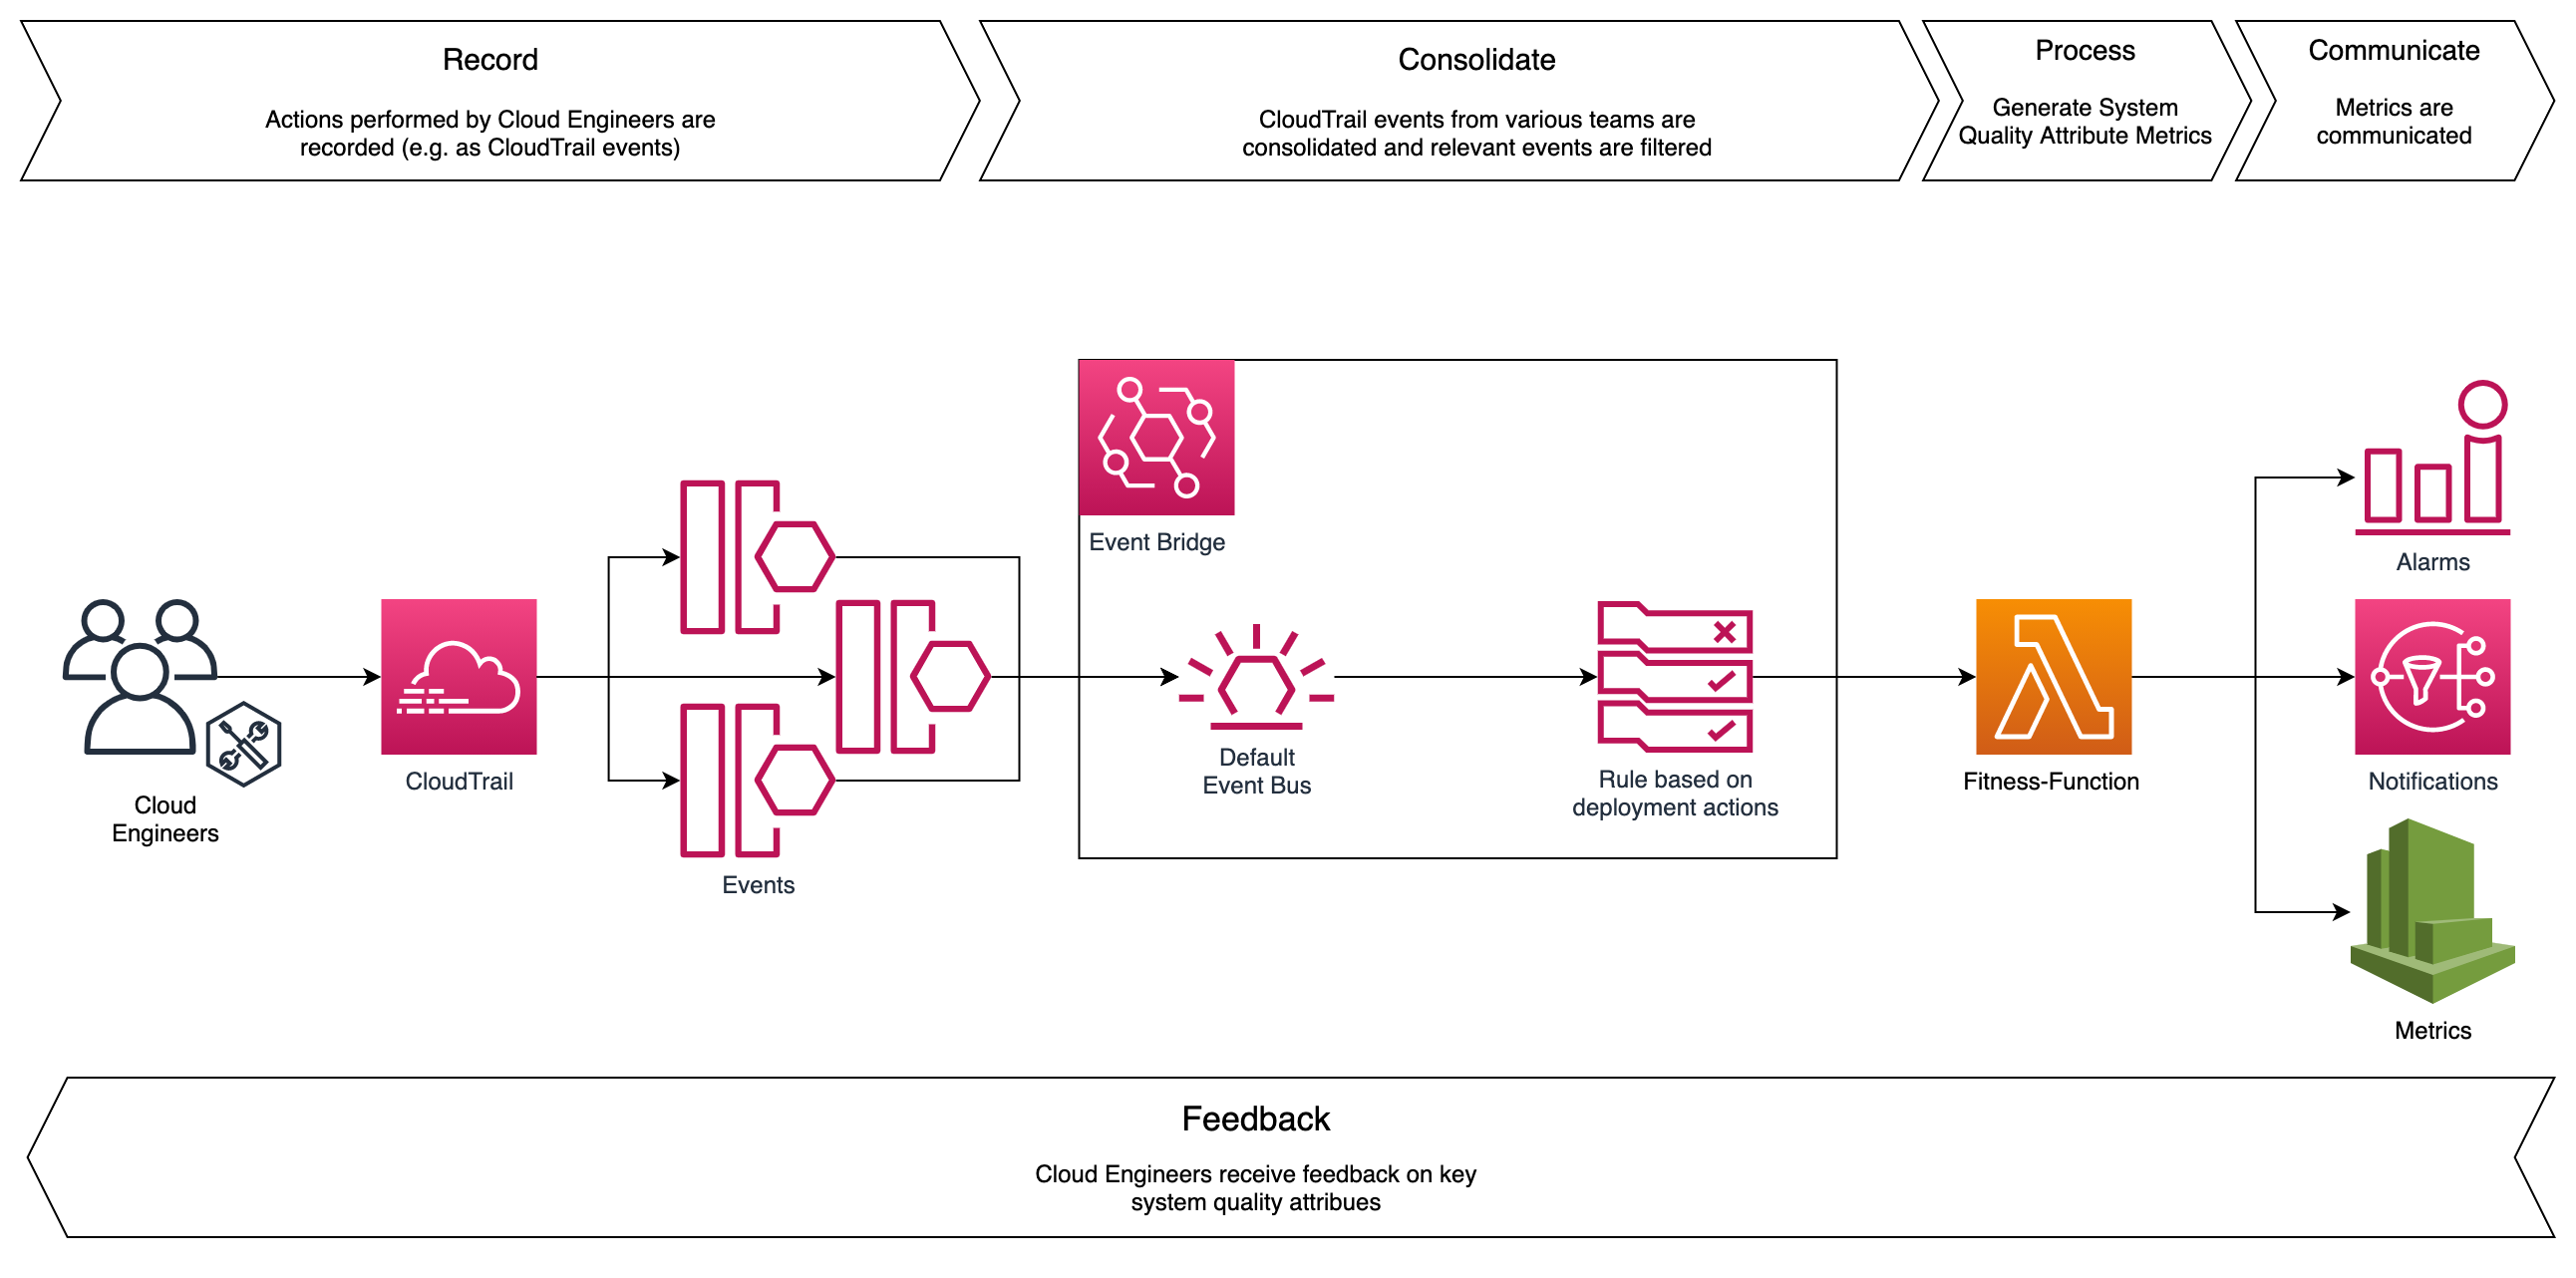


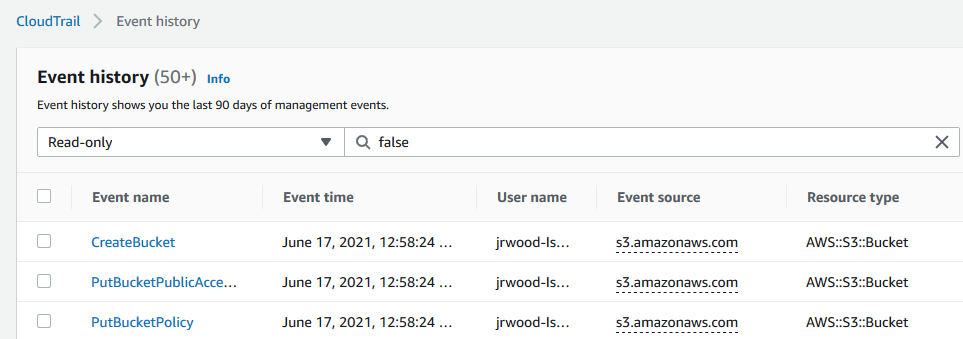


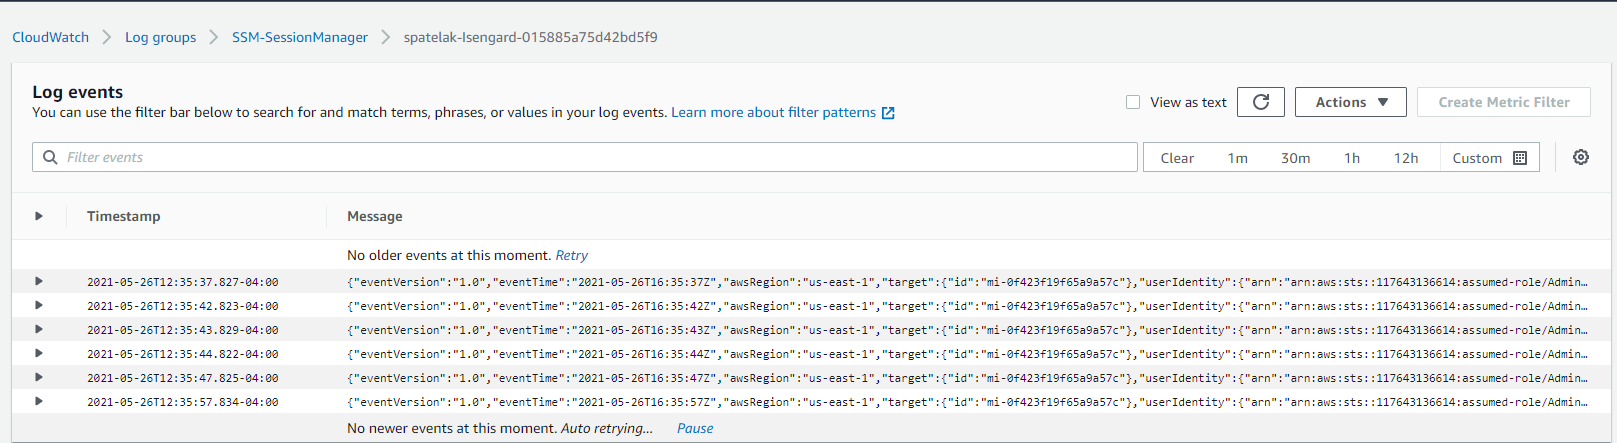

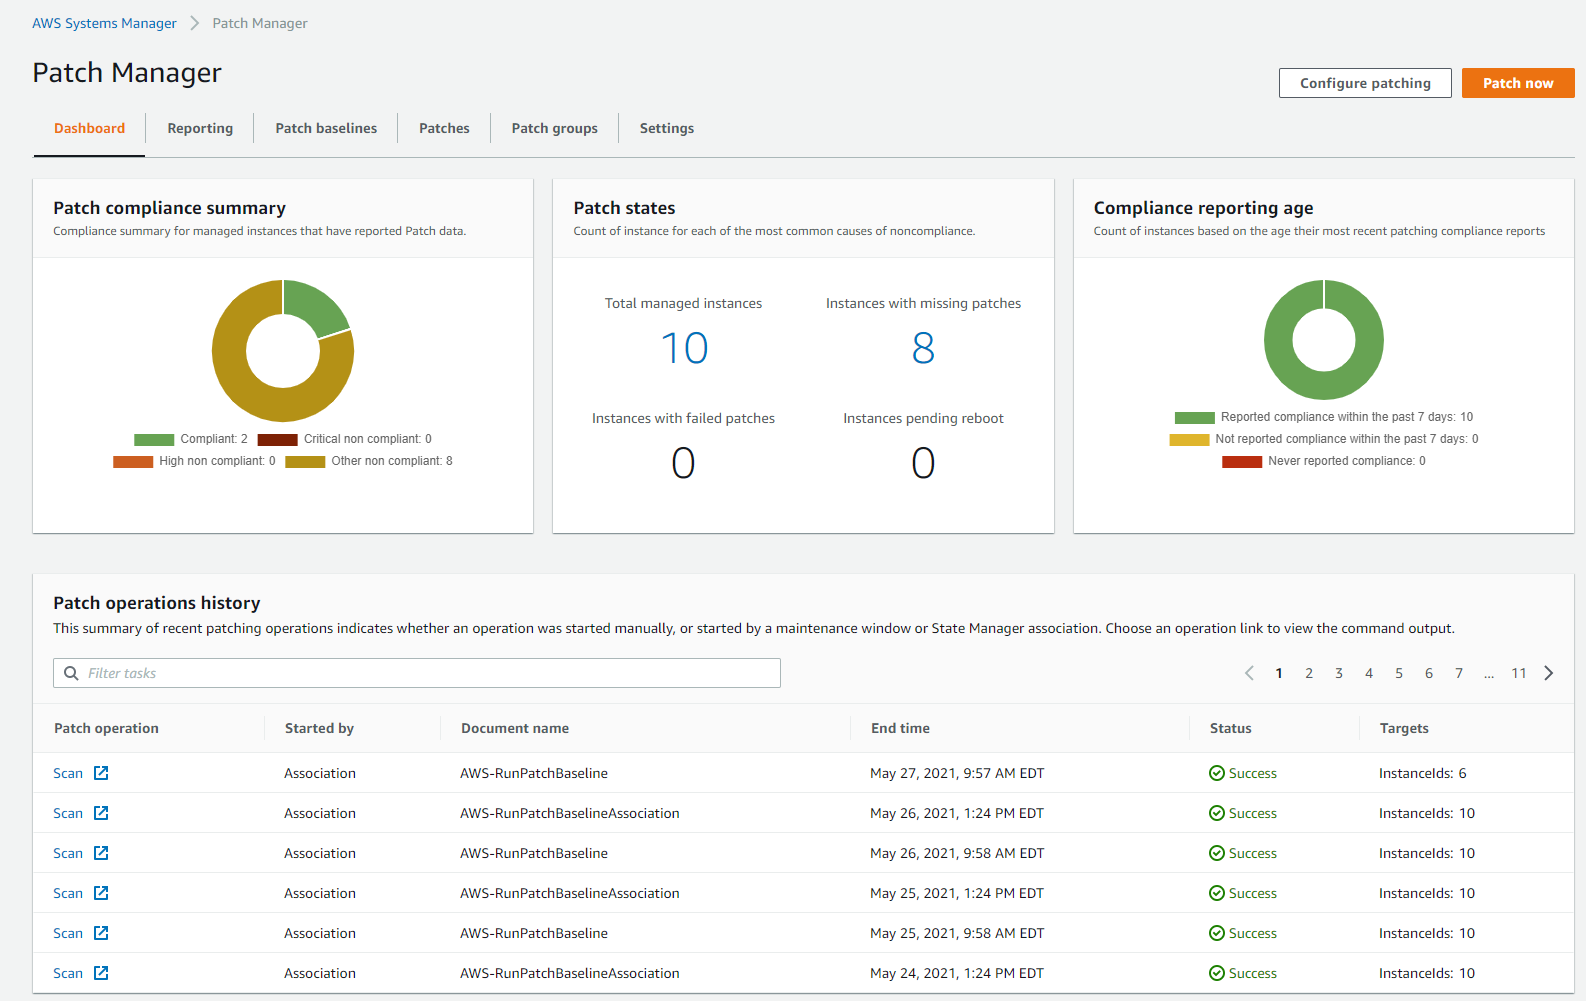


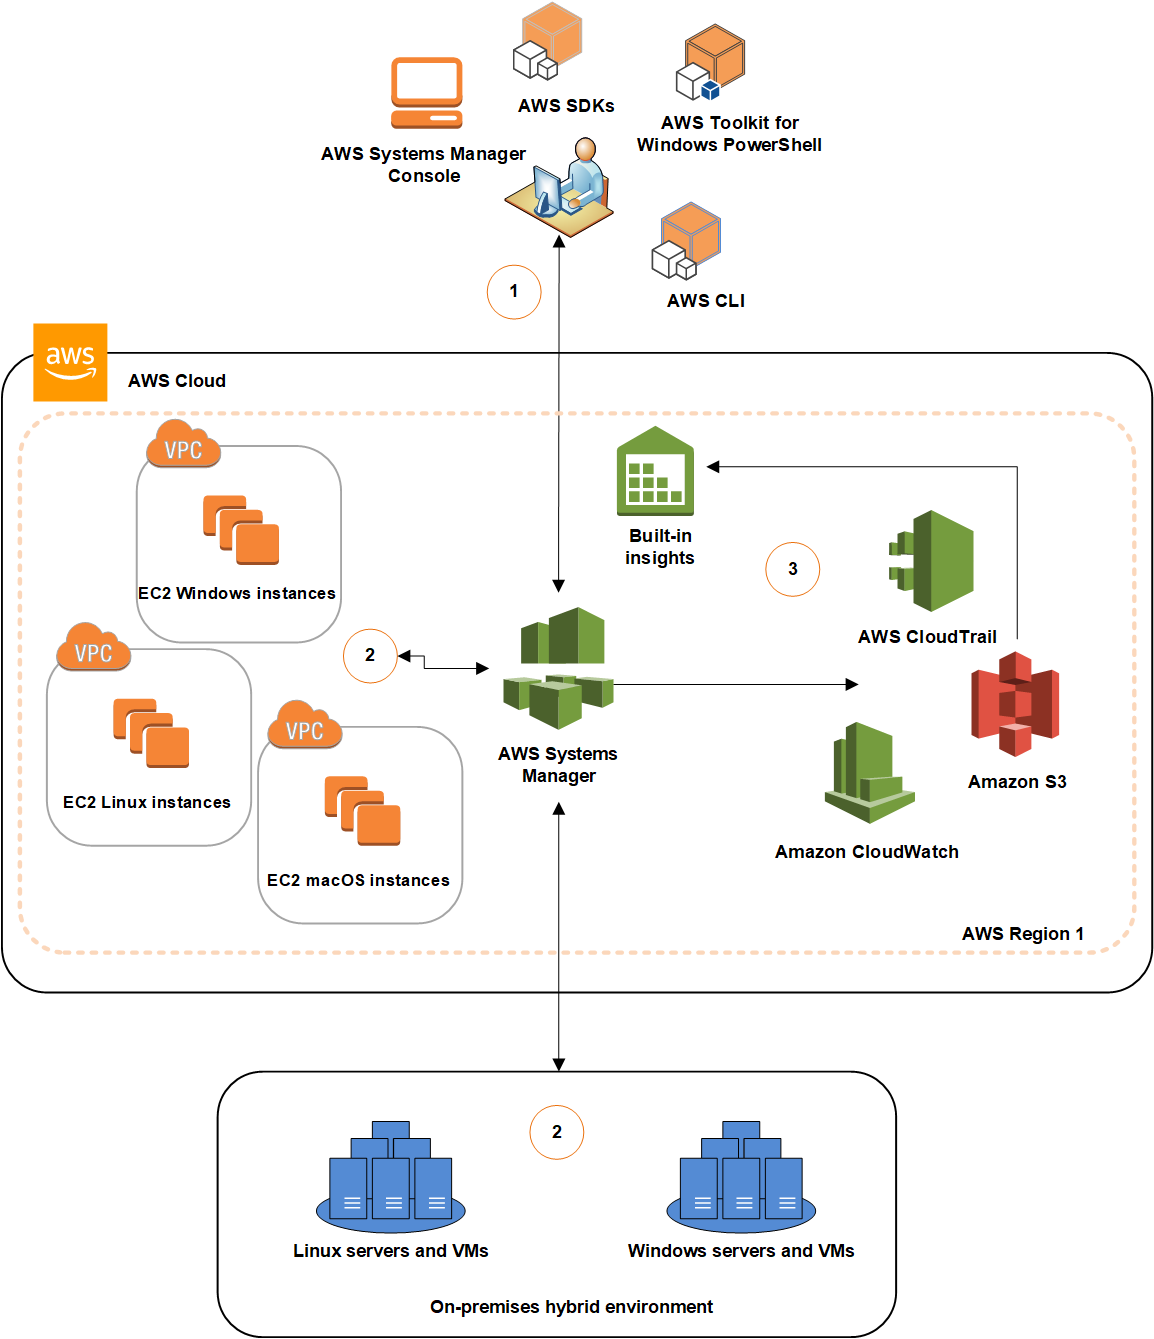
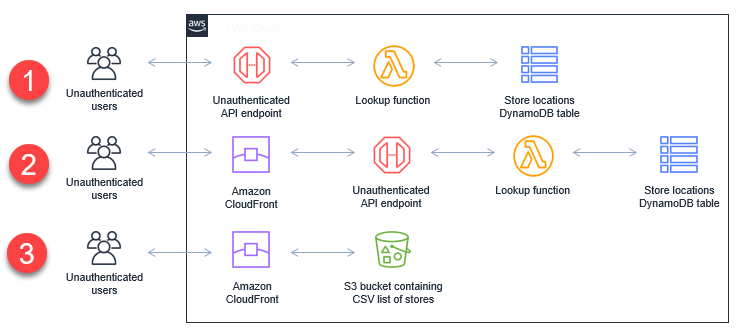

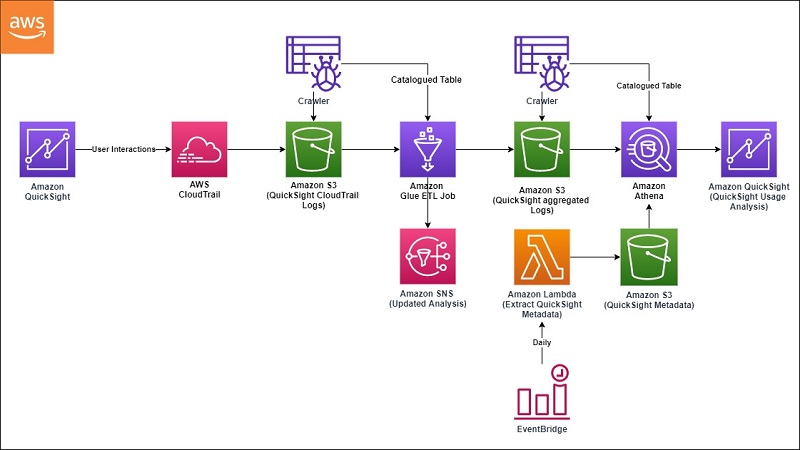

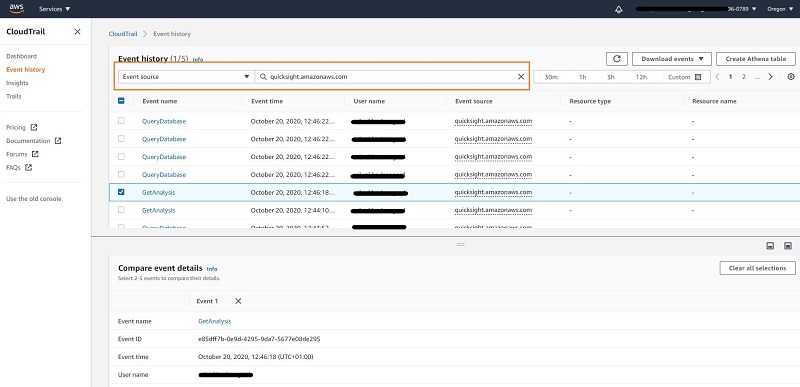
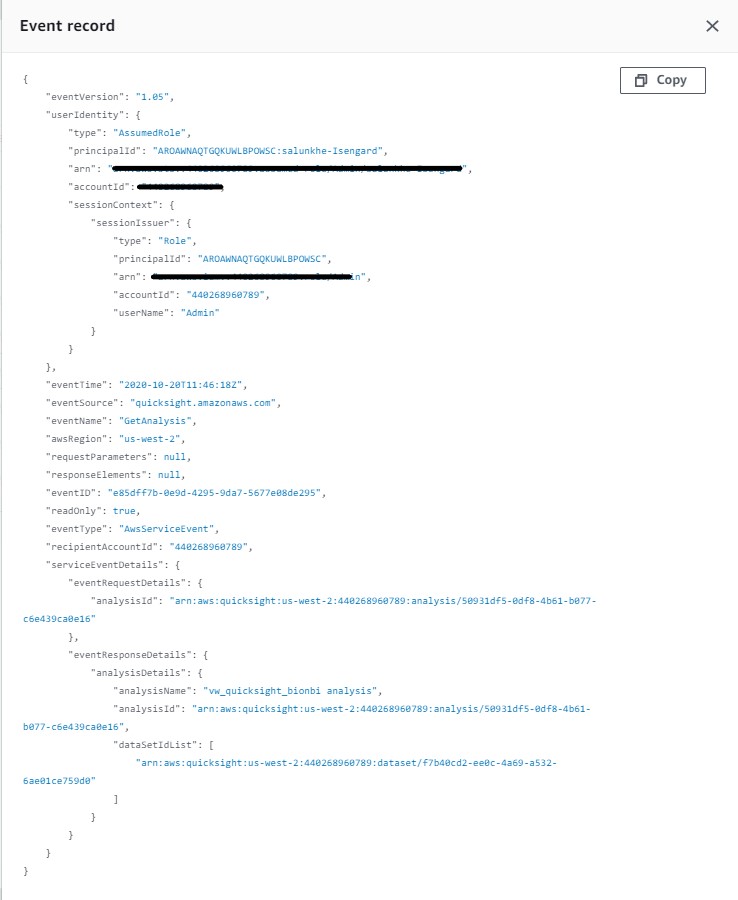
 QuickSight visualization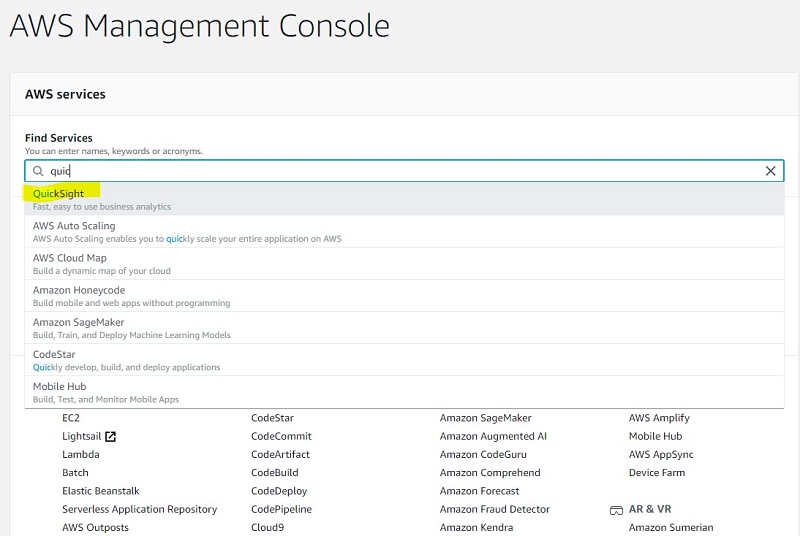
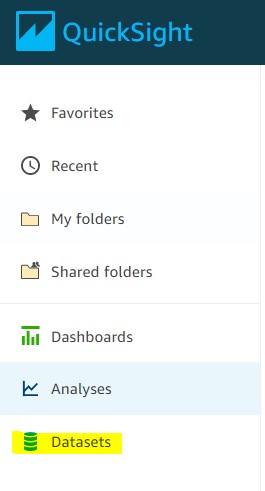
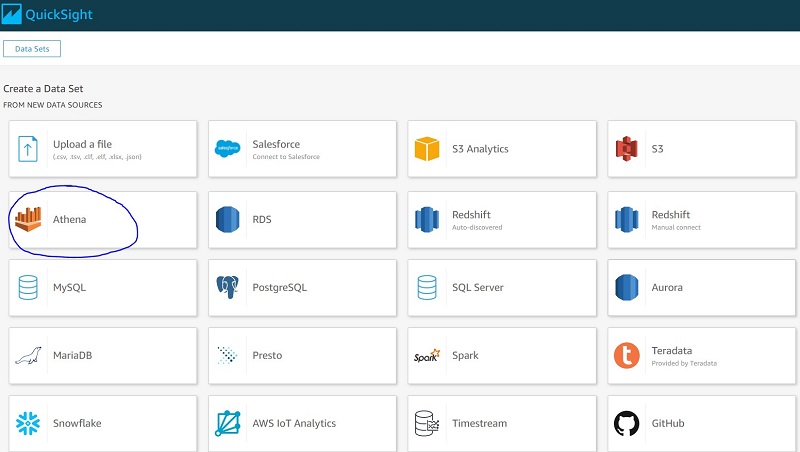
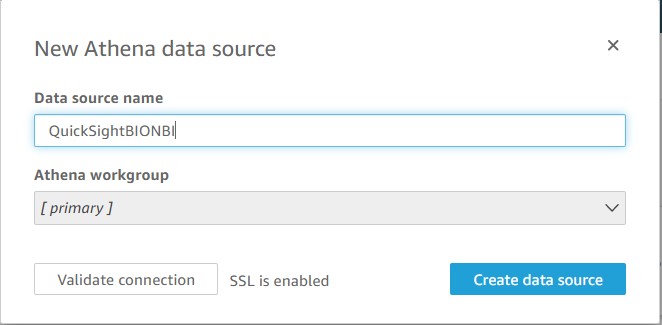
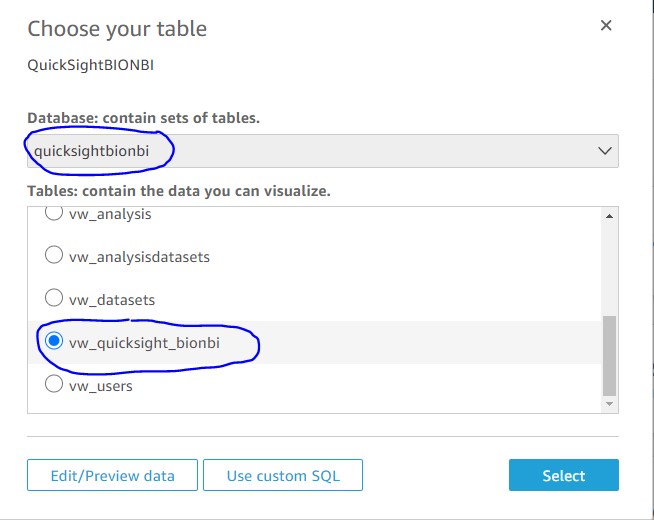

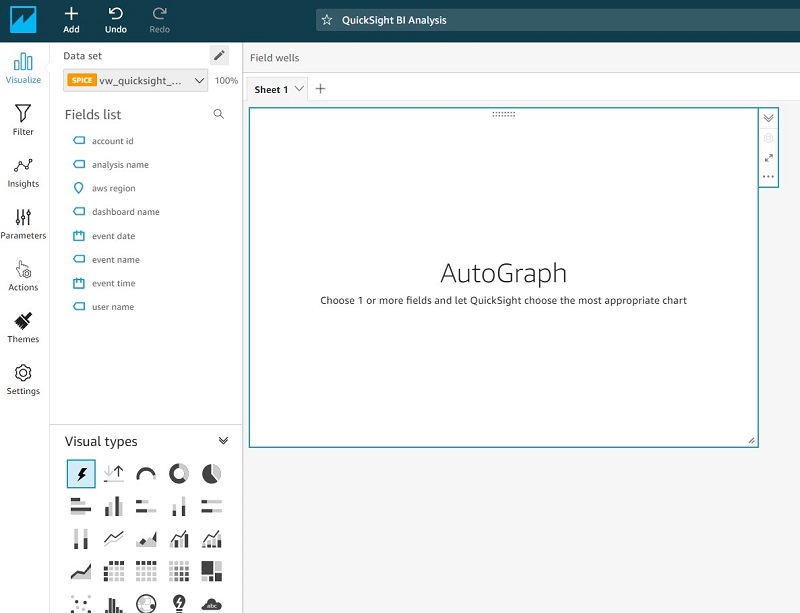

 Sunil Salunkhe is a Senior Solution Architect working with Strategic Accounts on their vision to leverage the cloud to drive aggressive growth strategies. He practices customer obsession by solving their complex challenges in all the aspects of the cloud journey including scale, security and reliability. While not working, he enjoys playing cricket and go cycling with his wife and a son.