You know we love a good cyberdeck around here, and we think you’ll love this video game emulator fresh from the latest issue of HackSpace magazine, out now.
We’ve only just finished printing a series on building a games cabinet using the RetroPie games emulator on a Raspberry Pi… and now something comes along that makes our plywood, full-size arcade machine look old hat.
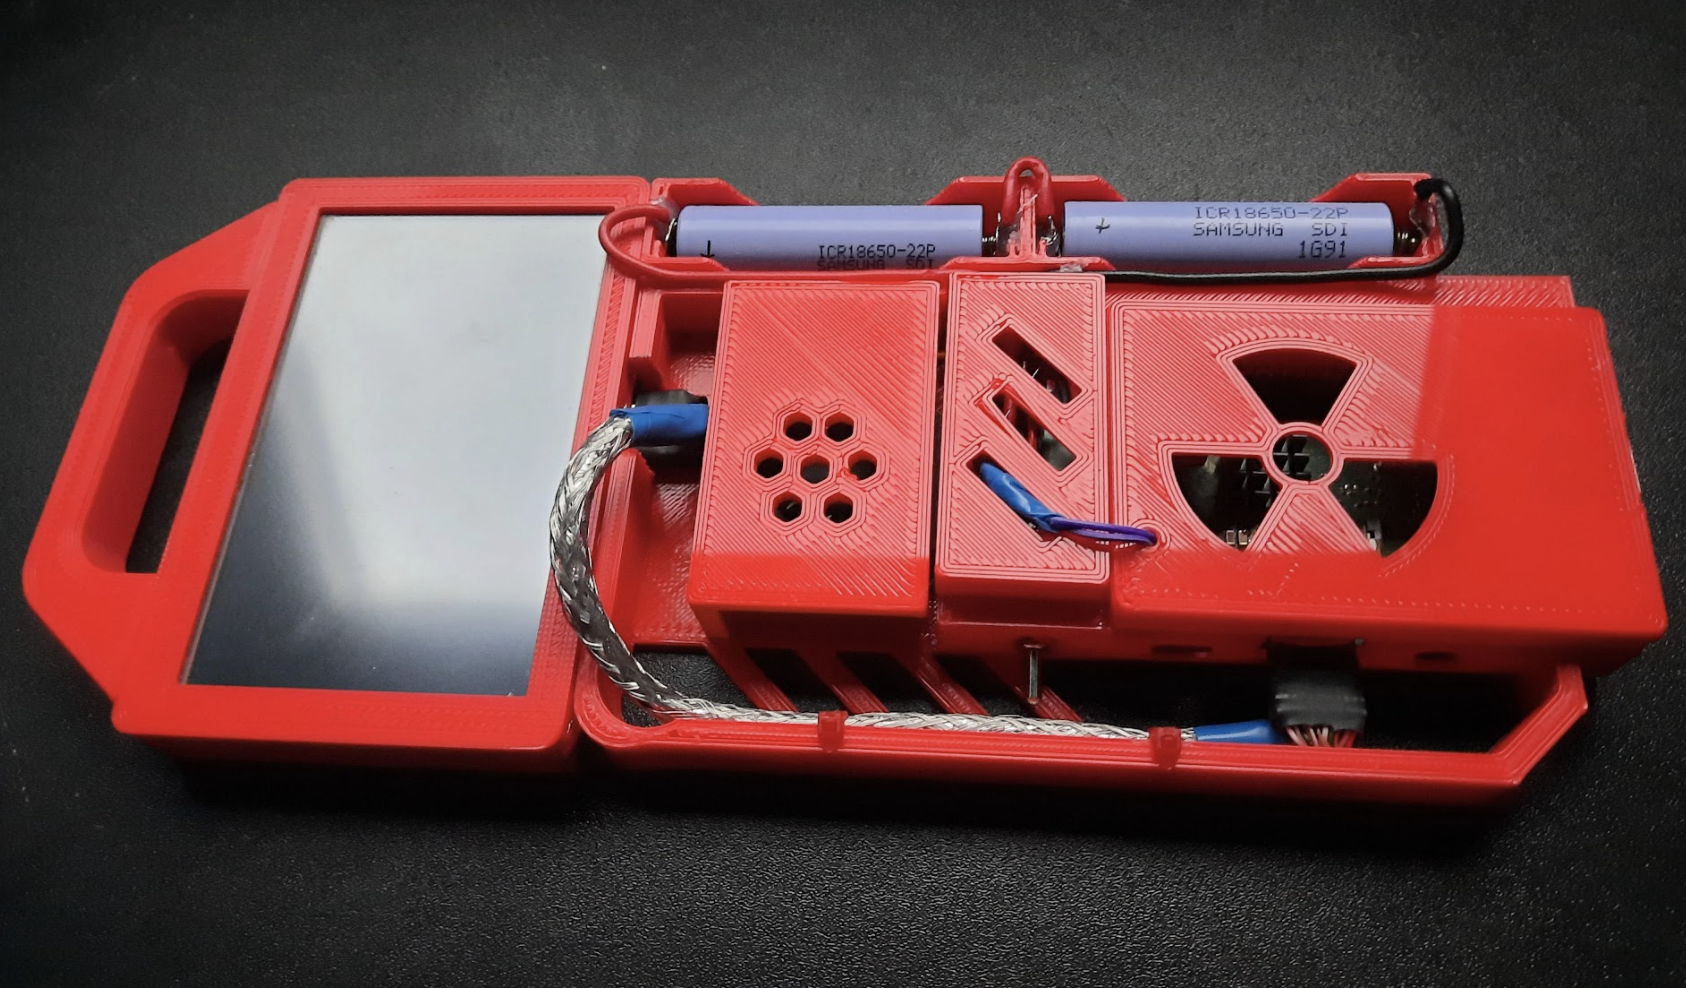
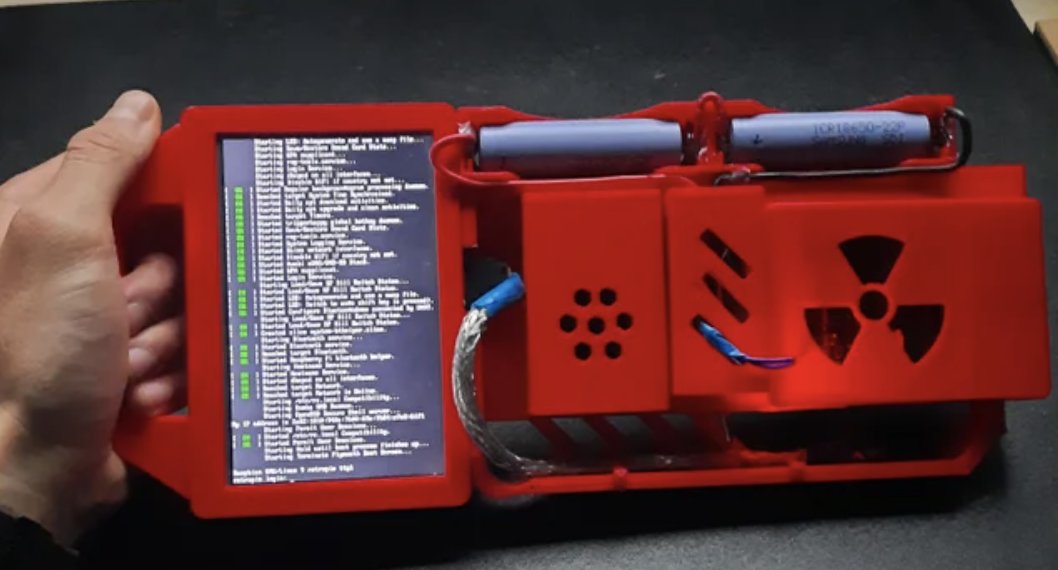
This mostly 3D-printed cyberdeck features a 5-inch 800 × 480 touchscreen display, as well as the usual ports available through the Raspberry Pi 3 Model B+ that powers it. Quite how useful the screen’s portrait orientation will be for Sonic The Hedgehog is anyone’s guess, but if you’re playing any sort of top-down shooter, you’re laughing. The maker describes this project as a “video game emulator with some edge” – we think it’s pretty impressive for a project that began as an excuse to learn 3D design.
HackSpace magazine issue 47 out NOW!
Each month, HackSpace magazine brings you the best projects, tips, tricks and tutorials from the makersphere. You can get it from the Raspberry Pi Press online store or your local newsagents.
As always, every issue is free to download in PDF format from the HackSpace magazine website.
In the latest issue of HackSpace magazine, Andrew Gregory meets Anna Ploszajski to explore the bit of the Venn diagram where making and materials meet.
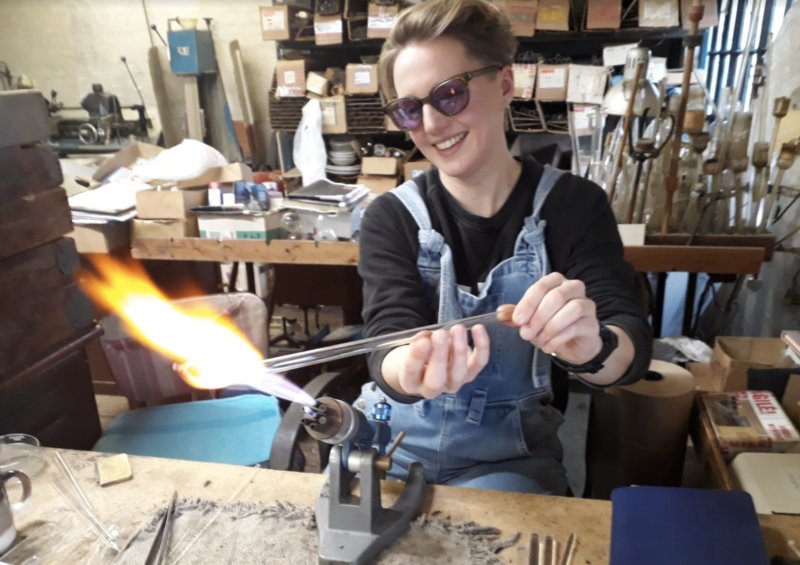
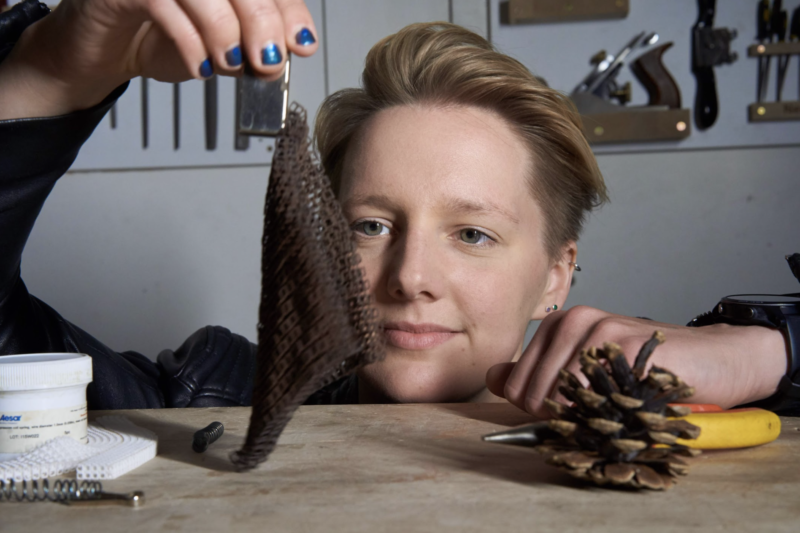
Anna Ploszajski (pronounced Por-shy-ski) is a cross-channel swimmer, a materials scientist, a writer, and a breaker-down of barriers to scientific understanding. 50% of the HackSpace editorial team listen to her podcast, Handmade, from which has arisen a book: Handmade: A scientist’s search for meaning through making. Naturally, we wanted to talk to her to find out why we humans do what we do when we turn object A into object B. That’s a pretty big question, but if anyone can answer it for us, Anna can.
Anna’s journey into making began with watching a bit of broken glassware getting fixed (Image: Charlie Murphy)
HackSpace: Hi Anna! You’ve written a book about making. Before we get on to that, though, we’d like to ask you about something you’ve been working on in your non-writing life – 4D printing. A while ago we saw a box with a hinged lid; the hinges were fabric, and the box was PLA, so you get the benefits of two types of material in one object. I guess what you’re doing is rather more advanced than that?
Anna Ploszajski: You say that, but I’ve been doing quite a lot of experiments in 3D printing onto fabric to try and make a 4D thing, because PLA has a kind of shape memory. I was wanting to do the experiment that I was doing (which actually I described at the end of the book). I’m trying to draw a conclusion about how my adventures in craft had also impacted my scientific research life. And the example that I use is this experiment that I did 3D printing onto fabrics.
What I was doing began with sort of pre-stressing, just normal textiles. I think there was a cotton, linen, pre-stressing it, just stretching them out with my hands, and then attaching them onto the print bed. And so, you already put in a kind of internal strain into the fabric, then 3D-print a very simple design that was either a circle, or just simple lines. And then obviously, when you print onto it, then the PLA plastic is bonded onto the textile. My idea was that if you then heated that material up, then it would soften, and that tension that you’d put into the fabric would be released. So that was my idea.
Anna’s mission is to make science available to non-scientists (Image: Steve Cross)
My project was all to do with exploring this idea of 4D printing. So printing, using 3D printing, to make objects that move in some way after you’ve printed them. The thing about it is, it’s adjacent to this topic of smart materials. There’s a family of materials that have some kind of smart property, usually it’s colour-changing or shape-changing in response to an external stimulus. So, that could be temperature change, or light levels or moisture levels.
And those smart materials are not actually that smart, it turns out, because what they do is really simple. Let’s take the example of a really simple shape change: wood is a really good example. It expands when it gets wet. And it contracts when it dries out. By our definition of a smart material, that is a smart material because it changes shape when there’s a change in environment. And that’s a very simple movement. And these smart materials tend to just have this kind of flip-flopping between two simple states – either, you know, an expanded state or a contracted state in this example. That’s not actually that useful, unless you can do a clever design to use that movement to form a clever kind of motion.
A really good example in nature is the pine cone; the spines of a pine cone have this really ingenious bi-layer structure, where one side of them has a very hygroscopic wood – it expands a lot when it gets wet. And the other side doesn’t expand a lot when it gets wet. So, when the pine cone gets wet, it’s that bi-layer structure that causes that movement. The wood itself is just expanding. But the contrast between the two is what causes that motion. So I was trying to get inspired by that and combine, using clever design, a quite simple, smart material with some design that would combine it with a non-smart material that would cause some kind of motion.
It’s all to do with stored tension, and triggering that tension release. And to be honest with you, I didn’t get very far with it. I understand the material side; that was fine. And I could do all my experiments in the lab, and I could characterise the materials fine, but I just don’t have a designer’s brain.
And that is what the book is about in a way: trying to access or tap into these other skills that designers and makers and craftspeople have which I don’t.
Anna’s book Handmade: A scientist’s search for meaning through making is available to buy now
HS: How much have you learned over the course of writing the book? You must have had to speak to all sorts of people to research it.
AP: I think that meeting all those craftspeople, and getting a view into their world, really gave me an appreciation for exactly how much work and time and skill and practice goes into really honing these skills. Wood is a really good example: when I did the wood carving workshop with Barn the Spoon, it took hours trying to make a spoon, but when I did it, mine didn’t look anything like his spoons.
The skills themselves are often not that complicated or difficult to do. It’s the constant practice in refinement and design, which are the skills that I didn’t necessarily have.
HS: What led you to write the book?
AP: A few things. Firstly, I wanted to write a popular science book that didn’t cater to the normal popular science audience, by which I mean people who are already relatively interested in science, the types of people who would browse the popular science sections in a bookshop and pick things up about space, or the gut, or whatever. I feel like that audience is already very well catered for.
What I wanted to do was try and write a popular book that would be read by someone who would never normally read a science book – that’s the whole of the rest of the population. So you’ll notice in the book that there are a lot of scientific analyses and explanations, but they’re all quite short. And my hope was that, if someone’s coming at this with not very much prior knowledge of science, they get to a description of the quantum mechanics behind why glass is transparent. But on the next page, we’re back to the story. And it’s really those stories that were the most important thing to me.
Like the sound of a materials scientist on a journey into making? Listen to Anna’s excellent Handmade podcast (Image: Steve Cross)
And so, in each of the ten chapters on different materials, the story isn’t the story of the material – it’s the story of something else. So in Plastics, it’s the story of my Polish grandad and, you know, his life story throughout the 20th century, which intertwines with the story of the rise and fall of plastics.
I wanted to draw all these other audiences in by storytelling, and then hopefully, sneak the science in when they weren’t looking.
The story of the book itself is to do with feeling very inadequate, I suppose. I had this realisation, having walked into the Institute of Making for the first time, that I was supposedly this expert in materials, having studied the science of it, having studied all on paper, but actually, there were all of these different people that had so much more in-depth knowledge than me. The craftspeople and the makers and the artists and the historians and the designers and the architects… And so it was them that I really wanted to spend time with and learn from.
That was four years ago. That was when I started my podcast, which is also called Handmade. And that was where I started interviewing makers and craftspeople. And the book just grew from that. Quite a few of the people that I interviewed on the podcast have ended up being featured in the book as the very, very, very kind craftspeople that took me under their wing and showed me the ropes of what they do.
To take blacksmithing as one example – I thought I was an expert in materials, but I had never felt metal softening under my fingers. Yes, I knew the theory, I could draw you the iron-carbon phase diagram, I could talk about the phases and melting, and all of the ways that carbon and iron interact at the atomic level inside steel. But I’ve never done it. And I didn’t know how hard you had to hit it to make it change shape. Agnes, the blacksmith who taught me, is just so, so brilliant. I’m such a huge fangirl of her. And it was very humbling, actually, to spend time with people like that.
It’s one thing to understand the molecular changes that occur when you fire clay; it’s another thing entirely to be able to make a pot
HS: Getting to touch and feel the materials rather than study them, was there any one in particular that you gained an appreciation of?
AP: My favourite chapter in the book is Sugar, because it was the most fun story to write. And it’s the story of my English Channel swim. [Yes, you read that right – Anna has swum the English Channel.] One of the reasons was, I think, it already is one of the strongest chapters for storytelling. Because it is this kind of archetypal physical journey from A to B, but also a journey of discovery about yourself. And intertwined in that story is the story of sugar, and all its different forms, and how it affects the body and the mind.
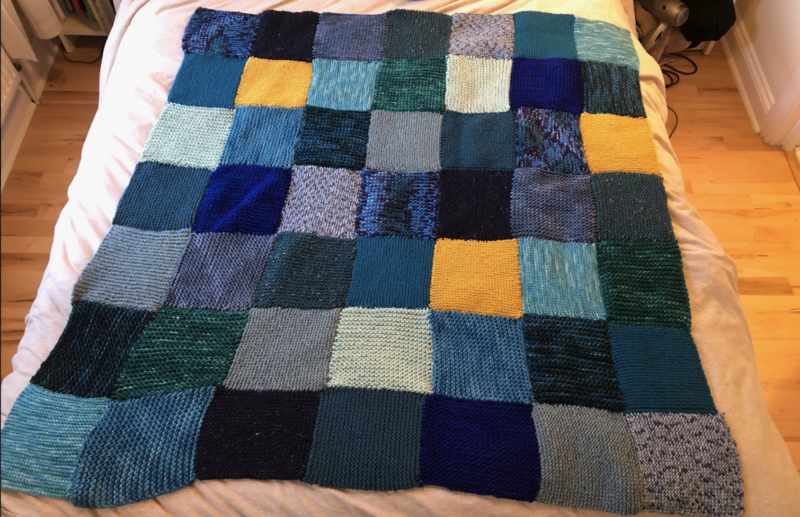
In terms of the crafts, it was really wool that caught my imagination, and I’ve stuck with it. The story of wool is the story of my camper-van trip around Scotland and the north of England. I acquired wool from all these different places that I went to on my trip, and then knitted a patchwork blanket with all the wool I got from the different places. And through doing that, I taught myself how to knit and I met all of these kinds of amazing knitters and wool-craft people throughout Scotland and the north of England, and chatted to them and got an insight into this amazing world of women who knit – and they were all women – and what it means to them, and how it connects them. And it’s very meditative, I find, and that’s the craft that I’ve taken through since finishing the book a year ago. That’s the craft that I’ve continued with.
Knitting contains loads of mathematical patterns, which knitters seem to understand intuitively
I don’t know what it is about it. It just feels so nice to create something, you know, especially in the last year when we were all sitting at home watching Netflix and trawling through the movies and TV shows on there. Although that felt like perhaps a bit of a waste of time, actually, if I was knitting while watching TV, it wasn’t all a waste of time; I had something to show for it at the end. And I think that’s what craft gives us – it’s a sense of purpose almost, and a sense of achievement at the end.
You know, to have that sense of achievement of ‘I’ve made this’ and now I can wear it, or now I can use it. I haven’t had that in science before. I only got that when I started entering this world of craft.
HS: It sounds like you see a disconnect between science and making. Is that fair to say?
AP: I’ve thought a lot about this: this kind of compartmentalising of making and science, or art and science as I talk about in the book (and I know that art and making are absolutely not the same thing). And I think there are a lot of reasons why the arts and sciences have been sort of severed from each other. In formal education, we separate them. At school, we have to often choose between those types of subjects. I ended up going down the science route, but I did A-level music. I love writing and music and history, and I was always crap at art, but I enjoy it. I think it’s really unhelpful that we do that, because it means that we brand people as ‘you’re a scientist’, or ‘you’re more of an artist’. And actually, I think the majority of people are probably somewhere in the middle. Actually, they have interest in both.
Wool was hugely important for England’s development into a major mediaeval power. It’s also good for keeping your feet warm
It’s a real shame that we often get siphoned off into these different camps, and often don’t get the chance to rediscover the other one. As someone who was siphoned off into the scientific track, it was really liberating to be able to discover the craft and artistic world. It was, like I say, very humbling. It was also really nice to be a complete beginner again at something, to be able to ask the silly questions from a place of curiosity, with no pressure, no educational pressure. I wasn’t trying to achieve anything apart from trying to make a spoon, or forge a knife, or throw a pot, or whatever it was.
Materials is a really interesting subject because it can sit at this intersection between the artistic world and the scientific world. Materials, perhaps uniquely in the sciences, is a really lovely way to explore the more artistic side. And what I’ve discovered through the book and through the podcast, is that we all understand these materials, maybe in slightly different ways. But quite often, it’s just that we use different language to talk about them. I remember interviewing a silversmith on my podcast called John Cussell, who described cold-working silver metal to me as making the atoms angry. So, when you cold-work silver, it becomes more and more stiff. I would describe that as putting dislocations into the material and putting internal stresses and strains to make them more brittle. We’re both talking about the same thing in different ways. And I think that, really, the wonderful thing that I love about materials is that it can be this common substance, literally, through which all sorts of different people can talk to each other.
We’re fascinated by the idea of 4D printing – printing an object that’s designed to move (Image: Steve Cross)
HS: Citizen science has taken huge steps forward recently in broadening access to scientific research, but very often it’s locked away inside university buildings and it’s a real shame. What do you think can be done about that?
AP: That’s my life’s mission, to try and break science out of universities through doing things like writing the book and the podcast, and the talks that I give. I really want to invite people in and show them that science – it’s a huge cliché but science really is everywhere. It’s never been more important than in the last 18 months to understand science, virology, how contagions spread – that’s all science. And the science communication that’s going on around that has been mixed. Some of it’s been really good, but some of it’s been really damaging. That’s what’s important to me is to break science out of these institutions, because a lot of people are turned off science at a very early age. And unlike a lot of other areas, it’s impossible to turn back. If you go down a non-scientific route, through school, and then maybe through university or through a job, it’s impossible to go back on that and pick it up again later. I feel like subjects like history and literature are much more accessible to everybody. Whereas science is considered to be more for a select few, you know, a chosen few who are allowed to do it. And that’s really not fair.
HS: Are craftspeople scientists? There must be a lot of crossover in terms of learning, experimentation, and so on.
AP: I think you’d have to ask them, but whatever it is they do is experimentation, right? And they do experiments all the time – what temperature do I need to make my steel to make it do X? Or, what composition do I need my clay to be to make it do Y? How do I do the settings on my furnace to make sure that my pots don’t explode? And that is exactly the sort of stuff that we would do in the lab, you know: methodical experimentation. So in that way, definitely. I can’t see that there’s any difference at all between that. And in terms of the way that craftspeople and scientists think, that’s much more difficult to answer.
Most science has arisen from craftspeople and early experimenters. The subject of material science arose out of the subject of metallurgy, which arose out of blacksmiths like Agnes. If you go back far enough, it’s all the same thing.
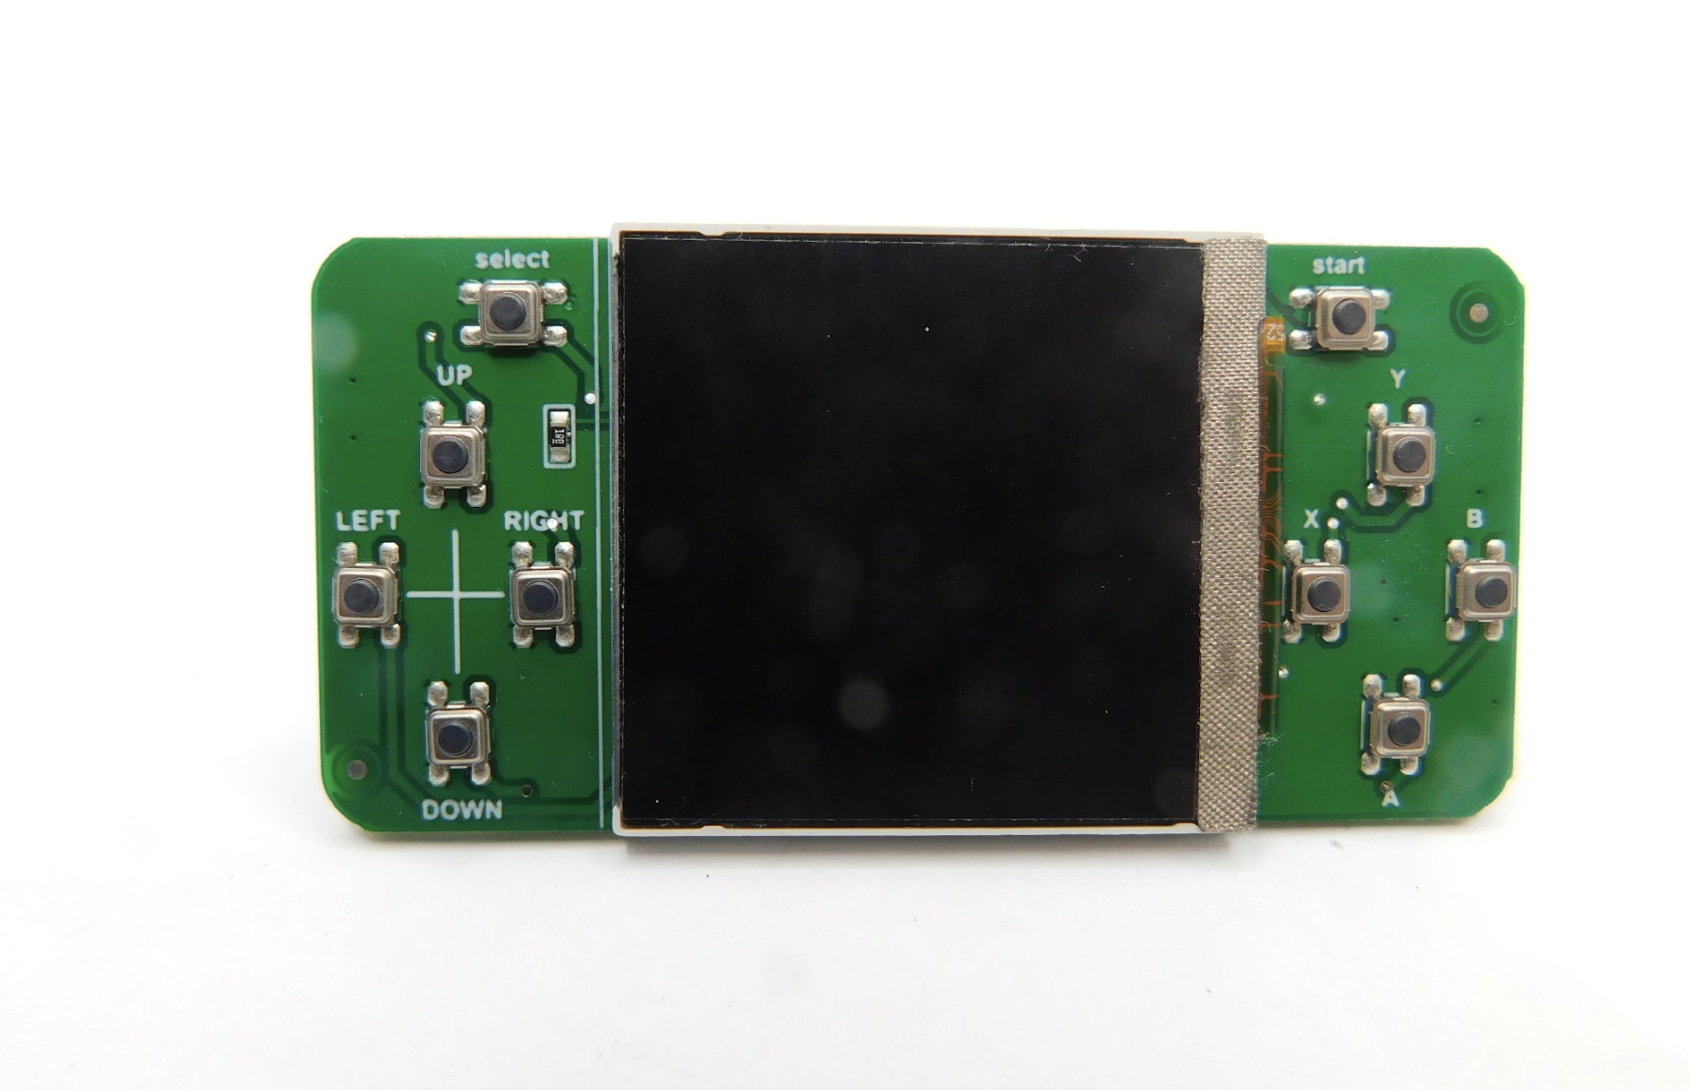
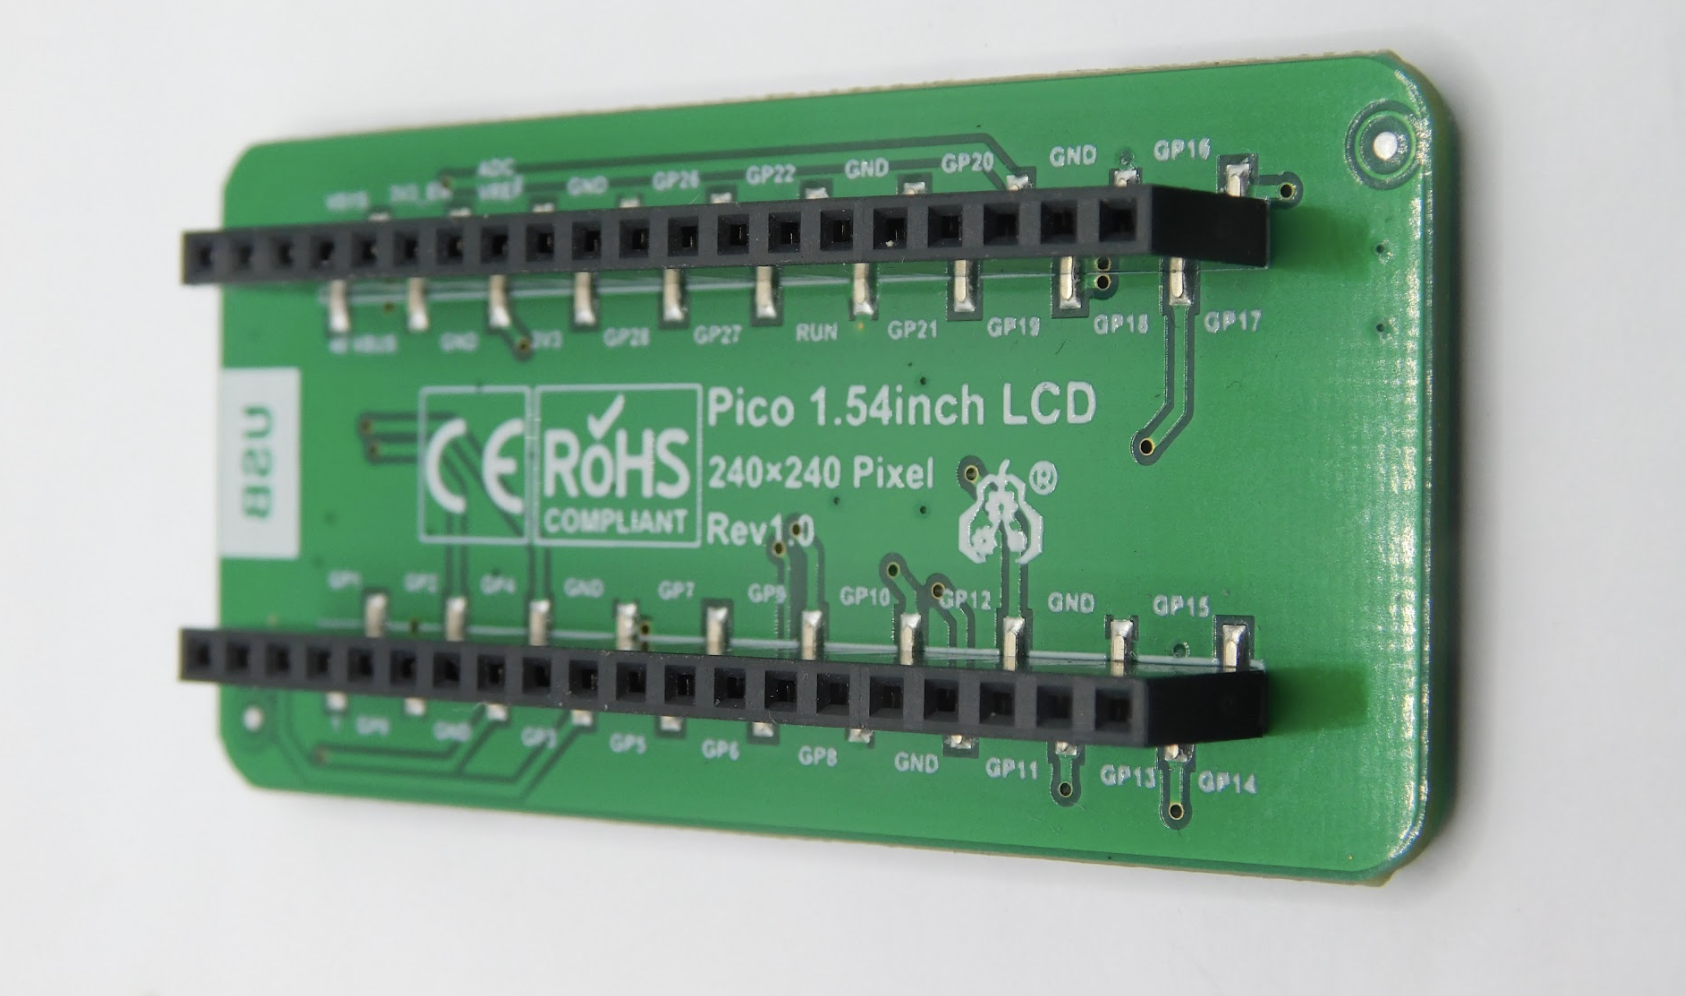
In the latest issue of HackSpace magazine, Ben Everard tests whether a bit of kit from Spotpear can turn Raspberry Pi Pico into a games machine.
The snappily named Raspberry Pi Pico display 1.54-inch LCD by Spotpear ($11.89) brings in a 240×240 pixel IPS screen and ten buttons in a joypad-like arrangement. There’s four for direction, four for action, a select, and a start. At least, they’re labelled like this. You can use them for anything you like.
The buttons are just a bit too small and fiddly for us
To help you get started, there’s a short manual, which includes example code for MicroPython and C.
This example code is easy enough to use, but it is a little messy. The mechanism for controlling the hardware isn’t separated into its own module, so you’re left with either the task of building the library yourself or having slightly untidy code. Not the biggest inconvenience, but compared to how neatly some maker hardware companies manage their code, we found ourselves off to a disappointing start.
There are also some sample UF2 files included along with the C example code, but these appear to have been built for different hardware and work either partially or not at all. The actual example code did compile and work properly.
Impressive quality
When we ran the example code, we were impressed with the quality of the screen. With 240×240 pixels in just 1.54 inches, there’s a high pixel density that can give crisp graphics. Obviously, high pixel densities are a double-edged sword. While they can look great, it does mean higher RAM use, more time transferring data, and more data to process.
Fortunately, Pico is well-suited to the task of driving screens. Each pixel can take 16 bits of colour data, so a full-frame buffer is just 115,200 bytes. The display data is transferred by SPI, and Pico has a maximum SPI frequency of half the clock speed. For MicroPython, that means 62.5MHz. The actual data transfer rate is a little less than this because of overhead of the protocol, but we were able to drive full-frame refreshes at over 40 fps, which is plenty for smooth animations.
Pico slots in the back, which is perfect for space-constrained builds
Obviously, if you’re looking to do animations, sending the data is only half the story. You also need to calculate the frame before it’s displayed. If you’re using MicroPython, you are quite limited by the amount of processing you can do and still keep a high frame rate (though you could use the second core to offload some of the processing). With C, you’ve got much more scope, especially as you could potentially offload the data transfer using direct memory access (DMA).
Battery-sucking light
The one disappointing thing about the screen is that there’s no control over the backlight. According to the documentation, it should be attached to pin 13, but it isn’t. You can’t turn it on or off – it’s just permanently on, and quite bright. That’s a deal-breaker for anything running off battery power, as it will suck up a lot of power. However, if you want a display permanently on, this might be perfectly acceptable.
While we were quite impressed by the screen, we can’t say the same for the other part of the hardware – the buttons. They’re small, stiff, and have very little movement. The end result is a button that is hard to press, and hard to know if you’ve pressed it. They’re the sort of buttons that are commonly used as reset buttons as they’re hard to accidentally press.
We had hoped that this screen would make a good base for a games console, but unfortunately these buttons would just make for a frustrating experience. They might be OK for a menu-driven user interface, but that’s about it.
Another minor annoyance in this is the lack of any mounting holes. This makes it hard to embed into a project as the user interface.
We wanted to like this project. It’s got a good, high-res screen and a nice layout of buttons. However, the choice of components makes it hard to see how we’ll use this in our projects. We’re considering removing the surface-mount buttons and soldering wires onto them to make a more useful device, but if you’re going to go to that level of surgery, it’s probably better to start with a plain screen and work your way up from there.
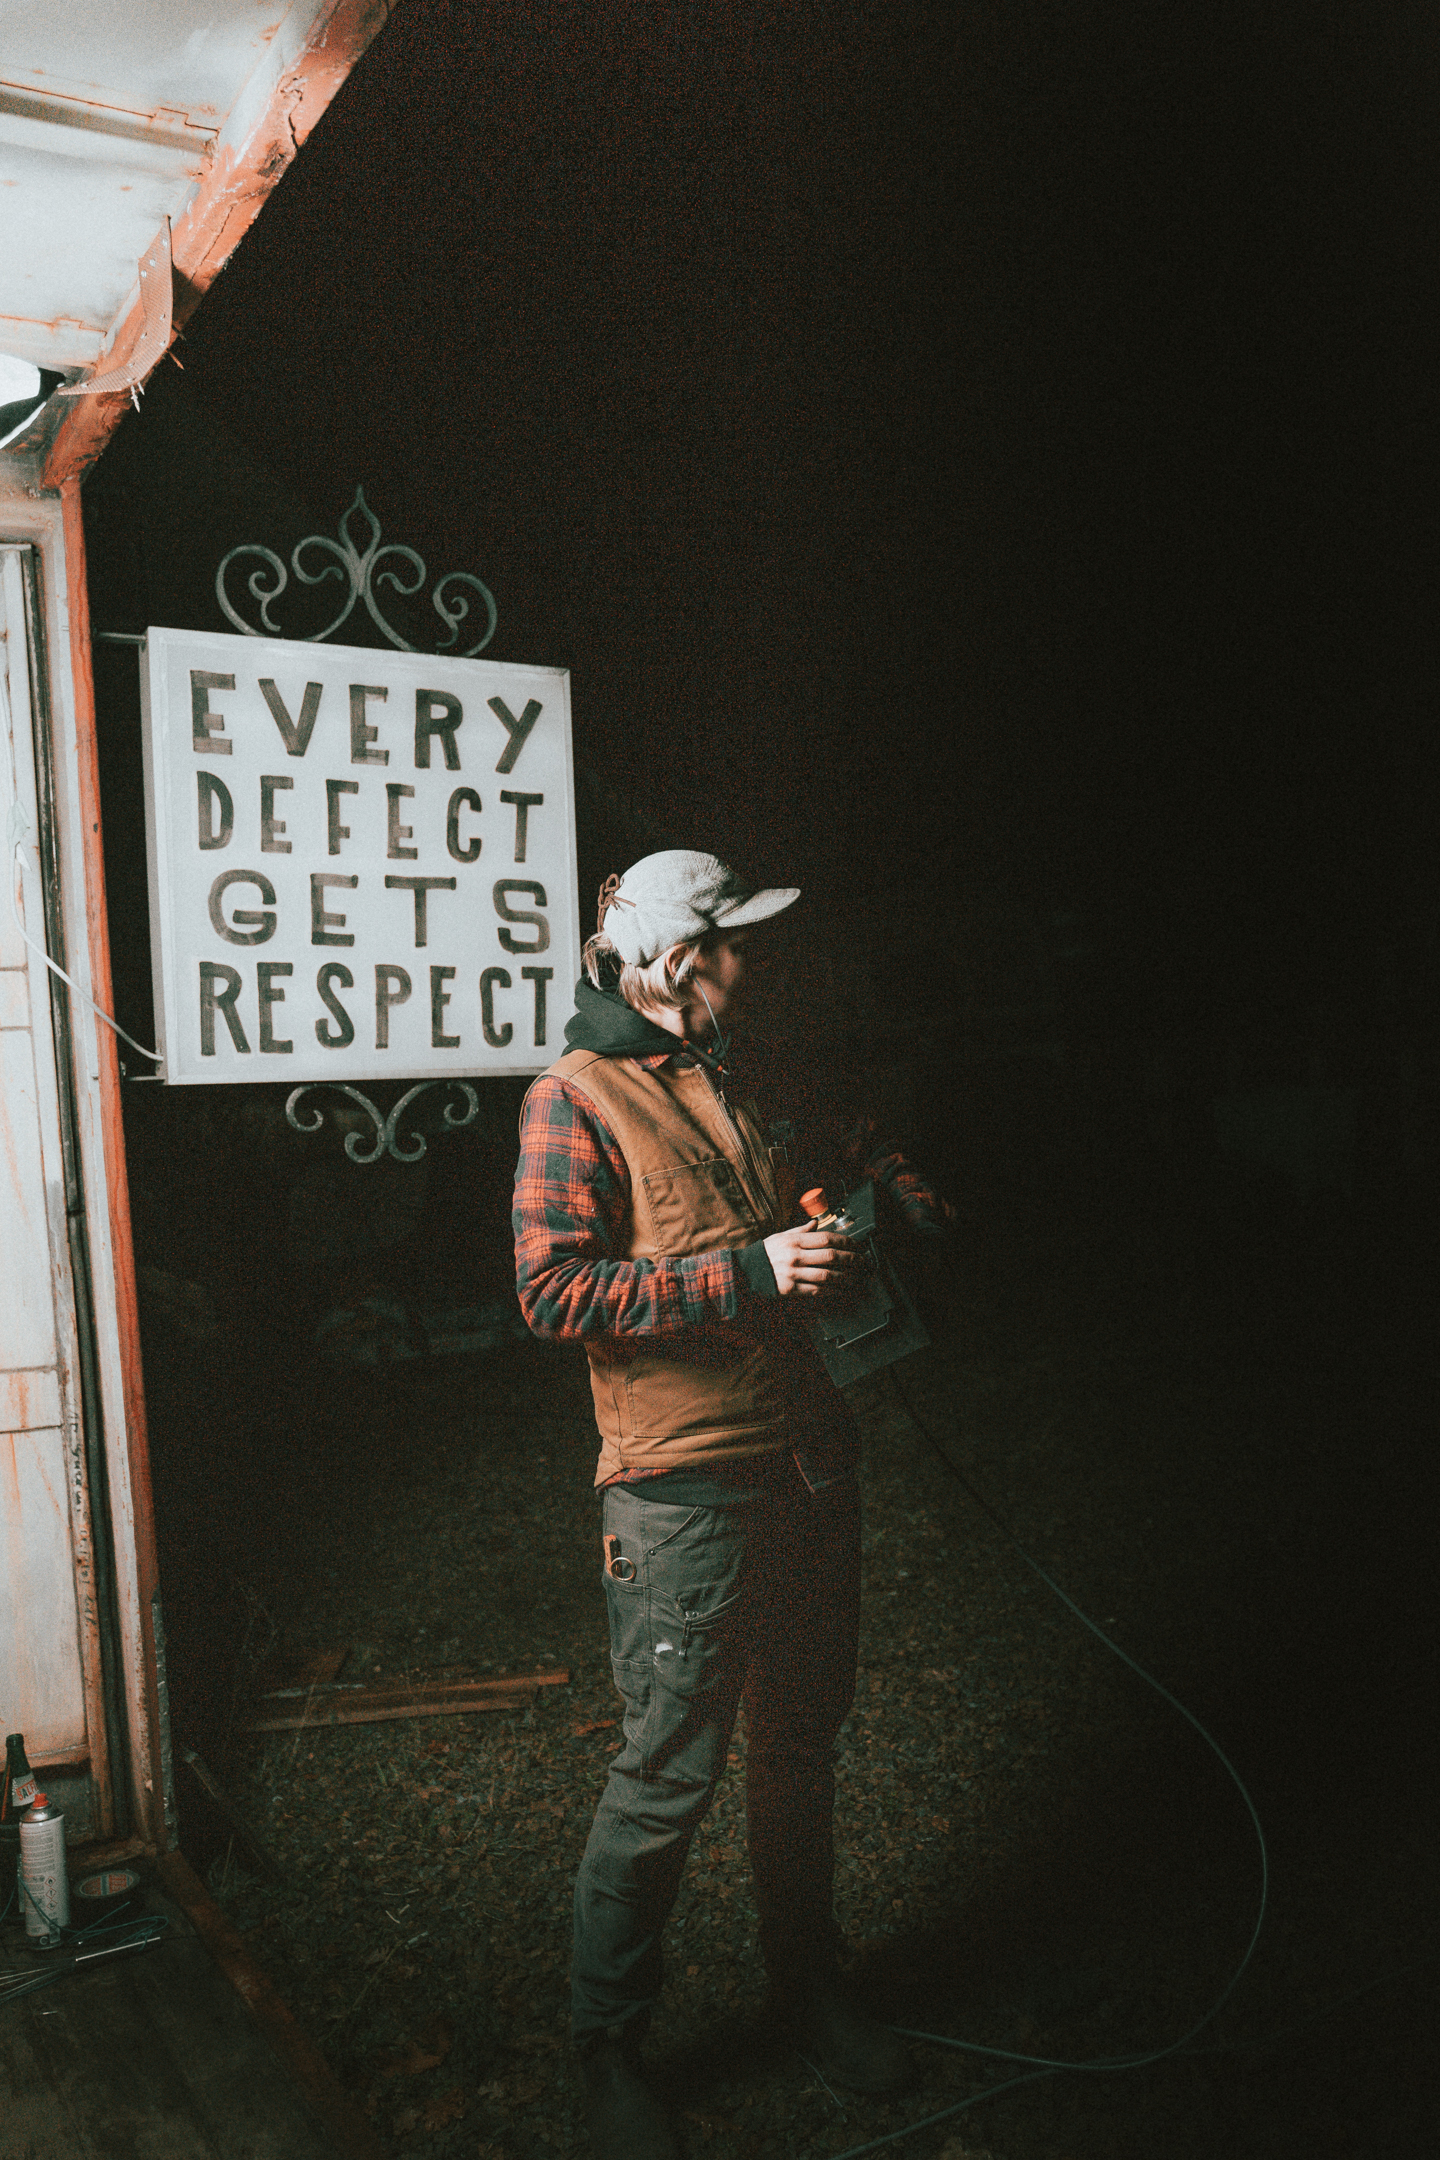
Laura Kampf, the Köln-based wood and metalworker with a mild tiny house and Leatherman obsession sat down (virtually) with Alex Bate to talk about prison tattoo machines, avoiding your nightmares, and why aggressive hip-hop and horror movies inspire her weekly project builds.
Smudo the workshop dog was also there, which seems to be becoming a recurring and pleasant feature of HackSpace magazine interviews.
In five years, Laura has uploaded over 200 videos to YouTube
Alex: Your videos feel very unique in how they’re produced. It feels as though we’re in the workshop watching you get on with your day. That you’d be doing this regardless of whether the camera was there or not.
Laura: Yeah, that’s absolutely it. I mean, I document it for YouTube because I’m aware that this is the only place for me. And the documentation, that’s the work part, like setting up the camera, thinking about the story. But the physical work of building something, that’s a form of meditation. That’s just my happy place. And I know I have to document my work because I have to do something to make a living, right? I can’t just play. So YouTube is my work. But making is just, it’s just what I do, and I feel more and more that this is the only place for me.
And this is probably how musicians feel when they are performing on stage. You know, this – being in my shop, I feel so comfortable. And I feel so good. I don’t have that anywhere else.
I remember seeing that you went to design school. Is that where your journey as a maker started or does creativity run in your family? I know your brother is creative (instagram.com/zooburger), but what about your parents?
My brother is super-creative, but my parents, not so much. My grandfather was an engineer. So I think it kind of skipped a generation.
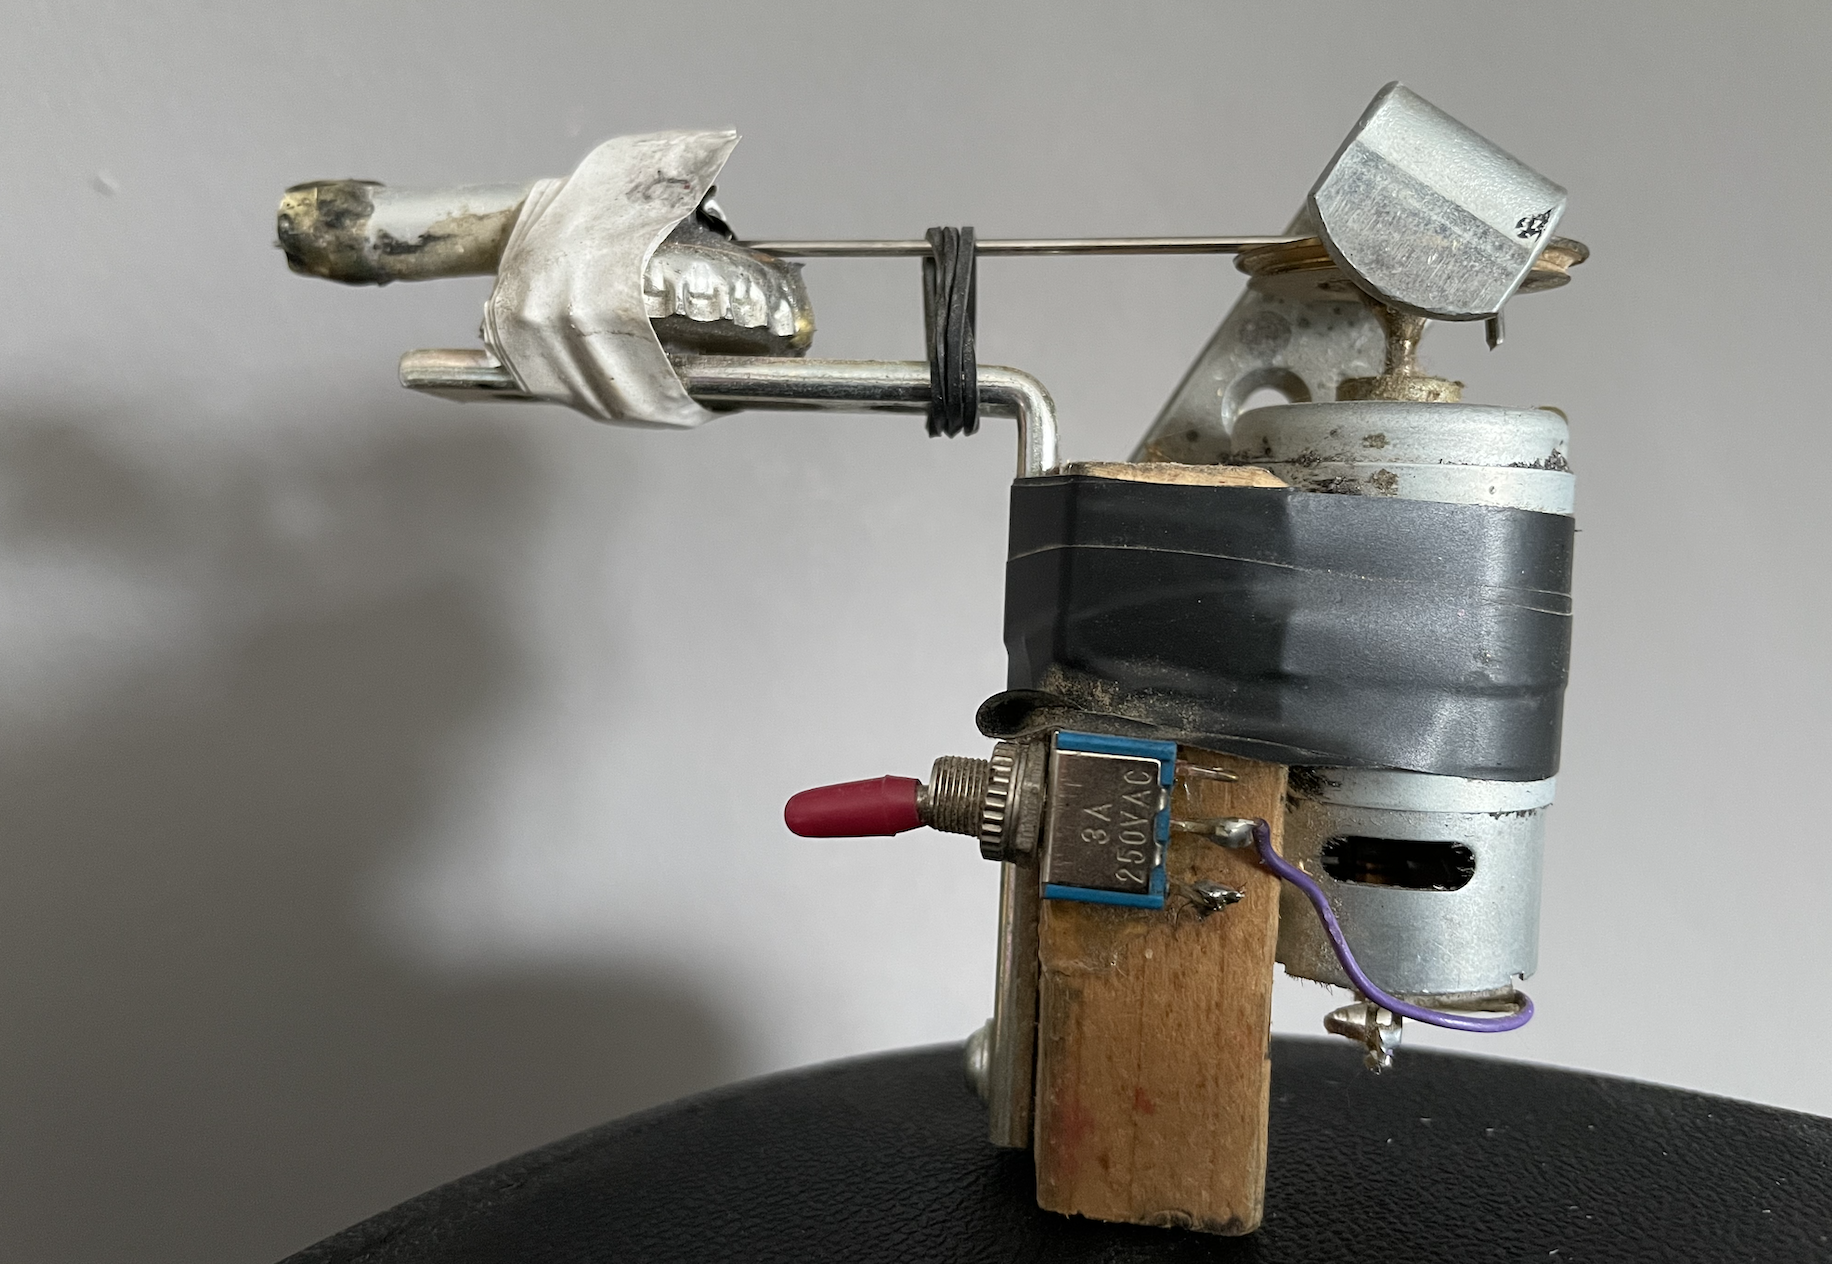
In design school, there was a project where we had to build something out of everyday objects. And it was for us, the designers, to get away from the computers and just do something with our hands. I built a tattoo machine, like a prison-style tattoo machine. And I was hooked. I remember coming home and I was so moved by the whole thing. Even though the machine looks terrible, everything fell into place.
Because all my life, people were telling me you need to find this one thing that you’re really good at and then just keep doing that. I think it’s also a German thing, you know, like, be perfect at one thing, and then you’ll be the best in your field. And I could never focus on one thing and building this tattoo machine; there were so many different things coming together.
I had all this interest in so many different fields and I could use them for the project – I enjoyed drawing fonts and learned how to do old-school tattoo lettering, and I could do a little bit of electronics to hook up a switch. All these things, I thought it was super-interesting. It was the first time I could just use little bits of everything I knew to make something that was really cool, and I was hooked after that.
Laura works mostly with wood and metal in her weekly videos
Have you tattooed yourself with the tattoo machine?
I wanted to and then, thank God, because I was really young, it’s very likely that I would have done that, a tattoo artist came by and I showed him the machine, and he was like, “Don’t do it. It’s running way too fast. You will make mincemeat out of your skin”. But I bought pigs legs and pig’s ears and tattooed them. I couldn’t eat pig for probably two years after that. It was so warm, and tattooing the piece for a couple hours, the fat was running out of it – it was disgusting.
It’s interesting that if you look at the stuff that you’re making now, the anchor point that started all of this is a prison tattoo machine.
Looking back, I remember the little things that I made; when I showed them to people, they just didn’t show the same excitement for them as I did. And it was such a disappointment until I realised that no, the stuff I was making was really bad. That’s why no one was excited, because I didn’t know what I was doing. Once I got better and better, and especially with YouTube and talking to the community – well, I’m preaching to the choir here; everyone knows making is fantastic, and we have a very focused, niche community – and they get it.
All good workshops need a dog
Do you feel like a bit of a sense of responsibility being a woman in this community, being queer in this community? Two of the things that are a minority in this field. Do you feel that affects your work at all?
I didn’t to begin with, I have to say. In the beginning, I felt more that it wasn’t about me, it was about the things that I make, and my sexuality and my gender don’t play a role in this. I don’t think about my sexuality all day long; I don’t think about the fact I’m a girl all day long, so why would it be in my videos? But I have to say that I changed my mind about these things. Because visibility is really important.
I had this really weird experience at the 10 Maker event a few years ago. I was wearing this T-shirt I got for free on one Christopher Street Day, it says ‘Gay Okay’. I love that shirt; it’s a really nice fit. I went to get some groceries with Brett from Skull and Spade and Hassan from HABU, and there was this girl, maybe eleven or twelve years old, and she saw me wearing that shirt, hanging out with regular dudes, doing regular stuff in a regular supermarket, and her jaw dropped. We were in the countryside, you don’t see things like rainbow flags there. And I could tell she’s maybe gay too, and it was so good for her to see that. There’s nothing different about you – you can still hang out with guys, you can still, you know, go shopping and all these things. That’s when I realised, institutions like Christopher Street Day are so important, but it’s also important to just have it integrated into regular stuff, not just special occasions. Today’s International Women’s Day? Well, we need to celebrate girls every day; every day you need to celebrate these things.
So, I kind of made it a habit to have rainbow flags in my videos. Not every video, and never super-obvious, but in the background, when I talk to the camera sometimes. I do wear my Gay Okay shirt every once in a while. I don’t want to make it a point because people like to put you in drawers. And, once you’re the queer maker, you’re the queer maker, and that’s all people want to talk about. And I don’t want that because I still think, at the end of the day, it’s about the things I build and not about me and my sexuality and gender. But, yeah, to just sprinkle it in every once in a while, I think it’s very important.
I don’t get much negativity about this. I was surprised, pleasantly so, obviously, but yeah, a couple of days ago, I wore my Gay Okay t-shirt in my Instagram Stories, and people applauded me for it, and that’s really interesting. I would never have thought that.
It might not look like it now, but this will become a pub on wheels
Do you get much trolling at all? Or are you spared from it?
I think, at the beginning of my YouTube career, I was growing really fast and really, like, exponentially. And I had a couple of videos that went viral, like the beer bike, that went outside of the community. For those viral videos, you get negativity. They don’t know who you are, they don’t know the context, they don’t know what I’m doing. That’s why I hate having viral videos. It brings in the worst. I like to be in this little lake, surrounded by my followers.
A few people have said that, actually. That it’s the worst. It’s the thing everybody aims for and then, when you get there, you wish you weren’t.
Yeah, they take you out of context. Those people, they see one of my videos, they don’t know that I’m building something. And that’s another interesting thing that your community learns about you. They know I build something every week for the past six years. Every week, it can’t be the Holy Grail every freaking week. Sometimes it’s bad, but it’s stuff that I did that week – it’s documentation.
When I was a kid, I remember my mind was blown that The Simpsons had a different intro every episode. Something different happens every time. I couldn’t believe that, and how much work went into it. I think it primed me for being a weekly creator.
The tattoo machine that started it all
It’s impressive. There aren’t a lot of makers releasing weekly videos, and many that do are releasing build videos in weekly parts. And you just come along and go ta-da!
Haha, but not every video is a good idea. Some of them are really bad ideas. But that’s my privilege, you know, that I can still do that. Because I have to, otherwise there wouldn’t be a video, and I love that because the pressure helps me keep going. And the process is the same. It doesn’t matter if you’re building a tiny house or a scratch post for a cat. The process is me, being in the shop, listening to podcasts, listening to music, enjoying my tools, playing with the material – it’s all the same, it doesn’t really matter.
So, the public bench stuff that I’ve been doing lately, I get so many questions like, “Oh no, how could you leave the bench” and, like, I don’t give a damn about the bench. It’s not the bench, it’s the process that I enjoy. I could literally throw everything that I build away – I could throw it in the trash right away. I wouldn’t mind. I’m so focused on the process.
I was going to ask you about the bench, because it was recently vandalised and so you made another one. Most people would probably just not, would just raise their hands in defeat and leave it. But you just made it again.
I was expecting it to break eventually. And, to be honest, I was kinda hoping for it because I wanted to do it again. And, this time, I’m actually hoping for it to get broken again because I want to do it again.
Laura’s bike frame cup holder
I may be making this up, but I’m sure you once mentioned that it’s illegal to sell furniture in Germany unless you’re registered. Is that right?
Yeah, it’s a very broad description of this, but the craftsmanship in Germany is of a very high standard, right? At least we like to think so. So, if you want to be a carpenter, you’re first an apprentice for three years or so, then you can be a carpenter and work under a master carpenter. If you want to educate other apprentices, or if you want to sell certain furniture, I think chairs is one of them, then you have to be a master. And it’s the same for every field. I think the most plausible is electricians. If you are not a master electrician, you cannot, say, make a lamp and sell it.
But my interest is so general. I wanted to make lamps, but the notion of designing a lamp that’s made out of wood and then obviously has electricity in it, it’s just impossible.
I spoke to the TÜV and asked them, if I design a lamp and want to sell it in a store, how do I do it. And I would have to get it checked by their institution, which is a couple of hundred euros, and get a certificate. But I would have to do this for the next lamp design, and the next. And that makes them so expensive. I can’t sell a lamp for 150 euros if it costs me more than that to get it checked. I’m not interested in mass production, I want to make one-off pieces.
I had already quit my job when I discovered this and remember having a big knot in my stomach thinking, ‘what do I do?’, and YouTube was the answer.
Could you not use YouTube as a way of selling lamps? It’s not a lamp, it’s a video prop?
Yeah, there are loopholes – this is not a lamp, this is art. But, when I quit my job to become a self-employed lamp seller, I really only quit my job because I hated working for other people, not because it was my dream to sell furniture and lamps. I didn’t know YouTube really existed as a thing for me, and once I figured out people were actually making money off this, I was like, OK, I need to get a camera, I need to give this a try. Because that would be better than building stuff to sell it. I wasn’t interested in selling stuff. I don’t want clients. I don’t want that pressure from anyone else except me, so YouTube worked out perfectly for me.
How to build a tattoo machine from scratch – one of Laura’s most popular videos
The job you quit was as a Display Artist for Urban Outfitters, if I remember correctly? Designing displays within a store. That sounded like a brilliant job.
It was. It was a great job, but it wasn’t for me. It was probably the perfect job, but I am not a good employee. I was asked a couple of years ago if I would do a talk about my career and how I made this job for myself and followed my dreams, blah, blah. I don’t like ‘follow your dreams’. It was the other way around. I avoided my nightmares. That’s how I got here. I never dreamed of this, I didn’t know this existed. So, I think avoiding your nightmares is much more efficient than following your dreams.
With your design school background, when you create something, how much of that project is art over functionality? Dovetails versus pocket holes for instance.
It’s more, and this is hard to explain, but I have this internal measuring unit of how much work should go into a project. I know how much time I can put into a project, and there’s this bucket of work I’ve put into it, and depending on how full the bucket is determines how the project looks and whether I use pocket holes or dovetails, for example.
You work a lot with wood and with metal, as well as a few other materials, all of which require their own set of skills. Where have you learned all your techniques?
All YouTube. That’s the cool thing. It’s all full circle. There are some things – I had a couple of jobs where I learned some skills. I worked as a flight case builder for three years, just filling those black flight cases. Which sounds very, very trivial. It’s not though, It’s crazy. You have to work so precisely, otherwise, the catches won’t close and all these things, and everything is building boxes. So I learned a bunch of stuff there. It was my Karate Kid apprenticeship. But a lot of it is YouTube. I remember watching Jimmy DiResta – I saw his TV show online, and then I watched a bunch of his videos without realising it was the same guy. Eventually, I noticed he had a weekly schedule and a podcast, and it was all exactly what I needed to see and hear. Right when I quit my job and I couldn’t sell lamps, there were these people telling me that they do this for a living. It was perfect timing. I feel like I’m the second generation YouTuber and they’re the first.
Laura’s cargo bike
As well as those makers, what else influences your work?
I like to listen to a lot of hip-hop, like super-aggressive hip-hop that is the complete opposite of me and has nothing to do with my world. And I like to watch horror movies, super-scary and bloody horror movies. I like to explore the opposite of what I have. A view into a completely different world. The Fantasy Filmfest is a huge inspiration for me. These movies that go right to DVD; they don’t go into the big theatres. I like to think about how they got made? How did they think of that? That’s the biggest inspiration. And, with hip-hop, the personas, and why they feel like they do, and how do they come up with those lines. They’re in their own universe, they have their own rules. I just love that. It’s how I feel when I’m building stuff. I’m telling myself a story that I don’t know the ending of. I don’t like to make sketches, I don’t like to know if it works. If I see someone else had the idea and did a full video about it, I don’t even want to do the idea anymore. I want to have that unknown. This is the idea, this is the stuff you have, now try to make it happen.
Is there anything still on the list? Projects you still want to work on?
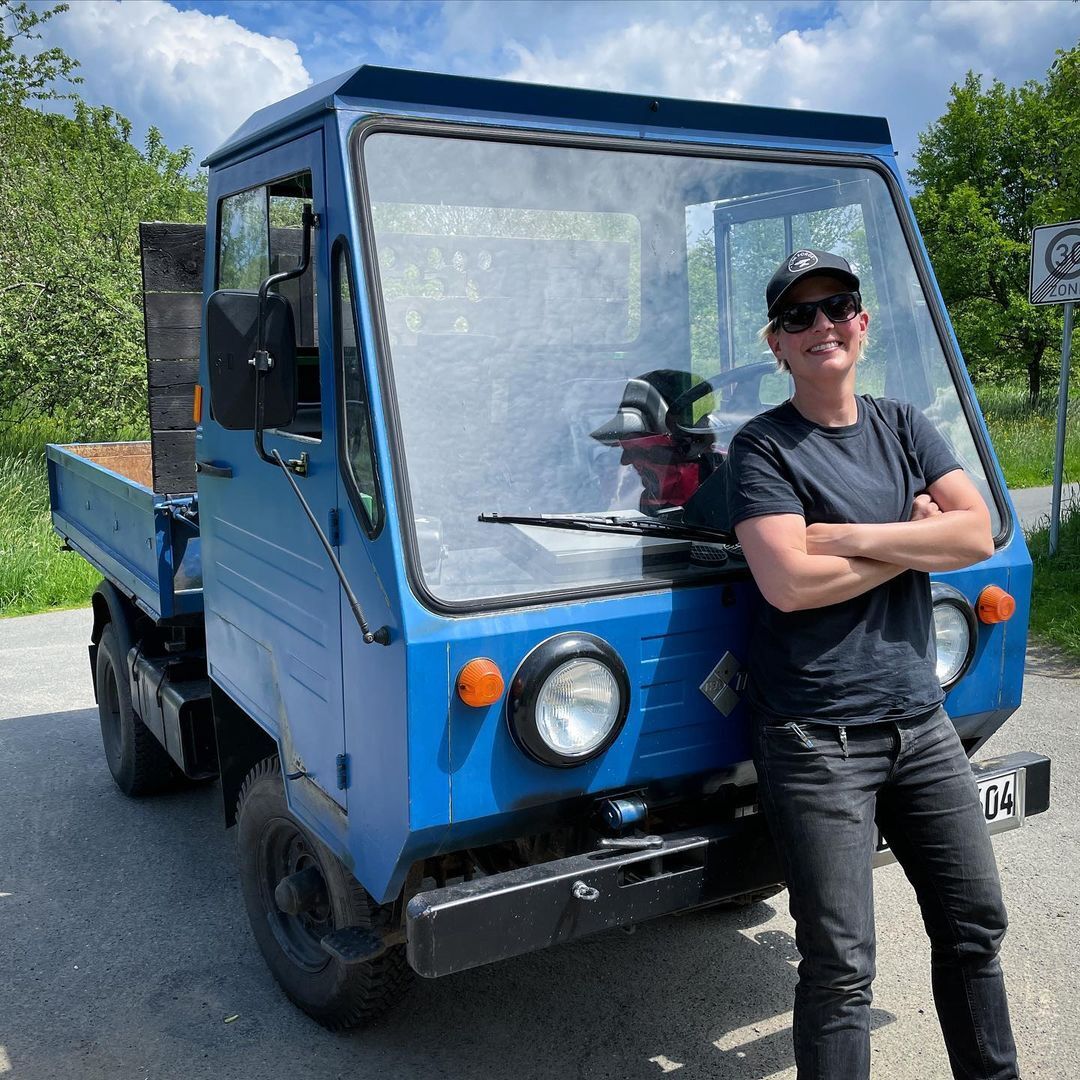
I don’t know if you saw it on Instagram, but I bought a Multicar. It’s so good. It’s the slowest car ever; it is painfully slow – 45 kilometres an hour and that’s it. But it has torque; you can tow pretty much everything with it. So my plan is to take the world’s smallest pub that I built a couple months ago and put it on at the back of the Multicar.
Something is holding me back at the moment, though. I have all the parts, I should be able to do it, but I don’t know what it is. I experience that quite often – I have an idea, and everything should be good to go, but I’m not doing it. And then, eventually, it turns out I wasn’t sure about the colour, or something else that was missing that I didn’t know at the time. So I don’t push it. But that’s the project I’m looking forward to.
Do you think you’ll ever just get to the point where you’re going to stop doing weekly videos? Or is this you for life?
I don’t know. Like, that’s the one thing that I’m really scared of, like, what happens when I get sick? Because at the beginning of the year, I hired my best friend. So now we’re both relying on my mental and physical health. So I think it’s a good idea to broaden stuff and have more income streams. I love doing the TV stuff [Laura recently started presenting a new TV show], because whenever I’m working with the TV people, I think, like, oh man, I love YouTube. And, when I do too much YouTube, I start really looking forward to working with actual professionals again. It’s a cool balance. I kind of hope that I can keep doing this. You know, I think it’s really cool. And as I said, there’s no other place for me. Where would I go?
Clever keyring with screwdriver
You have YouTube, you have TV, you have your podcast, and you sell merchandise. Is there anything left?
I think I would like to actually have a couple of products now. Some of the furniture I’m building, if you look at them in a different context to ‘this is just what I built this week’ and is only the product of seven days’ worth of work, I think some of those ideas aren’t that bad. And if you put some more work into them, they could be pieces that would sell. But I would want someone who takes the prototypes and does the whole production for me. I’m not interested in all that. But I think it would be cool to have a line of plywood furniture.
So we won’t be seeing a run of the Laura Kampf bench across Köln?
A newspaper interviewed me about the bench. And for the interview, they also approached the city saying, hey, wouldn’t you want to work with her? And you know, maybe collaborate on this because this might be a cool thing. And they said that they don’t have the personnel. But honestly, if they would have done it, that would have made it so boring. Working with somebody in an office telling me where the broken benches are so I can go and fix them. That’s a job.
Laura’s beer bike
Is there anything you’ve ever made that you haven’t wanted to share? A build just for you?
Until I hit publish, I feel like that every week. It feels like I’m just making it for myself. I talk very positively about YouTube, and that’s genuinely how I feel about it, but sometimes it’s really hard on me because I’ll work seven days on a video, think it’s the best thing I ever did, and it makes me so happy. I’ll edit it for hours, sink all this time into it, all this energy, and then the video tanks, and it kinda ruins it for me. I’m in a super-good mood right now because the bench video did so well, and people understand what I’m trying to say. But, there are other cases where it doesn’t work as well, and where I feel like I’ve dropped the ball and couldn’t get my excitement across. And that’s always super-disappointing because I’m always excited about the stuff I make; I always have some angle I find super-interesting, otherwise, I’m not motivated to do it. And, when the video tanks, it makes me feel like I lost the opportunity to spread that excitement, to spread that motivation, and that feels like I wasted my time. And that’s the downside of YouTube.
I mean, I think every creator takes it in a different way. And you need to find a way to deal with this, and it’s really important to talk about it. This is my dream job and I can do whatever I want to do as long as I don’t drop the ball. I hired my friend, so now I can’t drop the ball for the both of us.
Laura Kampf produces a video every Sunday on her YouTube channel. You can also follow her on Instagram and, for any German-speaking readers, her podcast – Raabe & Kampf – with friend and journalist Melanie Raabe can be found wherever you listen to podcasts.
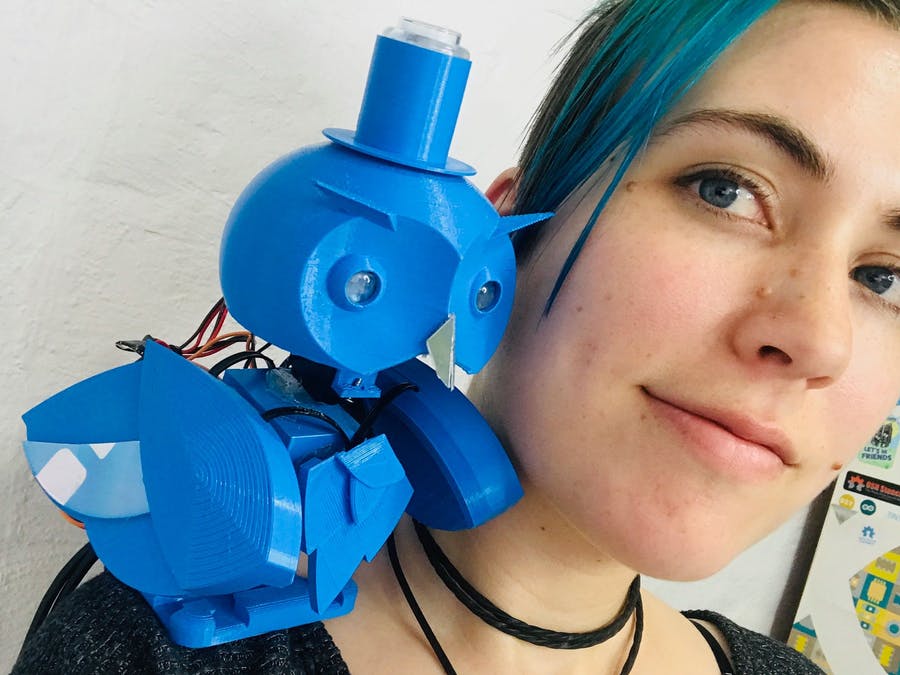
When we saw Alex Glow’s name in the latest issue of HackSpace magazine, we just had to share their project. HackSpace #45 celebrates the best Raspberry Pi builds of all time, and we remembered spotting Alex’s wearable robotic owl familiar back in the day. For those of you yet to have had the pleasure, meet Archimedes…
Archimedes taking a perch on his maker’s shoulder
Back in 2018, Hackster’s Alex Glow built Archimedes, an incredible robot companion using a combination of Raspberry Pi Zero W and Arduino with the Google AIY Vision Kit for its ‘brain’.
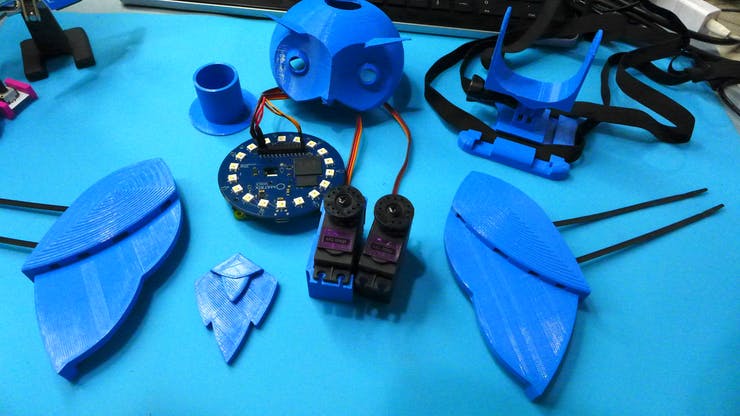
An updated model, Archie 2, using Raspberry Pi 3B, ESP32-powered Matrix Voice, and an SG90 micro-servo motor saw the personable owl familiar toughen up – Alex says the 3D-printed case is far more durable – as well as having better voice interaction options using Matrix HAL (for which installer packages are provided for Raspberry Pi and Python), plus Mycroft and Snips.ai voice assistant software.
Owl innards
Other refinements included incorporating compact discs into the owl’s wings to provide an iridescent sheen. Slots in the case allowed Alex to feed through cable ties to attach Archie’s wings, which she says now “provide a lively bounce to the wings, in tune with his active movements (as well as my own).”
Raspberry Pi getting stuffed into Archimedes’ head
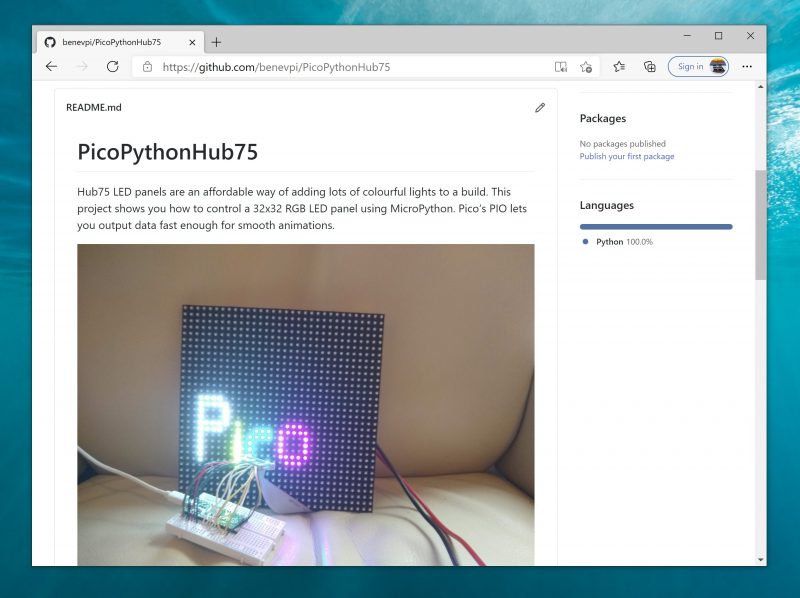
HUB75 LED panels provide an affordable way to add graphical output to your projects. They were originally designed for large advertising displays (such as the ones made famous by Piccadilly Circus in London, and Times Square in New York). However, we can use a little chunk of these bright lights in our projects. They’re often given a ‘P’ value, such as P3 or P5 for the number of millimetres between the different RGB LEDs. These don’t affect the working or wiring in any way.
We used a 32×32 Adafruit screen. Other screens of this size may work, or may be wired differently. It should be possible to get screens of different sizes working, but you’ll have to dig through the code a little more to get it running properly.
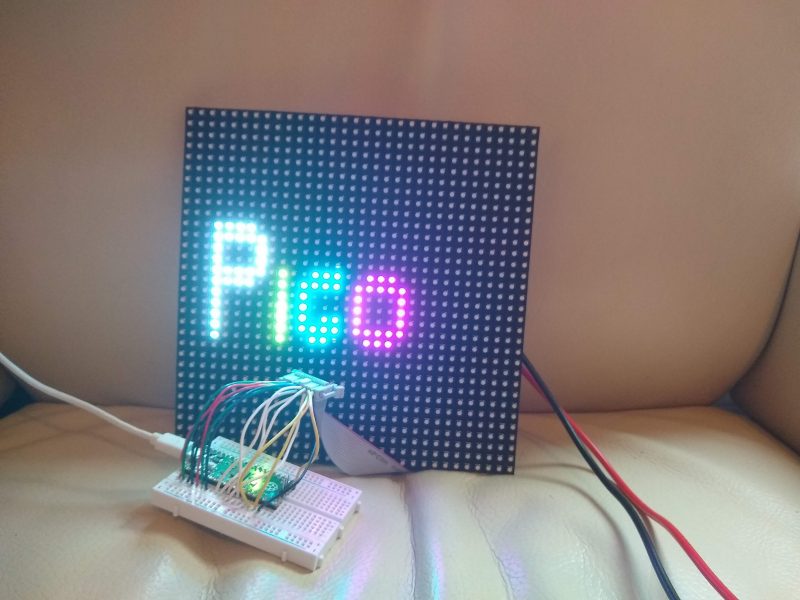
The most cost- effective way to add 1024 RGB LEDs to your project
The protocol for running these displays involves throwing large amounts of data down six different data lines. This lets you light up one portion of the display. You then switch to a different portion of the display and throw the data down the data lines again. When you’re not actively writing to a particular segment of the display, those LEDs are off.
There’s no in-built control over the brightness levels – each LED is either on or off. You can add some control over brightness by flicking pixels on and off for different amounts of time, but you have to manage this yourself. We won’t get into that in this tutorial, but if you’d like to investigate this, take a look at the box on ‘Going Further’.
The first thing you need to do is wire up the screen. There are 16 connectors, and there are three different types of data sent – colour values, address values, and control values. You can wire this up in different ways, but we just used header wires to connect between a cable and a breadboard. See here for details of the connections.
These screens can draw a lot of power, so it’s best not to power them from your Pico’s 5V output. Instead, use a separate 5V supply which can output enough current. A 1A supply should be more than enough for this example. If you’re changing it, start with a small number of pixels lit up and use a multimeter to read the current.
With it wired up, the first thing to do is grab the code and run it. If everything’s working correctly, you should see the word Pico bounce up and down on the screen. It is a little sensitive to the wiring, so if you see some flickering, make sure that the wires are properly seated. You may want to just display the word ‘Pico’. If so, congratulations, you’re finished!
However, let’s take a look at how to customise the display. The first things you’ll need to adapt if you want to display different data are the text functions – there’s one of these for each letter in Pico. For example, the following draws a lower-case ‘i’:
def i_draw(init_x, init_y, r, g, b):
    for i in range(4):
        light_xy(init_x, init_y+i+2, r, g, b)
    light_xy(init_x, init_y, r, g, b)
As you can see, this uses the light_xy method to set a particular pixel a particular colour (r, g, and b can all be 0 or 1). You’ll also need your own draw method. The current one is as follows:
def draw_text():
    global text_y
    global direction
    global writing
    global current_rows
    global rows

    writing = True
    text_y = text_y + direction
    if text_y > 20: direction = -1
    if text_y < 5: direction = 1
    rows = [0]*num_rows
    #fill with black
    for j in range(num_rows):
    rows[j] = [0]*blocks_per_row

    p_draw(3, text_y-4, 1, 1, 1)
    i_draw(9, text_y, 1, 1, 0)
    c_draw(11, text_y, 0, 1, 1)
    o_draw(16, text_y, 1, 0, 1)
    writing = False
This sets the writing global variable to stop it drawing this frame if it’s still being updated, and then just scrolls the text_y variable between 5 and 20 to bounce the text up and down in the middle of the screen.
This method runs on the second core of Pico, so it can still throw out data constantly from the main processing core without it slowing down to draw images.
Get HackSpace magazine – Issue 40
Each month, HackSpace magazine brings you the best projects, tips, tricks and tutorials from the makersphere. You can get it from the Raspberry Pi Press online store, The Raspberry Pi store in Cambridge, or your local newsagents.
In the extra special Raspberry Pi Pico launch issue of HackSpace magazine, editor Ben Everard shows you how to get extra levels of brightness out of your LEDs with our new board.
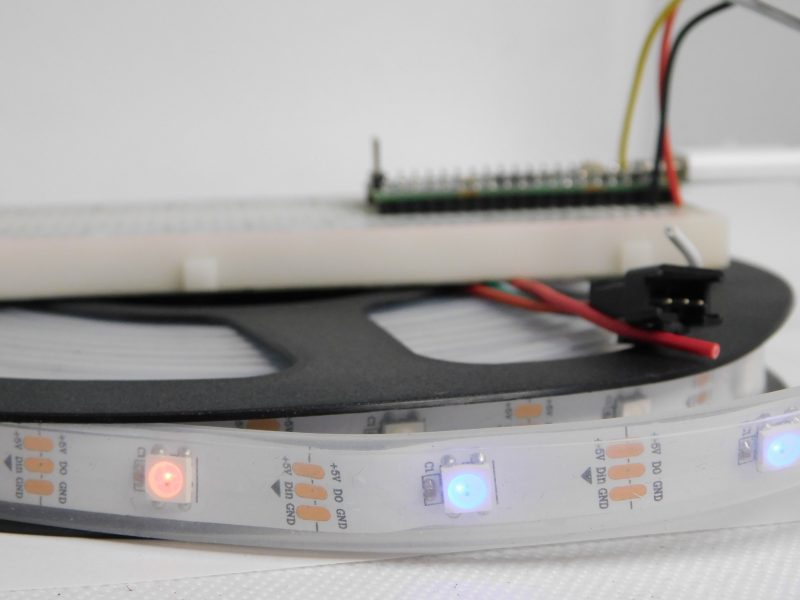
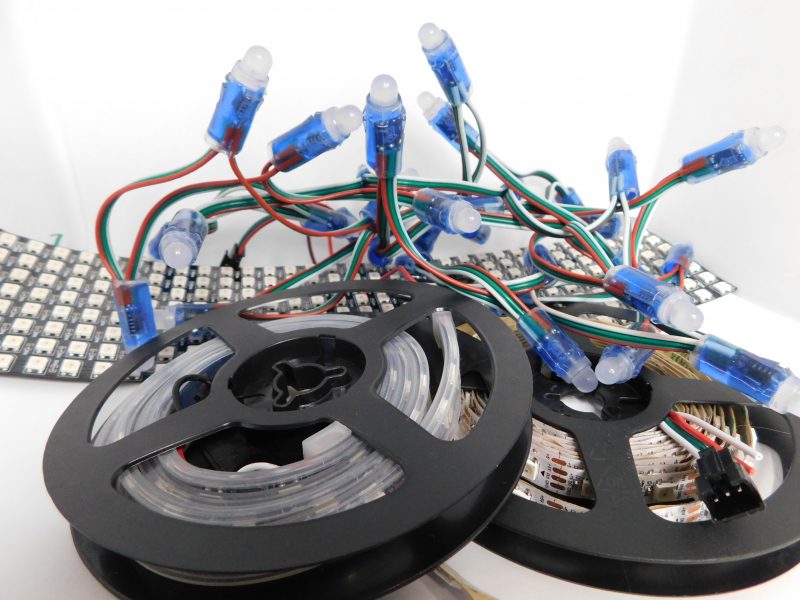
WS2812B LEDs, commonly known as NeoPixels, are cheap and widely available LEDs. They have red, green, and blue LEDs in a single package with a microcontroller that lets you control a whole string of them using just one pin on your microcontroller.
The three connections may be in a different order on your LED strip, so check the labels to make sure they’re connected correctly
However, they do have a couple of disadvantages:
1) The protocol needed to control them is timing-dependent and often has to be bit-banged.
2) Each colour has 8 bits, so has 255 levels of brightness. However, these aren’t gamma-corrected, so the low levels of brightness have large steps between them. For small projects, we often find ourselves only using the lower levels of brightness, so often only have 10 or 20 usable levels of brightness.
There will usually be wires already connected to your strip, but if you cut it, you’ll need to solder new wires on
We’re going to look at how two features of Pico help solve these problems. Firstly, Programmable I/O (PIO) lets us implement the control protocol on a state machine rather than the main processing cores. This means that we don’t have to dedicate any processor time to sending the data out. Secondly, having two cores means we can use one of the processing cores to dither the NeoPixels. This means shift them rapidly between different brightness levels to make pseudo-levels of brightness.
For example, if we wanted a brightness level halfway between levels 3 and 4, we’d flick the brightness back and forth between 3 and 4. If we can do this fast enough, our eyes blur this into a single brightness level and we don’t see the flicker. By varying the amount of time at levels 3 and 4, we can make many virtual levels of brightness. While one core is doing this, we still have a processing core completely free to manipulate the data we want to display.
First, we’ll need a PIO program to communicate with the WS2812B LEDs. The Pico development team have provided an example PIO program to work with – you can see the full details here, but we’ll cover the essentials here. The PIO code is:
.program ws2812
.side_set 1
.define public T1 2
.define public T2 5
.define public T3 3
bitloop:
 out x, 1 side 0 [T3 - 1]
 jmp !x do_zero side 1 [T1 - 1]
 do_one:
 jmp bitloop side 1 [T2 - 1]
 do_zero:
 nop side 0 [T2 - 1]
We looked at the PIO syntax in the main cover feature, but it’s basically an assembly language for the PIO state machine. The WS2812B protocol uses pulses at a rate of 800kHz, but the length of the pulse determines if a 1 or a 0 is being sent. This code uses jumps to move through the loop to set the timings depending on whether the bit (stored in the register x) is 0 or 1. The T1, T2, and T3 variables hold the timings, so are used to calculate the delays (with 1 taken off as the instruction itself takes one clock cycle). There’s also a section in the pio file that links the PIO code and the C code:
This line sets up the output shift register which holds each 32 bits of data before it’s moved bit by bit into the PIO state machine. The parameters are the config (that we’re setting up and will use to initialise the state machine); a Boolean value for shifting right or left (false being left); and a Boolean value for autopull which we have set to true. This means that whenever the output shift register falls below a certain threshold (set in the next parameter), the PIO will automatically pull in the next 32 bits of data.
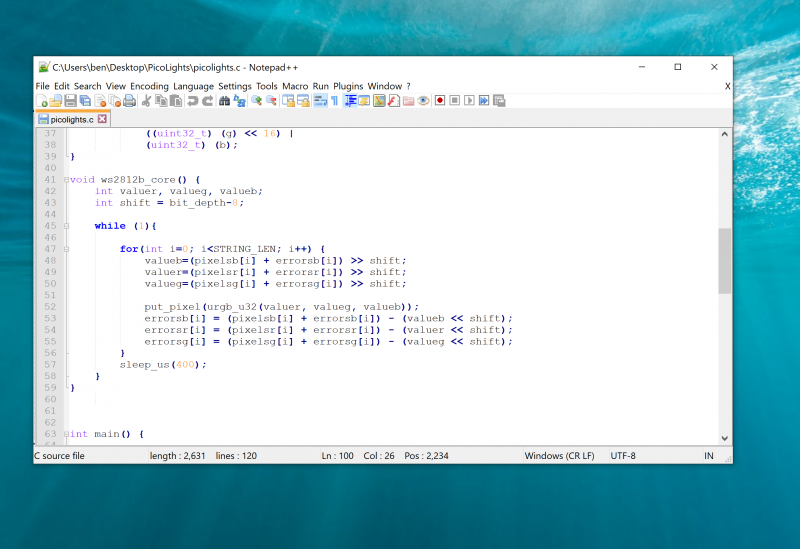
Using a text editor with programmer’s features such as syntax highlighting will make the job a lot easier
The final parameter is set using the expression rgbw ? 32 : 24. This means that if the variable rgbw is true, the value 32 is passed, otherwise 24 is passed. The rbgw variable is passed into this function when we create the PIO program from our C program and is used to specify whether we’re using an LED strip with four LEDs in each (using one red, one green, one blue, and one white) or three (red, green, and blue).
The PIO hardware works on 32-bit words, so each chunk of data we write with the values we want to send to the LEDs has to be 32 bits long. However, if we’re using RGB LED strips, we actually want to work in 24-bit lengths. By setting autopull to 24, we still pull in 32 bits each time, but once 24 bits have been read, another 32 bits are pulled in which overwrite the remaining 8 bits.
sm_config_set_fifo_join(&c, PIO_FIFO_JOIN_TX);
Each state machine has two four-word FIFOs attached to it. These can be used for one going in and one coming out. However, as we only have data going into our state machine, we can join them together to form a single eight-word FIFO using the above line. This gives us a small buffer of time to write data to in order to avoid the state machine running out of data and execution stalling. The following three lines are used to set the speed the state machine runs at:
int cycles_per_bit = ws2812_T1 + ws2812_T2 +
ws2812_T3;
 float div = clock_get_hz(clk_sys) / (freq *
cycles_per_bit);
 sm_config_clkdiv(&c, div);
The WS2812B protocol demands that data is sent out at a rate of 800kHz. However, each bit of data requires a number of state machine cycles. In this case, they’re defined in the variables T1, T2, and T3. If you look back at the original PIO program, you’ll see that these are used in the delays (always with 1 taken off the value because the initial instruction takes one cycle before the delay kicks in). Every loop of the PIO program will take T1 + T2 + T3 cycles. We use these values to calculate the speed we want the state machine to run at, and from there we can work out the divider we need to slow the system clock down to the right speed for the state machine. The final two lines just initialise and enable the state machine.
The main processor
That’s the code that’s running on the state machine, so let’s now look at the code that’s running on our main processor cores. The full code is on github. Let’s first look at the code running on the second core (we’ll look at how to start this code running shortly), as this controls the light levels of the LEDs.
We start by defining a virtual bit depth. This is how many bits per pixel you can use. Our code will then attempt to create the necessary additional brightness levels. It will run as fast as it can drive the LED strip, but if you try to do too many brightness levels, you’ll start to notice flickering.
We found twelve to be about the best with strings up to around 100 LEDs, but you can experiment with others. Our code works with two arrays – pixels which holds the values that we want to display, and errors which holds the error in what we’ve displayed so far (there are three of each for the different colour channels).
If you just want to see this in action, you can download the UF2 file from hsmag.cc/orfgBD and flash it straight to your Pico
To explain that latter point, let’s take a look at the algorithm for determining how to light the LED. We borrowed this from the source code of Fadecandy by Micah Scott, but it’s a well-used algorithm for calculating error rates. We have an outer while loop that just keeps pushing out data to the LEDs as fast as possible. We don’t care about precise timings and just want as much speed as possible. We then go through each pixel.
The corresponding item in the errors array holds the cumulative amount our LED has been underlit so far compared to what we want it to be. Initially, this will be zero, but with each loop (if there’s a difference between what we want to light the LED and what we can light the LED) this error value will increase. These two numbers (the closest light level and the error) added together give the brightness at the pseudo-level, so we need to bit-shift this by the difference between our virtual level and the 8-bit brightness levels that are available.
This gives us the value for this pixel which we write out. We then need to calculate the new error level. Let’s take a look at what this means in practice. Suppose we want a brightness level halfway between 1 and 2 in the 8-bit levels. To simplify things, we’ll use nine virtual bits. 1 and 2 in 8-bit is 2 and 4 in 9 bits (adding an extra 0 to the end multiplies everything by a power of 2), so halfway between these two is a 9-bit value of 3 (or 11 in binary, which we’ll use from now on).
In the first iteration of our loop, pixels is 11, errors is 0, and shift is 1.
value = 11 >> 1 = 1
errors = 11 – 10 = 1
So this time, the brightness level of 1 is written out. The second iteration, we have:
value = 100 >> 1 = 10
errors = 100 – 100 = 0
So this time, the brightness level of 10 (in binary, or 2 in base 10) is written out. This time, the errors go back to 0, so we’re in the same position as at the start of the first loop. In this case, the LED will flick between the two brightness levels each loop so you’ll have a brightness half way between the two.
Using this simple algorithm, we can experiment with different virtual bit-depths. The algorithm will always handle the calculations for us, but we just have to see what creates the most pleasing visual effect for the eye. The larger the virtual bit depth, the more potential iterations you have to go through before the error accumulates enough to create a correction, so the more likely you are to see flicker. The biggest blocker to increasing the virtual bit depth is the sleep_us(400). This is needed to reset the LED strip.
NeoPixels come in many different shapes and sizes
Essentially, we throw out bits at 800kHz, and each block of 24 bits is sent, in turn, to the next LED. However, once there’s a long enough pause, everything resets and it goes back to the first LED. How big that pause is can vary. The truth is that a huge proportion of WS2812B LEDs are clones rather than official parts – and even for official parts, the length of the pause needed to reset has changed over the years.
400 microseconds is conservative and should work, but you may be able to get away with less (possibly even as low as 50 microseconds for some LEDs). The urgb_u32 method simply amalgamates the red, blue, and green values into a single 32-bit string (well, a 24-bit string that’s held inside a 32-bit string), and put_pixel sends this to the state machine. The bit shift there is to make sure the data is in the right place so the state machine reads the correct 24 bits from the output shift register.
Getting it running
We’ve now dealt with all the mechanics of the code. The only bit left is to stitch it all together.
int main() {
 PIO pio = pio0;
 int sm = 0;
 uint offset = pio_add_program(pio, &ws2812_
program);
 ws2812_program_init(pio, sm, offset, PIN_TX,
1000000, false);
 multicore_launch_core1(ws2812b_core);

 while (1) {
 for (int i = 0; i < 30; ++i) {
pixels[i] = i;

for (int j=0;j<30;++j){
 pixels[0] = j;
 if(j%8 == 0) { pixels[1] = j; }
 sleep_ms(50);
 }
 for (int j=30;j>0;--j){
 pixels[0] = j;
 if(j%8 == 0) { pixels[1] = j; }
 sleep_ms(50);
 }
 }
 } }
The method ws2812_program_init calls the method created in the PIO program to set everything up. To launch the algorithm creating the virtual bit-depth, we just have to use multicore_launch_core1 to set a function running on the other core. Once that’s done, whatever we put in the pixels array will be reflected as accurately as possible in the WS2812B LEDs. In this case, we simply fade it in and out, but you could do any animation you like.
Get a free Raspberry Pi Pico
Would you like a free Raspberry Pi Pico? Subscribe to HackSpace magazine via your preferred option here, and you’ll receive your new microcontroller in the mail before the next issue arrives.
What if you could give the joy of opening a Raspberry Pi–themed gift every single month for a whole year? But what if the thought of wrapping 12 individual things fills you with Scrooge-level dread?
Snap up a magazine subscription for one of your nearest and/or dearest and we’ll take care of the packaging and delivery while you sit back and reap all the credit!
You could end up with a few extra gifts depending on what you sign up for so, read on and take your pick.
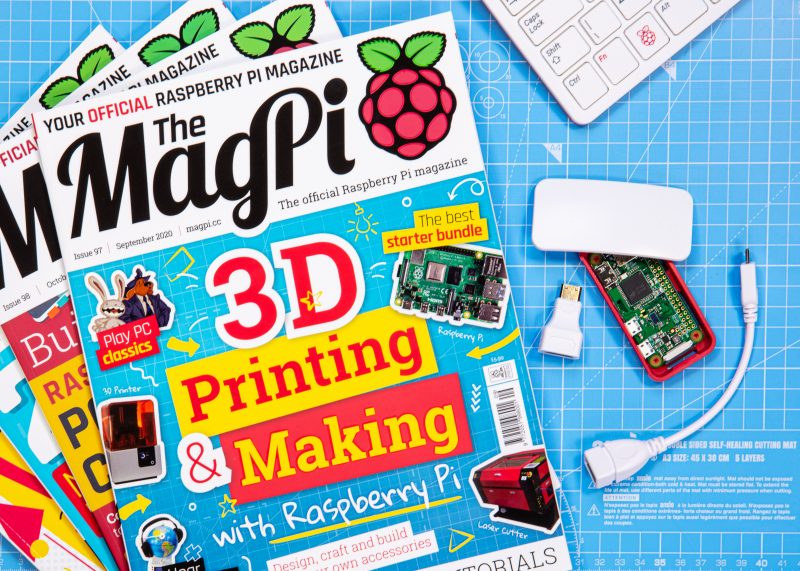
The MagPi magazine
The official Raspberry Pi magazine comes with a free Raspberry Pi Zero W kit worth £20 when you sign up for a 12-month subscription. You can use our tiniest computer in tonnes of projects, meaning Raspberry Pi fans can never have enough. That’s a top gift-giving bonus for you right there.
Every issue of The MagPi is packed with computing and electronics tutorials, how-to guides, and the latest news and reviews. They also hit their 100th issue this month so, if someone on your list has been thinking about getting a subscription, now is a great time.
HackSpace magazine is the one to choose for fixers and tinkerers of all abilities. If you’re looking for a gift for someone who is always taking things apart and hacking everyday objects, HackSpace magazine will provide a year of inspiration for them.
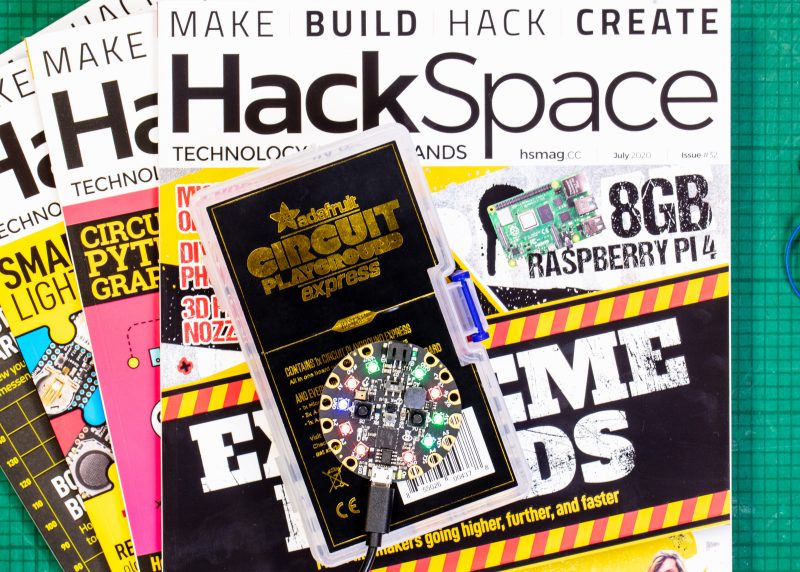
12-month subscriptions come with a free Adafruit Circuit Playground Express, which has been specially developed to teach programming novices from scratch and is worth £25.
Custom PC is the magazine for people who are passionate about PC technology and hardware. And they’ve just launched a pretty cool new giveaway with every 12-month subscription: a free Chillblast Aero RGB Gaming mouse worth £40. Look, it lights up, it’s cool.
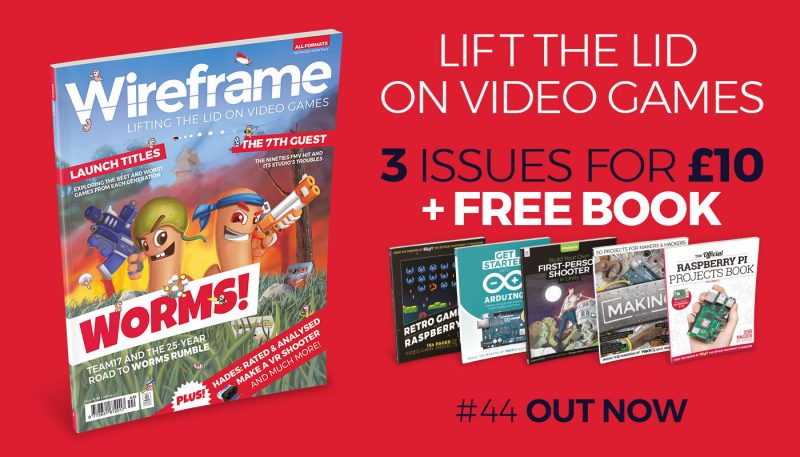
Wireframe magazine lifts the lid on video games. In every issue, you’ll find out how games are made, who makes them, and how you can code them to play for yourself using detailed guides.
The latest deal gets you three issues for just £10, plus your choice of one of our official books as a gift. By the way, that ‘three for £10 plus a free book’ is available across ALL our magazines. Did I not tell you that before? My bad. It’s good though, right?
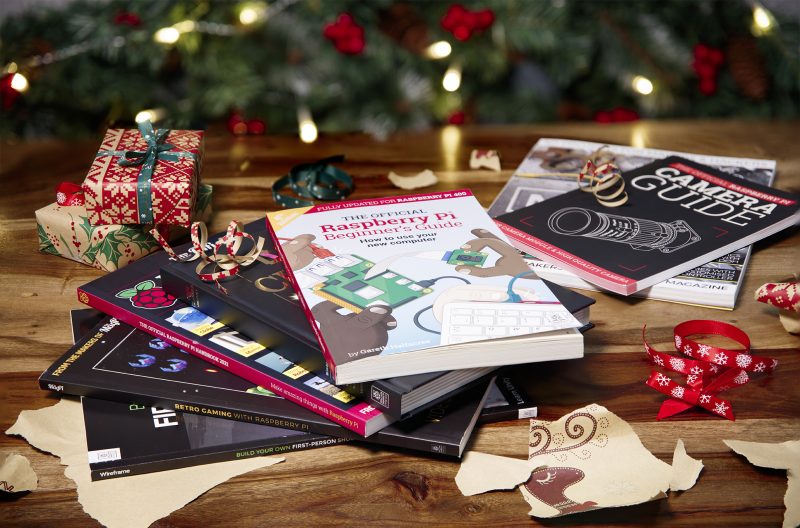
And as an extra Christmas gift to you all, we’ve decided to keep our Black Friday deal rolling until Christmas Eve, so if you buy just one teeny tiny book from the Raspberry Pi Press store, you get two more completely FREE!
Better still, all of the books in the deal only cost £7 or £10 to start with, so makes for a good chunky batch of presents at a brilliantly affordable price.
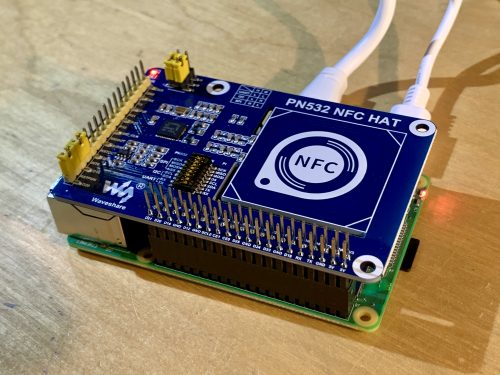
Add a bit of security to your project or make things selectable by using different cards. In the latest issue of HackSpace magazine, PJ Evans goes contactless.
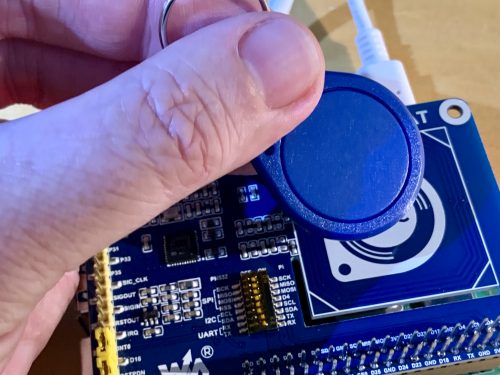
The HAT is not hard on resources, so you can use many variants of Raspberry Pi
NFC (near-field communication) is based on the RFID (radio-frequency identification) standard. Both allow a device to receive data from a passive token or tag (meaning it doesn’t require external power to work). RFID supports a simple ID message that shouts ‘I exist’, whereas NFC allows for both reading and writing of data.
Most people come into contact with these systems every day, whether it’s using contactless payment, or a card to unlock a hotel or office door. In this tutorial we’ll look at the Waveshare NFC HAT, an add-on for Raspberry Pi computers that allows you to interact with NFC and RFID tokens.
Prepare your Raspberry Pi
We start with the usual step of preparing a Raspberry Pi model for the job. Reading RFID tags is not strenuous work for our diminutive friend, so you can use pretty much any variant of the Raspberry Pi range you like, so long as it has the 40-pin GPIO. We only need Raspberry Pi OS Lite (Buster) for this tutorial; however, you can install any version you wish. Make sure you’ve configured it how you want, have a network connection, and have updated everything by running sudo apt -y update && sudo apt -y upgrade on the command line.
Enable the serial interface
This NFC HAT is capable of communicating over three different interfaces: I2C, SPI, and UART. We’re going with UART as it’s the simplest to demonstrate, but you may wish to use the others. Start by running sudo raspi-config, going to ‘Interfacing options’, and selecting ‘Serial Interface’. When asked if you want to log into the console, say ‘No’. Then, when asked if you want to enable the serial interface, say ‘Yes’. You’ll need to reboot now. This will allow the HAT to talk to our Raspberry Pi over the serial interface.
Configure and install the HAT
As mentioned in the previous step, we have a choice of interfaces and swapping between them means changing some physical settings on the NFC HAT itself. Do not do this while the HAT is powered up in any way. Our HAT can be configured for UART/Serial by default but do check on the wiki at hsmag.cc/iHj1XA. The jumpers at I1 and I0 should both be shorting ‘L’, D16 and D20 should be shorted and on the DIP switch, everything should be off except RX and TX. Check, double-check, attach the HAT to the GPIO, and boot up.
The Waveshare HAT contains many settings. Make sure to read the instructions!
Download the examples
You can download some examples directly from Waveshare. First, we need to install some dependencies. Run the following at the command line: sudo apt install rpi.gpio p7zip-full python3-pip pip3 install spidev pyserial
Now, download the files and unpack them: cd wget https://www.waveshare.com/w/upload/6/67/Pn532-nfc-hat-code.7z 7z x Pn532-nfc-hat-code.7z
Before you try anything out, you need to edit the example file so that we use UART (see the accompanying code listing). cd ~/raspberrypi/python nano example_get_uid.py
Find the three lines that start pn532 = and add a # to the top one (to comment it out). Now remove the # from the line starting pn532 = PN532_UART. Save, and exit.
Try it out!
Finally, we get to the fun part. Start the example code as follows: python3 example_get_uid.py If all is well, the connection to the HAT will be announced. You can now place your RFID token over the area of the HAT marked ‘NFC’. Hexadecimal numbers will start scrolling up the screen; your token has been detected! Each RFID token has a unique number, so it can be used to uniquely identify someone. However, this HAT is capable of much more than that as it also supports NFC and can communicate with common standards like MIFARE Classic, which allows for 1kB of storage on the card. Check out example_dump_mifare.py in the same directory (but make sure you make the same edits as above to use the serial connection).
Going further
You can now read unique identifiers on RFID and NFC tokens. As we just mentioned, if you’re using the MIFARE or NTAG2 standards, you can also write data back to the card. The examples folder contains some C programs that let you do just that. The ability to read and write small amounts of data onto cards can lead to some fun projects. At the Electromagnetic Field festival in 2018, an entire game was based around finding physical locations and registering your presence with a MIFARE card. Even more is possible with smartphones, where NFC can be used to exchange data in any form.
Get HackSpace magazine 37 – Out Now!
Each month, HackSpace magazine brings you the best projects, tips, tricks and tutorials from the makersphere. You can get it from the Raspberry Pi Press online store, The Raspberry Pi store in Cambridge, or your local newsagents.
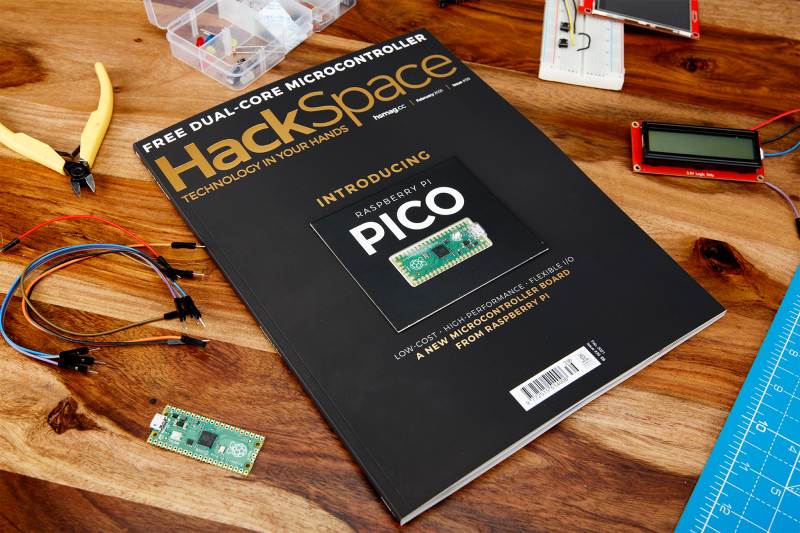
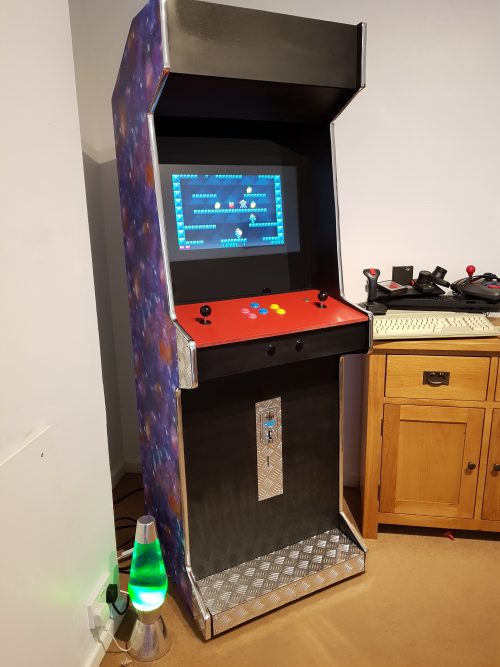
Games consoles might be fast and have great graphics, but they’re no match for the entertainment value of a proper arcade machine. In this month’s issue of Hackspace magazine, you’re invited to relive your misspent youth with this huge build project.
There’s something special about the comforting solidity of a coin-eating video game monolith, and nothing screams retro fun like a full-sized arcade cabinet sitting in the corner of the room. Classic arcade machines can be a serious investment. Costing thousands of pounds and weighing about the same as a giant panda, they’re out of reach for all but the serious collector. Thankfully, you can recreate that retro experience using modern components for a fraction of the price and weight.
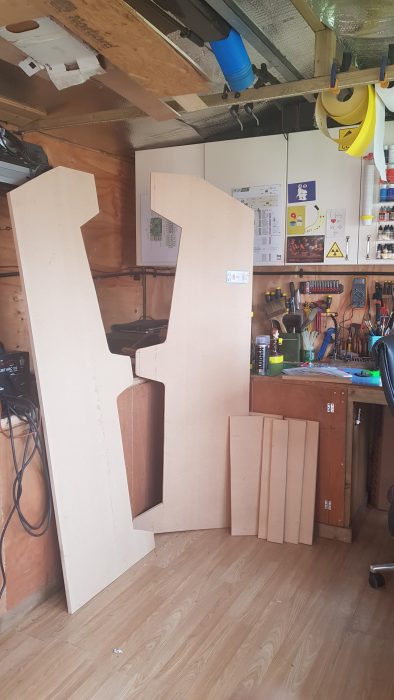
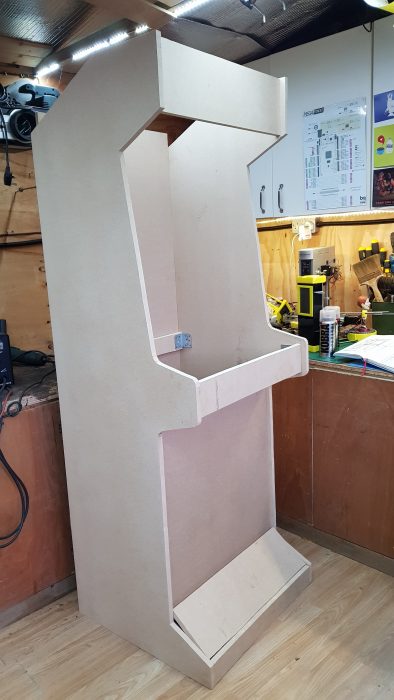
An arcade cabinet is much easier to make than you might expect. It’s essentially a fancy cupboard that holds a monitor, speakers, a computer, a keyboard, and some buttons. You can make your own cabinet using not much more than a couple of sheets of MDF, some clear plastic, and a few cans of spray paint.
If you want a really authentic-looking cabinet, you can find plenty of plans and patterns online. However, most classic cabinets are a bit bigger than you might remember, occupying almost a square metre of floor space. If you scale that down to approximately 60 cm2, you can make an authentic-looking home arcade cabinet that won’t take over the entire room, and can be cut from just two pieces of 8 × 4 (2440 mm × 1220 mm) MDF. You can download our plans, but these are rough plans designed for you to tweak into your own creation. A sheet of 18 mm MDF is ideal for making the body of the cabinet, and 12 mm MDF works well to fill in the front and back panels. You can use thinner sheets of wood to make a lighter cabinet, but you might find it less sturdy and more difficult to screw into.
See – simples
The sides of the machine should be cut from 18 mm MDF, and will be 6 feet high. The sides need to be as close to identical as possible, so mark out the pattern for the side on one piece of 18 mm MDF, and screw the boards together to hold them while you cut. You can avoid marking the sides by placing the screws through the waste areas of the MDF. Keep these offcuts to make internal supports or brackets. You can cut the rest of the pieces of MDF using the project plans as a guide.
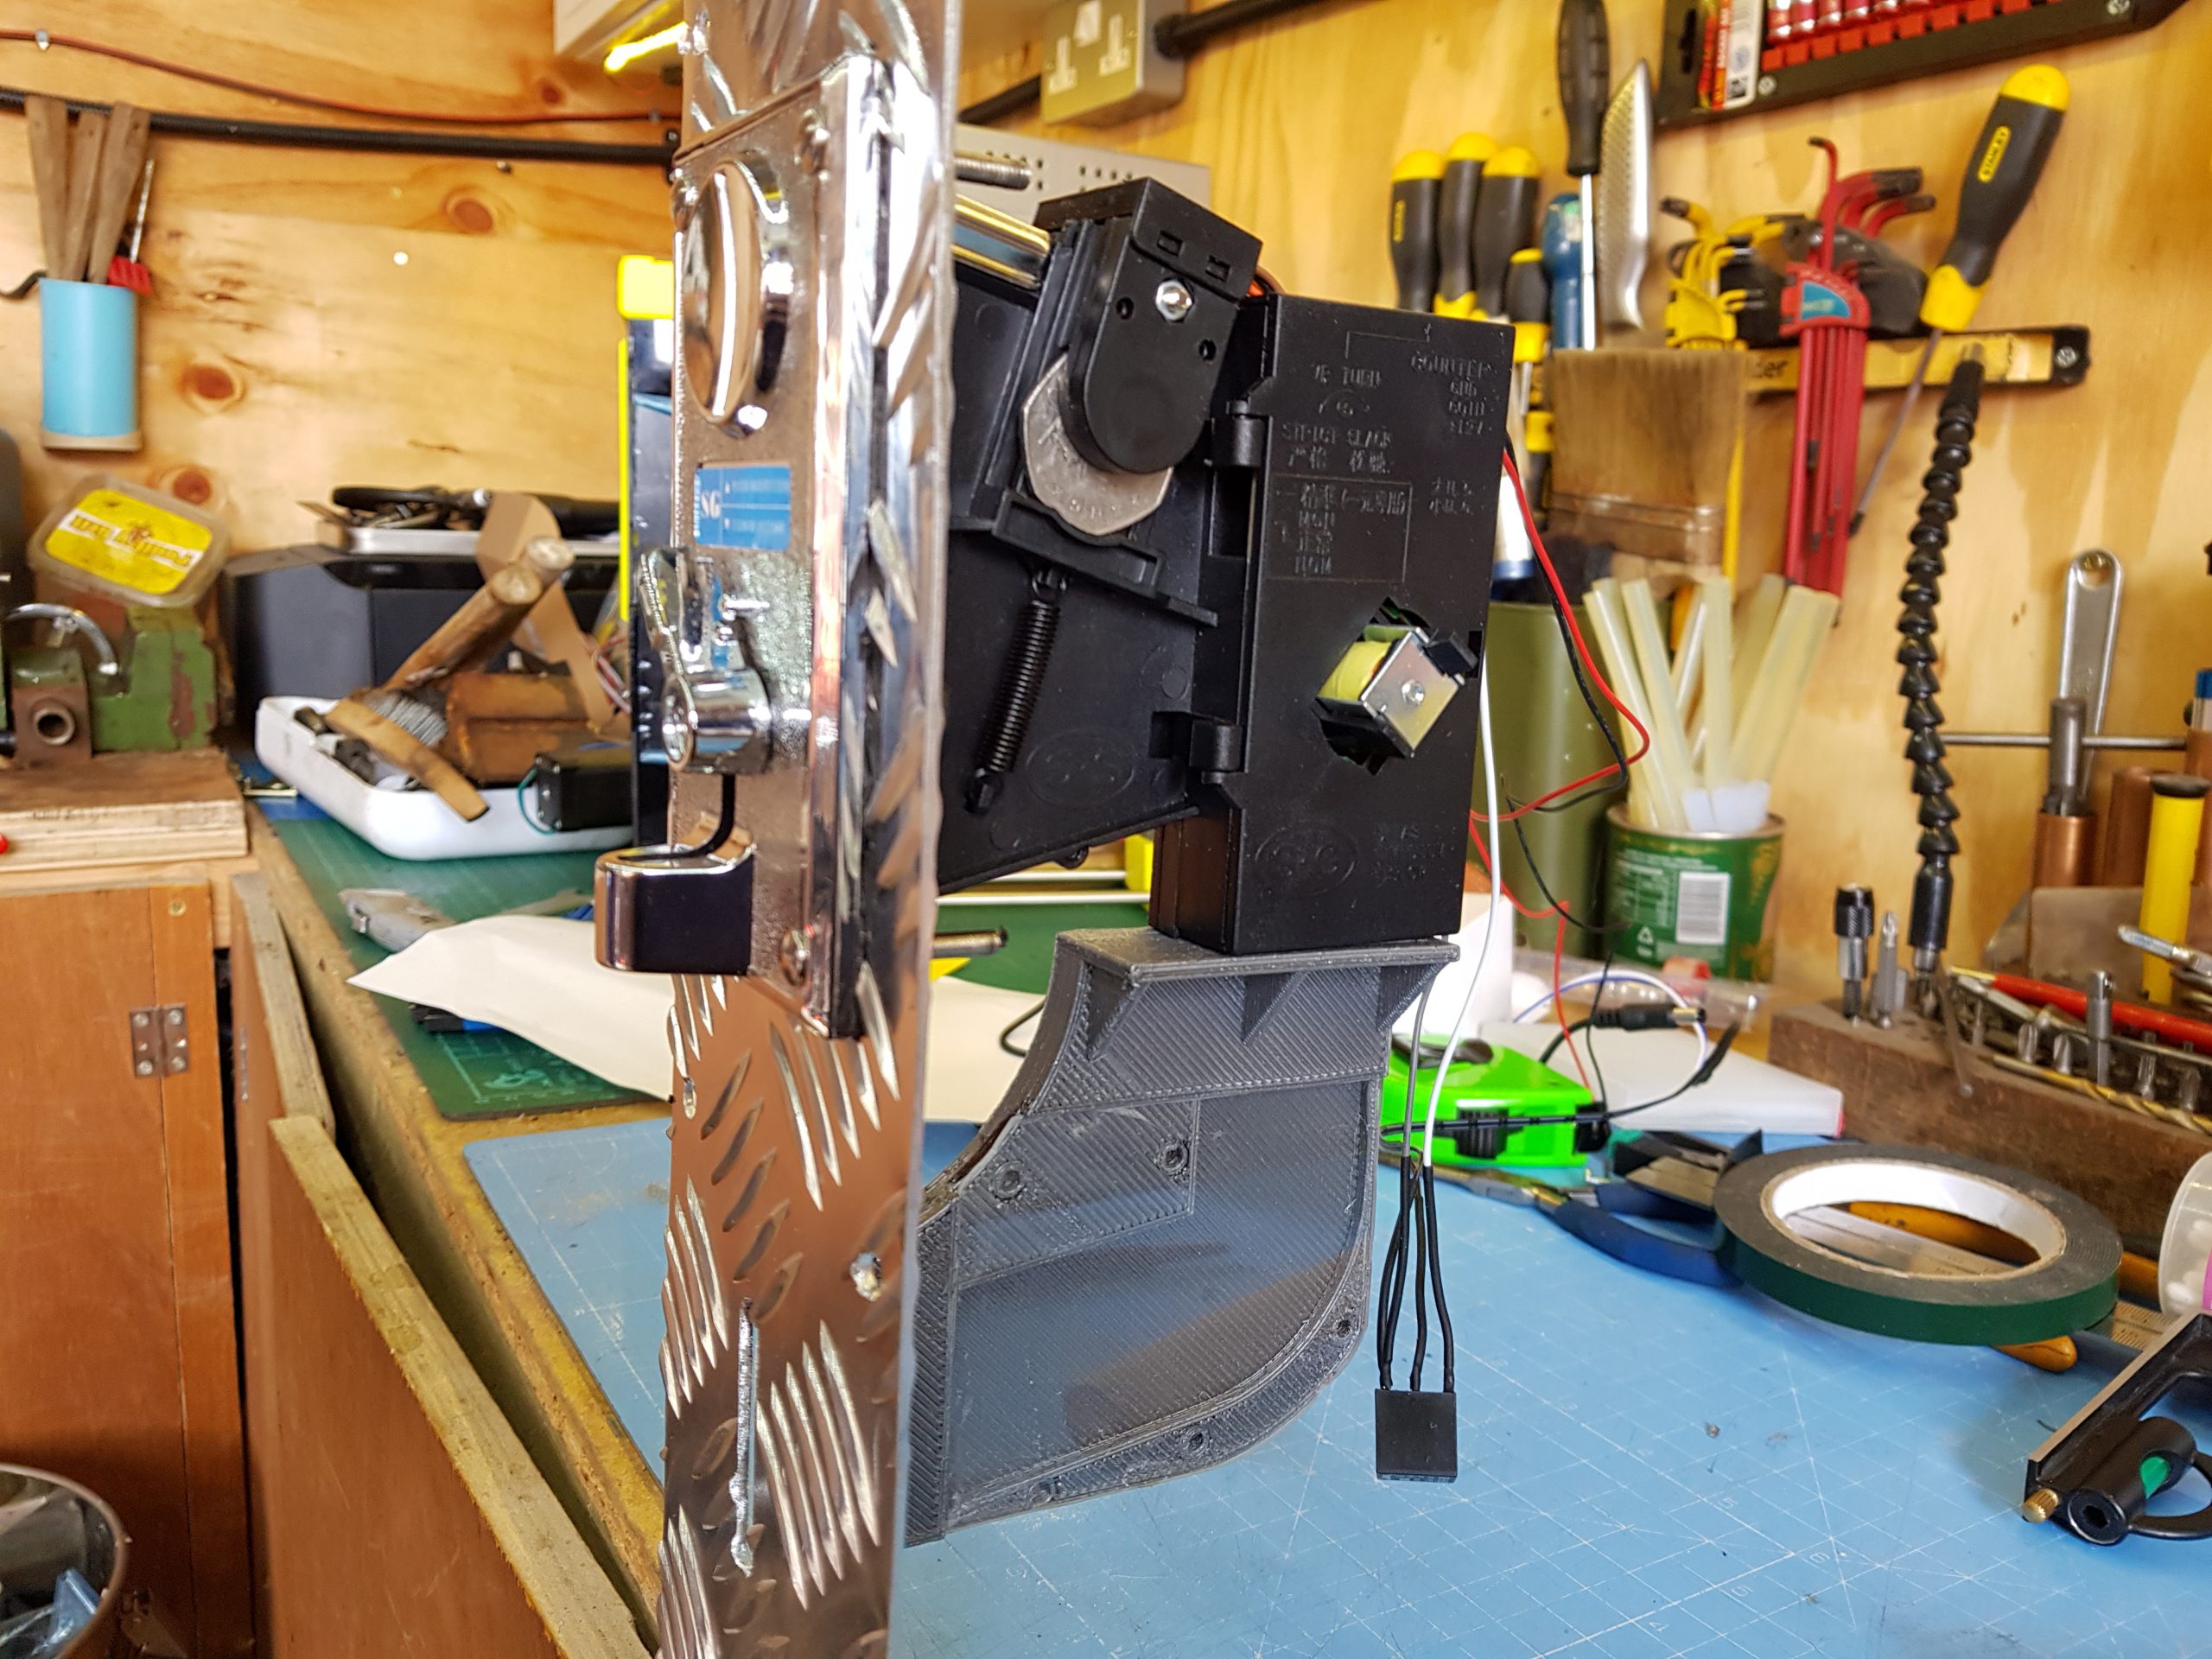
Why not add a coin machine for extra authenticity
Attach the side pieces to the base, so that the sides hang lower than the base by an inch or two. If you’re more accomplished at woodworking and want to make the strongest cabinet possible, you can use a router to joint and glue the pieces of wood together. This will make the cabinet very slightly narrower and will affect some measurements, but if you follow the old adage to measure twice and cut once, you should be fine. If you don’t want to do this, you can use large angle brackets and screws to hold everything together. The cabinet will still be strong, and you’ll have the added advantage that you can disassemble it in the future if necessary.
Keep attaching the 18 mm MDF pieces, starting with the top piece and the rear brace. Once you have these pieces attached, the cabinet should be sturdy enough to start adding the thinner panels. Insetting the panels by about an inch gives the cabinet that retro look, and also hides any design crimes you might have committed while cutting out the side panels.
The absolute sizing of the cabinet isn’t critical unless you’re trying to make an exact copy of an old machine, so don’t feel too constrained by measuring things down to the millimetre. As long as the cabinet is wide enough to accept your monitor, everything else is moveable and can be adjusted to suit your needs.
Make it shiny
You can move onto decoration once the cabinet woodwork is fitted together. This is mostly down to personal preference, although it’s wise to think about which parts of the case will be touched more often, and whether your colour choices will cause any problems with screen reflection. Matt black is a popular choice for arcade cabinets because it’s non-reflective and any surface imperfections are less noticeable with a matt paint finish.
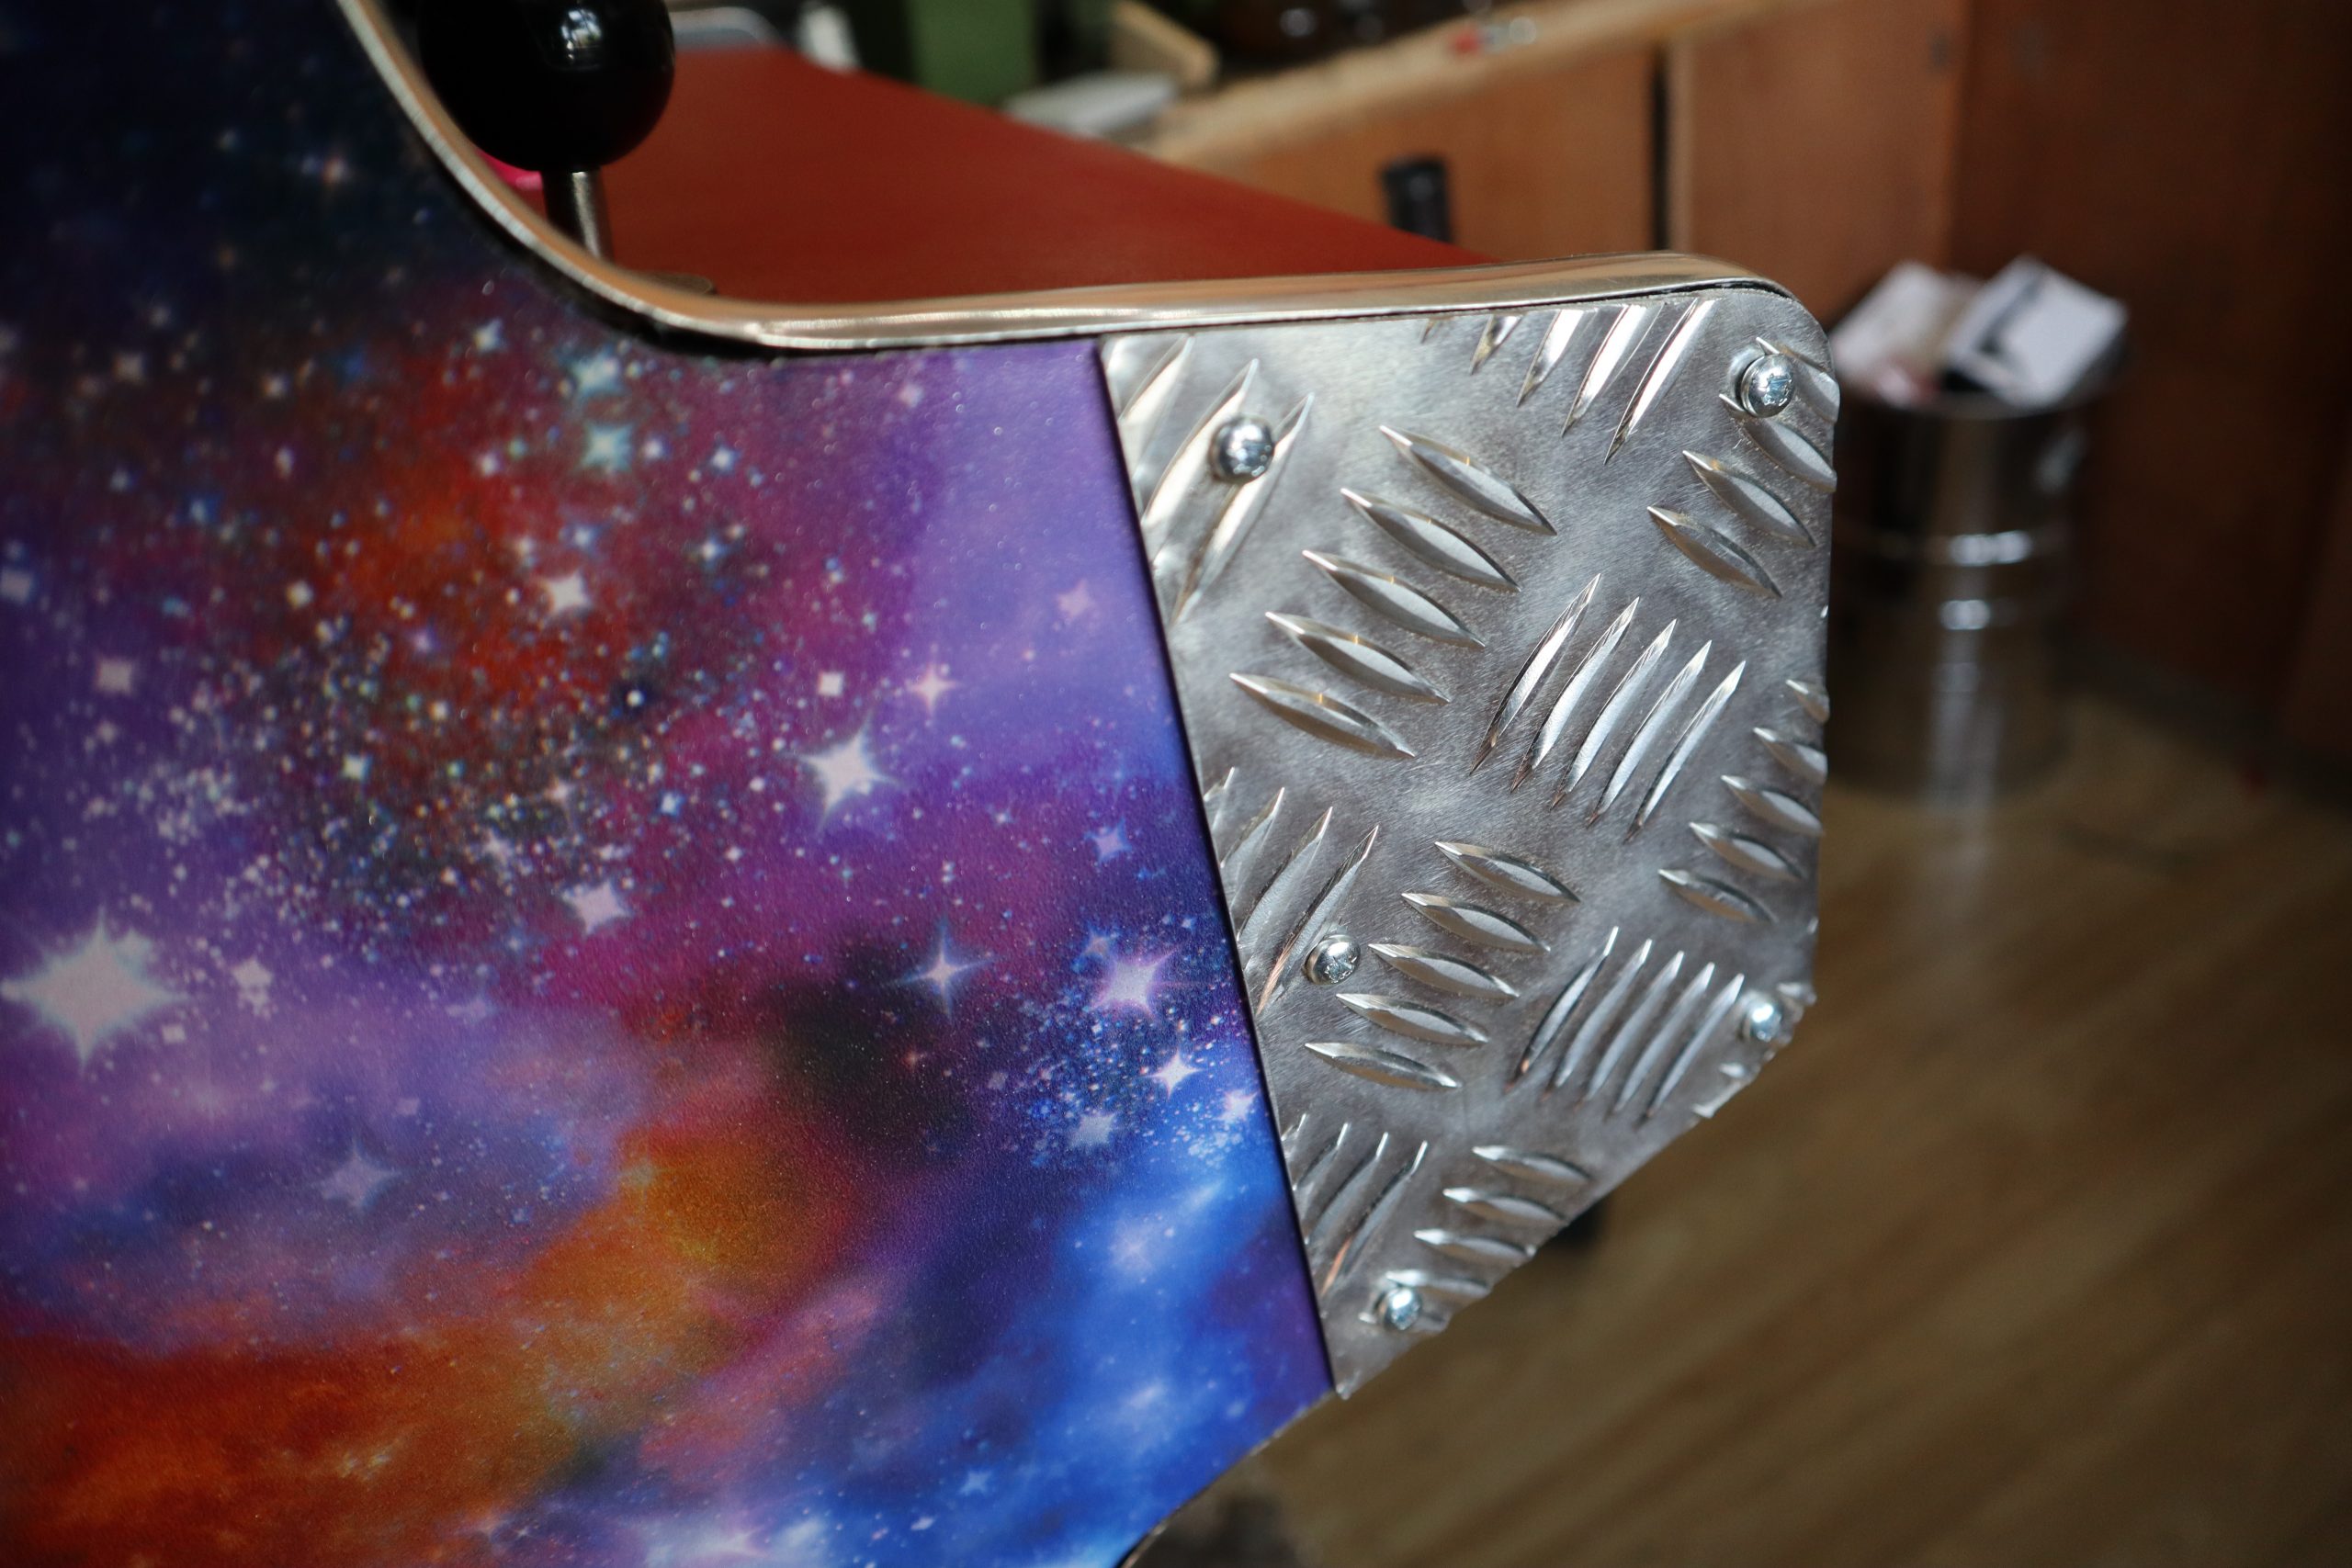
Aluminium checker plate is a good way of protecting your cabinet from damage, and it can be cut and shaped easily.
Wallpaper or posters make a great choice for decorating the outside of the cabinet, and they are quick to apply. Just be sure to paste all the way up to the edge, and protect any areas that will be handled regularly with aluminium checker plate or plastic sheet. The edges of MDF sheets can be finished with iron-on worktop edging, or with the chrome detailing tape used on cars. You can buy detailing tape in 12 mm and 18 mm widths, which makes it great for finishing edges. The adhesive tape provided with the chrome edging isn’t always very good, so it’s worth investing in some high-strength, double-sided clear vinyl foam tape.
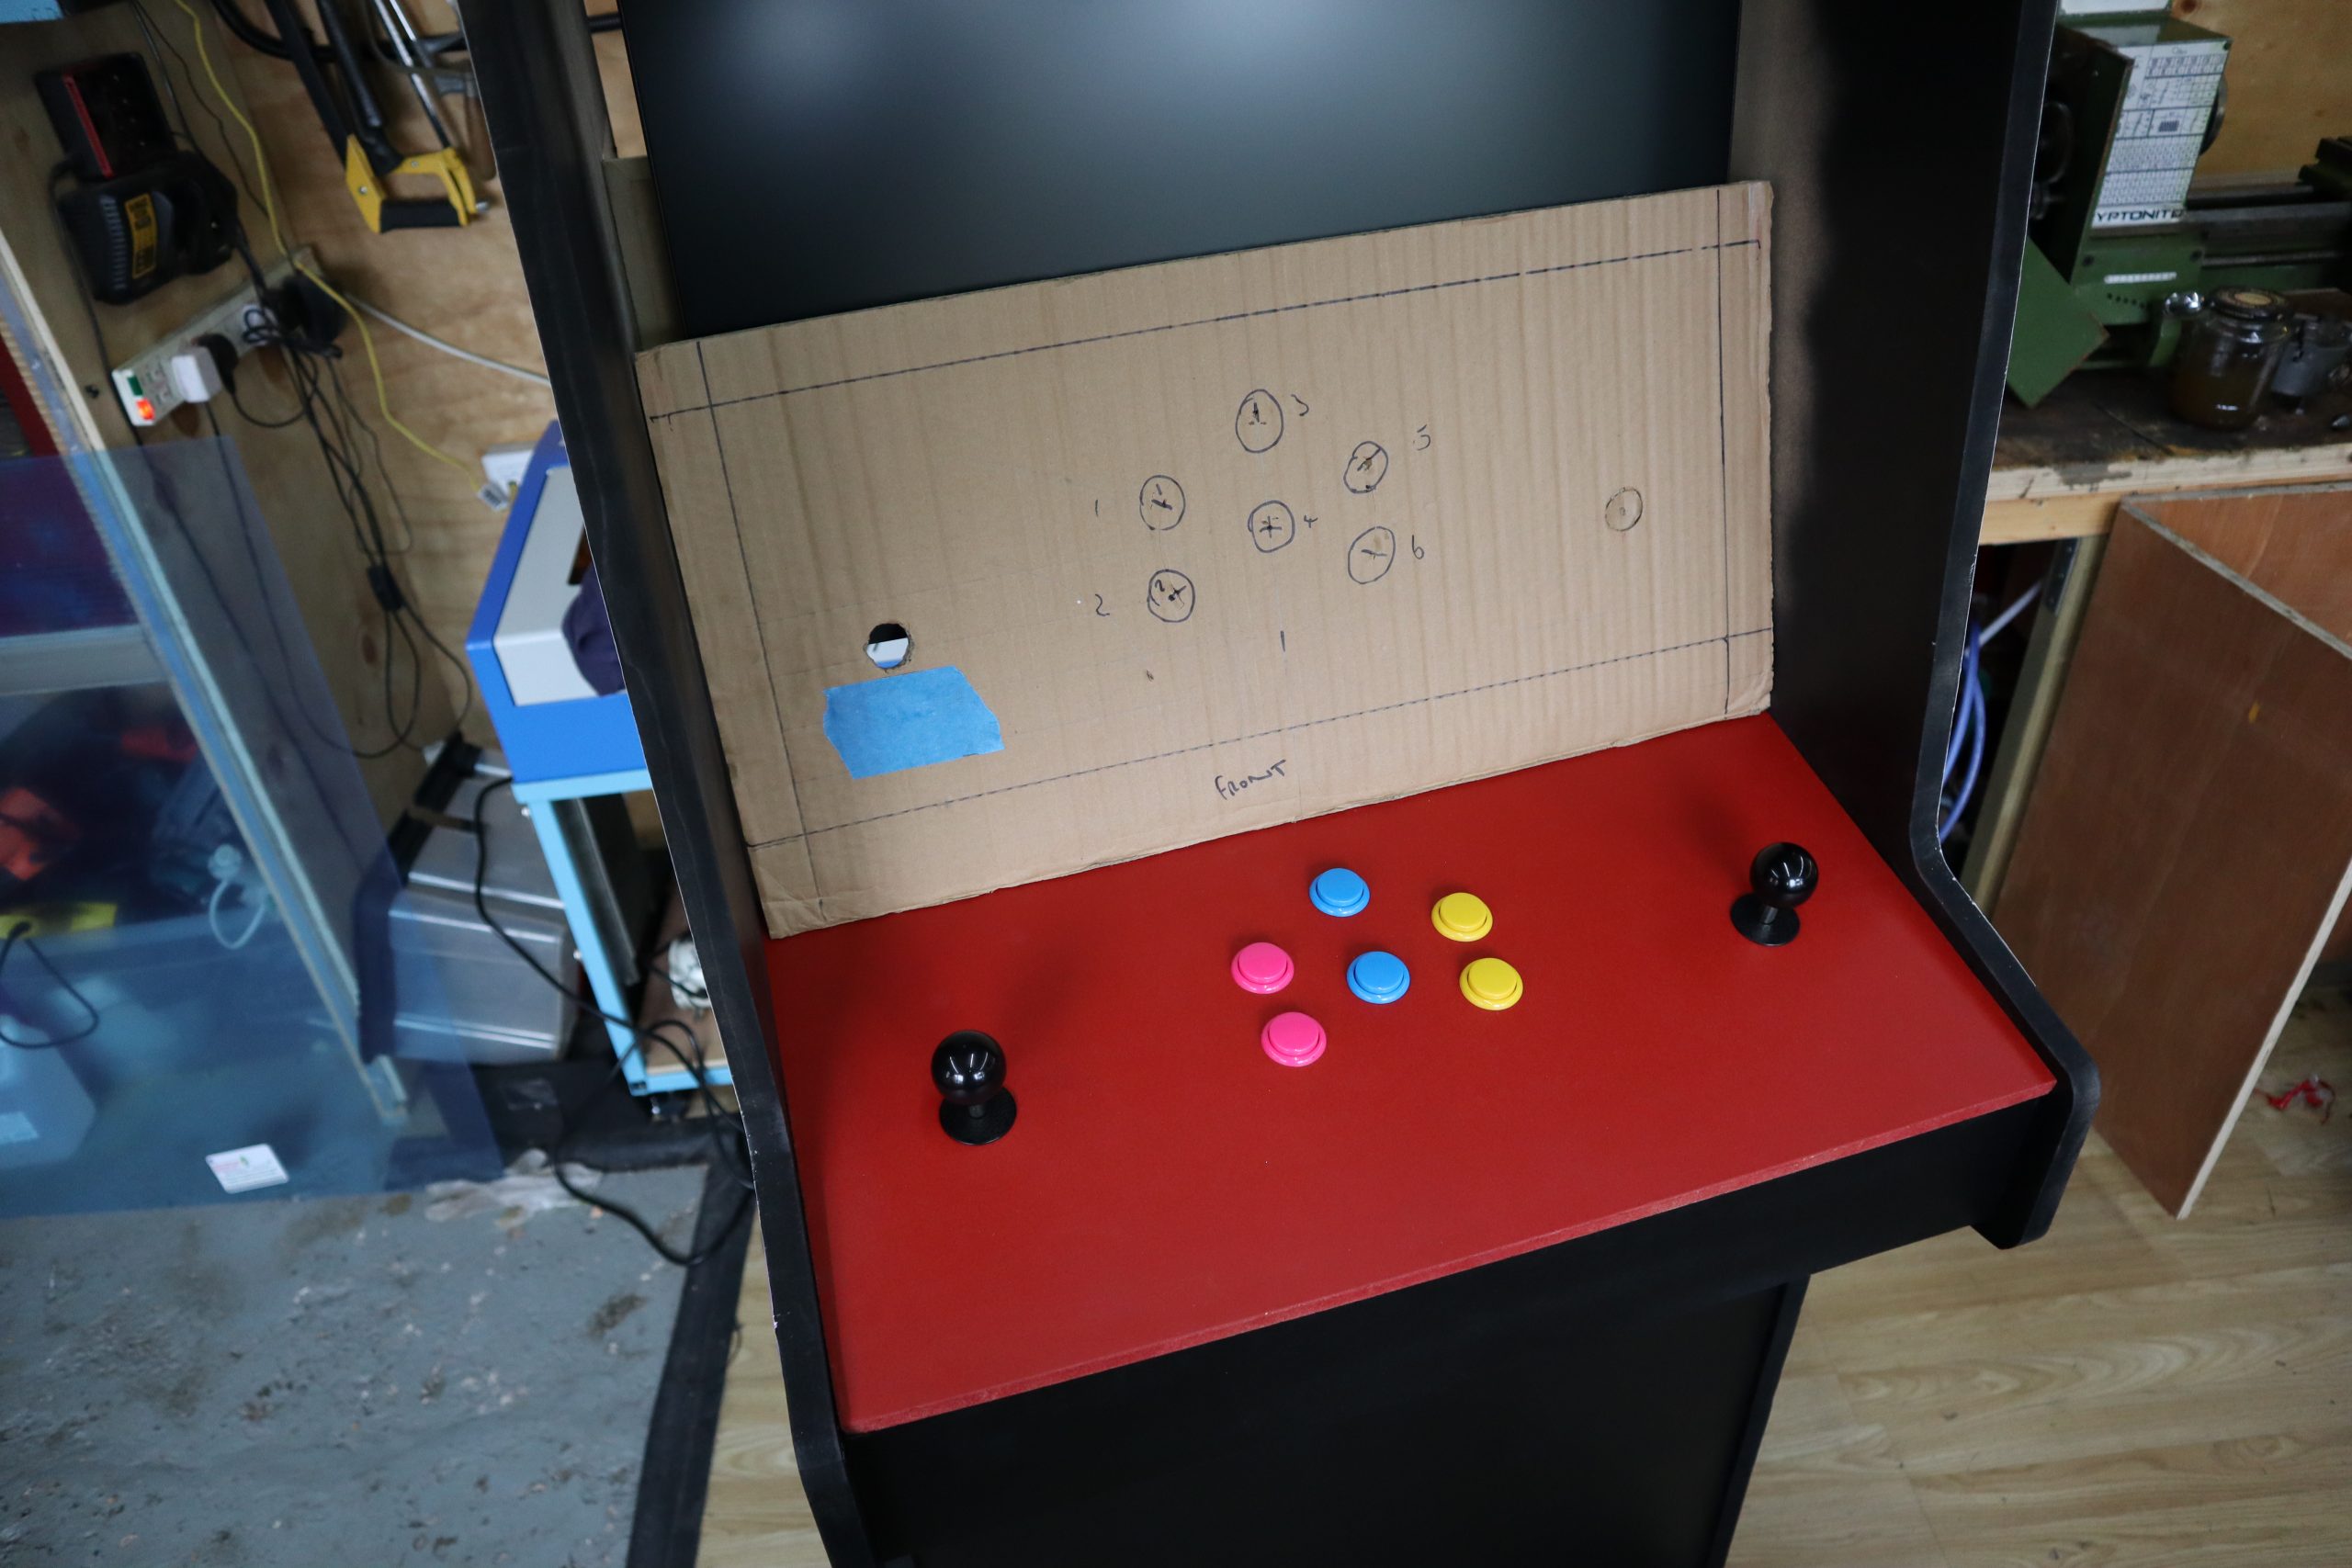
You’ve made your cabinet, but it’s empty at the moment. You’re going to add a Raspberry Pi, monitor, speakers, and a panel for buttons and joysticks. To find out how, you can read the full article in HackSpace magazine 35.
Get HackSpace magazine 35 Out Now!
Each month, HackSpace magazine brings you the best projects, tips, tricks and tutorials from the makersphere. You can get it from the Raspberry Pi Press online store, The Raspberry Pi store in Cambridge, or your local newsagents.
If you subscribe for 12 months, you get an Adafruit Circuit Playground Express , or can choose from one of our other subscription offers, including this amazing limited-time offer of three issues and a book for only £10!
To provide the best experiences, we use technologies like cookies to store and/or access device information. Consenting to these technologies will allow us to process data such as browsing behavior or unique IDs on this site. Not consenting or withdrawing consent, may adversely affect certain features and functions.
Functional
Always active
The technical storage or access is strictly necessary for the legitimate purpose of enabling the use of a specific service explicitly requested by the subscriber or user, or for the sole purpose of carrying out the transmission of a communication over an electronic communications network.
Preferences
The technical storage or access is necessary for the legitimate purpose of storing preferences that are not requested by the subscriber or user.
Statistics
The technical storage or access that is used exclusively for statistical purposes.The technical storage or access that is used exclusively for anonymous statistical purposes. Without a subpoena, voluntary compliance on the part of your Internet Service Provider, or additional records from a third party, information stored or retrieved for this purpose alone cannot usually be used to identify you.
Marketing
The technical storage or access is required to create user profiles to send advertising, or to track the user on a website or across several websites for similar marketing purposes.