Post Syndicated from Julian Wood original https://aws.amazon.com/blogs/compute/building-well-architected-serverless-applications-managing-application-security-boundaries-part-1/
This series of blog posts uses the AWS Well-Architected Tool with the Serverless Lens to help customers build and operate applications using best practices. In each post, I address the serverless-specific questions identified by the Serverless Lens along with the recommended best practices. See the introduction post for a table of contents and explanation of the example application.
Security question SEC2: How do you manage your serverless application’s security boundaries?
Defining and securing your serverless application’s boundaries ensures isolation for, within, and between components.
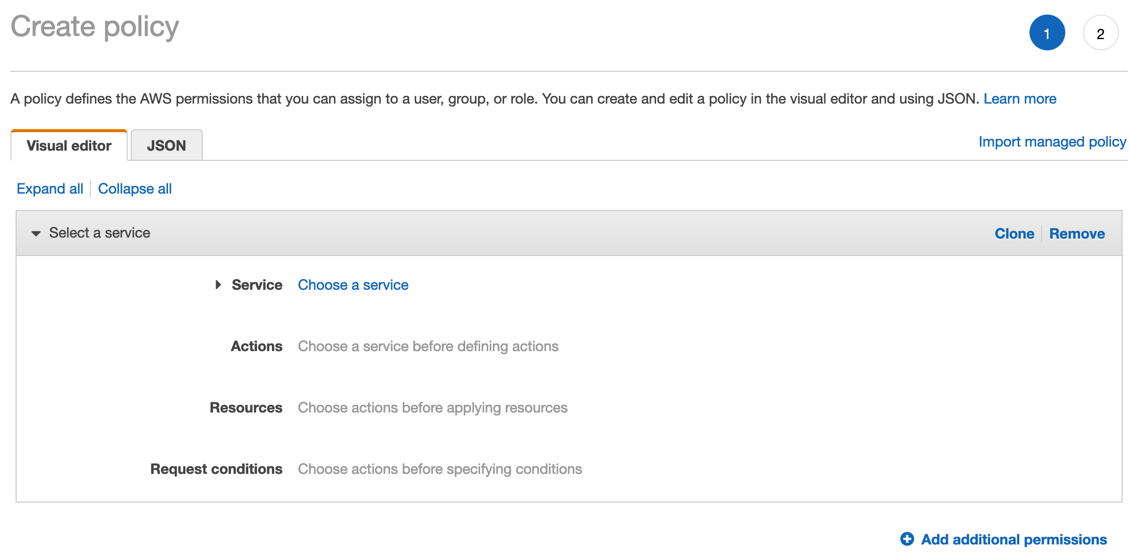
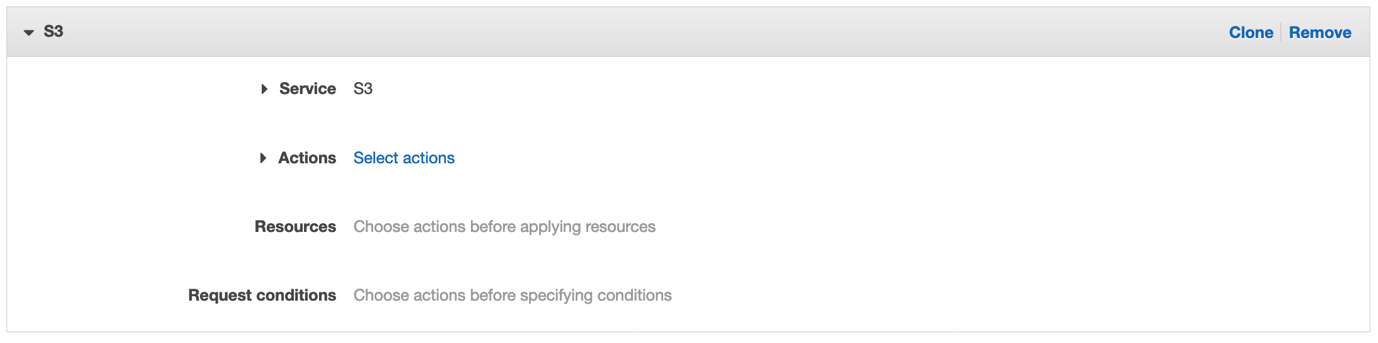
Required practice: Evaluate and define resource policies
Resource policies are AWS Identity and Access Management (IAM) statements. They are attached to resources such as an Amazon S3 bucket, or an Amazon API Gateway REST API resource or method. The policies define what identities have fine-grained access to the resource. To see which services support resource-based policies, see “AWS Services That Work with IAM”. For more information on how resource policies and identity policies are evaluated, see “Identity-Based Policies and Resource-Based Policies”.
Understand and determine which resource policies are necessary
Resource policies can protect a component by restricting inbound access to managed services. Use resource policies to restrict access to your component based on a number of identities, such as the source IP address/range, function event source, version, alias, or queues. Resource policies are evaluated and enforced at IAM level before each AWS service applies it’s own authorization mechanisms, when available. For example, IAM resource policies for API Gateway REST APIs can deny access to an API before an AWS Lambda authorizer is called.
If you use multiple AWS accounts, you can use AWS Organizations to manage and govern individual member accounts centrally. Certain resource policies can be applied at the organizations level, providing guardrail for what actions AWS accounts within the organization root or OU can do. For more information see, “Understanding how AWS Organization Service Control Policies work”.
Review your existing policies and how they’re configured, paying close attention to how permissive individual policies are. Your resource policies should only permit necessary callers.
Implement resource policies to prevent unauthorized access
For Lambda, use resource-based policies to provide fine-grained access to what AWS IAM identities and event sources can invoke a specific version or alias of your function. Resource-based policies can also be used to control access to Lambda layers. You can combine resource policies with Lambda event sources. For example, if API Gateway invokes Lambda, you can restrict the policy to the API Gateway ID, HTTP method, and path of the request.
In the serverless airline example used in this series, the IngestLoyalty service uses a Lambda function that subscribes to an Amazon Simple Notification Service (Amazon SNS) topic. The Lambda function resource policy allows SNS to invoke the Lambda function.
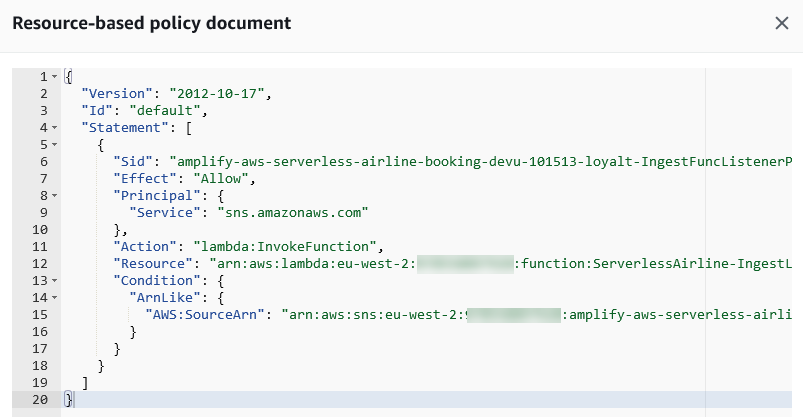
Lambda resource policy document
API Gateway resource-based policies can restrict API access to specific Amazon Virtual Private Cloud (VPC), VPC endpoint, source IP address/range, AWS account, or AWS IAM users.
Amazon Simple Queue Service (SQS) resource-based policies provide fine-grained access to certain AWS services and AWS IAM identities (users, roles, accounts). Amazon SNS resource-based policies restrict authenticated and non-authenticated actions to topics.
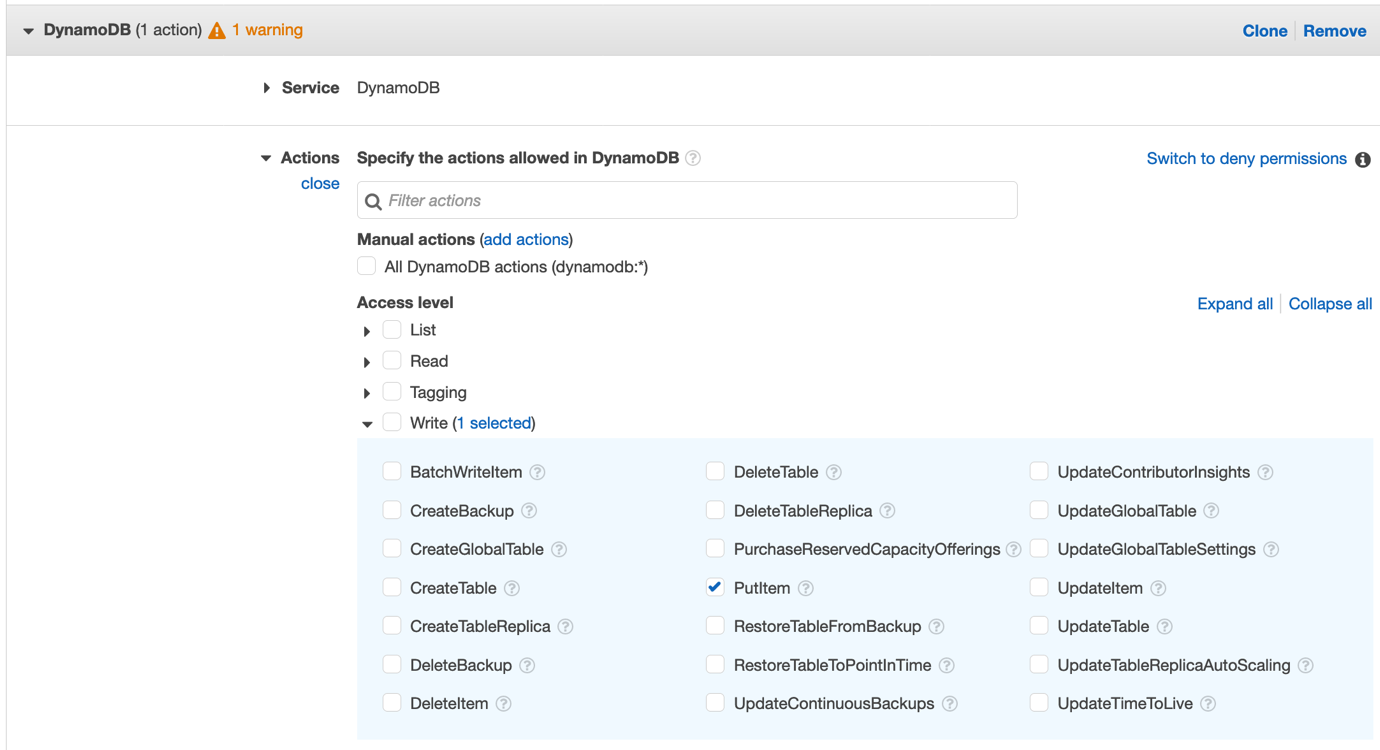
Amazon DynamoDB resource-based policies provide fine-grained access to tables and indexes. Amazon EventBridge resource-based policies restrict AWS identities to send and receive events including to specific event buses.
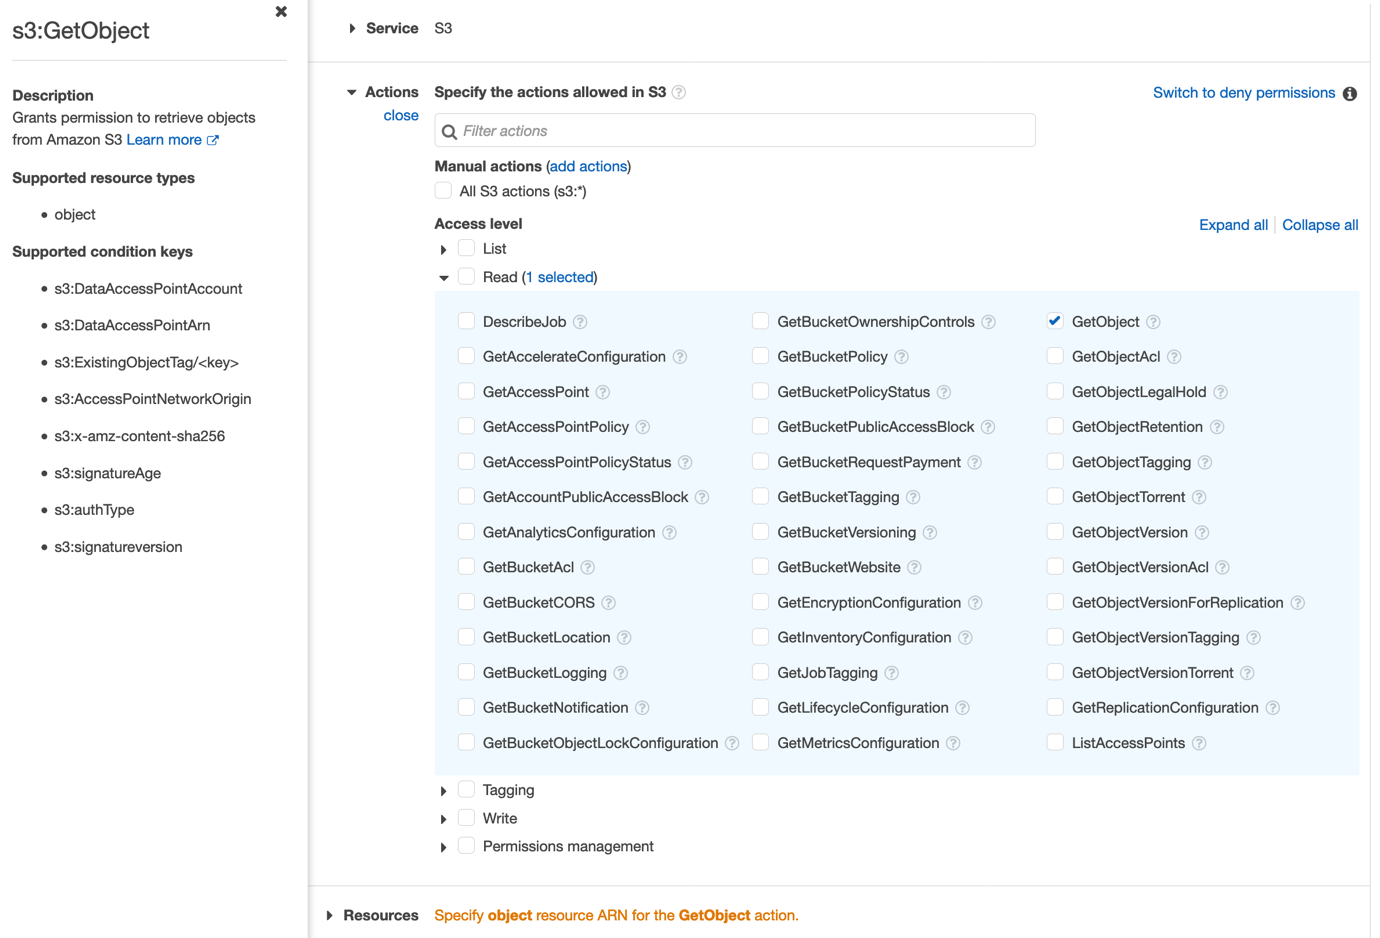
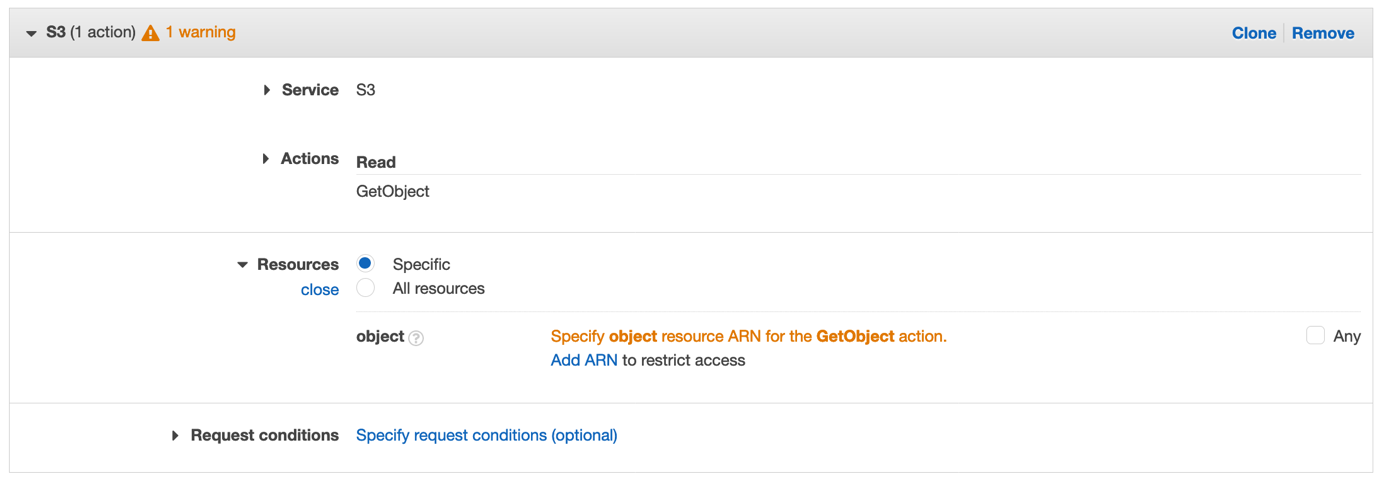
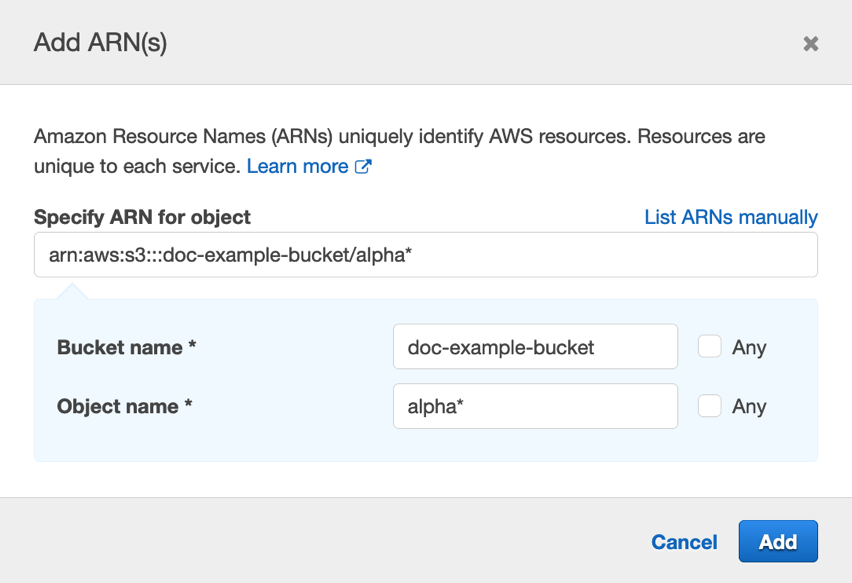
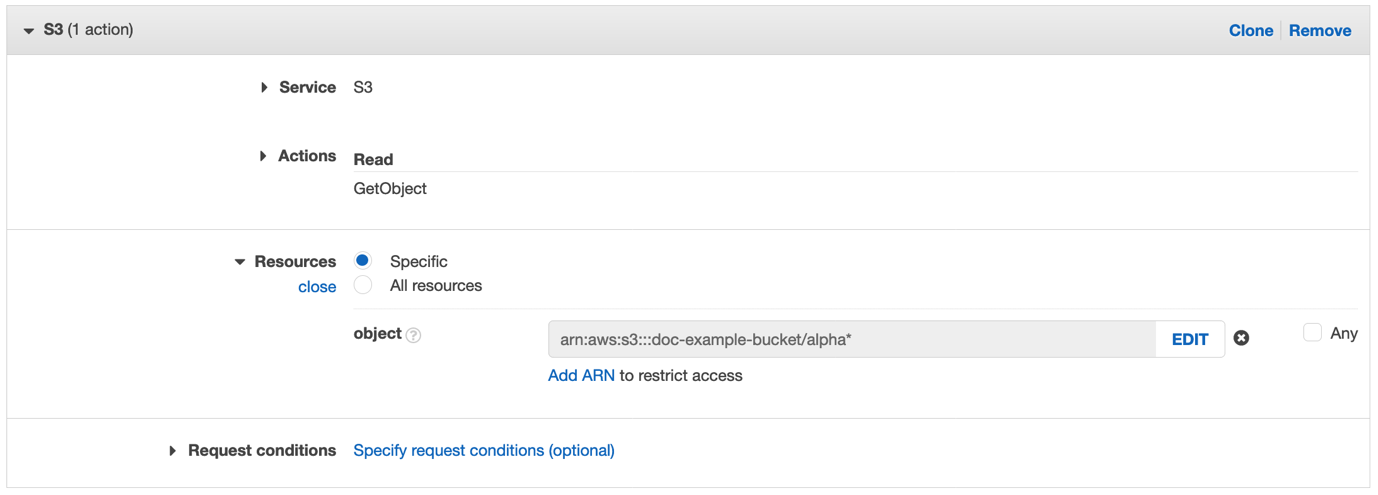
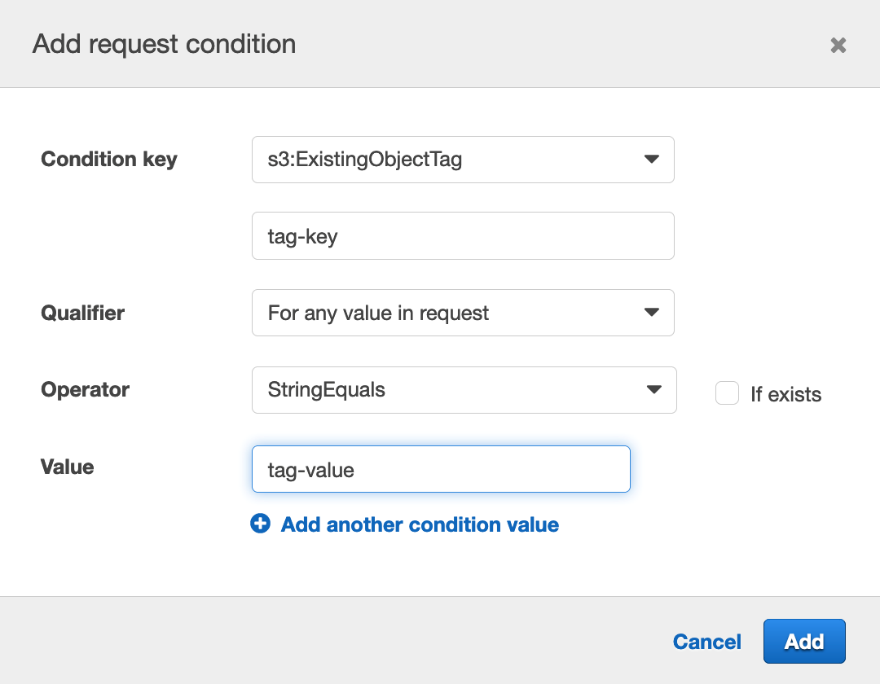
For Amazon S3, use bucket policies to grant permission to your Amazon S3 resources.
The AWS re:Invent session Best practices for growing a serverless application includes further suggestions on enforcing security best practices.

Best practices for growing a serverless application
Good practice: Control network traffic at all layers
Apply controls for controlling both inbound and outbound traffic, including data loss prevention. Define requirements that help you protect your networks and protect against exfiltration.
Use networking controls to enforce access patterns
API Gateway and AWS AppSync have support for AWS Web Application Firewall (AWS WAF) which helps protect web applications and APIs from attacks. AWS WAF enables you to configure a set of rules called a web access control list (web ACL). These allow you to block, or count web requests based on customizable web security rules and conditions that you define. These can include specified IP address ranges, CIDR blocks, specific countries, or Regions. You can also block requests that contain malicious SQL code, or requests that contain malicious script. For more information, see How AWS WAF Works.
A private API endpoint is an API Gateway interface VPC endpoint that can only be accessed from your Amazon Virtual Private Cloud (Amazon VPC). This is an elastic network interface that you create in a VPC. Traffic to your private API uses secure connections and does not leave the Amazon network, it is isolated from the public internet. For more information, see “Creating a private API in Amazon API Gateway”.
To restrict access to your private API to specific VPCs and VPC endpoints, you must add conditions to your API’s resource policy. For example policies, see the documentation.
By default, Lambda runs your functions in a secure Lambda-owned VPC that is not connected to your account’s default VPC. Functions can access anything available on the public internet. This includes other AWS services, HTTPS endpoints for APIs, or services and endpoints outside AWS. The function cannot directly connect to your private resources inside of your VPC.
You can configure a Lambda function to connect to private subnets in a VPC in your account. When a Lambda function is configured to use a VPC, the Lambda function still runs inside the Lambda service VPC. The function then sends all network traffic through your VPC and abides by your VPC’s network controls. Functions deployed to virtual private networks must consider network access to restrict resource access.
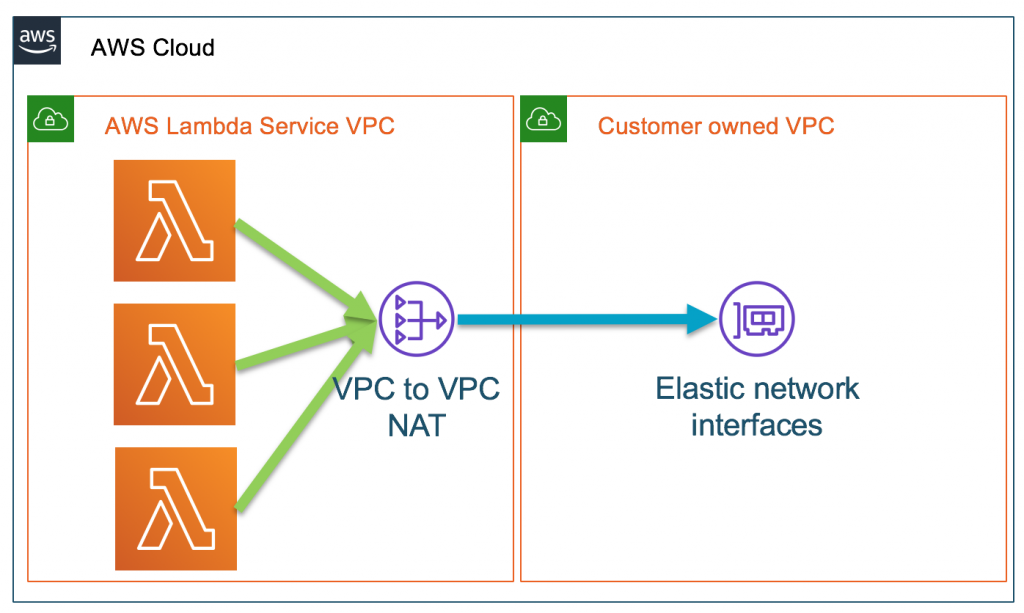
AWS Lambda service VPC with VPC-to-VPT NAT to customer VPC
When you connect a function to a VPC in your account, the function cannot access the internet, unless the VPC provides access. To give your function access to the internet, route outbound traffic to a NAT gateway in a public subnet. The NAT gateway has a public IP address and can connect to the internet through the VPC’s internet gateway. For more information, see “How do I give internet access to my Lambda function in a VPC?”. Connecting a function to a public subnet doesn’t give it internet access or a public IP address.
You can control the VPC settings for your Lambda functions using AWS IAM condition keys. For example, you can require that all functions in your organization are connected to a VPC. You can also specify the subnets and security groups that the function’s users can and can’t use.
Unsolicited inbound traffic to a Lambda function isn’t permitted by default. There is no direct network access to the execution environment where your functions run. When connected to a VPC, function outbound traffic comes from your own network address space.
You can use security groups, which act as a virtual firewall to control outbound traffic for functions connected to a VPC. Use security groups to permit your Lambda function to communicate with other AWS resources. For example, a security group can allow the function to connect to an Amazon ElastiCache cluster.
To filter or block access to certain locations, use VPC routing tables to configure routing to different networking appliances. Use network ACLs to block access to CIDR IP ranges or ports, if necessary. For more information about the differences between security groups and network ACLs, see “Compare security groups and network ACLs.”
In addition to API Gateway private endpoints, several AWS services offer VPC endpoints, including Lambda. You can use VPC endpoints to connect to AWS services from within a VPC without an internet gateway, NAT device, VPN connection, or AWS Direct Connect connection.
Using tools to audit your traffic
When you configure a Lambda function to use a VPC, or use private API endpoints, you can use VPC Flow Logs to audit your traffic. VPC Flow Logs allow you to capture information about the IP traffic going to and from network interfaces in your VPC. Flow log data can be published to Amazon CloudWatch Logs or S3 to see where traffic is being sent to at a granular level. Here are some flow log record examples. For more information, see “Learn from your VPC Flow Logs”.
Block network access when required
In addition to security groups and network ACLs, third-party tools allow you to disable outgoing VPC internet traffic. These can also be configured to allow traffic to AWS services or allow-listed services.
Conclusion
Managing your serverless application’s security boundaries ensures isolation for, within, and between components. In this post, I cover how to evaluate and define resource policies, showing what policies are available for various serverless services. I show some of the features of AWS WAF to protect APIs. Then I review how to control network traffic at all layers. I explain how Lambda functions connect to VPCs, and how to use private APIs and VPC endpoints. I walk through how to audit your traffic.
This well-architected question will be continued where I look at using temporary credentials between resources and components. I cover why smaller, single purpose functions are better from a security perspective, and how to audit permissions. I show how to use AWS Serverless Application Model (AWS SAM) to create per-function IAM roles.
For more serverless learning resources, visit https://serverlessland.com.