Post Syndicated from Julian Wood original https://aws.amazon.com/blogs/compute/introducing-iam-and-lambda-authorizers-for-amazon-api-gateway-http-apis/
Amazon API Gateway HTTP APIs enable you to create RESTful APIs with lower latency and lower cost than API Gateway REST APIs.
The API Gateway team is continuing work to improve and migrate popular REST API features to HTTP APIs. We are adding two of the most requested features, AWS Identity and Access Management (IAM) authorizers and AWS Lambda authorizers.
HTTP APIs already support JWT authorizers as a part of OpenID Connect (OIDC) and OAuth 2.0 frameworks. For more information, see “Simple HTTP API with JWT Authorizer.”
IAM authorization
AWS IAM roles and policies offer flexible, robust, and fully managed access controls, without writing any code. You can use IAM roles and policies to control who can create and manage your APIs, in addition to who can invoke them. IAM authorization for HTTP API routes is the best choice for internal or private APIs called by other AWS services like AWS Lambda.
IAM authorization for HTTP API APIs is similar to that for REST APIs. IAM access is determined by identity policies, which are attached to IAM users, groups, or roles. These policies define what identity can access which HTTP APIs routes. See “AWS Services That Work with IAM.”
Lambda authorization
A Lambda authorizer is a Lambda function which API Gateway calls for an authorization check when a client makes a request to an HTTP API route. You can use Lambda authorizers to implement custom authorization schemes to comply with your security requirements.
New authorizer features
HTTP API Lambda authorizers have some new features compared to REST APIs. There is a new payload and response format, including a simple Boolean authorization option.
New payload versions and response format
Lambda authorizers for HTTP APIs introduce a new payload format, version 2.0. If you need compatibility to use the same Lambda authorizers for both REST and HTTP APIs, you can continue to use version 1.0.
The payload format version also determines the request format and response structure that you must send to and return from your Lambda authorizer function. The version 2.0 payload context now allows non-string values. With version 1.0, your Lambda authorizer must return an IAM policy that allows or denies access to your API route. This is the same existing functionality as REST APIs. You can use standard IAM policy syntax in the policy. For examples of IAM policies, see “Control access for invoking an API.”
If you choose the new 2.0 format version when configuring the authorizer, you can now return either a Boolean value, or an IAM policy. The Boolean value enables simple responses from the authorizer without having to construct an IAM policy, and is in the format:
{
  "isAuthorized": true/false,
  "context": {
    "exampleKey": "exampleValue"
  }
}
The context object is optional. You can pass context properties on to Lambda integrations or access logs by using $context.authorizer.property. To learn more, see “Customizing HTTP API access logs.”
Caching authorizer responses
You can enable caching for a Lambda authorizer for up to one hour. To enable caching, your authorizer must have at least one identity source. API Gateway calls the Lambda authorizer function only when all of the specified identity sources are present. API Gateway uses the identity sources as the cache key. If a client specifies the same identity source parameters within the cache TTL, API Gateway uses the cached authorizer result. The Lambda authorizer function is not invoked.
Caching is enabled at the API Gateway level per authorizer. It is important to understand the effect of caching, particularly with simple responses and multiple routes. When using a simple response, the authorizer fully allows or denies all API requests that match the cached identity source values.
For example, you have two different routes using the same Lambda authorizer with a simple response. Both routes have different access requirements. The first route allows access to GET /list-users with an Authorization header with the value SecretTokenUsers. The second route denies access using the same header to GET /list-admins.
The Lambda authorizer has a single identity source, $request.header.Authorization, with the following code:
$request.header.Authorization.
exports.handler = async(event, context) => {
    let response = {
        "isAuthorized": false,
        "context": {
            "AuthInfo": "defaultdeny"
        }
    };
    if ((event.routeKey === "GET /list-users") && (event.headers.Authorization === "SecretTokenUsers")) {
        response = {
            "isAuthorized": true,
            "context": {
                "AuthInfo": "true-users"
            }
        };
    }
    if ((event.routeKey === "GET /list-admins") && (event.headers.authorization === "SecretTokenUsers")) {
        response = {
            "isAuthorized": false,
            "context": {
                "AuthInfo": "false-admins",
            }
        };
    }
    return response;
};
As both routes share the same identity source parameter, a cache result from successfully accessing /list-users with the Authorization header could allow access to /list-admins which is not intended. To cache responses differently per route, add $context.routeKey as an additional identity source. This creates a cache key that is unique for each route.
If more granular permissions are required, disable simple responses and return an IAM policy instead.
Testing Lambda authorizers
You have an existing Lambda function behind an HTTP API and want to add a Lambda authorizer using the new Boolean simple response. Create a new Lambda authorizer function with the following code.
exports.handler = async(event, context) => {
    let response = {
        "isAuthorized": false,
        "context": {
            "AuthInfo": "defaultdeny"
        }
    };
    if (event.headers.Authorization === "secretToken") {
        response = {
            "isAuthorized": true,
            "context": {
                "AuthInfo": "Customer1"
            }
        };
    }
    return response;
};
The authorizer returns true if a header called Authorization has the value secretToken.
To create an authorizer, browse to the API Gateway console. Navigate to your HTTP API, choose Authorization under Develop, select the Attach authorizers to routes tab, and choose Create and attach an authorizer.

Create and attach HTTP API authorizer
Create the Lambda authorizer, pointing to your Lambda authorizer function. Select Payload format version 2.0 with a Simple response.

Create Lambda simple authorizer settings
Enable caching and add two identity sources, $request.header.Authorization and $context.routeKey, to ensure that your cache key is unique when adding multiple routes.

Add caching and identity sources to Lambda authorizer
Choose Create and attach. The route is now using a Lambda authorizer.
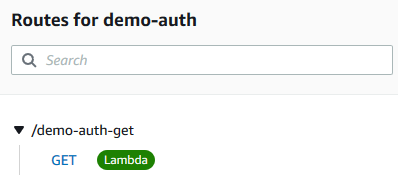
HTTP API route includes Lambda authorizer
The following examples to test the API authentication use Postman but you can use any HTTP client.
Send a GET request to the HTTP APIs URL without specifying any authorization header.

Postman unauthorized GET request
API Gateway returns a 401 Unauthorized response, as expected. The required $request.header.Authorization identity source is not provided, so the Lambda authorizer is not called.
Enter a valid Authorization header key, but an invalid value.

Postman Forbidden GET request
API Gateway returns a 403 Forbidden response as the request is now passed to the Lambda authorizer, which has evaluated the value, and returned "isAuthorized": false.
Supply a valid Authorization header key and value.

Postman successful authorized GET request
API Gateway authorizes the request using the Lambda authorizer and sends the request to the Lambda function integration which returns a successful 200 response.
For more Lambda authorizer code examples see “Custom Authorizer Blueprints for AWS Lambda.”
AWS CloudFormation support
Lambda authorizers for HTTP APIs are configured as AWS::ApiGatewayV2::Authorizer CloudFormation resources. Today, they are imported into AWS Serverless Application Model (AWS SAM) applications as native CloudFormation resources.
LambdaAuthorizer:
    Type: 'AWS::ApiGatewayV2::Authorizer'
    Properties:
    Name: LambdaAuthorizer
    ApiId: !Ref HttpApi
    AuthorizerType: REQUEST
    AuthorizerUri: arn:aws:apigateway:{region}:lambda:path/2015-03-31/functions/arn:aws:lambda: {region}:{account id}:function:{Function name}/invocations
    IdentitySource:
        - $request.header.Authorization
    AuthorizerPayloadFormatVersion: 2.0
Conclusion
IAM and Lambda authorizers are two of the most requested features for Amazon API Gateway HTTP APIs. You can now use IAM authorization in a similar way to API Gateway REST APIs. Lambda authorizers for HTTP APIs offer the option of a simpler Boolean response with the new version 2.0 payload and response format. You configure identity sources to specify the location of data that’s required to authorize a request, which are also used as the cache key.
These authorizers are generally available in all AWS Regions where API Gateway is available. To learn more about options for protecting your APIs, you can read the documentation. For more information about Amazon API Gateway, visit the product page.
For the latest blogs, videos, and training for AWS Serverless, see https://serverlessland.com/.


