Post Syndicated from Jeff Barr original https://aws.amazon.com/blogs/aws/new-cloud-ngfw-for-aws/
In 2018 I wrote about AWS Firewall Manager (Central Management for Your Web Application Portfolio) and showed you how you could host multiple applications, perhaps spanning multiple AWS accounts and regions, while maintaining centralized control over your organization’s security settings and profile. In the same way that Amazon Relational Database Service (RDS) supports multiple database engines, Firewall Manager supports multiple types of firewalls: AWS Web Application Firewall, AWS Shield Advanced, VPC security groups, AWS Network Firewall, and Amazon Route 53 DNS Resolver DNS Firewall.
Cloud NGFW for AWS
Today we are introducing support for Palo Alto Networks Cloud NGFW in Firewall Manager. You can now use Firewall Manager to centrally provision & manage your Cloud next-generation firewall resources (also called NGFWs) and monitor for non-compliant configurations, all across multiple accounts and Virtual Private Clouds (VPCs). You get the best-in-class security features offered by Cloud NGFW as a managed service wrapped inside a native AWS experience, with no hardware hassles, no software upgrades, and pay-as-you-go pricing. You can focus on keeping your organization safe and secure, even as you add, change, and remove AWS resources.
Palo Alto Networks pioneered the concept of deep packet inspection in their NGFWs. Cloud NGFW for AWS can decrypt network packets, look inside, and then identify applications using signatures, protocol decoding, behavioral analysis, and heuristics. This gives you the ability to implement fine-grained, application-centric security management that is more effective than simpler models that are based solely on ports, protocols, and IP addresses. Using Advanced URL Filtering, you can create rules that take advantage of curated lists of sites (known as feeds) that distribute viruses, spyware, and other types of malware, and you have many other options for identifying and handling desirable and undesirable network traffic. Finally, Threat Prevention stops known vulnerability exploits, malware, and command-and-control communication.
The integration lets you choose the deployment model that works best with your network architecture:
Centralized – One firewall running in a centralized “inspection” VPC.
Distributed – Multiple firewalls, generally one for each VPC within the scope managed by Cloud NGFW for AWS.
Cloud NGFW protects outbound, inbound, and VPC-to-VPC traffic. We are launching with support for all traffic directions.
AWS Inside
In addition to centralized provisioning and management via Firewall Manager, Cloud NGFW for AWS makes use of many other parts of AWS. For example:
AWS Marketplace – The product is available in SaaS form on AWS Marketplace with pricing based on hours of firewall usage, traffic processed, and security features used. Cloud NGFW for AWS is deployed on a highly available compute cluster that scales up and down with traffic.
AWS Organizations – To list and identify new and existing AWS accounts and to drive consistent, automated cross-account deployment.
AWS Identity and Access Management (IAM) – To create cross-account roles for Cloud NGFW to access log destinations and certificates in AWS Secrets Manager.
AWS Config – To capture changes to AWS resources such as VPCs, VPC route configurations, and firewalls.
AWS CloudFormation – To run a StackSet that onboards each new AWS account by creating the IAM roles.
Amazon S3, Amazon CloudWatch, Amazon Kinesis – Destinations for log files and records.
Gateway Load Balancer – To provide resiliency, scale, and availability for the NGFWs.
AWS Secrets Manager – To store SSL certificates in support of deep packet inspection.
Cloud NGFW for AWS Concepts
Before we dive in and set up a firewall, let’s review a few important concepts:
Tenant – An installation of Cloud NGFW for AWS associated with an AWS customer account. Each purchase from AWS Marketplace creates a new tenant.
NGFW – A firewall resource that spans multiple AWS Availability Zones and is dedicated to a single VPC.
Rulestack – A set of rules that defines the access controls and threat protections for one or more NGFWs.
Global Rulestack – Represented by an FMS policy, contains rules that apply to all of the NGFWs in an AWS Organization.
Getting Started with Cloud NGFW for AWS
Instead of my usual step-by-step walk-through, I am going to show you the highlights of the purchasing and setup process. For a complete guide, read Getting Started with Cloud NGFW for AWS.
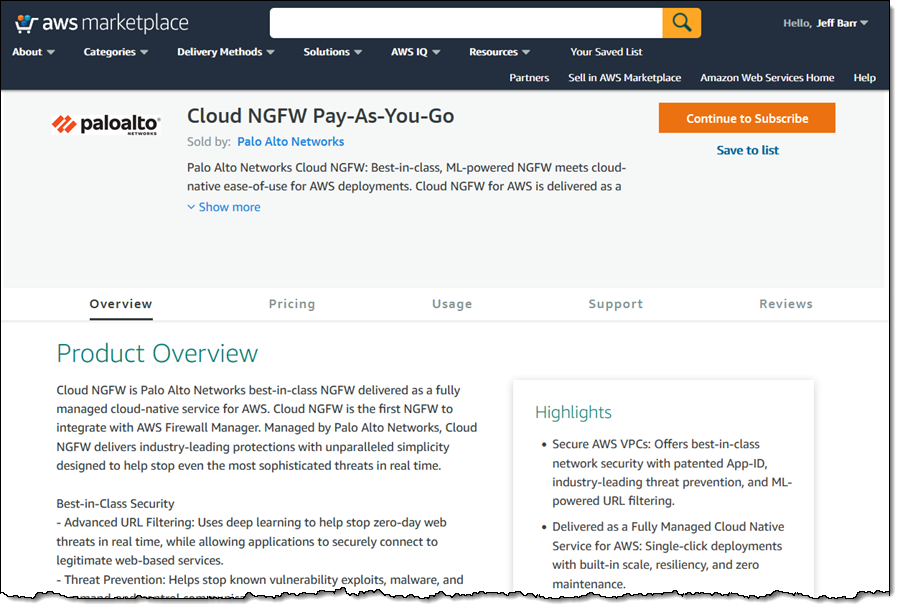
I start by visiting the Cloud NGFW Pay-As-You-Go listing in AWS Marketplace. I review the pricing and terms, click Continue to Subscribe, and proceed through the subscription process.

After I subscribe, Cloud NGFW for AWS will send me an email with temporary credentials for the Cloud NGFW console. I use the credential to log in, and then I replace the temporary password with a long-term one:

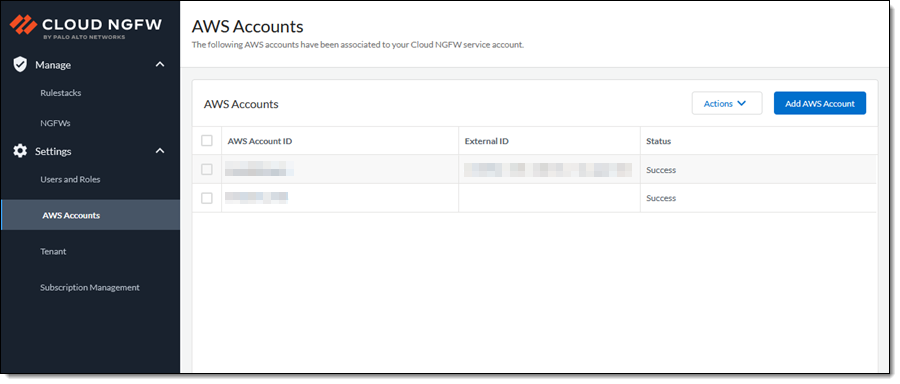
I click Add AWS Account and enter my AWS account Id. The console will show my account and any others that I subsequently add:

The NGFW console redirects me to the AWS CloudFormation console and prompts me to create a stack. This stack sets up cross-account IAM roles, designates (but does not create) logging destinations, and lets Cloud NGFW access certificates in Secrets Manager for packet decryption.
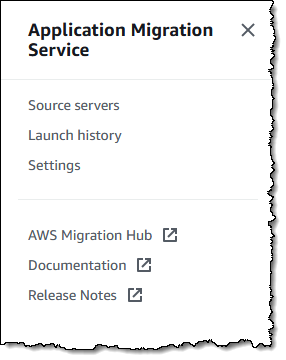
From here, I proceed to the AWS Firewall Manager console and click Settings. I can see that my cloud NGFW tenant is ready to be associated with my account. I select the radio button next to the name of the firewall, in this case “Palo Alto Networks Cloud NGFW” and then click the Associate button. Note that the subscription status will change to Active in a few minutes.

Once the NGFW tenant is associated with my account I return to the AWS Firewall Manager console and click Security policies to proceed. There are no policies yet, and I click Create policy to make one:

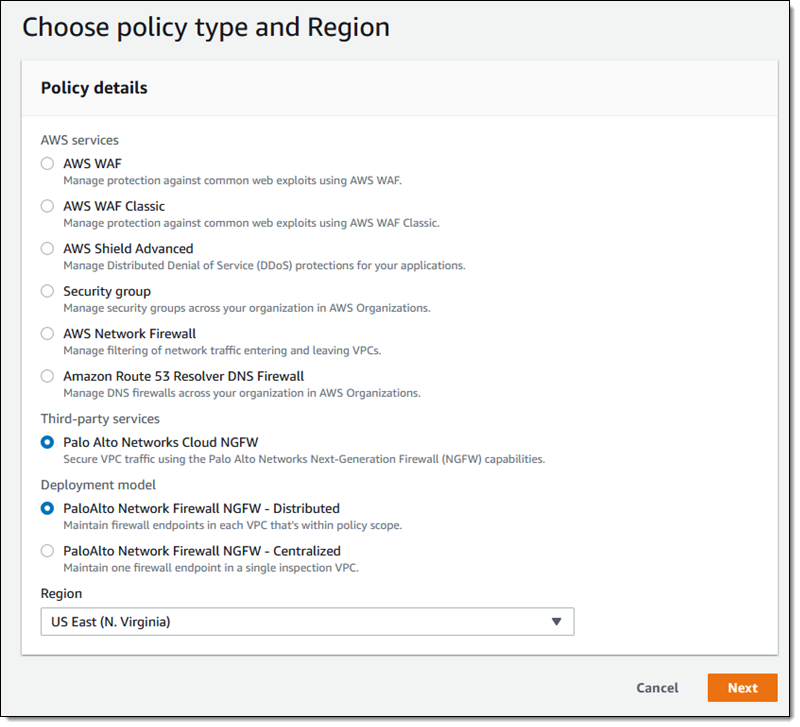
I select Palo Alto Networks Cloud NGFW, choose the Distributed model, pick an AWS region, and click Next to proceed (this model will create a Cloud NGFW endpoint in each in-scope VPC):

I enter a name for my policy (Distributed-1), and select one of the Cloud NGFW firewall policies that are available to my account. I can also click Create firewall policy to navigate to the Palo Alto Networks console and step through the process of creating a new policy. Today I select grs-1:

I have many choices and options when it comes to logging. Each of the three types of logs (Traffic, Decryption, and Threat) can be routed to an S3 bucket, a CloudWatch log group, or a Kinesis Firehose delivery stream. I choose an S3 bucket and click Next to proceed:

Now I choose the Availability Zones where I need endpoints. I have the option to select by name or by ID, and I can optionally designate a CIDR block within each AZ that will be used for the subnets:

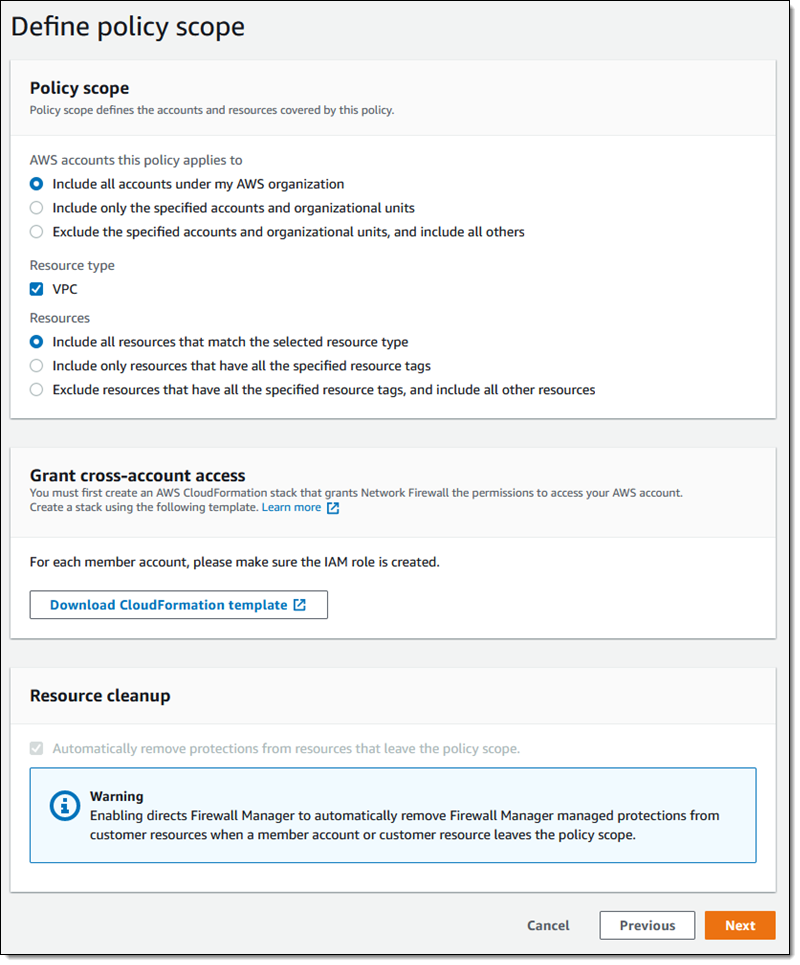
The next step is to choose the scope: the set of accounts and resources that are covered by this policy. As I noted earlier, this feature works hand-in-hand with AWS Organizations and gives me multiple options to choose from:
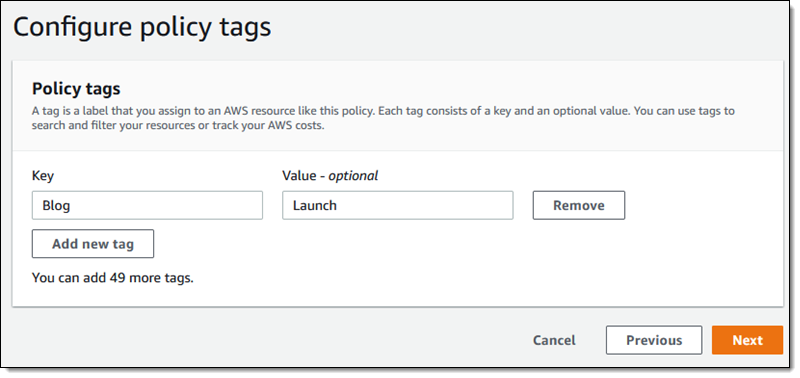
The CloudFormation template linked above is used to create an essential IAM role in each member account. When I run it, I will need to supply values for the CloudNGFW Account ID and ExternalId parameters, both of which are available from within the Palo Alto Networks console. On the next page I can tag my newly created policy:

On the final page I review and confirm all of my choices, and click Create policy to do just that:

My policy is created right away, and it will start to list the in-scope accounts within minutes. Under the hood, AWS Firewall Manager calls Cloud NGFW APIs to create NGFWs for the VPCs in my in-scope accounts, and the global rules are automatically associated with the created NGFWs. When the NGFWs are ready to process traffic, AWS Firewall Manager creates the NGFW endpoints in the subnets.
As new AWS accounts join my organization, AWS Firewall Manager automatically ensures they are compliant by creating new NGFWs as needed.

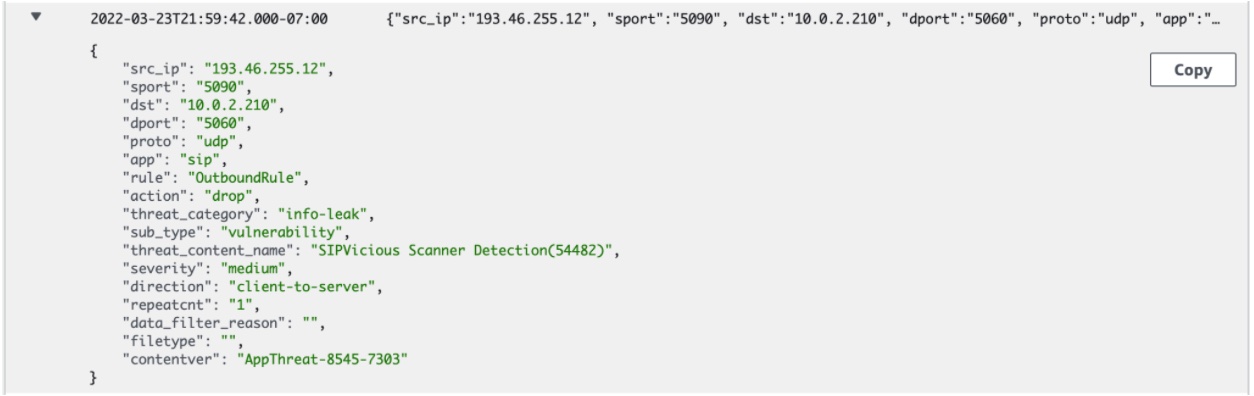
Next I review the Cloud NGFW threat logs to see what threats are being blocked by Cloud NGFW. In this example Cloud NGFW protected my VPC against SIPVicious scanning activity:

And in this example, Cloud NGFW protected my VPC against a malware download:

Things to Know
Both AWS Firewall Manager and Cloud NGFW are regional services and my AWS Firewall Manager policy is therefore regional. Cloud NGFW is currently available in the US East (N. Virginia) and US West (N. Califormia) Regions, with plans to expand in the near future.
— Jeff;


 As you may have already read, we recently sent an


 Ten years ago we launched


 We launched
 This team came together to build a best-in-class gene-editing prediction platform. CRISPR (


 Faster is always better, and today I am thrilled to be able to tell you that your latency-sensitive EFS workloads can now run about twice as fast as before!