Post Syndicated from Brian Carlson original https://aws.amazon.com/blogs/devops/choosing-well-architected-ci-cd-open-source-software-aws-services/
This series of posts discusses making informed decisions when choosing to implement open-source tools on AWS services, adopt managed AWS services to satisfy the same needs, or use a combination of both.
We look at key considerations for evaluating open-source software and AWS services using the perspectives of a startup company and a mature company as examples. You can use these two different points of view to compare to your own organization. To make this investigation easier we will use Continuous Integration (CI) and Continuous Delivery (CD) capabilities as the target of our investigation.

In two related posts, we follow two AWS customers, Iponweb and BigHat Biosciences, as they share their CI/CD journeys, their perspectives, the decisions they made, and why. To end the series, we explore an example reference architecture showing the benefits AWS provides regardless of your emphasis on open-source tools or managed AWS services.
Why CI/CD?
Until your creations are in the hands of your customers, investment in development has provided no return. The faster valuable changes enter production, the greater positive impact you can have on your customer. In today’s highly competitive world, the ability to frequently and consistently deliver value is a competitive advantage. The Operational Excellence (OE) pillar of the AWS Well-Architected Framework recognizes this impact and focuses on the capabilities of CI/CD in two dedicated sections.
The concepts in CI/CD originate from software engineering but apply equally to any form of content. The goal is to support development, integration, testing, deployment, and delivery to production. For example, making changes to an application, updating your machine learning (ML) models, changing your multimedia assets, or referring to the AWS Well-Architected Framework.
Adopting CI/CD and the best practices from the Operational Excellence pillar can help you address risks in your environment, and limit errors from manual processes. More importantly, they help free your teams from the related manual processes, so they can focus on satisfying customer needs, differentiating your organization, and accelerating the flow of valuable changes into production.

How do you decide what you need?
The first question in the Operational Excellence pillar is about understanding needs and making informed decisions. To help you frame your own decision-making process, we explore key considerations from the perspective of a fictional startup company and a fictional mature company. In our two related posts, we explore these same considerations with Iponweb and BigHat.
The key considerations include:
- Functional requirements – Providing specific features and capabilities that deliver value to your customers.
- Non-functional requirements – Enabling the safe, effective, and efficient delivery of the functional requirements. Non-functional requirements include security, reliability, performance, and cost requirements.
- Without security, you can’t earn customer trust. If your customers can’t trust you, you won’t have customers.
- Without reliability you aren’t available to serve your customers. If you can’t serve your customers, you won’t have customers.
- Performance is focused on timely and efficient delivery of value, not delivering as fast as possible.
- Cost is focused on optimizing the value received for the resources spent (for example, money, time, or effort), not minimizing expense.
- Operational requirements – Enabling you to effectively and efficiently support, maintain, sustain, and improve the delivery of value to your customers. When you “Design with Ops in Mind,” you’re enabling effective and efficient support for your business outcomes.
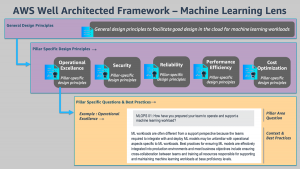
These non-feature-related key considerations are why Operational Excellence, Security, Reliability, Performance Efficiency, and Cost Optimization are the five pillars of the AWS Well-Architected Framework.
The startup company
Any startup begins as a small team of inspired people working together to realize the unique solution they believe solves an unsolved problem.
For our fictional small team, everyone knows each other personally and all speak frequently. We share processes and procedures in discussions, and everyone know what needs to be done. Our team members bring their expertise and dedicate it, and the majority of their work time, to delivering our solution. The results of our efforts inform changes we make to support our next iteration.
However, our manual activities are error-prone and inconsistencies exist in the way we do them. Performing these tasks takes time away from delivering our solution. When errors occur, they have the potential to disrupt everyone’s progress.
We have capital available to make some investments. We would prefer to bring in more team members who can contribute directly to developing our solution. We need to iterate faster if we are to achieve a broadly viable product in time to qualify for our next round of funding. We need to decide what investments to make.
- Goals – Reach the next milestone and secure funding to continue development
- Needs – Reduce or eliminate the manual processes and associated errors
- Priority – Rapid iteration
- CI/CD emphasis – Baseline CI/CD capabilities and non-functional requirements are emphasized over a rich feature set
The mature company
Our second fictional company is a large and mature organization operating in a mature market segment. We’re focused on consistent, quality customer experiences to serve and retain our customers.
Our size limits the personal relationships between our service and development teams. The process to make requests, and the interfaces between teams and their systems, are well documented and understood.
However, the systems we have implemented over time, as needs were identified and addressed, aren’t well documented. Our existing tool chain includes some in-house scripting and both supported and unsupported versions of open-source tools. There are limited opportunities for us to acquire new customers.
When conditions change and new features are desired, we want to be able to rapidly implement and deploy those features as fast as possible. If we can differentiate our services, however briefly, we may be able to win customers away from our competitors. Our other path to improved profitability is to evolve our processes, maximizing integration and efficiencies, and capturing cost reductions.
- Goals – Differentiate ourselves in the marketplace with desired new features
- Needs – Address the risks of poorly documented systems and unsupported software
- Priority – Evolve efficiency
- CI/CD emphasis – Rich feature set and integrations are emphasized over improving the existing non-functional capabilities
Open-source tools on AWS vs. AWS services
The choice of open-source tools or AWS service is not binary. You can select the combination of solutions that provides the greatest value. You can implement open-source tools for their specific benefits where they outweigh the costs and operational burden, using underlying AWS services like Amazon Elastic Compute Cloud (Amazon EC2) to host them. You can then use AWS managed services, like AWS CodeBuild, for the undifferentiated features you need, without additional cost or operational burden.

Feature Set
Our fictional organizations both want to accelerate the flow of beneficial changes into production and are evaluating CI/CD alternatives to support that outcome. Our startup company wants a working solution—basic capabilities, author/code, build, and deploy, so that they can focus on development. Our mature company is seeking every advantage—a rich feature set, extensive opportunities for customization, integration capabilities, and fine-grained control.
Open-source tools
Open-source tools often excel at meeting functional requirements. When a new functionality, capability, or integration is desired, any developer can implement it for themselves, and then contribute their code back to the project. As the user community for an open-source project expands the number of use cases and the features identified grows, so does the number of potential solutions and potential contributors. Developers are using these tools to support their efforts and implement new features that provide value to them.
However, features may be released in unsupported versions and then later added to the supported feature set. Non-functional requirements take time and are less appealing because they don’t typically bring immediate value to the product. Non-functional capabilities may lag behind the feature set.
Consider the following:
- Open-source tools may have more features and existing integrations to other tools
- The pace of feature set delivery may be extremely rapid
- The features delivered are those desired and created by the active members of the community
- You are free to implement the features your company desires
- There is no commitment to long-term support for the project or any given feature
- You can implement open-source tools on multiple cloud providers or on premises
- If the project is abandoned, you’re responsible for maintaining your implementation
AWS services
AWS services are driven by customer needs. Services and features are supported by dedicated teams. These customer-obsessed teams focus on all customer needs, with security being their top priority. Both functional and non-functional requirements are addressed with an emphasis on enabling customer outcomes while minimizing the effort they expend to achieve them.
Consider the following:
- The pace of delivery of feature sets is consistent
- The feature roadmap is driven by customer need and customer requests
- The AWS service team is dedicated to support of the service
- AWS services are available on the AWS Cloud and on premises through AWS Outposts

Cost Optimization
Why are we discussing cost after the feature set? Security and reliability are fundamentally more important. Leadership naturally gravitates to following the operational excellence best practice of evaluating trade-offs. Having looked at the potential benefits from the feature set, the next question is typically, “What is this going to cost?” Leadership defines the priorities and allocates the resources necessary (capital, time, effort). We review cost optimization second so that leadership can make a comparison of the expected benefits between CI/CD investments, and investments in other efforts, so they can make an informed decision.
Our organizations are both cost conscious. Our startup is working with finite capital and time. In contrast, our mature company can plan to make investments over time and budget for the needed capital. Early investment in a robust and feature-rich CI/CD tool chain could provide significant advantages towards the startup’s long-term success, but if the startup fails early, the value of that investment will never be realized. The mature company can afford to realize the value of their investment over time and can make targeted investments to address specific short-term needs.
Open-source tools
Open-source software doesn’t have to be purchased, but there are costs to adopt. Open-source tools require appropriate skills in order to be implemented, and to perform management and maintenance activities. Those skills must be gained through dedicated training of team members, team member self-study, or by hiring new team members with the existing skills. The availability of skilled practitioners of open-source tools varies with how popular a tool is and how long it has had an active community. Loss of skilled team members includes the loss of their institutional knowledge and intimacy with the implementation. Skills must be maintained with changes to the tools and as team members join or leave. Time is required from skilled team members to support management and maintenance activities. If commercial support for the tool is desired, it may be available through third-parties at an additional cost.
The time to value of an open-source implementation includes the time to implement and configure the resources and software. Additional value may be realized through investment of time configuring or implementing desired integrations and capabilities. There may be existing community-supported integrations or capabilities that reduce the level of effort to achieve these.
Consider the following:
- No cost to acquire the software.
- The availability of skill practitioners of open-source tools may be lower. Cost (capital and time) to acquire, establish, or maintain skill set may be higher.
- There is an ongoing cost to maintain the team member skills necessary to support the open-source tools.
- There is an ongoing cost of time for team members to perform management and maintenance activities.
- Additional commercial support for open-source tools may be available at additional cost
- Time to value includes implementation and configuration of resources and the open-source software. There may be more predefined community integrations.
AWS services
AWS services are provided pay-as-you-go with no required upfront costs. As of August 2020, more than 400,000 individuals hold active AWS Certifications, a number that grew more than 85% between August 2019 and August 2020.
Time to value for AWS services is extremely short and limited to the time to instantiate or configure the service for your use. Additional value may be realized through the investment of time configuring or implementing desired integrations. Predefined integrations for AWS services are added as part of the service development roadmap. However, there may be fewer existing integrations to reduce your level of effort.
Consider the following:
- No cost to acquire the software; AWS services are pay-as-you-go for use.
- AWS skill sets are broadly available. Cost (capital and time) to acquire, establish, or maintain skill sets may be lower.
- AWS services are fully managed, and service teams are responsible for the operation of the services.
- Time to value is limited to the time to instantiate or configure the service. There may be fewer predefined integrations.
- Additional support for AWS services is available through AWS Support. Cost for support varies based on level of support and your AWS utilization.
Open-source tools on AWS services
Open-source tools on AWS services don’t impact these cost considerations. Migration off of either of these solutions is similarly not differentiated. In either case, you have to invest time in replacing the integrations and customizations you wish to maintain.

Security
Both organizations are concerned about reputation and customer trust. They both want to act to protect their information systems and are focusing on confidentiality and integrity of data. They both take security very seriously. Our startup wants to be secure by default and wants to trust the vendor to address vulnerabilities within the service. Our mature company has dedicated resources that focus on security, and the company practices defense in depth across internal organizations.
The startup and the mature company both want to know whether a choice is safe, secure, and can validate the security of their choice. They also want to understand their responsibilities and the shared responsibility model that applies.
Open-source tools
Open-source tools are the product of the contributors and may contain flaws or vulnerabilities. The entire community has access to the code to test and validate. There are frequently many eyes evaluating the security of the tools. A company or individual may perform a validation for themselves. However, there may be limited guidance on secure configurations. Controls in the implementer’s environment may reduce potential risk.
Consider the following:
- You’re responsible for the security of the open-source software you implement
- You control the security of your data within your open-source implementation
- You can validate the security of the code and act as desired
AWS services
AWS service teams make security their highest priority and are able to respond rapidly when flaws are identified. There is robust guidance provided to support configuring AWS services securely.
Consider the following:
- AWS is responsible for the security of the cloud and the underlying services
- You are responsible for the security of your data in the cloud and how you configure AWS services
- You must rely on the AWS service team to validate the security of the code
Open-source tools on AWS services
Open-source tools on AWS services combine these considerations; the customer is responsible for the open-source implementation and the configuration of the AWS services it consumes. AWS is responsible for the security of the AWS Cloud and the managed AWS services.

Reliability
Everyone wants reliable capabilities. What varies between companies is their appetite for risk, and how much they can tolerate the impact of non-availability. The startup emphasized the need for their systems to be available to support their rapid iterations. The mature company is operating with some existing reliability risks, including unsupported open-source tools and in-house scripts.
The startup and the mature company both want to understand the expected reliability of a choice, meaning what percentage of the time it is expected to be available. They both want to know if a choice is designed for high availability and will remain available even if a portion of the systems fails or is in a degraded state. They both want to understand the durability of their data, how to perform backups of their data, and how to perform recovery in the event of a failure.
Both companies need to determine what is an acceptable outage duration, commonly referred to as a Recovery Time Objective (RTO), and for what quantity of elapsed time it is acceptable to lose transactions (including committing changes), commonly referred to as Recovery Point Objective (RPO). They need to evaluate if they can achieve their RTO and RPO objectives with each of the choices they are considering.
Open-source tools
Open-source reliability is dependent upon the effectiveness of the company’s implementation, the underlying resources supporting the implementation, and the reliability of the open-source software. Open-source tools are the product of the contributors and may or may not incorporate high availability features. Depending on the implementation and tool, there may be a requirement for downtime for specific management or maintenance activities. The ability to support RTO and RPO depends on the teams supporting the company system, the implementation, and the mechanisms implemented for backup and recovery.
Consider the following:
- You are responsible for implementing your open-source software to satisfy your reliability needs and high availability needs
- Open-source tools may have downtime requirements to support specific management or maintenance activities
- You are responsible for defining, implementing, and testing the backup and recovery mechanisms and procedures
- You are responsible for the satisfaction of your RTO and RPO in the event of a failure of your open-source system
AWS services
AWS services are designed to support customer availability needs. As managed services, the service teams are responsible for maintaining the health of the services.
Consider the following:
- AWS services are fully managed and service teams are responsible for the health of the services.
- AWS services are designed and implemented to support customer reliability requirements. AWS CodeCommit is specifically designed for high availability. AWS CodeCommit, AWS CodeBuild, AWS CodePipeline, and AWS CodeDeploy are all engineered to exceed 99.9% availability.
- CodeCommit, CodeBuild, CodePipeline, and CodeDeploy use highly durable services, including Amazon S3 and Amazon DynamoDB, to store customer data redundantly across multiple facilities.
Open-source tools on AWS services
Open-source tools on AWS services combine these considerations; the customer is responsible for the open-source implementation (including data durability, backup, and recovery) and the configuration of the AWS services it consumes. AWS is responsible for the health of the AWS Cloud and the managed services.

Performance
What defines timely and efficient delivery of value varies between our two companies. Each is looking for results before an engineer becomes idled by having to wait for results. The startup iterates rapidly based on the results of each prior iteration. There is limited other activity for our startup engineer to perform before they have to wait on actionable results. Our mature company is more likely to have an outstanding backlog or improvements that can be acted upon while changes moves through the pipeline.
Open-source tools
Open-source performance is defined by the resources upon which it is deployed. Open-source tools that can scale out can dynamically improve their performance when resource constrained. Performance can also be improved by scaling up, which is required when performance is constrained by resources and scaling out isn’t supported. The performance of open-source tools may be constrained by characteristics of how they were implemented in code or the libraries they use. If this is the case, the code is available for community or implementer-created improvements to address the limitation.
Consider the following:
- You are responsible for managing the performance of your open-source tools
- The performance of open-source tools may be constrained by the resources they are implemented upon; the code and libraries used; their system, resource, and software configuration; and the code and libraries present within the tools
AWS services
AWS services are designed to be highly scalable. CodeCommit has a highly scalable architecture, and CodeBuild scales up and down dynamically to meet your build volume. CodePipeline allows you to run actions in parallel in order to increase your workflow speeds.
Consider the following:
- AWS services are fully managed, and service teams are responsible for the performance of the services.
- AWS services are designed to scale automatically.
- Your configuration of the services you consume can affect the performance of those services.
- AWS services quotas exist to prevent unexpected costs. You can make changes to service quotas that may affect performance and costs.
Open-source tools on AWS services
Open-source tools on AWS services combine these considerations; the customer is responsible for the open-source implementation (including the selection and configuration of the AWS Cloud resources) and the configuration of the AWS services it consumes. AWS is responsible for the performance of the AWS Cloud and the managed AWS services.

Operations
Our startup company wants to limit its operations burden as much as possible in order to focus on development efforts. Our mature company has an established and robust operations capability. In both cases, they perform the management and maintenance activities necessary to support their needs.
Open-source tools
Open-source tools are supported by their volunteer communities. That support is voluntary, without any obligation or commitment from the users. If either company adopts open-source tools, they’re responsible for the management and maintenance of the system. If they want additional support with an obligation and commitment to support their implementation, third parties may provide commercial support at additional cost.
Consider the following:
- You are responsible for supporting your implementation.
- The open-source community may provide volunteer support for the software.
- There is no commitment to support the software by the open-source community.
- There may be less documentation, or accepted best practices, available to support open-source tools.
- Early adoption of open-source tools, or the use of development builds, includes the chance of encountering unidentified edge cases and unanticipated issues.
- The complexity of an implementation and its integrations may increase the difficulty to support open-source tools. The time to identify contributing factors may be extended by the complexity during an incident. Maintaining a set of skilled team members with deep understanding of your implementation may help mitigate this risk.
- You may be able to acquire commercial support through a third party.
AWS services
AWS services are committed to providing long-term support for their customers.
Consider the following:
- There is long-term commitment from AWS to support the service
- As a managed service, the service team maintains current documentation
- Additional levels of support are available through AWS Support
- Support for AWS is available through partners and third parties
Open-source tools on AWS services
Open-source tools on AWS services combine these considerations. The company is responsible for operating the open-source tools (for example, software configuration changes, updates, patching, and responding to faults). AWS is responsible for the operation of the AWS Cloud and the managed AWS services.
Conclusion
In this post, we discussed how to make informed decisions when choosing to implement open-source tools on AWS services, adopt managed AWS services, or use a combination of both. To do so, you must examine your organization and evaluate the benefits and risks.

Examine your organization
You can make an informed decision about the capabilities you adopt. The insight you need can be gained by examining your organization to identify your goals, needs, and priorities, and discovering what your current emphasis is. Ask the following questions:
- What is your organization trying to accomplish and why?
- How large is your organization and how is it structured?
- How are roles and responsibilities distributed across teams?
- How well defined and understood are your processes and procedures?
- How do you manage development, testing, delivery, and deployment today?
- What are the major challenges your organization faces?
- What are the challenges you face managing development?
- What problems are you trying to solve with CI/CD tools?
- What do you want to achieve with CI/CD tools?
Evaluate benefits and risk
Armed with that knowledge, the next step is to explore the trade-offs between open-source options and managed AWS services. Then evaluate the benefits and risks in terms of the key considerations:
- Features
- Cost
- Security
- Reliability
- Performance
- Operations
When asked “What is the correct answer?” the answer should never be “It depends.” We need to change the question to “What is our use case and what are our needs?” The answer will emerge from there.
Make an informed decision
A Well-Architected solution can include open-source tools, AWS Services, or any combination of both! A Well-Architected choice is an informed decision that evaluates trade-offs, balances benefits and risks, satisfies your requirements, and most importantly supports the achievement of your business outcomes.
Read the other posts in this series and take this journey with BigHat Biosciences and Iponweb as they share their perspectives, the decisions they made, and why.
Resources
Want to learn more? Check out the following CI/CD and developer tools on AWS:
Continuous integration (CI)
Continuous delivery (CD)
AWS Developer Tools
For more information about the AWS Well-Architected Framework, refer to the following whitepapers:
AWS Well-Architected Framework
AWS Well-Architected Operational Excellence pillar
AWS Well-Architected Security pillar
AWS Well-Architected Reliability pillar
AWS Well-Architected Performance Efficiency pillar
AWS Well-Architected Cost Optimization pillar

Author bio
 |
Brian is the global Operational Excellence lead for the AWS Well-Architected program. Formerly the technical lead for an international network, Brian works with customers and partners researching the operations best practices with the greatest positive impact and produces guidance to help you achieve your goals. |