Tag Archives: Permissions

Manage roles and entitlements with PBAC using Amazon Verified Permissions

Post Syndicated from Abhishek Panday original https://aws.amazon.com/blogs/devops/manage-roles-and-entitlements-with-pbac-using-amazon-verified-permissions/

Traditionally, customers have used role-based access control (RBAC) to manage entitlements within their applications. The application controls what users can do, based on the roles they are assigned. But, the drive for least privilege has led to an exponential growth in the number of roles. Customers can address this role explosion by moving authorization logic out of the application code, and implementing a policy-based access control (PBAC) model that augments RBAC with attribute-based access control (ABAC).

In this blog post, we cover roles and entitlements, how they are applicable in apps authorization decisions, how customers implement roles and authorization in their app today, and how to shift to a centralized PBAC model by using Amazon Verified Permissions.

Describing roles and entitlements, approaches and challenges of current implementations

In RBAC models, a user’s entitlements are assigned based on job role. This role could be that of a developer, which might grant permissions to affect code in the pipeline of an app. Entitlements represent the features, functions, and resources a user has permissions to access. For example, a customer might be able to place orders or view pets in a pet store application, or a store owner might be entitled to review orders made from their store.

The combination of roles assigned to a user and entitlements granted to these roles determines what a human user can do within your application. Traditionally, application access has all been handled in code by hard coding roles that users can be assigned and mapping those roles directly to a set of actions on resources. However, as the need to apply more granular access control grows (as with least privilege), so do the number of required hard-coded roles that are assigned to users to obtain this level of granularity. This problem is frequently called role explosion, where role definitions grow exponentially which requires additional overhead from your teams to manage and audit roles effectively. For example, the code to authorize request to get details of an order has multiple if/else statements, as shown in the following sample.


boolean userAuthorizedForOrder (Order order, User user){
    if (user.storeId == user.storeID) {
        if (user.roles.contains("store-owner-roles") {            // store owners can only access orders for their own stores  
            return true; 
        } else if (user.roles.contains("store-employee")) {
            if (isStoreOpen(current_time)) {                      // Only allow access for the order to store-employees when
                return true                                       // store is open 
            }
        }
    } else {
        if (user.roles("customer-service-associate") &&           // Only allow customer service associates to orders for cases 
                user.assignedShift(current_time)) &&              // they are assinged and only during their assigned shift
                user.currentCase.order.orderId == order.orderId
         return true;
    }
    return false; 
}

This problem introduces several challenges. First, figuring out why a permission was granted or denied requires a closer look at the code. Second, adding a permission requires code changes. Third, audits can be difficult because you either have to run a battery of tests or explore code across multiple files to demonstrate access controls to auditors. Though there might be additional considerations, these three challenges have led many app owners to begin looking at PBAC methods to address the granularity problem. You can read more about the foundations of PBAC models in Policy-based access control in application development with Amazon Verified Permissions. By shifting to a PBAC model, you can reduce role growth to meet your fine-grained permissions needs. You can also externalize authorization logic from code, develop granular permissions based on roles and attributes, and reduce the time that you spend refactoring code for changes to authorization decisions or reading through the code to audit authorization logic.

In this blog, we demonstrate implementing permissions in a PBAC model through a demo application. The demo application uses Cognito groups to manage role assignment, Verified Permissions to implement entitlements for the roles. The approach restricts the resources that a role can access using attribute-based conditions. This approach works well in usecases when you already have a system in place to manage role assignment and you can define resources that a user may access by matching attributes of the user with attributes of the resource.

Demo app

Let’s look at a sample pet store app. The app is used by 2 types of users – end users and store owners. The app enables end users to search and order pets. The app allows store owners to list orders for the store. This sample app is available for download and local testing on the aws-samples/avp-petstore-sample Github repository. The app is a web app built by using AWS Amplify, Amazon API-Gateway, Amazon Cognito, and Amazon Verified Permissions. The following diagram is a high-level illustration of the app’s architecture.

Architectural Diagram

Steps

  1. The user logs in to the application, and is re-directed to Amazon Cognito to sign-in and obtain a JWT token.
  2. When user take an action (eg. ListOrders) in the application, the application calls Amazon API-Gateway to process the request.
  3. Amazon API-Gateway forwards the request to a lambda function, that call Amazon Verified Permissions to authorize the action. If the authorization results in deny, the lambda returns Unauthorized back to the application.
  4. If the authorization succeed, the application continues to execute the action.

RBAC policies in action

In this section, we focus on building RBAC permissions for the sample pet store app. We will guide you through building RBAC by using Verified Permissions and by focusing on a role for store owners, who are allowed to view all orders for a store. We use Verified Permissions to manage the permissions granted to this role and Amazon Cognito to manage role assignments.

We model the store owner role in Amazon Cognito as a user group called Store-Owner-Role. When a user is assigned the store owner role, the user is added to the “Store-Owner-Role” user group. You can create the users and users groups required to follow along with the sample application by visiting managing users and groups in Amazon Cognito.

After users are assigned to the store owner role, you can enforce that they can list all orders in the store by using the following RBAC policy. The policy provides access to any user in the Store-Owner-Role to perform the ListOrders and GetStoreInventory actions on any resource.

permit (
         principal in MyApplication::Group::"Store-Owner-Role",
         action in [
              MyApplication::Action::"GetStoreInventory",
              MyApplication::Action::"ListOrders"
         ],
         resource
);

Based on the policy we reviewed – the store owner will receive a Success! when they attempt to list existing orders.

Eve is permitted to list orders

This example further demonstrates the division of responsibility between the identity provider (Amazon Cognito) and Verified Permissions. The identity provider (IdP) is responsible for managing roles and memberships in roles. Verified Permissions is responsible for managing policies that describe what those roles are permitted to do. As demonstrated above, you can use this process to add roles without needing to change code.

Using PBAC to help reduce role explosion

Up until the point of role explosion, RBAC has worked well as the sole authorization model. Unfortunately, we have heard from customers that this model does not scale well because of the challenge of role explosion. Role explosion happens when you have hundreds or thousands of roles, and managing and auditing those roles becomes challenging. In extreme cases, you might have more roles than the number of users in your organization. This happens primarily because organizations keep creating more roles, with each role granting access to a smaller set of resources in an effort to follow the principle of least privilege.

Let’s understand the problem of role explosion through our sample pet store app. The pet store app is now being sold as a SaaS product to pet stores in other locations. As a result, the app needs additional access controls to ensure that each store owner can view only the orders from their own store. The most intuitive way to implement these access controls was to create an additional role for each location, which would restrict the scope of access for a store owner to their respective store’s orders. For example, a role named petstore-austin would allow access only to resources in the Austin, Texas store. RBAC models allow developers to predefine sets of permissions that can be used in an application, and ABAC models allow developers to adapt those permissions to the context of the request (such as the client, the resource, and the method used). The adoption of both RBAC and ABAC models leads to an explosion of either roles or attribute-based rules as the number of store locations increases.

To solve this problem, you can combine RBAC and ABAC policies into a PBAC model. RBAC policies determines the actions the user can take. Augmenting these policies with ABAC policies allows you to control the resouces they can take those actions on. For example, you can scope down the resources a user can access based on identity attributes, such as department or business unit, region, and management level. This approach mitigates role explosion because you need to have only a small number of predefined roles, and access is controlled based on attributes. You can use Verified Permissions to combine RBAC and ABAC models in the form of Cedar policies to build this PBAC solution.

We can demonstrate this solution in the sample pet store app by modifying the policy we created earlier and adding ABAC conditions. The conditions specify that users can only ListOrders of the store they own. The store a store owner owns is represented in Amazon Cognito by employmentStoreCode. This policy now expands on the granularity of access of the original RBAC policy without leading to numerous RBAC policies.

permit (
         principal in MyApplication::Group::"Store-Owner-Role",
         action in [
              MyApplication::Action::"GetStoreInventory",
              MyApplication::Action::"ListOrders"
          ],
          resource
) when { 
          principal.employmentStoreCode == resource.storeId 
};

We demonstrate that our policy restricts access for store owners to the store they own, by creating a user – eve – who is assigned the Store-Owner-Role and owns petstore-london. When Eve lists orders for the petstore-london store, she gets a success response, indicating she has permissions to list orders.
Eve is permitted to list orders for petstore-london

Next, when even tries to list orders for the petstore-seattle store, she gets a Not Authorized response. She is denied access as she does not own petstore-seattle.

Eve is not permitted to list orders for petstore-seattle

Step-by-step walkthrough of trying the Demo App

If you want to go through the demo of our sample pet store app, we recommend forking it from aws-samples/avp-petstore-sample Github repo and going through this process in README.md to ensure hands-on familiarity.

We will first walk through setting up permissions using only RBAC for the sample pet store application. Next, we will see how you can use PBAC to implement least priveledge as the application scales.

Implement RBAC based Permissions

We describe setting up policies to implement entitlements for the store owner role in Verified Permissions.

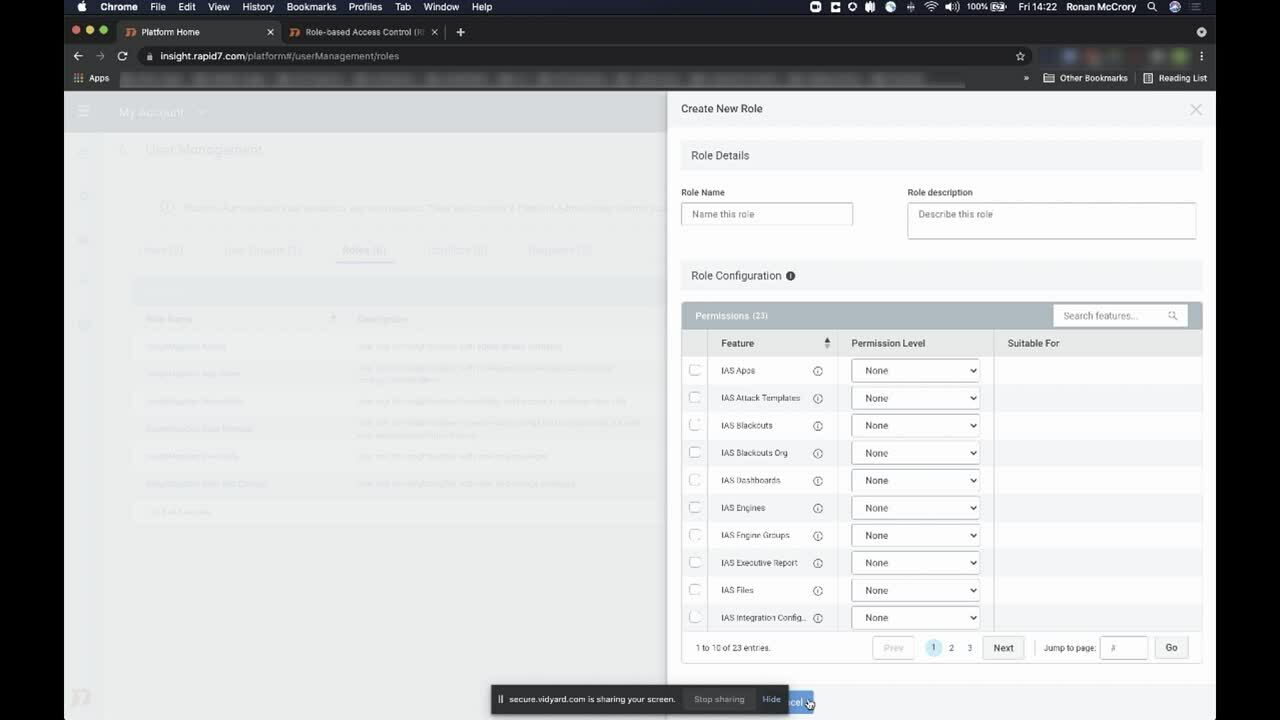
    1. Navigate to the AWS Management Console, search for Verified Permissions, and select the service to go to the service page.
    2. Create new policy store to create a container for your policies. You can create an Empty Policy Store for the purpose of the walk-through.
    3. Navigate to Policies in the navigation pane and choose Create static policy.
    4. Select Next and paste in the following Cedar policy and select Save.
permit (
        principal in MyApplication::Group::"Store-Owner-Role",
        action in [
               MyApplication::Action::"GetStoreInventory",
               MyApplication::Action::"ListOrders"
         ],
         resource
);
  1. You need to get users and assign the Store-Owner-Role to them. In this case, you will use Amazon Cognito as the IdP and the role can be assigned there. You can create users and groups in Cognito by following the below steps.
    1. Navigate to Amazon Cognito from the AWS Management Console, and select the user group created for the pet store app.
    2. Creating a user by clicking create user and create a user with user name eve
    3. Navigate to the Groups section and create a group called Store-Owner-Role .
    4. Add eve to the Store-Owner-Role group by clicking Add user to Group, selecting eve and clicking the Add.
  2. Now that you have assigned the Store-Owner-Role to the user, and Verified Permissions has a permit policy granting entitlements based on role membership, you can log in to the application as the user – eve – to test functionality. When choosing List All Orders, you can see the approval result in the app’s output.

Implement PBAC based Permissions

As the company grows, you want to be able to limit GetOrders access to a specific store location so that you can follow least privilege. You can update your policy to PBAC by adding an ABAC condition to the existing permit policy. You can add a condition in the policy that restricts listing orders to only those stores the user owns.

Below is the walk-though of updating the application

    1. Navigate to the Verified Permissions console and update the policy to the below.
permit (
         principal in MyApplication::Group::"Store-Owner-Role",
         action in [
              MyApplication::Action::"GetStoreInventory",
              MyApplication::Action::"ListOrders"
          ],
          resource
) when { 
          principal.employmentStoreCode == resource.storeId 
};
  1. Navigate to the Amazon Cognito console, select the user eve and click “Edit” in the user attributes section to update the “custom:employmentStoreCode”. Set the attribute value to “petstore-london” as eve owns the petstore-london location
  2. You can demonstrate that eve can only list orders of “petstore-london” by following the below steps
    1. We want to make sure that latest changes to the user attributed are passed to the application in the identity token. We will refresh the identity token, by logging out of the app and logging in again as Eve. Navigate back to the application and logout as eve.
    2. In the application, we set the Pet Store Identifier as petstore-london and click the List All Orders. The result is success!, as Eve is authorized to list orders of the store she owns.
    3. Next, we change the Pet Store Identifier to petstore-seattle and and click the List All Orders. The result is Not Authorized, as Eve is authorized to list orders of stores she does not owns.

Clean Up section

You can cleanup the resources that were created in this blog by following these steps.

Conclusion

In this post, we reviewed what roles and entitlements are as well as how they are used to manage user authorization in your app. We’ve also covered RBAC and ABAC policy examples with respect to the demo application, avp-petstore-sample, that is available to you via AWS Samples for hands-on testing. The walk-through also covered our example architecture using Amazon Cognito as the IdP and Verified Permissions as the centralized policy store that assessed authorization results based on the policies set for the app. By leveraging Verified Permissions, we could use PBAC model to define fine-grained access while preventing role explosion. For more information about Verified Permissions, see the Amazon Verified Permissions product details page and Resources page.

Abhishek Panday

Abhishek is a product manager in the Amazon Verified Permissions team. He has been working with the AWS for more than two years, and has been at Amazon for more than five years. Abhishek enjoys working with customers to understand the customer’s challenges and building products to solve those challenges. Abhishek currently lives in Seattle and enjoys playing soccer, hiking, and cooking Indian cuisines.

Jeremy Ware

Jeremy is a Security Specialist Solutions Architect focused on Identity and Access Management. Jeremy and his team enable AWS customers to implement sophisticated, scalable, and secure IAM architecture and Authentication workflows to solve business challenges. With a background in Security Engineering, Jeremy has spent many years working to raise the Security Maturity gap at numerous global enterprises. Outside of work, Jeremy loves to explore the mountainous outdoors participate in sports such as Snowboarding, Wakeboarding, and Dirt bike riding.

How to use customer managed policies in AWS IAM Identity Center for advanced use cases

Post Syndicated from Ron Cully original https://aws.amazon.com/blogs/security/how-to-use-customer-managed-policies-in-aws-single-sign-on-for-advanced-use-cases/

Are you looking for a simpler way to manage permissions across all your AWS accounts? Perhaps you federate your identity provider (IdP) to each account and divide permissions and authorization between cloud and identity teams, but want a simpler administrative model. Maybe you use AWS IAM Identity Center (successor to AWS Single Sign-On) but are running out of room in your permission set policies; or need a way to keep the role models you have while tailoring the policies in each account to reference their specific resources. Or perhaps you are considering IAM Identity Center as an alternative to per-account federation, but need a way to reuse the customer managed policies that you have already created. Great news! Now you can use customer managed policies (CMPs) and permissions boundaries (PBs) to help with these more advanced situations.

In this blog post, we explain how you can use CMPS and PBs with IAM Identity Center to address these considerations. We describe how IAM Identity Center works, how these types of policies work with IAM Identity Center, and how to best use CMPs and PBs with IAM Identity Center. We also show you how to configure and use CMPs in your IAM Identity Center deployment.

IAM Identity Center background

With IAM Identity Center, you can centrally manage access to multiple AWS accounts and business applications, while providing your workplace users a single sign-on experience with your choice of identity system. Rather than manage identity in each account individually, IAM Identity Center provides one place to connect an existing IdP, Microsoft Active Directory Domain Services (AD DS), or workforce users that you create directly in AWS. Because IAM Identity Center integrates with AWS Organizations, it also provides a central place to define your roles, assign them to your users and groups, and give your users a portal where they can access their assigned accounts.

With AWS Identity Center, you manage access to accounts by creating and assigning permission sets. These are AWS Identity and Access Management (IAM) role templates that define (among other things) which policies to include in a role. If you’re just getting started, you can attach AWS managed policies to the permission set. These policies, created by AWS service teams, enable you to get started without having to learn how to author IAM policies in JSON.

For more advanced cases, where you are unable to express policies sufficiently using inline policies, you can create a custom policy in the permission set. When you assign a permission set to users or groups in a specified account, IAM Identity Center creates a role from the template and then controls single sign-on access to the role. During role creation, IAM Identity Center attaches any specified AWS managed policies, and adds any custom policy to the role as an inline policy. These custom policies must be within the 10,240 character IAM quota of inline policies.

IAM provides two other types of custom policies that increase flexibility when managing access in AWS accounts. Customer managed policies (CMPs) are standalone policies that you create and can attach to roles in your AWS accounts to grant or deny access to AWS resources. Permissions boundaries (PBs) provide an advanced feature that specifies the maximum permissions that a role can have. For both CMPs and PBs, you create the custom policy in your account and then attach it to roles. IAM Identity Center now supports attaching both of these to permission sets so you can handle cases where AWS Managed Policies and inline policies may not be enough.

How CMPs and PBs work with IAM Identity Center

Although you can create IAM users to manage access to AWS accounts and resources, AWS recommends that you use roles instead of IAM users for this purpose. Roles act as an identity (sometimes called an IAM principal), and you assign permissions (identity-based policies) to the role. If you use the AWS Management Console or the AWS Command Line Interface to assume a role, you get the permissions of the role that you assumed. With its simpler way to maintain your users and groups in one AWS location and its ability to centrally manage and assign roles, AWS recommends that you use IAM Identity Center to manage access to your AWS accounts.

With this new IAM Identity Center release, you have the option to specify the names of CMPs and one PB in your permission set (role definition). Doing so modifies how IAM Identity Center provisions roles into accounts. When you assign a user or group to a permission set, IAM Identity Center checks the target account to verify that all specified CMPs and the PB are present. If they are all present, IAM Identity Center creates the role in the account and attaches the specified policies. If any of the specified CMPs or the PB are missing, IAM Identity Center fails the role creation.

This all sounds simple enough, but there are important implications to consider.

If you modify the permission set, IAM Identity Center updates the corresponding roles in all accounts to which you assigned the permission set. What is different when using CMPs and PBs is that IAM Identity Center is uninvolved in the creation or maintenance of the CMPs or PBs. It’s your responsibility to make sure that the CMPs and PBs are created and managed in all of the accounts to which you assign permission sets that use the CMPs and PBs. This means that you must be careful in how you name, create, and maintain these policies in your accounts, to avoid unintended consequences. For example, if you do not apply changes to CMPs consistently across all your accounts, the behavior of an IAM Identity Center created role will vary between accounts.

What CMPs do for you

By using CMPs with permission sets, you gain four main benefits:

  1. If you federate to your accounts directly and have CMPs already, you can reuse your CMPs with permission sets in IAM Identity Center. We describe exceptions later in this post.
  2. If you are running out of space in your permission set inline policies, you can add permission sets to increase the aggregate size of your policies.
  3. Policies often need to refer to account-specific resources by Amazon Resource Name (ARN). Designing an inline policy that does this correctly across all your accounts can be challenging and, in some cases, may not be possible. By specifying a CMP in a permission set, you can tailor the CMPs in each of your accounts to reference the resources of the account. When IAM Identity Center creates the role and attaches the CMPs of the account, the policies used by the IAM Identity Center–generated role are now specific to the account. We highlight this example later in this post.
  4. You get the benefit of a central location to define your roles, which gives you visibility of all the policies that are in use across the accounts where you assigned permission sets. This enables you to have a list of CMP and PB names that you should monitor for change across your accounts. This helps you ensure that you are maintaining your policies correctly.

Considerations and best practices

Start simple, avoid complex – If you’re just starting out, try using AWS managed policies first. With managed policies, you don’t need to know JSON policy to get started. If you need more advanced policies, start by creating identity-based inline custom policies in the permission set. These policies are provisioned as inline policies, and they will be identical in all your accounts. If you need larger policies or more advanced capabilities, use CMPs as your next option. In most cases, you can accomplish what you need with inline and customer managed policies. When you can’t achieve your objective using CMPs, use PBs. For information about intended use cases for PBs, see the blog post When and where to use IAM permissions boundaries.

Permissions boundaries don’t constrain IAM Identity Center admins who create permission sets – IAM Identity Center administrators (your staff) that you authorize to create permission sets can create inline policies and attach CMPs and PBs to permission sets, without restrictions. Permissions boundary policies set the maximum permissions of a role and the maximum permissions that the role can grant within an account through IAM only. For example, PBs can set the maximum permissions of a role that uses IAM to create other roles for use by code or services. However, a PB doesn’t set maximum permissions of the IAM Identity Center permission set creator. What does that mean? Suppose you created an IAM Identity Center Admin permission set that has a PB attached, and you assigned it to John Doe. John Doe can then sign in to IAM Identity Center and modify permission sets with any policy, regardless of what you put in the PB. The PB doesn’t restrict the policies that John Doe can put into a permission set.

In short, use PBs only for roles that need to create IAM roles for use by code or services. Don’t use PBs for permission sets that authorize IAM Identity Center admins who create permission sets.

Create and use a policy naming plan – IAM Identity Center doesn’t consider the content of a named policy that you attach to a permission set. If you assign a permission set in multiple accounts, make sure that all referenced policies have the same intent. Failure to do this will result in unexpected and inconsistent role behavior between different accounts. Imagine a CMP named “S3” that grants S3 read access in account A, and another CMP named “S3” that grants S3 administrative permissions over all S3 buckets in account B. A permission set that attaches the S3 policy and is assigned in accounts A and B will be confusing at best, because the level access is quite different in each of the accounts. It’s better to have more specific names, such as “S3Reader” and “S3Admin,” for your policies and ensure they are identical except for the account-specific resource ARNs.

Use automation to provision policies in accounts – Using tools such as AWS CloudFormation stacksets, or other infrastructure-as-code tools, can help ensure that naming and policies are consistent across your accounts. It also helps reduce the potential for administrators to modify policies in undesirable ways.

Policies must match the capabilities of IAM Identity Center – Although IAM Identity Center supports most IAM semantics, there are exceptions:

  1. If you use an identity provider as your identity source, IAM Identity Center passes only PrincipalTag attributes that come through SAML assertions to IAM. IAM Identity Center doesn’t process or forward other SAML assertions to IAM. If you have CMPs or PBs that rely on other information from SAML assertions, they won’t work. For example, IAM Identity Center doesn’t provide multi-factor authentication (MFA) context keys or SourceIdentity.
  2. Resource policies that reference role names or tags as part of trust policies don’t work with IAM Identity Center. You can use resource policies that use attribute-based access control (ABAC). IAM Identity Center role names are not static, and you can’t tag the roles that IAM Identity Center creates from its permission sets.

How to use CMPs with permission sets

Now that you understand permission sets and how they work with CMPs and PBs, let’s take a look at how you can configure a permission set to use CMPs.

In this example, we show you how to use one or more permission sets that attach a CMP that enables Amazon CloudWatch operations to the log group of specified accounts. Specifically, the AllowCloudWatch_permission set attaches a CMP named AllowCloudWatchForOperations. When we assign the permission set in two separate accounts, the assigned users can perform CloudWatch operations against the log groups of the assigned account only. Because the CloudWatch operations policies are in CMPs rather than inline policies, the log groups can be account specific, and you can reuse the CMPs in other permission sets if you want to have CloudWatch operations available through multiple permission sets.

Note: For this blog post, we demonstrate using CMPs by utilizing the IAM Management Console to create policies and assignments. We recommend that after you learn how to do this, you create your policies through automation for production environments. For example, use AWS CloudFormation. The intent of this example is to demonstrate how you can have a policy in two separate accounts that refer to different resources; something that is harder to accomplish using inline policies. The use case itself is not that advanced, but the use of CMPs to have different resources referenced in each account is a more advanced idea. We kept this simple to make it easier to focus on the feature than the use case.

Prerequisites

In this example, we assume that you know how to use the AWS Management Console, create accounts, navigate between accounts, and create customer managed policies. You also need administrative privileges to enable IAM Identity Center and to create policies in your accounts.

Before you begin, enable IAM Identity Center in your AWS Organizations management account in an AWS Region of your choice. You need to create at least two accounts within your AWS Organization. In this example, the account names are member-account and member-account-1. After you set up the accounts, you can optionally configure IAM Identity Center for administration in a delegated member account.

Configure an IAM Identity Center permission set to use a CMP

Follow these four procedures to use a CMP with a permission set:

  1. Create CMPs with consistent names in your target accounts
  2. Create a permission set that references the CMP that you created
  3. Assign groups or users to the permission set in accounts where you created CMPs
  4. Test your assignments

Step 1: Create CMPs with consistent names in your target accounts

In this step, you create a customer managed policy named AllowCloudWatchForOperations in two member accounts. The policy allows your cloud operations users to access a predefined CloudWatch log group in the account.

To create CMPs in your target accounts

  1. Sign into AWS.

    Note: You can sign in to IAM Identity Center if you have existing permission sets that enable you to create policies in member accounts. Alternatively, you can sign in using IAM federation or as an IAM user that has access to roles that enable you to navigate to other accounts where you can create policies. Your sign-in should also give you access to a role that can administer IAM Identity Center permission sets.

  2. Navigate to an AWS Organizations member account.

    Note: If you signed in through IAM Identity Center, use the user portal page to navigate to the account and role. If you signed in by using IAM federation or as an IAM user, choose your sign-in name that is displayed in the upper right corner of the AWS Management Console and then choose switch role, as shown in Figure 1.

    Figure 1: Switch role for IAM user or IAM federation

    Figure 1: Switch role for IAM user or IAM federation

  3. Open the IAM console.
  4. In the navigation pane, choose Policies.
  5. In the upper right of the page, choose Create policy.
  6. On the Create Policy page, choose the JSON tab.
  7. Paste the following policy into the JSON text box. Replace <account-id> with the ID of the account in which the policy is created.

    Tip: To copy your account number, choose your sign-in name that is displayed in the upper right corner of the AWS Management Console, and then choose the copy icon next to the account ID, as shown in Figure 2.

    Figure 2: Copy account number

    Figure 2: Copy account number

    {
        "Version": "2012-10-17",
        "Statement": [
            {
                "Action": [
                    "logs:CreateLogStream",
                    "logs:DescribeLogStreams",
                    "logs:PutLogEvents",
                    "logs:GetLogEvents"
                ],
                "Effect": "Allow",
                "Resource": "arn:aws:logs:us-east-1:<account-id>:log-group:OperationsLogGroup:*"
            },
            {
                "Action": [
                    "logs:DescribeLogGroups"
                ],
                "Effect": "Allow",
                "Resource": "arn:aws:logs:us-east-1:<account-id>:log-group::log-stream:*"
            }
        ]
    }

  8. Choose Next:Tags, and then choose Next:Review.
  9. On the Create Policy/Review Policy page, in the Name field, enter AllowCloudWatchForOperations. This is the name that you will use when you attach the CMP to the permission set in the next procedure (Step 2).
  10. Repeat steps 1 through 7 in at least one other member account. Be sure to replace the <account-id> element in the policy with the account ID of each account where you create the policy. The only difference between the policies in each account is the <account-id> in the policy.

Step 2: Create a permission set that references the CMP that you created

At this point, you have at least two member accounts containing the same policy with the same policy name. However, the ResourceARN in each policy refers to log groups that belong to the respective accounts. In this step, you create a permission set and attach the policy to the permission set. Importantly, you attach only the name of the policy to the permission set. The actual attachment of the policy to the role that IAM Identity Center creates, happens when you assign the permission set to a user or group in Step 3.

To create a permission set that references the CMP

  1. Sign in to the Organizations management account or the IAM Identity Center delegated administration account.
  2. Open the IAM Identity Center console.
  3. In the navigation pane, choose Permission Sets.
  4. On the Select Permission set type screen, select Custom permission Set and choose Next.
    Figure 3: Select custom permission set

    Figure 3: Select custom permission set

  5. On the Specify policies and permissions boundary page, expand the Customer managed policies option, and choose Attach policies.
    Figure 4: Specify policies and permissions boundary

    Figure 4: Specify policies and permissions boundary

  6. For Policy names, enter the name of the policy. This name must match the name of the policy that you created in Step 1. In our example, the name is AllowCloudWatchForOperations. Choose Next.
  7. On the Permission set details page, enter a name for your permission set. In this example, use AllowCloudWatch_PermissionSet. You can alspecify additional details for your permission sets, such as session duration and relay state (these are a link to a specific AWS Management Console page of your choice).
    Figure 5: Permission set details

    Figure 5: Permission set details

  8. Choose Next, and then choose Create.

Step 3: Assign groups or users to the permission set in accounts where you created your CMPs

In the preceding steps, you created a customer managed policy in two or more member accounts, and a permission set with the customer managed policy attached. In this step, you assign users to the permission set in your accounts.

To assign groups or users to the permission set

  1. Sign in to the Organizations management account or the IAM Identity Center delegated administration account.
  2. Open the IAM Identity Center console.
  3. In the navigation pane, choose AWS accounts.
    Figure 6: AWS account

    Figure 6: AWS account

  4. For testing purposes, in the AWS Organization section, select all the accounts where you created the customer managed policy. This means that any users or groups that you assign during the process will have access to the AllowCloudWatch_PermissionSet role in each account. Then, on the top right, choose Assign users or groups.
  5. Choose the Users or Groups tab and then select the users or groups that you want to assign to the permission set. You can select multiple users and multiple groups in this step. For this example, we recommend that you select a single user for which you have credentials, so that you can sign in as that user to test the setup later. After selecting the users or groups that you want to assign, choose Next.
    Figure 7: Assign users and groups to AWS accounts

    Figure 7: Assign users and groups to AWS accounts

  6. Select the permission set that you created in Step 2 and choose Next.
  7. Review the users and groups that you are assigning and choose Submit.
  8. You will see a message that IAM Identity Center is configuring the accounts. In this step, IAM Identity Center creates roles in each of the accounts that you selected. It does this for each account, so it looks in the account for the CMP that you specified in the permission set. If the name of the CMP that you specified in the permission set matches the name that you provided when creating the CMP, IAM Identity Center creates a role from the permission set. If the names don’t match or if the CMP isn’t present in the account to which you assigned the permission set, you see an error message associated with that account. After successful submission, you will see the following message: We reprovisioned your AWS accounts successfully and applied the updated permission set to the accounts.

Step 4: Test your assignments

Congratulations! You have successfully created CMPs in multiple AWS accounts, created a permission set and attached the CMPs by name, and assigned the permission set to users and groups in the accounts. Now it’s time to test the results.

To test your assignments

  1. Go to the IAM Identity Center console.
  2. Navigate to the Settings page.
  3. Copy the user portal URL, and then paste the user portal URL into your browser.
  4. At the sign-in prompt, sign in as one of the users that you assigned to the permission set.
  5. The IAM Identity Center user portal shows the accounts and roles that you can access. In the example shown in Figure 8, the user has access to the AllowCloudWatch_PermissionSet created in two accounts.
    Figure 8: User portal

    Figure 8: User portal

    If you choose AllowCloudWatch_PermissionSet in the member-account, you will have access to the CloudWatch log group in the member-account account. If you choose the role in member-account-1, you will have access to CloudWatch Log group in member-account-1.

  6. Test the access by choosing Management Console for the AllowCloudWatch_PermissionSet in the member-account.
  7. Open the CloudWatch console.
  8. In the navigation pane, choose Log groups. You should be able to access log groups, as shown in Figure 9.
    Figure 9: CloudWatch log groups

    Figure 9: CloudWatch log groups

  9. Open the IAM console. You shouldn’t have permissions to see the details on this console, as shown in figure 10. This is because AllowCloudWatch_PermissionSet only provided CloudWatch log access.
    Figure 10: Blocked access to the IAM console

    Figure 10: Blocked access to the IAM console

  10. Return to the IAM Identity Center user portal.
  11. Repeat steps 4 through 8 using member-account-1.

Answers to key questions

What happens if I delete a CMP or PB that is attached to a role that IAM Identity Center created?
IAM prevents you from deleting policies that are attached to IAM roles.

How can I delete a CMP or PB that is attached to a role that IAM Identity Center created?
Remove the CMP or PB reference from all your permission sets. Then re-provision the roles in your accounts. This detaches the CMP or PB from IAM Identity Center–created roles. If the policies are unused by other IAM roles in your account or by IAM users, you can delete the policy.

What happens if I modify a CMP or PB that is attached to an IAM Identity Center provisioned role?
The IAM Identity Center role picks up the policy change the next time that someone assumes the role.

Conclusion

In this post, you learned how IAM Identity Center works with customer managed policies and permissions boundaries that you create in your AWS accounts. You learned different ways that this capability can help you, and some of the key considerations and best practices to succeed in your deployments. That includes the principle of starting simple and avoiding unnecessarily complex configurations. Remember these four principles:

  1. In most cases, you can accomplish everything you need by starting with custom (inline) policies.
  2. Use customer managed policies for more advanced cases.
  3. Use permissions boundary policies only when necessary.
  4. Use CloudFormation to manage your customer managed policies and permissions boundaries rather than having administrators deploy them manually in accounts.

To learn more about this capability, see the IAM Identity Center User Guide. If you have feedback about this post, submit comments in the Comments section below. If you have questions about this post, start a new thread on the AWS IAM re:Post or contact AWS Support.

Want more AWS Security news? Follow us on Twitter.

Ron Cully

Ron s a Principal Product Manager at AWS where he leads feature and roadmap planning for workforce identity products at AWS. Ron has over 20 years of industry experience in product and program management of networking and directory related products. He is passionate about delivering secure, reliable solutions that help make it easier for customers to migrate directory aware applications and workloads to the cloud.

Nitin Kulkarni

Nitin Kulkarni

Nitin is a Solutions Architect on the AWS Identity Solutions team. He helps customers build secure and scalable solutions on the AWS platform. He also enjoys hiking, baseball and linguistics.

Tags in Zabbix 6.0 LTS – Usage, subfilters and guidelines

Post Syndicated from Andrey Biba original https://blog.zabbix.com/tags-in-zabbix-6-0-lts-usage-subfilters-and-guidelines/19565/

Starting from Zabbix 5.4, item tags have completely replaced applications. This design decision has allowed us to implement many new usability improvements – from providing additional information and classification to the tagged entities, to defining action conditions and security permissions by referencing specific tags and their values. Let’s take a look at how tags are defined in the official Zabbix templates and some of the potential tag use cases when configuring actions and access permissions.

Tag usage in Zabbix 6.0

The outdated “applications” have been replaced by tags, which I wanted to talk about in more detail today.

The main difference between tags and applications is that tags are defined using a name and a value, which greatly expands their scope of usage. Now tags are used in items, triggers, hosts, services, user groups for permission configuration, actions, and more. I am sure that their scope will expand with each new release. 

Due to the structural difference between “applications” and tags, filtering tools had to be adapted. For example, in the “Latest data” section in Zabbix 6.0, sub-filters have been redesigned to support tags and provide granular filtering options. Grouping tags by name allowed to save space and made using sub-filters more intuitive.

To optimize the work with tags, we have developed several standards for different template elements. 

Template

Now each template contains the mandatory class and target tags. Using these tags will allow distribution templates by class, such as application, database, network, etc., and by the target.

Items

Mandatory component tag that describes whether the data element belongs to a particular system or type. If a metric belongs to several types at once, it is necessary to use several component tags to describe the relevant component assignment as best as possible. 

Custom tags are also allowed for low-level discovery data elements using LLD macros. 

Triggers

The scope tag is assigned to the trigger based on the issue type. The general idea is to organize triggers into 5 groups: availability, performance, notification, security and capacity

Hosts

For a host, the service tag is used, which defines a single service or multiple services running on this host. 

Example of tagging on a ClickHouse by HTTP template 

Let’s start with the tags of the template itself. It has class: database and target: clickhouse tags assigned to it. You shouldn’t assign too many tags on the template level, because each of these tags will be inherited by template elements, which can create unnecessary redundancy, and as a result, a “mess” of tags. 

Let’s take a look at a few metrics and triggers from this template.

The “ClickHouse: Check port availability” metric is assigned the component: health and component: network tags, as it contains information about the health of the service and the checks are performed over the network. Problems on this metric can be displayed to the group responsible for the network 

The “ClickHouse: Get information about dictionaries” metric has a tag component: dictionaries because it explicitly refers to dictionaries, and a tag component: raw, because it is a master metric, and dependent metrics get data from it.

The metrics from the low-level discovery “Replicas” rule contain the component: replication, database: {#DB}, and table: {#TABLE} tags. LLD metrics allow custom tags as they allow the use of low-level discovery macros for grouping flexibility. 


Trigger “ClickHouse: Version has changed (new version: {ITEM.VALUE}” with scope: notice tag implies a simple notification that does not contain critical information related to system unavailability and performance. At the same time, trigger “ClickHouse: Port {$CLICKHOUSE. PORT} is unavailable” means the system is unavailable and has the tag scope: availability. 


How to use tags?

As I wrote earlier, right now we are using tags for the majority of Zabbix components, so they become a functional and flexible tool for managing monitoring. One of the latest such implementations is Services – now they can also have tags assigned to them. 

Of course, one of the most obvious use cases is the logical grouping of some elements. This allows filtering triggers and metrics by given parameters.

The next use case is also of significant importance – it’s the extension of the rights management functionality. With the help of tags, it is possible to add a layer of granularity so a Zabbix user can view problems for a particular service. For example, we need to provide access to Nginx servers that are in the Webservers group. To do this, just add the read permissions for the Webservers group in the Permissions section of a User group and select the Webservers group in the Tag Filter section and add the service: nginx tag. You can find more information about user groups on our official Zabbix documentation page.

Using tags in permissions

Let’s look at the use of rights with a practical example. Suppose there are 3 user groups: 

  • Hardware team – a team of administrators that is responsible for hardware 
  • Network team – a team of administrators that is responsible for the network and network hardware
  • Software team – a team of administrators that is responsible for software 

For each group assign the following permissions: 

  • for the Hardware team, set the read permissions for the Hardware group
    • In the tag filters, set the tag and tag value to scope: availability in the tag filter because we want the team to see only availability problems.
  • for the Network team, set the read permissions for the Database, Hardware, Linux servers, Network groups
    • In the tag filters for the Database, Hardware and Linux servers set the tag and tag value to component: network in the tag filter, because for these groups it is necessary to see only problems related to the network.
    • in the tag filters for the Network host group, we have to set “All tags” since we’re interested in seeing all of the problems related to hosts in this host group.
  • for the Software team, set the read permissions for the Databases and Linux servers groups
    • In the tag filters set, the tag and tag value to class: software for each group to see events exclusively related to software. 

With this configuration, each user group will see only those problems that fall under the respective permissions and tag filters. 

Remember, that  a Super admin user will see all of the problems created in Zabbix

While users belonging to User roles of type Administrator or User will see a restricted set of problems based on their permissions:

  • Users from the Hardware team group will only see problems for hosts from the Hardware group and triggers with the tag scope: availability.

  • A user who is in the Network team will see all problems with the component: network tag and all triggers for the Network host group.

  • And users of the Software team only have access to problems with the class: software tag.

Using tags in actions

And of course the use of tags in actions. Pretty often required to set up quite complex conditions which may become confusing and hard to maintain. Tags, as a universal tool, add another entity that you can use when creating actions.

For example, if we want to send notifications about network availability problems with a severity greater than Warning to network administrators, we can specify the following conditions for our action:

  • value of tag class equals network
  • value of tag scope equals availability
  • Trigger severity is greater than or equal to Warning

Questions

Q: Are tags a full-featured replacement for “applications” or are there any downsides? 

A: Of course, they not only replace the functional “applications” but also extend the functionality of using tags in various aspects of Zabbix. 


Q: Is the current implementation of tags finalized or is there more to come?

A: No, we are working every day to improve the experience gained from using Zabbix, and tags in particular, so we are listening to the opinion of the community and adapting the functionality for the best result. If you have any ideas or comments, please use the official Zabbix forum and the Zabbix support portal to share them with us!


Q: Is there a document describing the best practice approach of using tags?

A: Yes, there is a guideline section on the documentation site that contains recommendations for best tags usage in Zabbix.

The post Tags in Zabbix 6.0 LTS – Usage, subfilters and guidelines appeared first on Zabbix Blog.

Solving the Access Goldilocks Problem: RBAC for InsightAppSec Is Here

Post Syndicated from Tom Caiazza original https://blog.rapid7.com/2021/11/01/solving-the-access-goldilocks-problem-rbac-for-insightappsec-is-here/

Solving the Access Goldilocks Problem: RBAC for InsightAppSec Is Here

We’re all familiar with the story of Goldilocks and the Three Bears. Goldilocks starts a new job as a security specialist on the security team at Three Bears’ Porridge, Inc. and is given access to their application security platform.

At first, the access she’s given is far too broad. It causes problems, and she has access to more data than she needs to do her job. By the end of the day, it’s impacted the entire system. The next day, she’s given too little access, preventing her from fully completing her tasks and creating more work for Hansel, Gretel, and the rest of the security team. Finally, after several rounds of granting and restricting permissions, they eventually land on an access level that’s just right.

Does this famous yarn hit a little too close to home?

Getting access control just right

Providing the right access levels to different teams and individual team members is a critical component of managing any security program, but it can be time-consuming, cumbersome, and rife with constant back-and-forth.

That’s why we’re excited to announce a new feature standard for InsightAppSec called Role-Based Access Control (RBAC). Our RBAC system gives you the flexibility to provide the right levels of access to the InsightAppSec platform needed for each role on your security team. By identifying users through groups, you can grant access and permissions quickly and easily, reducing back-and-forth setting up access that may have caused your team more than one porridge hangover.

The InsightAppSec RBAC feature works under a simple premise: scalability. RBAC allows you to create groups with bespoke levels of access based on what they need to actually do their jobs. The role a user is given will govern what they can see in the product in terms of features — for example, can they see the scan configs or vulnerabilities areas? — but their data access will define if they can actually see any data within those areas.

It doesn’t matter if you have a department of 10 or 20 — everyone assigned to designated groups will have the right access parameters to successfully carry out their tasks. Those parameters are easily updated to roll with changes as needed, and they’re fully customizable. With a few clicks, RBAC lets you set the access levels your entire security team needs to operate.

Go for the Goldilocks zone

So, why is this so important? Well, on day one, Goldilocks had far too much access and nearly brought the operation to a screeching halt. Having too many team members with unneeded access invites risk, and cleaning up that mess can be time-consuming and difficult. Similarly, day 2 wasn’t much better. Goldilocks didn’t have the permissions she needed and couldn’t contribute to the team (through no fault of her own). That meant the slack needed to be picked up somewhere, putting stress on the entire team and slowing the operation down.

If Three Bears’ Porridge, Inc. had the new RBAC, Goldilocks and the other members of her team or in her group would have had the permissions they needed from day 1, saving time, headaches, and money.

But the conveniences go further than that. InsightAppSec’s RBAC feature allows you to better partner with the dev team, providing them direct access to their application vulnerability details and context. That means less back-and-forth, less time lost, and a system that will scale with your business.

The RBAC feature allows you to do more than create custom roles. You can control access to applications in bulk with just a few clicks — and with our prebuilt roles, you can use the feature right out of the proverbial box (and customize from there).

This is one of the many features we’ve been working on this year to make your life at work just a little bit safer, more streamlined, and efficient. Current InsightAppSec customers will see that they may already have access to RBAC, and it will be rolled out for other parts of the Insight platform in the coming months. If you’d like to learn more, check out this handy video:

Solving the Access Goldilocks Problem: RBAC for InsightAppSec Is Here

As for Goldilocks, she’s been promoted to security administrator and is dreaming of becoming a CISO. And they lived happily ever after.

NEVER MISS A BLOG

Get the latest stories, expertise, and news about security today.

Build an end-to-end attribute-based access control strategy with AWS SSO and Okta

Post Syndicated from Louay Shaat original https://aws.amazon.com/blogs/security/build-an-end-to-end-attribute-based-access-control-strategy-with-aws-sso-and-okta/

This blog post discusses the benefits of using an attribute-based access control (ABAC) strategy and also describes how to use ABAC with AWS Single Sign-On (AWS SSO) when you’re using Okta as an identity provider (IdP).

Over the past two years, Amazon Web Services (AWS) has invested heavily in making ABAC available across the majority of our services. With ABAC, you can simplify your access control strategy by granting access to groups of resources, which are specified by tags, instead of managing long lists of individual resources. Each tag is a label that consists of a user-defined key and value, and you can use these to assign metadata to your AWS resources. Tags can help you manage, identify, organize, search for, and filter resources. You can create tags to categorize resources by purpose, owner, environment, or other criteria. To learn more about tags and AWS best practices for tagging, see Tagging AWS resources.

The ability to include tags in sessions—combined with the ability to tag AWS Identity and Access Management (IAM) users and roles—means that you can now incorporate user attributes from your identity provider as part of your tagging and authorization strategy. Additionally, user attributes help organizations to make permissions more intuitive, because the attributes are easier to relate to teams and functions. A tag that represents a team or a job function is easier to audit and understand.

For more information on ABAC in AWS, see our ABAC documentation.

Why use ABAC?

ABAC is a strategy that that can help organizations to innovate faster. Implementing a purely role-based access control (RBAC) strategy requires identity and security teams to define a large number of RBAC policies, which can lead to complexity and time delays. With ABAC, you can make use of attributes to build more dynamic policies that provide access based on matching the attribute conditions. AWS supports both RBAC and ABAC as co-existing strategies, so you can use ABAC alongside your existing RBAC strategy.

A good example that uses ABAC is the scenario where you have two teams that require similar access to their secrets in AWS Secrets Manager. By using ABAC, you can build a single role or policy with a condition based on the Department attribute from your IdP. When the user is authenticated, you can pass the Department attribute value and use a condition to provide access to resources that have the identical tag, as shown in the following code snippet. In this post, I show how to use ABAC for this example scenario.

"Condition": {
                "StringEquals": {
                    "secretsmanager:ResourceTag/Department": "${aws:PrincipalTag/Department}"

ABAC provides organizations with a more dynamic way of working with permissions. There are four main benefits for organizations that use ABAC:

  • Scale your permissions as you innovate: As developers create new project resources, administrators can require specific attributes to be applied when resources are created. This can include applying tags with attributes that give developers immediate access to the new resources they create, without requiring an update to their own permissions.
  • Help your teams to change and grow quickly: Because permissions are based on user attributes from a corporate identity source such as an IdP, changing user attributes in the IdP that you use for access control in AWS automatically updates your permissions in AWS.
  • Create fewer AWS SSO permission sets and IAM roles: With ABAC, multiple users who are using the same AWS SSO permission set and IAM role can still get unique permissions, because permissions are now based on user attributes. Administrators can author IAM policies that grant users access only to AWS resources that have matching attributes. This helps to reduce the number of IAM roles you need to create for various use cases in a single AWS account.
  • Efficiently audit who performed an action: By using attributes that are logged in AWS CloudTrail next to every action that is performed in AWS by using an IAM role, you can make it easier for security administrators to determine the identity that takes actions in a role session.

Prerequisites

In this section, I describe some higher-level prerequisites for using ABAC effectively. ABAC in AWS relies on the use of tags for access-control decisions, so it’s important to have in place a tagging strategy for your resources. To help you develop an effective strategy, see the AWS Tagging Strategies whitepaper.

Organizations that implement ABAC can enhance the use of tags across their resources for the purpose of identity access. Making sure that tagging is enforced and secure is essential to an enterprise-wide strategy. For more information about enforcing a tagging policy, see the blog post Enforce Centralized Tag Compliance Using AWS Service Catalog, DynamoDB, Lambda, and CloudWatch Events.

You can use the service AWS Resource Groups to identify untagged resources and to find resources to tag. You can also use Resource Groups to remediate untagged resources.

Use AWS SSO with Okta as an IdP

AWS SSO gives you an efficient way to centrally manage access to multiple AWS accounts and business applications, and to provide users with single sign-on access to all their assigned accounts and applications from one place. With AWS SSO, you can manage access and user permissions to all of your accounts in AWS Organizations centrally. AWS SSO configures and maintains all the necessary permissions for your accounts automatically, without requiring any additional setup in the individual accounts.

AWS SSO supports access control attributes from any IdP. This blog post focuses on how you can use ABAC attributes with AWS SSO when you’re using Okta as an external IdP.

Use other single sign-on services with ABAC

This post describes how to turn on ABAC in AWS SSO. To turn on ABAC with other federation services, see these links:

Implement the solution

Follow these steps to set up Okta as an IdP in AWS SSO and turn on ABAC.

To set up Okta and turn on ABAC

  1. Set up Okta as an IdP for AWS SSO. To do so, follow the instructions in the blog post Single Sign-On Between Okta Universal Directory and AWS. For more information on the supported actions in AWS SSO with Okta, see our documentation.
  2. Enable attributes for access control (in other words, turn on ABAC) in AWS SSO by using these steps:
    1. In the AWS Management Console, navigate to AWS SSO in the AWS Region you selected for your implementation.
    2. On the Dashboard tab, select Choose your identity source.
    3. Next to Attributes for access control, choose Enable.

      Figure 1: Turn on ABAC in AWS SSO

      Figure 1: Turn on ABAC in AWS SSO

    You should see the message “Attributes for access control has been successfully enabled.”

  3. Enable updates for user attributes in Okta provisioning. Now that you’ve turned on ABAC in AWS SSO, you need to verify that automatic provisioning for Okta has attribute updates enabled.Log in to Okta as an administrator and locate the application you created for AWS SSO. Navigate to the Provisioning tab, choose Edit, and verify that Update User Attributes is enabled.

    Figure 2: Enable automatic provisioning for ABAC updates

    Figure 2: Enable automatic provisioning for ABAC updates

  4. Configure user attributes in Okta for use in AWS SSO by following these steps:
    1. From the same application that you created earlier, navigate to the Sign On tab.
    2. Choose Edit, and then expand the Attributes (optional) section.
    3. In the Attribute Statements (optional) section, for each attribute that you will use for access control in AWS SSO, do the following:
      1. For Name, enter https://aws.amazon.com/SAML/Attributes/AccessControl:<AttributeName>. Replace <AttributeName> with the name of the attribute you’re expecting in AWS SSO, for example https://aws.amazon.com/SAML/Attributes/AccessControl:Department.
      2. For Name Format, choose URI reference.
      3. For Value, enter user.<AttributeName>. Replace <AttributeName> with the Okta default user profile variable name, for example user.department. To view the Okta default user profile, see these instructions.


    Figure 3: Configure two attributes for users in Okta

    Figure 3: Configure two attributes for users in Okta

    In the example shown here, I added two attributes, Department and Division. The result should be similar to the configuration shown in Figure 3.

  5. Add attributes to your users by using these steps:
    1. In your Okta portal, log in as administrator. Navigate to Directory, and then choose People.
    2. Locate a user, navigate to the Profile tab, and then choose Edit.
    3. Add values to the attributes you selected.
    Figure 4: Addition of user attributes in Okta

    Figure 4: Addition of user attributes in Okta

  6. Confirm that attributes are mapped. Because you’ve enabled automatic provisioning updates from Okta, you should be able to see the attributes for your user immediately in AWS SSO. To confirm this:
    1. In the console, navigate to AWS SSO in the Region you selected for your implementation.
    2. On the Users tab, select a user that has attributes from Okta, and select the user. You should be able to see the attributes that you mapped from Okta.
    Figure 5: User attributes in Okta

    Figure 5: User attributes in Okta

Now that you have ABAC attributes for your users in AWS SSO, you can now create permission sets based on those attributes.

Note: Step 4 ensures that users will not be successfully authenticated unless the attributes configured are present. If you don’t want this enforcement, do not perform step 4.

Build an ABAC permission set in AWS SSO

For demonstration purposes, I’ll show how you can build a permission set that is based on ABAC attributes for AWS Secrets Manager. The permission set will match resource tags to user tags, in order to control which resources can be managed by Secrets Manager administrators. You can apply this single permission set to multiple teams.

To build the ABAC permission set

  1. In the console, navigate to AWS SSO, and choose AWS Accounts.
  2. Choose the Permission sets tab.
  3. Choose Create permission set, and then choose Create a custom permission set.
  4. Fill in the fields as follows.
    1. For Name, enter a name for your permission set that will be visible to your users, for example, SecretsManager-Profile.
    2. For Description, enter ABAC SecretsManager Profile.
    3. Select the appropriate session duration.
    4. For Relay State, for my example I will enter the URL for Secrets Manager: https://console.aws.amazon.com/secretsmanager/home. This will give a better user experience when the user signs in to AWS SSO, with an automatic redirect to the Secrets Manager console.
    5. For the field What policies do you want to include in your permission set?, choose Create a custom permissions policy.
    6. Under Create a custom permissions policy, paste the following policy.
      {
          "Version": "2012-10-17",
          "Statement": [
              {
                  "Sid": "SecretsManagerABAC",
                  "Effect": "Allow",
                  "Action": [
                      "secretsmanager:DescribeSecret",
                      "secretsmanager:PutSecretValue",
                      "secretsmanager:CreateSecret",
                      "secretsmanager:ListSecretVersionIds",
                      "secretsmanager:UpdateSecret",
                      "secretsmanager:GetResourcePolicy",
                      "secretsmanager:GetSecretValue",
                      "secretsmanager:ListSecrets",
                      "secretsmanager:TagResource"
                  ],
                  "Resource": "*",
                  "Condition": {
                      "StringEquals": {
                          "secretsmanager:ResourceTag/Department": "${aws:PrincipalTag/Department}"
                      }
                  }
              },
              {
                  "Sid": "NeededPermissions",
                  "Effect": "Allow",
                  "Action": [
             "kms:ListKeys",
             "kms:ListAliases",
                      "rds:DescribeDBInstances",
                      "redshift:DescribeClusters",
                      "rds:DescribeDBClusters",
                      "secretsmanager:ListSecrets",
                      "tag:GetResources",
                      "lambda:ListFunctions"
                  ],
                  "Resource": "*"
              }
          ]
      }
      

    This policy grants users the ability to create and list secrets that belong to their department. The policy is configured to allow Secrets Manager users to manage only the resources that belong to their department. You can modify this policy to perform matching on more attributes, in order to have more granular permissions.

    Note: The RDS permissions in the policy enable users to select an RDS instance for the secret and the Lambda Permissions are to enable custom key rotation.

    If you look closely at the condition

    “secretsmanager:ResourceTag/Department”: “${aws:PrincipalTag/Department}”

    …the condition states that the user can only access Secrets Manager resources that have a Department tag, where the value of that tag is identical to the value of the Department tag from the user.

  5. Choose Next: Tags.
  6. Tag your permission set. For my example, I’ll add Key: Service and Value: SecretsManager.
  7. Choose Next: Review and create.
  8. Assign the permission set to a user or group and to the appropriate accounts that you have in AWS Organizations.

Test an ABAC permission set

Now you can test the ABAC permission set that you just created for Secrets Manager.

To test the ABAC permission set

  1. In the AWS SSO console, on the Dashboard page, navigate to the User Portal URL.
  2. Sign in as a user who has the attributes that you configured earlier in AWS SSO. You will assume the permission set that you just created.
  3. Choose Management console. This will take you to the console that you specified in the Relay State setting for the permission set, which in my example is the Secrets Manager console.

    Figure 6: AWS SSO ABAC profile access

    Figure 6: AWS SSO ABAC profile access

  4. Try to create a secret with no tags:
    1. Choose Store a new secret.
    2. Choose Other type of secrets.
    3. You can add any values you like for the other options, and then choose Next.
    4. Give your secret a name, but don’t add any tags. Choose Next.
    5. On the Configure automatic rotation page, choose Next, and then choose Store.

    You should receive an error stating that the user failed to create the secret, because the user is not authorized to perform the secretsmanager:CreateSecret action.

    Figure 7: Failure to create a secret (no attributes)

    Figure 7: Failure to create a secret (no attributes)

  5. Choose Previous twice, and then add the appropriate tag. For my example, I’ll add a tag with the key Department and the value Serverless.

    Figure 8: Adding tags for a secret

    Figure 8: Adding tags for a secret

  6. Choose Next twice, and then choose Store. You should see a message that your secret creation was successful.

    Figure 9: Successful secret creation

    Figure 9: Successful secret creation

Now administrators who assume this permission set can view, create, and manage only the secrets that belong to their team or department, based on the tags that you defined. You can reuse this permission set across a large number of teams, which can reduce the number of permission sets you need to create and manage.

Summary

In this post, I’ve talked about the benefits organizations can gain from embracing an ABAC strategy, and walked through how to turn on ABAC attributes in Okta and AWS SSO. I’ve also shown how you can create ABAC-driven permission sets to simplify your permission set management. For more information on AWS services that support ABAC—in other words, authorization based on tags—see our updated AWS services that work with IAM page.

If you have feedback about this blog post, submit comments in the Comments section below. If you have questions about this post, start a new thread on the AWS Single Sign-On forum.

Want more AWS Security how-to content, news, and feature announcements? Follow us on Twitter.

Author

Louay Shaat

Louay is a Security Solutions Architect with AWS. He spends his days working with customers, from startups to the largest of enterprises helping them build cool new capabilities and accelerating their cloud journey. He has a strong focus on security and automation helping customers improve their security, risk, and compliance in the cloud.

How to delegate management of identity in AWS Single Sign-On

Post Syndicated from Louay Shaat original https://aws.amazon.com/blogs/security/how-to-delegate-management-of-identity-in-aws-single-sign-on/

In this blog post, I show how you can use AWS Single Sign-On (AWS SSO) to delegate administration of user identities. Delegation is the process of providing your teams permissions to manage accounts and identities associated with their teams. You can achieve this by using the existing integration that AWS SSO has with AWS Organizations, and by using tags and conditions in AWS Identity and Access Management (IAM).

AWS SSO makes it easy to centrally manage access to multiple Amazon Web Services (AWS) accounts and business applications, and to provide users with single sign-on access to all their assigned accounts and applications from one place.

AWS SSO uses permission sets—a collection of administrator-defined policies—to determine a user’s effective permissions to access a given AWS account. Permission sets can contain either AWS managed policies or custom policies that are stored in AWS SSO. Policies are documents that act as containers for one or more permission statements. These statements represent individual access controls (allow or deny) for various tasks, which determine what tasks users can or cannot perform within the AWS account. Permission sets are provisioned as IAM roles in your organizational accounts, and are managed centrally using AWS SSO.

AWS SSO is tightly integrated with AWS Organizations, and runs in your AWS Organizations management account. This integration enables AWS SSO to retrieve and manage permission sets across your AWS Organizations configuration.

As you continue to build more of your workloads on AWS, managing access to AWS accounts and services becomes more time consuming for team members that manage identities. With a centralized identity approach that uses AWS SSO, there’s an increased need to delegate control of permission sets and accounts to domain and application owners. Although this is a valid use case, access to the management account in Organizations should be tightly guarded as a security best practice. As an administrator in the management account of an organization, you can control how teams and users access your AWS accounts and applications.

This post shows how you can build comprehensive delegation models in AWS SSO to securely and effectively delegate control of identities to various teams.

Solution overview

Suppose you’ve implemented AWS SSO in Organizations to manage identity across your entire AWS environment. Your organization is growing and the number of accounts and teams that need access to your AWS environment is also growing. You have a small Identity team that is constantly adding, updating, or deleting users or groups and permission sets to enable your teams to gain access to their required services and accounts.

Note: You can learn how to enable AWS SSO from the Introducing AWS Single Sign-On blog post.

As the number of teams grows, you want to start using a delegation model to enable account and application owners to manage access to their resources, in order to reduce the heavy lifting that is done by teams that manage identities.

Figure 1 shows a simple organizational structure that your organization implemented.
 

Figure 1: AWS SSO with AWS Organizations

Figure 1: AWS SSO with AWS Organizations

In this scenario, you’ve already built a collection of organizational-approved permission sets that are used across your organization. You have a tagging strategy for permission sets, and you’ve implemented two tags across all your permission sets:

  • Environment: The values for this tag are Production or Development. You only apply Production permission sets to Production accounts.
  • OU: This tag identifies the organizational unit (OU) that the permission set belongs to.

A value of All can be assigned to either tag to identify organization-wide use of the permission set.

You identified three models of delegation that you want to enable based on the setup just described, and your Identity team has identified three use cases that they want to implement:

  • A simple delegation model for a team to manage all permission sets for a set of accounts.
  • A delegation model for support teams to apply read-only permission sets to all accounts.
  • A delegation model based on AWS Organizations, where a team can manage only the permission sets intended for a specific OU.

The AWS SSO delegation model enables three key conditions for restricting user access:

  • Permission sets.
  • Accounts
  • Tags that use the condition aws:ResourceTag, to ensure that tags are present on your permission sets as part of your delegation model.

In the rest of this blog post, I show you how AWS SSO administrators can use these conditions to implement the use cases highlighted here to build a delegation model.

See Delegating permission set administration and Actions, resources, and condition keys for AWS SSO for more information.

Important: The use cases that follow are examples that can be adopted by your organization. The permission sets in these use cases show only what is needed to delegate the components discussed. You need to add additional policies to give users and groups access to AWS SSO.

Some examples:

Identify your permission set and AWS SSO instance IDs

You can use either the AWS Command Line Interface (AWS CLI) v2 or the AWS Management Console to identify your permission set and AWS SSO instance IDs.

Use the AWS CLI

To use the AWS CLI to identify the Amazon resource names (ARNs) of the AWS SSO instance and permission set, make sure you have AWS CLI v2 installed.

To list the AWS SSO instance ID ARN

Run the following command:

aws sso-admin list-instances

To list the permission set ARN

Run the following command:

aws sso-admin list-permission-sets --instance-arn <instance arn from above>

Use the console

You can also use the console to identify your permission sets and AWS SSO instance IDs.

To list the AWS SSO Instance ID ARN

  1. Navigate to the AWS SSO in your Region. Choose the Dashboard and then choose Choose your identity source.
  2. Copy the AWS SSO ARN ID.
Figure 2: AWS SSO ID ARN

Figure 2: AWS SSO ID ARN

To list the permission set ARN

  1. Navigate to the AWS SSO Service in your Region. Choose AWS Accounts and then Permission Sets.
  2. Select the permission set you want to use.
  3. Copy the ARN of the permission set.
Figure 3: Permission set ARN

Figure 3: Permission set ARN

Use case 1: Accounts-based delegation model

In this use case, you create a single policy to allow administrators to assign any permission set to a specific set of accounts.

First, you need to create a custom permission set to use with the following example policy.

The example policy is as follows.

            "Sid": "DelegatedAdminsAccounts",
            "Effect": "Allow",
            "Action": [
                "sso:ProvisionPermissionSet",
                "sso:CreateAccountAssignment",
                "sso:DeleteInlinePolicyFromPermissionSet",
                "sso:UpdateInstanceAccessControlAttributeConfiguration",
                "sso:PutInlinePolicyToPermissionSet",
                "sso:DeleteAccountAssignment",
                "sso:DetachManagedPolicyFromPermissionSet",
                "sso:DeletePermissionSet",
                "sso:AttachManagedPolicyToPermissionSet",
                "sso:CreatePermissionSet",
                "sso:UpdatePermissionSet",
                "sso:CreateInstanceAccessControlAttributeConfiguration",
                "sso:DeleteInstanceAccessControlAttributeConfiguration"
            ],
            "Resource": [
                "arn:aws:sso:::account/112233445566",
                "arn:aws:sso:::account/223344556677",
                "arn:aws:sso:::account/334455667788"
            ]
        }

This policy specifies that delegated admins are allowed to provision any permission set to the three accounts listed in the policy.

Note: To apply this permission set to your environment, replace the account numbers following Resource with your account numbers.

Use case 2: Permission-based delegation model

In this use case, you create a single policy to allow administrators to assign a specific permission set to any account. The policy is as follows.

{
                    "Sid": "DelegatedPermissionsAdmin",
                    "Effect": "Allow",
                    "Action": [
                        "sso:ProvisionPermissionSet",
                        "sso:CreateAccountAssignment",
                        "sso:DeleteInlinePolicyFromPermissionSet",
                        "sso:UpdateInstanceAccessControlAttributeConfiguration",
                        "sso:PutInlinePolicyToPermissionSet",
                        "sso:DeleteAccountAssignment",
                        "sso:DetachManagedPolicyFromPermissionSet",
                        "sso:DeletePermissionSet",
                        "sso:AttachManagedPolicyToPermissionSet",
                        "sso:CreatePermissionSet",
                        "sso:UpdatePermissionSet",
                        "sso:CreateInstanceAccessControlAttributeConfiguration",
                        "sso:DeleteInstanceAccessControlAttributeConfiguration",
                        "sso:ProvisionApplicationInstanceForAWSAccount"
                    ],
                    "Resource": [
                        "arn:aws:sso:::instance/ssoins-1111111111",
                        "arn:aws:sso:::account/*",
                        "arn:aws:sso:::permissionSet/ssoins-1111111111/ps-112233abcdef123"

            ]


        },          

This policy specifies that delegated admins are allowed to provision only the specific permission set listed in the policy to any account.

Note:

Use case 3: OU-based delegation model

In this use case, the Identity team wants to delegate the management of the Development permission sets (identified by the tag key Environment) to the Test OU (identified by the tag key OU). You use the Environment and OU tags on permission sets to restrict access to only the permission sets that contain both tags.

To build this permission set for delegation, you need to create two policies in the same permission set:

  • A policy that filters the permission sets based on both tags—Environment and OU.
  • A policy that filters the accounts belonging to the Development OU.

The policies are as follows.

{
                    "Sid": "DelegatedOUAdmin",
                    "Effect": "Allow",
                    "Action": [
                        "sso:ProvisionPermissionSet",
                        "sso:CreateAccountAssignment",
                        "sso:DeleteInlinePolicyFromPermissionSet",
                        "sso:UpdateInstanceAccessControlAttributeConfiguration",
                        "sso:PutInlinePolicyToPermissionSet",
                        "sso:DeleteAccountAssignment",
                        "sso:DetachManagedPolicyFromPermissionSet",
                        "sso:DeletePermissionSet",
                        "sso:AttachManagedPolicyToPermissionSet",
                        "sso:CreatePermissionSet",
                        "sso:UpdatePermissionSet",
                        "sso:CreateInstanceAccessControlAttributeConfiguration",
                        "sso:DeleteInstanceAccessControlAttributeConfiguration",
                        "sso:ProvisionApplicationInstanceForAWSAccount"
                    ],
                    "Resource": "arn:aws:sso:::permissionSet/*/*",
                    "Condition": {
                        "StringEquals": {
                            "aws:ResourceTag/Environment": "Development",
                            "aws:ResourceTag/OU": "Test"
                        }
                    }
        },
        {
            "Sid": "Instance",
            "Effect": "Allow",
            "Action": [
                "sso:ProvisionPermissionSet",
                "sso:CreateAccountAssignment",
                "sso:DeleteInlinePolicyFromPermissionSet",
                "sso:UpdateInstanceAccessControlAttributeConfiguration",
                "sso:PutInlinePolicyToPermissionSet",
                "sso:DeleteAccountAssignment",
                "sso:DetachManagedPolicyFromPermissionSet",
                "sso:DeletePermissionSet",
                "sso:AttachManagedPolicyToPermissionSet",
                "sso:CreatePermissionSet",
                "sso:UpdatePermissionSet",
                "sso:CreateInstanceAccessControlAttributeConfiguration",
                "sso:DeleteInstanceAccessControlAttributeConfiguration",
                "sso:ProvisionApplicationInstanceForAWSAccount"
            ],
            "Resource": [
                "arn:aws:sso:::instance/ssoins-82593a6ed92c8920",
                "arn:aws:sso:::account/112233445566",
                "arn:aws:sso:::account/223344556677",
                "arn:aws:sso:::account/334455667788"

            ]
        }

In the delegated policy, the user or group is only allowed to provision permission sets that have both tags, OU and Environment, set to “Development” and only to accounts in the Development OU.

Note: In the example above arn:aws:sso:::instance/ssoins-11112222233333 is the ARN for the AWS SSO Instance ID. To get your AWS SSO Instance ID, refer to Identify your permission set and AWS SSO Instance IDs.

Create a delegated admin profile in AWS SSO

Now that you know what’s required to delegate permissions, you can create a delegated profile and deploy that to your users and groups.

To create a delegated AWS SSO profile

  1. In the AWS SSO console, sign in to your management account and browse to the Region where AWS SSO is provisioned.
  2. Navigate to AWS Accounts and choose Permission sets, and then choose Create permission set.
     
    Figure 4: AWS SSO permission sets menu

    Figure 4: AWS SSO permission sets menu

  3. Choose Create a custom permission set.
     
    Figure 5: Create a new permission set

    Figure 5: Create a new permission set

  4. Give a name to your permission set based on your naming standards and select a session duration from your organizational policies.
  5. For Relay state, enter the following URL:
    https://<region>.console.aws.amazon.com/singlesignon/home?region=<region>#/accounts/organization 
    

    where <region> is the AWS Region in which you deployed AWS SSO.

    The relay state will automatically redirect the user to the Accounts section in the AWS SSO console, for simplicity.
     

    Figure 6: Custom permission set

    Figure 6: Custom permission set

  6. Choose Create new permission set. Here is where you can decide the level of delegation required for your application or domain administrators.
     
    Figure 7: Assign users

    Figure 7: Assign users

    See some of the examples in the earlier sections of this post for the permission set.

  7. If you’re using AWS SSO with AWS Directory Service for Microsoft Active Directory, you’ll need to provide access to AWS Directory Service in order for your administrator to assign permission sets to users and groups.

    To provide this access, navigate to the AWS Accounts screen in the AWS SSO console, and select your management account. Assign the required users or groups, and select the permission set that you created earlier. Then choose Finish.

  8. To test this delegation, sign in to AWS SSO. You’ll see the newly created permission set.
     
    Figure 8: AWS SSO sign-on page

    Figure 8: AWS SSO sign-on page

  9. Next to developer-delegated-admin, choose Management console. This should automatically redirect you to AWS SSO in the AWS Accounts submenu.

If you try to provision access by assigning or creating new permission sets to accounts or permission sets you are not explicitly allowed, according to the policies you specified earlier, you will receive the following error.
 

Figure 9: Error based on lack of permissions

Figure 9: Error based on lack of permissions

Otherwise, the provisioning will be successful.

Summary

You’ve seen that by using conditions and tags on permission sets, application and account owners can use delegation models to manage the deployment of permission sets across the accounts they manage, providing them and their teams with secure access to AWS accounts and services.

Additionally, because AWS SSO supports attribute-based access control (ABAC), you can create a more dynamic delegation model based on attributes from your identity provider, to match the tags on the permission set.

If you have feedback about this blog post, submit comments in the Comments section below. If you have questions about this post, start a new thread on the AWS Single Sign-On forum.

Want more AWS Security how-to content, news, and feature announcements? Follow us on Twitter.

Author

Louay Shaat

Louay is a Security Solutions Architect with AWS. He spends his days working with customers, from startups to the largest of enterprises, helping them build cool new capabilities and accelerating their cloud journey. He has a strong focus on security and automation to help customers improve their security, risk, and compliance in the cloud.

User roles for the enterprise

Post Syndicated from Arturs Lontons original https://blog.zabbix.com/user-roles-for-the-enterprise/12887/

In this post, we’ll talk about granular user roles introduced in Zabbix 5.2 and some scenarios where user roles should be used and where they give a great benefit to these specific environments.

Contents

I. Permissions granularity (0:40)
II. User Roles in 5.2 (5:16)
III. Example use cases (16:16)
IV. Questions &amp; Answers (h2)

Permissions granularity

Permissions granularity

Let’s consider two roles: the NOC Team role and the Network Administrator role. These are quite different roles requiring different permission levels. Let’s not also forget that the people working in these roles usually have different skill sets, therefore the user experience is quite important for both of these roles: NOC Team probably wants to see only the most important, the most vital data, while the Network Administrators usually require permissions to view data in more detail and have access to more detailed and granular information overviews of what’s going on in your environment.

For our example, let’s first define the requirements for these roles.

NOC Team role:

  • They will definitely require access to dashboards and maps.
  • We will want to restrict unnecessary UI elements for them just to improve the UX. In this case – less is more. Removing the unused UI elements will make the day-to-day workflow easier for the NOC team members who aren’t as proficient with Zabbix as our Monitoring team members.
  • For security reasons we need to restrict API access because NOC team members will either use API very rarely or not at all. With roles we can restrict the API access either partially or completely.
  • The ability to modify the existing  configuration will be restricted, as the NOC team will not be responsible for changing  the Zabbix configuration.
  • The ability to close problems manually will be restricted, since the network admin team will be responsible for that.

Network Administrator role:

  • Similar to the NOC team, the Network Administrators also require access to dashboards and maps. what’s going on in your environment, the health of the environment.
  • They need to have access to configuration, since members of this team are responsible for making configuration changes.
  • Most likely, instead of disabling the API access for our network administrator role, we would want to restrict API access in some way. They might still need access to get or create methods, while access to everything else should be restricted.
  • For each of our roles we will be implementing a UI cleanup by restricting UI elements – we will hide the functionality that we have opted out of using.

Roles and multi-tenancy

Granular permissions are one of the key factors in multi-tenant environments. We could use permissions to segregate our environment per tenant, but in 5.2 that’s not the end of it:

  • Imagine multiple tenants where each has different monitoring requirements. Some want to use the services function for SLA calculation, others want to use inventory, or need the maps and the dashboards.
  • Restricting access to elements and actions per tenant is important. So, for example, some tenants wish to be able to close problems manually, others need to have restrictions on map or dashboard creations for a specific user group..
  • Permissions are still used to enable isolation between tenants on host group level

User Roles in 5.2

With Zabbix 5.2 these use cases, which require additional permission granularity, are now fully supported.

So, let’s take a look at how the User Role feature looks in a real environment.

User role

User roles in Zabbix 5.2 are something completely new. Each user will have a role assigned to them on top of their User Type:

User permissions

We end up having our User types being  linked to User roles, and User roles linked to Users. This means that User types are linked to Users indirectly through the User roles.

User types

The User, Admin, and Super admin types are still in use. The role will be linked to one of these 3 user types.

User roles

Note that User type restrictions still apply.

  • Super admin has access to every section: Administration, Configuration, Reports, Inventory, and Monitoring.
  • Admin has access to Configuration, Reports, Inventory, and Monitoring.
  • User has access to Reports, Inventory, and Monitoring.

Frontend sections restricted by User type

Default User roles

Once we upgrade to 5.2 or install a fresh 5.2 instance, we will have a set of default user roles. The 4 pre-configured user roles are available under Administration > User roles:

  • Super admin,
  • Admin,
  • User, and
  • Guest.

Super admin role

  • The default Super admin role is static. It is set up by default once you upgrade or install a fresh instance. Users cannot modify this role.

All of the other default roles can be modified. In the Zabbix environment, we must have at least a single user with this Super admin role that has access to all of Zabbix functionality. This is similar to the root user in the Linux OS.

Newly created roles of either  Super admin, Admin, or User types can be modified. For example, we can create another Super admin role, change the permissions. For instance, we can have a Super admin that doesn’t have access to Administration > General, but has access to everything else.

User role section

Once we open the User roles section, we will see a list of features and functions that we can restrict per user role.

When we create a new role or open a pre-created role they will have the maximum allowed permissions depending on the User type that is used for the role.

Each of the default roles contains the maximum allowed permissions per user type

UI element restriction

We can restrict access to UI elements for each role. If we wish to create a NOC role we can restrict them to have access only to Dashboards and maps. When we open the User up and go to Permissions we will see the available sections highlighted in green.

NOC user role that has access only to Dashboards and maps

Once we open up the Dashboards or the Monitoring section, we will  see only the UI sections in our navigation menu that have been permitted for this specific user.

Global view: NOC user role that has access only to Dashboards and maps

Host group permissions

Note, that User Group access to Host Groups still has to be properly assigned. For instance, when we open the Dashboard, we still have to check if this user belongs to a user group, which has access to a specific host group. Then we will either display or hide the corresponding data.

User Group access to Host Group

Access to API

API access can also be restricted for each role. Depending on the Access to API “Enabled” checkbox the corresponding user of this specific role will be permitted or denied to access the API.

Used when creating API specific user roles

In addition to that, we can allow or restrict the execution of specific API methods. For this we can use an Allow or Deny list. For instance, we could create a user that has access only to get methods: they can read the data, but they cannot modify the data.

Restricting API method

Let’s use host.create method as an example. If I don’t have permission to do so, I will see an error message ‘no permissions to call’ and then the name of the call — host.create in this case.

Access to actions

Each role can have a specific list of actions that it can perform with respect to the role User type.

In this context, ‘Actions’ mean what this user can do within the UI: Do we wish for the user to be able to close problems, acknowledge them, create or edit maps.

Defining access to actions

NOTE. For the role of type ‘User’, the ‘Create and edit maintenance’ will be grayed out because the User type by default doesn’t have access to the Maintenance section. You cannot enable it for the role of User type, but you can enable or disable it for the Admin type role.

Restricting Actions example

Let’s restrict the role for acknowledging and closing problems. Once we define the restriction the acknowledgment and closing of problems will be grayed out in the frontend.

If we enable it (the checkboxes are editable), we can acknowledge and close problems.

Restricted role

Unrestricted role

Default access

We can also modify the Default access section. We can define that a role has default access to new actions, modules, and UI elements. For instance, if we are importing a new frontend module or upgrading our version 5.2 to version 6.0 in the future –  if any new UI elements, modules or action types appear, do we want for this specific role to have access to it by default once it is created or should this role by default have restricted access to all of these new elements that we are creating?

This allows to give access to any new UI elements for our Super Admin users while disabling the for any other User roles.

Default access for new elements of different types can be enabled or disabled for user roles

If Default access is enabled, whenever a new element is added, the user belonging to this role will automatically have access to it.

Role assignment post-upgrade

How are these roles going to be assigned after migration to 5.2? I have my users of a specific User type, but what’s going to happen with roles? Will I have to assign them manually?

When you upgrade to 5.2 from, for example, 5.0, the users will have the pre-created default roles for Admin, User, and Super admin assigned for them based on their types.

Pre-created roles after migration

This allows us to keep things as they were before 5.2 or go ahead with creating new User roles.

Example use cases

The following example use cases will give you an idea of how you can implement this in your environment.

Read-only role

ANOC Team User role, with no ability to create or modify any elements:

  • read-only access to dashboards,
  • no access to problems,
  • no access to API, and
  • no permissions to execute frontend scripts.

When we are defining this new role, we will mark the corresponding checkboxes in the Monitoring section. The User type for this role is going to be ‘User’ because they don’t need to have access to Administration or Configuration.

User type and sections the role has access to

We will also restrict access to actions, the API, and decide on the new UI element and module permission logic. Default access to new actions and modules will be restricted. Read up on Zabbix release notes to see if any new UI elements have been added in future releases!

Read-only role

When we log in with this user and go to Dashboards, we will see that this user has no option to create or edit a dashboard because we have restricted such an action. The access is still granted based on the Dashboard permissions — depending on whether it is a public or a private dashboard. When they open it up, the data that they will see will depend on the User group to Host group relationship.

When this user opens up the frontend, he will see that access to the unnecessary UI elements is restricted (the restricted UI elements are hidden). Even though he has access to the Problem widget on the dashboard, they are unable to acknowledge or close the problem as we have restricted those actions.

Restricted UI elements hidden and ‘Acknowledge’ button unclickable for this Role

Restrict access to Administration section

Another very interesting use case — restricting access to Administration sections. Administration sections are available only for our Super admins, but, in this case, we want to have a separate role of type Super admin that has some restrictions.

Our Super admin type role that has no access to User сonfiguration and General Zabbix settings will need to be able to:

  • create and manage proxies,
  • define media types and frontend scripts, and
  • access the queue to check the health of our Zabbix instance.

But they won’t be able to create new User groups, Users, and so on.

So, we are opening our Administration > User roles section, creating a new role of type Super admin, and restricting all of the user-related sections, and also restricting access to Administration > General.

User type – Super admin. General and User sections are restricted for this role

When we log in, we can see that there is no access to Administration > General section because we have restricted the ability to change housekeeper settings,  trigger severities, and other settings that are available in Administration > General.

But the Monitoring Super admin user still has the ability to create new Proxies, Media Types, Scripts and has access to the Queue section. This is a nice way to create different types of Super admins which was not possible before 5.2.

Access to Administration section elements

Roles for multi-tenant environment

Zabbix Dashboards and maps are used by multiple tenants to provide monitoring data.

In our example, we will imagine a customer portal that different tenants can access. They log in to Zabbix and based on their roles and permissions can access different elements. One of our Tenant requires a NOC role :

  • read-only access to dashboards,
  • read-only access to maps,
  • no access to API,
  • no access to configuration,
  • isolation per tenant so we won’t be able to see the host status of other tenants.

We will create a new role in Administration > User roles — new role of type User. We will restrict access only to the UI elements that need to be visible for the users belonging to this role.

User type role with very limited access to UI

Since we need to have isolation, we will also be using tag-based permissions to isolate our Hosts per tenant. We’ll go to Permissions section, add read-only or write permissions on a User group to a specific Host group. Then we will also define the tag-based permissions so that these users have access only to problems that are tagged with a specific tag.

Tag-based permissions to isolate our Hosts per tenant

Don’t forget to actually tag those problems and define these tags either on the trigger level or on the host level.

Tagging on the host level

Once we have implemented this, if we open up the UI, we go to Monitoring > Dashboards. We can see that:

  • The UI is restricted only to the required monitoring sections.
  • Tag-based permission ensure that we are seeing problems related to our specific tenant.

Isolation and role restriction have been implemented, and we can successfully have our multi-tenant environment.

Roles for multi-tenant environments

What’s next?

How would you proceed with upgrading to Zabbix 5.2 and implementing this? At the design stage, you need to understand that User roles can help you with a couple of things and you need to estimate and assign value to these things if you want to implement them in your environment.

  1. User roles can improve auditing. Since you have restricted roles per each user it’s easier to audit who did what in your environment.
  2. Restricting API access. We can not only enable or disable API access, but we can also restrict our users to specific methods. From the security and auditing perspective, this adds a lot of flexibility.
  3. Restricting configuration. We can restrict users to specific actions or limit their access to specific Configuration sections as in the example with the custom Super admin role. This allows us to have multiple tiers of admins in our environment
  4. Removing unwanted UI elements. By restricting access to only the necessary UI elements we can give Zabbix a much cleaner look and improve the UX of your users.

Thank you! I hope I gave you some insight into how roles can be used and how they will be implemented in Zabbix 5.2. I hope you aren’t too afraid to play around with this new set of features and implement them in your environment.

Questions & Answers

Question. Can we have a limited read-only user that will have access to all the hosts that are already in Zabbix and will be added in the future?

Answer. Yes, we can have access to all of the existing Host groups. But when you add a new Host Group, you will have to go to your Permissions section and assign User Group to Host Group permissions for the newly added group.

Question. So that means that now we can have a fully customizable multi-tenant environment?

Answer. Definitely. Fully customizable based both on our User group to Host group permissions and roles to make the actions and different UI sections available as per the requirements of our tenants.

Question. I want to create a user with only API access. Is that possible in 5.0 or 5.2?

Answer. It’s been possible for a while now.  You can just disable the frontend access and leave the user with the respective permissions on specific Host groups. But with 5.2 you can make the API limitations more granular. So, you can say that this API-only user has access only to specific API methods

Question. Can we make a user who can see but cannot edit the configuration?

Answer. Partially. For read-only users, read-only access still works for the Monitoring section. But if we go to Configuration, if we want to see anything in the Configuration section, we need write access.You can use Monitoring > Hosts section, where you can see partial configuration. Configuration section unfortunately still is not available for read-only access.