Tag Archives: Featured

How To Do Bare Metal Backup and Recovery

Post Syndicated from Kari Rivas original https://www.backblaze.com/blog/how-to-do-bare-metal-backup-and-recovery/

A decorative image with a broken server stack icon on one side, the cloud in the middle, then a fixed server icon on the right.

When you’re creating or refining your backup strategy, it’s important to think ahead to recovery. Hopefully you never have to deal with data loss, but any seasoned IT professional can tell you—whether it’s the result of a natural disaster or human error—data loss will happen.

With the ever-present threat of cybercrime and the use of ransomware, it is crucial to develop an effective backup strategy that also considers how quickly data can be recovered. Doing so is a key pillar of increasing your business’ cyber resilience: the ability to withstand and protect from cyber threats, but also bounce back quickly after an incident occurs. The key to that effective recovery may lie with bare metal recoveries.

In this guide, we will discuss what bare metal recovery is, its importance, the challenges of its implementation, and how it differs from other methods.

Creating Your Backup Recovery Plan

Your backup plan should be part of a broader disaster recovery (DR) plan that aims to help you minimize downtime and disruption after a disaster event.

A good backup plan starts with, at bare minimum, following the 3-2-1 rule. This involves having at least three copies of your data, two local copies (on-site) and at least one copy off-site. But it doesn’t end there. The 3-2-1 rule is evolving, and there are additional considerations around where and how you back up your data.

As part of an overall disaster recovery plan, you should also consider whether to use file and/or image-based backups. This decision will absolutely inform your DR strategy. And it leads to another consideration—understanding how to use bare metal recovery. If you plan to use bare metal recovery (and we’ll explain the reasons why you might want to), you’ll need to plan for image-based backups.

What Is Bare Metal Backup?

The term “bare metal” means a machine without an operating system (OS) installed on it. Fundamentally, that machine is “just metal”—the parts and pieces that make up a computer or server. A “bare metal backup” is designed so that you can take a machine with nothing else on it and restore it to your normal state of work. That means that the backup data has to contain the operating system (OS), user data, system settings, software, drivers, and applications, as well as all of the files. The terms image-based backups and bare metal backups are often used interchangeably to mean the process of creating backups of entire system data.

Bare metal backup is a favored method by many businesses because it ensures absolutely everything is backed up. This allows the entire system to be restored should a disaster result in total system failure. File-based backup strategies are, of course, very effective when just backing up folders and large media files, but when you’re talking about getting people back to work, a lot of man hours go into properly setting up a workstations to interact with internal networks, security protocols, proprietary or specialized software, etc. Since file-based backups do not back up the operating system and its settings, they are almost obsolete in modern IT environments, and operating on a file-based backup strategy can put businesses at significant risk or add downtime in the event of business interruption.

How Does Bare Metal Backup Work?

Bare metal backups allow data to be moved from one physical machine to another, to a virtual server, from a virtual server back to a physical machine, or from a virtual machine to a virtual server—offering a lot of flexibility.

This is the recommended method for backing up preferred system configurations so they can be transferred to other machines. The operating system and its settings can be quickly copied from a machine that is experiencing IT issues or has failing hardware, for example. Additionally, with a bare metal backup, virtual servers can also be set up very quickly instead of configuring the system from scratch.

What is Bare Metal Recovery (BMR) or Bare-Metal Restore?

As the name suggests, bare metal recovery is the process of recovering the bare metal (image-based) backup. By launching a bare metal recovery, a bare metal machine will retrieve its previous operating system, all files, folders, programs, and settings, ensuring the organization can resume operations as quickly as possible.

How Does Bare Metal Recovery Work?

A bare metal recovery (or restore) works by recovering the image of a system that was created during the bare metal backup. The backup software can then reinstate the operating system, settings, and files on a bare metal machine so it is fully functional again.

This type of recovery is typically issued in a disaster situation when a full server recovery is required, or when hardware has failed.

Why Is BMR Important?

The importance of BMR is dependent on an organization’s recovery time objective (RTO), the metric for measuring how quickly IT infrastructure can return online following a data disaster. The need for high-speed recovery, which in most cases is a necessity, means many businesses use bare metal recovery as part of their backup recovery plan.

If an OS becomes corrupted or damaged and you do not have a sufficient recovery plan in place, then the time needed to reinstall it, update it, and apply patches can result in significant downtime. BMR allows a server to be completely restored on a bare metal machine to its exact settings and configured simply and quickly.

Another key factor for choosing BMR is to protect against cybercrime. If your IT team can pinpoint the time when a system was infected with malware or ransomware, then a restore can be executed to wipe the machine clean of any threats and remove the source of infection, effectively rolling the system back to a time when everything was running smoothly.

BMR’s flexibility also means that it can be used to restore a physical or virtual machine, or simply as a method of cloning machines for easier deployment in the future.

The key advantages of bare metal recovery (BMR) are:

  • Speed: BMR offers faster recovery speeds than if you had to reinstall your OS and run updates and patches. It restores every system element to its exact state as when it was backed up, from the layout of desktop icons to the latest software updates and patches—you do not have to rebuild it step by step.
  • Security: If a system is subjected to a ransomware attack or any other type of malware or virus, a bare metal restore allows you to safely erase an entire machine or system and restore from a backup created before the attack.
  • Simplicity: Bare metal recovery can be executed without installing any additional software on the bare machine.

BMR: Some Caveats

Like any backup and recovery method, some IT environments may be more suitable for BMR than others, and there are some caveats that an organization should be aware of before implementing such a strategy.

First, bare metal recovery can experience issues if the restore is being executed on a machine with dissimilar hardware. The reason for this is that the original operating system copy needs to load the correct drivers to match the machine’s hardware. Therefore, if there is no match, then the system will not boot.

Fortunately, Backblaze Partner integrations, like MSP360, have features that allow you to restore to dissimilar hardware with no issues. This is a key feature to look for when considering BMR solutions. Otherwise, you have to seek out a new machine that has the same hardware as the corrupted machine.

Second, there may be a reason for not wanting to run BMR, such as a minor data accident when a simple file/folder restore is more practical, taking less time to achieve the desired results. A bare metal recovery strategy is recommended when a full machine needs to be restored, so it is advised to include several different options in your backup recovery plan to cover all scenarios.

Bare Metal Recovery in the Cloud

An on-premises disaster disrupts business operations and can have catastrophic implications for your bottom line. And, if you’re unable to run your preferred backup software, performing a bare metal recovery may not even be an option. Backblaze has created a solution that draws data from Veeam Backup & Replication backups stored in Backblaze B2 Cloud Storage to quickly bring up an orchestrated combination of on-demand servers, firewalls, networking, storage, and other infrastructure in phoenixNAP’s bare metal cloud servers. This Instant Business Recovery (IBR) solution includes fully-managed, affordable 24/7 disaster recovery support from Backblaze’s managed service provider partner specializing in disaster recovery as a service (DRaaS).

IBR allows your business to spin up your entire environment, including the data from your Backblaze B2 backups, in the cloud. With this active DR site in the cloud, you can keep business operations running while restoring your on-premises systems. Recovery is initiated via a simple web form or phone call. Instant Business Recovery protects your business in the case of on-premises disaster for a fraction of the cost of typical managed DRaaS solutions. As you build out your business continuity plan, you should absolutely consider how to sustain your business in the case of damage to your local infrastructure; Instant Business Recovery allows you to begin recovering your servers in minutes to ensure you meet your RTO.

BMR and Cloud Storage

Bare metal backup and recovery should be a key part of any DR strategy. From moving operating systems and files from one physical machine to another, to transferring image-based backups from a virtual machine to a virtual server, it’s a tool that makes sense as part of any IT admin’s toolbox.

Your next question is where to store your bare metal backups, and cloud storage makes good sense. Even if you’re already keeping your backups off-site, it’s important for them to be geographically distanced in case your entire area experiences a natural disaster or outage. That takes more than just backing up to the cloud, really—it’s important to know where your cloud storage provider stores their data for both compliance standards, speed of content delivery (if that’s a concern), and to ensure that you’re not unintentionally storing your off-site backup close to home.

Remember that these are critical backups you’ll need in a disaster scenario, so consider recovery time and expense when choosing a cloud storage provider. While it may seem more economical to use cold storage, it comes with long recovery times and high fees to recover quickly. Using always-hot cloud storage is imperative, both for speed and to avoid an additional expense in the form of a bill for egress fees after you’ve recovered from a cyberattack.

Host Your Bare Metal Backups in Backblaze B2 Cloud Storage

Backblaze B2 Cloud Storage provides S3 compatible, Object Lock-capable hot storage for one-fifth the cost of AWS and other public clouds—with no trade-off in performance.

Get started today, and contact us to support a customized proof of concept (PoC) for datasets of more than 50TB.

The post How To Do Bare Metal Backup and Recovery appeared first on Backblaze Blog | Cloud Storage & Cloud Backup.

What Is Cyber Insurance?

Post Syndicated from Kari Rivas original https://www.backblaze.com/blog/what-is-cyber-insurance/

A decorative image with a pig typing on a computer, then directional lines moving from the computer to a lock icon. One the right of the image is a dollar sign, a shield with a check mark, and a box with four asterisks.

The first cybersecurity insurance policy was issued in 1997. In the following 27 years it’s grown from a niche insurance product to an important consideration for organizations large and small to protect their bottom line from cyber threats like malicious data breaches, malware, phishing attacks, and ransomware

While there are many security tactics to deploy in order to maintain business continuity (BC) should any of the above happen, getting back up and running in the event of a security incident can cost time and money. Cyber insurance is one way to reduce fallout from security events, prepare your business, and support business continuity objectives. 

Today, we are breaking down the basics of cyber insurance: What is it? How much will it cost? What do cyber insurance companies provide? And how do you get it?

Does my organization need cyber insurance?

Cyber insurance has become more common as part of BC planning. Like many things in the cybersecurity world, it can be a bit hard to measure precise adoption numbers because there are different industry associations, enforcement agencies, and so on in different geographic markets. According to Fortune Business Insights, the global cyber insurance market size was valued at $16.66 billion in 2023. The market is projected to grow from $20.88 billion in 2024 to $120.47 billion by 2032, exhibiting a compound annual growth rate (CAGR) of 24.5% during the forecast period.

Take a look at these three data points in cybersecurity risk:

  1. According to a 2023 Ransomware Market Report, global ransomware costs are predicted to reach $265 billion annually by 2031, up from $20 billion in 2021.
  2. According to IBM, the average cost of a data breach in the U.S. is $4.88 million, up 10% over 2023.
  3. Fifty-nine percent of organizations were hit by ransomware in the last year, according to Sophos’ State of Ransomware 2024 report.

Whether your company is a 10 person software as a service (SaaS) startup or a global enterprise, cyber insurance could be the difference between a minor interruption of business services and closing up for good. However, providers don’t opt to provide coverage for every business that applies for cyber insurance. If you want coverage (and there are plenty of reasons why you would), it helps to prepare by making your company as attractive (meaning low-risk) as possible to cyber insurers. Some cyber insurance providers like Coalition even offer assistance and services to reduce your cyber risk posture before an attack as part of a “whole package” approach. 

Ransomware Protection Resource

Learn about the growing threat of ransomware and what you can do to protect against ransomware attacks.

➔ Ransomware Ebook

What is cyber insurance?

Cyber insurance protects your business from losses resulting from a digital attack. This can include business income loss, but it also includes coverage for unforeseen expenses, including:

  • Forensic post-breach review expenses.
  • Additional monitoring outflows.
  • The expenditure for notifying parties of a breach.
  • Public relations service expenses.
  • Litigation fees.
  • Accounting expenses.
  • Court-ordered judgments.
  • Claims disbursements.

Cyber insurance policies may also cover ransom payments. However, according to expert guidance, it is never advisable or prudent to pay the ransom, even if it’s covered by insurance. 

There are a few reasons for this:

  1. It’s not guaranteed that cybercriminals will provide a decryption key to recover your data. They’re criminals after all.
  2. Even with a decryption key, you may not be able to recover your data. This could be intentional, or simply poor design on the part of cybercriminals. Ransomware code is notoriously buggy.
  3. Paying the ransom encourages cybercriminals to keep plying their trade, and can even result in businesses that pay being hit by the same ransomware demand twice.
  4. Ransom payouts may be illegal. Certain states make it illegal for local government entities to pay ransoms. Federally in the U.S., it’s illegal to make payments to individuals, organizations, regimes, and sometimes entire countries that are on the sanctions list—and some cyber crime groups are certainly on that list. 

Ultimately, the most effective way to undermine the motivation of these criminal groups is to reduce the potential for profit. 

Types of cyber insurance

What plans cover and how much they cost can vary. Typically, you can choose between first-party coverage, third-party coverage, or both.

First-party coverage protects your own data and includes coverage for business expenses related to things like recovery of lost or stolen data, lost revenue due to business interruption, and legal counsel, and other types of expenses.

Third-party coverage protects your business from liability claims brought by someone outside the company. This type of policy might cover things like payments to consumers affected by a data breach, costs for litigation brought by third parties, and losses related to defamation.

Depending on how substantial a digital attack’s losses could be to your business, your best choice may be both first- and third-party coverage.

Cyber insurance policy coverage considerations

Cyber insurance protects your company’s bottom line by helping you pay for costs related to recovering lost or stolen data and cover costs incurred by affected third parties (if you have third-party coverage).

As you might imagine, cyber insurance policies vary. When reviewing cyber insurance policies, it’s important to ask these questions:

  1. Does this policy cover a variety of digital attacks, especially the ones we’re most susceptible to?
  2. What are the policy’s exclusions? For example, unlikely circumstances like acts of war or terrorism and well-known, named viruses may not be covered in the policy.
  3. How much do the premiums and deductibles cost for the coverage we need?
  4. What are the coverage (payout) amounts or limitations?

Keep in mind that choosing the company with the lowest premiums may not be the best strategy. For further reading, the Federal Trade Commission offers a helpful checklist of additional considerations for choosing a cyber insurance policy.

Errors & omissions (E&O) coverage

Technology errors and omissions (E&O) coverage isn’t technically cyber insurance, but could be part of a comprehensive policy. This type of coverage protects your business from expenses that may be incurred if/when your product or service fails to deliver or doesn’t work the way it’s supposed to. This can be confused with cyber insurance coverage because it protects your business in the case your technology product or service fails. The difference is that E&O coverage comes into effect when that failure is due to the business’ own negligence.

You may want to pay the upcharge for E&O coverage to protect against harm caused if/when your product or service fails to deliver or work as intended. E&O also offers coverage for data loss stemming from employee errors or employee negligence in following data safeguards already in place. Consider whether you also need this type of protection and ask your cyber insurer if they offer E&O policies.

Beyond insurance

Cybersecurity insurance providers often offer a range of holistic services designed to help you manage and mitigate cyber risks. These services go beyond traditional insurance coverage, providing proactive support in the form of risk assessment, incident response, and recovery assistance. This comprehensive approach helps you strengthen your cybersecurity posture and minimize the impact of cyber incidents.

Services potentially offered by cybersecurity insurance providers:

  • Risk assessment and management: Evaluating your current cybersecurity measures and identifying vulnerabilities.
  • Incident response planning: Assisting in the development and implementation of incident response plans.
  • Threat intelligence: Providing real-time information on emerging cyber threats and vulnerabilities.
  • Employee training and awareness: Offering programs to educate employees on best practices for cybersecurity.
  • Breach response services: Support during and after a cyber incident, including forensic investigation and legal assistance.
  • Business continuity and recovery support: Helping to restore operations and recover lost data following an incident.
  • Regulatory compliance guidance: Assisting in meeting industry-specific cybersecurity regulations and standards.

It’s important to ask if these services are included in your policy or if you can add them if needed. 

Premiums, deductibles, and coverage

What are the average premium costs, deductible amounts, and liability coverage for a business like yours? The answer to that question turns out to be more complex than you’d think.

How are premiums determined?

Every insurance provider is different, but here are common factors that affect cyber insurance premiums:

  • Your industry (e.g., education, healthcare, and financial industries are higher risk)
  • Your company size (e.g., more employees increase risk)
  • Amount and sensitivity of your data (e.g., school districts with student and faculty personal identifiable information are at higher risk)
  • Your revenue (e.g., a profitable bank will be more attractive to cybercriminals)
  • Your investment in cybersecurity (e.g., lower premiums go to companies with dedicated resources and policies around cybersecurity)
  • Coverage limit (e.g., the cost per incident will decrease with a lower liability limit).
  • Deductible (e.g., the more you pay per incident, the less your plan’s premium)

What does the average premium cost?

These days, it’s challenging to estimate the true cost of an attack because historical data hasn’t been widely shared. The U.S. Government Accountability Office reported that the rising “frequency, severity, and cost of cyberattacks” increases cyber insurance premiums.

But, generally speaking, if you are willing to cover more of the cost of a data breach, your deductible rises, and your premium falls. Data from TechInsurance reveals that the average cyber insurance premium is around $145 per month depending on your risk profile and the policy limits you choose. 

How do I get cyber insurance?

Most companies start with an online quote from a cyber insurance provider, but many will eventually need to compile more detailed and specific information in order to get the most accurate figures.

If you’re a business owner, you may have all the information you need at hand, but for mid-market and enterprise companies, securing a cyber insurance policy should be a cross-functional effort. You’ll need information from finance, legal, and compliance departments, IT, operations, and perhaps other divisions to ensure cyber insurance coverage and policy terms meet your company’s needs.

Before the quote, an insurance company will perform a risk assessment of your business in order to determine the cost to insure you. A typical cyber insurance questionnaire might include specific, detailed questions in the areas of organizational structure, legal and compliance requirements, business policies and procedures, and questions about your technical infrastructure. Here are some questions you might encounter:

  • Organizational: What kind of third-party data do you store or process on your computer systems?
  • Legal and compliance: Are you aware of any disputes over your business website address and domain name?
  • Policies and procedures: Do you have a business continuity plan in place?
  • Technical: Do you utilize a cloud provider to store data or host applications?

Cyber insurance readiness

Now that you know the basics of cyber insurance, you can be better prepared if and when the time comes to get insured. Shoring up your vulnerability to cyber incidents goes a long way toward helping you acquire cyber insurance and get the best premiums possible. You can start by protecting business workstations with automatic backups and by protecting virtual machines (VMs), servers, and network attached storage (NAS) data for BC and disaster recovery (DR). 

The post What Is Cyber Insurance? appeared first on Backblaze Blog | Cloud Storage & Cloud Backup

10 Stories from 10 Years of Drive Stats Data

Post Syndicated from original https://www.backblaze.com/blog/10-stories-from-10-years-of-drive-stats-data/

On April 10, 2013, Backblaze saved our first daily hard drive snapshot file. We had decided to start saving these daily snapshots to improve our understanding of the burgeoning collection of hard drives we were using to store customer data. That was the beginning of the Backblaze Drive Stats reports that we know today.

Little did we know at the time that we’d be collecting the data for the next 10 years or writing various Drive Stats reports that are read by millions, but here we are.

I’ve been at Backblaze longer than Drive Stats and probably know the drive stats data and history better than most, so let’s spend the next few minutes getting beyond the quarterly and lifetime tables and charts and I’ll tell you some stories from behind the scenes of Drive Stats over the past 10 years.

1. The Drive Stats Light Bulb Moment

I have never been able to confirm whose idea it was to start saving the Drive Stats data. The two Brians—founder Brian Wilson, our CTO before he retired and engineer Brian Beach, our current CTO—take turns eating humble pie and giving each other credit for this grand experiment.

But, beyond the idea, one Brian or the other also had to make it happen. Someone had to write the Python scripts to capture and process the data, and then deploy these scripts across our fleet of shiny red Storage Pods and other storage servers, and finally someone also had to find a place to store all this newly captured data. My money’s on—to paraphrase Mr. Edison—founder Brian being the 1% that is inspiration, and engineer Brian being the 99% that is perspiration. The split could be 90/10 or even 80/20, but that’s how I think it went down.

2. The Experiment Begins

In April 2013, our Drive Stats data collection experiment began. We would collect and save basic drive information, including the SMART statistics for each drive, each day. The effort was more than a skunkworks project, but certainly not a full-fledged engineering project. Conducting such experiments has been part of our DNA since we started and we continue today, albeit with a little more planning and documentation. Still the basic process—try something, evaluate it, tweak it, and try again—still applies, and over the years, such experiments have led to the development of our Storage Pods and our Drive Farming efforts.

Our initial goal in collecting the Drive Stats data was to determine if it would help us better understand the failure rates of the hard drives we were using to store data. Questions that were top of mind included: Which drive models lasted longer? Which SMART attributes really foretold drive health? What is the failure rate of different models? And so on. The answers, we hoped, would help us make better purchasing and drive deployment decisions.

3. Where “Drive Days” Came From

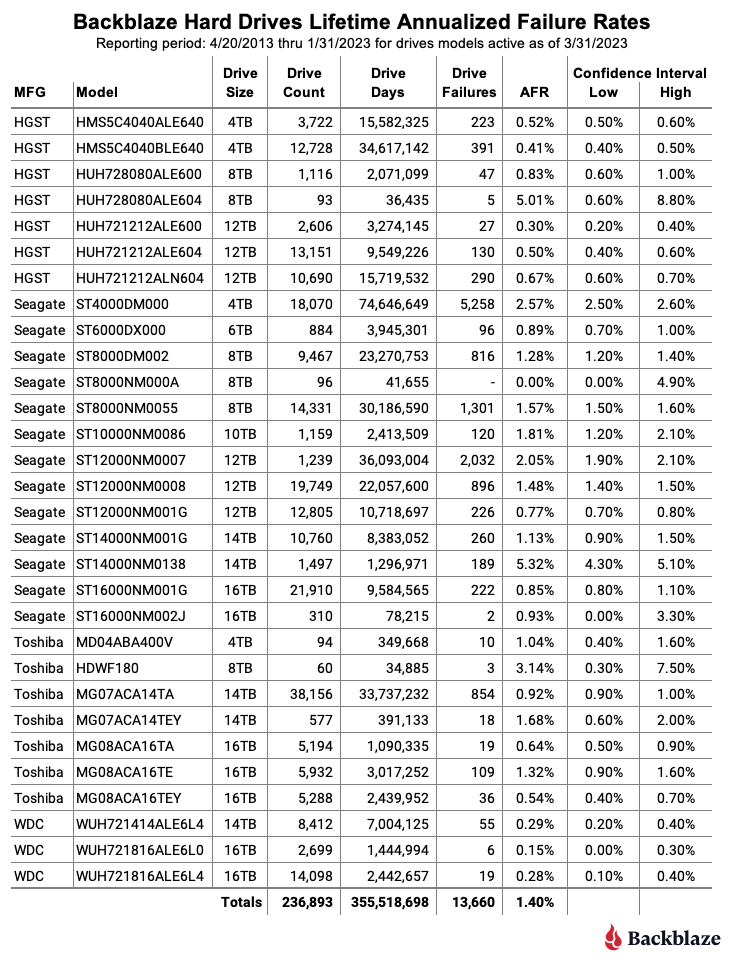
To compute a failure rate of a given group of drives over a given time period, you might start with two pieces of data: the number of drives, and the number of drive failures over that period of time. So, if over the last year, you had 10 drives and one failed, you could say the 10% failure rate for the year. That works for static systems, but data centers are quite different. On a daily basis, drives enter and leave the system. There are new drives, failed drives, migrated drives, and so on. In other words, the number of drives is probably not consistent across a given time period. To address this issue, CTO Brian (current CTO Brian that is) worked with professors from UC Santa Cruz on the problem and the idea of Drive Days was born. A drive day is one drive in operation for one day, so one drive in operation for ten days is ten drive days.

To see this in action you start by defining the cohort of drives and the time period you want and then apply the following formula to get the Annualized Failure Rate (AFR).

AFR = ( Drive Failures / ( Drive Days / 365 ) )

This simple calculation allows you to compute an Annualized Failure Rate for any cohort of drives over any period of time and accounts for a variable number of drives over that period.

4. Wait! There’s No Beginning?

In testing out our elegantly simple AFR formula, we discovered a problem. Not with the formula, but with the data. We started collecting data on April 10, 2013, but many of the drives were present before then. If we wanted to compute the AFR of model XYZ for 2013, we could not count the number of drive days those drives had prior to April 10—there were none.

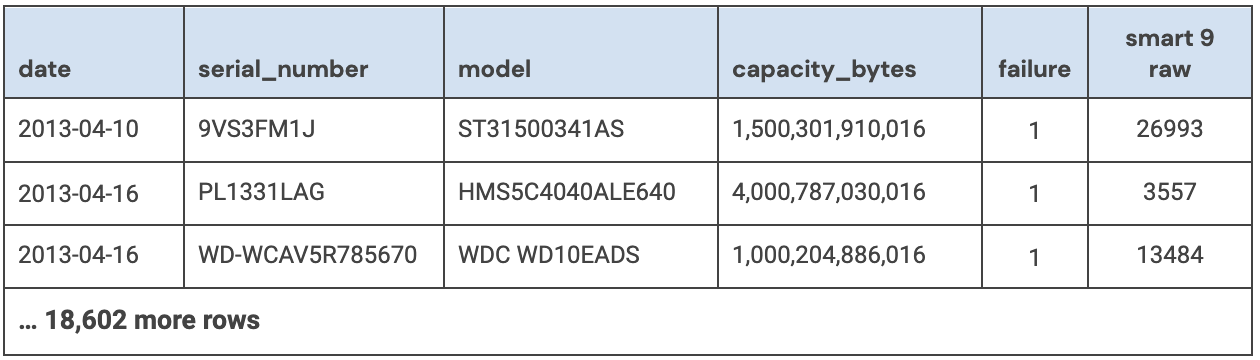
Never fear, SMART 9 raw value to the rescue. For the uninitiated, the SMART 9 raw value contains the number of power-on hours for a drive. A little math gets you the number of days—that is Drive Days—and you are ready to go. This little workaround was employed whenever we needed to work with drives that came into service before we started collecting data.

Why not use SMART 9 all of the time? A couple of reasons. First, sometimes the value gets corrupted. Especially when the drive is failing, it could be zero or a million or anywhere in between. Second, a new drive can have non-default SMART values. Perhaps it is just part of the burn in process or a test group at the manufacturer, or maybe the drive was a return that passed some qualification process.

Regardless, the starting value of SMART 9 wasn’t consistent across drives, so we just counted operational days in our environment and used SMART 9 as a substitute only when we couldn’t count those days. Using SMART 9 is moot now as these days there are no drives left in the current drive collection which were present prior to April 2013.

5. There’s Gold In That There Data

While the primary objective of collecting the data was to improve our operations, there was always another potential use lurking about—to write a blog post, or two, or 56. Yes, we’ve written 56 blog posts and counting based on our Drive Stats data. And no, we could have never imagined that would be the case when this all started back in 2013.

The very first Drive Stats-related blog post was written by Brian Beach (current CTO Brian, former engineer Brian) in November 2013 (we’ve updated it since then). The post had the audacious title of “How Long Do Disk Drives Last?” and a matching URL of “www.backblaze.com/blog/how-long-do-disk-drives-last/”. Besides our usual blog readers, search engines were falling all over themselves referring new readers to the site based on searches for variants of the title and the post became first page search material for multiple years. Alas, all Google things must come to an end, as the post disappeared into page two and then the oblivion beyond.

Buoyed by the success of the first post, Brian went on to write several additional posts over the next year or so based on the Drive Stats data.

That’s an impressive body of work, but Brian is, by head and heart, an engineer, and writing blog posts meant he wasn’t writing code. So after his post to open source the Drive Stats data in February 2015, he passed the reins of this nascent franchise over to me.

6. What’s in a Name?

When writing about drive failure rates, Brian used the term “Hard Drive Reliability” in his posts. When I took over, beginning with the Q1 2015 report, we morphed the term slightly to “Hard Drive Reliability Stats.” That term lasted through 2015 and in Q1 2016 it was shortened to “Hard Drive Stats.” I’d like to tell you there was a great deal of contemplation and angst that went into the decision, but the truth is the title of the Q1 2016 post “One Billion Drive Hours and Counting: Q1 2016 Hard Drive Stats,” was really long and we left out the word reliability so it wouldn’t be any longer—something about title length, the URL, search terms, and so on. The abbreviated version stuck and to this day we publish “Hard Drive Stats” reports. That said, we often shorten the term even more to just “Drive Stats,” which is technically more correct given we have solid state drives (SSDs), not just hard disk drives (HDDs), in the dataset when we talk about boot drives.

7. Boot Drives

Beginning in Q4 2013, we began collecting and storing failure and SMART stats data from some of the boot drives that we use on our storage servers in the Drive Stats data set. Over the first half of 2014, additional boot drive models were configured to report their data and by Q3 2014, all boot drives were reporting. Now the Drive Stats dataset contained both data from the data drives and the boot drives of our storage servers. There was one problem: there was no field for drive source. In other words, to distinguish a data drive from a boot drive, you needed to use the drive model.

In Q4 2018, we began using SSDs as boot drives and began collecting and storing drive stats data from the SSDs as well. Guess what? There was no drive type field either, so SSD and HDD boot drives had to be distinguished by their model numbers. Our engineering folks are really busy on product and platform features and functionality, so we use some quick-and-dirty SQL on the post-processing side to add the missing information.

The boot drive data sat quietly in the Drive Stats dataset for the next few years until Q3 2021 when we asked the question “Are SSDs Really More Reliable Than Hard Drives?” That’s the first time the boot drive data was used. In this case, we compared the failure rates of SSDs and HDDs over time. As the number of boot drive SSDs increased, we started publishing a semi-annual report focused on just the failure rates for the SSD boot drives.

8. More Drives = More Data

On April 10, 2013, data was collected for 21,195 hard drives. The .csv data file for that day was 3.2MB. The numbers of drives and the amount of data has grown just a wee bit since then, as you can see in the following charts.

The current size of a daily Drive Stats .csv file is over 87MB. If you downloaded the entire Drive Stats dataset, you would need 113GB of storage available once you unzipped all the data files. If you are so inclined, you’ll find the data on our Drive Stats page. Once there, open the “Downloading the Raw HD Test Data” link to see a complete list of the files available.

9. Who Uses The Drive Stats Dataset?

Over the years, the Drive Stats dataset has been used in multiple ways for different reasons. Using Google Scholar, you can currently find 660 citations for the term “Backblaze hard drive stats” going back to 2014. This includes 18 review articles. Here are a couple of different ways the data has been used.

      • As a teaching tool: Several universities and similar groups have used the dataset as part of their computer science, data analytics, or statistics classes. The dataset is somewhat large, but it’s still manageable, and can be divided into yearly increments if needed. In addition, it is reasonably standardized, but not perfect, providing a good data cleansing challenge. The different drive models and variable number of drive counts allows students to practice data segmentation across the various statistical methods they are studying.
      • For artificial intelligence (AI) and machine learning: Over the years several studies have been conducted using AI and machine learning techniques applied to the Drive Stats data to determine if drive failure or drive health is predictable. We looked at one method from Interpretable on our blog, but there are several others. The results have varied, but the general conclusion is that while you can predict drive failure to some degree, the results seem to be limited to a given drive model.

10. Drive Stats Experiments at Backblaze

Of course, we also use the Drive Stats data internally at Backblaze to inform our operations and run our own experiments. Here are a couple examples:

      • Inside Backblaze: Part of the process in developing and productizing the Backblaze Storage Pod was the development of the software to manage the system itself. Almost from day one, we used certain SMART stats to help determine if a drive was not feeling well. In practice, other triggers such as ATA errors or FSCKs alerts, will often provide the first indicator of a problem. We then apply the historical and current SMART stats data that we have recorded and stored to complete the analysis. For example, we receive an ATA error on a given drive. There could be several non-drive reasons for such an error, but we can quickly determine that the drive has a history of increasing bad media and command timeouts values over time. Taken together, it could be time to replace that drive.
      • Trying new things: The Backblaze Evangelism team decided that SQL was too slow when accessing the Drive Stats data. They decided to see if they could use a combination of Parquet and Trino to make the process faster. Once they had done that, they went to work duplicating some of the standard queries we run each quarter in producing our Drive Stats Reports.

What Lies Ahead

First, thank you for reading and commenting on our various Drive Stats Reports over the years. You’ve made us better and we appreciate your comments—all of them. Not everyone likes the data or the reports, and that’s fine, but most people find the data interesting and occasionally useful. We publish the data as a service to the community at large, and we’re glad many people have found it helpful, especially when it can be used in teaching people how to test, challenge, and comprehend data—a very useful skill in navigating today’s noise versus knowledge environment.

We will continue to gather and publish the Drive Stats dataset each quarter for as long as it is practical and useful to our readers. That said, I can’t imagine we’ll be writing Drive Stats reports 10 years from now, but just in case, if anyone is interested in taking over, just let me know.

The post 10 Stories from 10 Years of Drive Stats Data appeared first on Backblaze Blog | Cloud Storage & Cloud Backup.

A Tale of Two NAS Setups, Part Two: Managing Media Files

Post Syndicated from James Flores original https://www.backblaze.com/blog/a-tale-of-two-nas-setups-part-two-managing-media-files/

A decorative diagram showing icons of media files flowing through a NAS to the cloud.

Editor’s Note

This post is the second in a two-part series about sharing practical NAS tips and tricks to help readers with their own home or office NAS setups. Check out Part One where Backblazer Vinodh Subramanian walks through how he set up a NAS system at home to manage files and back up devices. And read on to learn how Backblazer James Flores uses a NAS to manage media files as a professional filmmaker.

The modern computer has been in existence for decades. As hardware and software have advanced, 5MB of data has gone from taking up a room and weighing a literal ton to being orders of magnitude more compact than what you would find on a typical smartphone. No matter how much storage there is, though, we—I know I am not alone—have been generating content to fill the space. Industry experts say that we reached 64.2 zettabytes of data created, captured, copied, and consumed globally in 2020, and we’re set to reach more than 180 zettabytes in 2025. And a lot of that is media—from .mp3s and .jpgs to .movs, we all have a stock pile of files sitting somewhere.

If you’re creating content you probably have this problem to the 10th power. I started out creating content by editing videos in high school, and my content collection has only grown from there. After a while, the mix of physical media formats had amassed into a giant box stuffed with VHS tapes, DVCPRO tapes, Mini DVs, DVDs, CD-ROMs, flash drives, external hard disk drives (HDDs), internal laptop HDDs, an Apple TimeCapsule, SD cards, and, more recently, USB 3.0 hard drives. Needless to say, it’s unruly at best, and a huge data loss event waiting to happen at worst.

Today, I’m walking through how I solved a problem most of us face: running into the limits of storage.

The Origin Story

My collection of media started because of video editing. Then, when I embarked on an IT career, the amount of data I was responsible for only grew, and my new position came with the (justifiable) paranoia of data loss. In the corporate setting, a network attached storage device (NAS) quickly became the norm—a huge central repository of data accessible to any one on the network and part of the domain.

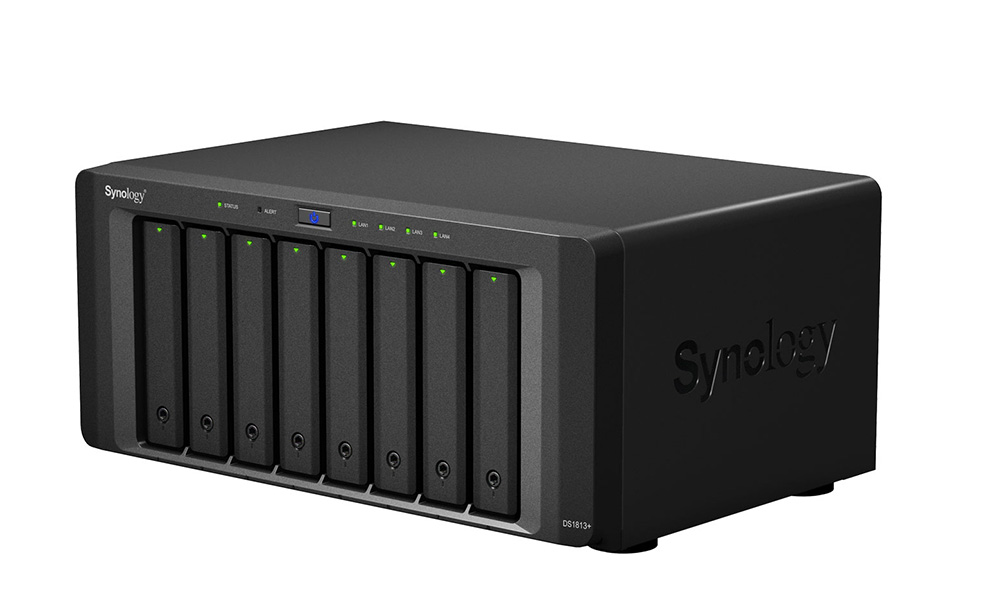
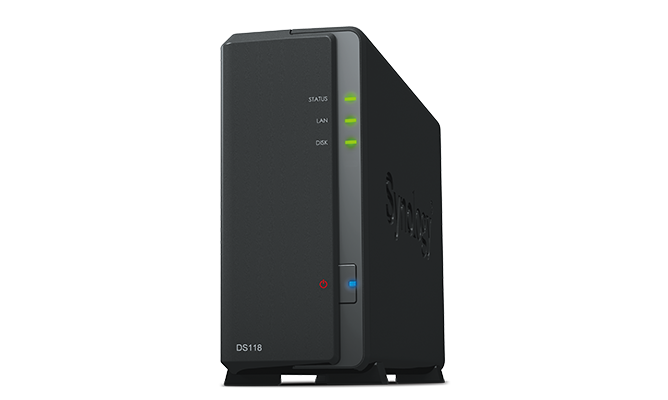
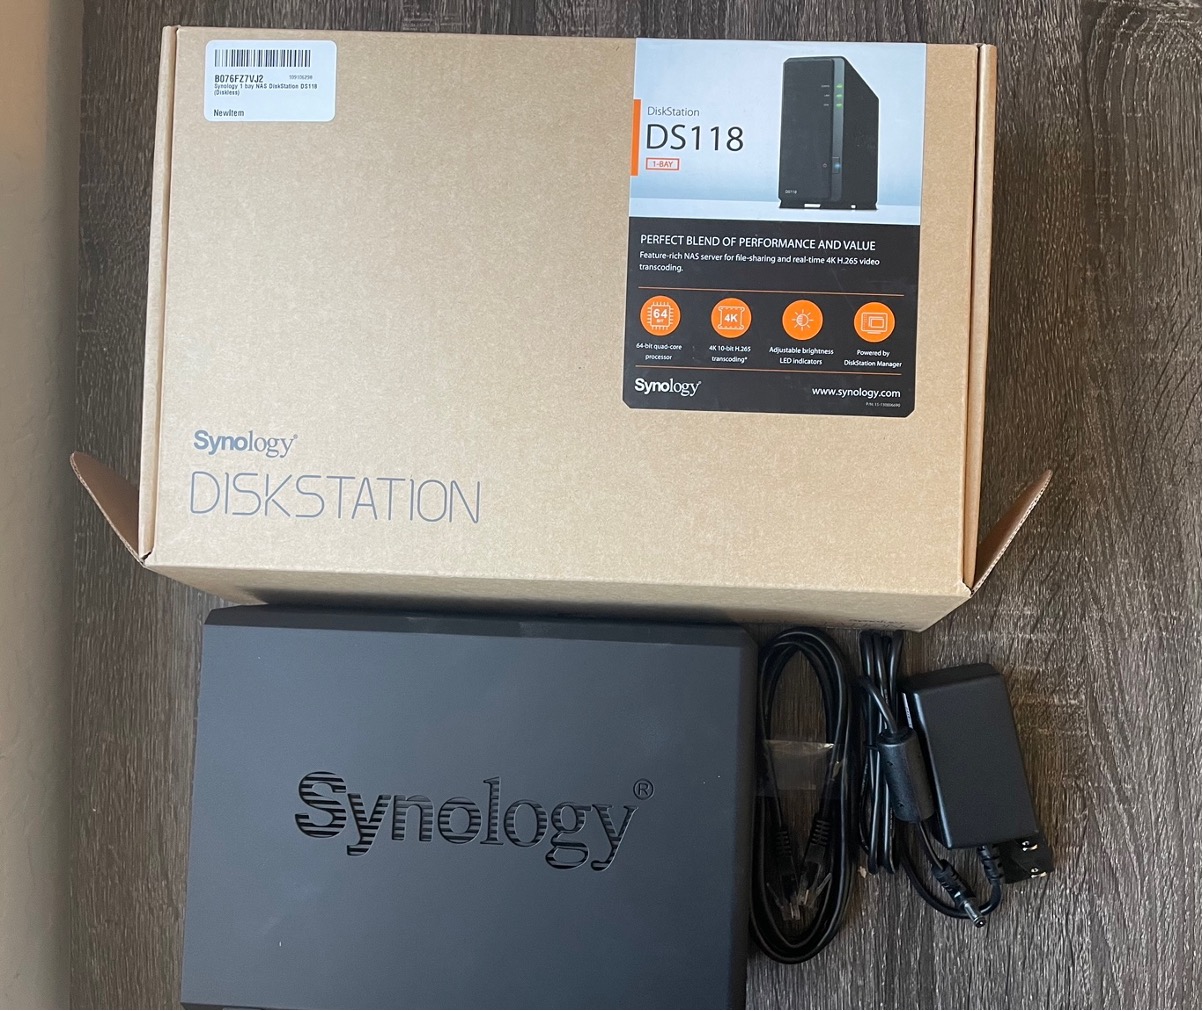
An image of a Synology network attached storage (NAS) device.
A Synology NAS.

Meanwhile in 2018, I returned to creating content again in full swing. What started with small webinar edits on a Macbook Air quickly turned into scripted productions complete with custom graphics and 4K raw footage. And thus the data bloat continued.

But this time (informed by my IT background), the solution was easy. Instead of burning data to several DVDs and keeping them in a shoebox, I used larger volume storage like hard drives (HDDs) and NAS devices. After all, HDDs are cheap and relatively reliable.

And, I had long since learned that a good backup strategy is key. Thus, I embarked on making my backup plan an extension of my data management plan.

The Plan

The plan was simple. I wanted to have a 4TB NAS to use as a backup location and to extend my internal storage in case I needed to. After all, my internal drive was 7TB—who’s going to use more than that? (I thought at the time, unable to see my own future.) Setting up NAS is relatively simple: it replicated a standard IT setup, with a switch, a static IP address, and some cables.

But first, I needed hardwired network access in my office which is far away from my router. As anyone who works with media knows, accessing a lot of large files over wifi just isn’t fun. Luckily my house was pre-wired with CAT5—CAT5 cables that were terminated as phone lines. (Who uses a landline these days?) After terminating the cables with CAT5E adapters, installing a small 10-port patch panel and a new switch, I had a small network where my entire office was hardwired to my router/modem.

As far as the NAS goes, I chose a Synology DS214+, a simple two-bay NAS. After all, I didn’t expect to really use it all. I worked primarily off of my internal storage, then files were archived to this Synology device. I could easily move them back and forth between my primary and secondary storage because I’d created my internal network, and life was good.

Data Bloat Strikes Again

Fast forward to 2023. Now, I’m creating content routinely for two different companies, going to film school, and flexing my freelance editing skills on indie films. Even with the extra storage I’d built in for myself, I am at capacity yet again. Not only have I filled up Plan A on my internal drive, but now my Plan B NAS is nearing capacity. And, where are those backups being stored? My on-prem-only solution wasn’t cutting it.

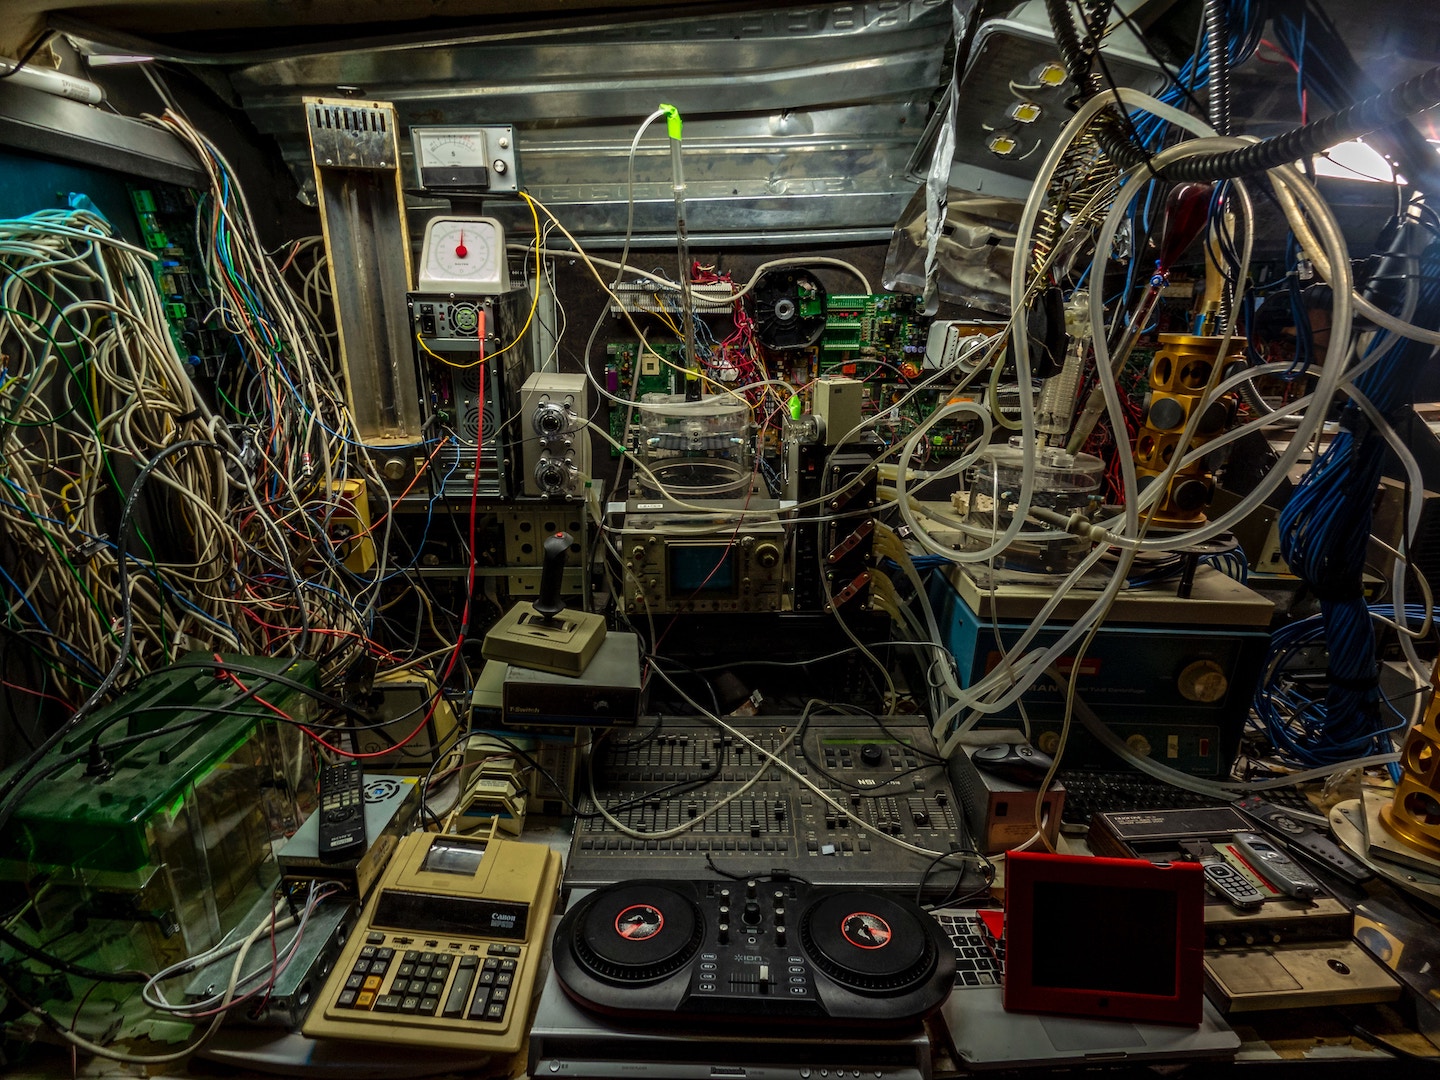
A photograph of a room with an overwhelming amount of old and new technology and cables.
This wasn’t me—but I get it.

Okay, New Plan

So what’s next?

Since I’m already set up for it, there’s a good argument to expand the NAS. But is that really scalable? In an office full of film equipment, a desk, a lightboard, and who knows what else in the future, do I really need another piece of equipment that will run all day?

Like all things tech, the answer is in the cloud. Synology’s NAS was already set up for cloud-based workflows, which meant that I got the best of both worlds: the speed of on-prem and the flexibility of the cloud.

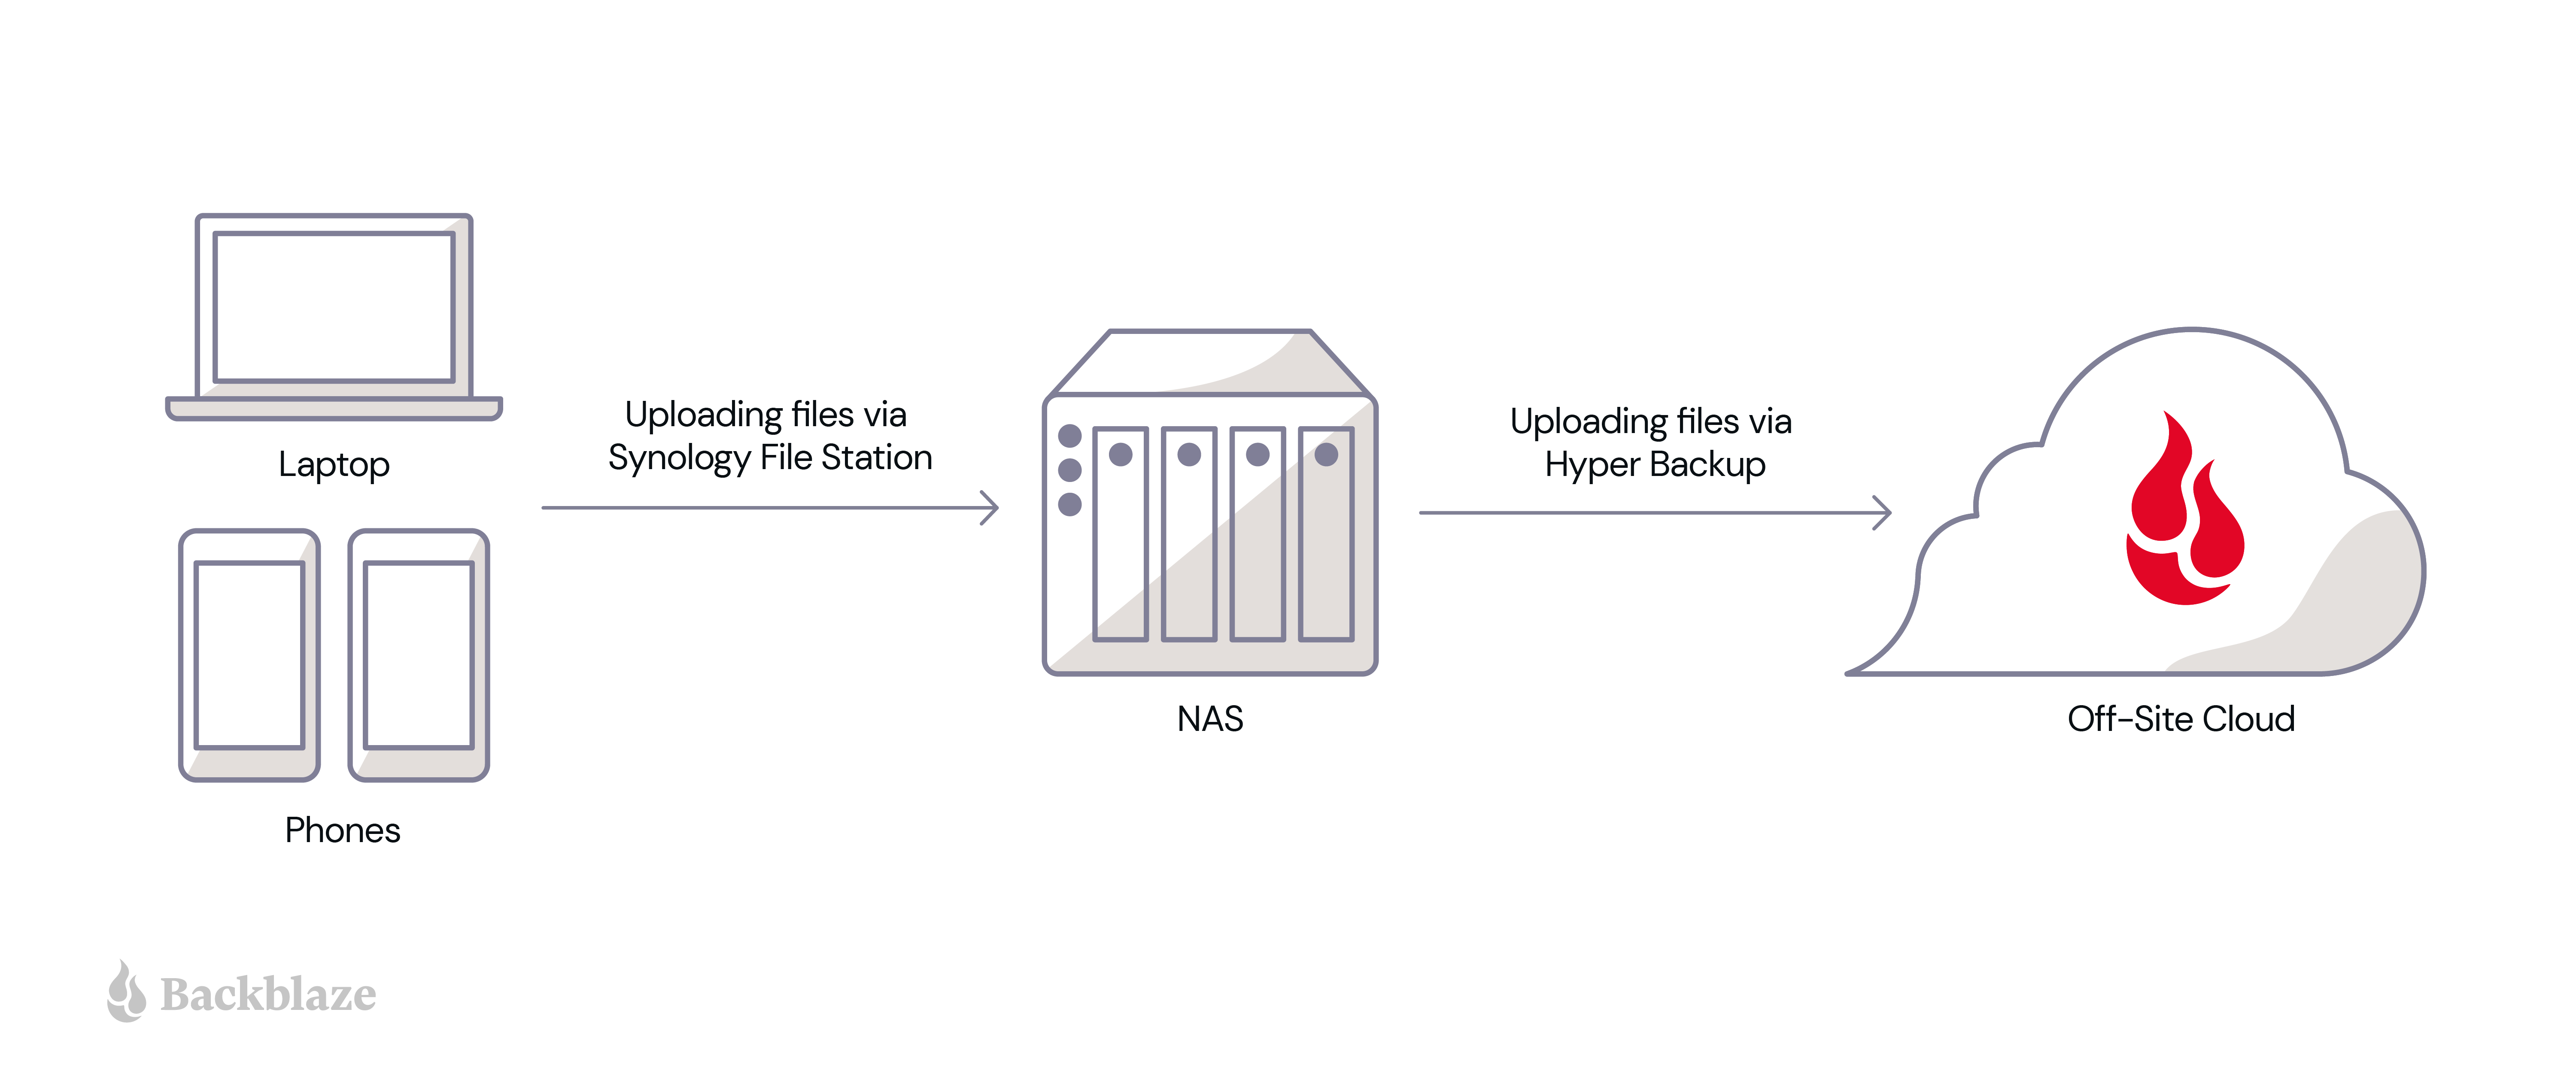
Synology has its own marketplace with add-on packages which are essentially apps that let you add functionality to your device. Using their Cloud Sync app, you can sync an entire folder on your NAS to a cloud object storage provider. For me that means: Instead of buying another NAS device (hardware I have to maintain) or some other type of external storage (USB drives, LTO tapes), I purchase cloud storage, set up Cloud Sync to automatically sync data to Backblaze B2 Cloud Storage, and my data is set. It’s accessible from anywhere, I can easily create off-site backups, and I am not adding hardware to my jam-packed office.

I Need a Hero

This is great for my home office and the small projects I do in my spare time but how is this simple setup being used to modernize media workflows?

A big sticking point for media folks is what we talked about before—that large files can take up too much bandwidth to work well on wifi. However, as the cloud has become more accessible to all, there are many products today on the market designed to solve that problem for media teams specifically.

Up Amongst the Clouds

One problem though: Many of these tools push their own cloud storage. You could opt to play cloud storage hopscotch: sign up for the free tier of Google Drive,  drag and drop files (and hope the browser keeps the connection going), hit capacity, then jump to the next cloud storage provider’s free tier and fill that up. With free accounts across the internet, all of the sudden you have your files stored all over the place, and you may not even remember where they all are. So, instead of my cardboard box full of various types of media, we end up with media in silos across different cloud providers.

And you can’t forget the cost. Cloud storage used to be all about the big guys. Beyond the free tiers, pricing was designed for big business, and many cloud storage providers have tiered pricing based on your usage, charges for downloads, throttled speeds, and so on. But, the cost of storage per GB has only decreased over the years, so (in theory), the cost of cloud storage should have gone down. (And I can’t resist a shameless plug here: At Backblaze, storage is ⅕ the cost of other cloud providers.)

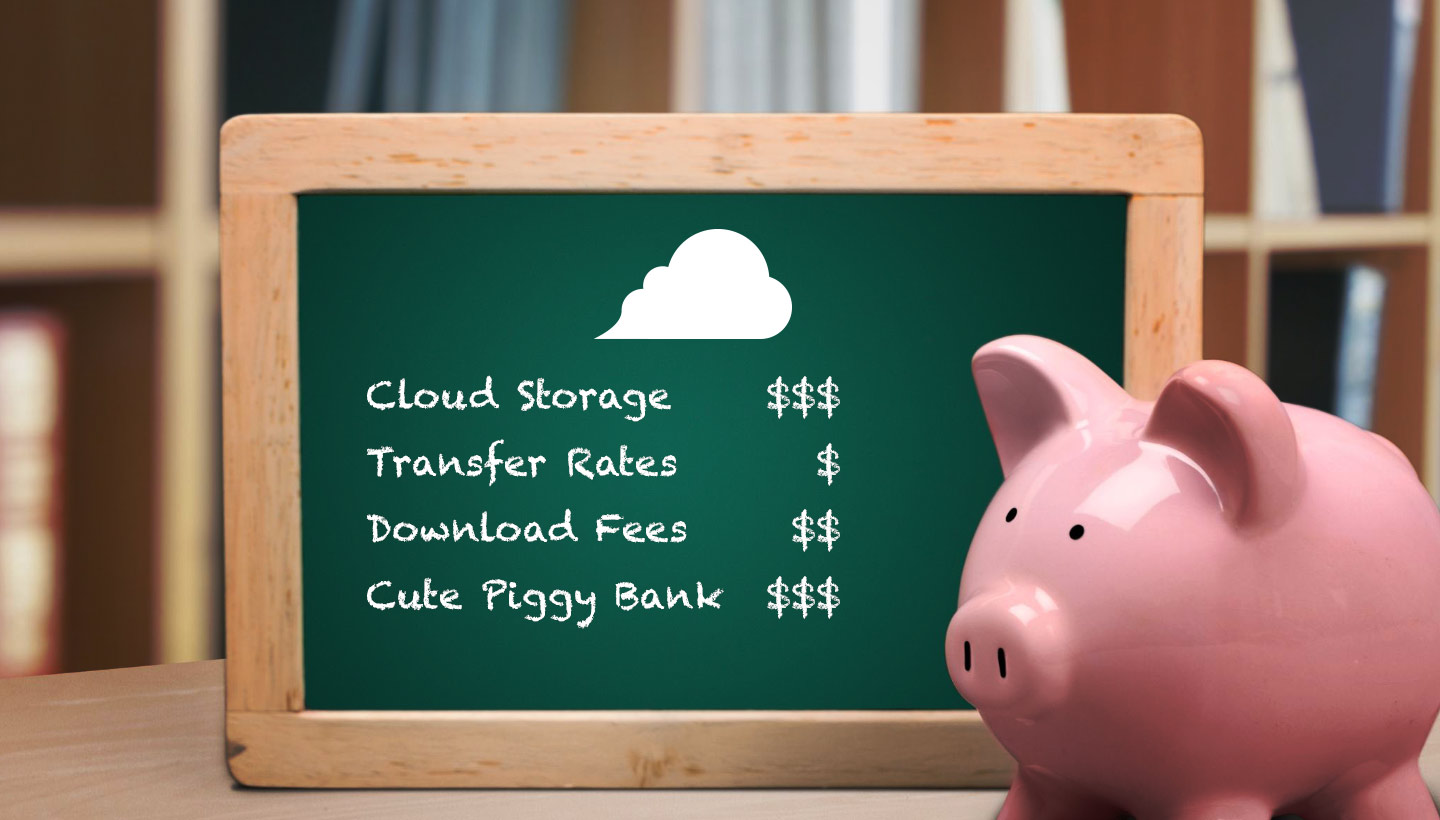
An image of a chalkboard and a piggy bank. The chalkboard displays a list of fees with dollar signs indicating how much or little they cost.
Key takeaway: Cute piggy bank, yes. Prohibitively expensive cloud storage, no.

Using NAS for Bigger Teams

It should be news to no one that COVID changed a lot in the media and entertainment industry, bringing remote work to our front door, and readily-available cloud products are powering those remote workflows. However, when you’re storing in each individual tool, it’s like when you have a USB drive over here, and an external hard drive over there.

As the media tech stack has evolved, a few things have changed. You have more options when it comes to choosing your cloud storage provider. And, cloud storage providers have made it a priority for tools to talk to each other through APIs. Here’s a good example: now that my media files are synced to and backed up with Synology and Backblaze, they are also readily accessible for other applications to use. This could be direct access to my Backblaze storage with a nonlinear editing system (NLE) or any modern workflow automation tool. Storing files in the cloud is only an entry point for a whole host of other cloud workflow hacks that can make your life immensely easier.

These days, you can essentially “bring your own storage” (BYOS, let’s make it a thing). Now, the storage is the foundation of how I can work with other tools, and it all happens invisibly and easily. I go about my normal tasks, and my files follow me.

With many tools, it’s as simple as pointing your storage to Backblaze. When that’s not an option, that’s when you get into why APIs matter, a story for another day (or another blog post). Basically, with the right storage, you can write your own rules that your tools + storage execute, which means that things like this LucidLink, iconik, and Backblaze workflow are incredibly easy.

Headline: Cloud Saves the (Media) World

So that’s the tale of how and why I set up my home NAS, and how that’s naturally led me to cloud storage. The “how” has gotten easier over the years. It’s still important to have a hard-wired internet connection for my NAS device, but now that you can sync to the cloud and point your other tools to use those synced files, you have the best of both worlds: a hybrid cloud workflow that gives you maximum speed with the ability to grow your storage as you need to.

Are you using NAS to manage your media at home or for a creative team? We’d love to hear more about your setup and how it’s working for you.

The post A Tale of Two NAS Setups, Part Two: Managing Media Files appeared first on Backblaze Blog | Cloud Storage & Cloud Backup.

What “Dead to Me” Taught Us About 3-2-1 Backup

Post Syndicated from Barry Kaufman original https://www.backblaze.com/blog/what-dead-to-me-taught-us-about-3-2-1-backup/

A decorative image showing a TV screen with a spotlight coming from the right. The numerals 3, 2, 1 are displayed on the background of the image; the words Dead to Me are displayed on the TV screen.

When you start thinking about backup strategies, it tends to get inside your head. Like Dustin Hoffman’s character in “Rain Man”, seeing equations float around him as he calculates his odds in Vegas, the mental exercise of ensuring your backups have backups of their own tends to manifest itself in the strangest places.

Take, for example, the finale of the Netflix show “Dead to Me” starring Christina Applegate and Linda Cardellini. The show wrapped up a few months back and should definitely be moving toward the top of your “I’ve been meaning to watch that” list. And if you have already seen it, I can’t stress enough how much more you pick up on a second time around.

Anyway, to a certain segment of the audience, the climax of the show served as a fitting conclusion to a whole host of storyline threads whose dense weave kept viewers enthralled from the first episode to the last. But to those of us who tend to worry about things like a proper 3-2-1- backup strategy, the final few episodes concealed a subtle message about the importance of proper data backup procedures.

Let’s dig into what “Dead to Me” can teach us about the importance of a good backup strategy.

Defining a 3-2-1 Backup Strategy

As we’ve discussed at length before, a good 3-2-1- backup strategy involves three copies of your data:

  • One: On-site storage on your home device. Your phone, your laptop, your tablet, whatever. If you can physically touch it and your files are in there somewhere, that’s your first copy.
  • Two: On-site storage on a separate device. This can be an external hard drive, a thumb drive, or if you’re on a Mac, Time Machine. If it’s not physically in the device, but it’s still somewhere close by, that’s your second copy.
  • Three: Off-site backup. This should automatically scan the files on your device and upload copies to the cloud for safe-keeping. (Pssst, we’re partial to Backblaze’s astonishingly simple cloud back up here).

Okay, So What Does That Have to Do With “Dead to Me”?

There’s kind of a long road ahead, so buckle up.

For those of you who haven’t seen it, or who binged it so long ago you need a refresher, “Dead to Me” follows the story of two friends, Jen (Applegate) and Judy (Cardellini). Jen is a recently widowed mom whose husband Ted had been killed in a hit and run shortly before the show started. Judy is a woman she meets during a group therapy session, who claims to have lost her husband as well.

Only, as it turns out, Judy didn’t lose her husband. They just split up—after an argument that started when they accidentally struck and killed Jen’s husband.

Intrigued yet? We’re only on the first episode.

By the end of the first season, Jen has discovered the truth about Judy (but they’re still friends), Judy is dating a police officer who is investigating the crime she committed, and her ex-husband Steve (James Marsden, playing against his usual type as a jerk) is desperately trying to cover up the crime while avoiding the Greek mafia, who have a contract out on him.

We cannot stress enough that all of this craziness happens in the first season, which ends with Jen accidentally murdering Steve by—of course—cracking him in the head with a wooden bird, which winds up as a critical plot point.

A image of a wooden bird statue.
You see tchotchke. I see danger.

From there the plot twists around on itself, throwing every curveball imaginable at you from secret twin brothers to money laundering schemes to torrid affairs (and hey, we already mentioned the Greek mafia). But critical to our point is one plot thread that could have been avoided with a proper backup strategy.

Karen and the… Let’s Call It 2-1 Strategy

A minor character in the first few seasons, Karen is a neighbor of Jen’s who… well, can be kind of a Karen. You know that person in your neighborhood that you suspect reports you to the Homeowner’s Association whenever your grass gets a little too long? That’s her.

As the neighborhood Karen, she has a natural inclination to keep an eye on things. As such, her house is ringed by security cameras. And as we learned in the season two premiere, one of those cameras just happened to spy Steve on his way to Jen’s house the night he was murdered.

Plot twist, right?

Since this is a huge piece of evidence implicating them in the murder they’re actively covering up, Jen and Judy have to ensure that the incriminating footage is destroyed forever. That means deleting the footage, which they discover has been safely stored in the cloud. They first try to convince Jeff, Karen’s ex, to log on and do it (side note: this happens after they discovered he was having an affair with one of Judy’s ex-boyfriends, because this show is bonkers) but unfortunately Karen has changed the password to her cloud storage.

So they have to sweet-talk their way into Karen’s house (greasing the wheels with her favorite dish—Mexican lasagna with extra raisins) and get her to delete the footage off the cloud. It’s a wonderful moment of female camaraderie as they convince Karen that the data on the cloud represents too many painful memories of her time with her ex. And when Karen finally drags the folder to the trash, we cheer her for finding the strength to move on.

A image of three women sitting at a counter drinking coffee in front of an open laptop.
Just a couple of friends, deleting files over coffee.

And then, the punchline.

“And if I ever want to see it again, I have it backed up on my hard drive,” she exclaims, holding up her external drive backup. Jen and Judy manage to steal that, and in doing so get away with their crime scot-free.

What Should Karen Have Done?

Look, we get that the show is trying to get us to root for Jen and Judy as our protagonists, but to be honest, murder is one of those things that is a little hard to look past.

Especially given that the FBI was looking into the crime at that point in the show, what Karen did could legally be considered obstruction of justice. Or at least unintended obstruction of justice, which we’re pretty sure is still a crime. (We on the blog team are definitely not lawyers, though.)

Had Karen utilized a proper 3-2-1 strategy, she should have had a third copy—the one on her local drive—even after she was tricked into deleting it from the cloud and handing over her external drive. And, if she was using Backblaze, she would have been able to access an earlier version of her backup with either our standard 30-day version history or Extended Version History. So, she could have pulled a copy even after she deleted it.

The Moral of the Story Is: 3-2-1 Backups Are Still the Best

Karen handed over all the incriminating evidence about the murder to the person who committed it. Which, true, made for a happy ending as far as the show is concerned. But for those of us who can’t seem to get 3-2-1 backup strategies out of our head, she committed a serious blunder. A 2-1 backup strategy just won’t cut it.

And that, folks, is how “Dead to Me” reminds us all once again that a 3-2-1 backup strategy is still the best way to keep your data safe and out of the hands of nefarious, if endearing, murderers.

The post What “Dead to Me” Taught Us About 3-2-1 Backup appeared first on Backblaze Blog | Cloud Storage & Cloud Backup.
World Backup Day: Backing Up by the Numbers

Post Syndicated from original https://www.backblaze.com/blog/world-backup-day-backing-up-by-the-numbers/

A decorative image displaying a globe with an arrow encircling it, the words World Backup Day, and a cloud with a stylized flame icon.

Today, March 31, is World Backup Day. If you don’t know, now you know! Some years ago, we and other denizens of the internet got together because we felt that the joy of protecting your data was worthy of celebration. Each year on this day, we encourage folks to take the pledge to backup their data. This year, we wanted to share some fun facts we pulled about our Backblaze Personal Backup service, and throw in a few things we’ve learned from our yearly backup poll as well. Spoiler: We do that poll again every year in June for Backup Awareness Month, so come visit us again then and we’ll review the trends.

The Who and Where of Backup

A caveat about this data: If you’re familiar with Backblaze, you know we have a few different services, including Backblaze Personal Backup, Backblaze Business Backup, and Backblaze B2 Cloud Storage. This article will only be referencing data from our Personal Backup service.

And, shout out to Simple Maps for providing us with geographic info that we mapped to our data.

The Winners: Which Cities Back Up the Most?

To be clear, we think anyone who’s backing up is a winner. But in this section, we decided to talk about both the cities with the most users per capita and the number of users in a city. Given that the second option rewards bigger cities, we thought it was a little unfair to just present that data.

2022 Top 5 Cities Where You’re Most Likely to Run Into a Backblaze User

Here, we take a look at the cities with the most Backblaze licenses per capita.

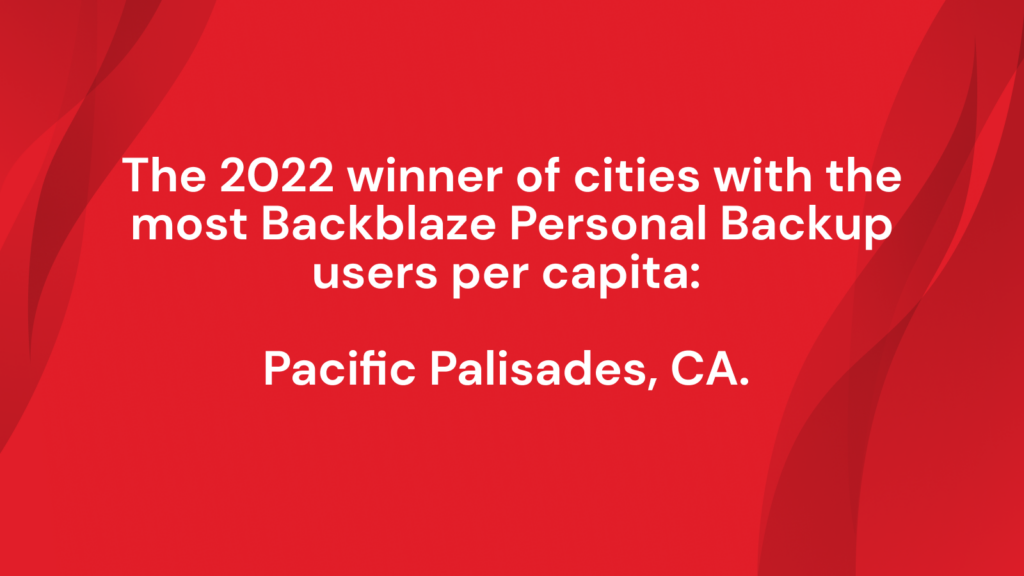
An image displaying the words: The 2022 winner of cities with the most Backblaze Personal Backup users per capita: Pacific Palisades, CA.
  1. Pacific Palisades, CA: 136.6
  2. Winnetka, IL: 129.1
  3. Orinda, CA: 128.2
  4. Beverly Hills, CA: 126.2
  5. Mill Valley, CA: 117.1

Good job California and a very special shout out to Winnetka! Way to go!

2022 Top 5 Cities With the Most Backblaze Users

And, here, we look at cities with the highest number of users.

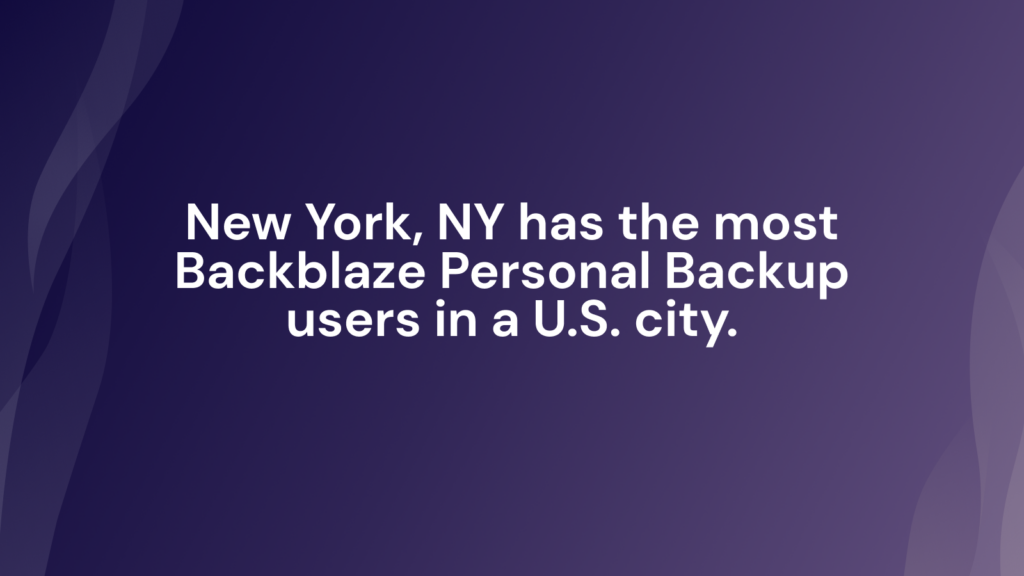
  1. New York, NY: 8,401
  2. Los Angeles, CA: 6,754
  3. Brooklyn, NY: 5,587
  4. San Francisco, CA: 5,117
  5. Seattle, WA: 5,021

The Potential: The Places We Want to Give Some Back Up Love To

Hey, we get it: we’re passionate about a relatively nerdy thing. (Back up. It’s still back up.) That said, we’re always looking for ways to spread the love and peace of mind that comes from data protection.

2022 Top 5 Cities Least Likely to Run Into a Backblaze User

Here’s where we look at cities with the least Backblaze users per capita.

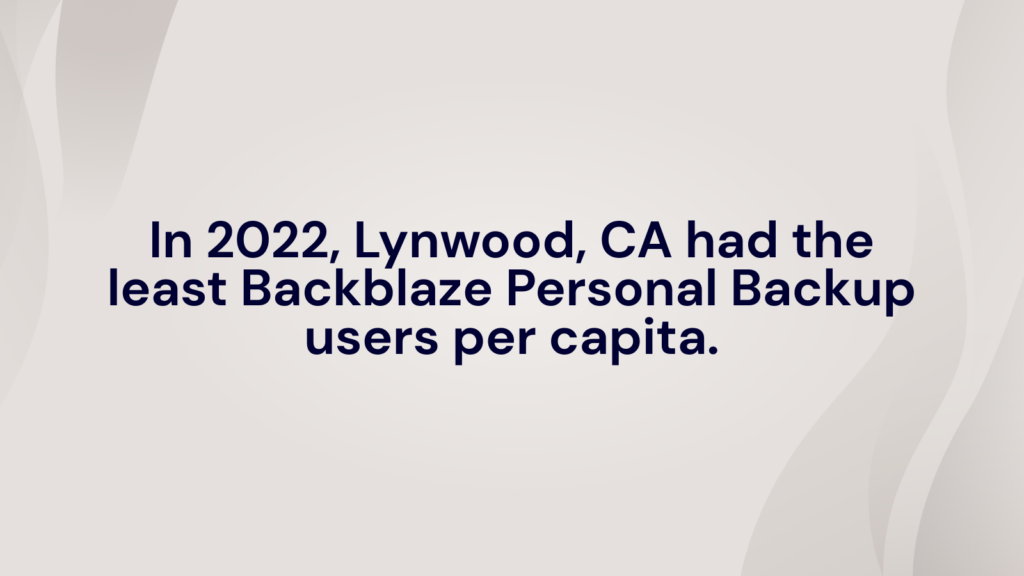
  1. Lynwood, CA: .14
  2. Arecibo, PR: .17
  3. Trujillo Alto, PR: .17
  4. Carolina, PR: .17
  5. Vega Baja, PR: .18

Clearly, we haven’t been giving Puerto Rico enough love. We’re sorry, Puerto Rico! We’d love to chat about back up with you.

2022 Cities With the Fewest Users

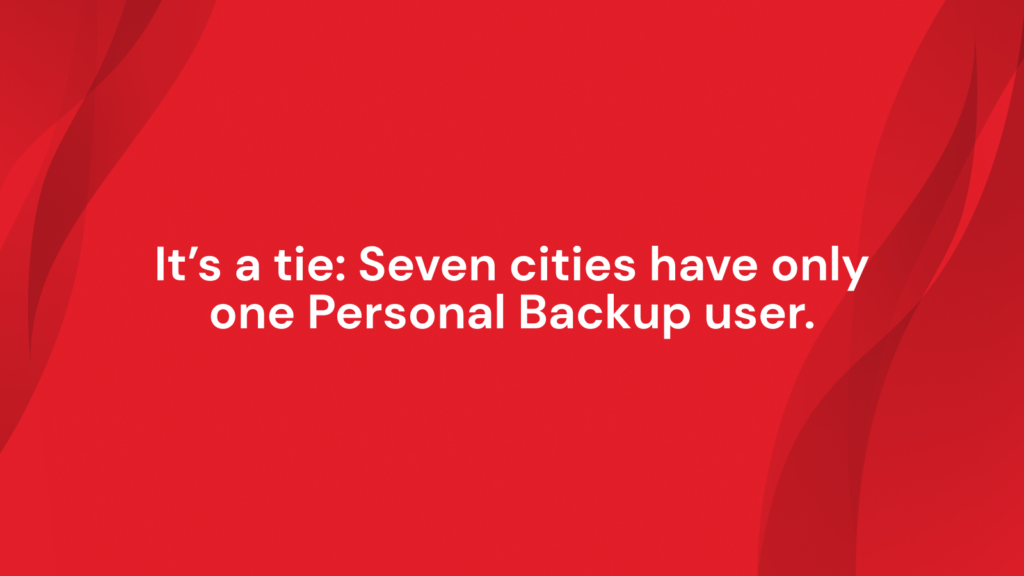
You might be noticing a pattern. Here, we look at cities with the least number of users in our database—so, cities with one license, because there are also cities with zero users. But to figure out which cities those are, we’d have to find a list of ALL the cities in the U.S. and deduplicate it against our list of cities with at least one license. It would be a whole thing. Let it suffice to say, there are cities with zero users, and we hope someday they have more.

  1. Arecibo, PR: 1
  2. Canovanas, PR: 1
  3. Carolina, PR: 1
  4. Lynwood, CA: 1
  5. Trujillo Alto, PR: 1
  6. Vega Baja, PR: 1
  7. Waianae, HI: 1

Given the amount of objectively beautiful places on this list, we’d love to assume you’re all busy outdoors and not stuck behind a computer.

State of Affairs

Okay, we’ve talked about cities, but things get even more interesting when you filter this by state instead. Buckle up, folks!

States With the Most Users Per Capita

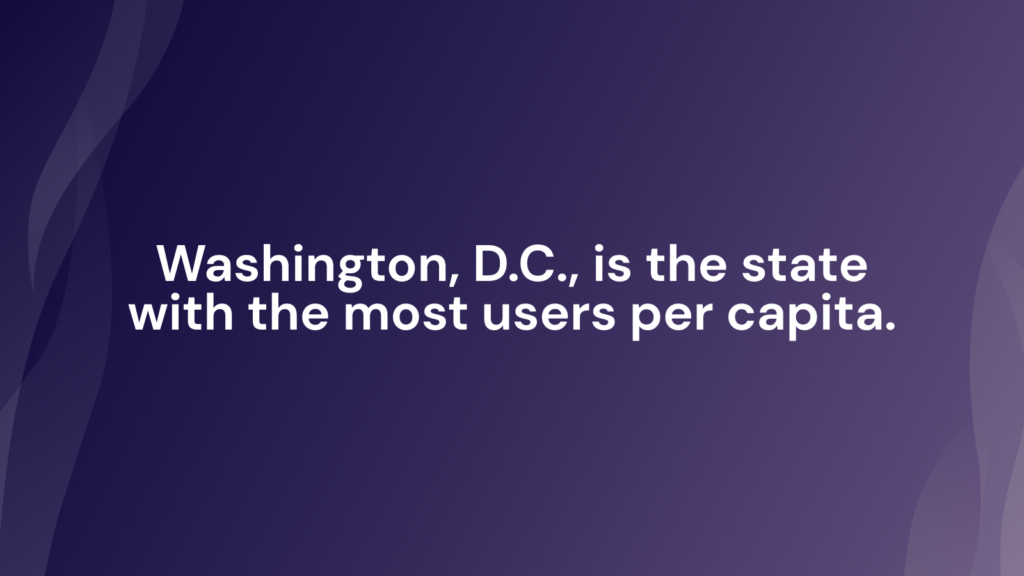
  1. Washington, D.C.: 26.04
  2. Vermont: 21.67
  3. Oregon: 21.60
  4. Washington: 20.67
  5. Colorado: 19.99

Finally, a list California didn’t make. (It’s number seven.) It’s super interesting when you compare this to the cities with the most users per capita, especially because our winner in that category has 136.6 compared to our winner here with 26.04.

Even if you take out Washington, D.C. (some folks might argue that it’s more fair to call it a city), Vermont comes in with 21.67 statewide. That’s less than a fifth of the concentration of users you’d find in Pacific Palisades, CA.

States With The Most Cities With Only One License Per Capita

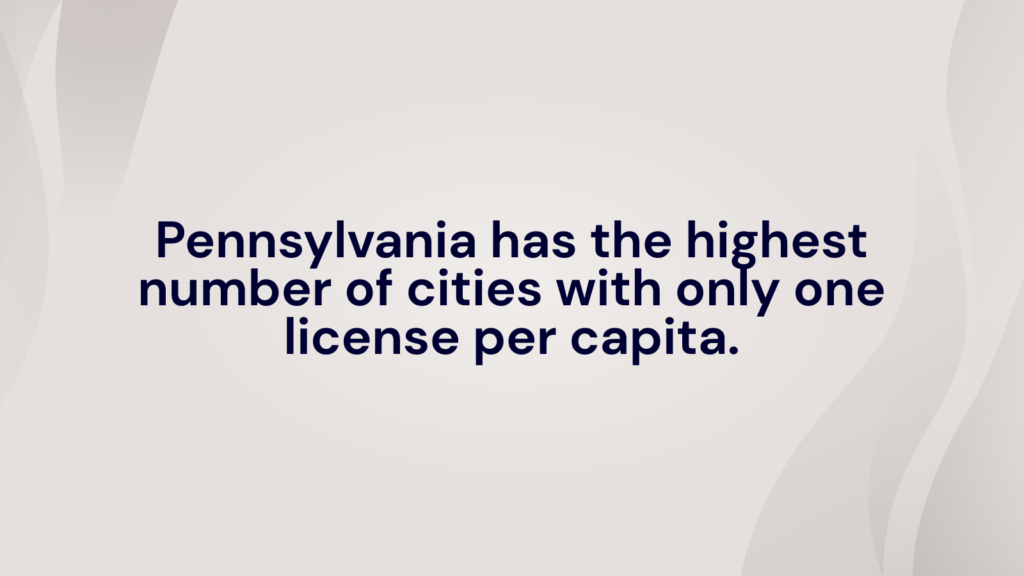
Some nuance here: This doesn’t mean states with the least number users, but rather states with the most cities with only one license. So, in essence, this list favors states that have a lot of cities.

  1. Pennsylvania—177
  2. New York—172
  3. Texas—166
  4. Illinois—126
  5. Ohio—126
  6. Iowa—112
  7. Minnesota—111
  8. Michigan—111
  9. California—106
  10. Indiana—101

Look at that! Some of our standouts above become a little less impressive when you get here. And, we’d like to note that California has made all but one of the lists so far: proof that backup stories are no simple matter of “best” and “worst”.

The Even Bigger Picture

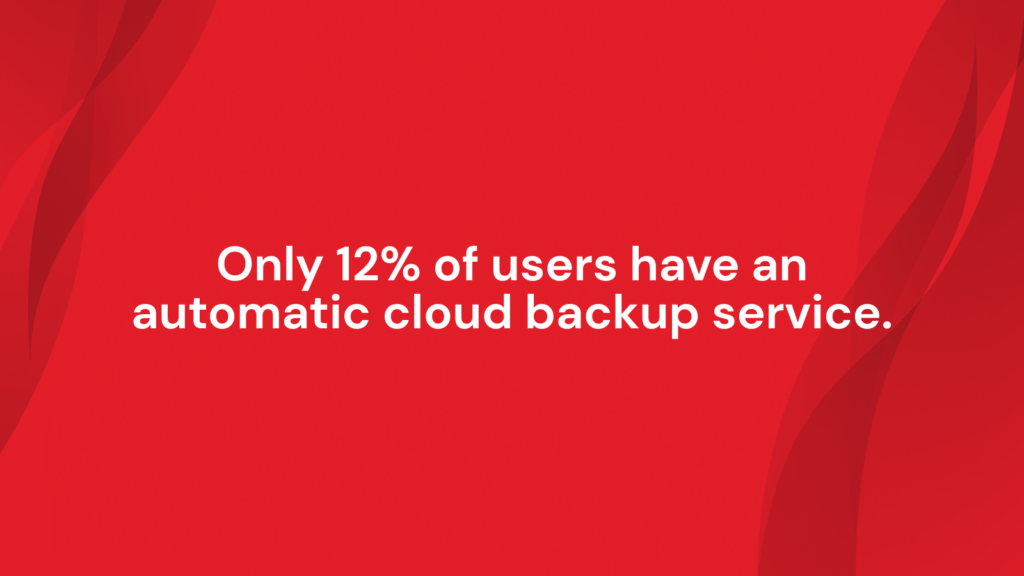
There are even more stories to tell when you compare this to our yearly backup poll. According to our data, only 12% of computer users use a cloud backup service like Backblaze. That means that the numbers we’re showing you here are a portion of the 12% of computer owners overall.

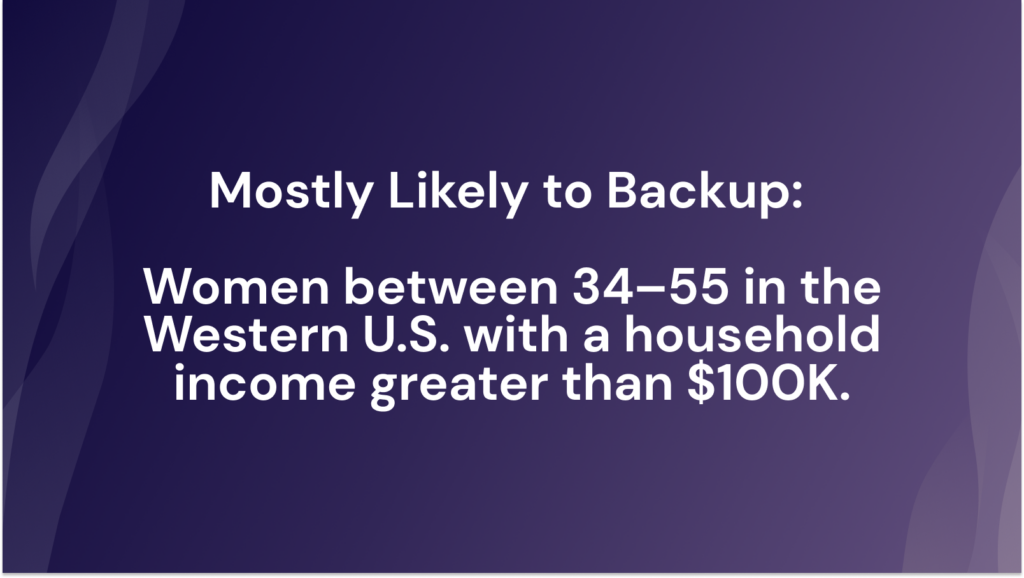
Still, the person most likely to be a backer upper—someone who owns a computer and backs it up at least once a day—likely lives in the Western United States. Even though we’re working with a smaller data set, it’s interesting to see that our data still reflects overall trends.

Celebrate With Us!

We hope you enjoyed our foray into data as much as we did. Feel free to take the World Backup Day pledge, reach out to us on socials, or comment below if you want to know more. And, check back in June to see the newest backup survey.

Until then, happy backing up!

The post World Backup Day: Backing Up by the Numbers appeared first on Backblaze Blog | Cloud Storage & Cloud Backup.
SSD 101: How Reliable are SSDs?

Post Syndicated from original https://backblazeprod.wpenginepowered.com/blog/how-reliable-are-ssds/

A decorative image showing an illustration of an SSD drive that exposes the interior. A headline reads How Reliable Are SSDs?
This article has been updated since it was originally published in 2023.

Solid state drives (SSDs) continue to grow in popularity, and no wonder. Compared to hard disk drives (HDDs), they are faster, smaller, more power efficient, and sturdier since they have no moving parts to jostle around. And, they are becoming available in larger and larger capacities while their cost comes down.

But are they really as dependable as they claim to be? SSDs still have vulnerabilities, and storage tech that lasts thousands of years isn’t commercially viable (yet!). 

In this post we’re going to consider the issue of SSD reliability. We’ll take a closer look at:

  • SSD tech.
  • SSD storage memory.
  • Reliability factors.
  • Signs of SSD failure.

So, how reliable is an SSD? Let’s dig in.

But First, Back It Up

Of course, as a data storage and backup company, you know what we’re going to say right off: No matter how you store your data, you should always back it up. Even if your data is stored on a brand new SSD, it won’t do you any good if your computer is stolen, destroyed by a flood, or lost in a fire or other act of nature. We recommend using a 3-2-1 backup strategy to safeguard your data.

SSD Tech

Almost all types of today’s SSDs use NAND flash memory. NAND isn’t an acronym like a lot of computer terms. Instead, it’s a name that’s derived from its logic gate, the basic building block of its memory cells, called “NOT AND.” (For the curious, a NAND gate is a logic gate that produces an output that is false only if all its inputs are true.)

A diagram of the interior motherboard of an SSD identifying the cache, controller, and NAND Flash Memory.

Flash (the term following NAND) refers to a non-volatile solid state memory that retains data even when the power source is removed. 

NAND storage has specific properties that affect how long it will last. NAND flash memory works by storing data in individual memory cells organized in a grid-like array. When data (a 1 or a 0) is written to a NAND cell (also known as programming), the data must be erased before new data can be written to that same cell. When writing and erasing a NAND cell, electrons are sent through an insulator and back, and the insulator starts to wear. Eventually, the insulator wears to the point where it may have difficulty keeping the electrons in their correct (programmed) location, which makes it increasingly more difficult to determine if the electrons are where they should be and to indicate the correct value (1 or 0) of the cell.

This means that flash type memory cells can only be reliably programmed and erased a given number of times. This is measured in programmed/erase cycles, more commonly known as P/E cycles.

P/E cycles are an important measurement of SSD reliability, but there are other factors that are important to consider as well including TBW (terabytes written) and MTBF (mean time between failures). Here are a few definitions to help keep everything straight:

Programmed/Erase Cycles (P/E Cycles)

A P/E cycle in solid state storage involves writing data to a NAND flash memory cell then erasing that data, so it is ready to be rewritten. The endurance of an SSD, measured in P/E cycles, varies depending on the technology, but typically falls somewhere between 500 and 100,000 P/E cycles. 

Terabytes Written (TBW)

Terabytes written is the total amount of data that can be written to an SSD before it is likely to fail. For example, here are the TBW warranties for the popular Samsung V-NAND SSD 870 EVO:

  • 250GB model: 150TBW
  • 500GB model: 300TBW
  • 1TB model: 600TBW
  • 2TB model: 1,200TBW
  • 4TB model: 2,400TBW

All of these models are warrantied for five years or TBW, whichever comes first.

Mean Time Between Failures (MTBF)

MTBF is a metric used to gauge the reliability of a hardware component throughout its anticipated lifespan. For most components, the measure is typically in thousands or even tens of thousands of hours between failures. For example, an HDD may have a mean time between failures of 300,000 hours, while an SSD might have 1.5 million hours.

Manufacturers provide these specifications for their products. They can help you understand your drives’ expected lifespan as well as its suitability for specific applications.

Be careful when reviewing the specifications though, as they don’t guarantee your particular SSD will last for that specific duration. Rather, they indicate that, based on a sample set of the SSD model, errors are anticipated to occur at a certain rate. A 1.2 million hour MTBF means that, assuming the drive is used at an average of eight hours a day, a sample size of 1,000 SSDs would be expected to have one failure every 150 days, or about twice a year.

Today, many SSDs come with a utility which monitors the life expectancy of the drive. Their recommendations are based on monitoring the SMART attributes of the drive. As we discussed in a previous post, there is little consistency between the different SSD manufacturers in what attributes they monitor and how they calculate drive life expectancy. Therefore, it is important that you read the manual for your particular SSD if you are interested in using this information to decide when to replace your SSD.

SSD Storage Memory

There are currently five different NAND flash cell technologies based on the number of bits stored per cell, which we’ll discuss below. Generally, as the number of bits stored per cell increases, the cost per bit decreases, but endurance and performance may decrease as well.

SLC (Single Level Cell): One Bit Per Cell

SLC was the first type of NAND flash storage developed. It stores one bit per cell. SLC storage is fast and wear is minimal. On the downside, it’s not space-efficient; that is, the physical size of the SSD form factor used.

MLC (Multi-Level Cell): Two Bits Per Cell

MLC stores two bits per cell. This basically doubled the amount of storage and lowered the cost for a given form factor. But MLC is slower as it has to distinguish between the two bits in a given cell.

TLC (Triple Level Cell): Three Bits Per Cell

The trend continued with TLC where three bits are stored per cell. This advancement had two interesting consequences. First, the unit cost started to be appealing to most audiences. While still two to three times as expensive as a comparable hard drive, a TLC-based SSD was affordable. Second, the TLC technology hastened the introduction of caching within the SSD, as the unaided read/write speeds had dipped to near those of a hard drive.

QLC (Quad Level Cell): Four Bits Per Cell

QLC is the current “standard.” It stores four bits per cell. This increases storage density yet again, lowers the price even more, and, with caching improvements, continues to deliver superior speed. On the downside, the drive can wear out sooner, especially as it fills up.

3D NAND

In the previous technologies the cells are side by side in a single, two-dimensional layer—this design is described as planar. In 3D NAND, the cells are stacked three-dimensionally. This improves storage density and speed, but increases the manufacturing cost and lowers endurance over time.

In general SLC and MLC are faster and last longer, but are limited to the amount of space. TLC and QLC technologies can store data at a lower cost, but may be slower. However, the difference in speed is probably negligible for the average consumer, and is sometimes made up for by things like dynamic caching. The 3D NAND technology is a great choice, but be prepared to pay more.

SSD Reliability Factors to Consider

Compared to HDDs, SSDs are sturdier. Since they don’t have moving parts like actuator arms and spinning platters, they can withstand accidental drops and other shocks, vibration, extreme temperatures, and magnetic fields better than HDDs. Add to that their small size and lower power consumption, and the idea of replacing HDDs with SSDs could be worth the time and effort.

That’s not exactly the whole story though. There are different performance and reliability criteria you should use depending on whether the SSD will be used in a home desktop computer, a data center, or an exploration vehicle on Mars. And SSD manufacturers are increasingly marketing SSDs for specific workloads such as write-intensive, read-intensive, or mixed-use. What that means is that you can select the optimal level of SSD endurance and capacity for a particular use case. 

For instance, an enterprise user with a high-transaction database might opt for a drive that can withstand a higher number of writes at the expense of capacity. Or, a user operating a database that doesn’t get frequent writes might choose a lower performance drive with a higher capacity. By doing this, the manufacturers are hiding the complexity embedded in the technology like storage NAND (SLC, MLC, etc), caching, and so on. That said, it does make it easier to match your requirements to the best type of SSD.

Signs of SSD Failure

You’ve likely encountered the dreaded clicking sound that emanates from a dying HDD. An SSD has no moving parts, so you won’t get an audible warning that an SSD is about to fail, but there are usually other signs of when that’s going to happen. If you start to notice any of them, take action by replacing that drive with a new one. Indicators that your SSD is nearing its end of life include:

1) Errors Involving Bad Blocks

Much like bad sectors on HDDs, there are bad blocks on SSDs. If you have a bad block, the computer will typically try to read or save a file, but it takes an unusually long time and ends in failure, so the system eventually gives up and sends an error message.

2) Files Cannot Be Read or Written

There are two ways in which a bad block can affect your files. First, the system detects the bad block while writing data to the drive, and thus refuses to write data, or second, the system detects the bad block after the data has been written, and thus refuses to read that data.

3) The File System Needs Repair

Getting an error message like this on your screen can happen simply because the computer was not shut down properly, but it also could be a sign of an SSD developing bad blocks or other problems.

4) Crashing During Boot

A crash during the computer boot is a sign that your drive could be developing a problem. You should make sure you have a current backup of all your data before it gets worse and the drive fails completely.

5) The Drive Becomes Read-Only

Your drive might refuse to write any more data to disk and can only read data. Fortunately, you can still get your data off the disk, and you should.

So, How Reliable Is an SSD?

Let’s break down the reliability of SSDs into three, more specific questions:

Question 1: How long can we reasonably expect an SSD to last?

Answer: An SSD should ideally last as long as its manufacturer expects it to last (generally five years), provided that the use of the drive is not excessive for the technology it employs (e.g. using a QLC in an application with a high number of writes). Consult the manufacturer’s recommendations to ensure that how you’re using the SSD matches its best use.

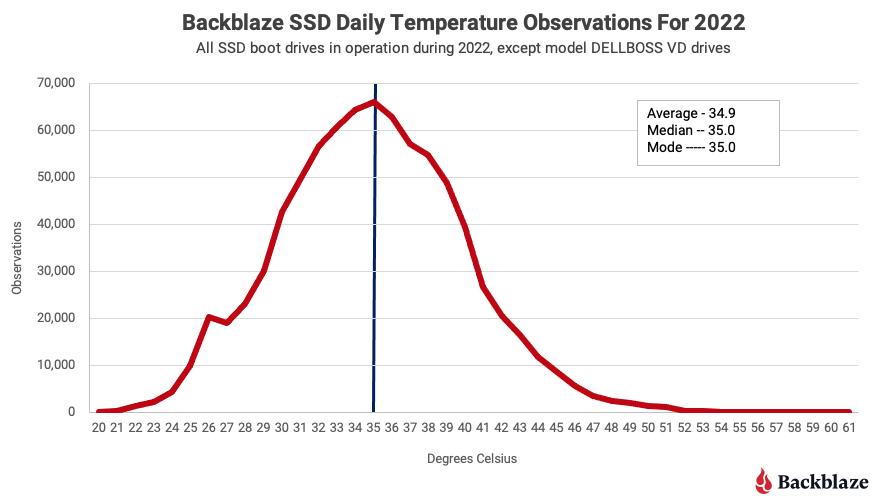
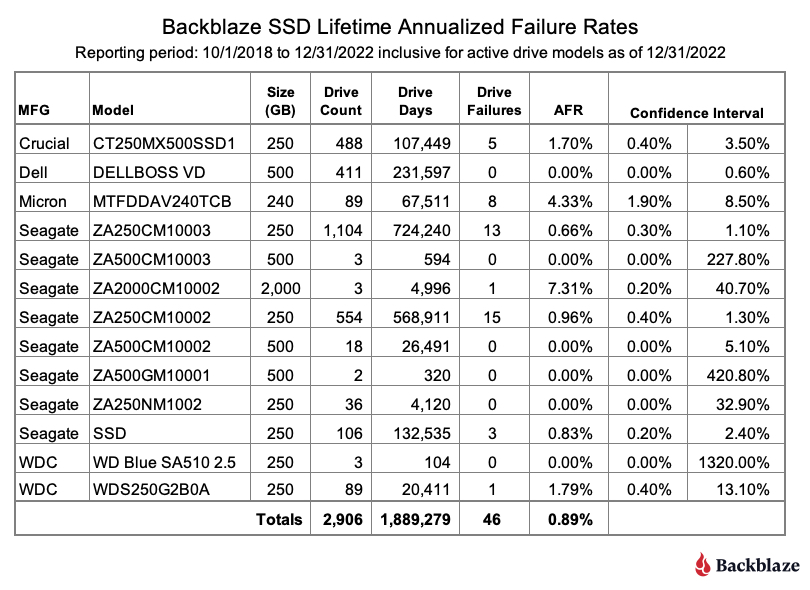
Here at Backblaze we use SSDs for many different applications. The one use case we have rigorous reliability data for is as boot drives in our storage servers. This cohort of drives does more than boot these servers; they also write, store, read, and delete log files of various types recorded by the storage servers on a daily basis. The latest Drive Stats SSD Edition illuminates the reliability of the drive models we use for this purpose.

Question 2: Do SSDs fail faster than HDDs?

Answer: There are many variables in comparing the reliability of HDDs and SSDs, the primary one being how they are used. In the SSD Drive Stats report noted above, we compared SSD and HDD boot drives as they performed the same function in the same types of systems, storage servers. While it seems in the first three years or so the different drives are similar in their failure curves, the curves separate after four years, with the HDDs failing at a higher rate. So far the SSDs have maintained a 1% or less Annualized Failure Rate (AFR) through the first four years.

SSD users are far more likely to replace their storage drive because they’re ready to upgrade to a newer technology, higher capacity, or faster drive, than having to replace the drive due to a short lifespan. Under normal use we can expect an SSD to last years. If you replace your computer every three years, as most users do, then you probably needn’t worry about whether your SSD will last as long as your computer. What’s important is whether the SSD will be sufficiently reliable that you won’t lose your data during its lifetime.

Question 3: Are SSDs good for long-term storage?

Answer: SSDs, like hard drives, are meant to be used. An external drive stuffed into a closet for a couple of years is never a good thing, and it doesn’t matter whether it is an SSD or HDD inside. The evidence of whether an SSD will fare better than a HDD in such a circumstance is anecdotal at best. Still, it is better to use an external drive as a backup of your computer as part of your backup plan—just don’t make it your only backup.

Summary

It’s good to understand how the different SSD technologies affect their reliability, and whether it’s worth it to spend extra money for SLC over MLC or QLC. However, unless you’re using an SSD in a specialized application with more writes than reads as we described above, just selecting a good quality SSD from a reputable manufacturer should be enough to make you feel confident that your SSD will have a useful life span.

Keep an eye out for any signs of failure or bad sectors, and, of course, be sure to have a solid backup plan no matter what type of drive you’re using.

FAQs

1. How do you measure SSD reliability?

There are a number of metrics that can help you understand SSD reliability, including programmed/erase (P/E) cycles, terabytes written (TBW), and mean time between failures (MBTF). These metrics alone won’t be able to tell you how long a given SSD will last, but they can help you understand roughly where your SSD is in its lifecycle. Check the manufacturer’s warranty and endurance rating in TBW. Higher values indicate better durability.

2. What are programmed/erase (P/E) cycles?

A solid-state storage programmed/erase (P/E) cycle is a sequence of events in which data is written to a solid-state NAND flash memory cell, then erased, and then rewritten. How many P/E cycles a SSD can endure varies with the technology used, somewhere between 500 to 100,000 P/E cycles.

3. What SSD should I buy?

The ideal SSD to buy depends on your specific needs. Consider factors like capacity, speed, and budget. For most users, a mid-range SSD from a reputable brand offers a good balance of performance and affordability. SSD manufacturers are increasingly marketing SSDs for specific workloads such as write-intensive, read-intensive, or mixed-use. What that means is that you can select the optimal level of SSD endurance and capacity for a particular use case. For instance, an enterprise user with a high-transaction database might opt for a drive that can withstand a higher number of writes at the expense of capacity. Or, a user operating a database that doesn’t get frequent writes might choose a lower performance drive with a higher capacity.

4. How do I know my SSD is going to fail?

SSDs will eventually fail, but there usually are advance warnings of when that’s going to happen. Some warning signs include errors involving bad blocks, being unable to read or write files, getting error messages that the file system needs repair, crashes during boot, or when your drive becomes read-only. When this happens, make sure you have a good backup.

5. How long can I expect an SSD to last?

An SSD should ideally last as long as its manufacturer expects it to last (generally five years), provided that the use of the drive is not excessive for the technology it employs. Consult the manufacturer’s recommendations to ensure that how you’re using the SSD matches its best use.

6. Do SSDs fail faster than HDDs?

There are many variables in comparing the reliability of HDDs and SSDs, the primary one being how they are used. SSD users are far more likely to replace their storage drive because they’re ready to upgrade to a newer technology, higher capacity, or faster drive, than having to replace the drive due to a short lifespan. Under normal use we can expect an SSD to last years. If you replace your computer every three years, as most users do, then you probably needn’t worry about whether your SSD will last as long as your computer. What’s important is whether the SSD will be sufficiently reliable that you won’t lose your data during its lifetime.

7. Are SSDs good for long-term storage?

SSDs, like hard drives, are meant to be used. An external drive stuffed into a closet for a couple of years is never a good thing, and it doesn’t matter whether it is an SSD or HDD inside. The evidence of whether an SSD will fare better than a HDD in such a circumstance is anecdotal at best. Still, it is better to use an external drive as a backup of your computer as part of your backup plan—just don’t make it your only backup.

The post SSD 101: How Reliable are SSDs? appeared first on Backblaze Blog | Cloud Storage & Cloud Backup.
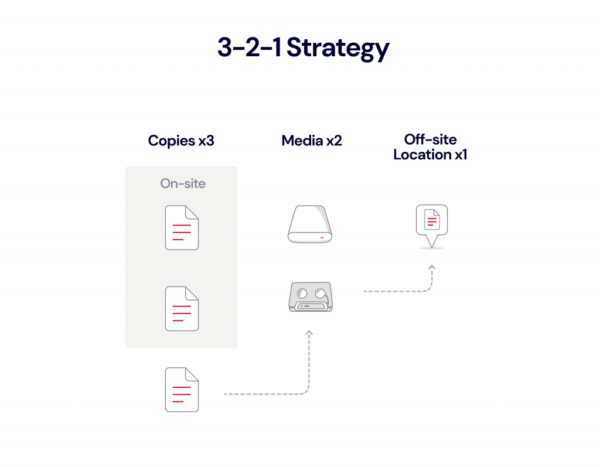
Building Your (Digital) Go Bag

Post Syndicated from Stephanie Doyle original https://www.backblaze.com/blog/building-your-digital-go-bag/

A decorative image of several icons that represent photos, documents, identification cards, and money flowing into a backpack.

Quick! You have 10 minutes to get your most important documents out of your house. What do you need?

Here’s another scenario: you’re away from home and you find out there was a fire. Are you confident that you have all your important information somewhere you can access?

It’s never fun to imagine disaster scenarios, but that doesn’t mean you should avoid the necessary preparation. Building a good emergency kit checklist—and digitizing the things you can—is one of the easiest things you can do to give yourself peace of mind. Today, I’m covering all the things that can and should go into your digital go bag.

Editor’s Note

We’ve had this article on our calendar for a while now, and it’s part of our campaign to celebrate World Backup Day. But, we never want to be the ones shifting the focus from the victims of natural disasters. With the devastating storms that rolled through the U.S. South and beyond this weekend, we wanted to take a moment to say that our thoughts are with everyone affected, and if you have the ability to donate, this is a great boots-on-the-ground charity helping folks out right now.

Disaster Prep: Better Known as Recovery Planning

It may seem far-fetched that you’ll be in the position to get the essentials in only 10 minutes, but speaking from personal experience, that’s exactly what happened to me when the 2003 Cedar Fire struck in San Diego—there’s nothing like seeing your friends’ homes on the national news, let me tell you. And, having spent much of my adult life in hurricane-prone New Orleans, disaster readiness is just a way of life. It’s common to discuss the incoming storms with the old-timers in your neighborhood bar over a $2 afternoon High Life, and they are almost always right in predicting if a hurricane is going to turn and hit Florida.

A photo of Jim Cantore in a storm pointing ahead.
And you always know it’s a serious weather event when Jim Cantore comes to town. Source.

One of the things these experiences have taught me is that disasters and recovery happen in stages. There’s the inciting event—a house fire, a hurricane, etc.—and then there’s the displacement and recovery. You’re trying to call an insurance company when the lines are all tied up, and when you finally get through, you need to give them information that they need when you’re far from home and in crisis. You may have renter’s insurance, but when you’re trying to re-buy your book collection, really, which ones did you have? And, there are some things that can’t be replaced—photos are a great example. Finding a way to organize and digitize these things means that you don’t have to worry about stuff when you should be worrying about people.

All that to say, the more you can do to be prepared ahead of time, the better. That means not only having your documents in a place you can access, but also knowing what documents you need in the first place. While this type of file organization started out in response to natural disasters, it’s actually helped in many other ways—I always know where my files are to give to my tax guy, and I’ve implemented a good 3-2-1 backup strategy, which means I’m confident my data is protected and accessible.

As it happens, there’s a name for this type of intentional preparation when you’re building an emergency kit: folks call those kits go bags. It makes sense right? You have a bag that holds the things you need to go. These days, though, many of the things that you’d traditionally include in that physical bag can also be digitized. So, with all that in mind, let’s talk about how to build your (digital) go bag.

What Documents Do I Need in My Emergency Kit?

A little caveat here: just because you can digitize something, doesn’t mean that should be your only copy. There are some things that you just flat-out need to have in person, like your driver’s license, though some states have experimented with digital wallets that contain official, legal copies of those things. Nevertheless, having a digital backup of your important physical documents means that you’ll have the information to replace them should you need to.

After that, you can break your go bag checklist into a few different categories.

  • Household Identification
  • Financial and Legal Information
  • Medical Information
  • Emergency Contact Information
  • Valuables and Priceless Personal Items

We’ve shamelessly borrowed this information from a Federal Emergency Management Agency (FEMA) list of essentials, and we’ve added a few notes as well. Let’s break down each category.

Household Identification

These are all the things you need to prove you are who you say you are, and to prove that your kids, pets, and spouse are, in fact, your kids, pets, and spouse. It may seem like this isn’t important, but there were whole organizations dedicated to reuniting pets with their rightful owners after Hurricane Katrina—and it wasn’t easy. And, imagine if you’ve divorced and don’t have custody papers in an emergency. Sure, courts have records of those agreements, but sometimes those papers take weeks or months to get copies of.

The List

  • Vital Records: Birth certificates, marriage agreements, divorce decrees, adoption or custody papers.
  • Identity Records: Passports, driver’s license, i.d. card, Social Security card, green card, visa, military service i.d.
  • Pet Records: Pet ownership papers, identification tags, microchip information.
A photo of a woman kissing her very cute dog in front of a window.
Your dog, blissfully unaware that your legal relationship to each other is documented.

Financial and Legal Information

If your home or income is affected during a disaster, you’ll need documentation to request assistance from your insurance company or government disaster assistance programs. Remember that even after you get assistance, all that comes with tax implications down the road (for better or worse). Both of those processes take time, so in addition to having your information organized and ready to go, try to keep some emergency cash on hand during high-risk time periods.

The List

  • Housing Documents: Lease or rental agreements, mortgage agreement, home equity line of credit, house or property deed, lists of/receipts for repairs.
  • Bills: Utility bills, student loans, alimony, child support, elder care, gym memberships, streaming services.
  • Vehicle Documents: Loan documents, VIN number, registration, title.
  • Financial Accounts: Checking, savings, debit cards, credit cards, retirement accounts, investment accounts.
  • Insurance Policies: Homeowners, renters, auto, life, flood, fire.
    • Note: Don’t forget to document your property! Make a list of items covered by insurance with their estimated values, and take pictures of all that stuff.
  • Sources of Income: Pay stubs, government benefits, alimony, child support, rent payments, 1099 income.
  • Tax Statements: Federal/state income tax returns, property tax, vehicle tax.
  • Estates Planning: Wills, trusts, powers of attorney.

Medical Information

Even more so than the other sections on this list, it’s important to make sure you have thorough documentation for each member of your household. Remember that there are some items on this list that you’ll need sooner rather than later—think prescription refills. And, make sure that allergy information is front and center, especially life-threatening allergies (like to seafood or nuts).

The List

  • Insurance Information: Health and dental insurance, Medicare, Medicaid, Veterans Administration (VA) health benefits.
  • Medical Records: List of medications, illnesses/disabilities, immunizations, allergies, prescriptions, medical equipment and devices, pharmacy information.
  • Legal Documents: Living will, medical powers of attorney, Do Not Resuscitate (DNR) documents, caregiver agency contracts, disabilities documentations, Social Security (SSI) benefits information.
  • Contact Information: A list of doctors, specialists, dentists, pediatricians.

(Emergency) Contact Info

Finally, you’ll want all of the contact information you may need in one place—it’ll save you time and headaches when you’re trying to make calls, plus you may be able to delegate some phone calls to others. The exercise itself is useful to help you remember any miscellaneous items you may have forgotten in your other documents. Bonus: you can keep a list of extensions or direct phone lines and skip the automated phone tree.

A photo of a man wearing a phone headset and sitting at a computer, smiling at the viewer of the photo.
Press one for more options.

The List

  • Employers
  • Schools
  • Houses of worship
  • Homeowners’ associations
  • Home repair services
  • Relatives/emergency contacts
  • Utility companies
  • Insurance companies
  • Lawyers
  • Local non-emergency services
  • Government agencies

Valuables and Priceless Personal Items

Most of the things that fit in this section aren’t able to be digitized—your wedding dress, heirlooms, jewelry, and the like. Still, don’t forget that those things may have a paper trail you want to keep in your records, especially if you have additional insurance on things like the jewelry.

And, you can never forget to mention photos in this section. While most of us are now in the habit of using our smartphones as cameras, so most of our new photos are already stored in the cloud, don’t forget to digitize all of your photos, including the ones passed down by relatives, taken by professionals, and so on. And, even though it seems like our phones are safer than other formats, you’ll want to back up your mobile devices as well.

Go Bag: Go for Backups

Here’s the short answer to the question of what to digitize: anything you can. Even if the digital copies aren’t legally acceptable, like in our i.d. example above, you’ll at least have the information to fill out online forms or re-order the documents as necessary.

Once you have digital copies of all of these documents, it’s also easy to backup your information. We recommend that you follow a 3-2-1 backup strategy: having three copies of your files in two separate locations with one of those locations off-site. That way, you can grab your documents and go if you’re at home, or if the worst happens and you can’t access that on-site information, you can access all that information in the cloud.

A decorative image of a lightbulb with 3-2-1 in a halo surrounding it. Also, a title that says "3-2-1 Backup Strategy"
The 3-2-1 backup strategy: always a great idea.

Is My Go Bag Safe Online?

Good question. This is the most important information in your life, and we’re asking you to store it all online, the playground of cybercriminals. There’s a lot you can do to protect yourself, though. You’ve already achieved one of those things: setting up a backup strategy. You should also store your data in a secure location. Watch out for clever phishing attempts. And, make sure you follow password best practices, including setting up multi-factor authentication (MFA).

Make It a Holiday to Update Your Information Regularly

Remember that a lot of the information on this list will change over time. Maybe you’re the type of person who remembers to update their files continuously or when something big changes, but it’s a good idea to set one day per year (Around tax day? Maybe going into hurricane season? Groundhog’s Day?) that you intentionally set as Update Important Information Day. (We’re big fans of holidays that combine the whimsical and the practical here at Backblaze.) Feel free to workshop the holiday title and celebrate judiciously. Then, use a backup service like Backblaze Personal Backup that continuously and automatically backs up your data, and you’ll be pretty well prepared for whatever life throws at you.

The post Building Your (Digital) Go Bag appeared first on Backblaze Blog | Cloud Storage & Cloud Backup.
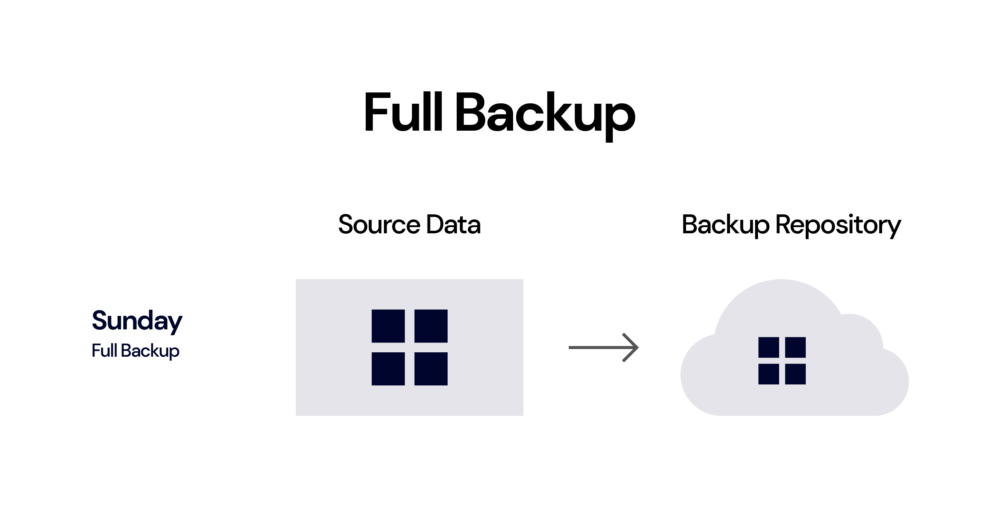
Object Storage for Film, Video, and Content Creation

Post Syndicated from James Flores original https://www.backblaze.com/blog/object-storage-for-film-video-and-content-creation/

A decorative image showing icons representing drives and storage options superimposed on a cloud. A title reads: Object Storage for Media Workflows

Twenty years ago, who would have thought going to work would mean spending most of your time on a computer and running most of your applications through a web browser or a mobile app? Today, we can do everything remotely via the power of the internet—from email to gaming, from viewing our home security cameras to watching the latest and greatest movie trailers—and we all have opinions about the best browsers, too…

Along with that easy, remote access, a slew of new cloud technologies are fueling the tech we use day in and day out. To get to where we are today, the tech industry had to rethink some common understandings, especially around data storage and delivery. Gone are the days that you save a file on your laptop, then transport a copy of that file via USB drive or CD-ROM (or, dare we say, a floppy disk) so that you can keep working on it at the library or your office. And, those same common understandings are now being reckoned with in the world of film, video, and content creation.

In this post, I’ll dive into storage, specifically cloud object storage, and what it means for the future of content creation, not only for independent filmmakers and content creators, but also in post-production workflows.

The Evolution of File Management

If you are reading this blog you are probably familiar with a storage file system—think Windows Explorer, the Finder on Mac, or directory structures in Linux. You know how to create a folder, create files, move files, and delete folders. This same file structure has made its way into cloud services such as Google Drive, Box, and Dropbox. And many of these technologies have been adopted to store some of the largest content, namely media files like .mp4, .wav, or .r3d files.

But, as camera file outputs grow larger and larger and the amount of content generated by creative teams soars, folders structures get more and more complex. Why is this important?

Well, ask yourself: How much time have you spent searching for clips you know exist, but just can’t seem to find? Sure, you can use search tools to search your folder structure but as you have more and more content, that means searching for the proverbial needle in a haystack—naming conventions can only do so much, especially when you have dozens or hundreds of people adding raw footage, creating new versions, and so on.

Finding files in a complex file structure can take so much time that many of the aforementioned companies create system limits preventing long searches. In addition, they may limit uploads and downloads making it difficult to manage the terabytes of data a modern production creates. So, this all begs the question: Is a traditional file system really the best for scaling up, especially in data-heavy industries like filmmaking and video content creation? Enter: Cloud object storage.

Refresher: What is Object Storage?

You can think of object storage as simply a big pool of storage space filled with object data. In the past we’ve defined object data as “some assemblage of data with one unique identifier and an infinite amount of metadata.” The three components that comprise objects in object storage are key here. They include:

  1. Unique Identifier: Referred to as a universally unique identifier (UUID) or global unique identifier (GUID), this is simply a complex number identifier.
  2. Infinite Metadata: Data about the data with endless possibilities.
  3. Data: The actual data we are storing.

So what does that actually mean?

It means each object (this can be any type of file—a .jpg, .mp4, .wav, .r3d, etc.) has an automatically generated unique identifier which is just a number (e.g. 4_z6b84cf3535395) versus a folder structure path you must manually create and maintain (e.g. D:\Projects\JOB4548\Assets\RAW\A001\A001_3424OP.RDM\A001_34240KU.RDC\
A001_A001_1005ku_001.R3D).

An image of a card catalog.
Interestingly enough, this is where metadata comes from.

It also means each object can have an infinite amount of metadata attached to it. Metadata, put simply, is a “tag” that identifies how the file is used or stored. There are several examples of metadata, but here are just a few:

  • Descriptive metadata, like the title or author.
  • Structural metadata, like how to order pages in a chapter.
  • Administrative metadata, like when the file was created, who has permissions to it, and so on.
  • Legal metadata, like who holds the copyright or if the file is in the public domain.

So, when you’re saying an image file is 400×400 pixels and in .jpg format, you’ve just identified two pieces of metadata about the file. In filmmaking, metadata can include things like reel numbers or descriptions. And, as artificial intelligence (AI) and machine learning tools continue to evolve, the amount of metadata about a given piece of footage or image only continues to grow. AI tools can add data around scene details, facial recognition, and other identifiers, and since those are coded as metadata, you will be able to store and search files using terms like “scenes with Bugs Bunny” or “scenes that are in a field of wildflowers”—and that means that you’ll spend less time trying to find the footage you need when you’re editing.

When you put it all together, you have one gigantic content pool that can grow infinitely. It uses no manually created complex folder structure and naming conventions. And it can hold an infinite amount of data about your data (metadata), making your files more discoverable.

Let’s Talk About Object Storage for Content Creation

You might be wondering: What does this have to do with the content I’m creating?

Consider this: When you’re editing a project, how much of your time is spent searching for files? A recent study by GISTICS found that the average creative person searches for media 83 times a week. Maybe you’re searching your local hard drive first, then your NAS, then those USB drives in your closet. Or, maybe you are restoring content off an LTO tape to search for that one clip you need. Or, maybe you moved some of your content to the cloud—is it in your Google Drive or in your Dropbox account? If so, which folder is it in? Or was it the corporate Box account? Do you have permissions to that folder? All of that complexity means that the average creative person fails to find the media they are looking for 35% of the time. But you probably don’t need a study to tell you we all spent huge amounts of time searching for content.

An image showing a command line interface window with a failed search.
Good old “request timed out.”

Here is where object storage can help. With object storage, you simply have buckets (object storage containers) where all your data can live, and you can access it from wherever you’re working. That means all of the data stored on those shuttle drives sitting around your office, your closet of LTO tapes, and even a replica of your online NAS are in a central, easily accessible location. You’re also working from the most recent file.

Once it’s in the cloud, it’s safe from the types of disasters that affect on-premises storage systems, and it’s easy to secure your files, create backups, and so on. It’s also readily available when you need it, and much easier to share with other team members. It’s no wonder many of the apps you use today take advantage of object storage as their primary storage mechanism.

The Benefits of Object Storage for Media Workflows

Object storage offers a number of benefits for creative teams when it comes to streamlining workflows, including:

  • Instant access
  • Integrations
  • Workflow interoperability
  • Easy distribution
  • Off-site back up and archive

Instant Access

With cloud object storage, content is ready when you need it. You know inspiration can strike at any time. You could be knee deep in editing a project, in the middle of binge watching the latest limited series, or out for a walk. Whenever the inspiration decides to strike, having instant access to your library of content is a game changer. And that’s the great thing about object storage in the cloud: you gain access to massive amounts of data with a few clicks.

Integrations

Object storage is a key component of many of the content production tools in use today. For example, iconik is a cloud-native media asset management (MAM) tool that can gather and organize media from any storage location. You can point iconik to your Backblaze B2 Bucket and use its advanced search functions as well as its metadata tagging.

Workflow Interoperability

What if you don’t want to use iconik, specifically? What’s great about using cloud storage as a centralized repository is that no matter what application you use, your data is in a single place. Think of it like your external hard drive or NAS—you just connect that drive with a new tool, and you don’t have to worry about downloading everything to move to the latest and greatest. In essence, you are bringing your own storage (BYOS!).

Here’s an example: CuttingRoom is a cloud native video editing and collaboration tool. It runs entirely in your web browser and lets you create unique stories that can instantly be published to your destination of choice. What’s great about CuttingRoom is its ability to read an object storage bucket as a source. By simply pointing CuttingRoom to a Backblaze B2 Bucket, it has immediate access to the media source files and you can get to editing. On the other hand, if you prefer using a MAM, that same bucket can be indexed by a tool like iconik.

Easy Distribution

Now that your edit is done, it’s time to distribute your content to the world. Or, perhaps you are working with other teams to perfect your color and sound, and it’s time to share your picture lock version. Cloud storage is ready for you to distribute your files to the next team or an end user.

Here’s a recent, real-world example: If you have been following the behind-the-scenes articles about creating Avatar: The Way of Water, you know that not only was its creation the spark of new technology like the Sony Venice camera with removable sensors, but the distribution featured a cloud centric flow. Footage (the film) was placed in an object store (read: a cloud storage database), processed into different formats, languages were added with 3D captions, and then footage was distributed directly from a central location.

And, while not all of us have Jon Landau as our producer, a huge budget, and a decade to create our product, this same flexibility exists today with object storage—with the added bonus that it’s usually budget-friendly as well.

Off-Site Back Up and Archive

And last but certainly not least, let’s talk back up and archive. Once a project is done, you need space for the next project, but no one wants to risk losing the old project. Who out there is completely comfortable hitting the delete key as well as saying yes to the scary prompt, “Are you sure you want to delete?”

Well, that’s what you would have to do in the past. These days, object storage is a great place to store your terabytes and terabytes of archived footage without cluttering your home, office, or set with additional hardware. Compared with on-premises storage, cloud storage lets you add more capacity as you need it—just make sure you understand cloud storage pricing models so that you’re getting the best bang for your buck.

If you’re using a NAS device in your media workflow, you’ll find you need to free up your on-prem storage. Many NAS devices, like Synology and QNAP, have cloud storage integrations that allow you to automatically sync and archive data from your device to the cloud. In fact, you could start taking advantage of this today.

No delete key here—just a friendly archive button.

Getting Started With Object Storage for Media Workflows

Migrating to the cloud may seem daunting, but it doesn’t have to be. Especially with the acceleration of hybrid workflows in the film industry recently, cloud-based workflows are becoming more common and better integrated with the tools we use every day. You can test this out with Backblaze using your free 10GB that you get just for signing up for Backblaze B2. Sure, that may not seem like much when a single .r3d file is 4GB. But with that 10GB, you can test upload speeds and download speeds, try out integrations with your preferred workflow tools, and experiment with AI metadata. If your team is remote, you could try an integration with LucidLink. Or if you’re looking to power a video on-demand site, you could integrate with one of our content delivery network (CDN) partners to test out content distribution, like Backblaze customer Kanopy, a streaming service that delivers 25,000 videos to libraries worldwide.

Change is hard, but cloud storage can be easy. Check out all of our media workflow solutions and get started with your 10GB free today.

The post Object Storage for Film, Video, and Content Creation appeared first on Backblaze Blog | Cloud Storage & Cloud Backup.
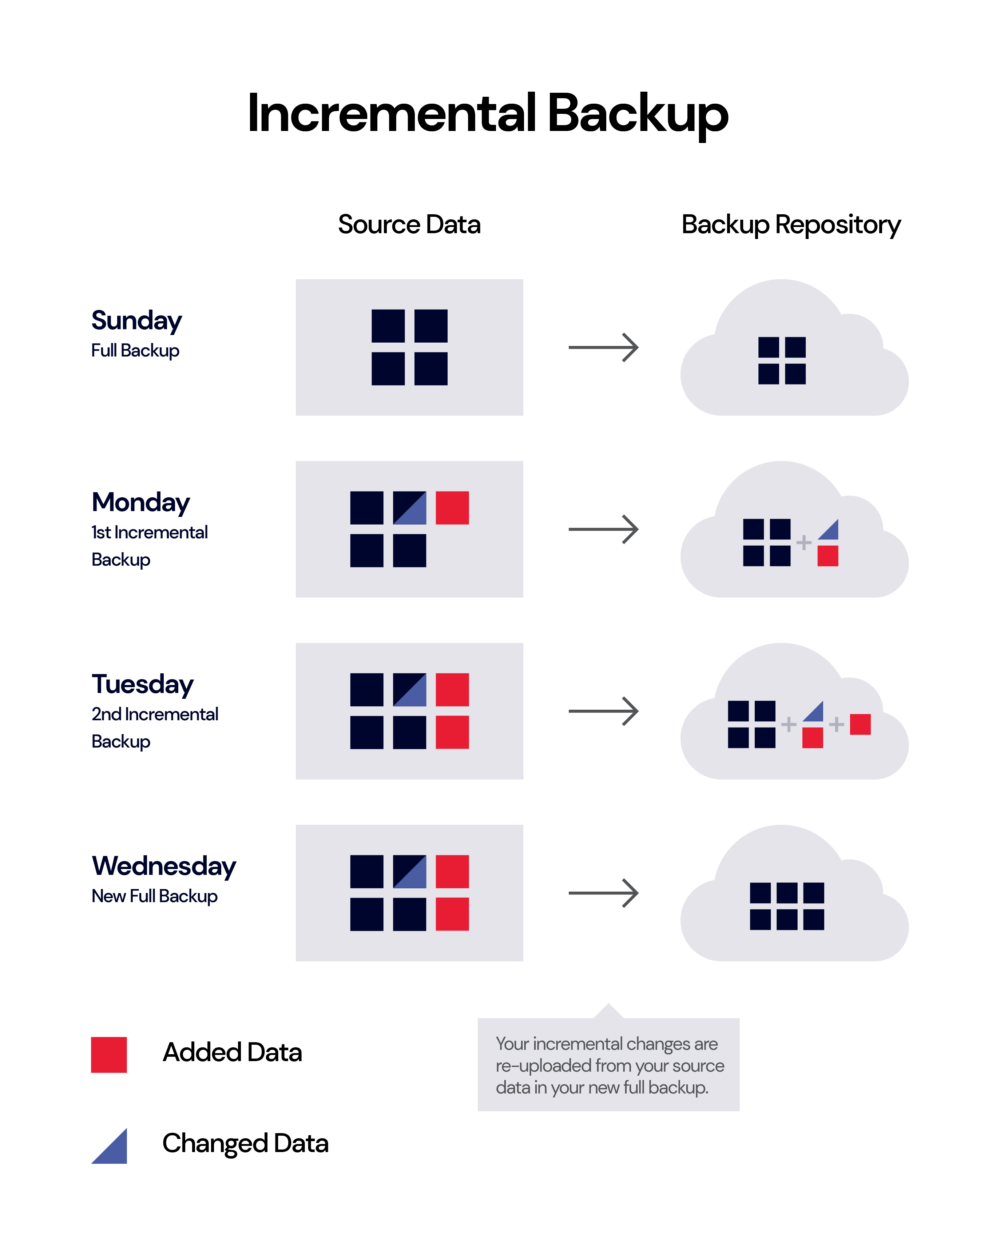
A Tale of Two NAS Setups, Part One: Easy Off-Site Backups

Post Syndicated from Vinodh Subramanian original https://www.backblaze.com/blog/a-tale-of-two-nas-setups-part-one-easy-off-site-backups/

A decorative images showing two phones and a laptop flowing data into a NAS device and then a storage cloud.

Network attached storage (NAS) devices offer centralized data storage solutions, enabling users to easily protect and access their data locally. You can think of a NAS device as a powerful computer that doesn’t have a display or keyboard. NAS can function as extended hard disks, virtual file cabinets, or centralized storage systems depending on individual needs. While NAS devices provide local data protection, a hybrid setup with cloud storage offers off-site protection by storing files on geographically remote servers.

This blog is the first in a two part series that will focus on home NAS setups, exploring how two Backblazers set up their NAS devices and connected them to the cloud. We’ll aim to present actionable setup tips and explain what each of our data storage needs are so that you can create your own NAS setup strategy.

I’m Vinodh, your first user. In this post, I will walk you through how I use a Synology Single-Bay NAS device and Backblaze B2 Cloud Storage.

Synology NAS device

Why Did I Need a NAS Device At My Home?

Before I share my NAS setup, let’s take a look at some of the reasons why I needed a NAS device to begin with. Knowing that will give you a better understanding of what I’m trying to accomplish with NAS.

My work at Backblaze involves guiding customers through all things NAS and cloud storage. I use a single-bay NAS device to understand its features and performance. I also create demos, test use cases, and develop marketing materials and back them up on my NAS and in the cloud to achieve the requirements of a 3-2-1 backup strategy. That strategy recommends that you have three copies of data stored in two different locations with one copy off-site.

Additionally, I use my NAS setup to off-load the (stunning!) photos and videos from my wife’s and my iPhones to free up space and protect them safely in the cloud. Lastly, I’d also like to mention that I work remotely and collaborate with people as part of my regular work, but today we’re going to talk about how I back up my files using a hybrid cloud storage setup that combines Synology NAS and Backblaze B2. Combining NAS and cloud storage is a great backup and storage solution for both business and personal use, providing a layer of protection in the event of hardware failures, accidental deletions, natural disasters, or ransomware attacks.

Now that you understand a little bit about me and what I’m trying to accomplish with my NAS device, let’s jump into my setup.

What Do I Need From My NAS Device?

Needless to say, there are multiple ways to set up a NAS device. But, the most common setup is for backing up your local devices (computer, phones, etc.) to your NAS device. A basic setup like this, with a few computers and devices backing up to the same NAS device, protects data in that you have a second copy of your data stored locally. However, the data can still be lost if there is hardware failure, theft, fire, or any other unexpected event that poses a threat to your home. This means that your backup strategy needs something more in order to truly protect your data.

Off-site protection with cloud storage solves this problem. So, when I planned my NAS setup, I wanted to make sure I had a NAS device that integrates well with a cloud storage provider to achieve a 3-2-1 backup strategy.

Now that we’ve talked about my underlying data protection strategy, here are the devices and tools I used to create a complete 3-2-1 NAS backup setup at my home:

  • Devices with data:
    • MacBook Pro–1
    • iPhone–2
  • Storage products:
    • Synology Device–1
    • Seagate 4TB internal hard disk drive–1
    • Backblaze B2 Cloud Storage
  • Applications:
    • Synology Hyper Backup
    • Synology Photos

What Did I Want to Back Up on My NAS Device?

My MacBook Pro is where I create test use cases, demos, and all the files I need to do my job, such as blog posts, briefs, presentation decks, ebooks, battle cards, and so on. In addition to creating files, I also download webinars, infographics, industry reports, video guides, and any other information that I find useful to support our sales and marketing efforts. As I mentioned previously, I want to protect this business data both locally (for quick access) and in the cloud (for off-site protection). This way, I can not only secure the files, but also remotely collaborate with people from different locations so everyone can access, review, and edit the files simultaneously to ensure timely and consistent messaging.

Meanwhile, my wife and I each have an iPhone 12 with 128GB storage space. Clearly, a total of 256GB is not enough for us—it only takes six to nine months for us to run out of storage on our devices. Once in a while, I clean up the storage space to make sure my phone runs at optimal speed by removing any duplicate or unwanted photos or movies. However, my wife doesn’t like to delete anything as she often wants to look back and remember that one time we went to that one place with those friends. But, she has hundreds of pictures of that one place with those friends. As a result, our iPhone family usage is almost always at capacity.

A screenshot of Vinodh's family storage usage on iCloud. User Sandhya shows 195.7 GB used and user Vinodh shows 58.3 GB used. A third user, Anandaraj, is not using any data.
Our shared storage.

As you can see, being able to off-load pictures and movies from our phones to a local device would give us quick access, protect our memories in the cloud, and free up our iPhone storage.

How I Set Up My NAS Device

To accomplish all that, I set up a Synology Single-Bay NAS Diskstation (Model: DS118) which is powered by a 64-bit quad-core processor and 1GB DDR4 memory. As we discussed above, a NAS device is basically a computer without a display and keyboard.

A Synology one-bay DS118 NAS device and its box.
Unboxing my Synology NAS.

Most NAS devices are diskless, meaning we’d need to buy hard disk drives (HDD) and install them on the NAS device. Also, it is important to note that NAS devices work differently than a typical computer. A NAS device is always running even if you turn off your computer or laptop. A regular hard disk drive may not support this operating pressure. Therefore, it’s essential that we get NAS drives that are suitable for NAS devices. For my NAS device, I got a 4TB HDD from Seagate. You can look up compatible drives on Synology’s compatibility list. When you buy your NAS, the manufacturer should give you a list of which hard drives are compatible, and you can always check out Drive Stats if you want to read up on how long drives last.

An image of a 4 TB Seagate hard drive.
A 4TB Seagate HDD.

After getting the NAS device and HDD, the next item I wanted to figure out is where to keep it. NAS devices typically plug into routers rather than desktops or laptops. With help from my internet service provider, I was able to connect all rooms in our house with an ethernet connection that’s attached to the router. For now, I set up the NAS device in my home office on a spare desk connected to the router via an RJ45 cable.

An image of a Synology NAS device set up on a desk and plugged into an ethernet connection.
My Synology NAS in its new home with an Ethernet connection.

In addition to protecting data locally on the NAS device, I also use B2 Cloud Storage for off-site protection. Every NAS has its own software that helps you set up how your backups occur from your personal devices to your NAS, and that software will also have a way to back up to the cloud. On a Synology NAS, that software is called Hyper Backup, and we’ll talk a little bit more about it below.

How I Back Up My Computer to My NAS Device

A diagram showing a laptop and two phones. These upload to the central image, a NAS device. The NAS device backs up to a cloud storage provider.

The above diagram shows how I use a hybrid setup using Synology NAS and B2 Cloud Storage to protect data locally and off-site.

First, I use Synology File Station to upload critical business data to the NAS device. After I configure B2 Cloud Storage with Hyper Backup, all files uploaded to the NAS device automatically get uploaded and stored in B2 Cloud Storage.

Getting set up with B2 Cloud Storage is a simple process. Check out this video demonstration that shows how to get your NAS data to B2 Cloud Storage in 10 minutes or less.

How I Back Up iPhone Photos and Videos to My NAS Device

That takes care of our computer backups. Now on to photo storage. To off-load photos and movies and create more storage space on my phone, I installed the application “Synology Photos” on my and my wife’s iPhones. Now, whenever we take a picture or shoot a movie on our phones, the Synology Photos application automatically stores a copy of the files to the NAS device. And, the Hyper Backup application then copies those photos and movies to B2 Cloud Storage automatically.

This setup has enabled us to not worry about storage space on our phones. Even if we delete those pictures and movies, we can still access them quickly via the NAS device over our local area network (LAN). But most importantly, a copy of those memories is protected off-site in the cloud, and I can access that cloud storage copy easily from anywhere in the world.

Lessons Learned: What I’d Do Differently The Next Time

So, what can you take from my experience setting up a NAS device at home? I learned a few things along the way that you might find useful. Here is my advice if I were to do things differently the second time around:

  • Number of bays: I opted for a single bay NAS device for my home setup. After using the device for about three months now, I realize how much space it saved on my MacBook and iPhones. If I were to do it again, I’d choose a NAS device with four or more bays for increased storage options.
  • Check for Ethernet connectivity: Not all rooms in my house were wired for Ethernet connectivity, and I did not realize that until I started setting up the NAS device. I needed to get in touch with my internet service provider to provide Ethernet connectivity in all rooms—which delayed the setup by two weeks. If you’re looking to set up a NAS device at home, ensure the desired location in your home has an Ethernet connection.
  • Location: I initially wanted to set up my NAS device in the laundry room. However, I realized NAS devices require a space that is well ventilated with minimum exposure to heat, dust, or moisture. Therefore, I’d chosen to set up the NAS device at my office room instead. Consider factors like ventilation, accessibility, and dust exposure of the location for the longevity and performance of your NAS device.

So, whether you are a home user who wants additional storage, a small business owner who wants to create a centralized file storage system, or an IT admin for a mid-size or enterprise organization who wants to securely protect your critical business data both on-premises and off-site storage, the use of a NAS device along with cloud storage provides the protection you need to secure your data.

What’s Next: Looking Forward to Part Two

In part one of this series, we’ve learned how setting up a NAS device at home and connecting it to the cloud can effectively back up and protect critical business data and personal files while accomplishing a 3-2-1 backup strategy. Stay tuned for part two, where James Flores will share with us how he utilizes a hybrid NAS and cloud storage solution to back up, work on, and share media files with users from different locations. In the meantime, we’d love to hear about your experience setting up and using NAS devices with cloud storage. Please share your comments and thoughts below.

The post A Tale of Two NAS Setups, Part One: Easy Off-Site Backups appeared first on Backblaze Blog | Cloud Storage & Cloud Backup.
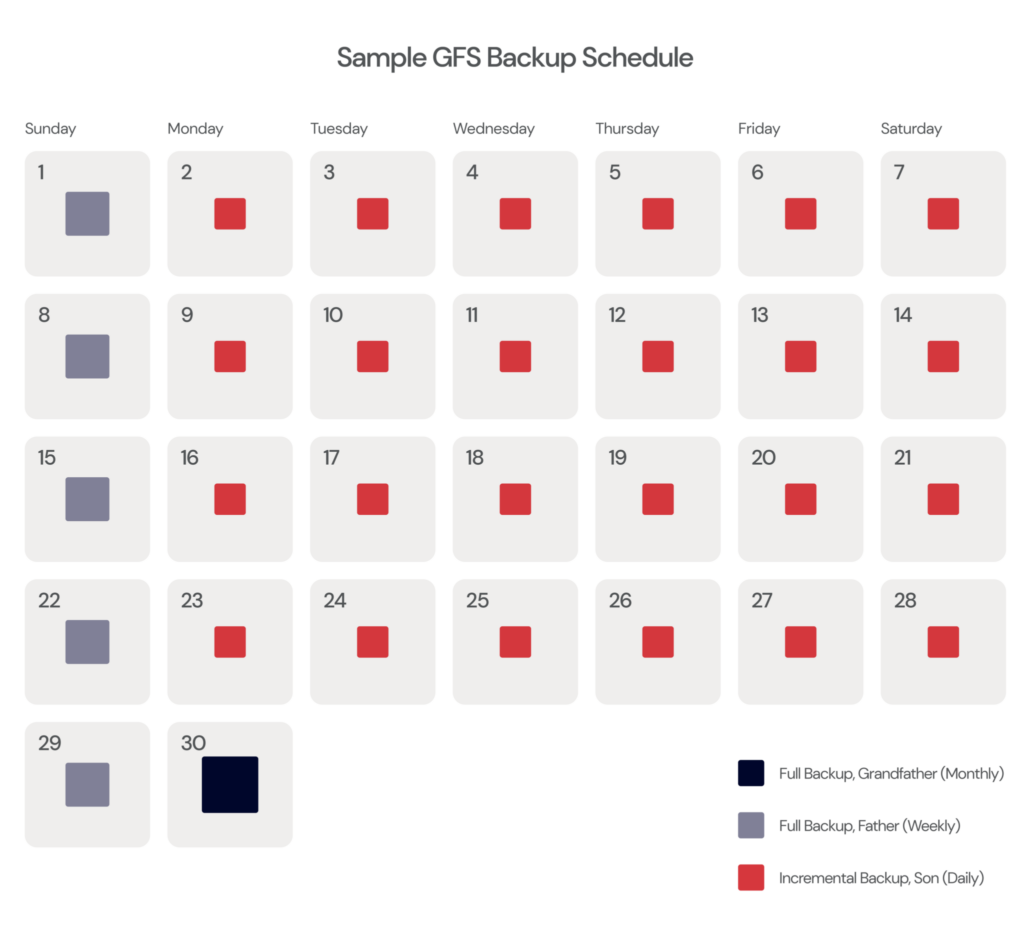
CDN Bandwidth Fees: What You Need to Know

Post Syndicated from Molly Clancy original https://www.backblaze.com/blog/cdn-bandwidth-fees-what-you-need-to-know/

A decorative image showing a cloud with three dollar signs and the word "Egress", three CDN nodes, and a series of 0s and 1s representing data.

You know that sinking feeling you get in your stomach when you receive a hefty bill you weren’t expecting, especially when you then have to justify it to your finance team or face making cuts elsewhere to cover budget overrun? That is what some content delivery network (CDN) customers experience when they get slammed with bandwidth fees without warning. To avoid those painful conversations, it’s important to understand how bandwidth fees work. Knowing precisely what you are paying for and how you use the cloud service can help prevent eye-popping bills you weren’t prepared for.

A CDN can be an excellent way to speed up your website, improve performance, and boost SEO, but not all vendors are created equal—some charge significantly more for data transfer than others. As a leading provider of specialized cloud storage, Backblaze offers free egress to leading CDN providers like Fastly, bunny.net, and Cloudflare. Backblaze also offers tools for developers that help manage storage efficiently while integrating smoothly with CDN services.

So, let’s talk about bandwidth fees and how they work to help you decide which CDN provider is right for you.

What are CDN bandwidth fees?

Most CDN cloud services work like this: You can configure the CDN to pull data from one or more origins (such as a Backblaze B2 Cloud Storage Bucket) for free or for a flat fee, and then you’re charged fees for usage, namely when data is transferred when a user requests it. 

These fees are known as bandwidth, download, or data transfer fees. (We’ll use these terms somewhat interchangeably.) Typically, storage providers also charge fees when data is retrieved by a CDN.

The fees aren’t a problem in and of themselves, but if you don’t have a good understanding of them, it could lead to unexpected costs. 

For example, if you’re a game-sharing platform, and one of your games goes viral, bandwidth and egress fees can add up quickly. CDN providers usually charge in arrears, meaning they wait to see how much of the data was accessed each month, and then they apply their fees.

Some of the cost factors to consider include traffic spikes, regional distribution of your users (as some regions have higher transfer rates), and frequency of transferring large media files. Monitoring and managing data transfer fees can be challenging, especially during high-traffic events, as fees can quickly escalate without warning.

Although some CDN services offer calculation tools, these are estimates and may not always account for sudden increases in data transfer. It’s important to know exactly how these fees work so you can plan your workflows better and position your content strategically to reduce fees and increase cost efficiency.

How do CDN bandwidth fees work?

Data transfer occurs when data leaves the network. An example might be when your application server delivers an HTML page to the browser or your cloud object store serves an image via the CDN. Another example is when your data is moved to a different regional server within the CDN to make access faster for users in nearby locations.

A decorative photo of a sign that says "$5 fee per usage for non-members."

Each instance where your data may be accessed or moved incurs a cost, and these fees can quickly add up. Typically, CDN vendors charge a fee per GB or TB up to a specific limit. Once you hit these thresholds, you may advance up another pricing tier or incur expensive overage charges. A busy month could cost you a mint, and traffic spikes for different reasons in different industries—like a Black Friday rush for an e-commerce site or around events like the Super Bowl for a sports betting site, for example.

Price comparison of bandwidth fees across CDN services

To get a better sense of how each CDN service charges for bandwidth, let’s explore the top providers and what they offer and charge. Each CDN varies in bandwidth fees, additional costs, and value-added features such as enhanced security and caching options.

As part of the Bandwidth Alliance and the CDN Alliance, some of these vendors have agreed to discount customer data transfer fees when transferring one or both ways between member companies. What’s more, Backblaze offers free egress with CDN partners Fastly, bunny.net, and Cloudflare, among other vendors, helping reduce costs for businesses with high data transfer fees. 

When comparing CDNs, consider not only their per-GB costs but also factors like regional pricing variations, tiered pricing thresholds, and any add-ons for specific services like DDoS protection, web application firewalls (WAF), or dedicated support. These factors can significantly impact total costs, especially for businesses with varying traffic levels.

Note: Prices are as published by vendors as of 11/21/2024.

1. Fastly

Fastly offers edge caches to deliver content instantly around the globe. The company also offers SSL services for $20/per domain per month. They have various additional add-ons for things like web application firewalls (WAFs), managed rules, DDoS protection, and their Gold support.

Their CDN pricing offers flexibility through three main options:

  1. Free Tier: This option provides up to $50 in monthly usage for any product (including CDN), with no request throttling and no cap on redirects or page rules. 
  2. Usage Tier: This option at $50 per month plus usage fees. It includes up to $100 in monthly CDN and Compute usage, with no cap on usage, five included TLS domains, mutual TLS, and SSO authentication.
  3. Packages: Start at $1,500 per month and include various features, with tiers designed to support growing and large businesses needing predictable, scalable CDN services.

Fastly proudly partners with Backblaze, so mutual customers enjoy zero egress fees. Fastly also offers custom enterprise pricing and trials for hands-on experience. For more info you can check out how Fastly’s CDN beats AWS CloudFront.

2. bunny.net

bunny.net labels itself as the world’s lightning-fast CDN service, with affordable region-based pricing. This makes them another strong alternative to AWS Cloudfront for companies with a limited budget. For the Standard Network (123 PoPs), rates start at $0.01/GB per month for North America and Europe, $0.045/GB for South America, $0.03/GB for Asia and Oceania, and $0.06/GB for the Middle East and Africa.

For businesses with higher bandwidth needs, the Volume Network offers a global rate of $0.005/GB up to 500TB, with tiered discounts available up to 2PB and beyond.

bunny.net partners with Backblaze to offer free egress. Check out how bunny.net compares to AWS CloudFront.

3. Cloudflare

Cloudflare offers a limited free plan for hobbyists and individuals. They also have tiered pricing plans for businesses called Pro, Business, and Enterprise. Instead of charging bandwidth fees, Cloudflare opts for the monthly subscription model, which includes everything.

The Pro plan costs $20/month (for 100MB of upload). The Business plan is $200/month (for 200MB of upload). You must call to get pricing for the Enterprise plan (for 500MB of upload).

Cloudflare partners with Backblaze, and joint customers enjoy free egress between the two services. It also offers dozens of add-ons for load balancing, smart routing, security, serverless functions, etc. Each one costs extra per month.

4. AWS Cloudfront

AWS Cloudfront is Amazon’s CDN and is tightly integrated with its AWS services. The company offers tiered pricing based on bandwidth usage. The specifics are as follows for North America:

  • First 1TB of data transfer per month is free.
  • $0.085/GB for the next 9TB per month.
  • $0.080/GB for the next 40TB per month.
  • $0.060/GB for the next 100TB per month.
  • $0.040/GB for the next 350TB per month.
  • $0.030/GB for the next 524TB per month.

Their pricing extends up to 5PB per month, and there are different pricing breakdowns for different regions.

Amazon offers special discounts for high-data users and those customers who use AWS for their application storage. You can also purchase add-on products that work with the CDN for media streaming and security.

A decorative image showing a portion of the earth viewed from space with lights clustered around city centers.
Sure it’s pretty. Until you know all those lights represent possible fees.

5. Google Cloud CDN

Google Cloud CDN offers fast and reliable content delivery services. However, Google charges bandwidth, cache egress fees, and for cache misses. Their pricing structure is as follows:

  • Cache Egress: $0.02–$0.20 per GB.
  • Cache Fill: $0.01–$0.04 per GB.
  • Cache Lookup Requests: $0.0075 per 10,000 requests.

Cache egress fees are priced per region, and in the U.S., they start at $0.08 for the first 10TB. Between 10–150TB costs $0.055, and beyond 500TB, you have to call for pricing.

Google charges $0.01 per GB for cache fill services.

6. Microsoft Azure

The Azure content delivery network is Microsoft’s offering that promises speed, reliability, and a high level of security.

Azure offers a limited free account for individuals to play around with. Depending on the zone, the price will vary for data transfer. For Zone One, which includes North America, Europe, Middle East, and Africa, pricing is as follows:

  • First 10TB: $0.158/GB per month.
  • Next 40TB: $0.14/GB per month.
  • Next 100TB: $0.121/GB per month.
  • Next 350TB: $0.102/GB per month.
  • Next 500TB: $0.093/GB per month.
  • Next 4,000TB: $0.084/GB per month.

Azure charges $.60 per 1,000,000,000 requests per month and $1 for rules per month. You can also purchase WAF services and other products for an additional monthly fee.

Comparing the CDNs

How to save on bandwidth fees

A CDN can significantly enhance the performance of your website or web application and is well worth the investment. However, finding ways to save on bandwidth fees pays dividends. Here are some strategies:

  • Look for Bandwidth Alliance partners. Many CDN providers, including those in the Bandwidth Alliance, offer discounted rates for bandwidth and egress fees when transferring data between member companies.
  • Choose affordable origin storage. Select origin storage that integrates seamlessly with your chosen CDN provider, reducing your data transfer costs. Backblaze B2, for example, offers completely free egress to partners like Fastly, bunny.net, and Cloudflare, and free egress up to 3x the amount you store for transfer to other services.
  • Optimize caching and edge settings. Fine-tuning caching rules to keep frequently accessed data at edge locations can reduce the amount of data transferred, helping to avoid unnecessary bandwidth fees.
  • Implement data compression. Compressing files, especially large media, reduces the data size served by the CDN, which in turn reduces bandwidth usage.
  • Minimize redirects and request loops. Reducing redirects and optimizing request loops helps keep data transfer low and avoids additional bandwidth fees.
  • Use tiered or reserved data transfer plans. Some CDNs offer reserved or tiered data transfer options that provide discounts on larger volumes; consider these if your data transfer needs are predictable and high.

Here at Backblaze, we think the world needs lower egress fees, and we offer free egress from Backblaze B2 to many CDN partners like Fastly, bunny.net, and Cloudflare.

FAQ

1. What is CDN bandwidth?

CDN bandwidth refers to the amount of data that is transferred between a content delivery network (CDN) and its end-users. When a user accesses a website or service that uses a CDN, the data they request is delivered from servers closest to them, which speeds up delivery and reduces latency. The total amount of this data transfer over time is considered the CDN bandwidth, and it can significantly affect performance and costs depending on traffic levels.

2. What is a bandwidth fee?

A bandwidth fee is a charge imposed by a CDN provider based on the volume of data transferred from the CDN’s servers to end-users. CDNs use a pay-per-use model for bandwidth, meaning websites or services pay for each unit of data transferred, typically measured in gigabytes (GB) or terabytes (TB). High traffic volumes or large files (like videos) can quickly increase these fees, making it important to monitor and manage bandwidth usage.

3. How can I reduce CDN usage?

Reducing CDN fees involves optimizing data transfer and content delivery practices. A few effective strategies are to look for bandwidth alliance partners, choose affordable origin storage, optimize caching and edge settings, implement data compression, minimize redirects and request loops, and use tiered or reserved data transfer plans.

4. How do I monitor CDN bandwidth usage effectively?

Most CDN providers offer analytics and reporting tools to track bandwidth usage in real time. By regularly reviewing these reports, you can identify high-demand assets, monitor peak traffic times, and adjust your delivery strategy to minimize bandwidth fees.

The post CDN Bandwidth Fees: What You Need to Know appeared first on Backblaze Blog | Cloud Storage & Cloud Backup

Virtual vs. Remote vs. Hybrid Production

Post Syndicated from James Flores original https://www.backblaze.com/blog/virtual-vs-remote-vs-hybrid-production/

A decorative image showing icons of a NAS device, a video with a superimposed play button, and a cloud with the Backblaze logo.

For many of us, 2020 transformed our work habits. Changes to the way we work that always seemed years away got rolled out within a few months. Fast forward to today, and the world seems to be returning back to some sense of normalcy. But one thing that’s not going back is how we work, especially for media production teams. Virtual production, remote video production, and hybrid cloud have all accelerated, reducing operating costs and moving us closer to a cloud-based reality.

So what’s the difference between virtual production, remote production, and hybrid cloud workflows, and how can you use any or all of those strategies to improve how you work? At first glance, they all seem to be different variations of the same thing. But there are important differences, and that’s what we’re digging into today. Read on to get an understanding of these new ways of working and what they mean for your creative team.

Going to NAB in April?

Want to talk about your production setup at NAB? Backblaze will be there with exciting new updates and hands-on demos for better media workflows. Oh, and we’re bringing some really hot swag. Reserve time to meet with our team (and snap up some sweet goodies) below.

➔ Meet Backblaze at NAB

What Is Virtual Production?

Let’s start with virtual production. It sounds like doing production virtually, which could just mean “in the cloud.” I can assure you, it’s way cooler than that. When the pandemic hit, social distancing became the norm. Gathering a film crew together in a studio or in any location of the world went out the door. Never fear: virtual production came to the rescue.

Virtual production is a method of production where, instead of building a set or going to a specific location, you build a set virtually, usually with a gaming engine such as Unreal Engine. Once the environment is designed and lit within Unreal Engine, it can then be fed to an LED volume. An LED volume is exactly what it sounds like: a huge volume of LED screens connected to a single input (the Unreal Engine environment).

With virtual production, your set becomes the LED volume, and Unreal Engine can change the background to anything you can imagine at the click of a button. Now this isn’t just a LED screen as a background—what makes virtual production so powerful is its motion tracking integration with real cameras.

Using a motion sensor system attached to a camera, Unreal Engine is able to understand where your camera is pointed. (It’s way more tech-y than that, but you get the picture.) You can even match the virtual lens in Unreal Engine with the lens of your physical camera. With the two systems combined, a camera following an actor on a virtual set can react by moving the background along with the camera in real time.

Virtual Production in Action

If you were one of the millions who have been watching The Mandalorian on Disney+, check out this behind the scenes look at how they utilized a virtual production.


This also means location scouting can be done entirely inside the virtual set and the assets created for pre-vizualiation can actually carry on into post, saving a ton of time (as the post work actually starts during pre-production.

So, virtual production is easily confused with remote production, but it’s not the same. We’ll get into remote production next.

What Is Remote Production?

We’re all familiar with the stages of production: development, pre-production, production, post-production, and distribution. Remote production has more to do with post-production. Remote production is simply the ability to handle post-production tasks from anywhere.

Here’s how the pandemic accelerated remote production: In post, assets are edited on non-linear editing software (NLEs) connected to huge storage systems located deep within studios and post-production houses. When everyone was forced to work from home, it made editing quite difficult. There were, of course, solutions that allowed you to remotely control your edit bay, but remotely controlling a system from miles away and trying to scrub videos over your at-home internet bandwidth quickly became a nuisance.

To solve this problem, everyone just took their edit bay home along with a hard drive containing what they needed for their particular project. But shuttling drives all over the place and trying to correlate files across all the remote drives meant that the NAS became the next headache. To resolve this confusion over storage, production houses turned to hybrid solutions—our next topic.

What Are Hybrid Cloud Workflows?

Hybrid cloud workflows didn’t originate during the pandemic, but they did make remote production much easier. A hybrid cloud workflow is a combination of a public cloud, private cloud, and an on-premises solution like a network attached storage device (NAS) or storage area network (SAN). When we think about storage, we think about first the relationship of our NLE to our local hard drive, then our relationship between the local computer and the NAS or SAN. The next iteration of this is the relationship of all of these (NLE, local computer, and NAS/SAN) to the cloud.

For each of these on-prem solutions the primary problems faced are capacity and availability. How much can our drive hold, and how do I access the NAS—local area network (LAN) or virtual private network (VPN)? Storage in the cloud inherently solves both of these problems. It’s always available and accessible from any location with an internet connection. So, to solve the problems that remote teams of editors, visual effects (VFX), color, and sound folks faced, the cloud was integrated into many workflows.

Using the cloud, companies are able to store content in a single location where it can then be distributed to different teams (VFX, color, sound, etc.). This central repository makes it possible to move large amounts of data across different regions, making it easier for your team to access it while also keeping it secure. Many NAS devices have native cloud integrations, so the automated file synchronization between the cloud and a local environment is baked in—teams can just get to work.

The hybrid solution worked so well that many studios and post houses have adopted them as a permanent part of their workflow and have incorporated remote production into their day-to-day. A good example is the video team at Hagerty, a production crew that creates 300+ videos a year. This means that workflows that were once locked down to specific locations are now moving to the cloud. Now more than ever, API accessible resources, like cloud storage with S3 compatible APIs that integrates with your preferred tools, are needed to make these workflows actually work.

Just one example of Hagerty’s content.

Hybrid Workflows and Cloud Storage

While the world seems to be returning to a new normal, our way of work is not. For the media and entertainment world, the pandemic gave the space a jolt of electricity, igniting the next wave of innovation. Virtual production, remote production, and hybrid workflows are here to stay. What digital video started 20 years ago, the pandemic has accelerated, and that acceleration is pointing directly to the cloud.

So, what are your next steps as you future-proof your workflow? First, inspect your current set of tools. Many modern tools are already cloud-ready. For example, a Synology NAS already has Cloud Sync capabilities. EditShare also has a tool capable of crafting custom workflows, wherever your data lives. (These are just a few examples.)

Second, start building and testing. Most cloud providers offer free tiers or free trials—at Backblaze, your first 10GB are free, for example. Testing a proof of concept is the best way to understand how new workflows fit into your system without overhauling the whole thing or potentially disrupting business as usual.

And finally, one thing you definitely need to make hybrid workflows work is cloud storage. If you’re looking to make the change a lot easier, you came to the right place. Backblaze B2 Cloud Storage pairs with hundreds of integrations so you can implement it directly into your established workflows. Check out our partners and our media solutions for more.

The post Virtual vs. Remote vs. Hybrid Production appeared first on Backblaze Blog | Cloud Storage & Cloud Backup.
The SSD Edition: 2022 Drive Stats Review

Post Syndicated from original https://www.backblaze.com/blog/ssd-edition-2022-drive-stats-review/

A decorative image displaying the article title 2022 Annual Report Drive Stats SSD Edition.

Welcome to the 2022 SSD Edition of the Backblaze Drive Stats series. The SSD Edition focuses on the solid state drives (SSDs) we use as boot drives for the data storage servers in our cloud storage platform. This is opposed to our traditional Drive Stats reports which focus on our hard disk drives (HDDs) used to store customer data.

We started using SSDs as boot drives beginning in Q4 of 2018. Since that time, all new storage servers and any with failed HDD boot drives have had SSDs installed. Boot drives in our environment do much more than boot the storage servers. Each day they also read, write, and delete log files and temporary files produced by the storage server itself. The workload is similar across all the SSDs included in this report.

In this report, we look at the failure rates of the SSDs that we use in our storage servers for 2022, for the last 3 years, and for the lifetime of the SSDs. In addition, we take our first look at the temperature of our SSDs for 2022, and we compare SSD and HDD temperatures to see if SSDs really do run cooler.

Overview

As of December 31, 2022, there were 2,906 SSDs being used as boot drives in our storage servers. There were 13 different models in use, most of which are considered consumer grade SSDs, and we’ll touch on why we use consumer grade SSDs a little later. In this report, we’ll show the Annualized Failure Rate (AFR) for these drive models over various periods of time, making observations and providing caveats to help interpret the data presented.

The dataset on which this report is based is available for download on our Drive Stats Test Data webpage. The SSD data is combined with the HDD data in the same files. Unfortunately, the data itself does not distinguish between SSD and HDD drive types, so you have to use the model field to make that distinction. If you are just looking for SSD data, start with Q4 2018 and go forward.

2022 Annual SSD Failure Rates

As noted, at the end of 2022, there were 2,906 SSDs in operation in our storage servers. The table below shows data for 2022. Later on we’ll compare the 2022 data to previous years.

A table listing the Annual SSD Failure Rates for 2022.

Observations and Caveats

  • For 2022, seven of the 13 drive models had no failures. Six of the seven models had a limited number of drive days—less than 10,000—meaning that there is not enough data to make a reliable projection about the failure rates of those drive models.
  • The Dell SSD (model: DELLBOSS VD) has zero failures for 2022 and has over 100,000 drive days for the year. The resulting AFR is excellent, but this is an M.2 SSD mounted on a PCIe card (half-length and half-height form factor) meant for server deployments, and as such it may not be generally available. By the way, BOSS stands for Boot Optimized Storage Solution.
  • Besides the Dell SSD, three other drive models have over 100,000 drive days for the year, so there is sufficient data to consider their failure rates. Of the three, the Seagate (model: ZA250CM10003, aka: Seagate BarraCuda 120 SSD ZA250CM10003) has the lowest AFR at 0.73%, with the Crucial (model: CT250MX500SSD1) coming in next with an AFR of 1.04% and finally, the Seagate (model: ZA250CM10002, aka: Seagate BarraCuda SSD ZA250CM10002) delivers an AFR of 1.98% for 2022.

Annual SSD Failure Rates for 2020, 2021, and 2022

The 2022 annual chart above presents data for events that occurred in just 2022. Below we compare the 2022 annual data to the 2020 and 2021 (respectively) annual data where the data for each year represents just the events which occurred during that period.

A table of the Backblaze Annual SSD Failure Rates for 2020, 2021, and 2022.

Observations and Caveats

  • As expected, the Crucial drives (model: CT250MX500SSD1) recovered nicely in 2022 after having a couple of early failures in 2021. We expect that trend to continue.
  • Four new models were introduced in 2022, although none have a sufficient number of drive days to discern any patterns even though none of the four models have experienced a failure as of the end of 2022.
  • Two of the 250GB Seagate drives have been around all three years, but they are going in different directions. The Seagate drive (model: ZA250CM10003) has delivered a sub-1% AFR over all three years. While the AFR for the Seagate drive (model: ZA250CM10002) slipped in 2022 to nearly 2%. Model ZA250CM10003 is the newer model of the two by about a year. There is little difference otherwise except the ZA250CM10003 uses less idle power, 116mW versus 185mW for the ZA250CM10002. It will be interesting to see how the younger model fares over the next year. Will it follow the trend of its older sibling and start failing more often, or will it chart its own course?

SSD Temperature and AFR: A First Look

Before we jump into the lifetime SSD failure rates, let’s talk about SSD SMART stats. Here at Backblaze, we’ve been wrestling with SSD SMART stats for several months now, and one thing we have found is there is not much consistency on the attributes, or even the naming, SSD manufacturers use to record their various SMART data. For example, terms like wear leveling, endurance, lifetime used, life used, LBAs written, LBAs read, and so on are used inconsistently between manufacturers, often using different SMART attributes, and sometimes they are not recorded at all.

One SMART attribute that does appear to be consistent (almost) is drive temperature. SMART 194 (raw value) records the internal temperature of the SSD in degrees Celsius. We say almost, because the Dell SSD (model: DELLBOSS VD) does not report raw or normalized values for SMART 194. The chart below shows the monthly average temperature for the remaining SSDs in service during 2022.

A bar chart comparing Average SSD Temperature by Month for 2022.

Observations and Caveats

  • There were an average of 67,724 observations per month, ranging from 57,015 in February to 77,174 in December. For 2022, the average temperature varied only one degree Celsius from the low of 34.4 degrees Celsius to the high of 35.4 degrees Celsius over the period.
  • For 2022, the average temperature was 34.9 degrees Celsius. The average temperature of the hard drives in the same storage servers over the same period was 29.1 degrees Celsius. This difference seems to fly in the face of conventional wisdom that says SSDs run cooler than HDDs. One possible reason is that, in all of our storage servers, the boot drives are further away from the cool aisle than the data drives. That is, the data drives get the cool air first. If you have any thoughts, let us know in the comments.
  • The temperature variation across all drives for 2022 ranged from 20 degrees Celsius (four observations) to 61 degrees Celsius (one observation). The chart below shows the observations for the SSD’s across that temperature range.

A line graph describing SSD Daily Temperature Observations for 2022.

The shape of the curve should look familiar: it’s a bell curve. We’ve seen the same type of curve when plotting the temperature observations of the storage server hard drives. The SSD curve is for all operational SSD drives, except the Dell SSDs. We attempted to plot the same curve for the failed SSDs, but with only 25 failures in 2022, the curve was nonsense.

Lifetime SSD Failure Rates

The lifetime failure rates are based on data from the entire time the given drive model has been in service in our system. This data goes back as far as Q4 2018, although most of the drives were put in service in the last three years. The table below shows the lifetime AFR for all of the SSD drive models in service as of the end of 2022.

A table showing the SSD Lifetime Annualized Failure Rates.

Observations and Caveats

  • The overall Lifetime AFR was 0.89% as of the end of 2022. This is lower than the Lifetime AFR 1.04% as of the end of 2021.
  • There are several very large confidence intervals. That is due to the limited amount of data (drive days) for those drive models. For example, there are only 104 drive days for the WDC model WD Blue SA510 2.5. As we accumulate more data, those confidence intervals should become more accurate.
  • We like to see a confidence interval of 1.0% or less for a given drive model. Only three drive models met this criteria:
    • Dell model DELLBOSS VD: lifetime AFR–0.00%
    • Seagate model ZA250CM10003: lifetime AFR–0.66%
    • Seagate model ZA250CM10002: lifetime AFR–0.96%
  • The Dell SSD, as noted earlier in this report, is an M.2 SSD mounted on a PCIe card and may not be generally available. The two Seagate drives are consumer level SSDs. In our case, a less expensive consumer level SSD works for our needs as there is no customer data on a boot drive, just boot files as well as log and temporary files. More recently as we have purchased storage servers from Supermicro and Dell, they bundle all of the components together into a unit price per storage server. If that bundle includes enterprise class SSDs or an M.2 SSD on a PCIe card, that’s fine with us.

The SSD Stats Data

We acknowledge that 2,906 SSDs is a relatively small number of drives on which to perform our analysis, and while this number does lead to wider than desired confidence intervals, it’s a start. Of course we will continue to add SSD boot drives to the study group, which will improve the fidelity of the data presented. In the meantime, we expect our readers will apply their usual skeptical lens to the data presented and use it accordingly.

The complete dataset used to create the information used in this review is available on our Hard Drive Test Data page. As noted earlier you’ll find SSD and HDD data in the same files, and you’ll have to use the model number to distinguish one record from another. You can download and use this data for free for your own purpose. All we ask are three things: 1) you cite Backblaze as the source if you use the data, 2) you accept that you are solely responsible for how you use the data, and 3) you do not sell this data to anyone; it is free.

Good luck, and let us know if you find anything interesting.

The post The SSD Edition: 2022 Drive Stats Review appeared first on Backblaze Blog | Cloud Storage & Cloud Backup.
Work Smarter With Backblaze and Quantum H4000 Essential

Post Syndicated from Jennifer Newman original https://www.backblaze.com/blog/work-smarter-with-backblaze-and-quantum-h4000-essential/

A decorative image displaying the Backblaze and Quantum logos.

How much do you think it costs your creative team to manage data? How much time and money is spent organizing files, searching for files, and maybe never finding those files? Have you ever quantified it? One market research firm has. According to GISTICS, a creative team of eight people wastes more than $85,000 per year searching for and managing files—and larger teams waste even more than that.

Creative teams need better tools to work smarter. Backblaze has partnered with Quantum to simplify media workflows, provide easy remote collaboration, and free up on-premises storage space with seamless content archiving to the cloud. The partnership provides teams the tools needed to compete. Read on to learn more.

What Is Quantum?

Quantum is a data storage company that provides technology, software, and services to help companies make video and other unstructured data smarter—so data works for them and not the other way around. Quantum’s H4000 Essential (H4000E) asset management and shared storage solution offers customers an all-in-one appliance that integrates automatic content indexing, search, discovery, and collaboration. It couples the CatDV asset management platform with Quantum’s StorNext 7 shared storage.

How Does This Partnership Benefit Joint Customers?

By pairing Quantum H4000 Essential with Backblaze B2 Cloud Storage, you get award-winning asset management and shared storage with the ability to archive to the cloud. The partnership provides a number of benefits:

  • Better organization: Creative teams work visually, and the Quantum platform supports visual workflows. All content is available in one place, with automatic content indexing, metadata tagging, and proxy generation.
  • Searchable assets: All content and projects are searchable in an easy to use visual catalog.
  • Seamless collaboration: Teams can use production tools like Adobe Premiere Pro, Final Cut Pro X, and others to work on shared projects as well as tagging, markup, versioning, chat, and approval tools to streamline collaboration.
  • Robust archive management: Archived content can be restored easily from Backblaze B2 to CatDV to keep work in progress lean and focused.
  • On-premises efficiency: Once projects are complete, they can be quickly archived to the cloud to free up storage space on the H4000E for high-resolution production files and ongoing projects.
  • Simplified billing: Data is stored on always-hot storage, eliminating the management frustration that comes with multiple tiers and variable costs for egress and API calls.

Purchase Cloud Capacity the Same Way You Purchase On-Premises

With Backblaze B2 Reserve, you can purchase capacity-based storage starting at 20TB to pair with your Quantum H4000E if you prefer a predictable cloud spend versus consumption-based billing. Key features of B2 Reserve include:

  • Free egress up to the amount of storage purchased per month.
  • Free transaction calls.
  • Enhanced migration services.
  • No delete penalties.
  • Upgraded Tera support.

Who Would Benefit From Backblaze B2 + Quantum H4000E?

The partnership benefits any team that handles large amounts of data, specifically media files. The solution can help teams with:

  • Simplifying media workflows.
  • Easing remote project management and collaboration.
  • Cloud tiering.
  • Extending on-premises storage.
  • Implementing a cloud-first strategy.
  • Backup and disaster recovery planning.
  • Ransomware protection.
  • Managing consistent data growth.

Getting Started With Backblaze B2 and Quantum H4000E

The Quantum H4000E is a highly-integrated solution for collaborative shared storage and asset management. Configured with Backblaze B2 for content archiving and retrieval, it provides new menu options to perform cloud archiving and move, copy, and restore content, freeing up H4000 local storage for high-resolution files. You can easily add on cloud storage to improve remote media workflows, content collaboration, media asset protection, and archive.

With the H4000E, everything you need to get started is in the box, ready to connect to your 10GbE and higher network. And, a simple Backblaze B2 archive plugin connects the solution directly to your Backblaze B2 account.

Simply create a Backblaze account and configure the Backblaze CatDV panel with your credentials.

Join Backblaze at NAB Las Vegas

Join us at NAB to learn more about the Quantum + Backblaze solution. Our booths are neighbors! Schedule a meeting with us for a demo.

The post Work Smarter With Backblaze and Quantum H4000 Essential appeared first on Backblaze Blog | Cloud Storage & Cloud Backup.
Backblaze Joins the CDN Alliance

Post Syndicated from Elton Carneiro original https://www.backblaze.com/blog/backblaze-joins-the-cdn-alliance/

A decorative image that features the Backblaze logo and the CDN Alliance logo.

As the leading specialized storage cloud platform, Backblaze is a big proponent of the open, collaborative nature of independent cloud service providers. From our participation in the Bandwidth Alliance to our large ecosystem of partners, we’re focused on what we call “Phase Three” of the cloud. What’s happening in Phase Three? The age of walled gardens, hidden fees, and out of control egress fees driven by the hyperscalers is in the past. Today’s specialized cloud solutions are oriented toward what’s best for users—an open, multi-cloud internet.

Which is why I’m particularly happy to announce today that we’ve joined the CDN Alliance, a nonprofit organization and community of industry leaders focused on ensuring that the content delivery network (CDN) industry is evolving in a way that best serves businesses distributing content of every type around the world—from streaming media to stock image resources to e-commerce and more.

The majority of the content we consume today on our many devices and platforms is being delivered through a CDN. Being part of the CDN Alliance allows Backblaze to collaborate and drive innovation with our peers to ensure that everyone’s content experience only gets better.

Through participation in and sponsorships of joint events, panels, and gatherings, we look forward to working with the CDN Alliance on the key challenges facing the industry, including availability, scalability, reliability, privacy, security, sustainability, interoperability, education, certification, regulations, and numerous others. Check out the CDN Alliance and its CDN Community for more info.

For more resources on CDN integrations with Backblaze B2 Cloud Storage you can read more about our top partners here.

The post Backblaze Joins the CDN Alliance appeared first on Backblaze Blog | Cloud Storage & Cloud Backup.

What is the CJIS Security Policy?

Post Syndicated from Molly Clancy original https://www.backblaze.com/blog/what-is-the-cjis-security-policy/

A decorative image of a computer displaying a lock with a magnifying glass hovering over the screen. Also a title that reads What is CJIS?

It’s always been the case that specific industries are subject to their own security standards when it comes to protecting sensitive data. You’ve probably heard of the complex rules and regulations around personal health information and credit card data, for example. Law enforcement agencies do some of the most specialized work possible, so the entire world of criminal justice is subject to its own policies and procedures. Here’s what you need to know about Criminal Justice Information Services and the CJIS Security Policy.

The History of Criminal Justice Information Services

Criminal Justice Information Services (CJIS) is the largest division of the FBI. It was originally established in 1992 to give law enforcement agencies, national security teams, and the intelligence community shared access to a huge repository of highly sensitive data like fingerprints and active case reports. The CJIS Security Policy exists to safeguard that information by defining protocols for the entire data life cycle wherever it exists, both at rest and in transit. It’s easy to see how important it is for law enforcement agencies to need quick and secure access to this case critical data, but it’s also clear just how detrimental that data could be if it got into the wrong hands.

What Is Criminal Justice Information?

To get a better sense of the CJIS Security Policy and how it works, let’s start by looking at the data it covers. These are the five types of data that qualify as criminal justice information (CJI):

  • Biometric data: Data points that can be used to identify a unique individual, like fingerprints, palm prints, iris scans, and facial recognition data.
  • Identity history data: A text record of an individual’s civil or criminal history that can be tied to the biometric data that identifies them.
  • Biographic data: Information about individuals associated with a particular case, even without unique identifiers or biometric data attached.
  • Property data: Information about vehicles or physical property associated with a particular case and accompanied by personally identifiable information.
  • Case/Incident history: Data about the history of criminal incidents.

How Does CJIS Compliance Work?

The sensitivity of the types of data that qualify as CJI explains just how complicated the CJIS Security Policy is. To complicate matters further, CJIS (under the FBI and in turn the U.S. Department of Justice) issues regular updates to the Security Policy. The complexity inherent in the national policy, in combination with the pressure of keeping pace with constant changes, has meant that many law enforcement, national security, and intelligence agencies opt not to share data between agencies in lieu of taking the necessary steps to keep it safe in compliance with CJIS.

Each individual government agency is responsible for managing their own CJIS compliance. And the Security Policy applies to anyone interacting with that data, regardless of what system they use to do so or how they are associated with the agency that owns it. That means law enforcement representatives, lawyers, contractors, and private entities, for example, are all subject to the rules laid out in the CJIS Security Policy. What’s more, state governments and their respective CJIS Security Officers are responsible for managing the application of the Security Policy at the state level.

A woman with multi-colored, digital lights projected on her face.

How To Achieve CJIS Compliance

Despite all this complexity, CJIS doesn’t issue any official compliance certifications. Instead, compliance with the Security Policy falls under the purview of each individual organization, agency, or government body. Having the right technical controls in place to satisfy all standardized areas of the policy—and managing those controls on an ongoing basis—is the best (and the only) way to achieve CJIS compliance. These are the 13 key areas listed in the Security Policy:

Area 1: Information Exchange Agreements

Before an agency or organization shares CJI with any other entity, both parties must establish and mutually sign a formal information exchange agreement to certify that everyone involved is in CJIS compliant.

Area 2: Awareness & Training

Any individuals interacting with CJI have to participate in annual specialized training about how they are expected to comply with the Security Policy.

Area 3: Incident Response

Every agency interacting with CJI must have an Incident Response Plan (IRP) in place to ensure their ability to identify security incidents when they occur. IRPs also outline plans to contain and remediate damage as quickly and efficiently as possible.

Area 4: Auditing & Accountability

Organizations have to monitor who accesses CJI, when they access it, and what they do with it. Establishing visibility into interactions like file access, login attempts, password changes, etc. helps dissuade bad actors from accessing data they shouldn’t and also gives agencies the forensic information they need to investigate incidents if breaches do occur.

Area 5: Access Control

Another way to ensure that only authorized users interact with CJI is to limit access based on specific attributes like job title, location, and IP address. Implementing role-based access controls helps limit the availability of CJI, so only the people who need to use that data can access it (and only when absolutely necessary).

Area 6: Identification & Authentication

Because of the rules around auditing & accountability and access control, the Security Policy also stipulates the importance of authenticating every user’s identity. CJIS’ identification & authentication rules include the use of multifactor authentication, regular password resets, and revoked credentials after five unsuccessful login attempts.

Area 7: Configuration Management

Only authorized users should be allowed to change the configuration of the systems that store CJI. This includes simple tasks like performing software updates, but it also extends to the hardware realm, for example when it comes to adding or removing devices from a network.

Area 8: Media Protection

Compliant agencies must establish policies to protect all forms of media, including putting procedures in place for the secure disposal of that media once it is no longer in use.

Area 9: Physical Protection

Any physical spaces (like on-premises server rooms, for example) should be locked, monitored by camera equipment, and equipped with alarms to prevent unauthorized access.

A wall of black and white security cameras.

Area 10: System & Communications Protection

Cybersecurity best practices should be in place, including perimeter protection measures like Intrusion Prevention Systems, firewalls, and anti-virus solutions. In the category of encryption, FIPS 140-2 certification and a minimum of 128 bit strength are required.

Area 11: Formal Audits

Although the CJIS doesn’t issue compliance certifications, agencies still have to be available for formal audits by CJIS representatives (like the CJIS Audit Unit and the CJIS Systems Agency) at least once every three years.

Area 12: Personnel Security

Any personnel with access to CJI have to undergo a screening process and background checks (including fingerprinting) to ensure their fitness to handle sensitive data.

Area 13: Mobile Devices

In order to remain in compliance, organizations have to develop acceptable use policies that govern how mobile devices are used, how they connect to the internet, what applications they can have on them, and even what websites they can access. In this case, mobile devices include smartphones, tablets, and laptops that can access CJI. When representatives use mobile devices to access CJI, those devices (and that access) are subject to all the areas of the Security Policy.

How Backblaze Supports CJIS Compliance

For any organization to achieve CJIS compliance, any partner or vendor that accesses, interacts with, or stores their CJI also needs to comply with the same Security Policy standards. You guessed it: that means cloud storage providers too. It’s your job to ensure that your organization is CJIS-compliant before transmitting your data to any cloud storage provider. At Backblaze, we follow the same security standards outlined in the CJIS Security Policy so that you can trust that your CJI is protected and your agency is in compliance even while it’s being stored in Backblaze B2 Cloud Storage or via our Business Backup product.

The post What is the CJIS Security Policy? appeared first on Backblaze Blog | Cloud Storage & Cloud Backup.

CISO’s Guide to Ransomware

Post Syndicated from Mark Potter original https://www.backblaze.com/blog/cisos-guide-to-ransomware/

The job of a Chief Information Security Officer (CISO) is never truly done. Just as soon as one threat is neutralized and mitigating controls have been put in place, some industrious cybercriminal finds a new way to make life miserable.

Even those of us working in information technology aren’t immune to these attacks. For example, Coinbase recently shared lessons learned from a phishing attempt on one of their employees. No customer account information was compromised, but the incident goes to show that “anyone can be social engineered.”

Coinbase took the right approach by assuming they’d be attacked and understanding that humans make mistakes, even the most diligent among us. In sharing what they learned, they make the whole community more aware. A rising tide lifts all boats, as they say. In that spirit, I’m sharing some of the lessons I’ve learned over the course of my career as a CISO that might help you be better prepared for the inevitable cyberattack.

Read on for best practices you can follow to mitigate your ransomware risk.

Ransomware Prevention, Detection, Mitigation, and Recovery Best Practices

The best way to address the threat of ransomware is to reduce the likelihood of a successful attack. First, help your employees through training and mitigating controls:

  • User Training: Making sure end users are savvy enough to spot a malicious email will ensure that you get fewer well-intentioned folks clicking on links. Things like phishing simulations can train users not to click on suspicious links or download unexpected attachments. While training is the first line of defense, you can’t rely on it alone. Even gold standard security training companies have been hit with successful phishing attacks.
  • Endpoint Detection and Response: An endpoint detection and response (EDR) tool can provide additional guardrails. Backblaze leverages EDR to help block and quarantine malicious payloads as they attempt to execute on the workstation.
  • Multifactor Authentication: Password strength can be weak, and people often reuse passwords across websites, so another essential component is multifactor authentication (MFA). If you click on a phishing link, or a cybercriminal gains privileged access to your system through some other means, they may be able to retrieve your account password from memory using readily available tools like Mimikatz on Windows or dscl on a Mac. MFA in the form of a logical or physical token, provides for an additional authentication credential that is random, and changes after a brief period of time.
  • Limiting Applications: Only allowing authorized applications to be installed by users, either through operating system configuration or third-party software, can help limit what employees can download. Be sure that people aren’t permitted to install applications that may open up additional vulnerabilities.

In addition to helping end users from falling for phishing, there are some best practices you can implement on your systems, network, and backend to reduce vulnerabilities as well.

  • Implement a Strong Vulnerability Management Program: A robust program can help you reduce your overall risk by being proactive in identifying and remediating your vulnerabilities.
  • Conduct Static Analysis Security Tests: These focus on looking for vulnerabilities in source code.
  • Perform Dynamic Application Security Tests: These look for vulnerabilities in running applications.
  • Execute Software Composition Analysis Security Tests: These can focus on enumerating and identifying vulnerabilities in versions of the third-party libraries and frameworks leveraged by your application.
  • Engage Third Parties to Conduct Penetration Testing: Third parties can discover weaknesses in your systems that your own team may miss.
  • Implement a Bug Bounty Program: Security researchers are incentivized to find security vulnerabilities in your application through bug bounty program rewards.
  • Stay on Top of Your Patching Cadence: Test and deploy system and application updates as soon as possible, but also have a rollback strategy in the event of a bad patch.
  • Implement Least Privilege: Users and programs/processes should only have the privileges they need to accomplish their tasks.
  • Use Standard User Accounts for Non-Admin Tasks: Admins can fall for the same types of phishing attacks as any other user. Using a regular non-admin account to read email, browse the web, etc., can help protect the admin from drive-by downloads, phishing, ransomware, and other forms of attack.
  • Segment Your Network: Implement physical separation, virtual local area networks (VLAN), and/or microsegmentation to limit what a server or device is able to communicate with.

Finally, stay up to date on guidance from sources such as the White House, the National Institute of Standards and Technology (NIST), the Federal Bureau of Investigation (FBI), and the Cybersecurity and Infrastructure Security Agency (CISA). The FBI and CISA also issued holiday and weekend ransomware advisories after a pattern of increased attacks was observed during those periods.

Responding If an Attack Slips Through

Realistically, attacks may slip through, and smart CISOs work from that assumption (and assume breach mindset).

Limiting the Blast Radius

As I mentioned during a 2021 SpiceWorld presentation, limiting the blast radius is key. When you’re experiencing a ransomware attack, you also want to isolate the infected system before the ransomware can attempt to access and encrypt other files on network shares. Once it has been isolated, you can investigate whether or not the ransomware has spread to other systems, collect digital forensics, wipe the system, reimage the system, restore the data from backup, and block the command and control IP addresses while monitoring the network to see if other systems attempt to communicate with those IP addresses.

Restoring Your Data

Once you have identified and remediated the root cause of the compromise, you can restore the data from backup after making sure that the backup doesn’t contain the malware you just cleaned up.

Of course, you can only back up if you’ve planned ahead. If you haven’t, you now have a difficult choice.

Should I Pay?

That really depends on what you have done to prepare for a ransomware attack. If you have backups that are disconnected, there’s a high likelihood you will be able to successfully recover to a known good state. It’s in everybody’s best interest not to pay the ransom, because it continues to fuel this type of criminal activity, and there’s no guarantee that any decrypter or key that a cybercriminal gives you is going to unlock your files. Ransomware, like any other code, can contain bugs, which may add to the recovery challenges.

There is, of course, cyber insurance, but you should know that organizations that have been hit are likely to pay higher premiums or have a more difficult time securing cyber insurance that covers ransomware.

Planning for a Fast Recovery

It is important to have a robust recovery plan, and to practice executing the plan. Some elements of a strong recovery plan include:

  • Train and Test Your Team: Regularly test your plan and train those with incident response and recovery responsibilities on what to do if and when an incident occurs. Tensions are high when an incident occurs, and regular testing and training builds muscle memory and increases familiarity so your team knows exactly what to do.
  • Plan, Implement, and Test Your Backups: Ensure that you have immutable backups that cannot be compromised during an attack. Test your restore process frequently to ensure backups are working properly. Focus on your data most importantly, but also your system images and configurations. Have a solid change management process that includes updating the system images and configuration files/scripts.
  • Know Who to Call: Maintain a list of internal and external contacts, so you know who to contact within your organization.
  • Establish Relationships With Law Enforcement: Building relationships with your local FBI field office and local law enforcement before an attack goes a long way toward being able to take the steps required to recover quickly from a ransomware attack while also collecting legally defensible evidence. Sharing indicators of compromise with the FBI or other partner law enforcement agencies may help with attribution and (later) prosecution efforts.

Don’t Be a Soft Target

Ransomware continues to cause problems for companies large and small. It’s not going away anytime soon. Cybercriminals are also targeting backups and Windows Shadow Volumes as part of their attacks. As a backup provider, of course, we have some thoughts on tools that can help, including:

Object Lock: Object Lock provides the immutability you need to know your backups are protected from ransomware. With Object Lock, no one can modify or delete your data, including cybercriminals and even the person who set the lock.

Instant Recovery in Any Cloud: Integrated with Veeam, this solution gives you your data back with a single command.

The reality is that attacks happen all the time, but you can take steps to prepare, prevent, respond to, and then recover from them in a way that doesn’t take your business down for weeks or months.

The post CISO’s Guide to Ransomware appeared first on Backblaze Blog | Cloud Storage & Cloud Backup.
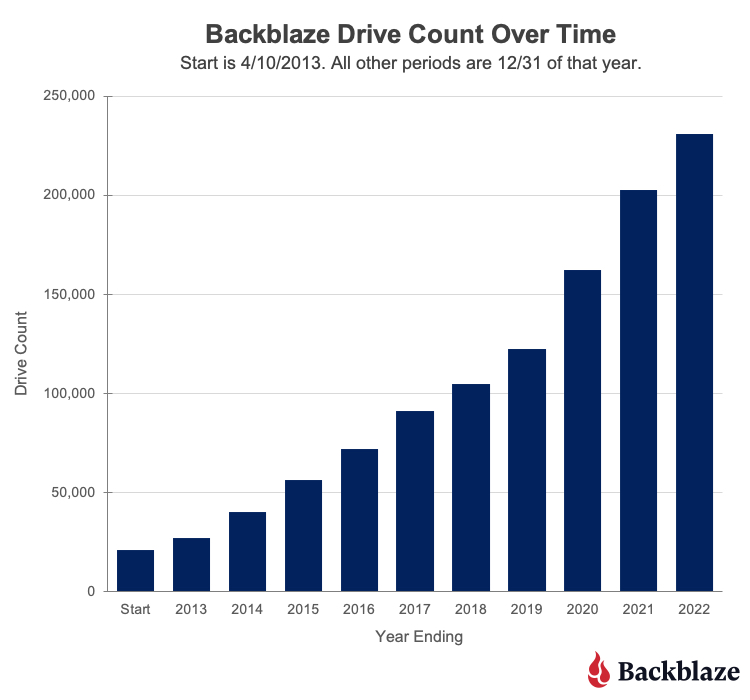
AWS CloudFront vs. bunny.net: How Do the CDNs Compare?

Post Syndicated from Molly Clancy original https://www.backblaze.com/blog/aws-cloudfront-vs-bunny-net-how-do-the-cdns-compare/

Remember the story about the hare and the tortoise? Well, this is not that story, but we are comparing bunny.net with another global content delivery network (CDN) provider, AWS CloudFront, to see how the two stack up. When you think of rabbits, you automatically think of speed, but a CDN is not just about speed; sometimes, other factors “win the race.”

As a leading specialized cloud storage provider, we provide application storage that folks use with many of the top CDNs. Working with these vendors allows us deep insight into the features of each platform so we can share the information with you. Read on to get our take on these two leading CDNs.

What Is a CDN?

A CDN is a network of servers dispersed around the globe that host content closer to end users to speed up website performance. Let’s say you keep your website content on a server in New York City. If you use a CDN, when a user in Las Vegas calls up your website, the request can pull your content from a server in, say, Phoenix instead of going all the way to New York. This is known as caching. A CDN’s job is to reduce latency and improve the responsiveness of online content.

Join the Webinar

Tune in to our webinar on Tuesday, February 28, 2022 at 10:00 a.m. PT/1:00 p.m. ET to learn how you can leverage bunny.net’s CDN and Backblaze B2 to accelerate content delivery and scale media workflows with zero-cost egress.

Sign Up for the Webinar

CDN Use Cases

Before we compare these two CDNs, it’s important to understand how they might fit into your overall tech stack. Some common use cases for a CDN include:

  • Website Reliability: If your website server goes down and you have a CDN in place, the CDN can continue to serve up static content to your customers. Not only can a CDN speed up your website performance tremendously, but it can also keep your online presence up and running, keeping your customers happy.
  • App Optimization: Internet apps use a lot of dynamic content. A CDN can optimize that content and keep your apps running smoothly without any glitches, regardless of where in the world your users access them.
  • Streaming Video and Media: Streaming media is essential to keep customers engaged these days. Companies that offer high-resolution video services need to know that their customers won’t be bothered by buffering or slow speeds. A CDN can quickly solve this problem by hosting 8K videos and delivering reliable streams across the globe.
  • Scalability: Various times of the year are busier than others—think Black Friday. If you want the ultimate scalability, a CDN can help buffer the traffic coming into your website and ease the burden on the origin server.
  • Gaming: Video game fans know nothing is worse than having your favorite online duel lock up during gameplay. Video providers use CDNs to host high-resolution content, so all their games run flawlessly to keep players engaged. They also use CDN platforms to roll out new updates and security patches without any limits.
  • Images/E-Commerce: Online retailers typically host thousands of images for their products so you can see every color, angle, and option available. A CDN is an excellent way to instantly deliver crystal clear, high-quality images without any speed issues or quality degradation.
  • Improved Security: CDN services often come with beefed-up security protocols, including distributed denial-of-service (DDoS) prevention across the platform and detection of suspicious behavior on the network.

Speed Tests: How Fast Can You Go?

Speed tests are a valuable tool that businesses can use to gauge site performance, page load times, and customer experience. You can use dozens of free online speed tests to evaluate time to first byte (TTFB) and the number of requests (how many times the browser has to make the request before the page loads). Some speed tests show other more advanced metrics.

A CDN is one aspect that can affect speed and performance, but there are other factors at play as well. A speed test can help you identify bottlenecks and other issues.

Some of the most popular tools are:

Comparing bunny.net vs. AWS CloudFront

Although bunny.net and AWS CloudFront provide CDN services, their features and technology work differently. You will want all of the details when deciding which CDN is right for your application.

bunny.net is a powerfully simple CDN that delivers content at lightning speeds across the globe. The service is scalable, affordable, and secure. They offer edge storage, optimization services, and DNS resources for small to large companies.

AWS CloudFront is a global CDN designed to work primarily with other AWS services. The service offers robust cloud-based resources for enterprise businesses.

Let’s compare all the features to get a good sense of how each CDN option stacks up. To best understand how the two CDNs compare, we’ll look at different aspects of each one so you can decide which option works best for you, including:

  • Network
  • Cache
  • Compression
  • DDoS Protection
  • Integrations
  • TLS Protocols
  • CORS Support
  • Signed Exchange Support
  • Pricing

Network

Distribution points are the number of servers within a CDN network. These points are distributed throughout the globe to reach users anywhere. When users request content through a website or app, the CDN connects them to the closest distribution point server to deliver the video, image, script, etc., as quickly as possible.

bunny.net

bunny.net has 114 global distribution points (also called points of presence or PoPs) in 113 cities and 77 countries. For high-bandwidth users, they also offer a separate, cost-optimized network of 10 PoPs. They don’t charge any request fees and offer multiple payment options.

AWS CloudFront

Currently, AWS CloudFront advertises that they have roughly 450 distribution points in 90 cities in 48 countries.

Our Take

While AWS CloudFront has many points in some major cities, bunny.net has a wider global distribution—AWS CloudFront covers 90 cities, and bunny.net covers 114. And bunny.net ranks first on CDNPerf, a third-party CDN performance analytics and comparison tool.

Cache

Caching files allows a CDN to serve up copies of your digital content from distribution points closer to end users, thus improving performance and reliability.

bunny.net

With their Origin Shield feature, when CDN nodes have a cache miss (meaning the content an end user wants isn’t at the node closest to them), the network directs the request to another node versus the origin. They offer Perma-Cache where you can permanently store your files at the edge for a 100% cache hit rate. They also recently introduced request coalescing, where requests by different users for the same file are combined into one request. Request coalescing works well for streaming content or large objects.

AWS CloudFront

AWS CloudFront uses caching to reduce the load of requests to your origin store. When a user visits your website, AWS CloudFront directs them to the closest edge cache so they can view content without any wait. You can configure AWS CloudFront’s cache settings using the backend interface.

Our Take

Caching is one of bunny.net’s strongest points of differentiation, primarily around static content. They also offer dynamic caching with one-click configuration by query string, cookie, and state cache as well as cache chunking for video delivery. With their Perma-Cache and request coalescing, their capabilities for dynamic caching are improving.

Compression

Compressing files makes them smaller, which saves space and makes them load faster. Many CDNs allow compression to maximize your server space and decrease page load times. The two services are on par with each other when it comes to compression.

bunny.net

The bunny.net system automatically optimizes/compresses images and minifies CSS and JavaScript files to improve performance. Images are compressed by roughly 80%, improving load times by up to 90%. bunny.net supports both .gzip and .br (Brotli) compression formats. The bunny.net optimizer can compress images and optimize files on the fly.

AWS CloudFront

AWS CloudFront allows you to compress certain file types automatically and use them as compressed objects. The service supports both .gzip and .br compression formats.

DDoS Protection

Distributed denial of service (DDoS) attacks can overwhelm a website or app with too much traffic causing it to crash and interrupting actual website traffic. CDNs can help prevent DDoS attacks.

bunny.net

bunny.net stops DDoS attacks via a layered DDoS protection system that stops both network and HTTP layer attacks. Additionally, a number of checks and balances—like download speed limits, connection counts for IP addresses, burst requests, and geoblocking—can be configured. You can hide IP addresses and use edge rules to block requests.

AWS CloudFront

AWS CloudFront uses security technology called AWS Shield designed to prevent DDoS and other types of attacks.

Our Take

As an independent, specialized CDN service, bunny.net has put most of their focus on being a standout when it comes to core CDN tasks like caching static content. That’s not to say that their security services are lacking, but just that their security capabilities are sufficient to meet most users’ needs. AWS Shield is a specialized DDoS protection software, so it is more robust. However, that robustness comes at an added cost.

Integrations

Integrations allow you to customize a product or service using add-ons or APIs to extend the original functionality. One popular tool we’ll highlight here is Terraform, a tool that allows you to provision infrastructure as code (IaC).

Terraform

HashiCorp’s Terraform is a third-party program that allows you to manage your CDN, store source code in repositories like GitHub, track each version, and even roll back to an older version if needed. You can use Terraform to configure bunny.net CDN pull zones only. You can use Terraform with AWS CloudFront by editing configuration files and installing Terraform on your local machine.

TLS Protocols

Transport Layer Security (TLS), formerly known as secure sockets layer (SSL), are encryption protocols used to protect website data. Whenever you see the lock sign on your internet browser, you are using a website that is protected by an TLS (HTTPS). Both services conform adequately to TLS standards.

bunny.net offers customers free TLS with its CDN service. They make setting it up a breeze (two clicks) in the backend of your account. You also have the option of installing your own SSL. They provide helpful step-by-step instructions on how to install it.

Because AWS CloudFront assigns a unique URL for your CDN content, you can use the default TLS certificate installed on the server or your own TLS. If you use your own, you should consult the explicit instructions for key length and install it correctly. You also have the option of using an Amazon TLS certificate.

CORS Support

Cross-origin resource sharing (CORS) is a service that allows your internet browser to deliver content from different sources seamlessly on a single webpage or app. Default security settings normally reject certain items if they come from a different origin and they may block the content. CORS is a security exception that allows you to host various types of content from other servers and deliver them to your users without any errors.

bunny.net and AWS CloudFront both offer customers CORS support through configurable CORS headers. Using CORS, you can host images, scripts, style sheets, and other content in different locations without any issues.

Signed Exchange Support

Signed exchange (SXG) is a service that allows search engines to find and serve cached pages to users in place of the original content. SXG speeds up performance and improves SEO in the process. The service uses cryptography to authenticate the origin of digital assets.

Both bunny.net and AWS CloudFront support SXG. bunny.net supports signed exchange through its token authentication system. The service allows you to enable, configure, and generate tokens and assign them an expiration date to stop working when you want.

AWS CloudFront supports SXG through its security settings. When configuring your settings, you can choose which cipher to use to verify the origin of the content.

Pricing

bunny.net

bunny.net offers simple, affordable, region-based pricing starting at $0.01/GB in the U.S. For high-bandwidth projects, their volume pricing starts at $0.005/GB for the first 500TB.

AWS CloudFront

AWS CloudFront offers a free plan, including 1TB of data transfer out, 10,000,000 HTTP or HTTPS requests, and 2,000,000 functions invocations each month.

AWS CloudFront’s paid service is tiered based on bandwidth usage. AWS CloudFront’s pricing starts at $0.085 per GB up to 10TB in North America. All told, there are seven pricing tiers from 10TB to >5PB. If you stay within the AWS ecosystem, data transfer is free from Amazon S3, their object storage service, however you’ll be charged to transfer data outside of AWS. Each tier is priced by location/country.

Our Take

bunny.net is probably one of the most cost effective CDNs on the market. For example, their traffic pricing for 5TB in Europe or North America is $50 compared to $425 with CloudFront. There are no request fees, you only pay for the bandwidth you actually use. All of their features are included without extra charges. And finally, egress is free between bunny.net and Backblaze B2, if you choose to pair the two services.

Our Final Take

bunny.net’s key advantages are its simplicity, pricing, and customer support. Many of the above features are configured in one-click, giving you advanced capabilities without the headache of trying to figure out complicated provisioning. Their pricing is straightforward and affordable. And, not for nothing, they also offer one-to-one, round-the-clock customer support. If it’s important to you to be able to speak with an expert when you need to, bunny.net is the better choice.

AWS CloudFront offers more robust features, like advanced security services, but those services come with a price tag and you’re on your own when it comes to setting them up properly. AWS also prefers customers to stay within the AWS ecosystem, so using any third-party services outside of AWS can be costly.

If you’re looking for an agnostic, specialized, affordable CDN, bunny.net would be a great fit. If you need more advanced features and have the time, know-how, and money to make them work for you, AWS CloudFront offers those.

CDNs and Cloud Storage

A CDN can boost the speed of your website pages and apps. However, you still need reliable, affordable application storage for the cache to pull from. Pairing robust application storage with a speedy CDN is the perfect solution for improved performance, security, and scalability.

The post AWS CloudFront vs. bunny.net: How Do the CDNs Compare? appeared first on Backblaze Blog | Cloud Storage & Cloud Backup.
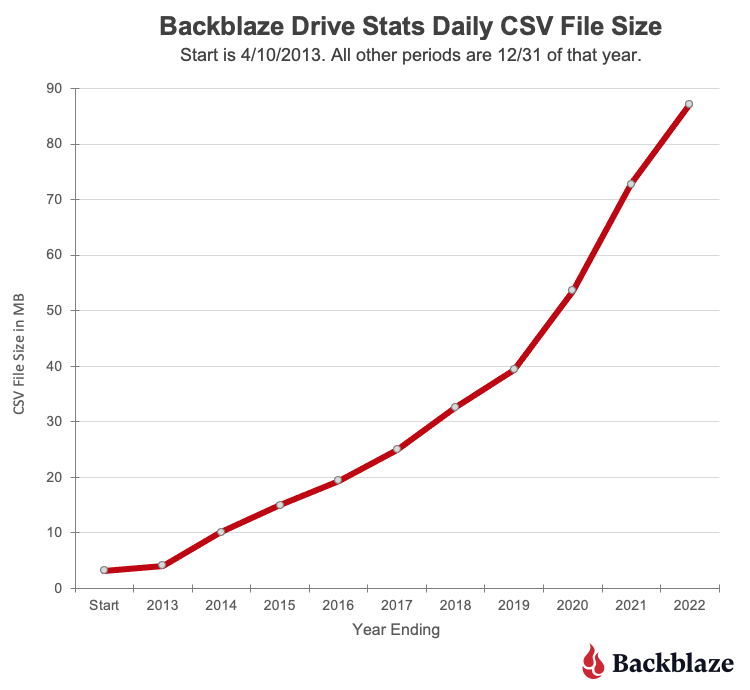
Go Wild with Wildcards in the Backblaze B2 Command Line Tool 3.7.1

Post Syndicated from Pat Patterson original https://www.backblaze.com/blog/go-wild-with-wildcards-in-backblaze-b2-command-line-tool-3-7-1/

File transfer tools such as Cyberduck, FileZilla Pro, and Transmit implement a graphical user interface (GUI), which allows users to manage and transfer files across local storage and any number of services, including cloud object stores such as Backblaze B2 Cloud Storage. Some tasks, however, require a little more power and flexibility than a GUI can provide. This is where a command line interface (CLI) shines. A CLI typically provides finer control over operations than a GUI tool, and makes it straightforward to automate repetitive tasks. We recently released version 3.7.0 (and then, shortly thereafter, version 3.7.1) of the Backblaze B2 Command Line Tool, alongside version 1.19.0 of the underlying Backblaze B2 Python SDK. Let’s take a look at the highlights in the new releases, and why you might want to use the Backblaze B2 CLI rather than the AWS equivalent.

Battle of the CLI’s: Backblaze B2 vs. AWS

As you almost certainly already know, Backblaze B2 has an S3-compatible API in addition to its original API, now known as the B2 Native API. In most cases, we recommend using the S3-compatible API, since a rich ecosystem of S3 tools and knowledge has evolved over the years.

While the AWS CLI works perfectly well with Backblaze B2, and we explain how to use it in our B2 Developer Quick-Start Guide, it’s slightly clunky. The AWS CLI allows you to set your access key id and secret access key via either environment variables or a configuration file, but you must override the default endpoint on the command line with every command, like this:

% aws --endpoint-url https://s3.us-west-004.backblazeb2.com s3api list-buckets

This is very tiresome if you’re working interactively at the command line! In contrast, the B2 CLI retrieves the correct endpoint from Backblaze B2 when it authenticates, so the command line is much more concise:

% b2 list-buckets

Additionally, the CLI provides fine-grain access to Backblaze B2-specific functionality, such as application key management and replication.

Automating Common Tasks with the B2 Command Line Tool

If you’re already familiar with CLI tools, feel free to skip to the next section.

Imagine you’ve uploaded a large number of WAV files to a Backblaze B2 Bucket for transcoding into .mp3 format. Once the transcoding is complete, and you’ve reviewed a sample of the .mp3 files, you decide that you can delete the .wav files. You can do this in a GUI tool, opening the bucket, navigating to the correct location, sorting the files by extension, selecting all of the .wav files, and deleting them. However, the CLI can do this in a single command:

% b2 rm --withWildcard --recursive my-bucket 'audio/*.wav'

If you want to be sure you’re deleting the correct files, you can add the --dryRun option to show the files that would be deleted, rather than actually deleting them:

% b2 rm --dryRun --withWildcard --recursive my-bucket 'audio/*.wav'
audio/aardvark.wav
audio/barracuda.wav
...
audio/yak.wav
audio/zebra.wav

You can find a complete list of the CLI’s commands and their options in the documentation.

Let’s take a look at what’s new in the latest release of the Backblaze B2 CLI.

Major Changes in B2 Command Line Tool Version 3.7.0

New rm command

The most significant addition in 3.7.0 is a whole new command: rm. As you might expect, rm removes files. The CLI has always included the low-level delete-file-version command (to delete a single file version) but you had to call that multiple times and combine it with other commands to remove all versions of a file, or to remove all files with a given prefix.

The new rm command is significantly more powerful, allowing you to delete all versions of a file in a single command:

% b2 rm --versions --withWildcard --recursive my-bucket images/san-mateo.png

Let’s unpack that command:

  • %: represents the command shell’s prompt. (You don’t type this.)
  • b2: the B2 CLI executable.
  • rm: the command we’re running.
  • --versions: apply the command to all versions. Omitting this option applies the command to just the most recent version.
  • --withWildcard: treat the folderName argument as a pattern to match the file name.
  • --recursive: descend into all folders. (This is required with –withWildcard.)
  • my-bucket: the bucket name.
  • images/san-mateo.png: the file to be deleted. There are no wildcard characters in the pattern, so the file name must match exactly. Note: there is no leading ‘/’ in Backblaze B2 file names.

As mentioned above, the --dryRun argument allows you to see what files would be deleted, without actually deleting them. Here it is with the ‘*’ wildcard to apply the command to all versions of the .png files in /images. Note the use of quotes to avoid the command shell expanding the wildcard:

% b2 rm --dryRun --versions --withWildcard --recursive my-bucket 'images/*.png'
images/amsterdam.png
images/sacramento.png

DANGER ZONE: by omitting --withWildcard and the folderName argument, you can delete all of the files in a bucket. We strongly recommend you use --dryRun first, to check that you will be deleting the correct files.

% b2 rm --dryRun --versions –recursive my-bucket
index.html
images/amsterdam.png
images/phoenix.jpeg
images/sacramento.png
stylesheets/style.css

New --withWildcard option for the ls command

The ls command gains the --withWildcard option. It operates identically as described above. In fact, b2 rm --dryRun --withWildcard --recursive executes the exact same code as b2 ls --withWildcard --recursive. For example:

% b2 ls --withWildcard --recursive my-bucket 'images/*.png'
images/amsterdam.png
images/sacramento.png

You can combine --withWildcard with any of the existing options for ls, for example --long:

% b2 ls --long --withWildcard --recursive my-bucket 'images/*.png'
4_z71d55dummyid381234ed0c1b_f108f1dummyid163b_d2dummyid_m165048_c004
_v0402014_t0016_u01dummyid48198 upload 2023-02-09 16:50:48 714686 images/amsterdam.png
4_z71d55dummyid381234ed0c1b_f1149bdummyid1141_d2dummyid_m165048_c004
_v0402010_t0048_u01dummyid48908 upload 2023-02-09 16:50:48 549261 images/sacramento.png

New --incrementalMode option for upload-file and sync

The new --incrementalMode option saves time and bandwidth when working with files that grow over time, such as log files, by only uploading the changes since the last upload. When you use the --incrementalMode option with upload-file or sync, the B2 CLI looks for an existing file in the bucket with the b2FileName that you supplied, and notes both its length and SHA-1 digest. Let’s call that length l. The CLI then calculates the SHA-1 digest of the first l bytes of the local file. If the digests match, then the CLI can instruct Backblaze B2 to create a new file comprising the existing file and the remaining bytes of the local file.

That was a bit complicated, so let’s look at a concrete example. My web server appends log data to a file, access.log. I’ll see how big it is, get its SHA-1 digest, and upload it to a B2 Bucket:

% ls -l access.log
-rw-r--r-- 1 ppatterson staff 5525849 Feb 9 15:55 access.log

% sha1sum access.log
ff46904e56c7f9083a4074ea3d92f9be2186bc2b access.log

The upload-file command outputs all of the file’s metadata, but we’ll focus on the SHA-1 digest, file info, and size.

% b2 upload-file my-bucket access.log access.log
...
{
...
"contentSha1": "ff46904e56c7f9083a4074ea3d92f9be2186bc2b",
...
"fileInfo": {
"src_last_modified_millis": "1675986940381"
},
...
"size": 5525849,
...
}

As you might expect, the digest and size match those of the local file.

Time passes, and our log file grows. I’ll first upload it as a different file, so that we can see the default behavior when the B2 Cloud Storage file is simply replaced:

% ls -l access.log
-rw-r--r-- 1 ppatterson staff 11047145 Feb 9 15:57 access.log

% sha1sum access.log
7c97866ff59330b67aa96d7a481578d62e030788 access.log

% b2 upload-file my-bucket access.log new-access.log
{
...
"contentSha1": "7c97866ff59330b67aa96d7a481578d62e030788",
...
"fileInfo": {
"src_last_modified_millis": "1675987069538"
},
...
"size": 11047145,
...
}

Everything is as we might expect—the CLI uploaded 11,047,145 bytes to create a new file, which is 5,521,296 bytes bigger than the initial upload.

Now I’ll use the --incrementalMode option to replace the first Backblaze B2 file:

% b2 upload-file --quiet my-bucket access.log access.log
...
{
...
"contentSha1": "none",
...
"fileInfo": {
"large_file_sha1": "7c97866ff59330b67aa96d7a481578d62e030788",
"plan_id": "ea6b099b48e7eb7fce01aba18dbfdd72b56eb0c2",
"src_last_modified_millis": "1675987069538"
},
...
"size": 11047145,
...
}

The digest is exactly the same, but it has moved from contentSha1 to fileInfo.large_file_sha1, indicating that the file was uploaded as separate parts, resulting in a large file. The CLI didn’t need to upload the initial 5,525,849 bytes of the local file; it instead instructed Backblaze B2 to combine the existing file with the final 5,521,296 bytes of the local file to create a new version of the file.

There are several more new features and fixes to existing functionality in version 3.7.0—make sure to check out the B2 CLI changelog for a complete list.

Major Changes in B2 Python SDK 1.19.0

Most of the changes in the B2 Python SDK support the new features in the B2 CLI, such as adding wildcard matching to the Bucket.ls operation and adding support for incremental upload and sync. Again, you can inspect the B2 Python SDK changelog for a comprehensive list.

Get to Grips with B2 Command Line Tool Version 3.7.0 3.7.1

Whether you’re working on Windows, Mac or Linux, it’s straightforward to install or update the B2 CLI; full instructions are provided in the Backblaze B2 documentation.

Note that the latest version is now 3.7.1. The only changes from 3.7.0 are a handful of corrections to help text and that the Mac binary is no longer provided, due to shortcomings in the Mac version of PyInstaller. Instead, we provide the Mac version of the CLI via the Homebrew package manager.

The post Go Wild with Wildcards in the Backblaze B2 Command Line Tool 3.7.1 appeared first on Backblaze Blog | Cloud Storage & Cloud Backup.
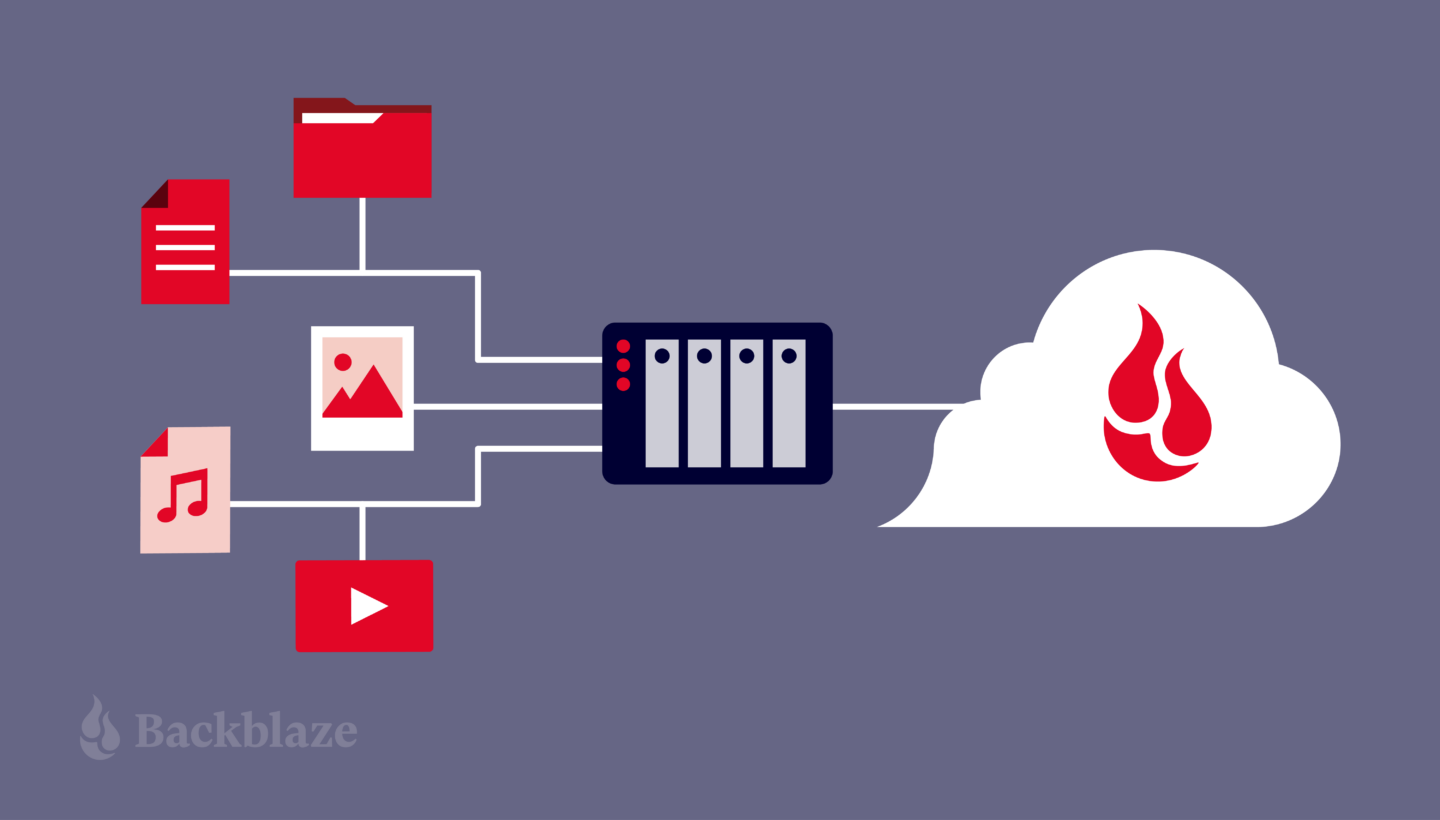
Thinking Through Your Cloud Strategy With Veeam’s V12 Release

Post Syndicated from Kari Rivas original https://www.backblaze.com/blog/thinking-through-your-cloud-strategy-with-veeams-v12-release/

We wouldn’t normally make a big deal about another company’s version release except this one is, well… kind of a big deal. Unlike most software releases that fly under the radar, there are big implications—for your backup strategy, your cloud storage usage, and your budget.
Leading backup and recovery provider, Veeam, announced the release of Version 12 (v12) of its popular Backup & Replication software on February 14. And we’re feeling the backup love.

So, what’s the big deal? With this release, Veeam customers can send backups directly to the cloud instead of (or in addition to) routing them to local storage first. Ultimately, the changes announced in v12 provide for easier backups, more diversified workloads, more flexibility in your cloud strategy, and capital expense (CapEx) savings on local storage.

Today, we’re breaking down what all that means and how you can take advantage of the changes to optimize your backup strategy and cloud storage spend.

Save the Date for VeeamON 2023 May 22–24 in Miami

Learn more about the Veeam v12 release and how Backblaze and Veeam make modern data protection easy. Backblaze is proud to be a Platinum sponsor at VeeamON this year and we look forward to seeing you there!

About Veeam

Veeam is a leader in backup, recovery, and data management solutions. They offer a single platform for cloud, virtual, physical, software as a service (SaaS), and Kubernetes environments. Their products help customers own, control, and protect data anywhere in the hybrid cloud.

Customers can already select Backblaze B2 Cloud Storage as a destination for their Veeam backups, and doing so just got a whole lot easier with v12. Read on to learn more.

How Veeam Previously Worked with Cloud Storage

Prior to v12, cloud object storage was enabled in Veeam through the Scale-Out Backup Repository (SOBR). To set up the Cloud Tier, you first had to set up a local repository for your backup data. Many people used a NAS for this purpose, but it could also be a SAN, hard drives, etc. This was your primary repository, also known as your performance tier.

Here’s an example workflow with SOBR and Backblaze B2.

You needed enough capacity on your local repository to land the data there first before you could then use the Veeam console to Move or Copy it to the cloud. If your data set is perpetually growing (and whose isn’t?), you previously had to either tier off more data to the cloud to free up local capacity, or invest in more local storage.

Veeam v12 changes all that.

Veeam v12 Gives You Choices

With this new version release, the primary repository can now be local, on-premises storage, or it can also be local object storage arrays or cloud storage like Backblaze B2.

You can still use the SOBR or back up direct to object storage. This opens up a whole range of benefits, including:

  • Easier Backups: You can now use the Backup Job functionality to send your data straight to the cloud. You no longer need to land it in local storage first. You can also create multiple Backup Jobs that go to different destinations. For instance, to better fortify your backup strategy, you can create a Backup Job to a Backblaze B2 Bucket in one region and then a Backup Copy Job to a B2 Bucket in a different region for redundancy purposes.
  • Diversified Workloads: More choices give you the ability to think through your workloads and how you want to optimize them for cost and access. You may want to send less critical workloads—like older backups, archives, or data from less important work streams—to the cloud to free up capacity on your local storage. You can do this by editing your Backup Jobs (using the Move backup function) that were previously routing through the SOBR to cloud storage to point directly to cloud object storage instead.
  • More Flexibility: v12 allows for more flexibility to use cloud storage in your backup strategy. You have options, including:
    • Making your primary repository on-premises and using the cloud as part of your Capacity Tier in the SOBR.
    • Moving to a fully cloud-based repository.
    • Mixing your use of the SOBR and direct-to-object storage Backup Jobs to optimize your disaster recovery (DR) strategy, recovery needs, and costs.
  • CapEx Savings: You no longer need to keep investing in more local storage as your data set grows. Rather than buying another server or NAS, you can optimize your existing infrastructure by more easily off-loading data to cloud storage to free up capacity on on-premises devices.

What’s Next: Thinking Through Your Strategy

Great, you have more choices. But which choice should you make, and why?

Ultimately, you want to increase your company’s cyber resilience. Your backup strategy should be airtight, but you also need to think through your recovery process and your DR strategy as well. We’ll explain a couple different ways you could make use of the functionality v12 provides and break down the pros and cons of each.

Scenario 1: Using Cloud Storage as Part of Your SOBR

In this case, your on-premises storage is your primary repository and the cloud is your secondary repository. The advantage of an on-premises repository is that it’s often going to give you the fastest, easiest access to recovery. If your recovery time objective (RTO) is very short, a local backup is likely going to give you the fastest data restoration option to meet that RTO goal.

Then, copy your backups to cloud storage to ensure you have another copy in case of a local disaster. This is always good practice as part of the 3-2-1 rule or 3-2-1-1-0 rule. Why is it important to have a copy in cloud storage? Well, even if you store backups for disaster recovery at another location, is your DR site far away enough? Is it immune from a local disaster? If not, you need another copy in the cloud in a location that’s geographically distanced from you.

Scenario 2: Using the Cloud as Your Primary Repository

In this case, the cloud is your primary repository. Direct backups to cloud object storage from Veeam are helpful for the following use cases:

  • Less critical workloads: This could include a lesser-used server, archived projects, files, and data; or business data that is less critical to restore in the case of disaster recovery.
  • To free up local storage: If you’re running up against a lack of local storage and need to make a decision on spending more for additional on-premises storage, the cloud is often more affordable than investing in additional physical storage devices.
  • Workloads where slightly longer recovery periods are acceptable: If you can handle a slightly longer recovery period, cloud storage is a good fit. But remember that not all cloud storage is created equal. Backblaze B2, for example, is always-hot storage, so you won’t have to worry about cold storage delays like you might with AWS Glacier.
  • To migrate away from an LTO system: If you were previously sending backup copy jobs to tape, you can now more easily use cloud storage as a replacement.
  • To eliminate a secondary on-premises location: Maybe you are worried your backups are stored too close to each other, or you simply want to get rid of a secondary on-premises location. The direct-to-cloud option gives you this option. You can reroute those backup copy jobs to copy direct-to-cloud object storage instead.
  • To eliminate on-premises backups altogether: Of course, if you want to completely eliminate local backups for whatever reason, you can now do that by sending all your backup and archive data to the cloud only, although you should carefully consider the implications of that strategy for your disaster recovery plan.

Planning for Disaster Recovery—How You’ll Restore

While it’s important to think about how to optimize your backup strategy using the new functionality introduced by v12, it’s equally as important to think about how you’ll restore business operations in the case of an on-premises disaster. Backblaze offers a unique solution through its partnerships with Veeam and PhoenixNAP—Instant Recovery in Any Cloud.

With this solution, you can run a single command using an industry-standard automation tool to quickly bring up an orchestrated combination of on-demand servers, firewalls, networking, storage, and other infrastructure in phoenixNAP. The command draws data from Veeam backups immediately to your VMware/Hyper-V based environment, so businesses can get back online with minimal disruption or expense. Best of all, there’s no cost unless you actually need to use the solution, so there’s no reason not to set it up now.

Instant Recovery in Any Cloud works with both of the scenarios described above—whether your cloud is your primary or secondary repository. One advantage of using the direct-to-cloud object storage Backup Job is that you can more easily leverage Instant Recovery in Any Cloud since your primary backup is in the cloud. Taking advantage of cloud transit speeds, your business can get back up and running in less time than it would take to restore back to on-premises storage.

Planning for Disaster Recovery—How You’ll Budget

Another consideration for tightening up your cyber resilience plan (and getting your executive team on board with it) is better understanding and anticipating any egress expenses you may face when recovering data—because the last thing you want to be doing in the case of a major data disaster is trying to convince your executive team to sign off on an astronomical egress bill from your cloud provider.

At Backblaze, we’ve always believed it’s good and right to enable customers to readily use their data. With B2 Reserve, our capacity-based offering, there are no egress fees, unlike those charged by AWS, Azure, and Google Cloud. B2 Reserve also includes premium support and Universal Data Migration services so you can move your data from another cloud provider without any lift on your team’s part.

For our Backblaze B2 pay-as-you-go consumption-based offering, egress fees stand at just $0.01/GB, and we waive egress fees altogether with many of our compute and CDN partners.

How Veeam Works with Backblaze B2

Backblaze is a Veeam Ready partner and certified Veeam Ready for Object with Immutability, meaning it’s incredibly easy to set up Backblaze B2 Cloud Storage as your cloud repository in Veeam’s SOBR. In fact, it takes only about 20 minutes.

Setting up Backblaze B2 as your primary repository in the direct-to-object storage method is even easier. Just follow the steps in our Quick-Start Guide to get started.

Backblaze B2 is one-fifth the cost of other major cloud providers and offers enterprise-grade security without enterprise pricing. Unlike other cloud providers, we do not charge extra for the use of Object Lock, which enables immutability for protection from ransomware. There’s also no minimum retention requirement unlike other cloud providers who charge you for 30, 60 or even 90 days for deleted data.

No matter how you choose to configure Veeam with Backblaze B2, you’ll know that your data is protected from on-site disaster, ransomware, and hardware failure.

Veeam + Backblaze: Now Even Easier

Get started today for $5/TB per month or contact your favorite reseller, like CDW or SHI, to purchase Backblaze via B2 Reserve, our all-inclusive capacity-based bundles.

The post Thinking Through Your Cloud Strategy With Veeam’s V12 Release appeared first on Backblaze Blog | Cloud Storage & Cloud Backup.