Post Syndicated from Crosstalk Solutions original https://www.youtube.com/watch?v=4tQwLrwOXHM
Comic for 2023.10.21 – Plastic Straw
Post Syndicated from Explosm.net original https://explosm.net/comics/plastic-straw
New Cyanide and Happiness Comic
How Cloudflare mitigated yet another Okta compromise
Post Syndicated from Sourov Zaman original http://blog.cloudflare.com/how-cloudflare-mitigated-yet-another-okta-compromise/
On Wednesday, October 18, 2023, we discovered attacks on our system that we were able to trace back to Okta – threat actors were able to leverage an authentication token compromised at Okta to pivot into Cloudflare’s Okta instance. While this was a troubling security incident, our Security Incident Response Team’s (SIRT) real-time detection and prompt response enabled containment and minimized the impact to Cloudflare systems and data. We have verified that no Cloudflare customer information or systems were impacted by this event because of our rapid response. Okta has now released a public statement about this incident.
This is the second time Cloudflare has been impacted by a breach of Okta’s systems. In March 2022, we blogged about our investigation on how a breach of Okta affected Cloudflare. In that incident, we concluded that there was no access from the threat actor to any of our systems or data – Cloudflare’s use of hard keys for multi-factor authentication stopped this attack.
The key to mitigating this week’s incident was our team’s early detection and immediate response. In fact, we contacted Okta about the breach of their systems before they had notified us. The attacker used an open session from Okta, with Administrative privileges, and accessed our Okta instance. We were able to use our Cloudflare Zero Trust Access, Gateway, and Data Loss Prevention and our Cloudforce One threat research to validate the scope of the incident and contain it before the attacker could gain access to customer data, customer systems, or our production network. With this confidence, we were able to quickly mitigate the incident before the threat-actors were able to establish persistence.
According to Okta’s statement, the threat-actor accessed Okta’s customer support system and viewed files uploaded by certain Okta customers as part of recent support cases. It appears that in our case, the threat-actor was able to hijack a session token from a support ticket which was created by a Cloudflare employee. Using the token extracted from Okta, the threat-actor accessed Cloudflare systems on October 18. In this sophisticated attack, we observed that threat-actors compromised two separate Cloudflare employee accounts within the Okta platform. We detected this activity internally more than 24 hours before we were notified of the breach by Okta. Upon detection, our SIRT was able to engage quickly to identify the complete scope of compromise and contain the security incident. Cloudflare’s Zero Trust architecture protects our production environment, which helped prevent any impact to our customers.
Recommendations for Okta
We urge Okta to consider implementing the following best practices, including:
- Take any report of compromise seriously and act immediately to limit damage; in this case Okta was first notified on October 2, 2023 by BeyondTrust but the attacker still had access to their support systems at least until October 18, 2023.
- Provide timely, responsible disclosures to your customers when you identify that a breach of your systems has affected them.
- Require hardware keys to protect all systems, including third-party support providers.
For a critical security service provider like Okta, we believe following these best practices is table stakes.
Recommendations for Okta’s Customers
If you are an Okta customer, we recommend that you reach out to them for further information regarding potential impact to your organization. We also advise the following actions:
- Enable Hardware MFA for all user accounts. Passwords alone do not offer the necessary level of protection against attacks. We strongly recommend the usage of hardware keys, as other methods of MFA can be vulnerable to phishing attacks.
- Investigate and respond to:
- All unexpected password and MFA changes for your Okta instances.
- Suspicious support-initiated events.
- Ensure all password resets are valid and force a password reset for any under suspicion.
- Any suspicious MFA-related events, ensuring only valid MFA keys are present in the user’s account configuration.
- Monitor for:
- New Okta users created.
- Reactivation of Okta users.
- All sessions have proper authentication associated with it.
- All Okta account and permission changes.
- MFA policy overrides, MFA changes, and MFA removal.
- Delegation of sensitive applications.
- Supply chain providers accessing your tenants.
- Review session expiration policies to limit session hijack attacks.
- Utilize tools to validate devices connected to your critical systems, such as Cloudflare Access Device Posture Check.
- Practice defense in depth for your detection and monitoring strategies.
Cloudflare’s Security and IT teams continue to remain vigilant after this compromise. If further information is disclosed by Okta or discovered through additional log analysis, we will publish an update to this post.
Friday Squid Blogging: Why There Are No Giant Squid in Aquariums
Post Syndicated from Bruce Schneier original https://www.schneier.com/blog/archives/2023/10/friday-squid-blogging-why-there-are-no-giant-squid-in-aquariums.html
They’re too big and we can’t recreate their habitat.
As usual, you can also use this squid post to talk about the security stories in the news that I haven’t covered.
Read my blog posting guidelines here.
IAM Roles Anywhere with an external certificate authority
Post Syndicated from Cody Penta original https://aws.amazon.com/blogs/security/iam-roles-anywhere-with-an-external-certificate-authority/
AWS Identity and Access Management Roles Anywhere allows you to use temporary Amazon Web Services (AWS) credentials outside of AWS by using X.509 Certificates issued by your certificate authority (CA). Faraz Angabini goes deep into using IAM Roles Anywhere in his blog post Extend AWS IAM roles to workloads outside of AWS with IAM Roles Anywhere. In this blog post, I take a step back from his post and first define what public key infrastructure (PKI) is and help you set one up for use for IAM Roles Anywhere.
I focus on setting up local PKI for testing purposes by building a basic, minimal certificate authority using openssl. I chose openssl as it’s a standard industry tool for cryptography and is often installed by default on many operating systems. However, you can achieve similar results in a simpler manner using open source tools such as cfssl. In this blog post, we create a local PKI for non-production use cases only for the sake of brevity and to focus more on understanding the core fundamentals. As I go along, I’ll point out what I left out and where to find more information.
Overview
The overall flow of this blog is as follows, there’s some new terminology, so please use this as a map to refer to as you read along to understand the flow. If you’re taking cornell notes, now would be the right time to write key words you see below such as key, certificate, end-entity certificate, certificate authority, CA, trust, IAM Roles Anywhere, and others that pop out to you.
- Explain the concepts of keys and certificates and their uses.
- Using what you learn about keys and certificates, create a CA.
- Import your certificate authority into IAM Roles Anywhere and establish trust between your certificate authority and IAM Roles Anywhere.
- Create an end-entity certificate.
- Exchange your end-entity certificate for IAM credentials using IAM Roles Anywhere.
Background
IAM Roles Anywhere is compatible with existing PKIs, and for demonstration purposes, you’ll create local infrastructure using openssl to get a deep understanding of the terminology and concepts. Existing PKIs such as AWS Certificate Manager (ACM) and third-party certificate authority services often abstract and simplify this process. With that being said, you have to start somewhere, so let’s start with a key.
What exactly is a key? The National Institute of Standards and Technology (NIST) defines a key as “a parameter used in conjunction with a cryptographic algorithm that determines the specific operation of that algorithm,” which is a formal way of saying for anything you would put inside the key parameter in a function like encrypt(key, data), decrypt(key, data), or sign(key, data). The definition cleverly avoids defining the key by its structure—such as, “It’s a sequence of 256 truly random bits” — as that’s not always the case. For example, in asymmetric encryption you have two keys. One key is private and should not, under any circumstances, be shared outside of your control; while another key is public and can be safely shared with the outside world. To illustrate this, let’s look at actual commands to generate keys:
NOTE: The key is printed in PKCS#8 format, which is a file format for the private key along with some metadata
You can inspect this key with:
The public key is embedded inside the private key and you can even pull the public part from the private key.
And like the private key, you can inspect it:
While you must keep your private key a secret, you can openly share your public key. You can even copy the key multiple times and rename each copy to designate an individual whom you would hand the public key out to.
Now here’s the most critical question that I cannot stress enough:
Who owns these keys?
Does the server that generated this private key own it? Do I, as the author of this blog, own it? Does Amazon, as the company, own this private key?
What about the public keys? Who exactly is Alice (alice-public.key)? Who is Bob (bob-public.key)? How are Bob and Alice different if they have the same public key? These are all rhetorical questions you should be asking yourself when working with cryptographic keys. It helps answer who is responsible for this key and ultimately any data encrypted/unencrypted with that key.
At its core, public key infrastructure (PKI) can be explained as assigning an identity to someone or something and using cryptographic keys to ensure that identity can be verified. In the case of internal PKIs, the someone or something is often a hierarchy of assets belonging to your company. For example, a flow could be:
- Your company
- Your company’s business unit
- business unit servers
- business unit load balancers
- business unit clients
- Another business unit
- Your company’s business unit
Step 1: Set up a root certificate authority
You need to start somewhere, right? To get a publicly trusted identity, you often need to go through a certificate management service like AWS Certificate Manager (ACM) or a third-party vendor. These vendors go through several audits with operating system providers to have their identity trusted on the operating system itself. For example, on MacOS, you can open the Keychain Access app, go to System Roots, and look at the Certificates tab to see identities that are managed on your behalf.
In this use case with IAM Roles Anywhere, you don’t have to worry about interacting with operating system providers, because you’re creating your own internal PKI—your own internal identity. You do this by creating a certificate authority.
But hold on now, what exactly is a certificate authority? For that matter, what is a certificate?
A certificate is a wrapper around a public key that assigns metadata to an entity. Remember how you can copy the public key and just rename it to alice-public.key? You’ll need a little more metadata than that but the concept is the same. Examples of metadata include “Who are you?” “Who gave you this key?” “When should this key expire?” “Here is what you’re allowed to use this key for,” and various other attributes. As you can imagine, you don’t want just anybody to provide you this type of metadata. You want trusted authorities to assign or validate that metadata for you, and so the term certificate authorities. Certificate authorities also sign these certificates using a digital signing algorithm such as RSA so that consumers of these certificates can verify that the metadata inside hasn’t been tampered with.
You want to be the certificate authority within your own internal network. So how do you go about doing that? Turns out, you’ve already completed the most critical step: creating a private key. By creating a cryptographically strong, random private key, you can assert that whoever owns this private key, represents our company. You can do so because it’s highly improbable that anyone could guess or brute-force this key. However, that means every mechanism you use to protect this private key is critical.
Remember though, you need an identity, and simply naming your private key anycompany.private.key and public key usecase.public.key isn’t ideal. It’s not ideal because you need a lot more metadata than a file name. You need metadata like you would have in the earlier certificate example. You need a certificate that represents your certificate authority, a sort of ID for your root certificate. To facilitate that, there’s a field in certificates called IsCA that’s either true or false. Meaning whether or not a certificate is simply a certificate or a certificate authority is determined by a flag inside the certificate. We’ll start by writing out an openssl configuration file that is used throughout multiple certificate management commands.
NOTE: What’s the difference between a root certificate and a root certificate authority? You can think of a root certificate authority as a person who stamps other certificates. This person themselves needs an ID card. That ID card is the root certificate.
But there are a few things I have to point out:
- Most certificates start their lives as a certificate signing request (CSR). They contain most of the data an actual certificate does and only become a certificate when signed either by the same entity that created it (self-signed certificate) or by another entity (external certificate authority). This is why you see
openssl reqfollowed byopenssl ca -selfsign. - Everything under
root-ca/must now be protected, especially anything generated underroot-ca/private/. - I skipped quite a few steps for the sake of brevity, including creating a subordinate certificate authority and keeping the root certificate authority offline, as well as adding a certificate revocation list and Online Certificate Status Protocol (OSCP) capabilities. These can be their own book and I would instead recommend reading Bulletproof TLS and PKI by Ivan Ristic. In this post, I include the bare minimum to import a certificate and get started with IAM Roles Anywhere. As a side note, if you’re importing a certificate from a certificate authority managed outside of AWS, it should come with these capabilities as well.
It’s good practice to inspect the actual root-ca.crt that was returned to you.
Note: If you want to inspect and compare the
root-ca.crtwith the certificate signing requestroot-ca.csr, you can useopenssl req -text -noout -verify -in root-ca.csr.
What you look for in the following output are that fields such as Subject, Public-Key Algorithm, and the CA:TRUE flag are set and correspond to the configuration you passed in earlier. Additional things to look for are Issuer (yourself since it’s self-signed), and Key Usage (what the public key included in the certificate is allowed to be used for).
Now why is this certificate especially important? This is your root certificate. When you’re asked “Does this certificate belong to your company?” this is the certificate that you must use in order to prove that it belongs to your company, including any certificates derived from this root certificate (remember, you can have a hierarchy) and also end-entity certificates (shown later). All certificates derived from this root certificate are cryptographically linked to it through a digital signing algorithm that combines hashing and encryption to sign the certificate (the example above uses sha256WithRSAEncryption).
With your root CA successfully set up, it’s time to integrate it with IAM Roles Anywhere.
Step 2: Set up IAM Roles Anywhere
Step 1: Set up a root certificate authority (root CA) was a prerequisite for using IAM Roles Anywhere. Remember, you set up all this infrastructure to eventually use it. In step 2, you start going through how to effectively use the root CA you set up to issue AWS credentials outside of the AWS ecosystem.
But before you do that, you must bind the IAM Roles Anywhere service to your private certificate authority (private CA). You do this by setting up a trust between the two. When you set up trust between two things, you’re essentially saying “I don’t have the information to verify this is a valid request, so I’m going to trust that the downstream component (in this case, your private CA) knows this information.” Another way of saying it is “if the private CA says it’s good, then it’s a valid request”. You can set up this trust with your newly created root CA by copying the encoded section of your root-ca.crt in the IAM Roles Anywhere console.
To set up the trust
- Go the the IAM Roles Anywhere console.
- Under External certificate bundle, paste the encoded section of your
root-ca.crt. - Submit the form.
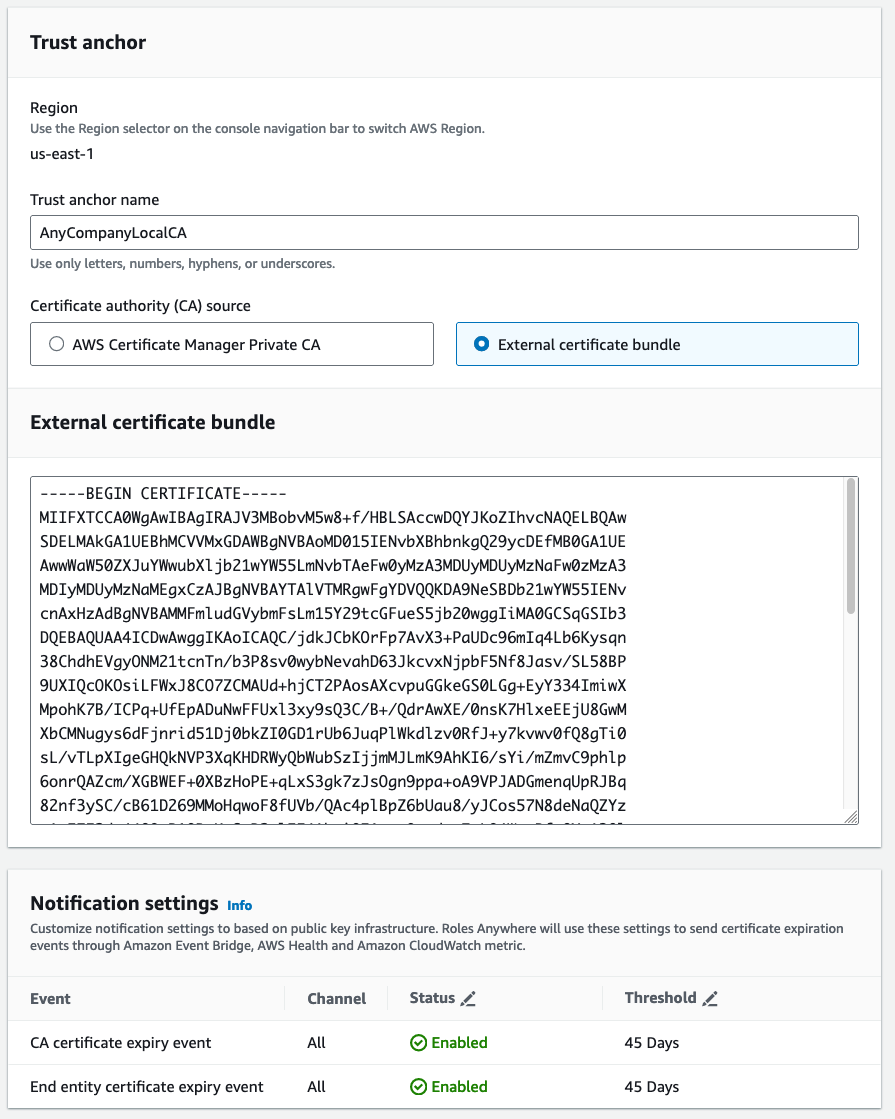
Figure 1: Use the console to set up a trust between IAM Roles Anywhere and the private CA
What you just set up is a trust anchor, which is a representation of your certificate authority inside of IAM Roles Anywhere. With this trust anchor in place, you can start tying in IAM roles to your authentication. Let’s start with something simple but practical, imagine an on-premises virtual machine (VM) that needs to have read access to Amazon Simple Storage Service (Amazon S3). Not only that, but it must have read only access to a specific folder in Amazon S3 and only that folder.
The first thing you need to do is create an IAM role that trusts IAM Roles Anywhere. But you need to be more specific than that. You need to create a role that trusts IAM Roles Anywhere only when the certificate presented to IAM Roles Anywhere contains the common name MyOnpremVM. If this is unclear, that’s okay, after you have all of the prerequisites set up, you’ll walk through the entire process step by step. The following is the trust section in an IAM policy that can be created in the IAM console.
The second thing you need to create is the actual Amazon S3 permissions:
Note: There are other certificate fields you might want to key off as well. See Trust policy in the documentation for more examples.
The last thing to do before moving on is to tie a set of roles to a profile. You can think of it as a container of multiple possible roles with the ability to further restrict them using session policies. Note that you use the role ARN for the S3 role you just created.
Profiles are created disabled by default, you can enable them later as needed. You could also enable a profile on creation by using the --enabled flag, but I want to highlight the ability to create it as disabled and then enabled it later for awareness. This becomes relevant in cases when you need to disable access, such as during a security event. Use the following command to enable the profile after creating it:
Now that all your infrastructure is in place, it’s time to provision an end-entity certificate and assume the role you created earlier.
Creating an end-entity certificate
The first thing you must do is obtain an end-entity certificate. This is called end-entity because a certificate can have an entire chain of certificates that are linked together. The end-entity certificate is at the end of the chain, which commonly represents individual entities, and so the term end-entity certificate.
Similar to how you set up your root certificate, it’s mostly a two-step process. You first create a certificate signing request and then ask someone to sign it (or sign it yourself). You can create a certificate signing request for your on-premises VM with:
As always, let’s inspect the certificate we made.
The client name (common name (CN) in the certificate) is what’s most important here, after all this is how we uniquely identify this specific VM.
Signing an end-entity certificate
Now that you have your certificate signing request, the certificate must be signed. Let’s have your private root CA that you created in Step 1 sign this certificate.
NOTE: You might have to move your
root-ca.crtfile into whatever$homeis inside of yourroot-ca.conffile before running the following command.
You’ll be asked to manually verify the certificate you’re about to sign. The key things you need to pay attention to for the purposes of IAM Roles Anywhere are:
Common Namebecause that’s how permissions and to what S3 bucket are decided.Key usagespecifiesDigital Signature, and basic constraints specifyCA:FALSE. Both are required to work with IAM Roles Anywhere.
After verification, you can commit the certificate to the local database and move on to the next step.
Swapping an end-entity certificate for AWS credentials
Now it’s time for the moment of truth. To review, you have:
- Created a local CA
- Uploaded the CA certificate into IAM Roles Anywhere and created a trust anchor
- Created an IAM role that trusts IAM Roles Anywhere, which in turn trusts your CA certificate
- Created an end-entity certificate for a specific server that has been signed by your CA
It’s time to swap this certificate for IAM credentials.
The API you call to swap credentials is CreateSession for IAM Roles Anywhere. This API serves as a wrapper around STS AssumeRole but requires that you pass in certificate information first. You, as the end user, don’t directly call this API. Instead, you use the IAM Roles Anywhere credential helper.
You can get the binary for this helper using the following example command (for Linux).
NOTE: The URL in the example uses version 1.0.4 of the credential helper as there isn’t a latest path. Verify that you’re getting the latest version using the table found inside of IAM roles anywhere documentation.
Then use the credential helper tool to successfully swap for AWS credentials.
NOTE: You pass in the private key, but the private key doesn’t leave the host, it’s used to sign the request to
CreateSession. See the signing process to learn more. The signing process is also why you use the credentials helper instead of making a call directly toCreateSession.
You can write the command you just ran into your AWS Config file instead of manually parsing the JSON response into environment variables, or run the serve command to set up a local credential-serving endpoint that’s compatible with the AWS SDK and AWS Command Line Interface (AWS CLI).
Then export the AWS_EC2_METADATA_SERVICE_ENDPOINT environment variable to point the AWS SDKs and AWS CLI to a local mock EC2 metadata endpoint instead of the endpoint normally found inside EC2 instances.
Then finally, confirm that you assumed the right role with:
And from here, you can use the AWS CLI or SDKs to make calls into AWS with the permissions you set up. For example, test your permissions by writing an object to Amazon S3 at a location you should be able to write to and a location you shouldn’t be.
Conclusion
To summarize, I started off this blog post discussing core concepts related to public key infrastructure. I talked about the purpose of keys (being improbable to guess) and certificates (tying an identity to a key, among other important concepts such as digital signing). I then discussed and showed you how to create a local certificate authority (CA), then use that CA to vend out end-entity certificates. Finally, you learned how to establish a trust relationship between your CA and IAM Roles Anywhere to allow IAM Roles Anywhere to verify end-entity certificates and exchange them with AWS credentials.
I encourage you to explore any other openssl commands and scenarios you can imagine. For example, how would you use this information to handle two different fleets of VMs, each with their own unique set of permissions? Another avenue to explore would be using cfssl instead of openssl to create a CA or using a provider such as AWS Private Certificate Authority. You can use an AWS account to try AWS Private Certificate Authority with a 30-day trial. See AWS Private CA Pricing to learn more.
If you have feedback about this post, submit comments in the Comments section below. If you have questions about this post, contact AWS Support.
Want more AWS Security news? Follow us on Twitter.
Worth It? Starlink Gen3 Router
Post Syndicated from Crosstalk Solutions original https://www.youtube.com/watch?v=hwfhCKcX8pY
The Printer With a Floppy Drive! Sony Mavica Printer from 1999
Post Syndicated from LGR original https://www.youtube.com/watch?v=W6yAbcbgUqI
Какъв им е бизнеса на задържаните – у нас, в Гърция, Сингапур и Русия Ексдепутат от ДБ е открил фирма на гръцкия лидер на ОПГ-то, изнасяло стоки за “Вагнер”
Post Syndicated from Екип на Биволъ original https://bivol.bg/exmp-db-company-russian-spy.html
петък 20 октомври 2023

Бивш депутат и член на националния съвет на една от партиите в управляващата коалиция е регистрирал като адвокат фирма на ръководителя на шпионската група от петимата арестувани чужди граждани за…
Resolve private DNS hostnames for Amazon MSK Connect
Post Syndicated from Amar Surjit original https://aws.amazon.com/blogs/big-data/resolve-private-dns-hostnames-for-amazon-msk-connect/
Amazon MSK Connect is a feature of Amazon Managed Streaming for Apache Kafka (Amazon MSK) that offers a fully managed Apache Kafka Connect environment on AWS. With MSK Connect, you can deploy fully managed connectors built for Kafka Connect that move data into or pull data from popular data stores like Amazon S3 and Amazon OpenSearch Service. With the introduction of the Private DNS support into MSK Connect, connectors are able to resolve private customer domain names, using their DNS servers configured in the customer VPC DHCP Options set. This post demonstrates a solution for resolving private DNS hostnames defined in a customer VPC for MSK Connect.
You may want to use private DNS hostname support for MSK Connect for multiple reasons. Before the private DNS resolution capability included with MSK Connect, it used the service VPC DNS resolver for DNS resolution. MSK Connect didn’t use the private DNS servers defined in the customer VPC DHCP option sets for DNS resolution. The connectors were only able to reference hostnames in the connector configuration or plugin that are publicly resolvable and couldn’t resolve private hostnames defined in either a private hosted zone or use DNS servers in another customer network.
Many customers ensure that their internal DNS applications are not publicly resolvable. For example, you might have a MySQL or PostgreSQL database and may not want the DNS name for your database to be publicly resolvable or accessible. Amazon Relational Database Service (Amazon RDS) or Amazon Aurora servers have DNS names that are publicly resolvable but not accessible. You can have multiple internal applications such as databases, data warehouses, or other systems where DNS names are not publicly resolvable.
With the recent launch of MSK Connect private DNS support, you can configure connectors to reference public or private domain names. Connectors use the DNS servers configured in your VPC’s DHCP option set to resolve domain names. You can now use MSK Connect to privately connect with databases, data warehouses, and other resources in your VPC to comply with your security needs.
If you have a MySQL or PostgreSQL database with private DNS, you can configure it on a custom DNS server and configure the VPC-specific DHCP option set to do the DNS resolution using the custom DNS server local to the VPC instead of using the service DNS resolution.
Solution overview
A customer can have different architecture options to set up their MSK Connect. For example, they can have Amazon MSK and MSK Connect are in the same VPC or source system in VPC1 and Amazon MSK and MSK Connect are in VPC2 or source system, Amazon MSK and MSK Connect are all in different VPCs.
The following setup uses two different VPCs, where the MySQL VPC hosts the MySQL database and the MSK VPC hosts Amazon MSK, MSK Connect, the DNS server, and various other components. You can extend this architecture to support other deployment topologies using appropriate AWS Identity and Access Management (IAM) permissions and connectivity options.
This post provides step-by-step instructions to set up MSK Connect where it will receive data from a source MySQL database with private DNS hostname in the MySQL VPC and send data to Amazon MSK using MSK Connect in another VPC. The following diagram illustrates the high-level architecture.

The setup instructions include the following key steps:
- Set up the VPCs, subnets, and other core infrastructure components.
- Install and configure the DNS server.
- Upload the data to the MySQL database.
- Deploy Amazon MSK and MSK Connect and consume the change data capture (CDC) records.
Prerequisites
To follow the tutorial in this post, you need the following:
- An AWS account.
- Permission to run an AWS CloudFormation script to create the services mentioned in the solution architecture.
- An Amazon Elastic Compute Cloud (Amazon EC2) key pair. For instructions, refer to create key-pair here.
- The following two parameters using Parameter Store, a capability of AWS Systems Manager, using the AWS Management Console or AWS Command Line Interface (AWS CLI). We use these parameters for the MySQL database root user and primary user password:
/Database/Credentials/root/Database/Credentials/master
Create the required infrastructure using AWS CloudFormation
Before configuring the MSK Connect, we need to set up the VPCs, subnets, and other core infrastructure components. To set up resources in your AWS account, complete the following steps:
- Choose Launch Stack to launch the stack in a Region that supports Amazon MSK and MSK Connect.

- Specify the private key that you use to connect to the EC2 instances.
- Update the SSH location with your local IP address and keep the other values as default.
- Choose Next.
- Review the details on the final page and select I acknowledge that AWS CloudFormation might create IAM resources.
- Choose Create stack and wait for the required resources to get created.

The CloudFormation template creates the following key resources in your account:
- VPCs:
- MSK VPC
- MySQL VPC
- Subnets in the MSK VPC:
- Three private subnets for Amazon MSK
- Private subnet for DNS server
- Private subnet for MSKClient
- Public subnet for bastion host
- Subnets in the MySQL VPC:
- Private subnet for MySQL database
- Public subnet for bastion host
- Internet gateway attached to the MySQL VPC and MSK VPC
- NAT gateways attached to MySQL public subnet and MSK public subnet
- Route tables to support the traffic flow between different subnets in a VPC and across VPCs
- Peering connection between the MySQL VPC and MSK VPC
- MySQL database and configurations
- DNS server
- MSK client with respective libraries
Please note, if you’re using VPC peering or AWS Transit Gateway with MSK Connect, don’t configure your connector for reaching the peered VPC resources with IPs in the CIDR ranges. For more information, refer to Connecting from connectors.
Configure the DNS server
Complete the following steps to configure the DNS server:
- Connect to the DNS server. There are three configuration files available on the DNS server under the
/home/ec2-userfolder:named.confmysql.internal.zonekafka.us-east-1.amazonaws.com.zone
- Run the following commands to install and configure your DNS server:
- Update
/etc/named.conf.
For the allow-transfer attribute, update the DNS server internal IP address to allow-transfer
{ localhost; <DNS Server internal IP address>; };.
You can find the DNS server IP address on the CloudFormation template Outputs tab.
Note that the MSK cluster is still not set up at this stage. We need to update the Kafka broker DNS names and their respective internal IP addresses in the /var/named/kafka.region.amazonaws.com configuration file after setting up the MSK cluster later in this post. For instructions, refer to here.
Also note that these settings configure the DNS server for this post. In your own environment, you can configure the DNS server as per your needs.
- Restart the DNS service:
You should see the following message:
Upload the data to the MySQL database
Typically, we can use an Amazon RDS for MySQL database, but for this post, we use custom MySQL database servers. The Amazon RDS DNS is publicly accessible and MSK Connect supports it, but it was not able to support databases or applications with private DNS in the past. With the latest private DNS hostnames feature launch, it can support applications’ private DNS as well, so we use a MySQL database on the EC2 instance.
This installation provides information about setting up the MySQL database on a single-node EC2 instance. This should not be used for your production setup. You should follow appropriate guidance for setting up and configuring MySQL in your account.
The MySQL database is already set up using the CloudFormation template and is ready to use now. To upload the data, complete the followings steps:
- SSH to the MySQL EC2 instance. For instructions, refer to Connect to your Linux instance. The data file
salesdb.sqlis already downloaded and available under the/home/ec2-userdirectory. - Log in to mysqldb with the user name master.
- To access the password, navigate to AWS Systems Manager and Parameter Store tab. Select /Database/Credentials/master and click on View Details and copy the value for the key.
- Log in to MySQL using the following command:
- Run the following commands to create the
salesdbdatabase and load the data to the table:
This will insert the records in various different tables in the salesdb database.
- Run show tables to see the following tables in the
salesdb:
Create a DHCP option set
DHCP option sets give you control over the following aspects of routing in your virtual network:
- You can control the DNS servers, domain names, or Network Time Protocol (NTP) servers used by the devices in your VPC.
- You can disable DNS resolution completely in your VPC.
To support private DNS, you can use an Amazon Route 53 private zone or your own custom DNS server. If you use a Route 53 private zone, the setup will work automatically and there is no need to make any changes to the default DHCP option set for the MSK VPC. For a custom DNS server, complete the following steps to set up a custom DHCP configuration using Amazon Virtual Private Cloud (Amazon VPC) and attach it to the MSK VPC.
There will be a default DHCP option set in your VPC attached to the Amazon provided DNS server. At this stage, the requests will go to Amazon’s provided DNS server for resolution. However, we create a new DHCP option set because we’re using a custom DNS server.
- On the Amazon VPC console, choose DHCP option set in the navigation pane.
- Choose Create DHCP option set.

- For DHCP option set name, enter
MSKConnect_Private_DHCP_OptionSet. - For Domain name, enter
mysql.internal. - For Domain name server, enter the DNS server IP address.
- Choose Create DHCP option set.
- Navigate to the MSK VPC and on the Actions menu, choose Edit VPC settings.
- Select the newly created DHCP option set and save it.
The following screenshot shows the example configurations.

- On the Amazon EC2 console, navigate to
privateDNS_bastion_host. - Choose Instance state and Reboot instance.
- Wait a few minutes and then run
nslookupfrom the bastion host; it should be able to resolve it using your local DNS server instead of Route 53:


Now our base infrastructure setup is ready to move to the next stage. As part of our base infrastructure, we have set up the following key components successfully:
- MSK and MySQL VPCs
- Subnets
- EC2 instances
- VPC peering
- Route tables
- NAT gateways and internet gateways
- DNS server and configuration
- Appropriate security groups and NACLs
- MySQL database with the required data
At this stage, the MySQL DB DNS name is resolvable using a custom DNS server instead of Route 53.
Set up the MSK cluster and MSK Connect
The next step is to deploy the MSK cluster and MSK Connect, which will fetch records from the salesdb and send it to an Amazon Simple Storage Service (Amazon S3) bucket. In this section, we provide a walkthrough of replicating the MySQL database (salesdb) to Amazon MSK using Debezium, an open-source connector. The connector will monitor for any changes to the database and capture any changes to the tables.
With MSK Connect, you can run fully managed Apache Kafka Connect workloads on AWS. MSK Connect provisions the required resources and sets up the cluster. It continuously monitors the health and delivery state of connectors, patches and manages the underlying hardware, and auto scales connectors to match changes in throughput. As a result, you can focus your resources on building applications rather than managing infrastructure.
MSK Connect will make use of the custom DNS server in the VPC and it won’t be dependent on Route 53.
Create an MSK cluster configuration
Complete the following steps to create an MSK cluster:
- On the Amazon MSK console, choose Cluster configurations under MSK clusters in the navigation pane.
- Choose Create configuration.
- Name the configuration
mskc-tutorial-cluster-configuration. - Under Configuration properties, remove everything and add the line
auto.create.topics.enable=true.

- Choose Create.

Create an MSK cluster and attach the configuration
In the next step, we attach this configuration to a cluster. Complete the following steps:
- On the Amazon MSK console, choose Clusters under MSK clusters in the navigation pane.
- Choose Create clusters and Custom create.
- For the cluster name, enter
mkc-tutorial-cluster. - Under General cluster properties, choose Provisioned for the cluster type and use the Apache Kafka default version 2.8.1.
- Use all the default options for the Brokers and Storage sections.
- Under Configurations, choose Custom configuration.
- Select
mskc-tutorial-cluster-configurationwith the appropriate revision and choose Next. - Under Networking, choose the MSK VPC.
- Select the Availability Zones depending upon your Region, such as
us-east1a,us-east1b, andus-east1c, and the respective private subnetsMSK-Private-1,MSK-Private-2, andMSK-Private-3if you are in theus-east-1Region. Public access to these brokers should be off. - Copy the security group ID from Chosen security groups.
- Choose Next.

- Under Access control methods, select IAM role-based authentication.
- In the Encryption section, under Between clients and brokers, TLS encryption will be selected by default.

- For Encrypt data at rest, select Use AWS managed key.
- Use the default options for Monitoring and select Basic monitoring.
- Select Deliver to Amazon CloudWatch Logs.

- Under Log group, choose visit Amazon CloudWatch Logs console.
- Choose Create log group.
- Enter a log group name and choose Create.

- Return to the Monitoring and tags page and under Log groups, choose Choose log group
- Choose Next.
- Review the configurations and choose Create cluster. You’re redirected to the details page of the cluster.
- Under Security groups applied, note the security group ID to use in a later step.


Cluster creation can typically take 25–30 minutes. Its status changes to Active when it’s created successfully.
Update the /var/named/kafka.region.amazonaws.com zone file
Before you create the MSK connector, update the DNS server configurations with the MSK cluster details.
- To get the list of bootstrap server DNS and respective IP addresses, navigate to the cluster and choose View client information.
- Copy the bootstrap server information with IAM authentication type.
- You can identify the broker IP addresses using
nslookupfrom your local machine and it will provide you the broker local IP address. Currently, your VPC points to the latest DHCP option set and your DNS server will not be able to resolve these DNS names from your VPC.
Now you can log in to the DNS server and update the records for different brokers and respective IP addresses in the /var/named/kafka.region.amazonaws.com file.
- Upload the
msk-access.pemfile toBastionHostInstancefrom your local machine: - Log in to the DNS server and open the
/var/named/kafka.region.amazonaws.comfile and update the following lines with the correct MSK broker DNS names and respective IP addresses:
Note that you need to provide the broker DNS as mentioned earlier. Remove .kafka.<region id>.amazonaws.com from the broker DNS name.
- Restart the DNS service:
You should see the following message:
Your custom DNS server is up and running now and you should be able to resolve using broker DNS names using the internal DNS server.
Update the security group for connectivity between the MySQL database and MSK Connect
It’s important to have the appropriate connectivity in place between MSK Connect and the MySQL database. Complete the following steps:
- On the Amazon MSK console, navigate to the MSK cluster and under Network settings, copy the security group.
- On the Amazon EC2 console, choose Security groups in the navigation pane.
- Edit the security group
MySQL_SGand choose Add rule. - Add a rule with MySQL/Aurora as the type and the MSK security group as the inbound resource for its source.
- Choose Save rules.
Create the MSK connector
To create your MSK connector, complete the following steps:
- On the Amazon MSK console, choose Connectors under MSK Connect in the navigation pane.
- Choose Create connector.
- Select Create custom plugin.
- Download the MySQL connector plugin for the latest stable release from the Debezium site or download Debezium.zip.
- Upload the MySQL connector zip file to the S3 bucket.
- Copy the URL for the file, such as
s3://<bucket name>/Debezium.zip. - Return to the Choose custom plugin page and enter the S3 file path for S3 URI.
- For Custom plugin name, enter
mysql-plugin.

- Choose Next.
- For Name, enter
mysql-connector. - For Description, enter a description of the connector.
- For Cluster type, choose MSK Cluster.
- Select the existing cluster from the list (for this post,
mkc-tutorial-cluster). - Specify the authentication type as IAM.
- Use the following values for Connector configuration:
- Update the following connector configuration:
- For Capacity type, choose Provisioned.
- For MCU count per worker, enter 1.
- For Number of workers, enter 1.
- Select Use the MSK default configuration.
- In the Access Permissions section, on the Choose service role menu, choose
MSK-Connect-PrivateDNS-MySQLConnector*, then choose Next. - In the Security section, keep the default settings.
- In the Logs section, select Deliver to Amazon CloudWatch logs.
- Choose visit Amazon CloudWatch Logs console.
- Under Logs in the navigation pane, choose Log group.
- Choose Create log group.

- Enter the log group name, retention settings, and tags, then choose Create.
- Return to the connector creation page and choose Browse log group.
- Choose the
AmazonMSKConnectlog group, then choose Next. - Review the configurations and choose Create connector.


Wait for the connector creation process to complete (about 10–15 minutes).

The MSK Connect connector is now up and running. You can log in to the MySQL database using your user ID and make a couple of record changes to the customer table record. MSK Connect will be able to receive CDC records and updates to the database will be available in the MSK <Customer> topic.
Consume messages from the MSK topic
To consume messages from the MSK topic, run the Kafka consumer on the MSK_Client EC2 instance available in the MSK VPC.
- SSH to the
MSK_ClientEC2 instance. TheMSK_Clientinstance has the required Kafka client libraries, Amazon MSK IAM JAR file,client.propertiesfile, and an instance profile attached to it, along with the appropriate IAM role using the CloudFormation template. - Add the
MSKClientSGsecurity group as the source for the MSK security group with the following properties:- For Type, choose All Traffic.
- For Source, choose Custom and MSK Security Group.
Now you’re ready to consume data.
- To list the topics, run the following command:
- To consume data from the
salesdb-server.salesdb.CUSTOMERtopic, use the following command:
Run the Kafka consumer on your EC2 machine and you will be able to log messages similar to the following:
While testing the application, records with CUST_ID 1998, 1999, and 2000 were updated, and these records are available in the logs.
Clean up
It’s always a good practice to clean up all the resources created as part of this post to avoid any additional cost. To clean up your resources, delete the MSK Cluster, MSK Connect connection, EC2 instances, DNS server, bastion host, S3 bucket, VPC, subnets and CloudWatch logs.
Additionally, clean up all other AWS resources that you created using AWS CloudFormation. You can delete these resources on the AWS CloudFormation console by deleting the stack.
Conclusion
In this post, we discussed the process of setting up MSK Connect using a private DNS. This feature allows you to configure connectors to reference public or private domain names.
We are able to receive the initial load and CDC records from a MySQL database hosted in a separate VPC and its DNS is not accessible or resolvable externally. MSK Connect was able to connect to the MySQL database and consume the records using the MSK Connect private DNS feature. The custom DHCP option set was attached to the VPC, which ensured DNS resolution was performed using the local DNS server instead of Route 53.
With the MSK Connect private DNS support feature, you can make your databases, data warehouses, and systems like secret managers that work with your own VPC inaccessible to the internet and be able to overcome this limitation and comply with your corporate security posture.
To learn more and get started, refer to private DNS for MSK connect.
About the author
 Amar is a Senior Solutions Architect at Amazon AWS in the UK. He works across power, utilities, manufacturing and automotive customers on strategic implementations, specializing in using AWS Streaming and advanced data analytics solutions, to drive optimal business outcomes.
Migrate data from Azure Blob Storage to Amazon S3 using AWS Glue
Post Syndicated from Qiushuang Feng original https://aws.amazon.com/blogs/big-data/migrate-data-from-azure-blob-storage-to-amazon-s3-using-aws-glue/
Today, we are pleased to announce new AWS Glue connectors for Azure Blob Storage and Azure Data Lake Storage that allow you to move data bi-directionally between Azure Blob Storage, Azure Data Lake Storage, and Amazon Simple Storage Service (Amazon S3).
We’ve seen a demand to design applications that enable data to be portable across cloud environments and give you the ability to derive insights from one or more data sources. One of the data sources you can now quickly integrate with is Azure Blob Storage, a managed service for storing both unstructured data and structured data, and Azure Data Lake Storage, a data lake for analytics workloads. With these connectors, you can bring the data from Azure Blob Storage and Azure Data Lake Storage separately to Amazon S3.
In this post, we use Azure Blob Storage as an example and demonstrate how the new connector works, introduce the connector’s functions, and provide you with key steps to set it up. We provide you with prerequisites, share how to subscribe to this connector in AWS Marketplace, and describe how to create and run AWS Glue for Apache Spark jobs with it. Regarding the Azure Data Lake Storage Gen2 Connector, we highlight any major differences in this post.
AWS Glue is a serverless data integration service that makes it simple to discover, prepare, and combine data for analytics, machine learning, and application development. AWS Glue natively integrates with various data stores such as MySQL, PostgreSQL, MongoDB, and Apache Kafka, along with AWS data stores such as Amazon S3, Amazon Redshift, Amazon Relational Database Service (Amazon RDS), and Amazon DynamoDB. AWS Glue Marketplace connectors allow you to discover and integrate additional data sources, such as software as a service (SaaS) applications and your custom data sources. With just a few clicks, you can search for and select connectors from AWS Marketplace and begin your data preparation workflow in minutes.
How the connectors work
In this section, we discuss how the new connectors work.
Azure Blob Storage connector
This connector relies on the Spark DataSource API and calls Hadoop’s FileSystem interface. The latter has implemented libraries for reading and writing various distributed or traditional storage. This connector also includes the hadoop-azure module, which lets you run Apache Hadoop or Apache Spark jobs directly with data in Azure Blob Storage. AWS Glue loads the library from the Amazon Elastic Container Registry (Amazon ECR) repository during initialization (as a connector), reads the connection credentials using AWS Secrets Manager, and reads data source configurations from input parameters. When AWS Glue has internet access, the Spark job in AWS Glue can read from and write to Azure Blob Storage.
We support the following two methods for authentication: the authentication key for Shared Key and shared access signature (SAS) tokens:
Azure Data Lake Storage Gen2 connector
The usage of Azure Data Lake Storage Gen2 is much the same as the Azure Blob Storage connector. The Azure Data Lake Storage Gen2 connector uses the same library as the Azure Blob Storage connector, and relies on the Spark DataSource API, Hadoop’s FileSystem interface, and the Azure Blob Storage connector for Hadoop.
As of this writing, we only support the Shared Key authentication method:
Solution overview
The following architecture diagram shows how AWS Glue connects to Azure Blob Storage for data ingestion.

In the following sections, we show you how to create a new secret for Azure Blob Storage in Secrets Manager, subscribe to the AWS Glue connector, and move data from Azure Blob Storage to Amazon S3.
Prerequisites
You need the following prerequisites:
- A storage account in Microsoft Azure and your data path in Azure Blob Storage. Prepare the storage account credentials in advance. For instructions, refer to Create a storage account shared key.
- A Secrets Manager secret to store a Shared Key secret, using one of the supporting authentication methods.
- An AWS Identity and Access Management (IAM) role for the AWS Glue job with the following policies:
- AWSGlueServiceRole, which allows the AWS Glue service role access to related services.
- AmazonEC2ContainerRegistryReadOnly, which provides read-only access to Amazon EC2 Container Registry repositories. This policy is for using AWS Marketplace’s connector libraries.
- A Secrets Manager policy, which provides read access to the secret in Secrets Manager.
- An S3 bucket policy for the S3 bucket that you need to load ETL (extract, transform, and load) data from Azure Blob Storage.
Create a new secret for Azure Blob Storage in Secrets Manager
Complete the following steps to create a secret in Secrets Manager to store the Azure Blob Storage connection strings using the Shared Key authentication method:
- On the Secrets Manager console, choose Secrets in the navigation pane.
- Choose Store a new secret.
- For Secret type, select Other type of secret.
- Replace the values for
accountName,accountKey, andcontainerwith your own values.

- Leave the rest of the options at their default.
- Choose Next.
- Provide a name for the secret, such as
azureblobstorage_credentials. - Follow the rest of the steps to store the secret.

Subscribe to the AWS Glue connector for Azure Blob Storage
To subscribe to the connector, complete the following steps:
- Navigate to the Azure Blob Storage Connector for AWS Glue on AWS Marketplace.
- On the product page for the connector, use the tabs to view information about the connector, then choose Continue to Subscribe.

- Review the pricing terms and the seller’s End User License Agreement, then choose Accept Terms.

- Continue to the next step by choosing Continue to Configuration.

- On the Configure this software page, choose the fulfillment options and the version of the connector to use.


We have provided two options for the Azure Blob Storage Connector: AWS Glue 3.0 and AWS Glue 4.0. In this example, we focus on AWS Glue 4.0. Choose Continue to Launch.

- On the Launch this software page, choose Usage instructions to review the usage instructions provided by AWS.
- When you’re ready to continue, choose Activate the Glue connector from AWS Glue Studio.


The console will display the Create marketplace connection page in AWS Glue Studio.
Move data from Azure Blob Storage to Amazon S3
To move your data to Amazon S3, you must configure the custom connection and then set up an AWS Glue job.
Create a custom connection in AWS Glue
An AWS Glue connection stores connection information for a particular data store, including login credentials, URI strings, virtual private cloud (VPC) information, and more. Complete the following steps to create your connection:
- On the AWS Glue console, choose Connectors in the navigation pane.
- Choose Create connection.
- For Connector, choose Azure Blob Storage Connector for AWS Glue.
- For Name, enter a name for the connection (for example,
AzureBlobStorageConnection). - Enter an optional description.
- For AWS secret, enter the secret you created (
azureblobstorage_credentials). - Choose Create connection and activate connector.

The connector and connection information is now visible on the Connectors page.

Create an AWS Glue job and configure connection options
Complete the following steps:
- On the AWS Glue console, choose Connectors in the navigation pane.
- Choose the connection you created (
AzureBlobStorageConnection). - Choose Create job.

- For Name, enter Azure Blob Storage Connector for AWS Glue. This name should be unique among all the nodes for this job.
- For Connection, choose the connection you created (
AzureBlobStorageConnection). - For Key, enter path, and for Value, enter your Azure Blob Storage URI. For example, when we created our new secret, we already set a container value for the Azure Blob Storage. Here, we enter the file path
/input_data/. - Enter another key-value pair. For Key, enter
fileFormat. For Value, enter csv, because our sample data is in this format. - Optionally, if the CSV file contains a header line, enter another key-value pair. For Key, enter header. For Value, enter true.
- To preview your data, choose the Data preview tab, then choose Start data preview session and choose the IAM role defined in the prerequisites.
- Choose Confirm and wait for the results to display.

- Select S3 as Target Location.
- Choose Browse S3 to see the S3 buckets that you have access to and choose one as the target destination for the data output.

- For the other options, use the default values.

- On the Job details tab, for IAM Role, choose the IAM role defined in the prerequisites.
- For Glue version, choose your AWS Glue version.
- Continue to create your ETL job. For instructions, refer to Creating ETL jobs with AWS Glue Studio.
- Choose Run to run your job.


When the job is complete, you can navigate to the Run details page on the AWS Glue console and check the logs in Amazon CloudWatch.

The data is ingested into Amazon S3, as shown in the following screenshot. We are now able to import data from Azure Blob Storage to Amazon S3.

Scaling considerations
In this example, we use the default AWS Glue capacity, 10 DPU (Data Processing Units). A DPU is a standardized unit of processing capacity that consists of 4 vCPUs of compute capacity and 16 GB of memory. To scale your AWS Glue job, you can increase the number of DPU, and also take advantage of Auto Scaling. With Auto Scaling enabled, AWS Glue automatically adds and removes workers from the cluster depending on the workload. After you choose the maximum number of workers, AWS Glue will adapt the right size of resources for the workload.
Clean up
To clean up your resources, complete the following steps:
- Remove the AWS Glue job and secret in Secrets Manager with the following command:
- If you are no longer going to use this connector, you can cancel the subscription to the Azure Blob Storage connector:
- On the AWS Marketplace console, go to the Manage subscriptions page.
- Select the subscription for the product that you want to cancel.
- On the Actions menu, choose Cancel subscription.
- Read the information provided and select the acknowledgement check box.
- Choose Yes, cancel subscription.
- Delete the data in the S3 bucket that you used in the previous steps.
Conclusion
In this post, we showed how to use AWS Glue and the new connector for ingesting data from Azure Blob Storage to Amazon S3. This connector provides access to Azure Blob Storage, facilitating cloud ETL processes for operational reporting, backup and disaster recovery, data governance, and more.
We welcome any feedback or questions in the comments section.
Appendix
When you need SAS token authentication for Azure Data Lake Storage Gen 2, you can use Azure SAS Token Provider for Hadoop. To do that, upload the JAR file to your S3 bucket and configure your AWS Glue job to set the S3 location in the job parameter --extra-jars (in AWS Glue Studio, Dependent JARs path). Then save the SAS token in Secrets Manager and set the value to spark.hadoop.fs.azure.sas.fixed.token.<azure storage account>.dfs.core.windows.net in SparkConf using script mode at runtime. Learn more in README.
References
- AWS Glue official document
- Developing, testing, and deploying custom connectors for your data stores with AWS Glue
- Migrating data from Google BigQuery to Amazon S3 using AWS Glue custom connectors
- Developing custom connectors
About the authors
 Qiushuang Feng is a Solutions Architect at AWS, responsible for Enterprise customers’ technical architecture design, consulting, and design optimization on AWS Cloud services. Before joining AWS, Qiushuang worked in IT companies such as IBM and Oracle, and accumulated rich practical experience in development and analytics.
 Noritaka Sekiyama is a Principal Big Data Architect on the AWS Glue team. He is passionate about architecting fast-growing data environments, diving deep into distributed big data software like Apache Spark, building reusable software artifacts for data lakes, and sharing knowledge in AWS Big Data blog posts.
 Shengjie Luo is a Big Data Architect on the Amazon Cloud Technology professional service team. They are responsible for solutions consulting, architecture, and delivery of AWS-based data warehouses and data lakes. They are skilled in serverless computing, data migration, cloud data integration, data warehouse planning, and data service architecture design and implementation.
 Greg Huang is a Senior Solutions Architect at AWS with expertise in technical architecture design and consulting for the China G1000 team. He is dedicated to deploying and utilizing enterprise-level applications on AWS Cloud services. He possesses nearly 20 years of rich experience in large-scale enterprise application development and implementation, having worked in the cloud computing field for many years. He has extensive experience in helping various types of enterprises migrate to the cloud. Prior to joining AWS, he worked for well-known IT enterprises such as Baidu and Oracle.
 Maciej Torbus is a Principal Customer Solutions Manager within Strategic Accounts at Amazon Web Services. With extensive experience in large-scale migrations, he focuses on helping customers move their applications and systems to highly reliable and scalable architectures in AWS. Outside of work, he enjoys sailing, traveling, and restoring vintage mechanical watches.
AWS Security Profile: Liam Wadman, Senior Solutions Architect, AWS Identity
Post Syndicated from Maddie Bacon original https://aws.amazon.com/blogs/security/aws-security-profile-liam-wadman-sr-solutions-architect-aws-identity/
In the AWS Security Profile series, I interview some of the humans who work in AWS Security and help keep our customers safe and secure. In this profile, I interviewed Liam Wadman, Senior Solutions Architect for AWS Identity.

Pictured: Liam making quick informed decisions about risk and reward
How long have you been at AWS and what do you do in your current role?
My first day was 1607328000 — for those who don’t speak fluent UTC, that’s December 2020. I’m a member of the Identity Solutions team. Our mission is to make it simpler for customers to implement access controls that protect their data in a straightforward and consistent manner across AWS services.
I spend a lot of time talking with security, identity, and cloud teams at some of our largest and most complex customers, understanding their problems, and working with teams across AWS to make sure that we’re building solutions that meet their diverse security requirements.
I’m a big fan of working with customers and fellow Amazonians on threat modeling and helping them make informed decisions about risks and the controls they put in place. It’s such a productive exercise because many people don’t have that clear model about what they’re protecting, and what they’re protecting it from.
When I work with AWS service teams, I advocate for making services that are simple to secure and simple for customers to configure. It’s not enough to offer only good security controls; the service should be simple to understand and straightforward to apply to meet customer expectations.
How did you get started in security? What about it piqued your interest?
I got started in security at a very young age: by circumventing network controls at my high school so that I could play Flash games circa 2004. Ever since then, I’ve had a passion for deeply understanding a system’s rules and how they can be bent or broken. I’ve been lucky enough to have a diverse set of experiences throughout my career, including working in a network operation center, security operation center, Linux and windows server administration, telephony, investigations, content delivery, perimeter security, and security architecture. I think having such a broad base of experience allows me to empathize with all the different people who are AWS customers on a day-to-day basis.
As I progressed through my career, I became very interested in the psychology of security and the mindsets of defenders, unauthorized users, and operators of computer systems. Security is about so much more than technology—it starts with people and processes.
How do you explain your job to non-technical friends and family?
I get to practice this question a lot! Very few of my family and friends work in tech.
I always start with something relatable to the person. I start with a website, mobile app, or product that they use, tell the story of how it uses AWS, then tie that in around how my team works to support many of the products they use in their everyday lives. You don’t have to look far into our customer success stories or AWS re:Invent presentations to see a product or company that’s meaningful to almost anyone you’d talk to.
I got to practice this very recently because the software used by my personal trainer is hosted on AWS. So when she asked what I actually do for a living, I was ready for her.
In your opinion, what’s the coolest thing happening in identity right now?
You left this question wide open, so I’m going to give you more than one answer.
First, outside of AWS, it’s the rise of ubiquitous, easy-to-use personal identity technology. I’m talking about products such as password managers, sign-in with Google or Apple, and passkeys. I’m excited to see the industry is finally offering services to consumers at no extra cost that you don’t need to be an expert to use and that will work on almost any device you sign in to. Everyday people can benefit from their use, and I have successfully converted many of the people I care about.
At AWS, it’s the work that we’re doing to enable data perimeters and provable security. We hear quite regularly from customers that data perimeters are super important to them, and they want to see us do more in that space and keep refining that journey. I’m all too happy to oblige. Provable security, while identity adjacent, is about getting real answers to questions such as “Can this resource be accessed publicly?” It’s making it simple for customers who don’t want to spend the time or money building the operational expertise to answer tough questions, and I think that’s incredible.
You presented at AWS re:Inforce 2023. What was your session about and what do you hope attendees took away from it?
My session was IAM336: Best practices for delegating access on IAM. I initially delivered this session at re:Inforce 2022, where customers gave it the highest overall rating for an identity session, so we brought it back for 2023!
The talk dives deep into some AWS Identity and Access Management (IAM) primitives and provides a lot of candor on what we feel are best practices based on many of the real-world engagements I’ve had with customers. The top thing that I hope attendees learned is how they can safely empower their developers to have some self service and autonomy when working with IAM and help transform central teams from blockers to enablers.
I’m also presenting at re:Invent 2023 in November. I’ll be doing a chalk talk called Best practices for setting up AWS Organizations policies. We’re targeting it towards a more general audience, not just customers whose primary jobs are AWS security or identity. I’m excited about this presentation because I usually talk to a lot of customers who have very mature security and identity practices, and this is a great chance to get feedback from customers who do not.
I’d like to thank all the customers who attended the sessions over the years — the best part of AWS events is the customer interactions and fantastic discussions that we have.
Is there anything you wish customers would ask about more often?
I wish more customers would frame their problems within a threat model. Many customer engagements start with a specific problem, but it isn’t in the context of the risk this poses to their business, and often focuses too much on specific technical controls for very specific issues, rather than an outcome that they’re trying to arrive at or a risk that they’re trying to mitigate. I like to take a step back and work with the customer to frame the problem that they’re talking about in a bigger picture, then have a more productive conversation around how we can mitigate these risks and other considerations that they may not have thought of.
Where do you see the identity space heading in the future?
I think the industry is really getting ready for an identity renaissance as we start shifting towards more modern and Zero Trust architectures. I’m really excited to start seeing adoption of technologies such as token exchange to help applications avoid impersonating users to downstream systems, or mechanisms such as proof of possession to provide scalable ways to bind a given credential to a system that it’s intended to be used from.
On the AWS Identity side: More controls. Simpler. Scalable. Provable.
What are you most proud of in your career?
Getting involved with speaking at AWS: presenting at summits, re:Inforce, and re:Invent. It’s something I never would have seen myself doing before. I grew up with a pretty bad speech impediment that I’m always working against.
I think my proudest moment in particular is when I had customers come to my re:Invent session because they saw me at AWS Summits earlier in the year and liked what I did there. I get a little emotional thinking about it.
Being a speaker also allowed me to go to Disneyland for the first time last year before the Anaheim Summit, and that would have made 5-year-old Liam proud.
If you had to pick a career outside of tech, what would you want to do?
I think I’d certainly be involved in something in forestry, resource management, or conservation. I spend most of my free time in the forests of British Columbia. I’m a big believer in shinrin-yoku, and I believe in being a good steward of the land. We’ve only got one earth.
If you have feedback about this post, submit comments in the Comments section below. If you have questions about this post, contact AWS Support.
Want more AWS Security news? Follow us on Twitter.
[$] mseal() and what comes after
Post Syndicated from corbet original https://lwn.net/Articles/948129/
Jeff Xu recently proposed
the addition of a new system call, named mseal(), that would allow
applications to prevent modifications to selected memory mappings. It
would enable the hardening of user-space applications against certain types
of attacks; some other operating systems have this type of feature already.
There is support for adding this type of mechanism to the Linux kernel as
well, but it has become clear that mseal() will not land in the
mainline in anything resembling its current form. Instead, it has become
an example of how not to do kernel development at a number of levels.
Rotate Your SSL/TLS Certificates Now – Amazon RDS and Amazon Aurora Expire in 2024
Post Syndicated from Channy Yun original https://aws.amazon.com/blogs/aws/rotate-your-ssl-tls-certificates-now-amazon-rds-and-amazon-aurora-expire-in-2024/
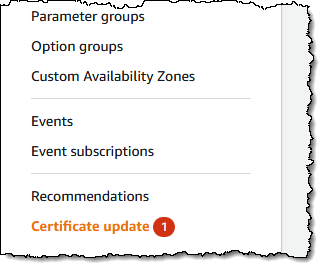 Don’t be surprised if you have seen the Certificate Update in the Amazon Relational Database Service (Amazon RDS) console.
If you use or plan to use Secure Sockets Layer (SSL) or Transport Layer Security (TLS) with certificate verification to connect to your database instances of Amazon RDS for MySQL, MariaDB, SQL Server, Oracle, PostgreSQL, and Amazon Aurora, it means you should rotate new certificate authority (CA) certificates in both your DB instances and application before the root certificate expires.
Most SSL/TLS certificates (rds-ca-2019) for your DB instances will expire in 2024 after the certificate update in 2020. In December 2022, we released new CA certificates that are valid for 40 years (rds-ca-rsa2048-g1) and 100 years (rds-ca-rsa4096-g1 and rds-ca-ecc384-g1). So, if you rotate your CA certificates, you don’t need to do It again for a long time.
Here is a list of affected Regions and their expiration dates of rds-ca-2019:
| Expiration Date | Regions |
| May 8, 2024 | Middle East (Bahrain) |
| August 22, 2024 | US East (Ohio), US East (N. Virginia), US West (N. California), US West (Oregon), Asia Pacific (Mumbai), Asia Pacific (Osaka), Asia Pacific (Seoul), Asia Pacific (Singapore), Asia Pacific (Sydney), Asia Pacific (Tokyo), Canada (Central), Europe (Frankfurt), Europe (Ireland), Europe (London), Europe (Milan), Europe (Paris), Europe (Stockholm), and South America (São Paulo) |
| September 9, 2024 | China (Beijing), China (Ningxia) |
| October 26, 2024 | Africa (Cape Town) |
| October 28, 2024 | Europe (Milan) |
| Not affected until 2061 | Asia Pacific (Hong Kong), Asia Pacific (Hyderabad), Asia Pacific (Jakarta), Asia Pacific (Melbourne), Europe (Spain), Europe (Zurich), Israel (Tel Aviv), Middle East (UAE), AWS GovCloud (US-East), and AWS GovCloud (US-West) |
The following steps demonstrate how to rotate your certificates to maintain connectivity from your application to your database instances.
Step 1 – Identify your impacted Amazon RDS resources
As I said, you can identify the total number of affected DB instances in the Certificate update page of the Amazon RDS console and see all of your affected DB instances. Note: This page only shows the DB instances for the current Region. If you have DB instances in more than one Region, check the certificate update page in each Region to see all DB instances with old SSL/TLS certificates.

You can also use AWS Command Line Interface (AWS CLI) to call describe-db-instances to find instances that use the expiring CA. The query will show a list of RDS instances in your account and us-east-1 Region.
$ aws rds describe-db-instances --region us-east-1 |
      jq -r '.DBInstances[] |
      select ((.CACertificateIdentifier != "rds-ca-rsa2048-g1") and
              (.CACertificateIdentifier != "rds-ca-rsa4096-g1") and
              (.CACertificateIdentifier != "rds-ca-ecc384-g1")) |
               "DBInstanceIdentifier:
              (.DBInstanceIdentifier), CACertificateIdentifier:
              (.CACertificateIdentifier)"'
Step 2 – Updating your database clients and applications
Before applying the new certificate on your DB instances, you should update the trust store of any clients and applications that use SSL/TLS and the server certificate to connect. There’s currently no easy method from your DB instances themselves to determine if your applications require certificate verification as a prerequisite to connect. The only option here is to inspect your applications’ source code or configuration files.
Although the DB engine-specific documentation outlines what to look for in most common database connectivity interfaces, we strongly recommend you work with your application developers to determine whether certificate verification is used and the correct way to update the client applications’ SSL/TLS certificates for your specific applications.
To update certificates for your application, you can use the new certificate bundle that contains certificates for both the old and new CA so you can upgrade your application safely and maintain connectivity during the transition period.
For information about checking for SSL/TLS connections and updating applications for each DB engine, see the following topics:
- Updating applications to connect to MariaDB instances using new SSL/TLS certificates
- Updating applications to connect to Microsoft SQL Server DB instances using new SSL/TLS certificates
- Updating applications to connect to MySQL DB instances using new SSL/TLS certificates
- Updating applications to connect to Oracle DB instances using new SSL/TLS certificates
- Updating applications to connect to PostgreSQL DB instances using new SSL/TLS certificates
- Updating applications to connect to Aurora MySQL DB clusters using new SSL/TLS certificates.
- Updating applications to connect to Aurora PostgreSQL DB clusters using new SSL/TLS certificates.
Step 3 – Test CA rotation on a non-production RDS instance
If you have updated new certificates in all your trust stores, you should test with a RDS instance in non-production. Do this set up in a development environment with the same database engine and version as your production environment. This test environment should also be deployed with the same code and configurations as production.
To rotate a new certificate in your test database instance, choose Modify for the DB instance that you want to modify in the Amazon RDS console.

In the Connectivity section, choose rds-ca-rsa2048-g1.

Choose Continue to check the summary of modifications. If you want to apply the changes immediately, choose Apply immediately.
To use the AWS CLI to change the CA from rds-ca-2019 to rds-ca-rsa2048-g1 for a DB instance, call the modify-db-instance command and specify the DB instance identifier with the --ca-certificate-identifier option.
$ aws rds modify-db-instance \
          --db-instance-identifier <mydbinstance> \
          --ca-certificate-identifier rds-ca-rsa2048-g1 \
          --apply-immediately
This is the same way to rotate new certificates manually in the production database instances. Make sure your application reconnects without any issues using SSL/TLS after the rotation using the trust store or CA certificate bundle you referenced.
When you create a new DB instance, the default CA is still rds-ca-2019 until January 25, 2024, when it will be changed to rds-ca-rsa2048-g1. For setting the new CA to create a new DB instance, you can set up a CA override to ensure all new instance launches use the CA of your choice.
$ aws rds modify-certificates \
          --certificate-identifier rds-ca-rsa2048-g1 \
          --region <region name>
You should do this in all the Regions where you have RDS DB instances.
Step 4 – Safely update your production RDS instances
After you’ve completed testing in non production environment, you can start the rotation of your RDS databases CA certificates in your production environment. You can rotate your DB instance manually as shown in Step 3. It’s worth noting that many of the modern engines do not require a restart, but it’s still a good idea to schedule it in your maintenance window.
In the Certificate update page of Step 1, choose the DB instance you want to rotate. By choosing Schedule, you can schedule the certificate rotation for your next maintenance window. By choosing Apply now, you can apply the rotation immediately.

If you choose Schedule, you’re prompted to confirm the certificate rotation. This prompt also states the scheduled window for your update.

After your certificate is updated (either immediately or during the maintenance window), you should ensure that the database and the application continue to work as expected.
Most of modern DB engines do not require restarting your database to update the certificate. If you don’t want to restart the database just for CA update, you can use the --no-certificate-rotation-restart flag in the modify-db-instance command.
$ aws rds modify-db-instance \
          --db-instance-identifier <mydbinstance> \
          --ca-certificate-identifier rds-ca-rsa2048-g1 \
          --no-certificate-rotation-restart
To check if your engine requires a restart you can check the SupportsCertificateRotationWithoutRestart field in the output of the describe-db-engine-versions command. You can use this command to see which engines support rotations without restart:
$ aws rds describe-db-engine-versions \
          --engine <engine> --include-all --region <region> |
          jq -r '.DBEngineVersions[] |
          "EngineName: (.Engine),
           EngineVersion: (.EngineVersion),
           SupportsCertificateRotationWithoutRestart: (.SupportsCertificateRotationWithoutRestart),
           SupportedCAs: ([.SupportedCACertificateIdentifiers |
          join(", ")])"'
Even if you don’t use SSL/TLS for the database instances, I recommend to rotate your CA. You may need to use SSL/TLS in the future, and some database connectors like the JDBC and ODBC connectors check for a valid cert before connecting and using an expired CA can prevent you from doing that.
To learn about updating your certificate by modifying your DB instance manually, automatic server certificate rotation, and finding a sample script for importing certificates into your trust store, see the Amazon RDS User Guide or the Amazon Aurora User Guide.
Things to Know
Here are a couple of important things to know:
- Amazon RDS Proxy and Amazon Aurora Serverless use certificates from the AWS Certificate Manager (ACM). If you’re using Amazon RDS Proxy when you rotate your SSL/TLS certificate, you don’t need to update applications that use Amazon RDS Proxy connections. If you’re using Aurora Serverless, rotating your SSL/TLS certificate isn’t required.
- Now through January 25, 2024 – new RDS DB instances will have the
rds-ca-2919certificate by default, unless you specify a different CA via theca-certificate-identifieroption on thecreate-db-instanceAPI; or you specify a default CA override for your account like mentioned in the above section. Starting January 26, 2024 – any new database instances will default to using therds-ca-rsa2048-g1certificate. If you wish for new instances to use a different certificate, you can specify which certificate to use with the AWS console or the AWS CLI. For more information, see thecreate-db-instanceAPI documentation. - Except for Amazon RDS for SQL Server, most modern RDS and Aurora engines support certificate rotation without a database restart in the latest versions. Call
describe-db-engine-versionsand check for the response fieldSupportsCertificateRotationWithoutRestart. If this field is set totrue, then your instance will not require a database restart for CA update. If set tofalse, a restart will be required. For more information, see Setting the CA for your database in the AWS documentation. - Your rotated CA signs the DB server certificate, which is installed on each DB instance. The DB server certificate identifies the DB instance as a trusted server. The validity of DB server certificate depends on the DB engine and version either 1 year or 3 year. If your CA supports automatic server certificate rotation, RDS automatically handles the rotation of the DB server certificate too. For more information about DB server certificate rotation, see Automatic server certificate rotation in the AWS documentation.
- You can choose to use the 40-year validity certificate (
rds-ca-rsa2048-g1) or the 100-year certificates. The expiring CA used by your RDS instance uses the RSA2048 key algorithm and SHA256 signing algorithm. Therds-ca-rsa2048-g1uses the exact same configuration and therefore is best suited for compatibility. The 100-year certificates (rds-ca-rsa4096-g1andrds-ca-ecc384-g1) use more secure encryption schemes thanrds-ca-rsa2048-g1. If you want to use them, you should test well in pre-production environments to double-check that your database client and server support the necessary encryption schemes in your Region.
Just Do It Now!
Even if you have one year left until your certificate expires, you should start planning with your team. Updating SSL/TLS certificate may require restart your DB instance before the expiration date. We strongly recommend that you schedule your applications to be updated before the expiry date and run tests on a staging or pre-production database environment before completing these steps in a production environments. To learn more about updating SSL/TLS certificates, see Amazon RDS User Guide and Amazon Aurora User Guide.
If you don’t use SSL/TLS connections, please note that database security best practices are to use SSL/TLS connectivity and to request certificate verification as part of the connection authentication process. To learn more about using SSL/TLS to encrypt a connection to your DB instance, see Amazon RDS User Guide and Amazon Aurora User Guide.
If you have questions or issues, contact your usual AWS Support by your Support plan.
— Channy
The Statue of Liberty: A Troublesome But Enduring Gift
Post Syndicated from Geographics original https://www.youtube.com/watch?v=NJ2vSN_RQNI
Supermicro Launches NVIDIA MGX Systems and We Find a Grace Hopper 1U
Post Syndicated from Patrick Kennedy original https://www.servethehome.com/supermicro-launches-nvidia-mgx-systems-and-we-find-a-grace-hopper-1u-arm/
Supermicro has new NVIDIA MGX servers for NVIDIA Grace Superchips and Grace Hopper GH200 AI servers. We show you the Supermicro ARS-111GL-NHR
The post Supermicro Launches NVIDIA MGX Systems and We Find a Grace Hopper 1U appeared first on ServeTheHome.
Empowering our partners with the new Tenant Platform dashboard
Post Syndicated from Dan Hollinger original http://blog.cloudflare.com/tenant-platform-ui-ga/
Itching to get started? Apply to the Self Serve Partner Beta or Enterprise partner programs now.
Cloudflare has always worked closely with partners to help build a better Internet. From our earliest Hosting Partners, to our latest Cloudflare One program and Authorized Service Delivery partners, we are dedicated to supporting our peers across the networking and cybersecurity ecosystem to secure Enterprise networks, mission-critical applications, and remote employees. As part of that commitment, we are proud to announce the general availability of our first dashboard for our Tenant Platform, providing an intuitive user interface for agencies and partners to manage their client accounts.
Tenant Platform introduction
The first version of the Tenant Platform was created in 2018 to support one of our large integration partners, IBM Cloud. They needed a secure way to independently provision accounts for their clients, spin up custom subscriptions, invite service users within each new account, and begin to configure the service. This platform, although API only, worked extremely well with our OEM and integration partners that were including our solution within their current platform to support their customers.
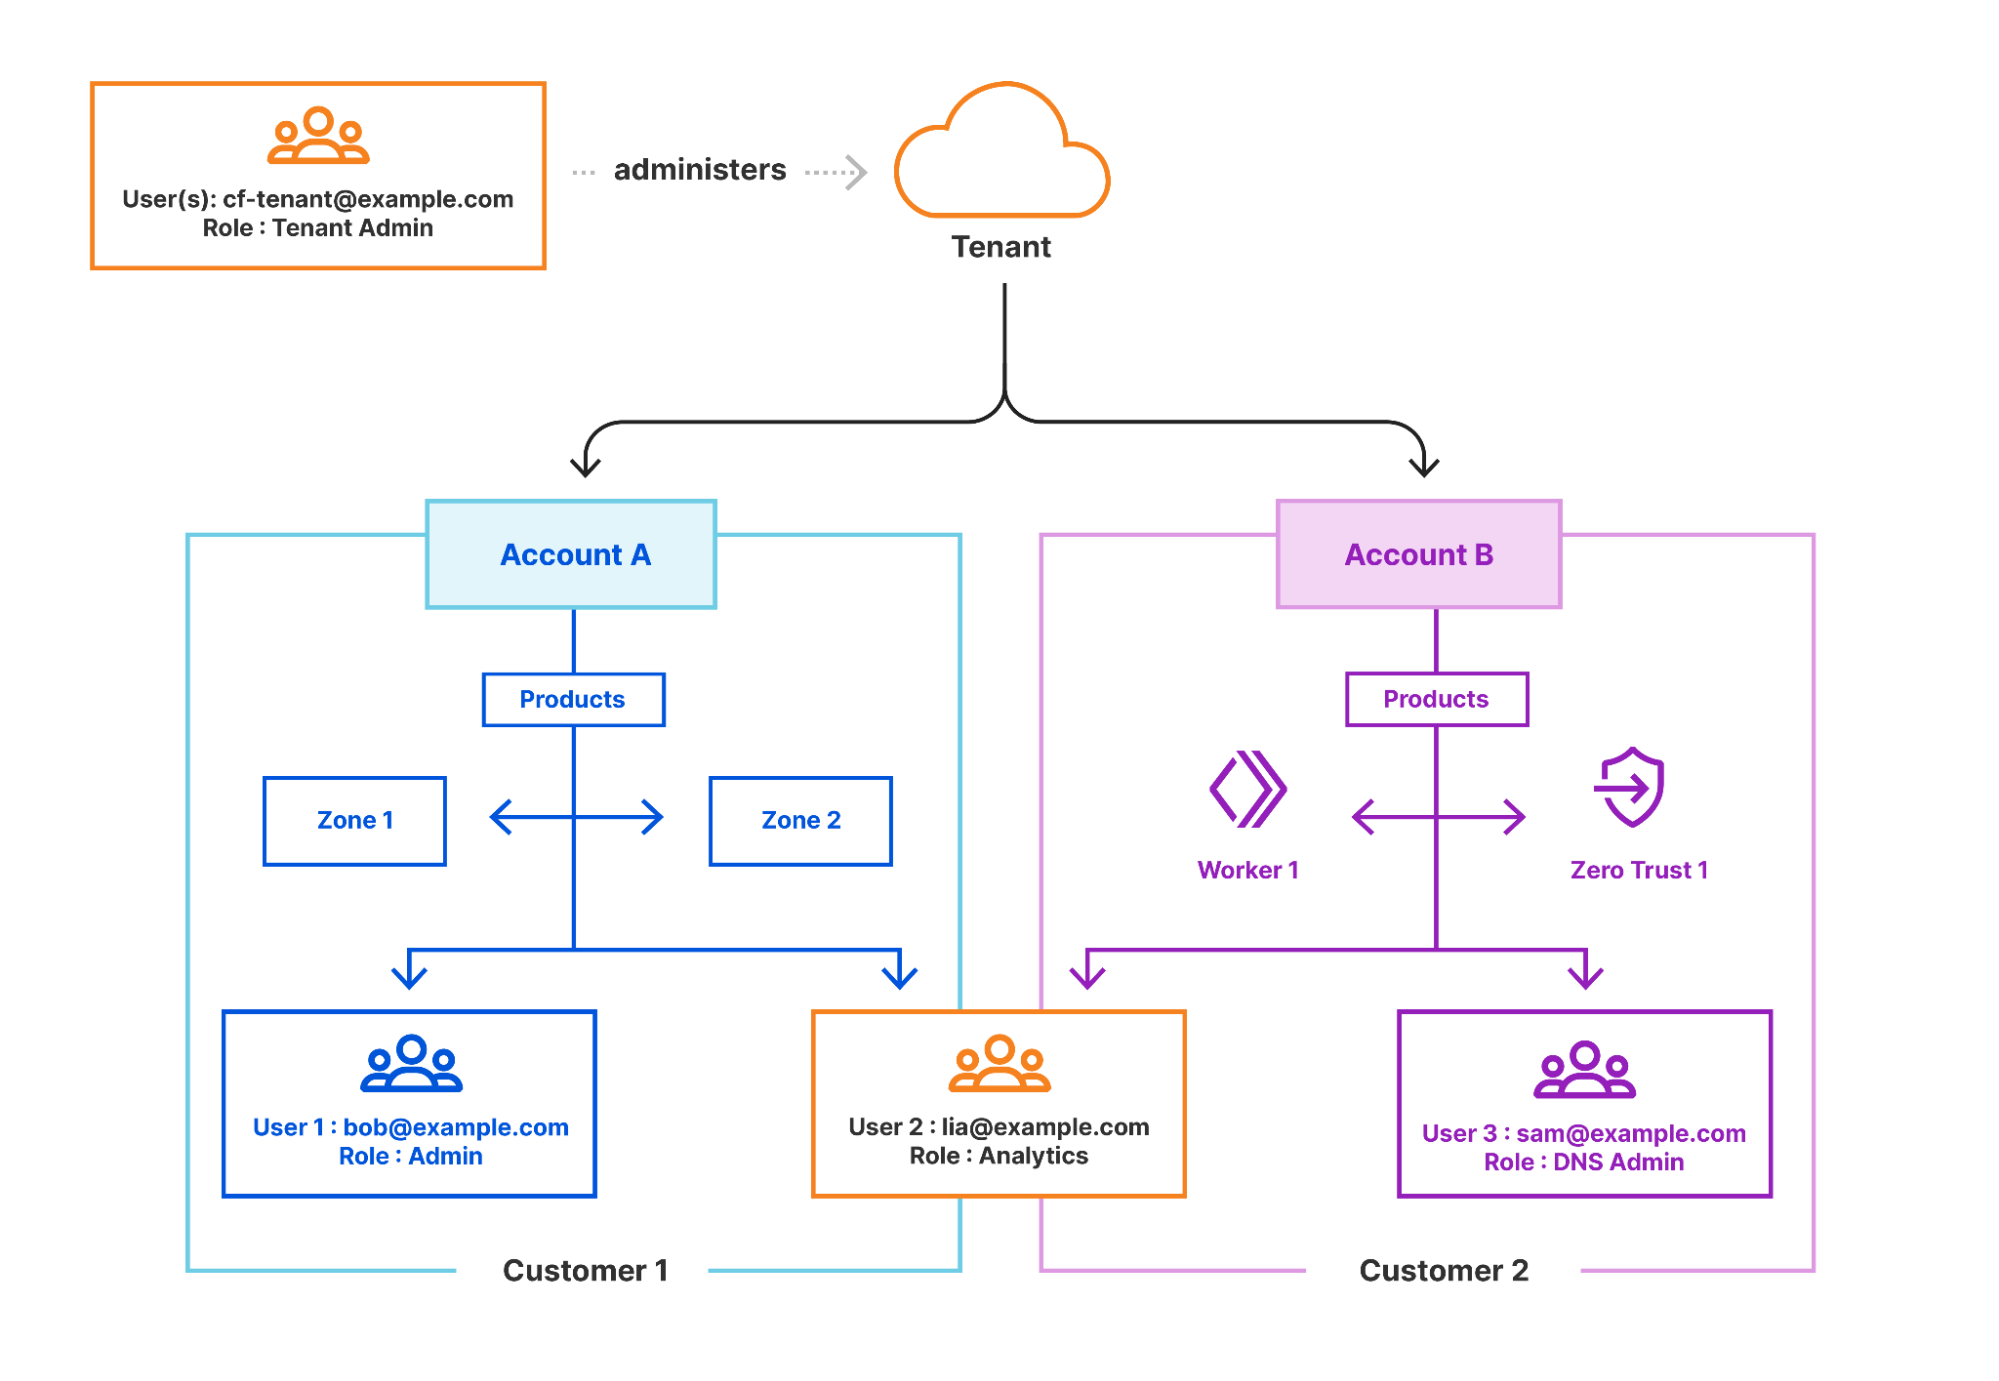
User interface overview
As Cloudflare has expanded the type of partners and customers it works with, it became clear that a user interface would be required to support agency, service and system integration partners that needed the same administrative controls as our integration partners, but available within our core dashboard. This allows scaled account management to be available to our partners as well as large Enterprise customers managing multiple business units.
Accessing the platform

All of our current partner administrators are now able to access the Tenants link on the left hand navigation within the Cloudflare dashboard. This will place them within the Tenant Overview page.
Tenant Overview

Within the Tenant Overview, we surface our documentation and some basic information about the tenant system and the program level of the partner.
Account insights
After speaking with our partners, the ability to quickly assess the health of accounts and underlying zones was paramount. To this end, we prioritized surfacing account-level security and performance insights for all child accounts within the Tenant system. This allows partner support teams to immediately dive into a specific Account that may be experiencing an issue or misconfiguration.


Managed accounts
An additional improvement is the creation of a Managed Account section under the Tenant category. This section allows you to quickly search for and get a summary of accounts in active management by your Tenant system. This table will include cumulative spend of the account, product activation reviews, and the most recent action from the account audit log. The goal is to provide a single page to understand the health of all of your managed accounts, and jump into the specific account when necessary.

Just getting started
Cloudflare’s mission is to help build a better Internet. We know we cannot do that alone, and we treasure all of our partners that have worked with us to accomplish that mission across our technical, channel and alliance relationships. Throughout 2023 and 2024, we look to continue to grow our Tenant Platform across a few key areas. We have a robust roadmap to continue to mature our API and UI for tenant user management, centralized subscription management, billing and analytics rollups, and other foundational improvements. Our goal is to make Cloudflare the vendor of choice to seamlessly integrate with our partner’s product and service offerings for CDN, WAF, DDoS, Zero Trust, Workers and more.
Would you like to learn more?
- Apply to become an Enterprise Partner on our Partner Portal
- Sign Up for the Self-Serve Partner Program
- Reach out to [email protected]

Security updates for Friday
Post Syndicated from corbet original https://lwn.net/Articles/948368/
Security updates have been issued by Debian (linux-5.10 and webkit2gtk), Fedora (matrix-synapse and trafficserver), Mageia (chromium-browser-stable, ghostscript, libxpm, and ruby-RedCloth), Oracle (.NET 7.0, curl, dotnet7.0, galera, mariadb, go-toolset, golang, java-1.8.0-openjdk, and python-reportlab), Red Hat (php, php:8.0, tomcat, and varnish), Slackware (httpd), SUSE (bluetuith, grub2, kernel, rxvt-unicode, and suse-module-tools), and Ubuntu (dotnet6, dotnet7, dotnet8, linux, linux-aws, linux-aws-5.15, linux-azure, linux-azure-5.15,
linux-azure-fde, linux-azure-fde-5.15, linux-gcp, linux-gke, linux-gkeop,
linux-hwe-5.15, linux-ibm, linux-ibm-5.15, linux-kvm, linux-lowlatency,
linux-lowlatency-hwe-5.15,linux-nvidia, linux-oracle, linux-raspi, linux, linux-aws, linux-aws-5.4, linux-azure, linux-azure-5.4, linux-gcp,
linux-gkeop, linux-hwe-5.4, linux-ibm, linux-ibm-5.4, linux-kvm,
linux-oracle, linux-oracle-5.4, linux-xilinx-zynqmp, linux, linux-aws, linux-aws-6.2, linux-azure, linux-azure-6.2,
linux-azure-fde-6.2, linux-gcp, linux-gcp-6.2, linux-hwe-6.2, linux-kvm,
linux-lowlatency, linux-lowlatency-hwe-6.2, linux-oracle, linux-raspi,
linux-starfive, linux, linux-aws, linux-azure, linux-azure-4.15, linux-gcp,
linux-gcp-4.15, linux-hwe, linux-kvm, linux-oracle, linux, linux-aws, linux-kvm, linux-lts-xenial, linux-azure, linux-bluefield, linux-intel-iotg, linux-oem-6.1, linux-raspi, and mutt).
AI and US Election Rules
Post Syndicated from Bruce Schneier original https://www.schneier.com/blog/archives/2023/10/ai-and-us-election-rules.html
If an AI breaks the rules for you, does that count as breaking the rules? This is the essential question being taken up by the Federal Election Commission this month, and public input is needed to curtail the potential for AI to take US campaigns (even more) off the rails.
At issue is whether candidates using AI to create deepfaked media for political advertisements should be considered fraud or legitimate electioneering. That is, is it allowable to use AI image generators to create photorealistic images depicting Trump hugging Anthony Fauci? And is it allowable to use dystopic images generated by AI in political attack ads?
For now, the answer to these questions is probably “yes.” These are fairly innocuous uses of AI, not any different than the old-school approach of hiring actors and staging a photoshoot, or using video editing software. Even in cases where AI tools will be put to scurrilous purposes, that’s probably legal in the US system. Political ads are, after all, a medium in which you are explicitly permitted to lie.
The concern over AI is a distraction, but one that can help draw focus to the real issue. What matters isn’t how political content is generated; what matters is the content itself and how it is distributed.
Future uses of AI by campaigns go far beyond deepfaked images. Campaigns will also use AI to personalize communications. Whereas the previous generation of social media microtargeting was celebrated for helping campaigns reach a precision of thousands or hundreds of voters, the automation offered by AI will allow campaigns to tailor their advertisements and solicitations to the individual.
Most significantly, AI will allow digital campaigning to evolve from a broadcast medium to an interactive one. AI chatbots representing campaigns are capable of responding to questions instantly and at scale, like a town hall taking place in every voter’s living room, simultaneously. Ron DeSantis’ presidential campaign has reportedly already started using OpenAI’s technology to handle text message replies to voters.
At the same time, it’s not clear whose responsibility it is to keep US political advertisements grounded in reality—if it is anyone’s. The FEC’s role is campaign finance, and is further circumscribed by the Supreme Court’s repeated stripping of its authorities. The Federal Communications Commission has much more expansive responsibility for regulating political advertising in broadcast media, as well as political robocalls and text communications. However, the FCC hasn’t done much in recent years to curtail political spam. The Federal Trade Commission enforces truth in advertising standards, but political campaigns have been largely exempted from these requirements on First Amendment grounds.
To further muddy the waters, much of the online space remains loosely regulated, even as campaigns have fully embraced digital tactics. There are still insufficient disclosure requirements for digital ads. Campaigns pay influencers to post on their behalf to circumvent paid advertising rules. And there are essentially no rules beyond the simple use of disclaimers for videos that campaigns post organically on their own websites and social media accounts, even if they are shared millions of times by others.
Almost everyone has a role to play in improving this situation.
Let’s start with the platforms. Google announced earlier this month that it would require political advertisements on YouTube and the company’s other advertising platforms to disclose when they use AI images, audio, and video that appear in their ads. This is to be applauded, but we cannot rely on voluntary actions by private companies to protect our democracy. Such policies, even when well-meaning, will be inconsistently devised and enforced.
The FEC should use its limited authority to stem this coming tide. The FEC’s present consideration of rulemaking on this issue was prompted by Public Citizen, which petitioned the Commission to "clarify that the law against ‘fraudulent misrepresentation’ (52 U.S.C. §30124) applies to deliberately deceptive AI-produced content in campaign communications." The FEC’s regulation against fraudulent misrepresentation (C.F.R. §110.16) is very narrow; it simply restricts candidates from pretending to be speaking on behalf of their opponents in a “damaging” way.
Extending this to explicitly cover deepfaked AI materials seems appropriate. We should broaden the standards to robustly regulate the activity of fraudulent misrepresentation, whether the entity performing that activity is AI or human—but this is only the first step. If the FEC takes up rulemaking on this issue, it could further clarify what constitutes “damage.” Is it damaging when a PAC promoting Ron DeSantis uses an AI voice synthesizer to generate a convincing facsimile of the voice of his opponent Donald Trump speaking his own Tweeted words? That seems like fair play. What if opponents find a way to manipulate the tone of the speech in a way that misrepresents its meaning? What if they make up words to put in Trump’s mouth? Those use cases seem to go too far, but drawing the boundaries between them will be challenging.
Congress has a role to play as well. Senator Klobuchar and colleagues have been promoting both the existing Honest Ads Act and the proposed REAL Political Ads Act, which would expand the FEC’s disclosure requirements for content posted on the Internet and create a legal requirement for campaigns to disclose when they have used images or video generated by AI in political advertising. While that’s worthwhile, it focuses on the shiny object of AI and misses the opportunity to strengthen law around the underlying issues. The FEC needs more authority to regulate campaign spending on false or misleading media generated by any means and published to any outlet. Meanwhile, the FEC’s own Inspector General continues to warn Congress that the agency is stressed by flat budgets that don’t allow it to keep pace with ballooning campaign spending.
It is intolerable for such a patchwork of commissions to be left to wonder which, if any of them, has jurisdiction to act in the digital space. Congress should legislate to make clear that there are guardrails on political speech and to better draw the boundaries between the FCC, FEC, and FTC’s roles in governing political speech. While the Supreme Court cannot be relied upon to uphold common sense regulations on campaigning, there are strategies for strengthening regulation under the First Amendment. And Congress should allocate more funding for enforcement.
The FEC has asked Congress to expand its jurisdiction, but no action is forthcoming. The present Senate Republican leadership is seen as an ironclad barrier to expanding the Commission’s regulatory authority. Senate Majority Leader Mitch McConnell has a decades-long history of being at the forefront of the movement to deregulate American elections and constrain the FEC. In 2003, he brought the unsuccessful Supreme Court case against the McCain-Feingold campaign finance reform act (the one that failed before the Citizens United case succeeded).
The most impactful regulatory requirement would be to require disclosure of interactive applications of AI for campaigns—and this should fall under the remit of the FCC. If a neighbor texts me and urges me to vote for a candidate, I might find that meaningful. If a bot does it under the instruction of a campaign, I definitely won’t. But I might find a conversation with the bot—knowing it is a bot—useful to learn about the candidate’s platform and positions, as long as I can be confident it is going to give me trustworthy information.
The FCC should enter rulemaking to expand its authority for regulating peer-to-peer (P2P) communications to explicitly encompass interactive AI systems. And Congress should pass enabling legislation to back it up, giving it authority to act not only on the SMS text messaging platform, but also over the wider Internet, where AI chatbots can be accessed over the web and through apps.
And the media has a role. We can still rely on the media to report out what videos, images, and audio recordings are real or fake. Perhaps deepfake technology makes it impossible to verify the truth of what is said in private conversations, but this was always unstable territory.
What is your role? Those who share these concerns can submit a comment to the FEC’s open public comment process before October 16, urging it to use its available authority. We all know government moves slowly, but a show of public interest is necessary to get the wheels moving.
Ultimately, all these policy changes serve the purpose of looking beyond the shiny distraction of AI to create the authority to counter bad behavior by humans. Remember: behind every AI is a human who should be held accountable.
This essay was written with Nathan Sanders, and was previously published on the Ash Center website.
Честита баня на Бойко Борисов!
Post Syndicated from Емилия Милчева original https://www.toest.bg/chestita-banya-na-boyko-borisov/

Прокуратурата се оказа най-добрият теляк в България. Я как изтърка, насапуниса и оплакна от обвинения лидера на ГЕРБ и бивш трикратен премиер Бойко Борисов! Бива я с кесето.
Новината, че държавното обвинение е прекратило делото за пране на пари „Барселонагейт“, което стана причина да се поиска имунитетът на лидера на ГЕРБ, не изненада. Не изненада и обяснението от Софийската градска прокуратура, че по случая не са намерени достатъчно доказателства, които
да сочат по несъмнен и категоричен начин да е извършено престъплението, за което досъдебното производство е било образувано.
Българските обвинители традиционно имат проблем с намирането на доказателства. А в „Барселонагейт“ най-напред трябва(ше) да се установи, че парите, с които е купена къщата в столицата на Каталуния за бившата миска Борислава Йовчева и детето ѝ, са „мръсни“ – придобити от корупция, рекет, трафик или друга незаконна дейност.
Вече няма да се рови има ли Борисов връзка с къщата за 3 млн. евро в Барселона, обитавана от бившата „Мис Бикини“ и дъщеря ѝ, нито ще се чакат резултати от разпоредена от прокуратурата ДНК експертиза на детето, родено на 18 април 2012 г., за да се разбере кой е биологичният му баща.
Тази проверка беше разпоредена след 15 май, когато все още ръководената от Иван Гешев прокуратура се разбърза с „Барселонагейт“, след като повече от две години държеше делото на трупчета и бяха саботирани всякакви опити да помръдне, в т.ч. разкриване на банкова тайна. Ускорението дойде след разразилата се вражда между Гешев и Борисов. Впоследствие Гешев беше отстранен, в.и.ф. главен прокурор Борислав Сарафов отново потопи -гейта, а градският прокурор на София Илияна Кирилова дори е образувала дисциплинарни производства срещу прокурора по „Барселонагейт“ Стефан Христов, защото карал служители да работят в почивните дни.
Политическите измерения на „банята“ са значително по-големи от липсата на правосъдие – което ще рече присъди – по високите етажи на властта. Испанската афера притесняваше Борисов, но вече може да си отдъхне.
Изводите
Бойко Борисов е „голяма работа“. Със сигурност така ще си помислят голяма част от българските граждани. Печели избори, макар да не управлява от 2021-ва. През годините излизаха разни телефонни разговори, но скандалите минаха и заминаха. Снимките на чекмедже от спалнята му, пълно с кюлчета и банкноти от по 500 евро, също не накърниха особено имиджа му, нито протестите „Мутри, вън!“. Един от най-богатите хора в България огласи, че си е плащал, за да му върви хазартният бизнес – и пак нищо. В ГЕРБ все така го слушат, а без него „сглобката“ ще се разпадне като кула от кубчета.
Компрометиране на реформите. Заличаването на „Барселонагейт“ компрометира опитите за съдебна реформа, бездруго засенчени от критиките към тях и към реформаторите – Бойко Борисов заедно с лидерите на ПП–ДБ Кирил Петков, Христо Иванов и Атанас Атанасов, също и олигарха от ДПС Делян Пеевски. Ще повлияе и на резултата от местните избори поради мълчанието от страна на Петков, Иванов и Атанасов.
Допреди малко повече от година Христо Иванов коментираше, че очаква „поредното замитане под килима“ за „Барселонагейт“ от страна на Гешев. Но го извърши прокуратурата, ръководена от Сарафов. Сега ГЕРБ и ДПС са партньори за реформиране на Конституцията и съпредседателят на ДБ не пита дали Борисов е могъл „да насочи паричен поток за своя личен интерес на база на влиянието си върху „Лукойл“ (тъй като едно от лицата в „Барселонагейт“ е свързано с компанията).
Съпредседателят на „Продължаваме промяната“ Кирил Петков също се е умълчал за „Барселонагейт“. Като премиер миналата година той беше заявил, че в доклада на испанските власти за случая е имало снимка на Борисов.
Не е свързано с точно обвинение, но е факт, че испанските власти са я включили.
Петков дори отиде по-далеч, след като на среща с италианския премиер Марио Драги в Рим отбеляза, че Европейската прокуратура трябва да има мандат за разследване на пране на пари между отделните държави. Според Кирил Петков това ще премахне потенциални престъпления като „вилата в Испания“.
Сега няма дори „приятелски огън“ по Борисов, въпреки че той иронизира и критикува правителството с мандат на ПП–ДБ от трибуната на всеки областен център, където обикаля в кампанията за местни избори.
Българската корупция е непроследима и ненаказуема. Има ли някой, който да мисли обратното?! Има ли вярващи, че похваленият от Пеевски антикорупционен закон ще работи така, че да бъдат издирени и наказани ония висши държавни функционери, съучаствали в инхаус процедурите за строителството на магистрала „Хемус“ и съдействали за авансовото плащане на милиони, част от които изтеглени на гише в сакове.
Но кой казва, че инхаус договорите са порочни – в ПП–ДБ вече не мислят така. Преди време ги мислеха за порочни. Като служебни министри през 2021 г. Кирил Петков и Асен Василев даваха гръмки пресконференции, а Бойко Рашков – вътрешният министър в кабинета „Петков“, стигна надълбоко в корупционните разкрития за „Хемус“. Настоящият регионален министър Андрей Цеков обаче не само няма да ги разваля, но и ще ги индексира.
Триадата, която ще управлява новата Комисия за противодействие на корупцията (КПК), ще бъде избрана през януари. Законът за противодействие на корупцията предвижда изборът да се проведе три месеца след обнародването му, тоест след 6 октомври. Предвид досегашното разпределение на постове в регулатори, лансирането на ДПС и пасивността на ПП–ДБ, ръководството на КПК без съмнение ще повтори схемата на т.нар. конституционно мнозинство.
Каквато и корупция да е имало досега, вече я няма. Теляците са се запотили, но са почистили. Честита баня на изкъпаните!
Някой помни ли какво означаваше „справедливост“?
Comic for 2023.10.20 – Fits
Post Syndicated from Explosm.net original https://explosm.net/comics/fits
New Cyanide and Happiness Comic