FSF: Free Software Awards

Post Syndicated from original https://lwn.net/Articles/874637/rss

The Free Software Foundation has opened
nominations
for the Free Software
Awards
. Nominations are open until November 30.

The dedication of the developers, documentation writers, community
organizers, and volunteers of the free software movement is what has helped
us all live
liberation
in the years the free software movement has been
active. Just using free software makes you part of our collective journey
to freedom, but some go above and beyond in their dedication to the free
software movement. Now, it’s time for us to show those community members
and projects that we appreciate their vital work.

[…] Maybe you’ve been inspired by the work of a particular member of the free software community, or have been impressed by the great strides made by a project that incorporates free software into their platform for social change.

Start here for a quick overview of everything you need to know

Post Syndicated from Ghost original https://yovko.net/welcome/

Start here for a quick overview of everything you need to know

Hey there, welcome to your new home on the web!

Unlike social networks, this one is all yours. Publish your work on a custom domain, invite your audience to subscribe, send them new content by email newsletter, and offer premium subscriptions to generate sustainable recurring revenue to fund your work.

Ghost is an independent, open source app, which means you can customize absolutely everything. Inside the admin area, you'll find straightforward controls for changing themes, colors, navigation, logos and settings — so you can set your site up just how you like it. No technical knowledge required.

If you're feeling a little more adventurous, there's really no limit to what's possible. With just a little bit of HTML and CSS you can modify or build your very own theme from scratch, or connect to Zapier to explore advanced integrations. Advanced developers can go even further and build entirely custom workflows using the Ghost API.

This level of customization means that Ghost grows with you. It's easy to get started, but there's always another level of what's possible. So, you won't find yourself outgrowing the app in a few months time and wishing you'd chosen something more powerful!


For now, you're probably just wondering what to do first. To help get you going as quickly as possible, we've populated your site with starter content (like this post!) covering all the key concepts and features of the product.

You'll find an outline of all the different topics below, with links to each section so you can explore the parts that interest you most.

Once you're ready to begin publishing and want to clear out these starter posts, you can delete the "Ghost" staff user. Deleting an author will automatically remove all of their posts, leaving you with a clean blank canvas.

Your guide to Ghost

If you get through all those and you're hungry for more, you can find an extensive library of content for creators over on the Ghost blog.


Getting help

If you need help, Ghost(Pro) customers can always reach our full-time support team by clicking on the Ghost(Pro) link inside their admin panel.

If you're a developer working with the codebase in a self-managed install, check out our developer community forum to chat with other users.

Have fun!

Customizing your brand and design settings

Post Syndicated from Ghost original https://yovko.net/design/

Customizing your brand and design settings

As discussed in the introduction post, one of the best things about Ghost is just how much you can customize to turn your site into something unique. Everything about your layout and design can be changed, so you're not stuck with yet another clone of a social network profile.

How far you want to go with customization is completely up to you, there's no right or wrong approach! The majority of people use one of Ghost's built-in themes to get started, and then progress to something more bespoke later on as their site grows.

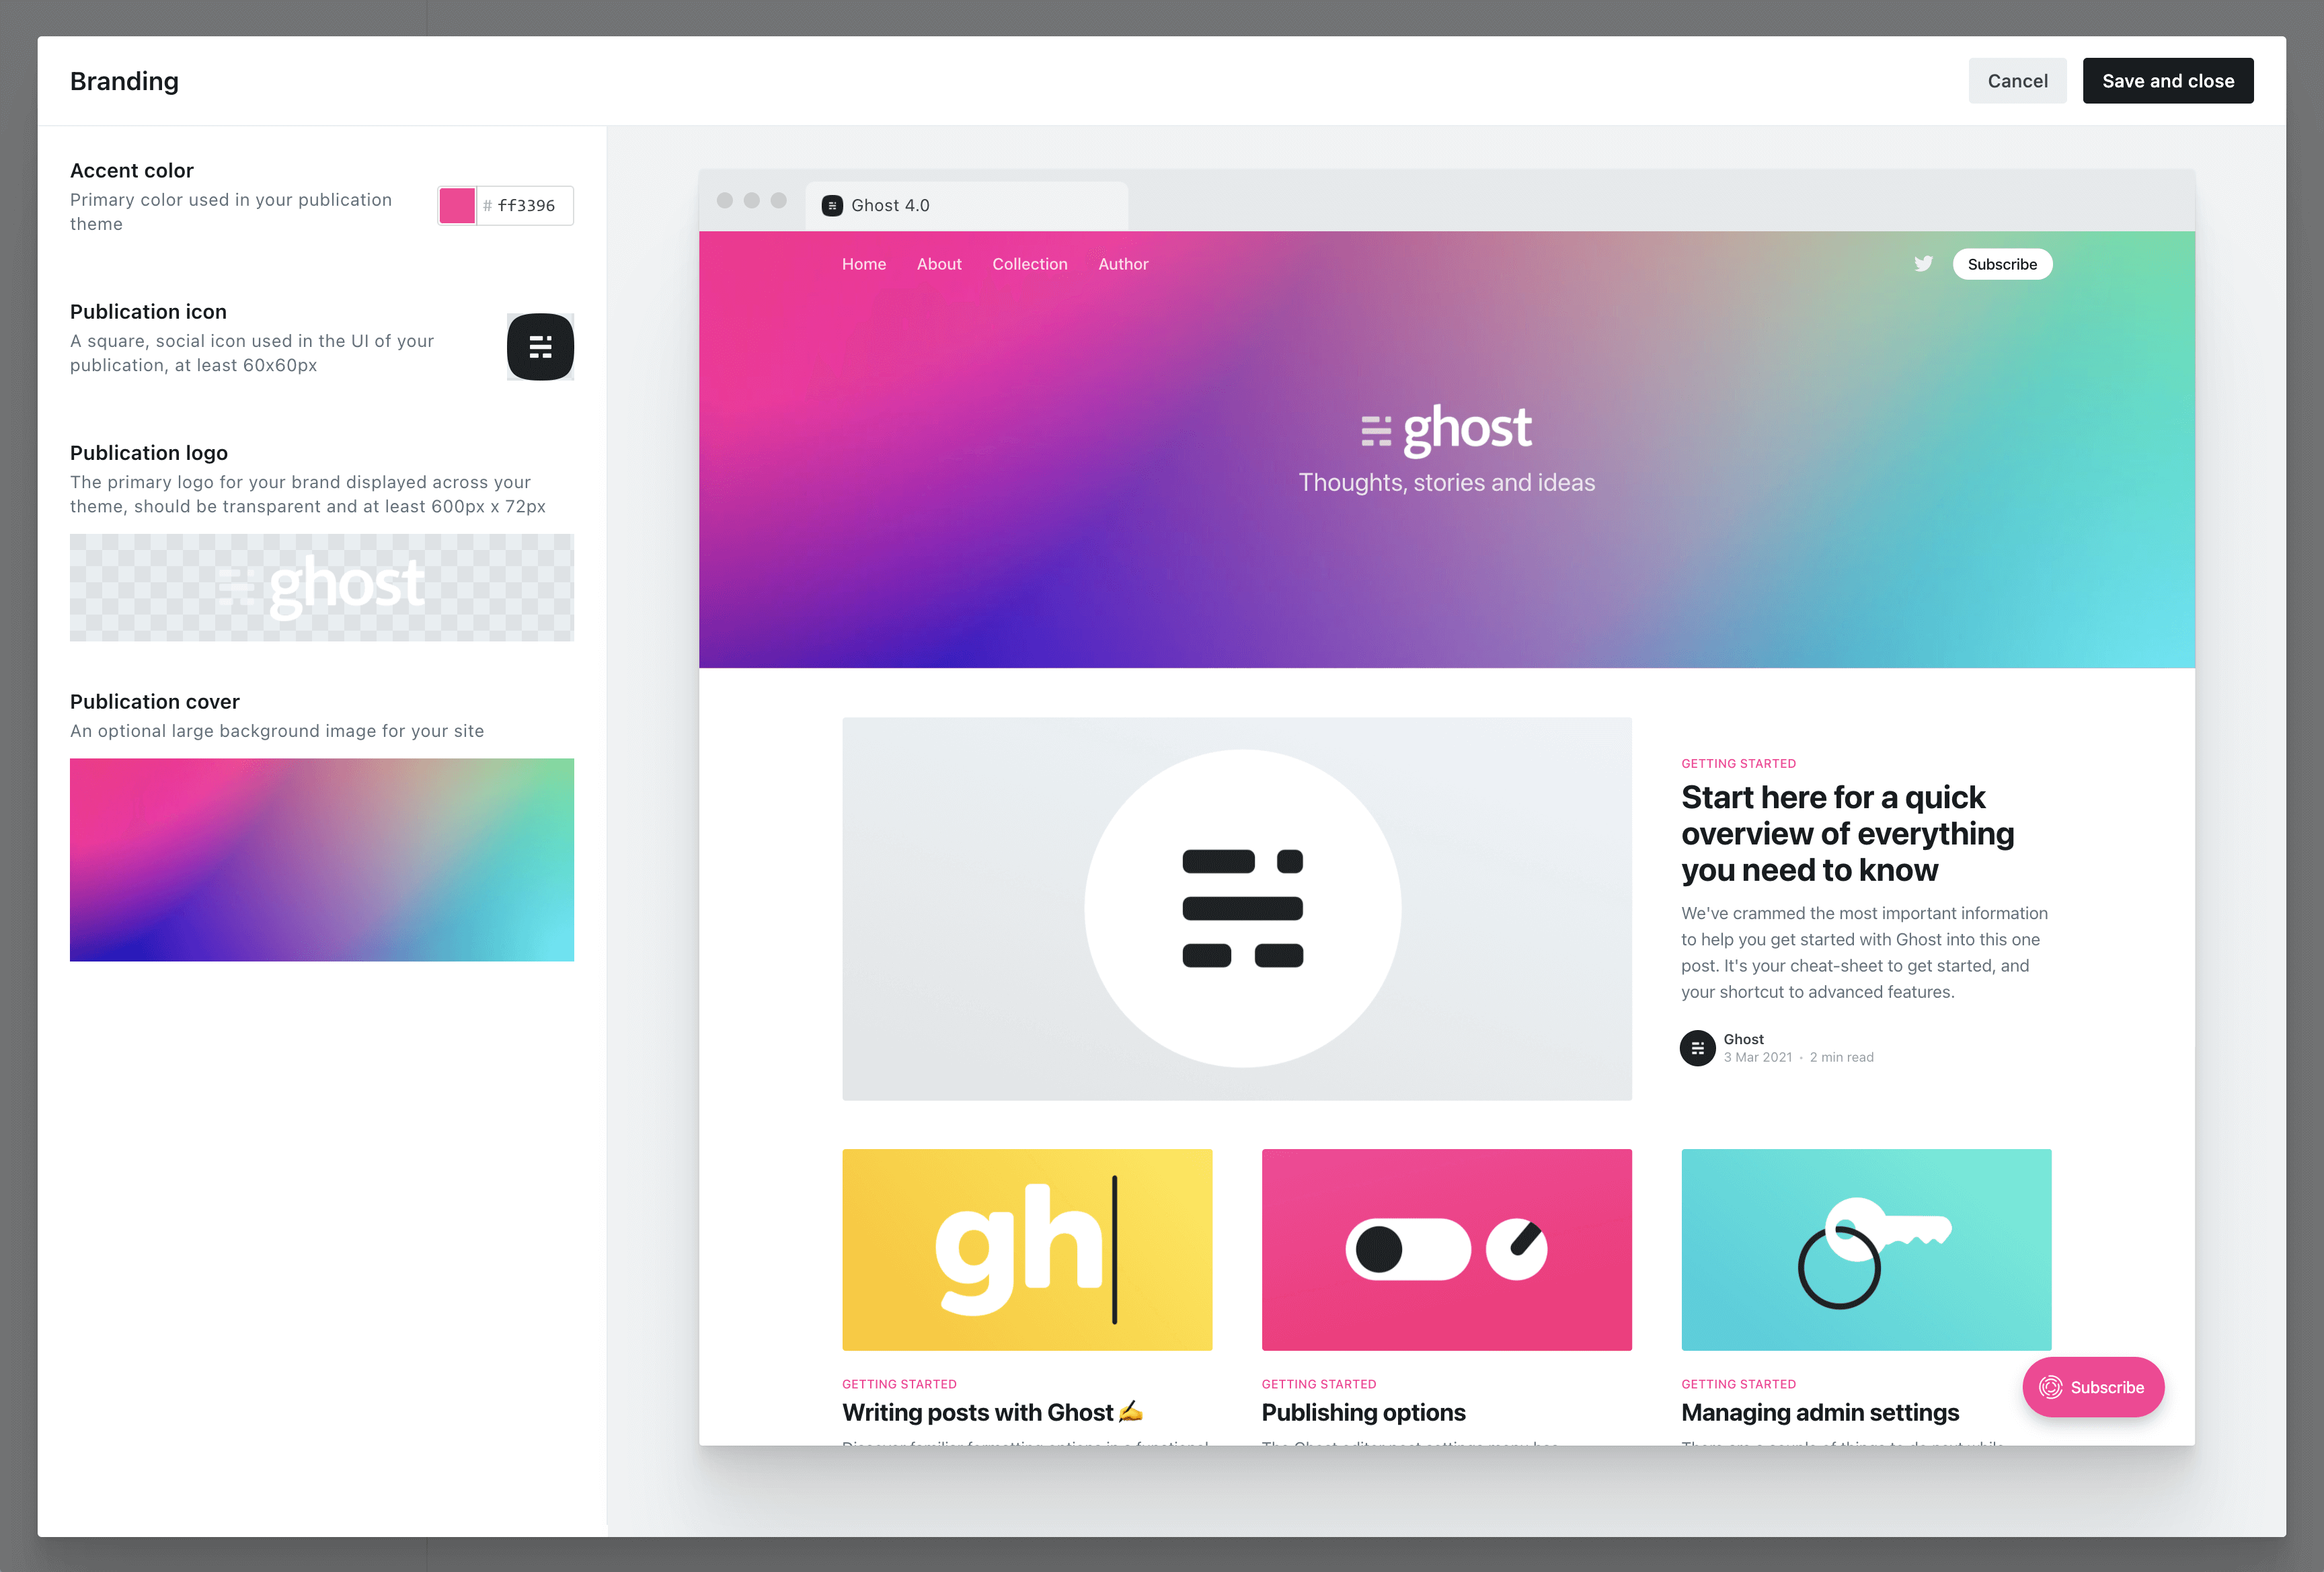
The best way to get started is with Ghost's branding settings, where you can set up colors, images and logos to fit with your brand.

Customizing your brand and design settings
Ghost Admin → Settings → Branding

Any Ghost theme that's up to date and compatible with Ghost 4.0 and higher will reflect your branding settings in the preview window, so you can see what your site will look like as you experiment with different options.

When selecting an accent color, try to choose something which will contrast well with white text. Many themes will use your accent color as the background for buttons, headers and navigational elements. Vibrant colors with a darker hue tend to work best, as a general rule.

Installing Ghost themes

By default, new sites are created with Ghost's friendly publication theme, called Casper. Everything in Casper is optimized to work for the most common types of blog, newsletter and publication that people create with Ghost — so it's a perfect place to start.

However, there are hundreds of different themes available to install, so you can pick out a look and feel that suits you best.

Customizing your brand and design settings
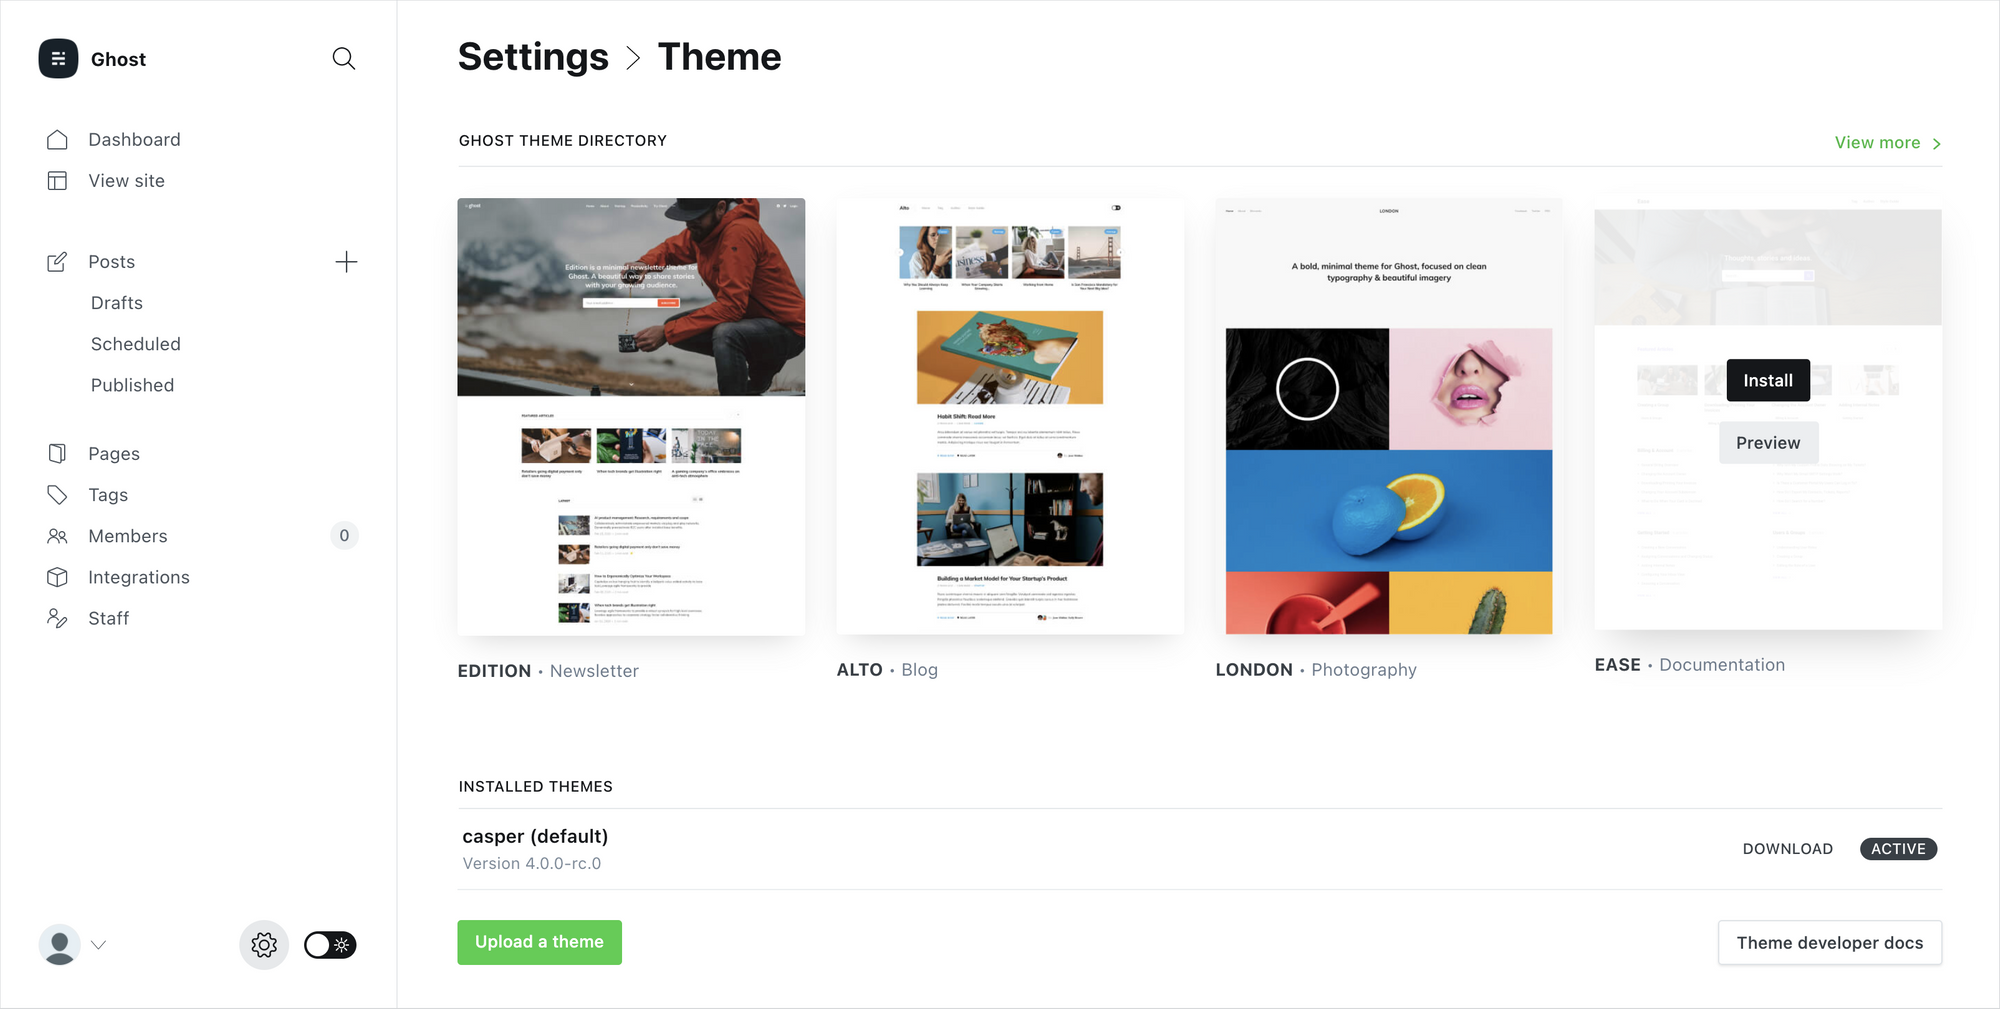
Ghost Admin → Settings → Theme

Inside Ghost's theme settings you'll find 4 more official themes that can be directly installed and activated. Each theme is suited to slightly different use-cases.

  • Casper (default) — Made for all sorts of blogs and newsletters
  • Edition — A beautiful minimal template for newsletter authors
  • Alto — A slick news/magazine style design for creators
  • London — A light photography theme with a bold grid
  • Ease — A library theme for organizing large content archives

And if none of those feel quite right, head on over to the Ghost Marketplace, where you'll find a huge variety of both free and premium themes.

Building something custom

Finally, if you want something completely bespoke for your site, you can always build a custom theme from scratch and upload it to your site.

Ghost's theming template files are very easy to work with, and can be picked up in the space of a few hours by anyone who has just a little bit of knowledge of HTML and CSS. Templates from other platforms can also be ported to Ghost with relatively little effort.

If you want to take a quick look at the theme syntax to see what it's like, you can browse through the files of the default Casper theme. We've added tons of inline code comments to make it easy to learn, and the structure is very readable.

{{#post}}
<article class="article {{post_class}}">

    <h1>{{title}}</h1>
    
    {{#if feature_image}}
    	<img src="{{feature_image}}" alt="Feature image" />
    {{/if}}
    
    {{content}}

</article>
{{/post}}
A snippet from a post template

See? Not that scary! But still completely optional.

If you're interested in creating your own Ghost theme, check out our extensive theme documentation for a full guide to all the different template variables and helpers which are available.

Writing and managing content in Ghost, an advanced guide

Post Syndicated from Ghost original https://yovko.net/write/

Writing and managing content in Ghost, an advanced guide

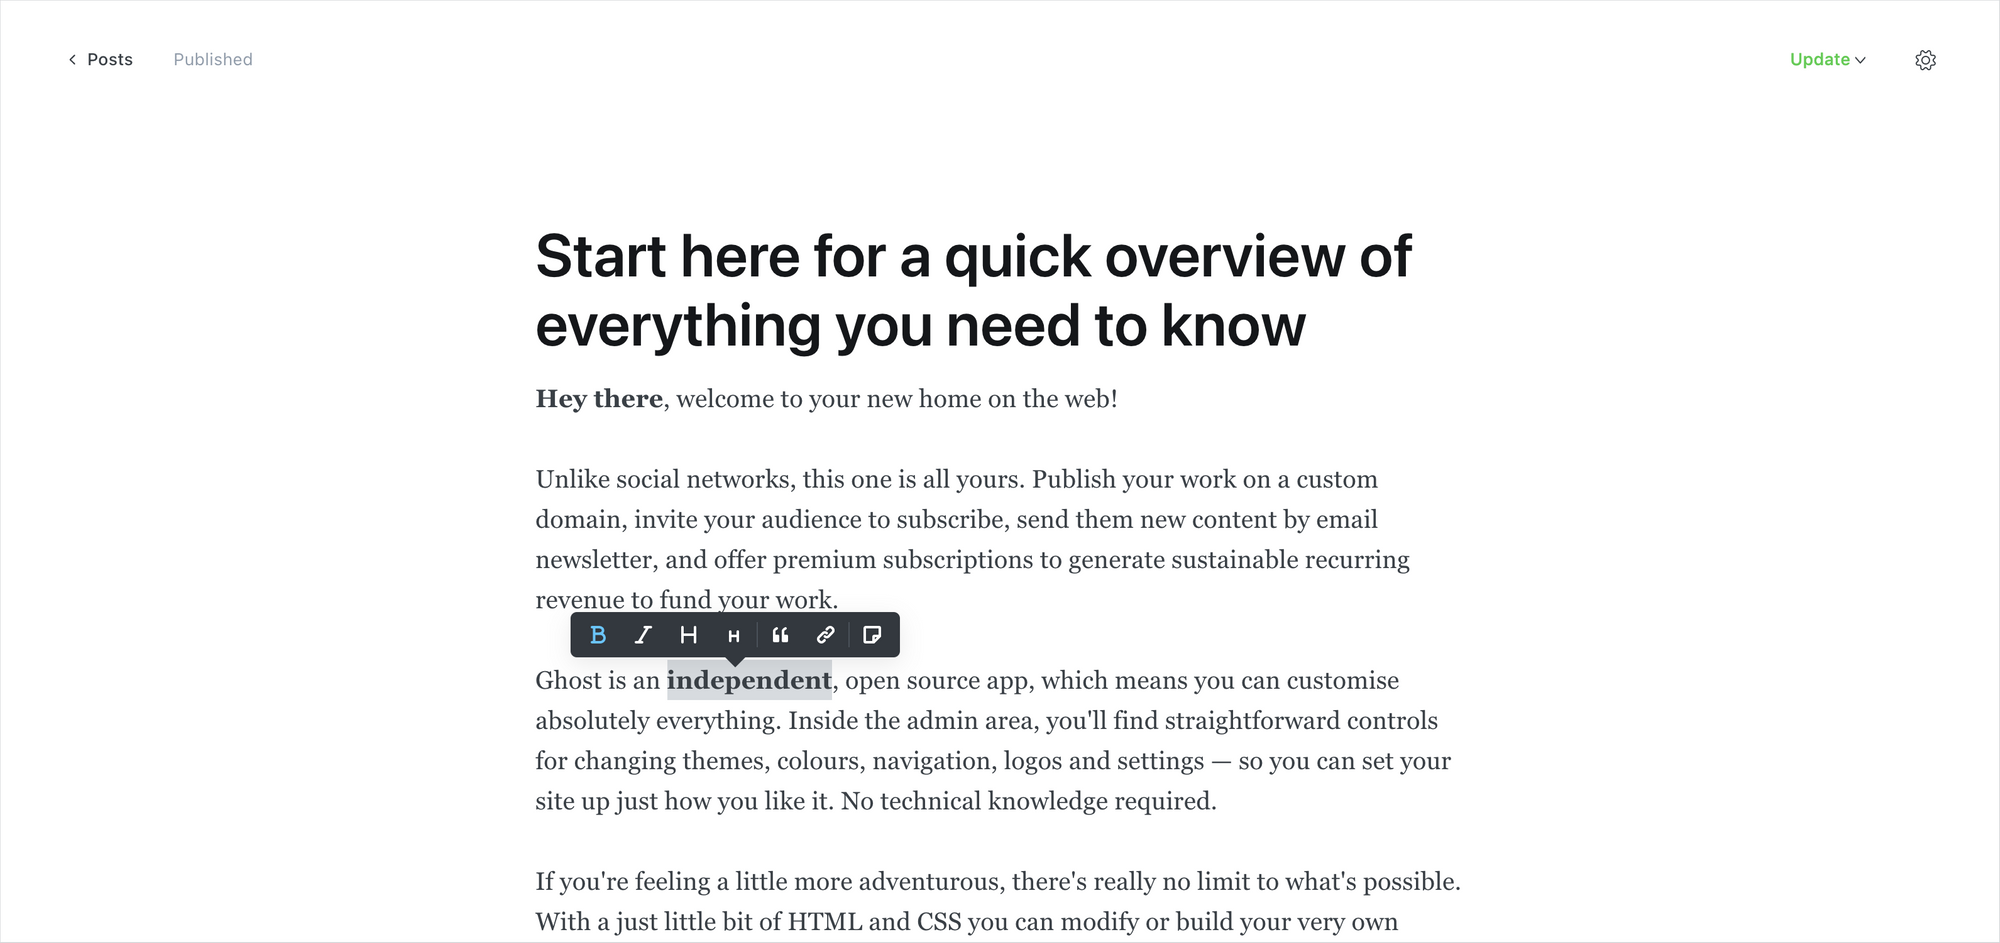
Ghost comes with a best-in-class editor which does its very best to get out of the way, and let you focus on your content. Don't let its minimal looks fool you, though, beneath the surface lies a powerful editing toolset designed to accommodate the extensive needs of modern creators.

For many, the base canvas of the Ghost editor will feel familiar. You can start writing as you would expect, highlight content to access the toolbar you would expect, and generally use all of the keyboard shortcuts you would expect.

Our main focus in building the Ghost editor is to try and make as many things that you hope/expect might work: actually work.

  • You can copy and paste raw content from web pages, and Ghost will do its best to correctly preserve the formatting.
  • Pasting an image from your clipboard will upload inline.
  • Pasting a social media URL will automatically create an embed.
  • Highlight a word in the editor and paste a URL from your clipboard on top: Ghost will turn it into a link.
  • You can also paste (or write!) Markdown and Ghost will usually be able to auto-convert it into fully editable, formatted content.
Writing and managing content in Ghost, an advanced guide
The Ghost editor. Also available in dark-mode, for late night writing sessions.

The goal, as much as possible, is for things to work so that you don't have to think so much about the editor. You won't find any disastrous "block builders" here, where you have to open 6 submenus and choose from 18 different but identical alignment options. That's not what Ghost is about.

What you will find though, is dynamic cards which allow you to embed rich media into your posts and create beautifully laid out stories.

Using cards

You can insert dynamic cards inside post content using the + button, which appears on new lines, or by typing / on a new line to trigger the card menu. Many of the choices are simple and intuitive, like bookmark cards, which allow you to create rich links with embedded structured data:

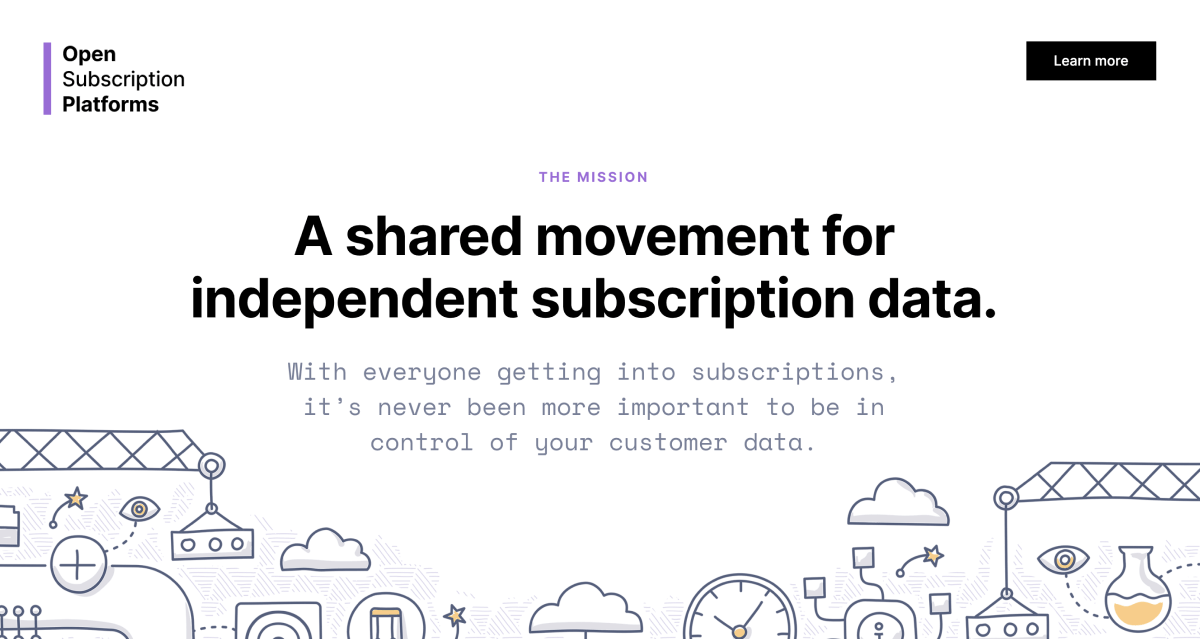
Open Subscription Platforms
A shared movement for independent subscription data.
Writing and managing content in Ghost, an advanced guide

or embed cards which make it easy to insert content you want to share with your audience, from external services:

But, dig a little deeper, and you'll also find more advanced cards, like one that only shows up in email newsletters (great for personalized introductions) and a comprehensive set of specialized cards for different types of images and galleries.

Once you  start mixing text and image cards creatively, the whole narrative of the story changes. Suddenly, you're working in a new format.

Writing and managing content in Ghost, an advanced guide

As it turns out, sometimes pictures and a thousand words go together really well. Telling people a great story often has much more impact if they can feel, even for a moment, as though they were right there with you.

Writing and managing content in Ghost, an advanced guide

Galleries and image cards can be combined in so many different ways — the only limit is your imagination.

Build workflows with snippets

One of the most powerful features of the Ghost editor is the ability to create and re-use content snippets. If you've ever used an email client with a concept of saved replies then this will be immediately intuitive.

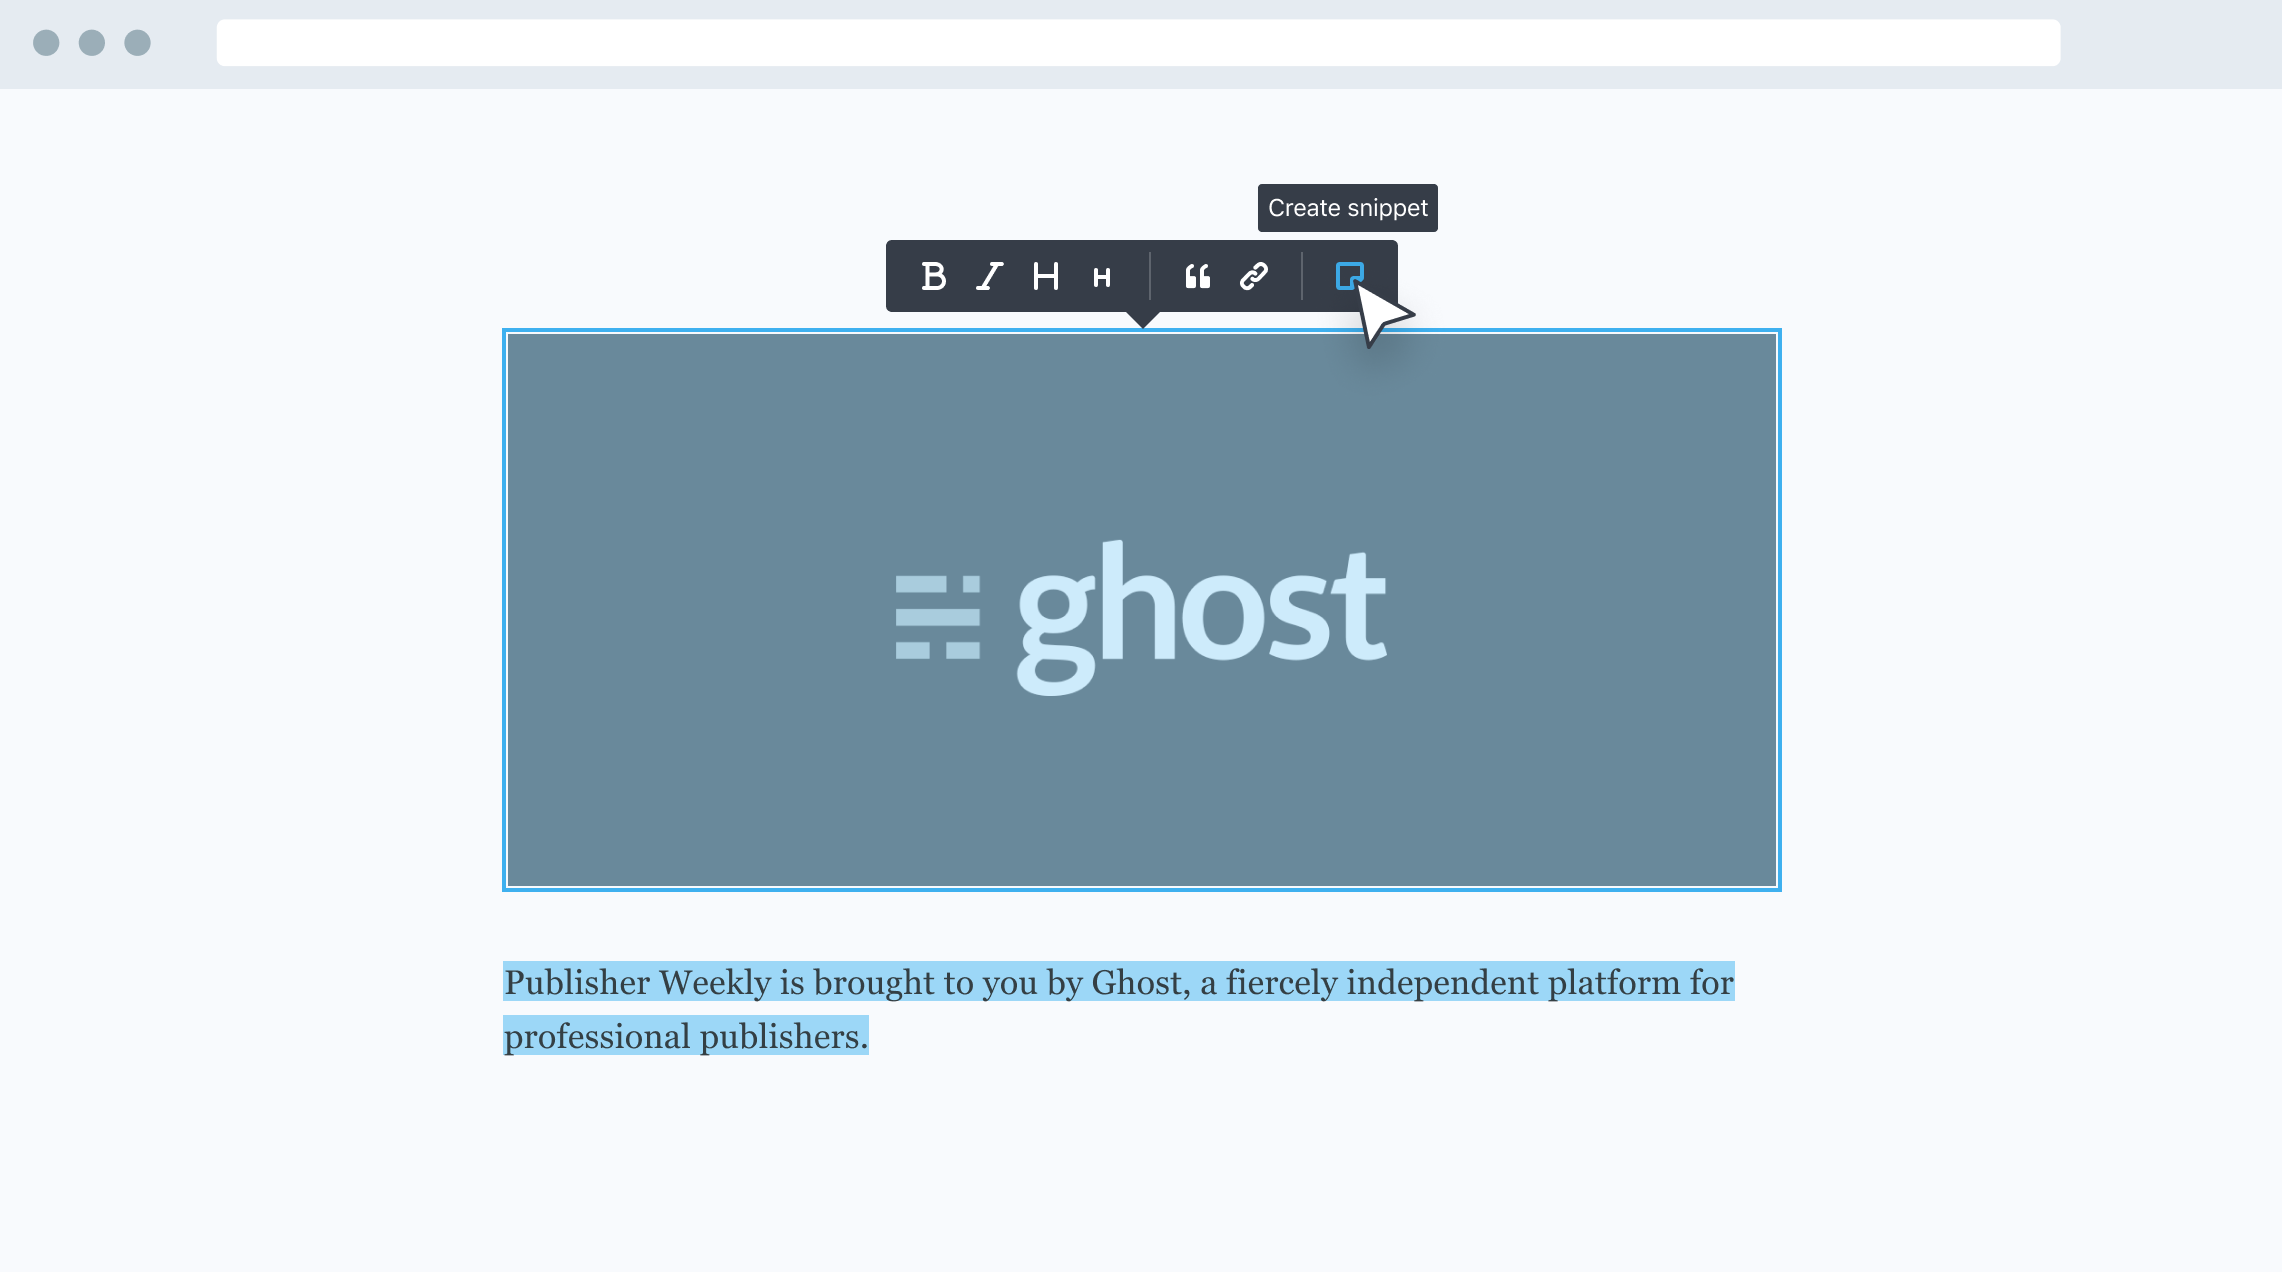
To create a snippet, select a piece of content in the editor that you'd like to re-use in future, then click on the snippet icon in the toolbar. Give your snippet a name, and you're all done. Now your snippet will be available from within the card menu, or you can search for it directly using the / command.

This works really well for saving images you might want to use often, like a company logo or team photo, links to resources you find yourself often linking to, or introductions and passages that you want to remember.

Writing and managing content in Ghost, an advanced guide

You can even build entire post templates or outlines to create a quick, re-usable workflow for publishing over time. Or build custom design elements for your post with an HTML card, and use a snippet to insert it.

Once you get a few useful snippets set up, it's difficult to go back to the old way of diving through media libraries and trawling for that one thing you know you used somewhere that one time.


Publishing and newsletters the easy way

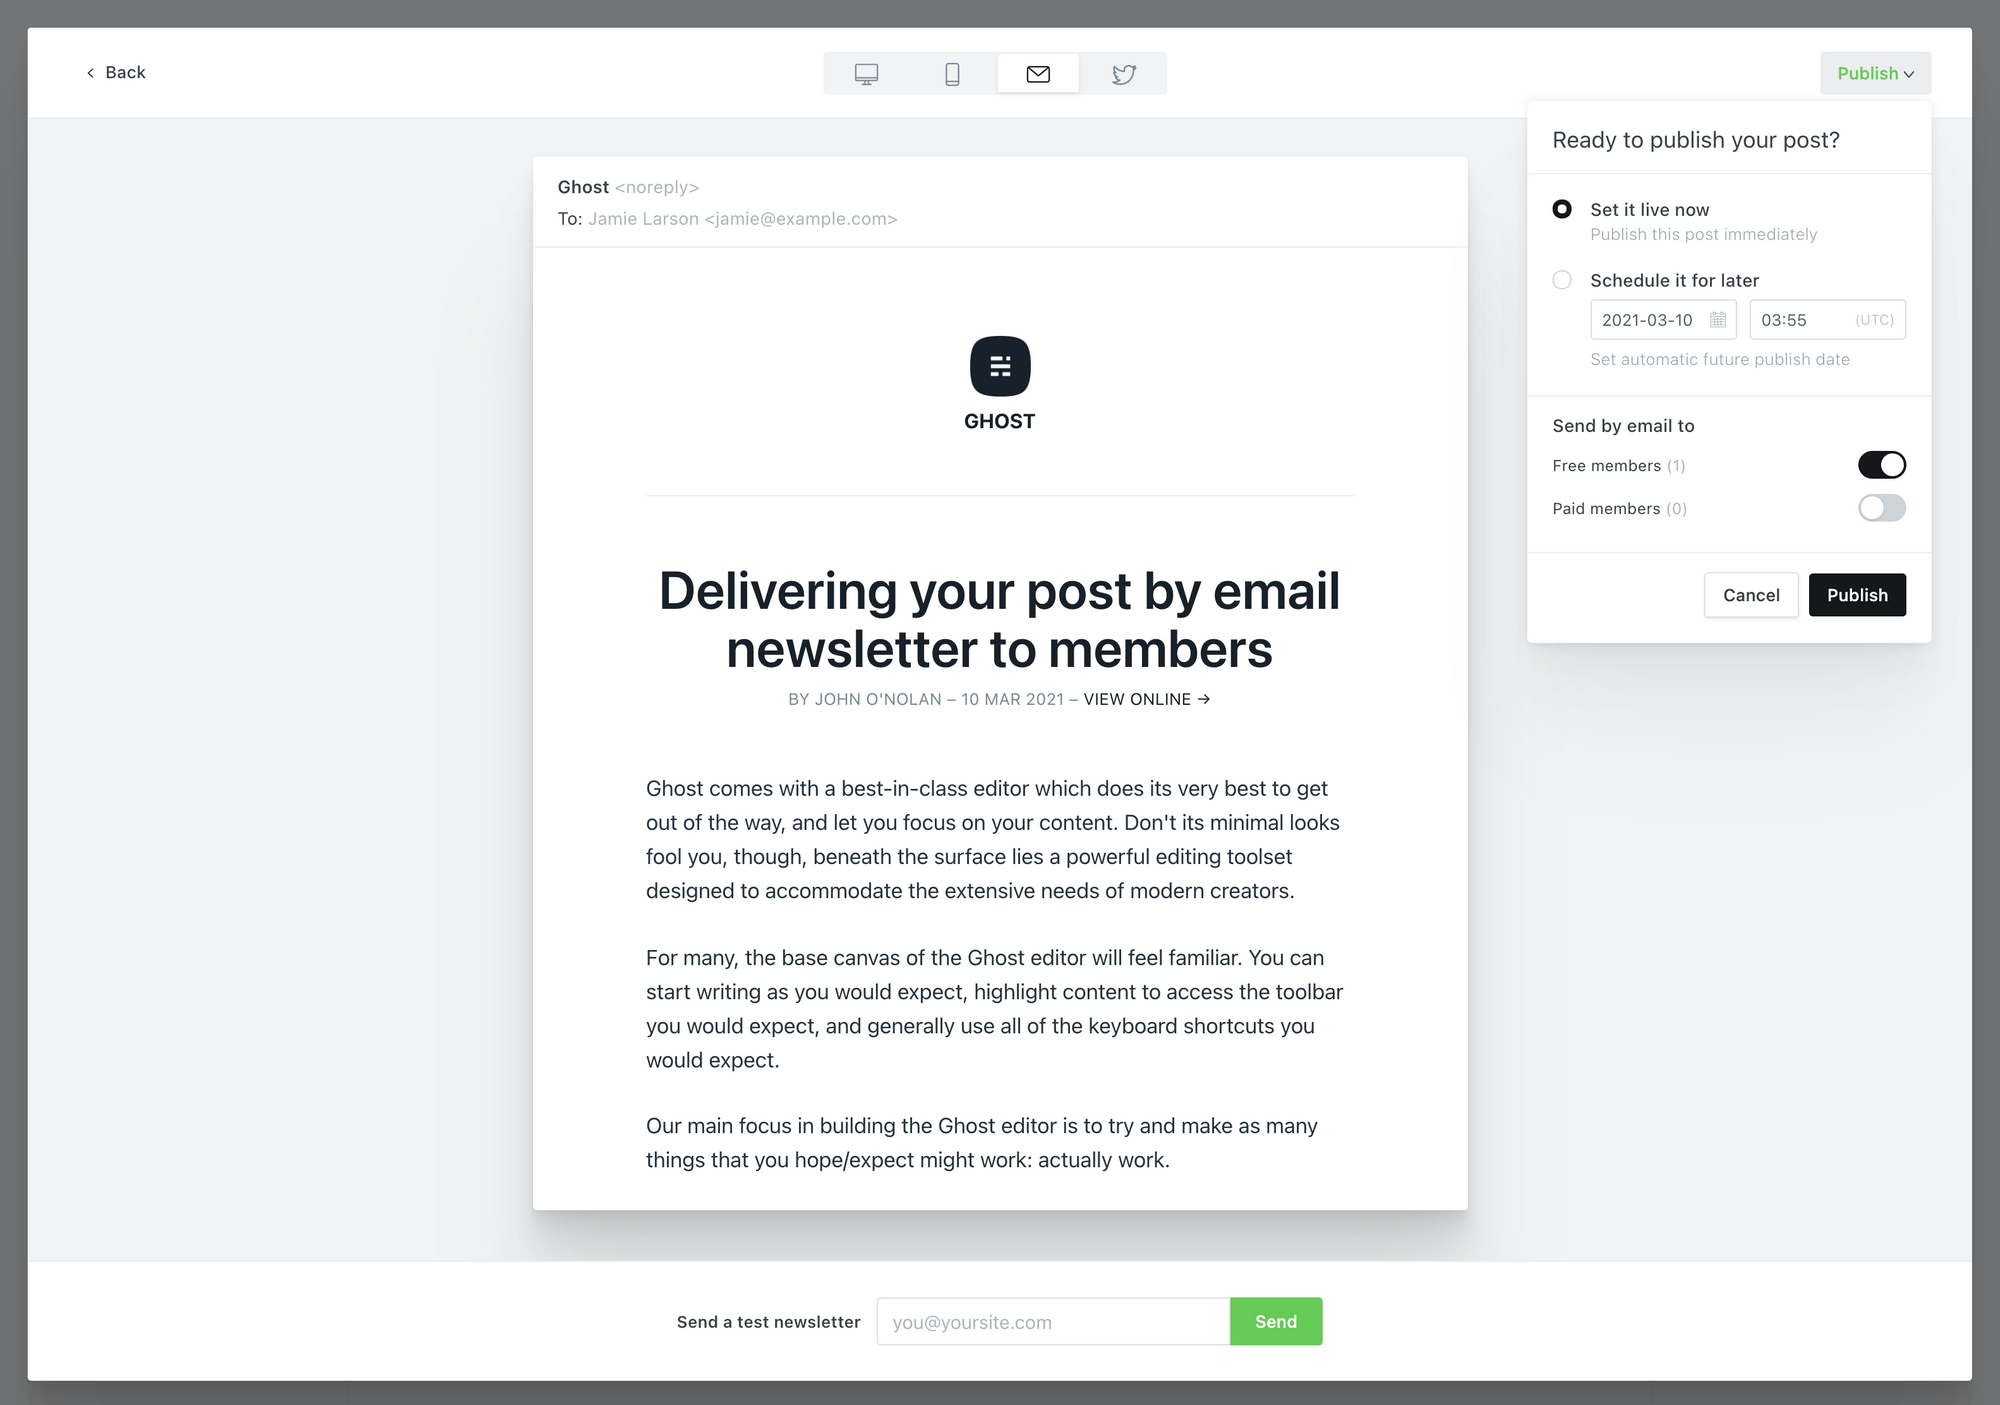
When you're ready to publish, Ghost makes it as simple as possible to deliver your new post to all your existing members. Just hit the Preview link and you'll get a chance to see what your content looks like on Web, Mobile, Email and Social.

Writing and managing content in Ghost, an advanced guide

You can send yourself a test newsletter to make sure everything looks good in your email client, and then hit the Publish button to decide who to deliver it to.

Ghost comes with a streamlined, optimized email newsletter template that has settings built-in for you to customize the colors and typography. We've spent countless hours refining the template to make sure it works great across all email clients, and performs well for email deliverability.

So, you don't need to fight the awful process of building a custom email template from scratch. It's all done already!


The Ghost editor is powerful enough to do whatever you want it to do. With a little exploration, you'll be up and running in no time.

Building your audience with subscriber signups

Post Syndicated from Ghost original https://yovko.net/portal/

Building your audience with subscriber signups

What sets Ghost apart from other products is that you can publish content and grow your audience using the same platform. Rather than just endlessly posting and hoping someone is listening, you can track real signups against your work and have them subscribe to be notified of future posts. The feature that makes all this possible is called Portal.

Portal is an embedded interface for your audience to sign up to your site. It works on every Ghost site, with every theme, and for any type of publisher.

You can customize the design, content and settings of Portal to suit your site, whether you just want people to sign up to your newsletter — or you're running a full premium publication with user sign-ins and private content.

Building your audience with subscriber signups

Once people sign up to your site, they'll receive an email confirmation with a link to click. The link acts as an automatic sign-in, so subscribers will be automatically signed-in to your site when they click on it. There are a couple of interesting angles to this:

Because subscribers are automatically able to sign in and out of your site as registered members: You can (optionally) restrict access to posts and pages depending on whether people are signed-in or not. So if you want to publish some posts for free, but keep some really great stuff for members-only, this can be a great draw to encourage people to sign up!

Ghost members sign in using email authentication links, so there are no passwords for people to set or forget. You can turn any list of email subscribers into a database of registered members who can sign in to your site. Like magic.

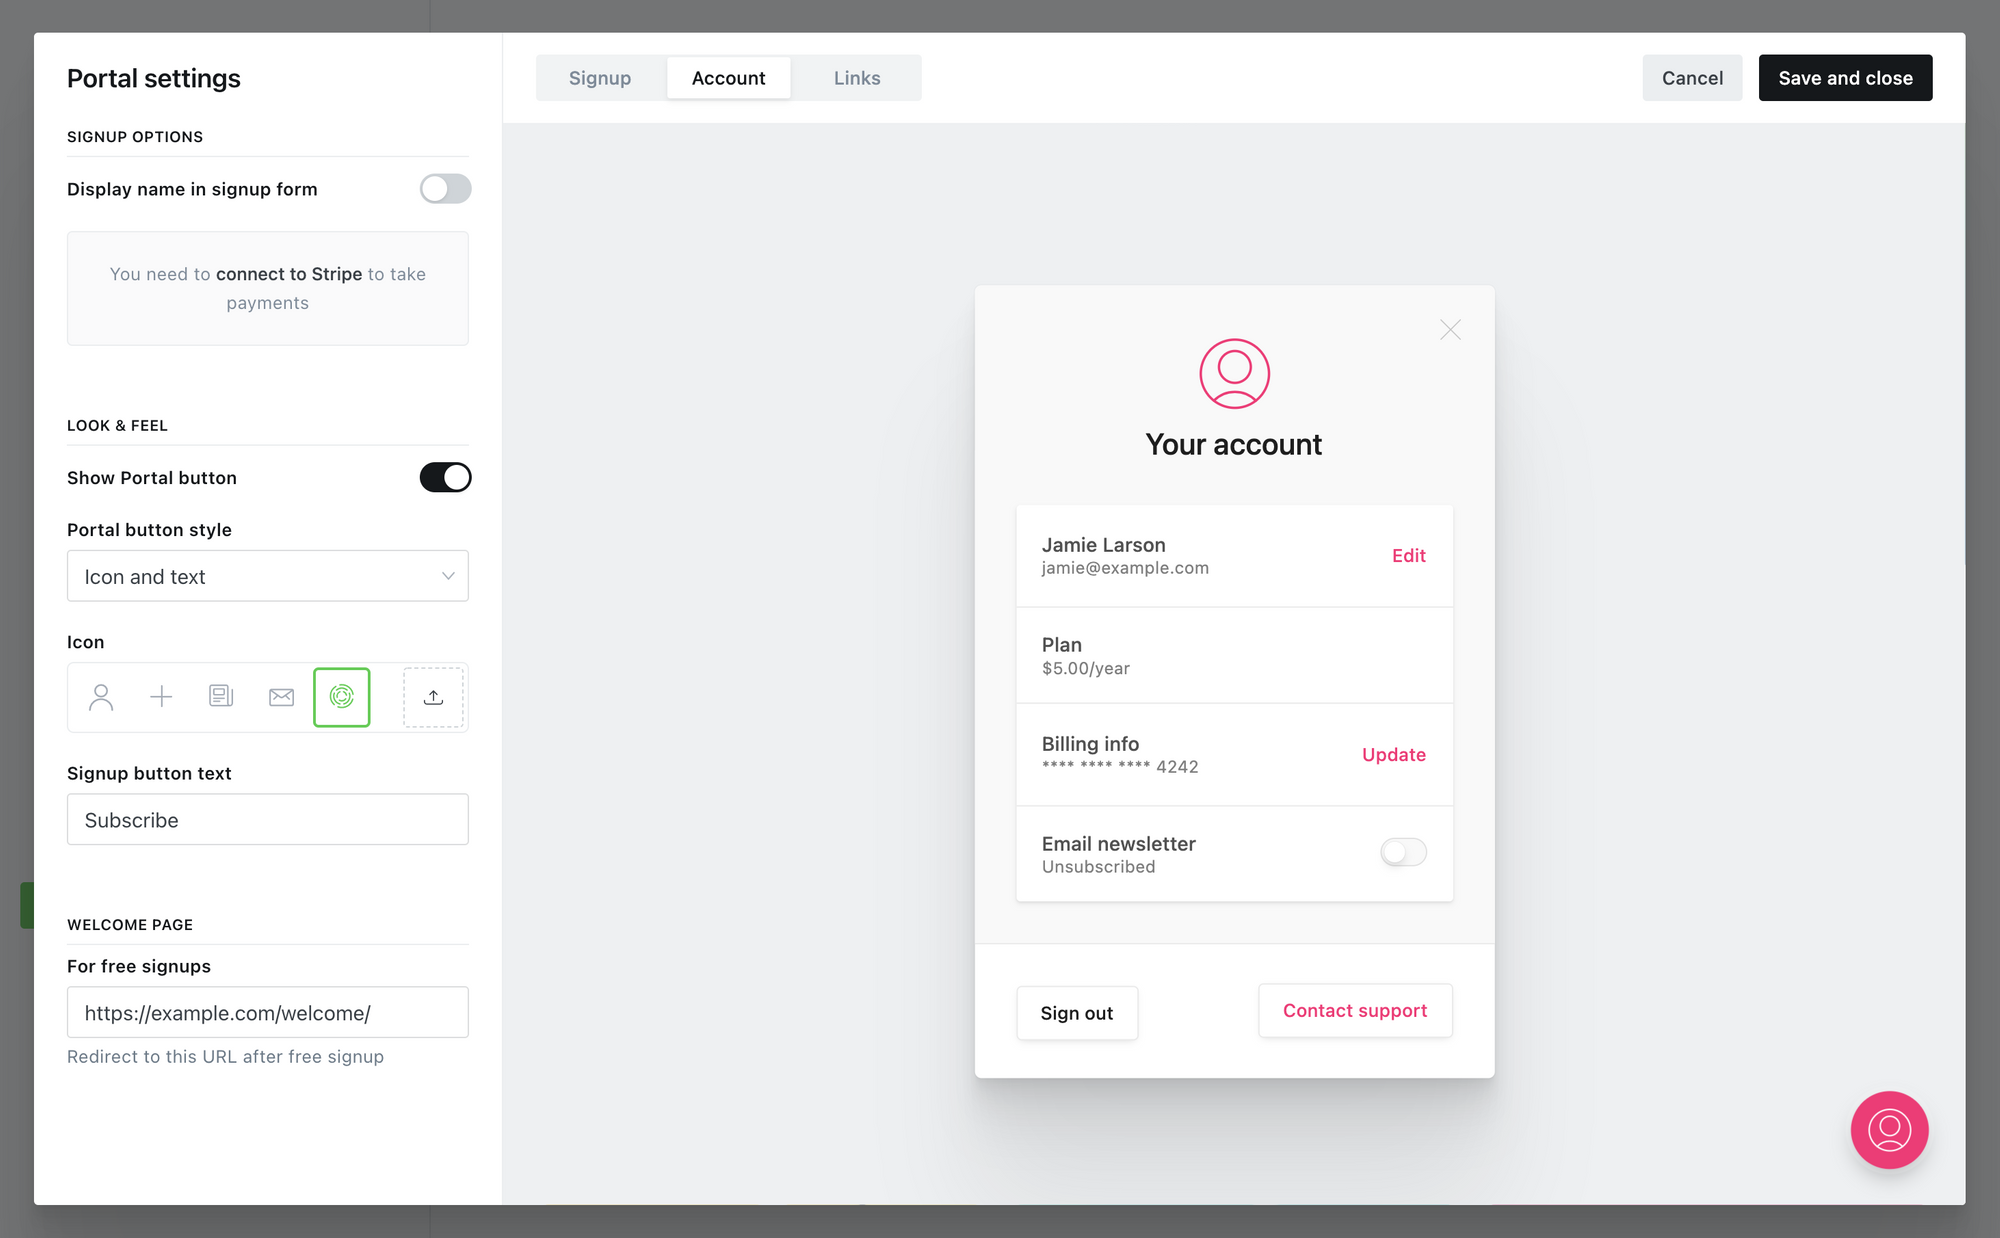
Portal makes all of this possible, and it appears by default as a floating button in the bottom-right corner of your site. When people are logged out, clicking it will open a sign-up/sign-in window. When members are logged in, clicking the Portal button will open the account menu where they can edit their name, email, and subscription settings.

The floating Portal button is completely optional. If you prefer, you can add manual links to your content, navigation, or theme to trigger it instead.

Like this! Sign up here


As you start to grow your registered audience, you'll be able to get a sense of who you're publishing for and where those people are coming from. Best of all: You'll have a straightforward, reliable way to connect with people who enjoy your work.

Social networks go in and out of fashion all the time. Email addresses are timeless.

Growing your audience is valuable no matter what type of site you run, but if your content is your business, then you might also be interested in setting up premium subscriptions.

Selling premium memberships with recurring revenue

Post Syndicated from Ghost original https://yovko.net/sell/

Selling premium memberships with recurring revenue

For creators and aspiring entrepreneurs looking to generate a sustainable recurring revenue stream from their creative work, Ghost has built-in payments allowing you to create a subscription commerce business.

Connect your Stripe account to Ghost, and you'll be able to quickly and easily create monthly and yearly premium plans for members to subscribe to, as well as complimentary plans for friends and family.

Ghost takes 0% payment fees, so everything you make is yours to keep!

Using subscriptions, you can build an independent media business like Stratechery, The Information, or The Browser.

The creator economy is just getting started, and Ghost allows you to build something based on technology that you own and control.

Selling premium memberships with recurring revenue
The Browser has over 10,000 paying subscribers

Most successful subscription businesses publish a mix of free and paid posts to attract a new audience, and upsell the most loyal members to a premium offering. You can also mix different access levels within the same post, showing a free preview to logged out members and then, right when you're ready for a cliffhanger, that's a good time to…

How to grow your business around an audience

Post Syndicated from Ghost original https://yovko.net/grow/

How to grow your business around an audience

As you grow, you'll probably want to start inviting team members and collaborators to your site. Ghost has a number of different user roles for your team:

Contributors
This is the base user level in Ghost. Contributors can create and edit their own draft posts, but they are unable to edit drafts of others or publish posts. Contributors are untrusted users with the most basic access to your publication.

Authors
Authors are the 2nd user level in Ghost. Authors can write, edit and publish their own posts. Authors are trusted users. If you don't trust users to be allowed to publish their own posts, they should be set as Contributors.

Editors
Editors are the 3rd user level in Ghost. Editors can do everything that an Author can do, but they can also edit and publish the posts of others – as well as their own. Editors can also invite new Contributors & Authors to the site.

Administrators
The top user level in Ghost is Administrator. Again, administrators can do everything that Authors and Editors can do, but they can also edit all site settings and data, not just content. Additionally, administrators have full access to invite, manage or remove any other user of the site.

The Owner
There is only ever one owner of a Ghost site. The owner is a special user which has all the same permissions as an Administrator, but with two exceptions: The Owner can never be deleted. And in some circumstances the owner will have access to additional special settings if applicable. For example: billing details, if using Ghost(Pro).

Ask all of your users to fill out their user profiles, including bio and social links. These will populate rich structured data for posts and generally create more opportunities for themes to fully populate their design.


If you're looking for insights, tips and reference materials to expand your content business, here's 5 top resources to get you started:

Setting up apps and custom integrations

Post Syndicated from Ghost original https://yovko.net/integrations/

Setting up apps and custom integrations

It's possible to extend your Ghost site and connect it with hundreds of the most popular apps and tools using integrations.

Whether you need to automatically publish new posts on social media, connect your favorite analytics tool, sync your community or embed forms into your content — our integrations library has got it all covered with hundreds of integration tutorials.

Many integrations are as simple as inserting an embed by pasting a link, or copying a snippet of code directly from an app and pasting it into Ghost. Our integration tutorials are used by creators of all kinds to get apps and integrations up and running in no time — no technical knowledge required.

Setting up apps and custom integrations

Zapier

Zapier is a no-code tool that allows you to build powerful automations, and our official integration allows you to connect your Ghost site to more than 1,000 external services.

Example: When someone new subscribes to a newsletter on a Ghost site (Trigger) then the contact information is automatically pushed into MailChimp (Action).

Here's a few of the most popular automation templates:


Custom integrations

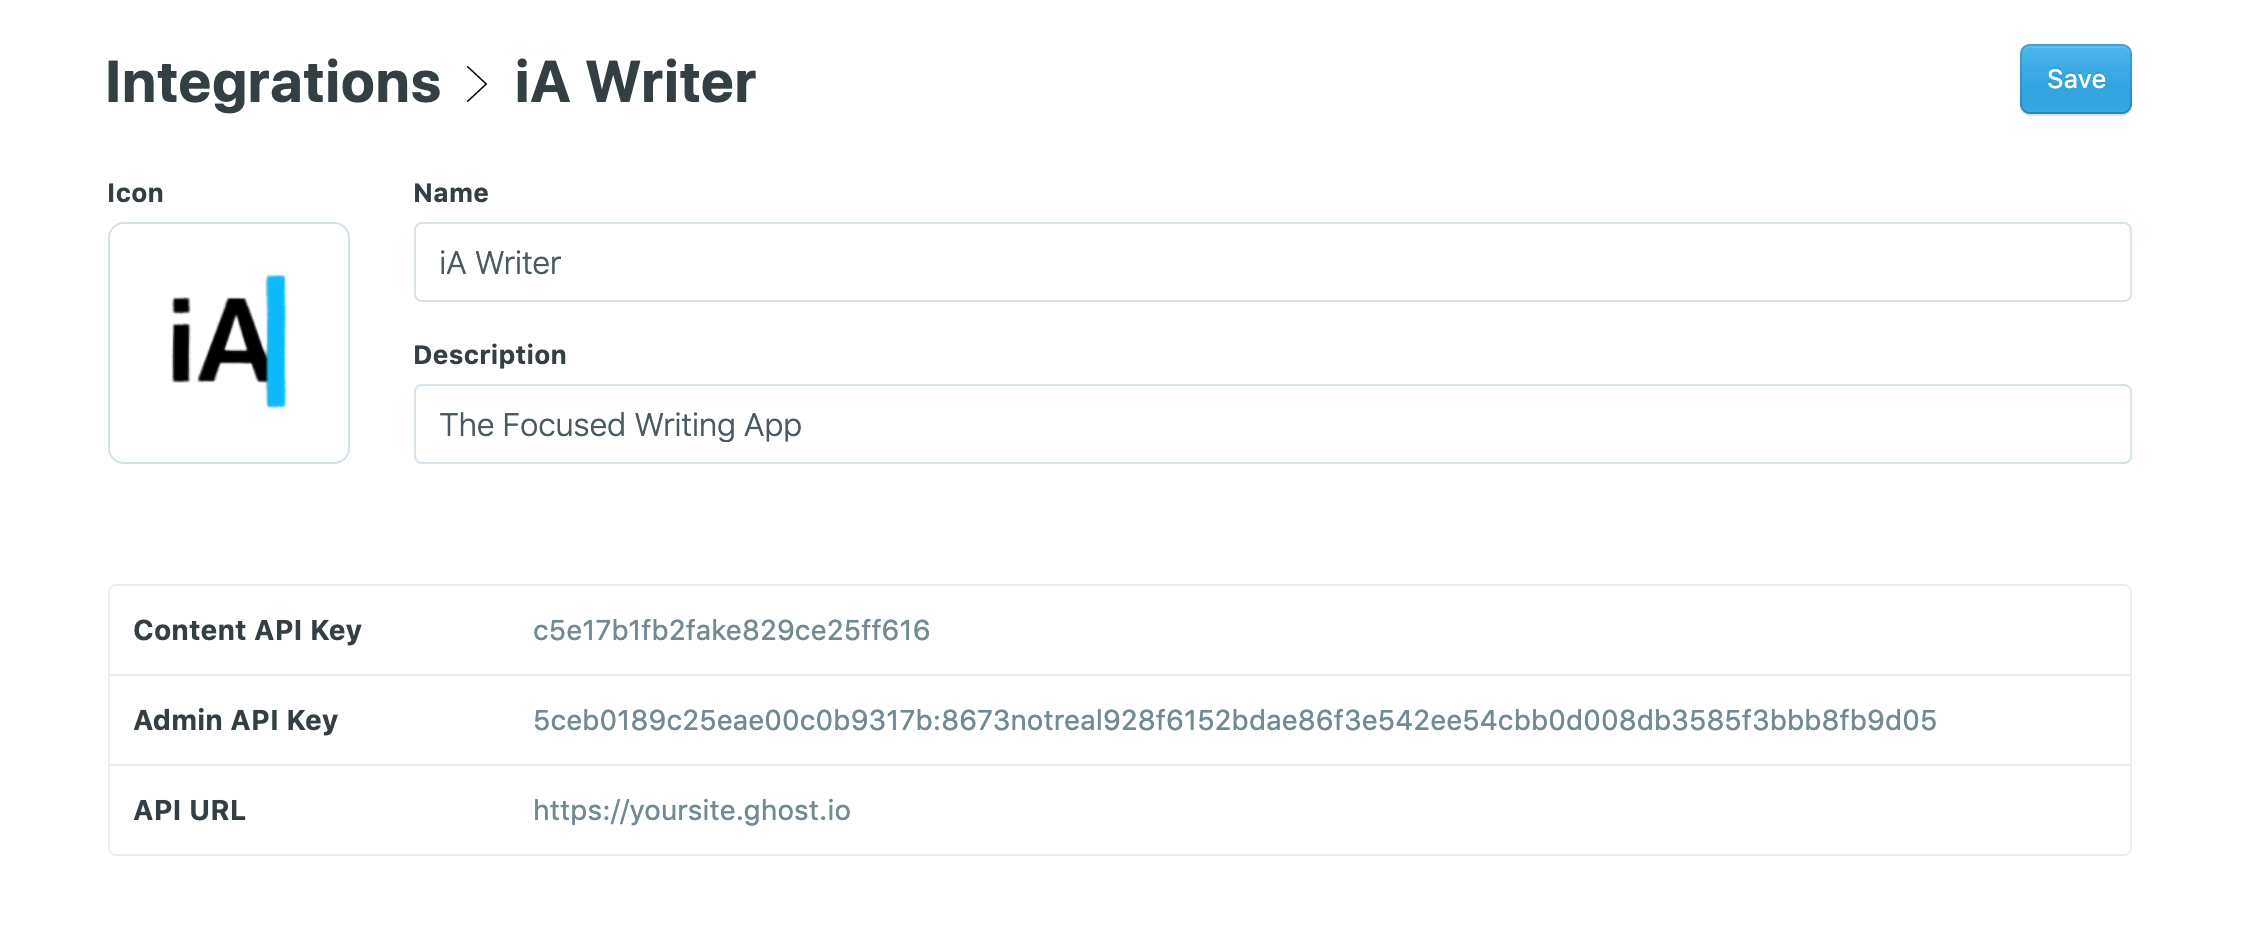
For more advanced automation, it's possible to create custom Ghost integrations with dedicated API keys from the Integrations page within Ghost Admin.

Setting up apps and custom integrations

These custom integrations allow you to use the Ghost API without needing to write code, and create powerful workflows such as sending content from your favorite desktop editor into Ghost as a new draft.

Hiding Vulnerabilities in Source Code

Post Syndicated from Bruce Schneier original https://www.schneier.com/blog/archives/2021/11/hiding-vulnerabilities-in-source-code.html

Really interesting research demonstrating how to hide vulnerabilities in source code by manipulating how Unicode text is displayed. It’s really clever, and not the sort of attack one would normally think about.

From Ross Anderson’s blog:

We have discovered ways of manipulating the encoding of source code files so that human viewers and compilers see different logic. One particularly pernicious method uses Unicode directionality override characters to display code as an anagram of its true logic. We’ve verified that this attack works against C, C++, C#, JavaScript, Java, Rust, Go, and Python, and suspect that it will work against most other modern languages.

This potentially devastating attack is tracked as CVE-2021-42574, while a related attack that uses homoglyphs –- visually similar characters –- is tracked as CVE-2021-42694. This work has been under embargo for a 99-day period, giving time for a major coordinated disclosure effort in which many compilers, interpreters, code editors, and repositories have implemented defenses.

Website for the attack. Rust security advisory.

Brian Krebs has a blog post.

EDITED TO ADD (11/12): An older paper on similar issues.

Security updates for Monday

Post Syndicated from original https://lwn.net/Articles/874623/rss

Security updates have been issued by Arch Linux (bind, chromium, freerdp, opera, webkit2gtk, and wpewebkit), Debian (cron, cups, elfutils, ffmpeg, libmspack, libsdl1.2, libsdl2, opencv, and tiff), Fedora (java-latest-openjdk, stb, and thunderbird), Mageia (cairo, cloud-init, docker, ffmpeg, libcaca, php, squid, and webkit2), openSUSE (busybox, chromium, civetweb, containerd, docker, runc, dnsmasq, fetchmail, flatpak, go1.16, krb5, ncurses, python, python-Pygments, squid, strongswan, transfig, virtualbox, wireguard-tools, and xstream), Red Hat (binutils, devtoolset-10-gcc, and flatpak), SUSE (libvirt, opensc, and transfig), and Ubuntu (webkit2gtk).

Скандалът със субсидиите Екипът на Лаура Кьовеши проверява видеото в „Биволъ“ с Десислава Танева

Post Syndicated from Николай Марченко original https://bivol.bg/%D0%B5%D0%BA%D0%B8%D0%BF%D1%8A%D1%82-%D0%BD%D0%B0-%D0%BB%D0%B0%D1%83%D1%80%D0%B0-%D0%BA%D1%8C%D0%BE%D0%B2%D0%B5%D1%88%D0%B8-%D0%BF%D1%80%D0%BE%D0%B2%D0%B5%D1%80%D1%8F%D0%B2%D0%B0-%D0%B2%D0%B8%D0%B4.html

понеделник 1 ноември 2021


Делегиран към Европейската прокуратура на Лаура Кьовеши прокурор е наблюдаващ по проверката на видеозаписа с участието на бившия министър на земеделието и храните Десислава Танева (ГЕРБ), в който тя моли…

Build workflows for Amazon Forecast with AWS Step Functions

Post Syndicated from James Beswick original https://aws.amazon.com/blogs/compute/build-workflows-for-amazon-forecast-with-aws-step-functions/

This post is written by Péter Molnár, Data Scientist, ML ProServe and Sachin Doshi, Senior Application Architect, ProServe.

This blog builds a full lifecycle workflow for Amazon Forecast to predict household electricity consumption from historic data. Previously, developers used AWS Lambda function to build workflows for Amazon Forecast. You can now use AWS Step Functions with AWS SDK integrations to reduce cost and complexity.

Step Functions recently expanded the number of supported AWS service integrations from 17 to over 200 with AWS API actions from 46 to over 9,000 with AWS SDK service integrations.

Step Functions is a low-code visual workflow service used for workflow automation and service orchestration. Developers use Step Functions with managed services such as artificial intelligence services, Amazon S3, and AWS Glue.

You can create state machines that use AWS SDK Service Integrations with Amazon States Language (ASL), AWS Cloud Development Kit (AWS CDK), AWS Serverless Application Model (AWS SAM), or visually using AWS Step Function Workflow Studio.

To create workflows for AWS AI services like Forecast, you can use Step Functions AWS SDK service integrations. This approach can be simpler because it allows users to build solutions without writing JavaScript or Python code.

Workflow for Amazon Forecast

The solution includes four components:

Solution architecture

  1. IAM role granting Step Functions control over Forecast.
  2. IAM role granting Forecast access to S3 storage locations.
  3. S3 bucket with input data
  4. Define Step Functions state machine and parameters for Forecast.

The repo provides an AWS SAM template to deploy these resources in your AWS account.

Understanding Amazon Forecast

Amazon Forecast is a fully managed service for time series forecasting. Forecast uses machine learning to combine time series data with additional variables to build forecasts.

Using Amazon Forecast involves steps that may take from minutes to hours. Instead of executing each step and waiting for its completion, you use Step Functions to define the steps of the forecasting process.

These are the individual steps of the Step Functions workflow:

Step Functions workflow

  1. Create a dataset: In Forecast, there are three types of datasets, target time series, related time series, and item metadata. The target time series is required and the others provide additional context with certain algorithms.
  2. Import data: This moves the information from S3 into a storage volume where the data is used for training and validation.
  3. Create a dataset group: This is the large box that isolates models and the data they are trained on from each other.
  4. Train a model: Forecast automates this process for you but you can also select algorithms. You can provide your own hyper parameters or use hyperparameter optimization (HPO) to determine the most performant values.
  5. Export back-test results: this creates a detailed table of the model performance.
  6. Deploy a predictor to deploy the model to use it to generate a forecast.
  7. Export forecast to create future predictions.

For more details, read the documentation of the Forecast APIs.

Example dataset

This example uses the individual household electric power consumption dataset. This dataset is available from the UCI Machine Learning Repository. We have aggregated the usage data to hourly intervals.

The dataset has three columns: the timestamp, value, and item ID. These are the minimum required to generate a forecast with Amazon Forecast.

Read more about the data and parameters in https://github.com/aws-samples/amazon-forecast-samples/tree/master/notebooks/basic/Tutorial.

Step Functions AWS SDK integrations

The AWS SDK integrations of Step Functions reduce the need for Lambda functions that call the Forecast APIs. You can call any AWS SDK-compatible service directly from the ASL. Use the following syntax in the resource field of a Step Functions task:

arn:aws:states:::aws-sdk:serviceName:apiAction.[serviceIntegrationPattern]

The following example compares using Step Functions AWS SDK service integrations with calling the boto3 Python method to create a dataset with a corresponding resource in the state machine definition. This is the ASL of a Step Functions state machine:

"States": {
  "Create-Dataset": {
    "Resource": "arn:aws:states:::aws-sdk:forecast:createDataset",
    "Parameters": {
      "DatasetName": "blog_example",
      "DataFrequency": "H",
      "Domain": "CUSTOM",
      "DatasetType": "TARGET_TIME_SERIES",
      "Schema": {
        "Attributes": [
          {
            "AttributeName": "timestamp",
            "AttributeType": "timestamp"
          },
          {
            "AttributeName": "target_value",
            "AttributeType": "float"
          },
          {
            "AttributeName": "item_id",
            "AttributeType": "string"
          }
        ]
      }
    },
    "ResultPath": "$.createDatasetResult",
    "Next": "Import-Data"
  }

The structure is similar to the corresponding boto3 methods. Compare the Python code with the state machine code – it uses the same parameters as calling the Python API:

forecast = boto3.client('forecast')
response = forecast.create_dataset(
             Domain='CUSTOM',
             DatasetType='TARGET_TIME_SERIES',
             DatasetName='blog_example',
             DataFrequency='H', 
             Schema={
               'Attributes': [
                  {
                    'AttributeName': 'timestamp',
                    'AttributeType': 'timestamp'
                  },
                  {
                    'AttributeName': 'target_value',
                    'AttributeType': 'float'
                  },
                  {
                    'AttributeName': 'item_id',
                    'AttributeType': 'string'
                  }
               ]
             }
           )

Handling asynchronous API calls

Several Forecast APIs run asynchronously, such as createDatasetImportJob and createPredictor. This means that your workflow must wait until the import job is completed.

You can use one of two methods in the state machine: create a wait loop, or allow any following task that depends on the completion of the previous task to retry.

In general, it is good practice to allow any task to retry for a few times. For simplicity this example does not include general error handling. Read the blog Handling Errors, Retries, and adding Alerting to Step Function State Machine Executions to learn more about writing robust state machines.

1. State machine wait loop

Wait loop

To wait for an asynchronous task to complete, use the services’ Describe* API methods to get the status of current job. You can implement the wait loop with the native Step Function tasks Choice and Wait.

Here, the task “Check-Data-Import” calls the describeDatasetImportJob API to receive a status value of the running job:

"Check-Data-Import": {
  "Type": "Task",
  "Resource": "arn:aws:states:::aws-sdk:forecast:describeDatasetImportJob",
  "Parameters": {
    "DatasetImportJobArn.$": "$.createDatasetImportJobResult.DatasetImportJobArn"
   },
   "ResultPath": "$.describeDatasetImportJobResult",
   "Next": "Fork-Data-Import"
 },
 "Fork-Data-Import": {
   "Type": "Choice",
   "Choices": [
     {
       "Variable": "$.describeDatasetImportJobResult.Status",
       "StringEquals": "ACTIVE",
       "Next": "Done-Data-Import"
     }
   ],
   "Default": "Wait-Data-Import"
 },
 "Wait-Data-Import": {
   "Type": "Wait",
   "Seconds": 60,
   "Next": "Check-Data-Import"
 },
 "Done-Data-Import": {
   "Type": "Pass",
   "Next": "Create-Predictor"
 },

2. Fail and retry

Alternatively, use the Retry parameter to specify how to repeat the API call in case of an error. This example shows how the attempt to create the forecast is repeated if the resource that it depends on is not created. In this case, the preceding task of creating the predictor.

The time between retries is set to 180 seconds and the number of retries must not exceed 100. This means that the workflow waits 3 minutes before trying again. The longest time to wait for the ML training is five hours.

With the BackoffRate set to 1, the wait interval of 3 minutes remains constant. Value greater that 1 may reduce the number of retries but may also add increased wait time for training jobs that run for several hours:

"Create-Forecast": {
  "Type": "Task",
  "Resource": "arn:aws:states:::aws-sdk:forecast:createForecast",
  "Parameters": {
    "ForecastName.$": "States.Format('{}_forecast', $.ProjectName)",
    "PredictorArn.$": "$.createPredictorResult.PredictorArn"
   },
   "ResultPath": "$.createForecastResult",
   "Retry": [
     {
       "ErrorEquals": ["Forecast.ResourceInUseException"],
       "IntervalSeconds": 180,
       "BackoffRate": 1.0,
       "MaxAttempts": 100
     }
   ],
   "Next": "Forecast-Export"
 },

Deploying the workflow

The AWS Serverless Application Model Command Line Interface (AWS SAM CLI) is an extension of the AWS CLI that adds functionality for building and testing serverless applications. Follow the instructions to install the AWS SAM CLI.

To build and deploy the application:

  1. Clone the GitHub repo:
    git clone https://github.com/aws-samples/aws-stepfunctions-examples/tree/main/sam/demo-forecast-service-integration
  2. Change directory to cloned repo.
    cd demo-forecast-service-integration
  3. Enable execute permissions for the deployment script
    chmod 700 ./bootstrap_deployment_script.sh
  4. Execute the script with a stack name of your choosing as parameter.
    ./bootstrap_deployment_script.sh <Here goes your stack name>

The script builds the AWS SAM template and deploys the stack under the given name. The AWS SAM template creates the underlying resources like S3 bucket, IAM policies, and Step Functions workflow. The script also copies the data file used for training to the newly created S3 bucket.

Running the workflow

After the AWS SAM Forecast workflow application is deployed, run the workflow to train a forecast predictor for the energy consumption:

  1. Navigate to the AWS Step Functions console.
  2. Select the state machine named “ForecastWorkflowStateMachine-*” and choose New execution.
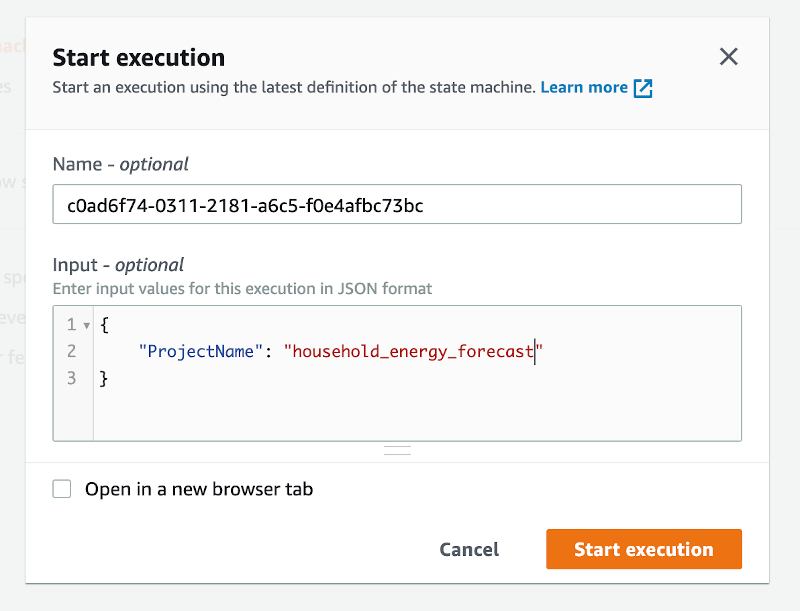
  3. Define the “ProjectName” parameter in form of a JSON structure. The name for the Forecast Dataset group is “household_energy_forecast”.
    Start execution
  4. Choose Start execution.

Viewing resources in the Amazon Forecast console

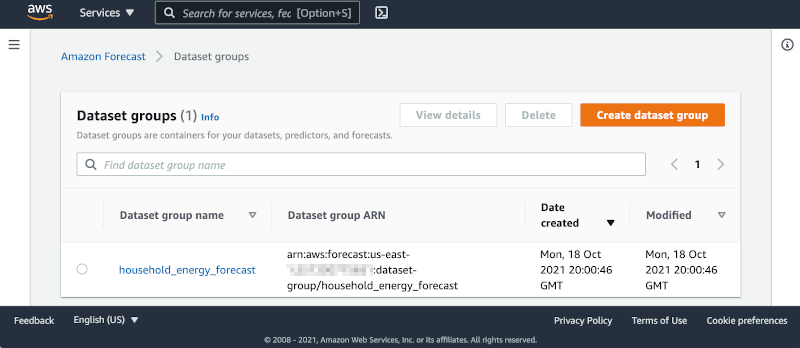
Navigate to the Amazon Forecast console and select the data set group “household_energy_forecast”. You can see the details of the Forecast resource as they are created. The provided state machine executes every step in the workflow and then deletes all resources, leaving the output files in S3.

Amazon Forecast console

You can disable the clean-up process by editing the state machine:

  1. Choose Edit to open the editor.
  2. Find the tasks “Clean-Up” and change the “Next” state from “Delete-Forecast_export” to “SuccessState”.
    "Clean-Up": {
       "Type": "Pass",
       "Next": "SuccessState"
    },
    
  3. Delete all tasks named Delete-*.

Remember to delete the dataset group manually if you bypass the clean-up process of the workflow.

Analyzing Forecast Results

The forecast workflow creates a folder “forecast_results” for all of its output files. In there you find the subfolders “backtestexport” with data produced by Backtest-Export task, and “forecast” with the predicted energy demand forecast produced by the Forecast-Export job.

The “backtestexport” folder contains two tables: “accuracy-metrics-values” with the model performance accuracy metrics, and “forecast-values” with the predicted forecast values of the training set. Read the blog post Amazon Forecast now supports accuracy measurements for individual items for details.

The forecast predictions are stored in the “forecast” folder. The table contains forecasts at three different quantiles: 10%, 50% and 90%.

The data files are partitioned into multiple CSV files. In order to analyze them, first download and merge the files into proper tables. Use the AWS CLI command to download

BUCKET="<your account number>-<your region>-sf-forecast-workflow"
aws s3 cp s3://$BUCKET/forecast_results . –recursive

Alternatively, you may import and analyze the data into Amazon Athena.

Cleaning up

To delete the application that you created, use the AWS SAM CLI.

sam delete --stack-name <Here goes your stack name>

Also delete the data files in the S3 bucket. If you skipped the clean-up tasks in your workflow, you must delete the dataset group from the Forecast console.

Important things to know

Here are things know, that will help you to use AWS SDK service integration:

  • Call AWS SDK services directly from the ASL in the resource field of a task state. To do this, use the following syntax: arn:aws:states:::aws-sdk:serviceName:apiAction.[serviceIntegrationPattern]
  • Use camelCase for apiAction names in the Resource field, such as “copyObject”, and use PascalCase for parameter names in the Parameters field, such as “CopySource”.
  • Step Functions cannot generate IAM policies for most AWS SDK service integrations. You must add those to the IAM role of the state machine explicitly.

Learn more about this new capability by reading its documentation.

Conclusion

This post shows how to create a Step Functions workflow for Forecast using AWS SDK service integrations, which allows you to use over 200 with AWS API actions. It shows two patterns for handling asynchronous tasks. The first pattern queries the describe-* API repeatedly and the second pattern uses the “Retry” option. This simplifies the development of workflows because in many cases they can replace Lambda functions.

For more serveless learning resources, visit Serverless Land.

The “Trojan Source” vulnerability

Post Syndicated from original https://lwn.net/Articles/874546/rss

The latest branded and trademarked vulnerability type is called “Trojan Source“. By playing tricks
with Unicode bidirectional support, an attacker can create malicious code
that appears to be benign to reviewers. “The attack is to use
control characters embedded in comments and strings to reorder source code
characters in a way that changes its logic.
” Various releases,
including Rust
1-56.1
,
are being made to address this problem.

Field Notes: Analyze Cross-Account AWS KMS Call Usage with AWS CloudTrail and Amazon Athena

Post Syndicated from Abhijit Rajeshirke original https://aws.amazon.com/blogs/architecture/field-notes-analyze-cross-account-aws-kms-call-usage-with-aws-cloudtrail-and-amazon-athena/

Businesses are expanding their footprint on Amazon Web Services (AWS) and are adopting a multi-account strategy to help isolate and manage business applications and data. In the multi-account strategy, it is common to have business applications deployed in one account accessing an Amazon Simple Storage Service (Amazon S3) encrypted bucket from another AWS account.

When an application in an AWS account uses a AWS Key Management Service (AWS KMS) key owned by a different account, it’s known as a cross-account call. For cross-account requests, AWS KMS throttles the account that makes the requests, not the account that owns the AWS KMS key. These requests count toward the request quota of the caller account. Sometimes it’s essential to identify or track cross-account AWS KMS API usage. In this blog, you will learn about use cases to track these requests and steps to identify cross-account AWS KMS calls.

To understand the problem better, consider a scenario where you have multiple AWS accounts set up in a hub and spoke configuration as shown in the following diagram.  Each account is administered by a different administrator. Amazon S3 data lake is located in the centralized hub account. The data lake bucket is encrypted using server-side encryption with AWS KMS (SSE-KMS) with customer-managed keys. Multiple spoke accounts access datasets from this data lake bucket. When a spoke account uploads or downloads objects from the data lake, Amazon S3 makes a GenerateDataKey (for uploads) or Decrypt (for downloads) API request to AWS KMS on behalf of the spoke account. These API requests get applied toward AWS KMS quota of the spoke account.

In the following diagram (figure 1), spoke accounts B, C, and D are uploading/downloading files from the encrypted data lake located in hub account A. Related AWS KMS API quotas will get applied to spoke accounts even though encryption/decryption is happening at the data lake S3 bucket. For example, the centralized Amazon S3 data lake is located in hub account A with an account ID 111111111111. Amazon S3 data lake bucket is encrypted using AWS KMS key ARN ending in 3aa3c82a2174.

Spoke account B with account ID 222222222222 is downloading 1,811 files and uploading 749 files from the centralized data lake. A total of 2,560 AWS KMS API calls will be counted against the request quota for account B.

Spoke account C with account ID 33333333333 is downloading 997 files and uploading 271 files from centralized data lake. A total of 1,268 AWS KMS API calls will be counted against the request quota for account C.

Spoke account D with account ID 444444444444 is downloading 638 files and uploading 306 files from centralized data lake from centralized data lake. The total 944 AWS KMS API quotas will get applied to account D.

Spoke and hub accounts are owned by separate business units and owned by different account administrators.

Note: when you configure your bucket to use an S3 Bucket Key for SSE-KMS, you may not see separate Decrypt or GenerateDataKey for each file upload or download.

Figure 1: Architecture outlining the hub and spoke accounts

Figure 1: Architecture outlining the hub and spoke accounts

This architecture design works for the following three use cases.

Use case #1:

A spoke account administrator wants to track the individual AWS KMS key-wise encryption/decryption costs using AWS Cost Explorer and cost allocation tags. Tracking costs this way works well for the AWS KMS API calls made within the same spoke account and related costs will be displayed under appropriate cost allocation tags. However, for the cross account AWS KMS API calls, cost allocation tags will not be visible outside of the hub account and will be displayed under cost allocation tag “None.” Analyzing cross-account AWS KMS API calls will help administrator determine approximate percentage usage by each cross account KMS key.

Use case # 2:

The spoke account has multiple applications, and each application has a unique AWS Identity and Access Management (IAM) principal. The spoke account administrator would like to track encryption/decryption usage. Identifying IAM principal-wise cross account calls will help the administrator determine approximate percent usage by each IAM principal /each application.

Use case # 3:

The spoke account administrator wants to understand how much AWS KMS quota is used for the cross-account specific KMS keys.

Solution Overview

Let’s discuss how we can track cross-account AWS KMS calls using AWS CloudTrail and Amazon Athena. For this solution, we will reuse your existing CloudTrail or create new CloudTrail in a Region where the hub account Amazon S3 data lake is located. As shown in the following diagram, we will use Athena to query the CloudTrail data to identify cross account AWS KMS calls used for S3 encryption/decryption.

Figure 2- Spoke and hub architecture

Figure 2: Architecture outlining the CloudTrail and Athena Solution

Prerequisites

For this walkthrough, you should have the following prerequisites:

  • AWS accounts (one for hub and at least one for spoke)
  • AWS KMS (SSE-KMS) with customer managed keys encrypted S3 bucket

Walkthrough

Step 1: Activate AWS CloudTrail for the hub account

CloudTrail is a service that enables governance, compliance, operational auditing, and risk auditing of your AWS account. With CloudTrail, you can log, continuously monitor, and retain account activity across your AWS accounts. If you have already activated CloudTrail, you can reuse the same. If you haven’t, you can activate it using the steps in this tutorial. For the proposed solution, you must enable CloudTrail for management events only. You don’t require CloudTrail for data events or insight events. Also, be aware that you need only single CloudTrail and creating duplicate cloud trails can increase the service cost.

Note:  you can analyze the data in Athena only when the CloudTrail data is available. Any access requests made prior to enabling CloudTrail cannot be analyzed. It takes up to 15 minutes for events to get to CloudTrail, and up to 5 minutes for CloudTrail to write to S3.

Step 2: Create Amazon Athena table to query the CloudTrail data

Amazon Athena is an interactive query service that analyzes data in Amazon S3 using standard SQL. Athena is serverless, so there is no infrastructure to manage, and you pay only for the queries that you run. Create an Athena table in any database or default database in a Region where your hub account S3 data lake bucket resides.

If you are using Athena for the first time, follow these steps to create a database. Once the database is created you need to create Athena table. Follow these steps to create a table:

  1. Open the Athena built-in query editor,
  2. copy the following query,
  3. modify as suggested,
  4. run the query.

In the LOCATION and storage.location.template clauses, replace the bucket with CloudTrail bucket. Replace accountId with hub account’s ID and replace awsRegion with region where data lake S3 bucket is located. For projection.timestamp.range, replace 2020/01/01 with the start date you want to use.

After successful initiation of the query, you will see the CloudTrail_logs table created in Athena.

CREATE EXTERNAL TABLE cloudtrail_logs_region(

    eventVersion STRING,

    userIdentity STRUCT<

        type: STRING,

        principalId: STRING,

        arn: STRING,

        accountId: STRING,

        invokedBy: STRING,

        accessKeyId: STRING,

        userName: STRING,

        sessionContext: STRUCT<

            attributes: STRUCT<

                mfaAuthenticated: STRING,

                creationDate: STRING>,

            sessionIssuer: STRUCT<

                type: STRING,

                principalId: STRING,

                arn: STRING,

                accountId: STRING,

                userName: STRING>>>,

    eventTime STRING,

    eventSource STRING,

    eventName STRING,

    awsRegion STRING,

    sourceIpAddress STRING,

    userAgent STRING,

    errorCode STRING,

    errorMessage STRING,

    requestParameters STRING,

    responseElements STRING,

    additionalEventData STRING,

    requestId STRING,

    eventId STRING,

    readOnly STRING,

    resources ARRAY<STRUCT<

        arn: STRING,

        accountId: STRING,

        type: STRING>>,

    eventType STRING,

    apiVersion STRING,

    recipientAccountId STRING,

    serviceEventDetails STRING,

    sharedEventID STRING,

    vpcEndpointId STRING

  )

PARTITIONED BY (

   `timestamp` string)

ROW FORMAT SERDE 'com.amazon.emr.hive.serde.CloudTrailSerde'

STORED AS INPUTFORMAT 'com.amazon.emr.cloudtrail.CloudTrailInputFormat'

OUTPUTFORMAT 'org.apache.hadoop.hive.ql.io.HiveIgnoreKeyTextOutputFormat'

LOCATION

  's3://bucket/AWSLogs/account-id/CloudTrail/aws-region'

TBLPROPERTIES (

  'projection.enabled'='true',

  'projection.timestamp.format'='yyyy/MM/dd',

  'projection.timestamp.interval'='1',

  'projection.timestamp.interval.unit'='DAYS',

  'projection.timestamp.range'='2020/01/01,NOW',

  'projection.timestamp.type'='date',

  'storage.location.template'='s3://bucket/AWSLogs/account-id/CloudTrail/aws-region/${timestamp}')

Athena screenshot

Step 3: Identify cross account Amazon S3 encryption/decryption calls

Once the Athena table is created, you can run the following query to find out cross-account AWS KMS calls made for S3 encryption /decryption.

Query:

SELECT useridentity.accountid as requestor_account_id,

              resources[1].accountid as owner_account_id,

              resources[1].arn as key_arn,       

          count(resources) as count

  FROM CloudTrail_logs_us_east_2

  WHERE eventsource='kms.amazonaws.com'

          AND timestamp between '2021/04/01' and '2021/08/30'

          AND eventname in ('Decrypt','Encrypt','GenerateDataKey')

          AND useridentity.accountid!= resources[1].accountid

    AND json_extract(json_extract(requestparameters , '$.encryptionContext'),'$.aws:s3:arn') is not null

  GROUP BY  useridentity.accountid,resources[1].accountid,resources[1].arn

  ORDER BY  key_arn,count desc

Result:

Result displays the cross account AWS KMS calls made for S3 encryption /decryption i.e. where caller account is not the key owner account for time period between April 1, 2021 and August 30, 2021.

Athena screenshot 2

The preceding example shows cross-account AWS KMS API calls generated by downloading /uploading files from centralized Amazon S3 data lake located in account A (111111111111) from spoke accounts B (222222222222), C (333333333333), and D (444444444444).

These AWS KMS quotas will get applied to caller (spoke) accounts even though key owner is hub account.

For example:

  • 2,560 AWS KMS API call quotas will be applied to account B.
  • 1,644 AWS KMS API call quotas will be applied to account C.
  • 944 AWS KMS API call quotas will be applied to account D.

Step 4: Identify IAM principal-wise cross account Amazon S3 encryption/decryption calls.

To identify IAM principal-wise cross account Amazon S3 encryption /decryption calls, you can run following query.

Query:

SELECT useridentity.accountid as requestor_account_id,
useridentity.principalid as requestor_principal,
resources[1].accountid as owner_account_id,
resources[1].arn as key_arn,
count(resources) as count
FROM CloudTrail_logs_us_east_2
WHERE eventsource='kms.amazonaws.com'
AND timestamp between '2021/04/01' and '2021/08/30'
AND eventname in ('Decrypt','Encrypt','GenerateDataKey')
AND useridentity.accountid!= resources[1].accountid
AND json_extract(json_extract(requestparameters , '$.encryptionContext'),'$.aws:s3:arn') is not null
GROUP BY useridentity.accountid,useridentity.principalid,resources[1].accountid,resources[1].arn
ORDER BY requestor_account_id,count desc

Result:

Athena screenshot 3

The preceding result shows  AWS Identity and Access Management (IAM) principal-wise cross-account AWS KMS API calls made between hub and spoke accounts. For example, Account B (22222222222) has two applications configured with IAM principals ids ending with 4C5VIMGI2, 4YFPRTQMP are accessing the centralized S3 bucket located in hub account A (111111111111).

For the time period between ‘2021/04/01’ and ‘2021/08/30’, the application configured with IAM principal ending in 4C5VIMGI2 made 1622 cross-account AWS KMS API calls. During this same time period, the application configured with IAM principal 4YFPRTQMP made 936 cross-account AWS KMS API calls.

We can further filter the results to see only KMS key ARN ending with 3aa3c82a2174 to get application- wise % of AWS KMS API calls made to the Amazon S3 centralized data lake from all the spoke accounts.

account ID table

Note:  we assume that each application is configured with a unique IAM principal.

Step 5: Identify cross account Amazon S3 encryption/decryption calls by events.

Query:

SELECT useridentity.accountid as requestor_account_id,

              resources[1].accountid as owner_account_id,

              resources[1].arn as key_arn,

              eventname as eventname,

          count(resources) as count

  FROM CloudTrail_logs_us_east_2

  WHERE eventsource='kms.amazonaws.com'

          AND timestamp between '2021/04/01' and '2021/08/30'

          AND useridentity.accountid!= resources[1].accountid

        AND json_extract(json_extract(requestparameters , '$.encryptionContext'),'$.aws:s3:arn') is not null

  GROUP BY useridentity.accountid, resources [1].accountid,resources[1].arn,eventname

  ORDER BY requestor_account_id,count desc

Result:

Athena screenshot 4

Amazon S3 makes decrypt API requests when you download the files and GenerateDataKey API request when you upload the file to encrypted S3 bucket. The result shows that:

  • Spoke account B (22222222222) made 1811 decrypt API requests to download 1811 files and 749 GenerateDataKey API requests to uploaded 749 files.
  • Spoke account C (33333333333) made 1373 decrypt API requests to download 1373 files and 271 GenerateDataKey API requests to uploaded 271 files.
  • Spoke account D (444444444444) made 638 decrypt API requests to download 638 files and 306 GenerateDataKey API requests to uploaded 306 files.

Note: When you configure your bucket to use an S3BucketKey for SSE-KMS, you may not have a separate Decrypt or GenerateDataKey for each file upload or download.

Step 6: Identify all the AWS KMS Calls.

To analyze the hub account for all the AWS KMS API calls made, run following query.

Query:

SELECT useridentity.accountid as requestor_account_id,

              resources[1].accountid as owner_account_id,

              resources[1].arn as key_arn,

          count(resources) as count

  FROM CloudTrail_logs_us_east_2

  WHERE eventsource='kms.amazonaws.com'

          AND timestamp between '2021/04/01' and '2021/08/30'

  GROUP BY useridentity.accountid, resources [1].accountid,resources[1].arn

  ORDER BY requestor_account_id,count desc

Result:

Athena screenshot 5

Results show all the AWS KMS API calls made in the hub account both within the account and across accounts. From this result, we can analyze that for centralized S3 data lake (KMS key ARN ending with 3aa3c82a2174), the majority of the calls are cross account AWS KMS API call and only 303 calls are made within account. You can do further analysis by refining the Amazon Athena queries based on your needs.

Cleaning up

To avoid incurring future charges, delete the resources that are no longer required.

Step 1: Delete the CloudTrail created in hub account

If you have created CloudTrail specifically for this solution, you can delete the CloudTrail by following the instructions in this user guide.

Step 2: Drop the Amazon Athena table

Log in to the Amazon Athena console and run the following drop table query:

Drop table < CloudTrail_logs_aws_region_1>

Conclusion

Tracking use of the cross-account AWS KMS APIs can be challenging in a multi-account scenario. In this blog, we learned how to use AWS CloudTrail and Amazon Athena to analyze AWS KMS API usage. In a hub and spoke account model, cross-account AWS KMS API quotas are applied to the spoke account when the spoke account accesses SSE-KMS encrypted S3 bucket in the hub account. You learned to analyze cross-account AWS KMS API quotas using AWS CloudTrail and Amazon Athena.  Finally, we learned how we can identify all the AWS KMS API call within account for period of time and analyze AWS KMS API traffic within account and across account. You can repeat the process and aggregate the data across Regions.

Additional Reading:

Manage your AWS KMS API request rates using Service Quotas and Amazon CloudWatch

Why did my CloudTrail cost and usage increase unexpectedly?

User Guide: Managing CloudTrail Costs

GitLab Unauthenticated Remote Code Execution CVE-2021-22205 Exploited in the Wild

Post Syndicated from Jake Baines original https://blog.rapid7.com/2021/11/01/gitlab-unauthenticated-remote-code-execution-cve-2021-22205-exploited-in-the-wild/

GitLab Unauthenticated Remote Code Execution CVE-2021-22205 Exploited in the Wild

On April 14, 2021, GitLab published a security release to address CVE-2021-22205, a critical remote code execution vulnerability in the service’s web interface. At the time, GitLab described the issue as an authenticated vulnerability that was the result of passing user-provided images to the service’s embedded version of ExifTool. A remote attacker could execute arbitrary commands as the git user due to ExifTool’s mishandling of DjVu files, an issue that was later assigned CVE-2021-22204.

CVE-2021-22205 was initially assigned a CVSSv3 score of 9.9. However, on September 21, 2021 GitLab revised the CVSSv3 score to 10.0. The increase in score was the result of changing the vulnerability from an authenticated issue to an unauthenticated issue. Despite the tiny move in CVSS score, a change from authenticated to unauthenticated has big implications for defenders. Rapid7’s vulnerability research team has a full root cause analysis of CVE-2021-22205 in AttackerKB.

There are multiple recently published public exploits for this vulnerability, and it reportedly has been exploited in the wild since June or July of 2021. We expect exploitation to increase as details of the unauthenticated nature of this vulnerability become more widely understood.

According to GitLab’s April 2021 advisory, CVE-2021-22205 affects all versions of both GitLab Enterprise Edition (EE) and GitLab Community Edition (CE) starting from 11.9. The vulnerability was patched in the following versions:

  • 13.10.3
  • 13.9.6
  • 13.8.8

Versions in the wild

At the time of writing (October 31, 2021), patches have been available for GitLab for more than six months. However, analysis of internet-facing GitLab instances suggests that a large number are still vulnerable.

We can see just short of 60,000 internet-facing GitLab installations. Unfortunately, GitLab’s web interface does not have an easy-to-extract version string. But by using the appearance of application_utilities about a year ago and then the migration of application_utilities into loading hints header, we can break the internet-facing GitLab installs into three categories: unpatched, maybe patched, and patched.

Of the 60,000 this is what we found:

  • 21% of installs are fully patched against this issue.
  • 50% of installs are not patched against this issue.
  • 29% of installs may or may not be vulnerable.

Mitigation guidance

Rapid7’s emergent threat response team has a full technical analysis of CVE-2021-22205 in AttackerKB, along with several ways for GitLab customers to determine whether they may be running vulnerable versions.

GitLab users should upgrade to the latest version of GitLab as soon as possible.

Rapid7 customers

Our researchers are currently evaluating the feasibility of adding a vulnerability check for CVE-2021-22205.

NEVER MISS A BLOG

Get the latest stories, expertise, and news about security today.

Защо не трябва да се броят 100% от контролните разписки от машинното гласуване?

Post Syndicated from Bozho original https://blog.bozho.net/blog/3852

Демократична България обжалва решението на ЦИК за 100% преброяване на контролите разписки (по партии/коалиции) и вписването на този резултат в отделни протоколи. Аргументите са изложени в детайли в жалбата, ето „накратко“:

  • ЦИК няма право да дописва така Изборния кодекс. В Изборния кодекс се казва нищо такова, ЦИК си измисля правила. И то същия ЦИК, който преди 2 седмици каза „щом не пише изрично, че може с електронен подпис, значи не може“. Само че разликата в случая с разписките е, че няма общ ред, който да важи.
  • Разписките не са бюлетини – те се броят по-трудно (с по-дребен шрифт са, не се сгъват еднакво, а това допринася за повече грешки. Изначално, идеята за машините е да спестят многото човешки грешки; сега ЦИК иска да ги върне „на стероиди“. Тук има и един друг аспект – бюлетините имат поредни номера и защитни механизми; разписките нямат. Всеки може да фалшифицира разписка и да я пусне заедно със своята. Или вместо своята, ако реши да саботира изборите. Единственият начин да се провери, че една разписка е истинска е чрез QR кода, само че в методическите указания такава проверка липсва, а секционните комисии не са длъжни да имат смартфон с приложение за четене и интерпретиране на тези QR кодове.
  • протоколите от ръчното преброяване не подлежат на проверка с автоматизирани контроли при приемането им в РИК, на каквато подлежат протоколите при броене на хартиени бюлетини. Т.е. нито РИК, нито Информационно обслужване ще проверяват дали не пише пълни глупости в този протокол – просто ще го сканират и ще го качат с грешките.
  • световната практика никога не е да се броят 100% от разписките. Винаги се брои извадка – колко да е тя е отделен въпрос, но е абсолютно безсмислено да се хвърля усилие за 100% с всички рискове, изброени по-горе. Досега винаги (и в България, и на други места, където се гласува с машини), разминаванията с резултата от машината винаги са били заради човешка грешка при броенето.

Освен, че предложението има всички тези проблеми, това, което то се опитва да постигне има доста по-разумни решения. Разписките представляват т.нар. voter-verifiable paper audit trail (VVPAT), или проверима от гласоподавателя хартиена одитна следа. Те могат да бъдат проверявани по няколко начина, така че да гарантират, че машините наистина записват това, което избирателят е искал.

  • извадкова проверка – напр. на 2 или 5 процента от секциите. Ако има компрометирани машини, които дават глаове на една партия, вземайки ги от другите, то при проверка на определен процент секции на случаен принцип, това ще се види. Нужно е да има такова несъответсвие дори само в 1 секция, за да предизвика по-задълбочена проверка. При такова несъответсвие, обаче, трябва да се проверят и QR кодовете на всички разписки. Вместо на случаен принцип, може партиите и коалициите да посочват в кои секции искат да се извърши проверката.
  • броене на общия брой разписки и последващо преброяване на резултатите по партии/коалиции само ако общият брой не излезе.
  • следизборен одит, проведен централизирано, със съответните QR четци.

Мнозинството в ЦИК обаче иска да прехвърли всичко на секционните комисии, които да създадат едни протоколи извън закона, които нямат стойност за изборния резултат, но които могат да бъдат използвани удобно от противниците на машинното гласуване.

Нека ЦИК приеме по-разумни правила за одитиране, така че наистина да има гаранции за работата на машините, а не да създава допълнителен хаос и неясноти. И не на последно място – да позволи експертите от партиите да се включим пълноценно в одита, вкл. с достъп до изходния код.

И нека партиите, чиито представители гласуваха за това решение (ГЕРБ, БСП, ДПС, ИТН) да послушат поне малко експертни аргументи, и особено ГЕРБ да спрат да плашат избирателите с несъществуващи конспирации.

Материалът Защо не трябва да се броят 100% от контролните разписки от машинното гласуване? е публикуван за пръв път на БЛОГодаря.

Sudan: seven days without Internet access (and counting)

Post Syndicated from João Tomé original https://blog.cloudflare.com/sudan-seven-days-without-internet-access-and-counting/

Sudan: seven days without Internet access (and counting)

Sudan: seven days without Internet access (and counting)

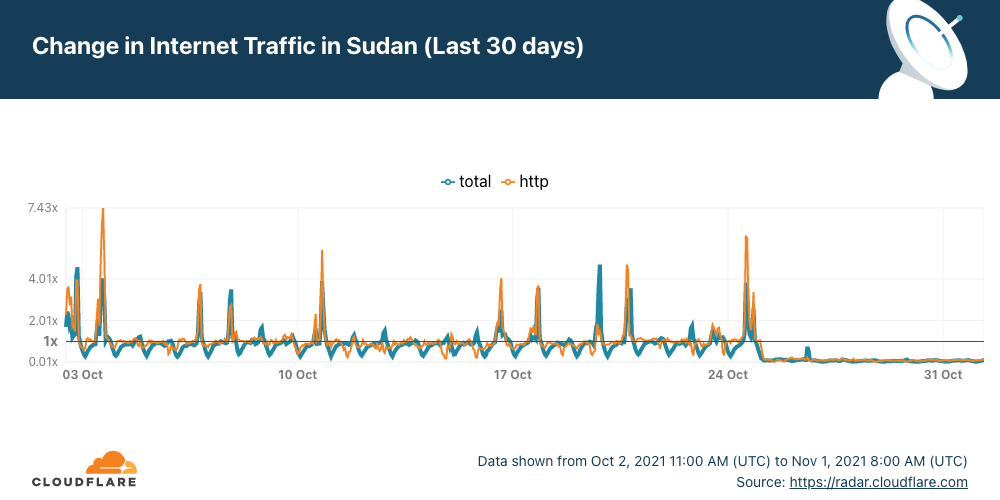
It’s not every day that there is no Internet access in an entire country. In the case of Sudan, it has been five days without Internet after political turmoil that started last Monday, October 25, 2021 (as we described).

The outage continues with almost a flat line and just a trickle of Internet traffic from Sudan. Cloudflare Radar shows that the Internet in Sudan is still almost completely cut off.

Sudan: seven days without Internet access (and counting)

There was a blip of traffic on Tuesday at ~14:00 UTC, for about one hour, but it flattened out again, and it continues like that — anyone can track the evolution on the Sudan page of Cloudflare Radar.

Sudan: seven days without Internet access (and counting)

Internet shutdowns are not that rare

Internet disruptions, including shutdowns and social media restrictions, are common occurrences in some countries and Sudan is one where this happens more frequently than most countries according to Human Rights Watch. In our June blog, we talked about Sudan when the country decided to shut down the Internet to prevent cheating in exams, but there were situations in the past more similar to this days-long shutdown — something that usually happens when there’s political unrest.

The country’s longest recorded network disruption was back in 2018, when Sudanese authorities cut off access to social media (and messaging apps like WhatsApp) for 68 consecutive days from December 21, 2018 to February 26, 2019. There was a full mobile Internet shutdown reported from June 3 to July 9, 2019 that lasted 36 days.

You can keep an eye on Cloudflare Radar to monitor how we see the Internet traffic globally and in every country.

The collective thoughts of the interwebz