HPE ProLiant DL145 Gen11 Review An AMD EPYC 8004 Edge Server

Post Syndicated from Patrick Kennedy original https://www.servethehome.com/hpe-proliant-dl145-gen11-review-an-amd-epyc-8004-edge-server-nvidia/

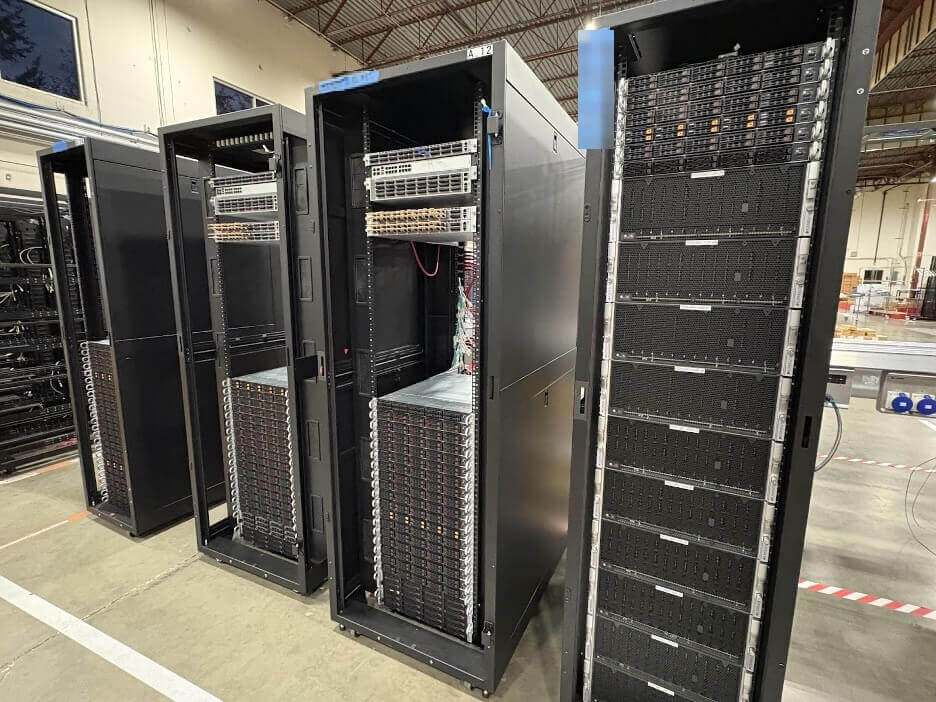
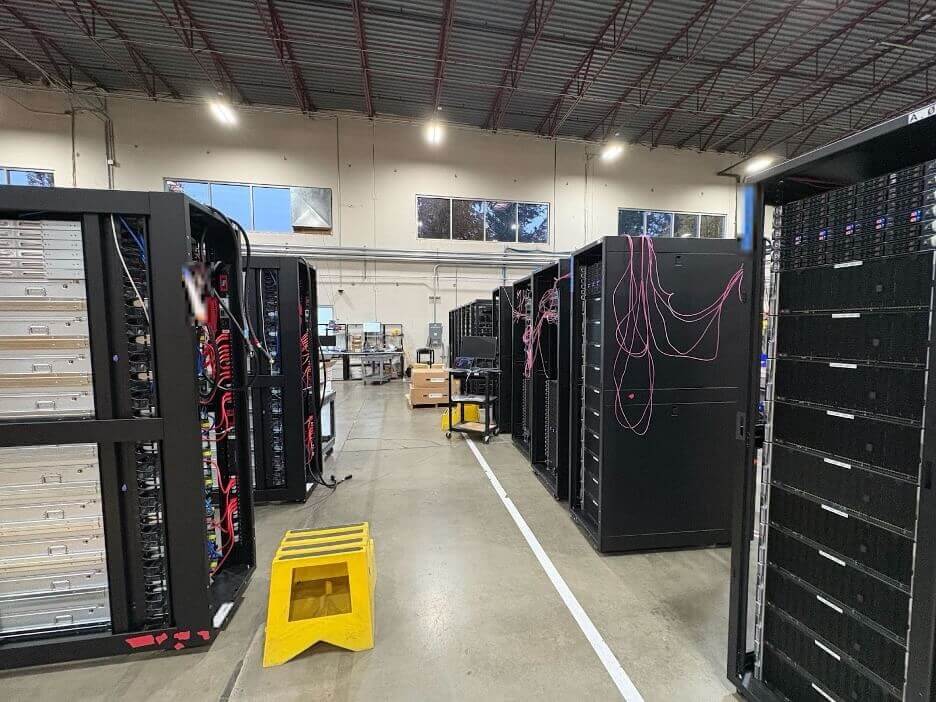
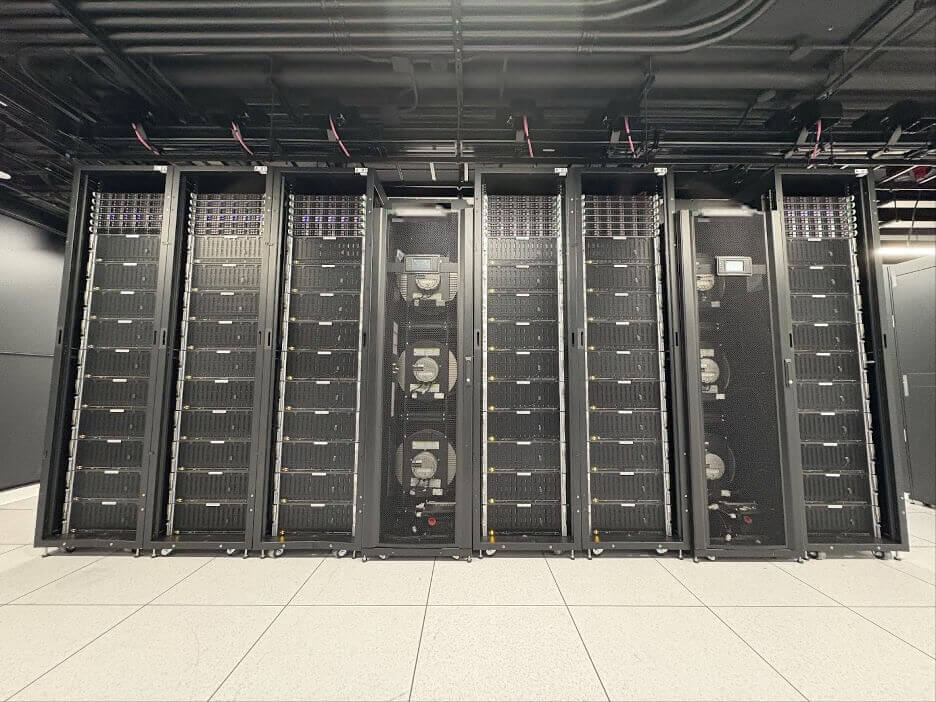
In our HPE ProLiant DL145 Gen11 edge server review, we see how this AMD EPYC 8004 server offers a lot in a low power envelope

The post HPE ProLiant DL145 Gen11 Review An AMD EPYC 8004 Edge Server appeared first on ServeTheHome.

[$] Hash-based module integrity checking

Post Syndicated from daroc original https://lwn.net/Articles/1012946/

On January 20, Thomas Weißschuh shared a new

patch set
implementing an alternate method for checking the integrity of
loadable kernel modules. This mechanism, which checks module integrity based
on hashes computed at build time instead of using cryptographic signatures,
could enable reproducible kernel builds in more contexts. Several distributions
have already expressed interest in the patch set if Weißschuh can get it
into the kernel.

Dynamically optimize, clip, and resize video from any origin with Media Transformations

Post Syndicated from Taylor Smith original https://blog.cloudflare.com/media-transformations-for-video-open-beta/

Today, we are thrilled to announce Media Transformations, a new service that brings the magic of Image Transformations to short-form video files wherever they are stored.

Since 2018, Cloudflare Stream has offered a managed video pipeline that empowers customers to serve rich video experiences at global scale easily, in multiple formats and quality levels. Sometimes, the greatest friction to getting started isn’t even about video, but rather the thought of migrating all those files. Customers want a simpler solution that retains their current storage strategy to deliver small, optimized MP4 files. Now you can do that with Media Transformations.

Short videos, big volume

For customers with a huge volume of short video, such as generative AI output, e-commerce product videos, social media clips, or short marketing content, uploading those assets to Stream is not always practical. Furthermore, Stream’s key features like adaptive bitrate encoding and HLS packaging offer diminishing returns on short content or small files.

Instead, content like this should be fetched from our customers’ existing storage like R2 or S3 directly, optimized by Cloudflare quickly, and delivered efficiently as small MP4 files. Cloudflare Images customers reading this will note that this sounds just like their existing Image Transformation workflows. Starting today, the same workflow can be applied to your short-form videos.

What’s in a video?

The distinction between video and images online can sometimes be blurry — consider an animated GIF: is that an image or a video? (They’re usually smaller as MP4s anyway!) As a practical example, consider a selection of product images for a new jacket on an e-commerce site. You want a consumer to know how it looks, but also how it flows. So perhaps the first “image” in that carousel is actually a video of a model simply putting the jacket on. Media Transformations empowers customers to optimize the product video and images with similar tools and identical infrastructure.

How to get started

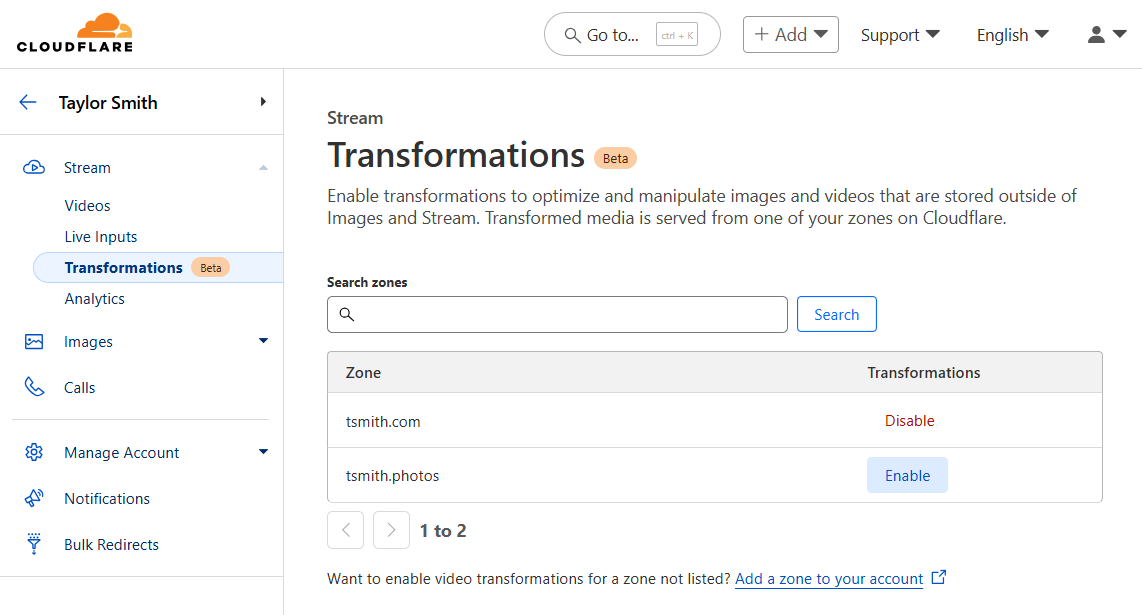
Any website that is already enabled for Image Transformations is now enabled for Media Transformations. To enable a new zone, navigate to “Transformations” under Stream (or Images), locate your zone in the list, and click Enable. Enabling and disabling a zone for transformations affects both Images and Media transformations.


After enabling Media Transformations on a website, it is simple to construct a URL that transforms a video. The pattern is similar to Image Transformations, but uses the media endpoint instead of the image endpoint:

https://example.com/cdn-cgi/media/<OPTIONS>/<SOURCE-VIDEO>

The <OPTIONS> portion of the URL is a comma-separated list of flags written as key=value. A few noteworthy flags:

  • mode can be video (the default) to output a video, frame to pull a still image of a single frame, or even spritesheet to generate an image with multiple frames, which is useful for seek previews or storyboarding.

  • time specifies the exact start time from the input video to extract a frame or start making a clip

  • duration specifies the length of an output video to make a clip shorter than the original

  • fit, together with height and width allow resizing and cropping the output video or frame.

  • Setting audio to false removes the sound in the output video.

The <SOURCE-VIDEO> is a full URL to a source file or a root-relative path if the origin is on the same zone as the transformation request.

A full list of supported options, examples, and troubleshooting information is available in DevDocs.

A few examples

I used my phone to take this video of the randomness mobile in Cloudflare’s Austin Office and put it in an R2 bucket. Of course, it is possible to embed the original video file from R2 directly:

That video file is almost 30 MB. Let’s optimize it together — a more efficient choice would be to resize the video to the width of this blog post template. Let’s apply a width adjustment in the options portion of the URL:

https://example.com/cdn-cgi/media/width=760/https://pub-d9fcbc1abcd244c1821f38b99017347f.r2.dev/aus-mobile.mp4

That will deliver the same video, resized and optimized:

Not only is this video the right size for its container, now it’s less than 4 MB. That’s a big bandwidth savings for visitors.

As I recorded the video, the lobby was pretty quiet, but there was someone talking in the distance. If we wanted to use this video as a background, we should remove the audio, shorten it, and perhaps crop it vertically. All of these options can be combined, comma-separated, in the options portion of the URL:

https://example.com/cdn-cgi/media/mode=video,duration=10s,width=480,height=720,fit=cover,audio=false/https://pub-d9fcbc1abcd244c1821f38b99017347f.r2.dev/aus-mobile.mp4

The result:

If this were a product video, we might want a small thumbnail to add to the carousel of images so shoppers can click to zoom in and see it move. Use the “frame” mode and a “time” to generate a static image from a single point in the video. The same size and fit options apply:

https://example.com/cdn-cgi/media/mode=frame,time=3s,width=120,height=120,fit=cover/https://pub-d9fcbc1abcd244c1821f38b99017347f.r2.dev/aus-mobile.mp4

Which generates this optimized image:

Try it out yourself using our video or one of your own: 

Input Limits

We are eager to start supporting real customer content, and we will right-size our input limitations with our early adopters. To start:

  • Video files must be smaller than 40 megabytes.

  • Files must be MP4s and should be h.264 encoded.

  • Videos and images generated with Media Transformations will be cached. However, in our initial beta, the original content will not be cached which means regenerating a variant will result in a request to the origin.

How it works

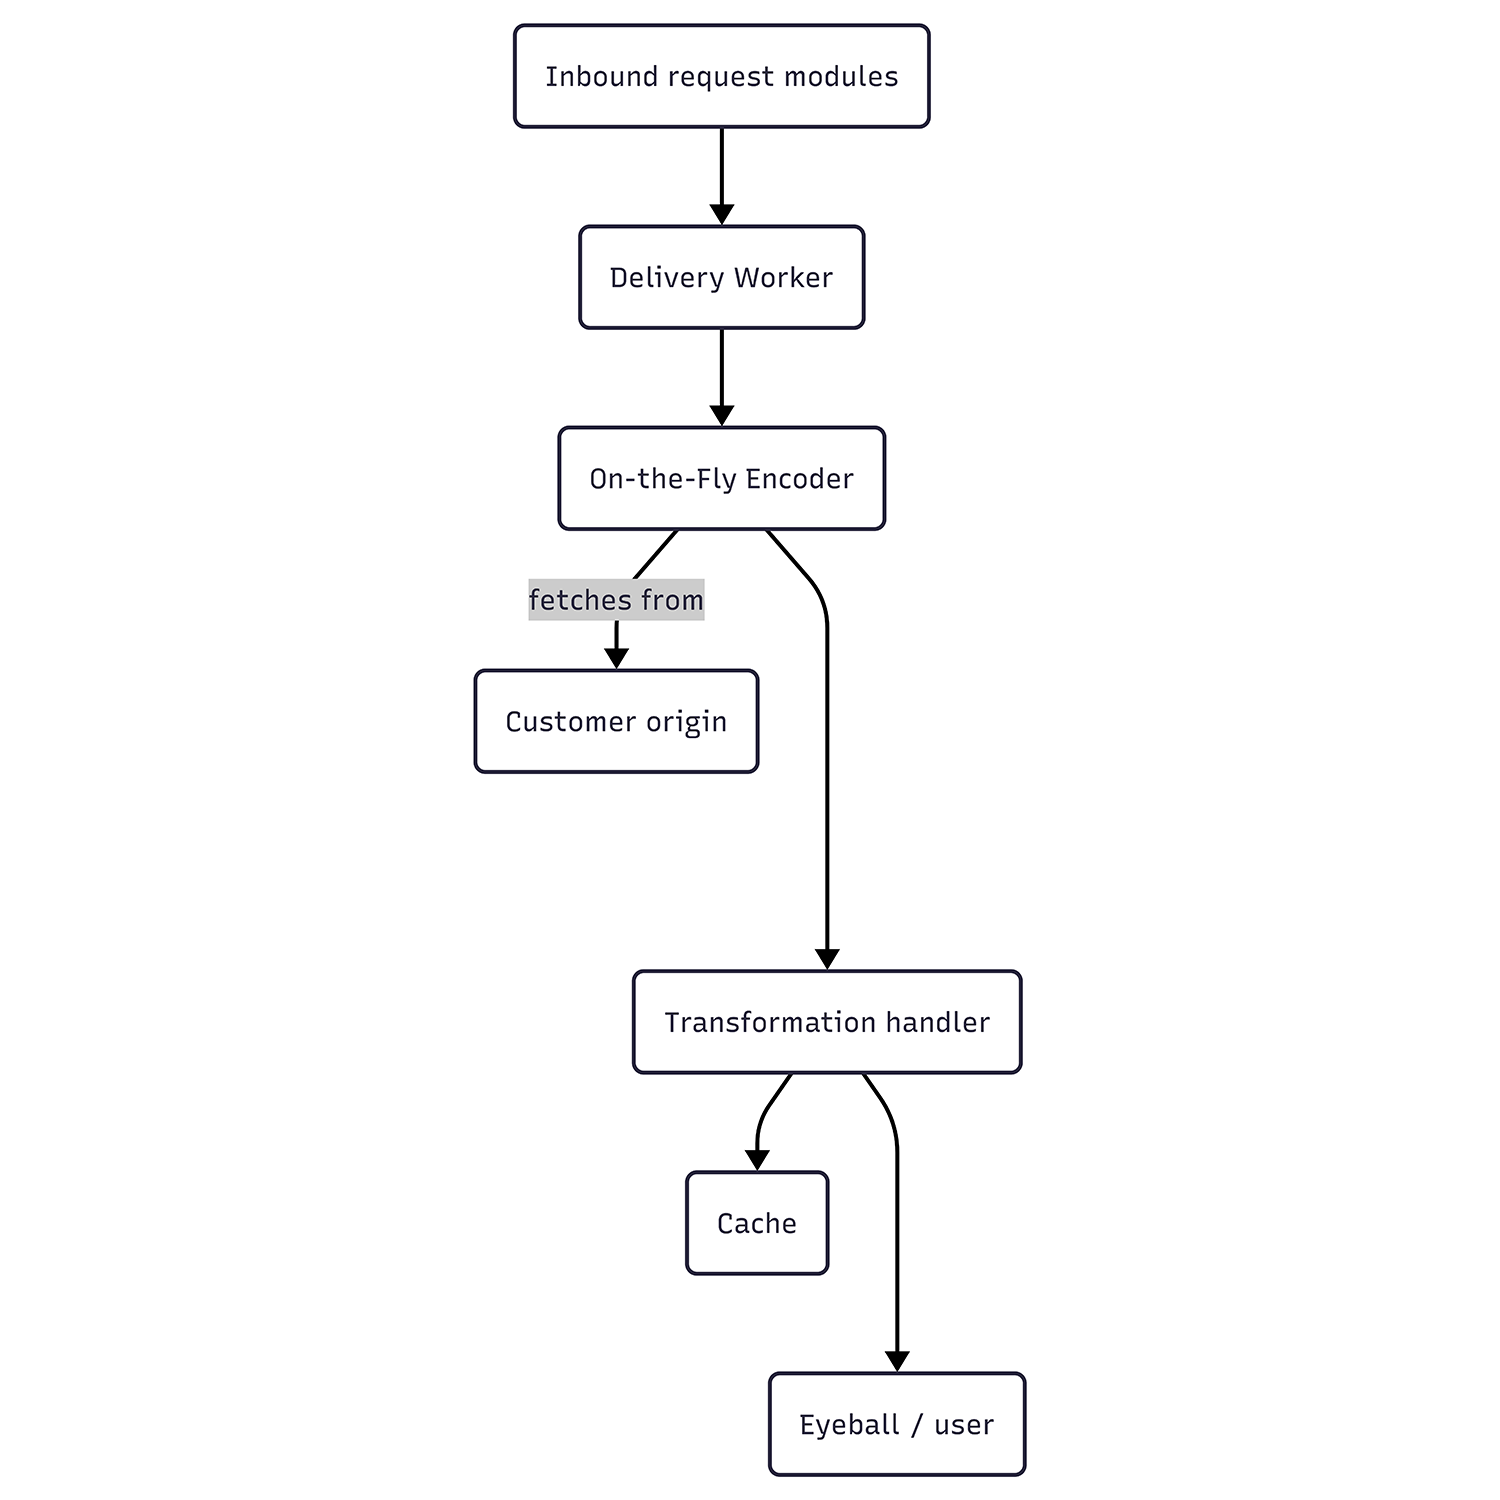
Unlike Stream, Media Transformations receives requests on a customer’s own website. Internally, however, these requests are passed to the same On-the-Fly Encoder (“OTFE”) platform that Stream Live uses. To achieve this, the Stream team built modules that run on our servers to act as entry points for these requests.

These entry points perform some initial validation on the URL formatting and flags before building a request to Stream’s own Delivery Worker, which in turn calls OTFE’s set of transformation handlers. The original asset is fetched from the customer’s origin, validated for size and type, and passed to the same OTFE methods responsible for manipulating and optimizing video or still frame thumbnails for videos uploaded to Stream. These tools do a final inspection of the media type and encoding for compatibility, then generate the requested variant. If any errors were raised along the way, an HTTP error response will be generated using similar error codes to Image Transformations. When successful, the result is cached for future use and delivered to the requestor as a single file. Even for new or uncached requests, all of this operates much faster than the video’s play time.


What it costs

Media Transformations will be free for all customers while in beta. We expect the beta period to extend into Q3 2025, and after that, Media Transformations will use the same subscriptions and billing mechanics as Image Transformations — including a free allocation for all websites/zones. Generating a still frame (single image) from a video counts as 1 transformation. Generating an optimized video is billed as 1 transformation per second of the output video. Each unique transformation is only billed once per month. All Media and Image Transformations cost $0.50 per 1,000 monthly unique transformation operations, with a free monthly allocation of 5,000.

Using this post as an example, recall the two transformed videos and one transformed image above — the big original doesn’t count because it wasn’t transformed. The first video (showing blog post width) was 15 seconds of output. The second video (silent vertical clip) was 10 seconds of output. The preview square is a still frame. These three operations would count as 26 transformations — and they would only bill once per month, regardless of how many visitors this page receives.

Looking ahead

Our short-term focus will be on right-sizing input limits based on real customer usage as well as adding a caching layer for origin fetches to reduce any egress fees our customers may be facing from other storage providers. Looking further, we intend to streamline Images and Media Transformations to further simplify the developer experience, unify the features, and streamline enablement: Cloudflare’s Media Transformations will optimize your images and video, quickly and easily, wherever you need them.

Try it for yourself today using our sample asset above, or get started by enabling Transformations on a zone in your account and uploading a short file to R2, both of which offer a free tier to get you going.

Security updates for Friday

Post Syndicated from daroc original https://lwn.net/Articles/1013336/

Security updates have been issued by Debian (chromium), Fedora (firefox and man2html), Mageia (erlang, ffmpeg, and vim), Oracle (doxygen, firefox, python-jinja2, squid, and webkit2gtk3), Red Hat (nodejs:18), SUSE (emacs, go1.23, go1.24, and pcp), and Ubuntu (ansible, firefox, linux-azure, linux-nvidia, and python-django).

История на женското здраве(опазване)

Post Syndicated from Надежда Цекулова original https://www.toest.bg/istoriya-na-zhenskoto-zdrave-opazvane/

История на женското здраве(опазване)

В историята на човечеството отношението към женското здраве е преминало през различни етапи и форми. В различните култури, общества и епохи жените са били от обожествявани до горени на клада, от жрици до безправни продължителки на рода.

Репродуктивните функции на женското тяло обаче неминуемо са били във фокуса на вниманието. Следващите редове представляват кратък и много бърз прелет над този хилядолетен път, който води до днешните ни разбирания за женско здраве. 


Хилядолетия наред в много цивилизации интересът към женското здраве се е простирал до физическото, репродуктивно здраве и способността на жената да роди здраво дете (в някои епохи и общества – здраво момче). Отвъд тази ѝ функция нито физическото, нито психичното ѝ здраве са били обект на значим научен интерес чак до XIX в. Ехото от това свръхфокусиране (или да си кажем направо – неглижиране) отеква силно дори и днес, дори и в прогресивните общества. На много места по света неглижирането на различни аспекти от женското здраве остава рутинна практика, а свеждането на жената до репродуктивните ѝ функции, за съжаление, се възражда. 

За да сме наясно с „женската“ медицина днес обаче, трябва да си даваме сметка за нейната история и обхват, за пропуснатите възможности и постигнатите победи, както и за целите, които никой никога не си е поставял. 

Женското здраве в древните цивилизации

Един от най-старите известни източници на медицинска информация за женското здраве е Кахунският гинекологичен папирус (ок. 1850–1700 г.пр.Хр.), който съдържа първични доказателства за медицински практики, свързани със здравето на жените в Древен Египет. Открит е през 1889 г. от Флиндерс Петри в района на днешен Лехун, Египет. Папирусът се състои от 34 параграфа, всеки от които разглежда конкретни медицински проблеми, свързани с женското здраве. Структурата на текста включва описание на симптомите, препоръка към лекаря как да диагностицира състоянието, и лечение, но без информация за прогнозата.

Сред записаните заболявания и състояния са проблеми със зрението, вагинални течения и други гинекологични разстройства. Египтяните свързвали множество здравословни проблеми (включително очни проблеми, болки в зъбите, шията и главата) със състоянието „скитаща матка“ – древноегипетско вярване, че матката може да се движи из тялото на жената и да предизвиква различни физически и психически симптоми. Лечението включвало „опушване“, масажи, билкови лекарства, компреси и вътрешно приложение на смеси като магарешко мляко и животински мазнини.

Сред най-значимите текстове в папируса са първите известни препратки към методи за контрацепция. В един от пасажите се споменава употребата на крокодилски изпражнения, но в съвременни изследвания на древния източник се отбелязва, че няма сигурни доказателства, че веществото е било директно прилагано вътрешно – възможно е да е било използвано като съставка за т.нар. опушване. Друго споменато средство е мед, нанесен върху матката. 

Сходен и вероятно повлиян от древноегипетската практика е погледът върху женското здраве и в древногръцкия и римския свят, чието влияние върху западната медицина продължава векове. Класическата античност бележи началото на опитите за класифициране на различни области на медицинските изследвания, като тогава в употреба влизат термините гинекология и акушерство. Хипократовият корпус – обширна колекция от трактати, приписвани на Хипократ, съдържа и редица гинекологични трактати. Именно Хипократ пръв използва термина „рак“ за описание на твърдите лезии в женските гърди, като ги свързва с проблеми с матката и менструалния цикъл. От времето на Хипократ и Аристотел датират и доказателства за съществуване на тестове за безплодие. Сред описаните методи е било например използването на червен камък в очите на жената. 

В древността акушерството е било добре развито, като акушерките са играли ключова роля в медицинската практика и има данни за добри познания относно женската анатомия и техниките за справяне с трудни раждания, включително ползване на билкови отвари за облекчаване на болките. Макар и по-слабо, развиват се и различни теории за контрацепция и аборт и тестове за установяване на бременност. Смята се, че майчината смъртност е била сравнима с тази в по-късни общества с по-добра документация, като например селска Англия през XVIII в., където средно 25 на 1000 раждания завършват със смърт на майката. Детската смъртност също е била висока, като се предполага, че в римското общество е достигала до 300 на 1000 раждания.

Тялото на жената в християнска Европа

В ранните цивилизации много общества по света са почитали богини, свързани с природата и плодовитостта, което е давало отражение върху ролята на жените в обществото и в семейството. Постепенното изтласкване на богините от културния и религиозния живот води до заличаване на религиозното и социалното влияние на жените.

Тенденцията довежда до създаване на социална йерархия, в която жените започват да се възприемат като подчинени на мъжете, и това се отразява драстично върху медицината и здравеопазването. 

С разпространението на християнството на места се появява практика жените, които практикуват лечебни изкуства, да бъдат гонени като вещици. През XV в. германският католически свещеник Хайнрих Крамър пише трактата Malleus Maleficarum („Чукът на вещиците“), в който описва личните си виждания за „магьосничество“ и препоръчва наказанието за тази дейност да са мъчения и изгаряне на клада. Макар да не е припознат от официалната църква, трактатът е изключително популярен и води до допълнително ограничаване на достъпа на жените до медицина в Средновековна Европа.

През XVIII и XIX в. гинекологията става официално медицинско направление, но жените са силно ограничени да практикуват медицинската професия. В този период възниква модата на „хистерията“. Макар да произлиза от старогръцката дума ‘ὑστέρα (hystera), означаваща „матка“, в средата на XVIII в. френската медицинска школа налага термина като наименование на психиатрично състояние на свръхвъзбуда, засягащо основно жените. Един от методите за „лечение“ на това състояние, който се практикува по онова време, е отстраняване на яйчниците. 

Индустриализация, Дарвин и първи признаци на феминизация 

Развитието на здравеопазването на жените през XIX и началото на XX в. е белязано от значителни трансформации, повлияни от обществените нагласи, медицинските открития и приноса на пионерки в тази област.

От една страна, с настъпването на индустриализацията през XIX и XX в. става видимо за изследователите, че жените от различните социални класи в развитите общества са третирани почти като различни биологични видове (макар явлението да датира от по-рано). Докато за жените от висшата класа е битувал стереотипът, че са слаби и деликатни, поради което са им били препоръчвани редица физически и интелектуални ограничения, за жените, които се е налагало да работят, се е смятало, че са здрави и издръжливи. 

Тази социална поляризация се задълбочава и от социалния дарвинизъм, който оправдава неравенствата чрез биологични аргументи – Чарлз Дарвин е вярвал, че жените са интелектуално по-нисши от мъжете, но морално ги превъзхождат. Въпреки това неговата еволюционна теория предоставя основа за идеята, че обществото може да се развива, а заедно с него – и ролите на жените. Именно тази негова концепция е била използвана от защитниците на правата на жените през XIX в., за да аргументират, че половото неравенство не е неизбежно и може да бъде преодоляно с времето.

От друга страна, развитието на обществата е дало нов тласък както на женското здравеопазване, така и на ролята на жените в медицината. Традиционното раждане в домашни условия започва постепенно да отстъпва пред новата възможност за раждане в болници с подкрепа от лекари, които вярват, че тези условия са по-безопасни и по-добре контролирани. През 40-те години на XIX в. започва създаването на болници, специализирани в грижата за жени. Те не само осигуряват здравни услуги за жени, но и дават възможност на първите лекарки да практикуват активно. През 1872 г. Елизабет Гарет Андерсън основава Лондонската болница за жени, която е управлявана изцяло от лекарки.

Един от ключовите моменти в началото на XX в. е борбата за достъп до контрацепция. През 1916 г. Маргарет Сангър открива първата клиника за контрол на раждаемостта в Бруклин, Ню Йорк, с което се противопоставя на съществуващите закони. Сангър участва и в разработката на противозачатъчното хапче, и в създаването на първите организации за семейно планиране. Смятана е за основателка на движението за контрол на раждаемостта.

Паралелно с тези процеси възниква и нуждата от информиране на жените за тяхното здраве. Темата започва постепенно да излиза от сферата на категоричните табута, за да избухне в истинска революция във втората половина на XX в., но за това – във втората част.

(Следва продължение.)


„Анатомия на пола: Жена“ разглежда здравето на жените като неразривна част от обществото, историята и културата. В поредицата изследваме как са се променяли нагласите към женското здраве, как медицината е възприемала специфичните потребности на жените и какви процеси са повлияли на достъпа им до качествени здравни грижи. Вглеждаме се в научните открития, но и в културните митове; в официалните политики, но и в личните истории на жени, борещи се за правото си на здраве и достойнство.

Властта на себе си прилича. Не и ДПС

Post Syndicated from Емилия Милчева original https://www.toest.bg/vlastta-na-sebe-si-prilicha-ne-i-dps/

Властта на себе си прилича. Не и ДПС

През 2025 г. не шутът на Доган, а корпуленцията на Пеевски вдъхва страх и затова съвместната пресконференция на управляващите – ГЕРБ–СДС, БСП – Обединена левица и „Има такъв народ“, е просто епизод от политическото шоу. На нея те обявиха как присъдружният им партньор ДПС–ДПС на Ахмед Доган непрекъснато искал нови и нови постове и така дестабилизирал властта, за да предизвика предсрочни избори. 

Хибридната опозиция

Доганистите пък заявиха, че няма да бъдат „смокинов лист за задкулисните договорки с Пеевски“. Не казаха обаче, че ще разпаднат управлението – та нали само то държи главата им над водата, иначе санкционираният за корупция олигарх ще ги погълне и ще изплюе костите им, както направи с „Булгартабак“. Според лидера на ГЕРБ Бойко Борисов ДПС–ДПС иска зам.-министър на труда и социалната политика, зам.-министър на външните работи и шест поста в регулаторите, но няма да получи нищо преди гласуването на бюджета за 2025 г. Изглежда, ще се раздава според заслугите при приемането му, а ДПС на Доган вече намали шансовете си, тъй като не го подкрепи на първо четене. Включи се обаче конкуренцията.

Има ли ново, скрито мнозинство, след като ДПС – Ново начало подкрепи предложения от управляващото мнозинство бюджет на първо четене? По тъмни доби, далече от светлината на деня, се сформира скрито мнозинство с тежката, задушаваща прегръдка на „момчето“ с корпулентни възможности, което отдавна реди и пренарежда зависимостите в държавата.

Севим Али, ДПС–ДПС

Двата лагера се обвиняват взаимно във връзки с Делян Пеевски. Тошко Йорданов (ИТН) дори обяви, че ДПС–ДПС непрекъснато вадели списъци с хора за назначаване, един от които дори се занимавал с разпространяване на детска порнография. В обществото обаче се появи странно привикване към Пеевски, след като всички политически сили по един или друг начин бяха във връзки с него. Публичността на Пеевски, скрит в сенките само допреди няколко години, вече е трудно да бъде игнорирана.

А през това време управляващите играят и с двете ДПС-та според конкретната си належаща нужда.

Те [ДПС–ДПС, б.а.] имат други цели – извън тези, свързани с държавата, включително и непрекъснато поставяне на теми, свързани с постове. Те имат за цел да дестабилизират и да отидат на избори. Единствената парламентарна група, която е заявила решение за избори, е групата на ДПС – Ново начало. Кой работи за интересите на ДПС – Ново начало, се налага като извод.

Деница Сачева, ГЕРБ-СДС

В действителност никоя от тези четири сили не иска да обърне лодката на властта. Не го иска и петата – „опозиционерът“ Пеевски, защото сега е най-удобният момент да затвърди влиянието си. Ето, лидерът на ГЕРБ отрича съществуването на такова влияние, защото няма как да бъде разграден модел, който е в опозиция, и твърди, че най-свързаният с Пеевски човек е Джевдет Чакъров.

Но ДПС – Ново начало е хибридна опозиция – самообяви се за такава, твърди, че няма да издига кандидати, нито ще участва в най-голямото превъоръжаване с власт, каквото са изборите на 96 нови членове на регулатори и в съдебната система. Но влиза в задкулисни договорки с управляващите. Така хем пази реномето на властта, хем атакува, критикува или саботира част от действията ѝ, но и я подкрепя във важни моменти. Последните два са ключови – подкрепи одобрението на бюджета за 2025 г. на първо четене и провали създаването на временна комисия, която да изясни кой и защо саботира работата на Европейската прокуратура в България. ДПС – Ново начало гласува заедно с ГЕРБ–СДС, БСП–ОЛ и ИТН и в двата случая, показвайки кой е асото в ръкава. Също демонстрира на ДПС–ДПС, че не са така насъщни.

МЕЧ внесе предложението за създаване на временна комисия за установяване на факти и обстоятелства относно системните случаи на саботаж, забавяне и противодействие от страна на български институции срещу разследвания на Европейската прокуратура от 2021 г. досега. За него гласуваха също ПП–ДБ и „Възраждане“, но и ДПС–ДПС. Защо депутатите поискаха такава комисия? Защото в интервю за „Капитал“ европейската прокурорка Теодора Георгиева огласи шокиращи данни как държавни институции възпрепятстват работата ѝ.

Мрежата – от прихванати хора без съвест

Освен собствена партия обаче, единствен Пеевски притежава и нерегламентирана „девета“ парламентарна група в 51-вото НС – това са депутати от различни политически сили, белязани от зависимостта си от олигарха и мрежите му. Тяхната „принадлежност“ към Пеевския клан се разчита по издигането и подкрепата за точно определени кандидати. Например Драгомир Стойнев и Кирил Добрев от БСП пламенно защитават кандидатурата на Росен Карадимов, понастоящем в управата на Българската банка за развитие (ББР), за председател на Комисията за защита на конкуренцията (КЗК) – и тримата публично отричат да са хора на Пеевски.

Как Пеевски се е сдобил с такава широка мрежа? Обяснението е на Божидар Божанов (ПП–ДБ) в личния му блог.

Сигурно пропускам нещо извън СРС-та, подкупи, компромати, бонуси, кариерно развитие, вкл. на роднини. Но всичко това се е случвало, с твърдяното активно участие на Пеевски, в последните 15–20 години. Всеки от тези механизми е прилаган спрямо все по-широк кръг хора – магистрати, служители в службите, политици, министри, държавни служители. И с всеки следващ „прихванат“ е ставало по-лесно този кръг да се разширява още и още.

Пеевски е брокер на реална власт, който чрез незаконни средства осигурява на всеки каквото му трябва, но при едно условие (като в „Приказка за стълбата“) – взема ти по нещо, най-вече съвестта. 

Спорната номинация на Росен Карадимов за малко възпря устрема на управляващите към бързо обновяване на регулаторните и контролните органи, някои от които пресрочили с повече от мандат времето си. Има големи шансове обаче ГЕРБ да го подкрепи, като Борисов призова БСП да излязат и да обяснят кандидатурата на Карадимов, а преди ден допусна и избора му. Междувременно бизнес организации и синдикати също се впуснаха в негова подкрепа, което, както казва Карадимов, го мотивирало да не се отказва.

Ако за КЗК влезе за гласуване в този вид, в който е предложена сега – ГЕРБ я гласуваме, ако не – ще останем с тези регулатори.

Бойко Борисов

Все още обаче не е постигнато пълно съгласие за подялбата на постовете в ключовите институции и договарянето на подкрепата. Затова и изборите им се бавят – въпреки приетите процедурни правила и кандидати, някои от които вече изслушани. 

Както стана ясно обаче, първо ще се приеме бюджетът, чието окончателно гласуване трябва да стане до 31 март. Феноменалният ръст на възнаграждения в него – между 50 и 75%, е за работещите в силовите структури, като МВР, ДАНС, ДАТО. Затова пък детските надбавки и майчинството за втората година са замразени на досегашните си нива. Наред с това властта се кани да излее 7 млрд. лв. в държавни фирми и предприятия в енергетиката, инфраструктурата, здравеопазването, ББР (заради санирането – любимата схема на ГЕРБ, която ще се осъществява с пари от бюджета).

Депесарският шут вече не е възможен

Въпреки че недоволства от разпределението на постове, ДПС–ДПС не може да срути правителството. „Депесарският шут“ – метафора от Прехода и символ на рисковете от партньорството с ДПС, днес е само спомен от времето, когато българската политика се въртеше от няколко големи играчи, а единното тогава ДПС беше в центъра на този процес. 

Но днес не е такъв фактор. През 90-те години ДПС използваше силови методи, за да влияе върху играчите на политическата сцена. През 2025 г. ситуацията е много по-различна. Ядрото в ДПС, струпано около почетния председател, не само се топи, а и се раздира от вътрешни противоречия. Самият Доган беше показан за кратко в предизборната кампания, а после отново скрит, защото образът на Сокола вече не вълнува. Редките му появи пред избиратели в последните месеци не са били посрещани с голям ентусиазъм. 

Все повече млади избиратели се насочват към структурите на Пеевски като по-перспективни за кариерно израстване. Социологически агенции показват, че ДПС–ДПС изпада на все по-задна позиция, ако изборите са днес. Последното проучване на „Маркет Линкс“ му отрежда пето място с резултат от 6,6%.

Така че „депесарските шутове“ отдавна са извън политическия тренд – балансът на силите е различен, ДПС не прилича на себе си. Пеевски умело се притуря към управляващата коалиция, която не се противи да се възползва от гласовете на ДПС – Ново начало. Засега нищо не помрачава величието на задкулисието (му) на политическата сцена. Секнаха престрелките с президента Радев. Някой помни ли, че Пеевски се обръщаше към президента с „Мистър Кеш“, говореше за „Пътя на копринките“, правейки асоциации с близък до Радев съветник?! Приключи и този политически водевил, сега двамата са в лагера на консерваторите миротворци, все едно каква част от Украйна ще отреже мирът, и най-добре да е победа за Русия.

Гласуването за Карадимов в пленарната зала ще е първият тест – и какво ще направят ГЕРБ и Борисов. 

Но властта на себе си прилича.

Т.Е. от Е.Т. – епизод 5

Post Syndicated from Тоест original https://www.toest.bg/t-e-ot-e-t-epizod-5/

Т.Е. от Е.Т. – епизод 5

Тръмп, после Пеевски, после Кирил Петков, след това пак Тръмп – три серии по 15 повторения. И накрая малко братята Тейт за кардио.

Следете видеорубриката на Елена Телбис за „Тоест“ и в Instagram и TikTok.

Build a secure data visualization application using the Amazon Redshift Data API with AWS IAM Identity Center

Post Syndicated from Songzhi Liu original https://aws.amazon.com/blogs/big-data/build-a-secure-data-visualization-application-using-the-amazon-redshift-data-api-with-aws-iam-identity-center/

In today’s data-driven world, securely accessing, visualizing, and analyzing data is essential for making informed business decisions. Tens of thousands of customers use Amazon Redshift for modern data analytics at scale, delivering up to three times better price-performance and seven times better throughput than other cloud data warehouses.

The Amazon Redshift Data API simplifies access to your Amazon Redshift data warehouse by removing the need to manage database drivers, connections, network configurations, data buffering, and more.

With the newly released feature of Amazon Redshift Data API support for single sign-on and trusted identity propagation, you can build data visualization applications that integrate single sign-on (SSO) and role-based access control (RBAC), simplifying user management while enforcing appropriate access to sensitive information.

For instance, a global sports gear company selling products across multiple regions needs to visualize its sales data, which includes country-level details. To maintain the right level of access, the company wants to restrict data visibility based on the user’s role and region. Regional sales managers should only see sales data for their specific region, such as North America or Europe. Conversely, the global sales executives require full access to the entire dataset, covering all countries.

In this post, we dive into the newly released feature of Amazon Redshift Data API support for SSO, Amazon Redshift RBAC for row-level security (RLS) and column-level security (CLS), and trusted identity propagation with AWS IAM Identity Center to let corporate identities connect to AWS services securely. We demonstrate how to integrate these services to create a data visualization application using Streamlit, providing secure, role-based access that simplifies user management while making sure that your organization can make data-driven decisions with enhanced security and ease.

Solution overview

We use multiple AWS services and open source tools to build a simple data visualization application with SSO to access data in Amazon Redshift with RBAC. The key components that power the solution are as follows:

  • IAM Identity Center and trusted identity propagation – IAM Identity Center can simplify user management by enabling SSO across AWS services. This allows users to authenticate with their corporate credentials managed in their corporate identity provider (IdP) like Okta, providing seamless access to the application. We explore how trusted identity propagation enables managing application-level access control at scale and activity logging across AWS services, like Amazon Redshift, by propagating and maintaining identity context throughout the workflow.
  • External IdP – We use Okta as an external IdP to manage user authentication. Okta connects to IAM Identity Center, allowing users to authenticate from external systems while maintaining centralized identity management within AWS. This makes sure that user access and roles are consistently maintained across both AWS services and external tools.
  • Amazon Redshift Serverless workgroup, Amazon Redshift Data API, and Amazon Redshift RBAC – Amazon Redshift is a fully managed data warehouse service that allows for fast querying and analysis of large datasets. In this solution, we use the Redshift Data API, which offers a simple and secure HTTP-based connection to Amazon Redshift, eliminating the need for JDBC or ODBC driver-based connections. The Redshift Data API is the recommended method to connect with Amazon Redshift for web applications. We also use RBAC in Amazon Redshift to demonstrate access restrictions on sales data based on the region column, making sure that regional sales managers only see data for their assigned regions, while global sales managers have full access.
  • Streamlit application – Streamlit is a widely used open source tool that enables the creation of interactive data applications with minimal code. In this solution, we use Streamlit to build a user-friendly interface where sales managers can view and analyze sales data in a visual, accessible format. The application will integrate with Amazon Redshift, providing users with access to the data based on their roles and permissions.

The following diagram illustrates the solution architecture for SSO with the Redshift Data API using IAM Identity Center.

The user workflow for the data visualization application consists of the following steps:

  1. The user (whether a regional sales manager or global sales manager) accesses the Streamlit application, which is integrated with SSO to provide a seamless authentication experience.
  2. The application redirects the user to authenticate through Okta, the external IdP. Okta verifies the user’s credentials and returns an ID token to the application.
  3. The application uses the token issued by Okta to assume a role and temporary AWS Identity and Access Management (IAM) session credentials to call the IAM Identity Center AssumeRoleWithWebIdentity API and IAM AssumeRole API in later steps.
  4. The application exchanges the Okta ID token for a token issued by IAM Identity Center by calling the IAM Identity Center CreateTokenWithIAM API using the temporary IAM credentials from the previous step. This token makes sure that the user is authenticated with AWS services and is tied to the IAM Identity Center user profile.
  5. The application requests an identity-enhanced IAM role session using the IAM Identity Center token by calling the AssumeRole
  6. The application uses the identity-enhanced IAM role session credentials to securely query Amazon Redshift for sales data. The credentials make sure that only authorized users can interact with the Redshift data.
  7. As the query is processed, Amazon Redshift checks the identity context provided by IAM Identity Center. It verifies the user’s role and group membership, such as being a part of the North American region or the global sales manager group.
  8. Based on the user’s identity and group membership, and using Amazon Redshift RBAC and row-level security, Amazon Redshift makes an authorization decision. The groups for the illustration can be broadly classified into the following categories:
    1. Regional sales managers will be granted access to view sales data only for the specific country or region they manage. For instance, the AMER North American Sales Manager will only see sales data related to North America. Similarly, the access control based on EMEA and APAC regions will provide row-level security for the respective regions.
    2. The global sales managers will be granted full access to all regions, enabling them to view the entire global dataset.

The setup consists of two main steps:

  1. Provision the resources for IAM Identity Center, Amazon Redshift and Okta:
    1. Enable IAM Identity Center and configure Okta as the IdP to manage user authentication and group provisioning.
    2. Create an Okta application to authenticate users accessing the Streamlit application.
    3. Set up an Amazon Redshift IAM Identity Center connection application to enable trusted identity propagation for secure authentication.
    4. Provision an Amazon Redshift Serverless
    5. Create the tables and configure RBAC within the Redshift workgroup to enforce row-level security for different IAM Identity Center federated roles, mapped to IAM Identity Center groups.
  2. Download, configure, and run the Streamlit application:
    1. Create a customer managed application in IAM Identity Center for the Redshift Data API client (Streamlit application) to enable secure API-based queries and create the required IAM roles
    2. Configure the Streamlit application.
    3. Run the Streamlit application.

Prerequisites

You should have the following prerequisites:

Provision the resources for IAM Identity Center, Amazon Redshift, and Okta

In this section, we walk through the steps to provision the resources for IAM Identity Center, Amazon Redshift, and Okta.

Enable IAM Identity Center and configure Okta as the IdP

Complete the following steps to enable IAM Identity Center and configure Okta as the IdP to manage user authentication and group provisioning:

  1. Create the following users and groups in Okta:
    1. Ethan Global with email [email protected], in group exec-global
    2. Frank Amer with email [email protected], in group amer-sales
    3. Alex Emea with email [email protected], in group emea-sales
    4. Ming Apac with email [email protected], in group apac-sales

  1. Create an IAM Identity Center instance in the AWS Region where Amazon Redshift is going to be deployed. An organization instance type is recommended.
  2. Configure Okta as the identity source and enable automatic user and group provisioning. The users and groups will be pushed to IAM Identity Center using SCIM protocol.

The following screenshot shows the users synced in IAM Identity Center using SCIM protocol.

Create an Okta application

Complete the following steps to create an Okta application to authenticate users accessing the Streamlit application:

  1. Create an OIDC application in Okta.
    1. Copy and save the client ID and client secret needed later for the Streamlit application and the IAM Identity Center application to connect using the Redshift Data API.
    2. Generate the client secret and set sign-in redirect URL and sign-out URL to http://localhost:8501 (we will host the Streamlit application locally on port 8501).
    3. Under Assignments, Controlled access, grant access to everyone.
  2. Create an OIDC IdP on IAM the console. The following screenshot shows an IdP created on the IAM console.

Set up an Amazon Redshift IAM Identity Center connection application

Complete the following steps to create an Amazon Redshift IAM Identity Center connection application to enable trusted identity propagation for secure authentication:

  1. On the Amazon Redshift console, choose IAM Identity Center connection in the navigation pane.
  2. Choose Create application.
  3. Name the application redshift-data-api-okta-app.
  4. Note down the IdP namespace. The default value AWSIDC is used for this post.
  5. In the IAM role for IAM Identity Center access section, you need to provide an IAM role. You can go to the IAM console and create an IAM role called RedshiftOktaRole with the following policy and trust relationship. RedshiftOktaRole is used by the Amazon Redshift IAM Identity Center connection application to manage and interact with IAM Identity Center.
    1. The policy attached to the role needs the following permissions:
      {
        "Version": "2012-10-17",
        "Statement": [
          {
            "Effect": "Allow",
            "Action": [
              "sso:DescribeApplication",
              "sso:DescribeInstance"
            ],
            "Resource": [
              "arn:aws:sso:::instance/<IAM Identity Center Instance ID>",
              "arn:aws:sso::<AWS Account ID>:application/<IAM Identity Center Instance ID>/*"
            ]
          }
        ]
      }

    2. The role uses the following trust relationship:
      {
        "Version": "2012-10-17",
        "Statement": [
          {
            "Effect": "Allow",
            "Principal": {
              "Service": [
                "redshift.amazonaws.com",
                "redshift-serverless.amazonaws.com"
              ]
            },
            "Action": [
              "sts:AssumeRole",
              "sts:SetContext"
            ]
          }
        ]
      }

  1. Leave Trusted Identity propagation section unchanged, then choose Next. You have the option to choose AWS Lake Formation or Amazon S3 Access Grants for use cases like using Amazon Redshift Spectrum to query external tables in Lake Formation. In our use case, we only use Amazon Redshift native tables so we don’t choose either.
  2. In the Configure client connections that use third-party IdPs section, choose No.
  3. Review and choose Create application.
  4. When the application is created, navigate to your IAM Identity Center connection redshift-data-api-okta-app and choose Assign to add the groups that were synced in IAM Identity Center using SCIM protocol from Okta.

We will enable trusted identity propagation and third-party IdP (Okta) on the customer managed application for the Redshift Data API in a later step instead of configuring it in the Amazon Redshift connection application.

The following screenshot shows the IAM Identity Center connection application created on the Amazon Redshift console.

The following screenshot shows groups assigned to the Amazon Redshift IAM Identity Center connection for the managed application.

Provision a Redshift Serverless workgroup

Complete the following steps to create a Redshift Serverless workgroup. For more details, refer to Creating a workgroup with a namespace.

  1. On the Amazon Redshift console, navigate to the Redshift Serverless dashboard.
  2. Choose Create workgroup.
  3. Enter a name for your workgroup (for example, redshift-tip-enabled).
  4. Change the Base capacity to 8 RPU in the Performance and cost control
  5. You can configure network and security based on your virtual private cloud (VPC) and subnet you want to create the workgroup.
  6. In the Namespace section, create a new namespace for your workgroup. (For example, redshift-tip-enabled-namespace).
  7. In the Database name and password section, select Customize admin user credentials and set the admin user name and create a password. Note them down to use in a later step to configure RBAC in Amazon Redshift.
  8. In the Identity Center connections section, choose Enable for the cluster option and select the Amazon Redshift IAM Identity Center application created in the previous step (redshift-data-api-okta-app).
  9. Associate an IAM role with the workgroup that has the following policies attached. Make it the default role to use.
    1. AmazonS3ReadOnlyAccess
    2. AmazonRedshiftDataFullAccess
    3. AmazonRedshiftQueryEditorV2ReadSharing
  10. Leave other settings as default and choose Next.
  11. Review the settings and create the workgroup.

Wait until the workgroup is available before continuing to the next steps.

Create the tables and configure RBAC within the Redshift Serverless workgroup

Next, you use the Amazon Redshift Query Editor V2 on the Amazon Redshift console to connect to the workgroup you just created. You create the tables and configure the Amazon Redshift roles corresponding to Okta groups for the groups in IAM Identity Center and use the RBAC policy to grant users privileges to view data only for their regions. Complete the following steps:

  1. On the Amazon Redshift console, open the Query Editor V2.
  2. Choose the options menu (three dots) next to the Redshift workgroup name and choose Edit connection.
  3. Select Other ways to connect and use the database user name and password to connect.
  4. In the query editor, run the following code to create the sales table and load the data from Amazon Simple Storage Service (Amazon S3):
    # Create the table
    CREATE TABLE IF NOT EXISTS public.sales_data (
        SKU VARCHAR(50),
        Product_Name VARCHAR(255),
        Category VARCHAR(100),
        Quantity INT,
        Sales_Price DECIMAL(10,2),
        Timestamp TIMESTAMP,
        City VARCHAR(100),
        Region_Code VARCHAR(10),
        Country VARCHAR(10),
        Latitude DECIMAL(10,6),
        Longitude DECIMAL(10,6),
        Population INT,
        Elevation INT,
        Timezone VARCHAR(50)
    );
    
    # Load data from S3 to table
    COPY public.sales_data
    FROM 's3://redshift-blogs/redshift-data-api-idc/sales_data.csv'
    IAM_ROLE default
    CSV
    IGNOREHEADER 1
    DELIMITER ','
    TIMEFORMAT 'auto';
    
    # Create Redshift roles for the groups in IDC, the role format is Namespace:IDCGroupName
    CREATE ROLE "AWSIDC:amer-sales";
    CREATE ROLE "AWSIDC:emea-sales";
    CREATE ROLE "AWSIDC:apac-sales";
    CREATE ROLE "AWSIDC:exec-global";
    
    --Create RLS policy
    CREATE RLS POLICY eu_region_filter
    WITH (timezone VARCHAR(50))
    USING (timezone LIKE 'Europe%');
    
    CREATE RLS POLICY apac_region_filter
    WITH (timezone VARCHAR(50))
    USING (timezone LIKE 'Asia%');
    
    CREATE RLS POLICY amer_region_filter
    WITH (timezone VARCHAR(50))
    USING (timezone LIKE 'America%');
    
    --Attach policy
    ATTACH RLS POLICY eu_region_filter ON sales_data TO ROLE "AWSIDC:emea-sales";
    ATTACH RLS POLICY apac_region_filter ON sales_data TO ROLE "AWSIDC:apac-sales";
    ATTACH RLS POLICY amer_region_filter ON sales_data TO ROLE "AWSIDC:amer-sales";
    
    --Turn on RLS on table
    ALTER TABLE public.sales_data ROW LEVEL SECURITY ON;
    GRANT IGNORE RLS TO ROLE "AWSIDC:exec-global";

IAM Identity Center will map the groups into the Redshift roles in the format of Namespace:IDCGroupName. Therefore, create the role name as AWSIDC:emea-sales and so on to match them with Okta group names synced in IAM Identity Center. The users will be created automatically within the groups as they log in using SSO into Amazon Redshift.

Download, configure, and run the Streamlit application

In this section, we walk through the steps to download, configure, and run the Streamlit application.

Create a customer managed application in IAM Identity Center for the Redshift Data API client

In order to start a trusted identity propagation workflow and allow Amazon Redshift to make authorization decisions based on the users and groups from IAM Identity Center (provisioned from the external IdP), you need an identity-enhanced IAM role session.

This requires a couple of IAM roles and a customer managed application in IAM Identity Center to handle the trust relationship between the external IdP and IAM Identity Center and control access for the Redshift Data API client, in this case, the Streamlit application.

First, you create two IAM roles, then you create a customer managed application for the Streamlit application. Complete the following steps:

  1. Create a temporary IAM role (we named it IDCBridgeRole) to exchange the token with IAM Identity Center (assuming you don’t have an existing IAM identity to use). This role will be assumed by the Streamlit application with AssumeRoleWithWebIdentity to get a temporary set of role credentials to call the CreateTokenWithIAM and AssumeRole APIs to get the identity-enhanced role session.
    1. Attach the following policy the role:
      {
          "Version": "2012-10-17",
          "Statement": [
              {
                  "Effect": "Allow",
                  "Action": "sso-oauth:CreateTokenWithIAM",
                  "Resource": "*"
              },
              {
                  "Effect": "Allow",
                  "Action": "sts:SetContext",
                  "Resource": "*"
              },
              {
                  "Effect": "Allow",
                  "Action": "sts:AssumeRole",
                  "Resource": "*"
              }
          ]
      }

    2. In the trust relationship, provide your AWS account ID and IdP’s URL. The trusted principal to use is the Amazon Resource Name (ARN) of oidc-provider you created earlier.
      {
          "Version": "2012-10-17",
          "Statement": [
              {
                  "Effect": "Allow",
                  "Principal": {
                      "Federated": "arn:aws:iam::<accountid>:oidc-provider/<your-idp-domain>"
                  },
                  "Action": "sts:AssumeRoleWithWebIdentity"
              }
          ]
      }

  1. Create an IAM role with permissions to access the Redshift Data API (we named it RedshiftDataAPIClientRole). This role will be assumed by the Streamlit application with the enhanced identities from IAM Identity Center and then used to authenticate requests to the Redshift Data API.
    1. Attach the AmazonRedshiftDataFullAccess AWS managed policy. AWS recommends using the principle of least privilege in your IAM policy.
    2. Restrict the trust relationship to the IDCBridgeRole ARN created in the previous step), and provide your AWS account ID:
      {
          "Version": "2012-10-17",
          "Statement": [
              {
                  "Sid": "Statement1",
                  "Effect": "Allow",
                  "Principal": {
                      "AWS": "arn:aws:iam::<accountid>:role/IDCBridgeRole"
                  },
                  "Action": [
                      "sts:AssumeRole",
                      "sts:SetContext"
                  ]
              }
          ]
      }

Now you can create the customer managed application.

  1. On the IAM Identity Center console, choose Applications in the navigation pane.
  2. Choose Add application.
  3. Choose I have an application I want to setup, select the OAuth 2.0 application type, and choose Next.
  4. Enter a name for the application, for example, RedshiftStreamlitDemo.
  5. In User and group assignment method, choose Do not require assignment. This means all the users provisioned in IAM Identity Center from Okta can use their Okta credentials to sign in to the Streamlit application. You can alternatively select the Require assignments option and pick the users and groups you want to allow access to the application.
  6. In the AWS access portal section, choose Not visible, then choose Next.
  7. In the Authentication with trusted token issuer section, select Create trusted token issuer, then enter the Okta issuer URL and enter a name for the trusted token issuer.
  8. In the map attribute, use the default email to email mapping between the external IdP attribute and IAM Identity Center attribute, then create the trusted token issuer.
  9. Select the trusted token issuer you just created.
  10. In the Aud claim section, use the client ID of the Okta application you noted earlier, then choose Next.
  11. In the Specify application credentials section, choose Edit the application policy and use the following policy:
    {
      "Version": "2012-10-17",
      "Statement": [
        {
          "Effect": "Allow",
          "Principal": {
            "Service": "redshift-data.amazonaws.com"
          },
          "Action": "sso-oauth:*",
          "Resource": "*"
        }
      ]
    }

  12. Choose Submit.

After the application is created, you can view it in on the IAM Identity Center.

  1. Choose Applications in the navigation pane, and locate the Customer managed applications tab.

  1. Choose the application to navigate to the application details page.
  2. In the Trusted applications for identity propagation section, choose Specify trusted applications and select the setup type as Individual applications and specify access, then choose Next.
  3. Choose Amazon Redshift as the service, then choose Next.
  4. In the Application that can receive requests section, choose the Amazon Redshift IAM Identity Center application you created, then choose Next.
  5. In the Access Scopes to apply section, check the redshift:connect
  6. Review and then choose Trust application.

Configure and run the Streamlit application

Now that you have the roles and the customer managed application in IAM Identity Center, you can create an identity-enhanced IAM role session, which is the most critical step to enable trusted identity propagation. Following steps provide an overview of Streamlit application code to create the identity-enhanced IAM role session.

  1. Authenticate with and retrieve the id_token from the external IdP (Okta).
  2. Call CreateTokenWithIAM using the external IdP issued id_token to obtain an IAM Identity Center issued id_token.
  3. Use AssumeRoleWithWebIdentity to obtain temporary IAM credentials (by assuming IDCBridgeRole, explained later).
  4. Extract the sts:identity_context from the IAM Identity Center issued id_token.
  5. Assume the role RedshiftDataAPIClientRole with the AssumeRole API and insert the sts:identity_context to obtain the identity-enhanced IAM role session credentials.

Now you can use these credentials to make requests to the Redshift Data API, and Amazon Redshift will be able to use the identity context for authorization decisions.

At this point, you should have all the required resources for creating the Streamlit application. Complete the following steps to test the Streamlit application:

  1. Download the Streamlit application code and modify the configuration section of the code based on the resources provisioned earlier:
# TIP Token exchange configuration
AWS_REGION = "<YOUR AWS REGION>" # us-east-1
TOKEN_EXCHANGE_APP_ARN = "<YOUR IDC CUSTOM APP ARN>" # The ARN of the IDC customer-managed-App created earlier
TOKEN_GRANT_TYPE = "urn:ietf:params:oauth:grant-type:jwt-bearer" # fixed value, please don't change
TEMP_ROLE_ARN = "<TEMP ROLE ARN>" # The role created in this step for users to assume with AssumeRoleWithWebIdentity(IDCBridgeRole)
ENHANCED_ROLE_ARN = "<ENHANCED ROLE ARN>" # The role created in this step for users to assume for the Identity-enhanced role session with IAM Identity Center(RedshiftDataAPIClientRole)
IDENHANCED_ROLE_SESSION_NAME = "rs-idc-tip-session" # Use any name for the session 
ROLE_DURATION_SECS = 3600  # 1 hour

# Okta OAuth configuration, replace with your own Okta Domain
OKTA_DOMAIN = "<YOUR OKTA DOMAIN>"
AUTHORIZE_URL = f"https://{OKTA_DOMAIN}/oauth2/v1/authorize"
TOKEN_URL = f"https://{OKTA_DOMAIN}/oauth2/v1/token"
REFRESH_TOKEN_URL = f"https://{OKTA_DOMAIN}/oauth2/v1/token"
REVOKE_TOKEN_URL = f"https://{OKTA_DOMAIN}/oauth2/v1/revoke"
LOGOUT_URL = f"https://{OKTA_DOMAIN}/oauth2/v1/logout"
CLIENT_ID = "<OKTA CLIENT ID>" # The client id of the Okta app created for the Streamlit app in 2.
CLIENT_SECRET = "<OKTA CLIENT SECRET>" # The client id of the Okta app created for the Streamlit app in 2.
REDIRECT_URI = "http://localhost:8501" # This is for dev/test purpose only
SCOPE = "openid profile email" # Please do not change
WORKGROUP_NAME = "<your-redshift-workgroup-we-used:redshift-tip-enabled>" #The name of the created Redshift Workgroup
DATABASE = "dev" # The database set for the Workgroup

We recommend hosting this application on an Amazon Elastic Compute Cloud (Amazon EC2) instance for production use cases, and using AWS Secrets Manager for sensitive information like the CLIENT_ID and CLIENT_SECRET provided as configuration parameters in the code for simplicity.

For this example, we use the Okta organization URL (/oauth2/v1/). You can use the customer authorization servers as well, for example, the default authorization server, but make sure all URLs are using the same authorization server. Refer to Authorization servers for more information about authorization servers in Okta.

After you modify the script for the Streamlit application, you can run it using a Python virtual environment.

  1. Create a Python virtual environment. The application has been tested successfully with versions v3.12.8 and v3.12.2.

You need to install the following packages, which are required libraries for the Streamlit application code you downloaded in your virtual environment:

  • streamlit
  • streamlit_oauth
  • boto3
  • pyjwt
  • pydeck
  • pandas
  1. You can install these libraries directly using the following command with the requirements file:
    pip install -r https://redshift-blogs.s3.us-east-1.amazonaws.com/redshift-data-api-idc/requirements.txt

  2. Test the Streamlit application in the Python virtual environment with the following command:
    streamlit run /path/to/st_app.py

  3. Log in with the user [email protected] from the apac-sales group.

The identity-enhanced role session credentials will display on the top of the page after successful authentication with Okta.

For the APAC region manager, you should only see the data from the countries in the Asia-Pacific region based on the row-level security filter you configured earlier.

  1. Log out and log back in with the global executive user, [email protected] from the exec-global

You should see the data in all regions.

You can try other regional users’ logins and you should see only the data in the region they belong to.

Trusted identity propagation deep dive

In this section, you walk through the Python code of the Streamlit application and explain how trusted identity propagation works. The following is an explanation of key parts of the application code.

main()

The main() function of the Streamlit application implements the preceding steps to get the identity-enhanced IAM role session using the get_id_enhanded_session() function, which wraps the login to get the identity-enhanced role session credentials:

def main():
    # Create OAuth2Component instance
    oauth2 = OAuth2Component(
        CLIENT_ID, 
        CLIENT_SECRET, 
        AUTHORIZE_URL, 
        TOKEN_URL, 
        REFRESH_TOKEN_URL, 
        REVOKE_TOKEN_URL)
    
    # Other setup code omitted
    
    # Handle OAuth authentication with Okta
    if not st.session_state.is_authenticated or is_token_expired():
        # Show the login button if not authenticated
        st.title("Login to the Demo app")
        result = oauth2.authorize_button("Login with Okta", REDIRECT_URI, SCOPE)
        if result and "token" in result:
            # Save the token in session state and mark the user as authenticated
            st.session_state.token = result.get("token")
            st.session_state.user_email = get_user_email_from_token(st.session_state.token.get("id_token"))
            st.session_state.aws_creds = get_id_enhanced_session(st.session_state.token.get("id_token"))
            st.session_state.is_authenticated = True
            st.rerun()
    else:
        
        st.json(st.session_state.aws_creds)
        st.title("Total Sales by City")
    
        if not is_token_expired():
            # Use the enhanced credentials to create the Redshift client
            redshift_client = boto3.client("redshift-data", region_name=AWS_REGION,
                                        aws_access_key_id=st.session_state.aws_creds['AccessKeyId'],
                                        aws_secret_access_key=st.session_state.aws_creds['SecretAccessKey'],
                                        aws_session_token=st.session_state.aws_creds['SessionToken'])
        else:
            st.error("Session expired. Please re-authenticate.")
            logout()
            
    # more code for query execution and data visualizetion omitted

We use the Streamlit st.session_state provided by Streamlit to store important session states, including the authentication status as well as additional information like user information and the AWS identity-enhanced role session credentials.

get_id_enhanced_session()

The get_id_enhanced_session() function code has three steps:

  1. We use the id_token (variable name: jwt_token) from Okta in JWT format to call the AssumeRoleWithWebIdentity API to assume the role IDCBridgeRole. This is because the user doesn’t have any AWS credentials to interact with the IAM Identity Center API. If you plan to host this application in an AWS environment with an IAM role available, for example, on an EC2 instance, you can use the role associated with Amazon EC2 to make the call to the IAM Identity Center APIs without creating IDCBridgeRole, but make sure the EC2 role has the required permissions we specified for IDCBridgeRole.
  2. After we have the credentials of the temporary role, we use them to make a call to the CreateTokenWithIAM API of IAM Identity Center. This API handles the exchange of tokens by taking in the id_token from Okta and returning an IAM Identity Center issued token, which will be used later to get the identity-enhanced role session. For more information, refer to the CreateTokenWithIAM API reference.
  3. Lastly, we extract the sts:identity_context from the IAM Identity Center issued id_token and pass it to the AWS Security Token Service (AWS STS) AssumeRole This is done by including the sts:identity_context in the ContextAssertion parameter within ProvidedContexts, along with ProviderArn set to arn:aws:iam::aws:contextProvider/IdentityCenter.
def get_id_enhanced_session(jwt_token):
    """
    Obtains an identity-enhanced session by assuming a temporary IAM role,
    creating a token with IAM, and assuming an enhanced role session.
    
    Args:
        jwt_token (str): The JWT id token from the identity provider.
    
    Returns:
        dict or None: The enhanced session credentials if successful, otherwise None.
    """
    logging.info("Starting identity-enhanced session process.")

    # Step 1: Assume a temporary IAM role with the provided JWT token
    temp_credentials = assume_role_with_web_identity(jwt_token)
    if not temp_credentials:
        logging.error("Failed to assume role with web identity.")
        return None

    # Step 2: Use the temporary credentials to create a token with IAM
    id_token = create_token_with_iam(jwt_token, temp_credentials)
    if not id_token:
        logging.error("Failed to create ID token with IAM.")
        return None

    # Step 3: Use the ID token to assume an enhanced role session
    enhanced_creds = assume_enhanced_role_session(id_token, temp_credentials)
    if not enhanced_creds:
        logging.error("Failed to assume enhanced role session.")
        return None

    logging.info("Successfully obtained identity-enhanced session credentials.")
    return enhanced_creds

assume_role_with_web_identity()

The assume_role_with_web_identity() function code is as follows. We initialize the STS client, decode the JWT token, and then assume the role with the web identity.

def assume_role_with_web_identity(jwt_token):
    """
    Assumes an IAM role using a web identity token and returns the temporary credentials.

    Args:
        jwt_token (str): The JWT token for authentication, typically issued by an external identity provider.

    Returns:
        dict: Temporary IAM credentials (Access Key, Secret Key, Session Token) or None if an error occurs.
    """
    try:
        # Initialize the STS client
        sts_client = boto3.client('sts', region_name=AWS_REGION)
        
        # Decode the JWT token without verifying signature (for debugging purposes)
        decoded_jwt = jwt.decode(jwt_token, options={"verify_signature": False})
        logging.debug(f"Decoded JWT Token: {decoded_jwt}")

        # Prepare the request for AssumeRoleWithWebIdentity
        assume_role_request = {
            'RoleArn': TEMP_ROLE_ARN,
            'RoleSessionName': 'WebIdentitySession',
            'WebIdentityToken': jwt_token,
            'DurationSeconds': DURATION_SECS  # 1 hour
        }

        # Call the AssumeRoleWithWebIdentity API
        assume_role_response = sts_client.assume_role_with_web_identity(**assume_role_request)
        
        # Extract the temporary credentials from the response
        temp_credentials = assume_role_response['Credentials']
        logging.info("Temporary credentials successfully obtained.")
        
        # Return the temporary credentials
        return temp_credentials

    except ClientError as e:
        logging.error(f"Error calling AssumeRoleWithWebIdentity: {e}")
        return None
    except jwt.ExpiredSignatureError:
        logging.error("JWT token has expired.")
        return None
    except jwt.DecodeError:
        logging.error("Error decoding JWT token.")
        return None
    except Exception as e:
        logging.error(f"Unexpected error: {e}")
        return None

create_token_with_iam()

The create_token_with_iam() function code is called to get the id_token from IAM Identity Center. The jwt_token is the id_token in JWT format issued by Okta; the id_token is the IAM Identity Center issued id_token.

def create_token_with_iam(jwt_token, temp_credentials):
    """
    Creates an IAM token using the provided JWT token and temporary credentials.

    Args:
        jwt_token (str): The JWT token to exchange for an IAM token.
        temp_credentials (dict): Temporary AWS credentials for assuming the role.
    
    Returns:
        str or None: The IAM token if successful, otherwise None.
    """
    logging.info("Starting token creation process with IAM.")
    
    # Initialize the SSO OIDC client with temporary credentials
    try:
        sso_oidc_client = boto3.client(
            'sso-oidc', 
            region_name=AWS_REGION, 
            aws_access_key_id=temp_credentials['AccessKeyId'],
            aws_secret_access_key=temp_credentials['SecretAccessKey'],
            aws_session_token=temp_credentials['SessionToken']
        )
    except Exception as e:
        logging.error(f"Error initializing SSO OIDC client: {e}")
        return None

    # Prepare the request for CreateTokenWithIAM
    token_request = {
        'clientId': TOKEN_EXCHANGE_APP_ARN,
        'grantType': TOKEN_GRANT_TYPE,
        'assertion': jwt_token
    }

    # Call the CreateTokenWithIAM API
    try:
        token_result = sso_oidc_client.create_token_with_iam(**token_request)
        id_token = token_result['idToken']
        logging.info(f"Successfully obtained ID Token: {id_token}")
        return id_token
    except ClientError as e:
        logging.error(f"Error calling CreateTokenWithIAM API: {e}")
        return None
    except KeyError as e:
        logging.error(f"Missing expected field in response: {e}")
        return None

In the CreateTokenWithIAM call, we pass the following parameters:

  • clientId – The ARN of the IAM Identity Center application for the Redshift Data API client
  • grantType – urn:ietf:params:oauth:grant-type:jwt-bearer
  • assertion – The id_token (jwt_token) issued by Okta

The idToken issued by IAM Identity Center is returned.

assume_enhanced_role_session()

The assume_enhanced_role_session() function uses the ID token to assume an identity-enhanced role session:

def assume_enhanced_role_session(id_token, temp_credentials):
    """
    Assumes an identity-enhanced IAM role session using the provided ID token and temporary credentials.

    Args:
        id_token (str): The ID token containing the identity context.
        temp_credentials (dict): Temporary AWS credentials for assuming the role.

    Returns:
        dict or None: The credentials for the identity-enhanced IAM role session, or None on failure.
    """
    logging.info("Extracting identity context from ID token.")
    identity_context = extract_identity_context_from_id_token(id_token)

    if not identity_context:
        logging.error("Failed to extract identity context from ID token.")
        return None

    try:
        # Initialize STS client with temporary credentials
        sts_client = boto3.client(
            'sts',
            region_name=AWS_REGION,
            aws_access_key_id=temp_credentials['AccessKeyId'],
            aws_secret_access_key=temp_credentials['SecretAccessKey'],
            aws_session_token=temp_credentials['SessionToken']
        )

        # Prepare AssumeRole request with identity context
        assume_role_request = {
            'RoleArn': ENHANCED_ROLE_ARN,
            'RoleSessionName': IDENHANCED_ROLE_SESSION_NAME,
            'DurationSeconds': ROLE_DURATION_SECS,
            'ProvidedContexts': [{
                'ContextAssertion': identity_context,
                'ProviderArn': "arn:aws:iam::aws:contextProvider/IdentityCenter"
            }]
        }

        # Call the AssumeRole API
        logging.info("Calling STS AssumeRole for identity-enhanced session.")
        assume_role_response = sts_client.assume_role(**assume_role_request)

        enhanced_role_credentials = assume_role_response['Credentials']
        logging.info("Successfully assumed enhanced role.")
        
        return enhanced_role_credentials

    except ClientError as e:
        logging.error(f"Error calling AssumeRole: {e}")
        return None

extract_identity_context_from_id_token()

The extract_identity_context_from_id_token() function extracts the sts:identity_context:

def extract_identity_context_from_id_token(id_token):
    """
    Extracts the identity context from a decoded JWT token.

    Args:
        id_token (str): The JWT token containing identity context.

    Returns:
        dict or None: The extracted identity context if available, otherwise None.
    """
    logging.info("Decoding ID token to extract identity context.")

    try:
        # Decode the JWT token (without signature verification)
        decoded_jwt = jwt.decode(id_token, options={"verify_signature": False})

        logging.debug(f"Decoded JWT Claims: {decoded_jwt}")

        # Extract the identity context from the token
        for key in ('sts:identity_context', 'sts:audit_context'):
            if key in decoded_jwt:
                return decoded_jwt[key]

        logging.warning("No valid identity context found in the token.")
        return None

    except Exception as e:
        logging.error(f"Error decoding JWT: {e}")
        return None

Now you have the identity-enhanced role session credentials to call the Amazon Redshift Data API.

execute_statement() and fetch_results()

The execute_statement() and fetch_results() functions demonstrate how to run Redshift queries and retrieve query results with trusted identity propagation for visualization:

def execute_statement(sql, redshift_client):
    """
    Executes a SQL statement on Amazon Redshift using the provided Redshift Data API client.

    Args:
        sql (str): The SQL query to execute.
        redshift_client (boto3.client): The Redshift Data API client.

    Returns:
        str: The execution ID of the statement.

    Raises:
        ClientError: If an error occurs during execution.
    """
    try:
        response = redshift_client.execute_statement(
            WorkgroupName=WORKGROUP_NAME,
            Database=DATABASE,
            Sql=sql 
        )
        return response["Id"]
    
    except ClientError as e:
        error_code = e.response.get('Error', {}).get('Code', '')
        
        if error_code == 'ExpiredTokenException':
            logging.error("Session expired. Logging out...")
            logout()
        else:
            logging.error(f"Error executing statement: {e}")
            raise
            
def fetch_results(statement_id, redshift_client):
    """
    Fetches query results from the Redshift Data API.

    Args:
        statement_id (str): The execution ID of the statement.
        redshift_client (boto3.client): The Redshift Data API client.

    Returns:
        list: A list of records from the query result.
    """
    try:
        response = redshift_client.get_statement_result(Id=statement_id)
        return response.get("Records", [])
    
    except ClientError as e:
        logging.error(f"Error fetching query results: {e}")
        raise

Conclusion

In this post, we showed how to create a third-party application backed by analytics insights arriving from Amazon Redshift securely using OIDC. With Redshift Data API support of IAM Identity Center integration, you can connect to Amazon Redshift using SSO from the IdP of your choice. You can extend this method to authenticate other AWS services that support trusted identity propagation, such as Amazon Athena and Amazon QuickSight, enabling fine-grained access control for IAM Identity Center users and groups across your AWS ecosystem. We encourage you to set up your application using IAM Identity Center integration and unify your access control directly from your IdP across all IAM Identity Center supported AWS services.

For more information on AWS services and applications that support trusted identity propagation, refer to Trusted identity propagation overview.


About the Authors

Songzhi Liu is a Principal Big Data Architect with the AWS Identity Solutions team. In this role, he collaborates closely with AWS customers and cross-functional teams to design and implement scalable data architectures, focusing on integrating big data and machine learning solutions to enhance identity awareness within the AWS ecosystem.

Rohit Vashishtha is a Senior Analytics Specialist Solutions Architect at AWS based in Dallas, Texas. He has over 19 years of experience architecting, building, leading, and maintaining big data platforms. Rohit helps customers modernize their analytic workloads using the breadth of AWS services and ensures that customers get the best price/performance with utmost security and data governance.

Fei Peng is a Senior Software Development Engineer working in the Amazon Redshift team, where he leads the development of Redshift Data API, enabling seamless and scalable access to cloud data warehouses.

Yanzhu Ji is a Product Manager in the Amazon Redshift team. She has experience in product vision and strategy in industry-leading data products and platforms. She has outstanding skill in building substantial software products using web development, system design, database, and distributed programming techniques. In her personal life, Yanzhu likes painting, photography, and playing tennis.
Metasploit Wrap-Up 03/06/2025

Post Syndicated from Brendan Watters original https://blog.rapid7.com/2025/03/06/metasploit-wrap-up-03-06-2025/

New module content (3)

Get NAA Credentials

Metasploit Wrap-Up 03/06/2025

Authors: skelsec, smashery, and xpn
Type: Auxiliary
Pull request: #19712 contributed by smashery
Path: admin/sccm/get_naa_credentials

Description: Adds an auxiliary module which performs the retrieval of Network Access Account (NAA) credentials from an System Center Configuration Manager (SCCM) server. Given a computer name and password (which can typically be created by a standard AD domain user), a misconfigured SCCM server will give NAA credentials when requested.

SonicWall HTTP Login Scanner

Author: msutovsky-r7
Type: Auxiliary
Pull request: #19935 contributed by msutovsky-r7
Path: scanner/sonicwall/login_scanner

Description: This adds a module to brute-force the login credentials for SonicWall NSv HTTP Login.

D-Tale RCE

Authors: Takahiro Yokoyama and taiphung217
Type: Exploit
Pull request: #19899 contributed by Takahiro-Yoko
Path: linux/http/dtale_rce_cve_2025_0655
AttackerKB reference: CVE-2025-0655

Description: This module exploits a bypass (CVE-2025-0655) for an older vulnerability (CVE-2024-3408), leading to remote code execution (RCE) in D-Tale, a visualizer for pandas data structures.

Enhancements and features (7)

  • #19639 from zeroSteiner – Adds support for check method in relay modules and updates the two relay modules present in Metasploit Framework. In the case of smb_relay, this checks if the target has SMB signing disabled. In the case of ESC8, it checks that the target URI responds with a 401 and offers NTLM as an authentication mechanism.
  • #19682 from h00die – Adds additional tests for Linux post functionality along with additional comments for better understanding; adds new library for work with Linux packages.
  • #19879 from zeroSteiner – This updates the existing MsDtypSecurityDescriptor class to include a #to_sddl_text method. This allows an initialized object to be displayed using the Security Descriptor Definition Language defined by Microsoft.
    • #19917 from zeroSteiner – This adds crypto primitives for AES key derivation (NIST SP 800 108) and AES key unwrapping (NIST SP 800 38f) replacing RubySMB’s implementation which does not support all of the parameters.
    • #19918 from msutovsky-r7 – Extracts a reusable Rex::Proto::Http::AuthDigest library for use within modules.
    • #19927 from bcoles – This improves the support of several Linux distros on the library function get_sysinfo in Msf::Post:Linux::System.
    • #19933 from zeroSteiner – Updates the auxiliary/scanner/ldap/ldap_login module with a new CreateSession option which controls the opening of an interactive LDAP session. This functionality was previously behind a feature flag, but is now enabled by default.
    • #19946 from zeroSteiner – Adds a warning to help users that are performing relay attacks. It notes that the attack won’t work when relaying SMB to SMB on the same host if the MS08-068 patch has been applied.

Bugs fixed (5)

  • #19745 from smashery – This adds an escape_args method to all command shells that finds the appropriate OS escaping routines for an SSH server.
  • #19902 from zeroSteiner – This fixes the byte to int and vice versa conversion in MsAdts.
  • #19919 from jheysel-r7 – This fixes an issue in the gather/ldap_esc_vulnerable_cert_finder that would come up when checking templates for ESC13 that had missing issuance policy OIDs.
  • #19922 from cgranleese-r7 – Fixes a crash when searching by target, i.e search targets:python.
  • #19925 from zeroSteiner – Fixes a bug that caused a module’s validation logic to not always be executed.

Documentation added (2)

  • #19895 from cgranleese-r7 – Updates multiple out of date reference links within modules.
  • #19920 from jheysel-r7 – This adds documentation for creating AD CS certificate templates that are vulnerable to ESC4, ESC13, and ESC15 for testing purposes.

You can always find more documentation on our docsite at docs.metasploit.com.

Get it

As always, you can update to the latest Metasploit Framework with msfupdate
and you can get more details on the changes since the last blog post from
GitHub:

If you are a git user, you can clone the Metasploit Framework repo (master branch) for the latest.
To install fresh without using git, you can use the open-source-only Nightly Installers or the
commercial edition Metasploit Pro

Introducing an enhanced local IDE experience for AWS Step Functions

Post Syndicated from Chris McPeek original https://aws.amazon.com/blogs/compute/introducing-an-enhanced-local-ide-experience-for-aws-step-functions/

This post written by Ben Freiberg, Senior Solutions Architect.

AWS Step Functions introduces an enhanced local IDE experience to simplify building state machines. Workflow Studio is now available within Visual Studio Code (VS Code) through the AWS Toolkit extension. With this integration, developers can author and edit state machines in their local IDE using the same powerful visual authoring experience found in the AWS Console.

Step Functions is a visual workflow service that helps developers use AWS services to build distributed applications, automate processes, orchestrate microservices, and create data and machine learning (ML) pipelines.

Customers choose Step Functions to build workflows that involve multiple services such as AWS Lambda, AWS Fargate, Amazon Bedrock, and HTTP API integrations. Developers create these workflows as state machines through the AWS Console using Workflow Studio or as code using Amazon States Language (ASL), a JSON-based domain specific language. Developers maintain their workflows definitions alongside the application and Infrastructure as code (IaC) code. Now, builders have even more capabilities to build and test their workflow in VS Code that matches the same experience as in AWS console.

Simplifying local workflow development

The integrated Workflow Studio provides developers with a seamless experience for building Step Functions workflows within their local IDE. You’ll use the same canvas used in the AWS Console to drag and drop states to build your workflows. As you modify the workflow visually, the ASL definition updates automatically, so you can focus on business logic rather than syntax. The Workflow Studio integration offers the same intuitive and visual approach to designing state machines as the AWS Console, without switching context.

Getting started

To use the updated IDE experience, verify that you have the AWS Toolkit with at least version 3.49.0 installed as a VS Code Extension.

AWS Toolkit extension in VS Code which can be updated.

Figure 1: AWS Toolkit update available

After installing the AWS Toolkit extension, you can start building with Workflow Studio by opening a state machine definition. You can use a definition file from your local workspace or use AWS Explorer to download an existing state machine definition from the cloud. VS Code integration supports ASL definitions in JSON and YAML formats. (Note: Files must end in .asl.json, asl.yml or .asl.yaml for Workflow Studio to automatically open the file.) While working with YAML files, Workflow Studio converts the definition to JSON for editing, then converts back to YAML before saving.

A sample state machine in Workflow Studio with Design mode open.

Figure 2: Design mode in Workflow Studio

Workflow Studio in VS Code supports both the Design and Code mode. Design mode provides a graphical interface to build and inspect your workflows. In Code mode, you can use an integrated code editor to view and edit the Amazon States Language (ASL) definition of your workflows. You can always switch back to text-based editing by selecting the Return to Default Editor link at the top right of Workflow Studio, as shown in the following screen.

A sample state machine in Workflow Studio with Code mode open.

Figure 3: Code mode in Workflow Studio

To open Workflow Studio in VS Code manually, you can use the “Open with Workflow Studio” action at the top of a workflow definition file or the icon in the top right of the editor pane. Both options are highlighted in the following screen. Additionally, you can use the file context-menu to open Workflow Studio from the file explorer pane.

A asl file in the default editor showing the different ways to open Workflow Studio.

Figure 4: Integrations of Workflow Studio into the editor

Edits you make in Workflow Studio are automatically synced to the underlying file as unsaved changes. To persist your changes, you must either save the changes from Workflow Studio or the file editor. Similarly, any changes you make to the local file are synced to Workflow Studio on save.

Workflow Studio is aware of Definition Substitutions, so you can even edit workflows which have been integrated with your IaC tooling like AWS CloudFormation or the AWS Cloud Development Kit (CDK). Definition Substitutions is a feature of CloudFormation that lets you add dynamic references in your workflow definition to a value that you provide in your IaC template.

AWSTemplateFormatVersion: "2010-09-09"
Description: "State machine with Definition Substitutions"
Resources:
  MyStateMachine:
    Type: AWS::StepFunctions::StateMachine
    Properties:
      StateMachineName: HelloWorld-StateMachine
      DefinitionS3Location:
        Bucket: amzn-s3-demo-bucket
        Key: state-machine-definition.json
      DefinitionSubstitutions:
        TableName: DemoTable

You can then use the Definition Substitutions in the definition of your state machine.

"Write message to DynamoDB": {
  "Type": "Task",
  "Resource": "arn:aws:states:::dynamodb:putItem",
  "Next": "Remove message from SQS queue",
  "Arguments": {
    "TableName": "${TableName}",
    "Item": {
      ... omitted for brevity ...
     }
  },
  "Output": "{% $states.input %}"
}

The code defines a Step Functions task state that writes a message to DynamoDB using the putItem operation. The ${TableName} substitution syntax allows for a dynamic DynamoDB table name that can be passed as a parameter when the state machine is executed.

Testing and Deployment

Workflow Studio integration supports testing a single state through Step Functions TestState API. With the TestState API, you can test a state in the cloud from your local IDE without creating a state machine or updating an existing state machine. With the power of localized granular testing, you can build and debug changes for individual states without needing to invoking the entire state machine. For example, you can refine the input or output processing, or update the conditional logic in a choice state without ever leaving your IDE.

Testing a state

  1. Open any state machine definition file in Workflow Studio
  2. Select a state from the canvas or the code tab
  3. Open the Inspector panel on the right side if not already openA DynamoDB PutItem opened in the Workflow Studio inspector panel with the Arguments showing a Definition Substitution..
    Figure 5: Arguments of an Individual state
  4. Select Test state button at the top
  5. Select your IAM role and add the input. Make sure that the role has the necessary permissions for using TestState API
  6. If your state contains any Definition Substitutions, you’ll see an additional section where you can replace them with your specific values.
  7. Select Start Test

Modal popup of the TestState with a role selected and showing the entered value of a Definition Substitution.

Figure 6: TestState configuration with a Definition Substitution

After the test succeeds, you can publish your workflow from the IDE using the AWS Toolkit. You can also use IaC tools such as AWS Serverless Application Model, AWS CDK, or CloudFormation to deploy your state machine.

Conclusion

Step Functions is introducing an enhanced local IDE experience to simplify the development of workflows using the VS Code IDE and AWS Toolkit. This streamlines the code-test-deploy-debug cycle and offers developers a seamless integration of Workflow Studio. By combining visual workflow design with the power of a full-featured IDE, developers can now build Step Functions workflows more efficiently.

To get started, install the AWS Toolkit for Visual Studio Code and visit the user guide on Workflow Studio integration. Find hands-on examples, best practices, and useful resources for AWS serverless at Serverless Land.

Scale and deliver game streaming experiences with Amazon GameLift Streams

Post Syndicated from Donnie Prakoso original https://aws.amazon.com/blogs/aws/scale-and-deliver-game-streaming-experiences-with-amazon-gamelift-streams/

Since 2016, game developers have been using Amazon GameLift to power games with dedicated, scalable server hosting capable of supporting 100M concurrent users (CCU) in a single game. Responding to customer requests for additional managed compute capabilities beyond game servers, we’re announcing Amazon GameLift Streams — a new capability in Amazon GameLift to help game publishers build and deliver global, direct-to-player game streaming experiences. As part of this announcement, existing capabilities in Amazon GameLift are now known as Amazon Gamelift Servers, continuing to serve hundreds of developers including industry leaders Ubisoft, Zynga, WB Games, and Meta.

Amazon GameLift Streams helps you deliver game streaming experiences at up to 1080p resolution and 60 frames per second across devices including iOS, Android, and PCs. In just a few clicks, you can deploy games built with a variety of 3D engines, without modifications, onto fully-managed cloud-based GPU instances and stream games through the AWS Network Backbone directly to any device with a web browser.

Amazon GameLift Streams helps you distribute your games direct-to-players, without having to invest millions of dollars in infrastructure and software development to build your own service. Players can start gaming in just a few seconds, without waiting for downloads or installs.

Here’s a quick look at Amazon GameLift Streams:

You can use the Amazon GameLift Streams SDK to integrate with your existing identity services, storefronts, game launchers, websites, or newly created experiences such as playable demos, and begin streaming to players. You can monitor active streams and usage from within the AWS console, and seamlessly scale your streaming infrastructure across multiple regions on the AWS global network to reach more players around the world with low-latency gameplay. Amazon GameLift Streams is the only solution that enables you to upload your game content onto fully-managed GPU instances in the cloud and start streaming in minutes, with little or no modification of your code.

Players can access AAA, AA, and indie games on PCs, phones, tablets, smart TVs, or any device with a WebRTC-enabled browser. Amazon GameLift Streams allows you to dynamically scale streaming capacity to match player demand, ensuring you only pay for what you need. You can choose from a selection of GPU instances that offer a range of price performance, and rely on the built-in security of AWS to protect your intellectual property.

Let’s get started
To begin using Amazon GameLift Streams, I need an existing Amazon GameLift Streams implementation. I prepare my game files by following the Amazon GameLift Streams documentation.

Then, I’ll upload my files to Amazon Simple Storage Service (Amazon S3). I can use the AWS Management Console or this AWS Command Line Interface (AWS CLI) command to upload my game files:

aws s3 sync my-game-folder s3://my-bucket/my-game-path

The next step is to create an Amazon GameLift Streams application. I navigate to the Amazon GameLift Streams console. This is how the new AWS GameLift Streams console looks:

On the Amazon GameLift Streams console, I choose Create application.

In the Runtime settings, I select the runtime environment for my game application.

Then, I need to select my S3 bucket and folder from the previous step, then set the path to my game’s main executable.

I also have the option to configure the automatic transfer of application-generated log files into a S3 bucket. After I’m done with this configuration, I choose Create application.

After my application setup is completed, I need to create a stream group, a collection of compute resources to run and stream the application. I navigate to Stream groups in the left navigation pane of the Amazon GameLift Streams console.

On this page, I define a description for my new stream group.

Here, I select the capabilities and pricing of my stream group. Since my application is using Microsoft Windows Server 2022 Base, I make sure to select one of the compatible stream classes.

Next, I need to link with the application I created in the previous step.

On the Configure stream settings page, I can configure additional locations for my stream group, bringing in additional capacity from other AWS Regions. There are two capacity options that I can choose, always-on capacity and on-demand capacity. The default capacity setting provides one streaming slot, which is sufficient for initial testing.

Then, I need to review my configuration and choose Create stream group.

With stream groups configured, I can test my game streaming. I navigate to the Test stream page on the console to launch my application as a stream. I select this stream group and select Choose.

On the next page, I can configure any command line arguments or environment variables to run my application. I don’t need any extra configurations and choose Test stream.

Then, I can see that my application is running as expected. I can also interact with my game. This test helps me verify that my game works properly in streaming mode and serves as an initial proof of concept.

After I’ve confirmed everything works, I can integrate the Web SDK into my own website. The Web SDK and AWS Software Development Kit (AWS SDK) with Amazon GameLift Streams APIs help me to embed game streams, similar to what I tested in the console, into any web page I manage.

Additional things to know

  • Availability – Amazon GameLift Streams is currently available in the following AWS Regions: US East (Ohio), US West (Oregon), Asia Pacific (Tokyo), Europe (Frankfurt). Additional streaming capacity can also be configured in US East (N. Virginia) and Europe (Ireland).
  • Supported operating systems – Amazon GameLift Streams supports games running on Windows, Linux, or Proton, offering easy onboarding and compatibility with game binaries. Learn more on Choosing a configuration in Amazon GameLift Streams documentation page.
  • Programmatic access – This new capability provides comprehensive tools including service APIs, client streaming SDKs, and AWS CLI for content packaging.

Now available
Explore how to streamline your game distribution using Amazon GameLift Streams. Learn more about getting started on the Amazon GameLift Streams page.

Happy streaming!

— Donnie

—

How is the News Blog doing? Take this 1 minute survey!

(This survey is hosted by an external company. AWS handles your information as described in the AWS Privacy Notice. AWS will own the data gathered via this survey and will not share the information collected with survey respondents.)

Network Stats: Launching the CA-East Region in Canada

Post Syndicated from Brent Nowak original https://www.backblaze.com/blog/network-stats-launching-the-ca-east-region-in-canada/

A decorative image showing the globe with cloud icons over the Backblaze data center locations.

Over the past few years, Backblaze has expanded our regional footprint, adding capacity in the US-West region, growing in our EU-Central locale, opening a new US-East presence, and, most recently, moving into Canada with CA-East with an initial storage capacity of just under 60PB. 

We approached our most recent expansion into Canada a bit differently, and today, I want to cover some of the new processes and efficiencies that we adopted for this project and how we’re well positioned to serve the Canadian market based on our network connections.

A photograph showing a sculpture of the the Toronto airport code, YYZ.
Backblaze deployment team lands in Toronto.

Scaling infrastructure and calling in the reinforcements

The CA-East data region deployment was our fastest to date, cutting the deployment life cycle (“the ink is signed” to a live production system) down in time by 50%. In this deployment cycle we worked with a third party integrator to help us streamline the process and also leveled up our automation procedures for installing operating systems and our storage software stack. 

Historically we’ve drop-shipped all our equipment such as the networking gear, servers, hard drives, cables, and tools to the destination site for our deployment team to inventory, unbox, and physically install. It’s fun. It’s controlled chaos (if you like that sort of thing)—but for this build cycle we wanted to iterate our process further to ease and enable future growth in a more predictable and scalable fashion by working with a third party to assist with the initial physical build of the racked equipment.

On our end, there’s up-front engineering time documenting how all the fiber, copper, and power cables are organized. We have a cable map for every device, every cable, and every location as well as how it should be connected. It’s heavy on the paperwork side, but it’s time well spent. It allows us to template and stamp out future cabinets with ease. When we need more storage-focused cabinets to deploy additional storage, that’s a cabinet standard. If we need more compute, that’s also a cabinet that can be easily built out from a template. 

The workload on the third party integrator side consists of taking our directions and performing all the physical racking and wiring. Handling all of these tasks takes time. You wouldn’t believe the amount of cardboard and packaging material that you need to process! Unboxing over a hundred servers, thousands of hard drives, and hundreds of fiber and copper cables is no small feat. (Apologies in hindsight for not giving you a marathon unboxing video.) They received all our packaging, then racked and cabled up everything according to our specifications. After inspection and quality control, everything was securely sealed in crates and shipped off to Canada.

A photograph showing several Backblaze servers.
Initial setup and bootstrapping of CA-East cluster at the integrator site.
A photo of Backblaze storage cabinets.
Almost ready for QA and final inspection before shipping to the data center.

Automate all the things

Perform a process once? Sure. Have to do it more than twice? Automate it!

Before shipment out to the data center location, we sent a small team to the integrator site to perform a physical quality assessment of the build and set up remote access, which allowed us to bootstrap the platform as we had access to power and an internet connection. 

Internally, we have a system that has a record of machine serial numbers and their roles (e.g., storage, api, database, etc). When a new machine boots up for the first time on our network, it gets a vanilla operating system installed via our PXE services. This is all parallelized, meaning that we were able to have systems to log in to within a few hours for the entire server set. 

It’s a lot of fun toggling the power buttons one-by-one on over 90 servers, the PXE server network link running hot, and having an entire fleet of servers automatically install an operating system and be ready for further administration within minutes. Quite different from my days of performing floppy disk installs of Windows 95!

With a final inspection and software pass, everything was approved for shipment. The integrators securely boxed up our cabinets and they were on their way to Canada.

CA-East setup

Arriving at the destination site, everything was brought to the data center floor, bolted down, grounded, and energized. Within four hours we had network connectivity with our internet carriers and had set up our secure connections back to our production network to start our Backblaze software installation with our various internal teams. Within a few days, we had around 90 servers running and ready for our Quality Assurance team to start running tests to simulate client activity.

We partnered with Cologix, a leading network-neutral interconnection and hyperscale edge data center provider in North America, as our Canadian data center facility operator for this deployment. Cologix’s digital edge data center is a 20,000-square-foot, Tier III facility with two megawatts of power. It is a highly secure and efficient colocation and interconnection hub that features industry leading cooling designs, robust 24/7 security with biometric dual authentication access, and compliance with SOC 1, SOC 2, HIPAA and PCI-DSS as well as ISO 27001 certification by Schellman.

A photo of Backblaze Storage Pods.
Storage Pods with a few compute servers at the top of each cabinet.
A photo of Backblaze Storage Pods.
CA-East: Network and compute cabinets with room to grow.

Connectivity

Our standard connectivity posture is to connect to three global carriers for the most expansive reach to every network possible, and also to join a local internet exchange (IX) for exchanging traffic between other IX members locally within the same data center or metro region for low-latency efficiency. Additionally, for this site, we also are connected to a large Canadian regional carrier to bring us in close proximity to Canadian-sourced traffic.

With low-latency and diverse dark fiber connectivity between Cologix’s data centers, including Canada’s largest and most important carrier hotel, the facility offers access to 160+ networks, TORIX, and 50+ cloud providers. 

Overall that makes our CA-East connectivity map look like this.

A diagram showing how Backblaze's network traffic is routed through global carriers, regional carriers, and the local level.
Option 1: Global Carriers. Option 2: Regional ISP. Option 3: IX Traffic.

Joining TorIX

The local internet exchange for this site is Toronto Internet Exchange (TorIX),  the leading Canadian internet exchange point (IXP) and one of the largest in the world. At the time of this post, more than 250 organizations exchange on average over 1.3 Terabits per second (Tbit/s) of traffic every day between each other locally.

Connecting to TorIX allows low latency transit between us and internet service providers (ISPs), other clouds, partner content delivery networks (CDNs), other enterprise networks, and hosting providers that provide compute services.

Go live

I’ve been at Backblaze for four years now and have been able to participate on builds to expand our US-West, US-East, and now CA-East regions. Turning on the metaphoric “switch” to make the site live is a little anticlimactic—from a network point of view, the only traffic we see at the start of a new region is our monitoring, internal jobs, and some soft-launched testing or proof of concept (PoC) accounts.

Here’s a sample of the network traffic from when we brought up peering with our carriers and soft launched the data region for our internal QA teams.

A chart showing Backblaze network ingress traffic after the data center was live.
Initial traffic into CA-East at time of launch.

Where is the initial network traffic coming from? With our network telemetry monitoring, we’re able to see the flows in traffic in and out of our network. That network traffic information is enriched with data that adds context to allow us to see how much traffic is coming to or from a particular upstream provider or geographical region.

Here’s a Sankey diagram that shows a snapshot of current traffic from Canadian provinces over different service providers to the Backblaze network, where the larger lines mean more traffic is seen from that particular province or network. Expectedly, Ontario and British Columbia are the two largest sources of traffic. 

A diagram showing network traffic by province and carrier network.
Ingress traffic by province and carrier networks to Backblaze network (BGP AS40401).

Canada is open for business

As the months progress, and as more customers create their accounts in this new data region and point their workloads at this location, we’ll see more traffic. We’ll be excited to see what fun insights we can glean, which we’ll keep you updated on in our Network Stats series. 

As Backblaze continues to grow its network, we’re excited to continue to iterate on our buildouts to make them more efficient. Ultimately, it lets us be more responsive to customer needs quickly. Same great network—just more locations.  

We’re excited to have a footprint in Canada and welcome your storage needs! If you’re interested in learning more about storing your data in Canada, you can read the go-live announcement here.

Ready to store data in CA East?

The new data region is available to customers now, and you can create an account there by selecting “CA East” in the region drop-down when creating a Backblaze account. Already storing data with Backblaze and want to keep a Canadian copy? Leverage our Cloud Replication feature and diversify your storage.

The post Network Stats: Launching the CA-East Region in Canada appeared first on Backblaze Blog | Cloud Storage & Cloud Backup

Bolt Graphics Zeus The New GPU Architecture with up to 2.25TB of Memory and 800GbE

Post Syndicated from Patrick Kennedy original https://www.servethehome.com/bolt-graphics-zeus-the-new-gpu-architecture-with-up-to-2-25tb-of-memory-and-800gbe/

The upcoming Bolt Graphics Zeus GPU architecture offers up to 6x 800GbE links and 2.2TB of memory on a 500W TDP GPU

The post Bolt Graphics Zeus The New GPU Architecture with up to 2.25TB of Memory and 800GbE appeared first on ServeTheHome.

The collective thoughts of the interwebz