When scanners miss the attack: how Cloudflare Client-Side Security protects storefronts

Post Syndicated from Juan Miguel Cejuela original https://blog.cloudflare.com/client-side-security-finds-4-malicious-campaigns/

A modern storefront can look perfectly healthy while malicious JavaScript works underneath: siphoning affiliate revenue, hijacking searches and clicks, tampering with analytics, or asking a remote server what to execute next. Pages load, products appear, and checkout works — yet the browser may be quietly doing something the site owner never authorized.

That is the blind spot our Client-Side Security machine learning (ML) model is built to expose. This post follows four operations, spanning eight payloads, that our Page Shield ML uncovered in the wild. 

The detection of these malicious payloads was automated; humans verified each finding only after the system had flagged it. When we afterward reviewed the campaigns using security scanning tools, seven of the eight payloads were entirely absent from VirusTotal, and URLScan returned no malicious verdict for any of them. Page Shield ML, meanwhile, caught all eight in live traffic.

For instance, while security research documented the broader Lnkr family years earlier, one specific payload version sat indexed by URLScan for nearly two and a half years with “No classification,” including during a direct scan in January 2024. Only in this case had VirusTotal ingested the payload earlier: while it currently flags the script as malicious, public history does not reveal when that verdict was first assigned. Meanwhile, Page Shield ML independently surfaced those exact bytes live on an online retailer's storefront. More broadly, a hash can be known long before the code behind it is classified as malicious. If your defense waits for that label, you are already late. You need ML that can unravel the JavaScript itself and judge it at scale.

Indeed, seeing a file is not the same as understanding it. The tricky part was that the four operations shared no universal signature or common concealment technique. One remained dormant unless the device, country, time, referrer, or browser state matched what it was waiting for. Another concealed a clickless affiliate request within an invisible iframe. Others intercepted clicks, suppressed monitoring, or conditionally loaded additional code from remote servers. To catch them, you have to watch how those pieces work together: when the script wakes up, what it hides, what it intercepts, and what it fetches next. Checking the page once is not enough; as these cases show, such scripts are built to stay quiet until the right victim shows up. That is why ongoing browser visibility makes the difference between catching an attack and missing it entirely.

How we detect and label JavaScript at scale

The same GNN (graph neural network) that flagged the four operations in this post had already caught malicious npm packages and an in-the-wild Magecart payment skimmer. The GNN does not treat JavaScript as a flat chunk of text; it reasons through the code as a graph: a syntax tree connecting code symbols and exposing what calls what, what the attacker tried to bury, and what still phones home. That structure helps it recognize suspicious patterns across minification, renaming, and some obfuscation without relying on a known URL or byte signature. 

The few scripts that the GNN flags as malicious (under 0.3% of all analyzed traffic) go to a lightweight large language model (LLM) on Workers AI for a live second opinion. This further reduces false positives while keeping recall high. When the LLM corroborates the GNN, customers are alerted.

To investigate the most complex scripts at scale, we use a cohort of frontier models, which we call teachers (an ensemble of automated judges). The cohort draws leading models from around six different families, including open-weight models running on Workers AI. We spin up each as an agent to analyze the same suspicious script in its own fresh, independent session. When useful, their agentic tool access lets them use a restricted JavaScript evaluator to unpack small snippets and reveal concealed behavior. We will soon extend this workflow with Cloudflare Sandbox for deeper analysis in isolated environments.

The frontier models sometimes disagree, especially on the most intricate scripts. We treat that disagreement as signal, not noise. Each label becomes a vote, weighted by the model's score in the Artificial Analysis Intelligence Index, producing a probability distribution over four labels: benign, payment skimming (magecart), other malware, and cryptomining. Human reviewers therefore need only examine scripts flagged as malicious or lacking a clear two-thirds majority. We then feed those label distributions back into GNN training, helping it distinguish ever more nuanced cases. This feedback loop is still partly manual, though we are starting to automate it.

Four malicious JavaScript operations we caught

These four operations do very different things, from commission theft to stolen analytics on shoppers the store already paid to acquire. Stealing a commission is not like skimming a credit card; likewise, hijacking search is not like stealing a password. If an ML model only knows one of those tricks, it will sleep through the others. Instead, our Page Shield ML has to stay attuned to every kind of hostile behavior. 

Now, let’s dig deeper into each operation and how it worked.

Operation 1: The after-hours affiliate-commission hijacker

Picture a quiet Sunday afternoon: a shopper on a phone taps a product. Instead of following the tap normally, the script opens a product or campaign landing page from an attacker-preselected list in a new tab and sends the original tab through an affiliate route. The storefront still appears to work. If the shopper completes a purchase (either then or later), the detour hijacks the attribution, crediting the sale (and any resulting commission) to an account that did not earn the referral.

What the shop lost

The shop could pay an unearned commission to an account that did not bring the shopper. Worse, if a legitimate partner had made the referral, the forced request could misattribute it, diverting credit and a potential payout from the partner who did the work. The damage could outlast one commission: partners who stop trusting the attribution system may also stop trusting the retailer behind it.

Attack chain

Qualified mobile visitor → intercepted product tap → script-selected page opens in new tab + original tab follows attacker’s affiliate route

How it stayed hidden

We found five related script builds: two active and three paused when captured. Each active variant uses a different set of gates before it acts, checking things like the visitor’s device and local time, whether the trick has run recently, whether a product button has appeared, and whether someone actually clicks it. That maze of rules keeps the malicious behavior out of sight during a brief automated visit unless the variant’s specific conditions are met. The active scripts use a MutationObserver (a JavaScript API) to watch for product tiles and buttons that dynamically appear after the page is first loaded. This lets them intercept clicks on those late-arriving elements, while a crawler that loaded the HTML once and stopped there could miss the redirect path entirely.

In the active later variants, the script intercepts a qualifying click and writes a three-day cooldown to localStorage (staying dormant on that device for days). It then executes a dual-tab maneuver: popping an attacker-chosen product page into a fresh tab to keep the shopper engaged, while the original tab takes a quick, unnoticed round-trip through the attacker's affiliate tracking link and back to the shop, to plant the attacker’s attribution cookie in the background. Console masking and self-defending source checks make inspection harder, while the cooldowns and narrow schedules limit how often the malicious path can appear during otherwise normal shopping.

The following sanitized excerpt shows how the payload hooks dynamic product tiles and executes the dual-tab detour. We simplified identifiers, reformatted the code, and neutralized destination URLs for readability.

The paused builds showed how the campaign could go dark without removing the script. Their embedded configuration set status: "paused", so they exited before installing click handlers. These paused scripts carried different per-shopper cooldown configurations (3, 4, and 5 days). One of the paused scripts even recorded a version-history comment explicitly documenting that the campaign was paused after Black Friday.

To reach visitors in the first place, the operation leveraged the site's marketing supply chain: the third-party scripts and tag managers embedded by e-commerce sites to track ad campaigns and analytics. One confirmed delivery path ran through two otherwise ordinary tag managers: Google Tag Manager → another tag manager → malicious script. That is how the payload reached the browser, not proof that either tag manager was compromised.

The attacker even disguised the domain hosting the script to pass a quick marketing review. One delivery host hid in plain sight: adtargett[.]com differed by a single “t” from adtarget[.]com, an advertising domain registered in 1998. The lookalike was registered in 2025 and, when we checked, its homepage called itself “Adtarget.com – Performance Marketing Agency.” This is typosquatting: by mimicking a real ad agency, the host blended in with routine marketing tags, quietly serving the malicious payload that hijacked shopper clicks and redirected them through affiliate payout links.

Operation 2: The clickless affiliate theft

While the first scam still needed a click, this one requires even less. A shopper can open a booking page, linger over the product options, and never touch an ad. In the background, however, the script might have already sent an affiliate request that could make a later sale look as though someone else had referred the shopper. Indeed, when the script’s conditions are met, the payload sends that request through a hidden iframe or a link that clicks itself.

What the shop lost

For the affected tourism business, the attack could corrupt the economics of customer acquisition: a legitimate booking or purchase could be credited to an unearned affiliate account. The code proves covert, automated affiliate requests, but whether any specific request resulted in completed attribution, account crediting, or paid commission in practice remains unobserved.

Attack chain

Time-gated browser → covert affiliate request (off-screen iframe) → 1-hour throttle cookie → when blocked, automated hidden-link click fallback

How it stayed hidden

The script conceals the affiliate request in two layers: selective execution (a pre-flight network gate and hourly schedule), and stealth delivery (an off-screen iframe). The first layer is surprising because its country labels are disconnected from actual geography: neither the shopper’s nor the shop’s location drives the choice.

First, the script calls a public IP-based geolocation service but ignores everything it returns, including the shopper’s country. We could not determine why it required a successful response while ignoring the returned data; this may have been intended to confuse investigators or simply been a remnant of an earlier version. Interestingly, if the geolocation request fails, the script silently stops; its promise chain ends with .catch(() => {}). Although intent is unproven, this fail-closed behavior could help the script evade network-restricted sandboxes.

Next, instead of using the fetched geolocation data, the payload contains three TradeDoubler (an affiliate-marketing network) configuration objects labelled {AU, US, and UK}. These settings blocks are embedded in the code, and each contains an affiliate URL and start and end times. The script computes Asia/Kolkata time in JavaScript, checks those configured time windows, then applies fixed odd/even-hour rules to choose one of the three or else skip the affiliate request for that run. The choice is deterministic. 

Together, the schedule and browser-state checks create time-gated selective execution, a form of cloaking. When those conditions do not line up, the affiliate behavior stays dormant, so a one-off inspection can miss it.

Once the script chooses a configuration, it writes a local cookie named affiliateClicked_<market> as a one-hour retry throttle so it will not re-fire for that region right away (this is a client-side throttle to avoid noise, not an affiliate-network attribution cookie). Next, it loads that affiliate URL in an off-screen iframe with the referrer suppressed. The iframe is the primary delivery path, but it carries an aggressive fallback: if the iframe errors or fails to finish loading after one to two seconds, the script creates a hidden link (<a>) without a target attribute and clicks it programmatically, which could navigate the user's active tab. To the qualifying shopper, nothing seems out of place: they never see an ad, never have to click, and can close the tab as if nothing happened.

As for the script’s obfuscation, it is simple but effective: even property names are assembled one character at a time. The following sanitized excerpt shows the payload creating an invisible off-screen iframe. We renamed key identifiers and reformatted the code for readability. The destination has been removed.

Operation 3: The old search saboteur, now storefront backdoor

Years ago, the Lnkr malware family made the news by hiding inside shady browser extensions, intercepting Google and Bing searches to redirect results and pocket ad money. Now, attackers repurposed the codebase to plant a backdoor into an online retailer’s website.

Because the script was running on a shop rather than a search engine, its old redirect tricks stayed dormant. This time, the script was used to send telemetry back to the attacker. More dangerously, it gave the attacker a remote doorway to arbitrarily download and run fresh JavaScript in customers' browsers whenever they wanted, without touching a single file on the server. It even carried an old trick from its extension days: shutting itself off if someone typed words like “virus” or “popup” into Google. From the outside, the store kept selling without a hint that anything was wrong.

What the shop lost

The shop lost control over what code runs in its customers' browsers. Attackers were secretly tracking visitors' sessions and had a direct backdoor to push and run any JavaScript they wanted on the storefront at any time.

Attack chain

HTML-referenced script → analyst evasion gates → parallel host-gated branches (dormant search vs. live backdoor) → arbitrary remote JavaScript execution

How it stayed hidden

Unlike campaigns delivered through tag managers, this script was directly embedded into the merchant’s HTML. We could not determine the exact initial intrusion vector; in practice, direct HTML insertions usually happen through compromised store admin credentials, an unauthorized template edit, or an infected third-party theme or plugin.

Under the hood, the script is a modular toolkit carrying both active and dormant code. Its older modules (transparent click overlays, search-engine query interceptors, extension-store link rewriters, and redirects for typosquatted domains, like buking[.]com instead of booking[.]com) only wake up on specific target sites, so they stayed turned off on this storefront. Several embedded domains (sugabit[.]net, votetoda[.]com, cdnpps[.]us, and telemetry endpoint hanstrackr[.]com) sat inside these disabled modules.

On the shop, the active branches focused on evasion, telemetry, and remote control:

  • Playing dead for security researchers. An evasion trick inherited from its browser-extension days: the script monitored search inputs and URL queries for telltale adware terms. Searching one security keyword paused the script for that visit. Searching two or more wrote a persistent opt-out record to localStorage, permanently silencing the script on that analyst's machine so repeated tests would find nothing. While originally built to dodge analysts on search engines, as far as we could determine, this check was hard-coded specifically to Google search URLs and remained dormant on the merchant's storefront.
  • Dynamic remote code execution. The script didn't need to modify the storefront to change its behavior. While the hardcoded domain names (scrprime[.]com, youronlinesearches[.]com, jullyambery[.]net) remained identical to older captures, what those endpoints returned was entirely up to the attacker. The script could phone home visitor telemetry, ask those servers for new instructions, and pull down fresh JavaScript directly into the shopper's browser. Effectively, this gave attackers a live backdoor to run arbitrary code on the storefront. We could not determine what second-stage payloads were served in practice.

All in all, a static snapshot of the site showed only the normal storefront, while the underlying state checks, anti-analysis traps, and remote-loading branches exposed the backdoor.

Operation 4: The paid-mobile cloaker

The shop already paid to bring this visitor in from a mobile ad or marketing campaign. The malicious script lets that visit through, then cuts off the merchant's visibility. Analytics go dark, the live support chat vanishes, and a rogue observer starts recording telemetry on the very session the store just bought. 

Behind the scenes, the payload refuses to run unless that visit matches an elaborate set of conditions: the exact target storefront, a narrow mobile screen, and a campaign tag during the first two pages of the visit. It stays dormant on laptops, corporate networks, cloud providers, and VPNs, so the engineers most likely to debug the page never see it fire. The script also stays dormant across selected US cities and regions, backed by a handcrafted denylist of 325 IP strings to dodge automated scanners and security analysts. Only then does the script attempt to tear down the shop’s monitoring, substitute replacement advertising and analytics identities, and phone home. A second look from the wrong device or network will never trigger it. All the while, the storefront keeps selling.

What the shop lost

For a direct-to-consumer retailer, the malware specifically targeted high-value traffic the store had paid to acquire through paid-search and marketing campaigns (ppc, cpc, sms, paid). Those customers could still buy. Yet the shop faced three clear threats: diverted advertising attribution and unearned publisher payouts, the loss of critical session analytics across nine observability tools, and the suppression of the help chat and contact form (preventing shoppers from asking questions or reporting anomalies). Dynamic analysis in a sandboxed browser environment confirmed that the replacement analytics script loaded and fired a tracking beacon (an invisible network request sent to log visitor activity), but whether the attacker successfully captured session telemetry or diverted ad revenue in practice remains unproven.

Attack chain

Campaign-tagged mobile arrival → multi-tier cloaking & network gates → monitoring sabotaged → advertising, analytics, and support controls rewritten 

How it stayed hidden

To blend into the store's marketing supply chain, the attacker delivered the payload from sdk-amazonaws[.]com, a lookalike domain registered in 2024 and wholly unaffiliated with the official Amazon Web Services domain (amazonaws.com, registered in 2005). To compound the deception, the attacker prefixed the domain with a subdomain mimicking a popular e-commerce marketing platform too. This stacked, double-trusted-brand typosquat forged a convincing disguise, engineered to slip past quick tag reviews. Neither Amazon Web Services nor the impersonated marketing platform was involved in the attack or suffered any compromise.

Once loaded in the browser, the script executed an exceptionally dense gauntlet of cloaking gates before triggering its main payload:

  • Target host and browsing context. The script verified that window.location.hostname matched the specific merchant host it was built to target (exiting immediately anywhere else), ensured the current window was top-level (not an embedded iframe), and checked that the path did not contain /challenge. It also verified that tracking marker cookies (_cart_dr and logoalt) were not already present in the browser.
  • Device and campaign filtering. The visitor's viewport width had to be narrower than 477 pixels (a handheld smartphone). Furthermore, the visitor had to arrive via a first-touch (the visitor's initial referral) campaign tagged with one of six specific UTM mediums (Urchin Tracking Module, standard URL tags used to track marketing campaigns): ppc, cpc, sms, paid, flow, or campaign. It also had to be the first or second page load of their session. Curiously, while the code contained a nominal non-UTM path, it required the session page count to be simultaneously greater than -1 and less than -2 (a mathematical impossibility that left that branch completely unreachable). This could be yet another diversion technique or a code change leftover.
  • The "random" gate that always passed. The code featured what looked like a probabilistic throttle (Math.random() <= threshold) to make execution appear intermittent. However, when we solved the deobfuscated arithmetic, the threshold reduced to exactly 1. Because JavaScript's Math.random() always returns a value strictly below 1, this gate always evaluates to true. Like the unreachable non-campaign branch, this is a condition that never actually decides anything. It may be a leftover throttle, or purposeful camouflage for anyone reading the obfuscated math. Either way, the captured payload never used it to skip a qualifying visitor.
  • Third-party IP intelligence. The script queried an external third-party IP intelligence API using an embedded key. It required a U.S. mobile consumer connection, while immediately bailing out if the response flagged a business network, hosting facility, cloud provider, bogon, Tor exit node, VPN, proxy, relay, or general threat indicator.
  • Geographic exclusions. The payload did not activate for visitors from specific regions (US-NY, US-CA, and US-NHDD) or from cities named San Francisco, Plymouth, Compton, Hopkinton, and Lafayette.
  • The 325-entry IP substring trap. The script checked the visitor's IP against an embedded denylist containing 325 full IPv4 address strings. After deduplication, these represented 313 unique addresses across 249 distinct three-octet prefixes. Rather than performing structured CIDR (Classless Inter-Domain Routing) subnet matching, the author simply stripped the final octet from the visitor's IPv4 address and ran a raw substring search: !denylistString.includes(visitorPrefix).

In stripped-down pseudocode, the multi-layer primary activation funnel looks like this:

Sabotaging observability and hijacking identities:

Only after every primary gate passed did the script execute its payload:

  • Blinding monitoring tools. It searched the DOM and removed script tags for nine different observability and analytics services: Lucky Orange, Segment, Optimizely, New Relic, Bugsnag, LogRocket, Hotjar, Microsoft Clarity, and the store's Google Tag Manager container (GTM-<redacted>). In remaining inline scripts, it string-replaced references to these tools with undefined dummy identifiers (hji0) so calls to them failed silently, attempting to blind the store's error reporting and monitoring.
  • Suppressing customer support. It injected CSS and removed elements to hide its support-chat and contact-form containers, cutting off the customer's direct line to store support.
  • Replacing advertising and analytics identities. It purged Google Ads globals (google_ad_modifications, adsbygoogle), tore down existing ad slots (ca-pub-<original>), and loaded Google Ads under a replacement publisher ID (ca-pub-<replacement>). It then injected a new Microsoft Clarity session-replay script configured with a rogue, replacement project ID.

Simpler independent beacons and the 600-day marker:

In sharp contrast to the elaborate primary cloak, the payload also contained secondary beaconing branches (standalone routines that quietly ping an external server to confirm a visit) that completely bypassed the viewport, hostname, campaign, geography, and IP gates. If the visitor was on their second page or beyond, the script wrote a persistent cookie (_cart_dr=1) with an expiry of exactly 600 days (51,840,000,000 milliseconds) and fired an invisible zero-pixel image request to a remote telemetry endpoint on maper[.]info (a tracking beacon used to log that the browser reached this step).

A separate branch checked for an alternate marker (_logo_alt), which would trigger a second telemetry .png beacon (a cookie this script looked for, but never wrote itself; likely planted by a companion script). This gave the attacker a simple, persistent hit-counter to log basic traffic for all visitors (IP and User-Agent logged at the endpoint) across the entire store, while keeping their high-risk ad-hijacking routines strictly hidden behind the mobile cloak (high-value paid arrivals). It shows why analyzing only one visible effect does not reveal the full reach of a multi-purpose payload.

Indicators of Compromise (IOCs)

We are publishing these indicators to help security teams and researchers detect and hunt these campaigns across their own environments. All indicators are drawn directly from captured payloads and their network connections. Listed URLs are defanged. Some indicators have been withheld or generalized because publishing them could inadvertently divulge the identities of affected organizations. Listed domains reflect infrastructure observed participating in the delivery, redirection, or telemetry chain during these attacks; inclusion does not imply that a shared service or hosting provider is exclusively malicious.

Four lessons for defenders

Taken together, the operations tell one escalating story: attackers changed the objective, delivery path, and disguise, but the browser still had to execute their logic. Four lessons stand out.

Behavior beats signatures. These operations pursued different forms of monetization and manipulation, but every payload still had to act in the browser: observe events, inspect state, alter the page, schedule work, make network requests, or load another stage. That is what structural analysis looks for: the logic a hostile payload must carry, even as URLs, signatures, and objectives change.

Selective execution is part of the attack, not a footnote. Device, time, geography, referrer, session, network, and cooldown gates can all defeat a crawler that visits once and takes a static snapshot. Continuous visibility matters because an attack may appear only to one browser, in one state, at one moment. 

Obfuscation raised the cost of analysis, but in these cases it did not prevent detection. Self-defending loops, console suppression, debugger traps, rotated string tables, and dead branches complicated analysis. Page Shield ML still surfaced all four operations despite those barriers. Fast in-house models surface the suspicious code at scale, while frontier models investigate the hardest cases. Their disagreements highlight the trickiest obfuscation and logic, helping us narrow our focus.

Context completes the picture. Code that looks ordinary in isolation can reveal its malicious role once defenders link static analysis with dynamic context: how it arrived, which browser state activated it, what connections it opened, and what it actually did at runtime.

Continuous visibility into client-side execution

These four operations relied on different layers of misdirection, but they all shared one constraint: their JavaScript had to execute in the browser. Public scanners and static crawls can miss gated behavior. Continuous observation helps clarify what the code actually does when real visitors interact with the page

Cloudflare Client-Side Security provides that visibility across all plans. You can turn on Continuous script monitoring under Security settings to track first- and third-party scripts on your storefront, while automated malicious-script detection and alerting are available with Client-Side Security Advanced. You can review script activity and manage detections directly in the Cloudflare dashboard.
AWS reimagines the getting started experience

Post Syndicated from Micah Walter original https://aws.amazon.com/blogs/aws/aws-reimagines-the-getting-started-experience/

Amazon Web Services (AWS) started with a handful of foundational infrastructure services such as Amazon Simple Storage Service (Amazon S3), Amazon Elastic Compute Cloud (Amazon EC2), and Amazon Simple Queue Service (Amazon SQS), so that anyone with an idea could start building. As the world’s largest companies and governments adopted AWS, they asked for features to optimize their configuration for a range of global business contexts, security requirements, and operational needs. To meet these needs, AWS expanded globally through new Regions and added breadth and depth of services in security, networking, governance, and cost controls, so those customers could operate wherever they needed and at the scale they require. That combination of global reach, breadth, and depth remains essential for those customers, but if you are at the start of a new idea, every configuration option is effort standing in the way of shipping your dream product fast.

Today, we’re announcing a new simplified experience on AWS for builders who are working at the pace of AI. Instead of having to complete configuration tasks before you can work on your project, you start with sensible defaults and simple administration. You sign up using an existing identity from providers including Google, GitHub, and Apple. For most new customers, no credit card is required to start and you receive $100 in free credits as part of the AWS Free Tier. You can build immediately in your first project. As you continue to work, you can invite collaborators with just an email address, without learning about AWS Identity and Access Management (IAM) or AWS IAM Identity Center. When your project grows beyond the free credits, you can set a spend limit so you stay within your budget on the paid plan. If you grow to need additional customization, you can activate advanced AWS features to access the full breadth and depth of AWS without migrating.

How it works
When you sign up, AWS organizes your work in a project. A project contains an AWS account, where you create resources, and settings for sharing with team members. AWS creates that structure for you and applies additional security controls so you can start building your idea. After signing in, you get a prompt to paste into your coding agent that configures it to work with your new AWS environment. From there, your agent can deploy resources, run workloads, and iterate on your application following best practices for working with AWS.

You can create another project with a click. When you want to work with an additional team member, you send an invitation to their email address. Identity permissions are handled for you, so there are no IAM users to create; each person you invite only gets access to the projects you specify. Console workflows and coding agents also configure permissions between supported services and resources automatically, so you do not have to set up or troubleshoot resource permissions by hand.

When you’re ready to move beyond free credits, you can upgrade to a paid plan by entering your payment method. You can set a monthly spend limit on a project based on your usage trends, starting at $20 per month. The spend limit is the ceiling for that project’s costs, and you pay for what you actually use up to that amount. For example, if you set a $50 spend limit and your project incurs $32 in charges that month, you pay $32 (plus taxes). AWS will suggest a spend limit based on your usage, and you can accept that recommendation or set a custom amount if you are planning to further scale your usage. If your project approaches the limit, you first receive notifications. If spend reaches the limit, AWS pauses your project rather than accumulating charges, and you can resume working on it when you raise the limit. Each project has its own spend limit so you can give a larger budget to a workload that is gaining traction while keeping a smaller budget on an experimental idea.

Let’s try it out
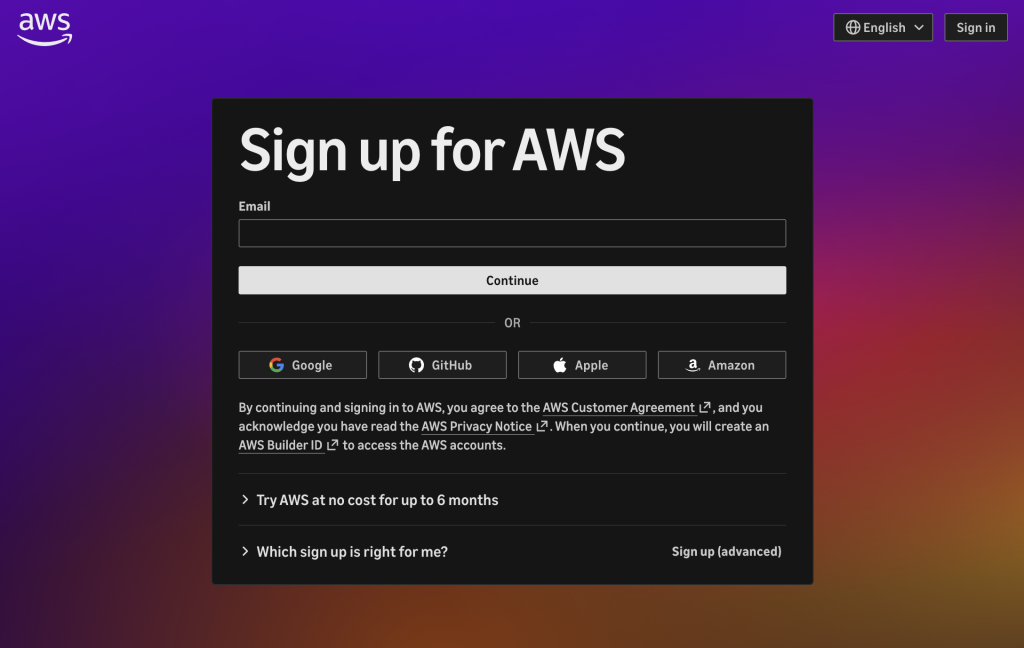
To get started, I went to aws.amazon.com and chose Create account. I signed in with my Google account and within seconds had a new project ready to go, as shown in the following screenshot.

The Sign up for AWS page, with options to continue with email or sign in using Google, GitHub, Apple, or Amazon.

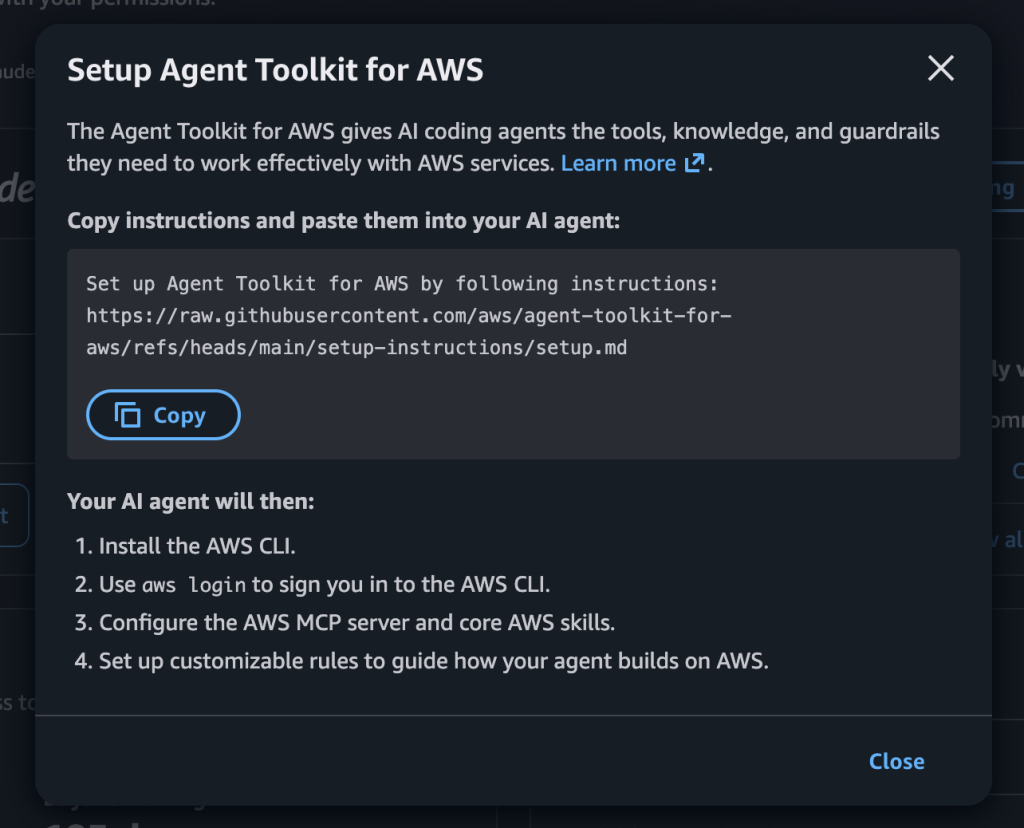
The first thing I saw was a prompt to configure my coding agent. I copied the prompt and pasted it into my agent. The agent set up the AWS Command Line Interface (AWS CLI) and the Agent Toolkit for AWS, logged me into AWS, and created a CLAUDE.md file in my project with guidance for the new experience.

The Setup Agent Toolkit for AWS dialog, with a prompt to copy and paste into your coding agent.

With the agent connected, I gave it a short prompt: build an API that returns a new unique sequential ID on every request. The agent created an AWS Lambda function, an Amazon DynamoDB table, and an Amazon API Gateway API, then deployed them for me. I did not have to configure resource permissions by hand. Within a few minutes I had a public endpoint that returned a newly minted ID on each request. My project started with $100 in free credits, and I received an additional $20 when the Lambda function was deployed.

A coding agent prompt to build an API that returns a unique sequential ID on every request.

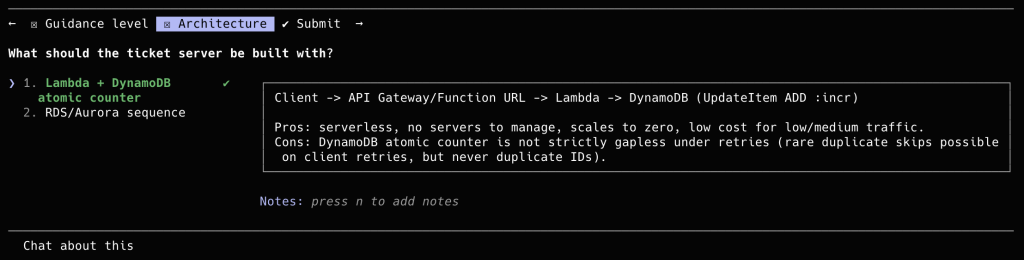
The coding agent presents architecture options for the sequential ID API, with AWS Lambda and Amazon DynamoDB selected.

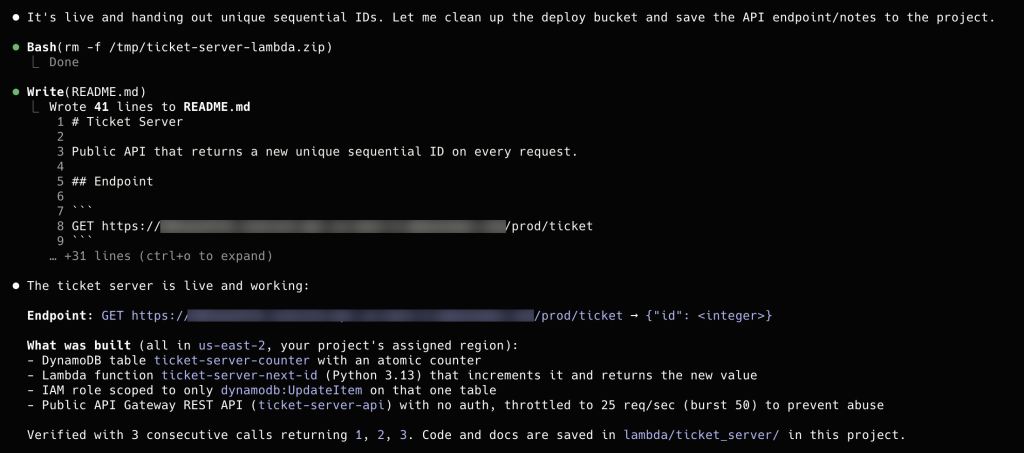
The coding agent confirms the API is live and lists the Amazon DynamoDB table, AWS Lambda function, and Amazon API Gateway API it deployed.

From the project, I could manage settings, invite team members by email, and monitor billing, as shown in the following screenshots.

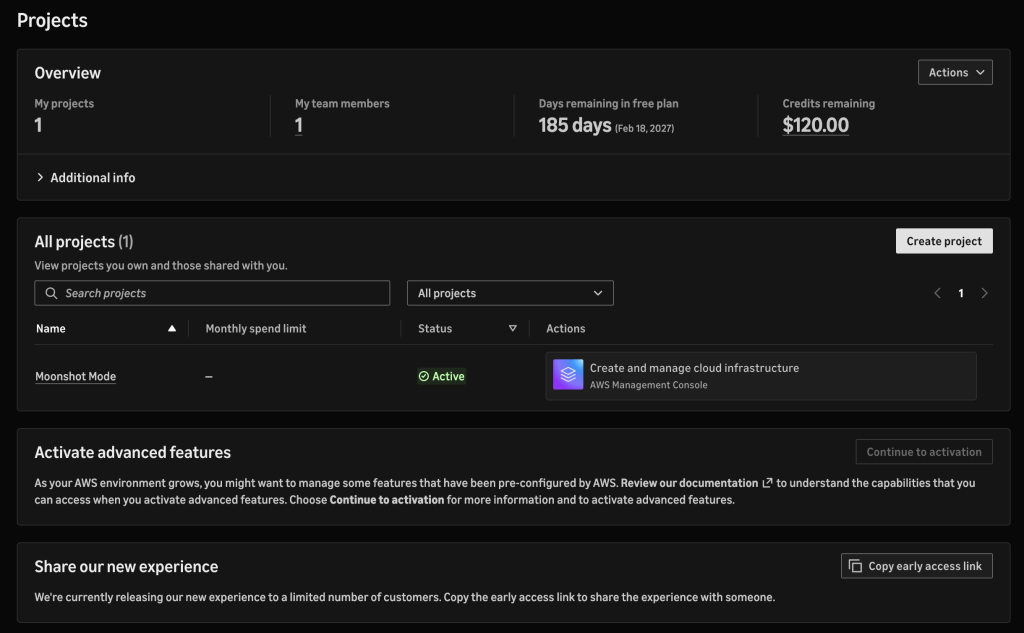
The Projects page, showing remaining free-plan days, credits, and a project.

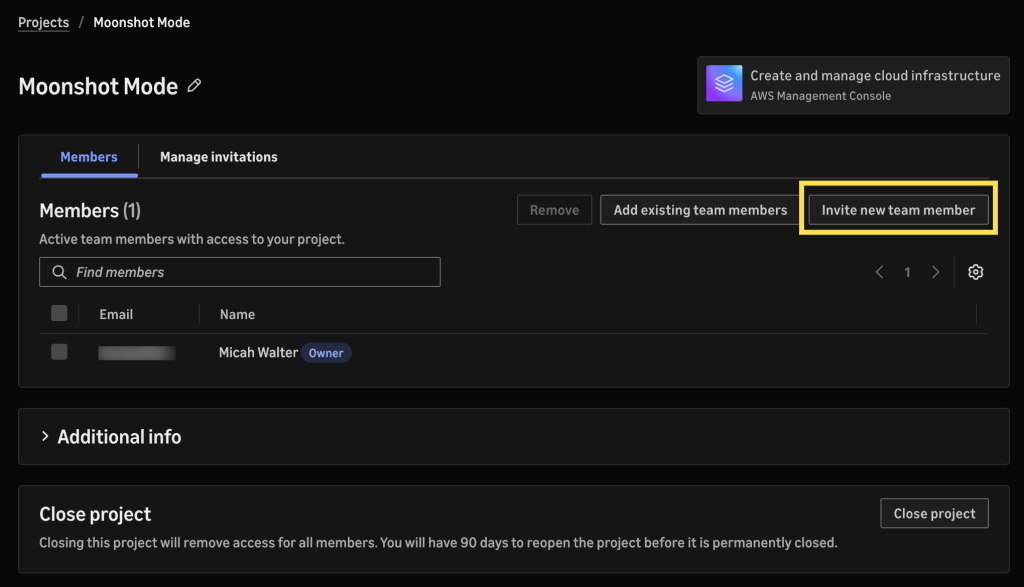
The project Members page, with the option to invite a new team member by email.

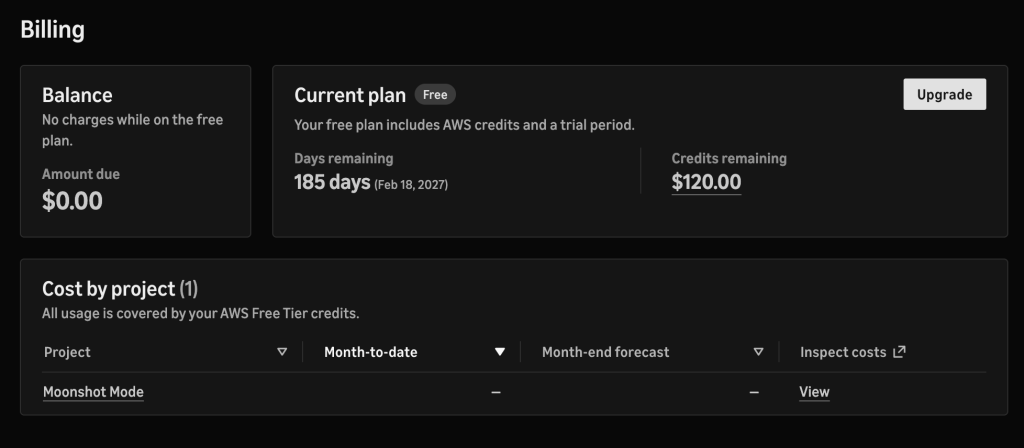
The Billing page, showing a $0.00 balance on the free plan, remaining credits, and cost by project.

Activating advanced features
If you reach the point where you need multiple Regions, or governance features like custom policies in AWS Organizations, you can activate advanced features at no additional cost. You’ll find yourself in a fully configured AWS Organization built according to best practices, with no migration and no downtime. Everything you configured previously is preserved and reflected in the underlying AWS services.

Now rolling out
We’ve heard from builders that they do not want to spend their first hours configuring an AWS environment. They want to build what they came to build, and we listened. AWS began as a place where anyone with an idea could start building, and this new simplified experience brings that starting point back, with sensible defaults so you can begin immediately, and with the global reach, breadth, and depth of AWS still there when your idea needs it. We are gradually rolling this experience out to new customers. We cannot wait to see what you build, and we want your feedback on the experience.

To try the new experience, create a new AWS account. To learn more, see Sign up for AWS (new).

Fedora 45 beta drags the Linux console into the 21st century (Register)

Post Syndicated from corbet original https://lwn.net/Articles/1094762/

The Register looks
forward
to the upcoming Fedora 45 release.

The biggest surprise is that Linux’s legacy in-kernel console – the
text-mode interface normally hidden beneath the GUI – has been
replaced with a software-controlled alternative.
The replacement is kmscon, a
userspace terminal emulator that has been in development for more
than a decade.

Discover and govern Snowflake data using SageMaker Unified Studio

Post Syndicated from Marco Duarte original https://aws.amazon.com/blogs/big-data/discover-and-govern-snowflake-data-using-sagemaker-unified-studio/

Many organizations operate in hybrid data environments where critical assets live in Snowflake while analytics workloads run on AWS, which can create governance gaps, discovery friction, and duplicated efforts when the two aren’t connected.

With Amazon SageMaker Unified Studio, you can govern data across Snowflake and AWS through its integrated catalog and AWS Glue Data Quality, a capability of AWS Glue. You connect directly to Snowflake tables without moving data, apply quality rules using AWS Glue Visual ETL, and publish validated assets to Amazon SageMaker Catalog, maintaining consistent governance across your entire distributed data estate.

Without this integration, cataloging Snowflake data requires building extraction pipelines, often taking days. With SageMaker Unified Studio connected to Snowflake, you can query, catalog, and validate the quality of federated data in 5–15 minutes. No data replication or custom ETL code required.

In this post, we show you how to connect Snowflake to Amazon SageMaker Unified Studio, register data assets in Amazon SageMaker Catalog, configure data quality validation using AWS Glue Visual ETL, and publish assets for unified collaboration. By following these steps, you enrich federated assets with data quality scores so that consumers across your organization can discover and trust the data, all while keeping it in Snowflake.

Solution overview

This solution integrates Snowflake with Amazon SageMaker Unified Studio for centralized data cataloging and quality validation.

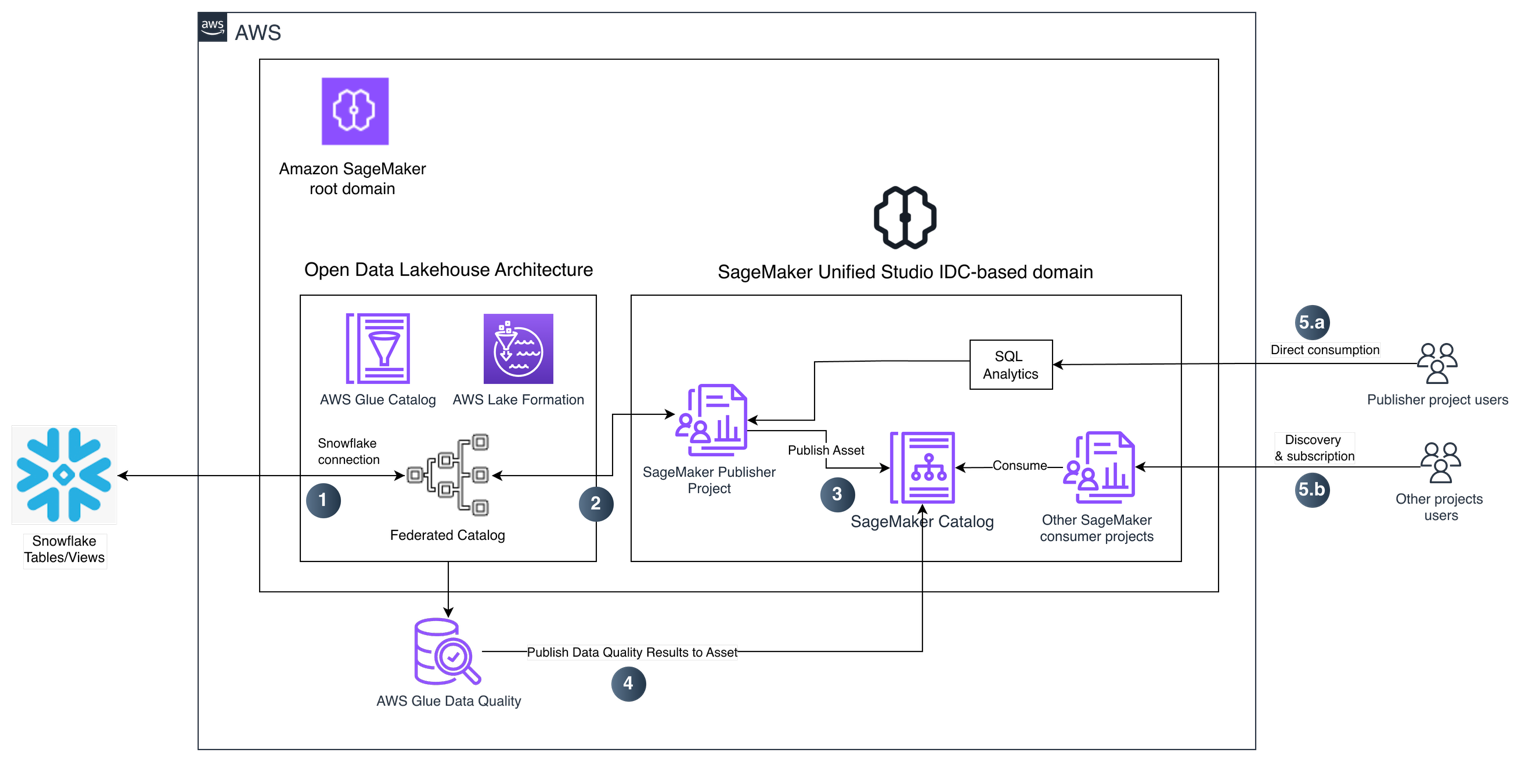
The architecture uses an AWS Glue connection to federate the Snowflake catalog into Amazon SageMaker Unified Studio. Tables become available in the project catalog without complex storage configurations. You can query data directly using SQL analytics, publish datasets to Amazon SageMaker Catalog for organization-wide discovery, and apply data quality rules through AWS Glue Visual ETL pipelines.

The workflow consists of the following steps:

Architecture diagram: Snowflake federated into SageMaker Unified Studio through AWS Glue, with data quality validation and publishing to SageMaker Catalog

Figure 1: Architecture for federating Snowflake into SageMaker Unified Studio and validating data quality

  1. Snowflake connection creation on Amazon SageMaker Unified Studio — Amazon SageMaker Unified Studio uses an AWS Glue connection to federate Snowflake tables and views into its open data lakehouse architecture. The federated catalog entry is registered in AWS Glue Data Catalog and governed by AWS Lake Formation for centralized access control, without moving data out of Snowflake.
  2. Federate Snowflake tables into the Amazon SageMaker publisher project — The Amazon SageMaker publisher project discovers the federated Snowflake tables through the AWS Glue Data Catalog integration.
  3. Publish the dataset to Amazon SageMaker Catalog — The publisher project publishes the dataset as a governed asset to the Amazon SageMaker Catalog, making it discoverable for data consumers across the organization.
  4. Validate data quality — AWS Glue Data Quality runs validation rules against the federated Snowflake data and publishes the data quality results directly to the corresponding asset in Amazon SageMaker Catalog.
  5. Consume data — Users access Snowflake data through two paths:
    1. Publisher project users — Query data with SQL Analytics — Users in the publisher project can query the Snowflake data directly using Amazon SageMaker Unified Studio SQL Analytics for interactive exploration and analysis, without copying or moving data.
    2. Consumer project users — Discovery and subscription through SageMaker Catalog — Other Amazon SageMaker consumer projects discover the published asset in the Amazon SageMaker Catalog, subscribe to it, and consume the data for their analytics and machine learning workloads.

Prerequisites

To follow along, you need:

  • An active Snowflake account with administrator access.
  • Tables or views created within a schema inside a Snowflake database.
  • An Amazon SageMaker Unified Studio and project created.
  • An Amazon Simple Storage Service (Amazon S3) bucket for AWS Glue assets.
  • Appropriate AWS Identity and Access Management (IAM) permissions configured (Amazon SageMaker Catalog is built on Amazon DataZone, so the IAM actions use the datazone: prefix.)

Your AWS Glue job execution role requires specific permissions to interact with Amazon SageMaker Catalog.

Required IAM policies for the AWS Glue job role

1. Amazon SageMaker Catalog search and listing permissions: Attach a policy that allows the AWS Glue job to search and list assets in Amazon SageMaker Catalog.

{
  "Version": "2012-10-17",
  "Statement": [
    {
      "Effect": "Allow",
      "Action": [
        "datazone:SearchListings",
        "datazone:GetListing",
        "datazone:ListDomains",
        "datazone:GetDomain"
      ],
      "Resource": "arn:aws:datazone:<REGION>:<ACCOUNT_ID>:domain/<DOMAIN_ID>"
    }
  ]
}

2. Amazon SageMaker Catalog time series data posting permissions: Add permissions to post data quality metrics:

{
  "Version": "2012-10-17",
  "Statement": [
    {
      "Effect": "Allow",
      "Action": [
        "datazone:PostTimeSeriesDataPoints",
        "datazone:GetAsset",
        "datazone:ListAssetRevisions"
      ],
      "Resource": "arn:aws:datazone:<REGION>:<ACCOUNT_ID>:domain/<DOMAIN_ID>"
    }
  ]
}

Configure the AWS Glue job role as an Amazon SageMaker domain user

Configure the IAM role used by your AWS Glue job as a domain user. In the Amazon SageMaker console, navigate to your domain, choose Access management, and add the AWS Glue job execution IAM role as a domain user.

Project-level permissions

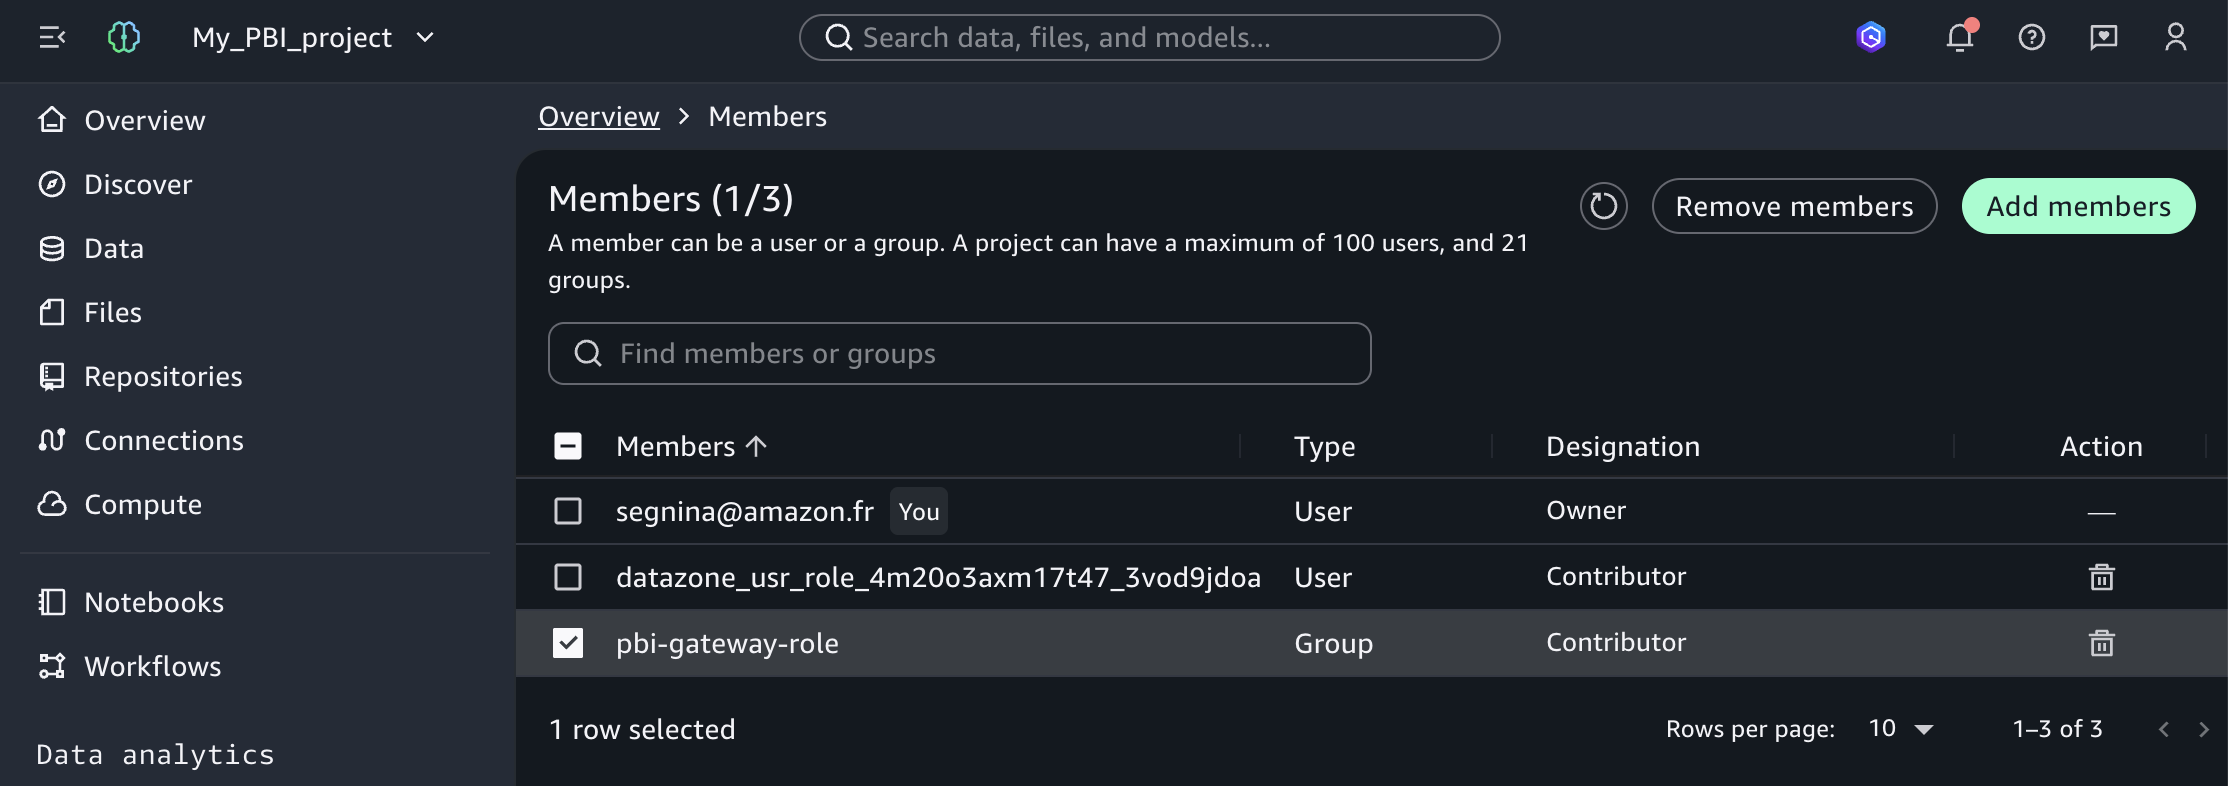
Add the AWS Glue job execution role as a project member with Owner permissions. Navigate to your project, go to Project settings > Members, and add the role.

For more information about IAM roles for AWS Glue, see the AWS Glue security documentation. For Amazon SageMaker Unified Studio permissions, refer to the Amazon SageMaker Unified Studio administrator guide.

Querying Snowflake datasets from Amazon SageMaker Unified Studio

The following sections walk you through connecting Snowflake to Amazon SageMaker Unified Studio and running data quality validation with results displayed in Amazon SageMaker Catalog.

Identifying information in Snowflake

First, gather your Snowflake connection details. You need a Snowflake account with tables or views created at the schema level within a database.

To obtain Snowflake connection information:

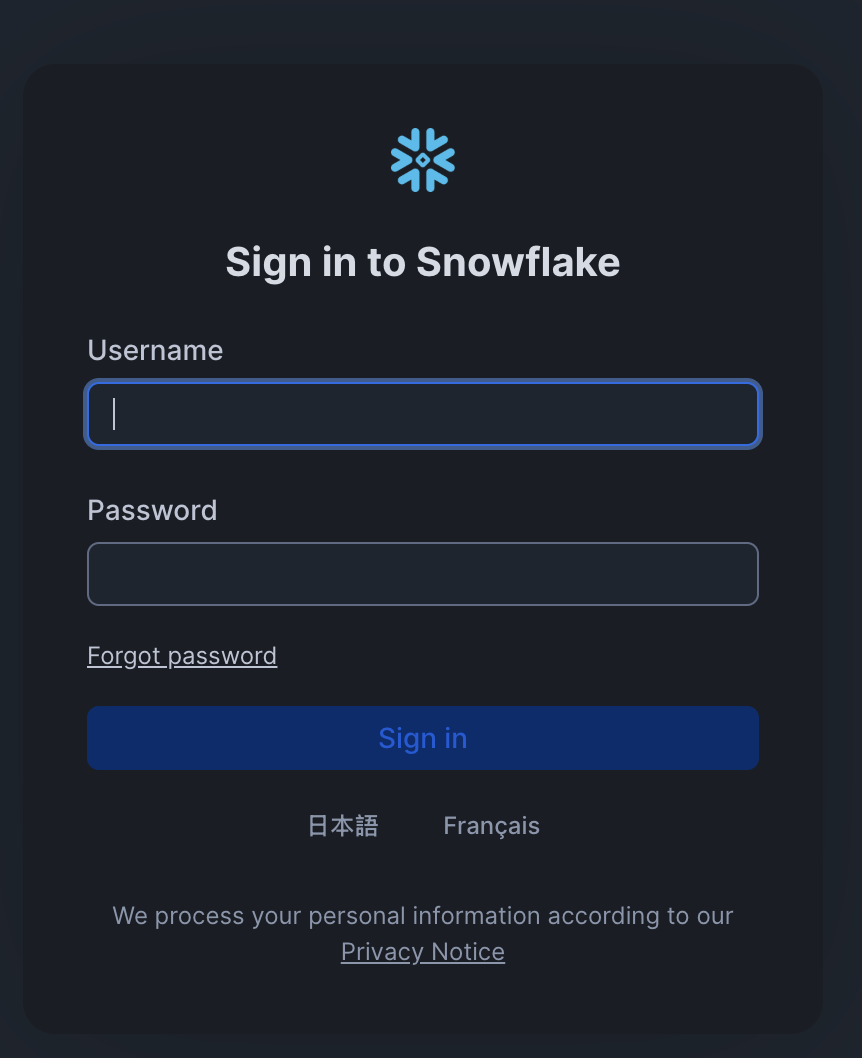
  1. Navigate to your Snowflake environment and sign in with administrator credentials.

    Snowflake sign-in screen for administrator credentials
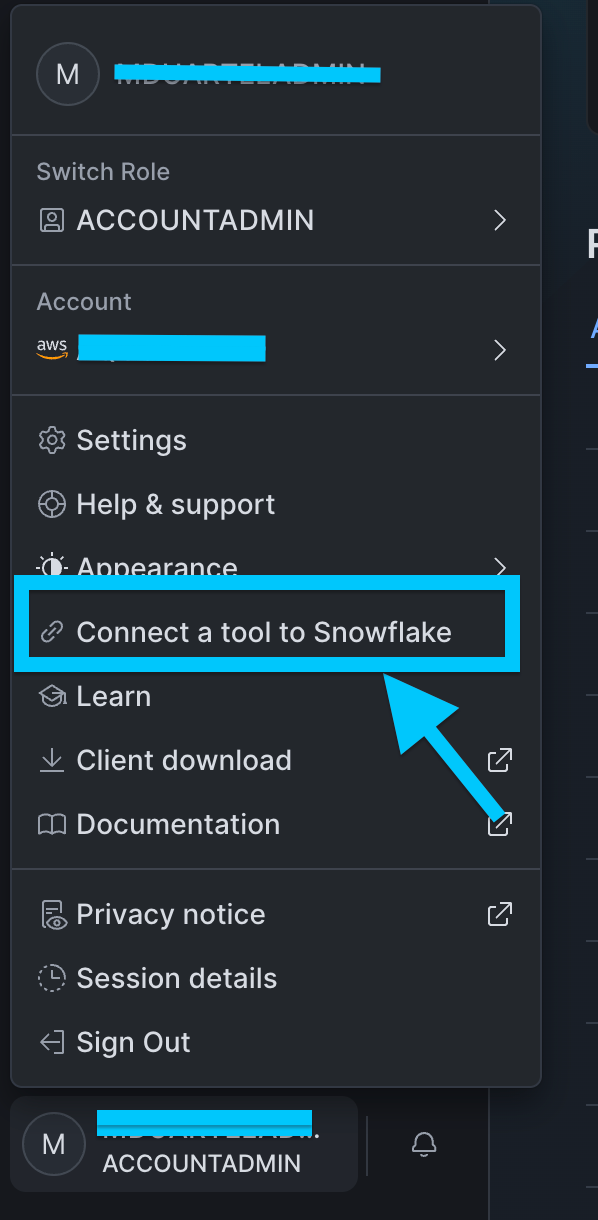
  2. Choose your user account and choose Connect a tool to Snowflake.

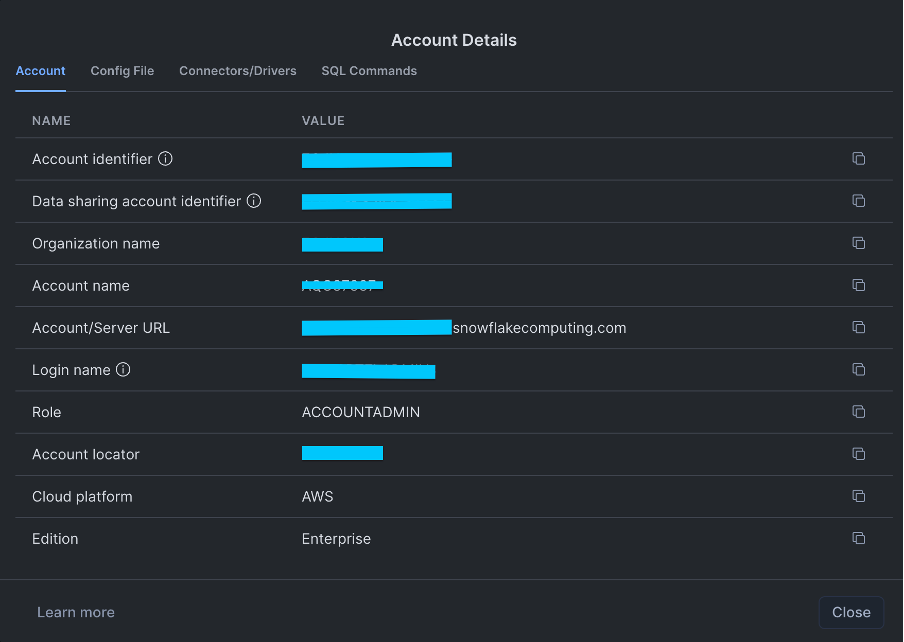
  3. Note the Account/Server URL displayed on the screen.
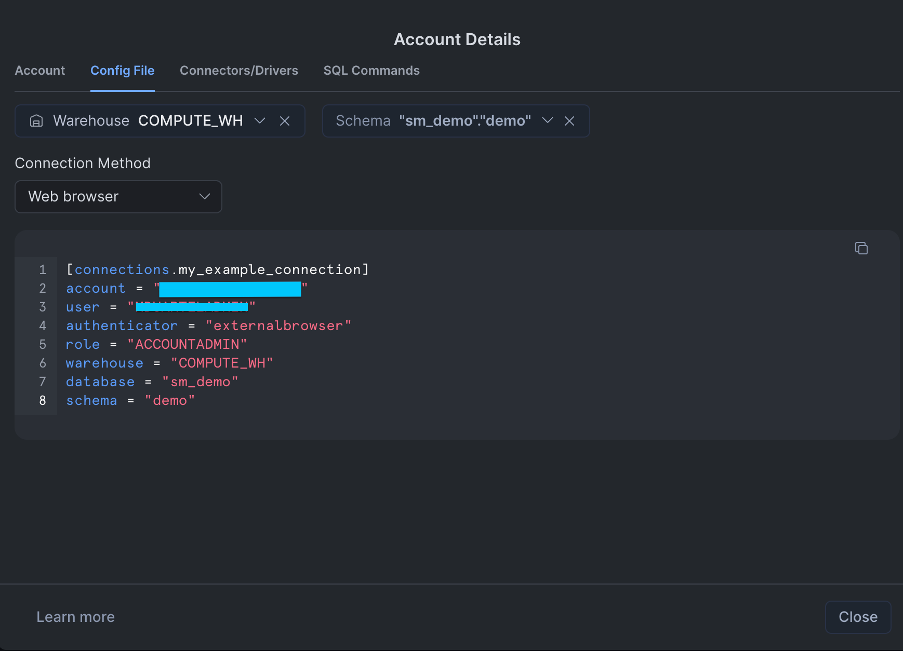
  4. Choose the Config File tab, select values for Warehouse, Database, and Schema, and copy these values for use in the next section.

Creating the connection in Amazon SageMaker Unified Studio

The Add Connection feature stores Snowflake connectivity details including credentials, server, and database information. Amazon SageMaker Unified Studio uses this connection to federate the Snowflake catalog through AWS Glue, so you can query data within minutes of setup.

You need an Amazon SageMaker Unified Studio domain and a project, which acts as a data producer project.

To create the Snowflake connection:

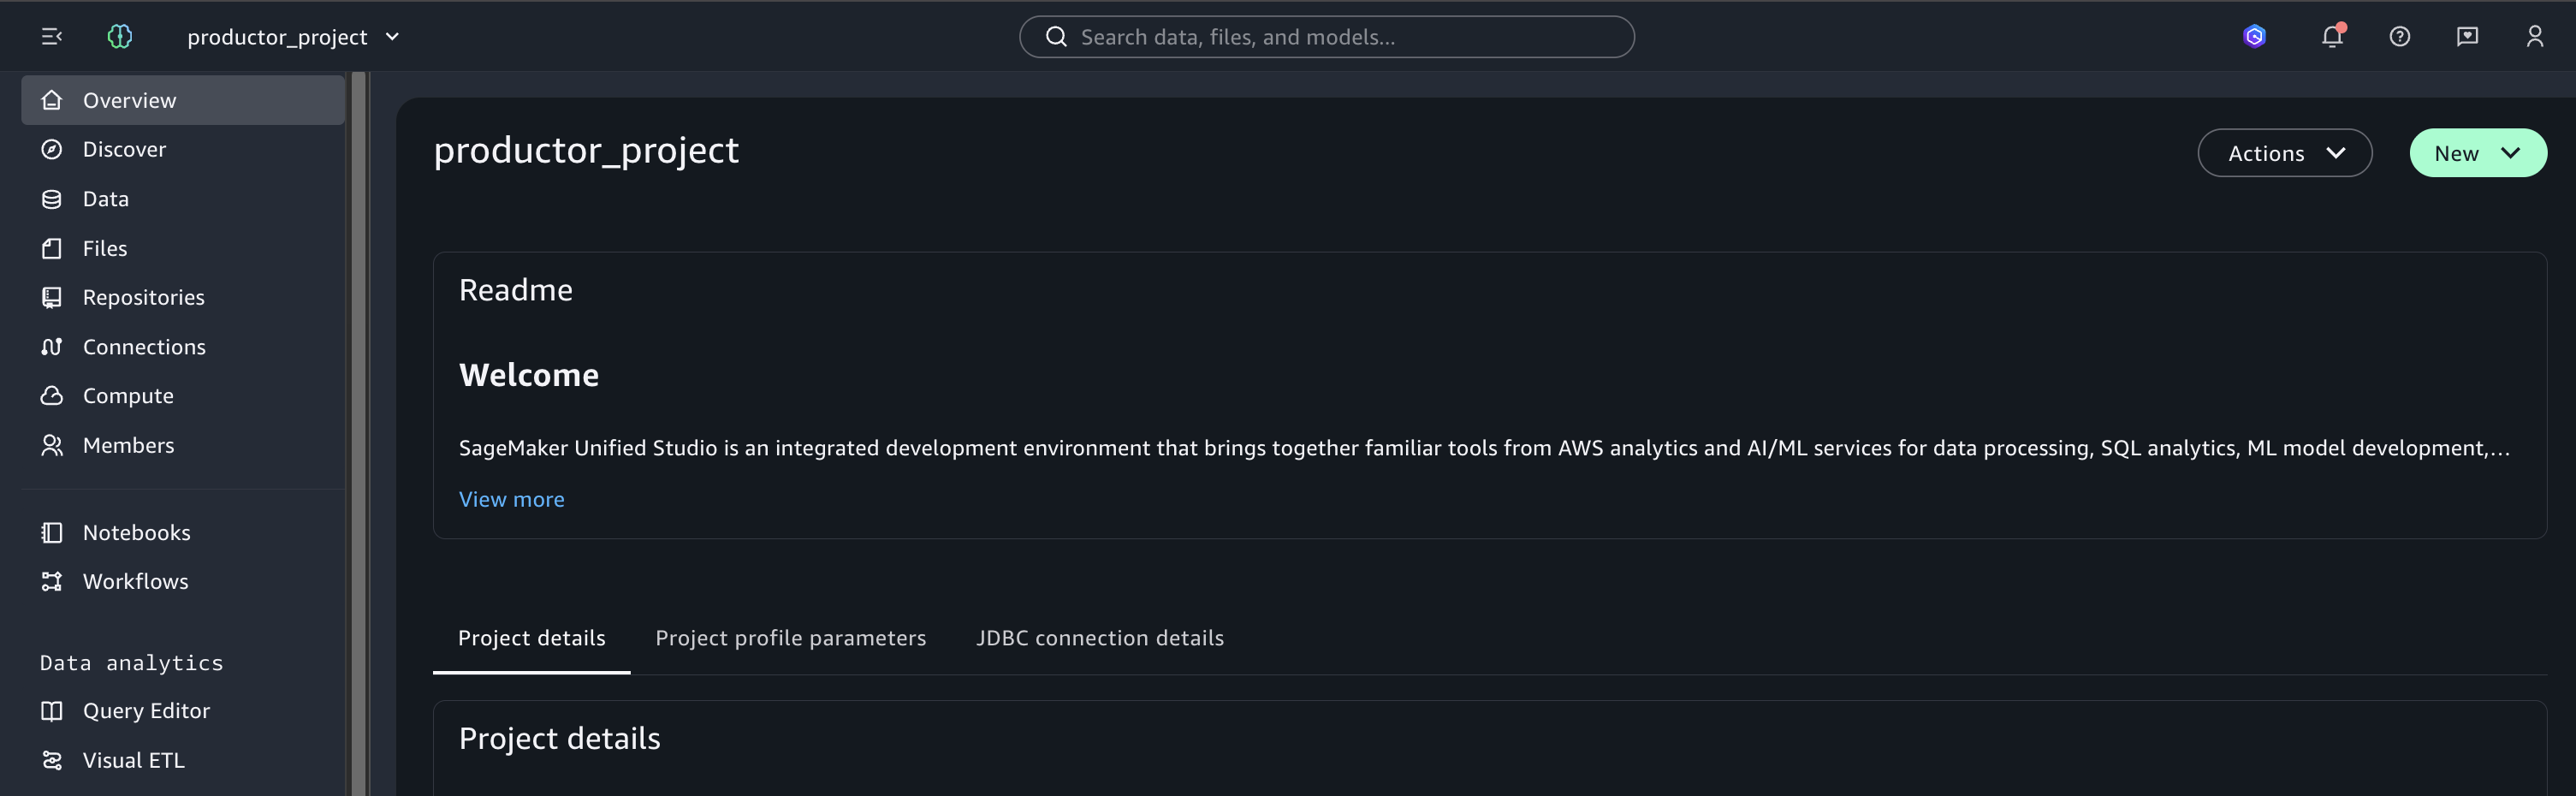
  1. In your Amazon SageMaker Unified Studio project, go to Overview.

    SageMaker Unified Studio project Overview page
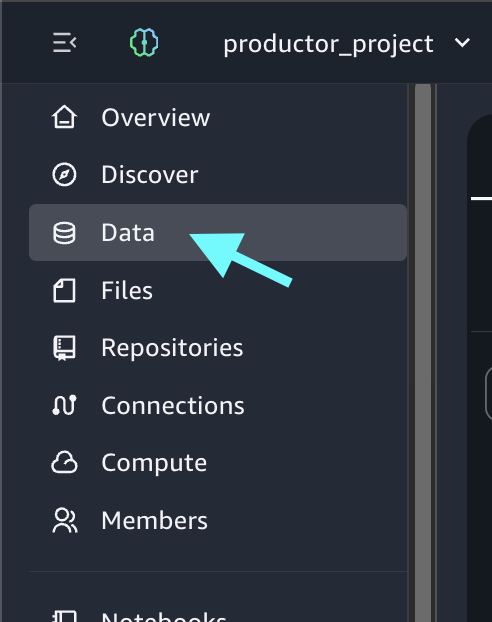
  2. Choose Data.

    Data option in the SageMaker Unified Studio project navigation
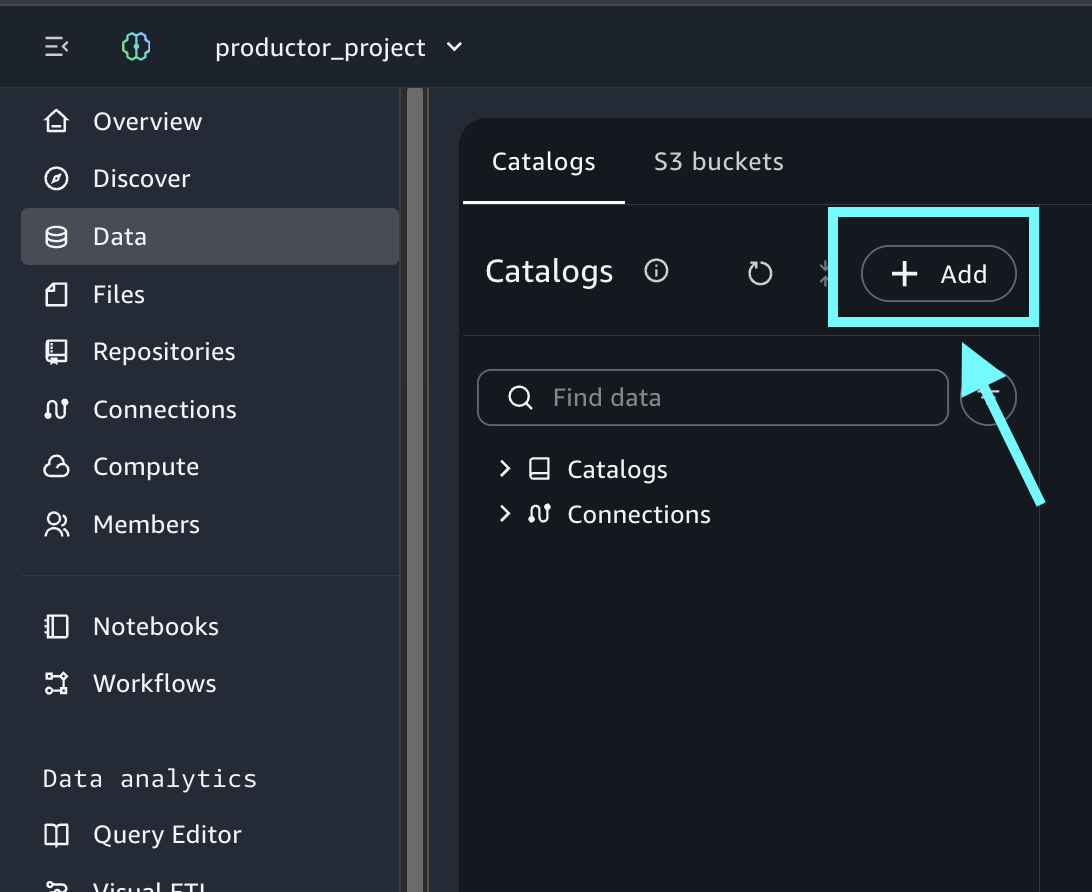
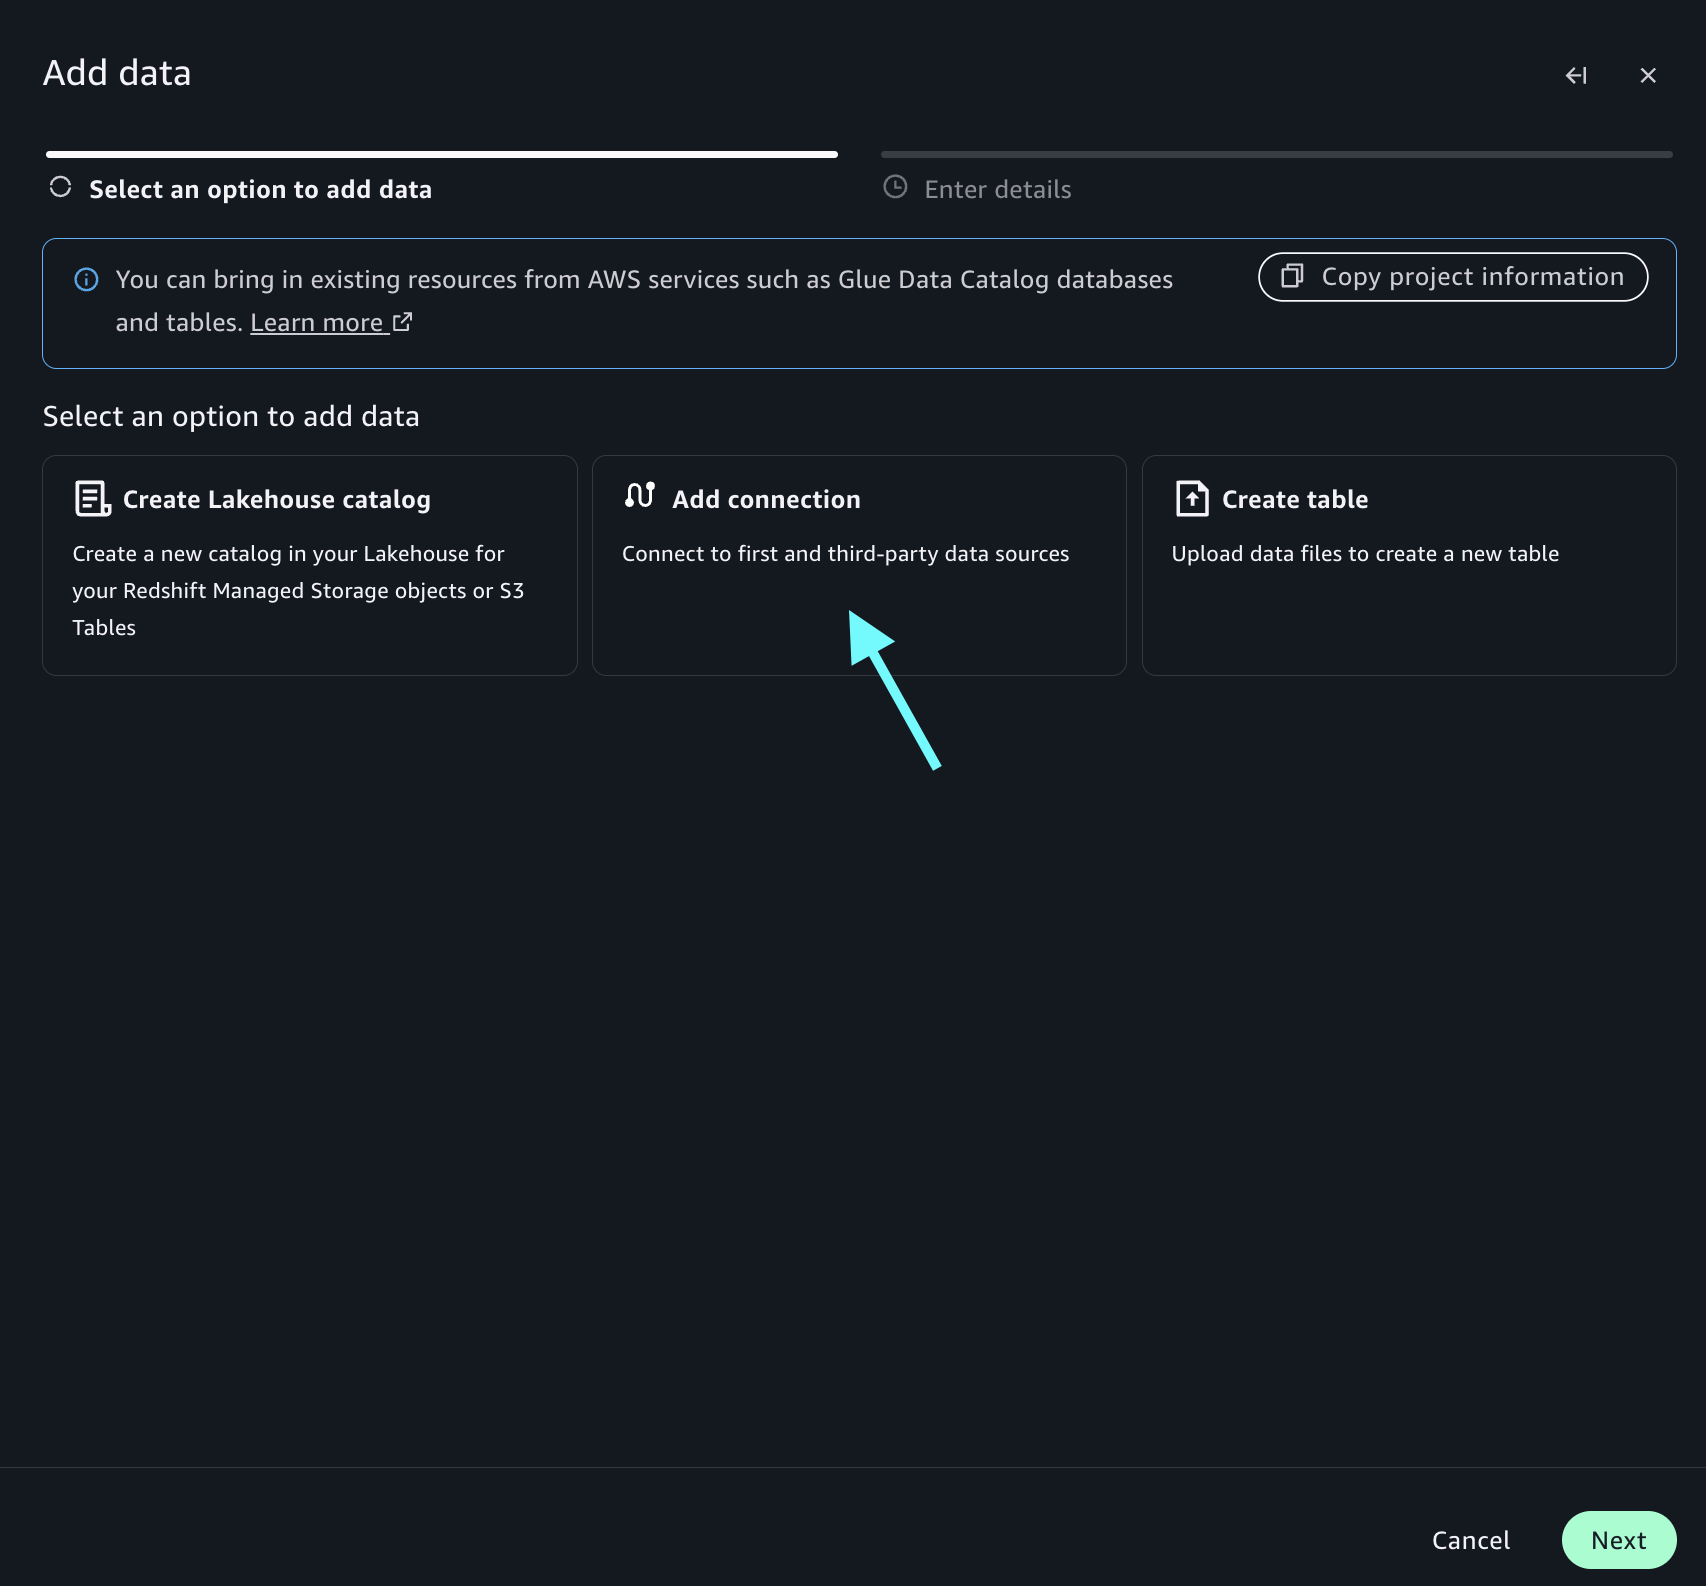
  3. Choose + Add, then choose Add Connection.

    Add menu in SageMaker Unified Studio with the Add Connection option
    Add Connection panel in SageMaker Unified Studio
  4. Choose Next.
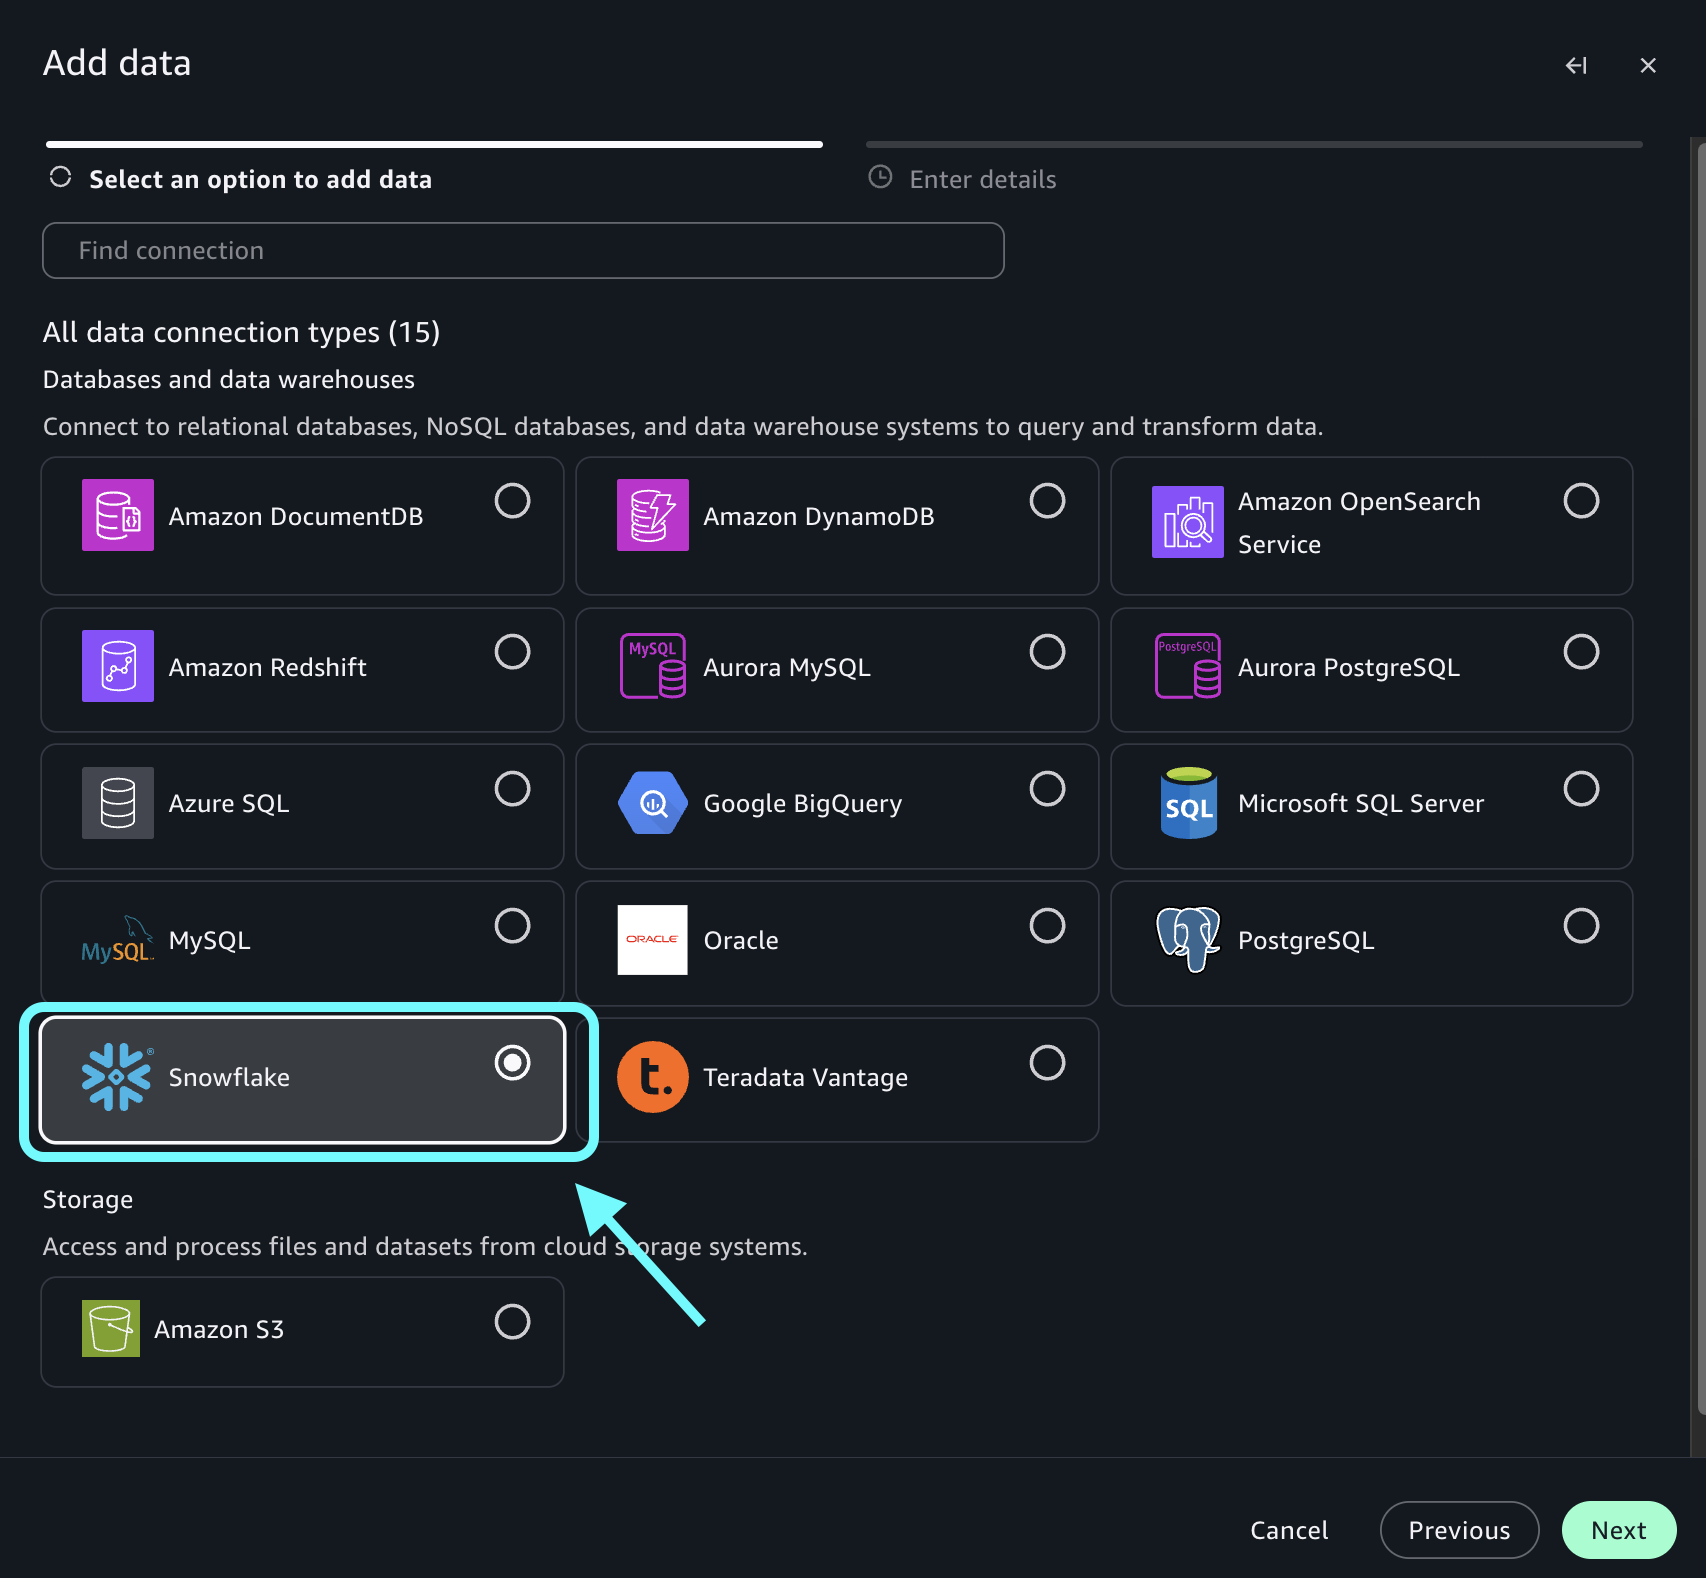
  5. Select Snowflake and choose Next.

    Connection type selection showing Snowflake in SageMaker Unified Studio
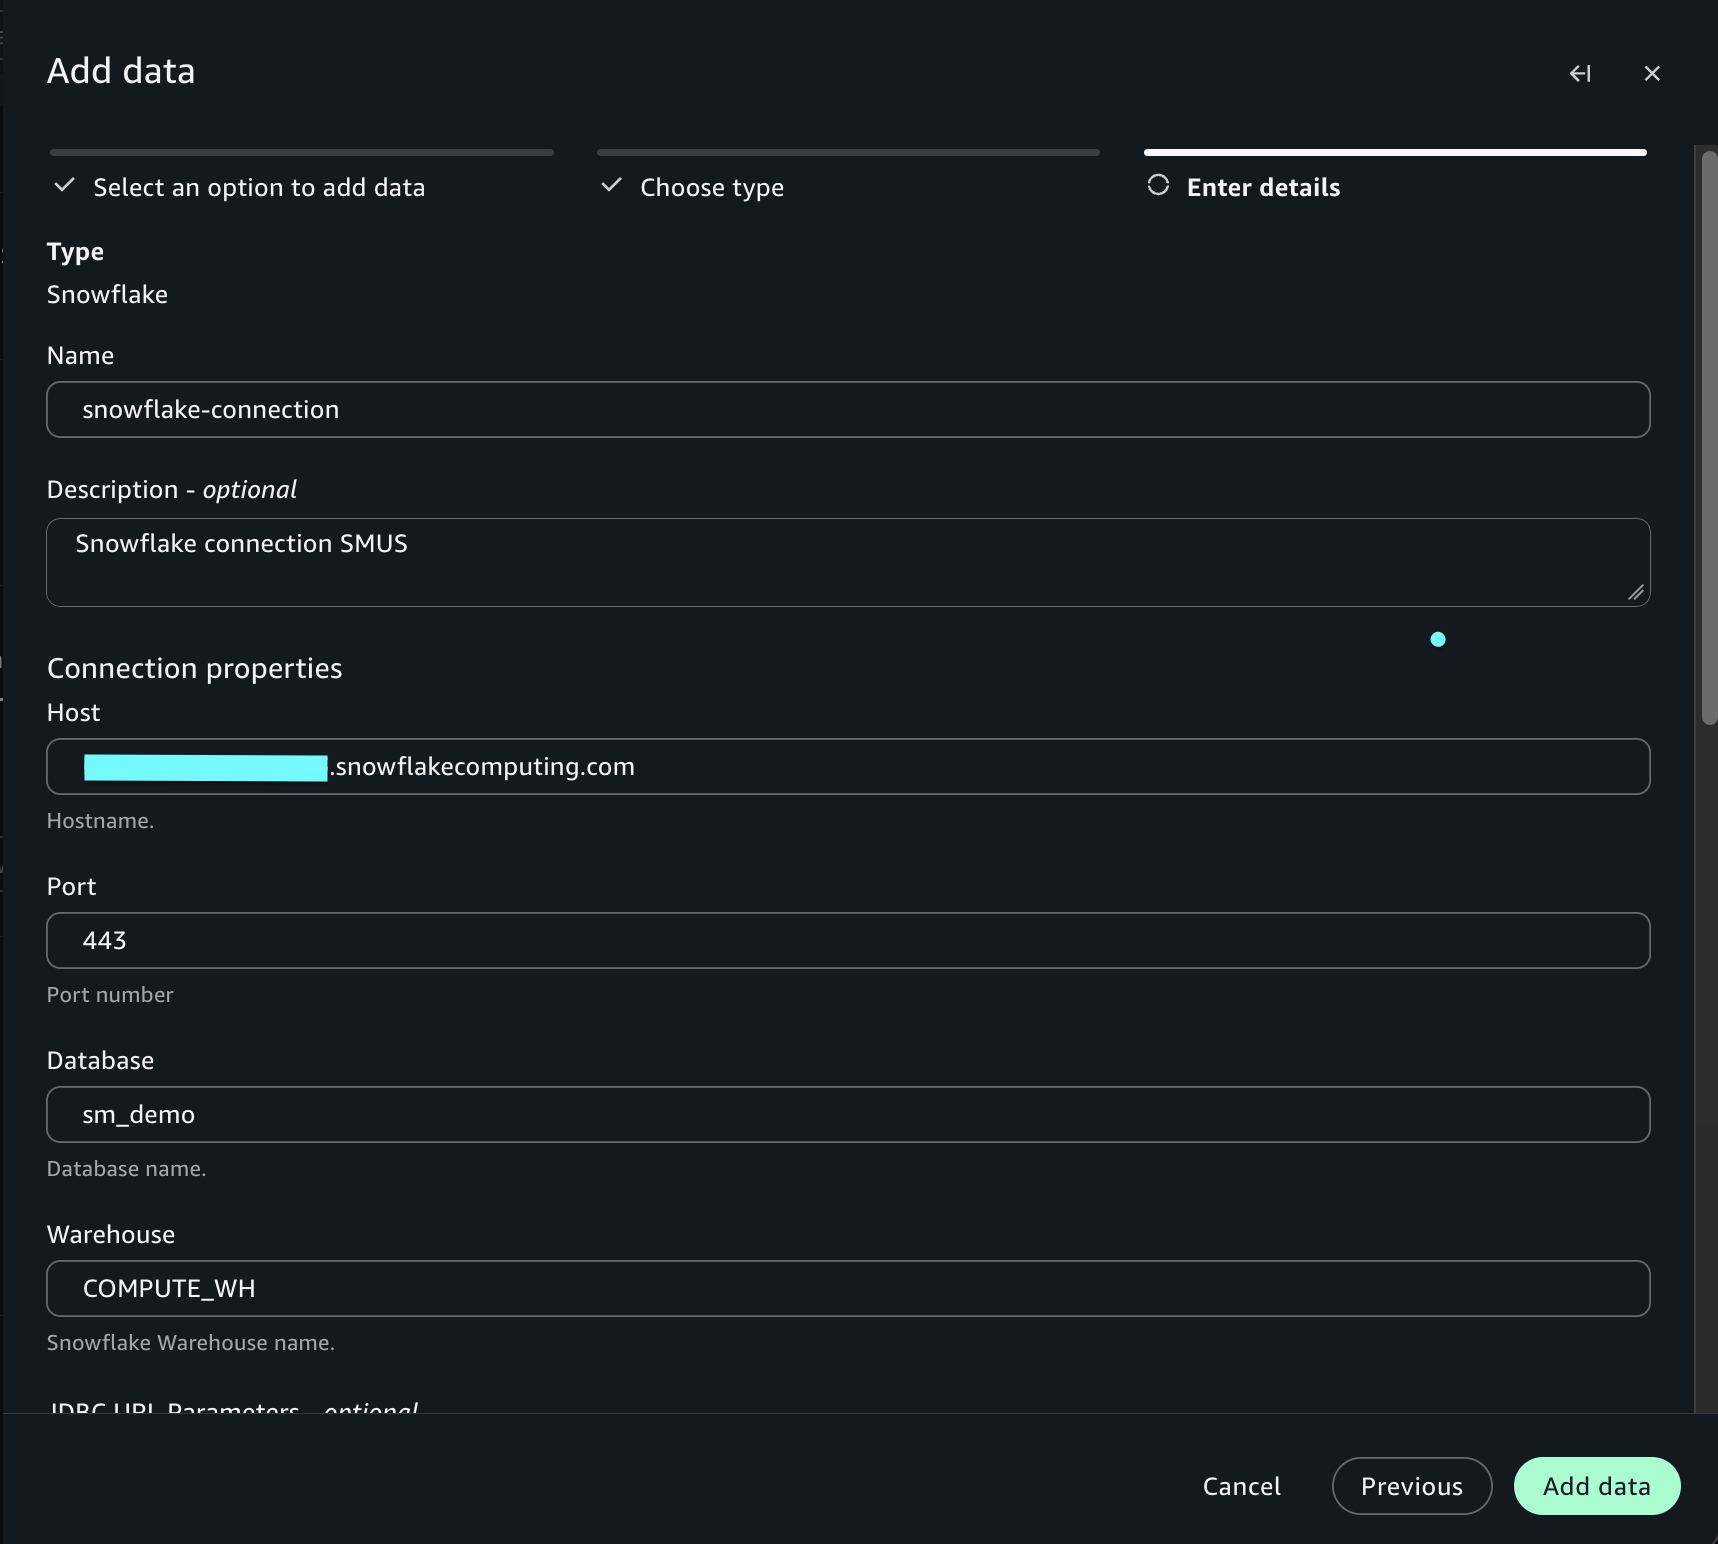
  6. Complete the connection details:
    • Name: snowflake-connection.
    • Description (Optional): Enter a description for your connection.
    • Host: Your Snowflake account URL (for example, XXXXXXXXX-XXX000000.snowflakecomputing.com).
    • Port: 443.
    • Database: Your database name (for example, sm_demo).
    • Warehouse: Your warehouse name (for example, COMPUTE_WH).
    • Schema: Your schema name (for example, demo).
    • Additional Properties:
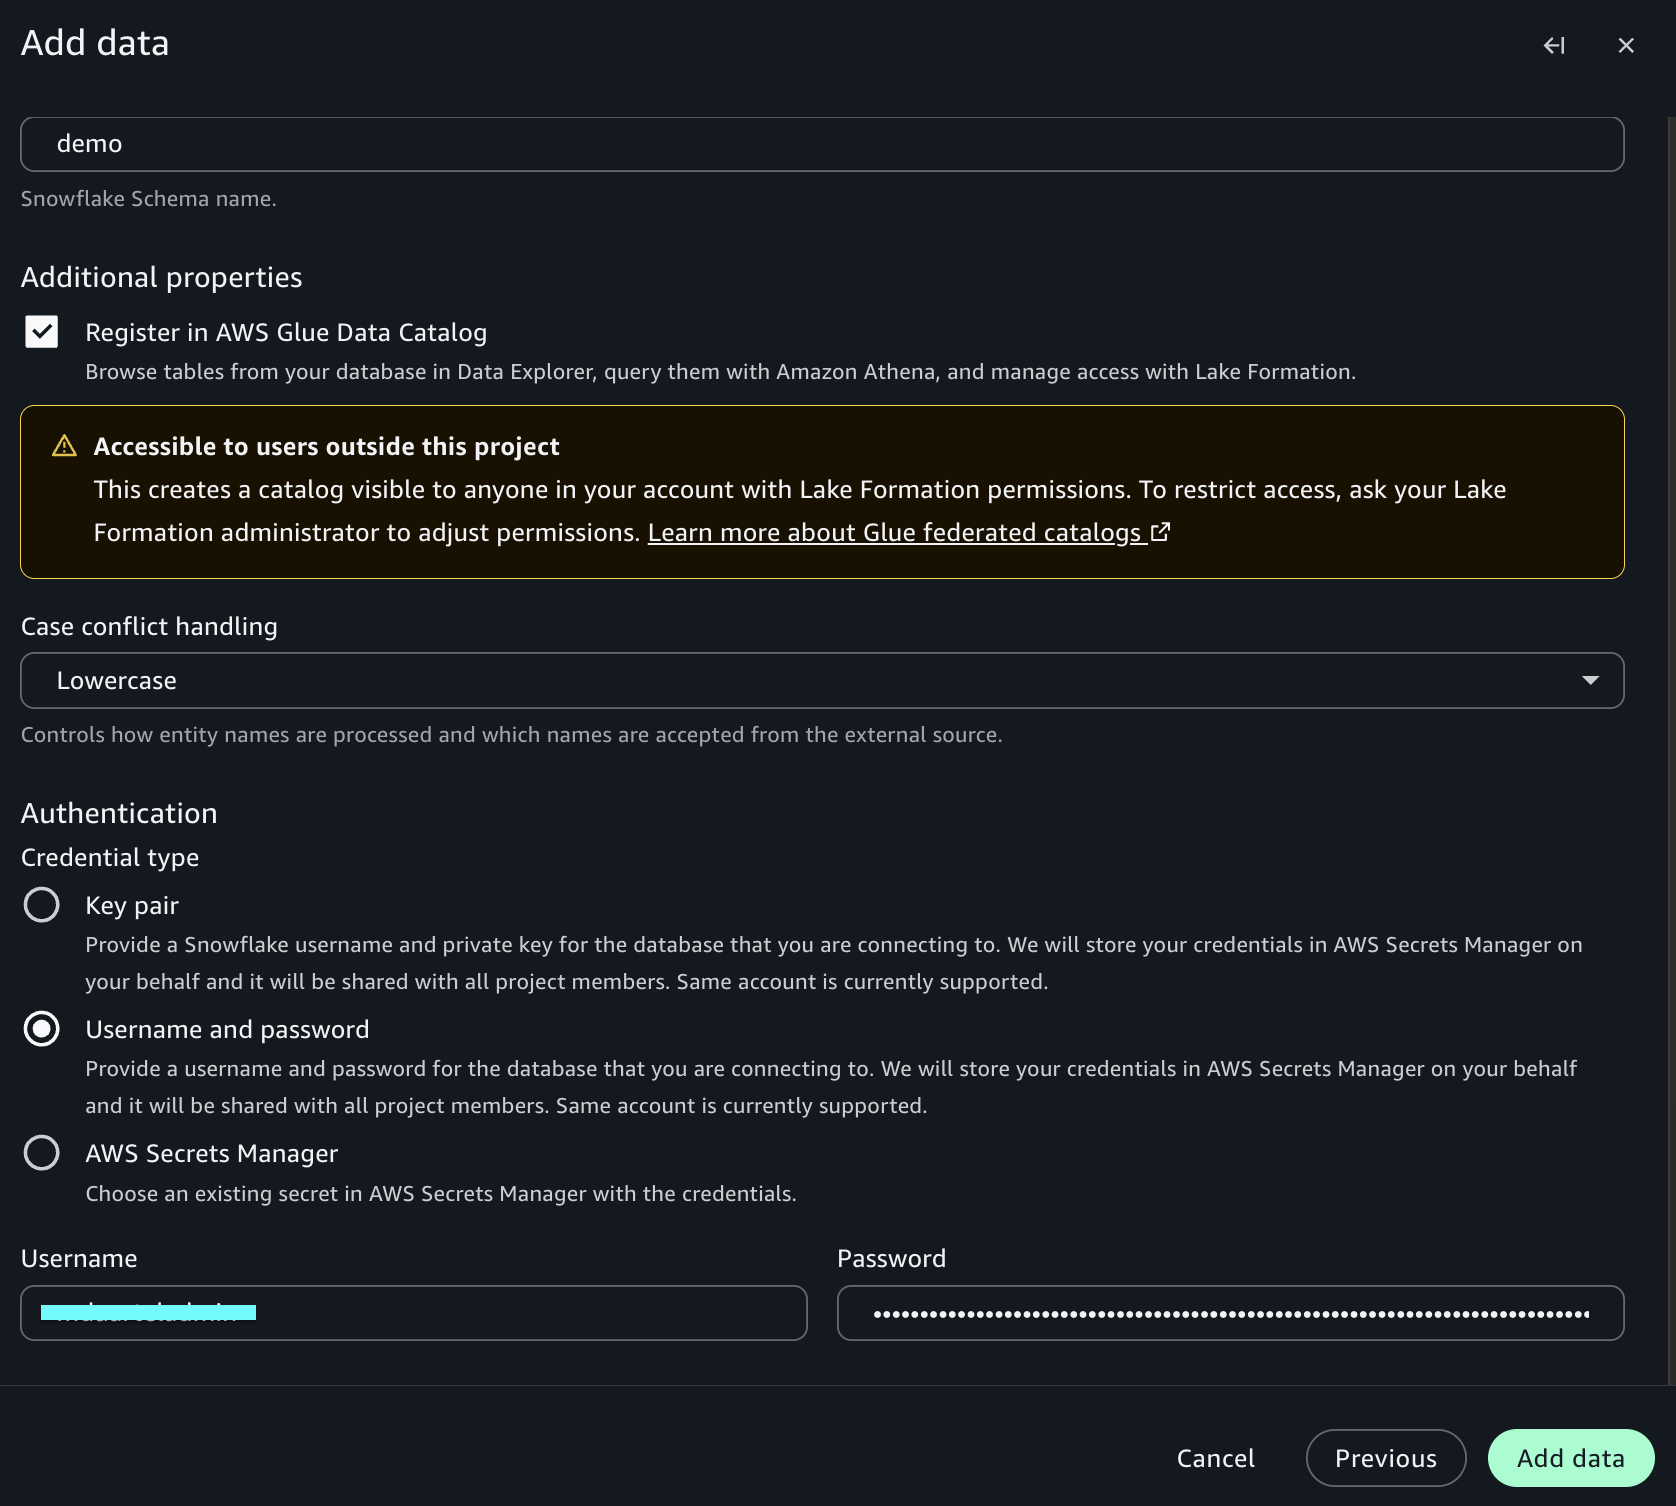
      • Register in AWS Glue Data Catalog: Turn on checkbox.
      • Case conflict handling: Select the option based on Snowflake naming syntax.
    • Authentication:
      • Username: Your Snowflake username.
      • Password: Your Snowflake password.
    Snowflake connection details form with name, host, port, database, warehouse, and schema fields
    Connection form showing authentication and AWS Glue Data Catalog registration options
  7. Choose Add Data.

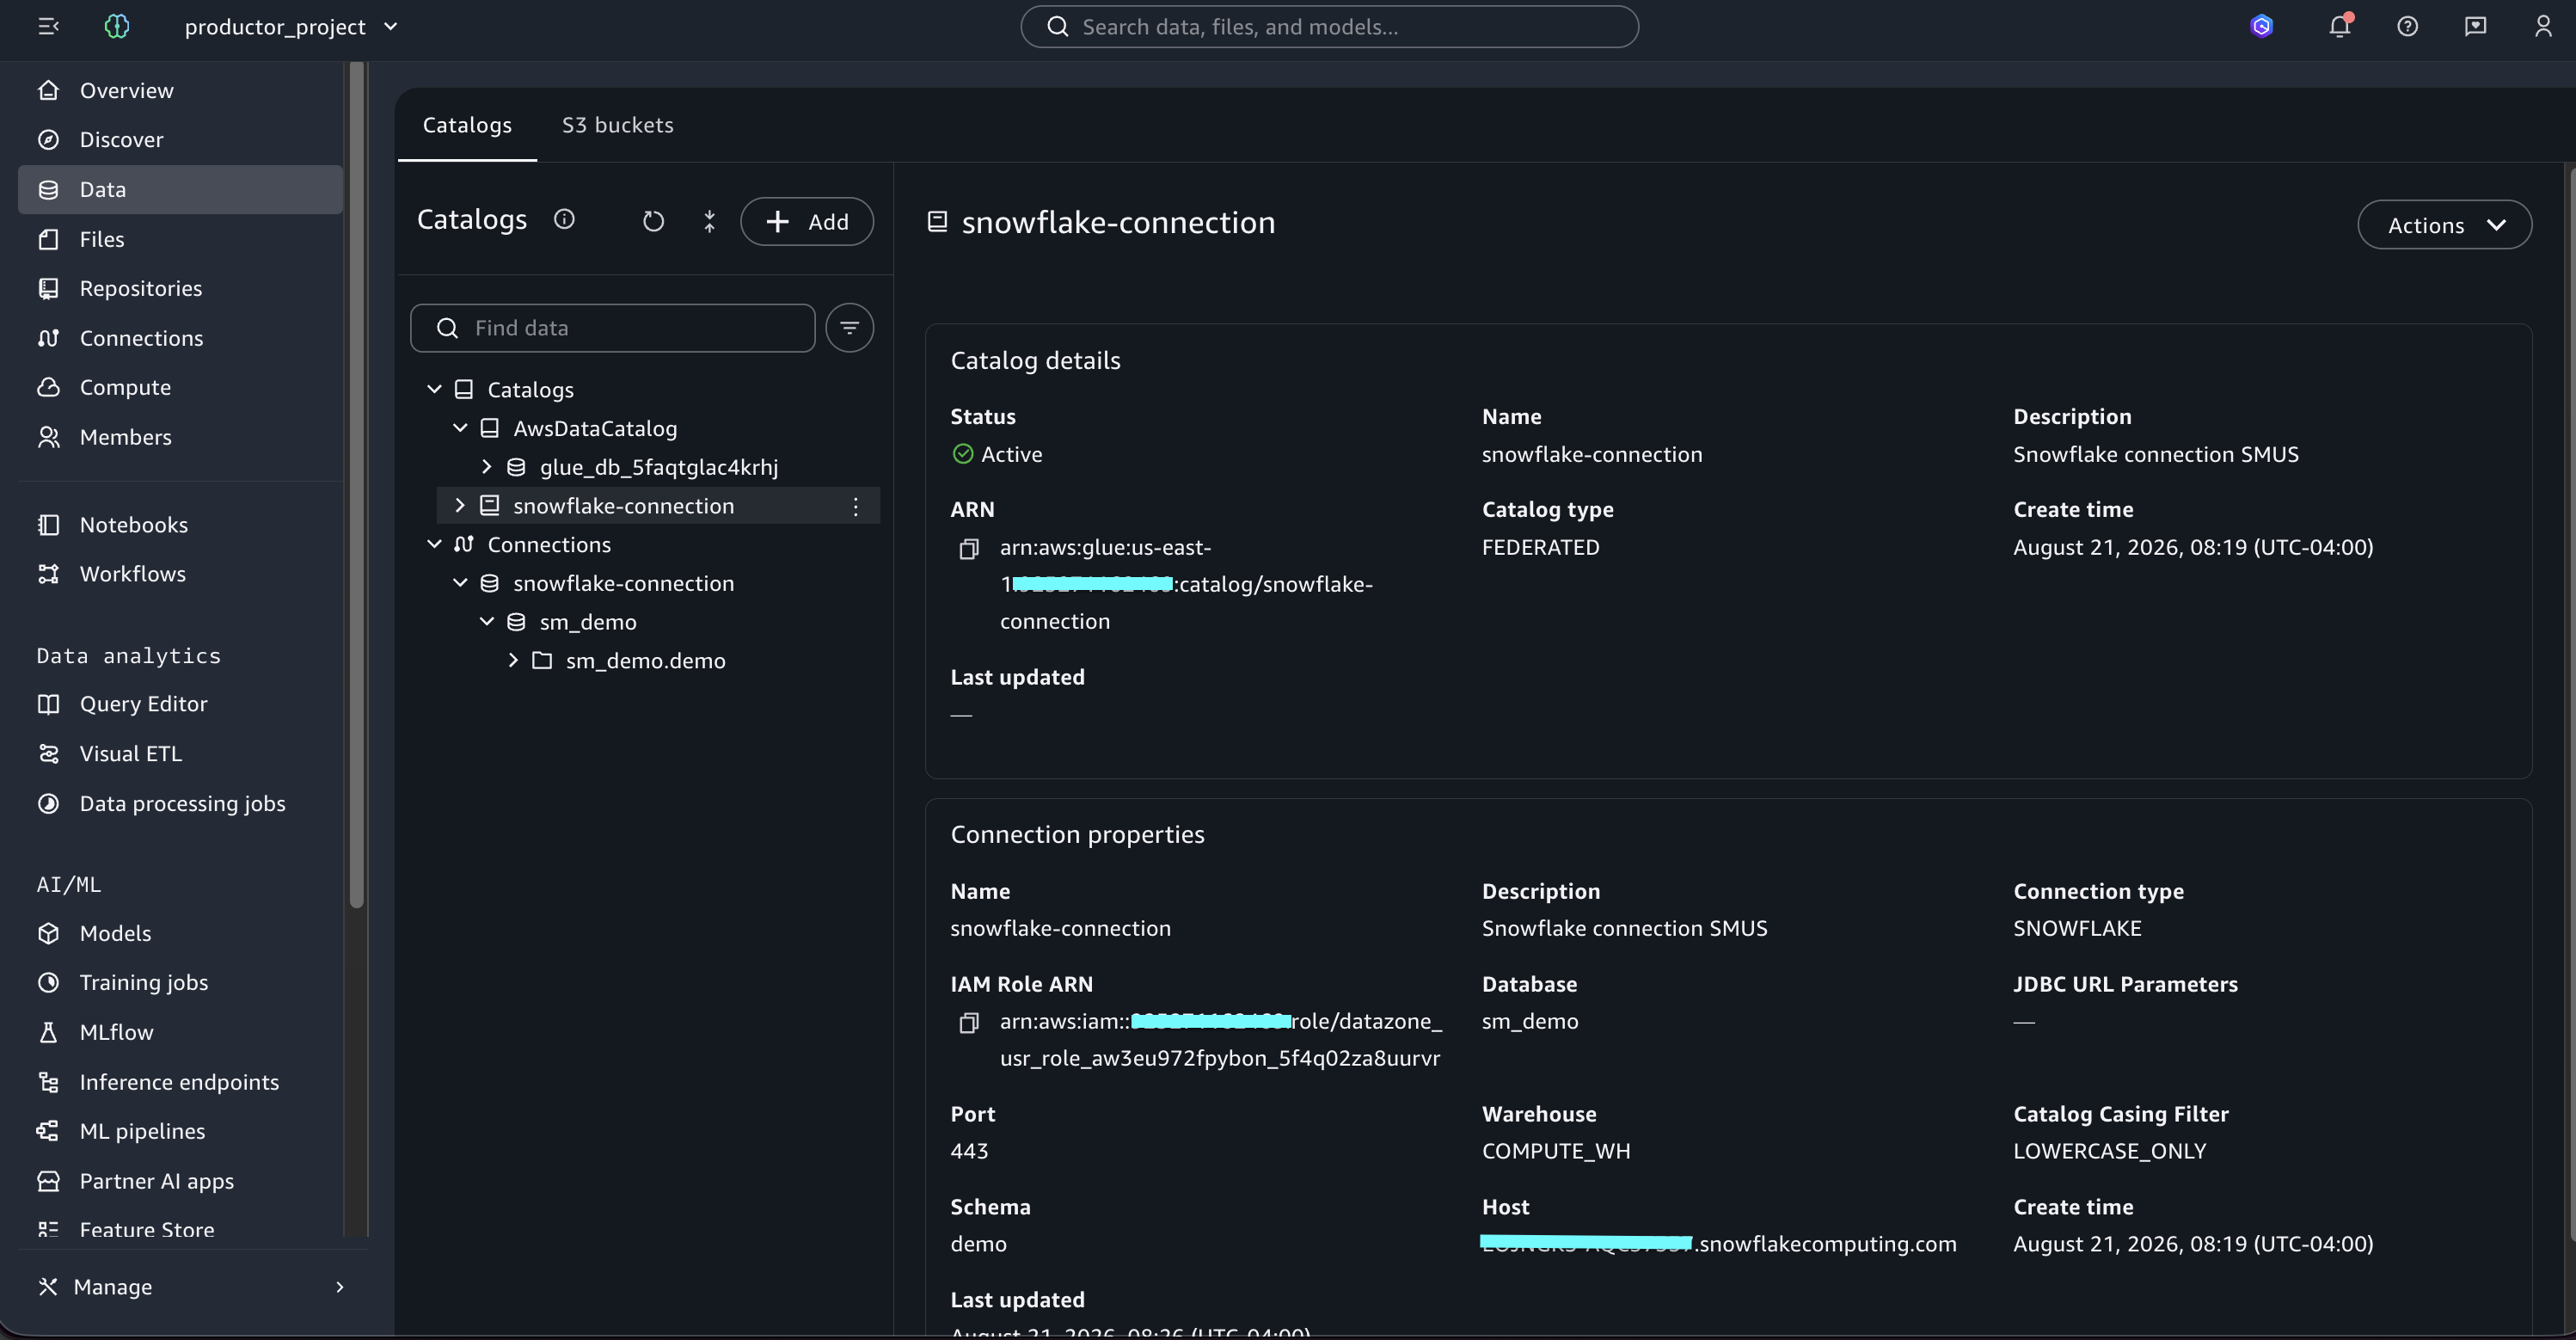
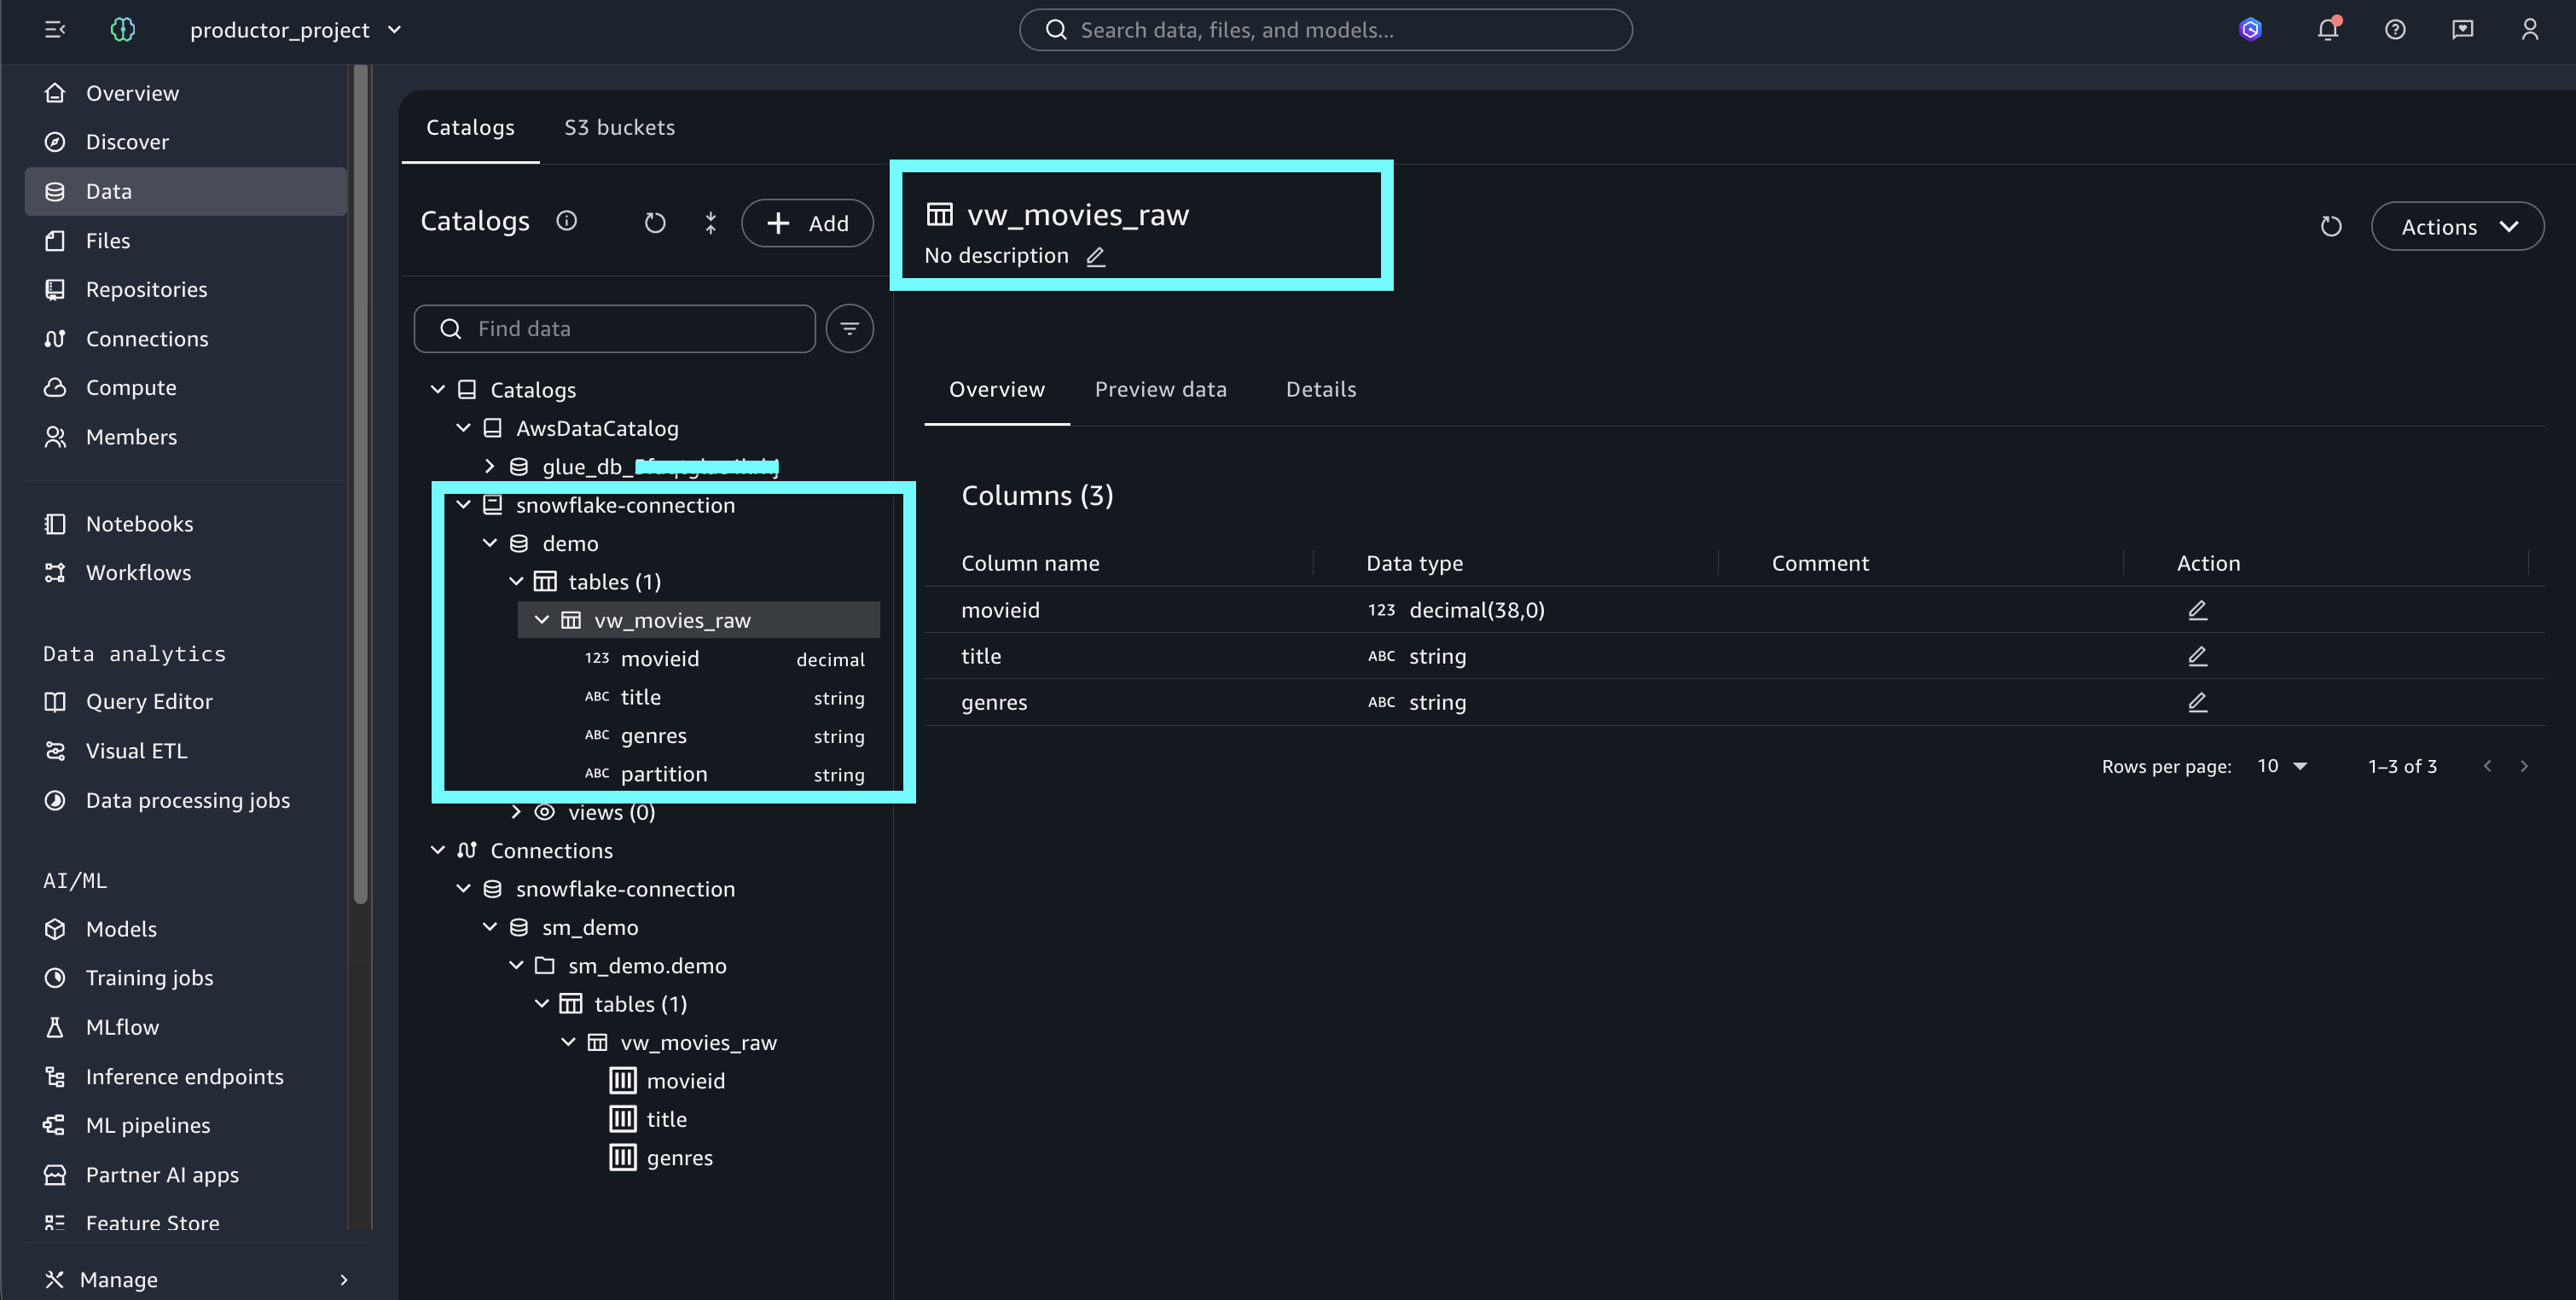
After creating the connection, wait a few minutes for the federated connection to be established. Search within Amazon SageMaker Unified Studio for the database and created objects.

Federated Snowflake database and objects appearing in SageMaker Unified Studio search

Federated Snowflake tables registered in the AWS Glue Data Catalog

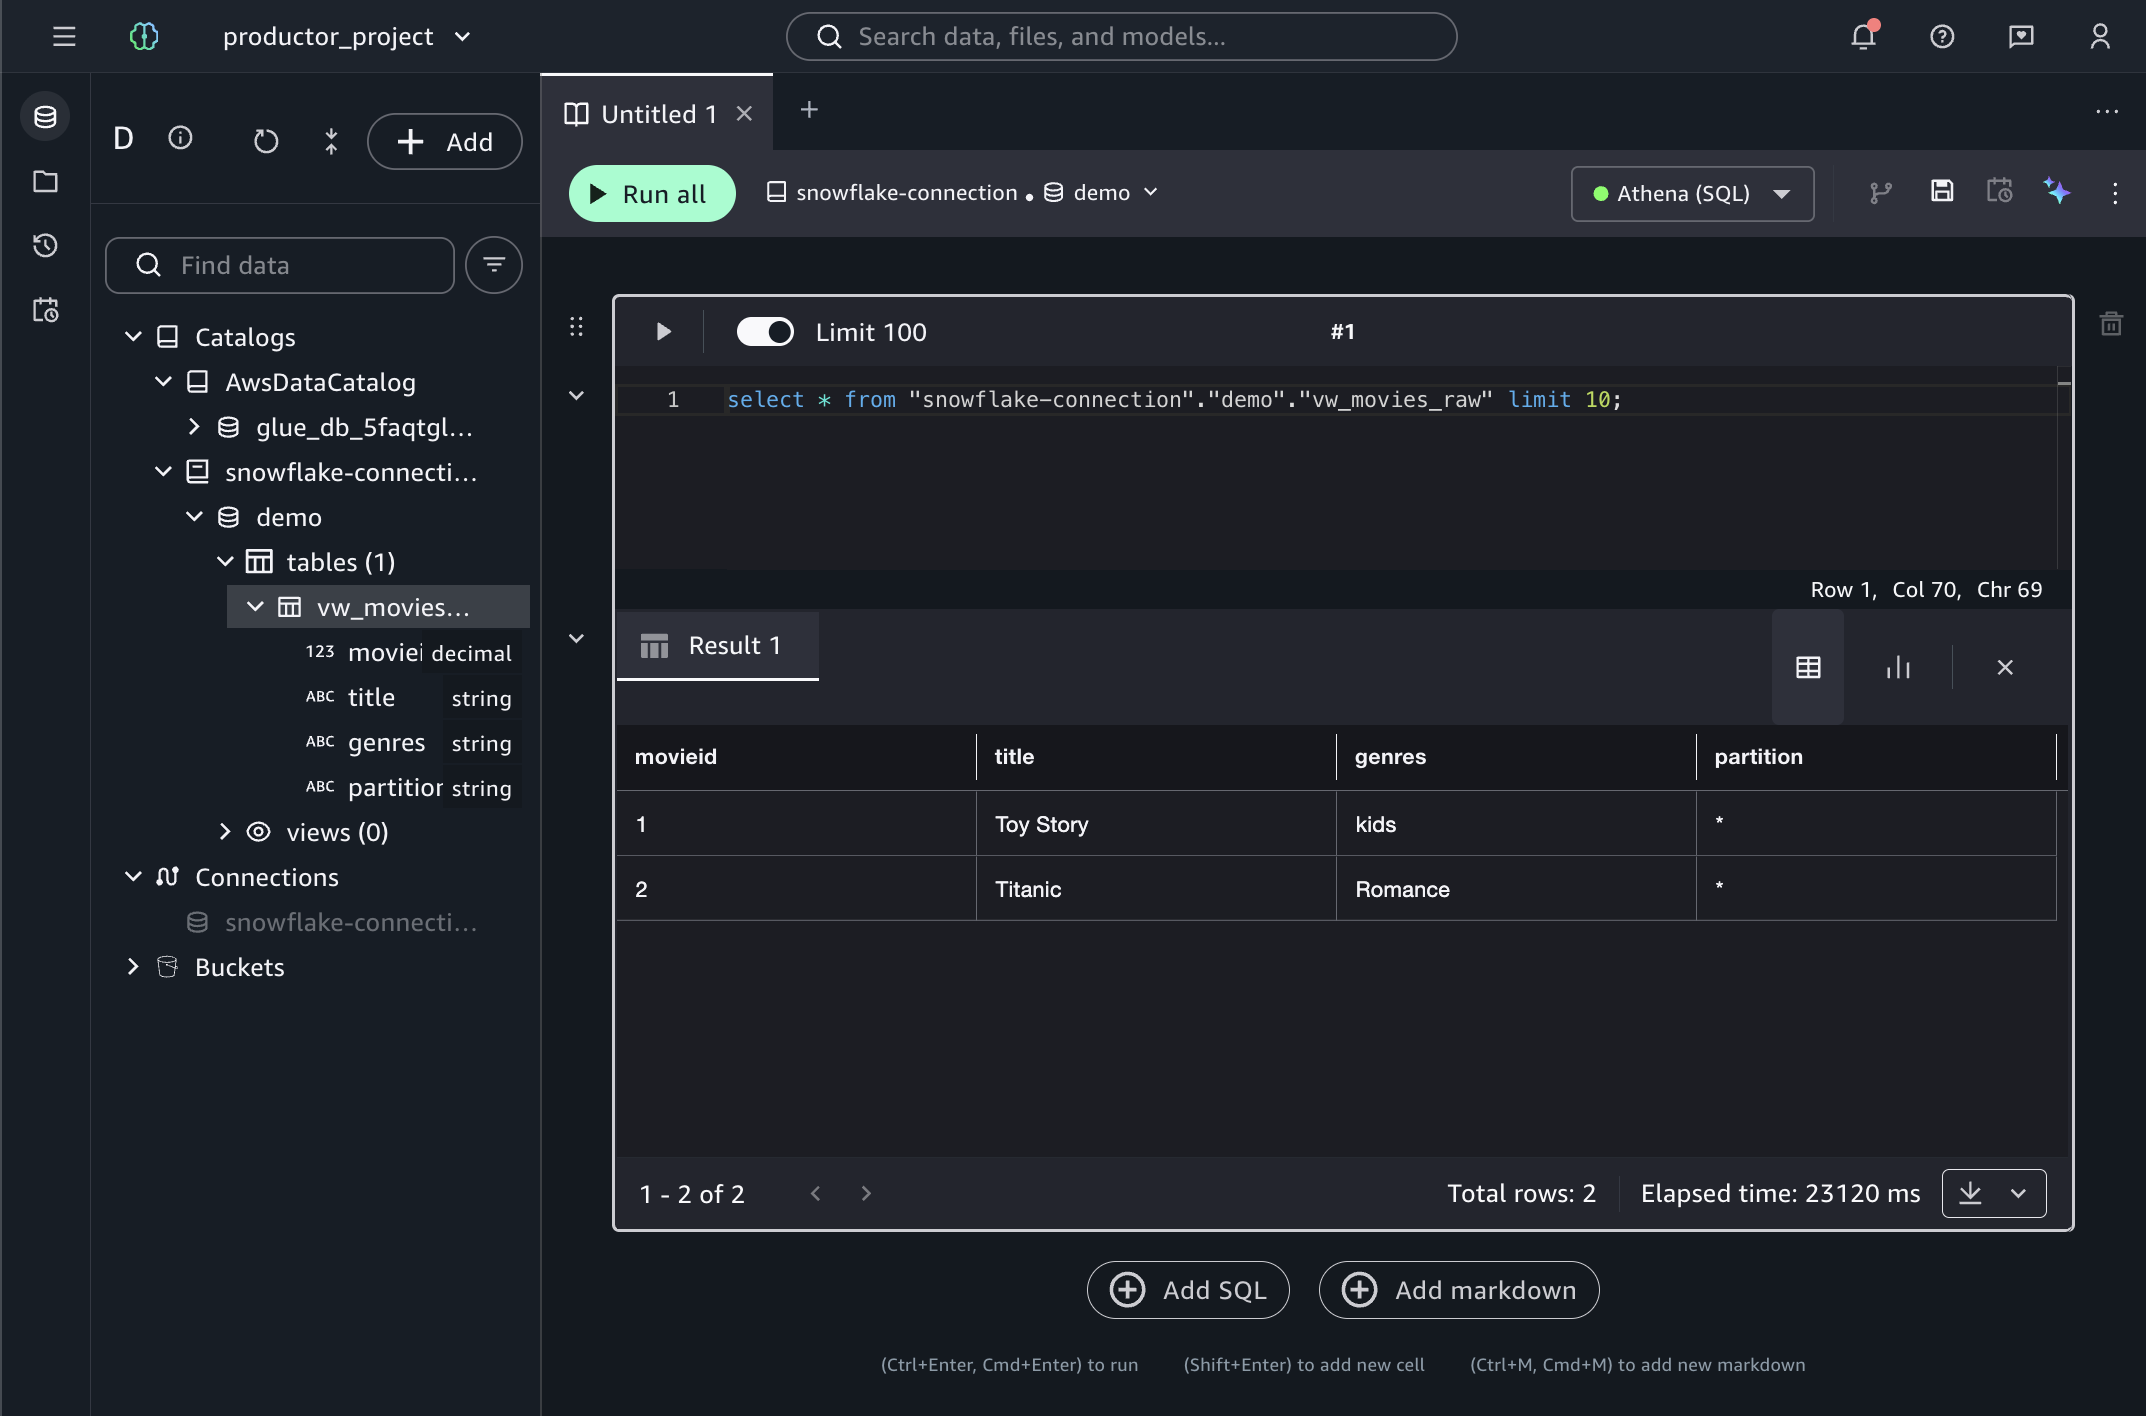
With the Snowflake connection established and the federated tables registered in AWS Glue Catalog, you’re now ready to query Snowflake data directly from Amazon SageMaker Unified Studio, without moving or replicating any data.

Query results from a federated Snowflake table in the SageMaker Unified Studio query editor

How federated queries work

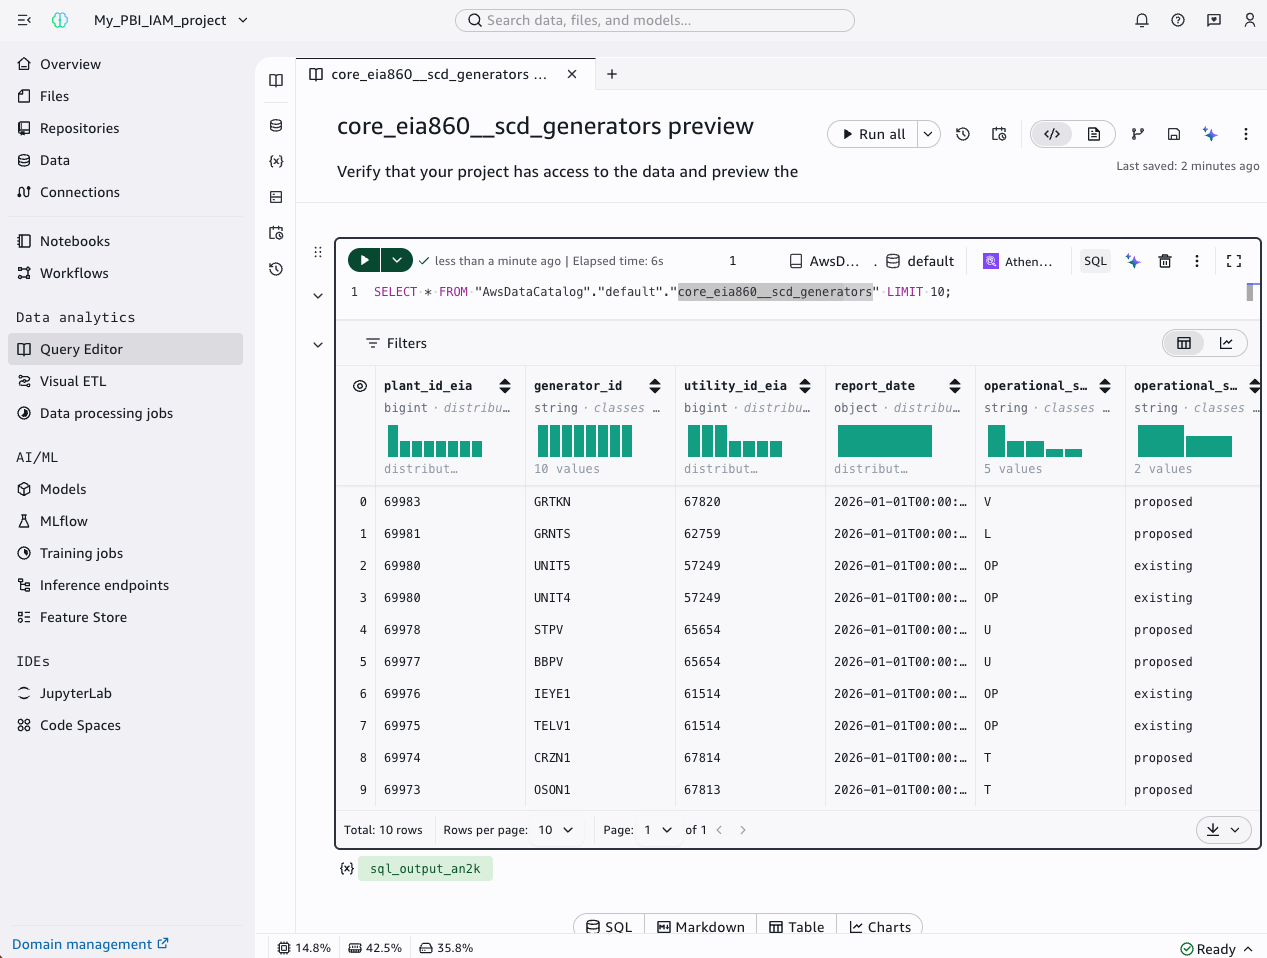
When you run a query in the Amazon SageMaker Unified Studio query editor against a federated Snowflake table, Amazon Athena runs the request. Athena is the underlying query engine integrated into Amazon SageMaker Unified Studio. Athena reads the table definition from AWS Glue Catalog, connects to Snowflake through the established connection, and pushes the query down for execution. Athena returns results directly to the query editor while Snowflake processes the data in place, and only the query results travel across the connection. Amazon SageMaker Unified Studio doesn’t copy data to S3 or any intermediate storage.

After you’ve validated that queries return the expected results, the next step is to publish this dataset to Amazon SageMaker Catalog, making it discoverable and shareable across your organization.

Publishing Snowflake datasets to the SageMaker Catalog

Now that your Snowflake connection is configured, you can publish your datasets to the Amazon SageMaker Catalog, making them discoverable and shareable across your organization.

Creating data assets in SageMaker Catalog

Data assets in Amazon SageMaker Catalog are the cataloged representation of your data resources. They help teams discover, govern, and share data across your organization.

In this section, you create a data asset associated with a Snowflake table. This process transforms a technical Snowflake table into a cataloged resource enriched with business metadata.

To create a data source:

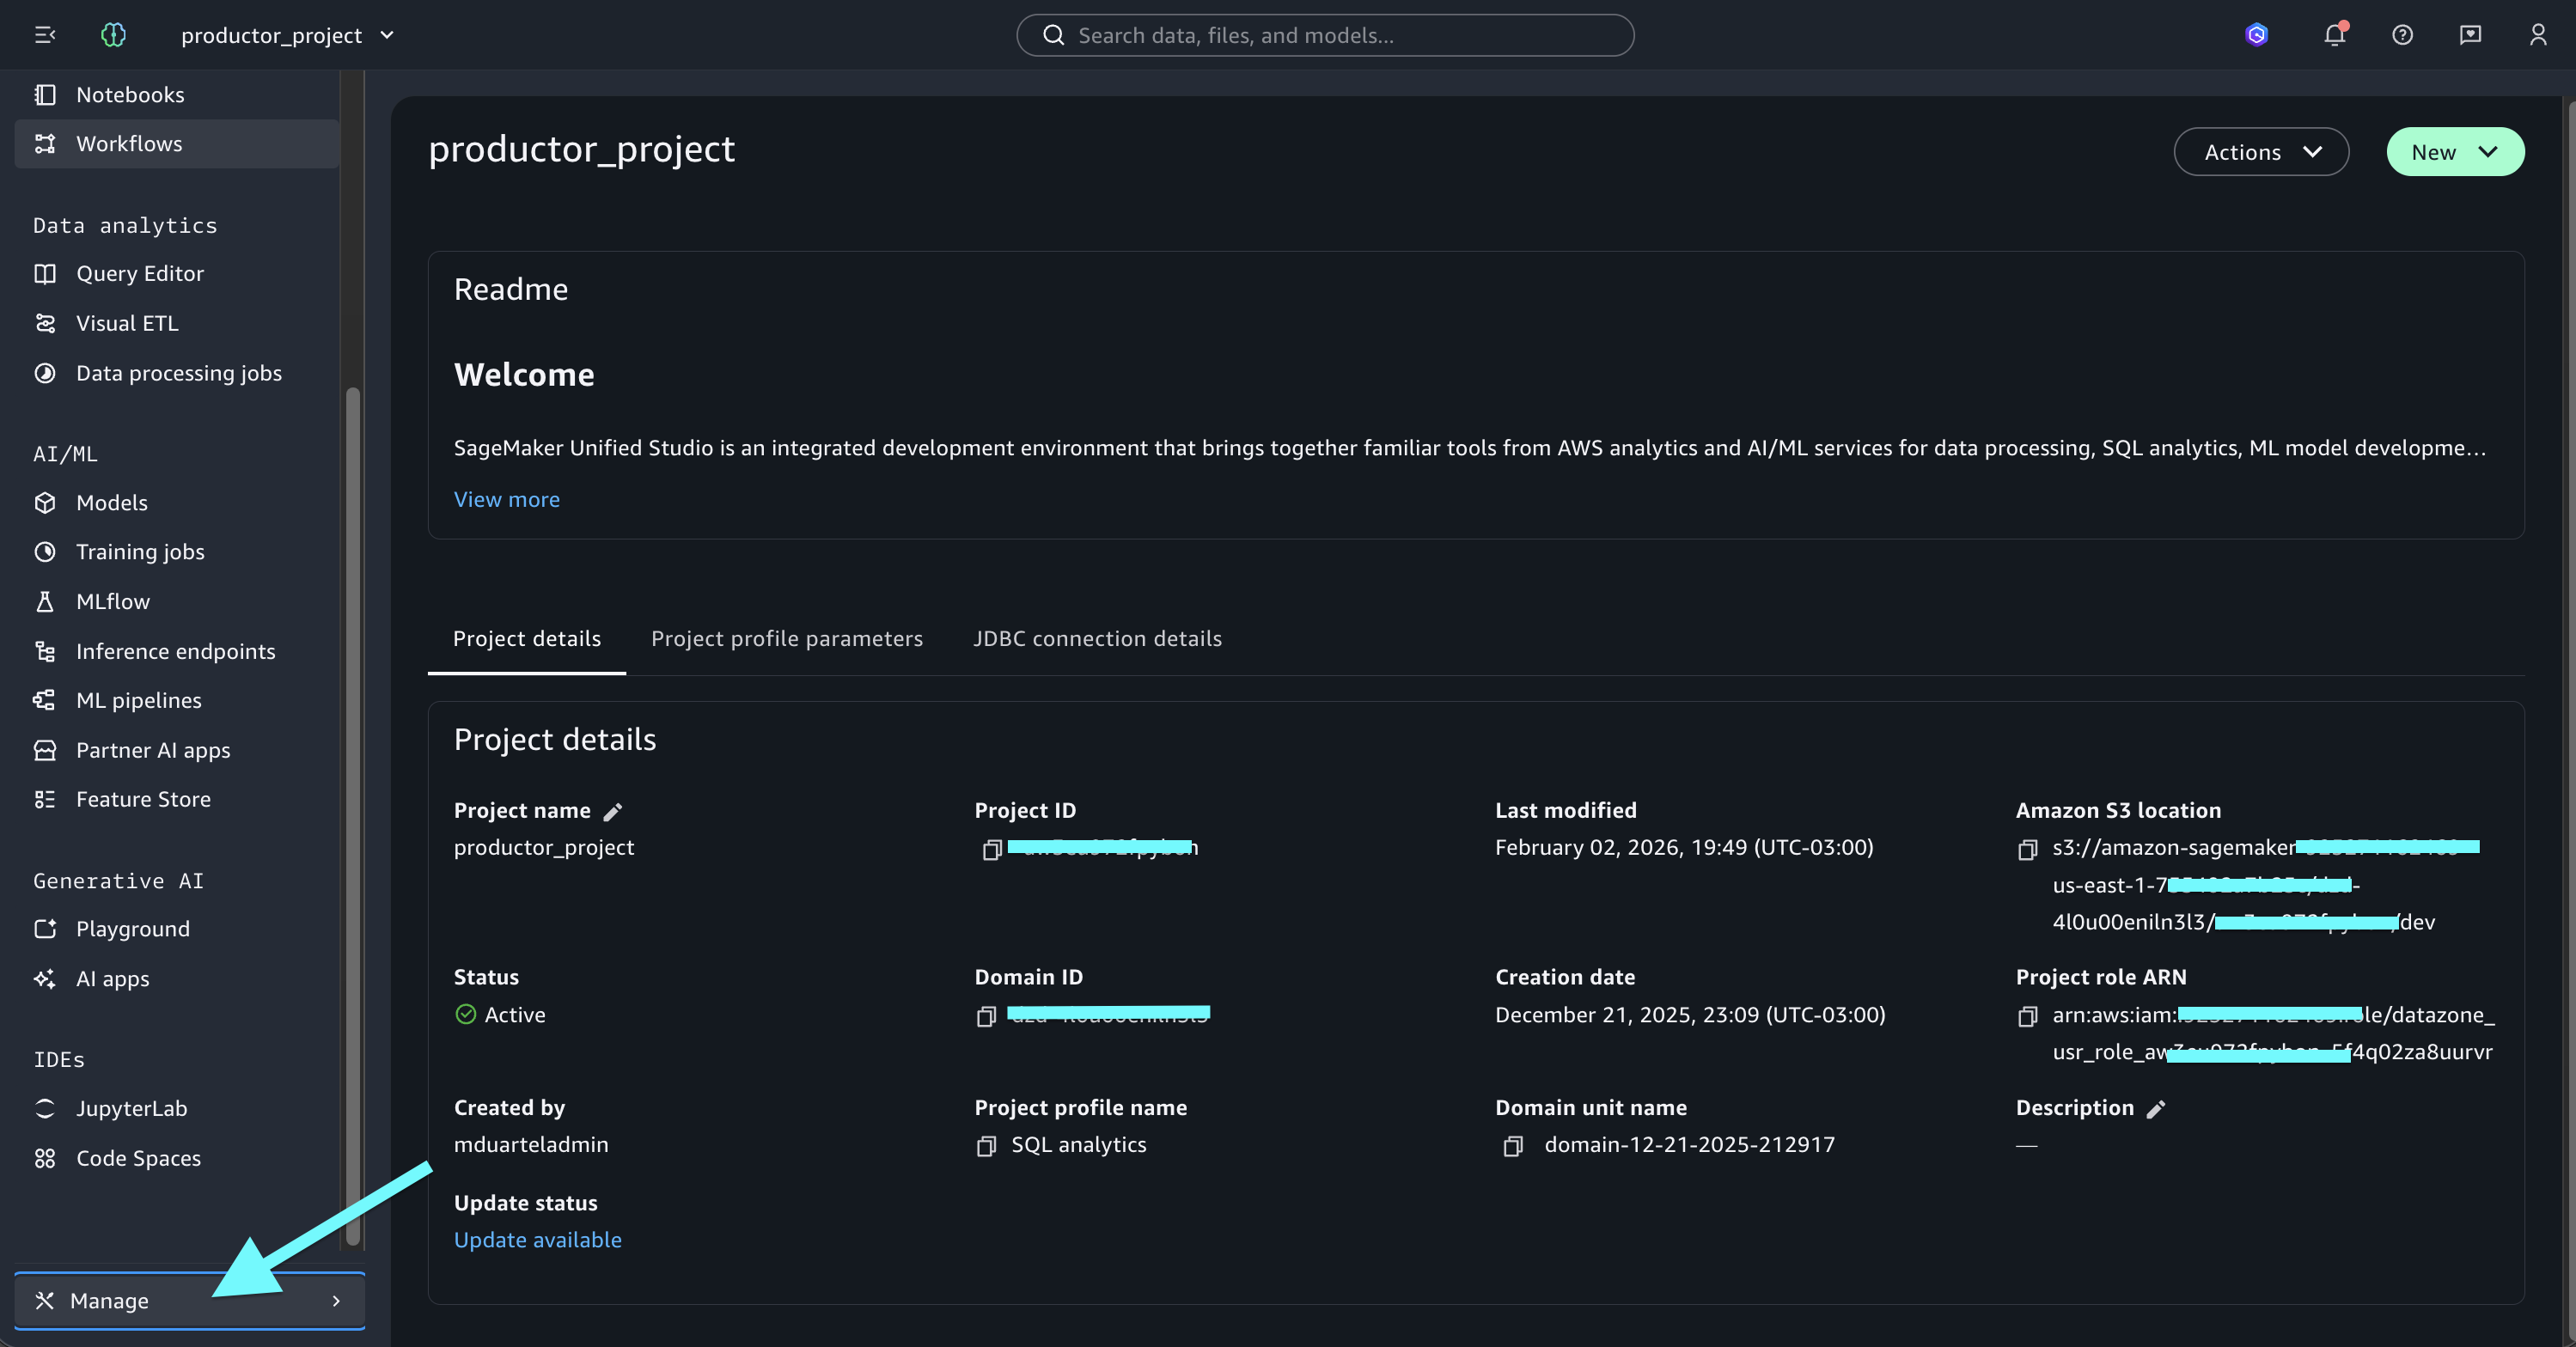
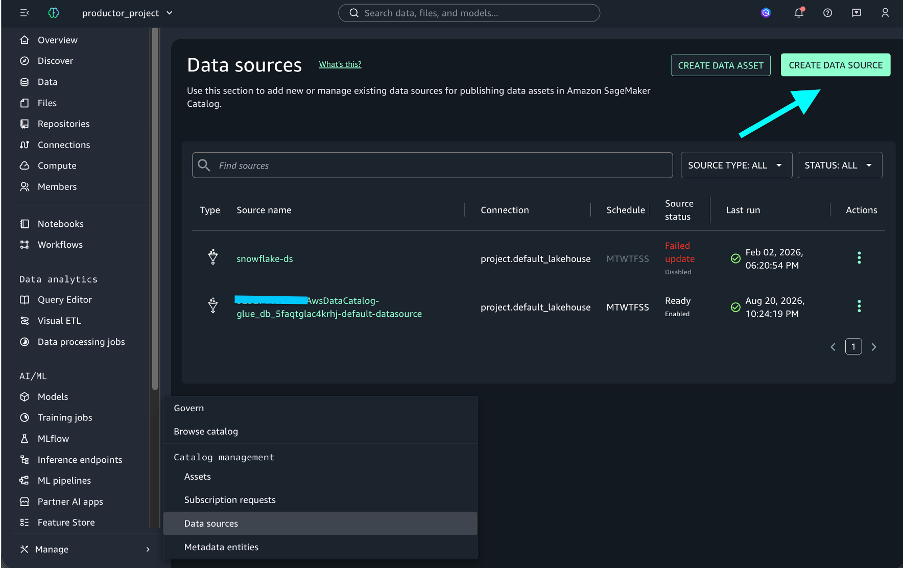
  1. In your Amazon SageMaker Unified Studio project, go to Manage.

    Manage tab in the SageMaker Unified Studio project
  2. Choose Data Sources.
  3. Choose Create Data Source.

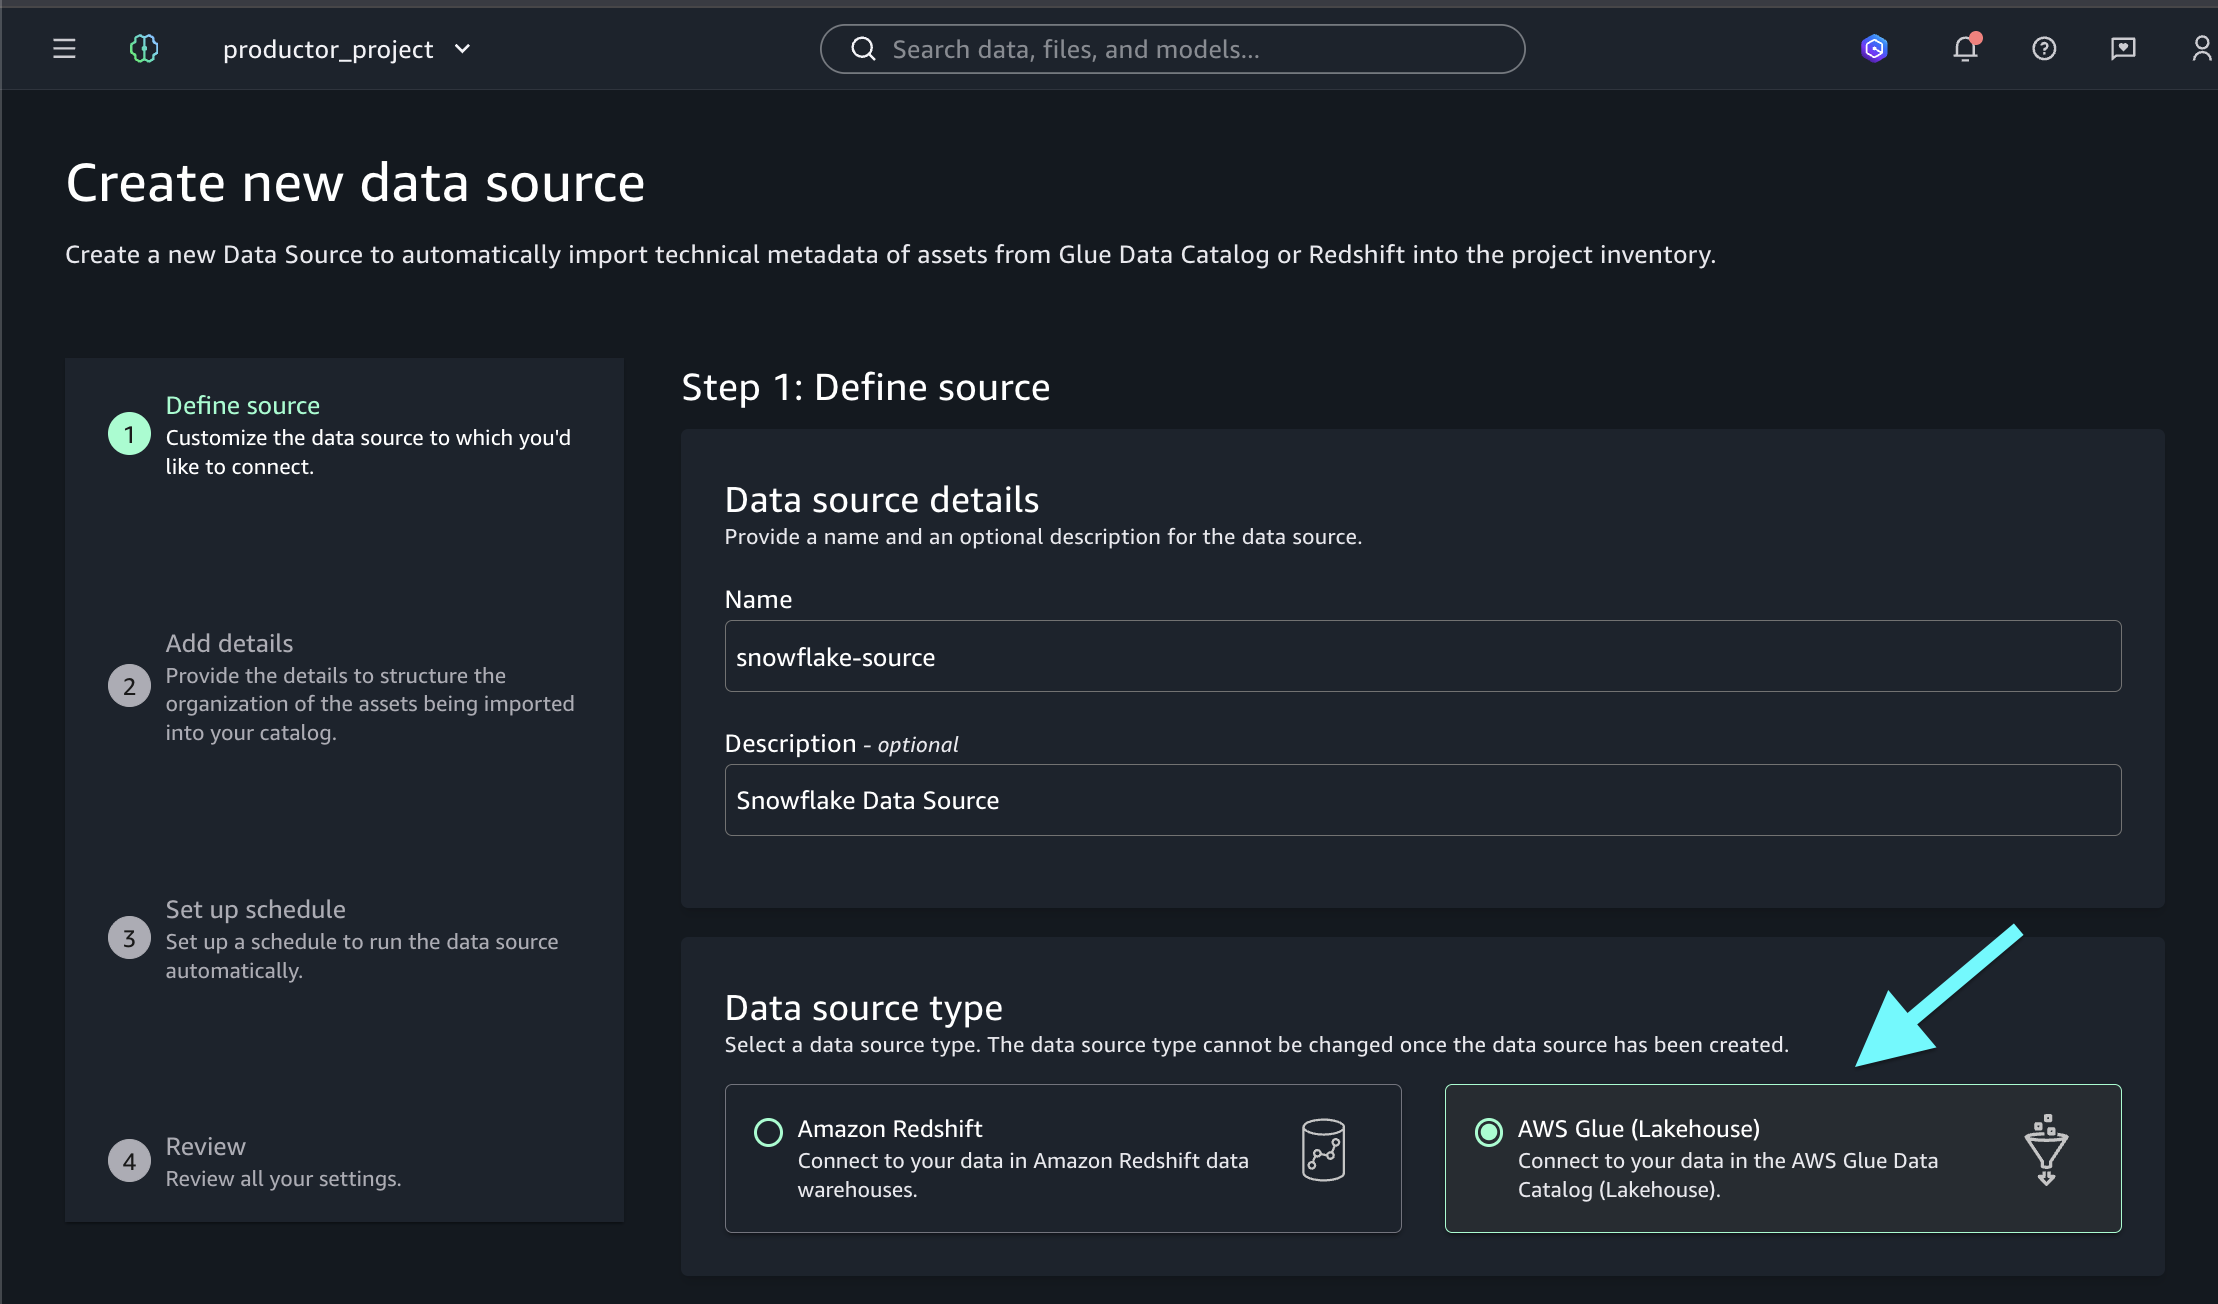
  4. Select the AWS Glue option.

    Data source type selection showing the AWS Glue option
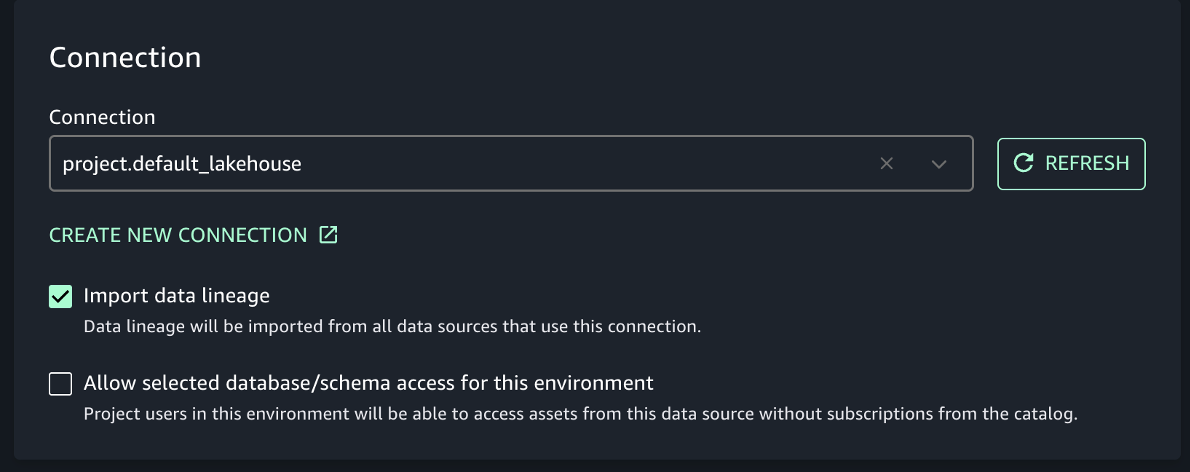
  5. Turn on the Import data lineage checkbox and select the connection: project.default_lakehouse.

    Data source configuration with Import data lineage and the project.default_lakehouse connection selected
  6. Complete the form and choose Next:
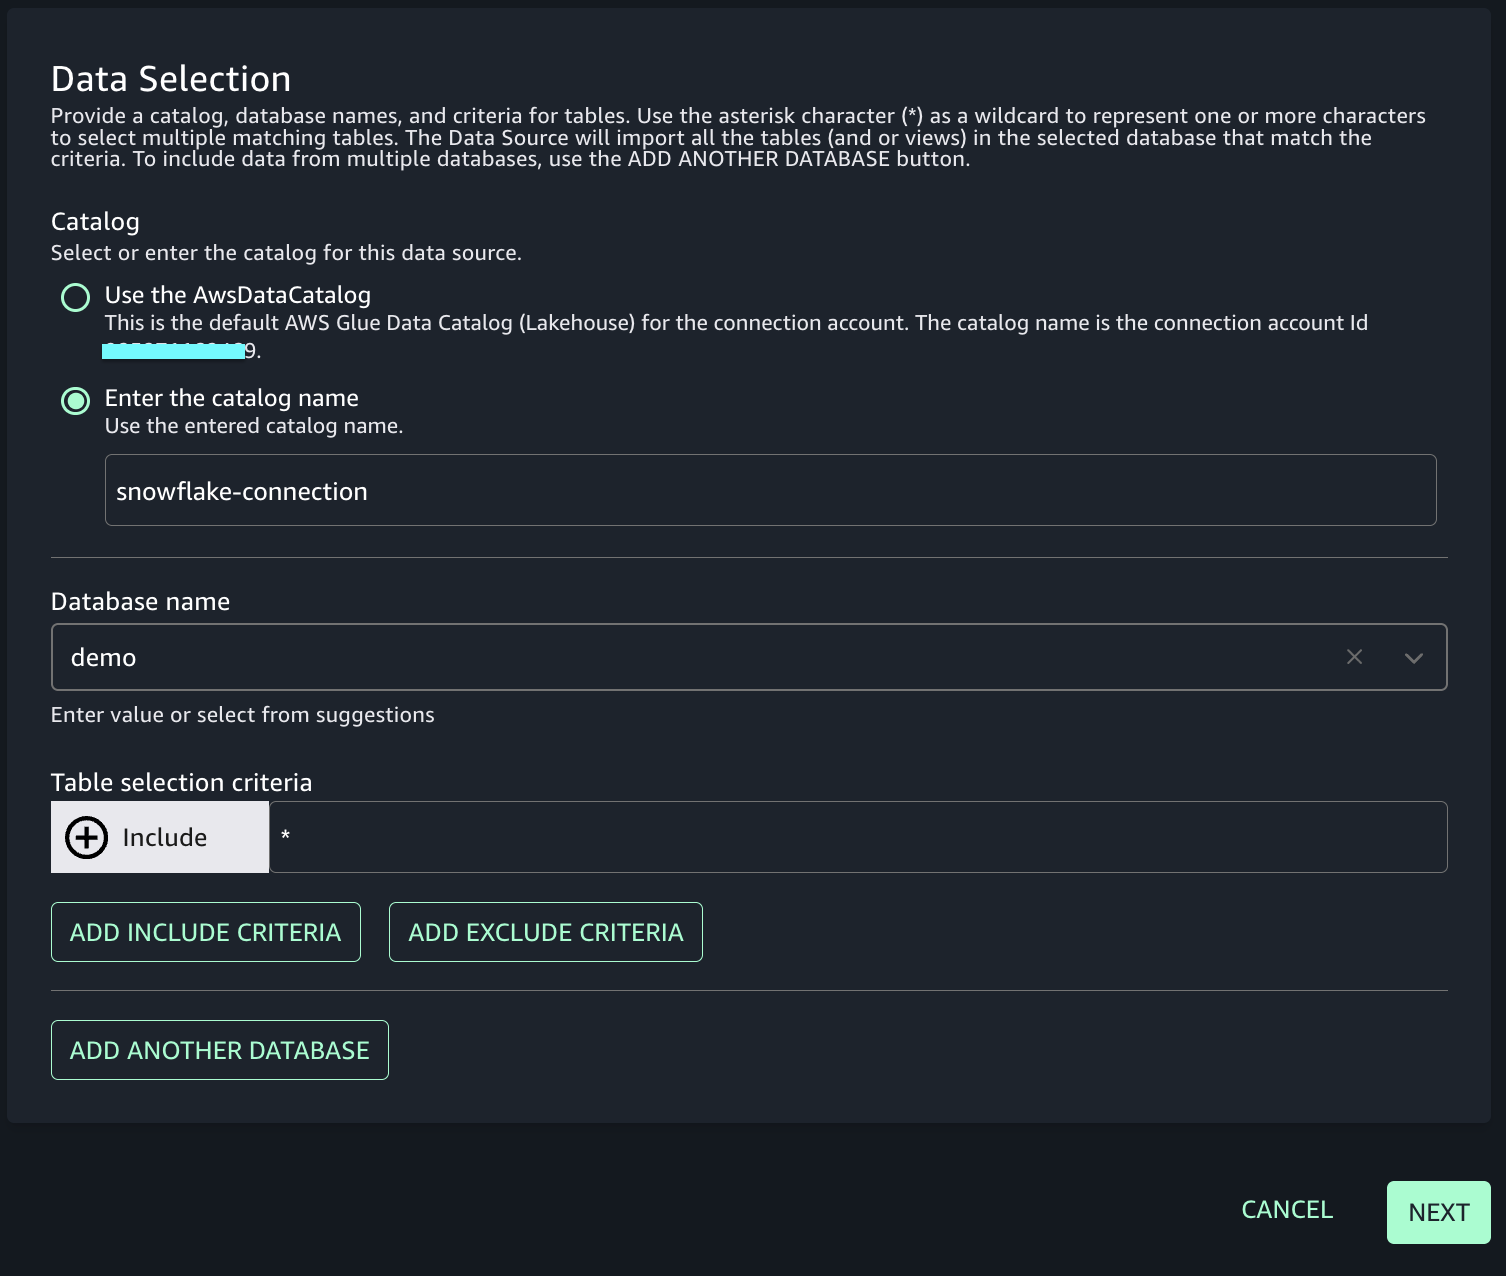
    • Catalog: Select Enter the catalog name and enter snowflake-connection.
    • Database name: Enter your database name (for example, movies).
    • Table selection criteria: Enter * for all tables in the database, or enter a specific table name.
    Data source form showing catalog name, database name, and table selection criteria
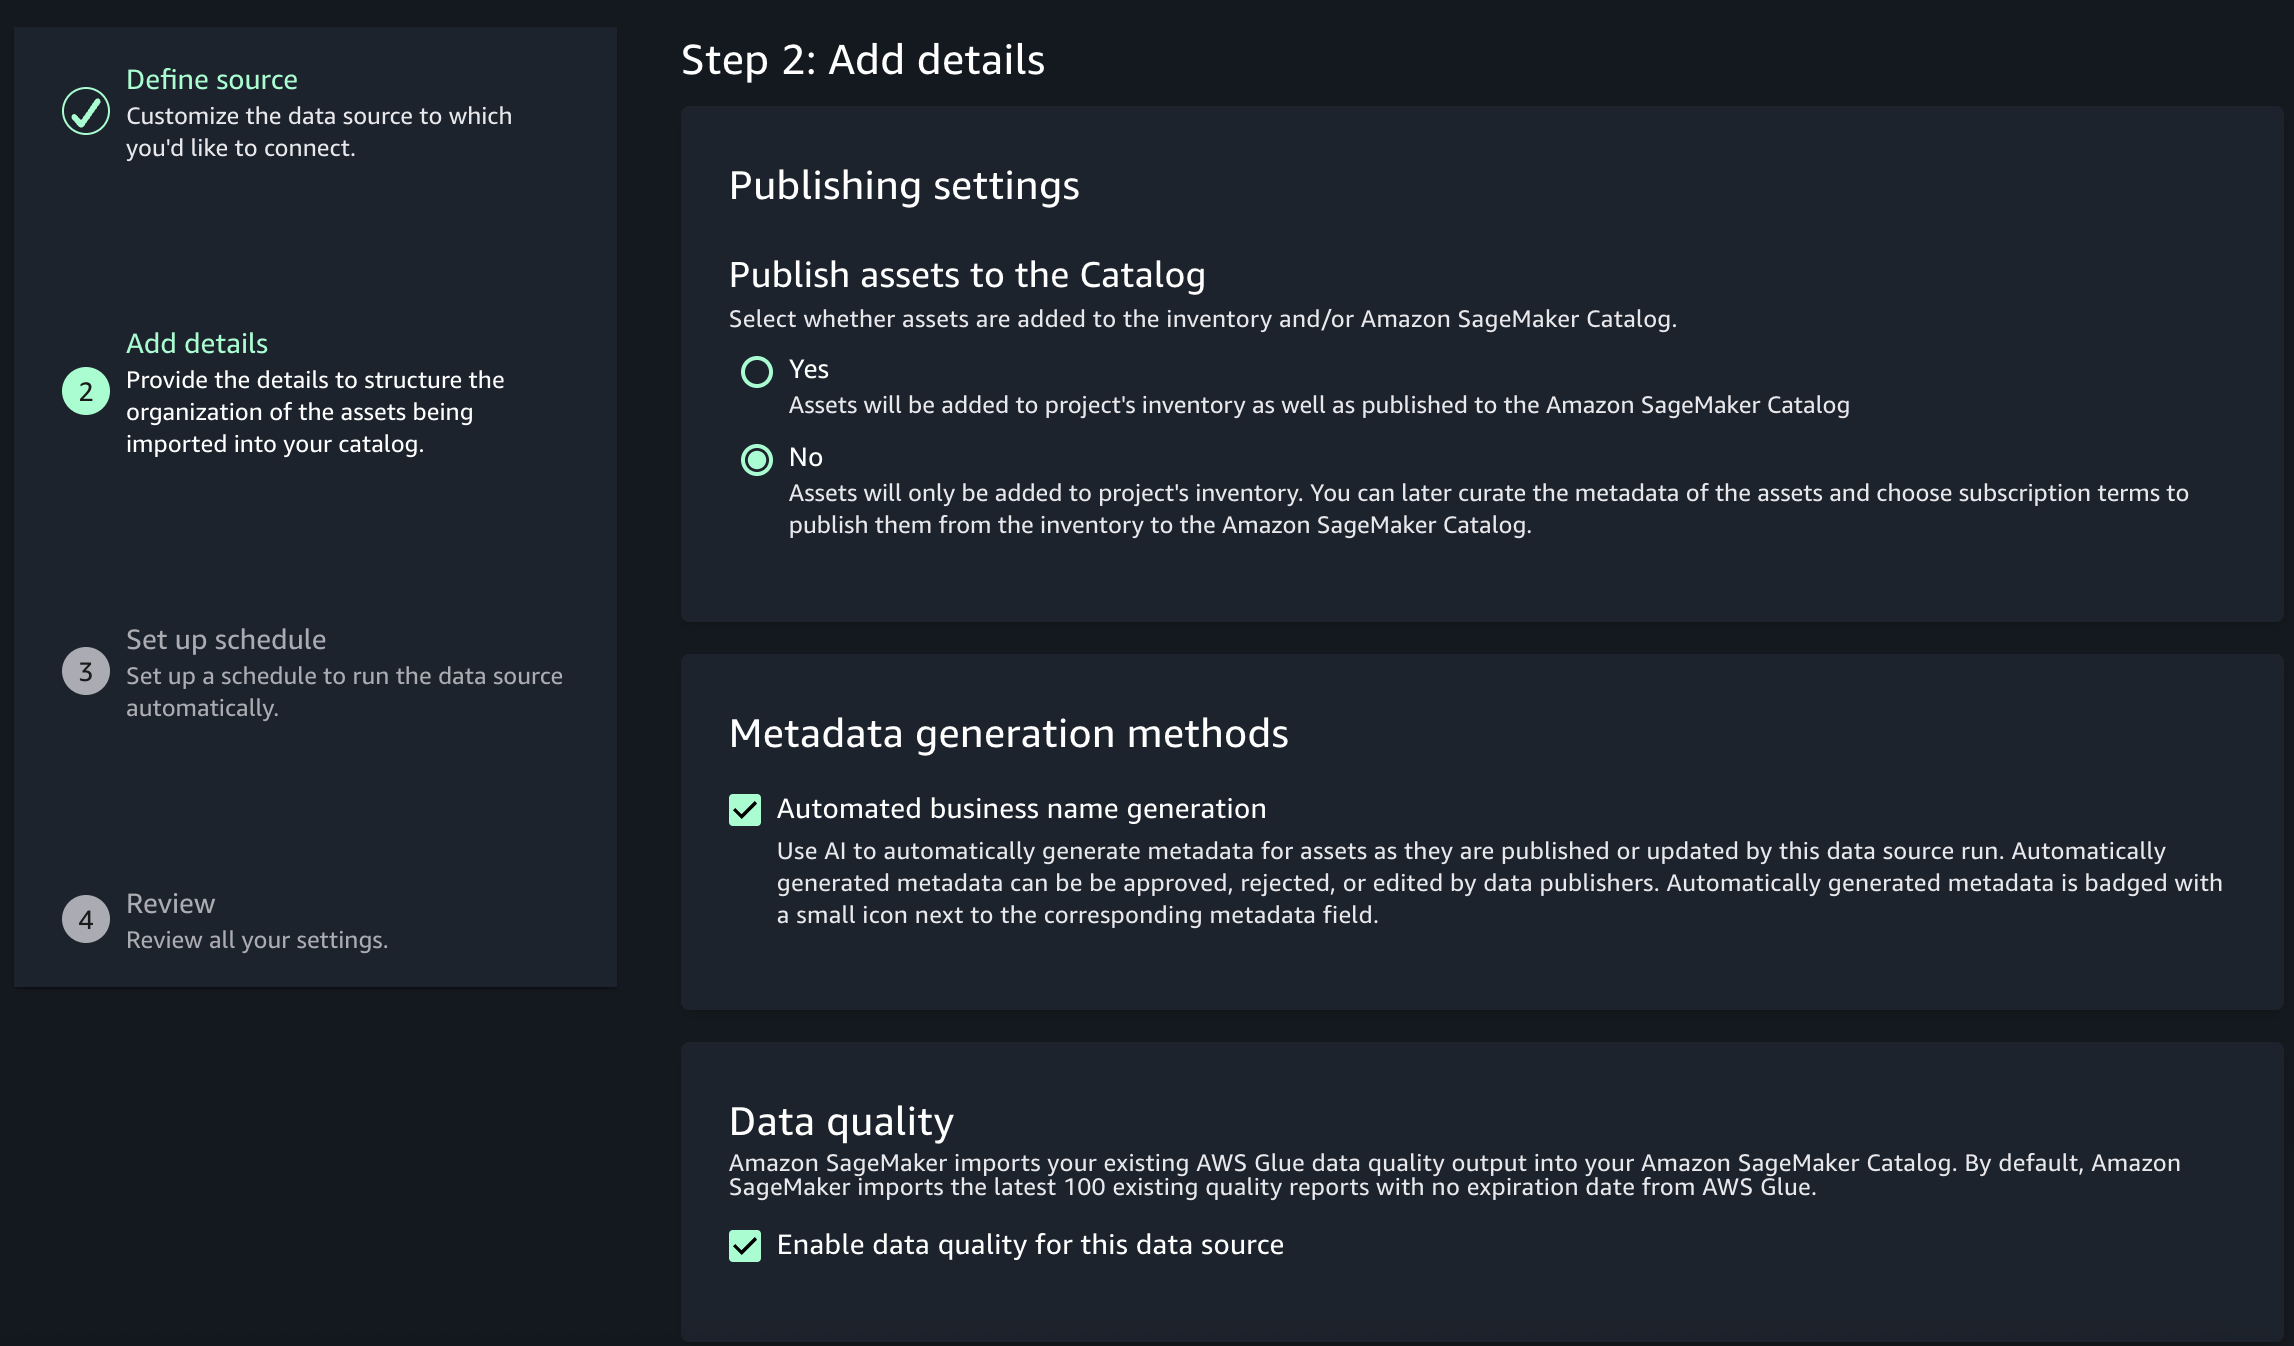
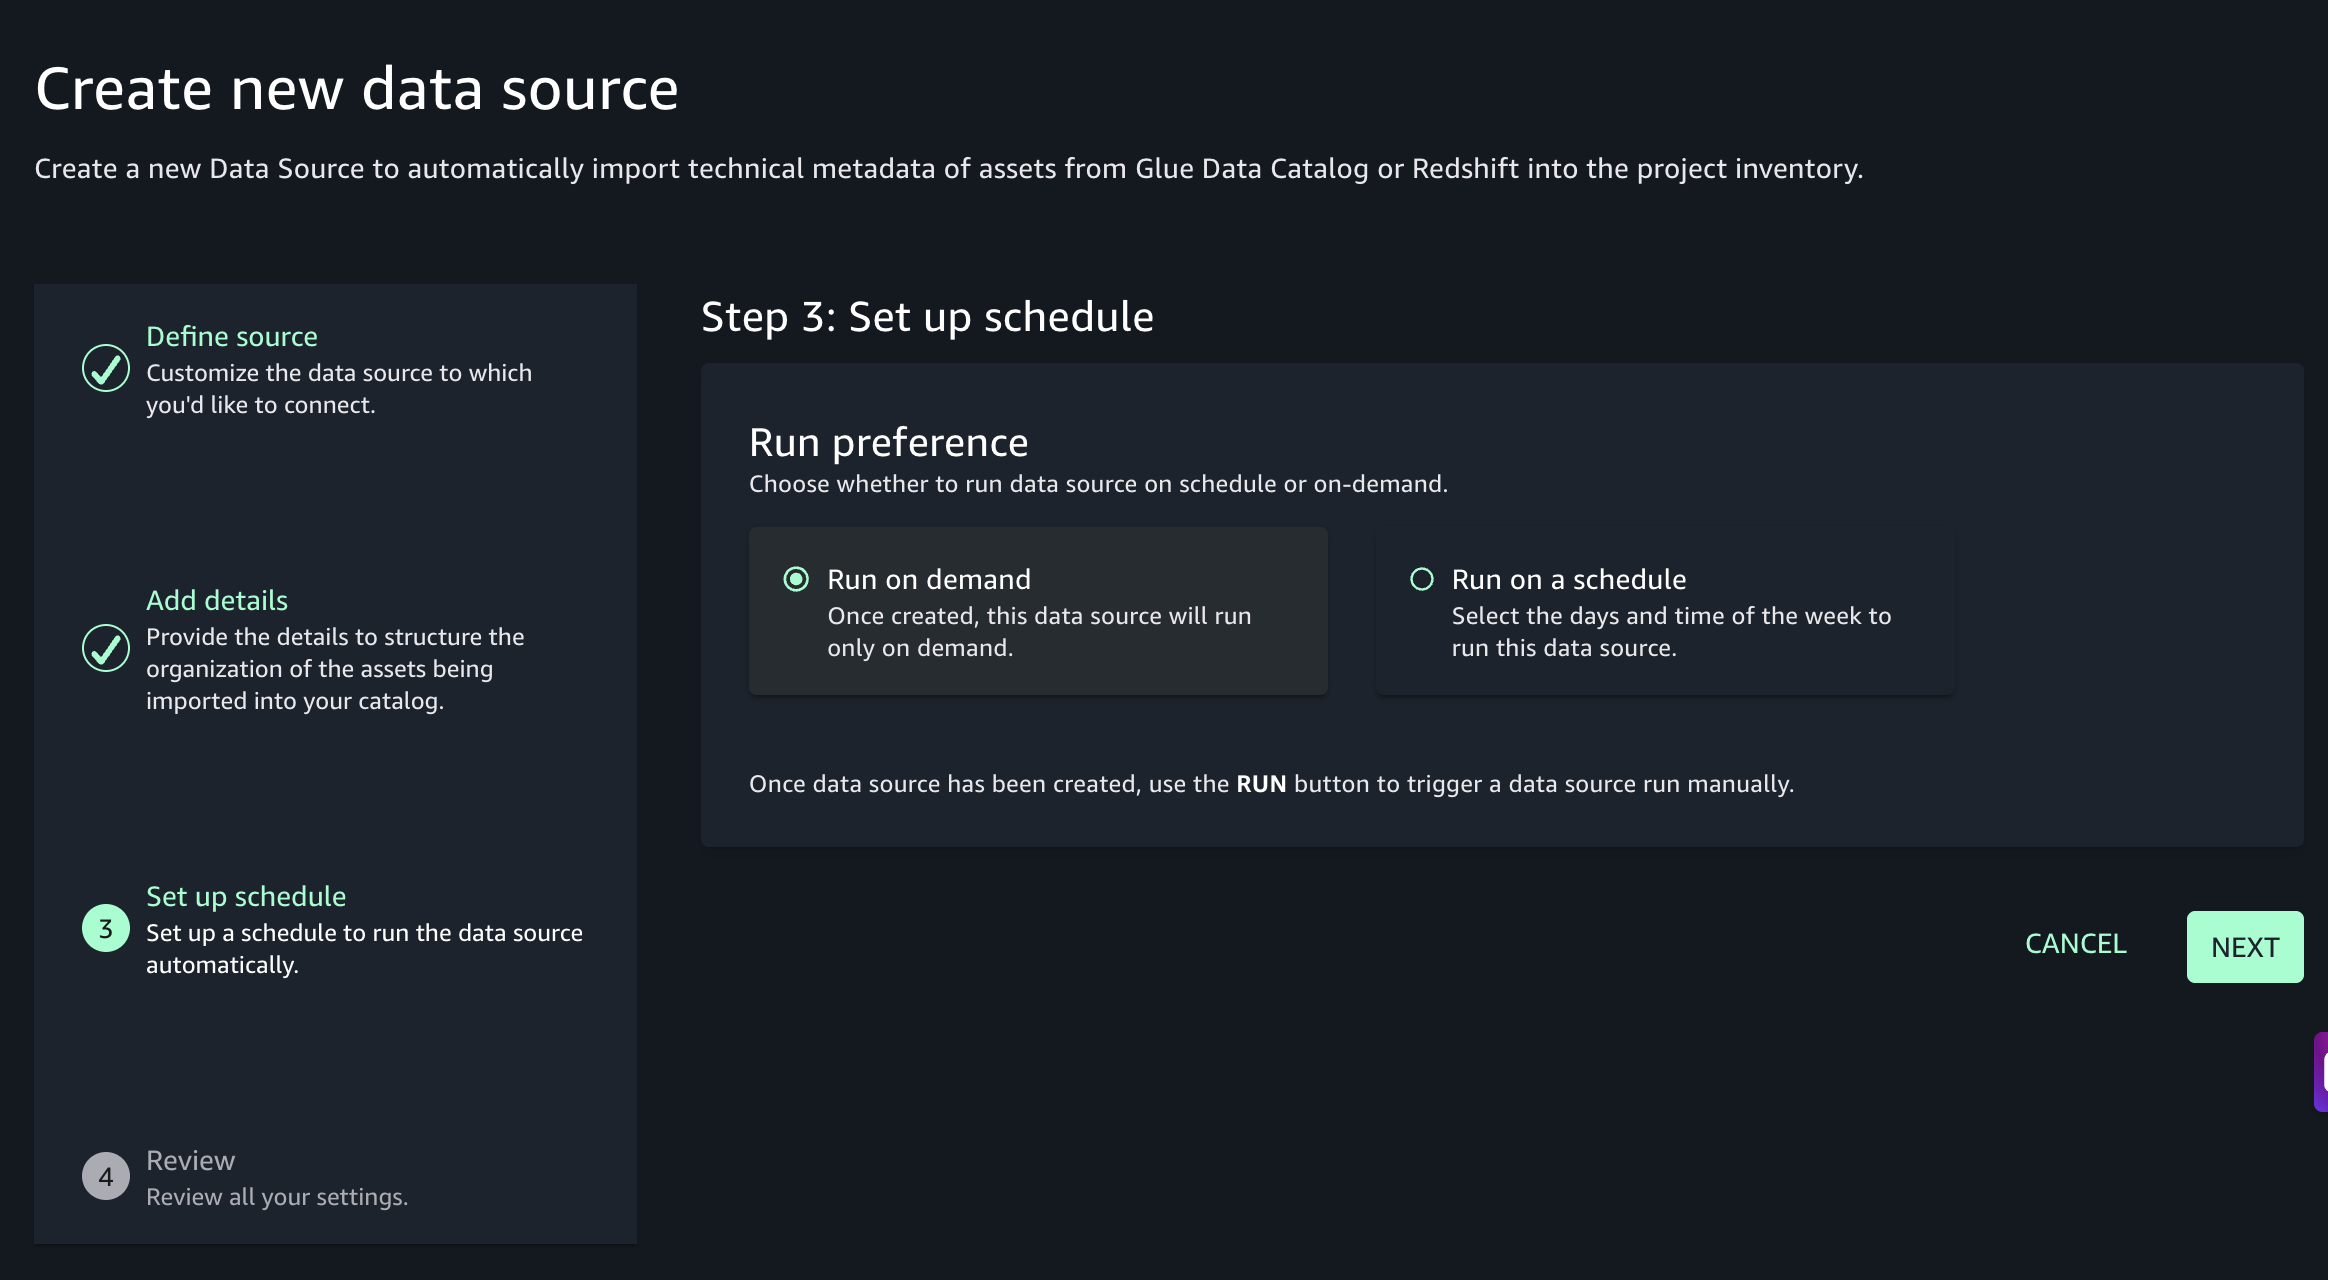
  7. Keep the default options and choose Next until you reach the summary screen.

    SageMaker Unified Studio data source configuration summary screen
    Data source review screen before creation
  8. Review your settings and choose Create.

To extract metadata and publish assets:

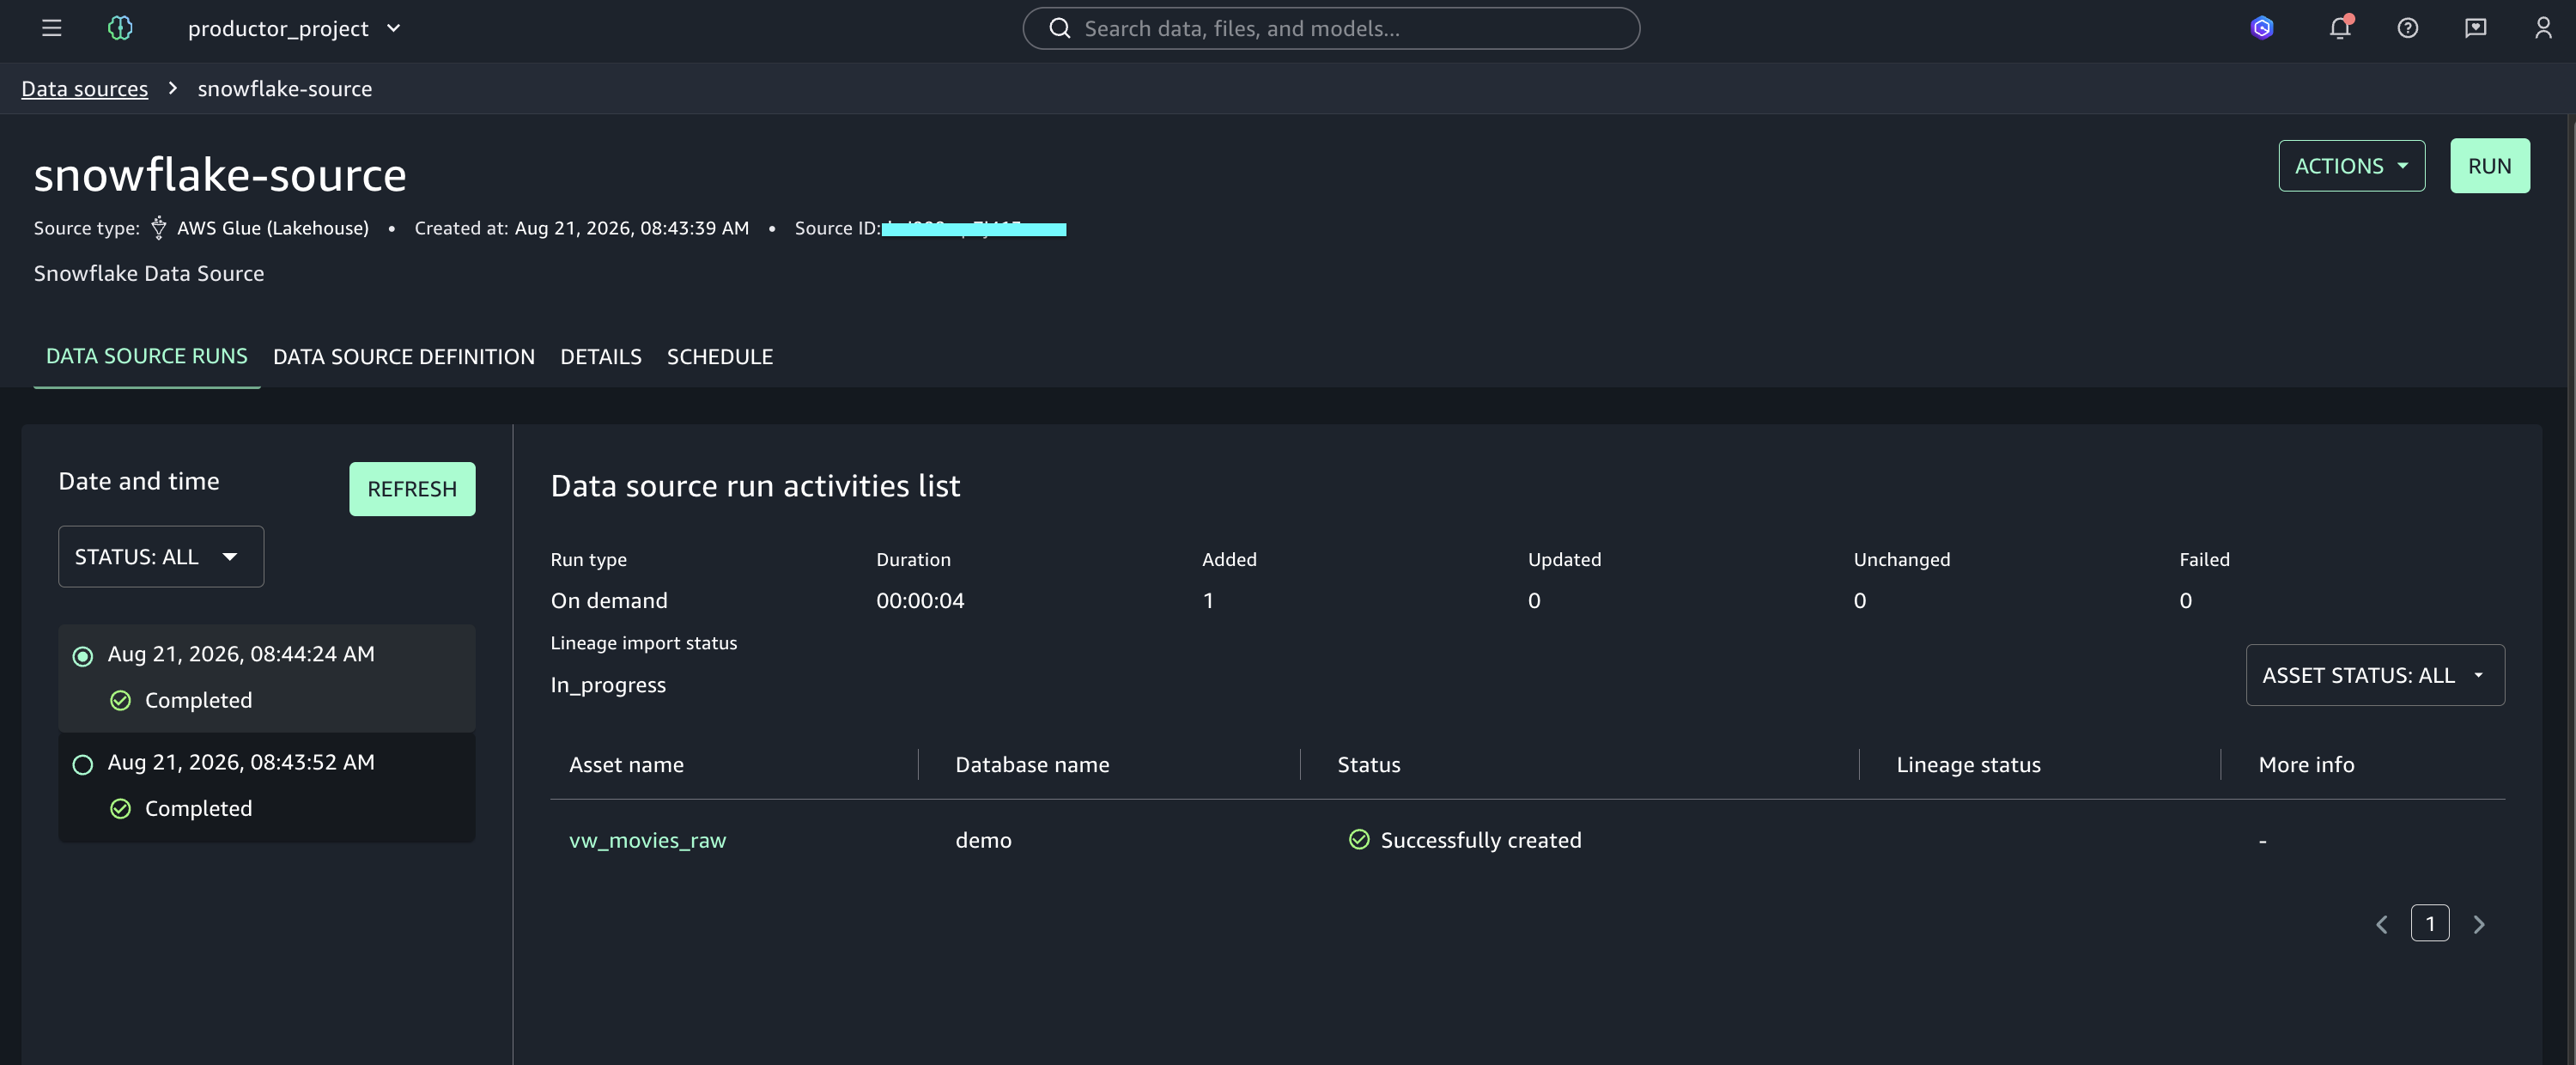
  1. Choose Run to start extracting metadata from AWS Glue Data Catalog.

    Data source detail page with the Run option to extract metadata from the AWS Glue Data Catalog
  2. Wait for the run to complete.
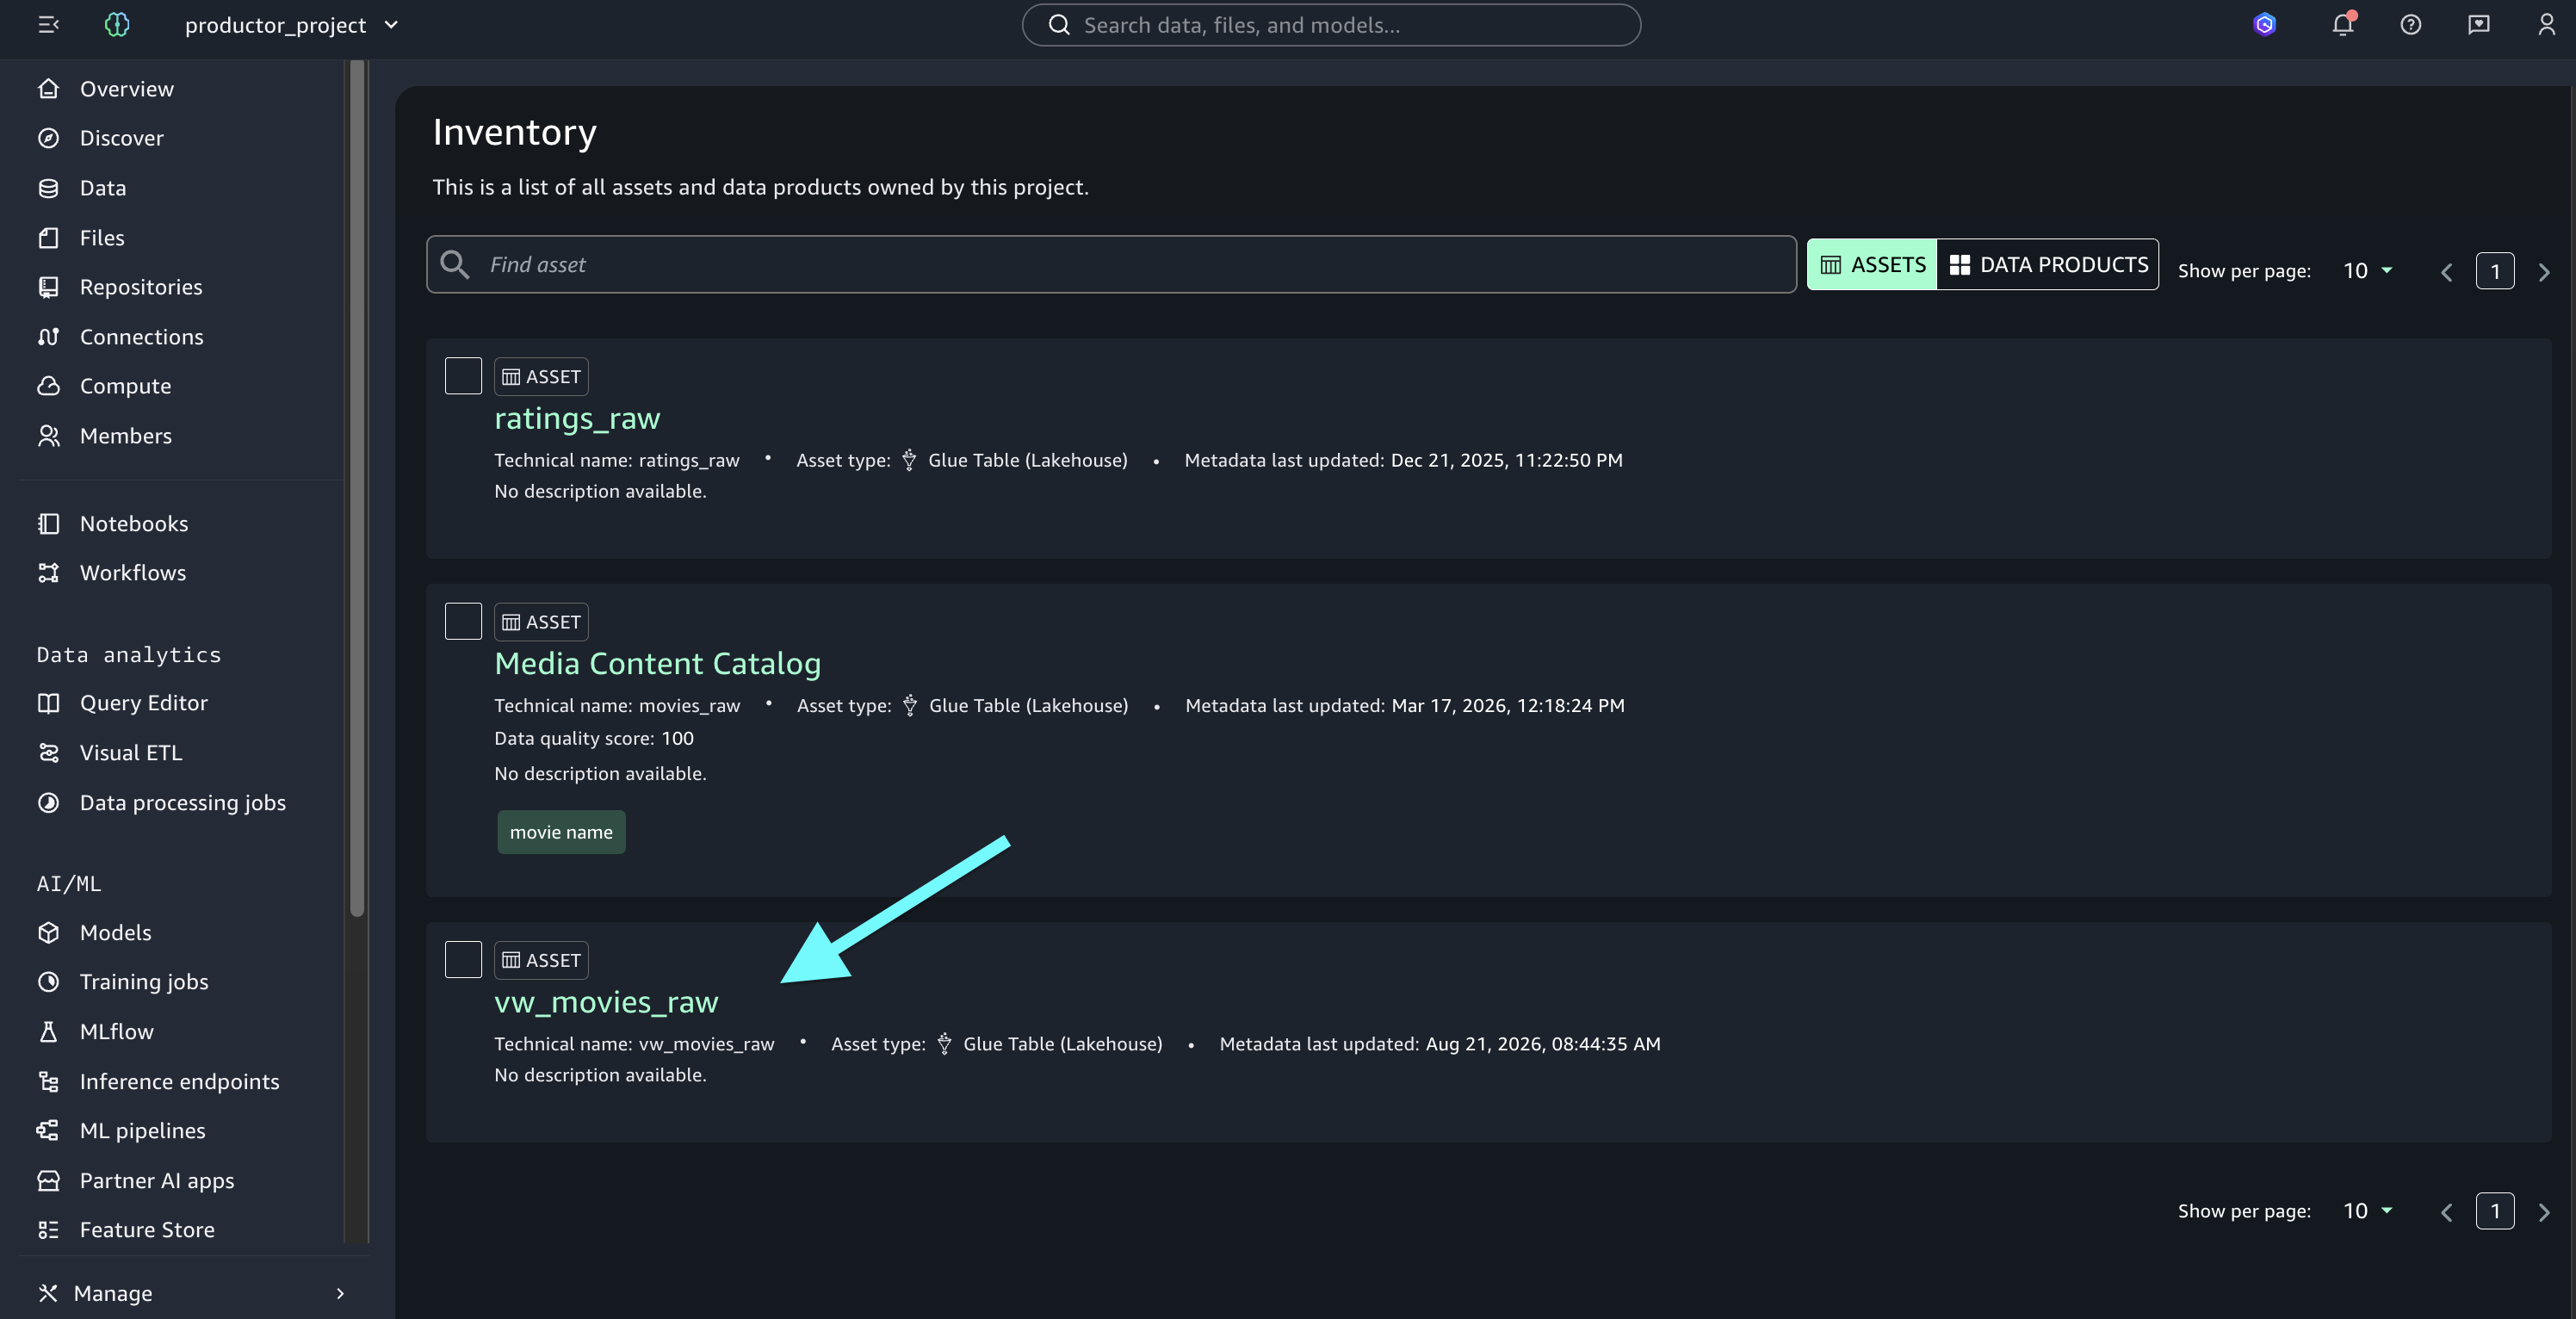
  3. Go to Assets to view the Asset Inventory.

    Asset inventory in SageMaker Catalog after the data source run completes

The following screenshot shows the asset inventory after the data source run completes.

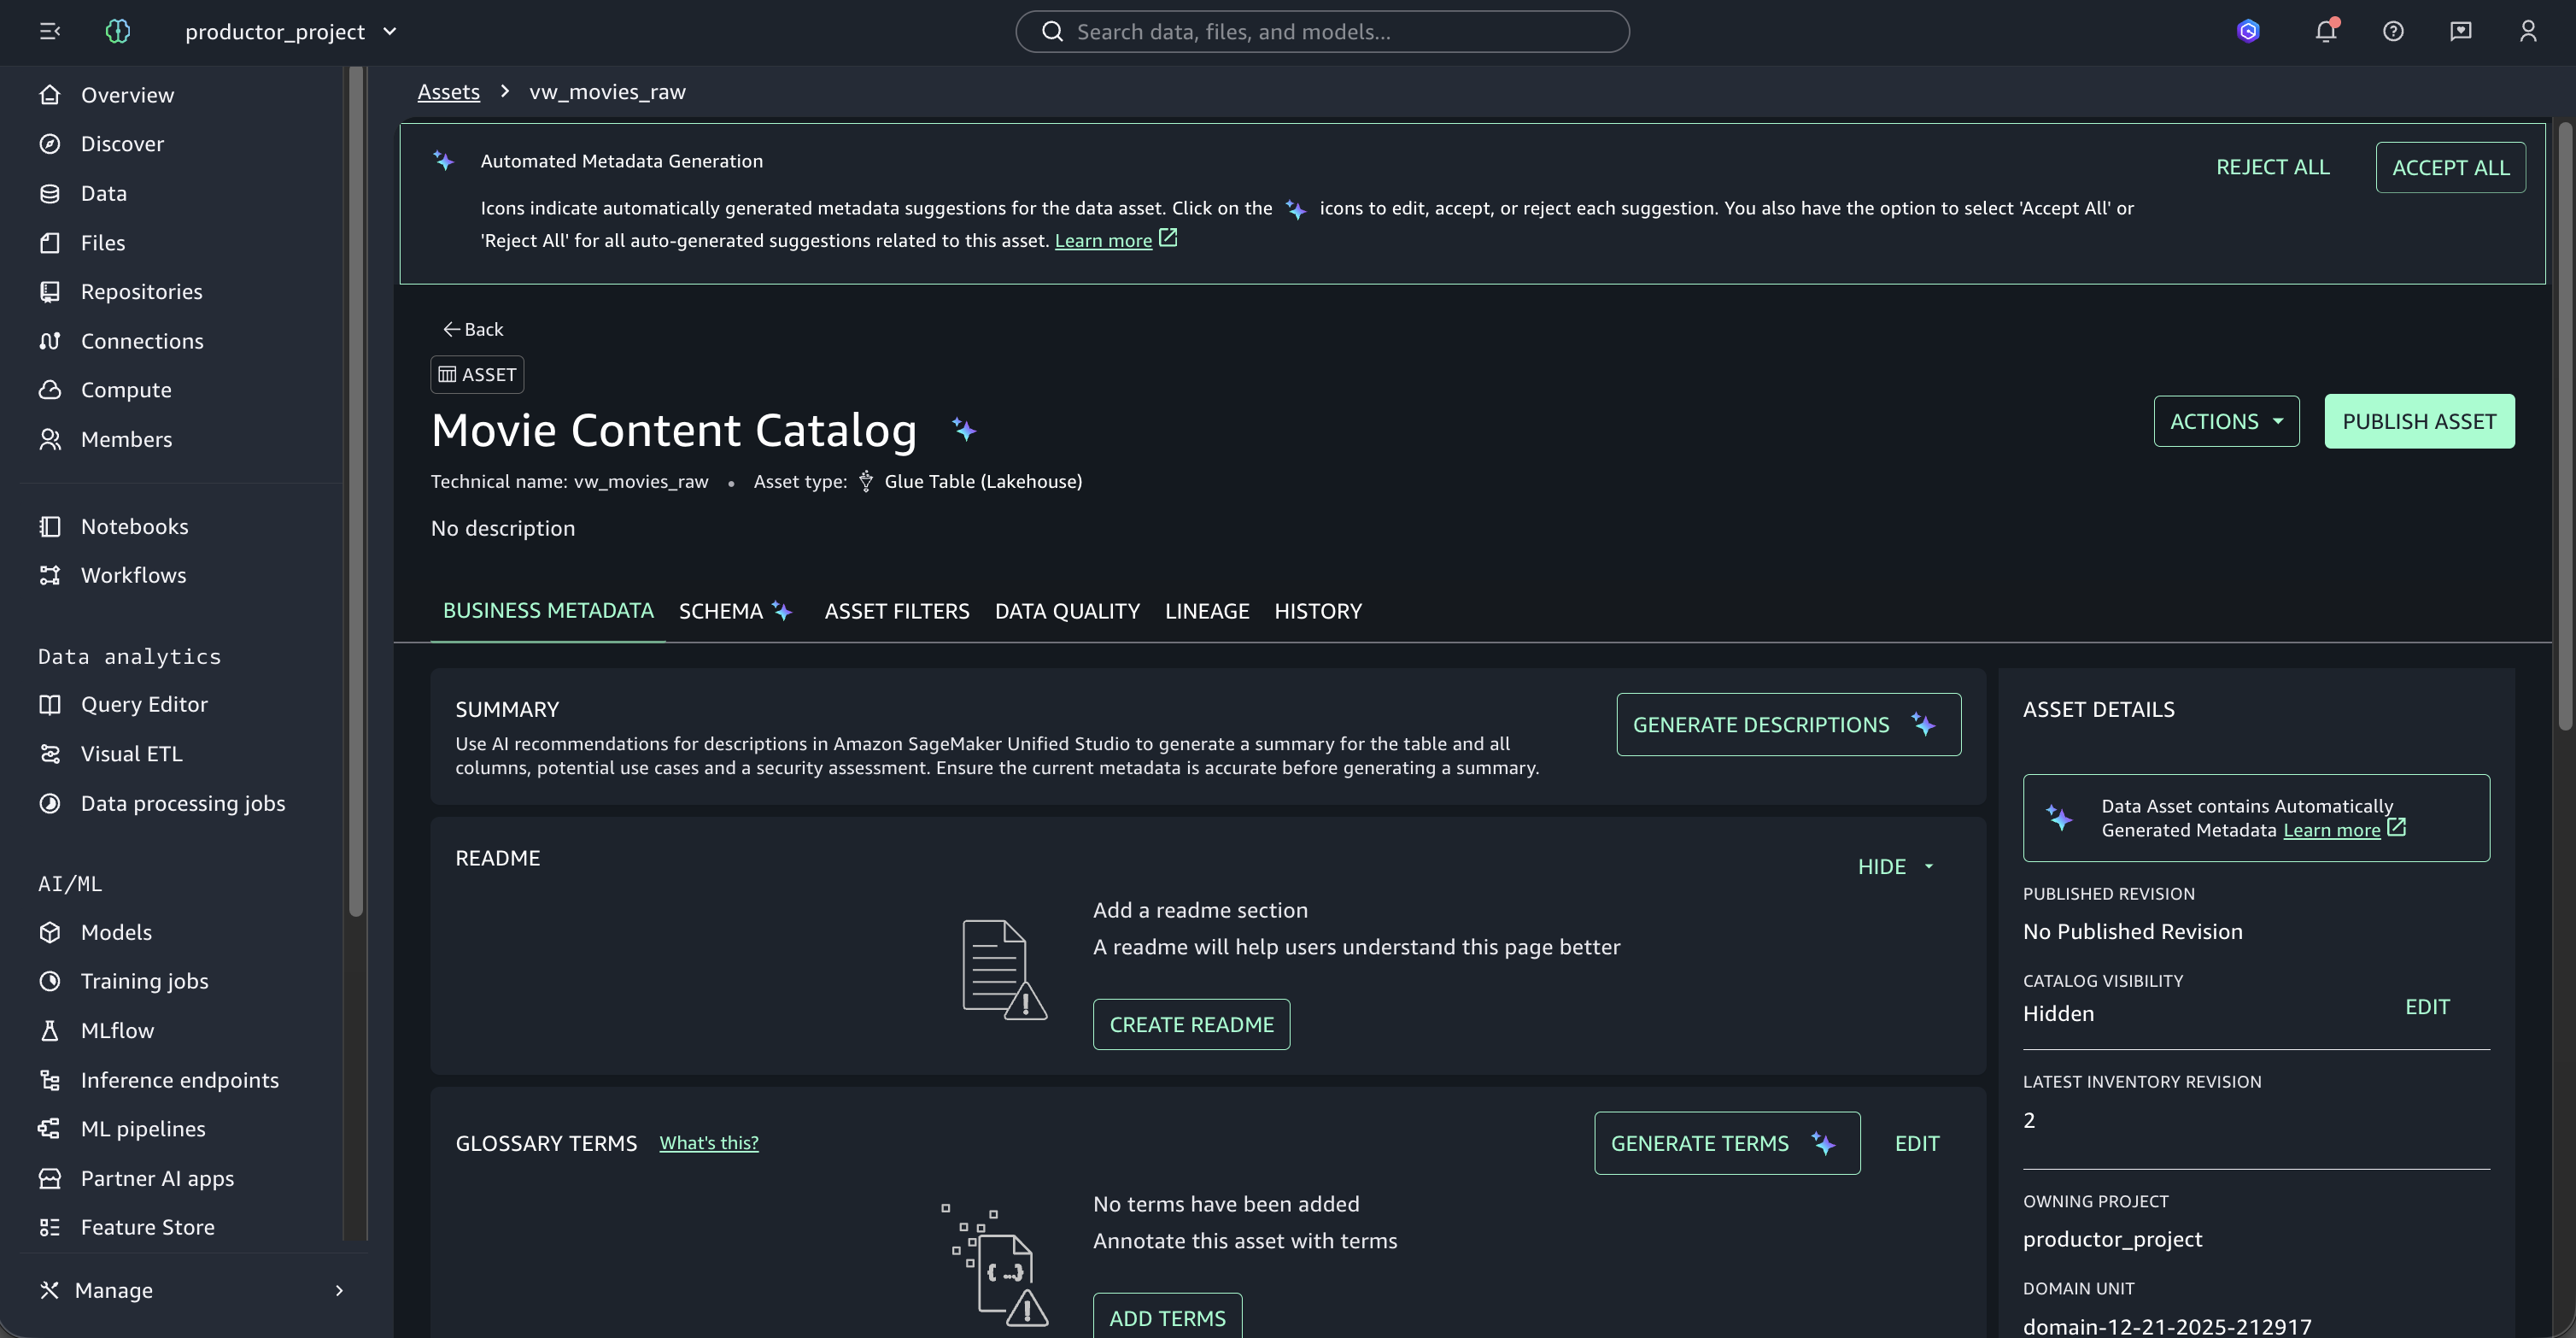
  1. Choose an asset to view its details.

    Asset detail page in SageMaker Catalog showing the Snowflake table metadata

At this point, you can enrich the business context by choosing Generate Descriptions. Amazon SageMaker Catalog analyzes the asset’s technical structure and generate:

  • Business descriptions in natural language for the asset.
  • Contextual definitions for each field/column.
  • Suggested glossary terms that could be applied.
  1. After your asset has been enriched with the necessary business metadata, you can publish it to the Amazon SageMaker Catalog by choosing Publish Asset.

Publish Asset option on the enriched Snowflake asset in SageMaker Catalog

The Snowflake enriched asset is now available to data consumers across your organization. Other users can discover it, subscribe to it, and consume it without data replication.

Implementing data quality rules with AWS Glue Data Quality

This section explains how to apply data quality validations to Snowflake data using AWS Glue Data Quality and visualize results in Amazon SageMaker Catalog.

Setting up the custom transform

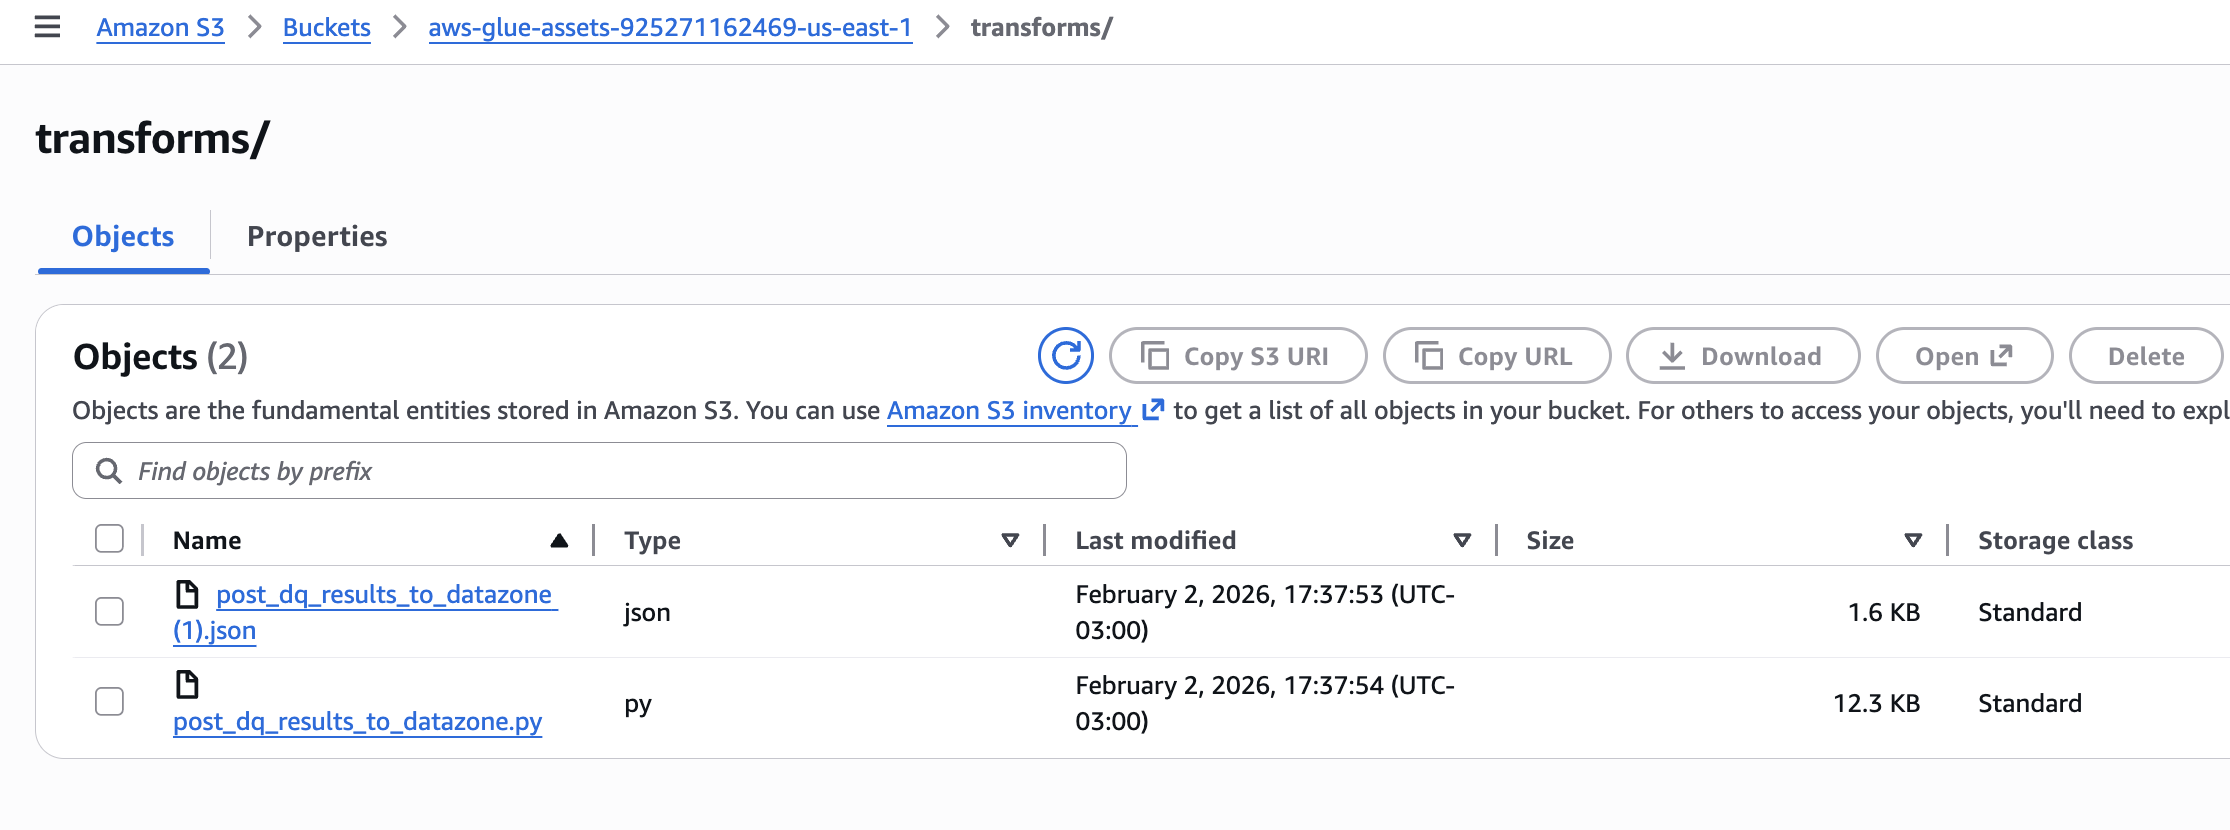
Upload two files to an Amazon S3 bucket in the same AWS account where you run AWS Glue:

Copy both files to your AWS Glue assets S3 bucket in the transforms folder (s3://aws-glue-assets-<account-id>-<region>/transforms). AWS Glue Studio reads all JSON files from this folder to register custom visual transforms.

Custom transform files uploaded to the transforms folder in the AWS Glue assets S3 bucket

In the following sections, we walk you through the steps of building an ETL pipeline for data quality validation using AWS Glue Studio.

Creating the AWS Glue Visual ETL job

AWS Glue for Spark provides built-in support for reading from Snowflake data sources.

To create a new visual ETL job:

  1. Open the AWS Glue console at https://console.aws.amazon.com/glue/. Choose ETL jobs, then Visual ETL.

    AWS Glue console showing ETL jobs and the Visual ETL option

Establishing the Snowflake connection

To add a Snowflake source:

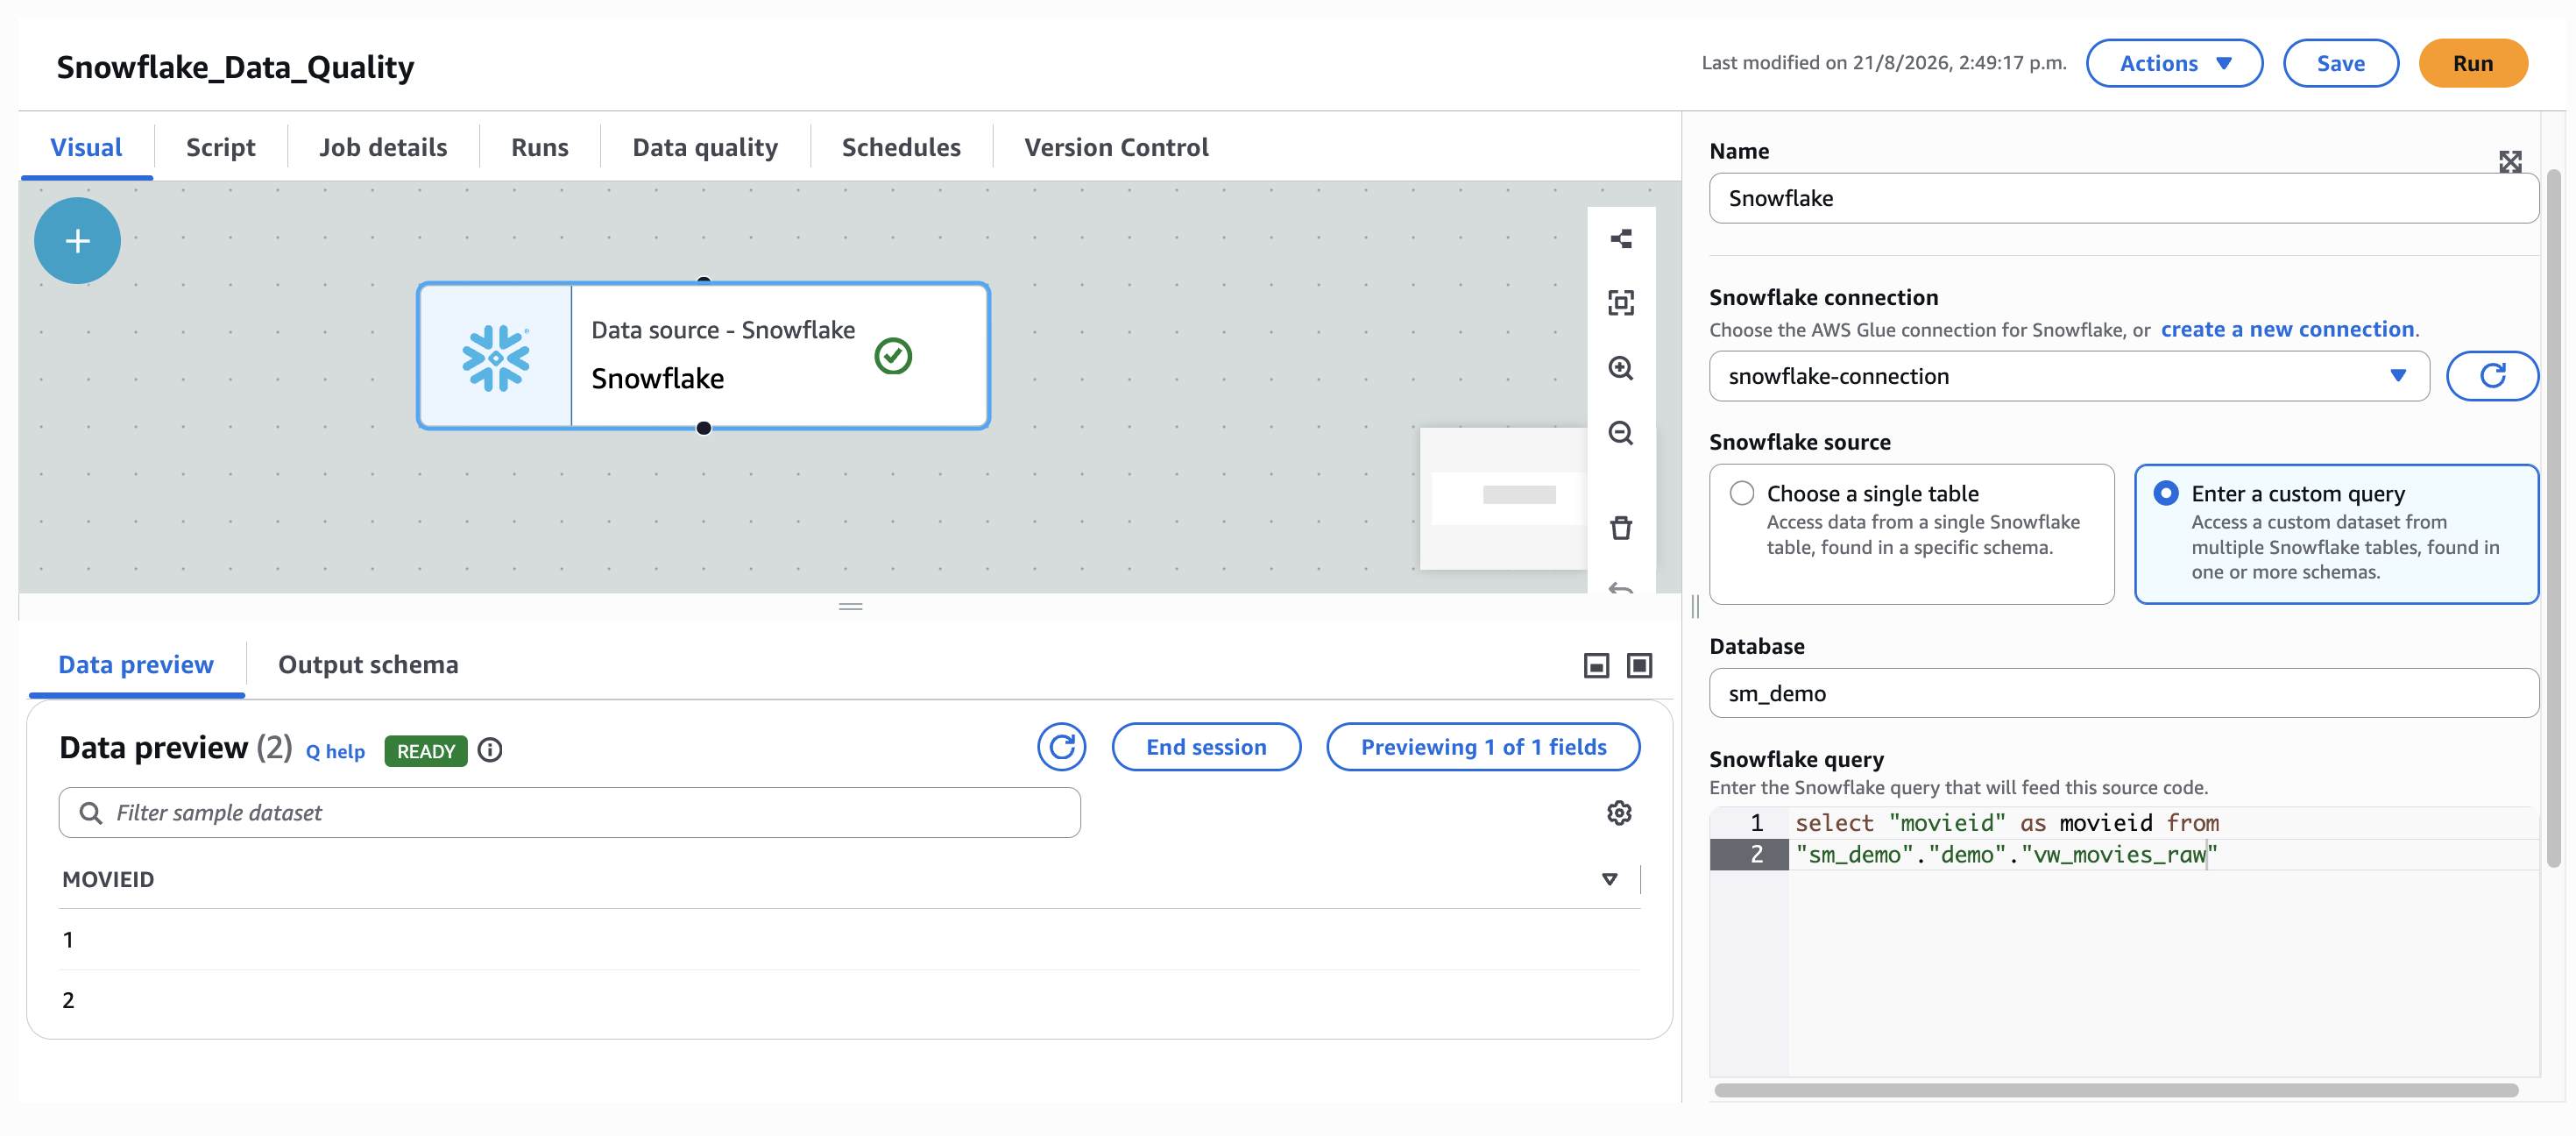
  1. In the job pane, choose Snowflake as your source. For Snowflake connection, select the connection that you created earlier. Specify the relevant schema and table for data quality checks.

    Snowflake source node configured in the AWS Glue visual ETL job

The visual editor displays the Data source properties panel where you select your connection, database, and enter a custom query targeting your Snowflake table.

Applying data quality rules

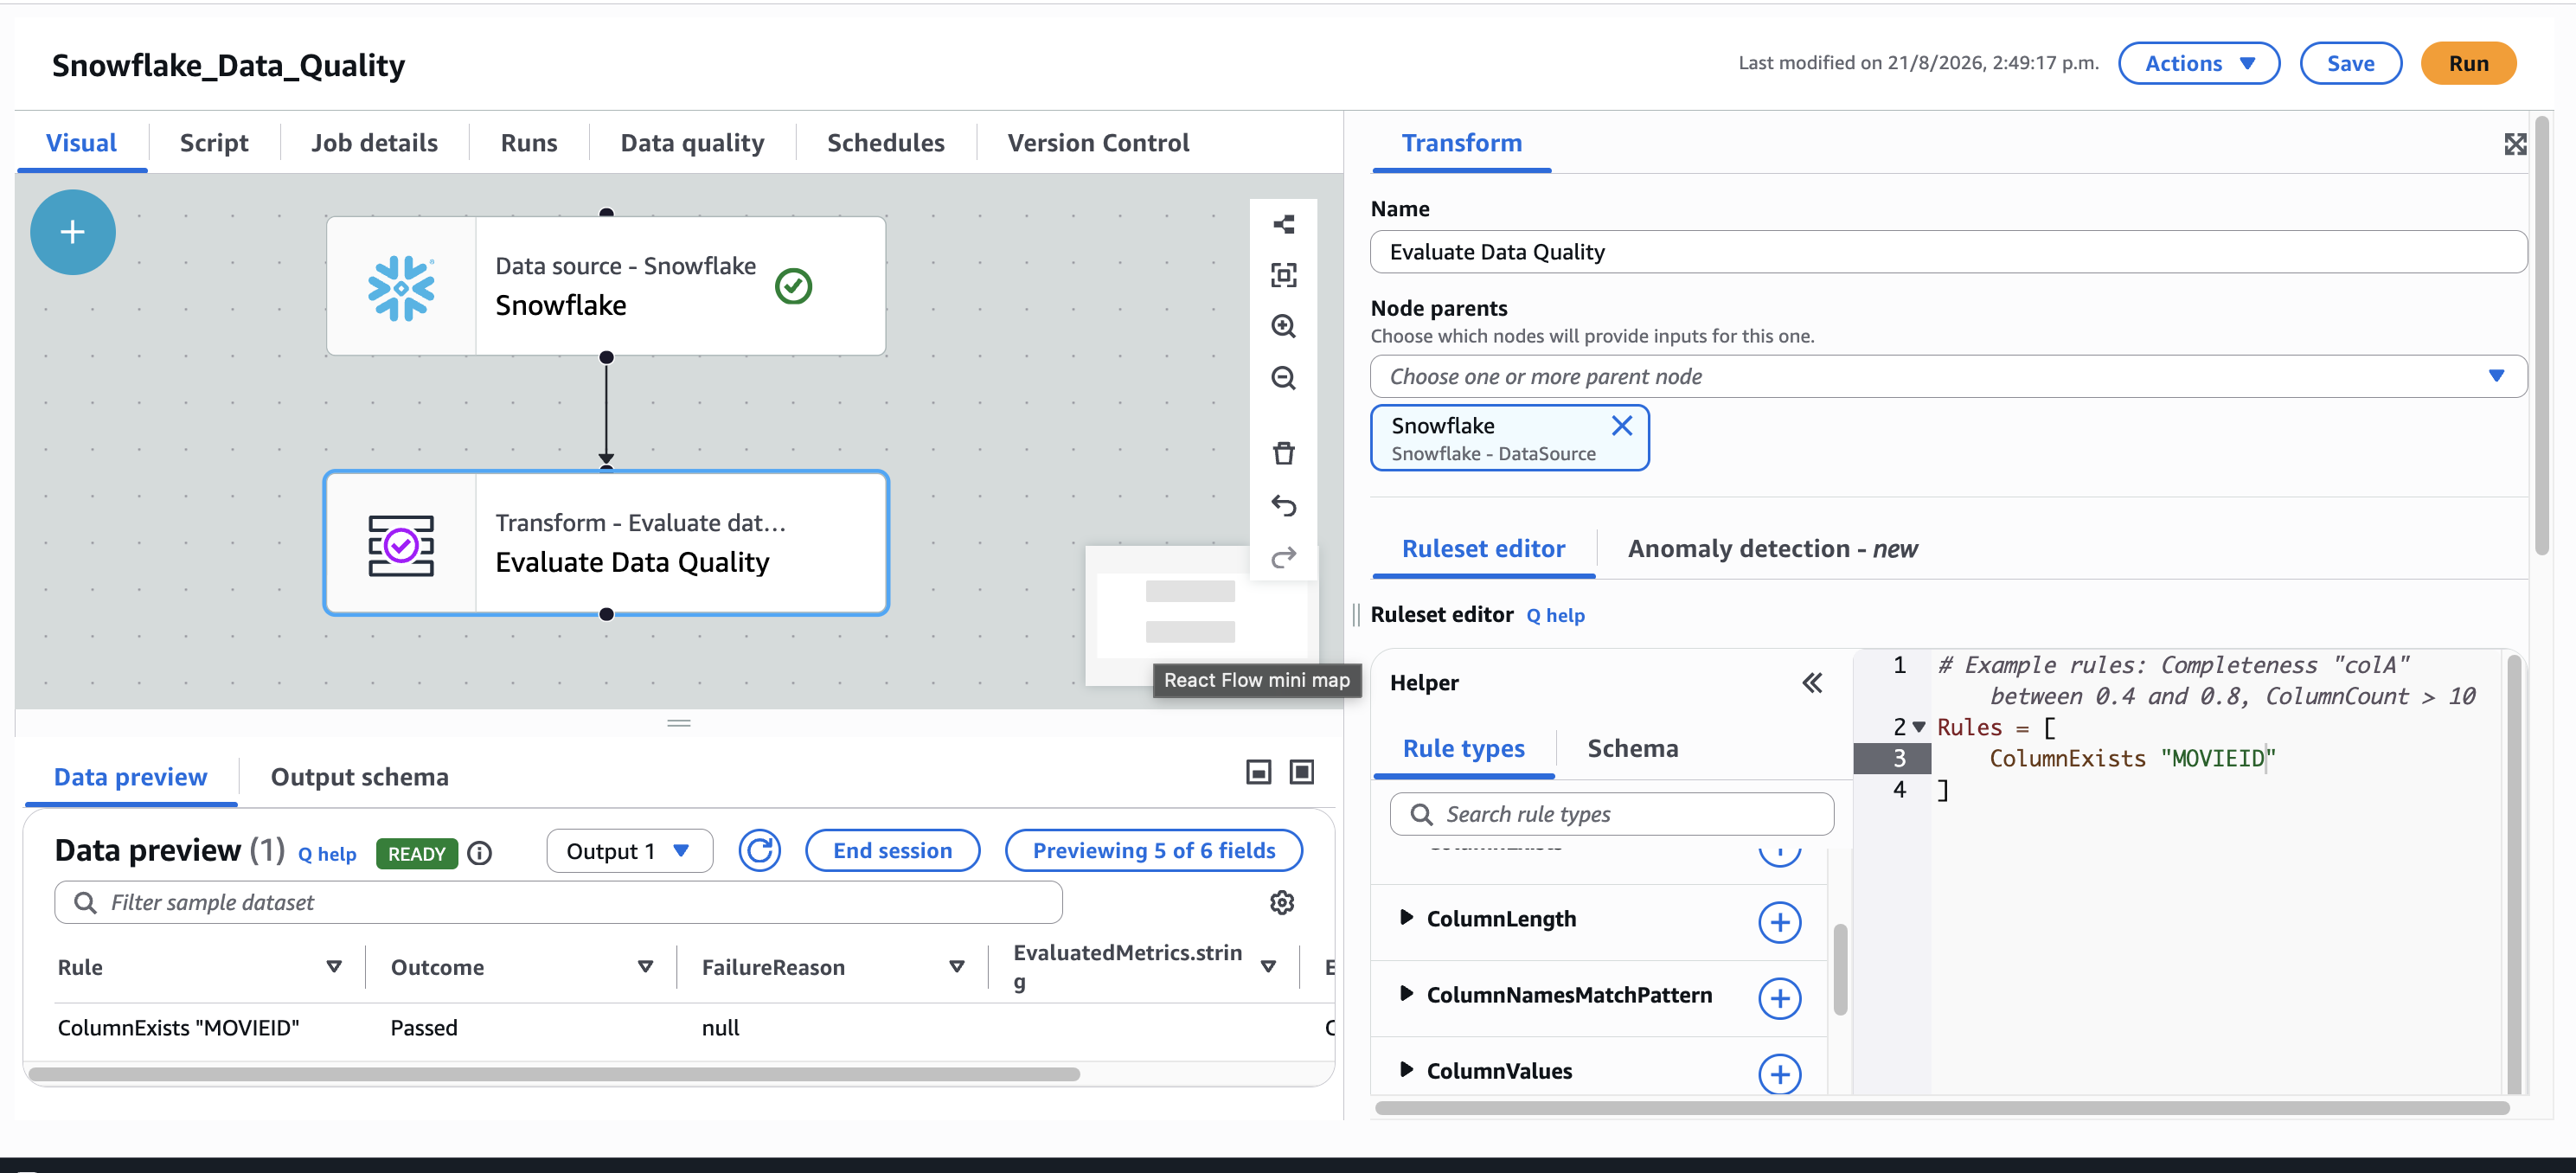
After establishing the Snowflake connection, configure the data quality evaluation step using the Data Quality Definition Language (DQDL).

To add data quality validation:

  1. Choose Transform and choose Evaluate Data Quality.
  2. Define domain-specific data quality rules using DQDL. For more information, see the AWS DQDL documentation.

    Evaluate Data Quality transform with DQDL rules in AWS Glue Studio
  3. Choose to output the data quality results. Optionally, store outcomes in Amazon S3 or publish to Amazon CloudWatch with alert notifications.

The preview of the data quality results from the ruleOutcomes node shows the outcomes of each rule.

Preview of the data quality rule outcomes from the ruleOutcomes node

Post the data quality results to Amazon SageMaker Catalog

To configure the custom transform:

  1. Add the Datazone DQ Result Sink transform to your job.
  2. Connect the ruleOutcomes node output to this transform.
  3. Complete the parameters:
    • Role to assume (Optional): Only needed for associated accounts.
    • Domain ID: Your Amazon SageMaker Unified Studio domain ID (found in the Amazon SageMaker Unified Studio portal).
    • Table name and Schema name: Same values used when creating the Snowflake source transform.
    • Data quality ruleset name: The name you want to give to the ruleset in Amazon SageMaker Catalog.
    • Max results: Maximum number of assets to return in case of multiple matches.

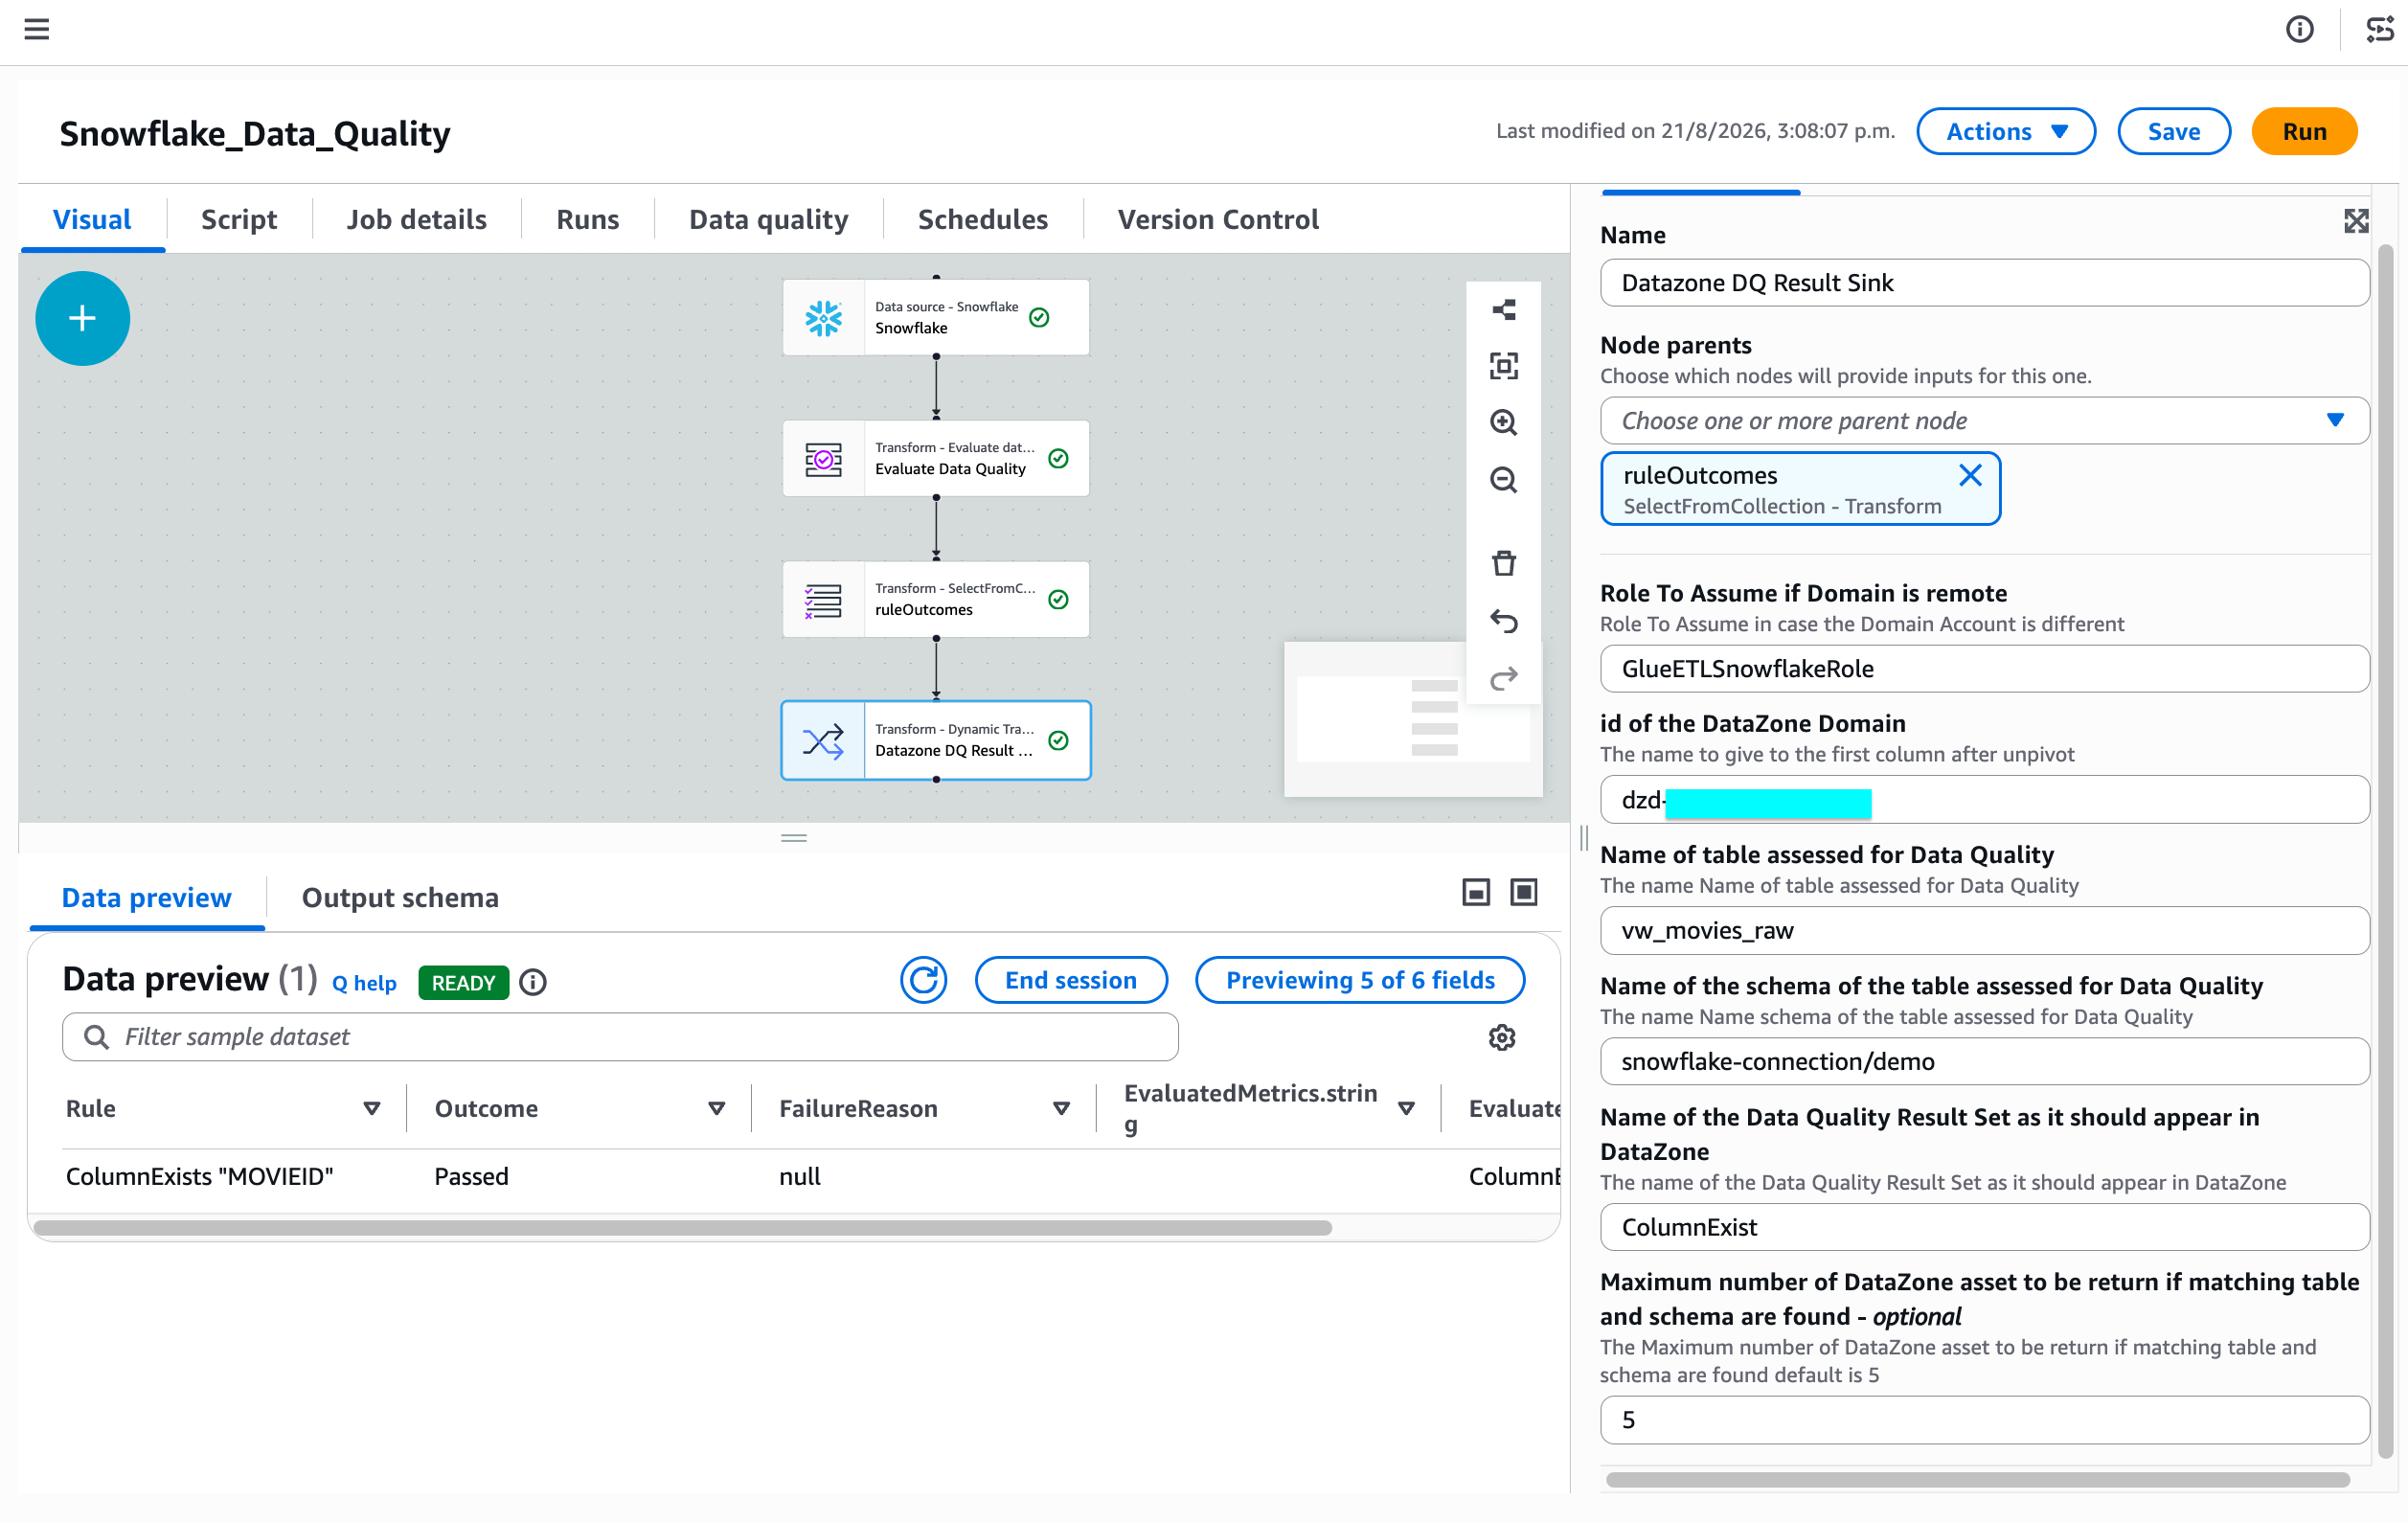
The following image shows the complete job graph with the Datazone DQ Result Sink transform configured.

AWS Glue visual ETL job graph with Snowflake source, Evaluate Data Quality, ruleOutcomes, and Datazone DQ Result Sink nodes

The visual editor displays four nodes connected sequentially: the Snowflake data source, the Evaluate Data Quality transform, the ruleOutcomes SelectFromCollection transform, and the Datazone DQ Result Sink transform.

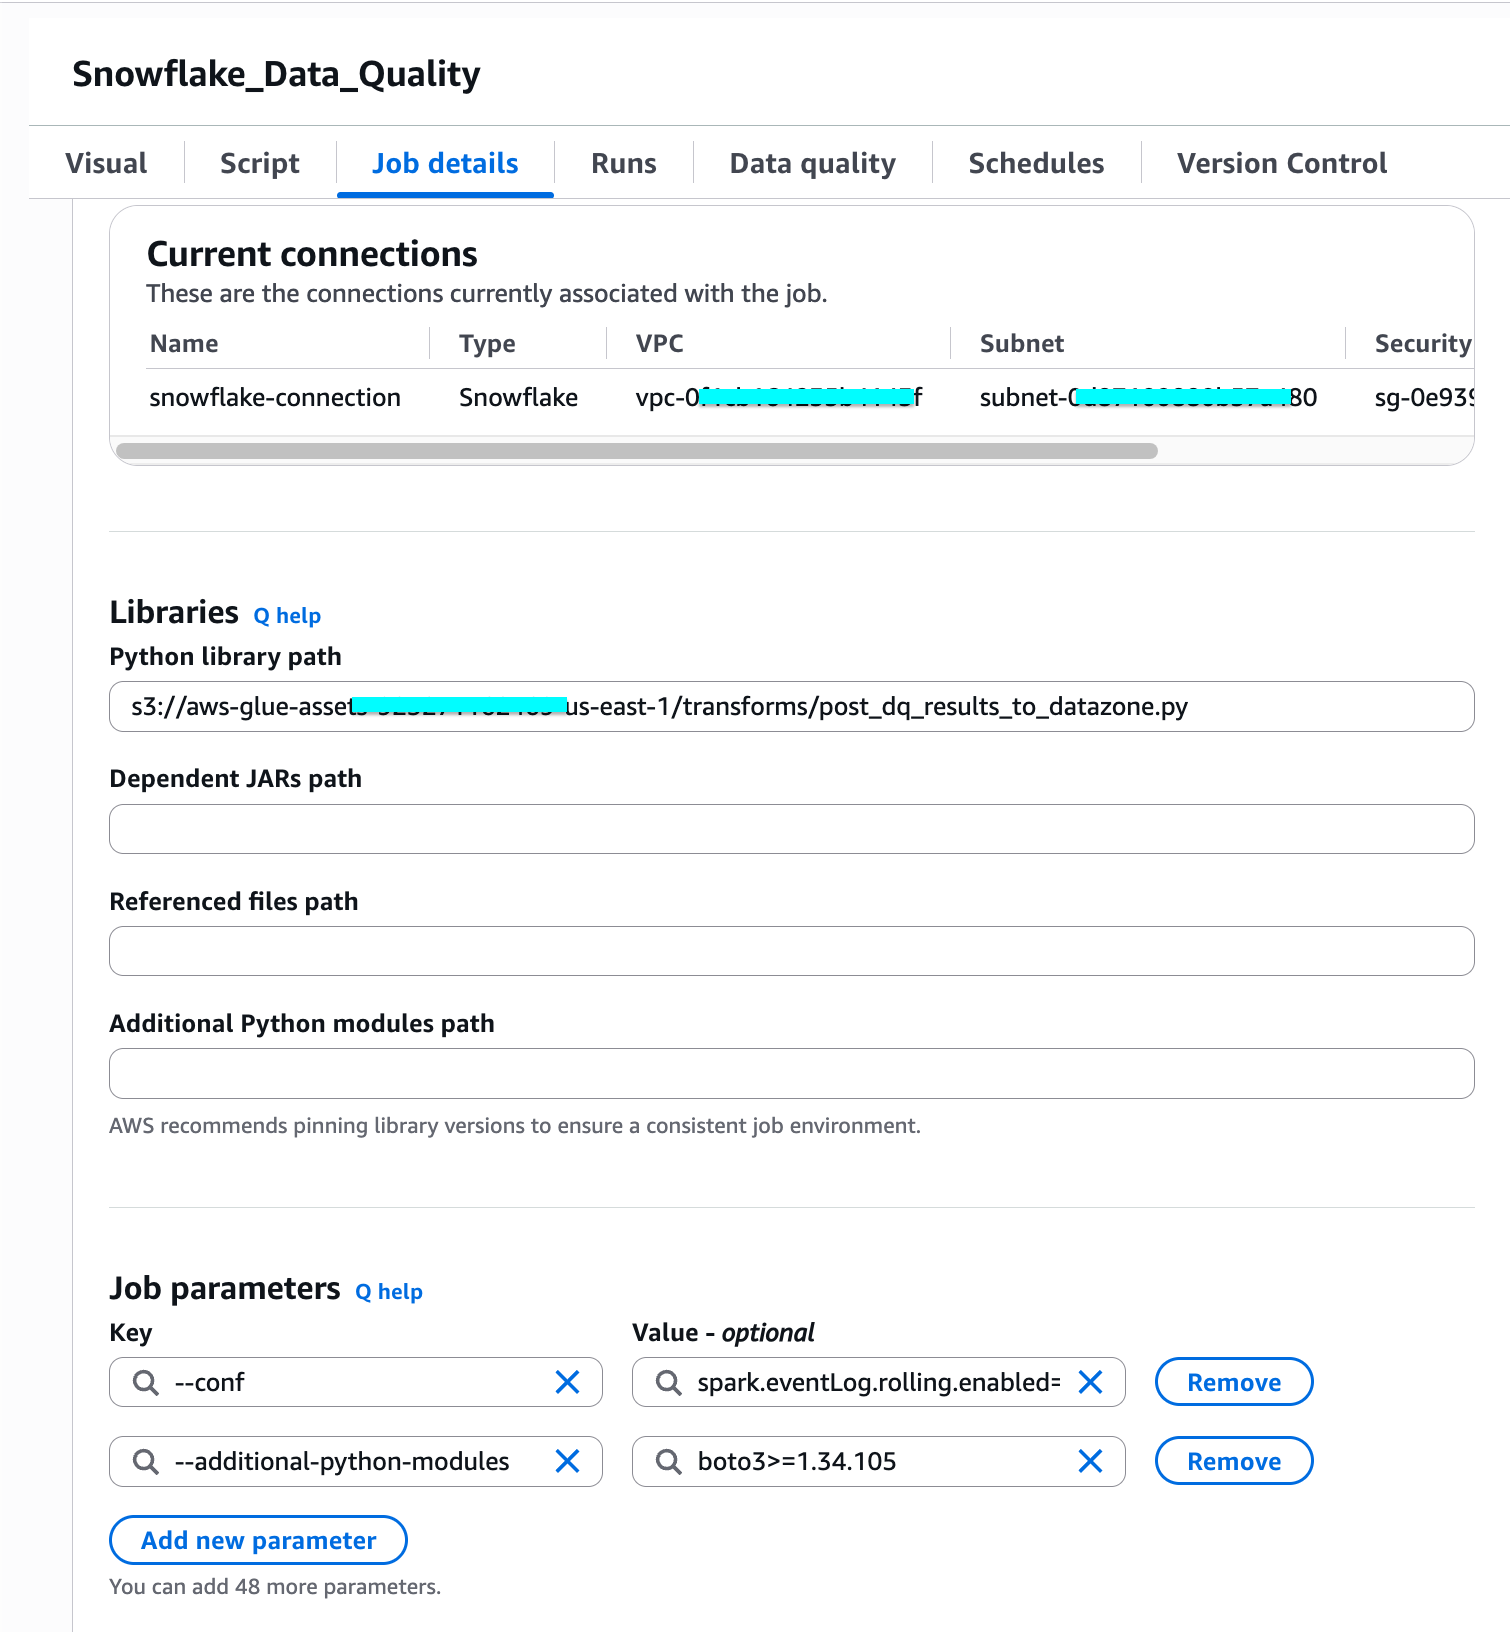
To configure job parameters:

  1. Choose Job details.
  2. In Job parameters, add the following key-value pair:
    • --additional-python-modules
    • boto3>=1.34.105
  3. Save and run the job.

AWS Glue job parameters with the additional-python-modules key set to boto3

Visualizing data quality results in the SageMaker Catalog

After the AWS Glue ETL job completes, you can view the data quality information directly in Amazon SageMaker Catalog. This is the key outcome of running data quality on a federated source: the asset gains quality scores and metadata without ever leaving Snowflake. This makes it trustworthy and ready for other teams across your organization to use. Data consumers can now discover this asset in Amazon SageMaker Catalog and evaluate its quality before subscribing, without needing direct access to Snowflake or running their own validation.

To view data quality results:

  1. Open the Amazon SageMaker Unified Studio console.
  2. Navigate to your project.
  3. Go to Assets.
  4. Choose the Snowflake data asset.
  5. View the data quality information displayed on the asset page.

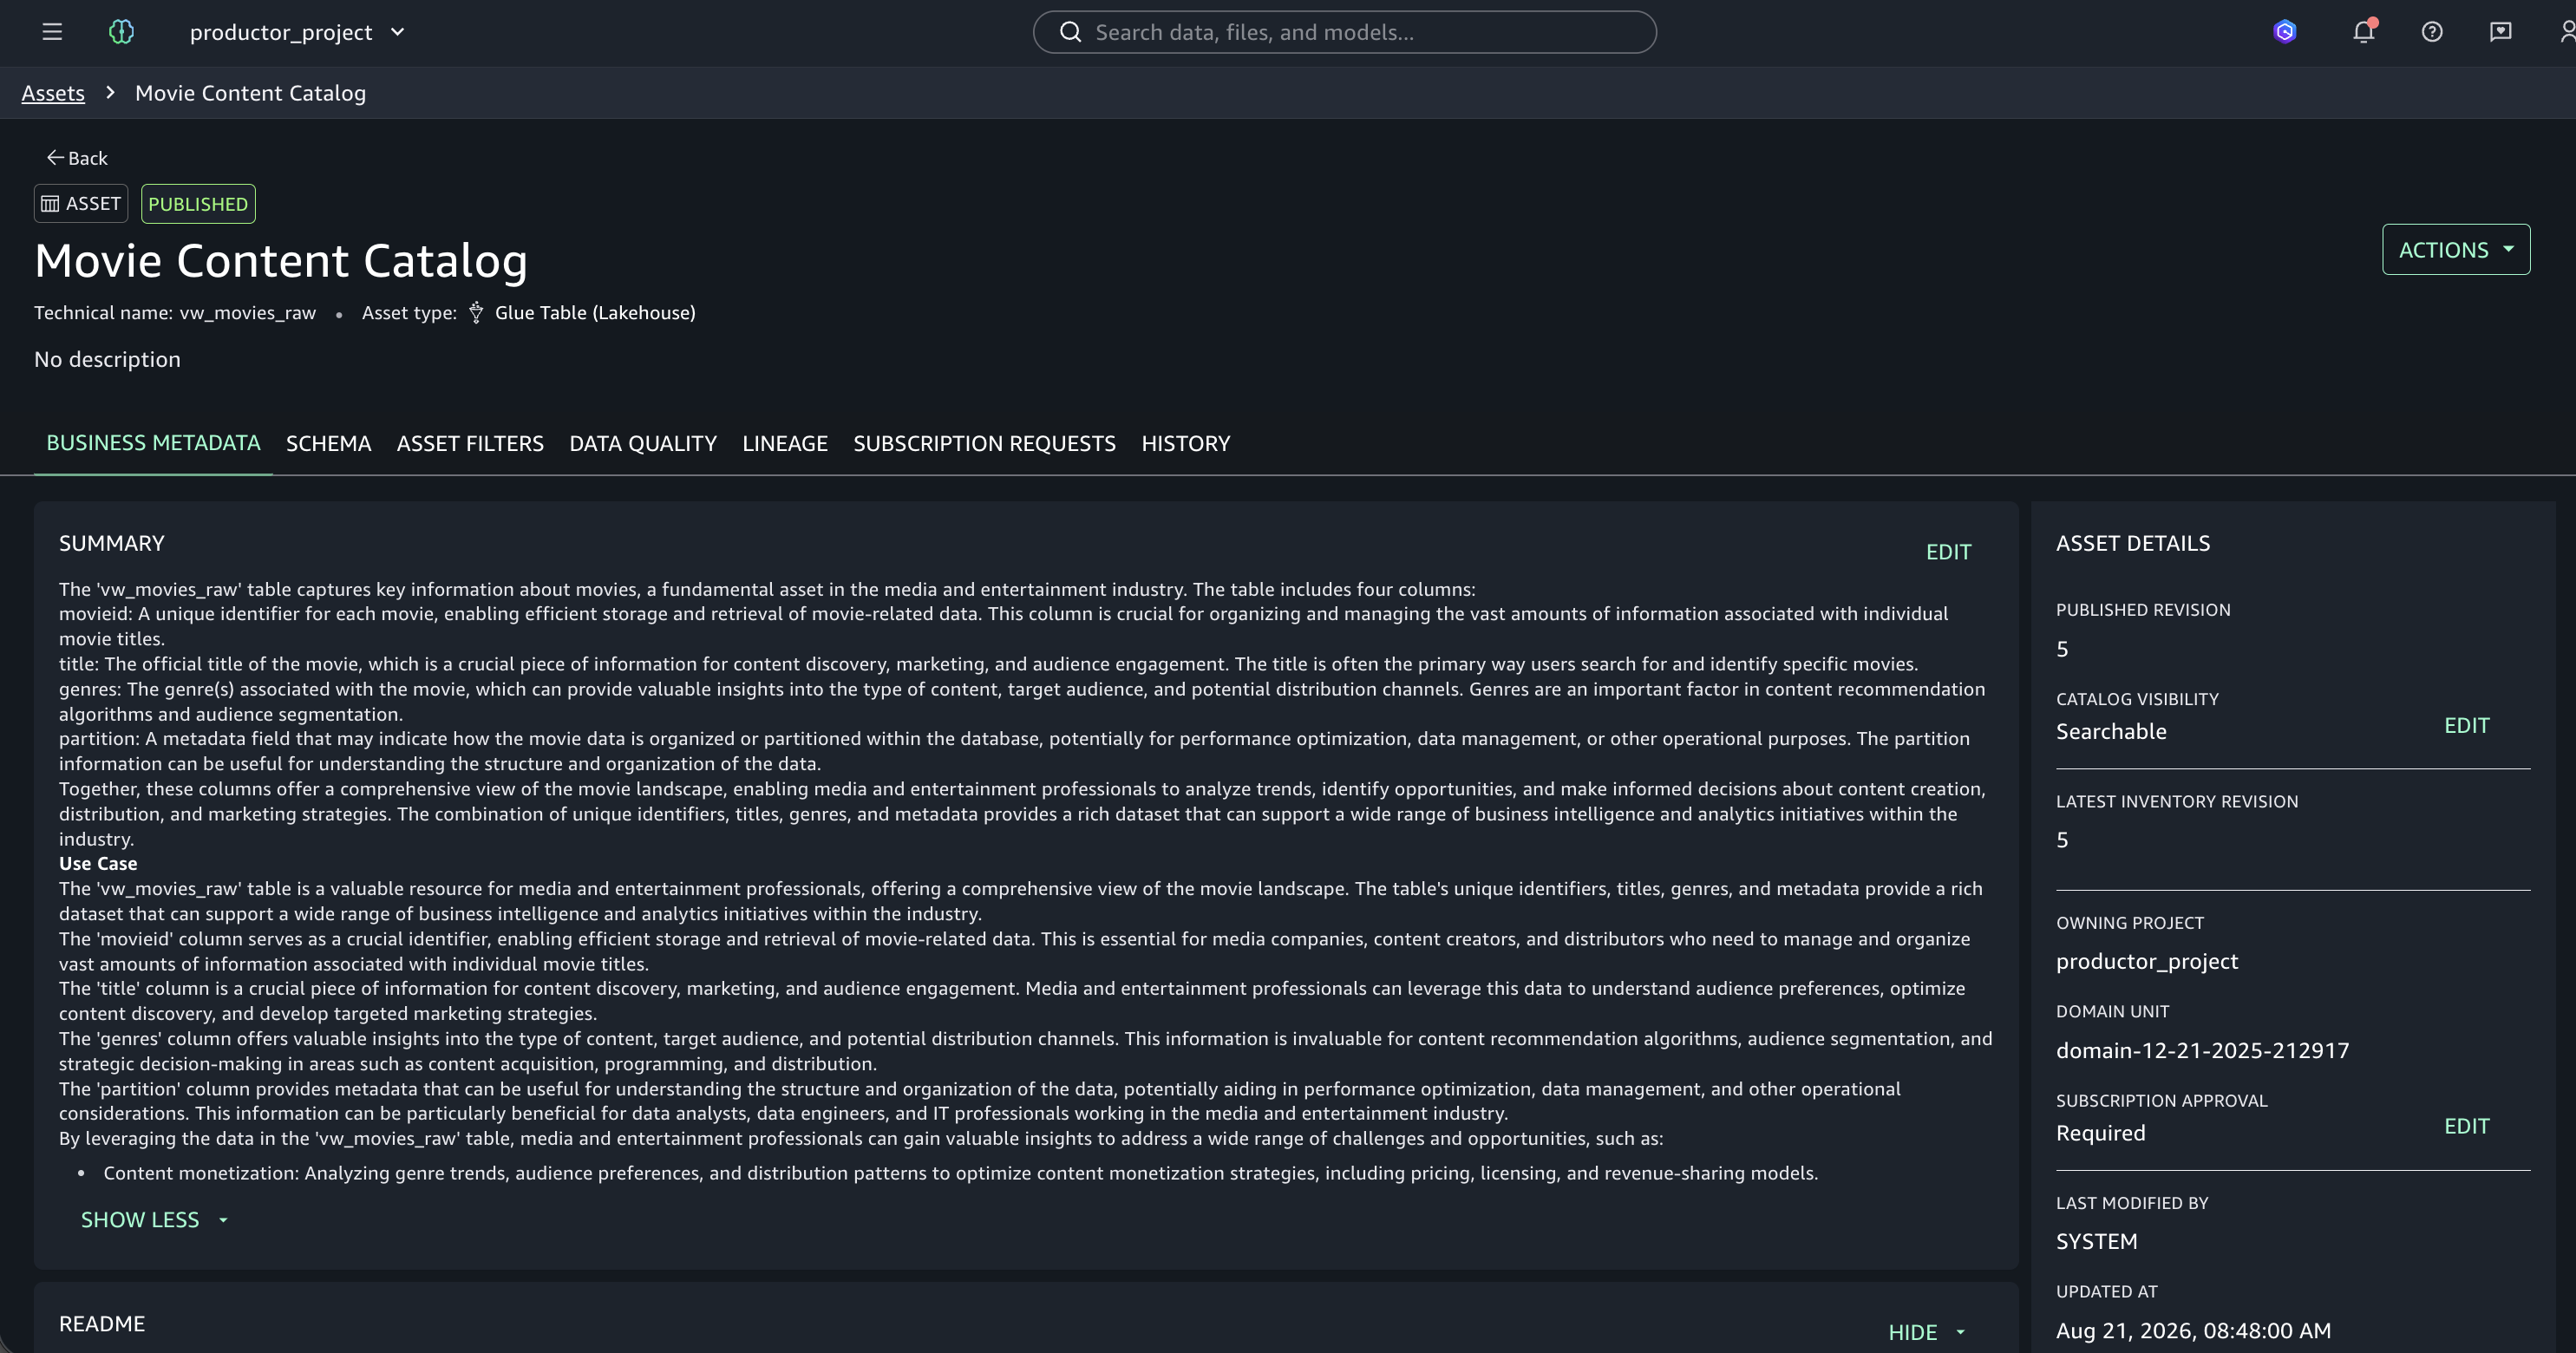
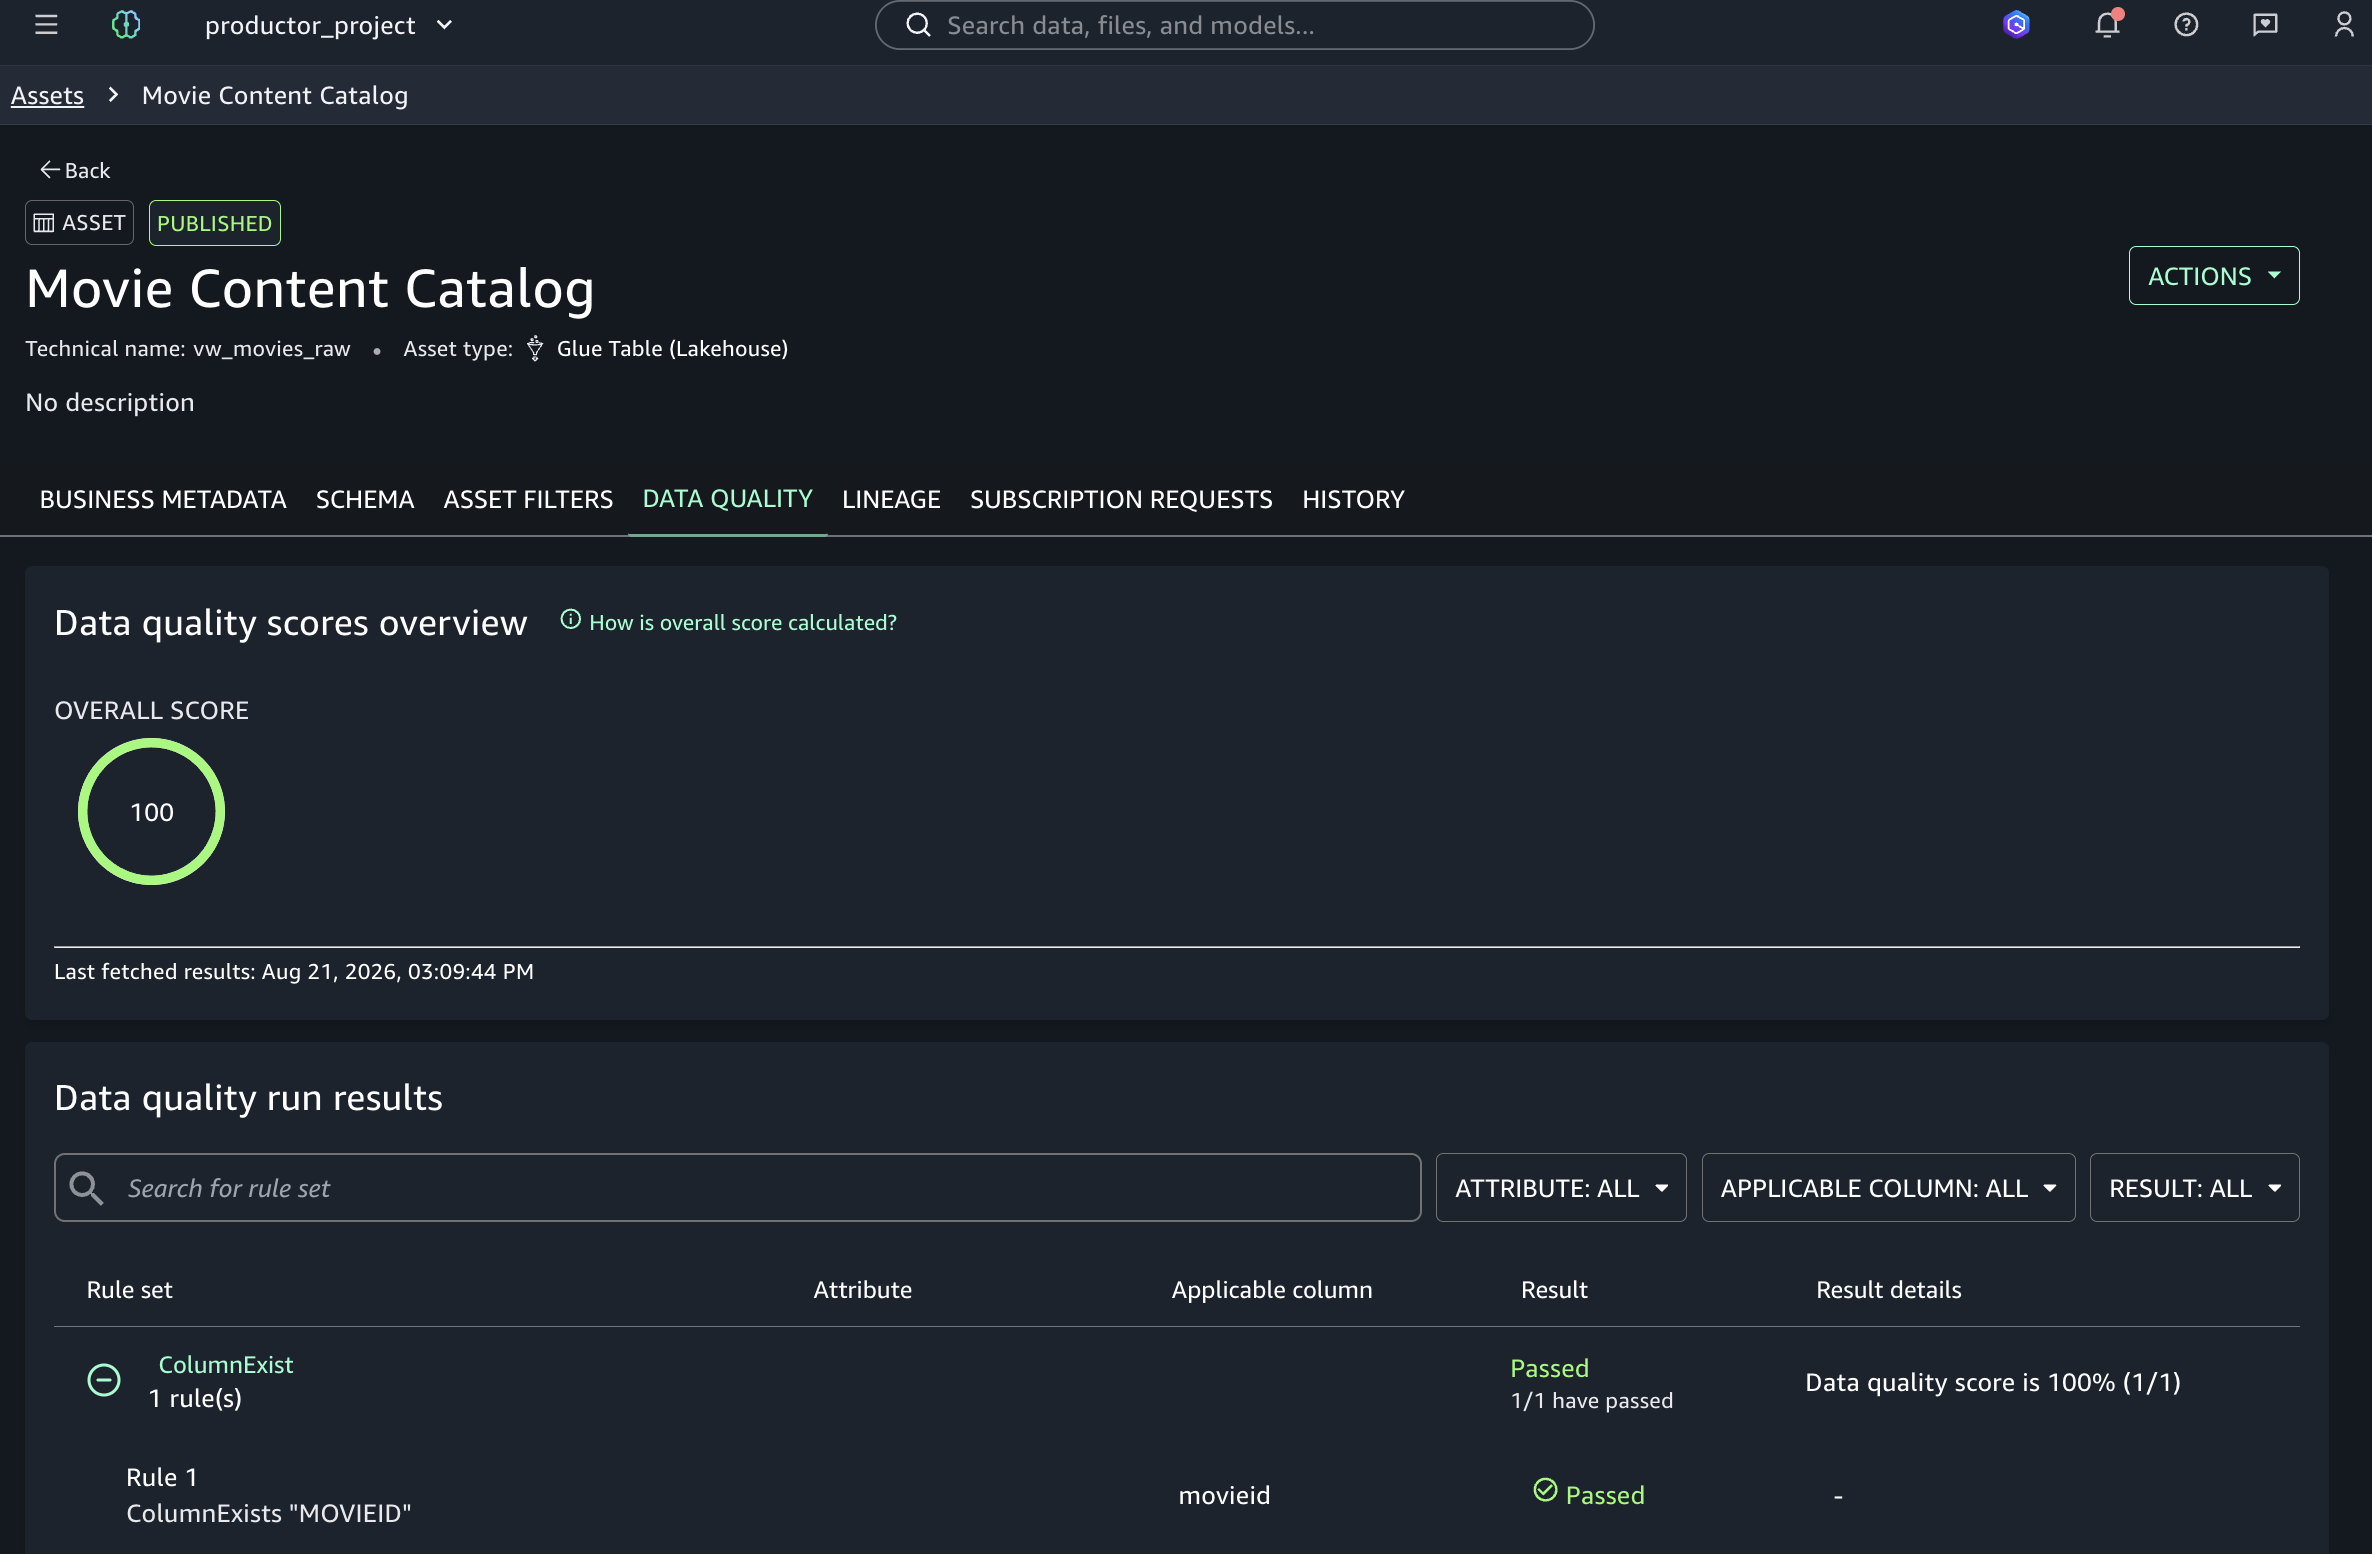
The following image shows the asset page in Amazon SageMaker Catalog with the data quality score populated.

SageMaker Catalog asset page showing a populated data quality score for the Snowflake asset

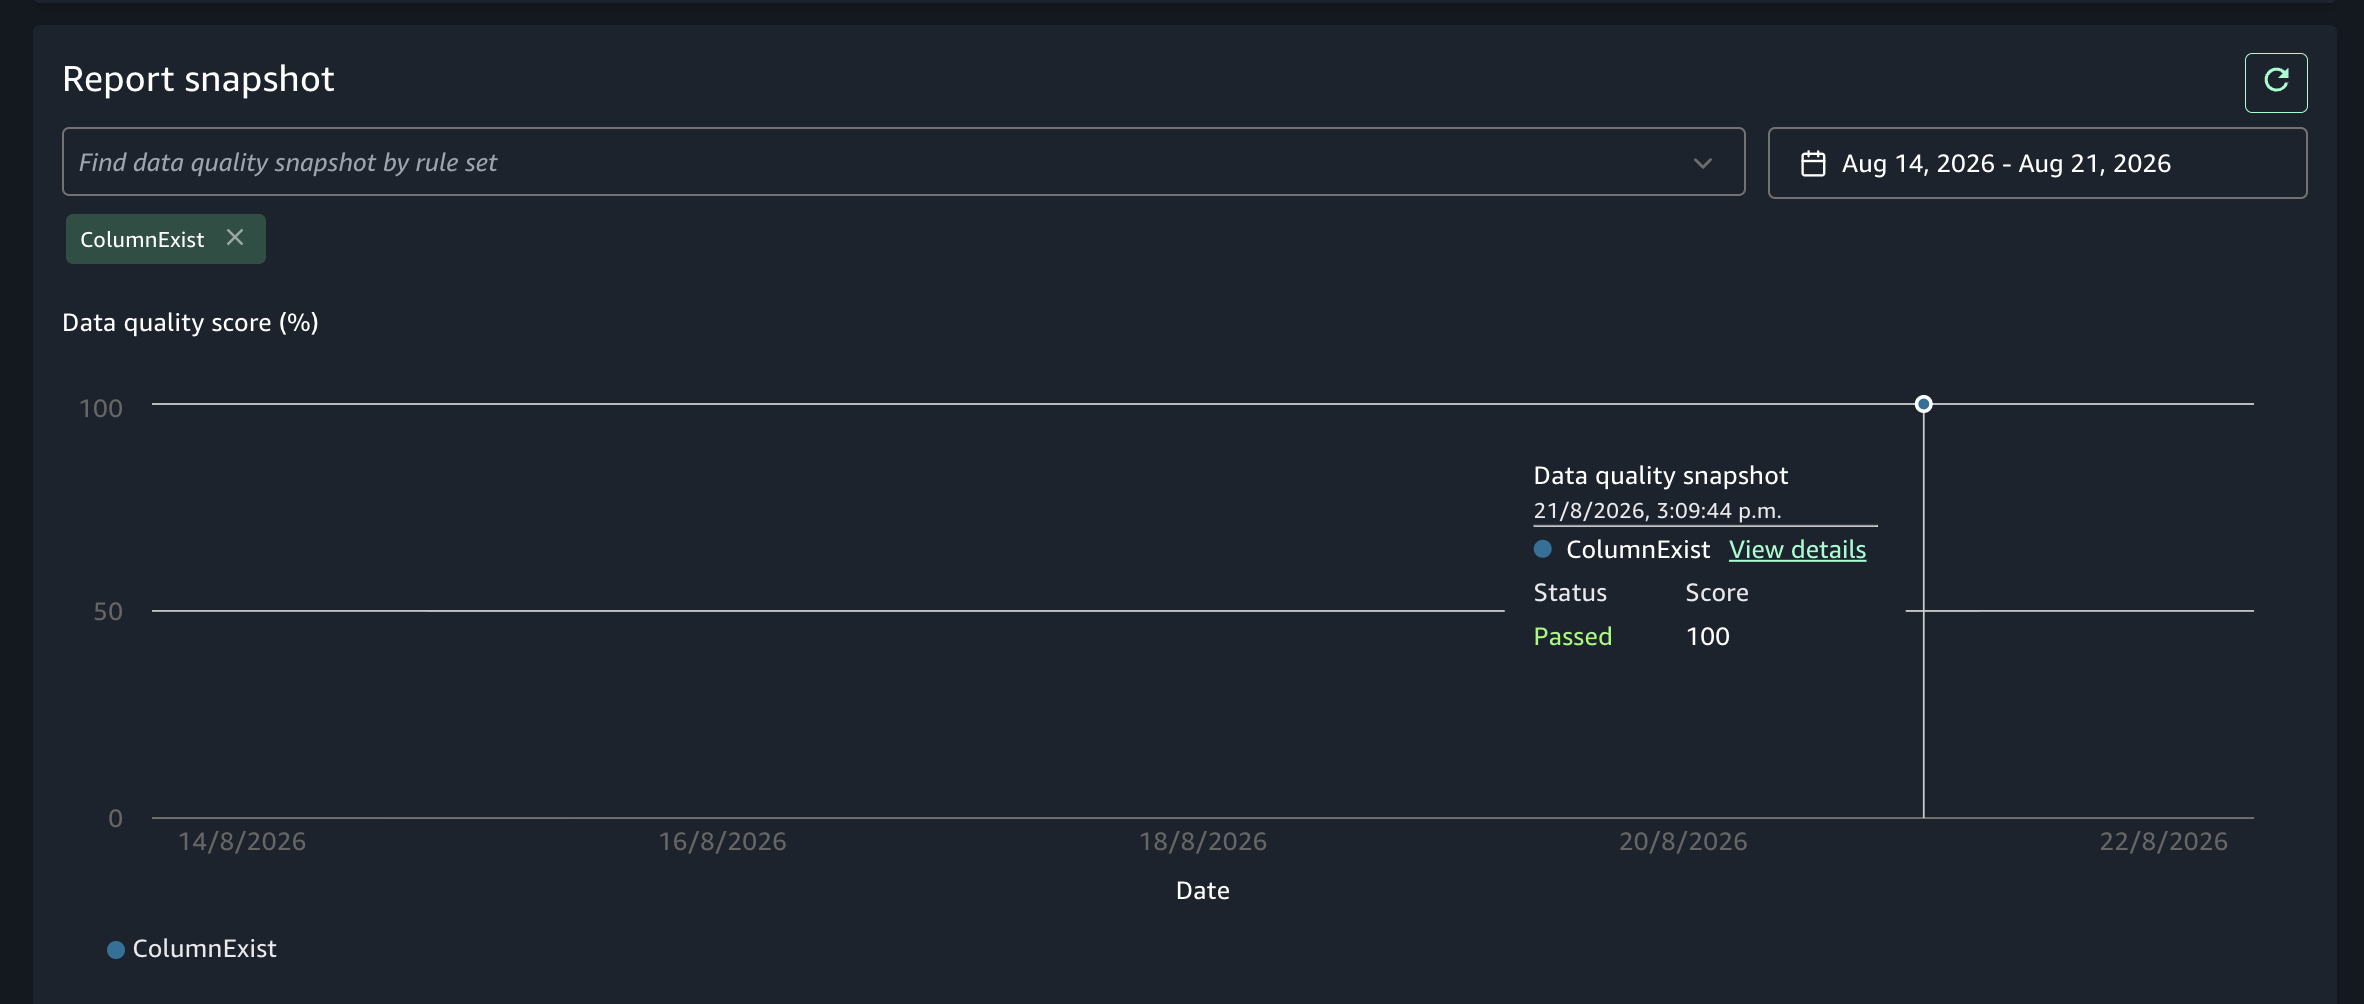
Data Quality tab in SageMaker Catalog showing an overall score of 100 with the movies rule set passed

The Data Quality tab shows an overall score of 100 and lists the rule set movies with a Passed result (1/1). This confirms that the data quality checks from AWS Glue posted successfully to Amazon SageMaker Catalog.

Clean up

To avoid ongoing charges, remove the resources you created during this walkthrough:

  1. Delete the AWS Glue ETL job — Open the AWS Glue console, choose ETL jobs, select your job, and then choose Delete.
  2. Remove the AWS Glue connection — In the AWS Glue console, go to Connections, select the Snowflake connection, and then choose Delete.
  3. Delete the data source in SageMaker Catalog — In your Amazon SageMaker Unified Studio project, go to Data Sources, select the data source you created, and then choose Delete.
  4. Remove S3 assets — Delete the custom transform files from your s3://aws-glue-assets-<account-id>-<region>/transforms/ bucket.
  5. Remove IAM policies — Detach and delete the IAM policies you attached to the AWS Glue job execution role. Remove the role as a domain user and project member.

Conclusion

In this post, we showed you how to connect Snowflake to Amazon SageMaker Unified Studio for centralized data cataloging and quality validation. This approach maintains consistent governance without replicating data. Key benefits include:

  • Query without data movement: Access Snowflake data directly from Amazon SageMaker Unified Studio through federated queries, using the interoperable data architecture of AWS and eliminating time-consuming data replication.
  • Centralized governance: Maintain a single source of truth for data discovery, quality metrics, and governance policies across your distributed data estate.
  • Automated quality validation: Apply consistent data quality rules using AWS Glue Data Quality and visualize results directly in Amazon SageMaker Catalog.
  • Unified collaboration: Support data discovery and sharing across your organization through the publishing capabilities of Amazon SageMaker Catalog.

To get started, open the Amazon SageMaker Unified Studio console. To learn more about related topics, see Cross-account lakehouse governance with Amazon S3 Tables and SageMaker Catalog and Get started with AWS Glue Data Quality dynamic rules for ETL pipelines.


About the authors

Marco Duarte López

Marco Duarte López

Marco is a Data Specialist Solutions Architect at AWS, based in Santiago, Chile. He works with organizations across the region to design modern data architectures and governance frameworks that enable trusted, scalable data consumption. He is a member of the AWS Technical Field Community (TFC) for Analytics, where he specializes in Data & AI Governance, and has led data transformation programs for some of the largest enterprises in the region.

Diego Ortiz

Diego Ortiz

Diego is a Senior Data Strategy Solutions Architect for Latin America based in San Juan, Puerto Rico, with 14+ years of experience in technology roles. He supports organizations across countries and industries to develop data and AI strategies aligned with their business objectives, combining strategic vision with deep technical expertise in data and AI technologies. He is a core member of the Data Governance global community at AWS and leads the analytics technical community in the Spanish-speaking countries of Latin America.

[$] Ways to encrypt data on servers

Post Syndicated from jake original https://lwn.net/Articles/1092553/

At the 2026 edition of FOSSY, Romeo
Solano gave a fast-paced, humorous presentation on what could have been a
rather boring topic: server encryption. There are a number of threats that
we face in today’s world, from criminals, government overreach, espionage,
and more, that can be thwarted with encryption. But encrypting data on a
system that may live elsewhere, without any access to its keyboard at boot
time, is rather more difficult than encrypting the disk of a laptop.
Solano described the problems and gave a tour of some of the solutions in
the talk.

„Господът на световете“. Извънземни и ислям

Post Syndicated from Атанас Шиников original https://www.toest.bg/gospodut-na-svetovete-izvunzemni-i-islyam/

„Господът на световете“. Извънземни и ислям

Като заклет читател на фантастика във всичките ѝ разновидности и жанрове прехвърлям през ума си възможни тематични връзки с вярата в Аллах. Имаше навремето един сериал – „Бойна звезда: Галактика“, римейк на по-стария от 70-те години на миналия век. В него човечеството е почти унищожено от расата на роботите сайлони, които в старата версия на сериала са творение на извънземна раса, а пък в последната – човешко. Интересното е, че в сериала военизираните роботи изповядват религия, която, противно на тази на хората, е строго монотеистична. Е, не се казва точно каква…

В една от любимите ми класики пък – „Хиперион“ на Дан Симънс, нещата стават една степен по-конкретни. Разказът се разгръща през XXVIII век и следва структурата на класическите „Кентърбърийски разкази“ на Джефри Чосър от XIV век. Един от разказвачите поклонници в романа е полковник Федман Касад, роден на Марс, в етническа група, която все още се определя като палестинци. Първият му сблъсък с радикалния ислям се случва на планетата Ком-Рияд. Името ѝ очевидно събира най-доброто от шиизма и сунизма, доколкото Ком, или Кум, днес е главен шиитски град в Иран, а пък Рияд е столицата на сунитска Саудитска Арабия. Там самопровъзгласил се нов пророк обявява джихад срещу господстващата политическа структура, известна като Хегемонията. Типичен екшън герой от добрите, Касад заявява, че Богът на исляма нито би одобрил, нито би позволил избиването на невинни – тук малко ми напомня на Ясер Арафат, когото гледах през 2001 г. в Дамаск да казва по телевизията, че

ислямът не насърчава убийството на нищо живо.

А вселената на Дан Симънс, колкото и владяна от човечеството, допуска наличието на нечовешки разумни раси. Предимно в миналото.

Ако се приземим обратно на Земята, някои от мрачните фантазии на Хауърд Лъвкрафт също съжителстват с вярата в Аллах или поне с негови последователи. Не се ли пръква зловещият Ал-Азиф („Некрономикон“), този магнум опус на окултната литература, в безумните видения на лудия арабин Абдул Алхазред от Йемен по времето на Омеядския халифат? Отстъпник от исляма, Алхазред се прекланя пред уродливите космически извънземни Йог-Сотот и Ктхулу и под руините на безименен пустинен град открива следи от древни космически раси, отдавна посещавали Земята. А пък смъртта му е описана от историка Ибн Халликан, според чийто разказ лудият арабин е погълнат от невидимо чудовище посред бял ден. Забавното е, че такъв историк действително съществува, живее през XIII век и пише история под формата на биографични речници със справки за живота на изтъкнати мюсюлмани.

Малко по-различен е случаят с „Дюн“ на Франк Хърбърт. Ако и светът на планетата Аракис да е антропоцентричен и извънземни – поне такива, каквито очаква популярната представа („нечовешка разумна форма на живот“) – да не съществуват там, имаме множество населени светове, които се подчиняват на трагичния пророчески образ на Пол Атреидски – Муад’Диб. Всъщност може да гледате на „Дюн“ като на наръчник за религиозната терминология на арабски. Махди, „Напътствания от Аллах“, е едно от прозвищата на Пол Атреидски, но и месианската фигура от края на времето в исляма. Джихад е свещената война (но и „върховно усилие“), водена от пустинните племена на фремените, напомнящи на воините на Пророка от VII век в пясъците на Арабия. Шай-Хулуд, пустинният червей, който произвежда космическата подправка меланж, идва от арабското „Нещо от вечността“ (шай’ хулуд). Лисан ал-гайб на арабски си е „езикът на неведомото“ и фремените го използват като название на пророка си. Примерите са десетки и за моя огромна изненада, когато през 1998 г. попаднах в тукашната арабистика, след като вече бях чел „Дюн“, открих, че доста плътно следват арабския. Една от любимите ми препратки е изразът би-лал кайфа, който фремените използват като „Амин!“. Той пък идва от арабското би-ла кайфа („без [да се пита] как!“), фраза, често свързвана в традиционното мюсюлманско богословие с фигурата на Абу л-Хасан ал-Ашари от IX–X век, който я използва, когато го питат как следва да се приемат и тълкуват Божиите качества в Корана. Ей така, без да се пита как.

Само че това е лесната част от разговора за вярата в Аллах в свят (или светове), където е възможно човешкото и извънземното да споделят една вселена. Защото става въпрос за фантастика. По-голямата част от нея може да носи етикета „научна“, но всички знаем, че става въпрос за фикция. Авторите не са мюсюлмани. Затова и могат да се отдадат на симпатична литературна игра, в която ислямът е вторичен, пък бил той и екзотичен играч. В този смисъл е лесно пластовете на въображаемия разказ да съвместят едновременно разговора за наличието на множество светове, разумен живот извън Земята и сферата на човешкото с едно изцяло въобразено, външно възприятие на мюсюлманския монотеизъм. В несериозността на този подход се крие и неговата безопасност.

Съвсем различно е да запретнем ръкави и да хванем (звездния) бик за рогата. Да надзърнем как мюсюлманите възприемат извънземни разумни форми на живот не през призмата на литературната фикция, а в сферата на религиозния закон (шари‘а), право (фикх) и богословието (калам). А с тях шега не бива. Който смята обратното, може да почете например за традиционните, предписани от Свещения закон, наказания за отрязването на ръката на крадеца в Корана („А на крадеца, мъж или жена, отсичайте ръцете за наказание, защото са присвоили – възмездие от Аллах“, 5:38), за отсъждането на убийство чрез хвърляне на камъни (раджм) по поводи като прелюбодейство. Или за богохулство, подигравка с Пророка, отстъпление (ридда) и оскверняване на Корана, да речем.

Сериозността, с която консервативните мюсюлмани възприемат свещените текстове и тяхната способност да определят дадени поведенчески модели, ясно личи в повлияни от Свещения закон държавни законодателни системи като например тези в Саудитска Арабия, Иран или Афганистан. Тъй че към всяка тема в обхвата на Свещения закон мюсюлманите следва да се отнасят с подобаваща сериозност. А не като Салман Рушди, който от 2022 г. носи върху лицето си (и не само) последствието от пренебрежителното отношение към Пратеника на Аллах, впрочем като далечен отзвук от фетвата на аятолах Хомейни срещу него през 1989 г.

Впрочем дали старите религиозни авторитети имат какво да кажат по въпроса?

Та нали съществуването на небесни тела, оттук и на други светове, е наблюдавано още от древността. Луна. Планети. Звезди. Там сигурно живее някой, тъй както Земята е обитаема от човека. От религиозна гледна точка пък, независимо коя е конкретната религия, е изключително важно да се знае дали приложимата религиозна рамка за човека на Земята би била валидна и за възможните разумни обитатели на небесните тела. В християнството дилемата влече след себе си въпроси около наличието на грях и съответно нуждата от изкупление. И дали Христос на земята е един за всички, включително и за извънземните, или се предполагат множество негови въплъщения?

В исляма съответно проблематична е валидността на Свещения закон (шари‘а) в неговата цялост за евентуални разумни извънземни форми на живот. Иначе казано, опростенчески, не просто дали има междузвездни „малки зелени човечета“, а важи ли за тях правилото за задължителната молитва (салат) пет пъти на ден. Или къде извършват задължителното за всеки мюсюлманин ритуално поклонение (хадж) в светите места на исляма. И дали пък евентуални разумни нечовешки форми на живот могат въобще да бъдат отговорни (мукаллаф) от юридическа гледна точка. Или пък, още една стъпка по-нататък, какво ще се случи с тях в Деня на възкресението (йаум ал-кийама) и какви евентуално ще бъдат Раят и Адът за тях – все сложни, но реални въпроси.

Ето го един философ – Ибн Рушд от XII век, познат ни като Авероес, когото тези дни превеждам. Той като че ли не е толкова скептичен. В своето съчинение за съвместимостта между вярата и разума разгръща доста интересен аргумент в полза на философията. Тя, казва Авероес, помага на хората да научат повече за Свещения закон, тоест за религията. Оттук и да забраниш философските книги е „угнетителство“ (зулм, абе направо зулум, както влиза в български през турски) спрямо най-достойните измежду хората и живите същества. Защото – казва той –

най-изключителните измежду живите същества заслужават признание от най-способните измежду хората – това са по подразбиране философите.

И колкото по-величаво е едно живо същество, толкова по-голямо нечестие е невежеството спрямо него. Съчинението е сред най-известните на Авероес. А тук очевидно говори за „достойни същества“ извън човешкия род. Знаем, че коментаторската традиция схваща тези му думи като обозначаващи ангелите и Аллах. Но може да натиснем педала на спекулацията и да кажем, че ако и Аллах да прозира в текста чрез позоваването на Коран 31:13 („Съдружаването е огромен гнет“), останалите живи същества могат да бъдат от всякакъв порядък. Разумни и достойни за признание. Нали?

И за да не си мислите, че си фантазирам, следва да кажа, че текстът на мюсюлманското Свещено писание не е толкова строго отричащ, колкото веднага и прибързано бихме предположили. Даже си е направо двусмислено благосклонен. Още в първата глава (сура) – „Откриващата“ (Ал-Фатиха), тази, която всеки мюсюлманин трябва да знае наизуст, защото е част от задължителната молитва, Аллах е наречен „Господа на световете“ (1:2). На Него „се подчинява всичко на небесата и на земята, доброволно или по принуда“ (3:83). Той е сътворил не само конете и мулетата, и магаретата „за да ги яздите и за украса“, но и „каквото не знаете“ (16:8). Тъй де, ако „каквото не знаете“ се появява в един и същи стих паралелно със земния добитък, може да се очакват и живи твари там някъде, където никой друг освен Аллах не знае. „Синовете на Адам“ са почетени и предпочетени от Аллах „да превъзхождат повечето от онези, които сътворихме“ (17:70). Със сигурност знаем, че измежду тези, които са сътворени и над които Аллах е предпочел човека, са ангелите и самият Иблис, известен още с прозвището Шейтан. Именно в това се състои и неговият бунт (2:34).

Един от най-любимите ми стихове обаче е 42:29:

И от Неговите знамения е сътворяването на небесата и на земята, и на тварите, които там е намножил. Той е способен да ги събере, ако пожелае.

Може да е неясно, но не е и отричащо. На небесата и на земята според някои тълкувания има твари, които сам Аллах е намножил. И това също не си го измислям. Тук „тварите“ са обозначени с думата дабба в арабския оригинал. Обикновено означава „добитък“, „добиче“. Разбира се, с по-общо значение на „твар“, „живо същество“, па понякога и „звяр“. Като в онези свещени текстове от Корана и Сунната, в които се говори за „Звяра от земята“ (Дабба мин ал-ард, „от земята едно животно“, Коран 27:82), който в края на времето, преди настъпването на Съдния ден, се появява почти като зверовете от виденията на библейския пророк Даниил или Откровението на св. Йоан Богослов.

За да не ме обвините, че нещо притурям върху традицията, има и големи тълкуватели, които мислят като мен. Вземете един Аз-Замахшари от XI век. Името идва от родното му място Замахшар в Иран, само че пътува много, както често правят учените тогава, че по някое време даже се установява в Мека. Толкова е начетен, че носи прозвището „Съсед, Приближен на Аллах“ (Джар Аллах). И в най-известния му коментар на Корана, т.нар. Ал-Кашшаф („Разкриващия“), той разсъждава също върху предполагаемите „небесни добичета“ от стих 42:29. Може ангелите – мир тям! – да се движат като птиците, пише Аз-Замахшари. А пък въобще не е невъзможно в небесата Аллах да е създал някаква небесна жива твар, която да ходи по тях, тъй както хората ходят по земята,

Пречист е Той, който създава различни видове същества, онова, което знаем, и онова, което не знаем!

Тази небесна жива твар си я нарича направо „животно“ (хайауан), откъдето на български е дошло хайван. Разбирайте, голям небесен хайван. Същото мнение се споделя и от друг голям коментатор, Фахр ад-Дин ар-Рази в „Ключове към неведомото“ (Мафатих ал-гайб), като тук „неведомото“ е същото като гайб в Лисан ал-гайб от „Дюн“. И при него откриваме темата за Аллах, който може да е създал „различни видове живи твари (хайвани!), които ходят по небесата така, както хората ходят по земята“. Да удължа и аз още малко интерпретативната нишка: ако в някои тълкувания е възможно „добиче“ (дабба) да обозначава и ангелите, и хората, и не само, то защо хайауан да изключва разумност?

Колегата му Ал-Куртуби („от Кордоба“) от XIII век обаче е по-скептичен. Няма такива неща в неговия коментар. Сигурно защото цитира много ранен коментар, може би първия запазен, този на Муджахид от VII – началото на VIII век, който бил казал, че „добичетата“ от въпросния стих са живи същества и се имат предвид ангелите и хората, и то на земята. Е, не сме оставени съвсем без никакви „извънземни“, доколкото за ангелите също се предполага, че обитават пространството над земята, някъде в небесата. Съществуват и други гледни точки – животните и насекомите в земното небе, гигантски животни в небето, някъде над видимата му част, че дори и животните в Рая.

В Коран 52:4 пък се говори за „посещавания Дом“. Много интересно, в признатия за авторитетен превод на български език от Цветан Теофанов имаме бележката към този стих, че „посещаваният дом“ тук е или храмът Кааба, или „небесното място, което ангелите обхождат“. Бележката е неслучайна, доколкото загатва за споменатите в достоверно предание от Пророка хиляди ангели, които се молят в свято място на небето, подобно на земната мюсюлманска светиня в Мека. Оттук пък и имало популярно предание, че по една свещена Кааба съществува във всяко едно от седемте небеса, където техните жители (ахл) ходят на поклонение. А пък „жителите“ може да бъдат не само ангели, нали? Коментатори добавят още, че „световете“ от Коран 1:2 могат да бъдат огромен брой, като някои предания говорят, че светът на хората и джиновете (не забравяйте, че те не са ангели, имат особен статус и са направени от огън според стих 15:27) е един от тях, ангелите живеят във втори, но извън това има още десетки хиляди, в които само Аллах знае кой живее. В стих 65:12 се добавя допълнителна възможност за други светове. „Аллах е, Който сътвори седем небеса, и от земята – също толкова“ допуска не само небесата да са седем, но и земите.

Ал-Куртуби, колкото и да е консервативен спрямо „небесните животни“, се опира на колегата си от XI век Ал-Мауарди, онзи същия, когото ИДИЛ използва като аргумент за властовата легитимност на Абу Бакр ал-Багдади, просто защото е един от най-известните политически теоретици на исляма. Ал-Куртуби очертава картина, при която седемте земи съществуват, подобно на небесата, една над друга, отделени от огромно разстояние, а във всяка от тях има обитатели (суккан). А пък тълкувателят Ал-Кауаши от XIII век добавя, че тъй както във всяко от небесата има ангели, така и във всяка от седемте земи има създадени хора (ахл), които имат свои собствени чудни качества. Че даже и според предание на Пророка във всяка земя имало по един Пророк като Мохамед, по един Адам, по един Нух (Ной), по един Ибрахим (Авраам) и пр. За всички, които се интересуват повече, по темата има чудесни неща на Шоайб Малик, Йорг Детерман и Парандис Таджбакш¹. За да не останете с впечатлението, че откриваме топлата вода, когато разлистим дебелите средновековни коментари на Корана и Сунната. Макар че откриването на топлата вода в някои квартали на София лятоска си е направо небесно откровение само по себе си.

Ала все пак трябва да сме почтени към изворовия материал, колкото и понякога да ни се ще да си изфантазираме нещо ей така, за забавление, с риск да си навлечем гнева на правоверните. Общото мнение е, че разумните същества във вселената – оттук и такива, които са религиозно задължени и отговорни (мукаллаф) по религиозния закон – са ангелите, хората и джиновете. Измежду тях ангелите и джиновете някак съответстват на дефиницията за „разумен, извънземен (донякъде)“ живот. Оттам нататък не са изключени възможности за наличие на множество светове, населени с техните обитатели, които евентуално да са разумни (оттук и отговорни по Свещения закон). Но както завършва всяко уважаващо себе си изказване в мюсюлманското право, Аллах знае най-добре!

1 Islamic Theology and Extraterrestrial Life: New Frontiers in Science and Religion. Ed. by Shoaib Ahmed Malik and Jörg Matthias Determann. London: I.B. Tauris, 2024. В изследването Мохаммад Махди Монтасери разглежда подробно тълкуванията на Коран 42:29, а Файсал Абдуллах повдига завесата откъм други стари коментари, които отварят възможността за извънземен разумен живот. В тази посока си струва човек да прегледа и Tajbakhsh, P. Islam and Extraterrestrial Life. Cambridge Essentials. Cambridge: Cambridge University Press, 2026.

(Следва продължение.)


В рубриката „Ориент кафе“ Атанас Шиников поднася любопитни теми, свързани не толкова с горещата политика, колкото с историята и културата на Близкия изток. А той, древен и днешен, е по-близко до нас и съвремието ни, отколкото си представяме.

Security updates for Wednesday

Post Syndicated from corbet original https://lwn.net/Articles/1094720/

Security updates have been issued by AlmaLinux (kernel, kernel-rt, libkcapi, nginx, nginx:1.24, openssl, osbuild-composer, perl, perl:5.32, python-tornado, rsync, and rust), Debian (cjose and nginx), Fedora (environment-modules, erlang, GitPython, knot, perl-Authen-SASL, python-configargparse, ruby, rubygems, and sblim-sfcb), Oracle (firefox, git-lfs, gstreamer1-plugins-base, kernel, libkcapi, nginx, nginx:1.26, openssl, osbuild-composer, perl, perl-YAML-Syck, postgresql18, python-tornado, and rust), Red Hat (fence-agents, git-lfs, microcode_ctl, osbuild-composer, podman, python-pyasn1, and resource-agents), SUSE (389-ds, ant, bson-devel, chirp-20260911, docker, gimp, google-cloud-sap-agent, hauler, kernel, kimi-code, libpcap, python-GitPython, python310, syncthing, yast2-samba-client, and zstd-jni), and Ubuntu (aom, imagemagick, kitty, openssh, phpseclib, policykit-1, python-sql, python-webob, shibboleth-sp, simplesamlphp, snapcast, srt, and suricata-update).

AWS STS simplifies session token size limits and adds session token size monitoring

Post Syndicated from Rishi Tripathy original https://aws.amazon.com/blogs/security/aws-sts-simplifies-session-token-size-limits-and-adds-session-token-size-monitoring/

AWS Security Token Service (AWS STS) has simplified session token size limits, giving you more room for your session policies and session tags. STS has replaced the packed policy size and the overall session token size limits with a single token size limit of 4,096 bytes. STS now reports session token size in API responses, Amazon CloudWatch metrics, and AWS CloudTrail events. By using STS, you can also generate session tokens of different sizes, so you can find the maximum token size that your infrastructure can support.

The 4,096-byte limit is the current maximum, not a permanent ceiling. AWS might increase the limit as new capabilities are added that require session tokens to carry more information.

In this post, you learn what has changed, what this change means for you, and what to do next.

What has changed

AWS STS session-vending APIs, such as AssumeRole, AssumeRoleWithSAML, AssumeRoleWithWebIdentity, GetSessionToken, and GetFederationToken, return temporary security credentials: an access key ID, a secret access key, and a session token. This change governs the session token, the opaque string that STS creates from the session policies and tags you pass plus the context that AWS adds.

Three things have changed.

  • A single limit: Previously, STS enforced two size limits on the session token. It serialized and compressed your session policies and tags into a form called the packed policy, which had its own limit. The assembled token, which included the packed policy, had a separate overall limit. A request could fail against either limit, and both failures returned the same PackedPolicyTooLargeException, so you couldn’t tell which one you exceeded. STS now enforces a single limit: the assembled session token must fit within 4,096 bytes. The separate packed policy limit, which made failures hard to predict, has been removed. When a token exceeds the assembled session token limit, STS returns PackedPolicyTooLargeException. STS continues to use the same exception, so existing error-handling code works without an SDK update.
  • Session token size is now reported. Every successful response from an STS session-vending API includes SessionTokenSize (which reports the session token size in bytes) and SessionTokenUtilization (which reports the percentage of the 4,096-byte limit consumed). STS also returns PackedPolicySize in every successful response for backward compatibility. PackedPolicySize now reports the same value as SessionTokenUtilization, enabling applications that use older AWS SDK versions to monitor utilization through this field. These response fields are also recorded in CloudTrail events. In CloudWatch, SessionTokenSize and SessionTokenMaxSize (the enforced limit) are published in the AWS/STS namespace.
  • Testing is more straightforward: MinimumSessionTokenSize is a new optional parameter on the STS session-vending APIs. You can use it to increase a session token to at least the size you specify, up to 4,096 bytes. Use the parameter to find the maximum token size your infrastructure can handle.
Behavior Previously Now
Limits enforced Two: Packed policy size and assembled token size One: Assembled session token size (4096 bytes)
Error on failure PackedPolicyTooLargeException: The error message didn’t identify which of the two limits was exceeded. PackedPolicyTooLargeException: The updated message reports your session token size and the maximum allowed size, both in bytes.
Session token size visibility Not reported

API Response and AWS CloudTrail:

SessionTokenSize, SessionTokenUtilization, and PackedPolicySize. PackedPolicySize reports the same percentage as SessionTokenUtilization for backward compatibility.

Amazon CloudWatch:

SessionTokenSize and SessionTokenMaxSize

Infrastructure testing No mechanism MinimumSessionTokenSize: Parameter on sesssion-vending APIs

What this change means for you?

How this affects you depends on your situation. The following scenarios cover the most common cases.

  • If you have never hit a token size error: You’re unlikely to notice a change. Your tokens stay their current size and gain headroom. Over time they could become larger than your systems have handled before. We recommend you use MinimumSessionTokenSize to find the maximum token size your systems can handle. See the What to do next section for more details.
  • If you’ve hit PackedPolicyTooLargeException before: Some requests that previously failed now succeed under the single limit. Review any workarounds you put in place specifically to avoid token size errors and decide whether you still need them. General best practices still apply: consistent tag casing and reused tag values compress more efficiently, and concise session policies keep the assembled token smaller. No code change is required for error handling. AWS STS still returns PackedPolicyTooLargeException when the assembled session token exceeds the limit, the same exception STS returned before this change.
  • If your systems enforce their own size limits on credentials: If your application uses an AWS SDK to obtain temporary credentials and make AWS API calls, the SDK handles the session token internally, so token size doesn’t affect your code. Focus instead on systems that store or forward session tokens, such as load balancers, proxies, caches, and databases. These systems might have size limits that smaller tokens didn’t reach. For example, a database column defined as varchar(2048) can’t hold a 4,096-byte token. Review where you persist or pass session tokens, and identify the maximum token size each system supports. The next section shows how to test this.

What to do next

We recommend the following three steps to prepare your systems for this change.

  1. Validate the maximum token size your systems can handle. Use MinimumSessionTokenSize to find the maximum session token size each system in your infrastructure can handle. Knowing these limits helps you identify systems that might reject or truncate larger tokens. The 4,096-byte limit reflects today’s needs, not a permanent ceiling. It might grow as AWS introduces new capabilities such as additional context keys for new services, richer audit metadata, and larger cryptographic signatures as the industry transitions to post-quantum algorithms. Avoid hard-coding the current maximum into your systems and revisit any fixed size assumptions if the limit changes.

    Tip: AWS STS serializes and compresses your session policies and tags when assembling the token. Compression results vary based on the actual content, not just its length. Two sets of tags with identical character counts can produce different token sizes. This is why MinimumSessionTokenSize is a more reliable way to test your infrastructure than estimating from input length.

    aws sts assume-role \
      --role-arn arn:aws:iam::123456789012:role/MyRole \
      --role-session-name validation-test \
      --minimum-session-token-size 4096

    Start at 4,096 bytes to test against the largest possible token. If a system truncates or rejects it, lower the value to find the size your infrastructure supports, then raise that limit where you can. MinimumSessionTokenSize is available in the latest AWS SDK, AWS Command Line Interface (AWS CLI), and Tools for PowerShell versions. See the STS API Reference for details. If your AWS SDK or AWS CLI predates the parameter, update it to use this feature.

  2. Monitor your session token size (recommended). If your infrastructure has size constraints, you can use monitoring to see tokens that are approaching your limit and act before a request fails. AWS STS reports size through three channels, each suited to a different need.
    • In the API response: Reading SessionTokenUtilization and SessionTokenSize from the response requires the latest AWS SDK version. You can also monitor token size through CloudWatch and CloudTrail without updating your SDK.
    {
      "Credentials": {
        "AccessKeyId": "REDACTED",
        "SecretAccessKey": "REDACTED",
        "SessionToken": "REDACTED",
        "Expiration": "2026-06-30T12:00:00Z"
      },
      "AssumedRoleUser": { "...": "..." },
      "PackedPolicySize": 61,
      "SessionTokenSize": 2532,
      "SessionTokenUtilization": 61
    }

    • In CloudWatch: STS publishes SessionTokenSize and SessionTokenMaxSize in the AWS/STS namespace. Use them to build dashboards and set alarms. Set your alarm against the size limit you found during testing, not the 4,096-byte maximum. The maximum is the same for every account, so your own infrastructure limit is the one that matters.

    The following figure shows the SessionTokenMaxSize and SessionTokenSize metrics graphed in the CloudWatch console.

    Figure 1: SessionTokenMaxSize and SessionTokenSizemetrics in the CloudWatch console

    Figure 1: SessionTokenMaxSize and SessionTokenSizemetrics in the CloudWatch console

    • In CloudTrail: Each STS session-vending event records SessionTokenUtilization and SessionTokenSize for successful calls.
    {
      "eventName": "AssumeRole",
      "responseElements": {
        "credentials": { "...": "..." },
        "assumedRoleUser": { "...": "..." },
        "packedPolicySize": 61,
        "sessionTokenUtilization": 61,
        "sessionTokenSize": 2532
      }
    }

  3. Use appropriate fields for monitoring session token utilization. AWS STS still returns PackedPolicySize in session-vending API responses and CloudTrail records for backward compatibility. The field now reports the same value as SessionTokenUtilization: the percentage of the 4,096-byte session token size limit consumed by the token. As a result, PackedPolicySize values might appear lower even when your token content has not changed.

    If your SDK exposes SessionTokenUtilization, use that field because its name reflects the value’s current meaning. If an earlier SDK does not expose SessionTokenUtilization, use PackedPolicySize to monitor the same utilization percentage without updating the SDK. We recommend you monitor SessionTokenSize for the token size in bytes.

Conclusion

You now have more room for session tags, tag values, and session policies in your AWS sessions. AWS STS enforces a single 4,096-byte session token limit, returns a clearer error message when a token exceeds it, and reports token size so you can track growth proactively. Validate your token-handling systems with MinimumSessionTokenSize, and watch SessionTokenUtilization and SessionTokenSize for ongoing visibility.

References

If you have feedback about this post, submit comments in the Comments section below.


Rishi Tripathy

Rishi Tripathy

Rishi is a Principal Product Manager on the AWS Identity and Access Management (IAM) team. He focuses on access control mechanisms that help enterprises secure their AWS environments at scale. He is passionate about building security primitives that are straightforward to adopt and hard to misconfigure.

Tanmay Baid

Tanmay Baid

Tanmay is a Senior Software Development Engineer on the AWS Identity and Access Management (IAM) team. He works on the core identity systems behind the credentials and tokens customers rely on to access AWS at massive scale. He enjoys working on the hard problems at the intersection of distributed systems, identity, and security.

Connect Amazon SageMaker Unified Studio to Microsoft Power BI – Part 1: IAM Identity Center (IDC)-based domains

Post Syndicated from Ramesh H Singh original https://aws.amazon.com/blogs/big-data/connect-amazon-sagemaker-unified-studio-to-microsoft-power-bi-part-1-iam-identity-center-idc-based-domains/

Connecting Power BI to your Amazon SageMaker Unified Studio data catalogs typically required third-party bridges. These bridges added complexity and licensing costs. In this post, you create a direct connection using new authentication modes in the Amazon Athena ODBC driver, removing those dependencies entirely. If your organization uses Power BI as its business intelligence (BI) tool, your analysts can configure access to governed data in Amazon SageMaker Unified Studio without changing their tools or workflows. As an AWS alternative, Amazon Quick Sight provides serverless BI integration with Amazon SageMaker Unified Studio at pay-per-session pricing.

A previous post showed the connection method using a third-party ODBC-JDBC bridge. The Amazon Athena ODBC driver (version 2.2.0 and later) now supports Amazon SageMaker Unified Studio authentication directly, eliminating the need for customers to configure third-party bridge components previously required for this connection. This bridge also created additional components and required ongoing maintenance. The native connection simplifies the architecture by reducing these requirements.

UC Irvine, a top-ten U.S. public research university, consolidates student data from systems across multiple departments into a single governed repository that supports reporting, research, and analytics for decision-making at the strategic, tactical, and operational levels. Many of their analysts rely on Power BI to explore and visualize this governed data.

“Our users rely on Power BI for data visualization and reporting, but connecting to governed data in AWS previously required workarounds. The ODBC connection feature gives a direct path from Power BI into our SageMaker Unified Studio projects—no bridge software, no extra licensing, just a connection string and we’re ready to go.”

— Bernadette Theologidy, Manager, Student Analytics, UC Irvine

The Athena ODBC driver introduces two new authentication modes for SageMaker Unified Studio:

  1. SageMakerBrowserIdc (for IDC-based domains): The driver opens a browser window and authenticates through AWS IAM Identity Center (and your external identity provider, if configured). No local AWS credentials are needed.
  2. SageMakerIam (for AWS Identity and Access Management (IAM)-based and IDC-based domains): The driver uses AWS credentials from the default credential provider chain. For this walkthrough, we use AWS IAM Identity Center to provide those credentials.

You connect Microsoft Power BI to Amazon SageMaker Unified Studio through Athena. The Athena ODBC driver supports using two connection methods that use these authentication modes:

Method 1: DSN-based (Athena Power BI connector): You configure an ODBC Data Source Name (DSN) and use the Athena connector in Power BI. This method supports DirectQuery and Import mode with both SageMakerBrowserIdc and SageMakerIam authentication.

Method 2: DSN-less (Power BI ODBC connector): You use the Power BI ODBC connector with a connection string, requiring no DSN configuration. This method supports Import mode only with SageMakerIam authentication. DirectQuery isn’t available because the Power BI ODBC connector doesn’t support it. The connection string in Power BI Desktop must match exactly the one on Power BI Service. Because the gateway runs as a Windows service without interactive browser access, both ends must use SageMakerIam.

Feature Method 1: DSN-based Method 2: DSN-less
Power BI Connector Amazon Athena connector ODBC connector
Data connectivity mode DirectQuery and Import Import only
Requires DSN configuration Yes No
Data freshness Real-time (DirectQuery) or scheduled (Import) Scheduled refresh only
Authentication types SageMakerIam and SageMakerBrowserIdc SageMakerIam only
Domain types supported IAM-based and IDC-based IAM-based and IDC-based
Best for Dashboards requiring live data Scenarios where DSN management is not possible or scheduled refresh is acceptable

This is Part 1 of a two-part series. This post covers IDC-based domains using both connection methods. Part 2 covers IAM-based domains.

Solution overview

In this walkthrough, you take the role of a data analyst at an energy company. You need to understand the current state and future direction of the U.S. power generation fleet using the Public Utility Data Liberation Project, available on the Registry of Open Data on AWS. Our goal is to analyze generation capacity and identify where new investment is flowing. We connect Power BI to Athena through Amazon SageMaker Unified Studio and query the EIA-860 generators dataset directly from our data catalog. The result is a single visualization that reveals the energy transition.

The following diagram illustrates the solution architecture for connecting Power BI to Amazon SageMaker Unified Studio through Amazon Athena.

Architecture diagram showing Power BI connecting to Amazon Athena through Amazon SageMaker Unified Studio, with a Microsoft on-premises data gateway on Amazon EC2

Figure 1: Architecture diagram

The following architecture demonstrates a six-step workflow.

  1. Data engineers and analysts connect Power BI Desktop to Athena as a data source.
  2. They build their reports locally.
  3. They then publish them to the Power BI Service.
  4. Microsoft On-Premises Data Gateway on an Amazon Elastic Compute Cloud (Amazon EC2) instance connects to Athena using the instance’s attached IAM role.
  5. The Power BI Service then uses this gateway connection.
  6. Report viewers access the published reports through Power BI Service to make data-driven decisions.

On the AWS side, Athena queries the data catalog managed by AWS Glue Data Catalog. The catalog references data stored in Amazon Simple Storage Service (Amazon S3). An Amazon SageMaker Unified Studio project governs all access.

In an IDC-based domain (covered in this post), Power BI Desktop uses SageMakerBrowserIdc for Method 1 and SageMakerIam for Method 2. Power BI Desktop can run on-premises or on an EC2 instance. The gateway always uses SageMakerIam (it runs as a Windows service without browser access) and authenticates using instance profile credentials, which rotate automatically. The gateway can only query data within projects where its IAM role has been added as a member. For IAM-based domains, see Part 2.

Prerequisites

Before connecting Power BI to Amazon SageMaker Unified Studio, verify that your environment meets these requirements:

  • Athena ODBC driver – The latest Amazon Athena ODBC driver (version 2.2.0 or more recent) for Windows 64-bit.
  • Microsoft Power BI Desktop – The latest version installed on your Windows machine.
  • Microsoft Power BI Pro License – Required for publishing reports and configuring the on-premises data gateway.
  • Microsoft Power BI on-premises data gateway – The latest version installed on the EC2 instance.
  • Amazon SageMaker Unified Studio – An Amazon SageMaker Unified Studio IDC-based domain.

You need an Amazon SageMaker Unified Studio project with data assets. For detailed instructions, refer to the Amazon SageMaker Unified Studio User Guide.

The following screenshot shows the Amazon SageMaker Unified Studio project Query Editor interface, which runs a preview query against the EIA-860 generators dataset.

SageMaker Unified Studio Query Editor previewing the EIA-860 generators dataset

Figure 2: SageMaker Unified Studio project with the EIA-860 generators dataset available in the data catalog

Method 1: DSN-based connection (Athena Power BI connector)

This method uses the Amazon Athena Power BI connector with an ODBC Data Source Name (DSN), supporting DirectQuery and Import mode.

You configure Power BI Desktop to connect to your data assets in Amazon SageMaker Unified Studio using the SageMakerBrowserIdc authentication mode. The driver opens a browser window and authenticates through IAM Identity Center (and your external identity provider, if configured).

Add your SSO user as a member of your SageMaker Unified Studio project

Your single sign-on (SSO) user needs project-level access to query data with Athena. Verify your user is listed as a project member or add it by following Add project members in the Amazon SageMaker Unified Studio User Guide.

The following screenshot shows the SageMaker Unified Studio project user management page, where project owners can add or remove project users and roles.

SageMaker Unified Studio project members page listing users and roles

Figure 3: Members of a SageMaker Unified Studio project

Gather configuration values to configure your Amazon Athena ODBC DSN

Gather the following values from your Amazon SageMaker Unified Studio project:

  1. Open your Amazon SageMaker Unified Studio project.
  2. In the top right, select the three dots.
  3. Choose Project details.
  4. Select JDBC and ODBC details.
  5. Under ODBC connection details copy the following information: IDC issuer URL, domain ID, project ID, Athena workgroup name and AWS Region.

The following screenshot shows the Amazon SageMaker Unified Studio project overview page, where you can copy these details.

SageMaker Unified Studio project overview showing ODBC connection details

Figure 4: ODBC connection details

Configure the ODBC DSN

Create a System DSN using the Amazon Athena ODBC driver. For the general DSN creation steps, see Configuring a data source name on Windows in the Amazon Athena User Guide.

Enter the following values:

Field Value
Data Source Name Name your datasource (for example, pbi-idcdomain)
Region The AWS Region where your Amazon SageMaker domain is provisioned (for example, us-east-1)
Catalog AwsDataCatalog
Database default
Workgroup Your Athena workgroup name (for example, workgroup-abcdefghij-klmexample)

In the Authentication Options, configure the following values:

Field Value
Authentication Type SageMakerBrowserIdc
SSO Start URL IAM Identity Center entry point (for example, https://identitycenter.amazonaws.com/ssoins-0example)
SSO Region Region of IAM Identity Center (for example, us-east-1)
SageMaker Domain ID dzd-123456example
SageMaker Project ID abcd12example
SageMaker Domain Region Region of your Amazon SageMaker Unified Studio project (for example, us-east-1)

Choose OK, then Test to verify the connection. Choose Allow Access when prompted by the browser.

The following screenshot shows the consent prompt.

Browser consent prompt requesting access approval during authentication

Figure 5: Browser consent prompt

The following screenshot shows the successful connection test.

ODBC DSN configuration showing a successful connection test with SageMakerBrowserIdc

Figure 6: Successful connection test in the ODBC DSN configuration with SageMakerBrowserIdc authentication

Connect Power BI Desktop to your data

With the DSN configured, you can connect Power BI Desktop to your data catalog and load the generators dataset.

  1. Open Power BI Desktop.
  2. Open the Get Data menu and select More.
  3. Search for and select Amazon Athena and choose Connect.
  4. For Data Source Name (DSN), enter pbi-idcdomain.
  5. Select DirectQuery.
  6. Choose OK.
  7. Choose Use Data Source Configuration and then Connect.
  8. In the AwsDataCatalog folder, navigate to your database.
  9. Select the core_eia860__scd_generators table.
  10. Choose Load.

The following screenshot shows Power BI Desktop successfully connected to the AWS data catalog.

Power BI Desktop connected to the data catalog with the generators table loaded

Figure 7: Power BI Desktop connected to the data catalog with the generators table loaded using SageMakerBrowserIdc authentication

Create your dashboard and publish it

You can create a dashboard to visualize U.S. power generation data. To create a visualization, complete the following steps:

  1. In the Visualizations pane, choose the Stacked bar chart.
  2. Assign the Y-Axis: Drag technology_description to the Y-Axis.
  3. Assign the X-Axis (Values): Drag capacity_mw to the X-Axis (automatically summed).
  4. Assign the Legend (Stack): Drag operational_status to the Legend field.
  5. Choose Publish.
  6. Give your report a name (for example, generation-idcdomain) and choose Save.
  7. Sign in and choose a destination workspace.
Power BI Desktop stacked bar chart of generation capacity by technology and operational status

Figure 8: Power BI Desktop report using the EIA-860 generators dataset

After publishing, the report structure is available on Power BI Service.

Method 2: DSN-less connection (Power BI ODBC connector)

In this method, you use the Power BI ODBC connector with a connection string (no DSN required). This method supports Import mode only and SageMakerIam authentication. Because the gateway cannot perform browser authentication, both Desktop and gateway must use SageMakerIam. If your workflow requires SageMakerBrowserIdc, use Method 1.

If your machine already has AWS credentials through another method in the default credential provider chain, skip the following setup.

Administrator setup

Create a custom permission set named SageMakerDataAnalyst in IAM Identity Center with the following inline policy. For detailed steps, see Create a permission set in the AWS IAM Identity Center User Guide.

{
    "Version": "2012-10-17",
    "Statement": [
        {
            "Sid": "SageMakerAccess",
            "Effect": "Allow",
            "Action": [
                "datazone:GetConnection",
                "datazone:ListConnections",
                "datazone:GetDomain",
                "datazone:GetProject"
            ],
            "Resource": "*"
        },
        {
            "Sid": "STSForDriver",
            "Effect": "Allow",
            "Action": [
                "sts:GetCallerIdentity"
            ],
            "Resource": "*"
        }
    ]
}

Assign your user to this permission set for the AWS account containing your SageMaker Unified Studio domain. Then configure your AWS Command Line Interface (AWS CLI) SSO profile by running aws configure sso. For the full CLI configuration walkthrough with detailed steps, see Part 2. After your profile is configured, run aws sso login to authenticate.

Add the IAM identity as a member of SageMaker Unified Studio project

The IAM identity providing credentials needs both domain-level and project-level access to query data through Athena.

  1. Add AWSReservedSSO_SageMakerDataAnalyst_1234example as a domain IAM user: see Managing users in the Amazon SageMaker Unified Studio Admin Guide. Choose Current account.
SageMaker Unified Studio domain users list including the IAM identity

Figure 9: List of users of your SageMaker Unified Studio domain including the IAM identity

  1. Add AWSReservedSSO_SageMakerDataAnalyst_1234example as a project member: see Add project members in the Amazon SageMaker Unified Studio User Guide.
SageMaker Unified Studio project members list including the IAM identity

Figure 10: Members of a SageMaker Unified Studio project including the IAM identity

Gather configuration values

Gather the following connection values from your Amazon SageMaker Unified Studio project:

  1. Open your Amazon SageMaker Unified Studio Project.
  2. On the navigation pane, choose Overview.
  3. Select JDBC and ODBC details.
  4. Select the Using IAM auth toggle.
  5. Copy the ODBC connection string.
SageMaker Unified Studio project overview showing the ODBC connection string for IAM auth

Figure 11: ODBC connection string on the SageMaker Unified Studio project overview

Connect Power BI Desktop to your data and publish

With the configuration parameters of your project, you can connect Power BI Desktop to your data catalog and load the generators dataset.

  1. Open Power BI Desktop.
  2. Open the Get Data menu and select More.
  3. Search for and select ODBC and choose Connect.
  4. For Data Source Name (DSN), select (None).
  5. Expand Advanced Options.
  6. In the Connection string field, enter your connection string. For example, Driver={Amazon Athena ODBC (x64)};AwsRegion=us-east-1;Catalog=AwsDataCatalog;Schema=default;Workgroup=workgroup-abcdefghij-klmexample;SageMakerDomainId= dzd-123456example;SageMakerProjectId= abcd12example;SageMakerDomainRegion=us-east-1;AuthenticationType=SageMakerIam;
  7. Choose OK.
  8. Choose Default or Custom and then Connect.
  9. In the AwsDataCatalog folder, navigate to your database.
  10. Select the core_eia860__scd_generators table.
  11. Choose Load.

When publishing, name your report generation-idcdomain-dsnless.

Configure the on-premises data gateway and view your report on Power BI Service

After creating your reports in Power BI Desktop, configure the on-premises data gateway to view your report on Power BI Service.

You can configure the gateway using either a DSN or a DSN-less connection string, matching the method you used in Power BI Desktop.

Create and attach an IAM role to the Power BI Gateway EC2 instance

Create an IAM role for the EC2 instance that will host your Power BI gateway. Name the role pbi-gateway-role (or a name of your choice). The role must use EC2 as the trusted entity and include the following inline policy:

{
    "Version": "2012-10-17",
    "Statement": [
        {
            "Sid": "SageMakerAccess",
            "Effect": "Allow",
            "Action": [
                "datazone:GetConnection",
                "datazone:ListConnections",
                "datazone:GetDomain",
                "datazone:GetProject"
            ],
            "Resource": "*"
        },
        {
            "Sid": "STSForDriver",
            "Effect": "Allow",
            "Action": [
                "sts:GetCallerIdentity"
            ],
            "Resource": "*"
        }
    ]
}

Attach this role to your Power BI Gateway EC2 instance. For detailed steps on creating and attaching an IAM role to an EC2 instance, refer to IAM roles for Amazon EC2 in the Amazon EC2 User Guide.

Add the Power BI Gateway IAM role as a member of SageMaker Unified Studio project

The gateway IAM role needs project-level access to query data through Athena.

  1. Add the IAM pbi-gateway-role role as a domain IAM user: see Managing users in the Amazon SageMaker Unified Studio Admin Guide. Choose Current account (or Associated account if your gateway is deployed in a different account).

The following screenshot, from the Amazon SageMaker page of the AWS Management Console, shows the list of users of your Amazon SageMaker Unified Studio domain, including the IAM gateway role.

SageMaker Unified Studio domain users list including the Power BI gateway IAM role

Figure 12: List of users of your SageMaker Unified Studio domain including the IAM gateway role

Add the IAM pbi-gateway-role role as a project member: see Add project members in the Amazon SageMaker Unified Studio User Guide.

The following screenshot shows the Amazon SageMaker Unified Studio project user management page listing the project members.

SageMaker Unified Studio project members list including the Power BI gateway IAM role

Figure 13: Members of a SageMaker Unified Studio project including the IAM gateway role

Configure the data source on Power BI Gateway

How you configure the data source depends on the method you used in Power BI Desktop.

Method 1 (DSN-based)

Configure a System DSN on the gateway EC2 instance following the same ODBC DSN steps described in Method 1. When configuring, make sure that:

  • You use the System DSN tab (not User DSN) because the gateway runs as a Windows service under a separate account.
  • The authentication type is set to SageMakerIam regardless of what you used on Desktop.
  • The DSN name matches exactly the one configured on Power BI Desktop (for example, pbi-idcdomain)

Method 2 (DSN-less)

No configuration is needed on the gateway machine itself. You configure the data source directly in Power BI Service.

Configure the data source and view your report on Power BI Service

To view your report, complete the following steps:

  1. Open the workspace where you saved your report.
  2. Search the Semantic Model which has the same name as your report (for example, generation-idcdomain) and choose the More options icon (three dots).
  3. Choose Settings.
  4. Expand Gateway and Cloud Connection.
  5. Choose View Datasources (play icon) on your gateway.
  6. Choose Manually add to gateway.
  7. Add a connection name (for example, pbi-idcdomain).

The next step depends on the method that you chose:

Method 1 (DSN-based)

  1. Add the DSN (for example, pbi-idcdomain) that matches exactly the one configured on Power BI Desktop.

Method 2 (DSN-less)

  1. In the Connection string field, enter the connection string that matches exactly the one used in Power BI Desktop.

Next, continue with the configuration:

  1. Select Anonymous as Authentication Method.
  2. Choose Create.
  3. Expand again Gateway and Cloud Connection.
  4. For Maps to, choose the connection that you created (for example, pbi-idcdomain).
  5. Choose Apply.
  6. Return to the workspace where you saved your report.
  7. On the Content section, choose your report (for example, generation-idcdomain).

The following screenshot shows a Power BI report on Power BI Service.

Published Power BI report rendering on Power BI Service

Figure 14: Power BI report on Power BI Service

You can now see your report online with the data from your Amazon SageMaker Unified Studio project.

Clean up

To avoid additional charges after testing, delete the Amazon SageMaker Unified Studio domain and EC2 instances. Refer to Delete domains and Terminate Instances for instructions.

Conclusion

In this post, you connected Microsoft Power BI to Amazon SageMaker Unified Studio using an IDC-based domain with both DSN-based and DSN-less methods. This provides a direct connection, with no third-party licensing, that maintains data governance. In Part 2, we cover IAM-based domains.

You can automate many steps of this process. For information about automating DSN creation on the Power BI Gateway or Service, refer to How ENGIE automates the deployment of Amazon Athena data sources on Microsoft Power BI. If you don’t want users adding the gateway IAM role directly, you can create a custom blueprint as a self-service tool for gateway role addition. The blueprint uses a ProjectMembership resource with a configurable parameter that project owners can activate at project creation, automatically adding the gateway role as a project contributor.

For additional best practices, refer to the Using Microsoft Power BI with the AWS Cloud Whitepaper. To learn more, visit Amazon SageMaker Unified Studio and Amazon Athena.


About the authors

Ramesh Singh

Ramesh Singh

Ramesh is a Senior Product Manager Technical (External Services) at AWS in Seattle, Washington, currently with the Amazon SageMaker team. He is passionate about building high-performance ML/AI and analytics products that help enterprise customers achieve their critical goals.

Armando Segnini

Armando Segnini

Armando is a Senior Analytics Specialist Solutions Architect at AWS, partnering with enterprise customers to architect scalable data, analytics, and AI platforms. He helps organizations turn complex data challenges into business value through expertise in streaming, BI integration, and generative AI. Outside of work, Armando enjoys traveling with his family, exploring new cultures, photography, and functional fitness competitions.

Gaurav Sharma

Gaurav is a Specialist Solutions Architect (Analytics) at AWS, supporting US public sector customers on their cloud journey. Outside of work, Gaurav enjoys spending time with his family and reading books.

Krishna Atluru

Krishna Atluru

Krishna is an Enterprise Support Lead TAM at AWS. He provides customers with in-depth guidance on improving security posture and operational excellence for their workloads, helping them build secure, resilient, and cost-effective solutions. His areas of expertise include building serverless architectures, and data and analytics solutions. Outside of work, Krishna enjoys cooking, swimming, and traveling.

Saushthav Saxena

Saushthav Saxena

Saushthav is a Software Development Engineer at AWS on the Amazon Athena team, where he has spent the past few years working on distributed systems and data analytics at scale. Based in the San Francisco Bay Area, his background spans full-stack development, high performance computing, and large-scale infrastructure. Outside of work, he enjoys reading sci-fi novels, swimming, and traveling with family and friends.

Connect Amazon SageMaker Unified Studio to Microsoft Power BI – Part 2: IAM-based domains

Post Syndicated from Ramesh H Singh original https://aws.amazon.com/blogs/big-data/connect-amazon-sagemaker-unified-studio-to-microsoft-power-bi-part-2-iam-based-domains/

In Part 1 of this series, we connected Microsoft Power BI to Amazon SageMaker Unified Studio using an IAM Identity Center (IDC)-based domain. The Amazon Athena ODBC driver (version 2.2.0 and later) supports Amazon SageMaker Unified Studio authentication natively, removing the third-party ODBC-JDBC bridge previously required. We walked through both the DSN-based connection and the DSN-less connection, from Power BI Desktop through the on-premises data gateway to Power BI Service, where report viewers access published dashboards.

In this post, you create the same direct connection using an AWS Identity and Access Management (IAM)-based domain. The walkthrough covers the same two connection methods. The differences are the Amazon SageMaker Unified Studio console navigation paths, the configuration values, and an additional administrator setup that provides AWS credentials through AWS IAM Identity Center. This is Part 2 of a two-part series. For a detailed comparison of the two connection methods, see Part 1.

Solution overview

The architecture is the same as the previous post (see the architecture diagram and walkthrough scenario in Part 1). Power BI Desktop connects to Amazon Athena through the ODBC driver and the Amazon SageMaker Unified Studio project governs all data access. At the same time, the on-premises data gateway on an Amazon Elastic Compute Cloud (Amazon EC2) instance bridges the connection to Power BI Service so report viewers can access published dashboards.

The difference is in authentication: An IAM-based domain uses SageMakerIam authentication for both connection methods. The driver retrieves credentials from the AWS default credential provider chain. For this walkthrough, AWS IAM Identity Center provides those credentials through a custom permission set. Power BI Desktop can run on-premises or on an EC2 instance in the AWS Cloud. The gateway EC2 instance authenticates using its attached IAM role.

Prerequisites

Complete the prerequisites from Part 1. Additionally, you need:

  • AWS Command Line Interface (AWS CLI) – The latest version of the AWS CLI installed on your Windows machine. In this post series, the ODBC driver uses the AWS IAM Identity Center profile configured through the CLI for authentication.
  • Amazon SageMaker Unified Studio – An Amazon SageMaker Unified Studio IAM-based domain with AWS IAM Identity Center single sign-on (SSO) enabled.

The following screenshot shows the Amazon SageMaker Unified Studio (IAM-based domain) project Query Editor interface. It runs a preview query on the EIA-860 generators dataset.

SageMaker Unified Studio Query Editor previewing the EIA-860 generators dataset in an IAM-based domain

Figure 1: SageMaker Unified Studio (IAM-based domain) project with the EIA-860 generators dataset available in the data catalog

Administrator setup

This section configures AWS IAM Identity Center to provide credentials for the SageMakerIam authentication mode. It applies to Method 1 (IAM-based domain) and Method 2 (both domain types). If your machine already has AWS credentials available through another method in the default credential provider chain, you can skip this section and proceed directly to the method of your choice. For the full list of credential sources, refer to Credential providers in the AWS SDKs and Tools Reference Guide.

Create a permission set in IAM Identity Center

Create a custom permission set named SageMakerDataAnalyst in IAM Identity Center with the following inline policy. For detailed steps, see Create a permission set in the AWS IAM Identity Center User Guide.

{
    "Version": "2012-10-17",
    "Statement": [
        {
            "Sid": "SageMakerAccess",
            "Effect": "Allow",
            "Action": [
                "datazone:GetConnection",
                "datazone:ListConnections",
                "datazone:GetDomain",
                "datazone:GetProject"
            ],
            "Resource": "*"
        },
        {
            "Sid": "STSForDriver",
            "Effect": "Allow",
            "Action": [
                "sts:GetCallerIdentity"
            ],
            "Resource": "*"
        }
    ]
}

The "Resource": "*" is required because these API actions do not support resource-level permissions. For more information, see Actions, resources, and condition keys for Amazon DataZone.

This doesn’t grant broad access to your data. These are read-only metadata actions that allow the ODBC driver to discover connection details and retrieve temporary Athena credentials. The actual data access is governed by Amazon SageMaker Unified Studio project membership: Users can only query data within projects where they have been explicitly added as members. The Amazon SageMaker Unified Studio project IAM role provides Athena and Amazon S3 permissions separately.

Assign users to the permission set

To assign users or groups to the target AWS account, complete the following steps:

  1. In the IAM Identity Center console, choose AWS accounts.
  2. Select the target account where your Amazon SageMaker Unified Studio IAM-based domain is deployed.
  3. Choose Assign users or groups.
  4. Select the SSO users or groups that need access.
  5. Select the SageMakerDataAnalyst permission set.
  6. Choose Submit.

Configure AWS IAM Identity Center profile

To configure the AWS IAM Identity Center profile, run the following command in your terminal on Windows:

aws configure sso

When prompted, enter the following values:

Prompt Value
SSO session name For example, smus
SSO start URL The IDC issuer URL. For example, https://identitycenter.amazonaws.com/ssoins-0example
SSO region The SSO Region. For example, us-east-1
SSO registration scopes sso:account:access

A browser window opens for authentication. After authentication, select your account and the SageMakerDataAnalyst role.

The following screenshots show the consent window and the successful authentication message.

Browser consent prompt requesting access approval during AWS CLI SSO authentication

Figure 2: Browser consent prompt

Browser page confirming successful AWS CLI SSO authentication

Figure 3: Browser authentication successful message

When prompted, enter the following values:

Prompt Value
Default client Region None
CLI default output format None
Profile Name Change value by default

The resulting ~/.aws/config file should look like the following:

[default]
sso_session = smus
sso_account_id = 1234example
sso_role_name = SageMakerDataAnalyst

[sso-session smus]
sso_start_url = https://identitycenter.amazonaws.com/ssoins-0example
sso_region = us-east-1
sso_registration_scopes = sso:account:access

Verify authentication and daily use

To verify that your SSO profile is working correctly, run the following command:

aws sts get-caller-identity

You should receive a response like the following:

{
    "UserId": "AROARHJJNFBQD6EXAMPLE:[email protected]",
    "Account": "111122223333",
    "Arn": "arn:aws:sts::111122223333:assumed-role/AWSReservedSSO_SageMakerDataAnalyst_1234example/[email protected]"
}

For daily use, no passwords or EC2 instance roles are required. When your SSO session expires, run the following command to quickly refresh it:

aws sso login

Add your IAM identity as a member of your Amazon SageMaker Unified Studio project

The IAM identity providing credentials to the ODBC driver needs project-level access to query data through Athena. If you completed the administrator setup, this is the SSO role associated with your permission set (for example, AWSReservedSSO_SageMakerDataAnalyst_1234example). If you’re using another credential source, add the IAM role or user that provides those credentials. For detailed steps, see Managing users for IAM-based domains in the Amazon SageMaker Unified Studio Administrator Guide.

The following screenshot shows the Amazon SageMaker Unified Studio domain management page, which lists the members in a project.

SageMaker Unified Studio project members list

Figure 4: List of members of your SageMaker Unified Studio project

Gather the information to authenticate

To get the parameters that you need to authenticate, complete these steps:

  1. Open your Amazon SageMaker Unified Studio Project.
  2. Open Domain Management.
  3. Choose Users.
  4. Choose View SSO connection.
  5. Copy the end of the Instance ARN, so we can build the Instance URL like https://identitycenter.amazonaws.com/ssoins-0example

The following screenshot shows the Amazon SageMaker Unified Studio domain management page with SSO connection details.

SageMaker Unified Studio domain SSO connection details showing the IAM Identity Center instance ARN

Figure 5: AWS IAM Identity Center information

  1. Choose the user icon and copy the Region as shown in the following screenshot.
SageMaker Unified Studio user menu showing the Region

Figure 6: User icon with the Region information

Method 1: DSN-based connection (Athena Power BI connector)

In this method, you configure an ODBC Data Source Name (DSN) and use the Amazon Athena connector in Power BI. This method uses SageMakerIam authentication mode and supports both DirectQuery and Import mode.

This section covers IAM-based domains. For IDC-based domains, see Part 1.

Gather configuration values to configure your Amazon Athena ODBC DSN

Before configuring the ODBC DSN, gather the following connection values from your Amazon SageMaker Unified Studio project:

  1. Open your Amazon SageMaker Unified Studio Project.
  2. Top right, select the three dots.
  3. Choose Project details.
  4. Select JDBC and ODBC details.
  5. Copy the following values: domain ID, Amazon SageMaker project ID, AWS Region, and Athena workgroup.

The following screenshot shows the Amazon SageMaker Unified Studio project overview page, which provides the project details to copy.

SageMaker Unified Studio project details showing domain ID, project ID, Region, and Athena workgroup

Figure 7: Project details with SageMaker domain ID, SageMaker project ID, Region, and Athena workgroup

Configure the ODBC DSN

Create a System DSN using the Amazon Athena ODBC driver. For the general DSN creation steps, see Configuring a data source name on Windows in the Amazon Athena User Guide. Enter the following values:

Field Value
Data Source Name Name your datasource (for example, pbi-iamdomain)
Region The AWS Region where your Amazon SageMaker domain is provisioned (for example, us-east-1)
Catalog AwsDataCatalog
Database default
Workgroup Your Athena workgroup name (for example, workgroup-abcdefghij-klmexample)

In the Authentication Options, configure the following values:

Field Value
Authentication Type SageMakerIam
SageMaker Domain ID dzd-123456example
SageMaker Project ID abcd12example
SageMaker Region Region of your SageMaker Unified Studio project (for example, us-east-1)

Choose OK, then Test to verify the connection. Choose Allow Access when prompted by the browser.

The following screenshot shows the successful connection test.

ODBC DSN configuration showing a successful connection test with SageMakerIam

Figure 8: Successful connection test in the ODBC DSN configuration with SageMakerIam authentication

Connect Power BI Desktop to your data

With the DSN configured, you can connect Power BI Desktop to your data catalog and load the generators dataset.

  1. Open Microsoft Power BI Desktop.
  2. Open the Get Data menu and select More.
  3. Search for and select Amazon Athena and choose Connect.
  4. For Data Source Name (DSN), enter pbi-iamdomain.
  5. Select DirectQuery.
  6. Choose OK.
  7. Choose Use Data Source Configuration and then Connect.
  8. In the AwsDataCatalog folder, navigate to your database.
  9. Select the core_eia860__scd_generators table.
  10. Choose Load.

The following screenshot shows Power BI Desktop successfully connected to the data catalog.

Power BI Desktop connected to the data catalog with the generators table loaded

Figure 9: Power BI Desktop connected to the data catalog with the generators table loaded using SageMakerIam authentication

Create your dashboard and publish it

You can create a dashboard to visualize U.S. power generation data. To create a visualization, complete the following steps:

  1. In the Visualizations pane, choose the Stacked bar chart.
  2. Assign the Y-Axis: Drag technology_description to the Y-Axis.
  3. Assign the X-Axis (Values): Drag capacity_mw to the X-Axis (automatically summed).
  4. Assign the Legend (Stack): Drag operational_status to the Legend field.
  5. Choose Publish.
  6. Give your report a name (for example, generation-iamdomain) and choose Save.
  7. Sign in and choose a destination workspace.

The following screenshot shows the Power BI dashboard with U.S. power generation data.

Power BI stacked bar chart of U.S. generation capacity by technology and operational status

Figure 10: Power BI dashboard with U.S. power generation data

After you publish, the report structure becomes available on Microsoft Power BI Service.

Method 2: DSN-less connection (Power BI ODBC connector)

In this method, you use the Power BI ODBC connector with a connection string (no DSN required). This method supports Import mode only and SageMakerIam authentication. Because the gateway can’t perform browser authentication and connection strings need to match, both Desktop and gateway must use SageMakerIam.

This section covers IAM-based domains. For IDC-based domains, see Part 1.

Gather configuration values to configure your DSN-less connection

Gather the following connection values from your Amazon SageMaker Unified Studio project:

  1. Open your Amazon SageMaker Unified Studio Project.
  2. Top right, select the three dots.
  3. Choose Project details.
  4. Select JDBC and ODBC details.
  5. Copy the ODBC connection string.

The following screenshot shows the Amazon SageMaker Unified Studio project overview page with the ODBC connection string to copy.

SageMaker Unified Studio project overview showing the ODBC connection string

Figure 11: Project details with ODBC connection string

Connect Power BI Desktop to your data and publish

With the configuration parameters of your project, you can connect Power BI Desktop to your data catalog and load the generators dataset.

  1. Open Power BI Desktop.
  2. Open the Get Data menu and select More.
  3. Search for and select ODBC and choose Connect.
  4. For Data Source Name (DSN), select (None).
  5. Expand Advanced Options.
  6. In the Connection string field, enter your connection string. For example, Driver={Amazon Athena ODBC (x64)};AwsRegion=us-east-1;Catalog=AwsDataCatalog;Schema=default;Workgroup=workgroup-abcdefghij-klmexample;SageMakerDomainId= dzd-123456example;SageMakerProjectId= abcd12example;SageMakerDomainRegion=us-east-1;AuthenticationType=SageMakerIam;
  7. Choose OK.
  8. Choose Default or Custom and then Connect.
  9. In the AwsDataCatalog folder, navigate to your database.
  10. Select the core_eia860__scd_generators table.
  11. Choose Load.

When publishing, name your report generation-iamdomain-dsnless.

Configure the gateway and view your report on Power BI Service

After creating your reports in Power BI Desktop, configure the on-premises data gateway to view your report on Power BI Service.

You can configure the gateway using either a DSN or a DSN-less connection string, matching the method you used in Power BI Desktop.

Create and attach an IAM role to the Power BI Gateway EC2 instance

Create an IAM role for the EC2 instance that will host your Power BI gateway. Name the role pbi-gateway-role (or a name of your choice). The role must use EC2 as the trusted entity and include the following inline policy:

{
    "Version": "2012-10-17",
    "Statement": [
        {
            "Sid": "SageMakerAccess",
            "Effect": "Allow",
            "Action": [
                "datazone:GetConnection",
                "datazone:ListConnections",
                "datazone:GetDomain",
                "datazone:GetProject"
            ],
            "Resource": "*"
        },
        {
            "Sid": "STSForDriver",
            "Effect": "Allow",
            "Action": [
                "sts:GetCallerIdentity"
            ],
            "Resource": "*"
        }
    ]
}

Attach this role to your Power BI Gateway EC2 instance. For detailed steps on creating and attaching an IAM role to an EC2 instance, refer to IAM roles for Amazon EC2 in the Amazon EC2 User Guide.

Add the Power BI Gateway IAM role as a member of SageMaker Unified Studio project

The gateway IAM role needs project-level access to query data through Athena. The steps to add the role differ depending on your domain type.

IAM-based domain

  1. Open your Amazon SageMaker Unified Studio Project.
  2. Open Domain Management.
  3. Choose your Project Name.
  4. Choose Members.
  5. Choose Add members.
  6. Select the IAM role of your Power BI gateway (for example, pbi-gateway-role).
  7. Choose Add.

The following screenshot shows the Amazon SageMaker Unified Studio project domain management page with options to add members to a project.

SageMaker Unified Studio project members list including the Power BI gateway IAM role

Figure 12: List of members of a SageMaker Unified Studio project with the IAM gateway role

Configure the data source on Power BI Gateway

How you configure the data source depends on the method you used in Power BI Desktop.

Method 1 (DSN-based)

Configure a System DSN on the gateway EC2 instance following the same ODBC DSN steps described in Method 1. When configuring, make sure that:

  • You use the System DSN tab (not User DSN) because the gateway runs as a Windows service under a separate account.
  • The authentication type is set to SageMakerIam.
  • The DSN name matches exactly the one configured on Power BI Desktop (for example, pbi-iamdomain).

Method 2 (DSN-less)

No configuration is needed on the gateway machine itself. You configure the data source directly in Power BI Service.

Configure the data source and view your report on Power BI Service

To view your report, complete the following steps:

  1. Open the workspace where you saved your report.
  2. Search the Semantic Model which has the same name as your report (for example, generation-iamdomain) and choose the More options icon (three dots).
  3. Choose Settings.
  4. Expand Gateway and Cloud Connection.
  5. Choose View Datasources (play icon) on your gateway.
  6. Choose Manually add to gateway.
  7. Add a connection name (for example, pbi-iamdomain).

The next step depends on the method that you chose:

Method 1 (DSN-based)

  1. Add the DSN (for example, pbi-iamdomain) that matches exactly the one configured on Power BI Desktop.

Method 2 (DSN-less)

  1. In the Connection string field, enter the connection string that matches exactly the one used in Power BI Desktop.

Next, continue with the configuration:

  1. Select Anonymous as Authentication Method.
  2. Choose Create.
  3. Expand again Gateway and Cloud Connection.
  4. For Maps to, choose the connection that you created (for example, pbi-iamdomain).
  5. Choose Apply.
  6. Return to the workspace where you saved your report.
  7. On the Content section, choose your report (for example, generation-iamdomain).

The following screenshot shows a report on Power BI Service.

Published Power BI report rendering on Power BI Service

Figure 13: Power BI report on Power BI Service

You can now see your report online with the data from your Amazon SageMaker Unified Studio project.

Clean up

To avoid additional charges after testing, delete the Amazon SageMaker Unified Studio domain and EC2 instances. Refer to Delete domains and Terminate Instances for instructions.

Conclusion

In this two-part series, you connected Power BI to Amazon SageMaker Unified Studio through Amazon Athena. Part 1 covered IDC-based domains. This post covered IAM-based domains using SageMakerIam authentication. This provides a direct connection path, with no third-party licensing, while maintaining data governance and security.

You can automate many steps of this process. For information about automating DSN creation on the Power BI Gateway or Service, refer to How ENGIE automates the deployment of Amazon Athena data sources on Microsoft Power BI. If you don’t want users adding the gateway IAM role directly, you can create a custom blueprint as a self-service tool for gateway role addition. The blueprint uses a ProjectMembership resource with a configurable parameter that project owners can activate at project creation, automatically adding the gateway role as a project contributor.

For additional best practices, refer to the Using Microsoft Power BI with the AWS Cloud Whitepaper. To learn more, visit Amazon SageMaker Unified Studio and Amazon Athena.


About the authors

Ramesh H Singh

Ramesh H Singh

Ramesh is a Senior Product Manager Technical at AWS in Seattle, focused on Amazon SageMaker. He’s passionate about building analytics and AI products that help enterprise customers unlock real value from their data. Away from work, he spends his time hiking with family and exploring spirituality. Connect with him on LinkedIn.

Armando Segnini

Armando Segnini

Armando is a Senior Analytics Specialist Solutions Architect at AWS, partnering with enterprise customers to architect scalable data, analytics, and AI platforms. He helps organizations turn complex data challenges into business value through expertise in streaming, BI integration, and generative AI. Outside of work, Armando enjoys traveling with his family, exploring new cultures, photography, and functional fitness competitions.

Gaurav Sharma

Gaurav is a Specialist Solutions Architect (Analytics) at AWS, supporting US public sector customers on their cloud journey. Outside of work, Gaurav enjoys spending time with his family and reading books.

Krishna Atluru

Krishna Atluru

Krishna is an Enterprise Support Lead TAM at AWS. He provides customers with in-depth guidance on improving security posture and operational excellence for their workloads, helping them build secure, resilient, and cost-effective solutions. His areas of expertise include building serverless architectures, and data and analytics solutions. Outside of work, Krishna enjoys cooking, swimming, and traveling.

Saushthav Saxena

Saushthav Saxena

Saushthav is a Software Development Engineer at AWS on the Amazon Athena team, where he has spent the past few years working on distributed systems and data analytics at scale. Based in the San Francisco Bay Area, his background spans full-stack development, high-performance computing, and large-scale infrastructure. Outside of work, he enjoys reading sci-fi novels, swimming, and traveling with family and friends.

Architecting resilient authentication with Amazon Cognito multi-Region replication

Post Syndicated from Abrom Douglas original https://aws.amazon.com/blogs/security/architecting-resilient-authentication-with-amazon-cognito-multi-region-replication/

Your consumer identity and access management (CIAM) system is the foundation of your customer experience. It’s how users sign in, access services, and engage with your applications. As your business scales across geographies, ensuring authentication is always available becomes a core architectural requirement. However, building multi-Region authentication has traditionally required complex custom replication solutions that synchronize user data, manage consistency, and handle failover, all adding significant operational overhead. Amazon Cognito simplifies this with multi-Region replication (MRR), which automatically replicates user pools across AWS Regions with near-real-time synchronization, built-in failover, and seamless sign-in, while keeping operational complexity and costs optimized.

In this post, we show you how to prepare your user pool for MRR, provide architectural decisions and reference architectures for business to consumer (B2C), business to business (B2B), and machine to machine (M2M) use cases, and practical guidance on implementing failover strategies.

Amazon Cognito MRR at a glance

Amazon Cognito MRR creates a replica user pool in another AWS Region (a replica Region) that shares the same user pool ID as your primary user pool. The primary user pool (the user pool in your primary Region) remains authoritative, and its configurations (app client IDs, client secrets), user data (attributes, hashed credentials, group memberships), and external identity provider (IdP) settings are replicated to the replica with eventual consistency.

The user pool in the replica Region (replica user pool) supports user authentication operations (such as sign-in, token generation and revocation) and read-only operations towards user pool configurations and user attributes (such as list users and groups and describe user pool configurations). Write operations against user pool configurations and updating user attributes aren’t enabled in the replica user pool and can only be made in the primary user pool. Amazon Cognito returns an Action temporarily unavailable error when using managed login, or an OperationNotEnabledException when using an AWS SDK for those operations. See Supported API operations in secondary Regions for a list of API operations supported in replica Regions.

JSON web tokens (JWTs) and active sessions are interoperable between Regions; for example, a refresh token issued by the primary Region is accepted in the replica Region to retrieve new ID and access tokens.

While this post primarily focuses on MRR architecture patterns and considerations, you can visit the following posts to learn more about MRR basics and the next-generation infrastructure behind it:

Prepare for multi-Region replication

In this section, we show you architectural decisions and preparation work for a successful MRR deployment.

Apply a multi-Region customer managed key

Without MRR enabled, data is encrypted at rest with an AWS owned AWS Key Management Service (AWS KMS) key and encrypted in transit with TLS 1.2 and TLS 1.3 with hybrid post-quantum key exchange. Before enabling MRR, you must configure your user pool to use a customer managed key. This must be a symmetric multi-Region AWS KMS customer managed key.

Architectural considerations for your KMS key:

  • You only need to set up one replica multi-Region key for your customer managed key because Amazon Cognito MRR supports only one additional replica Region.
  • You own the administration of the customer managed key, including key policies, rotation, and deletion. You can also consider a key rotation strategy before enabling MRR or enable automatic key rotation.
  • Follow least-privilege principles in KMS key policy and scope the KMS key to your user pool only. You can do so by applying a condition statement: kms:EncryptionContext:aws:cognito-idp:<userpool-arn>. See the data encryption section in the Amazon Cognito developer guide for a full example key policy.

Choose a multi-Region OIDC issuer

In each ID and access tokens, Amazon Cognito includes a default Issuer claim in the JWT payload, referred as iss, to represent the identity provider that issued the token. The OpenID Connect (OIDC) specification dictates that the iss format must be a URL that uses https scheme and publishes a JSON metadata document about the identity provider available at the <iss>/.well-known/openid-configuration path. The metadata document must also include the JSON Web Key (JWK) document in the <iss>/.well-known/jwks.json path, which contains the signing keys to validate the token signatures for its integrity.

The original issuer type follows the format as https://cognito-idp.<region>.amazonaws.com/<userpool_id>. However, this issuer URL format and the OIDC well-known metadata are regional resources. As part of the MRR capability, Cognito introduces a new multi-Region OIDC issuer type, the updated issuer, and follows the format as https://issuer-cognito-idp.<region>.amazonaws.com/<userpool_id>. This new updated issuer type replaces the original single Region type and maintains availability of the issuer endpoint regardless of the state of primary or replica Region.

Based on the issuer URL format you select, your OpenID Connect discovery endpoint is hosted at  <iss>/.well-known/openid-configuration and your JSON Web Key Set (JWKS) endpoint at <iss>/.well-known/jwks.json. Both original type and updated type are supported with the Amazon Cognito MRR capability. You can change the issuer type at any stage in your MRR journey, and the newly issued tokens, including those generated by refresh tokens, will reflect the most current issuer type configurations.

We recommend adopting the updated issuer type. With the updated issuer type, the OpenID Connect discovery document and JWKS endpoint remain consistent and available regardless of which Region is servicing requests. This means your applications can always fetch signing keys for token verification, even during a regional impairment.

To adopt the updated issuer type, update your applications and downstream dependencies to validate against the new updated iss value. If you use the aws-jwt-verify library, update to v5.2.1 or later that supports updated issuer type. Plan this as a coordinated deployment; existing ID and access tokens with the original issuer type remain valid and accepted by Amazon Cognito endpoints until they expire. When using an existing refresh token to exchange for a new set of ID and access tokens, new tokens always carry the current issuer format configuration at the time of token refresh operation, providing interoperability across two issuer formats.

If you can’t immediately adopt the multi-Region issuer—for example, because downstream services or third-party integrations validate the iss claim against a hard-coded original format pattern—you can enable MRR while continuing to use the original issuer type. However, in this configuration the OIDC discovery endpoint and JWKS endpoint are tied to a single Region and might be unavailable during a regional impairment. Your multi-Region application might not be able to fetch public keys dynamically and validate token signatures. To mitigate this, it’s a good practice to implement a JWKS caching strategy in your token verification layer. Cache the signing keys locally (respecting the Cache-Control headers) so your applications can continue to validate tokens using cached keys when the JWKS endpoint is unreachable. This approach lets you benefit from MRR for user authentication while maintaining token verification continuity until you’re ready to complete the issuer migration. To learn more about the original and updated issuer types, see the Amazon Cognito user pools as an OIDC issuer section of the developer guide.

Configure regional service dependencies

Amazon Cognito user pools support several integrations with AWS services for extended customization functionalities. Those AWS services are regional services and must be configured independently in the replica Region, including:

  • AWS LambdaLambda triggers (for example, pre-authentication, pre-token generation, and others) are invoked in different authentication stages and should be deployed in the replica Region and attached to the replica user pool to match customized behaviors in the primary user pool. When deploying Lambda triggers, you can adopt the same logic for both primary and replica user pools and access to downstream resources or set up a different logic to characterize different behaviors when requests are served in the replica Region.
  • AWS WAF – WAF web access control lists (web ACLs) are associated to protect the user pool from unwanted requests. When accepting traffic to the replica user pool, create matching WAF web ACLs in the replica Region.
  • Amazon Simple Notification Service (Amazon SNS) – If you send text messages (for example, SMS-based multi-factor authentication (MFA), passwordless authentication, or SMS notifications), configure Amazon SNS in the replica Region. SNS requires additional set up (origination identities, spending limits) in each Region, and sender ID registration time depends on several factors.
  • Amazon Simple Email Service (Amazon SES) – If you use Amazon SES for email delivery, verify sending domains and email addresses in the replica Region and configure your replica user pool accordingly.
  • Amazon CloudWatch – If you export user activity logs from Amazon Cognito to a CloudWatch log group, or monitor service quotas in CloudWatch, configure alarms and analytics accordingly.

Use infrastructure-as-code tools like AWS CloudFormation or AWS Cloud Development Kit (AWS CDK) to maintain consistent configurations and deployments across Regions and environments. You should also monitor for any configuration drifts between assets.

Consider automatic domain failover

For authentication use cases that rely on managed login and OAuth 2.0 endpoints—including federated authentication and M2M authorization—Amazon Cognito supports automatic failover to the replica Region with an Amazon Route 53 health check. Cognito uses the health status of Route 53 health check to control whether traffic routes to the primary or replica user pool. The health check can be set up to monitor the health of an endpoint, a CloudWatch alarm, or a calculated number of other health checks, so you determine what triggers a healthy or unhealthy state and can adjust traffic routing as needed.

Both the Amazon Cognito prefix domain (for example, auth.us-east-1.amazoncognito.com) and custom domain (for example, auth.example.com) support automatic domain failover. Your domain serves as the single entry point for the user pool OAuth 2.0 endpoints and directs traffic to the managed login pages. Cognito automatically fails over domain traffic to the replica Region when a Route 53 health check becomes unhealthy and fails back to the primary Region when the check is healthy. You don’t need to create another prefix domain in the replica user pool for failover use cases.

With the automatic failover capability, you can use a single domain to serve external IdP configurations, including redirect URIs and SAML assertion consumer URLs. For example, use https://auth.example.com/saml2/logout to send SAML 2.0 sign-out responses. Because the domain can serve traffic to both the primary and replica Regions and remains unchanged across Regions, your external IdP configurations stay consistent across Regions, and existing federated users continue to authenticate without disruption. This means that you can enable MRR without having to contact external IdP admins to update configurations; all existing configurations will continue to work.

For SDK-based authentication use cases without managed login, a custom domain isn’t strictly required. We recommend configuring a custom endpoint for SDK requests to simplify failover orchestration, so you don’t have to modify the Region parameter in the SDK configuration. Behind your custom endpoint, you can use the same Route 53 health check or a custom load balancing strategy to proxy API requests to primary or replica Region endpoints. You might also consider load balancing user authentication traffic, by referring to an X-Amz-Target HTTP header (for example, X-Amz-Target: AWSCognitoIdentityProviderService.InitiateAuth), to both the primary and replica Regions, while keeping user sign-up operations in the primary Region. If you use both managed login and SDK authentication in the same user pool, you can consider using the custom domain as the custom endpoint of the SDK for a streamlined operation, where Route 53 health check initiates failover and failback between the primary and replica Regions.

Plan for TOTP MFA alternatives

Time-Based One-Time Password (TOTP) MFA isn’t supported in replica user pools. Users configured to use TOTP MFA must authenticate through the primary Region. If your application relies on TOTP as a second factor, this limitation requires careful planning because you want to enable an alternative MFA for your users, such as SMS OTP, email OTP, or passkey.

Review quotas

When you activate a replica user pool, you gain a separate set of default quotas in the replica Region. Previously reserved higher quotas for your user pool in the primary Region aren’t carried over to the replica Region.

Data sovereignty

When selecting a replica Region for your user pool, consider your organization’s data sovereignty and residency requirements, as user identity data will be replicated to and stored in that Region. For guidance on navigating compliance, continuity, and control obligations that may influence your Region selection, see Practical digital sovereignty: Navigating the pillars of compliance, continuity, and control.

Reference architectures

In this section, we show you reference architectures for common authentication patterns using the Amazon Cognito MRR capability. Each architecture demonstrates how Cognito MRR works with different authentication use cases.

Managed login and federation

Amazon Cognito managed login provides a fully managed authentication UI that handles sign-in, sign-up, and federation flows. With MRR, managed login endpoints are served from the healthy user pool based on your Route 53 health check configuration. Managed login also includes OAuth 2.0 endpoints and can be used with local Cognito accounts and federated users. Figure 1 depicts a reference architecture for using managed login to authenticate Cognito users.

Figure 1: Cognito MRR reference architecture for managed login and federation use cases

Figure 1: Cognito MRR reference architecture for managed login and federation use cases

When using Amazon Cognito with managed login, the process flow is:

  1. The user visits the application and is redirected to the managed login to begin the authentication flow.
  2. Managed login uses the Route 53 health check to control traffic routing.
  3. If the health check returns a healthy status, all traffic to the managed login flows to the primary Region user pool for user authentication.
  4. For a federated user, the primary Region user pool redirects the user to a federated IdP or social IdP for authentication. After successful authentication, Amazon Cognito creates or updates user attributes depending on whether it’s a new user signing in for first time or an existing user.
  5. If the health check returns an unhealthy status, all traffic to the managed login flows to the replica Region user pool. Cognito users will authenticate against the replica user pool.
  6. The replica Region user pool endpoint redirects federated users to external IdPs. However, any user creation or attribute update against replica user pool will fail until the health check returns healthy and traffic routes back to the primary Region.

M2M architecture

In an M2M architecture, services authenticate using the OAuth 2.0 client credentials grant. This flow doesn’t involve users; instead, backend services exchange client credentials for access tokens.

Figure 2: Cognito MRR reference architecture for machine-to-machine use case

Figure 2: Cognito MRR reference architecture for machine-to-machine use case

The authentication flow is:

  1. Application clients send a POST request to the Amazon Cognito /token endpoint with client credentials.
  2. Managed login uses the Route 53 health check to determine whether traffic should flow to the primary or replica user pool.
  3. If the health check returns a healthy status, traffic to the /token endpoint will flow to the primary Region user pool.
  4. If the health check returns an unhealthy status, traffic to the /token endpoint will flow to the replica Region user pool. After the health check returns to a healthy status, traffic will return to routing to the primary user pool.

SDK-based architecture

For applications that use AWS SDK or Amazon Cognito APIs directly (rather than through managed login), the authentication flow is embedded in your application code. This gives you more control over the user experience but requires additional considerations for failover.

Figure 3: Cognito MRR reference architecture for SDK use cases

Figure 3: Cognito MRR reference architecture for SDK use cases

The process shown in Figure 3 is:

  1. The user visits the application and signs in through a custom UI (using APIs or SDKs).
  2. (Optional) An Amazon Route 53 health check is configured to perform a health check against regional proxy endpoints and determine traffic routing. You can also use a custom health check or your DNS resolver to make traffic routing determinations.
  3. If the health check returns a healthy status, all traffic to the proxy endpoints will flow to the primary Region proxy for user authentication. You can also choose to load balance user authentication traffic across both the primary and backup Regions.
  4. The primary Region Amazon API Gateway proxy forwards user requests to the Amazon Cognito regional endpoint.
  5. If the health check returns an unhealthy status, all traffic will flow to the replica Region proxy.
  6. The replica Region API Gateway proxy begins forwarding user requests to the Amazon Cognito regional endpoint until the health check returns to healthy status.

In an SDK-based architecture, Amazon Cognito regional endpoints can also be called directly. You can also set up custom routing to use replica Region endpoints to load balance user authentication requests by routing read-only requests to both the primary and replica Region endpoints while keeping write requests in the primary Region.

Failover strategies

Now that you’ve set up multi-Region replication with Amazon Cognito, the next step is to test and monitor your multi-Region configuration. In this section, we walk through strategies for monitoring your endpoints, determining when to trigger failover, and testing your failover readiness.

Monitor with Route 53 health checks

Failover for Managed Login and all OAuth 2.0 flows is driven by Amazon Route 53 health checks associated with your Amazon Cognito prefix or custom domain. You’re responsible for what determines the state of this health check. The health check isn’t tied to your DNS CNAME record but is the signal that tells Amazon Cognito whether to route traffic to the primary or replica Region for all managed login endpoints. When the health check fails, Amazon Cognito routes traffic to the replica user pool. When the health check recovers, traffic is restored to the primary user pool.

A practical approach to get started to build a health check:

  1. Create a synthetic canary – Use Amazon CloudWatch Synthetics to run a canary that periodically exercises an actual authentication flow against your primary Region. For example, the canary can perform a client credentials token request against your Amazon Cognito domain’s /oauth2/token endpoint or execute a full AdminInitiateAuth API call with test credentials. This validates that the end-to-end authentication path is functional, not just that an endpoint is responding.
  2. Tie the canary to a CloudWatch alarm – Configure a CloudWatch alarm on the canary’s SuccessPercent CloudWatch metric. Set a threshold that accounts for transient errors (for example, alarm when success drops below 90% for three consecutive evaluation periods).
  3. Connect the alarm to your Route 53 health check (optional) – Create a Route 53 health check that monitors the CloudWatch alarm. When the alarm enters the ALARM state, the health check fails, and Amazon Cognito routes traffic to the replica user pool. If you prefer to rely on human intervention, skip this step and instead configure the CloudWatch alarm alert your operations team to manually invert the health check.

After you have your health check, associate it with your Amazon Cognito domain using the UpdateUserPoolDomain API or the Amazon Cognito console.

Authentication-only compared to full-stack failover

Before implementing failover, consider how your authentication layer relates to the rest of your application stack. There are two common patterns:

  • Authentication-only failover – Your application remains in a single Region, but authentication traffic fails over to the Amazon Cognito replica if only the primary Region’s authentication service is impaired. This works when your application can continue operating with tokens already issued (for example, cached JWTs, active sessions) and when downstream APIs don’t depend on the same Region as your user pool. Consider this option when the rest of your stack has its own availability model.
  • Full-stack failover – Your entire application—compute, data stores, APIs, and authentication—fails over to a replica Region. In this model, Amazon Cognito MRR is one component of a broader multi-Region architecture where authentication flows have tight dependencies on regional resources (such as Lambda triggers calling regional Amazon DynamoDB tables, or post-authentication logic writing to a regional event bus) that must be co-located with the user pool.

Use Amazon Application Recovery Controller (ARC) to coordinate failover across all components with a single action. ARC provides three capabilities that are particularly relevant for multi-Region authentication architectures:

  • Routing controls – Extremely reliable data plane controls that let you shift DNS traffic across Regions, with safety rules that prevent partial or unintended failovers (for example, preventing you from failing over authentication without also failing over the dependent API layer).
  • Readiness checks – Continuous monitoring of resource quotas, capacity, and network routing policies in your secondary Region, so you have confidence that the replica environment—including your Amazon Cognito replica user pool and its regional dependencies—can handle production traffic before you failover.
  • Region switch – Centralized, automated, and observable multi-Region recovery orchestration across multiple AWS accounts and resources, so you can execute a coordinated failover of your Cognito user pool alongside databases, compute, and APIs in a single recovery plan.

ARC is particularly valuable when your Amazon Cognito Lambda triggers, WAF rules, SNS and SES configurations, and downstream services all need to switch Regions in lockstep. Rather than managing failover for each component independently, you can use ARC to define a single recovery group that treats your authentication stack and application stack as one unit. To learn more about the capabilities and use cases of ARC, see Introducing Amazon Route 53 Application Recovery Controller.

The right choice depends on your recovery scope. Map the dependencies in your authentication flow: if your Lambda triggers call regional DynamoDB tables or your post-authentication logic writes to a regional event bus, those tight couplings point to full-stack failover. If your application validates tokens independently and doesn’t make real-time calls back to Amazon Cognito after token issuance, authentication-only failover keeps both your blast radius and operational overhead smaller.

Determine when to failover

Triggering failover too aggressively risks unnecessary disruptions; too conservatively risks a drop in desired availability. Here are the factors to balance:

  • Monitor authentication flow health – Validate that critical flows are functioning, including managed login endpoint availability and token endpoint responses.
  • Use composite health checks – Combine multiple signals. For example, require both the managed login and token endpoints to be healthy.
  • Set appropriate thresholds – Configure failure thresholds (for example, three consecutive failures) to distinguish transient errors from genuine impairments.
  • Consider downstream dependencies – Factor in Lambda triggers, external IdPs, and other regional services.
  • Client side retry logic – For SDK-based single-page application (SPA) architectures, consider implementing client-side retry logic with Region failover. When the primary Region is unavailable, your application should detect the failure and redirect authentication of API calls to the replica Region’s Amazon Cognito endpoint.

Understanding and determining the recovery time objective (RTO) and recovery point objective (RPO) should also be the key factor in determining when and why to failover. See the Establishing RPO and RTO Targets for Cloud Applications blog post to learn more.

Test failover readiness

If using Route 53 health check, start by manually inverting your Route 53 health check during a maintenance window. In the Route 53 console, enable Invert health check status to force the health check into a failed state; this triggers failover to the replica Region without requiring any infrastructure changes. While traffic is routing to the replica Region, validate that your critical authentication flows (sign-in, token refresh, federation) work correctly, then disable the inversion to restore traffic to the primary. This test confirms your end-to-end failover path is functional.

When you’re confident in the basic failover path, graduate to more realistic failure simulations with AWS Fault Injection Service (FIS). Create FIS experiment templates that disrupt your primary Region’s Amazon Cognito dependencies; for example, block network access to a dependent resource or inject latency into downstream API calls. Use FIS stop conditions (guardrails) to automatically halt experiments if unexpected impacts are detected. These experiments validate not just that failover triggers correctly, but that your replica Region handles real authentication load under degraded conditions.

We recommend conducting failover tests on a predefined and regular cadence and after any significant changes to your authentication architecture. Document your runbooks and make sure your operations team is familiar with both the failover and recovery procedures.

Conclusion

In this post, we built on the foundational knowledge of the Amazon Cognito MRR capability and showed you how to architect resilient authentication for real-world use cases:

  • Preparation considerations – Multi-Region KMS keys, OIDC issuer transitions, regional dependencies, and TOTP MFA considerations
  • Reference architectures – B2C, B2B, and M2M patterns using managed login, plus SDK-based approaches
  • Failover strategies – Route 53 health checks, ARC integration, and testing with health check inversion and AWS FIS

To get started, make sure your user pool is on the Essentials or Plus feature plan, configure your multi-Region KMS key and OIDC issuer, and create your first replica. For step-by-step setup instructions, see Multi-Region replication for user pools

If you have feedback or thoughts about this post, submit comments below. If you have questions, start a new thread on Amazon Cognito re:Post or contact AWS Support.


Abrom-Douglas-author

Abrom Douglas III

Abrom is a Senior Solutions Architect within AWS Identity with over 20 years of software engineering and security experience, specializing in identity and access management. He loves speaking with customers about how identity and access management can provide secure outcomes that enable both business and technology initiatives. In his free time, he enjoys cheering for Arsenal FC, photography, travel, volunteering, and competing in duathlons.

Edward Sun

Edward Sun

Edward is a Senior Security Specialist Solutions Architect focused on identity and access management. He loves helping customers throughout their cloud transformation journey with architecture design, security best practices, migration, and cost optimizations. Outside of work, Edward enjoys hiking, golfing, and cheering for his alma mater, the Georgia Bulldogs.

The collective thoughts of the interwebz