Когато параноята те разтресе здравата

Post Syndicated from original https://bivol.bg/%D0%BA%D0%BE%D0%B3%D0%B0%D1%82%D0%BE-%D0%BF%D0%B0%D1%80%D0%B0%D0%BD%D0%BE%D1%8F%D1%82%D0%B0-%D1%82%D0%B5-%D1%80%D0%B0%D0%B7%D1%82%D1%80%D0%B5%D1%81%D0%B5-%D0%B7%D0%B4%D1%80%D0%B0%D0%B2%D0%B0%D1%82.html

неделя 30 май 2021


Ако не от друго, поне от скука не можем да се оплачем в българския политически живот, съгласете се. Кубрат Пулев подмята между другото, че можело да се кандидатира за президент,…

Continuous Compliance Workflow for Infrastructure as Code: Part 1

Post Syndicated from Sumit Mishra original https://aws.amazon.com/blogs/devops/continuous-compliance-workflow-for-infrastructure-as-code-part-1/

Security and compliance standards are of paramount importance for organizations in many industries. There is a growing need to seamlessly integrate these standards in an application release cycle. From a DevOps standpoint, an application can be subject to these standards during two phases:

  • Pre-deployment – Standards are enforced in an application deployment pipeline prior to the deployment of the workload. This follows a shift-left testing approach of catching defects early in the release cycle and preventing security vulnerabilities and compliance issues from being deployed into your AWS account. Example of service/tool providing this capability are Amazon CodeGuru Reviewer and AWS CloudFormation Guard for security static analysis.
  • Post-deployment – Standards are deployed in application-specific AWS accounts. They only operate and report on resources deployed in those accounts. Example of a service providing this capability is AWS Config for runtime compliance checks.

For this post, we focus on pre-deployment security and compliance standards.

As a security and compliance engineer, you’re responsible for introducing guardrails based on your organizations’ security policies, ensuring continuous compliance of the workloads and preventing noncompliant workloads from being promoted to production. The process of releasing security and compliance guardrails to the individual application development teams who have to incorporate them into their release cycle can become challenging from a scalability standpoint.

You need a process with the following features:

  • A place to develop and test the guardrails before promotion or activation
  • Visibility into potential noncompliant resources before activating the guardrails (observation mode)
  • The ability to notify delivery teams if a noncompliant resource is found in their workload, allowing them time to remediate before guardrail activation
  • A defined deadline for the delivery teams to mitigate the issues
  • The ability to add exclusions to guardrails
  • The ability to enable the guardrail in production in active mode, causing the delivery pipeline to break if a noncompliant resource is found

In this post, we propose a continuous compliance workflow that uses the pattern of continuous integration and continuous deployment (CI/CD) to implement these capabilities. We discuss this solution from the perspective of a security and compliance engineer, and assume that you’re aware of application development terminologies and practices such as CI/CD, infrastructure as code (IaC), behavior-driven development (BDD), and negative testing.

Our continuous compliance workflow is technology agnostic. You can implement it using any combination of CI/CD tools and IaC frameworks such as AWS CloudFormation / AWS CDK as IaC and AWS CloudFormation Guard as policy-as-code tool.

This is part one of a two-part series; in this post, we focus on the continuous compliance workflow and not on its implementation. In Part 2, we focus on the technical implementation of the workflow using AWS Developer Tools, Terraform, and Terraform-Compliance, an open-source compliance framework for Terraform.

Continuous compliance workflow

The security and compliance team is responsible for releasing guardrails implementing compliance policies. Application delivery pipelines are enforced to carry out compliance checks by subjecting their workloads to these guardrails. However, as the guardrails are released and enforced in application delivery pipelines, there should not be an element of surprise for the application teams in which new guardrails suddenly break their pipelines without any warning. A critical ingredient of the continuous compliance workflow is the CI/CD pipeline, which allows for a controlled release of the guardrails to the application delivery pipelines.

To help facilitate this process, we introduce the workflow shown in the following diagram.

continuous compliance workflow

The security and compliance team implements compliance as code using a framework of their choice. The following is an example of compliance as code:

Scenario: Ensure all resources have tags
  Given I have resource that supports tags defined
  Then it must contain tags
  And its value must not be null

This compliance check ensures that all AWS resources created have the tags property defined. It’s written using an open-source compliance framework for Terraform called Terraform-Compliance. The framework uses BDD syntax to define the guardrails.

The guardrail is then checked into the feature branch of the repository where all the compliance guardrails reside. This triggers the security and compliance continuous integration (CI) process. The CI flow runs all the guardrails (including newly introduced ones) against the application workload code. Because this occurs in the security and compliance CI pipeline and not the application delivery pipeline, it’s not visible to the application delivery team and doesn’t impact them. This is called observation mode. The security and compliance team can observe the results of their new guardrails against application code without impacting the application delivery team. This allows for notification to the application delivery team to fix any noncompliant resources if found.

Actions taken for compliant workloads

If the workload is compliant with the newly introduced guardrail, the pipeline automatically merges the guardrail to the mainline branch and moves it to active mode. When a guardrail is in active mode, it impacts the application delivery pipelines by breaking them if any noncompliant resources are introduced in the application workload.

Actions taken for noncompliant workloads

If the workload is found to be noncompliant, the pipeline stops the automatic merge. At this point, an alternate path of the workflow takes over, in which the application delivery team is notified and asked to fix the compliance issues before an established deadline. After the deadline, the compliance code is manually merged into the mainline branch, thereby activating it.

The application delivery team may have a valid reason for being noncompliant with one or more guardrails, in which case they have to take their request to the security and compliance team so that the noncompliant resource is added to the exclusion list for that guardrail. If approved, the security and compliance team modifies the guardrail and updates the exclusion list, and the pipeline merges the changes to the mainline branch. The exclusion list is owned and managed by the security and compliance team—only they can approve an exclusion.

Application delivery pipelines run the compliance checks by first pulling guardrails from the mainline branch of the security and compliance repository and subjecting their respective terraform workloads to these guardrails. Only the guardrails in active mode are pulled, which is ensured by pulling the guardrails from the mainline branch only. This workflow implements the integration of the application delivery pipelines with the security and compliance repository, allowing it to pull the guardrails from the compliance repository on every run of the application pipeline. This integration enforces each AWS resource created in the terraform code to be subjected to the guardrails. If any resource isn’t in line with the guardrails, it’s found to be noncompliant and the pipeline stops deployment.

Customer testimonials

Truist Financial Corporation is an American bank holding company headquartered in Charlotte, North Carolina. The company was formed in December 2019 as the result of the merger of BB&T and SunTrust Banks. With AWS Professional Services, Truist implemented the Continuous Compliance Workflow using their own tool stack. Below is what the leadership had to say about the implementation:

“The continuous compliance workflow helped us scale our security and operational compliance checks across all our development teams in a short period of time with a limited staff. We implemented this at Truist using our own tool stack, as the workflow itself is tech stack agnostic. It helped us with shifting left of the development and implementation of compliance checks, and the observation mode in the workflow provided us with an early insight into our workload compliance report before activating the checks to start impacting pipelines of development teams. The workflow allows the development team to take ownership of their workload compliance, while at the same time having a centralized view of the compliance/noncompliance reports allows us to crowdsource learning and share remediations across the teams.”

—Gary Smith, Group Vice President (GPV) Digital Enablement and Quality Engineering, Truist Financial Corporation

“The continuous compliance workflow provided us with a framework over which we are able to roll out any industry standard compliance sets—CIS, PCI, NIST, etc. It provided centralized visibility around policy adherence to these standards, which helped us with our audits. The centralized view also provided us with patterns across development teams of most common noncompliance issues, allowing us to create a knowledge base to help new teams as we on-boarded them. And being self-service, it reduced the friction of on-boarding development teams, therefore improving adoption.”

—David Jankowski, SVP Digital Application Support Services, Truist Financial Corporation

Conclusion

In this two-part series, we introduce the continuous compliance workflow that outlines how you can seamlessly integrate security and compliance guardrails into an application release cycle. This workflow can benefit enterprises with stringent requirements around security and compliance of AWS resources being deployed into cloud.

Be on the lookout for Part 2, in which we implement the continuous compliance workflow using AWS CodePipeline and the Terraform-Compliance framework.

About the authors

Damodar Shenvi Wagle


Damodar Shenvi Wagle is a Cloud Application Architect at AWS Professional Services. His areas of expertise include architecting serverless solutions, ci/cd and automation.


sumit mishra


Sumit Mishra is Senior DevOps Architect at AWS Professional Services. His area of expertise include IaC, Security in pipeline, ci/cd and automation.


David Jankowski

David Jankowski is the group head and leads Channel and innovations build and support of DevSecOps Services, Quality Engineering practices, Production Operations and Cloud Migration and Enablement at TRUIST


Gary Smith


Gary Smith is the Quality Engineering practice lead for the Channels and Innovations SupportServices organization and was directly responsible for working with our AWS partners on building and implementing the continuous compliance process at TRUIST


My (Seemingly) Random Walk to Netflix

Post Syndicated from Netflix Technology Blog original https://netflixtechblog.com/my-seemingly-random-walk-to-netflix-293d952953fa

Part of our series on who works in Analytics at Netflix — and what the role entails

By Sean Barnes, Studio Production Data Science & Engineering

I am going to tell you a story about a person that works for Netflix. That person grew up dreaming of working in the entertainment industry. They attended the University of Southern California, double majored in data science and television & film production, and graduated summa cum laude. Upon graduation, they received an offer from Netflix to become an analytics engineer, and pursue their lifelong dream of orchestrating the beautiful synergy of analytics and entertainment. Pretty straightforward, right?!

Such a linear trajectory would make for a compelling candidate, but in reality, many of us encounter a few twists and turns along the way. I am here to tell you that these twists and turns are OK, and in many cases, they make you better off in the long run. Whether they worked at a manufacturer for very large industrial ventilation systems, or in finance, healthcare, or elsewhere in tech (big or small), most people on my team have unique paths to their current positions at Netflix. I am going to tell you my story, but I will also tell you about how bringing together people with diverse backgrounds can have unexpected benefits.

When I was growing up, I developed a strong interest in the space program. I went to space camp (nerd alert!), loved space movies (still do!), loved all things astronomy (still do!), and even recall watching a launch or two at school (yes, on those roll-out TV carts). Like any rational person, I set out on a course to pursue a career that would either put me in space or help to put others up there. I decided to attend the Georgia Institute of Technology (Go Jackets!!) and to major in aerospace engineering. I would eventually enroll in the combined BS/MS program, committing to aerospace long-term and to participating in undergraduate and graduate research. In parallel, I also began working as an intern for the U.S. Federal Government as an engineering analyst, which eventually converted into a full-time position. Along the way, I discovered three things that would have a significant impact on my future trajectory:

  1. No lab for me: I did not like being in a lab, and I did not like the idea of spending a ton of time trying to improve the efficiency of some engineering part/system.
  2. Searching for (and not finding) a specialty: There was not an aerospace engineering discipline that I was really interested in, and trust me, I really tried because I didn’t want to deviate from my linear career trajectory. Structures, dynamics, control systems, fluids, design…pass, pass, pass, pass, and pass!
  3. Programming joy: I discovered an aptitude and joy for programming, and in particular, I really liked developing simulation models that could provide meaningful insights and support decision-making without actually building anything or conducting a real-life experiment.

Given these signals, I made the decision to pivot on my initial plan to work for NASA and designed a new plan more in line with my growing interests. That plan consisted of modifying my MS curriculum to support my newly found enthusiasm for simulation modeling, and transitioning to the Applied Mathematics and Scientific Computation doctoral program at the University of Maryland, College Park. This program was perfect for my interests, and allowed me to develop the interdisciplinary mathematical and computation skills that I have been using ever since. I connected with two advisors who were beginning to explore use cases for operations research in healthcare, which was the perfect opportunity to put my interdisciplinary training to work on meaningful real-world applications. I wrote my dissertation on simulation modeling of infectious disease transmission in healthcare facilities and community populations.

BOOM, I finally figured out what I was supposed to be doing. End of story, right?!

Almost! Hang with me just a smidge longer. After defending my dissertation, I left my position with the U.S. Federal Government to become a tenure-track faculty in the Robert H. Smith School of Business at the University of Maryland, College Park. Yep, I stayed close to home, and worked there for 7 years. I grew a lot during this experience, and really enjoyed working with students and research collaborators. This is also the key period when most of my data science growth occurred, as I was developing my healthcare analytics research program and teaching analytics courses to MS and undergraduate students. Throughout this process, I developed skills in Python programming, data visualization, statistical analysis, machine learning, and optimization, both by doing and by teaching. However, in 2019, I explored several data science opportunities in the tech industry, and I was completely won over by the opportunity to join the Studio Production Data Science & Engineering team at Netflix.

There is a mathematical concept called a random walk, which is essentially a path that is generated via a sequence of (seemingly) random steps. Those steps can be generated in any number of ways (e.g., by flipping a coin, observing changes in the stock market, or using a computer-generated sequence of random numbers), and there are numerous ways to adapt this concept to different applications (e.g., computer science, physics, finance, economics, and more). My (seemingly) random walk to Netflix looks a little something like this:

Acknowledgment to Ritchie King for graphic design

Why is my walk only seemingly random? These steps may appear to be random, but what I now realize is that there are some common themes in my experience that align well with core components of Netflix culture. For instance, I am passionate about using data and models to inform decision-making, whether the application is in aerospace, healthcare, or entertainment. I really enjoy building relationships and collaborating with others. I also enjoy bringing analytics and modeling into new spaces for which these practices are relatively new, such as in healthcare and entertainment. Lastly, I’m a learner and an educator, so I love learning new things and helping others learn as well.

The next observation is also a newly gained perspective. I have recently been reading the book Algorithms to Live By, written by Brian Christian and Tom Griffiths. In the second chapter of the book, the authors describe how the algorithmic tradeoff between exploration and exploitation plays out in real life. Exploration means to seek out new options so that you can learn more about the possibilities, whereas exploitation means to focus on the best option(s) that you have discovered thus far. They provide examples of this tradeoff within the context of how one evaluates which restaurants to visit or which candidate to hire. A lot of my experiences before coming to Netflix were part of my exploration phase, which I now realize is totally OK. I believe this exploration is what is needed to find what truly brings joy, and also eliminate things that do not. And now, I have entered the exploitation phase of my career, where I am fully committed to bringing data science into interdisciplinary spaces.

OK, I know, it’s time to wrap this up.

Let me conclude by sharing a quick story about the unexpected benefits of hiring an infectious disease modeler to help accelerate the use of analytics in studio production. According to the U.S. Centers for Disease Control & Prevention, the first known case of COVID-19 was identified in December 2019, which was less than 6 months after my first day at Netflix. By March 2020 — less than 9 months into my tenure — cases of the virus were prevalent across the U.S. and the nation was beginning to shut down.

At studios across Hollywood, production was halted while executives and frontline workers alike scrambled to learn what they could about the virus and the risks associated with restarting production. Given my background, I emailed the vice president of my group (who hired me), and offered to help in any way that I could. He forwarded my email directly to our CFO [1], which initiated a series of events that included the establishment of a medical advisory board [2], development of a simulation model and risk-scoring framework to help support decisions regarding our safe return to production [3], close collaboration with a truly amazing set of individuals and teams across the company, and even a feature article in The Hollywood Reporter. Most of this work continues to this day, as we hopefully approach better times ahead. I never could have imagined such a sequence of events when I first arrived in Los Angeles.

So for those of you out there who feel like you’re on a (seemingly) random walk…YOU ARE NOT ALONE! Many of us have to do the exploration before we find something that we’re willing to exploit over the long-term, and that process does not always follow the linear trajectory that we imagine when we are taking the first steps away from our origins. Try to find the common themes and skills that you have developed across your diverse experiences, and craft that story for potential employers.

And to the potential employers out there, TAKE SOME RISKS! Think more deeply about what the ‘non-traditional’ candidate may bring to your organization. You never know, some circumstances may arise for which those (seemingly) less-relevant skills and experiences may become more useful than you imagined. By doing so, you’ll be facilitating exploration as an organization, and learning about how to build teams that are truly innovative. So together, employers and employees alike, let’s take our (seemingly) random walks, and explore the possibilities until we find those pockets in space where we can exploit the opportunities and accomplish our greatest goals.

Me (several years ago)

Footnotes

  1. Which, by the way, is a very Netflix thing to do
  2. Featuring one of my long-time infectious disease research collaborators and mentors
  3. Embarrassingly named the Barnes Model and the Barnes Scale, respectively, by one of my stunning colleagues

If this post resonates with you and you’d like to explore opportunities with Netflix, check out our analytics site, search open roles, and learn about our culture. You can also find more stories like this here.


My (Seemingly) Random Walk to Netflix was originally published in Netflix TechBlog on Medium, where people are continuing the conversation by highlighting and responding to this story.

Backblaze Terraform Provider Changes the Game for Avisi

Post Syndicated from Molly Clancy original https://www.backblaze.com/blog/backblaze-terraform-provider-changes-the-game-for-avisi/

Backblaze + Avisi Apps

Recently, we announced that Backblaze B2 Cloud Storage published a provider to the Terraform registry to support developers in their infrastructure as code (IaC) efforts. With the Backblaze Terraform provider, you can provision and manage B2 Cloud Storage resources directly from a Terraform configuration file.

Today’s post grew from a comment in our GitHub repository from Gert-Jan van de Streek, Co-founder of Avisi, a Netherlands-based software development company. That comment sparked a conversation that turned into a bigger story. We spoke with Gert-Jan to find out how the Avisi team practices IaC processes and uses the Backblaze Terraform provider to increase efficiency, accuracy, and speed through the DevOps lifecycle. We hoped it might be useful for other developers considering IaC for their operations.

What Is Infrastructure as Code?

IaC emerged in the late 2000s as a response to the increasing complexity of scaling software developments. Rather than provisioning infrastructure via a provider’s user interface, developers can design, implement, and deploy infrastructure for applications using the same tools and best practices they use to write software.

Provisioning Storage for “Apps That Fill Gaps”

The team at Avisi likes to think about software development as a sport. And their long-term vision is just as big and audacious as an Olympic contender’s—to be the best software development company in their country.

Gert-Jan co-founded Avisi in 2000 with two college friends. They specialize in custom project management, process optimization, and ERP software solutions, providing implementation, installation and configuration support, integration and customization, and training and plugin development. They built the company by focusing on security, privacy, and quality, which helped them to take on projects with public utilities, healthcare providers, and organizations like the Dutch Royal Notarial Professional Organization—entities that demand stable, secure, and private production environments.

They bring the same focus to product development, a business line Gert-Jan leads where they create “apps that fill gaps.” He coined the tagline to describe the apps they publish on the Atlassian and monday.com marketplaces. “We know that a lot of stuff is missing from the Atlassian and monday.com tooling because we use it in our everyday life. Our goal in life is to provide that missing functionality—apps to fill gaps,” he explained.

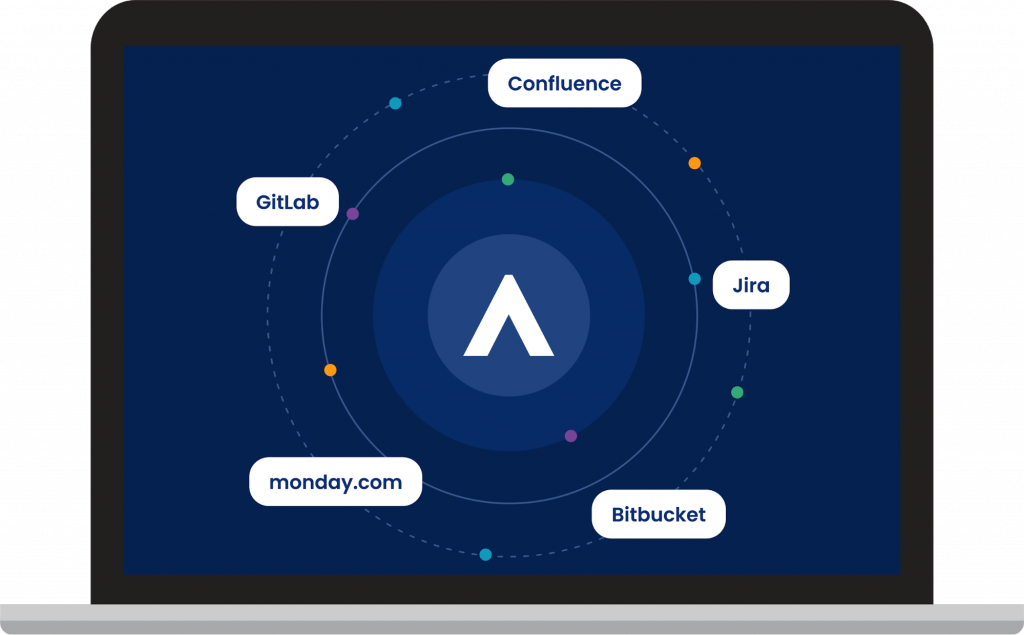
Avisi application platforms - Confluence, Jira, Bitbucket, Monday.com, GitLab
Avisi’s applications fill the gaps in popular project management solutions.

With multiple development environments for each application, managing storage becomes a maintenance problem for sophisticated DevOps teams like Avisi’s. For example, let’s say Gert-Jan has 10 apps to deploy. Each app has test, staging, and production environments, and each has to be deployed in three different regions. That’s 90 individual storage configurations, 90 opportunities to make a mistake, and 90 times the labor it takes to provision one bucket.

Infrastructure in Sophisticated DevOps Environments: An Example

10 apps x three environments x three regions = 90 storage configurations

Following DevOps best practices means Avisi writes reusable code, eliminating much of the manual labor and room for error. “It was really important for us to have IaC so we’re not clicking around in user interfaces. We need to have stable test, staging, and production environments where we don’t have any surprises,” Gert-Jan explained.

Terraform vs. CloudFormation

Gert-Jan had already been experimenting with Terraform, an open-source IaC tool developed by HashiCorp, when the company decided to move some of their infrastructure from Amazon Web Services (AWS) to Google Cloud Platform (GCP). The Avisi team uses Google apps for business, so the move made configuring access permissions easier.

Of course, Amazon and Google don’t always play nice—CloudFormation, AWS’s proprietary IaC tool, isn’t supported across the platforms. Since Terraform is open-source, it allowed Avisi to implement IaC with GCP and a wide range of third-party integrations like StatusCake, a tool they use for URL monitoring.

Backblaze B2 + Terraform

Simultaneously, when Avisi moved some of their infrastructure from AWS to GCP, they resolved to stand up an additional public cloud provider to serve as off-site storage as part of a 3-2-1 strategy (three copies of data on two different media, with one off-site). Gert-Jan implemented Backblaze B2, citing positive reviews, affordability, and the Backblaze European data center as key decision factors. Many of Avisi’s customers reside in the European Union and are often subject to data residency requirements that stipulate data must remain in specific geographic locations. Backblaze allowed Gert-Jan to achieve a 3-2-1 strategy for customers where data residency in the EU is top of mind.

When Backblaze published a provider to the Terraform registry, Avisi started provisioning Backblaze B2 storage buckets using Terraform immediately. “The Backblaze module on Terraform is pure gold,” Gert-Jan said. “It’s about five lines of code that I copy from another project. I configure it, rename a couple variables, and that’s it.”

Real-time Storage Sync With Terraform

Gert-Jan wrote the cloud function to sync between GCP and Backblaze B2 in Clojure, a functional programming language, running on top of Node.js. Clojure compiles to Javascript, so it runs in Java environments as well as Node.js or browser environments, for example. That means the language is available on the server side as well as the client side for Avisi.

The cloud function allowed off-site tiering to be almost instantaneous. Now, every time a file is written, it gets picked up by the cloud function and transferred to Backblaze in real time. “You need to feel comfortable about what you deploy and where you deploy it. Because it is code, the Backblaze Terraform provider does the work for me. I trust that everything is in place,” Gert-Jan said.

Avisi meeting room
The Avisi team at work.

Easier Lifecycle Rules and Code Reviews

In addition to reducing manual labor and increasing accuracy, the Backblaze Terraform provider makes setting lifecycle rules to comply with control frameworks like the General Data Protection Regulations (GDPR) and SOC 2 requirements much simpler. Gert-Jan configured one reusable module that meets the regulations and can apply the same configurations to each project. In a SOC 2 audit or when savvy customers want to know how their data is being handled, he can simply provide the code for the Backblaze B2 configuration as proof that Avisi is retaining and adequately encrypting backups rather than sending screenshots of various UIs.

Using Backblaze via the Terraform provider also streamlined code reviews. Prior to the Backblaze Terraform provider, Gert-Jan’s team members had less visibility into the storage set up and struggled with ecosystem naming. “With the Backblaze Terraform provider, my code is fully reviewable, which is a big plus,” he explained.

Simplifying Storage Management

Embracing IaC practices and using the Backblaze Terraform provider specifically means Gert-Jan can focus on growing the business rather than setting up hundreds of storage buckets by hand. He saves about eight hours per environment. Based on the example above, that equates to 720 hours saved all told. “Terraform and the Backblaze module reduced the time I spend on DevOps by 75% to just a couple of hours per app we deploy, so I can take care of the company while I’m at it,” he said.

If you’re interested in stepping up your DevOps game with IaC, set up a bucket in Backblaze B2 for free and start experimenting with the Backblaze Terraform provider.

The post Backblaze Terraform Provider Changes the Game for Avisi appeared first on Backblaze Blog | Cloud Storage & Cloud Backup.

Amazon Redshift ML Is Now Generally Available – Use SQL to Create Machine Learning Models and Make Predictions from Your Data

Post Syndicated from Danilo Poccia original https://aws.amazon.com/blogs/aws/amazon-redshift-ml-is-now-generally-available-use-sql-to-create-machine-learning-models-and-make-predictions-from-your-data/

With Amazon Redshift, you can use SQL to query and combine exabytes of structured and semi-structured data across your data warehouse, operational databases, and data lake. Now that AQUA (Advanced Query Accelerator) is generally available, you can improve the performance of your queries by up to 10 times with no additional costs and no code changes. In fact, Amazon Redshift provides up to three times better price/performance than other cloud data warehouses.

But what if you want to go a step further and process this data to train machine learning (ML) models and use these models to generate insights from data in your warehouse? For example, to implement use cases such as forecasting revenue, predicting customer churn, and detecting anomalies? In the past, you would need to export the training data from Amazon Redshift to an Amazon Simple Storage Service (Amazon S3) bucket, and then configure and start a machine learning training process (for example, using Amazon SageMaker). This process required many different skills and usually more than one person to complete. Can we make it easier?

Today, Amazon Redshift ML is generally available to help you create, train, and deploy machine learning models directly from your Amazon Redshift cluster. To create a machine learning model, you use a simple SQL query to specify the data you want to use to train your model, and the output value you want to predict. For example, to create a model that predicts the success rate for your marketing activities, you define your inputs by selecting the columns (in one or more tables) that include customer profiles and results from previous marketing campaigns, and the output column you want to predict. In this example, the output column could be one that shows whether a customer has shown interest in a campaign.

After you run the SQL command to create the model, Redshift ML securely exports the specified data from Amazon Redshift to your S3 bucket and calls Amazon SageMaker Autopilot to prepare the data (pre-processing and feature engineering), select the appropriate pre-built algorithm, and apply the algorithm for model training. You can optionally specify the algorithm to use, for example XGBoost.

Architectural diagram.

Redshift ML handles all of the interactions between Amazon Redshift, S3, and SageMaker, including all the steps involved in training and compilation. When the model has been trained, Redshift ML uses Amazon SageMaker Neo to optimize the model for deployment and makes it available as a SQL function. You can use the SQL function to apply the machine learning model to your data in queries, reports, and dashboards.

Redshift ML now includes many new features that were not available during the preview, including Amazon Virtual Private Cloud (VPC) support. For example:

Architectural diagram.

  • You can also create SQL functions that use existing SageMaker endpoints to make predictions (remote inference). In this case, Redshift ML is batching calls to the endpoint to speed up processing.

Before looking into how to use these new capabilities in practice, let’s see the difference between Redshift ML and similar features in AWS databases and analytics services.

ML Feature Data Training
from SQL
Predictions
using SQL Functions
Amazon Redshift ML

Data warehouse

Federated relational databases

S3 data lake (with Redshift Spectrum)

Yes, using
Amazon SageMaker Autopilot
Yes, a model can be imported and executed inside the Amazon Redshift cluster, or invoked using a SageMaker endpoint.
Amazon Aurora ML Relational database
(compatible with MySQL or PostgreSQL)
No

Yes, using a SageMaker endpoint.

A native integration with Amazon Comprehend for sentiment analysis is also available.

Amazon Athena ML

S3 data lake

Other data sources can be used through Athena Federated Query.

No Yes, using a SageMaker endpoint.

Building a Machine Learning Model with Redshift ML
Let’s build a model that predicts if customers will accept or decline a marketing offer.

To manage the interactions with S3 and SageMaker, Redshift ML needs permissions to access those resources. I create an AWS Identity and Access Management (IAM) role as described in the documentation. I use RedshiftML for the role name. Note that the trust policy of the role allows both Amazon Redshift and SageMaker to assume the role to interact with other AWS services.

From the Amazon Redshift console, I create a cluster. In the cluster permissions, I associate the RedshiftML IAM role. When the cluster is available, I load the same dataset used in this super interesting blog post that my colleague Julien wrote when SageMaker Autopilot was announced.

The file I am using (bank-additional-full.csv) is in CSV format. Each line describes a direct marketing activity with a customer. The last column (y) describes the outcome of the activity (if the customer subscribed to a service that was marketed to them).

Here are the first few lines of the file. The first line contains the headers.

age,job,marital,education,default,housing,loan,contact,month,day_of_week,duration,campaign,pdays,previous,poutcome,emp.var.rate,cons.price.idx,cons.conf.idx,euribor3m,nr.employed,y 56,housemaid,married,basic.4y,no,no,no,telephone,may,mon,261,1,999,0,nonexistent,1.1,93.994,-36.4,4.857,5191.0,no
57,services,married,high.school,unknown,no,no,telephone,may,mon,149,1,999,0,nonexistent,1.1,93.994,-36.4,4.857,5191.0,no
37,services,married,high.school,no,yes,no,telephone,may,mon,226,1,999,0,nonexistent,1.1,93.994,-36.4,4.857,5191.0,no
40,admin.,married,basic.6y,no,no,no,telephone,may,mon,151,1,999,0,nonexistent,1.1,93.994,-36.4,4.857,5191.0,no

I store the file in one of my S3 buckets. The S3 bucket is used to unload data and store SageMaker training artifacts.

Then, using the Amazon Redshift query editor in the console, I create a table to load the data.

CREATE TABLE direct_marketing (
	age DECIMAL NOT NULL, 
	job VARCHAR NOT NULL, 
	marital VARCHAR NOT NULL, 
	education VARCHAR NOT NULL, 
	credit_default VARCHAR NOT NULL, 
	housing VARCHAR NOT NULL, 
	loan VARCHAR NOT NULL, 
	contact VARCHAR NOT NULL, 
	month VARCHAR NOT NULL, 
	day_of_week VARCHAR NOT NULL, 
	duration DECIMAL NOT NULL, 
	campaign DECIMAL NOT NULL, 
	pdays DECIMAL NOT NULL, 
	previous DECIMAL NOT NULL, 
	poutcome VARCHAR NOT NULL, 
	emp_var_rate DECIMAL NOT NULL, 
	cons_price_idx DECIMAL NOT NULL, 
	cons_conf_idx DECIMAL NOT NULL, 
	euribor3m DECIMAL NOT NULL, 
	nr_employed DECIMAL NOT NULL, 
	y BOOLEAN NOT NULL
);

I load the data into the table using the COPY command. I can use the same IAM role I created earlier (RedshiftML) because I am using the same S3 bucket to import and export the data.

COPY direct_marketing 
FROM 's3://my-bucket/direct_marketing/bank-additional-full.csv' 
DELIMITER ',' IGNOREHEADER 1
IAM_ROLE 'arn:aws:iam::123412341234:role/RedshiftML'
REGION 'us-east-1';

Now, I create the model straight form the SQL interface using the new CREATE MODEL statement:

CREATE MODEL direct_marketing
FROM direct_marketing
TARGET y
FUNCTION predict_direct_marketing
IAM_ROLE 'arn:aws:iam::123412341234:role/RedshiftML'
SETTINGS (
  S3_BUCKET 'my-bucket'
);

In this SQL command, I specify the parameters required to create the model:

  • FROM – I select all the rows in the direct_marketing table, but I can replace the name of the table with a nested query (see example below).
  • TARGET – This is the column that I want to predict (in this case, y).
  • FUNCTION – The name of the SQL function to make predictions.
  • IAM_ROLE – The IAM role assumed by Amazon Redshift and SageMaker to create, train, and deploy the model.
  • S3_BUCKET – The S3 bucket where the training data is temporarily stored, and where model artifacts are stored if you choose to retain a copy of them.

Here I am using a simple syntax for the CREATE MODEL statement. For more advanced users, other options are available, such as:

  • MODEL_TYPE – To use a specific model type for training, such as XGBoost or multilayer perceptron (MLP). If I don’t specify this parameter, SageMaker Autopilot selects the appropriate model class to use.
  • PROBLEM_TYPE – To define the type of problem to solve: regression, binary classification, or multiclass classification. If I don’t specify this parameter, the problem type is discovered during training, based on my data.
  • OBJECTIVE – The objective metric used to measure the quality of the model. This metric is optimized during training to provide the best estimate from data. If I don’t specify a metric, the default behavior is to use mean squared error (MSE) for regression, the F1 score for binary classification, and accuracy for multiclass classification. Other available options are F1Macro (to apply F1 scoring to multiclass classification) and area under the curve (AUC). More information on objective metrics is available in the SageMaker documentation.

Depending on the complexity of the model and the amount of data, it can take some time for the model to be available. I use the SHOW MODEL command to see when it is available:

SHOW MODEL direct_marketing

When I execute this command using the query editor in the console, I get the following output:

Console screenshot.

As expected, the model is currently in the TRAINING state.

When I created this model, I selected all the columns in the table as input parameters. I wonder what happens if I create a model that uses fewer input parameters? I am in the cloud and I am not slowed down by limited resources, so I create another model using a subset of the columns in the table:

CREATE MODEL simple_direct_marketing
FROM (
        SELECT age, job, marital, education, housing, contact, month, day_of_week, y
 	  FROM direct_marketing
)
TARGET y
FUNCTION predict_simple_direct_marketing
IAM_ROLE 'arn:aws:iam::123412341234:role/RedshiftML'
SETTINGS (
  S3_BUCKET 'my-bucket'
);

After some time, my first model is ready, and I get this output from SHOW MODEL. The actual output in the console is in multiple pages, I merged the results here to make it easier to follow:

Console screenshot.

From the output, I see that the model has been correctly recognized as BinaryClassification, and F1 has been selected as the objective. The F1 score is a metrics that considers both precision and recall. It returns a value between 1 (perfect precision and recall) and 0 (lowest possible score). The final score for the model (validation:f1) is 0.79. In this table I also find the name of the SQL function (predict_direct_marketing) that has been created for the model, its parameters and their types, and an estimation of the training costs.

When the second model is ready, I compare the F1 scores. The F1 score of the second model is lower (0.66) than the first one. However, with fewer parameters the SQL function is easier to apply to new data. As is often the case with machine learning, I have to find the right balance between complexity and usability.

Using Redshift ML to Make Predictions
Now that the two models are ready, I can make predictions using SQL functions. Using the first model, I check how many false positives (wrong positive predictions) and false negatives (wrong negative predictions) I get when applying the model on the same data used for training:

SELECT predict_direct_marketing, y, COUNT(*)
  FROM (SELECT predict_direct_marketing(
                   age, job, marital, education, credit_default, housing,
                   loan, contact, month, day_of_week, duration, campaign,
                   pdays, previous, poutcome, emp_var_rate, cons_price_idx,
                   cons_conf_idx, euribor3m, nr_employed), y
          FROM direct_marketing)
 GROUP BY predict_direct_marketing, y;

The result of the query shows that the model is better at predicting negative rather than positive outcomes. In fact, even if the number of true negatives is much bigger than true positives, there are much more false positives than false negatives. I added some comments in green and red to the following screenshot to clarify the meaning of the results.

Console screenshot.

Using the second model, I see how many customers might be interested in a marketing campaign. Ideally, I should run this query on new customer data, not the same data I used for training.

SELECT COUNT(*)
  FROM direct_marketing
 WHERE predict_simple_direct_marketing(
           age, job, marital, education, housing,
           contact, month, day_of_week) = true;

Wow, looking at the results, there are more than 7,000 prospects!

Console screenshot.

Availability and Pricing
Redshift ML is available today in the following AWS Regions: US East (Ohio), US East (N Virginia), US West (Oregon), US West (San Francisco), Canada (Central), Europe (Frankfurt), Europe (Ireland), Europe (Paris), Europe (Stockholm), Asia Pacific (Hong Kong) Asia Pacific (Tokyo), Asia Pacific (Singapore), Asia Pacific (Sydney), and South America (São Paulo). For more information, see the AWS Regional Services list.

With Redshift ML, you pay only for what you use. When training a new model, you pay for the Amazon SageMaker Autopilot and S3 resources used by Redshift ML. When making predictions, there is no additional cost for models imported into your Amazon Redshift cluster, as in the example I used in this post.

Redshift ML also allows you to use existing Amazon SageMaker endpoints for inference. In that case, the usual SageMaker pricing for real-time inference applies. Here you can find a few tips on how to control your costs with Redshift ML.

To learn more, you can see this blog post from when Redshift ML was announced in preview and the documentation.

Start getting better insights from your data with Redshift ML.

Danilo

Getting Started with Amazon ECS Anywhere – Now Generally Available

Post Syndicated from Channy Yun original https://aws.amazon.com/blogs/aws/getting-started-with-amazon-ecs-anywhere-now-generally-available/

Since Amazon Elastic Container Service (Amazon ECS) was launched in 2014, AWS has released other options for running Amazon ECS tasks outside of an AWS Region such as AWS Wavelength, an offering for mobile edge devices or AWS Outposts, a service that extends to customers’ environments using hardware owned and fully managed by AWS.

But some customers have applications that need to run on premises due to regulatory, latency, and data residency requirements or the desire to leverage existing infrastructure investments. In these cases, customers have to install, operate, and manage separate container orchestration software and need to use disparate tooling across their AWS and on-premises environments. Customers asked us for a way to manage their on-premises containers without this added complexity and cost.

Following Jeff’s preannouncement last year, I am happy to announce the general availability of Amazon ECS Anywhere, a new capability in Amazon ECS that enables customers to easily run and manage container-based applications on premises, including virtual machines (VMs), bare metal servers, and other customer-managed infrastructure.

With ECS Anywhere, you can run and manage containers on any customer-managed infrastructure using the same cloud-based, fully managed, and highly scalable container orchestration service you use in AWS today. You no longer need to prepare, run, update, or maintain your own container orchestrators on premises, making it easier to manage your hybrid environment and leverage the cloud for your infrastructure by installing simple agents.

ECS Anywhere provides consistent tooling and APIs for all container-based applications and the same Amazon ECS experience for cluster management, workload scheduling, and monitoring both in the cloud and on customer-managed infrastructure. You can now enjoy the benefits of reduced cost and complexity by running container workloads such as data processing at edge locations on your own hardware maintaining reduced latency, and in the cloud using a single, consistent container orchestrator.

Amazon ECS Anywhere – Getting Started
To get started with ECS Anywhere, register your on-premises servers or VMs (also referred to as External instances) in the ECS cluster. The AWS Systems Manager Agent, Amazon ECS container agent, and Docker must be installed on these external instances. Your external instances require an IAM role that permits them to communicate with AWS APIs. For more information, see Required IAM permissions in the ECS Developer Guide.

To create a cluster for ECS Anywhere, on the Create Cluster page in the ECS console, choose the Networking Only template. This option is for use with either AWS Fargate or external instance capacity. We recommend that you use the AWS Region that is geographically closest to the on-premises servers you want to register.

This creates an empty cluster to register external instances. On the ECS Instances tab, choose Register External Instances to get activation codes and an installation script.

On the Step 1: External instances activation details page, in Activation key duration (in days), enter the number of days the activation key should remain active. The activation key can be used for up to 1,000 activations. In Number of instances, enter the number of external instances you want to register to your cluster. In Instance role, enter the IAM role to associate with your external instances.

Choose Next step to get a registration command.

On the Step 2: Register external instances page, copy the registration command. Run this command on the external instances you want to register to your cluster.

Paste the registration command in your on-premise servers or VMs. Each external instance is then registered as an AWS Systems Manager managed instance, which is then registered to your Amazon ECS clusters.

Both x86_64 and ARM64 CPU architectures are supported. The following is a list of supported operating systems:

  • CentOS 7, CentOS 8
  • RHEL 7
  • Fedora 32, Fedora 33
  • openSUSE Tumbleweed
  • Ubuntu 18, Ubuntu 20
  • Debian 9, Debian 10
  • SUSE Enterprise Server 15

When the ECS agent has started and completed the registration, your external instance will appear on the ECS Instances tab.

You can also add your external instances to the existing cluster. In this case, you can see both Amazon EC2 instances and external instances are prefixed with mi-* together.

Now that the external instances are registered to your cluster, you are ready to create a task definition. Amazon ECS provides the requiresCompatibilities parameter to validate that the task definition is compatible with the the EXTERNAL launch type when creating your service or running your standalone task. The following is an example task definition:

{
	"requiresCompatibilities": [
		"EXTERNAL"
	],
	"containerDefinitions": [{
		"name": "nginx",
		"image": "public.ecr.aws/nginx/nginx:latest",
		"memory": 256,
		"cpu": 256,
		"essential": true,
		"portMappings": [{
			"containerPort": 80,
			"hostPort": 8080,
			"protocol": "tcp"
		}]
	}],
	"networkMode": "bridge",
	"family": "nginx"
}

You can create a task definition in the ECS console. In Task Definition, choose Create new task definition. For Launch type, choose EXTERNAL and then configure the task and container definitions to use external instances.

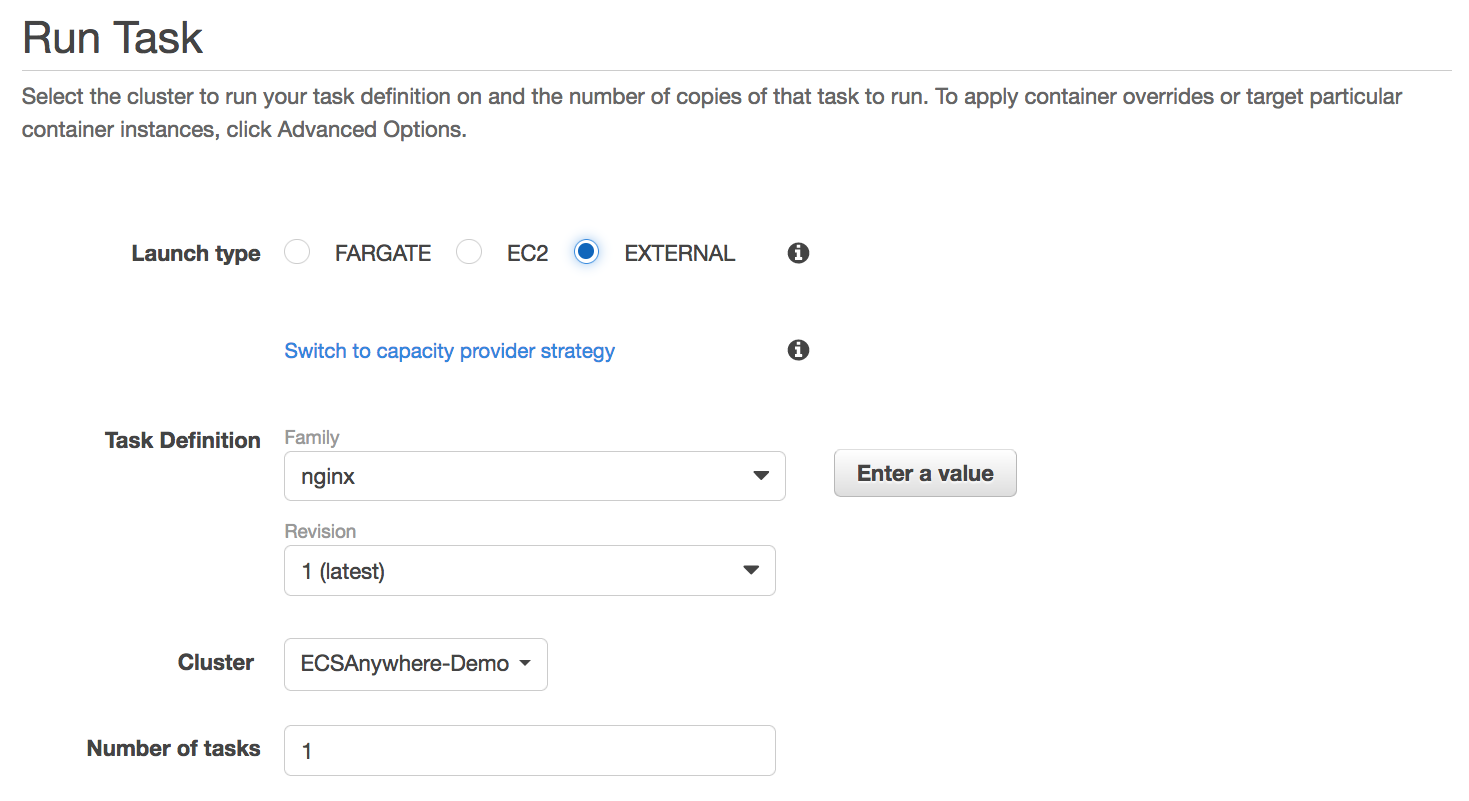
On the Tasks tab, choose Run new task. On the Run Task page, for Cluster, choose the cluster to run your task definition on. In Number of tasks, enter the number of copies of that task to run with the EXTERNAL launch type.

Or, on the Services tab, choose Create. Configure service lets you specify copies of your task definition to run and maintain in a cluster. To run your task in the registered external instance, for Launch type, choose EXTERNAL. When you choose this launch type, load balancers, tag propagation, and service discovery integration are not supported.

The tasks you run on your external instances must use the bridge, host, or none network modes. The awsvpc network mode isn’t supported. For more information about each network mode, see Choosing a network mode in the Amazon ECS Best Practices Guide.

Now you can run your tasks and associate a mix of EXTERNAL, FARGATE, and EC2 capacity provider types with the same ECS service and specify how you would like your tasks to be split across them.

Things to Know
Here are a couple of things to keep in mind:

Connectivity: In the event of loss of network connectivity between the ECS agent running on the on-premises servers and the ECS control plane in the AWS Region, existing ECS tasks will continue to run as usual. If tasks still have connectivity with other AWS services, they will continue to communicate with them for as long as the task role credentials are active. If a task launched as part of a service crashes or exits on its own, ECS will be unable to replace it until connectivity is restored.

Monitoring: With ECS Anywhere, you can get Amazon CloudWatch metrics for your clusters and services, use the CloudWatch Logs driver (awslogs) to get your containers’ logs, and access the ECS CloudWatch event stream to monitor your clusters’ events.

Networking: ECS external instances are optimized for running applications that generate outbound traffic or process data. If your application requires inbound traffic, such as a web service, you will need to employ a workaround to place these workloads behind a load balancer until the feature is supported natively. For more information, see Networking with ECS Anywhere.

Data Security: To help customers maintain data security, ECS Anywhere only sends back to the AWS Region metadata related to the state of the tasks or the state of the containers (whether they are running or not running, performance counters, and so on). This communication is authenticated and encrypted in transit through Transport Layer Security (TLS).

ECS Anywhere Partners
ECS Anywhere integrates with a variety of ECS Anywhere partners to help customers take advantage of ECS Anywhere and provide additional functionality for the feature. Here are some of the blog posts that our partners wrote to share their experiences and offerings. (I am updating this article with links as they are published.)

Now Available
Amazon ECS Anywhere is now available in all commercial regions except AWS China Regions where ECS is supported. With ECS Anywhere, there are no minimum fees or upfront commitments. You pay per instance hour for each managed ECS Anywhere task. ECS Anywhere free tier includes 2200 instance hours per month for six months per account for all regions. For more information, see the pricing page.

To learn more, see ECS Anywhere in the Amazon ECS Developer Guide. Please send feedback to the AWS forum for Amazon ECS or through your usual AWS Support contacts.

Get started with the Amazon ECS Anywhere today.

Channy

Update. Watch a cool demo of ECS Anywhere to operate a Raspberry Pi cluster at home office and read its deep-dive blog post.

Introducing Amazon Kinesis Data Analytics Studio – Quickly Interact with Streaming Data Using SQL, Python, or Scala

Post Syndicated from Danilo Poccia original https://aws.amazon.com/blogs/aws/introducing-amazon-kinesis-data-analytics-studio-quickly-interact-with-streaming-data-using-sql-python-or-scala/

The best way to get timely insights and react quickly to new information you receive from your business and your applications is to analyze streaming data. This is data that must usually be processed sequentially and incrementally on a record-by-record basis or over sliding time windows, and can be used for a variety of analytics including correlations, aggregations, filtering, and sampling.

To make it easier to analyze streaming data, today we are pleased to introduce Amazon Kinesis Data Analytics Studio.

Now, from the Amazon Kinesis console you can select a Kinesis data stream and with a single click start a Kinesis Data Analytics Studio notebook powered by Apache Zeppelin and Apache Flink to interactively analyze data in the stream. Similarly, you can select a cluster in the Amazon Managed Streaming for Apache Kafka console to start a notebook to analyze data in Apache Kafka streams. You can also start a notebook from the Kinesis Data Analytics Studio console and connect to custom sources.

Architectural diagram.

In the notebook, you can interact with streaming data and get results in seconds using SQL queries and Python or Scala programs. When you are satisfied with your results, with a few clicks you can promote your code to a production stream processing application that runs reliably at scale with no additional development effort.

For new projects, we recommend that you use the new Kinesis Data Analytics Studio over Kinesis Data Analytics for SQL Applications. Kinesis Data Analytics Studio combines ease of use with advanced analytical capabilities, which makes it possible to build sophisticated stream processing applications in minutes. Let’s see how that works in practice.

Using Kinesis Data Analytics Studio to Analyze Streaming Data
I want to get a better understanding of the data sent by some sensors to a Kinesis data stream.

To simulate the workload, I use this random_data_generator.py Python script. You don’t need to know Python to use Kinesis Data Analytics Studio. In fact, I am going to use SQL in the following steps. Also, you can avoid any coding and use the Amazon Kinesis Data Generator user interface (UI) to send test data to Kinesis Data Streams or Kinesis Data Firehose. I am using a Python script to have finer control over the data that is being sent.

import datetime
import json
import random
import boto3

STREAM_NAME = "my-input-stream"


def get_random_data():
    current_temperature = round(10 + random.random() * 170, 2)
    if current_temperature > 160:
        status = "ERROR"
    elif current_temperature > 140 or random.randrange(1, 100) > 80:
        status = random.choice(["WARNING","ERROR"])
    else:
        status = "OK"
    return {
        'sensor_id': random.randrange(1, 100),
        'current_temperature': current_temperature,
        'status': status,
        'event_time': datetime.datetime.now().isoformat()
    }


def send_data(stream_name, kinesis_client):
    while True:
        data = get_random_data()
        partition_key = str(data["sensor_id"])
        print(data)
        kinesis_client.put_record(
            StreamName=stream_name,
            Data=json.dumps(data),
            PartitionKey=partition_key)


if __name__ == '__main__':
    kinesis_client = boto3.client('kinesis')
    send_data(STREAM_NAME, kinesis_client)

This script sends random records to my Kinesis data stream using JSON syntax. For example:

{'sensor_id': 77, 'current_temperature': 93.11, 'status': 'OK', 'event_time': '2021-05-19T11:20:00.978328'}
{'sensor_id': 47, 'current_temperature': 168.32, 'status': 'ERROR', 'event_time': '2021-05-19T11:20:01.110236'}
{'sensor_id': 9, 'current_temperature': 140.93, 'status': 'WARNING', 'event_time': '2021-05-19T11:20:01.243881'}
{'sensor_id': 27, 'current_temperature': 130.41, 'status': 'OK', 'event_time': '2021-05-19T11:20:01.371191'}

From the Kinesis console, I select a Kinesis data stream (my-input-stream) and choose Process data in real time from the Process drop-down. In this way, the stream is configured as a source for the notebook.

Console screenshot.

Then, in the following dialog box, I create an Apache Flink – Studio notebook.

I enter a name (my-notebook) and a description for the notebook. The AWS Identity and Access Management (IAM) permissions to read from the Kinesis data stream I selected earlier (my-input-stream) are automatically attached to the IAM role assumed by the notebook.

Console screenshot.

I choose Create to open the AWS Glue console and create an empty database. Back in the Kinesis Data Analytics Studio console, I refresh the list and select the new database. It will define the metadata for my sources and destinations. From here, I can also review the default Studio notebook settings. Then, I choose Create Studio notebook.

Console screenshot.

Now that the notebook has been created, I choose Run.

Console screenshot.

When the notebook is running, I choose Open in Apache Zeppelin to get access to the notebook and write code in SQL, Python, or Scala to interact with my streaming data and get insights in real time.

In the notebook, I create a new note and call it Sensors. Then, I create a sensor_data table describing the format of the data in the stream:

%flink.ssql

CREATE TABLE sensor_data (
    sensor_id INTEGER,
    current_temperature DOUBLE,
    status VARCHAR(6),
    event_time TIMESTAMP(3),
    WATERMARK FOR event_time AS event_time - INTERVAL '5' SECOND
)
PARTITIONED BY (sensor_id)
WITH (
    'connector' = 'kinesis',
    'stream' = 'my-input-stream',
    'aws.region' = 'us-east-1',
    'scan.stream.initpos' = 'LATEST',
    'format' = 'json',
    'json.timestamp-format.standard' = 'ISO-8601'
)

The first line in the previous command tells to Apache Zeppelin to provide a stream SQL environment (%flink.ssql) for the Apache Flink interpreter. I can also interact with the streaming data using a batch SQL environment (%flink.bsql), or Python (%flink.pyflink) or Scala (%flink) code.

The first part of the CREATE TABLE statement is familiar to anyone who has used SQL with a database. A table is created to store the sensor data in the stream. The WATERMARK option is used to measure progress in the event time, as described in the Event Time and Watermarks section of the Apache Flink documentation.

The second part of the CREATE TABLE statement describes the connector used to receive data in the table (for example, kinesis or kafka), the name of the stream, the AWS Region, the overall data format of the stream (such as json or csv), and the syntax used for timestamps (in this case, ISO 8601). I can also choose the starting position to process the stream, I am using LATEST to read the most recent data first.

When the table is ready, I find it in the AWS Glue Data Catalog database I selected when I created the notebook:

Console screenshot.

Now I can run SQL queries on the sensor_data table and use sliding or tumbling windows to get a better understanding of what is happening with my sensors.

For an overview of the data in the stream, I start with a simple SELECT to get all the content of the sensor_data table:

%flink.ssql(type=update)

SELECT * FROM sensor_data;

This time the first line of the command has a parameter (type=update) so that the output of the SELECT, which is more than one row, is continuously updated when new data arrives.

On the terminal of my laptop, I start the random_data_generator.py script:

$ python3 random_data_generator.py

At first I see a table that contains the data as it comes. To get a better understanding, I select a bar graph view. Then, I group the results by status to see their average current_temperature, as shown here:

Notebook screenshot.

As expected by the way I am generating these results, I have different average temperatures depending on the status (OK, WARNING, or ERROR). The higher the temperature, the greater the probability that something is not working correctly with my sensors.

I can run the aggregated query explicitly using a SQL syntax. This time, I want the result computed on a sliding window of 1 minute with results updated every 10 seconds. To do so, I am using the HOP function in the GROUP BY section of the SELECT statement. To add the time to the output of the select, I use the HOP_ROWTIME function. For more information, see how group window aggregations work in the Apache Flink documentation.

%flink.ssql(type=update)

SELECT sensor_data.status,
       COUNT(*) AS num,
       AVG(sensor_data.current_temperature) AS avg_current_temperature,
       HOP_ROWTIME(event_time, INTERVAL '10' second, INTERVAL '1' minute) as hop_time
  FROM sensor_data
 GROUP BY HOP(event_time, INTERVAL '10' second, INTERVAL '1' minute), sensor_data.status;

This time, I look at the results in table format:

Notebook screenshot.

To send the result of the query to a destination stream, I create a table and connect the table to the stream. First, I need to give permissions to the notebook to write into the stream.

In the Kinesis Data Analytics Studio console, I select my-notebook. Then, in the Studio notebooks details section, I choose Edit IAM permissions. Here, I can configure the sources and destinations used by the notebook and the IAM role permissions are updated automatically.

Console screenshot.

In the Included destinations in IAM policy section, I choose the destination and select my-output-stream. I save changes and wait for the notebook to be updated. I am now ready to use the destination stream.

In the notebook, I create a sensor_state table connected to my-output-stream.

%flink.ssql

CREATE TABLE sensor_state (
    status VARCHAR(6),
    num INTEGER,
    avg_current_temperature DOUBLE,
    hop_time TIMESTAMP(3)
)
WITH (
'connector' = 'kinesis',
'stream' = 'my-output-stream',
'aws.region' = 'us-east-1',
'scan.stream.initpos' = 'LATEST',
'format' = 'json',
'json.timestamp-format.standard' = 'ISO-8601');

I now use this INSERT INTO statement to continuously insert the result of the select into the sensor_state table.

%flink.ssql(type=update)

INSERT INTO sensor_state
SELECT sensor_data.status,
    COUNT(*) AS num,
    AVG(sensor_data.current_temperature) AS avg_current_temperature,
    HOP_ROWTIME(event_time, INTERVAL '10' second, INTERVAL '1' minute) as hop_time
FROM sensor_data
GROUP BY HOP(event_time, INTERVAL '10' second, INTERVAL '1' minute), sensor_data.status;

The data is also sent to the destination Kinesis data stream (my-output-stream) so that it can be used by other applications. For example, the data in the destination stream can be used to update a real-time dashboard, or to monitor the behavior of my sensors after a software update.

I am satisfied with the result. I want to deploy this query and its output as a Kinesis Analytics application. To do so, I need to provide an S3 location to store the application executable.

In the configuration section of the console, I edit the Deploy as application configuration settings. There, I choose a destination bucket in the same region and save changes.

Console screenshot.

I wait for the notebook to be ready after the update. Then, I create a SensorsApp note in my notebook and copy the statements that I want to execute as part of the application. The tables have already been created, so I just copy the INSERT INTO statement above.

From the menu at the top right of my notebook, I choose Build SensorsApp and export to Amazon S3 and confirm the application name.

Notebook screenshot.

When the export is ready, I choose Deploy SensorsApp as Kinesis Analytics application in the same menu. After that, I fine-tune the configuration of the application. I set parallelism to 1 because I have only one shard in my input Kinesis data stream and not a lot of traffic. Then, I run the application, without having to write any code.

From the Kinesis Data Analytics applications console, I choose Open Apache Flink dashboard to get more information about the execution of my application.

Apache Flink console screenshot.

Availability and Pricing
You can use Amazon Kinesis Data Analytics Studio today in all AWS Regions where Kinesis Data Analytics is generally available. For more information, see the AWS Regional Services List.

In Kinesis Data Analytics Studio, we run the open-source versions of Apache Zeppelin and Apache Flink, and we contribute changes upstream. For example, we have contributed bug fixes for Apache Zeppelin, and we have contributed to AWS connectors for Apache Flink, such as those for Kinesis Data Streams and Kinesis Data Firehose. Also, we are working with the Apache Flink community to contribute availability improvements, including automatic classification of errors at runtime to understand whether errors are in user code or in application infrastructure.

With Kinesis Data Analytics Studio, you pay based on the average number of Kinesis Processing Units (KPU) per hour, including those used by your running notebooks. One KPU comprises 1 vCPU of compute, 4 GB of memory, and associated networking. You also pay for running application storage and durable application storage. For more information, see the Kinesis Data Analytics pricing page.

Start using Kinesis Data Analytics Studio today to get better insights from your streaming data.

Danilo

Vulhub – Pre-Built Vulnerable Docker Environments For Learning To Hack

Post Syndicated from original https://www.darknet.org.uk/2021/05/vulhub-pre-built-vulnerable-docker-environments-for-learning-to-hack/?utm_source=rss&utm_medium=social&utm_campaign=darknetfeed

Vulhub – Pre-Built Vulnerable Docker Environments For Learning To Hack

Vulhub is an open-source collection of pre-built vulnerable docker environments for learning to hack. No pre-existing knowledge of docker is required, just execute two simple commands and you have a vulnerable environment.

Features of Vulhub Pre-Built Vulnerable Docker Environments For Learning To Hack

Vulhub contains many frameworks, databases, applications, programming languages and more such as:

  • Drupal
  • ffmpeg
  • CouchDB
  • ActiveMQ
  • Glassfish
  • Joombla
  • JBoss
  • Kibana
  • Laravel
  • Rails
  • Python
  • Tomcat

And many, many more.

Read the rest of Vulhub – Pre-Built Vulnerable Docker Environments For Learning To Hack now! Only available at Darknet.

Anchor | Cloud Engineering Services 2022-05-27 07:02:18

Post Syndicated from Gerald Bachlmayr original https://www.anchor.com.au/blog/2022/05/death-by-nodevops/

The CEO of ‘Waterfall & Silo’ walks into the meeting room and asks his three internal advisors: How are we progressing with our enterprise transformation towards DevOps, business agility and simplification? 

The well-prepared advisors, who had read at least a book and a half about organisational transformation and also watched a considerable number of Youtube videos, confidently reply: We are nearly there. We only need to get one more team on board. We have the first CI/CD pipelines established, and the containers are already up and running.

Unfortunately the advisors overlooked some details.

Two weeks later, the CEO asks the same question, and this time the response is: We only need to get two more teams on board, agree on some common tooling, the delivery methodology and relaunch our community of practice.

A month later, an executive decision is made to go back to the previous processes, tooling and perceived ‘customer focus’.

Two years later, the business closes its doors whilst other competitors achieve record revenues.

What has gone wrong, and why does this happen so often?

To answer this question, let’s have a look… 

Why do you need to transform your business?

Without transforming your business, you will run the risk of falling behind because you are potentially: 

  1. Dealing with the drag of outdated processes and ways of working. Therefore your organisation cannot react swiftly to new business opportunities and changing market trends.
  2. Wasting a lot of time and money on Undifferentiated heavy lifting (UHL). These are tasks that don’t differentiate your business from others but can be easily done better, faster and cheaper by someone else, for example, providing cloud infrastructure. Every minute you spend on UHL distracts you from focusing on your customer.
  3. Not focusing enough on what your customers need. If you don’t have sufficient data insights or experiment with new customer features, you will probably mainly focus on your competition. That makes you a follower. Customer-focused organisations will figure out earlier what works for them and what doesn’t. They will take the lead. 

How do you get started?

The biggest enablers for your transformation are the people in your business. If they work together in a collaborative way, they can leverage synergies and coach each other. This will ultimately motivate them. Delivering customer value is like in a team sport: not the team with the best player wins, but the team with the best strategy and overall team performance.  

How do we get there?

Establishing top-performing DevOps teams

Moving towards cross-functional DevOps teams, also called squads, helps to reduce manual hand-offs and waiting times in your delivery. It is also a very scalable model that is used by many modern organisations that have a good customer experience at their forefront. This applies to a variety of industries, from financial services to retail and professional services. Squad members have different skills and work together towards a shared outcome. A top-performing squad that understands the business goals will not only figure out how to deliver effectively but also how to simplify the solution and reduce Undifferentiated Heavy Lifting. A mature DevOps team will always try out new ways to solve problems. The experimental aspect is crucial for continuous improvement, and it keeps the team excited. Regular feedback in the form of metrics and retrospectives will make it easier for the team to know that they are on the right track.

Understand your customer needs and value chain

There are different methodologies to identify customer needs. Amazon has the “working backwards from the customer” methodology to come up with new ideas, and Google has the “design sprint” methodology. Identifying your actual opportunities and understanding the landscape you are operating in are big challenges. It is easy to get lost in detail and head in the wrong direction. Getting the strategy right is only one aspect of the bigger picture. You also need to get the execution right, experiment with new approaches and establish strong feedback loops between execution and strategy. 

This brings us to the next point that describes how we link those two aspects.

A bidirectional governance approach

DevOps teams operate autonomously and figure out how to best work together within their scope. They do not necessarily know what capabilities are required across the business. Hence you will need a governing working group that has complete visibility of this. That way, you can leverage synergies organisation-wide and not just within a squad. It is important that this working group gets feedback from the individual squads who are closer to specific business domains. One size does not fit all, and for some edge cases, you might need different technologies or delivery approaches. A bidirectional feedback loop will make sure you can improve customer focus and execution across the business.

Key takeaways

Establishing a mature DevOps model is a journey, and it may take some time. Each organisation and industry deals with different challenges, and therefore the journey does not always look the same. It is important to continuously tweak the approach and measure progress to make sure the customer focus can improve.

But if you don’t start the DevOps journey, you could turn into another ‘Waterfall & Silo’.

The post appeared first on Anchor | Cloud Engineering Services.

How to implement a hybrid PKI solution on AWS

Post Syndicated from Max Farnga original https://aws.amazon.com/blogs/security/how-to-implement-a-hybrid-pki-solution-on-aws/

As customers migrate workloads into Amazon Web Services (AWS) they may be running a combination of on-premises and cloud infrastructure. When certificates are issued to this infrastructure, having a common root of trust to the certificate hierarchy allows for consistency and interoperability of the Public Key Infrastructure (PKI) solution.

In this blog post, I am going to show how you can plan and deploy a PKI that enables certificates to be issued across a hybrid (cloud & on-premises) environment with a common root. This solution will use Windows Server Certificate Authority (Windows CA), also known as Active Directory Certificate Services (ADCS) to distribute and manage x.509 certificates for Active Directory users, domain controllers, routers, workstations, web servers, mobile and other devices. And an AWS Certificate Manager Private Certificate Authority (ACM PCA) to manage certificates for AWS services, including API Gateway, CloudFront, Elastic Load Balancers, and other workloads.

The Windows CA also integrates with AWS Cloud HSM to securely store the private keys that sign the certificates issued by your CAs, and use the HSM to perform the cryptographic signing operations. In Figure 1, the diagram below shows how ACM PCA and Windows CA can be used together to issue certificates across a hybrid environment.

Figure 1: Hybrid PKI hierarchy

Figure 1: Hybrid PKI hierarchy

PKI is a framework that enables a safe and trustworthy digital environment through the use of a public and private key encryption mechanism. PKI maintains secure electronic transactions on the internet and in private networks. It also governs the verification, issuance, revocation, and validation of individual systems in a network.

There are two types of PKI:

This blog post focuses on the implementation of a private PKI, to issue and manage private certificates.

When implementing a PKI, there can be challenges from security, infrastructure, and operations standpoints, especially when dealing with workloads across multiple platforms. These challenges include managing isolated PKIs for individual networks across on-premises and AWS cloud, managing PKI with no Hardware Security Module (HSM) or on-premises HSM, and lack of automation to rapidly scale the PKI servers to meet demand.

Figure 2 shows how an internal PKI can be limited to a single network. In the following example, the root CA, issuing CAs, and certificate revocation list (CRL) distribution point are all in the same network, and issue cryptographic certificates only to users and devices in the same private network.

Figure 2: On-premises PKI hierarchy in a single network

Figure 2: On-premises PKI hierarchy in a single network

Planning for your PKI system deployment

It’s important to carefully consider your business requirements, encryption use cases, corporate network architecture, and the capabilities of your internal teams. You must also plan for how to manage the confidentiality, integrity, and availability of the cryptographic keys. These considerations should guide the design and implementation of your new PKI system.

In the below section, we outline the key services and components used to design and implement this hybrid PKI solution.

Key services and components for this hybrid PKI solution

Solution overview

This hybrid PKI can be used if you need a new private PKI, or want to upgrade from an existing legacy PKI with a cryptographic service provider (CSP) to a secure PKI with Windows Cryptography Next Generation (CNG). The hybrid PKI design allows you to seamlessly manage cryptographic keys throughout the IT infrastructure of your organization, from on-premises to multiple AWS networks.

Figure 3: Hybrid PKI solution architecture

Figure 3: Hybrid PKI solution architecture

The solution architecture is depicted in the preceding figure—Figure 3. The solution uses an offline root CA that can be operated on-premises or in an Amazon VPC, while the subordinate Windows CAs run on EC2 instances and are integrated with CloudHSM for key management and storage. To insulate the PKI from external access, the CloudHSM cluster are deployed in protected subnets, the EC2 instances are deployed in private subnets, and the host VPC has site-to-site network connectivity to the on-premises network. The Amazon EC2 volumes are encrypted with AWS KMS customer managed keys. Users and devices connect and enroll to the PKI interface through a Network Load Balancer.

This solution also includes a subordinate ACM private CA to issue certificates that will be installed on AWS services that are integrated with ACM. For example, ELB, CloudFront, and API Gateway. This is so that the certificates users see are always presented from your organization’s internal PKI.

Prerequisites for deploying this hybrid internal PKI in AWS

  • Experience with AWS Cloud, Windows Server, and AD CS is necessary to deploy and configure this solution.
  • An AWS account to deploy the cloud resources.
  • An offline root CA, running on Windows 2016 or newer, to sign the CloudHSM and the issuing CAs, including the private CA and Windows CAs. Here is an AWS Quick-Start article to deploy your Root CA in a VPC. We recommend installing the Windows Root CA in its own AWS account.
  • A VPC with at least four subnets. Two or more public subnets and two or more private subnets, across two or more AZs, with secure firewall rules, such as HTTPS to communicate with your PKI web servers through a load balancer, along with DNS, RDP and other port to communicate within your organization network. You can use this CloudFormation sample VPC template to help you get started with your PKI VPC provisioning.
  • Site-to-site AWS Direct Connect or VPN connection from your VPC to the on-premises network and other VPCs to securely manage multiple networks.
  • Windows 2016 EC2 instances for the subordinate CAs.
  • An Active Directory environment that has access to the VPC that hosts the PKI servers. This is required for a Windows Enterprise CA implementation.

Deploy the solution

The below CloudFormation Code and instructions will help you deploy and configure all the AWS components shown in the above architecture diagram. To implement the solution, you’ll deploy a series of CloudFormation templates through the AWS Management Console.

If you’re not familiar with CloudFormation, you can learn about it from Getting started with AWS CloudFormation. The templates for this solution can be deployed with the CloudFormation console, AWS Service Catalog, or a code pipeline.

Download and review the template bundle

To make it easier to deploy the components of this internal PKI solution, you download and deploy a template bundle. The bundle includes a set of CloudFormation templates, and a PowerShell script to complete the integration between CloudHSM and the Windows CA servers.

To download the template bundle

  1. Download or clone the solution source code repository from AWS GitHub.
  2. Review the descriptions in each template for more instructions.

Deploy the CloudFormation templates

Now that you have the templates downloaded, use the CouldFormation console to deploy them.

To deploy the VPC modification template

Deploy this template into an existing VPC to create the protected subnets to deploy a CloudHSM cluster.

  1. Navigate to the CloudFormation console.
  2. Select the appropriate AWS Region, and then choose Create Stack.
  3. Choose Upload a template file.
  4. Select 01_PKI_Automated-VPC_Modifications.yaml as the CloudFormation stack file, and then choose Next.
  5. On the Specify stack details page, enter a stack name and the parameters. Some parameters have a dropdown list that you can use to select existing values.

    Figure 4: Example of a <strong>Specify stack details</strong> page

    Figure 4: Example of a Specify stack details page

  6. Choose Next, Next, and Create Stack.

To deploy the PKI CDP S3 bucket template

This template creates an S3 bucket for the CRL and AIA distribution point, with initial bucket policies that allow access from the PKI VPC, and PKI users and devices from your on-premises network, based on your input. To grant access to additional AWS accounts, VPCs, and on-premises networks, please refer to the instructions in the template.

  1. Navigate to the CloudFormation console.
  2. Choose Upload a template file.
  3. Select 02_PKI_Automated-Central-PKI_CDP-S3bucket.yaml as the CloudFormation stack file, and then choose Next.
  4. On the Specify stack details page, enter a stack name and the parameters.
  5. Choose Next, Next, and Create Stack

To deploy the ACM Private CA subordinate template

This step provisions the ACM private CA, which is signed by an existing Windows root CA. Provisioning your private CA with CloudFormation makes it possible to sign the CA with a Windows root CA.

  1. Navigate to the CloudFormation console.
  2. Choose Upload a template file.
  3. Select 03_PKI_Automated-ACMPrivateCA-Provisioning.yaml as the CloudFormation stack file, and then choose Next.
  4. On the Specify stack details page, enter a stack name and the parameters. Some parameters have a dropdown list that you can use to select existing values.
  5. Choose Next, Next, and Create Stack.

Assign and configure certificates

After deploying the preceding templates, use the console to assign certificate renewal permissions to ACM and configure your certificates.

To assign renewal permissions

  1. In the ACM Private CA console, choose Private CAs.
  2. Select your private CA from the list.
  3. Choose the Permissions tab.
  4. Select Authorize ACM to use this CA for renewals.
  5. Choose Save.

To sign private CA certificates with an external CA (console)

  1. In the ACM Private CA console, select your private CA from the list.
  2. From the Actions menu, choose Import CA certificate. The ACM Private CA console returns the certificate signing request (CSR).
  3. Choose Export CSR to a file and save it locally.
  4. Choose Next.
    1. Use your existing Windows root CA.
    2. Copy the CSR to the root CA and sign it.
    3. Export the signed CSR in base64 format.
    4. Export the <RootCA>.crt certificate in base64 format.
  5. On the Upload the certificates page, upload the signed CSR and the RootCA certificates.
  6. Choose Confirm and Import to import the private CA certificate.

To request a private certificate using the ACM console

Note: Make a note of IDs of the certificate you configure in this section to use when you deploy the HTTPS listener CloudFormation templates.

  1. Sign in to the console and open the ACM console.
  2. Choose Request a certificate.
  3. On the Request a certificate page, choose Request a private certificate and Request a certificate to continue.
  4. On the Select a certificate authority (CA) page, choose Select a CA to view the list of available private CAs.
  5. Choose Next.
  6. On the Add domain names page, enter your domain name. You can use a fully qualified domain name, such as www.example.com, or a bare—also called apex—domain name such as example.com. You can also use an asterisk (*) as a wild card in the leftmost position to include all subdomains in the same root domain. For example, you can use *.example.com to include all subdomains of the root domain example.com.
  7. To add another domain name, choose Add another name to this certificate and enter the name in the text box.
  8. (Optional) On the Add tags page, tag your certificate.
  9. When you finish adding tags, choose Review and request.
  10. If the Review and request page contains the correct information about your request, choose Confirm and request.

Note: You can learn more at Requesting a Private Certificate.

To share the private CA with other accounts or with your organization

You can use ACM Private CA to share a single private CA with multiple AWS accounts. To share your private CA with multiple accounts, follow the instructions in How to use AWS RAM to share your ACM Private CA cross-account.

Continue deploying the CloudFormation templates

With the certificates assigned and configured, you can complete the deployment of the CloudFormation templates for this solution.

To deploy the Network Load Balancer template

In this step, you provision a Network Load Balancer.

  1. Navigate to the CloudFormation console.
  2. Choose Upload a template file.
  3. Select 05_PKI_Automated-LoadBalancer-Provisioning.yaml as the CloudFormation stack file, and then choose Next.
  4. On the Specify stack details page, enter a stack name and the parameters. Some parameters are filled in automatically or have a dropdown list that you can use to select existing values.
  5. Choose Next, Next, and Create Stack.

To deploy the HTTPS listener configuration template

The following steps create the HTTPS listener with an initial configuration for the load balancer.

  1. Navigate to the CloudFormation console:
  2. Choose Upload a template file.
  3. Select 06_PKI_Automated-HTTPS-Listener.yaml as the CloudFormation stack file, and then choose Next.
  4. On the Specify stack details page, enter the stack name and the parameters. Some parameters are filled in automatically or have a dropdown list that you can use to select existing values.
  5. Choose Next, Next, and Create Stack.

To deploy the AWS KMS CMK template

In this step, you create an AWS KMS CMK to encrypt EC2 EBS volumes and other resources. This is required for the EC2 instances in this solution.

  1. Open the CloudFormation console.
  2. Choose Upload a template file.
  3. Select 04_PKI_Automated-KMS_CMK-Creation.yaml as the CloudFormation stack file, and then choose Next.
  4. On the Specify stack details page, enter a stack name and the parameters.
  5. Choose Next, Next, and Create Stack.

To deploy the Windows EC2 instances provisioning template

This template provisions a purpose-built Windows EC2 instance within an existing VPC. It will provision an EC2 instance for the Windows CA, with KMS to encrypt the EBS volume, an IAM instance profile and automatically installs SSM agent on your instance.

It also has optional features and flexibilities. For example, the template can automatically create new target group, or add instance to existing target group. It can also configure listener rules, create Route 53 records and automatically join an Active Directory domain.

Note: The AWS KMS CMK and the IAM role are required to provision the EC2, while the target group, listener rules, and domain join features are optional.

  1. Navigate to the CloudFormation console.
  2. Choose Upload a template file.
  3. Select 07_PKI_Automated-EC2-Servers-Provisioning.yaml as the CloudFormation stack file, and then choose Next.
  4. On the Specify stack details page, enter the stack name and the parameters. Some parameters are filled in automatically or have a dropdown list that you can use to select existing values.

    Note: The Optional properties section at the end of the parameters list isn’t required if you’re not joining the EC2 instance to an Active Directory domain.

  5. Choose Next, Next, and Create Stack.

Create and initialize a CloudHSM cluster

In this section, you create and configure CloudHSM within the VPC subnets provisioned in previous steps. After the CloudHSM cluster is completed and signed by the Windows root CA, it will be integrated with the EC2 Windows servers provisioned in previous sections.

To create a CloudHSM cluster

  1. Log in to the AWS account, open the console, and navigate to the CloudHSM.
  2. Choose Create cluster.
  3. In the Cluster configuration section:
    1. Select the VPC you created.
    2. Select the three private subnets you created across the Availability Zones in previous steps.
  4. Choose Next: Review.
  5. Review your cluster configuration, and then choose Create cluster.

To create an HSM

  1. Open the console and go to the CloudHSM cluster you created in the preceding step.
  2. Choose Initialize.
  3. Select an AZ for the HSM that you’re creating, and then choose Create.

To download and sign a CSR

Before you can initialize the cluster, you must download and sign a CSR generated by the first HSM of the cluster.

  1. Open the CloudHSM console.
  2. Choose Initialize next to the cluster that you created previously.
  3. When the CSR is ready, select Cluster CSR to download it.

    Figure 5: Download CSR

    Figure 5: Download CSR

To initialize the cluster

  1. Open the CloudHSM console.
  2. Choose Initialize next to the cluster that you created previously.
  3. On the Download certificate signing request page, choose Next. If Next is not available, choose one of the CSR or certificate links, and then choose Next.
  4. On the Sign certificate signing request (CSR) page, choose Next.
  5. Use your existing Windows root CA.
    1. Copy the CSR to the root CA and sign it.
    2. Export the signed CSR in base64 format.
    3. Also export the <RootCA>.crt certificate in base64 format.
  6. On the Upload the certificates page, upload the signed CSR and the root CA certificates.
  7. Choose Upload and initialize.

Integrate CloudHSM cluster to Windows Server AD CS

In this section you use a script that provides step-by-step instructions to help you successfully integrate your Windows Server CA with AWS CloudHSM.

To integrate CloudHSM cluster to Windows Server AD CS

Open the script 09_PKI_AWS_CloudHSM-Windows_CA-Integration-Playbook.txt and follow the instructions to complete the CloudHSM integration with the Windows servers.

Install and configure Windows CA with CloudHSM

When the CloudHSM integration is complete, install and configure your Windows Server CA with the CloudHSM key storage provider and select RSA#Cavium Key Storage Provider as your cryptographic provider.

Conclusion

By deploying the hybrid solution in this post, you’ve implemented a PKI to manage security across all workloads in your AWS accounts and in your on-premises network.

With this solution, you can use a private CA to issue Transport Layer Security (TLS) certificates to your Application Load Balancers, Network Load Balancers, CloudFront, and other AWS workloads across multiple accounts and VPCs. The Windows CA lets you enhance your internal security by binding your internal users, digital devices, and applications to appropriate private keys. You can use this solution with TLS, Internet Protocol Security (IPsec), digital signatures, VPNs, wireless network authentication, and more.

Additional resources

If you have feedback about this post, submit comments in the Comments section below. If you have questions about this post, start a new thread on the AWS Certificate Manager forum or CloudHSM forum or contact AWS Support.

Want more AWS Security how-to content, news, and feature announcements? Follow us on Twitter.

Author

Max Farnga

Max is a Security Transformation Consultant with AWS Professional Services – Security, Risk and Compliance team. He has a diverse technical background in infrastructure, security, and cloud computing. He helps AWS customers implement secure and innovative solutions on the AWS cloud.

The collective thoughts of the interwebz

By continuing to use the site, you agree to the use of cookies. more information

The cookie settings on this website are set to "allow cookies" to give you the best browsing experience possible. If you continue to use this website without changing your cookie settings or you click "Accept" below then you are consenting to this.

Close